

RogerrogerD
-
Posts
145 -
Joined
-
Last visited
Content Type
Profiles
Forums
Articles
Gallery
Downloads
Events
Posts posted by RogerrogerD
-
-
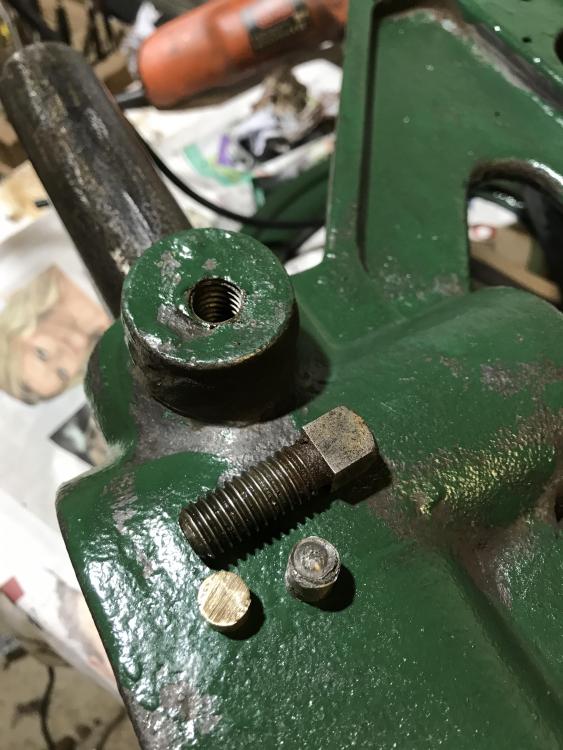
Finally got it apart. There was a little “nub” of steel under the screw holding it to the pillar. I replaced it with a brass nub.
A lick of paint and a while fiddling with a new pawl spring (which I expect to fiddle with some more), the here we are. Not quite perfect, but I learnt a lot on the way.

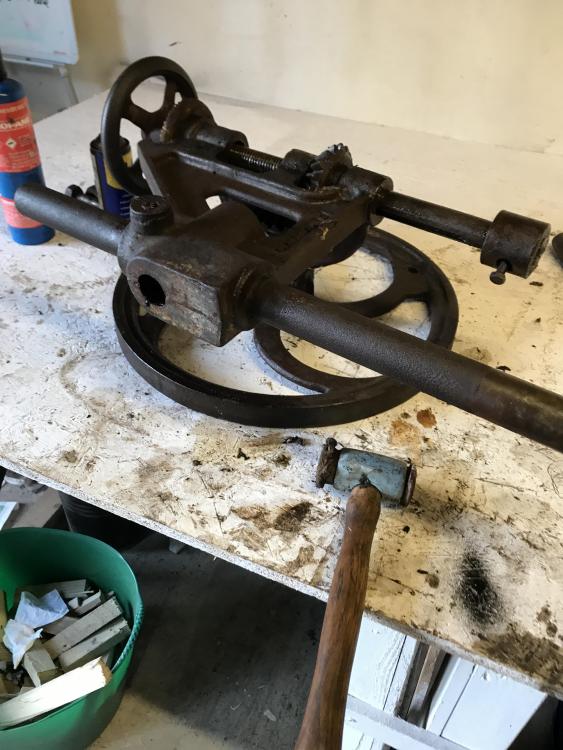
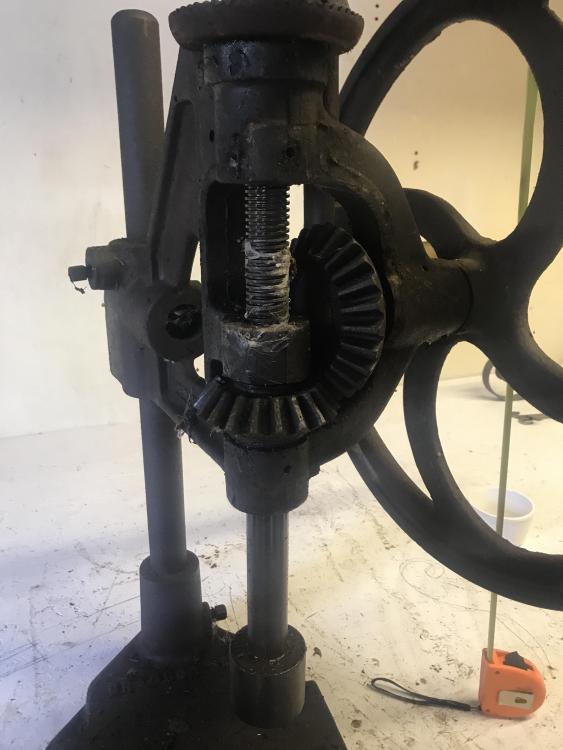
I have on order a 1/2” straight shaft arbour to fit a jacobs chuck, so once I get a face milled in the shaft, it’ll use modern bits as the old one are now impossible to get. A few other tweaks but not much left to do. Very weird gearing. Perhaps not weird but....One turn of that 50” flywheel gives 1 and a third turns of the drill.
-
It could well be a Peter Wright. But no markings anywhere.
-
i’ll try that, thanks TP.
-
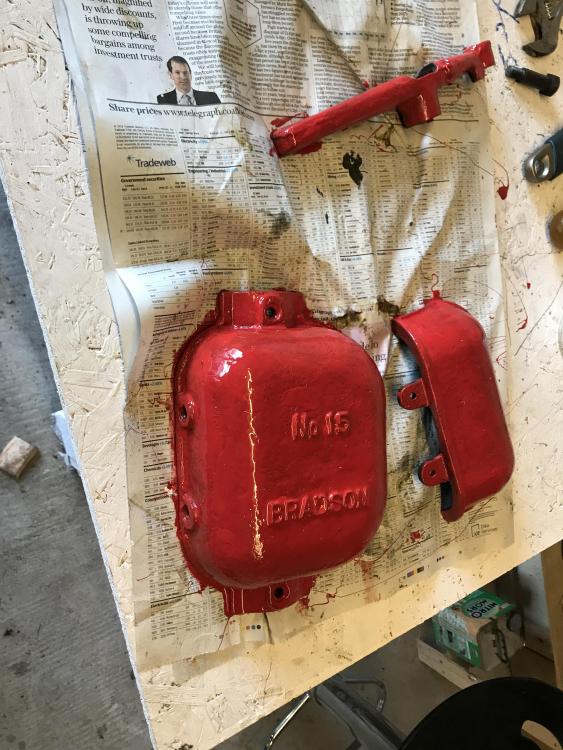
Some work on it today. Painting the gear covers.
Working off the rust from the base.
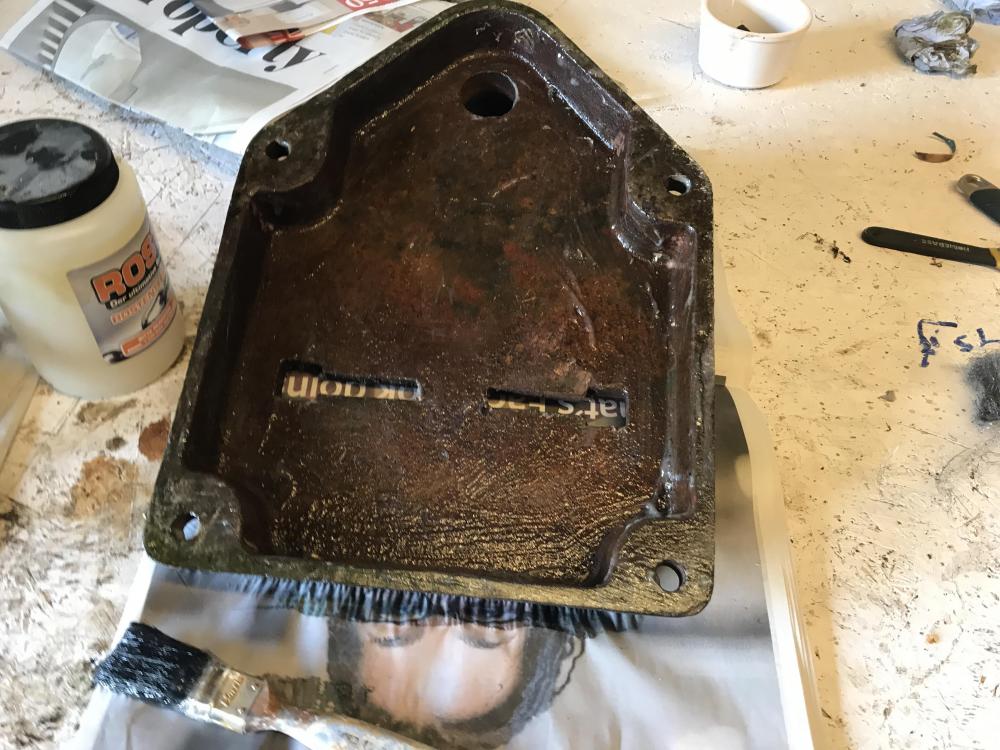
The pillar is rusted, and seized. A swim in wd40 penetrating oil, plus the application of some heat just started to move it, with some effort snd hammering. Will repeat tomorrow with even more heat.

The original colours were indeed red and green.
-
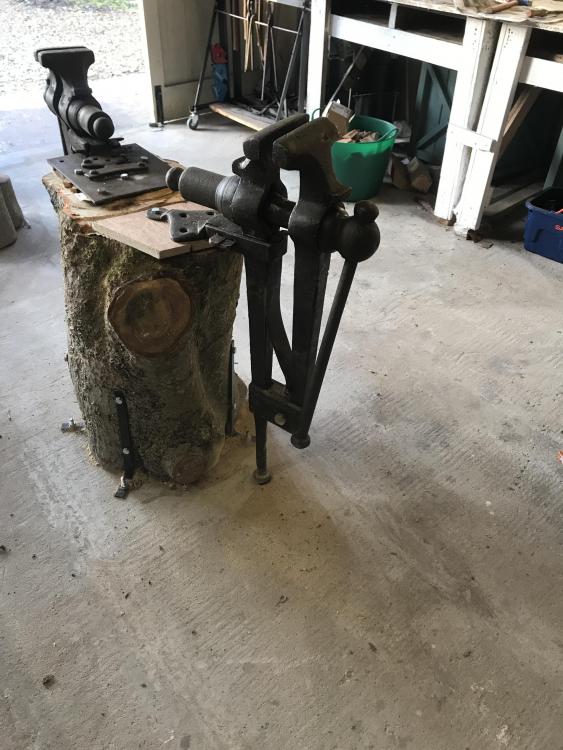
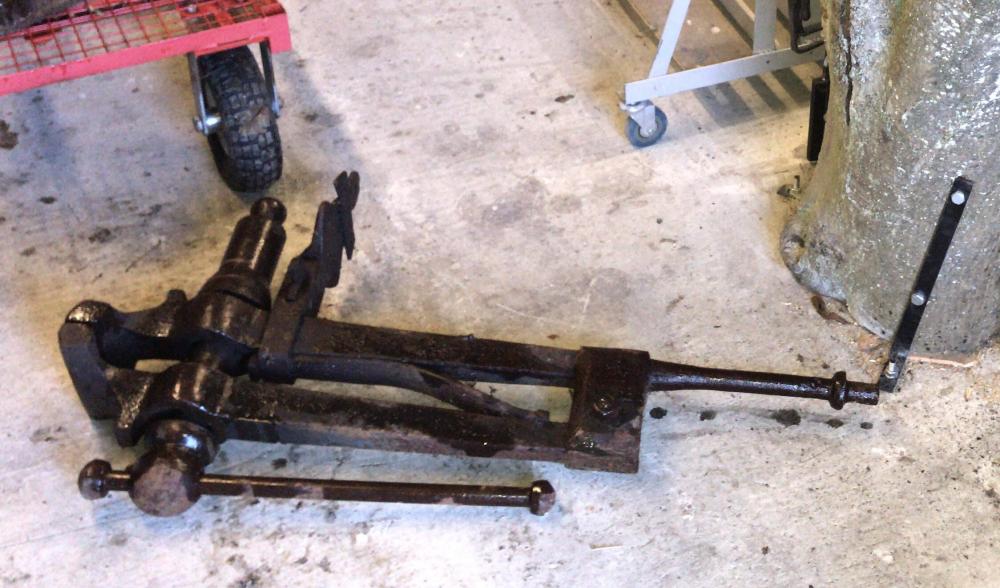
And its back together... strangely it now won’t close tight... I’m having a think about why. Here it is in a temporary mount. My other vice, somewhat smaller, on the other side of the the trunk.
-
I use the metal store online and it works easily enough like amazon but they dont seem to stock carbon steel. But fine for all sorts of mild. Delivery is efficient. I have used metals4u in the past, same simple online ordering.
-
Been thinking about how it might be raised and lowered on the pillar. Im guessing the best way to raise would be to place lumber under the chuck, loosen the pillar screw and wind it up on its own mechanism. And for “lowering” it onto a piece needing drilling, simply put a plank under the piece needing drilling...and forget about lowering.... sort of.
Which maybe gives me a clue how to dismantle the seized pillar collar...
-
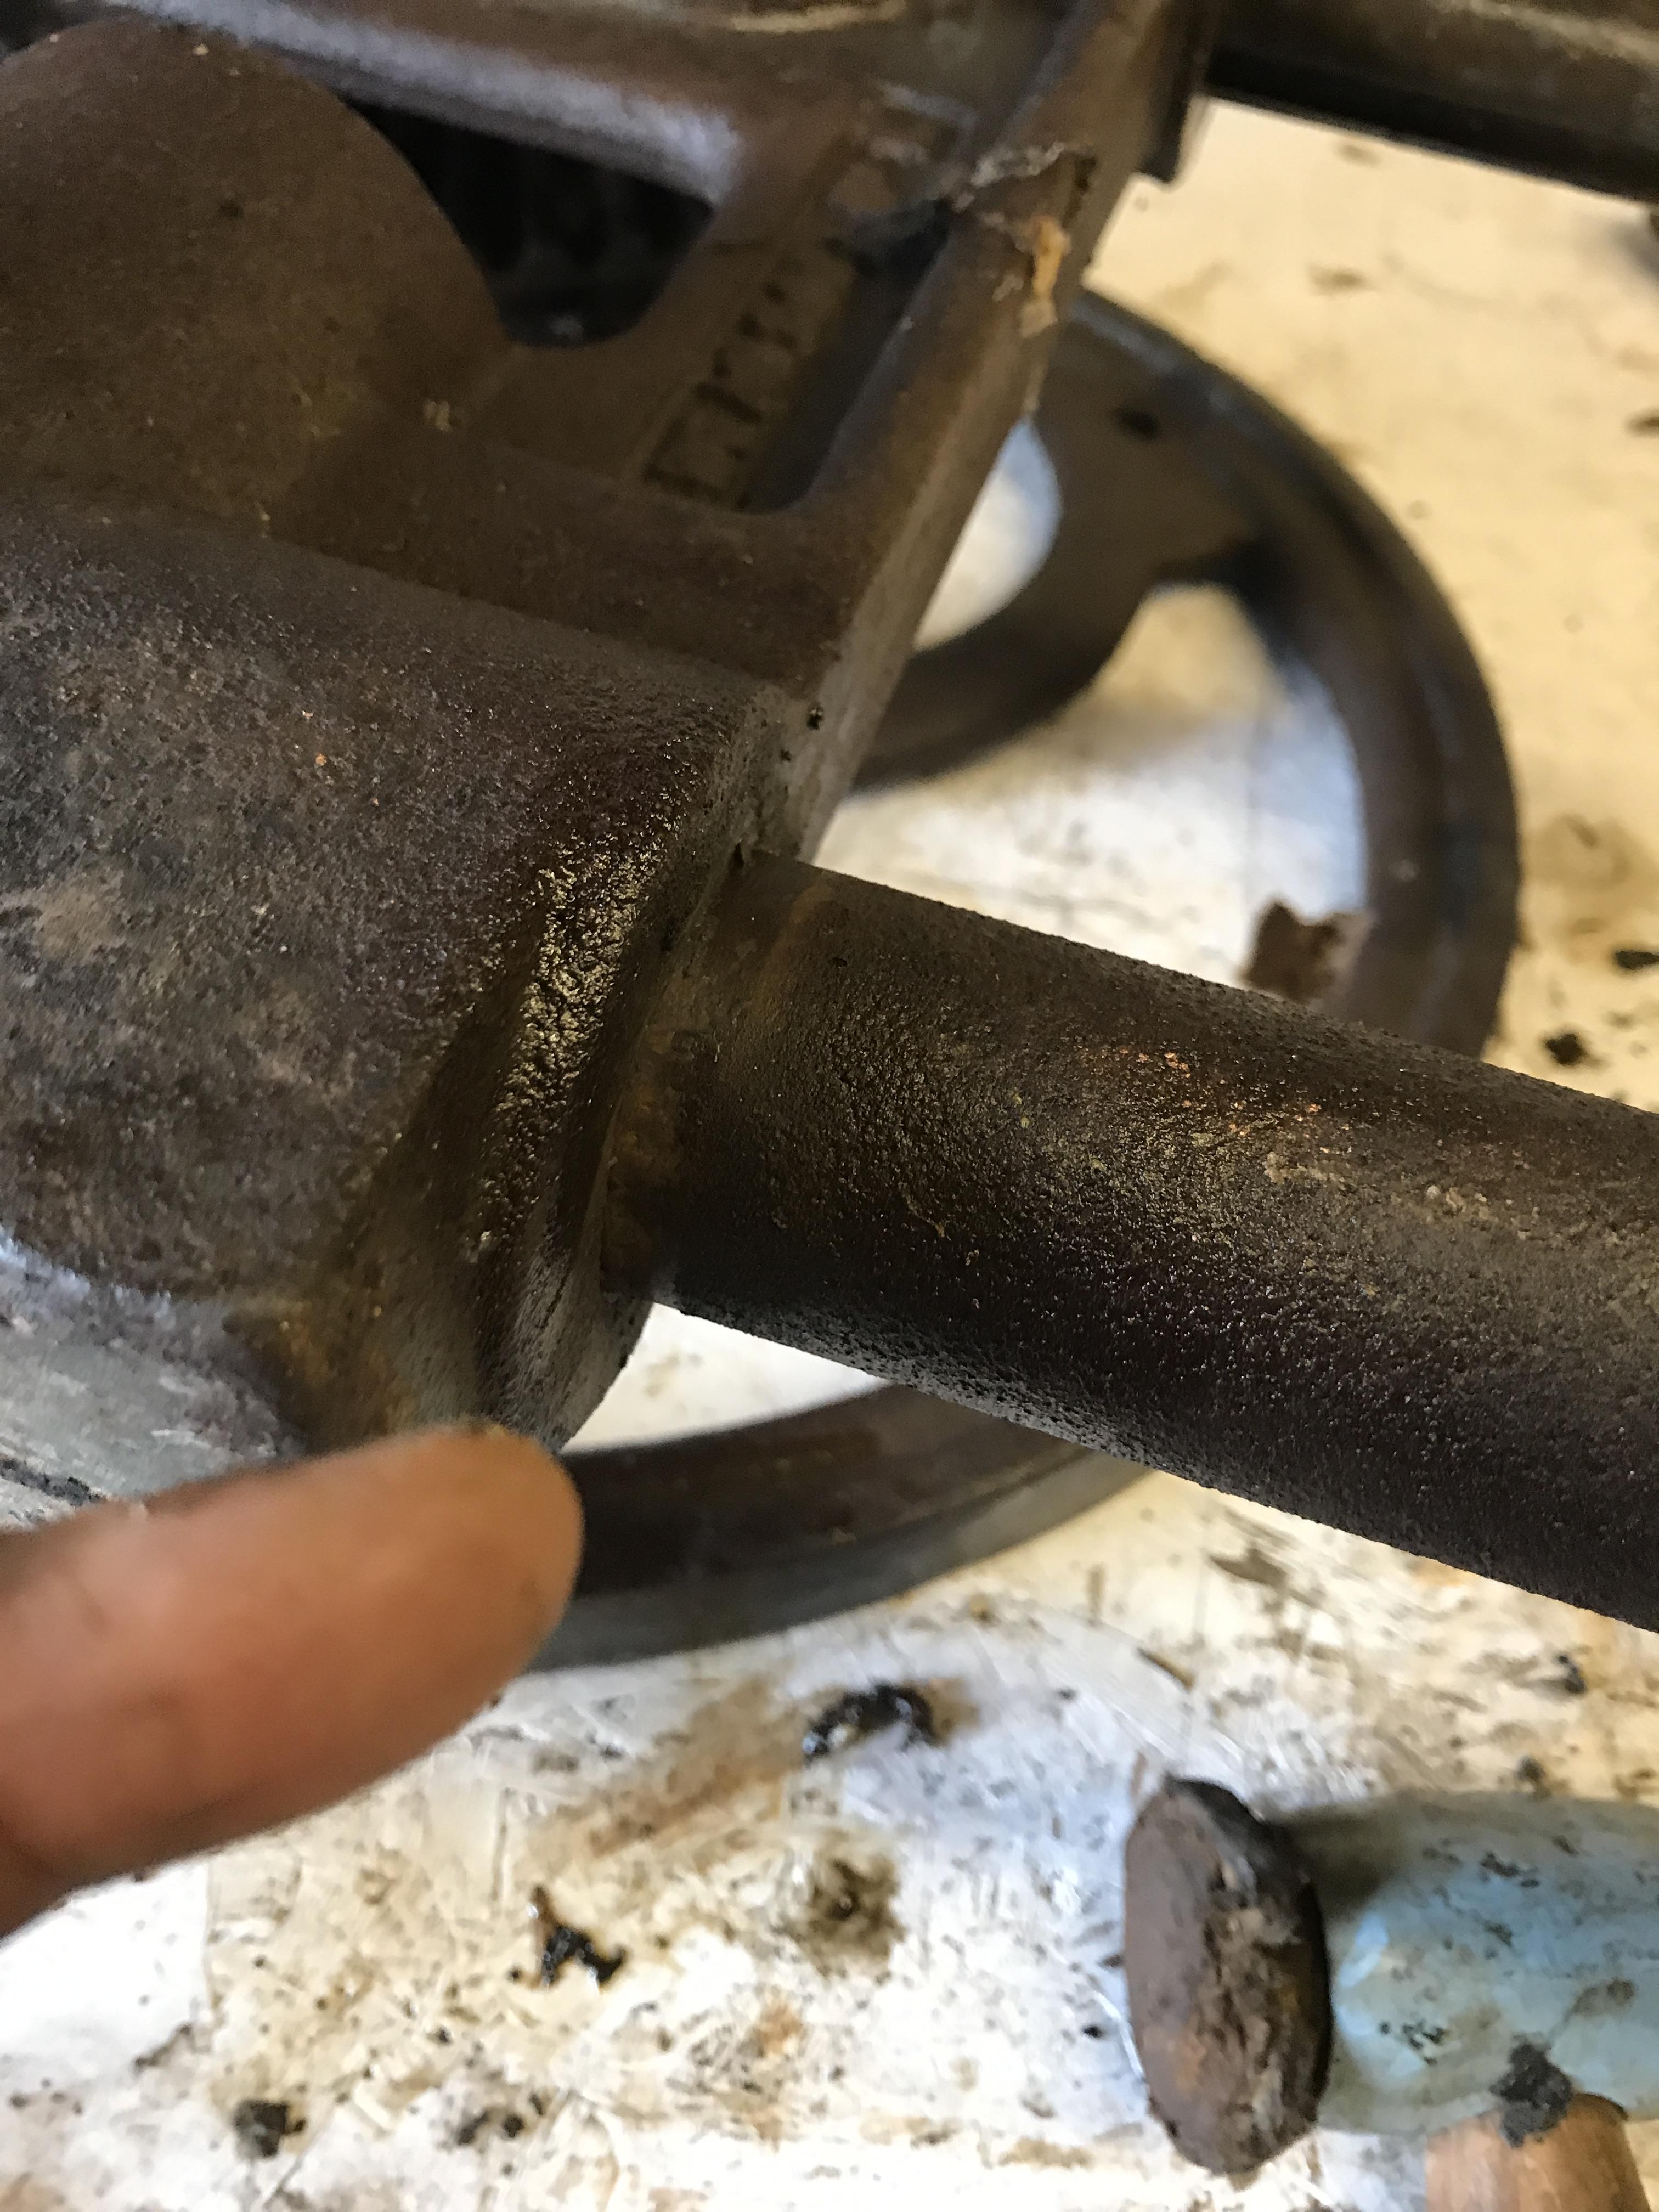
The whole mechanism is mounted on a single steel pillar, maybe inch and a half in diameter. The mechanism can be moved up and down but I’m a little surprised that there’s just a single screw holding the mechanism to the steel pillar. I guess it was designed to be pretty tight on the pillar and you tap it down, but it seems crude, and frankly difficult. Probably easier to have the object being drilled on a stack of wood, and add to it. I’ll probably convert to a jacobs chuck so I’ll need a little more height.
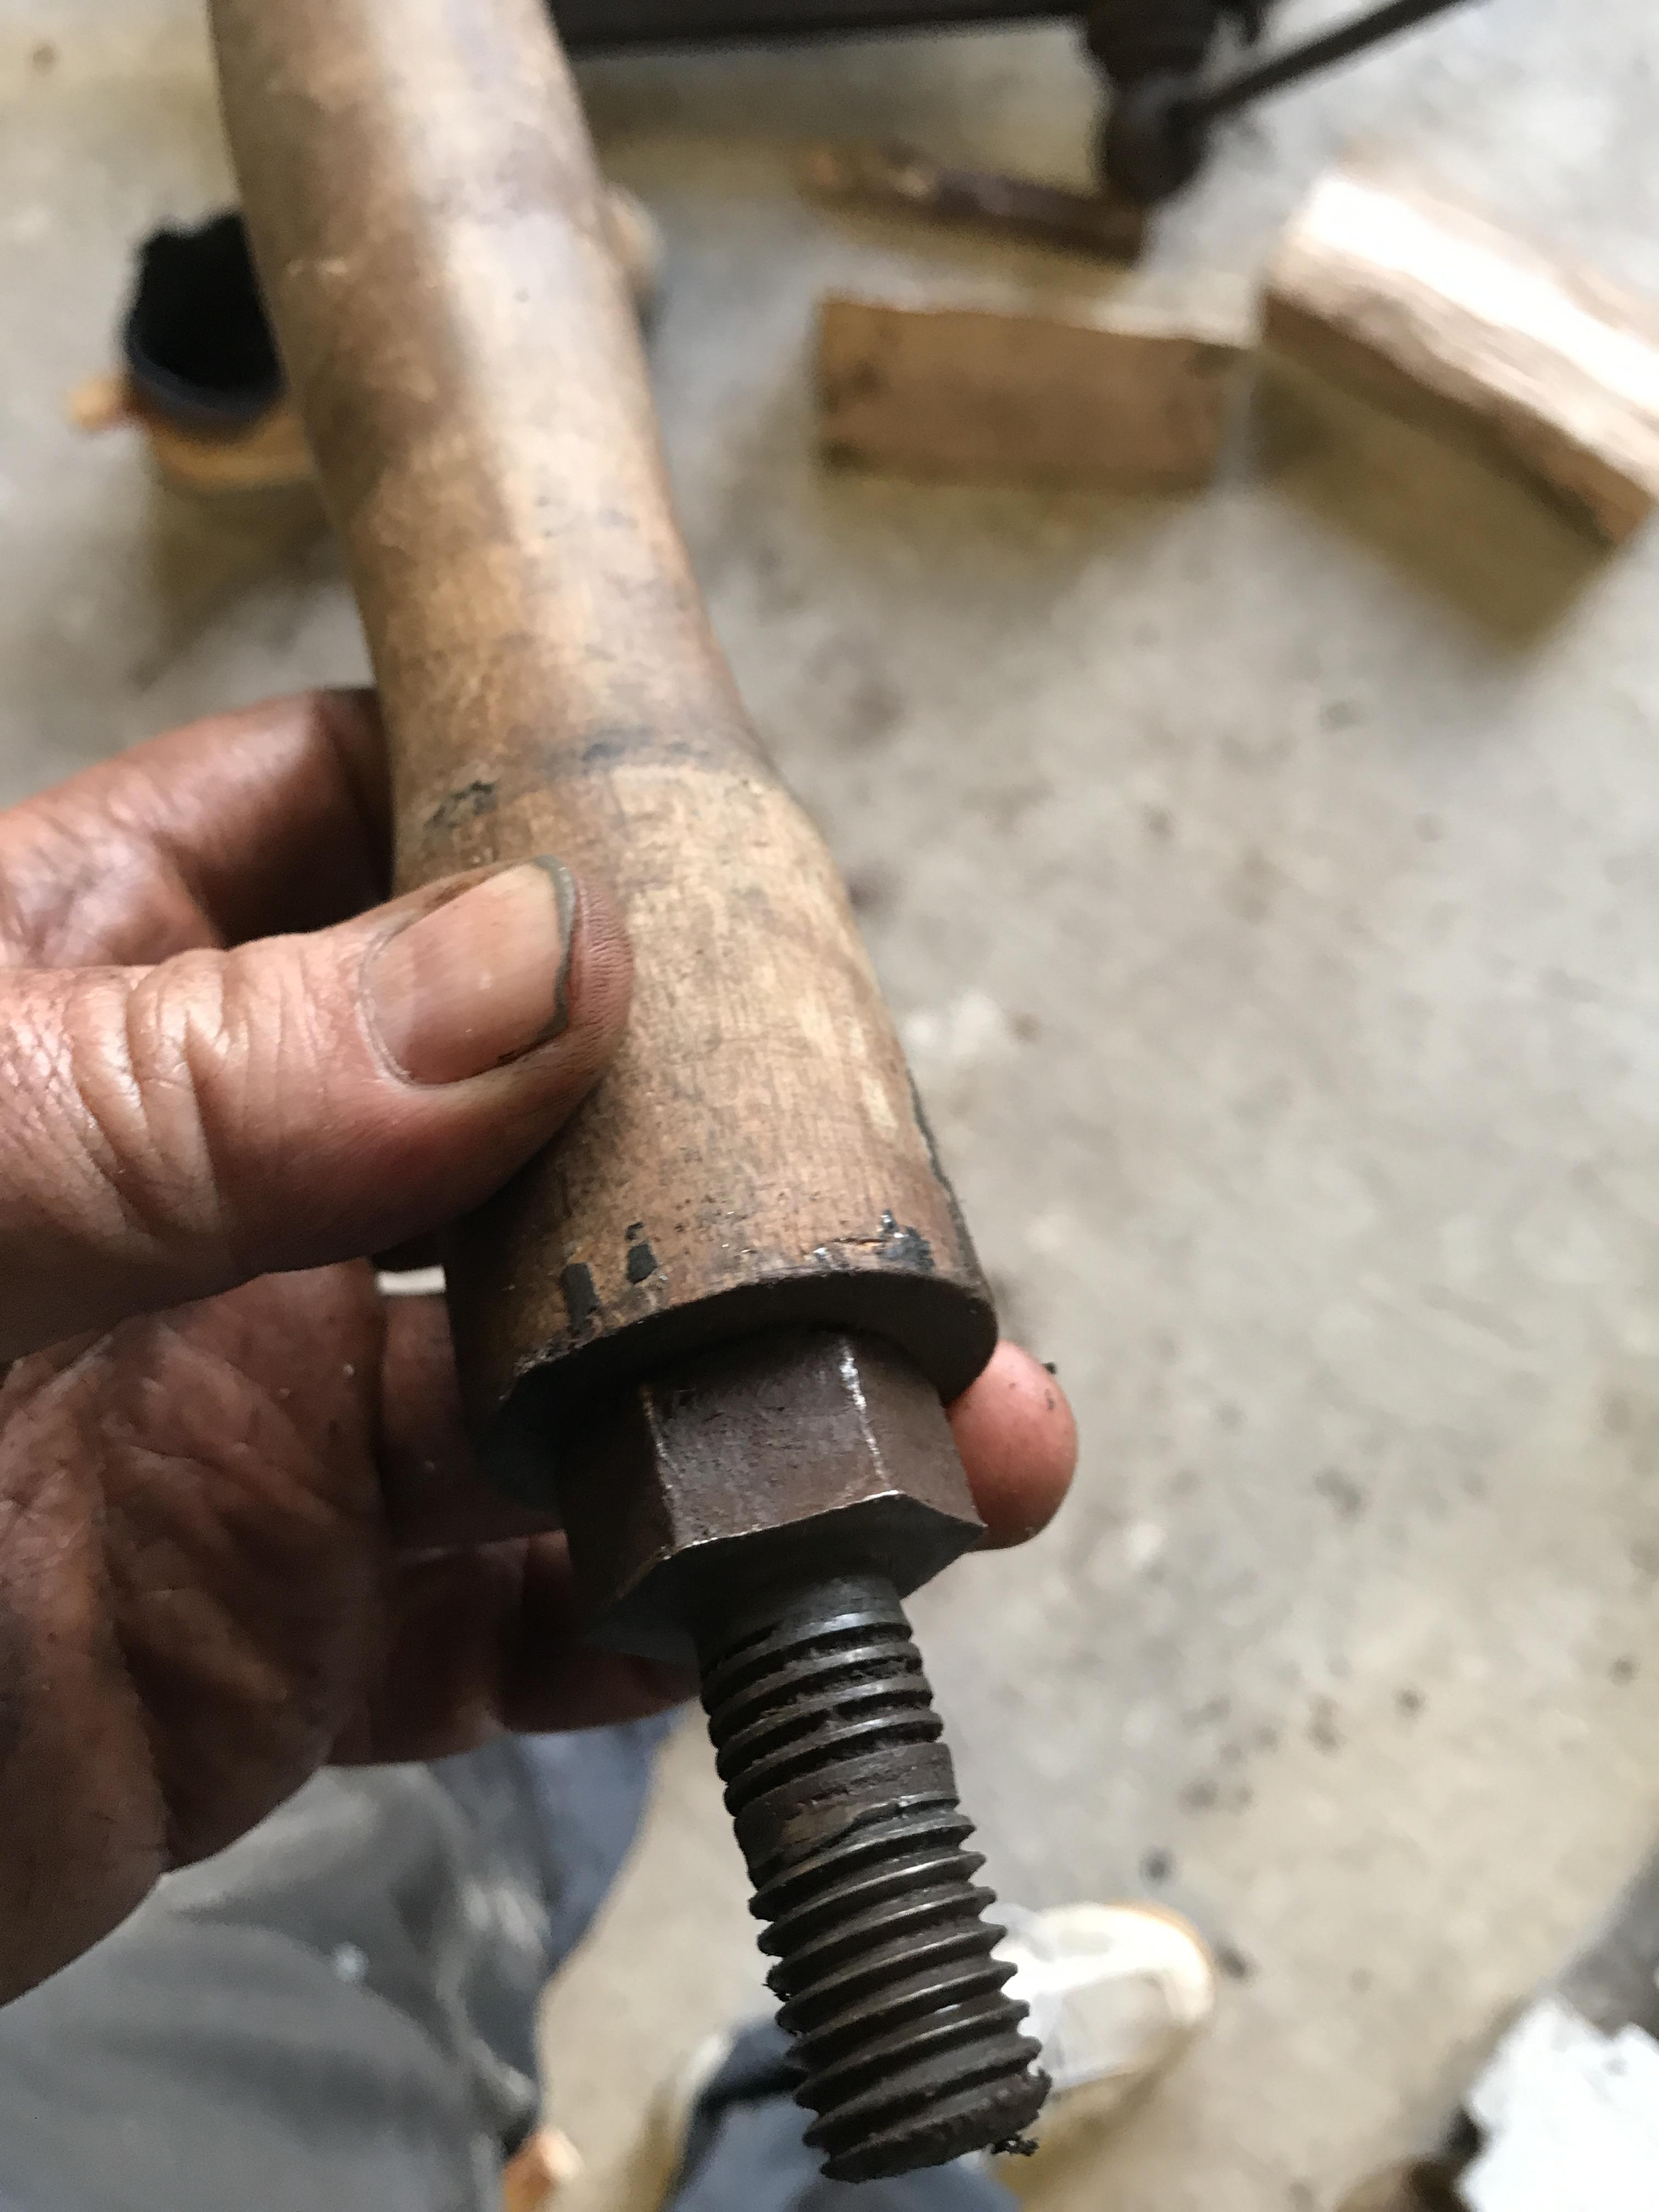
here’s the bolt holding the mechanism to the pillar. Anyone have advice on how it was intended to raise and lower?

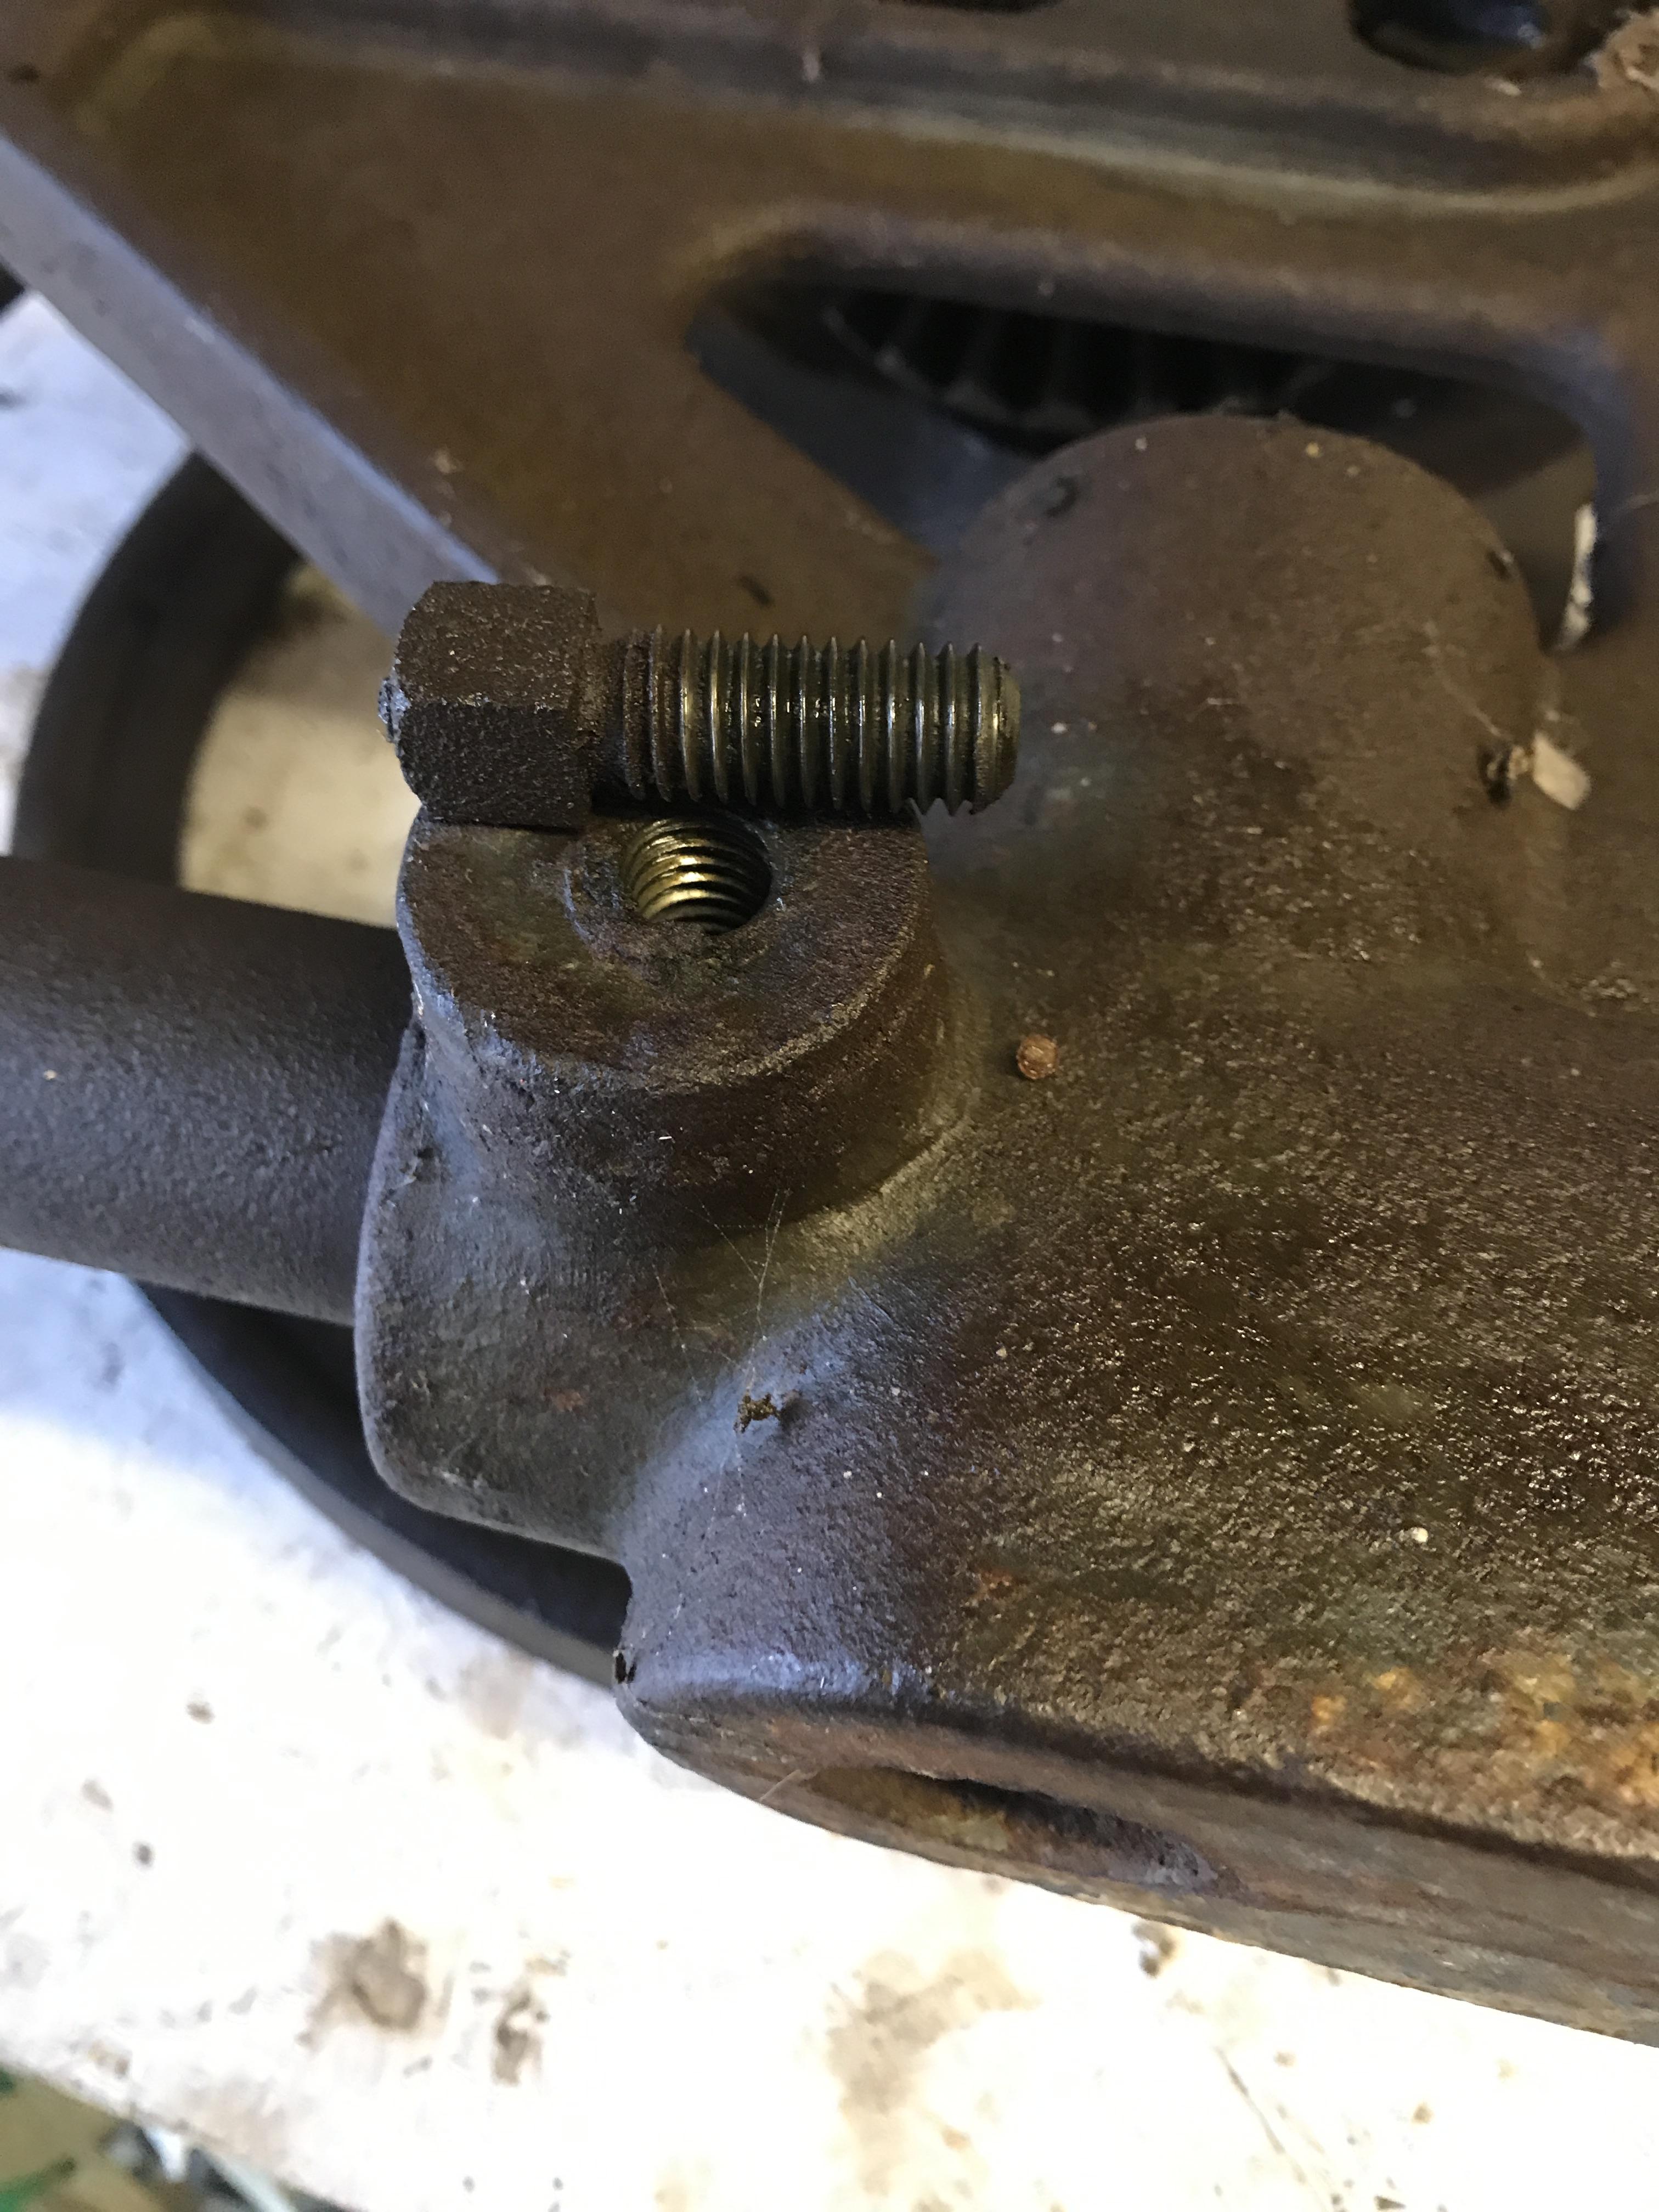
I’m struggling to remove the flywheel. A squirt of penetrating oil and I’ll leave it overnight. The handle is off and the threads are damaged but probably still usable. It looks like the handle was originally painted black. I’ll sand down but probably just linseed. I like the feel of linseed.

-
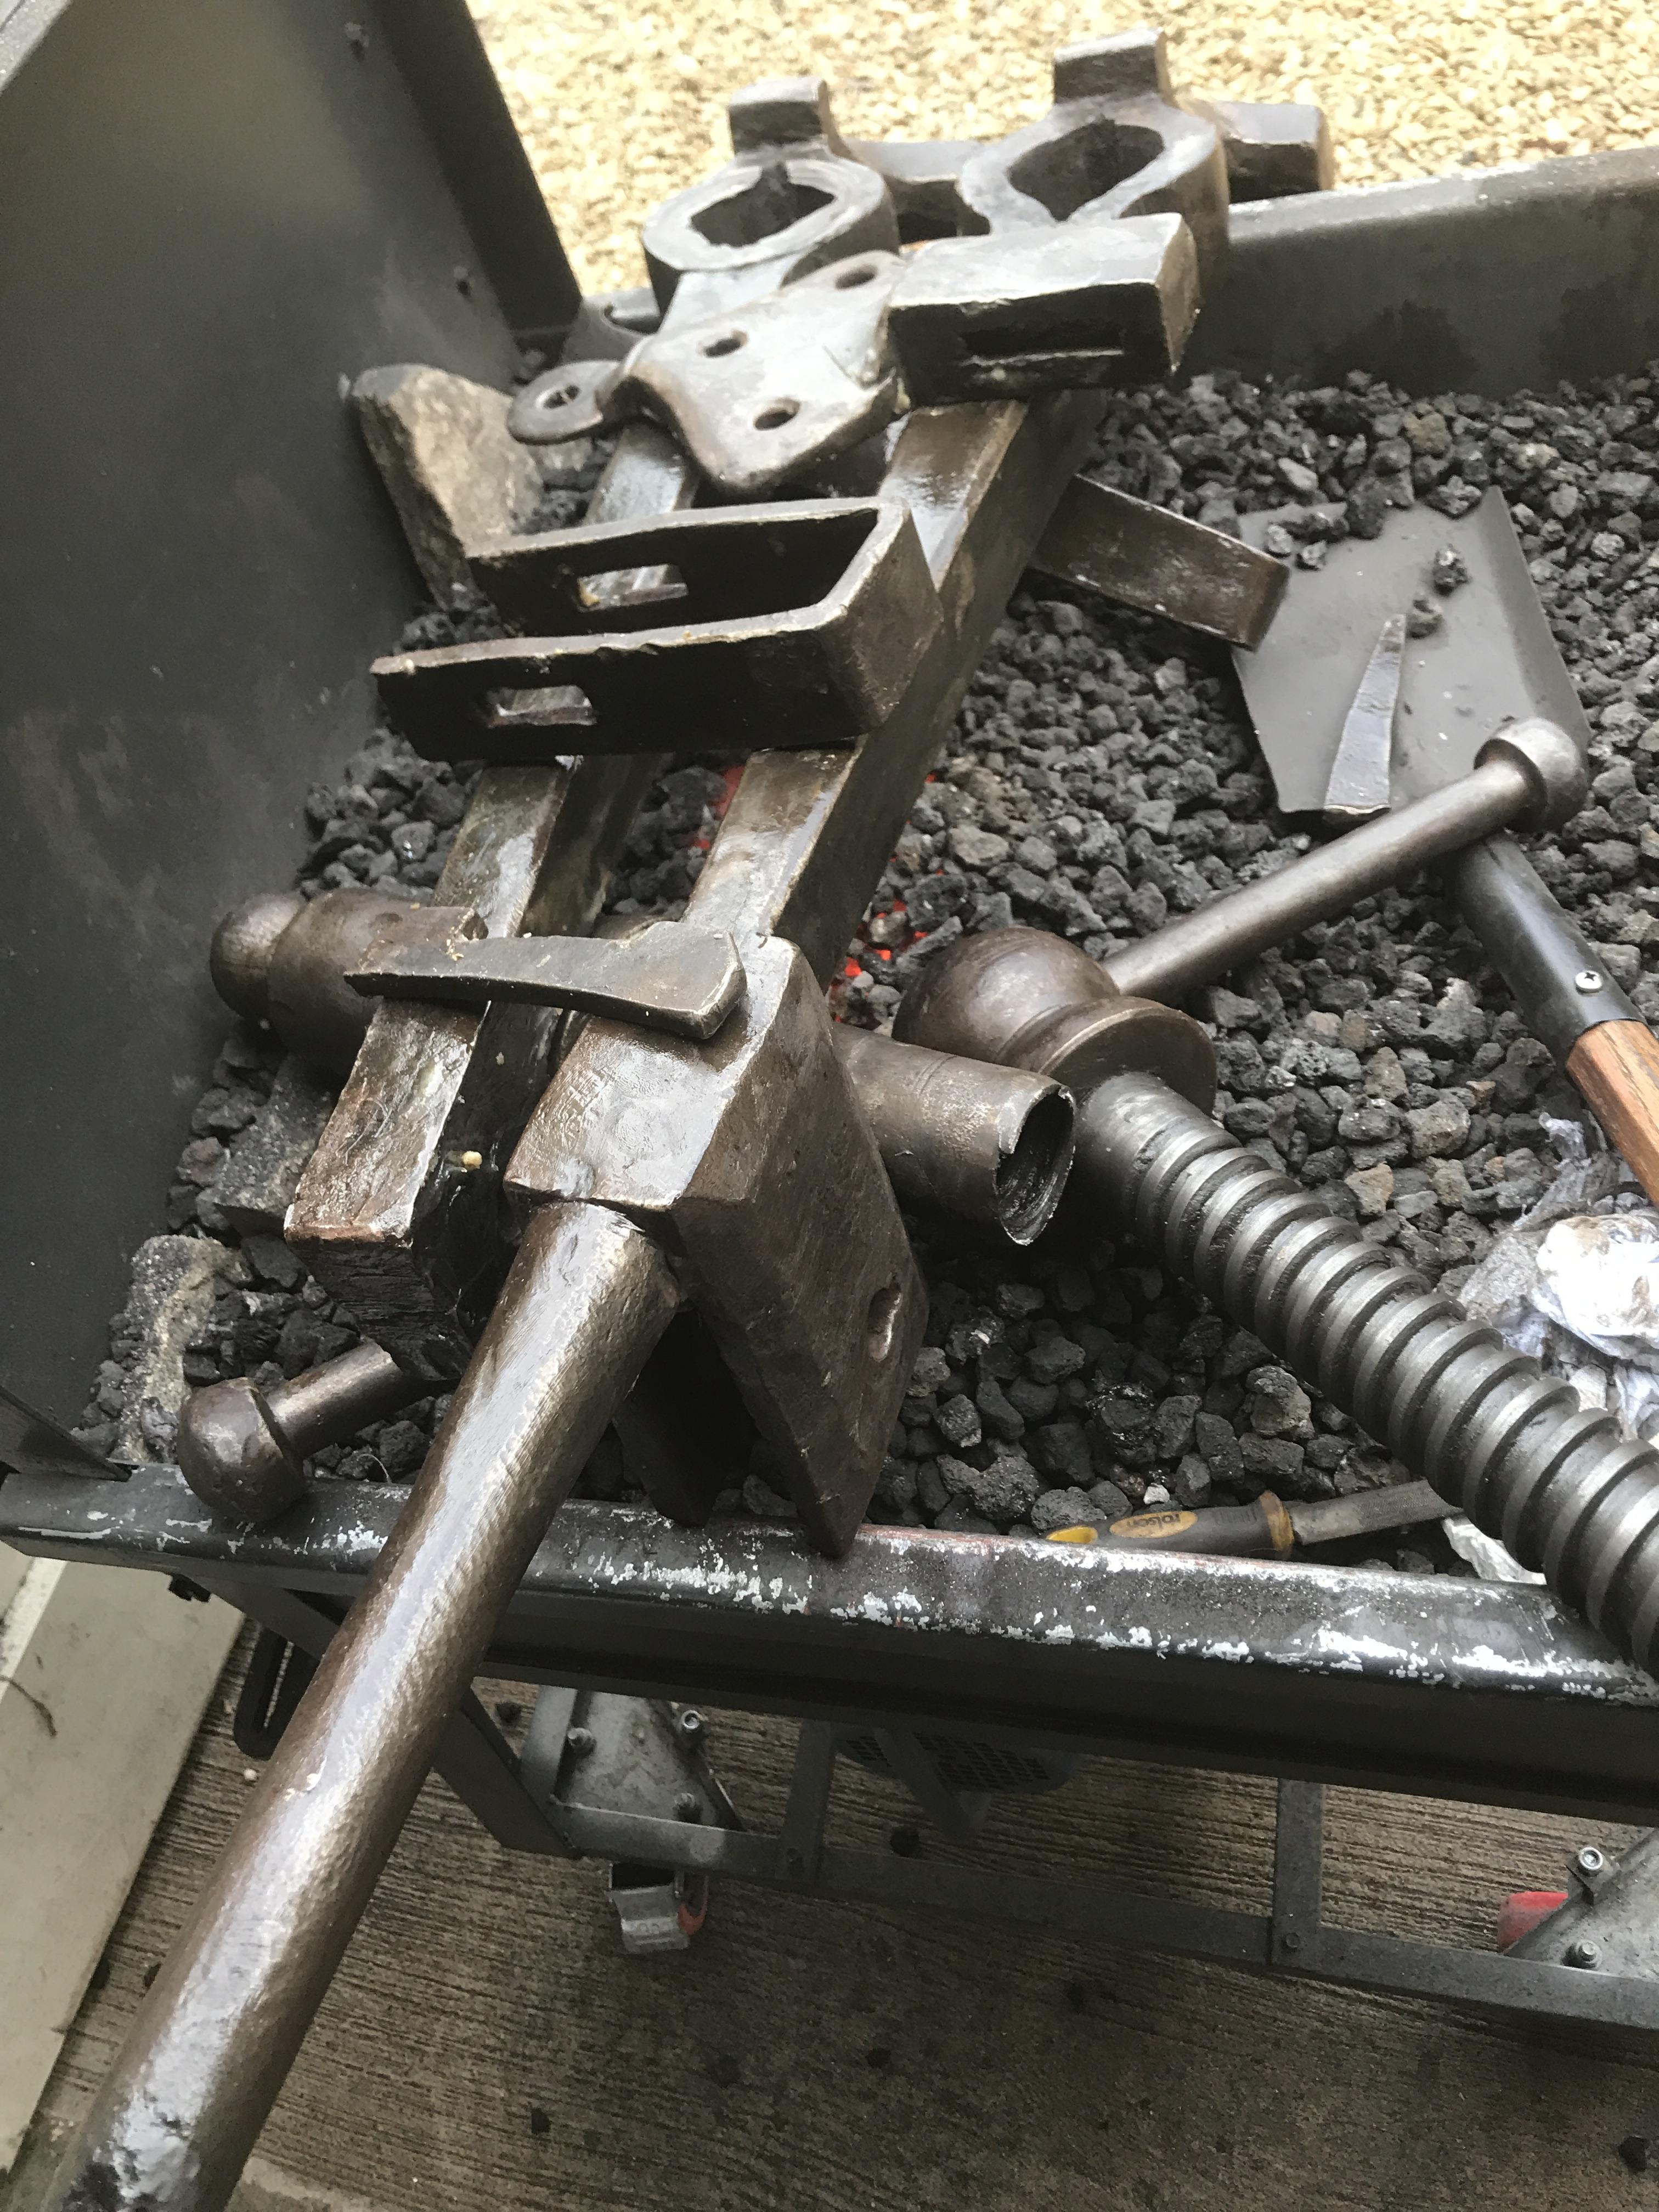
Curing the beeswax and linseed coating on a cooling forge.
-
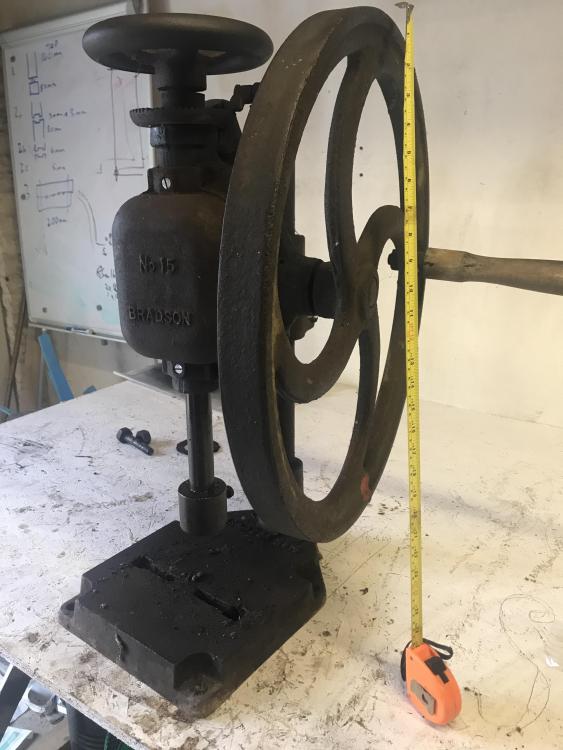
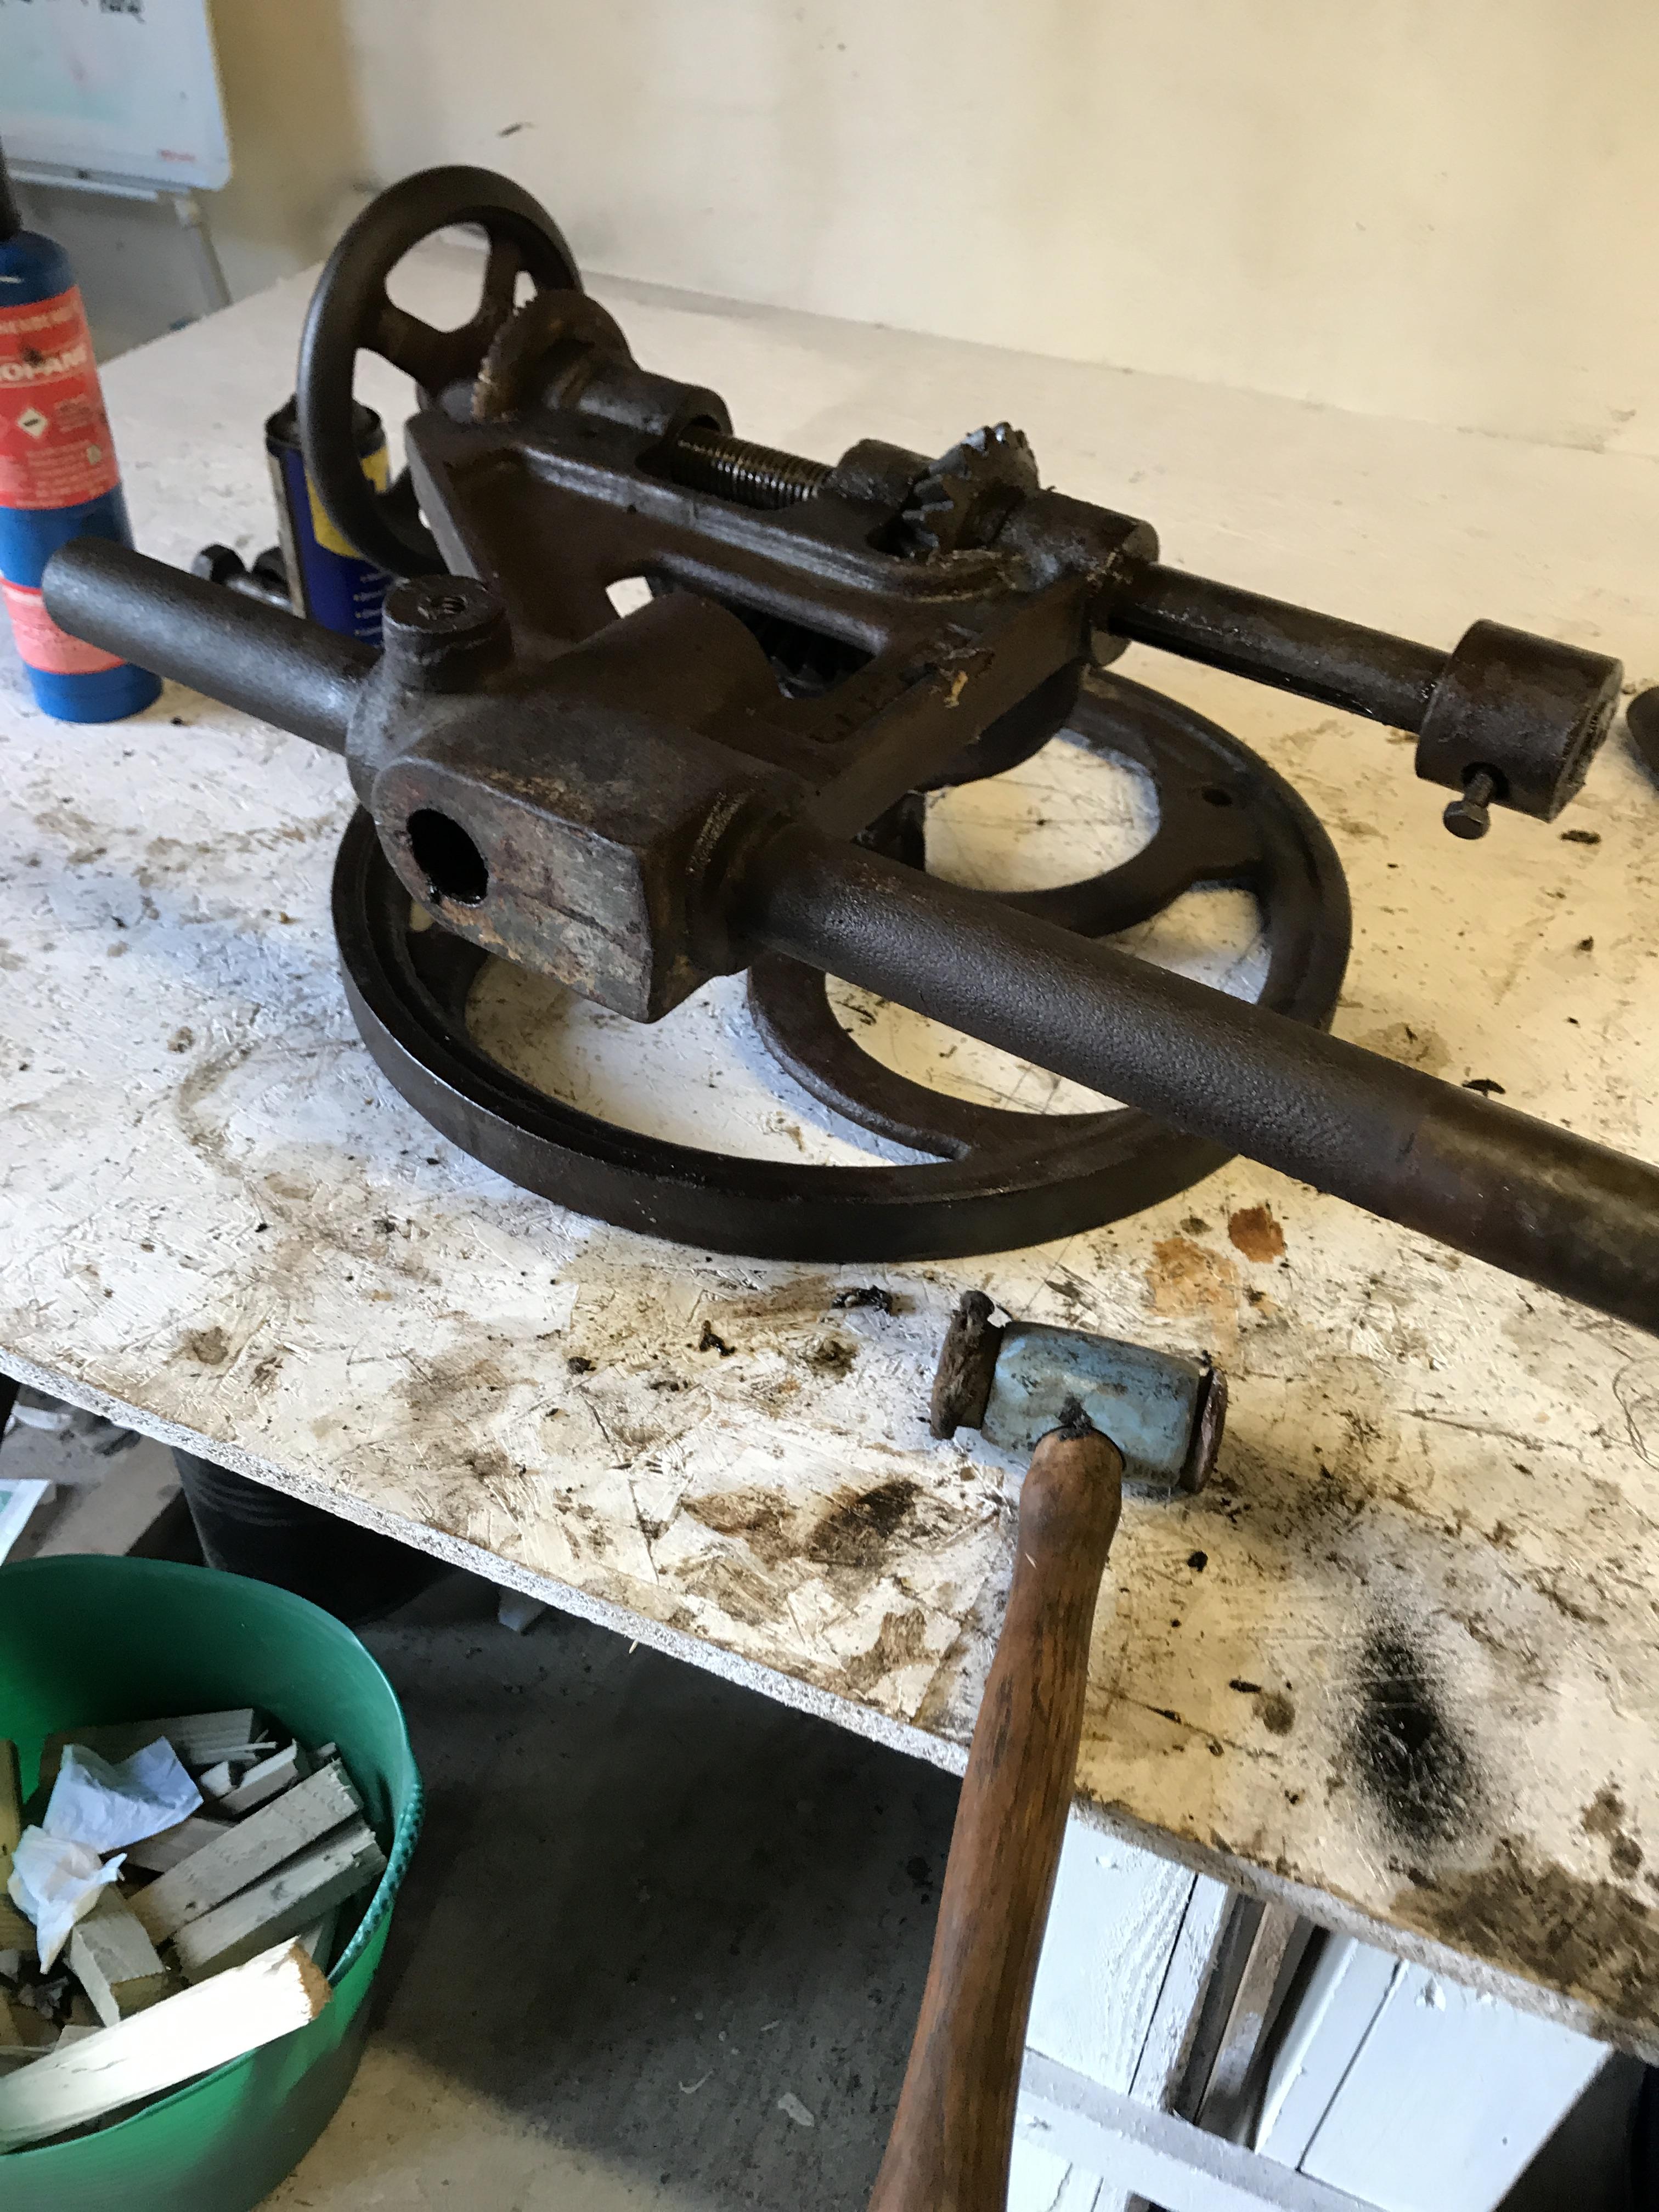
Picked up this huge drill press for £20 on ebay, locally.
Second image is after a night of Wd40 action.
next steps to take apart, get rid of the rust, paint and reassmeble in my shop.
2 and a half ft tall. 50” diameter flywheel.
I don’t know its age. Maybe 1920?

Taking the gear covers off. Spiders!
-
Rubbed down all parts with a home made mix of beeswax, BLO and turpentine. Fascinating examining the parts and working out how they were made especially the massive drift of both legs where the screw thread goes.
Next step is to finish off the surface treatment. I’ll place all the parts around the edge of my coke forge after I next use it. The heat will warm up the metal and its coating, then cool slowly leaving a nice shiny finish. My hands smell of linseed and beeswax. No better aroma.
New pivot bolt should arrive by post tomorrow and then I can put it all together and start thinking about the stand for it. I have a tree trunk in mind.
Close-up of the thread, which looks immaculate.

-
They certainly roll
-
At least its all of us...
-
No, not sure... but fairly certain. As a quick test i entered blacksmith coke forge onto UK ebay. Top six hits were side blowers, one bottom blower. That proves nothing, I know, but bottom blowers in my limited experience are rare. But I am no expert.
-
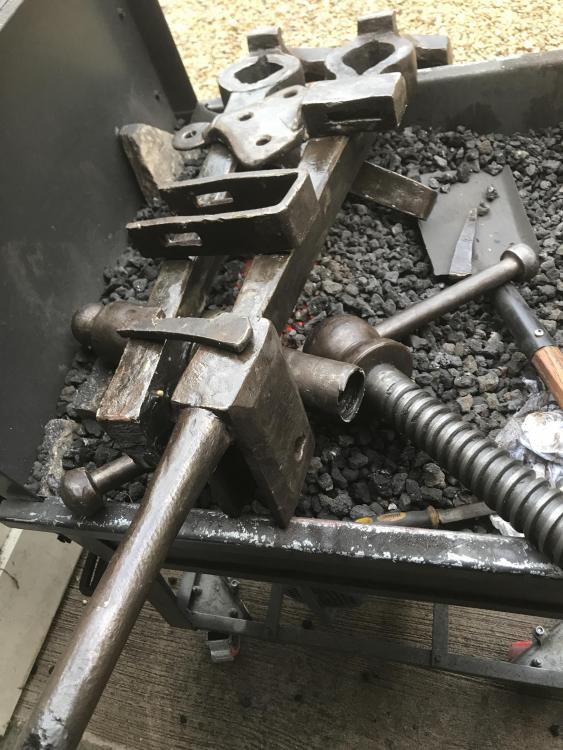
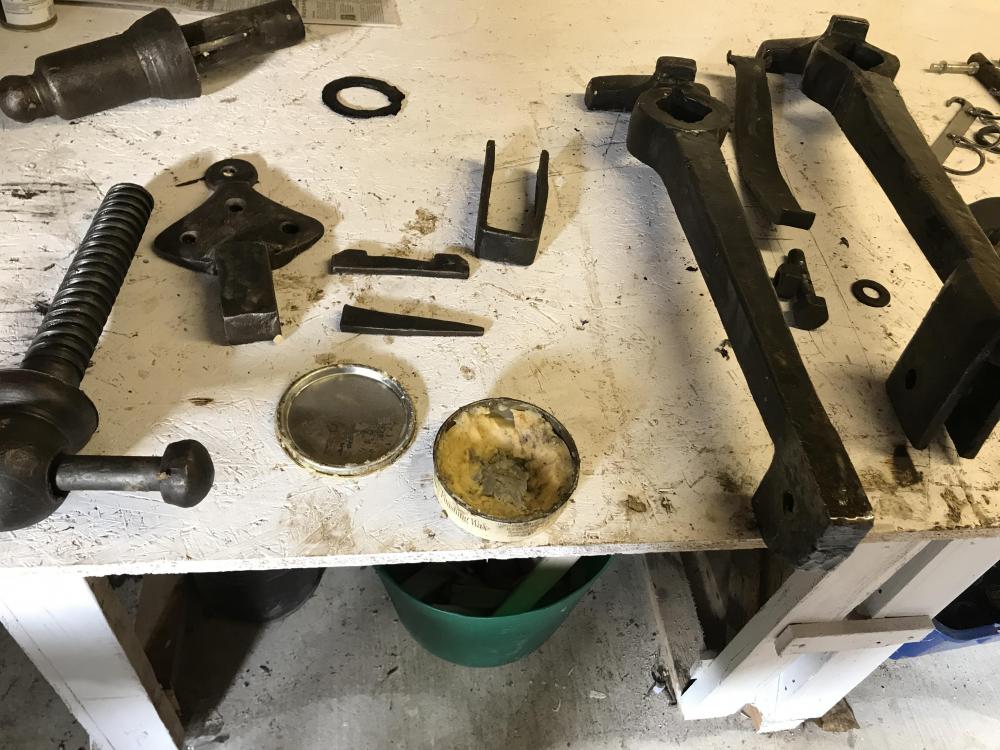
spent the day wire wheeling it. Comes up nice, no makers mark. Now I have the pivot point cleaned up its apparent the cheeks are in matching halves, forged welded together and the two together then forge welded on the leg. Strange. You can see the join but it looks solid.

It’ll need a new pivot bolt, and I was flat out of 3/4 inch bolts, so ordered some and they are on the way. Smallest component easily the most expensive. In the meantime, I put the parts together temporarily to test the spring. I was worried that 50 years plus of being clamped tight with the spring under tension would have eased it off. Amazingly it acts perfectly, no need to re-bend it. How remarkable is steel eh? All that potential energy locked in for decades and its still there, springing back into place. Sometimes we forget what remarkable material steel is.
-
I’ve been only at this blacksmithing game a few months so this post may be nonsense. I’m a Brit but love the US and have worked there a lot. It intrigues me that in some aspects there are different approaches to certain blacksmithing techniques and equipment. Some examples I’ve noticed so far:
1. A lot more use of coke forges in UK. Seems to be the standard. Coke is pretty easy to obtain in most parts over here. Charcoal less so. Most US pals seems to use gas mostly.
2. Most solid fuel forges over here seem to be side blown, water cooled. Compared to bottom blown in the US. From my fairly limited understanding, it seems that you can Manage the oxygen presence in a vertical “stack” of burning fuel a little easier, with a side blower. But maybe Im doing a disservice to my Amercan pals with bottom blowers who have a different skill set. Im not expert at using gas forges and dont really undertsand how oxygen is managed in them. Im not expert at any forge but Im learning quickly on my side blower.
3. Perhaps related to that I never come across people in the UK using Borax or any other flux here when forge welding. On the few occasions I see forge welding being done, its just get it to the right temp, perhaps in a low oxygen part of the forge then bang away. I‘m yet expert enough to judge. What I see of US forge welding is a ton of Borax. Not criticising, just noticing.
4. Some tools are different. Old fashioned pillar drills are common in the US but rare here, where bench drills seem to have been the norm.
5. It feels harder to get a range of different carbon steels over here in the UK compared to the US and our nomenclature for carbon steel is much less standardised, from what I can work out here. Maybe I’m just slow.
6. Not many railway spikes over here, as a commonly available and useful source of steel for little projects.
7. I love your big, flexible 2 x 72 belt sanders. Impossible to get in the UK, where the standard “linisher” is much smaller.
-
Ok I’ll follow that guidance, thanks.
-
I was lucky on ebay. Guy selling it was 25 minutes away.
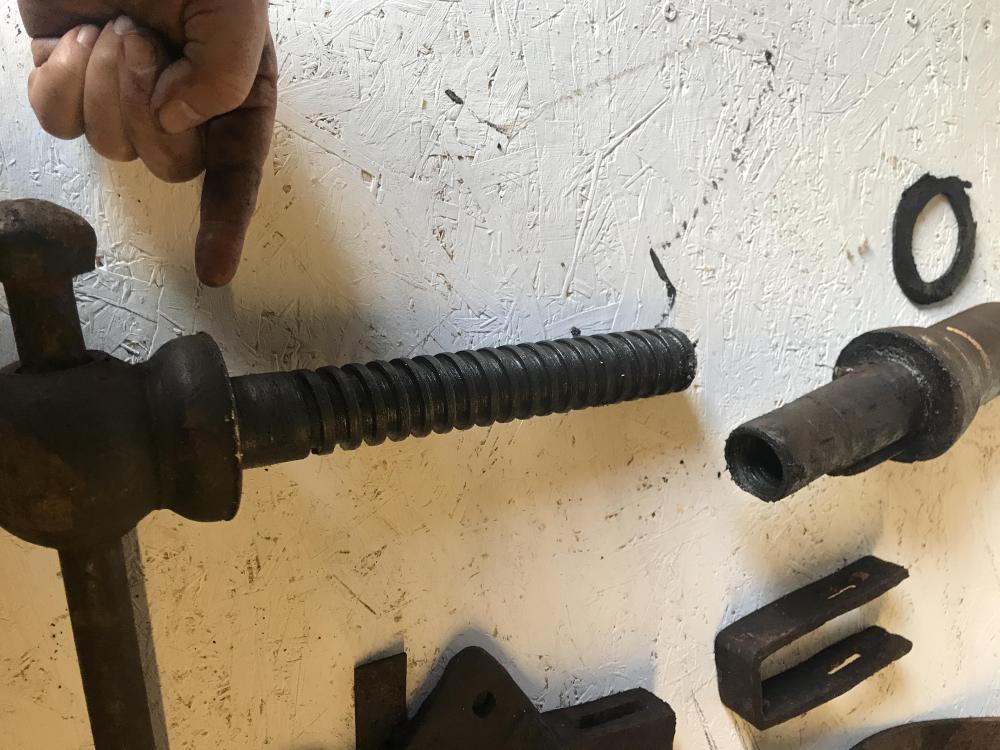
 Threads on the screw box look fine at first glance, but I need to clean it out and shine a light in there. A little surprised no thrust washer, and on the box side there are the remains of a leather washer. We’ll see how it works when cleaned up and then if I need to, I’ll work a thrust washer out.
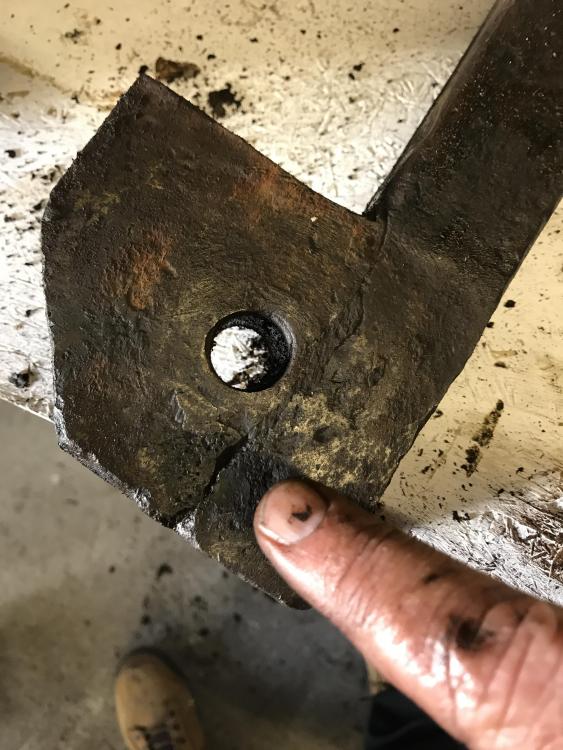
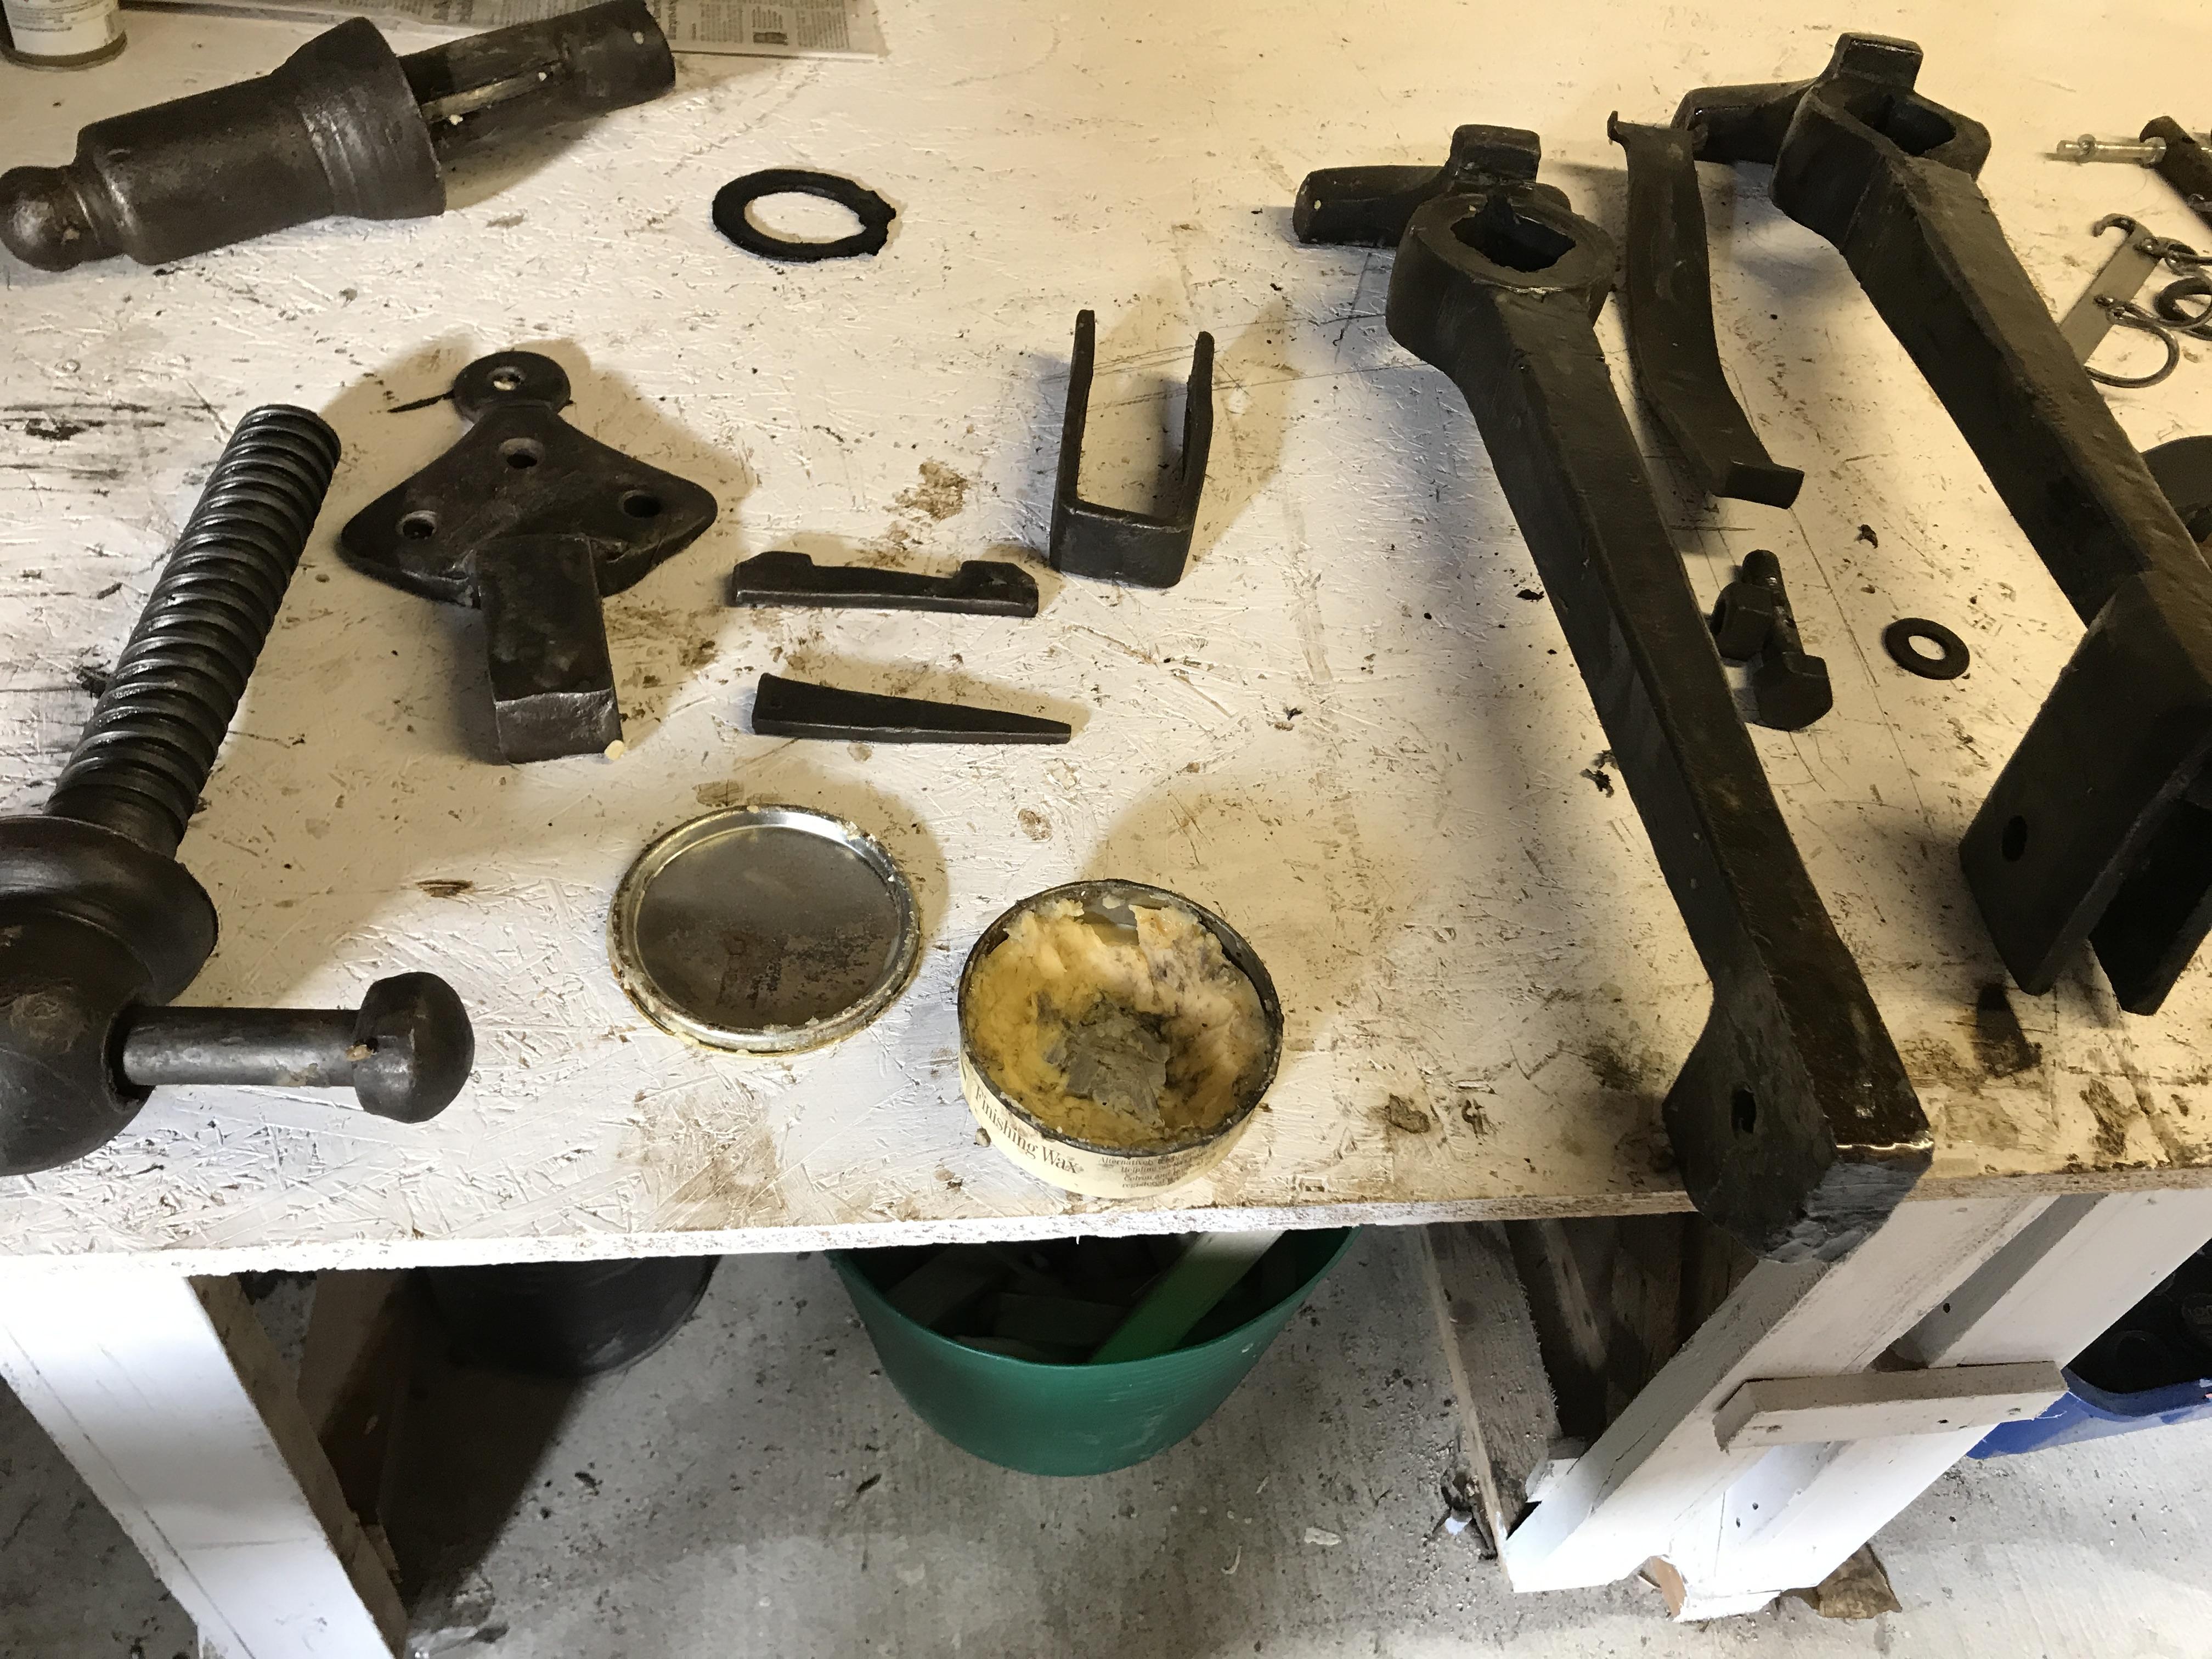
A few interesting anomalies.
1. The spring bracket was encouraged to stay in place at the top of the leg by a strange bead of weld horizontally on both sides of the leg. The weld wasn't to the bracket just a raised lip on the leg, but held it up. Not great welding. Ground it off.
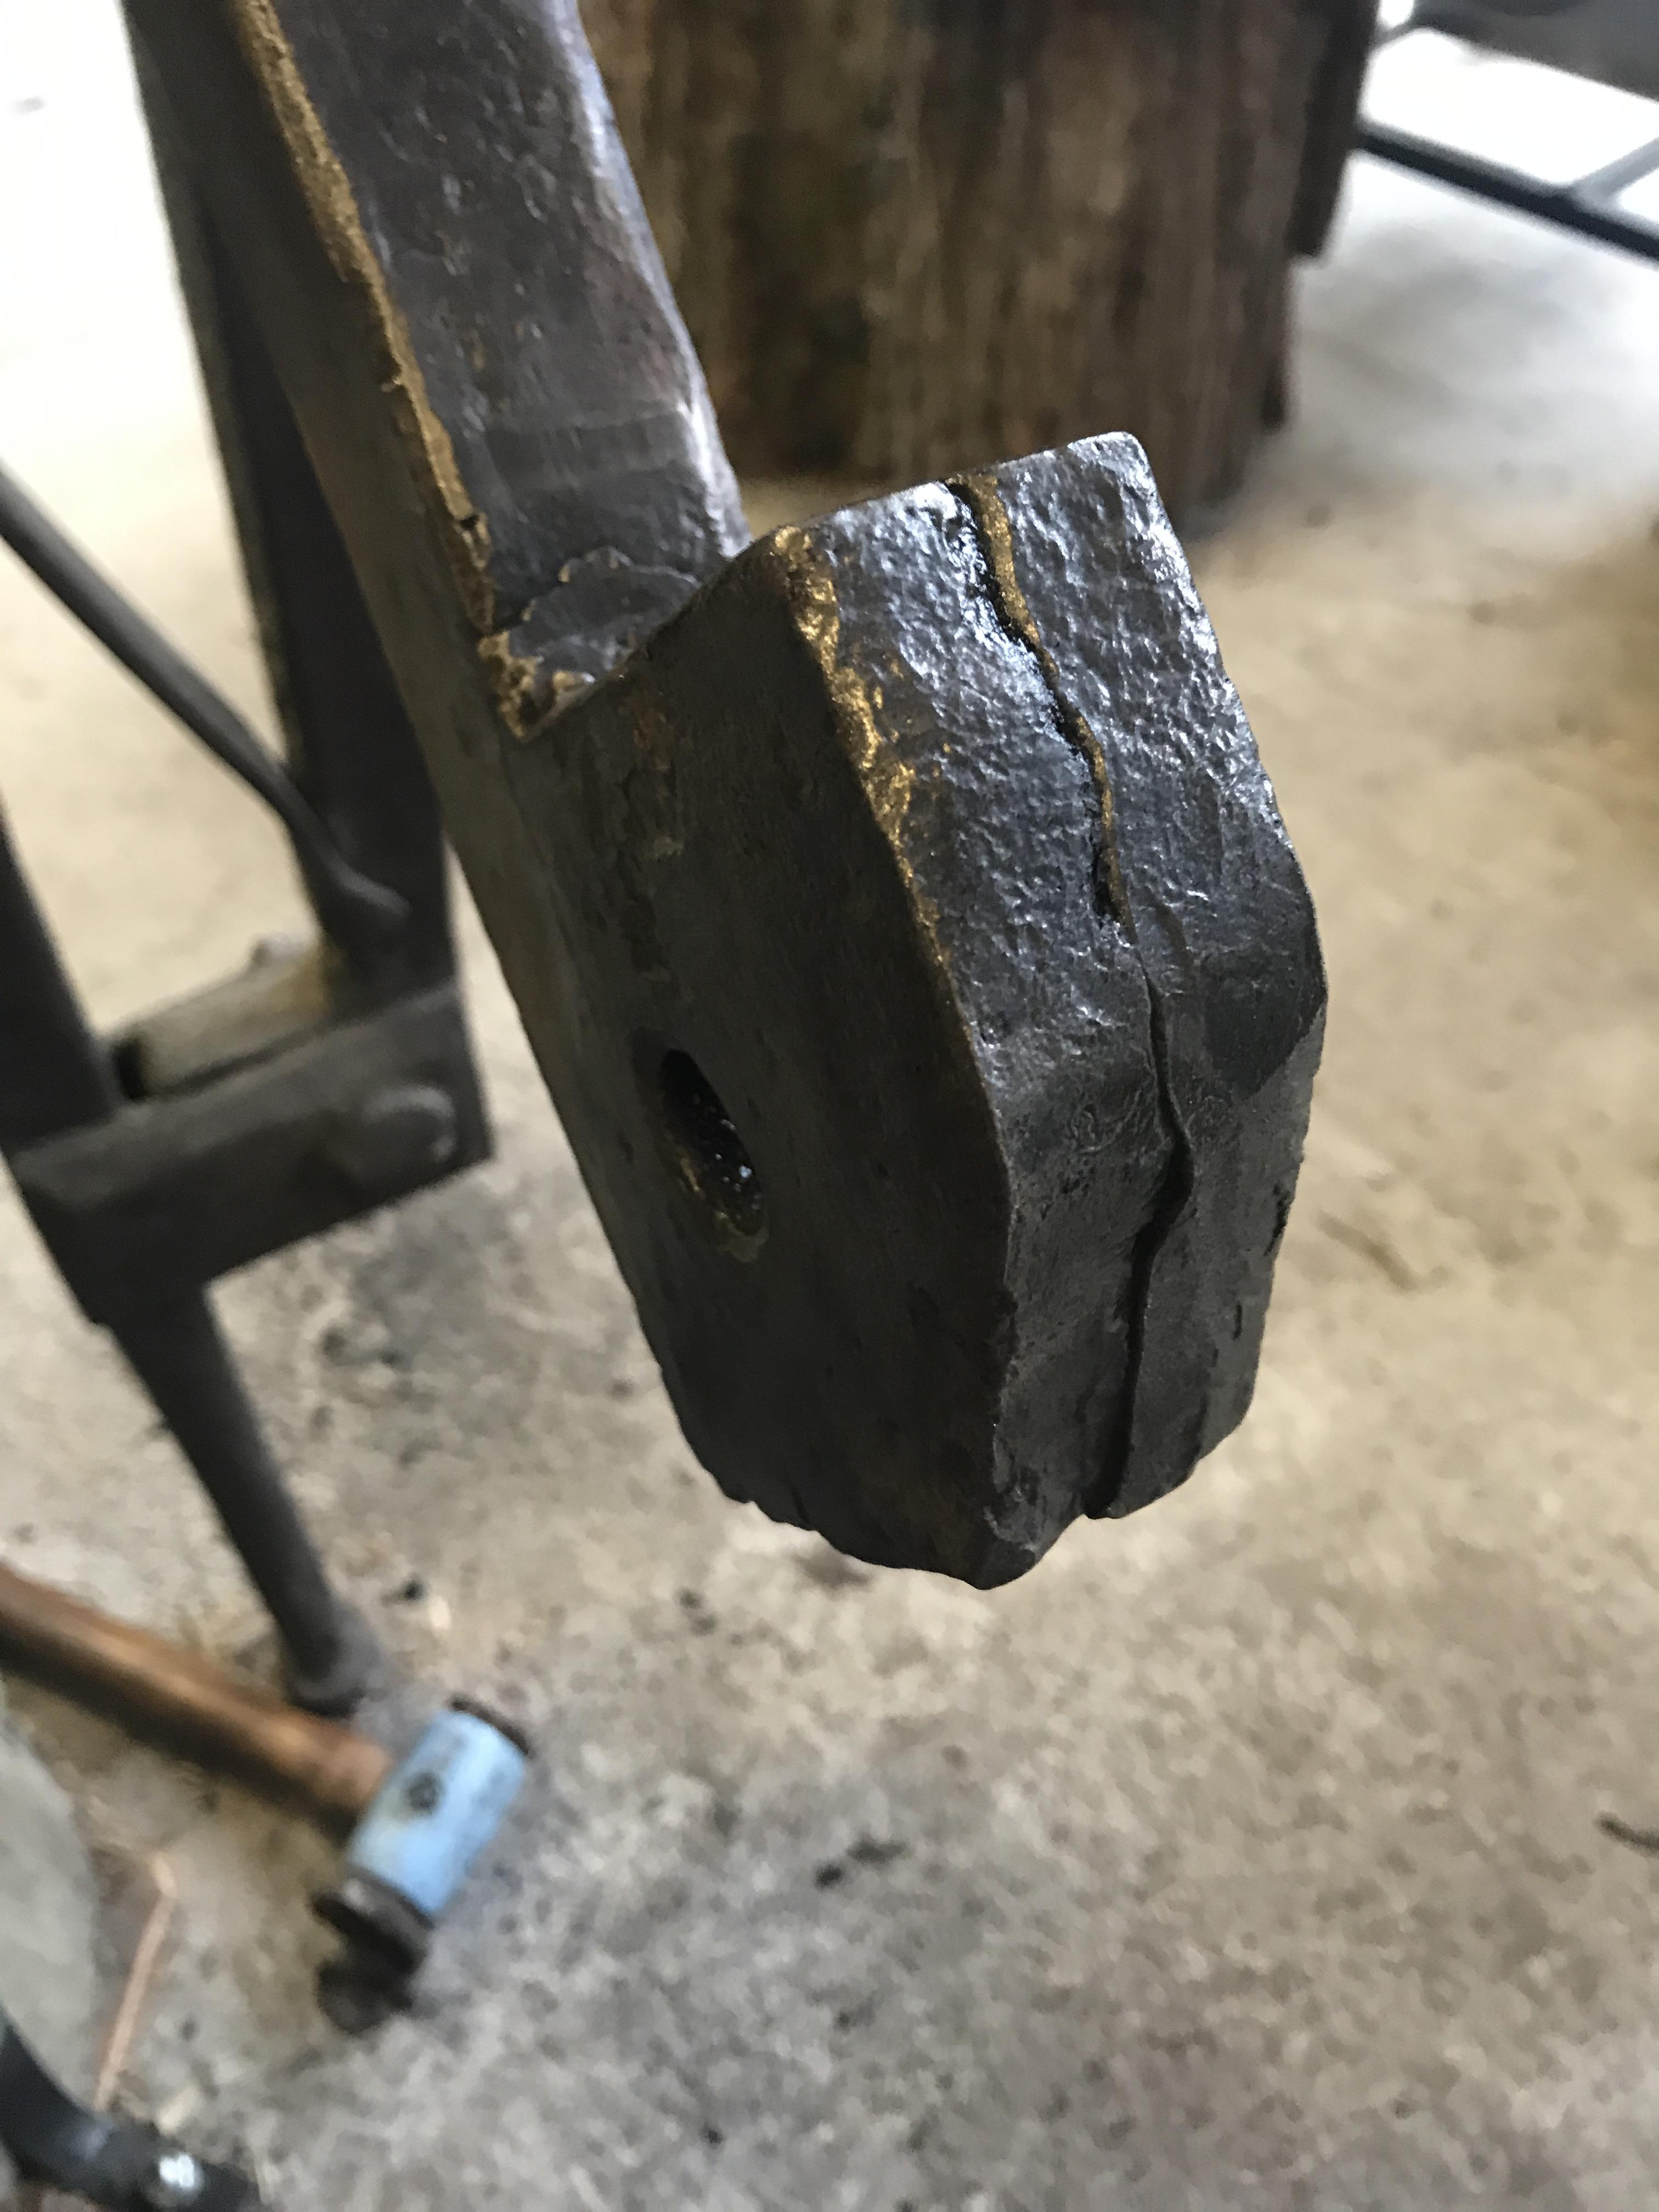
2. In the bottom picture in the post, showing the pitting on the pivot cheek, it looks like a crack running up, almost as if the leg part was welded originally to the cheek... maybe forge welded? Looks odd and I can’t work it out. Shouldnt be a problem, looks sturdy enough.
3. No makers mark at all...yet.
-
Yesterday I picked up this heavy old leg vise. £50 on ebay, along with a pillar drill press for another £20. I’ll do a seperate thread as I resrore that but first to the vise. Generally very good condition, nice straight jaws. A few signs of some odd welding done in the vicinity, but nothing too serious. Probably locked tight shut for 50 years plus, totally seized at the pivot joint.
It came apart with a bit of patience, a swim overnight in wd40 magic juice, a spanner, a soft hammer, some wooden wedges and the application of some heat. Thomas Powers advised I may find some pitting and corrosion on the pivot joint cheeks, and indeed thats what I found. Strange. Pics below. Seemed to be the cause of the seizure.
Next step will be wire wheeling the lot. With the spring being under compression, tight, for decades I was expecting to have lost some of its mojo, but it seems OK, time will tell when I put it all together again. If it needs a bit of a bend to give it its oomph back, I’m hoping I can achieve that then air cool it rather than have to do any complicated heat treatment. No sign of any makers mark yet.
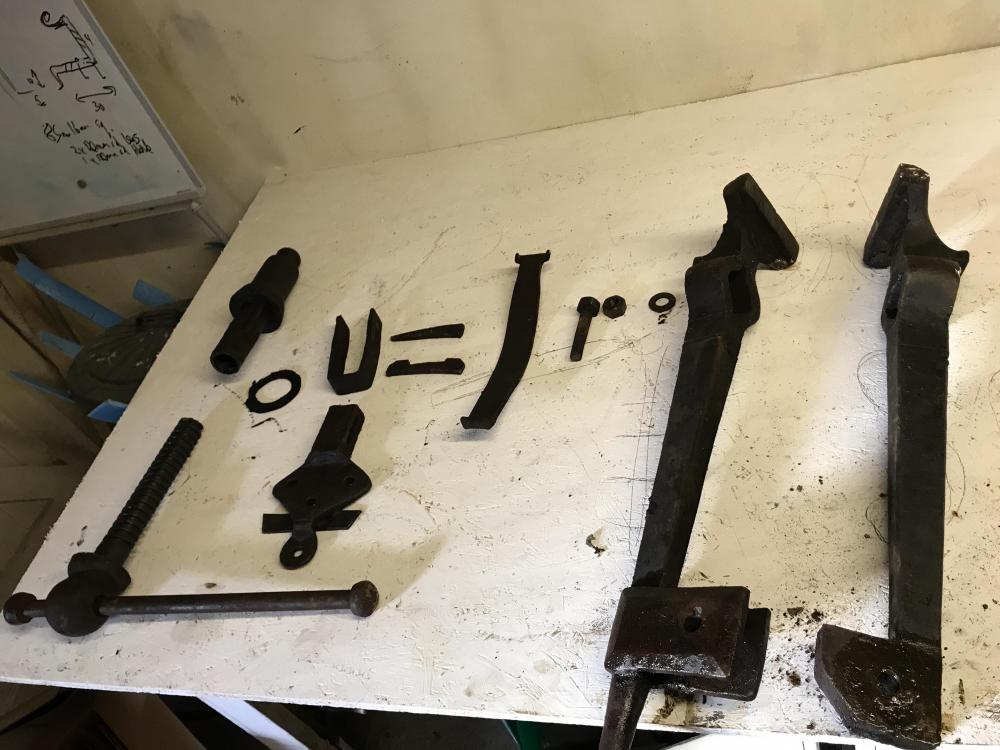

-
Got it apart after an overnight swim in wd40. As you predicted TP there was some odd pitting and unevenness on the pivot joint cheeks. Strange. I’ll make a new thread with pics in the vice section and get off this thread.
-
Thanks TP I’ll use that reasoning when my wife asks. :- )
-
Will do. :- ) I suspect that the vice has been cranked tight closed for a few decades. Spring looks OK but perhaps all that time under pressure will have deformed it a bit. I dunno... My plan is to clean it all up, fit it together and then check if the spring has enough oomph (technical term round these parts) to push the vice jaws apart. If not, I’ll whap it in the forge, warm it up and bend a bit more of a bend in it. I’m guessing I dont need to worry about heat treating it after, should be enough stiffness there with a simple air cool. Once done I’ll post a before and after pic on the vice thread. Seems greedy to have two post vices, but I couldnt walk away from it. Its a bit bigger than my current one.
-
Its flat, TP
-
This is where I think there should be a washer, but isn’t


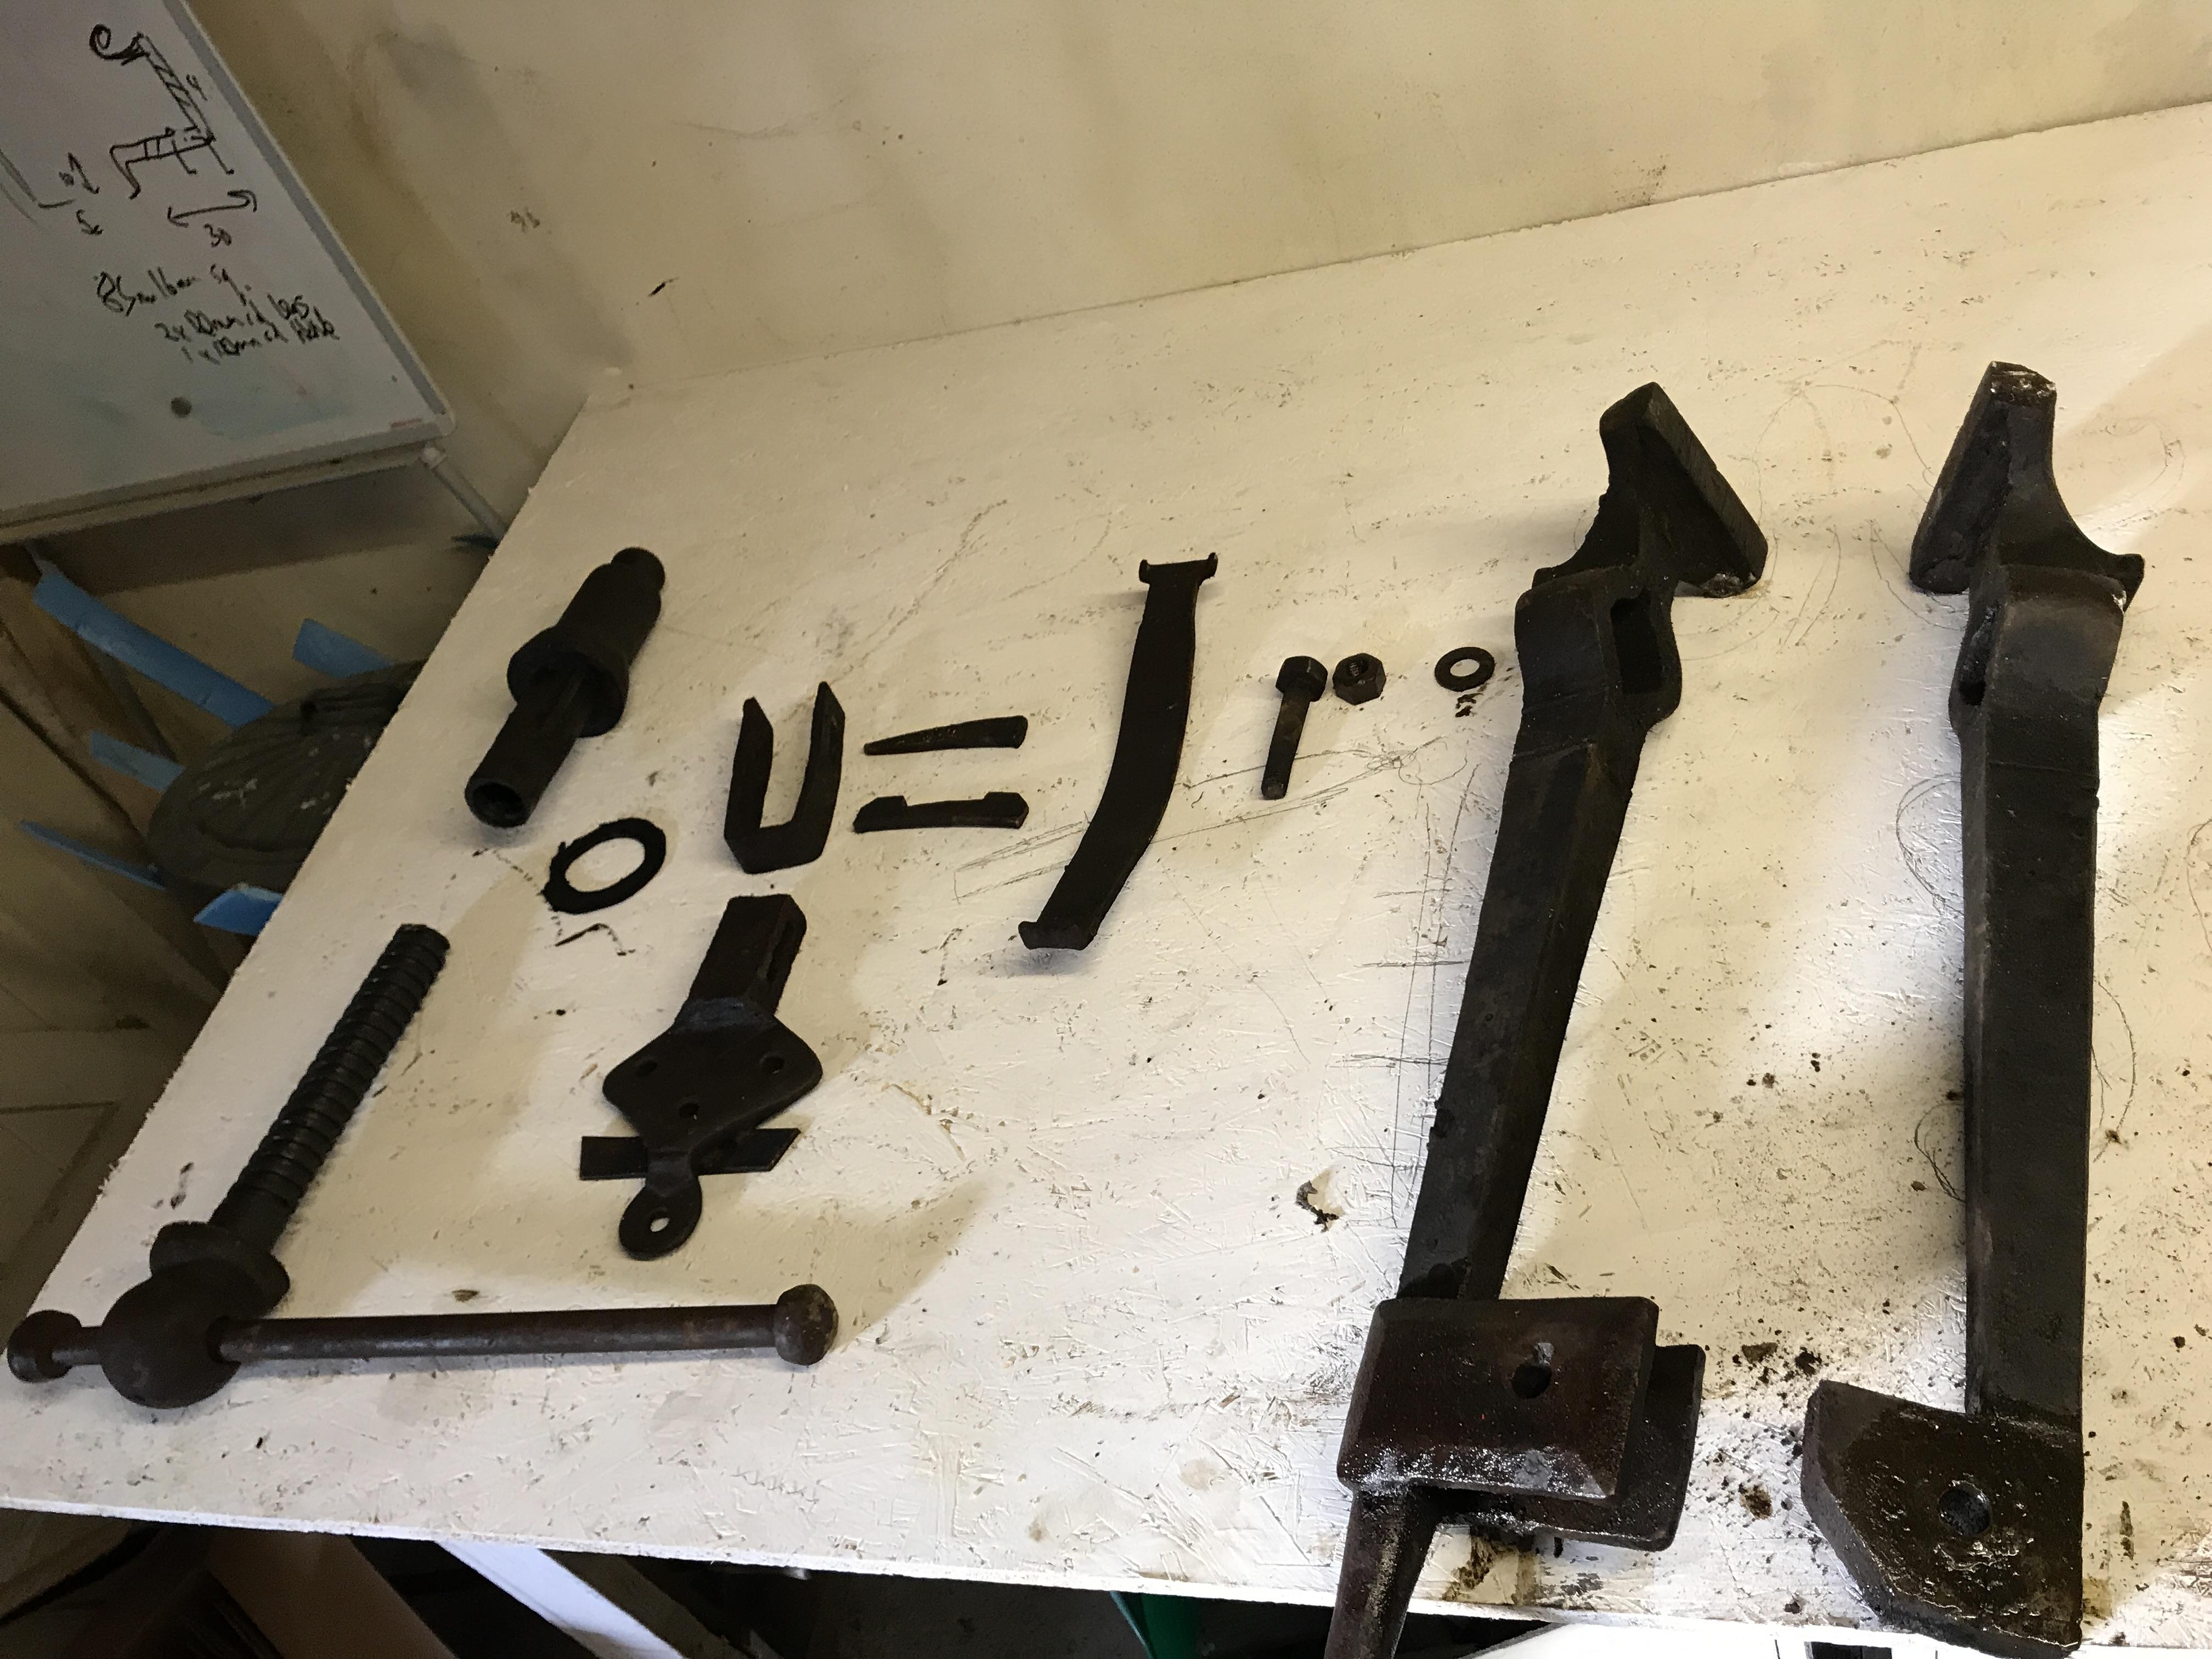
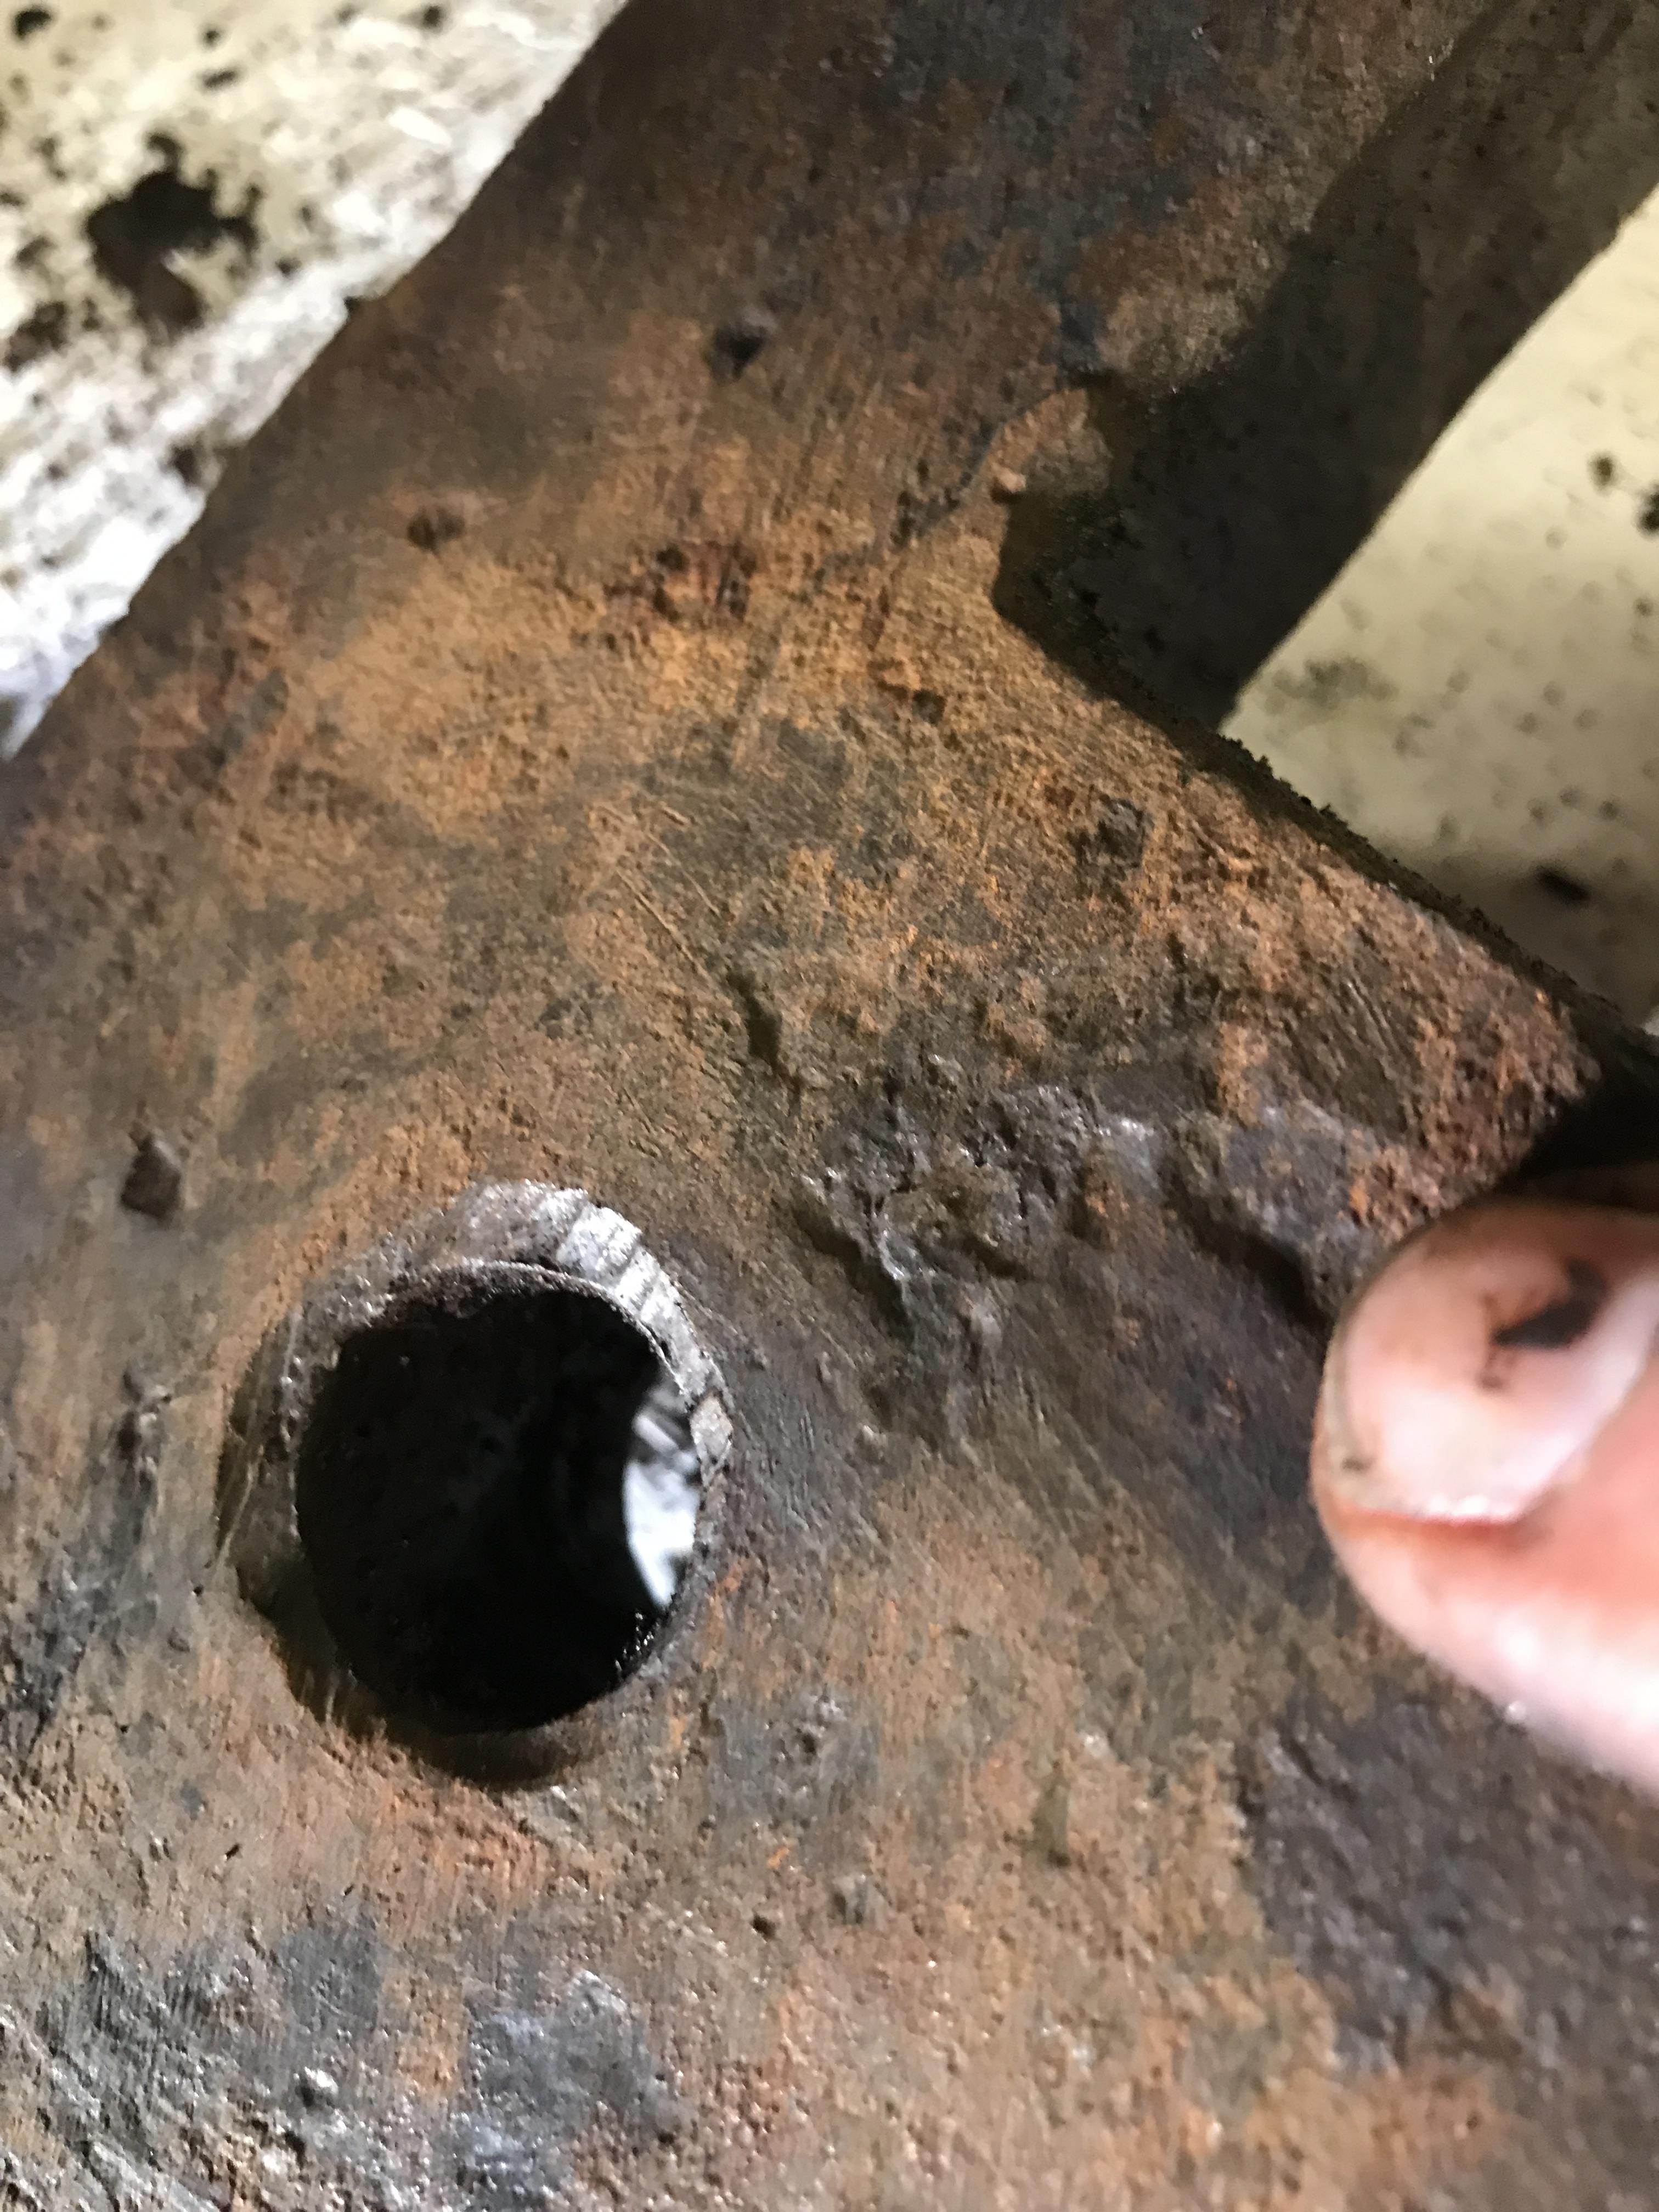


Is something missing here?
in Vises
Posted
Yes, You need a wedge piece to go behind the “key piece” that is already in there. You tap it in and it holds the whole vice tight. Looks like this, but dimensions not too critical.