

Brasilikilt
-
Posts
299 -
Joined
-
Last visited
Content Type
Profiles
Forums
Articles
Gallery
Downloads
Events
Posts posted by Brasilikilt
-
-
I only met Grant once, and can only consider him an acquaintance....
But, can actually hear him saying to all of us right now...
"I haven't died, I simply stopped using my peter wright." :-)
-
Hello!
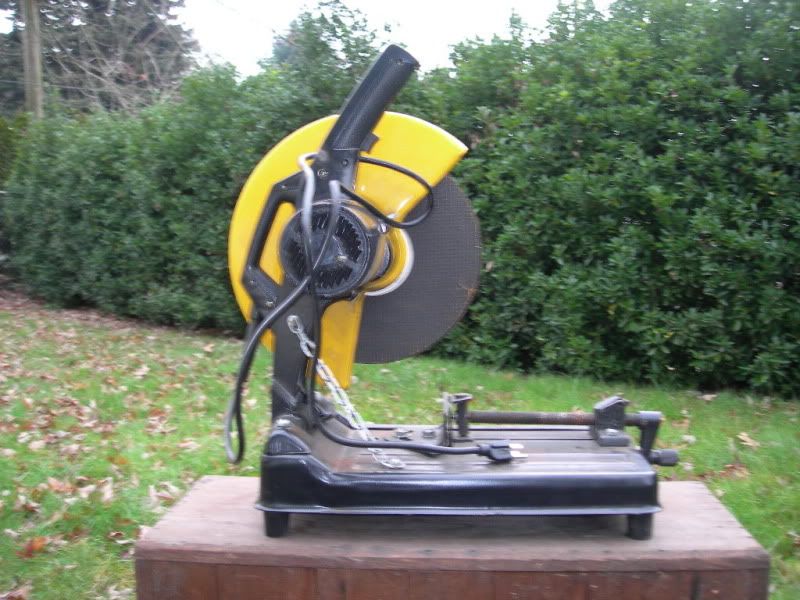
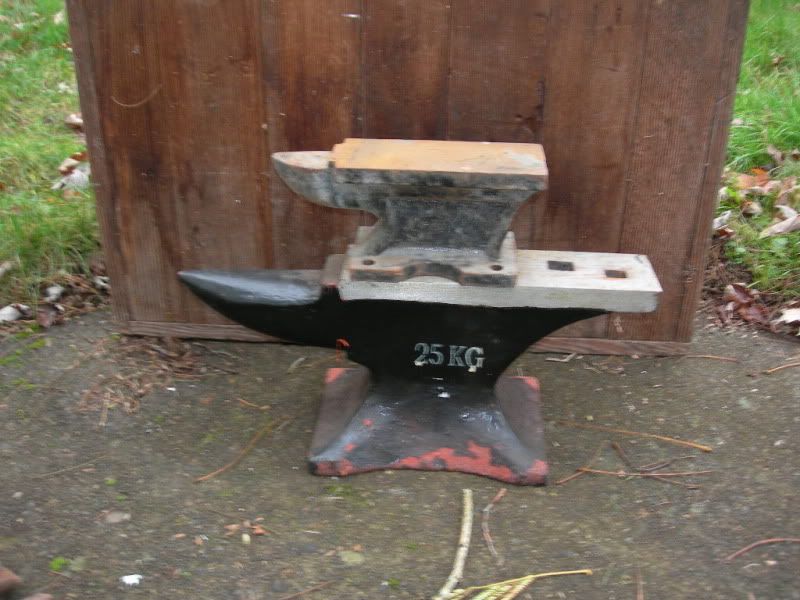
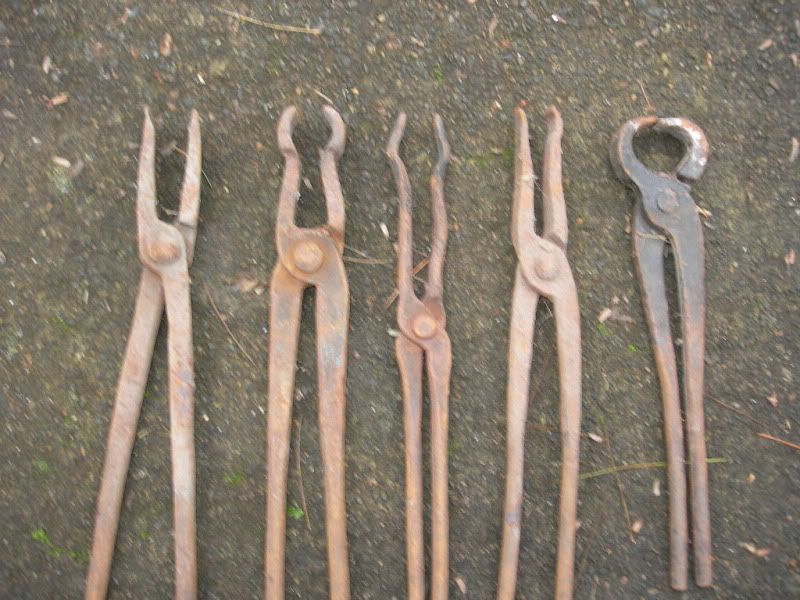
My relatives *seriously* hooked me up big time with blacksmith stuff this Christmas!!!
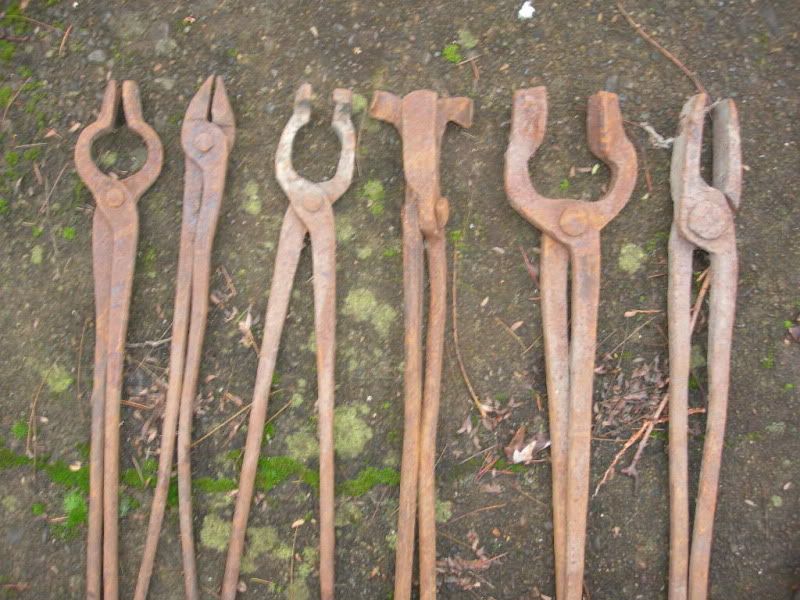
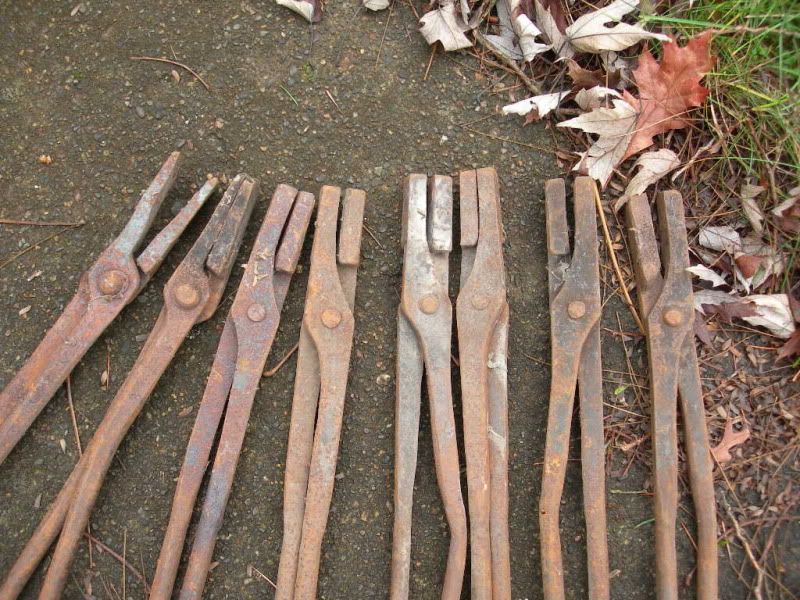
If you look at the picture with all the flat jaw tongs....Why would somebody need so many?
My first thought is that they they are tong "blanks". If you have a need for a particular type of tong, you don't have to make a new pair from scratch....You simply modify the jaws of one of the blanks, and can get back to business in comparatively little time.
If I were to draw the jaws out a bit, and weld pieces of angle iron/pipe cut in half, would this hold up reasonably well under normal use, or is it better to shape the jaws with swages and such? I suppose the answer has a lot to do with the type of tongs desired.
Prior to this, I only had 2 pairs of flat jaw tongs. This was fine as I was making more knives than anything else, but now the possibilities are quite numerous, and think that bolt jaw tongs might be the most versatile configuration?
Another question...With this and previous acquisitions, I now have 3 pairs of farriers nippers. I really do not foresee any likelihood of nipping hooves anytime soon and wondered if anyone on here has successfully modified nippers into usable tongs.
It seems as though they could be tweaked and made into bolt tongs to hold smaller stock, but perhaps someone has a better idea.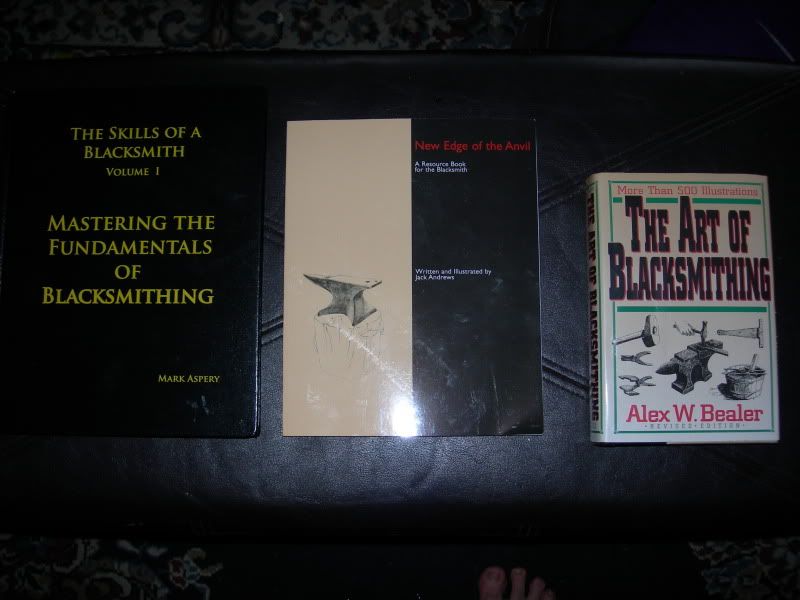

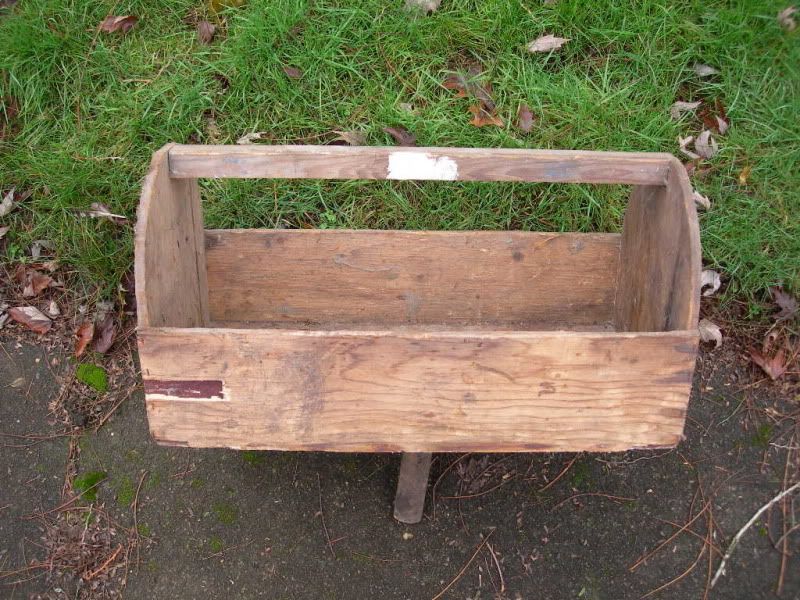
Anyways, I have the kids today and can't run out and use this stuff at the moment, I have to be content with ogling for now :-) -
It was explained to me that back in the day Coco Bolo was used on knife handles which would see a lot of moisture and use in the kitchen. Apparently it doesn't easily soak up stuff like other woods do.
-
I have a similar hammer which is a bit bigger and boxier than yours, and had the same thought to turn it into a stake anvil.
It's nice to see that my idea (OUR idea now) isn't so silly, and would actually work :-) -
Not long ago I saw an Australian IFI member use sections of bike tires for knife handles....It's such a good clever idea that I'd buy that guy a Sheaf Stout if I could :-)
I always thought that the composite decking material made from recycled tires called "TREX" or something might be an ideal handle material since it is firm, shock and moisture resistant and is easily shaped. Any deck installers in your area would have scraps or possibly pre cut samples to play with.
In Scandinavia they use disks made of birch bark glued together with tree sap
The best advice I can give you is to look around and experiment. Have fun and post pics of your work -
Wow, quite nice....It should make a lovely gift for one of the ladies in your family. I've seen rose/flower kits cut out with a cnc machine, did you go that route, or do them all by hand?
Ohh, Leather and wood....I've been messing with that stuff since I was a kid.....Just like Blacksmithing and Fab work, there are some veteran craftsman that will show you some super cool tricks to overcome those "whoops" moments.... -
Wow, never thought about stock removal.....You guys are certainly giving me a lot of food for thought :--)
Yes, I was thinking of a "C shape" when mentioning the open ended guide,and yes fullering spreads metal (Duh! why didn't I think of that?)
The "Sen" you mention, this tool here??
http://www.dfoggknives.com/photogallery/MakingSen/makingsen.html
If your blade is made from a leaf spring, and your sen is made from the same, would your sen would be tempered in the straw/bronze color range to work on a blade in it's annealed state?
The file idea is a good one...I have a few old worn Nicholson files and will experiment with this idea before trying it on anything I have some hours into
Thanks again fellas! -
Hello
I have begun work on an 18th century Scottish dirk blade for a customer, and wanted to do some fullering lengthwise along the spine of the blade.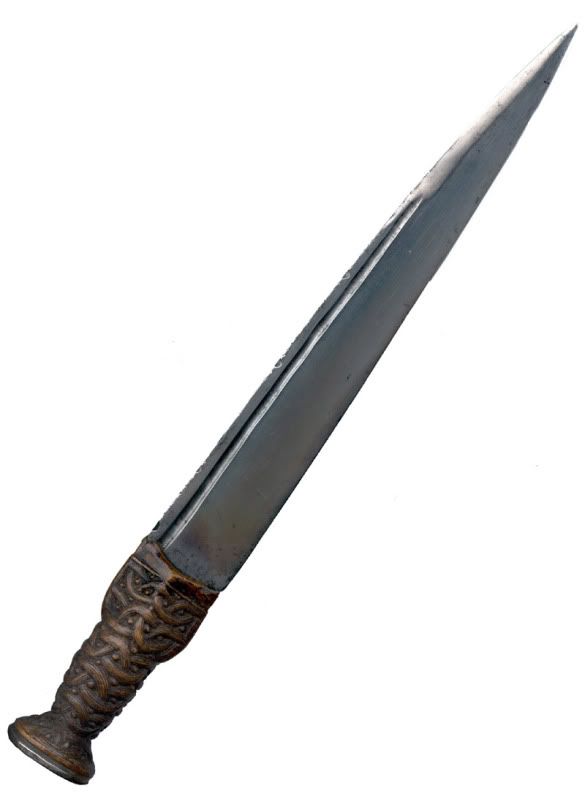
I want to start fairly simple such as what is seen in this example, but wonder how this is done.
I know that a top fuller and bottom die are used, and that the blade is moved in between, but I recognize that with a simple handheld fuller used with a hardy tool, I will at least need a 3rd arm or striker, and more skill than I currently possess in order to keep the blade perfectly straight while the fullering is being done. Seeing the fuller on this dirk, I suspect it was done freehand with a sriker
I suspect that many of you who work alone use some sort of jig to accomplish this, and am wondering what those jigs look like, and how they work.
I'm picturing something that is as simple as a blunt chisel with an adjustable hooked guide arm attached, or something slightly more elaborate that operates similarly to a drill press vise, but instead of a 2nd vise jaw, you have an open-ended guillotine tool.
Maybe it's better to have an adjustable stop built directly into the guillotine tool
Am I on the right track here? -
Why not get a beveled strip of suitable tool steel a couple inches wide with thickness to match the remaining section of face, cut it to length and weld the strips on the anvil? 2 fat welds along the sides and 1 down the center of the anvil face.
With a suitable gap between the beveled metal strips to ensure enough weld is adhering to the anvil, in my mind it seems like it would be an adequate repair, while saving a little grinding time and expensive hard facing rods. -
Ahh very fine work indeed, but I'm afraid that you'd catch too many of my arrows before you got close enough to use it :-)
-
Your plan sounds fine to me, but given the fact that a lot of these vises are made or fairly soft wrought iron you may not even need to heat it.
I bought a pretty rough vise off of Ebay a couple years back which had similar issues with the leg.
I figured that since the leg was likely bent while cold, It can be also straightened while cold. All I had to do was disassemble the vise and set the leg on the table of my anvil and rotate the vise leg while giving it a few good whacks with a hammer. It straightened right up and have had no problems with 2 years of use.
This being said, my vise is a fairly light 40 (ish) pounder with 4" jaws. On heavier vises with a thicker leg, your idea would probably work more efficiently :-) -
Very well done! Your finish work shows a lot of skill and attention to detail.
I don't want to highjack your thread, but your knives remind me very much of more refined version of a pair I finished last month
Kinda funny when ya look at them eh? Same blade steel, minor differences in regard to craftsmanship< (yours are nicer ) materials used, but still rather similar in appearance...all of them made around the same time about 100 miles apart. -
For what it's worth.....
I'm left handed, and like many other South paws I have had to adapt to a right handed world....scissors, guitars, can openers etc.
Currently my anvil horn points to the right...I didn't go with any mystical magnetic calculations, because trying to sight my old Silva Ranger compass to align a 178 lb mass of metal tends to throw the needle off a tad :-)
My rule of thumb (as a somewhat experienced beginner) is to point the anvil horn AWAY from the forge.. I do this because I tended to focus on the freakishly hot chunk of metal in my tongs and not so much where my nether regions are in relation to the horn. It's as simple as that. -
Lenaghan basically took the words right out of my mouth.
Since you have already made knives, you already have skills enough to start hammering on that bar to get a decent start on a sword.
Be honest with your Gramps and explain that swords are a bit too far out of your skills, and explain that you'll forge his sword bit by bit as your skills improve.
Either that, or make him a quick and dirty Uruk-Hai sword
-
I have a little can full of axle grease and motor oil. I chuck up a little wire brush in my drill and stick it in the can while spinning.
I clean the anvil with the wire brush and add a protective layer that gets in all the nooks and crannies, all in one lazy step.
I also do this to my post vise.
An old anvil usually has a wrought iron body. Wrought Iron doesn't rust as easily as modern mild steel, and this works in my favor.
I've only had to do this to my anvil a couple times, and it is stored outside in rainy NW Oregon. -
Tye.....keep an eye on your local craigslist for a good used anvil, take a trip to the scrap yard and look for a heavy block of steel,train car knuckle, or heavy piece off of machinery.
Do you have any welding skills? -
Wow, I love the tire tread idea.....I will have to stea- er borrow that idea someday!
-
http://users.frii.com/dnorris/maillearmor.html
http://www.metacafe.com/watch/7120675/saints_row_the_third_violent_office_space/?source=playlist
,It looks VERY time consuming Good luck!!! -
Wow, very impressive....You're rough "Frontier finish" looks great, and I also like the long guard and how it curves over to protect the fingers more
-
I would check Ebay and your local Craigslist ads. There are lots of machines out there aimed at the hobbyist that have been produced for decades, being sold for cheap today.
-
Hey all, thanks for the compliments :-)
It's definitely has given me a strong indication that I will actually be able to sell these, and am not merely adding to my own stash of cutlery :-)
To be honest with you, I have done pewter casting with nothing more than thick paper, but often prefer to use cloth such as denim or old bed sheets covered with craft glue.
I do this because it's more flexible and tends to conform to the shape of the handle better than stiff paper. I sometimes get bubbles or blemishes, and using the glued fabric makes it easier to take off and re apply if another pour is called for.
Chichi...Here's a link that will explain everything better than I could:
http://www.wrtcleather.com/1-ckd/tutorials/_pewter.html
Once again, thanks a bunch for all the kind words......I'm currently working on some more blades, including one with an African black wood handle which hopefully will turn out nice.
I'll keep you all informed
Iain -
Hey all
Just to give you a little info....
The blades are forged from 5160 leaf springs, normalized 3 times., quenched in veg oil once and then tempered 3 times in the kitchen oven until the spine was purple with bronze on the edge.
These are crafted as recreations of knives that would have been used around the time of the French and Indian/ Revolutionary wars.
The 2 top knives have domestic walnut handles with poured pewter rivets and bolsters, while the antler handle knife is a half tang secured with iron pins, also with a pewter bolster and end cap.

Yes, I know that my finish work leaves a lot to be desired at this point :-) There is still a bit of sanding and finish work yet to be done.
Another thing....I made these to sell, and reenactors for some reason like to see pits and hammer marks to "prove it was hand made" -
I really combed through the weeds for months to get my first anvil, and ended up driving for a day and spending a pretty penny for mine.
You look for a week and find a nearly new Mankel anvil with stand for $125?!?!? You're a jerk! :-)
Seriously...The course of events has favored you and put you ahead of the game. Search out the blueprints for a 55 forge, find an old metal drum and get to business. -
Wow....$140 is prohibitively expensive for my unemployed self.
I'm seriously thinking that this event will be a major disappointment. To know about all the cool stuff happening inside, but not having the cash to go in and experience any of it will obviously be a major bummer.
Are there any options for a less expensive entrance fee? Volunteer opportunities??
A swage block, what are your thoughts?
in Swage Blocks
Posted
Hey all
I was reluctant to post this right now because I know that many of us are feeling very sad for the loss of Grant Sarver, but I'm thinking that Grant has already supplied Old Clem and St. Dunstan a brand new pair of OCP tongs with which to pull off the devil's nose, and is most likely performing maintenance and repairs on St. Peter's gate even as we speak.
Grant was all about furthering the craft and providing those nuggets of wisdom to help us all in our smithing endeavors.
I'm pretty bummed out, but have just got off the phone with the guy and have set up a look-see tomorrow morning-early afternoon.
http://portland.craigslist.org/mlt/tls/2780519187.html
I post the link here because I am not all that dead-set on getting it, but realize the usefulness and a bit of a rarity of a swage block in these parts. If someone needs it more than me....so be it.
I have $300 in hand, and the guy seemed more than willing to have me come over and take a look at it. He does state that some of the edges are rough, but the block is a nice size and will likely be a very valuable addition to my tiny little smithy.
What are your opinions?