

Brasilikilt
-
Posts
299 -
Joined
-
Last visited
Content Type
Profiles
Forums
Articles
Gallery
Downloads
Events
Posts posted by Brasilikilt
-
-
Hey
My coal does the same thing, and it happens with every other person's coal forge I've used. I've never been bothered by it, I have simply accepted it as something that happens. The impurities as they are getting burned out tend to stick together which is what causes the coal to do that. It's all part of the coking process I imagine.
If it bothers you that much, you could always switch to coke, and I think that problem would be eliminated. -
This isn't my tool box, but very similar.
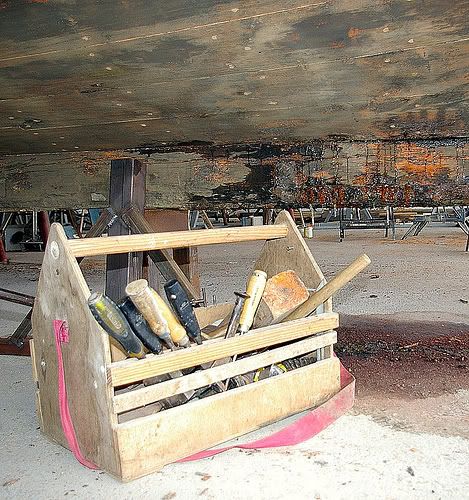
I like the idea of using well crafted things for work, but I tend to be a bit rough on my stuff, so I don't want to spend a lot of time or use nice materials for something that is going to get some hard use -
Thanks again to everyone for chiming in to answer my questions!
I agree that buying new steel is definitely a bargain compared to driving around expending time and gas to search out scrap piles that might yield just a small amount of good metal.
I basically am stuck at a point where I need to make a little money to put back into my hobby as I already have a few people who have seen my blades asking to buy pattern-welded stuff. I realize that producing an acceptable pattern welded billet will take time and practice, so I am simply trying to make do with what I have on hand, or can get for very cheap or free.
I burned the paint off of some of those Sawzall blades last night and will take some sand paper to them to get them cleaner...I did also pick up 4 or 5 pieces of strapping used to bind a few Schedule 80 pipes from work, so I figure that might be some decent material to start with.
I'm also probably going to grind the teeth off of an old file and see if I can get it to stick to some leaf spring to see if that works.
These are really good suggestions, and I know this will help out a lot.
Take care and thanks again....I will keep you posted with my results.
Iain -
Thanks for the information everyone!
I like the idea of the saw blades as I have the De Walt blades, and can get broken band saw blades and pallet strapping from work.
I'm surprised to hear that 5160 and Mild steel don't make a good blade as I've heard that combination mentioned to me a few times by other smiths saying that the hard and soft layers create a kind of micro saw action.
I never thought about the mild steel taking carbon away from the 5160, but I guess it does make sense.
I've already gotten a few of those blades to stick together, but I did burn a few of them in the process. it seems like a tightly bound stack of alternating saw blades and pallet strapping might be a good route for me to take.
Thanks for the info.I'll write later but now I have to go to work
Iain -
Hey all
Just a quick question:
I have bits and pieces of all sorts of stuff kicking around, and was wondering what the best steel combination would be for a new guy getting a decent billet of steel welded up in a coal forge.
I have a lot of A36 and 1020 mild steel, leaf springs, a whole bucket full of used De Walt sawz-all blades, railroad spikes and I can probably also dig up some old dull name brand files.
I know already to get my metal very clean, and have familiarized myself with the colors to look for when heating up the metal and have already done some successful practice welds.... Right now it's simply a matter of tack-welding a stack of different steels together at work, firing up the forge and just doing it.
Would perhaps mild steel and leaf spring (5160) be a good first billet weld with a likely chance of a decent blade??
Thanks for your help -
I've never worked wrought iron, only forged mild steel and pretended it was wrought :-)
What's the attraction other than it being old and tricky to obtain?
I've heard that it welds very well, and forges better at a higher heat, but other than that????
What am I missing here? -
Hey there
I would go onto the www.muzzleloadingforum.com and contact a guy with the user name "Wulf".
He makes some AMAZING locks all from scratch, Snaphauns, flintlocks, miquelet, Baltic sledge locks....all sorts of really fantastic stuff.
HE is the guy you should talk to on this subject.
Here are some examples of his work


-
Hey all
I've been on the look out for a good cross-peen sledge for a while now. I haven't been able to find much in the way of good used cross-peen hammers in either the lighter or heavier sizes.
But, during a visit to my local used-tool store I came across this monster. It's not a cross-peen, but it still looks like it would be a good smithing hammer, but don't know if it was originally designed for blacksmith work. I'm sure somebody here might be able to tell me if it had a more specific application.
It weighs around 13 lbs and I have the thought to replace the handle with metal tubing to use it for an Oliver hammer.....I'm still not sure.
Anyways, here's my sledge...now let's see yours.


-
Hey Tom
You come across as being very polite and incredibly eager to learn.....Keep this good attitude and you will find that people will be very accommodating.
I only wish you lived closer, or else I would invite you over right now :-)
People have recommended books for you to read. I have no doubt that these books are very good instructional guides. I have found that a lot of these books require you to already have a collection of tools on hand.
Seriously....read everything you can find, but there's one link I HIGHLY suggest you pay closer attention to (which has already been posted) is this one:
http://ftpforge.chez-alice.fr/Blacksmithing.pdf
I only wish I had seen this book when I was your age!
What I love about this book is that it teaches you how to blacksmith while making your own tools, but starting with a very bare amount of equipment. It covers all the basics, and if you do everything in the book, you will have a decent collection of tools and a very good start on your journey.
take care and good luck!
Iain -
Hey Tim
My forge is totally outside and I still smell like coal :-)
If it bothers you, wear a dust mask or go get a cheapo box fan and have it blow across the forge towards an opening. better yet, install a chimney of some sort.
One thing I know for sure is that there are lots of Blacksmiths throughout the ages that worked a coal forge everyday for 8+ hrs throughout their entire working career, and the larger portion of them died as old men.
I can safely deduct that while coal smoke isn't very good for you,or the environment, it's not the noxious poison that a lot of people make it out to be. -
The same thing happened to me.......I was trying to forge weld some strips of a36 (or something) together and had the same thing happen more than a couple times.
The explanation of trapped flux makes a lot of sense to me as I initially thought that it might have been super-heated trapped air/moisture being released by the hammer blow...The same thing has happened while I was working on my anvil while it was a bit damp....Lay a bit of hot steel on a wet anvil, hit it and POW!
Anyways....as Frosty explained-no harm, no foul....In my case I didn't make a successful weld, so I guess I'll have to practice more. -
A3483 would be 1898.
Whoops, my bad...
I just went outside tilted the anvil up to get better light and hit it with a wire brush. It looks more like A346...
I don't know if that would make much of a difference...
Either way, thanks for looking it up for me :-) -
My 200 lb. Trenton
Never have looked for numbers or stamps so I don't know it's age.
That's a great photo Chayancarrek! and just like me, it appears as though you have mounted yours on a fir stump :-)
Here's a picture of my well-used 178 lb Trenton.
The numbers on it are pretty well worn, and all I could make out was 'A348'(the last digit possibly being a 3)
If anyone could give a quick look in the anvil book and tell me the approximate age, I would be most appreciative.
Thanks
Iain

-
Here are the pics, hard to see from the photo but from various angles there's just enough letters to make out Peter Wright Patent England. Also included pic of "The Proviso" for those of you who get a bit gooey over puppies. The anvil measures 980mm long 400mm high and 140mm across the face
Cheers Ian
WOW! That anvil is beautiful...the corners are excellent, and I for one would be giddy with excitement over that one!
good on you!
From another Iain -
Hey Phil
It's yet another example to remind all of us how important blacksmiths used to be, and how we are still a very viable element among the professional workforce.
Would any of us send away to the manufacturer with this request to have them make a domed stove lid? Heck no! They wouldn't mess with setting their machines to make just one domed lid!
I have been wanting to make a dishing tool, maybe 4" wide to use in making spoons and forming brass. I don't have money to buy a swage block. I was thinking I could cut out a half round (an arch, or skateboard jump) out of 2" plate
and use that for dishing...
Seems easier than grinding a dish out of a solid block!
Well done Phil...send us a photo if you're able
Iain -
Not too many of the scrap yards around here (Sw Wa - Portland Or) sell to individuals any more.
Unload and go - NO scrounging!
Hey, you can go to Bob's Metals on interstate ave and talk to Kip..he's a bladesmith and will arrange for you to walk around with an escort to scrounge for what you need.
They charge 50 cents a pound for steel scrap....ANY steel....They have all kinds of tool steels just laying around, and Kip seemed very knowledgeable about steel types, nice guy, so he's a good cat to know! -
-
Arrrgghh Stupid UK TV Tax!!
One to look out for in February, Mastercrafts, looks like it could be a good one.
http://www.bbc.co.uk/tv/comingup/mastercrafts/
http://britishcrafts.wordpress.com/2010/01/ -
I'm in Canada, Nova Scotia.
This is a great site btw, I might even build my own forge after seeing some forges people built here.
If I were you, I would look for a blower. If they're rare in NS, you can get them from Ebay for around $50
If you have access to a welder, or know a friend, I would save your money and simply build a forge from whatever materials you can obtain easily.
Do a search on the 55 forge, and this will show you that a forge needn't be expensive to be effective -
How well does the 55 work? I mean im just starting out with ya know a simple knife idea and hope to make it into something awesome.
It's a 55 gallon metal drum with about 6" of the bottom cut off. and has a pipe in the center.
It's not the greatest forge in the world, but it's certainly good enough to get you started.
More than a few people have taken the original idea, put more time and work into them and made some really nice forges.
You also want to look into building a "Tim Lively" or "Lively Forge" He is a well known knife maker who made use of adobe filled steel washtubs for his blade smithing forges.
I think the one might work out well for you.
http://www.youtube.com/watch?v=4nceqeyGzhs -
Hey everyone! I am new to this craft but have always admired it and really want to try my hand at it. I want to build a good size forge for knife making but I have no idea the dimentions or even what kind of materials I should use. Sadly I don't even know the correct way to build the thing but I am really willing to learn. Please leave any info or point me in a direction.
One of the least expensive and easiest forges to build is the now famous '55 Forge' made from scrap pipes and an old 55 gallon oil drum.
Since the forum has been recently redone, I can't find the blueprints at the moment, so hopefully someone will post the link.
Another cheap and easy option is a wooden box full of dirt, you can pipe in air from the sides and wet-pack a fire pot out of the mud where the pipe blows out.
You can get a bag of kitty litter, which is made of clay, mix with water and cover the bottom of a trash can lid, or washing machine door. once again, make a bowl-like depression in the middle where the air comes out, and cover it with some kind of grate (a piece of 3/8" steel with a bunch of 1/4" holes drilled in it works well)
If all else fails.....there's always a hole in the ground.
I'm sure others will chime in with more suggestions, but hopefully my post has gotten your brain working in the right direction
take care
Iain -
If I were you, I would practice on some bits of scrap about the same size as your tang and do a couple trial runs before peening the tang of your dagger.
Get the piece red hot only in the area to be peened, and allow it to cool slowly in some fireplace ashes in order to anneal it.
once the metal is cool to the touch, clamp the blade very tight in a vise between 2 blocks of wood with the tang pointing up. slide the parts of your handle onto the tang to check to see if everything is fitting together correctly. At this point you might want to put some leather washers in between the cross guard and handle and maybe another between the handle and end cap.
Make sure you have some kind of metal washer (preferably matching the cross guard material)to peen onto, and make sure that there's no too much metal sticking out..about 1/4" is good.
Use the round end of a ball peen hammer to make several light to medium blows evenly on the corners and edges of the tang, or else you may see the tang bend to far in one direction.....you should see it starting to mushroom.
Continue doing this until you have peened the tang down far enough to cause your handle to tighten up.
If done correctly, your handle will be solid.
Hope this helps -
Thanks for all the feedback! It definitely reassures me that my thought process was on the right track.
Just a little something to remind me that my welding cert. course wasn't completely wasted :-)
I did a little net searching and saw that the FCAW wire is definitely more expensive than regular mild steel wire, but for now I won't have to buy a tank, which makes it much cheaper for me on a short-term basis.
I've been certified with FCAW, but my welding was always shielded with gas, and without gas, my welds always came out looking like they came out of a dog's back end, so I never really had considered a gas-less flux wire as a viable alternative.
I will head out and get some of this wire and start putting my stuff together. There's certainly quite a few little things that I've been wanting to weld up, and it seems like this wire will do the trick!
Thanks again for your responses, I'll be sure to post my projects on the forum to show everyone how it all turns out
Iain


Side blast forge from Diesel tank
in Solid Fuel Forges
Posted
I hope this will help
http://www.calsmith.org/techniques/forges/Side%20Blast%20forge.pdf