Jay.bro
-
Posts
159 -
Joined
-
Last visited
Content Type
Profiles
Forums
Articles
Gallery
Downloads
Events
Everything posted by Jay.bro
-
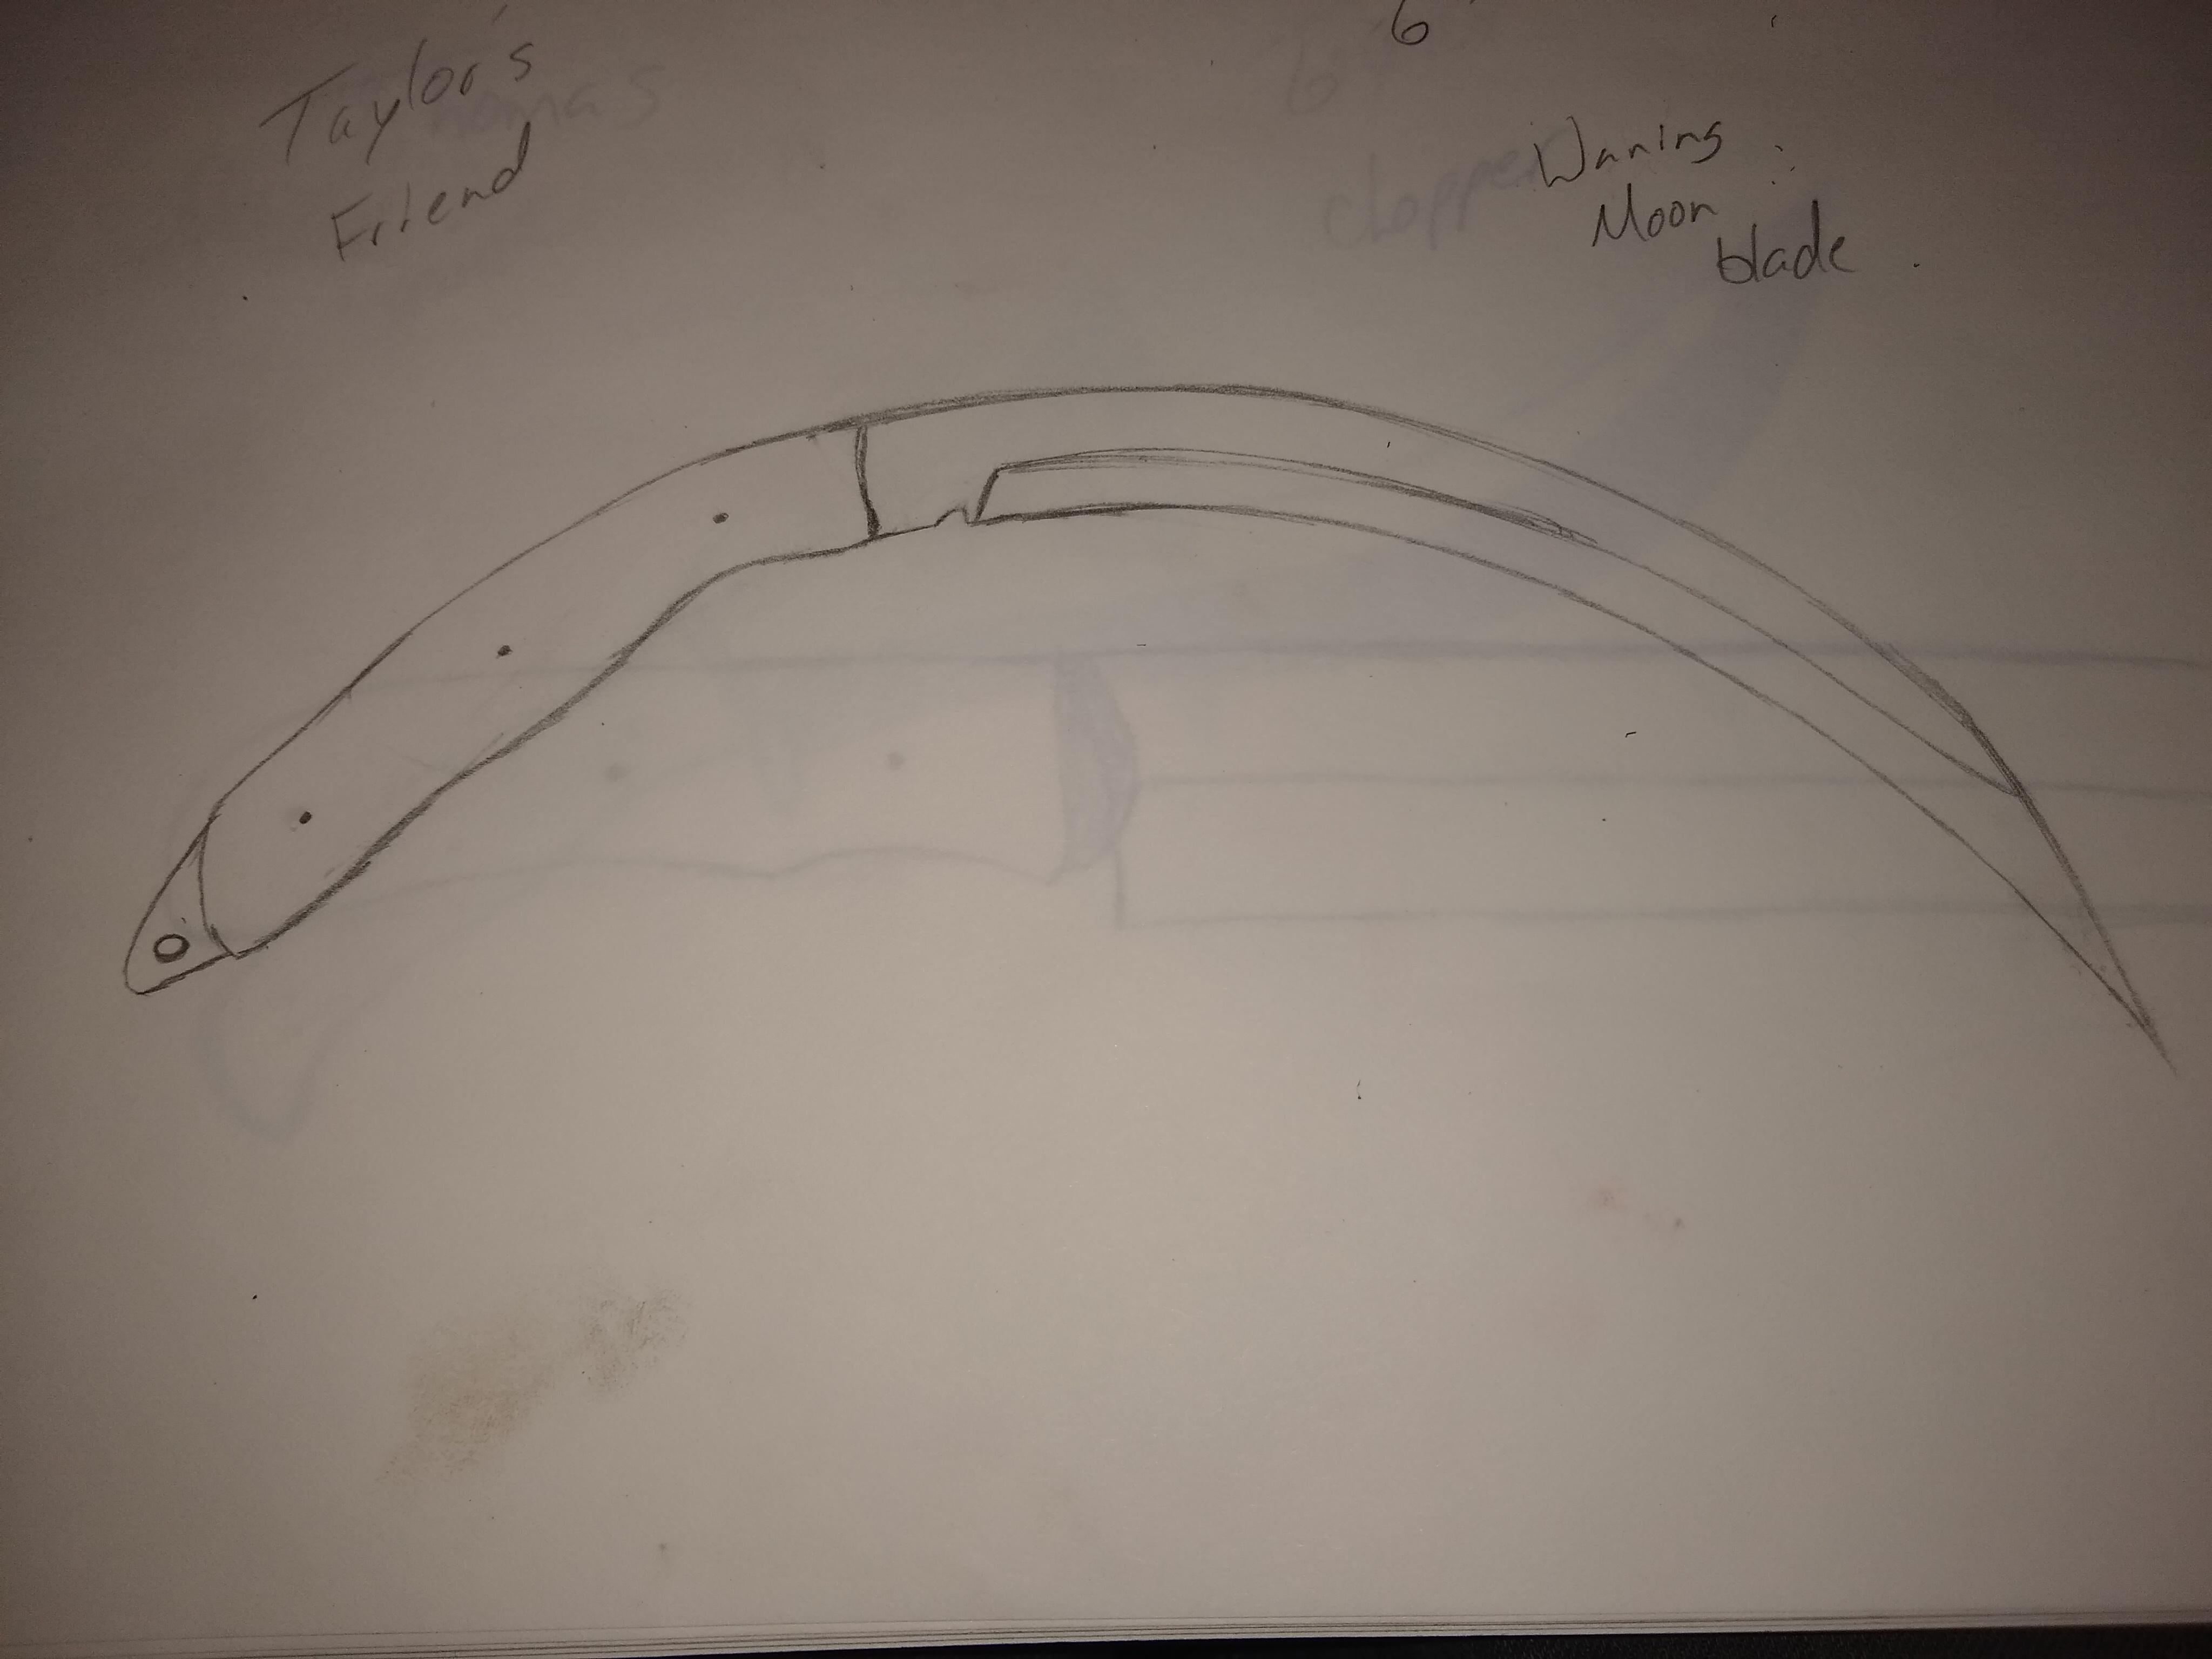
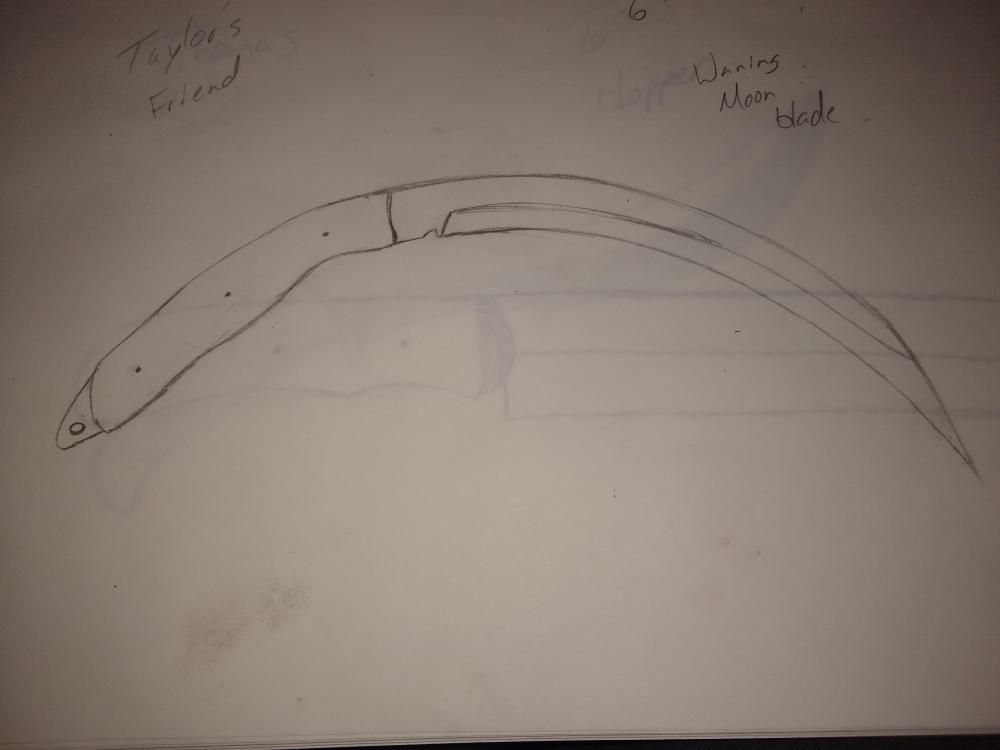
I just got it quenched and it is the blade is about the length of all the knives I've made so far I haven't measured it yet but once it cools off I'll measure it and take pics with a ruler next to it Figure I ought to add the concept art I drew up before.
-
Hey guys I got this big one shaped yesterday gonna start some grinder work today and get to the quench and temper done later. It's made of a high carbon, half inch bar off a machine from my job. It's my fifth knife so far and I'm super happy with how it turned out.

-
I figured when I build me a trailer I plan on fabricating some stabilizer and leveling jacks to add to it like the ones some campers have. I actually like the yurt idea we bought a camping tent that was a yurt style and I figure I can fabricate some pull apart pvc pieces to build a frame and I can figure out a covering for it if nothing else I could go old school and make some buckskin to use for the covering then I could modify to either a tipi or yurt style as my needs change.
-
I've done that a long time ago just not with pvc more with green tree limbs and using vines and green sapplings shaped into a ring to hold the base in a round shape
-
I see your point Thomas I may figure something along those lines as far as the trailer goes in the future and my ancestors were east coast Cherokee I know tipis we're more of a mobile home while wigwams we're considered a semi-permanent (in their time of course) so I was thinking structural sturdiness over portability when I was thinking wigwam I know how to make a tipi using buckskin and poles I was just considering the idea since it seemed there would be more standable space in a wigwam over a tipi I wasn't meaning it's a better or worse idea.
-
The updraft you mention is why I mentioned the mud chimney idea to assist and it is more difficult than a tipi to break down but also is more resistant to wind but I am also now starting to consider the tipi as well I was just thinking a wigwam is more of a useable shape as far as a workshop than a tipi with the same floorspace.
-
I had read some articles about using a tipi I just thought a wigwam seemed a touch more practical as it can be made to resemble a small longhouse style building and can be set up like a primitive workshop and can be more space versatile than I believe a tipi can be
-
I actually remember reading that post awhile back but I was thinking more basic and cost efficient I did like the idea and that's on my to do list but I haven't had the money for that as of yet my idea was similar to a traditional wigwam so it would have ventilation through the sticks and no electricity to it. I built a shed about a year ago but it turns out water stays in it for a couple of weeks after it rains so I can't use it for anything but storage. I've been using my front porch but the missus don't like being bit by the fire fleas so she doesn't like that too much.
-
So I'm finding we have had an extremely wet summer and I have been trying to get more into new projects I've been hobby blacksmithing awhile now and finally made my first 2 knives in the last 2 weeks and I'm realizing that I need a small building but the person we are renting from says we can't add any permanent structures like barns or shops. I was wondering if anyone has experimented with using a wigwam style building like the native Americans built as a smithy. Dirt floor and planning a mud chimney for the forge if all else fails this is just an idea but I was wanting to see you guys opinions on the idea before I pitch it to the landlord and see if she is okay with it. Thanks for your thoughts in advance.
-

New Anvil (Well... new to me)
Jay.bro replied to Jay.bro's topic in Anvils, Swage Blocks, and Mandrels
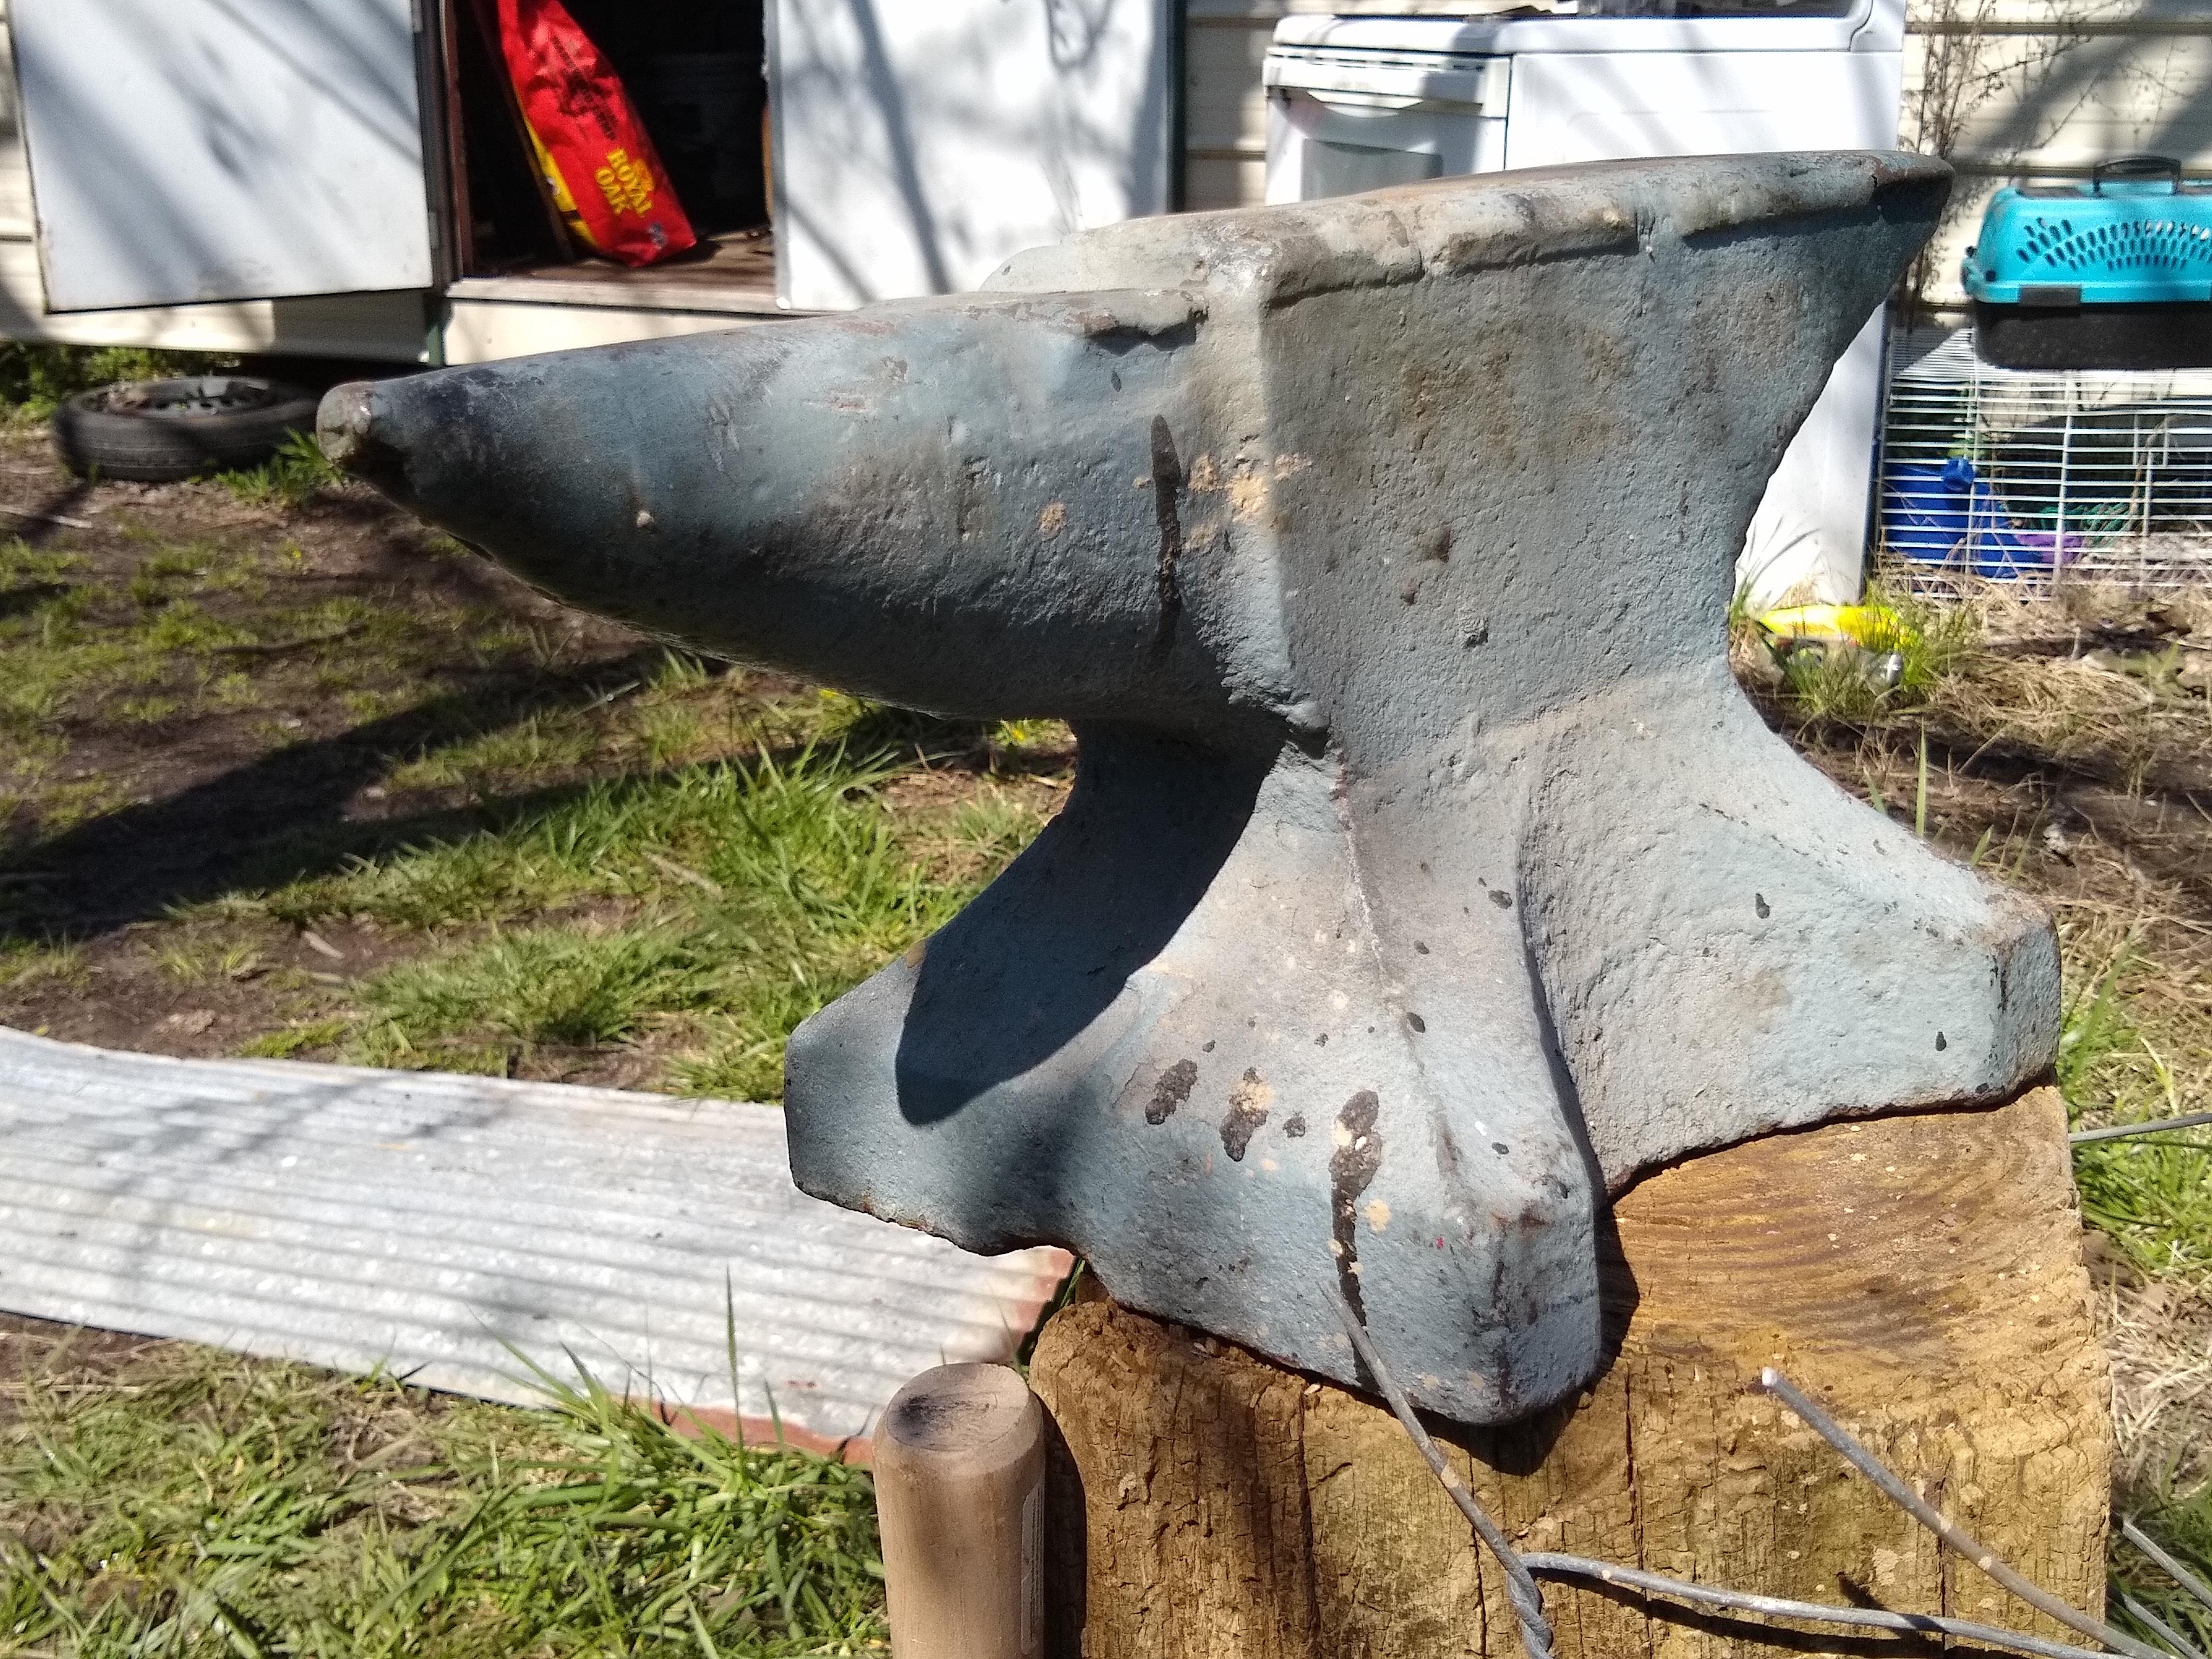
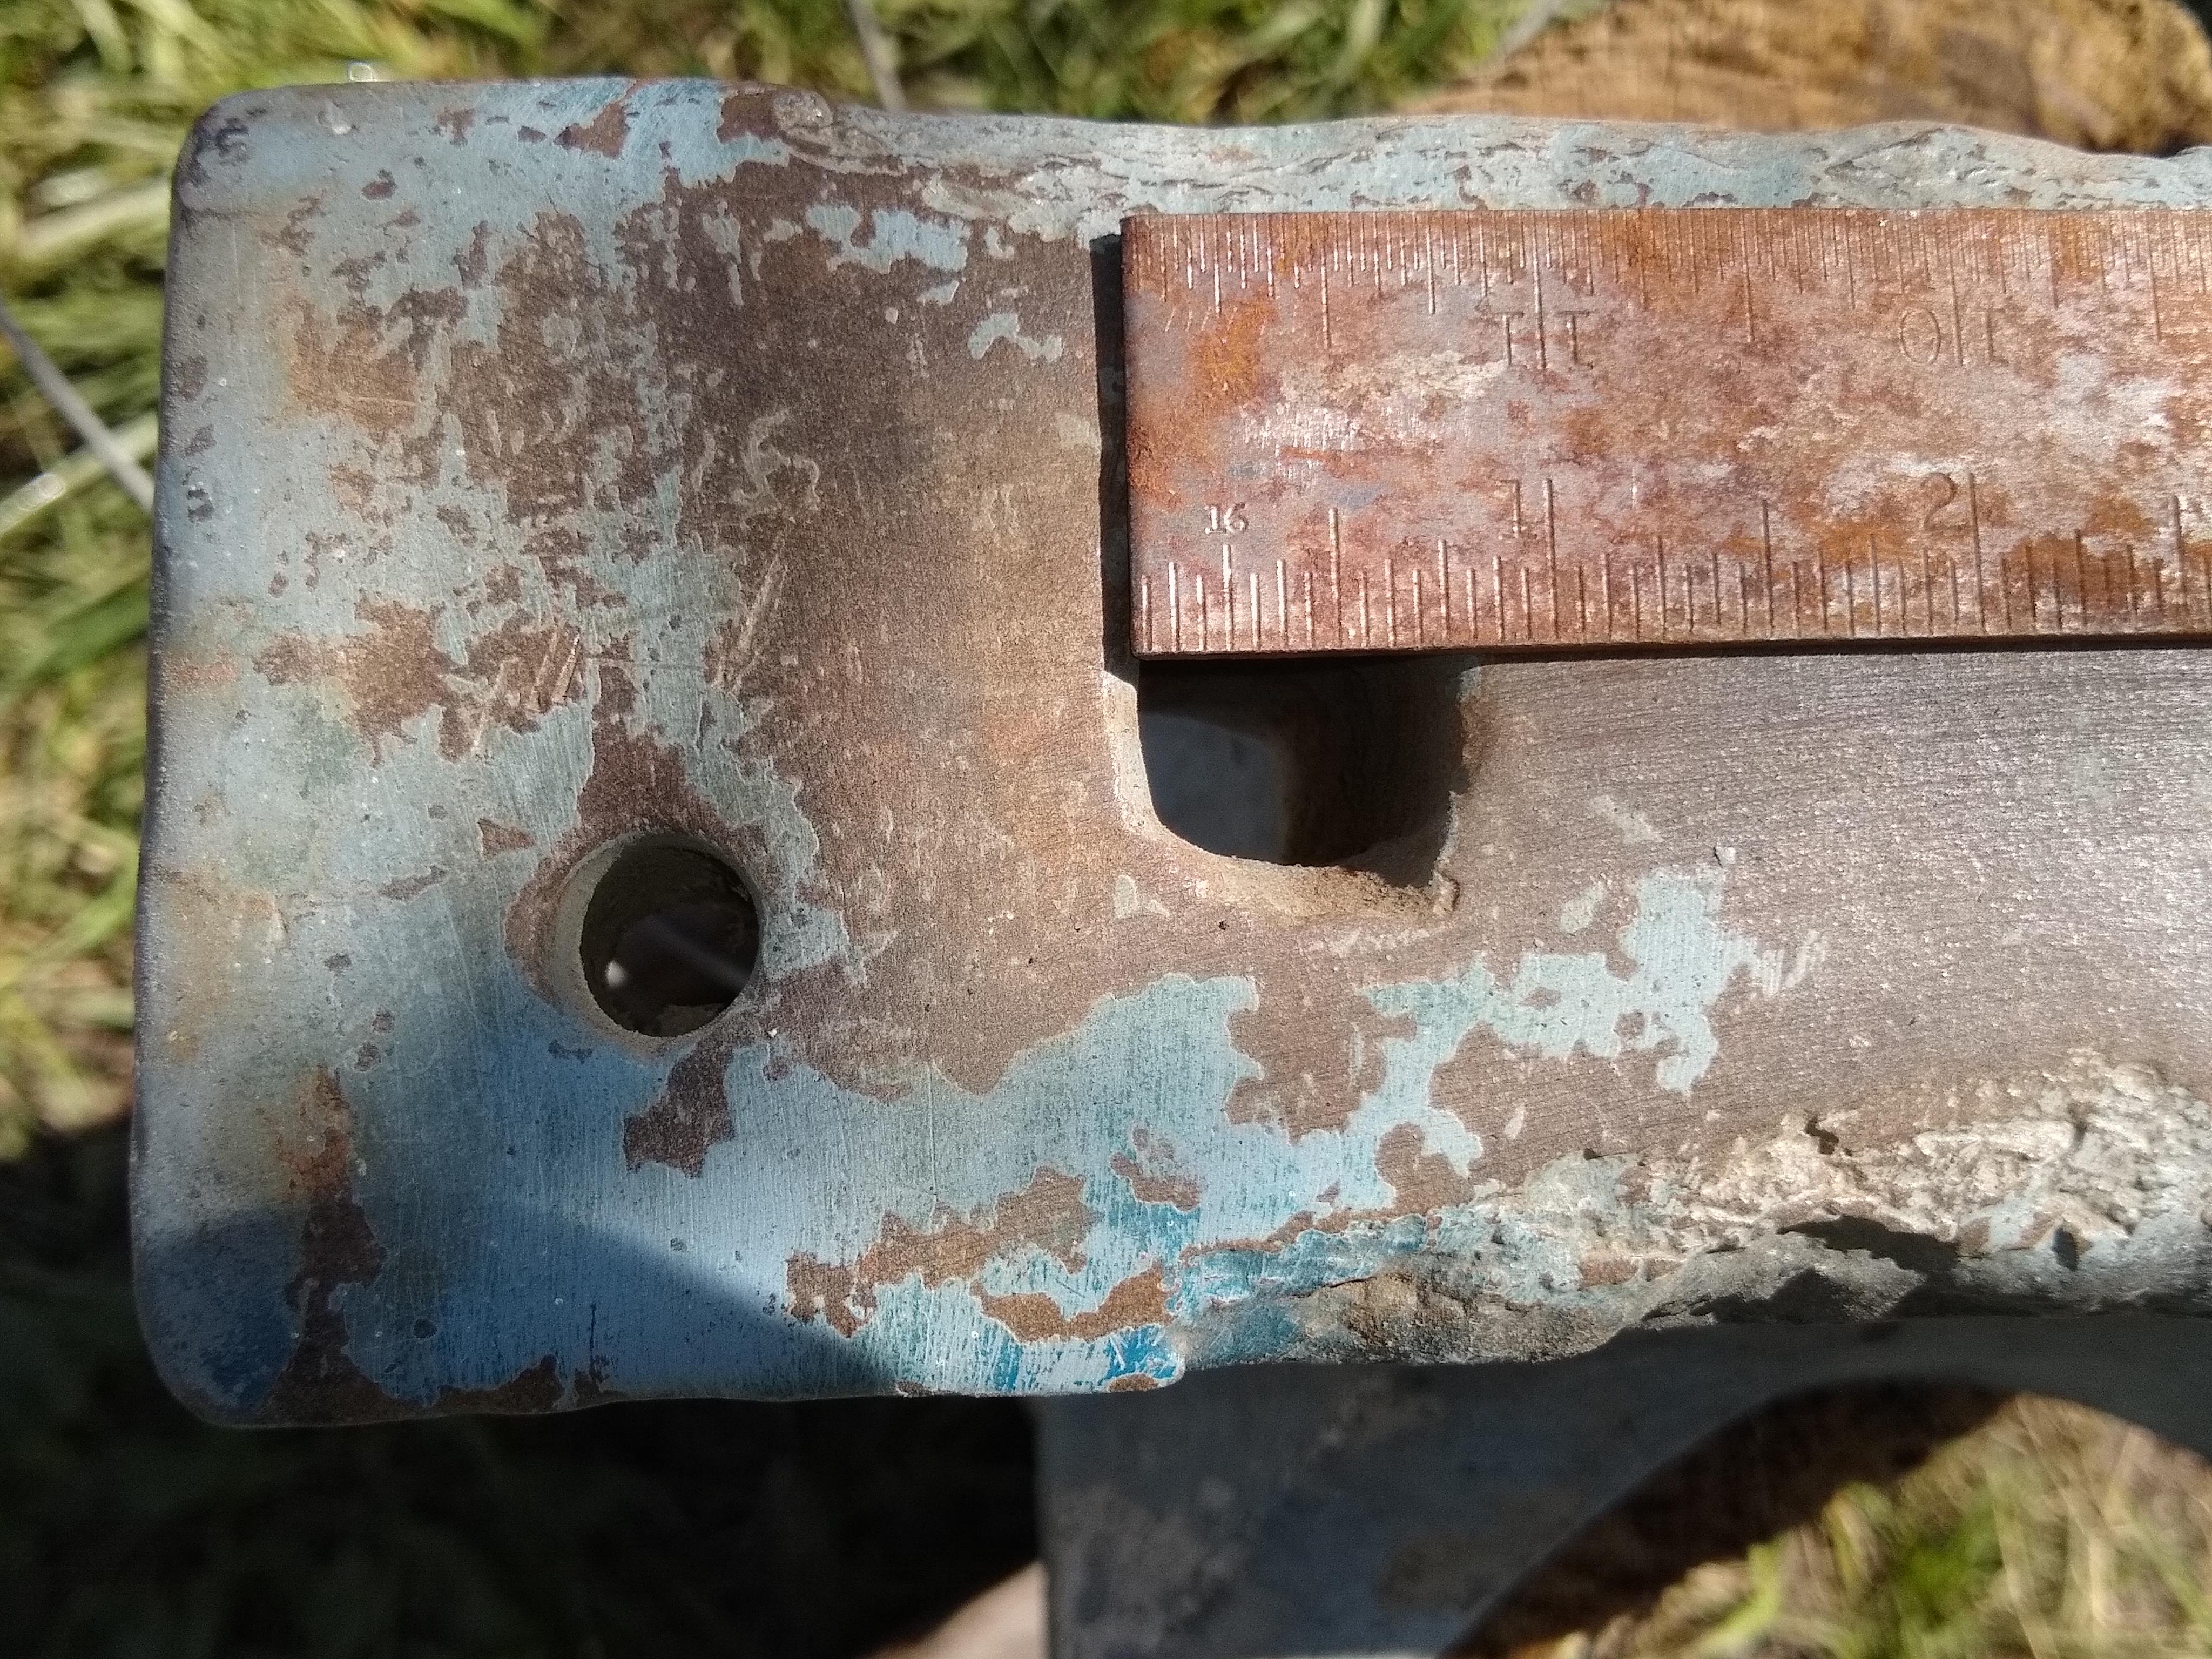
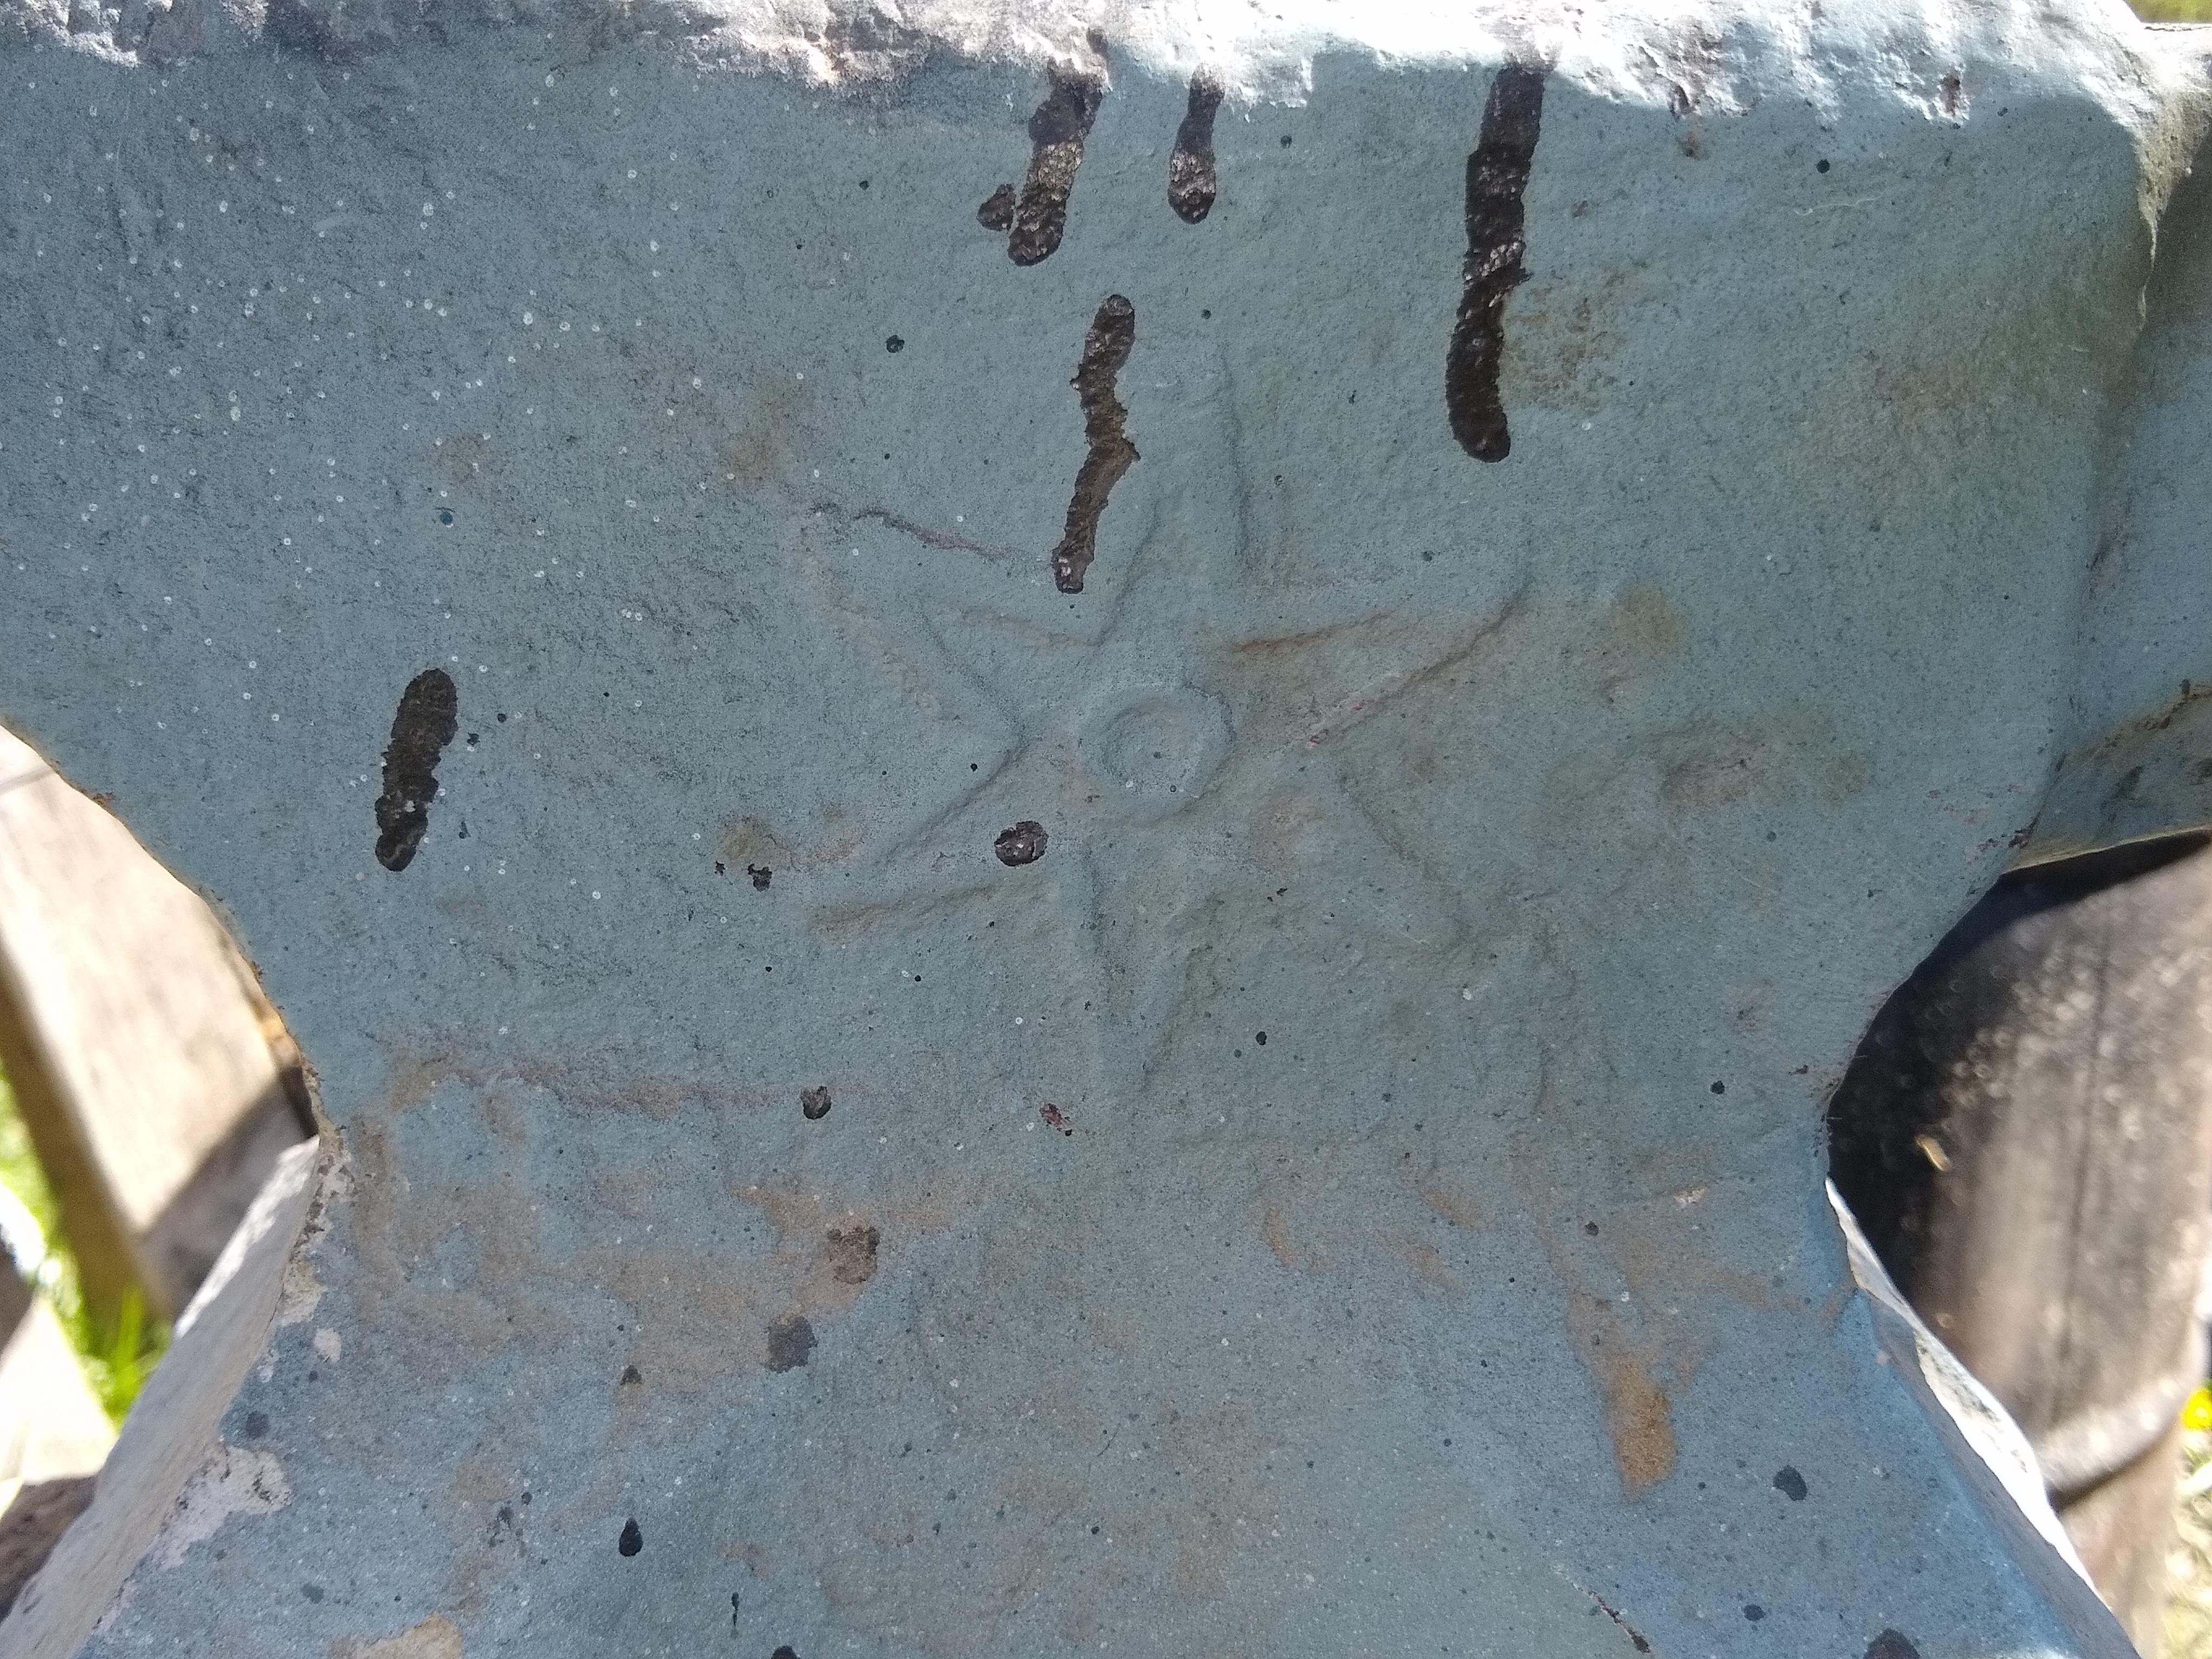
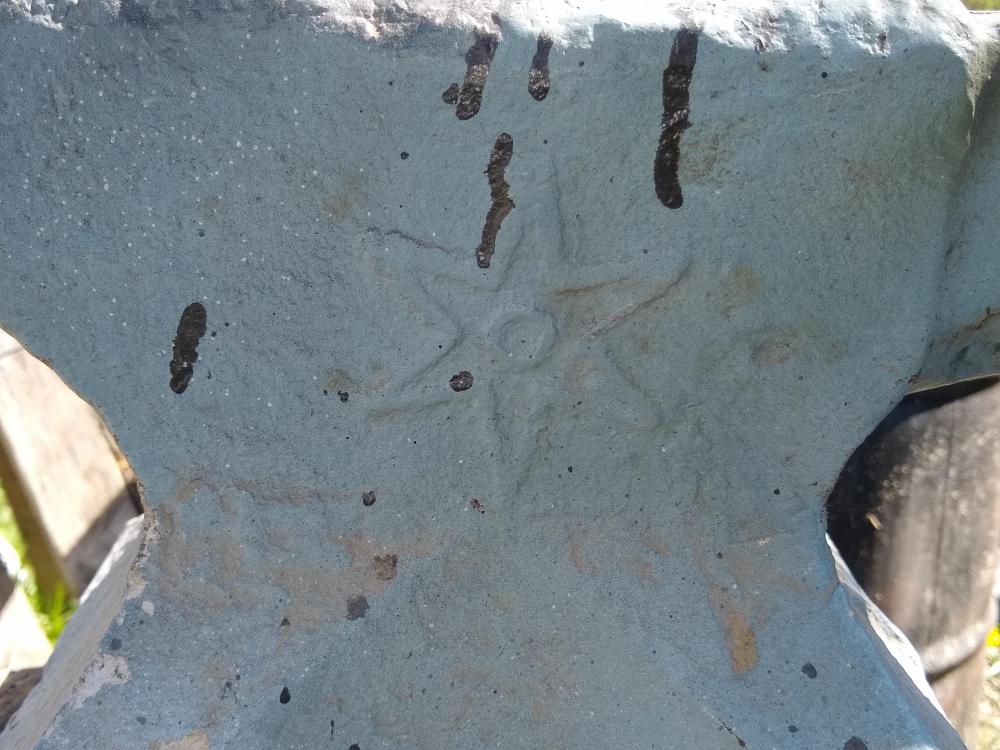
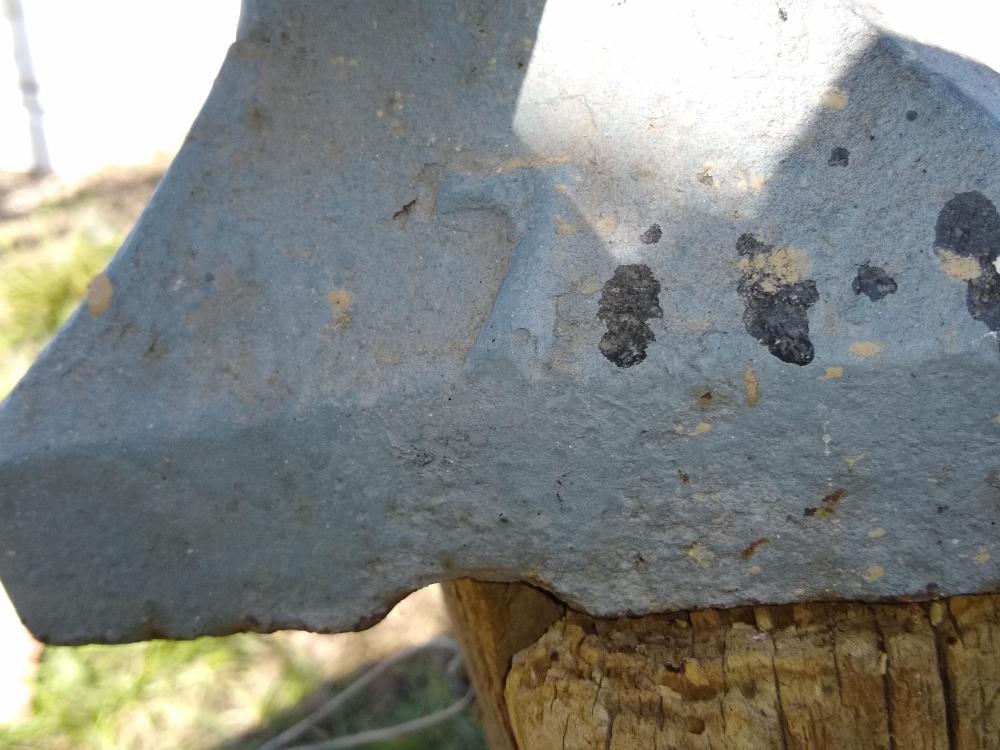
I thought it was an American star too until I found that the star was a 5 point star this is a 6 point but it may have changed at some point I'm just not sure. I have read several posts about not grinding on it or anything like that the only thing besides hot metal the face of this anvil may see is my wood handled wire brush I'm really excited about it I just realized that railroad spikes are the perfect size for the hardy hole so I think I found what I can make a few hardy tools from to get started I actually found a post on here asking about the same star design but nobody that commented had a definitive answer on who made it. I love it though it's my first anvil with a horn so I get to learn to use the horn now -
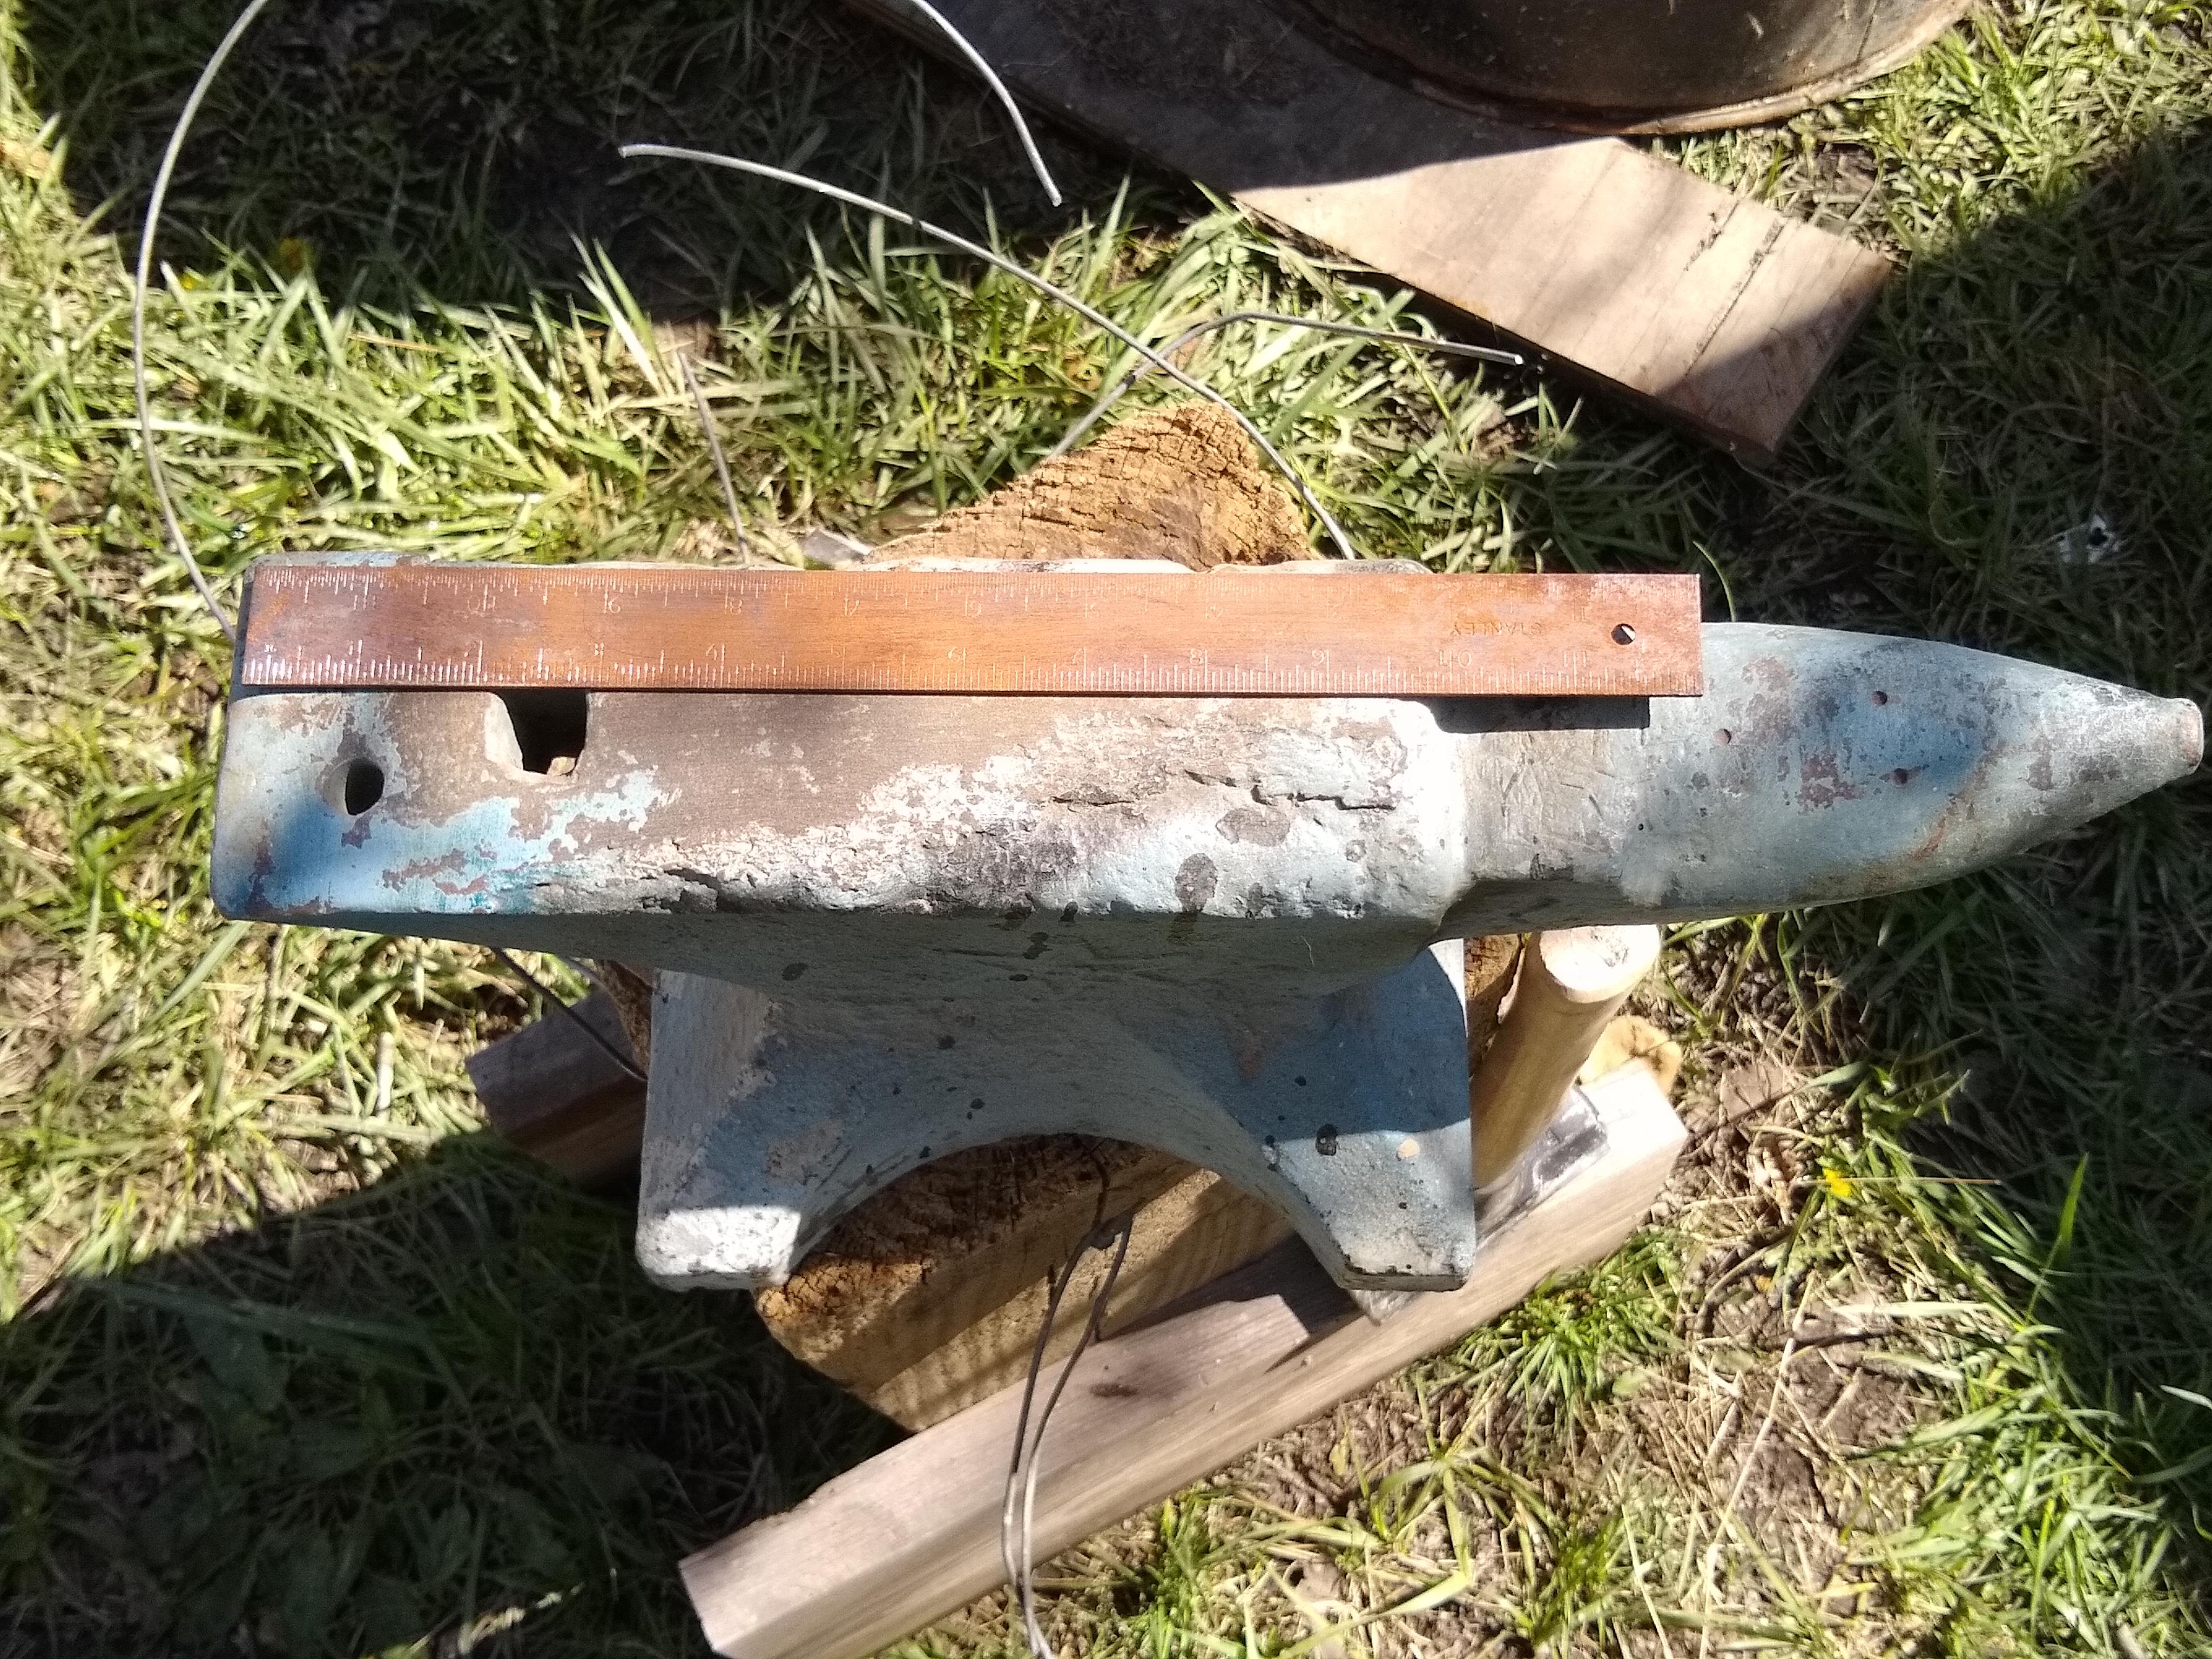
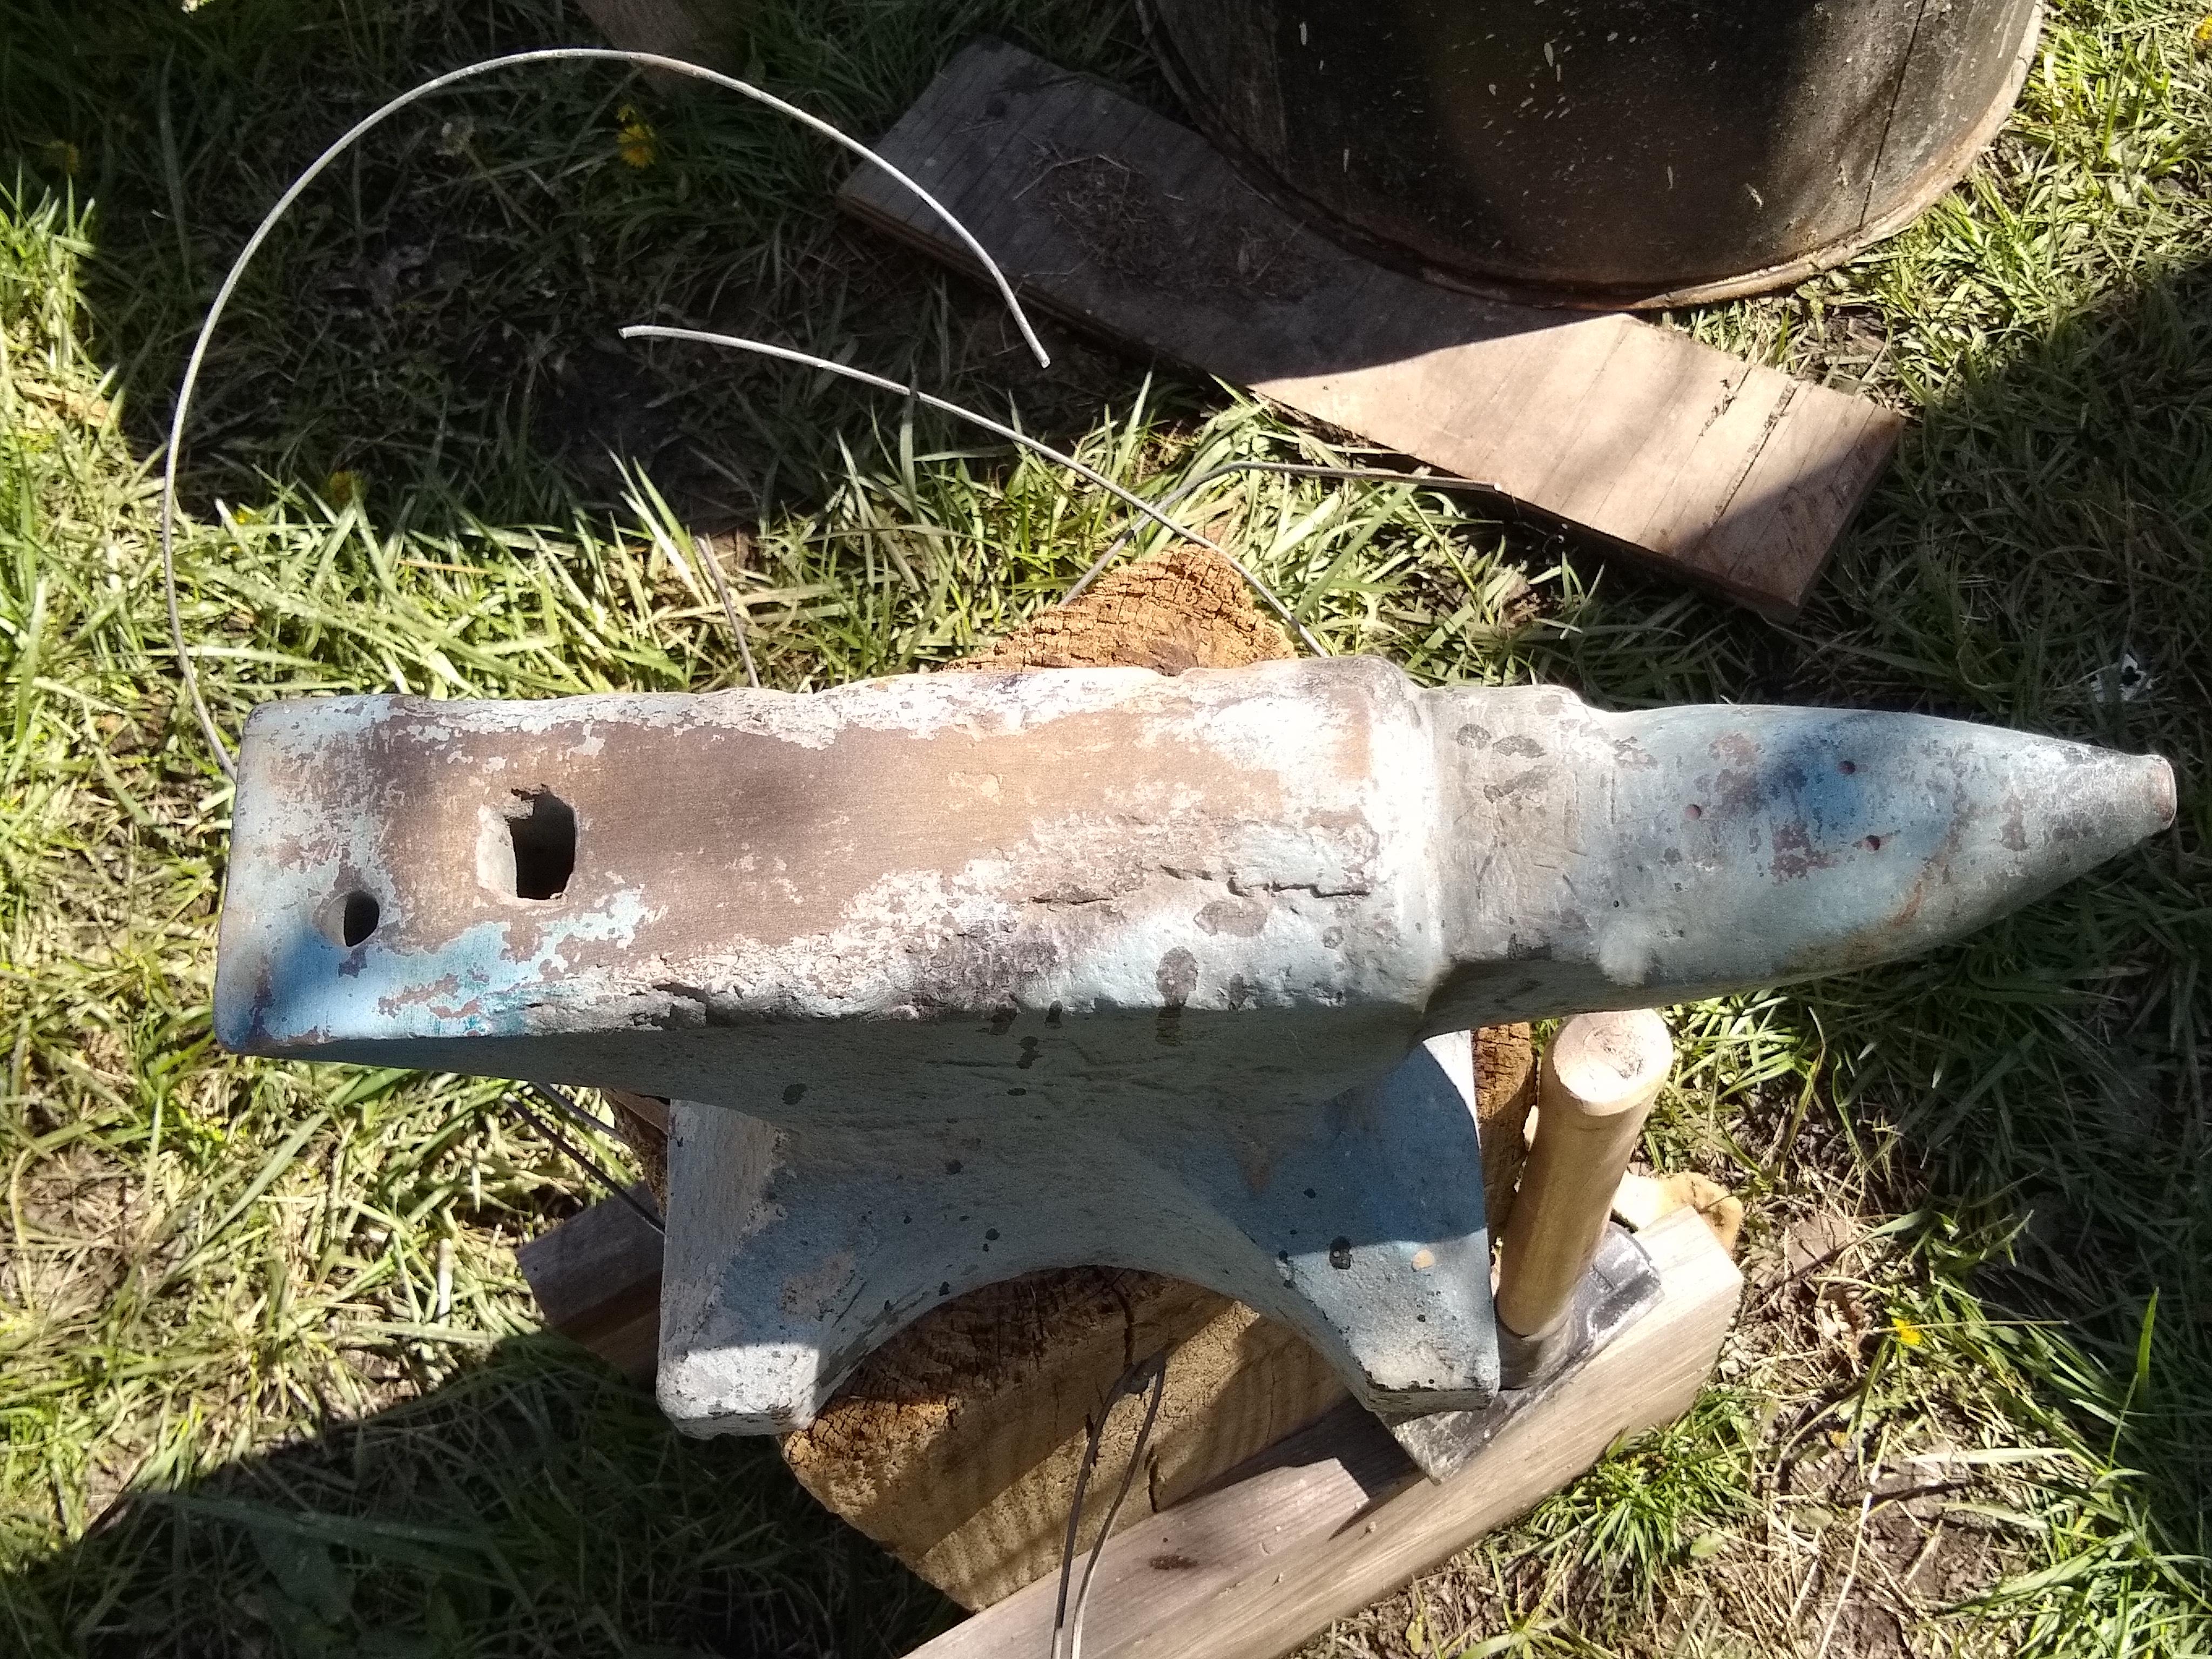
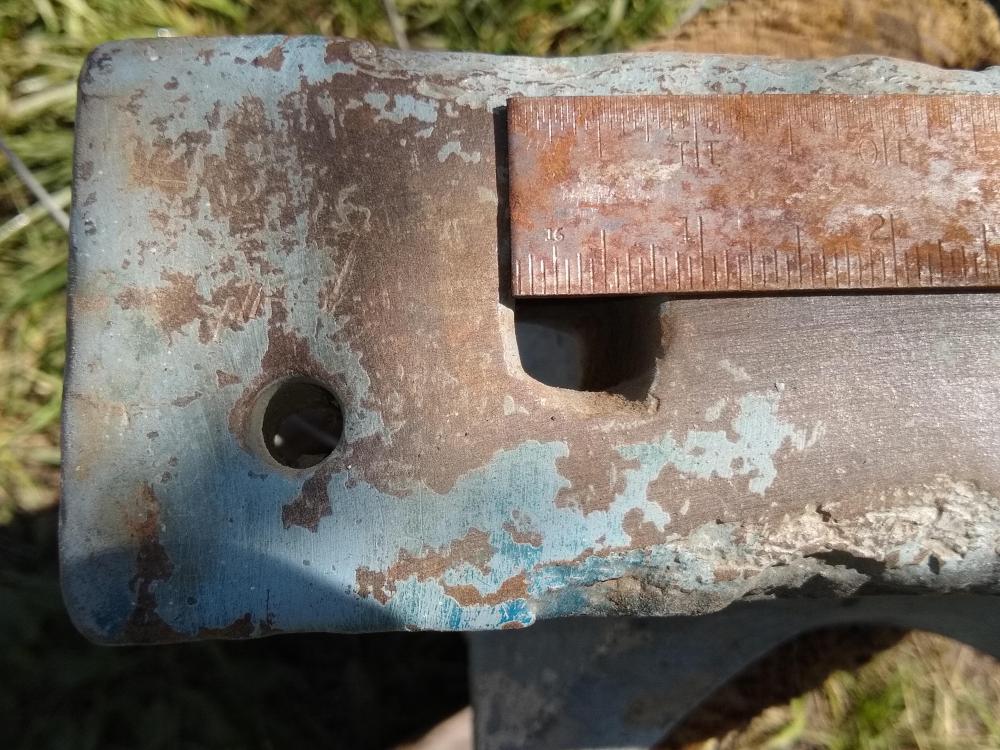
Hey everybody. I just wanted to share the pics of my new Anvil my wife picked up for me the other day, at our local pharmacy of all places. She said she paid 200 USD for it. (I'm pretty sure she overpaid) it's only about 60 lbs (haven't weighed it yet on our scales just going off what she said she was told when she got it.) The face isn't in the best shape but I think it's still useable. My steel ball bearing bounces back about 8 inches when dropped from 10 inches. The only marks I could find are the big star on the side and the 7 under the horn. I also found 3 little "holes?" In the horn that make the shape of a triangle but it has a useable work area and I like it. The ruler was for size reference. I still have my steel top hat I had been using but now I have a London pattern and I'm really happy to see my wife's support of my hobby. No idea of the maker after about a week of research. I'm really happy with it though.


-
I'm not sure if it's bituminous or anthricite the guy that has it buys it in a big truck load about 3 hours away and brings it here to his little shop and I only found out about it from a guy I work with that I just found out does smithing and a little foundry work. I know the cost of a bag of Royal oak that's 16 lbs was 14 dollars the last time I bought it and with the season where everyone does BBQ and grills coming up I expect that to inflate a bit. I have actually been drawing designs for stuff I wanna try on a sketch pad and in my graph book I have a waste oil burner plan that's similar to one from vegoilguy on YouTube channel but it's still in the design and learn and research phase. I tend to plan much more than I did before building this newest forge but it did get the job I needed it to do done. I did burn through a whole bag of charcoal doing it and tinkering with crucible equipment I've been building.
-
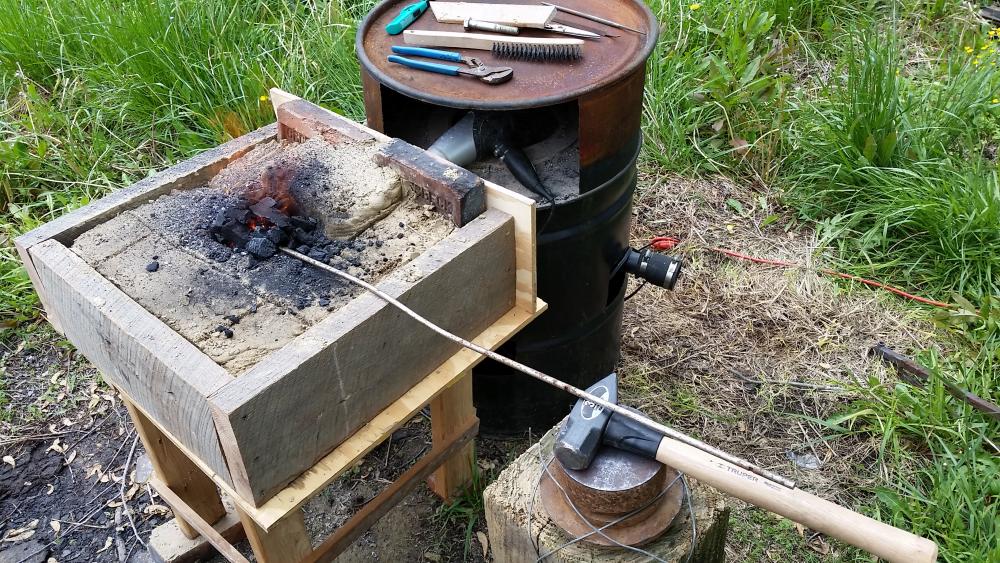
I work for a company that makes pallets so I throw them all day and I've been working with my box of dirt for a couple of years now just small projects, hooks, tools, etc, but I recently got asked to make something for someone at work and I tried forge welding in my box of dirt but it didn't quite hold up to the task and I had tried a trench before and it worked very well. That's the main reason I tried this set up. I actually disassembled my big bottom blast forge that burned out to make room for a cabinet. I never used it so it wasn't a big deal. I had considered a pile of bricks but I just had been needing a bit more of an open fire pot and I threw this together cause it was the best way for me to learn I actually wanna experiment with coal and I figured this design would be a good design for fuel diversity. There's a guy here that sells it for 20 USD for 50 lbs and I figured I could afford to try it out.
-
Dislocated it throwing a pallet down but it won't be long before it's better
-
Okay thanks I'm gonna do some more modifications and testing to it as soon as my thumb heals up and this rain goes away
-
Oh okay I think I see what you are saying now out of curiosity would it work if I just welded it at an angle from just in front of the tuyere to the side opposite the tuyere instead of bending it since the pipe is pretty solid already and I suspect it would need to be moved for this modification. I do like that idea and I planned on something similar with the other half but instead of the cutting 1 side off I just am gonna cut down one corner of it and open it up to where the top is straight up and down and the bottom maintains the 90° but that was another project for another time
-
I know I have one I built I just wanted something a little more portable my box of dirt is so heavy and I had this tube iron and I just had the idea I do want to try to build a few other forges but this was just a new thing I came up with I hadn't seen before
-
I actually don't have a welder I have to have ppl I know help me with that and I've considered this kind of forge too I just had this tube iron and just tried this idea and no other use for it. I actually still have 2 foot of this tube iron left I figured this could be used for bigger projects and I can always modify it as I need to with simple adjustable things or even add some dirt to it if nothing else but this was to test this design possibility but I have seen your design and do really want to try it out too
-
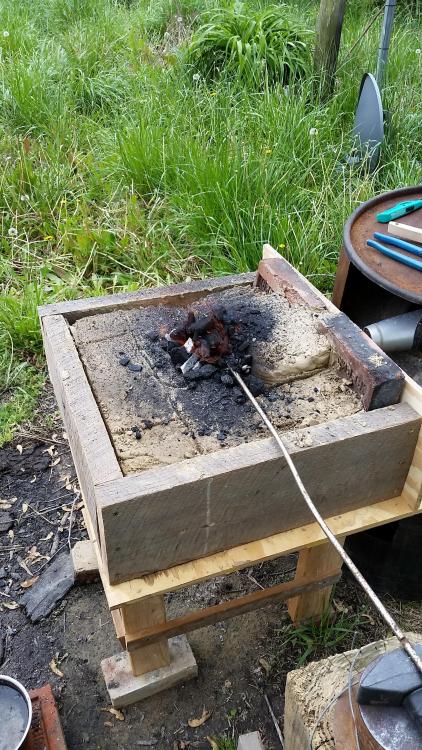
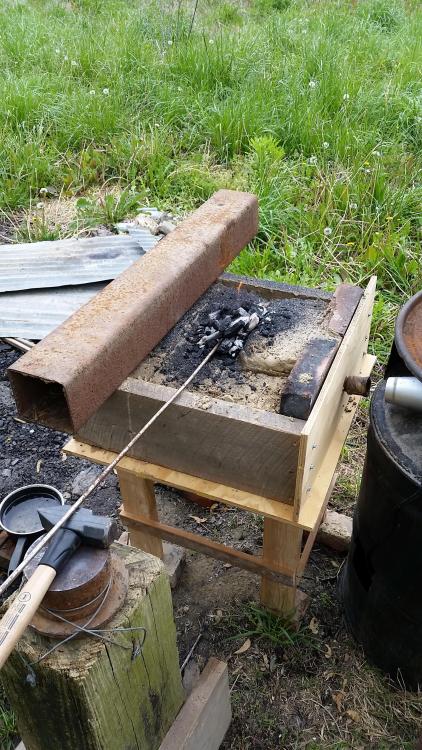
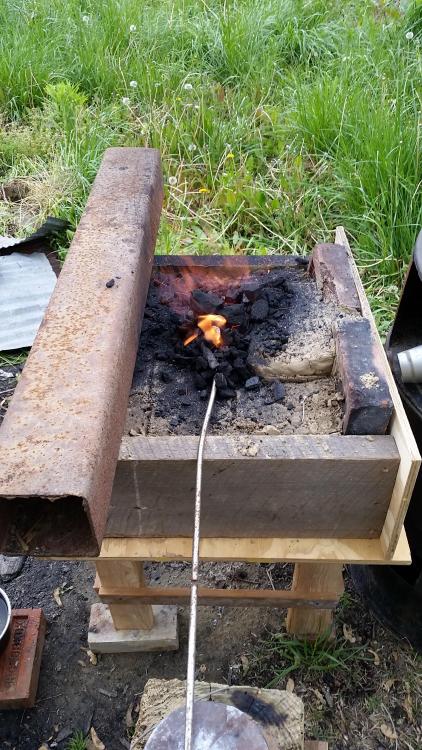
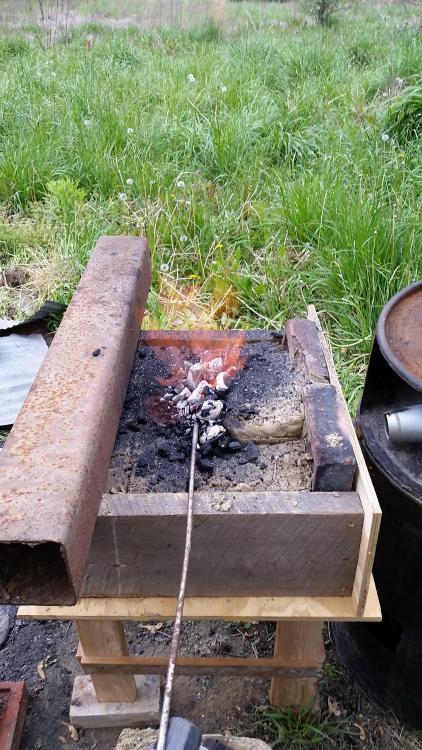
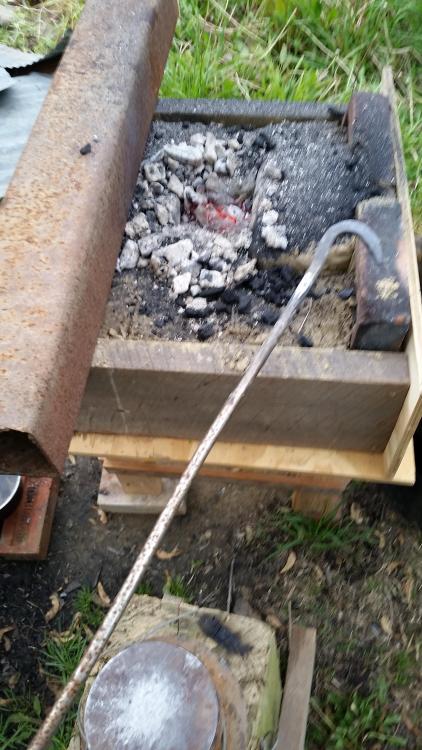
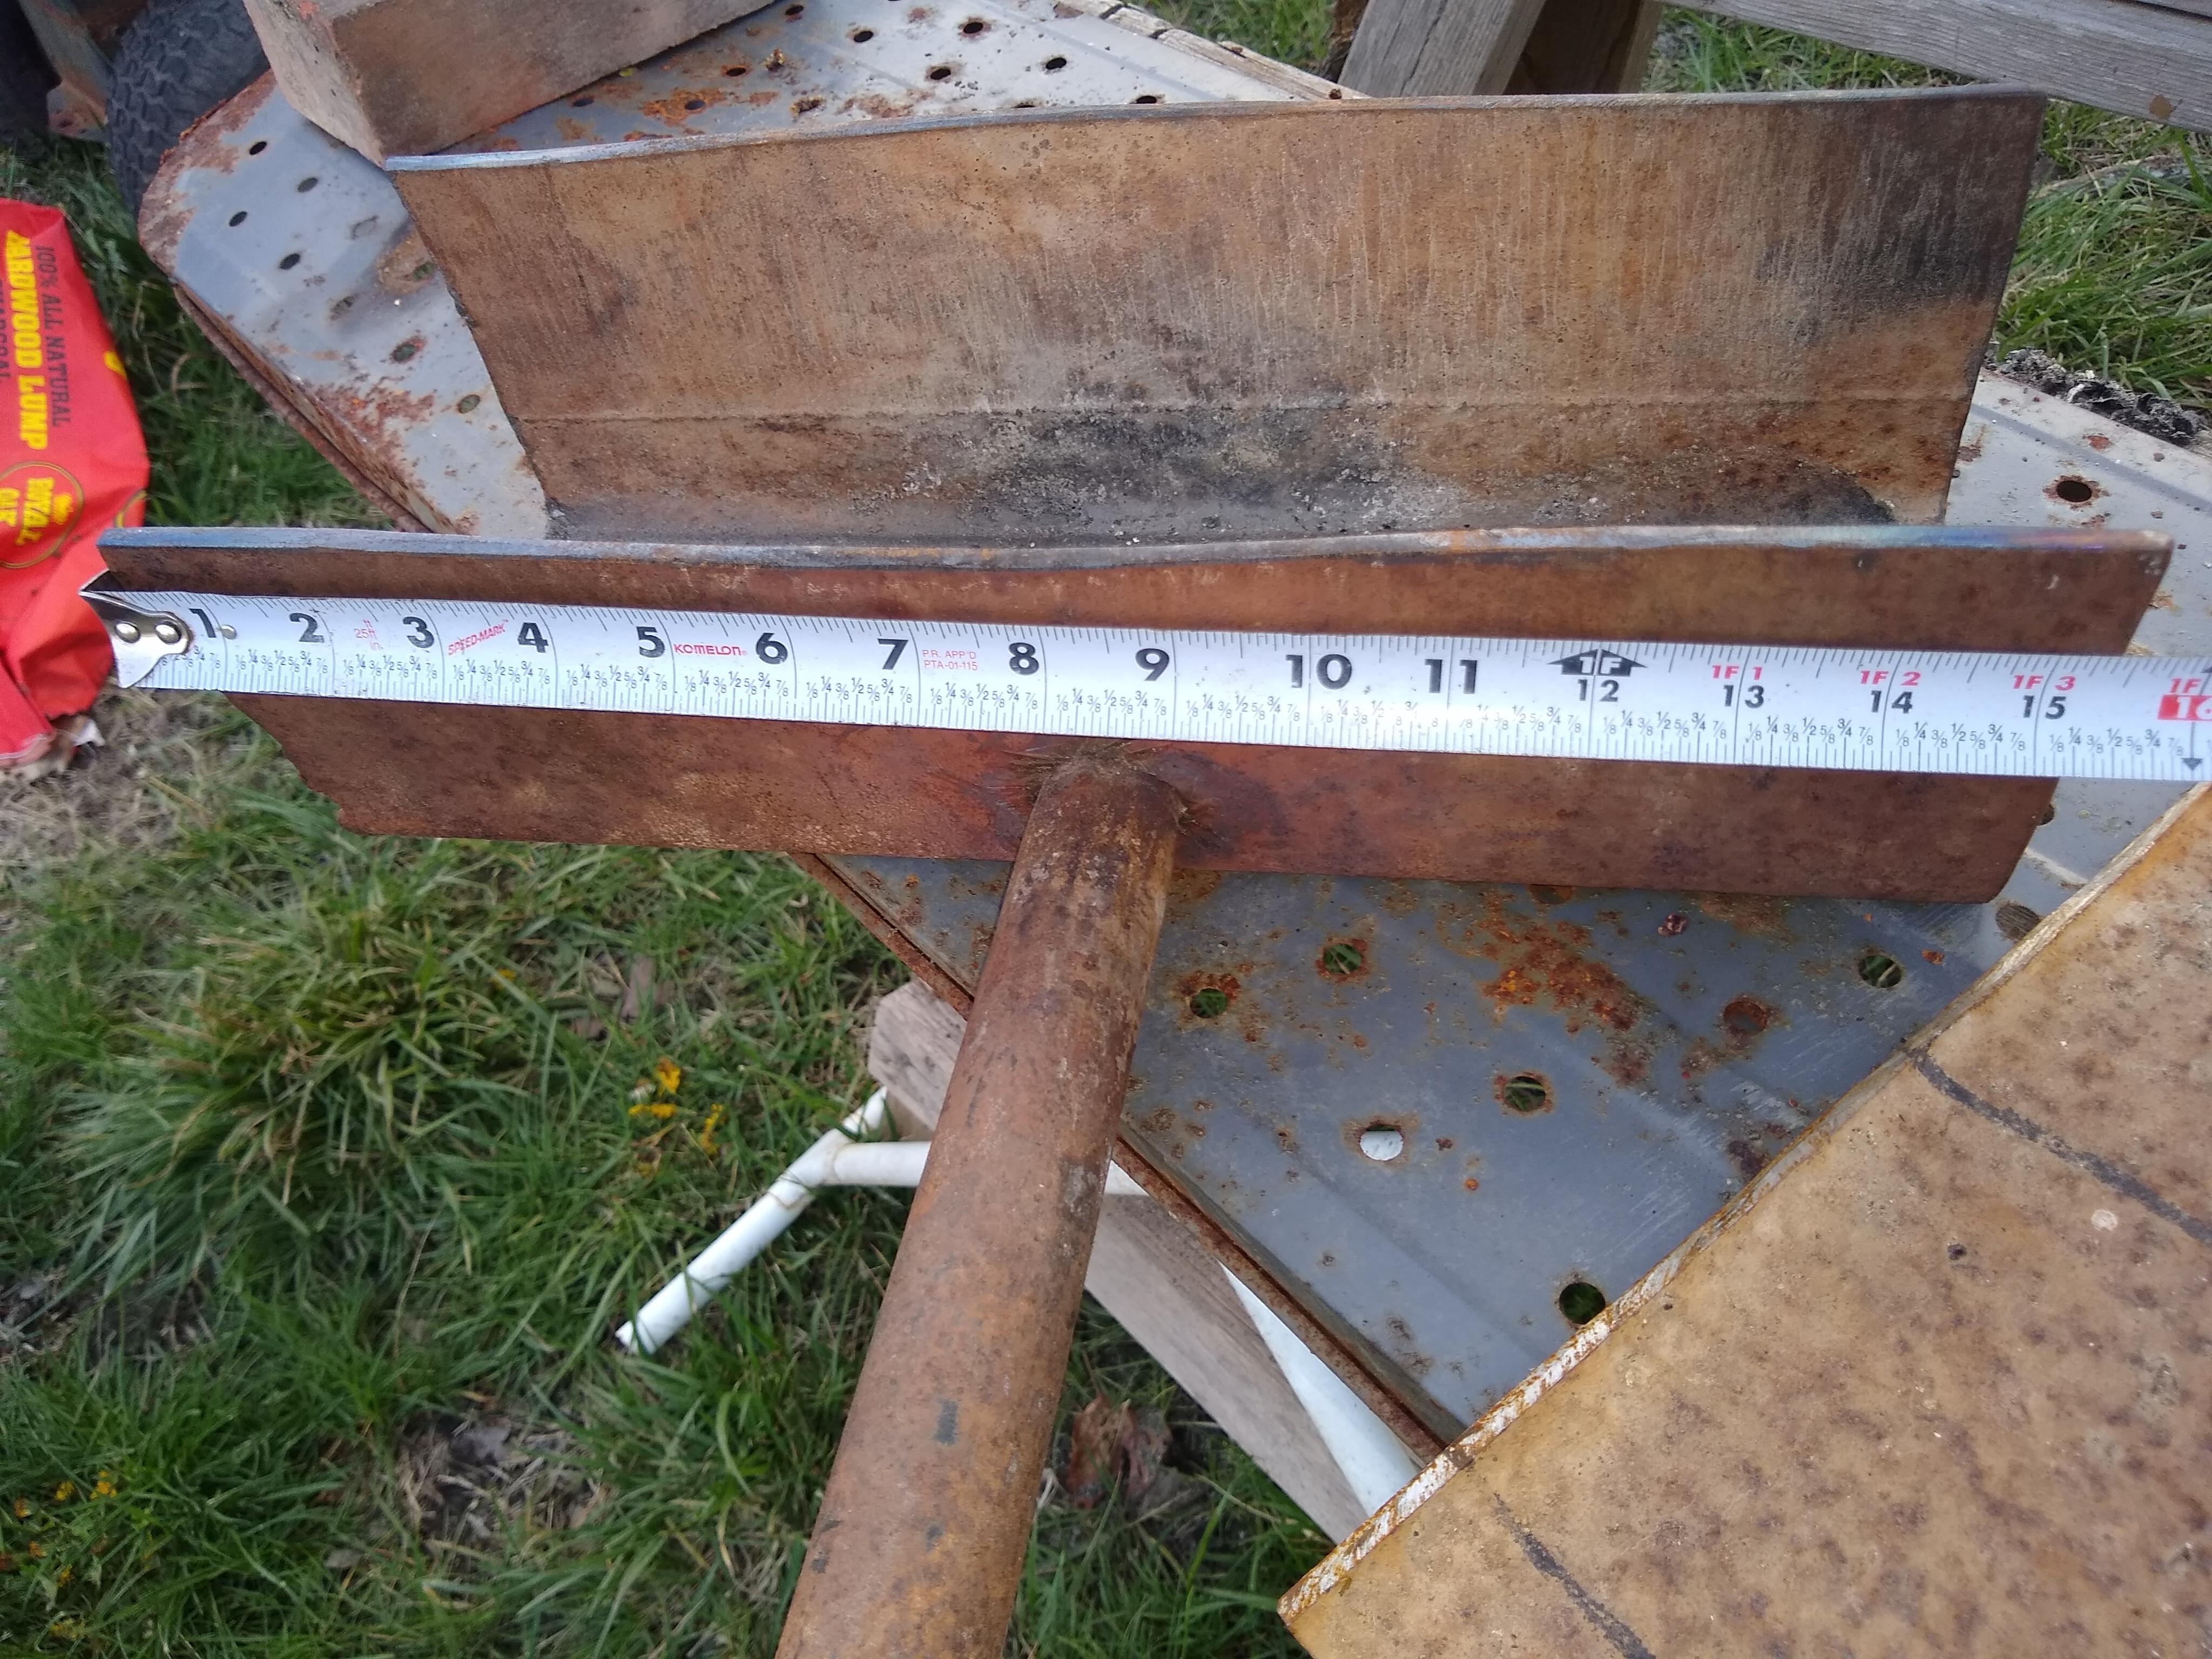
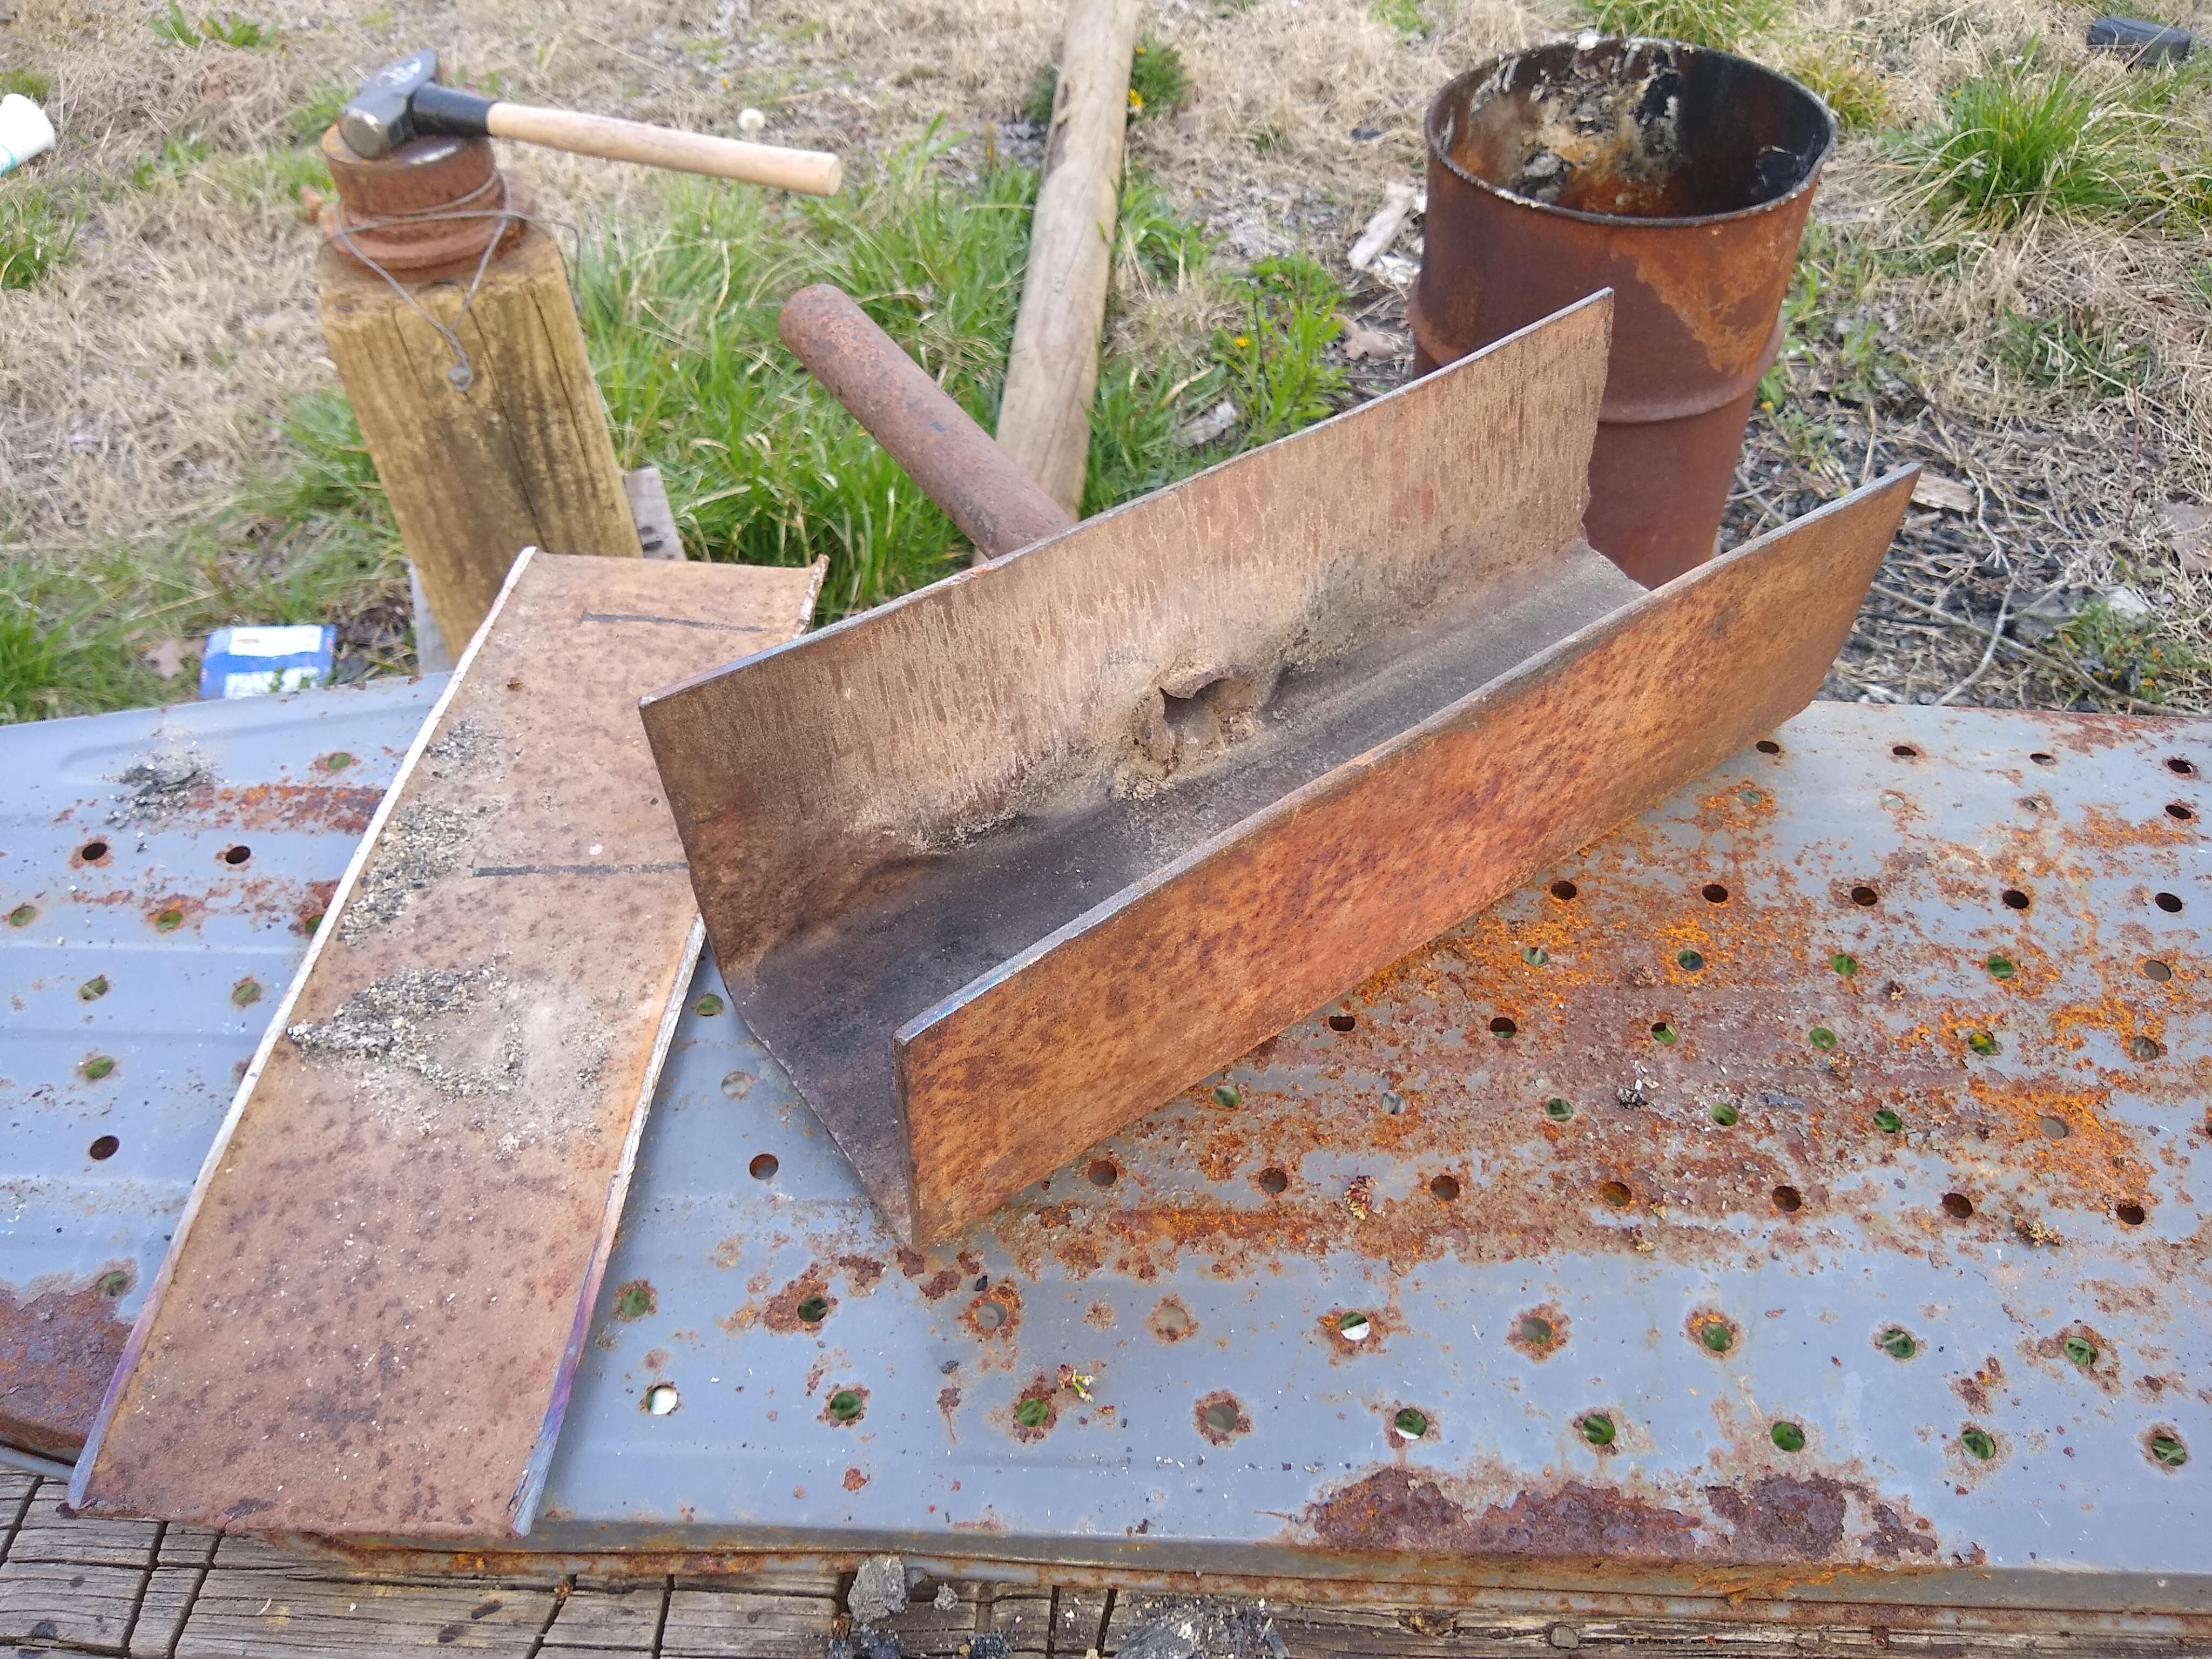
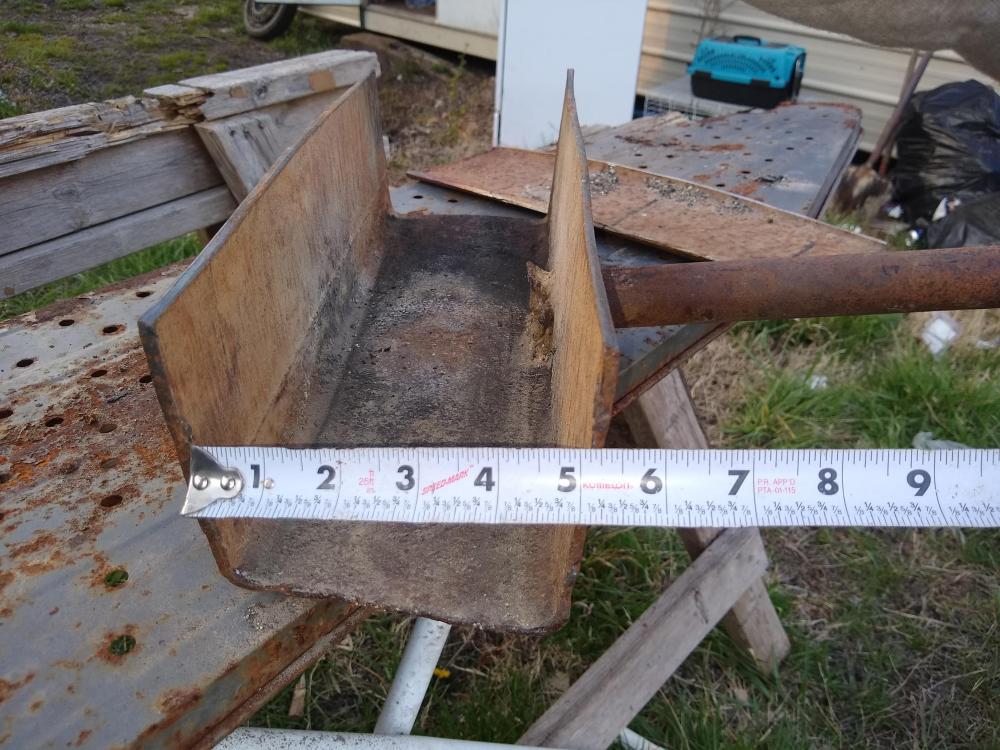
Well I have some clay bricks I plan on cutting at a 45 for the adjusting the fire pot size to accompany the drop down piece that will create a wall on one of the openings I did notice the way it was starting to warp I just used it to forge weld some band saw blades for a project I have so I do plan on addressing that I really fought with this one since I didn't have the right drill bit to cut the tuyere hole so I ended up cold chiseling a lot of it and then forcing the pipe through at the end but it's really solid without even welding it. I really liked my jabod forge and recently built a jabod foundry that is still being modified but I find the designs I used to limit my projects a lot. Oh and I did notice it was very fuel hungry I even considered trying to get some coal for this forge to see if it worked better. Progress on it has slowed due to a dislocated thumb and rain though but I will keep this updated I just never found a thread with a forge like this on here so I figured it might give new members another good direction they could go.
-
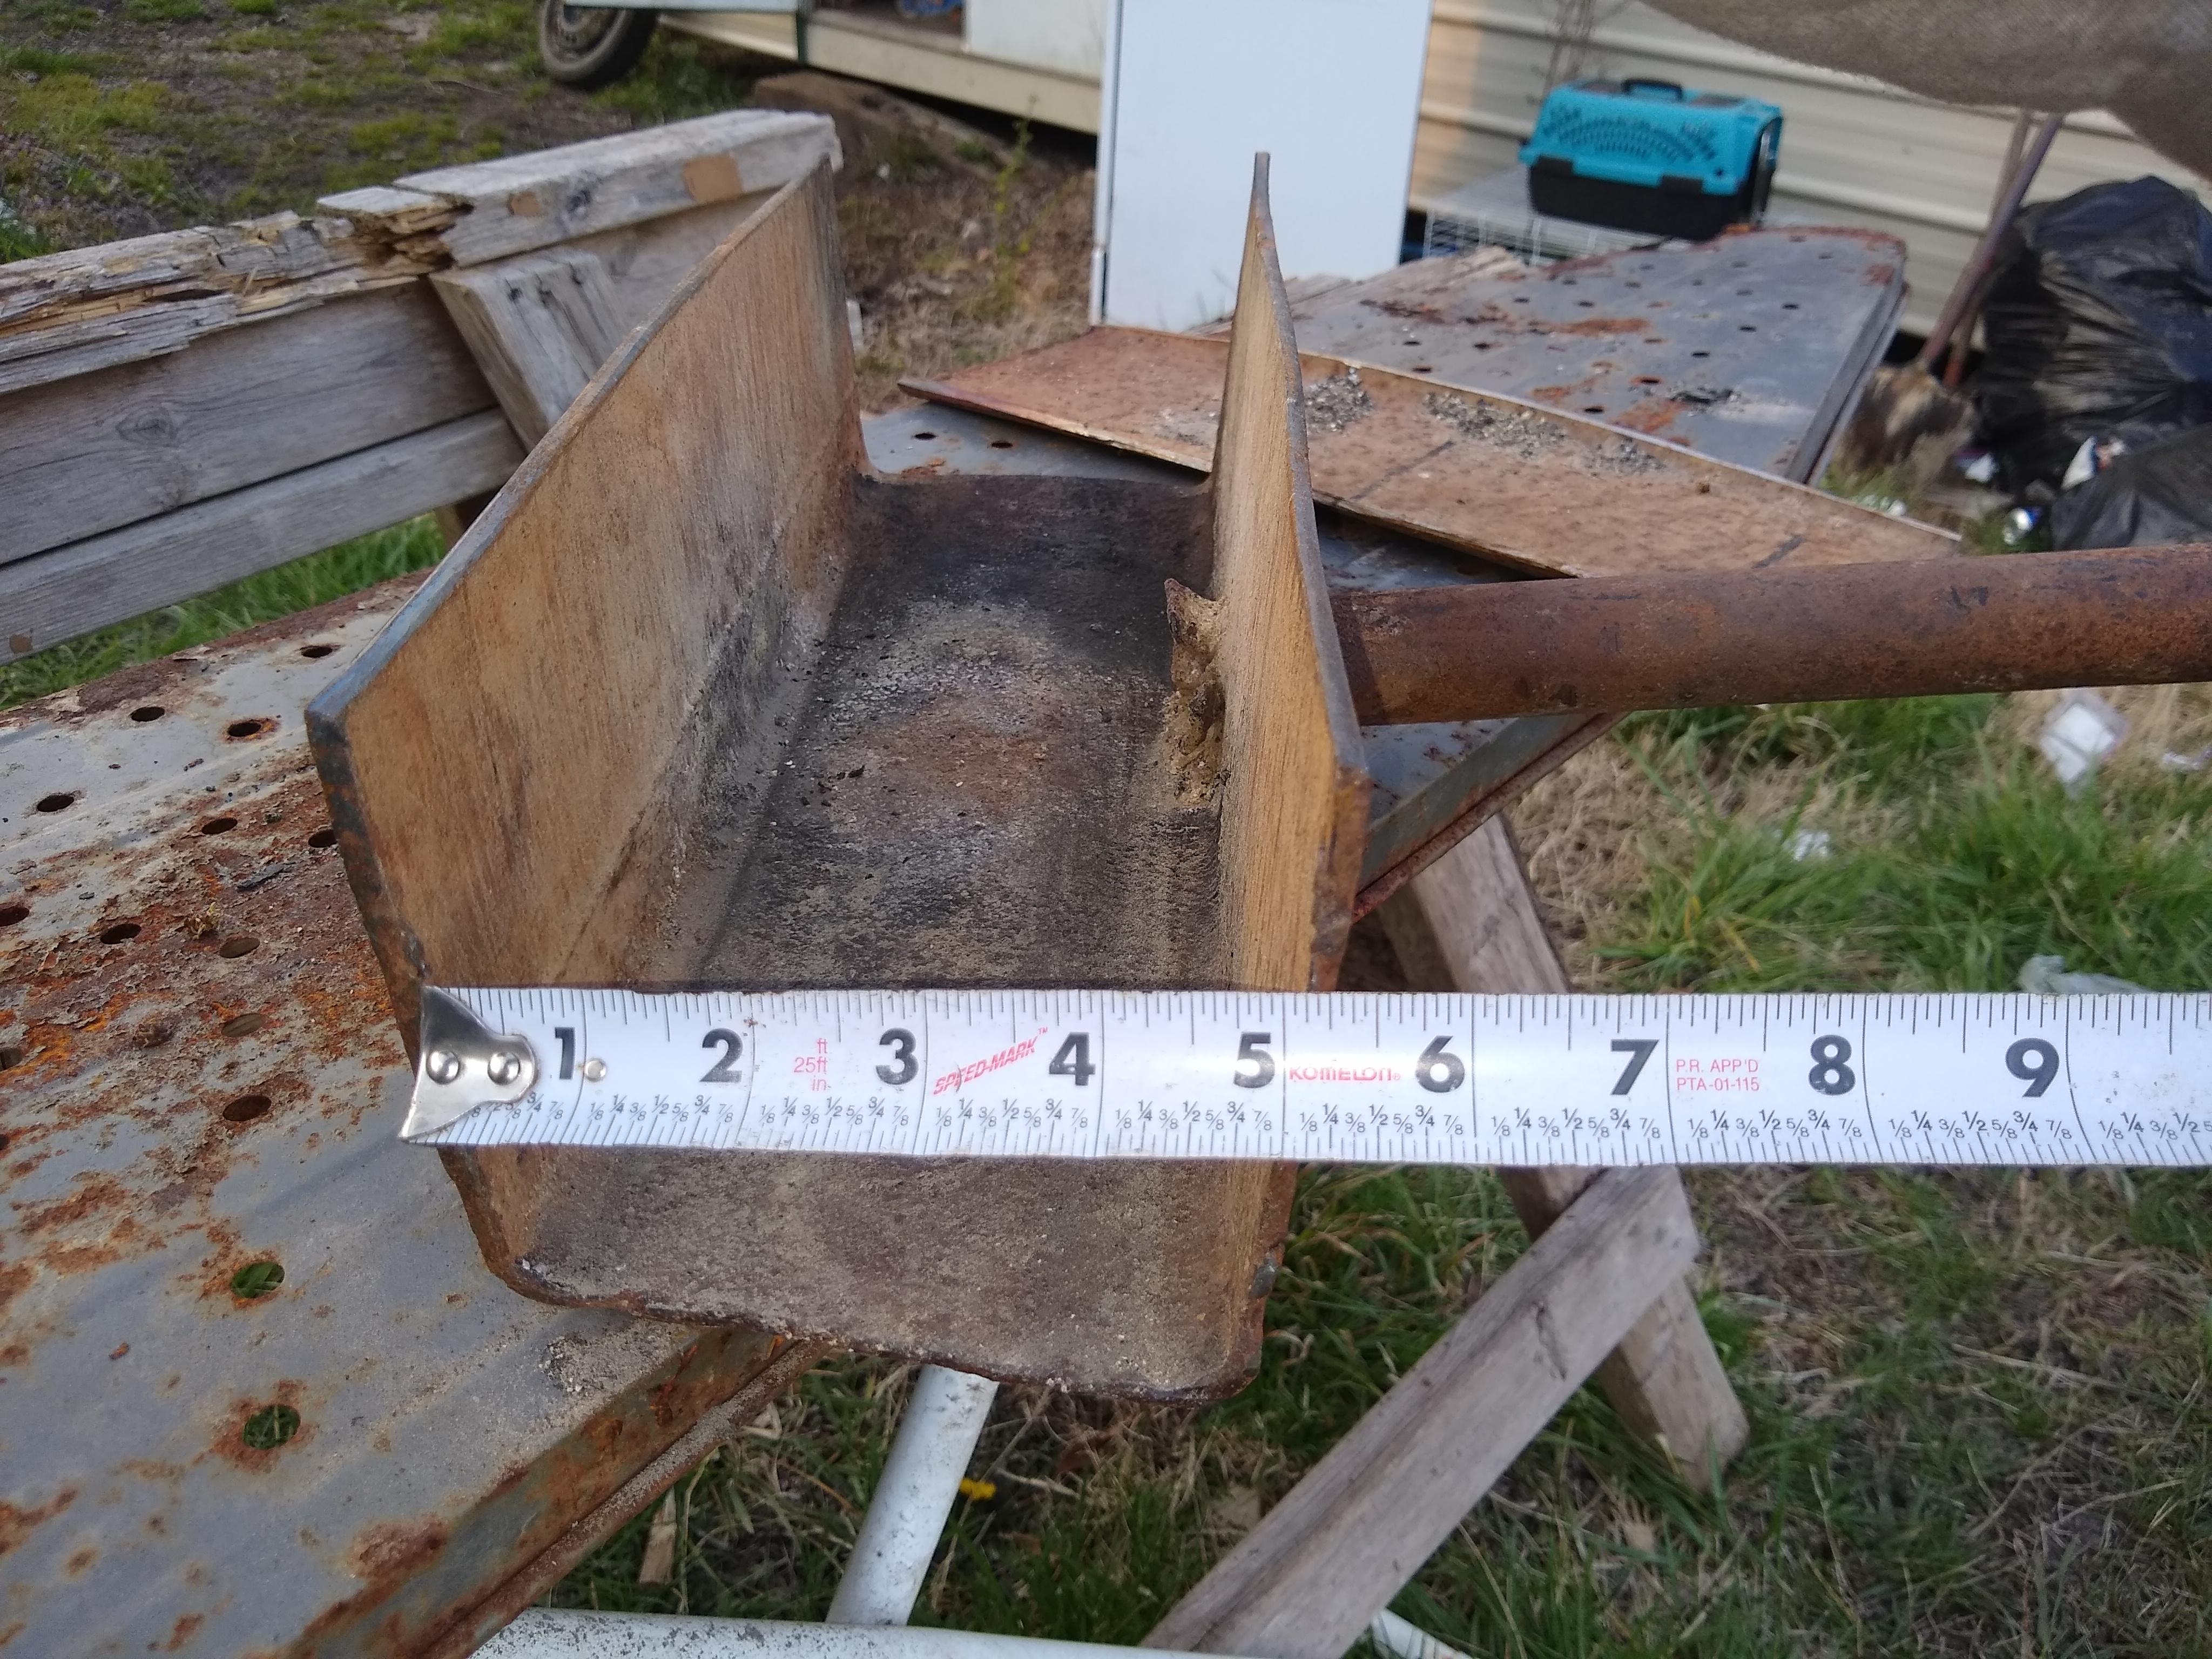
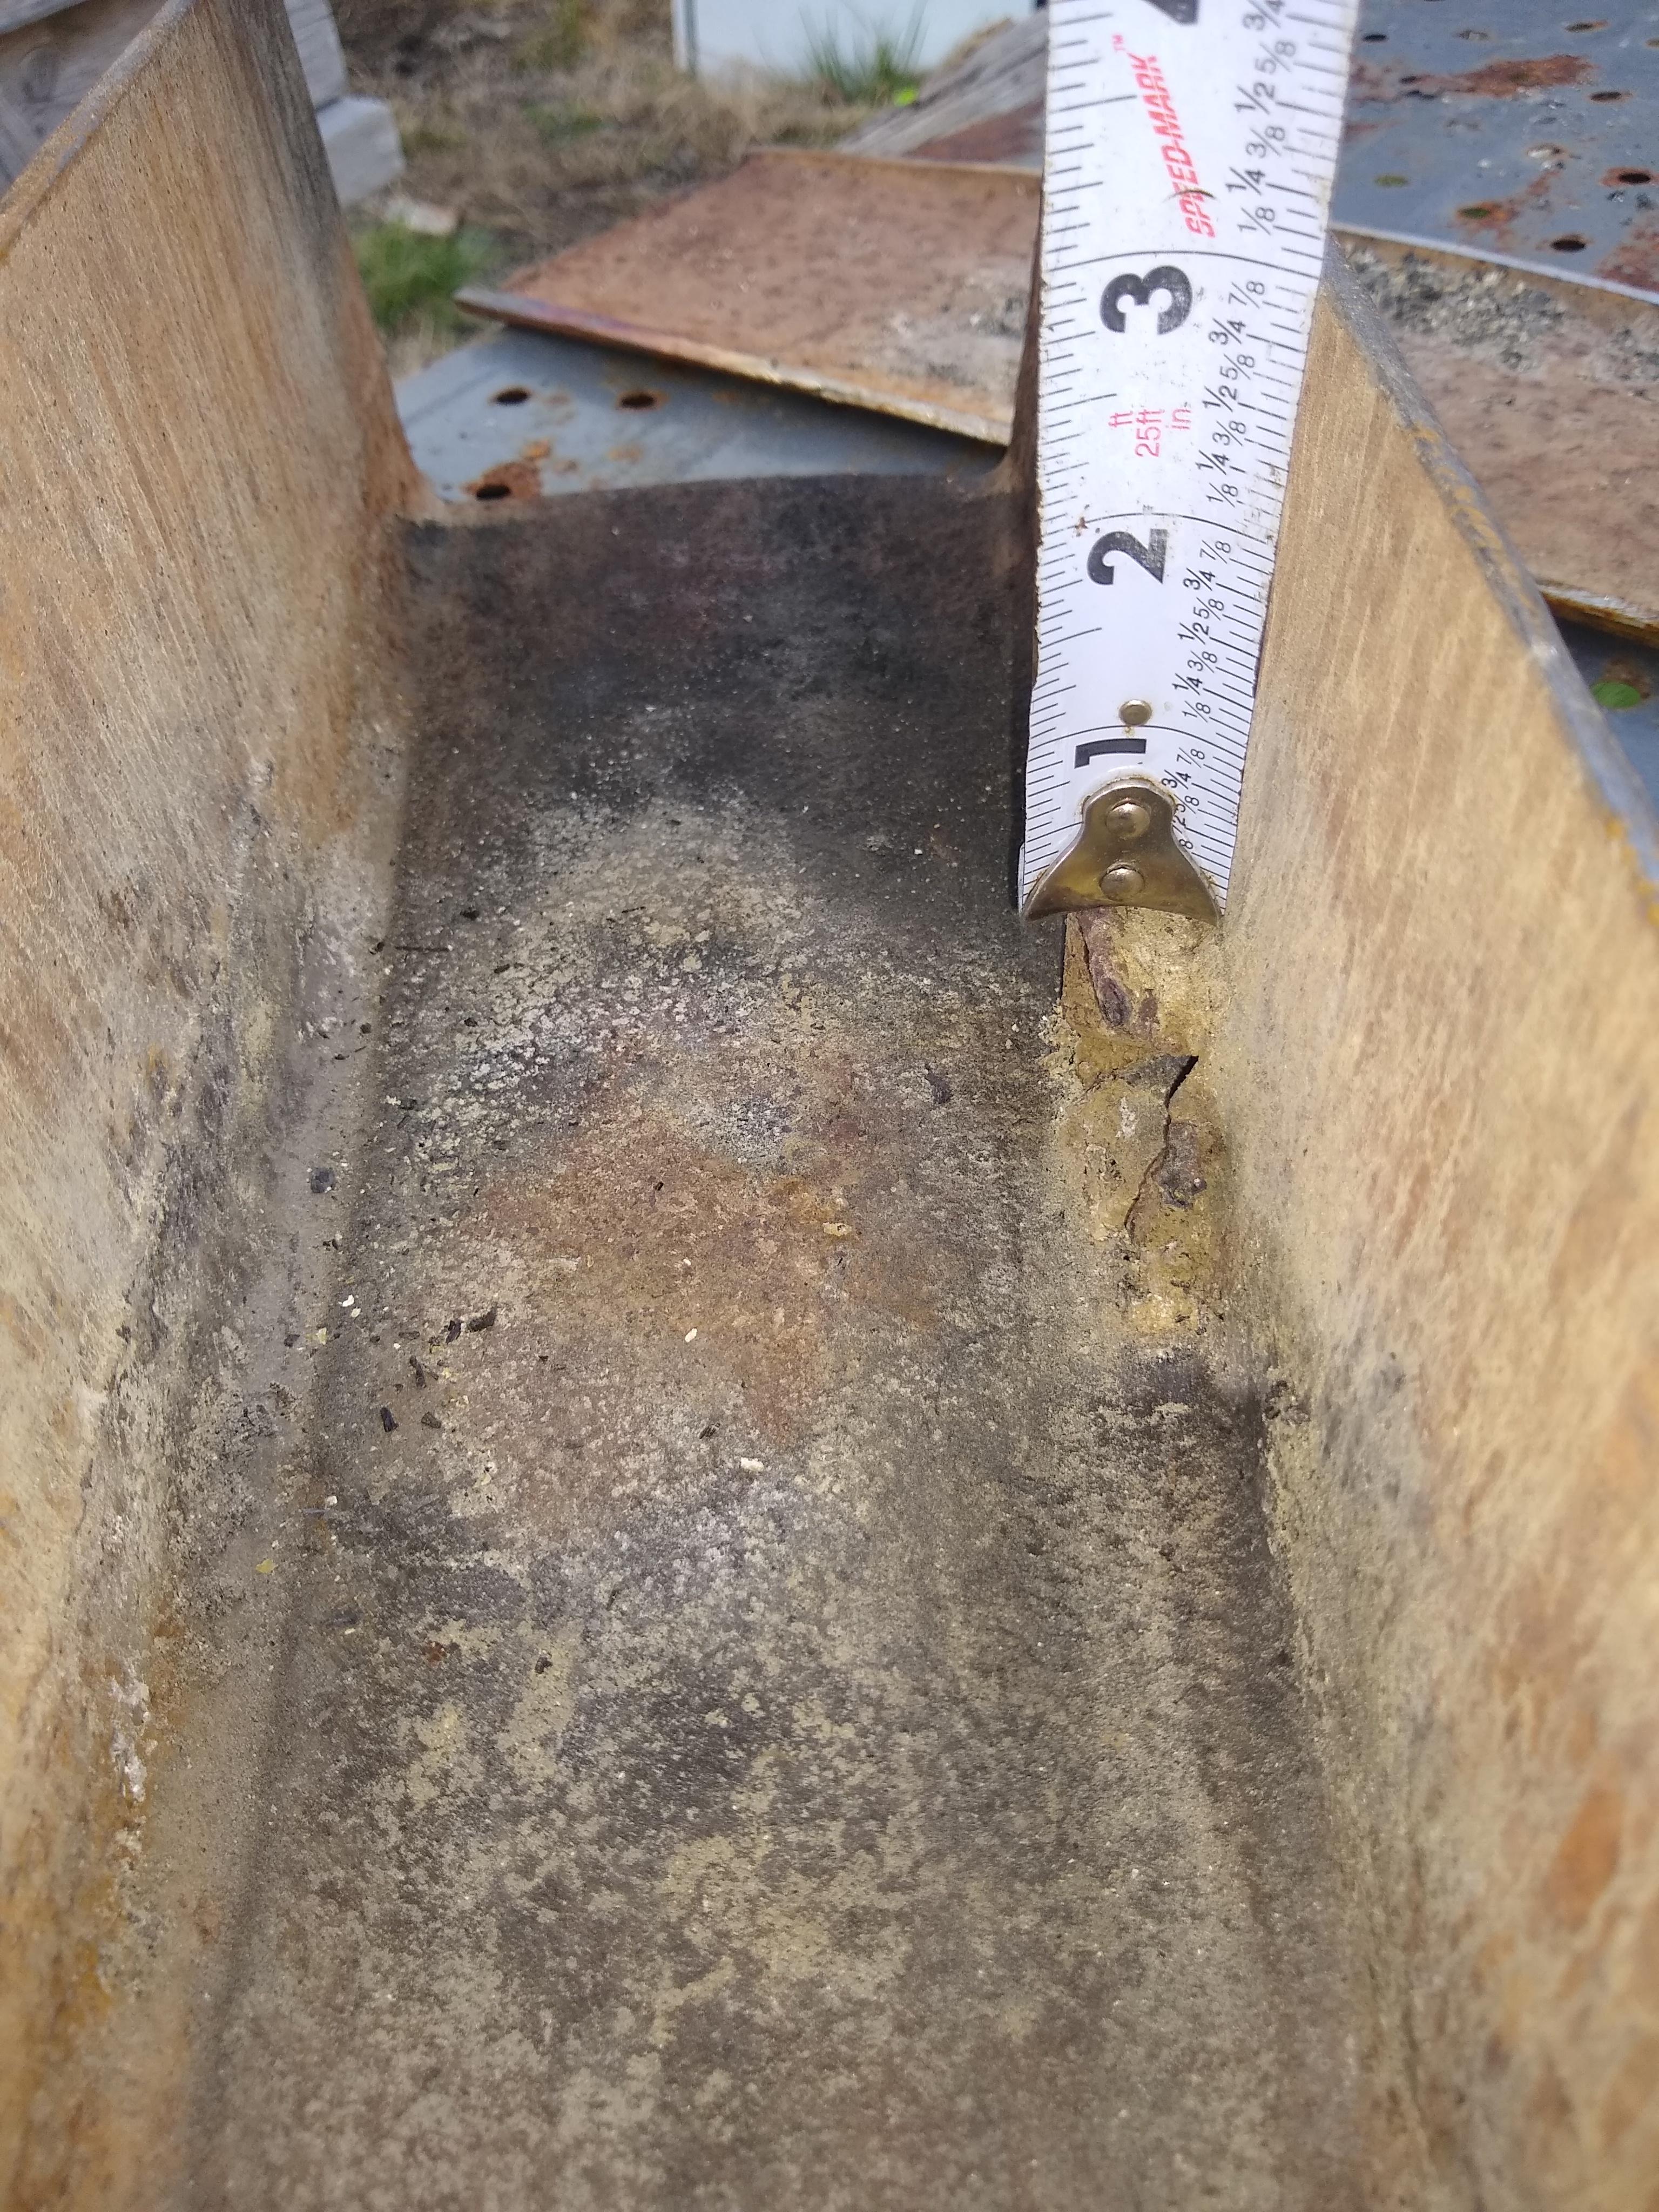
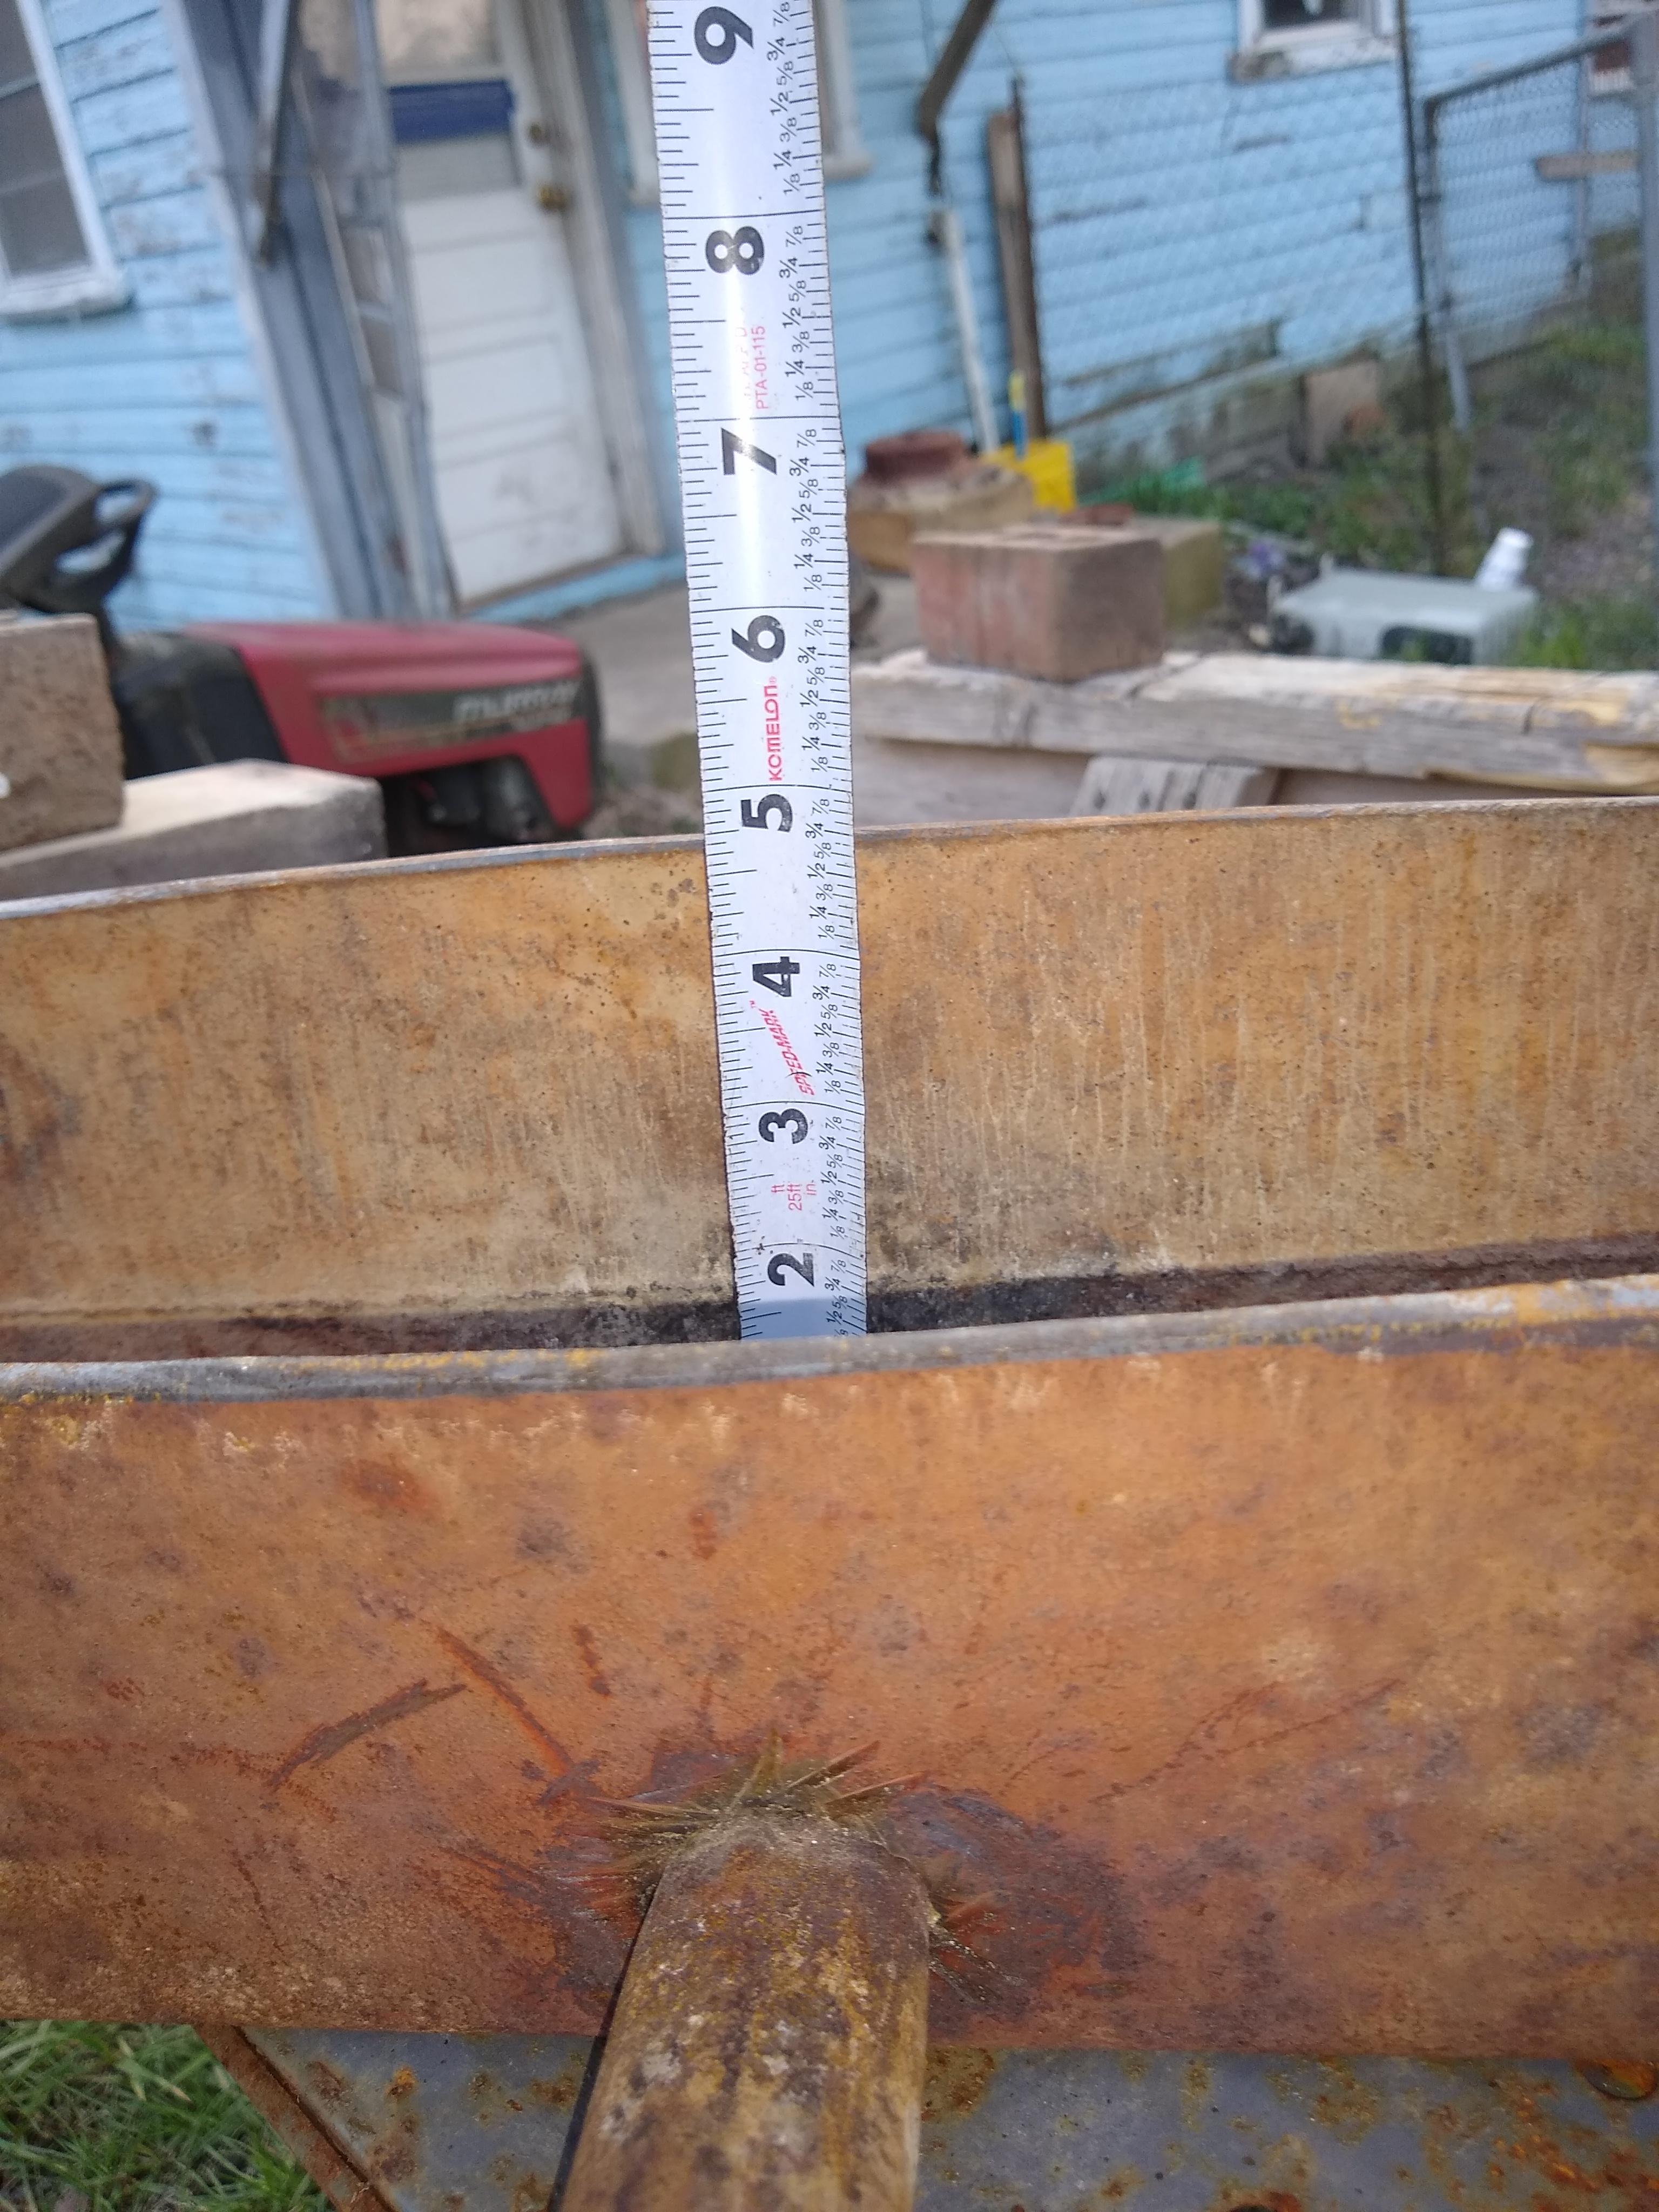
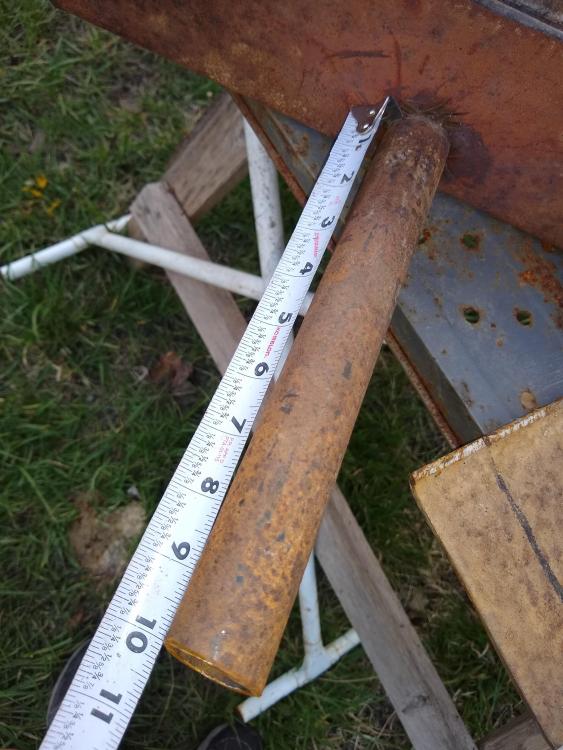
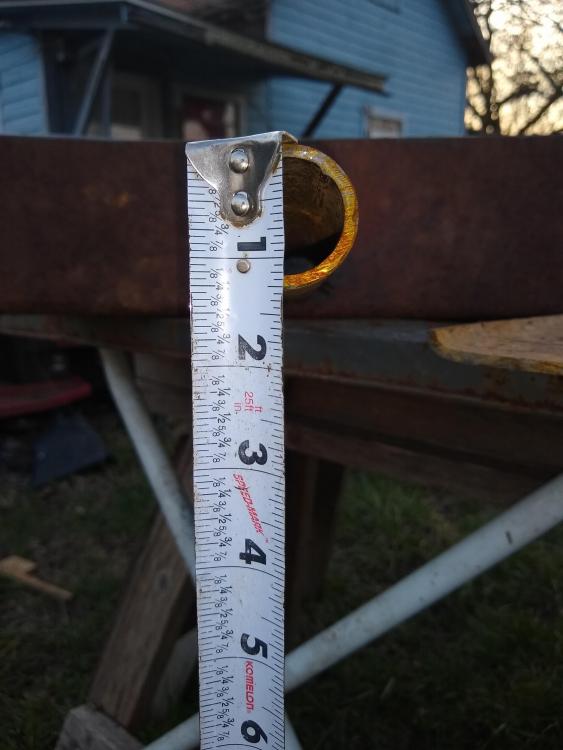
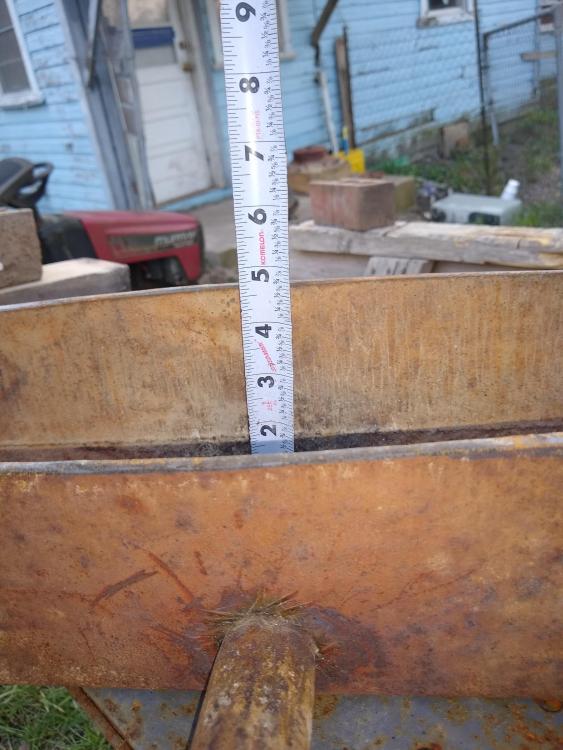
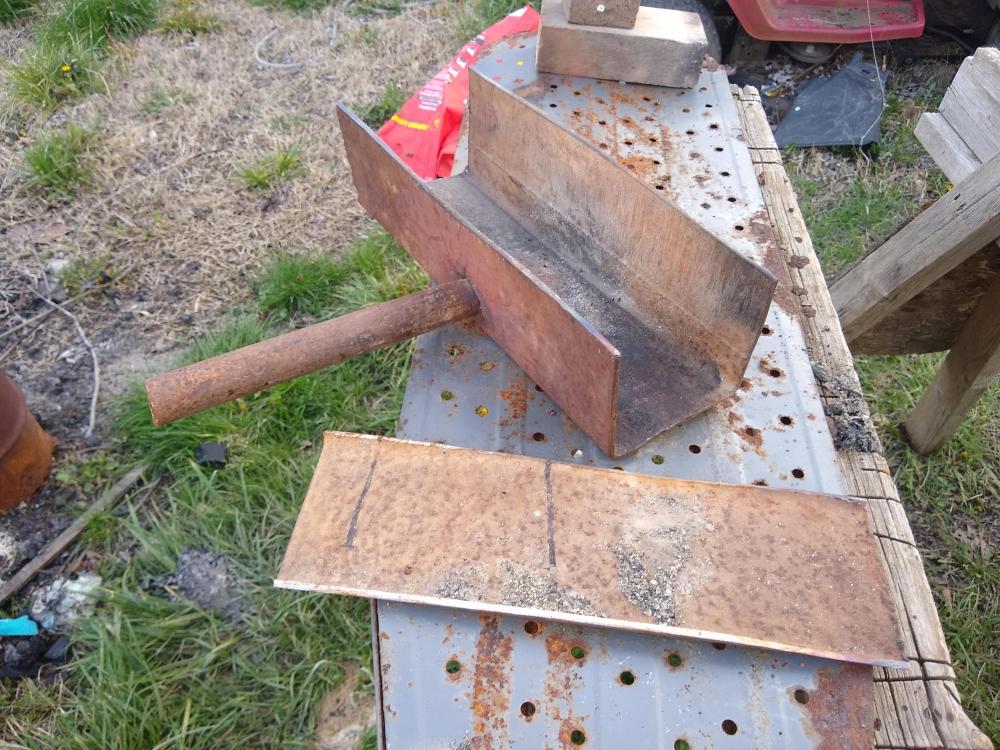
Hey guys I just wanted to show y'all my newest forge I just built and tested. It works pretty good but still needs a few things before it's finished. I built it from a piece of tube iron I cut one side off of and I'm gonna put 2 slits in that side so I can slide it down on one end to keep the fuel source in and will make it adjustable for smaller projects. I may add a spot on top of one of the sides to hold the charcoal before it goes into the fire. I still gotta add legs too and I am gonna add a bleeder valve to make the air flow adjustable with a hole in the side of the tuyere that I can put a slide pipe on to make it more adjustable for my hair dryer. But this really worked well when I tested it. Let me know what you guys think.


-
Need advice on refractory for new foundry build
Jay.bro replied to Jay.bro's topic in Smelting, Melting, Foundry, and Casting
Yeah I figured as much irondragon that's why I turned to the most experienced group of ppl I knew to ask -
Need advice on refractory for new foundry build
Jay.bro replied to Jay.bro's topic in Smelting, Melting, Foundry, and Casting
Okay thank you Steve that's what I was wanting to know I seen several youtubers that claim plaster would work and several ppl say they use it on other forum sites I think I'll find some refractory to pour over the kaowool instead -
I've been researching the web and all of the forums and I've had a small hiccup with my first foundry build. I built a box of dirt foundry and ended up burning through the bottom of it and caught it on fire a little bit. I plan on modifying it but I picked up a 20 lbs propane tank today that has a valve issue and I got to thinking. Does anyone have experience with pouring plaster of Paris and play sand mix over kaowool for use in a charcoal foundry I'm only going to be melting mostly aluminum, brass, copper and possibly try my hand at making some bronze or aluminum bronze in the future once I get more practiced. I'm just beginning my journey into metal casting but I've done a ton of research and I've read a few things about casting refractory over kaowool but not plaster/sand mix. I know its better to buy a tested refractory I was just looking at alternative options. Any advice would be appreciated and thank you in advance.
-
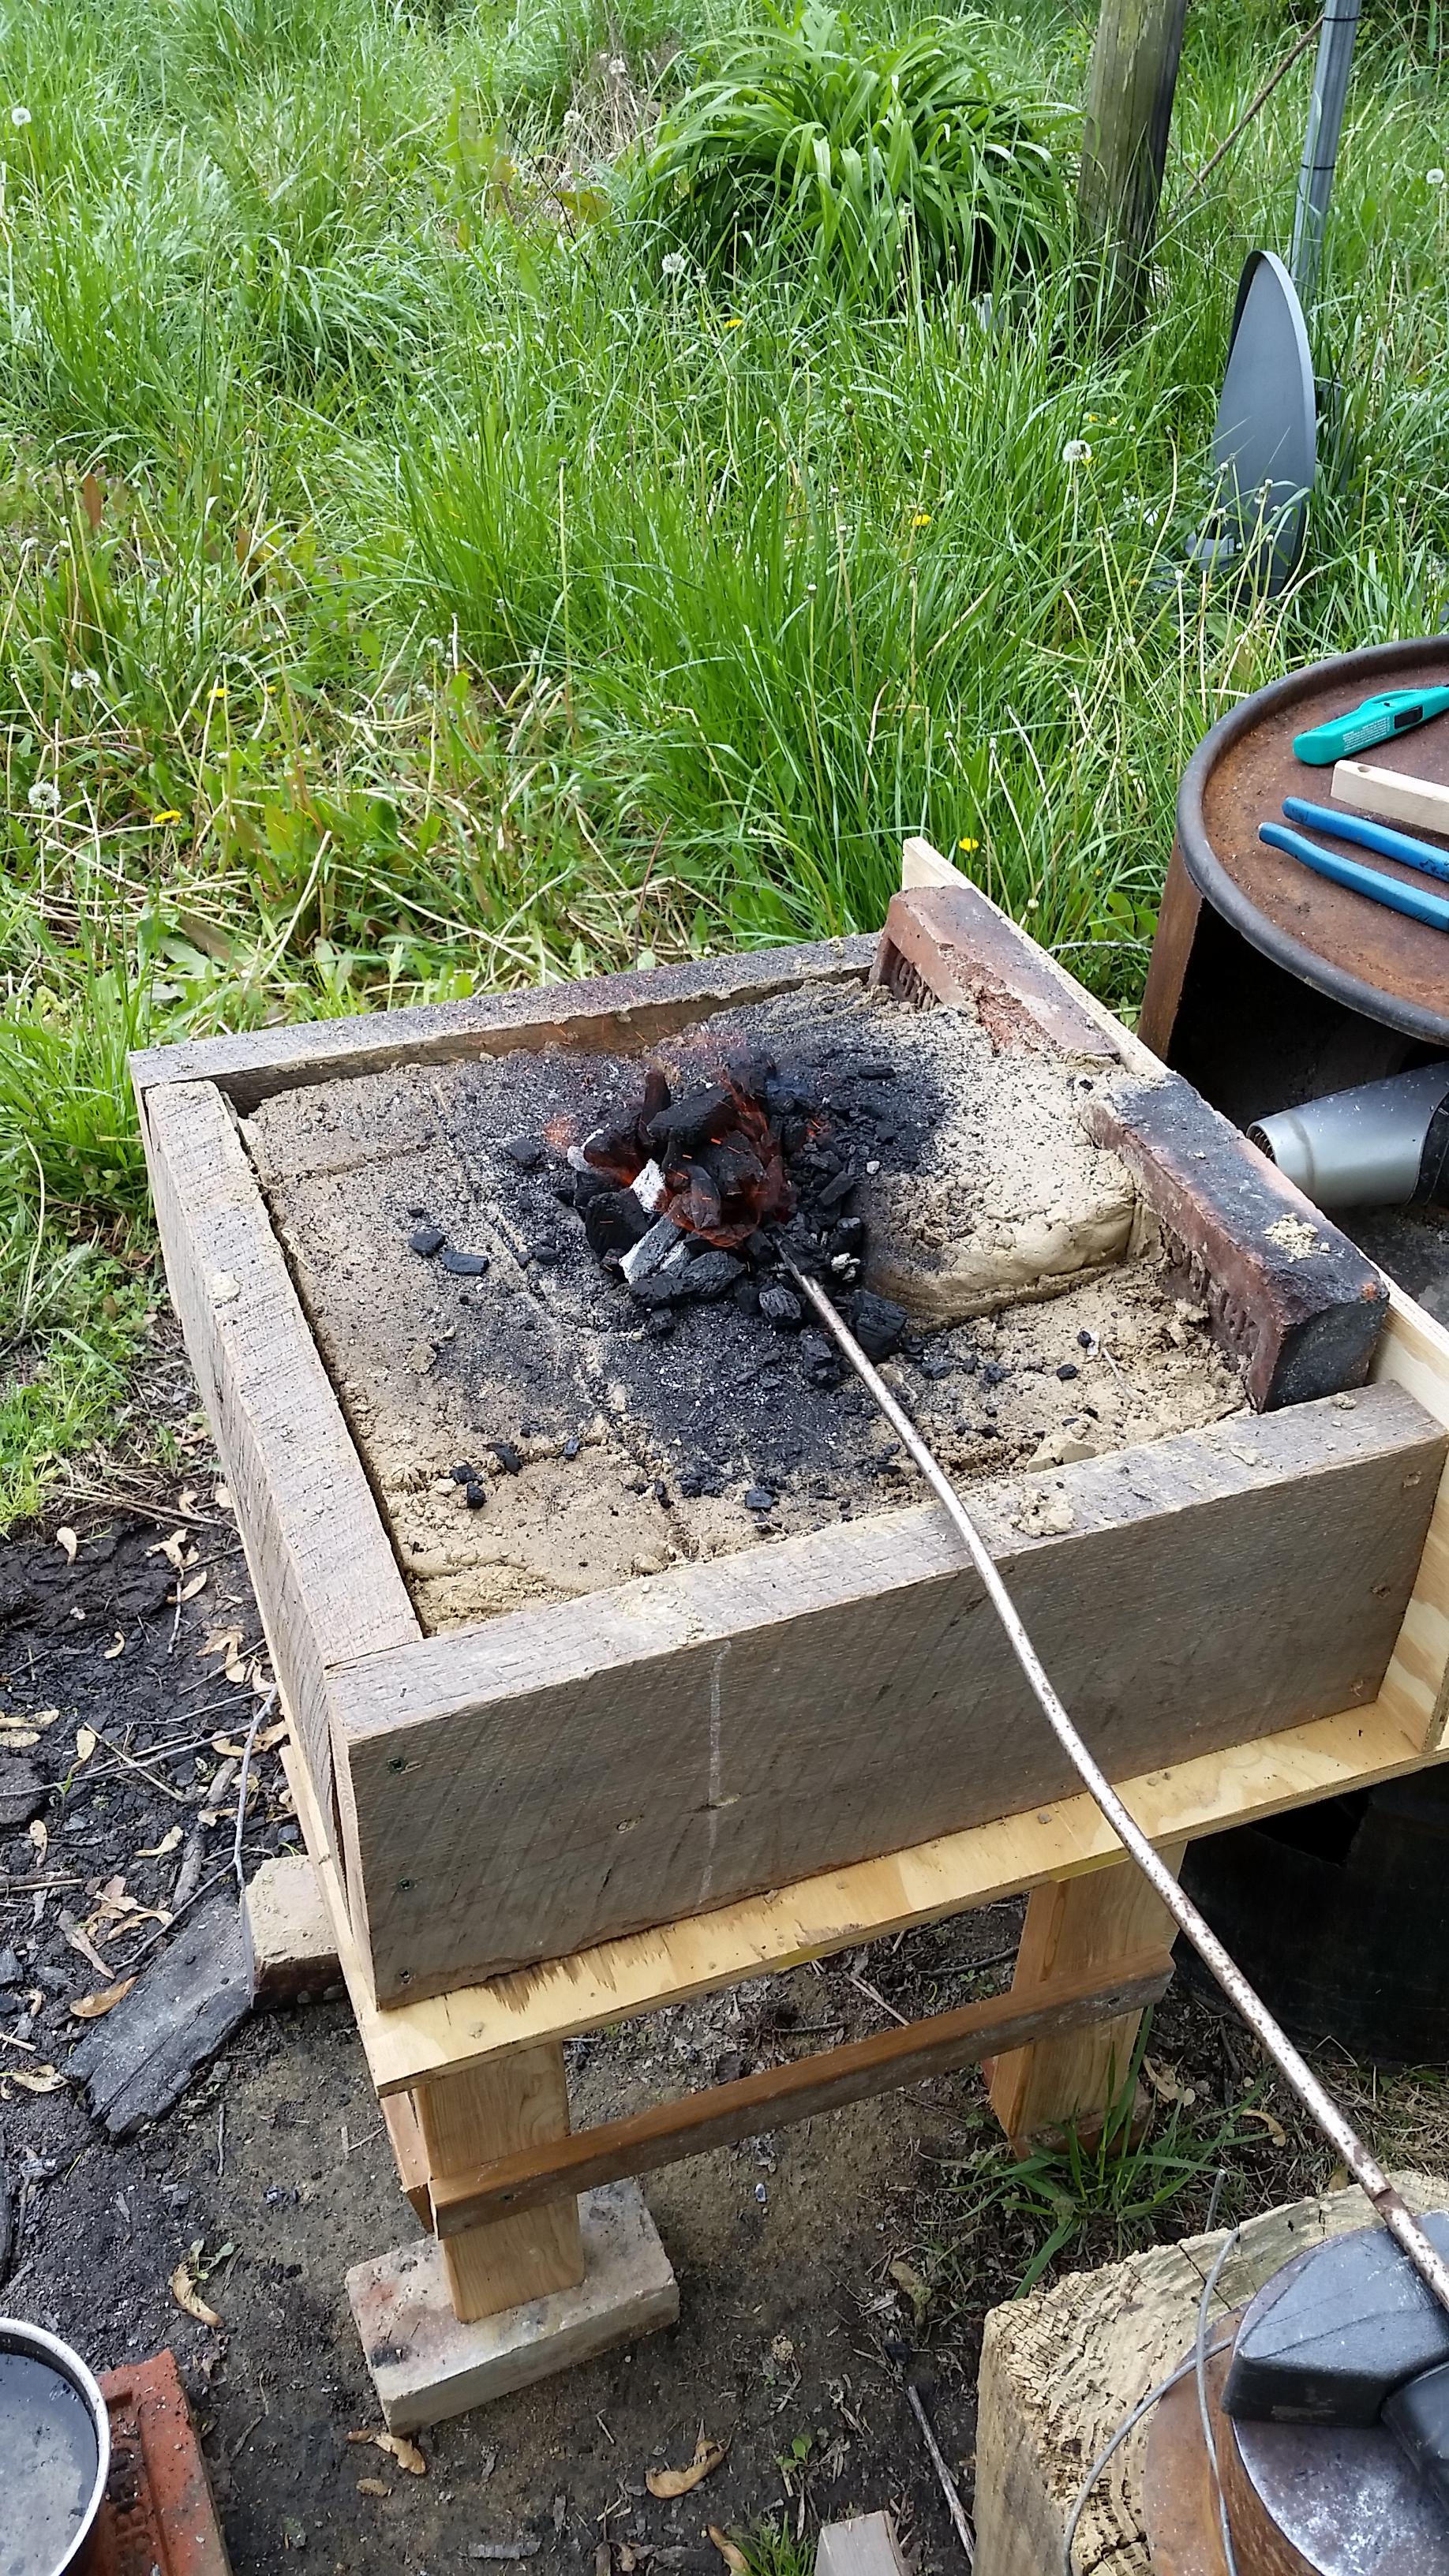
It works great I think I need to make a few modifications but it's dirt that's easy to fix it gets good and hot but I couldn't get it to forge weld not sure if it was me not being practiced enough the stock I tried to use or I need to raise the bottom to make the fireball sit even with the top of the dirt instead of an inch below I got it to a bright orange but not yellow or white it's probably me still not being very practiced with fire management yet. I like the economy though and control is good as long as I don't put the hairdryer too close to the tuyere and catch it on fire again when the tuyere vacuums fire out of the fire pot after you shut off the hairdryer. But anyways I think it needs a few modifications to get it just right.
-
Hey guys sorry no video today my wife and daughter stayed inside it rained yesterday and she was kinda cold and my daughter was fussy I think I need to reshape the fire pot a bit but it worked pretty good I had to turn the hairdryer on high to get the fireball at the right height. I took some pics for you guys to see how it went. I didn't do much just made a pick rake for the new forge.