IanOhio
Members
-
Joined
-
Last visited
-
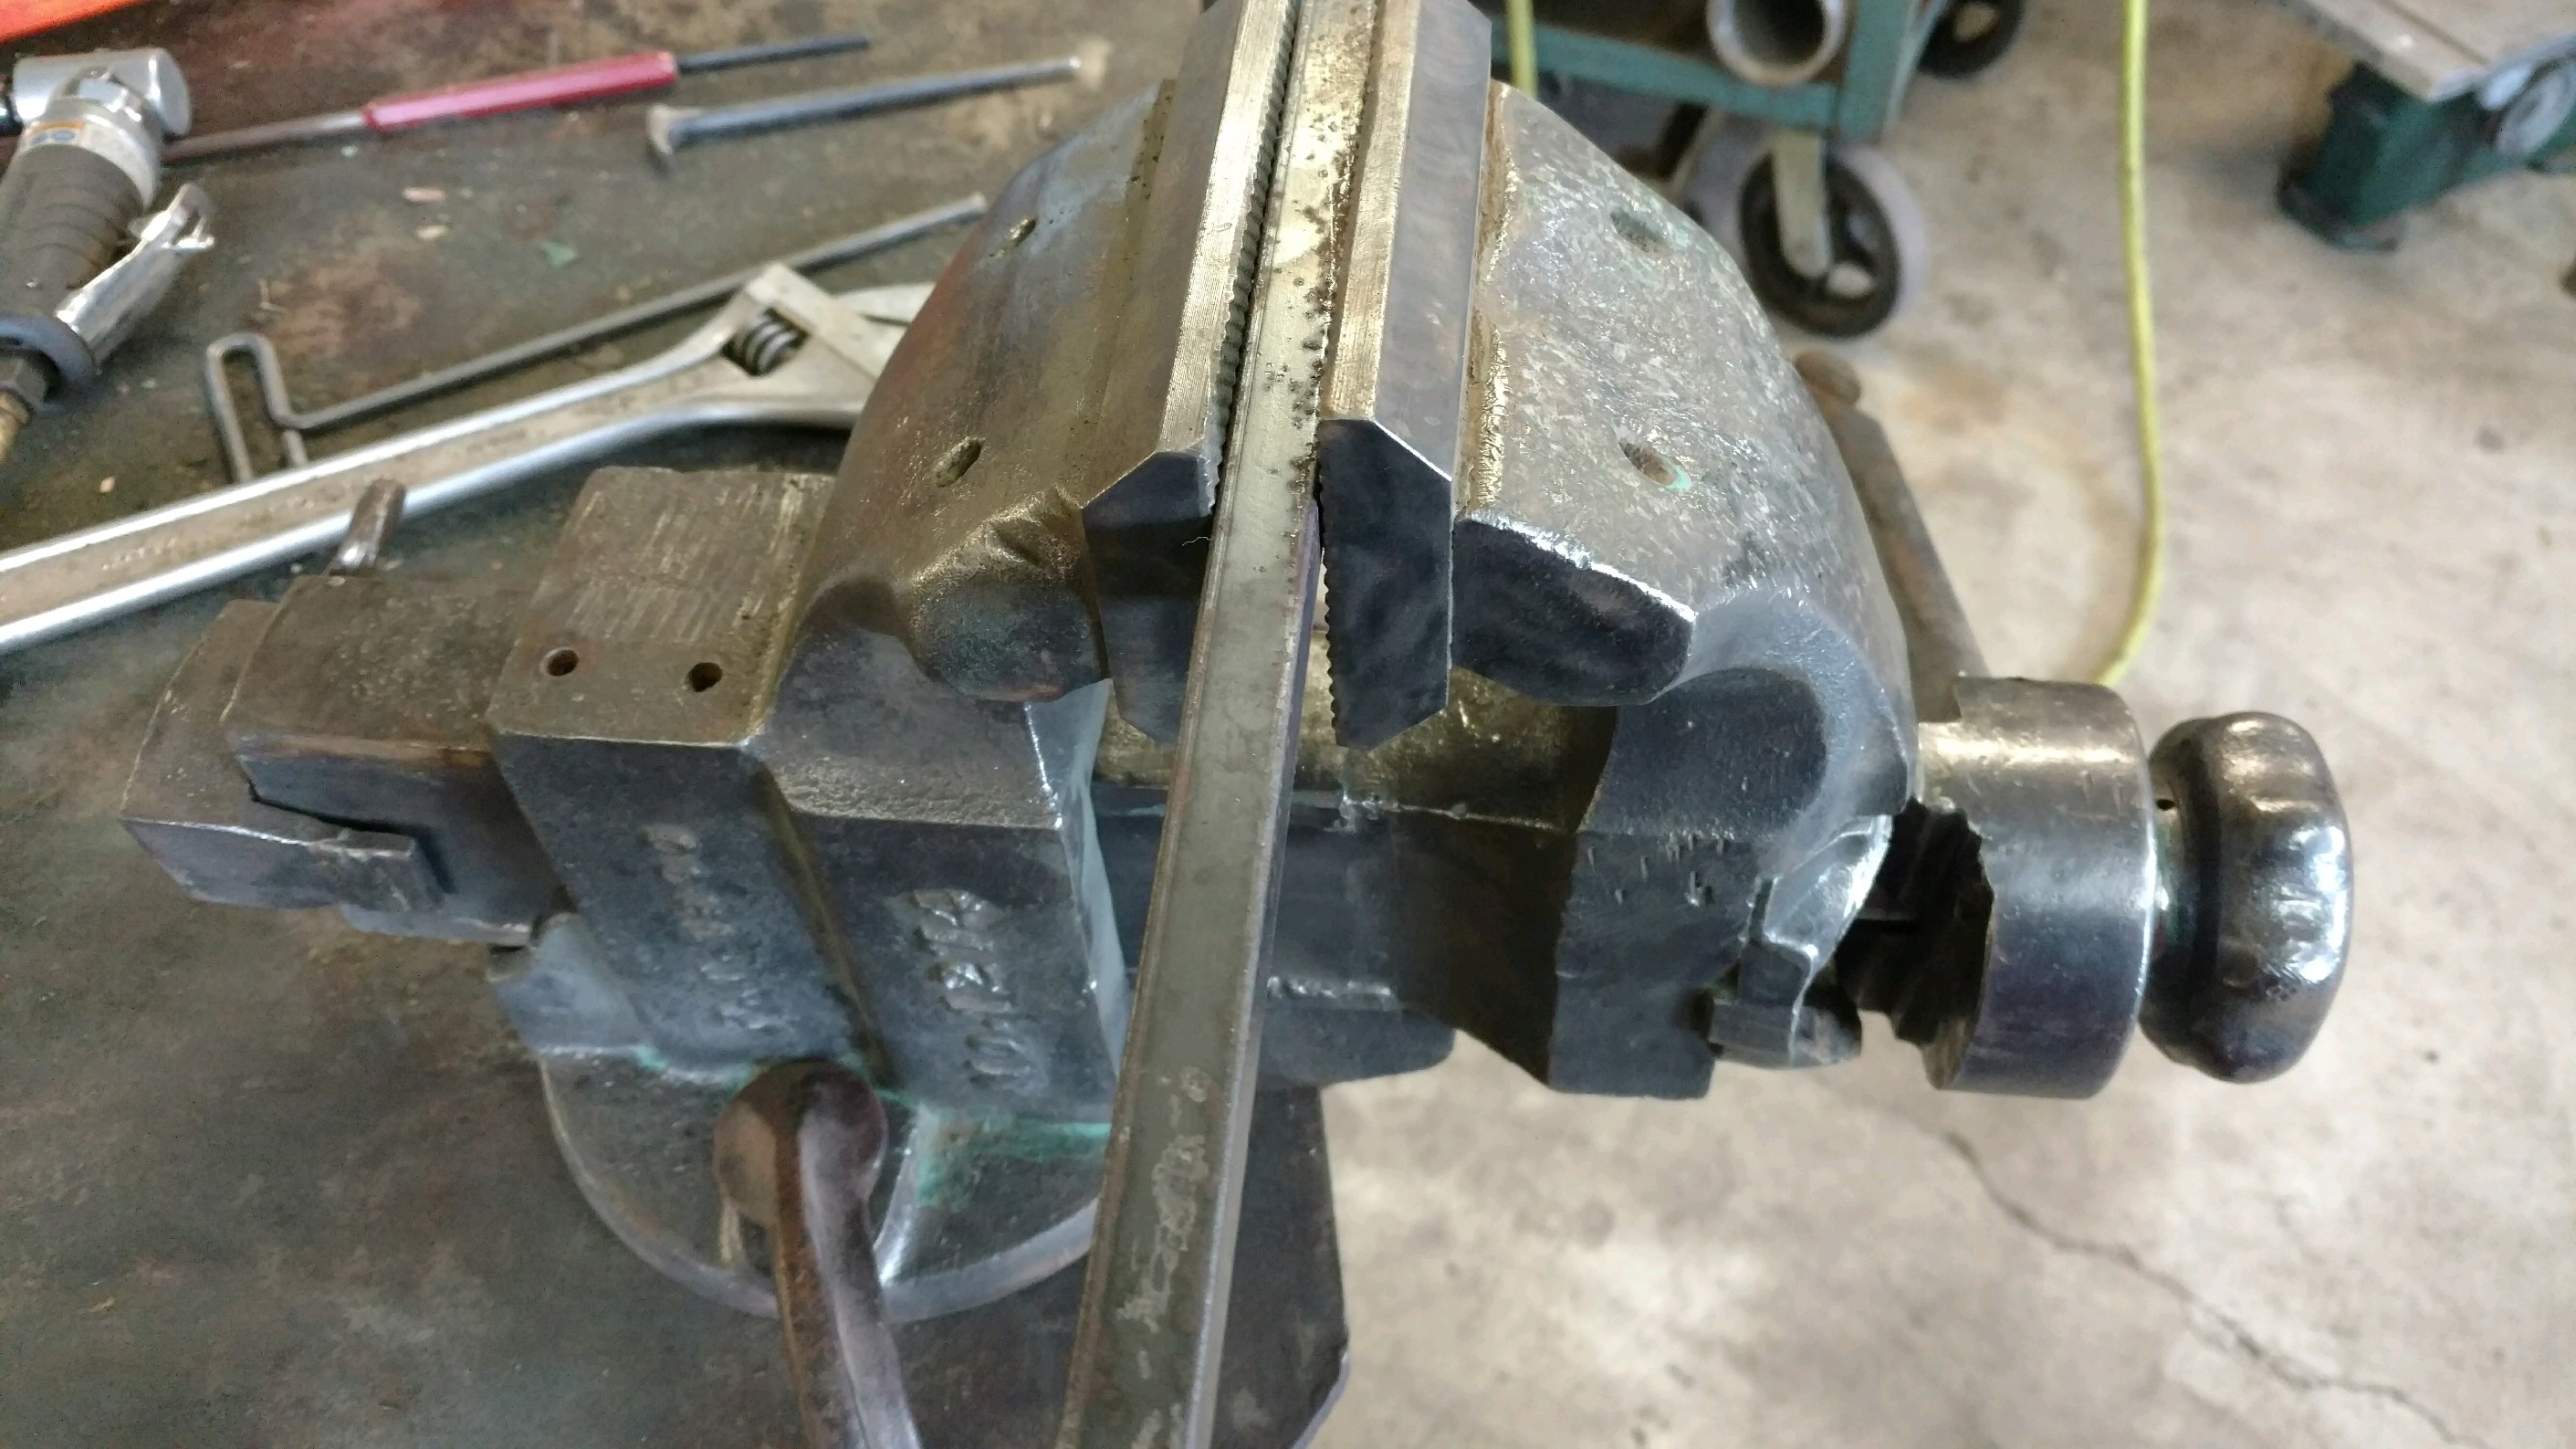
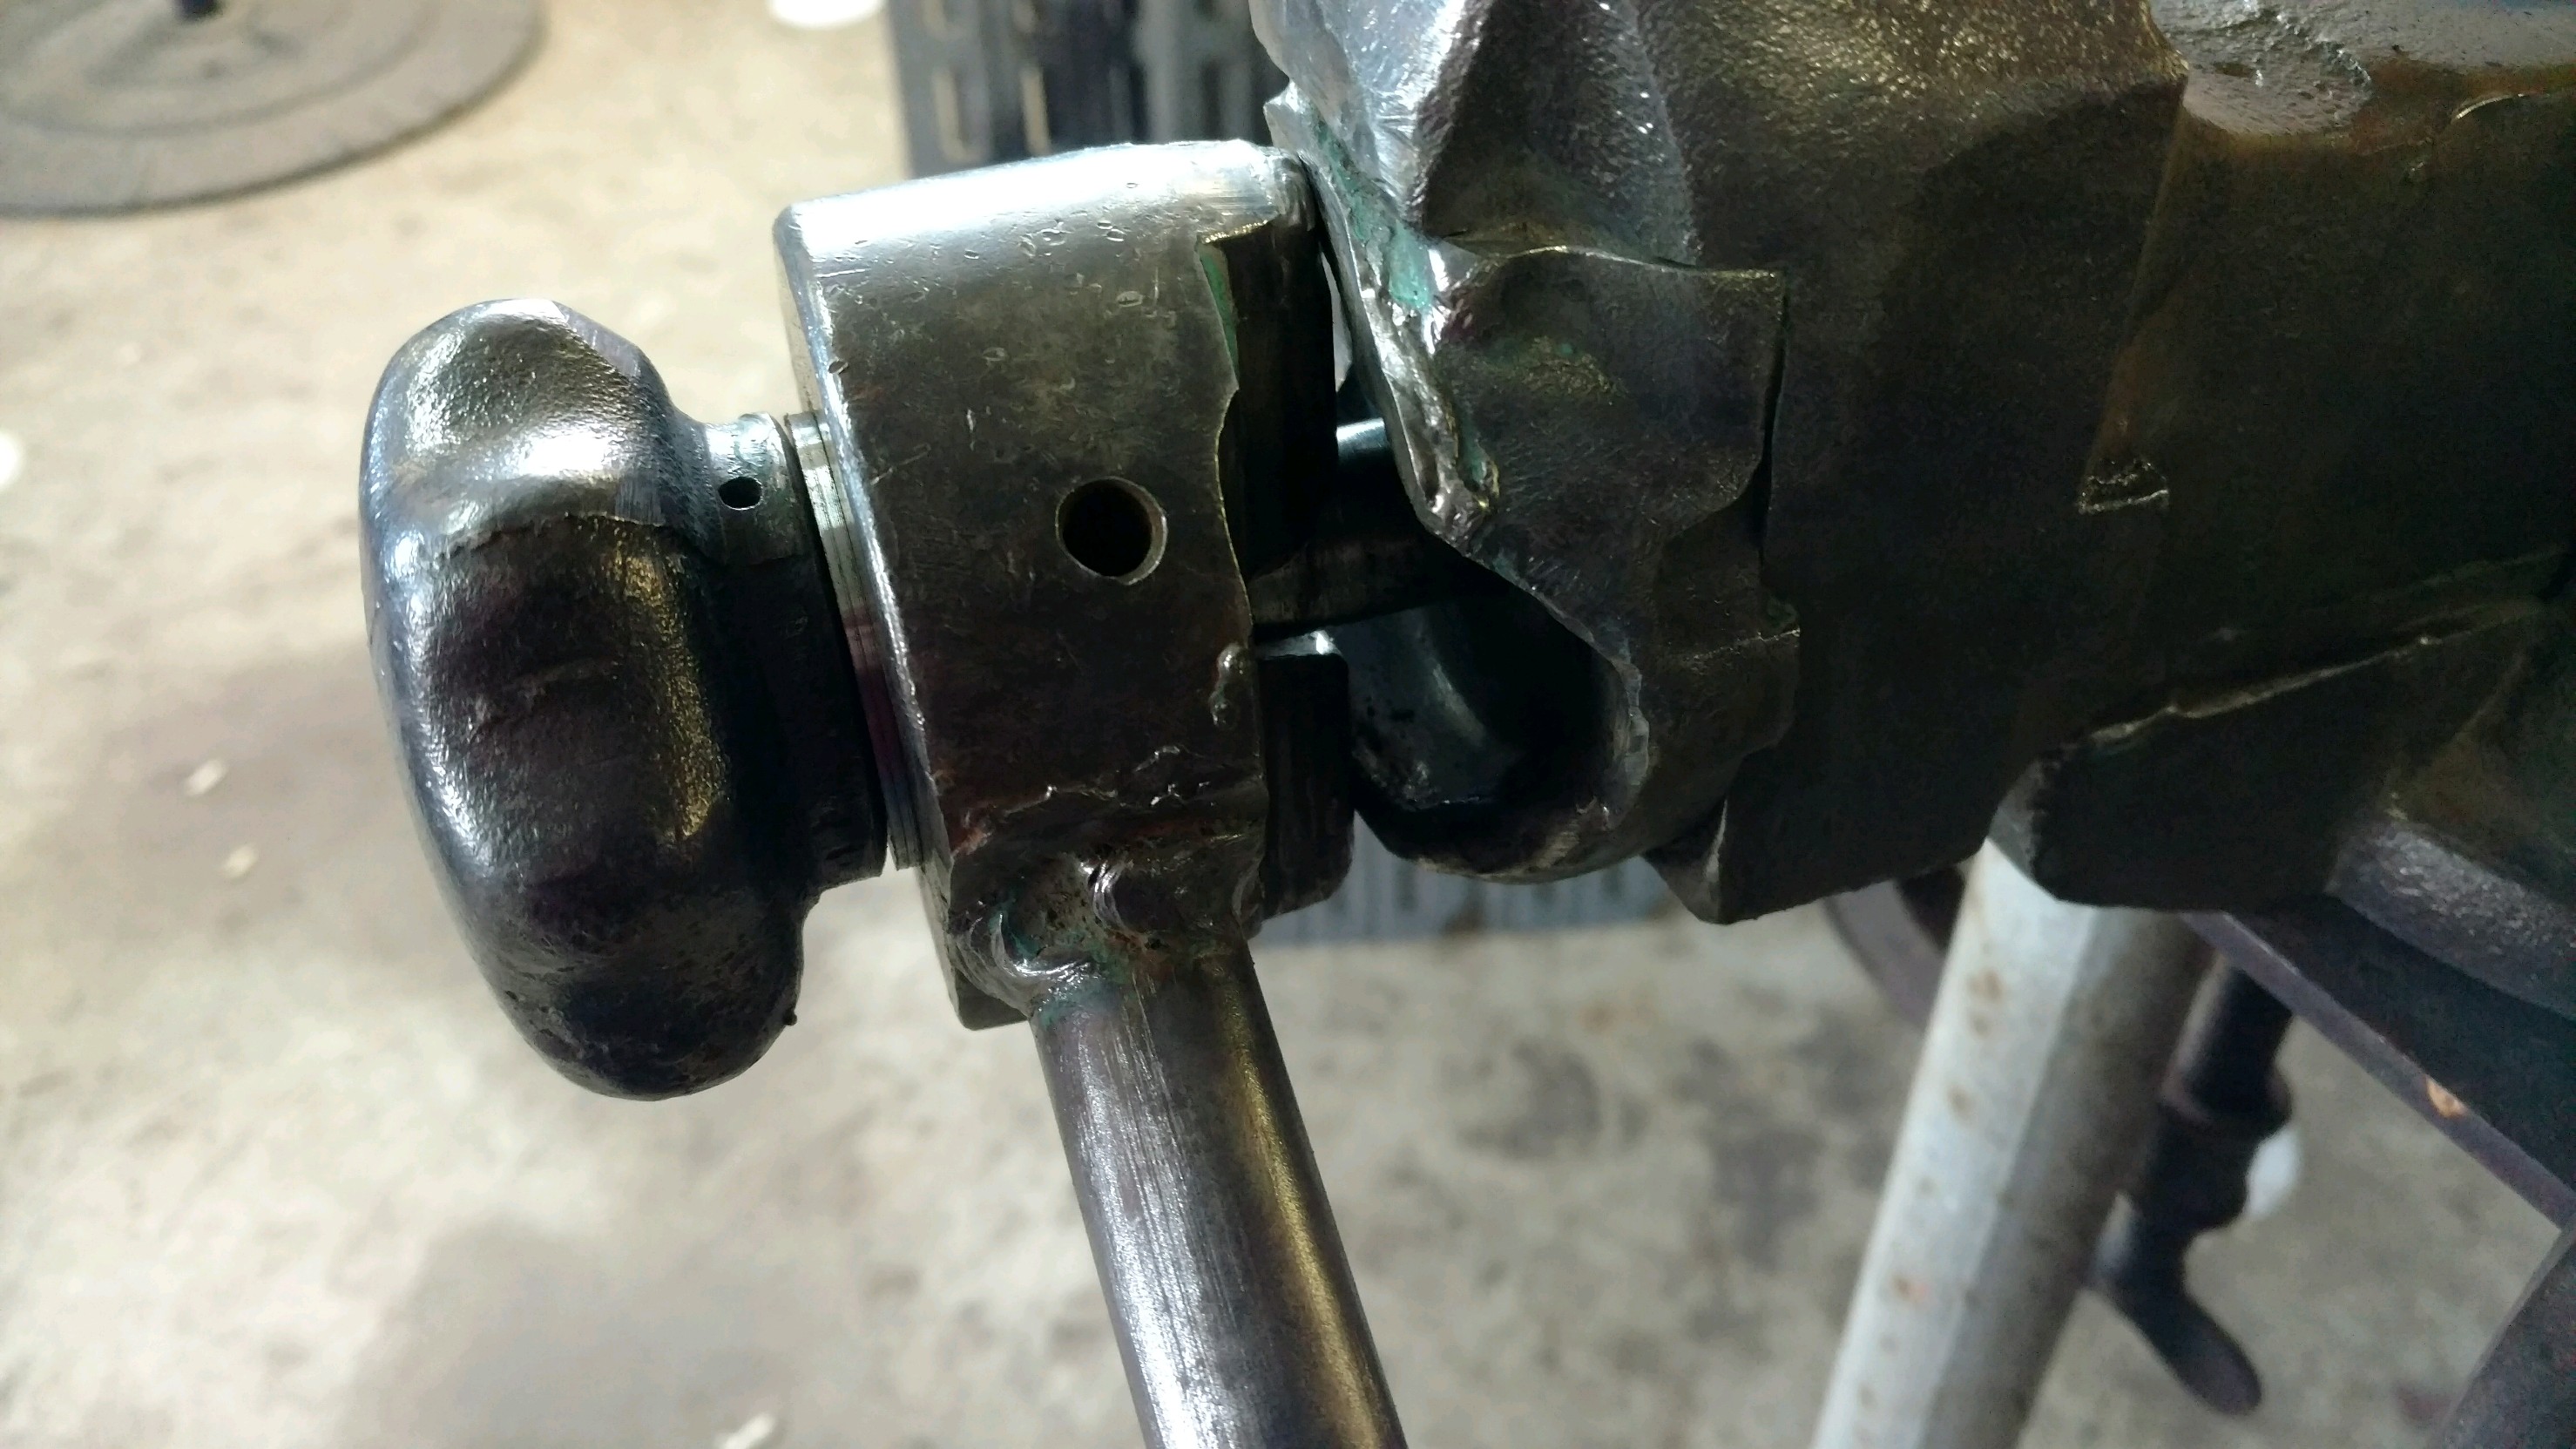
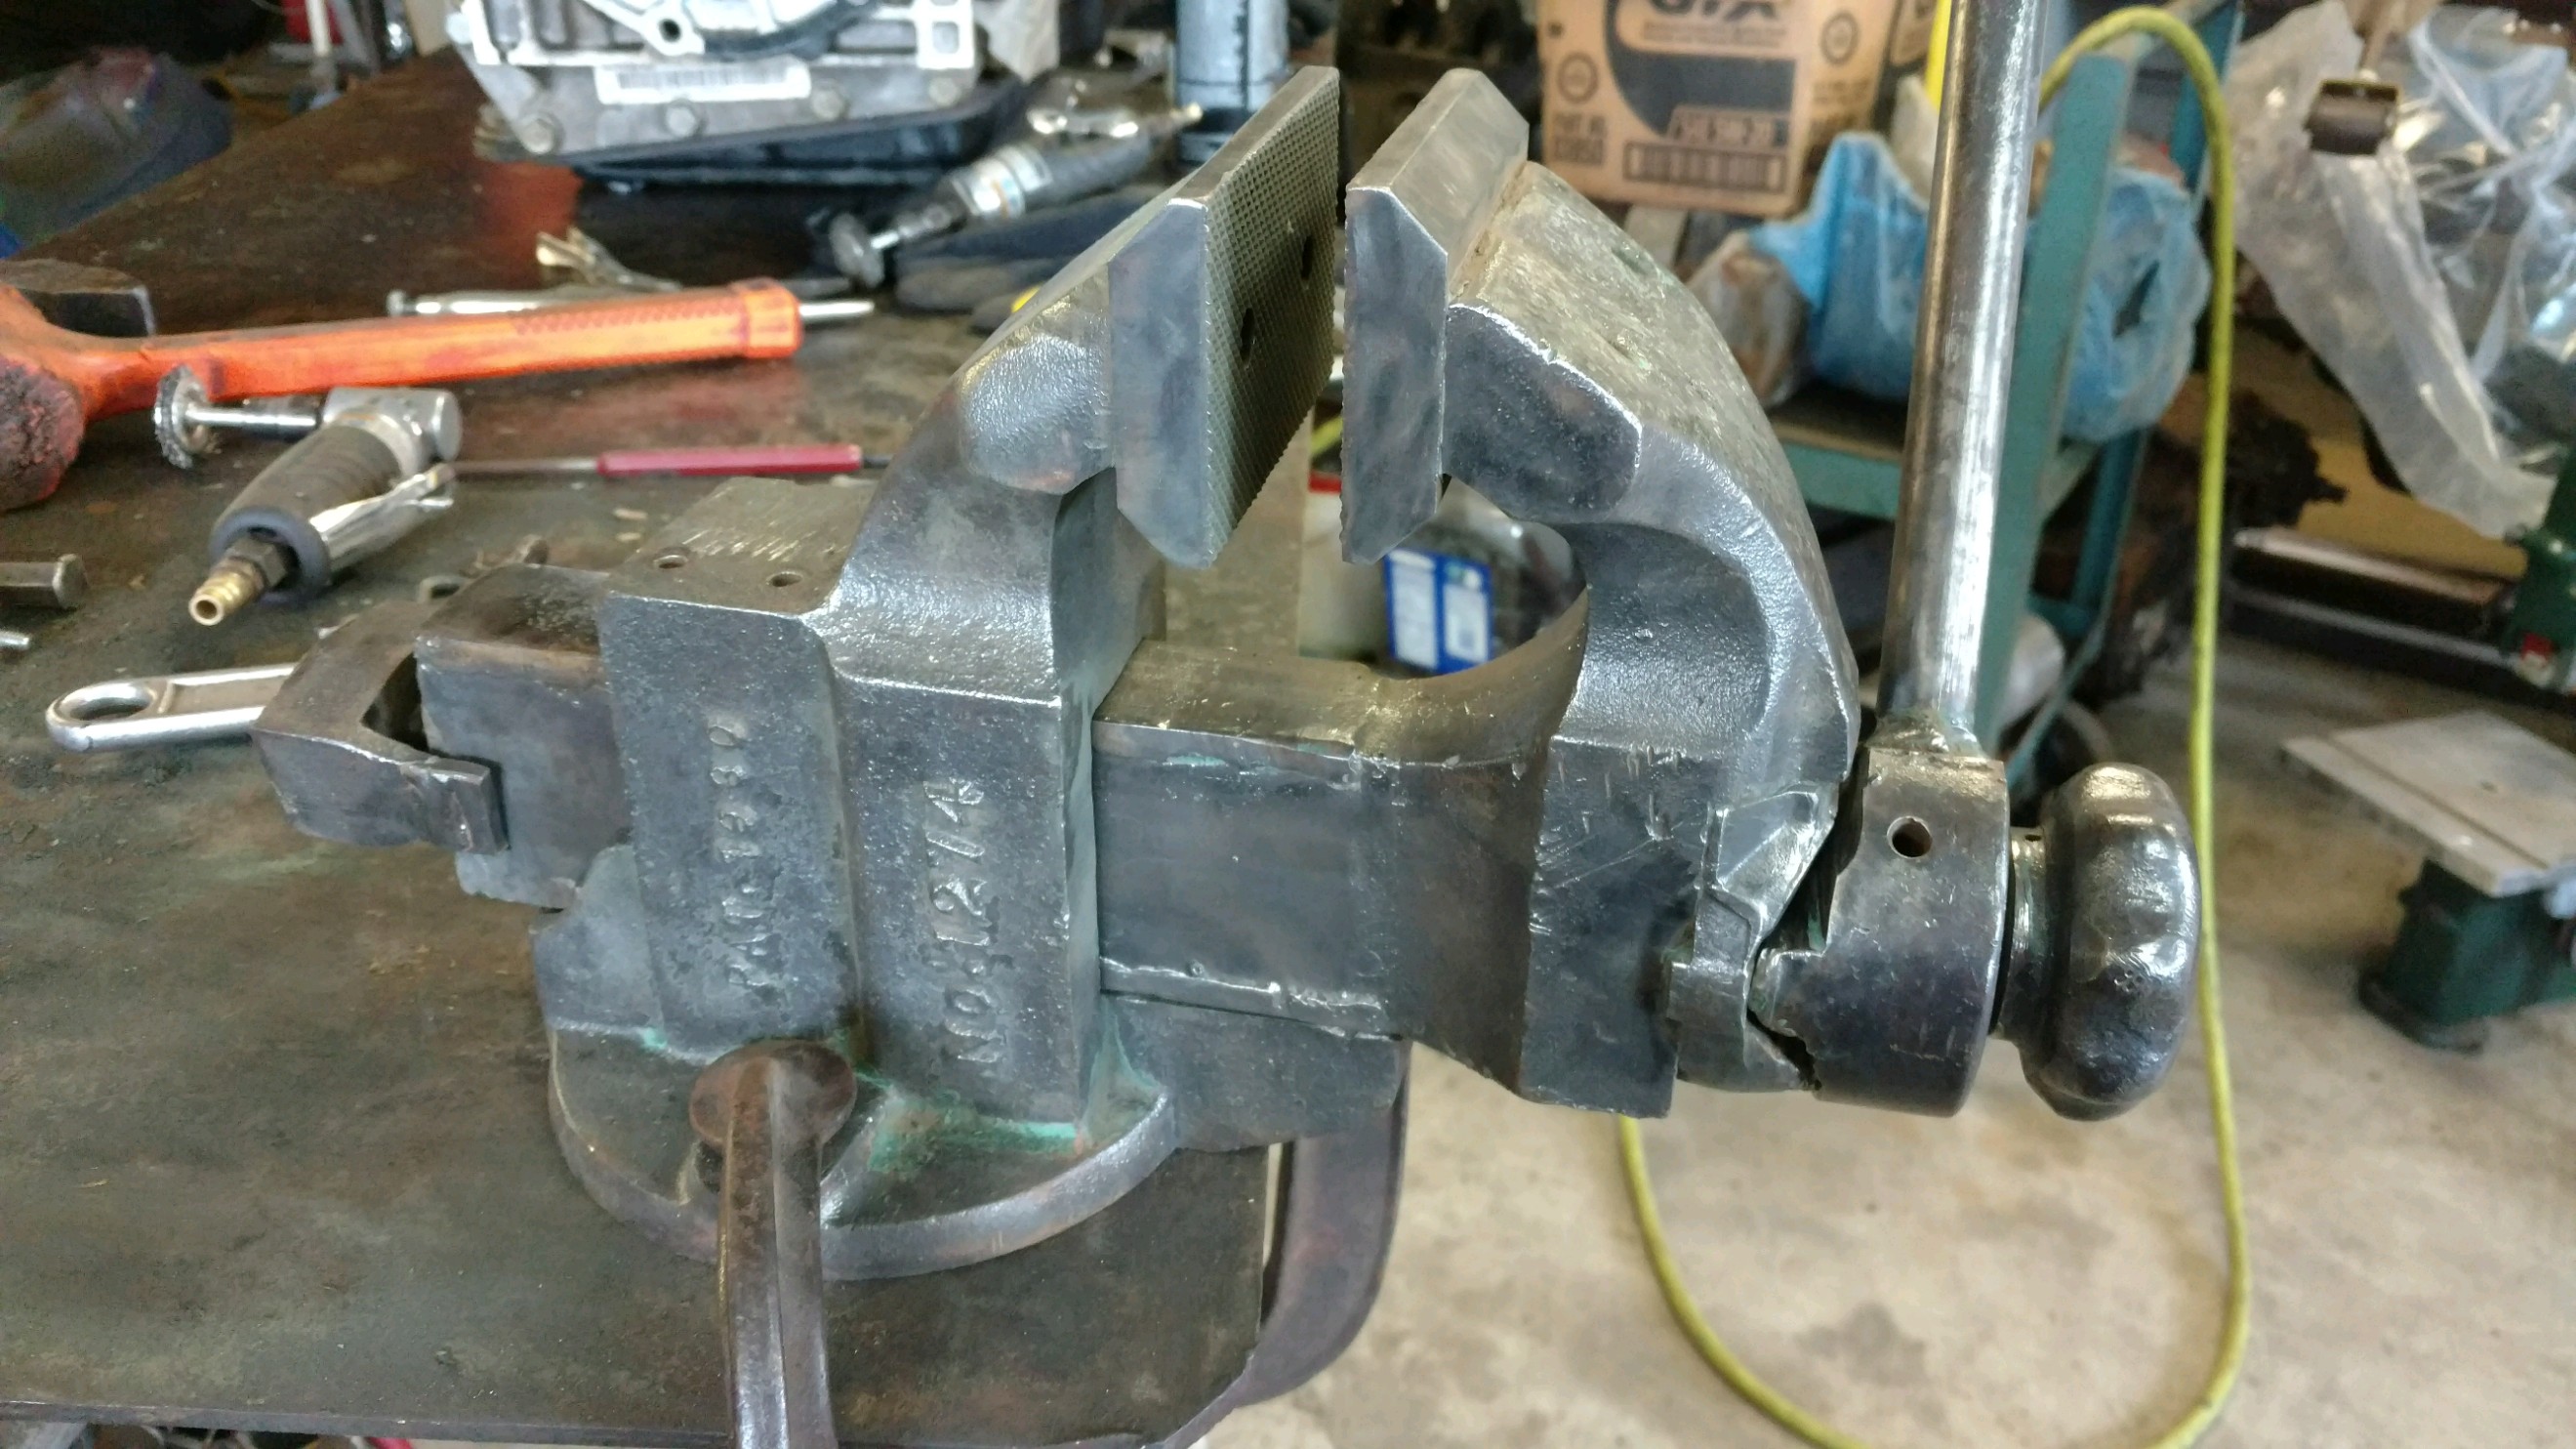
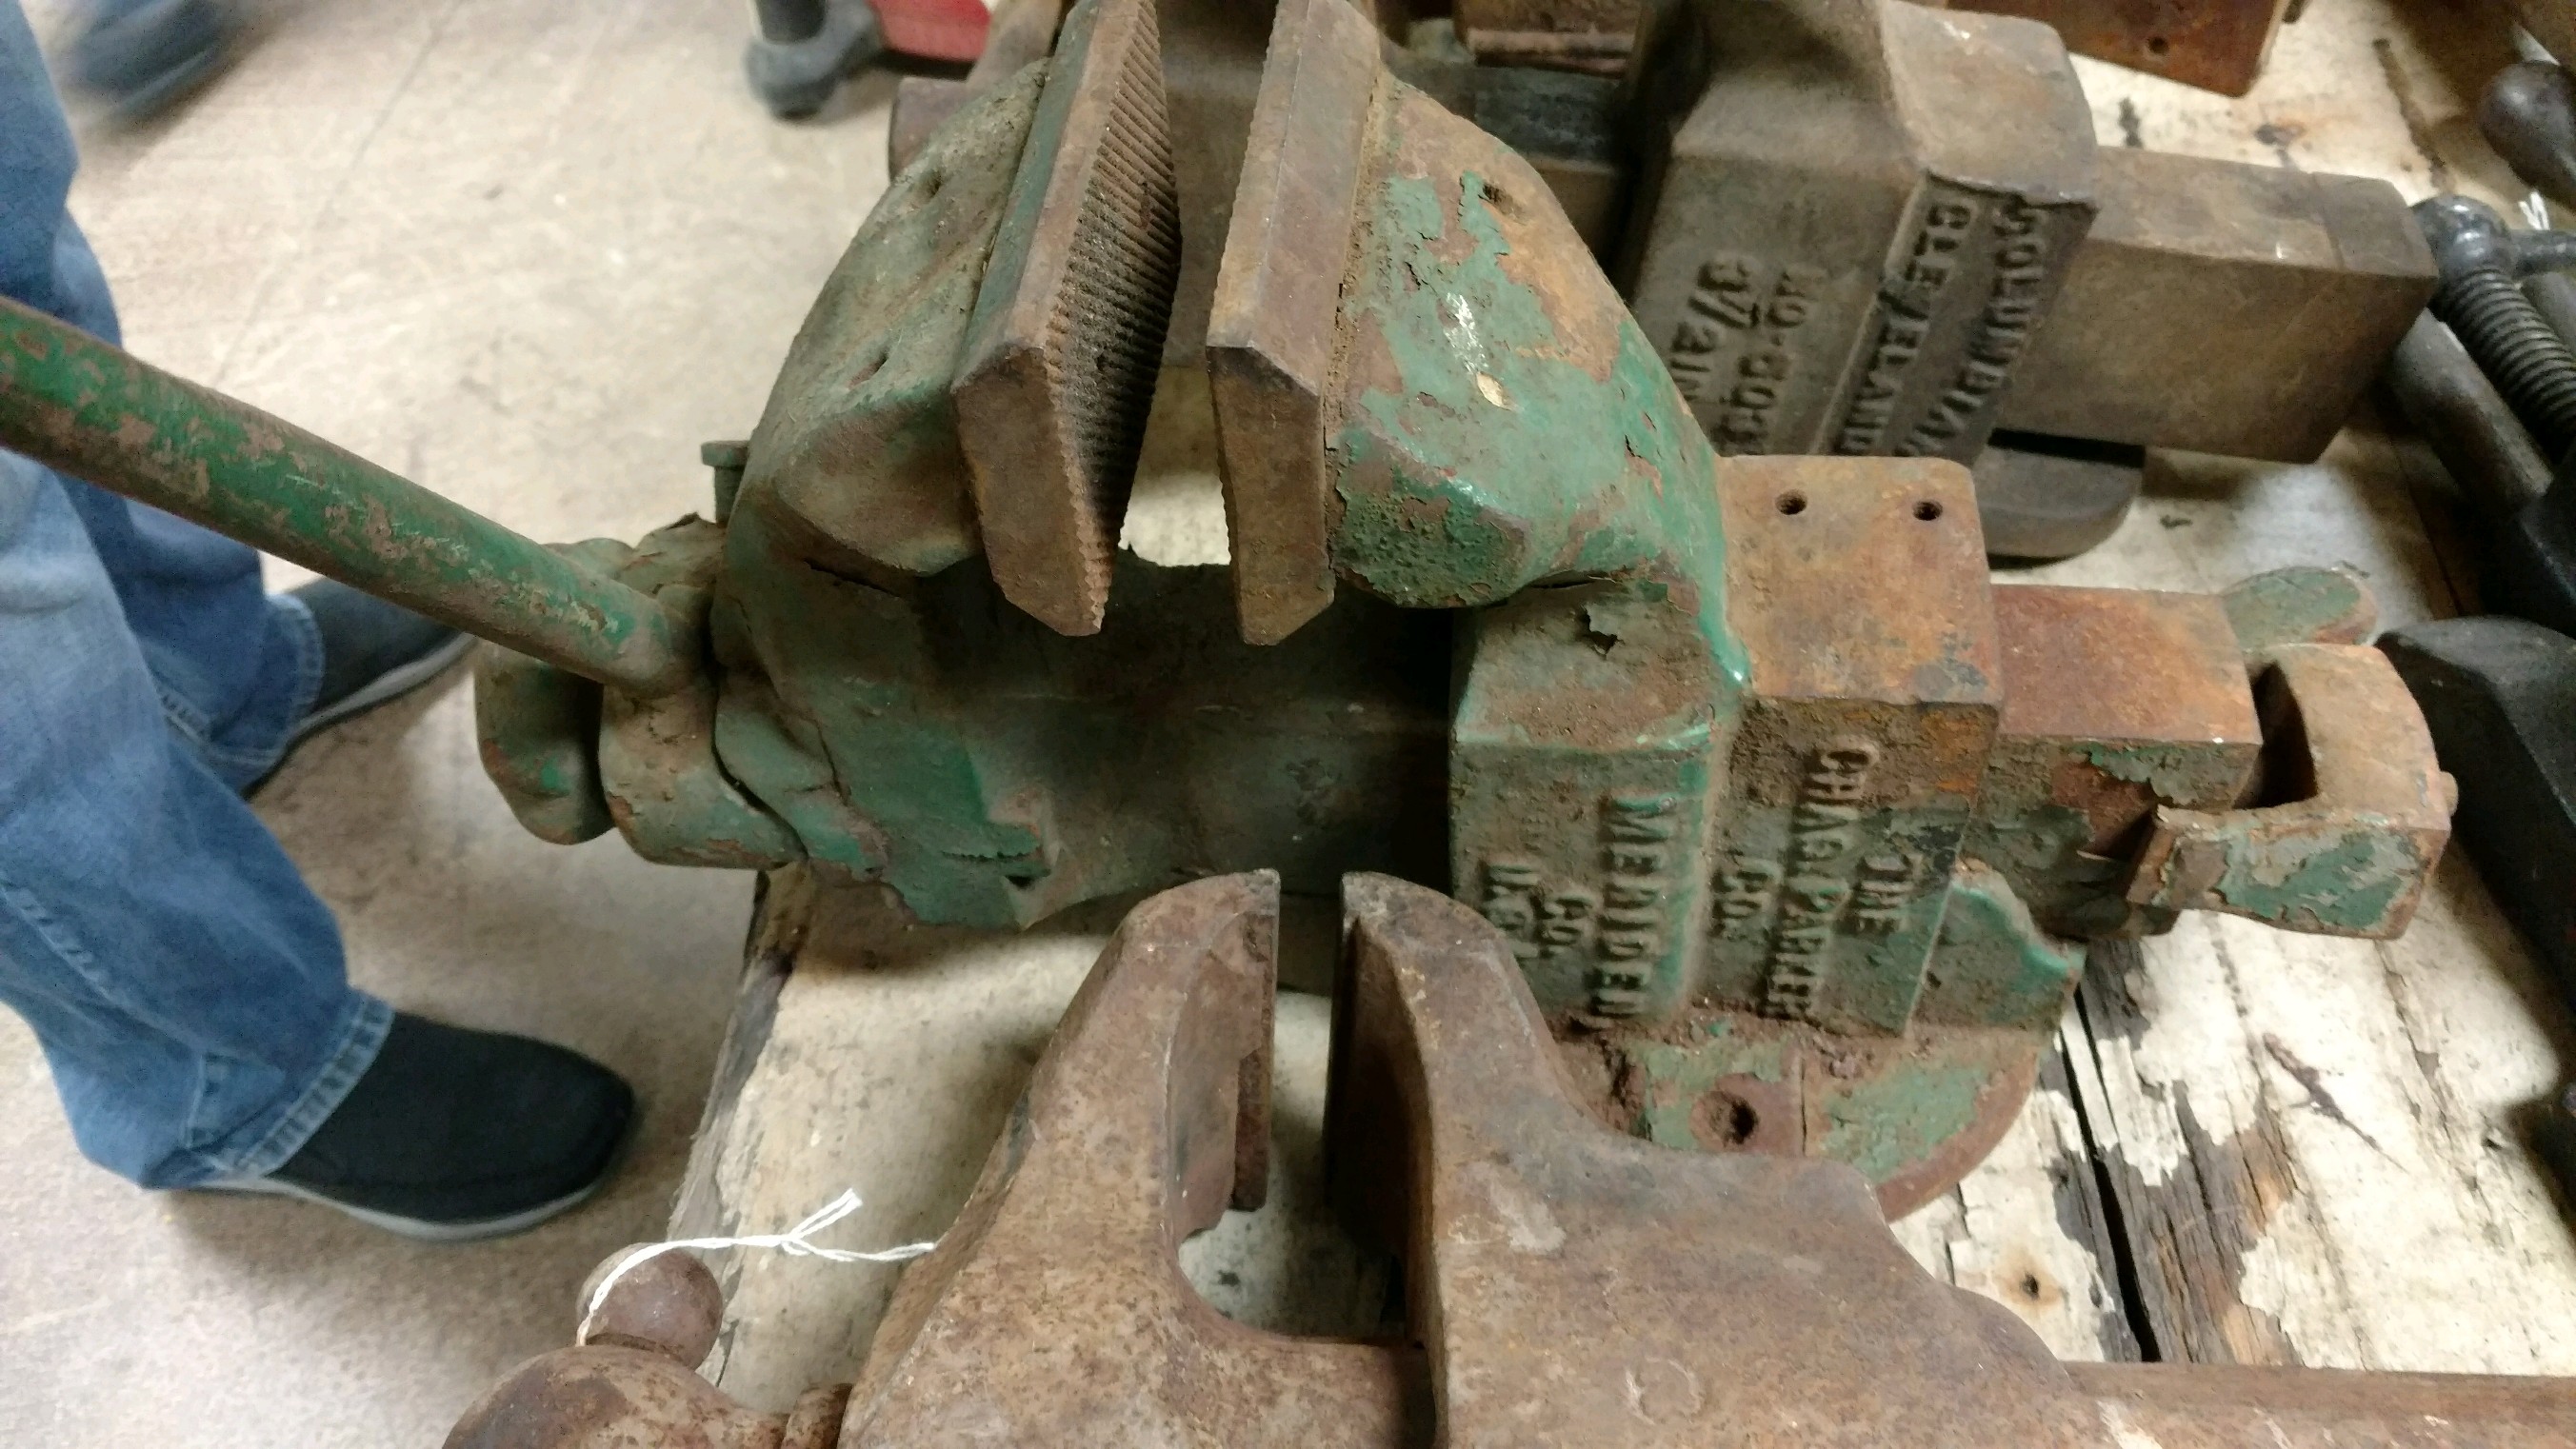
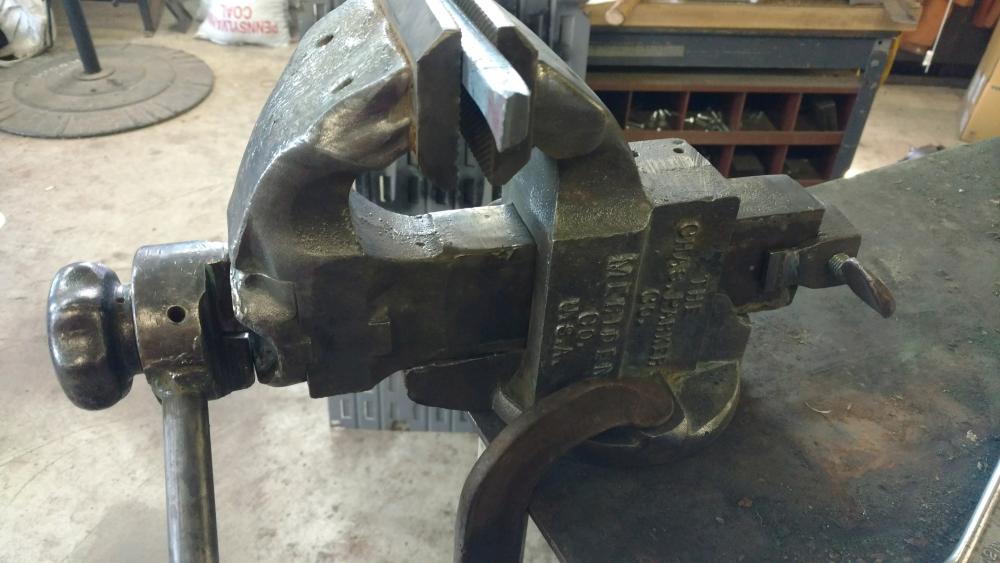
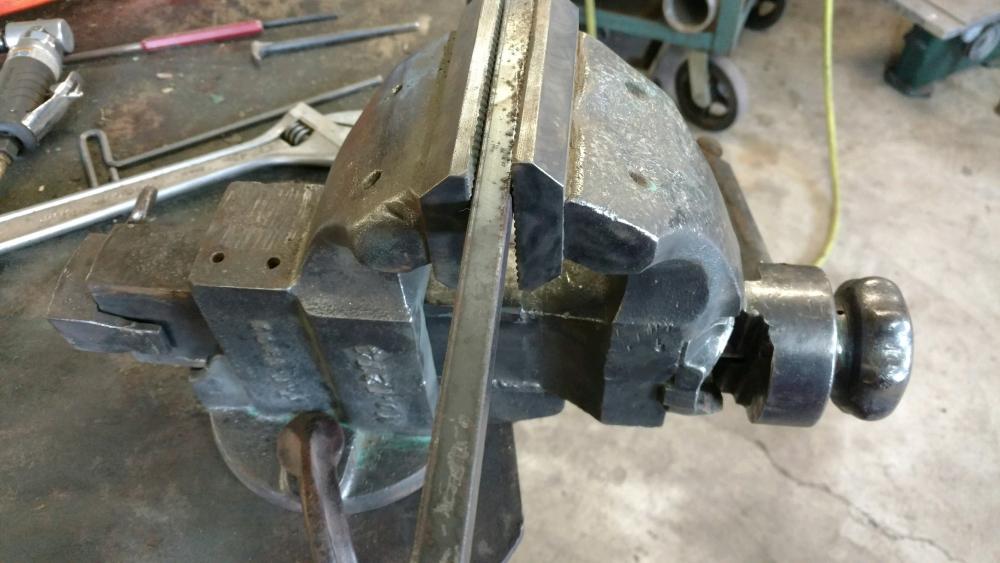
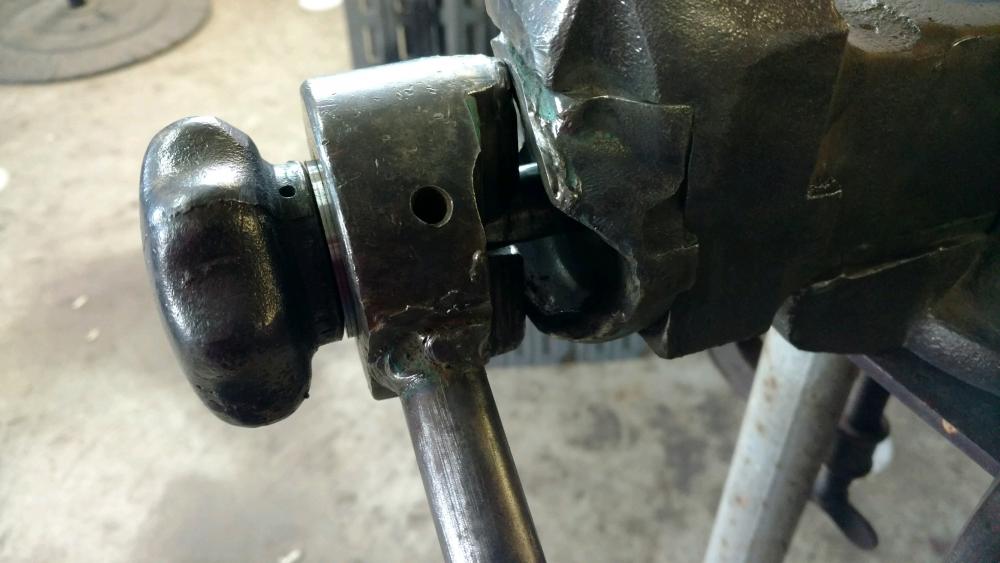
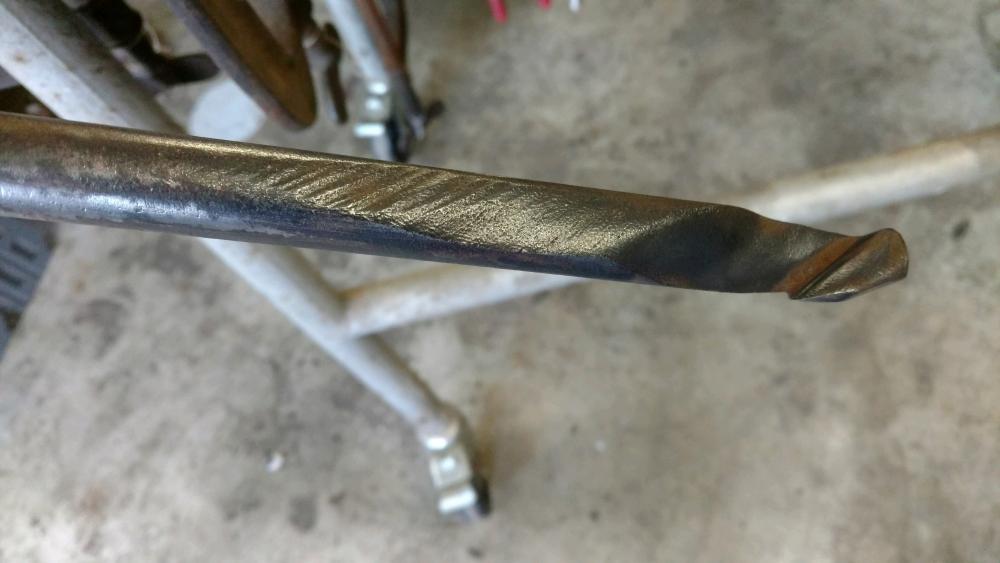
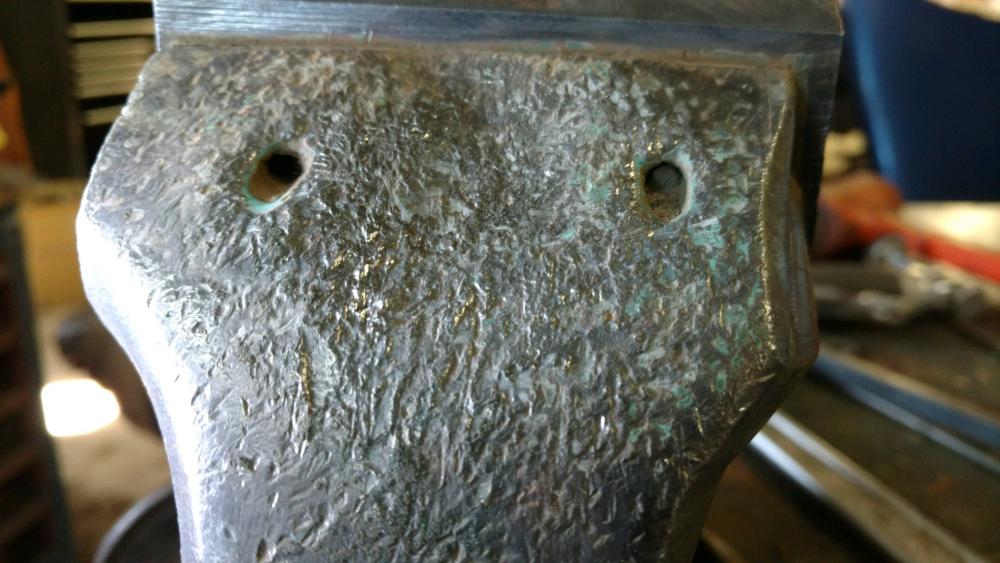
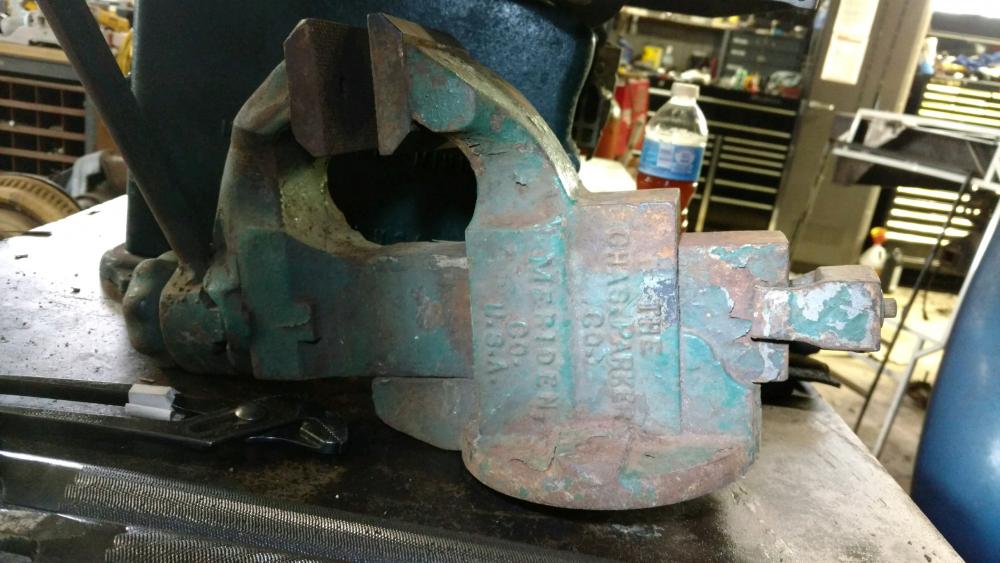
Got it all freed up and clean(ish) today. I'm going to guess that most of this was a shop built modification. Or it has numerous repairs. It works well, but only has an effective clamping range of about 1.25". The back contraption keeps the main screw from turning once you dial it in. She's definitely seem a lot of use. The sides of the sliding jaw are welded and ground to take up slop and the handle is almost worn through from something handing on it maybe? I'd love if I knew it's story, but probably never will. Going to mess with it this week, to see if I can't improve upon some of the repairs and I'll get some paint on it eventually too. But in the meanwhile, here are a few more pictures.

-
Picked this up today at the antique store, trying to find out some information about it. The knob at the front adjusts the main screw, and when you're close you turn the handle about 90 degrees to clamp it down. I'm not sure what the contraption on the back does. The screw is stuck, so I'll have to try to get everything freed and mess with it more tomorrow. I've never seen such a thing so it came home with me. I can't seem to find anything on the internet, hoping to find out if this is a factory made vise or someone modified it along the way. Either way, I think it's neat and could be useful after some TLC.


-
Holy carp this is entertaining.
-
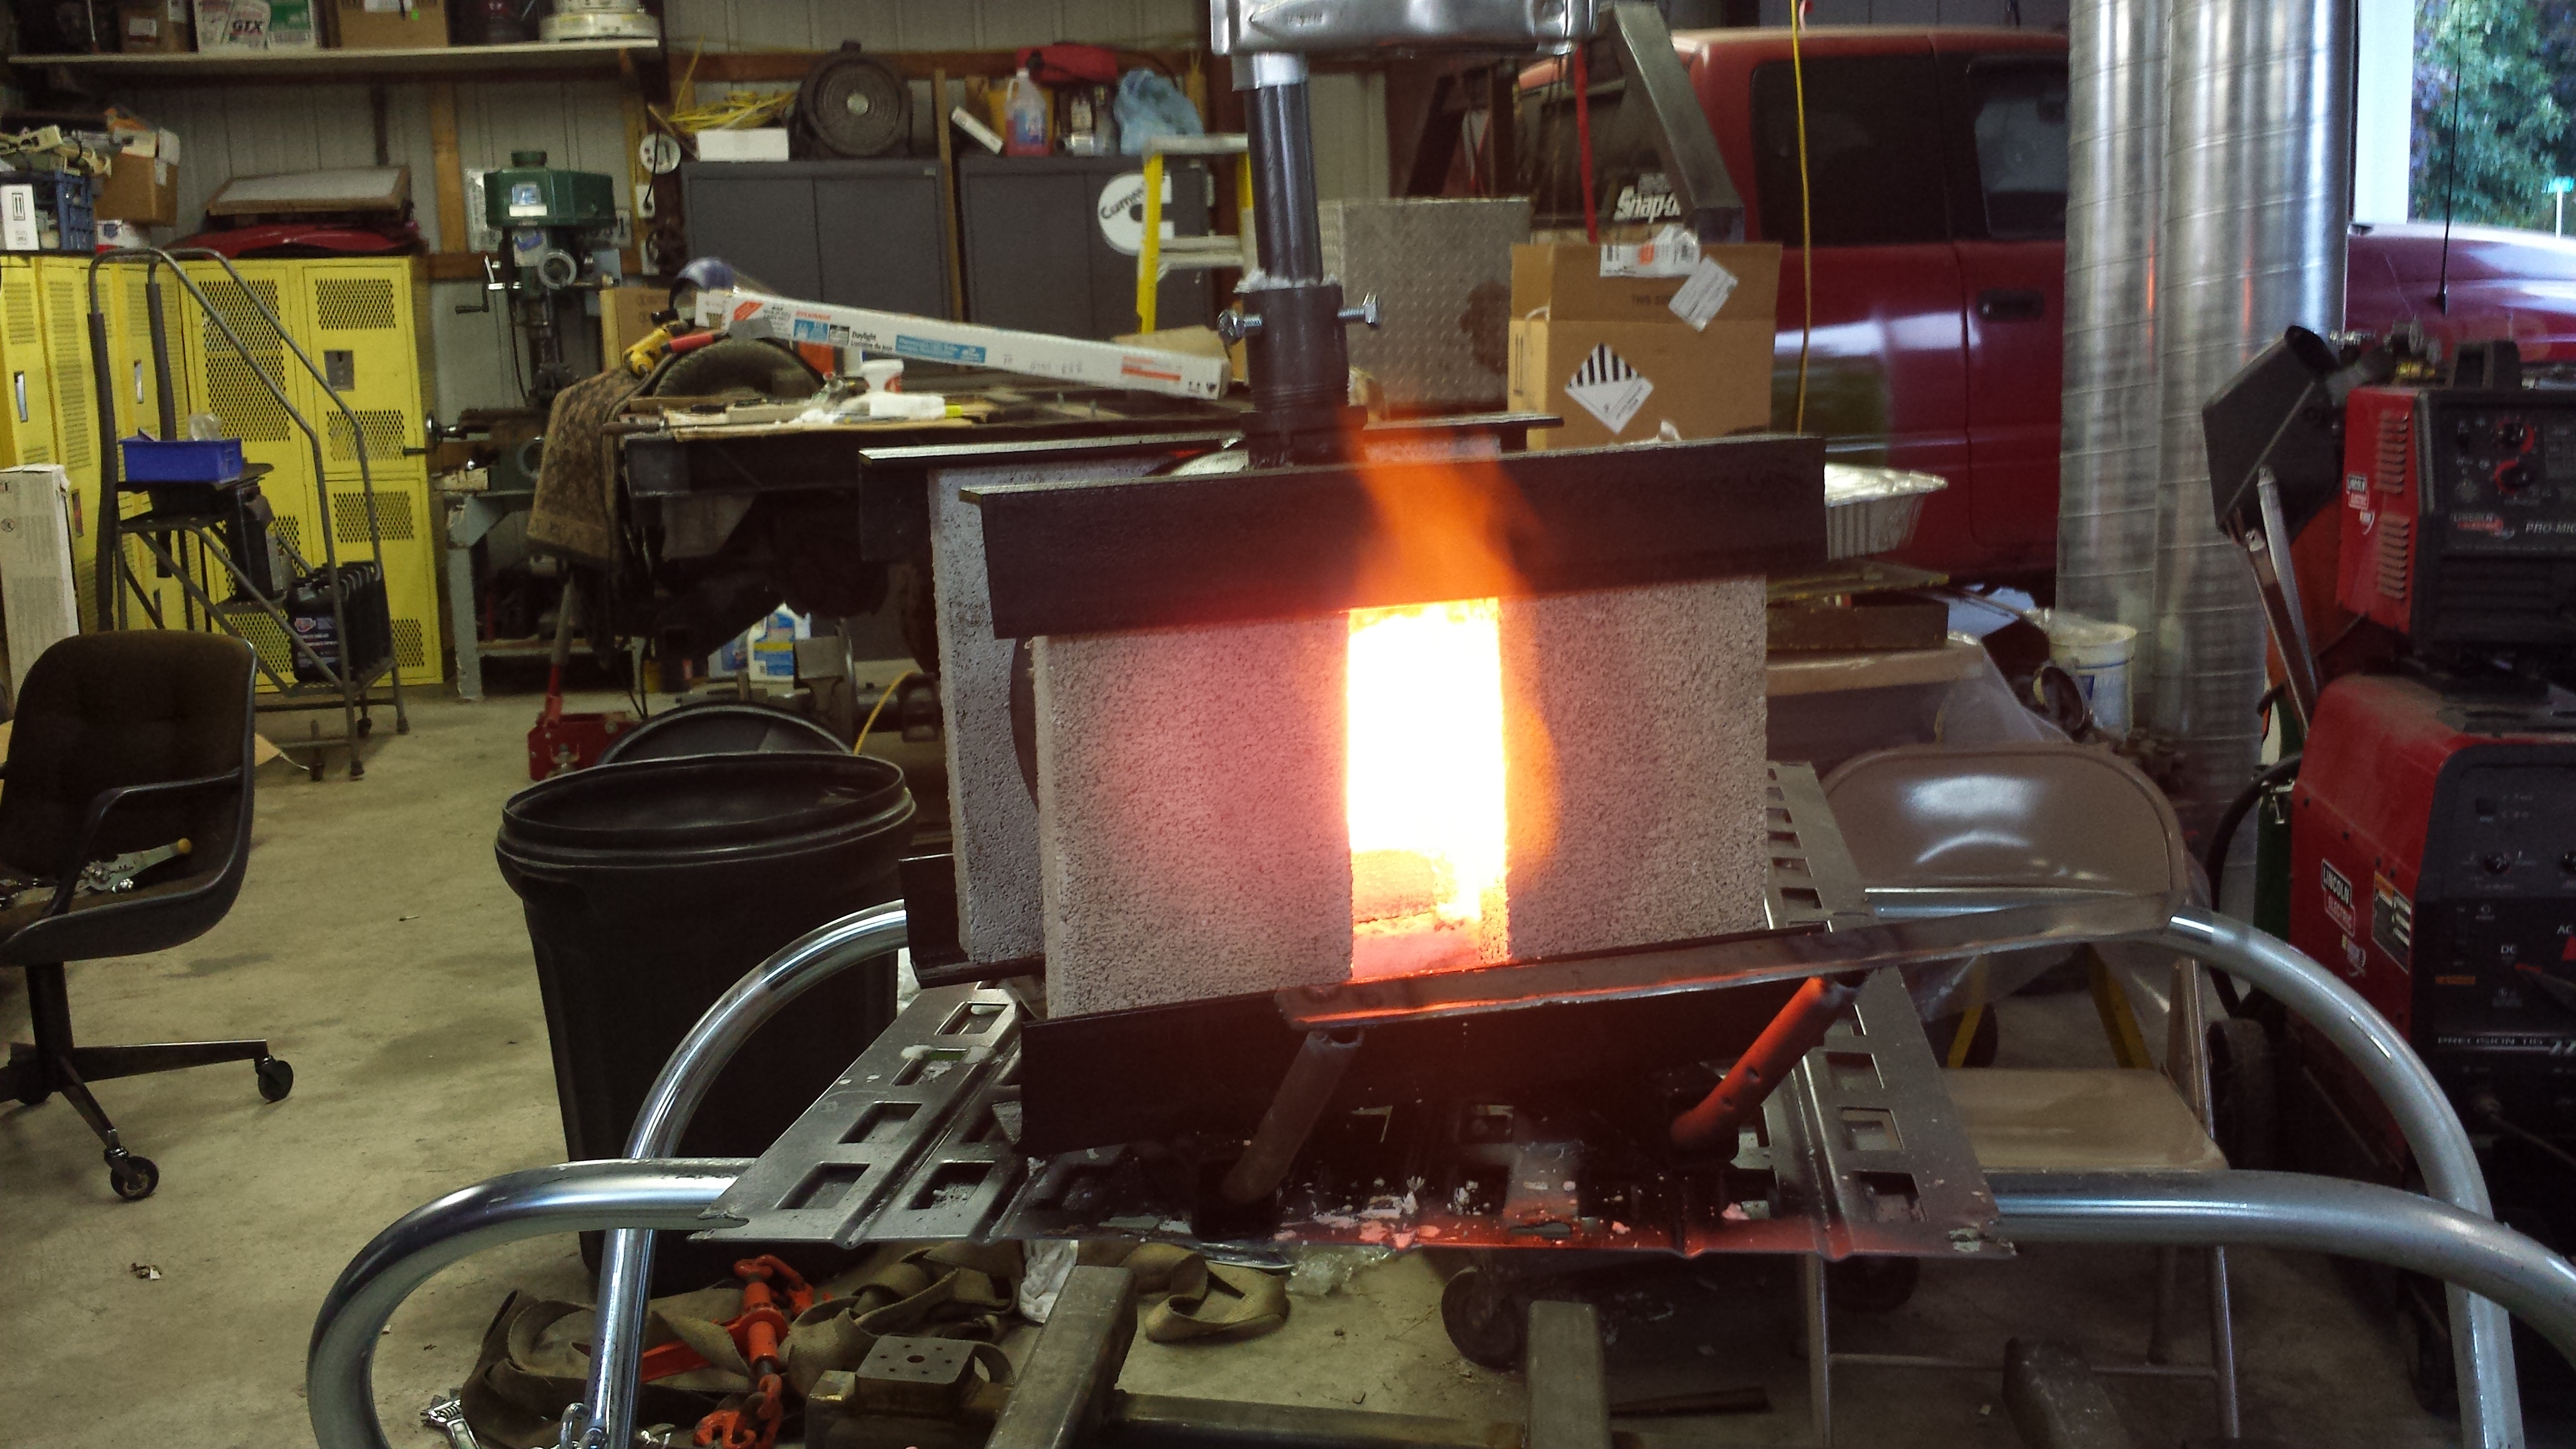
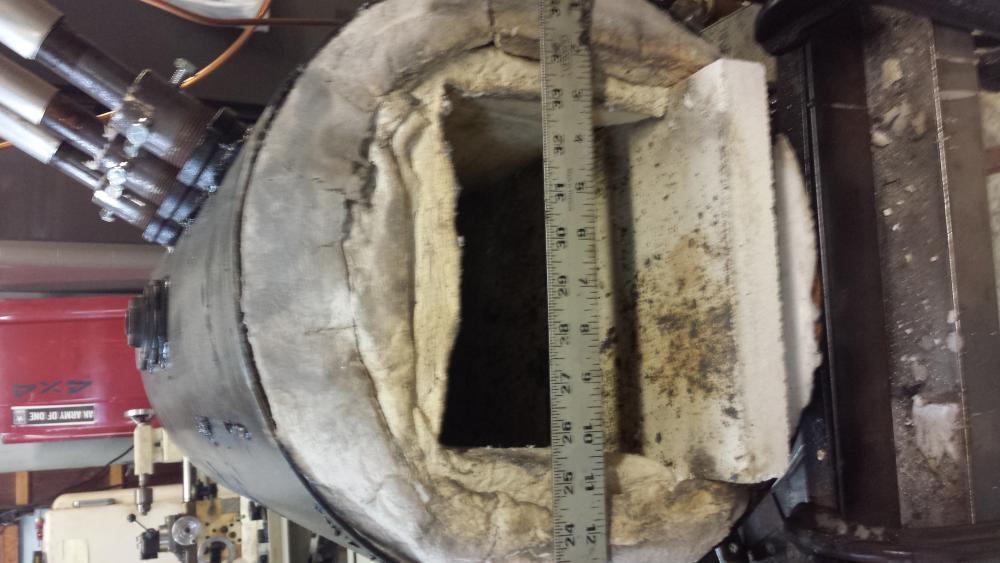
My own desire for multiple burners at first was for flexibility. Being able to run 1 or 2 to get that localization that you're talking about Frosty, if I needed it. But groping in the dark, as Mike said, I still made it too big, and one burner will not keep the whole forge hot enough. I have experimented with a firebrick baffle as described in another thread here. It helps some. Someday I will probably experiment with ribbon burners and make the interior dimension slightly shorter. Right now I'm content with the smaller one. I have jabbed the kaowool a couple times since it is so narrow.
-
-
I can only speak for my own motivations. There is so much information out there, and before you actually begin, you have no idea about what you need past the name of an object. Other than the images of blacksmiths with seemingly huge brick coal forges I had little experience with the craft. A few Google searches later and I find more big ones than little ones. I have an air tank, and go. I built my coal forge first. And I had trouble getting anything good out of it. Nevermind the fact that I had no idea what I was doing, how to control the fire or what kind of coal to use. Must be it's too small. Fast forward 6 months or so, I start to understand some basics, have a little bit of first hand experience and am able to weed through the mass amount of information easier. It kind of hit me one day watching a video of someone "teaching " how to forge some random object, and I said to myself 2 minutes in, "this guy doesn't know what he's doing." A year or two ago I would've not been able to tell the difference. I'm not saying I'm an expert of anything, I certainly am not. My long winded point is that it is easy to get misguided when you don't know where you're going. And the learning curve is exponential.
-
-
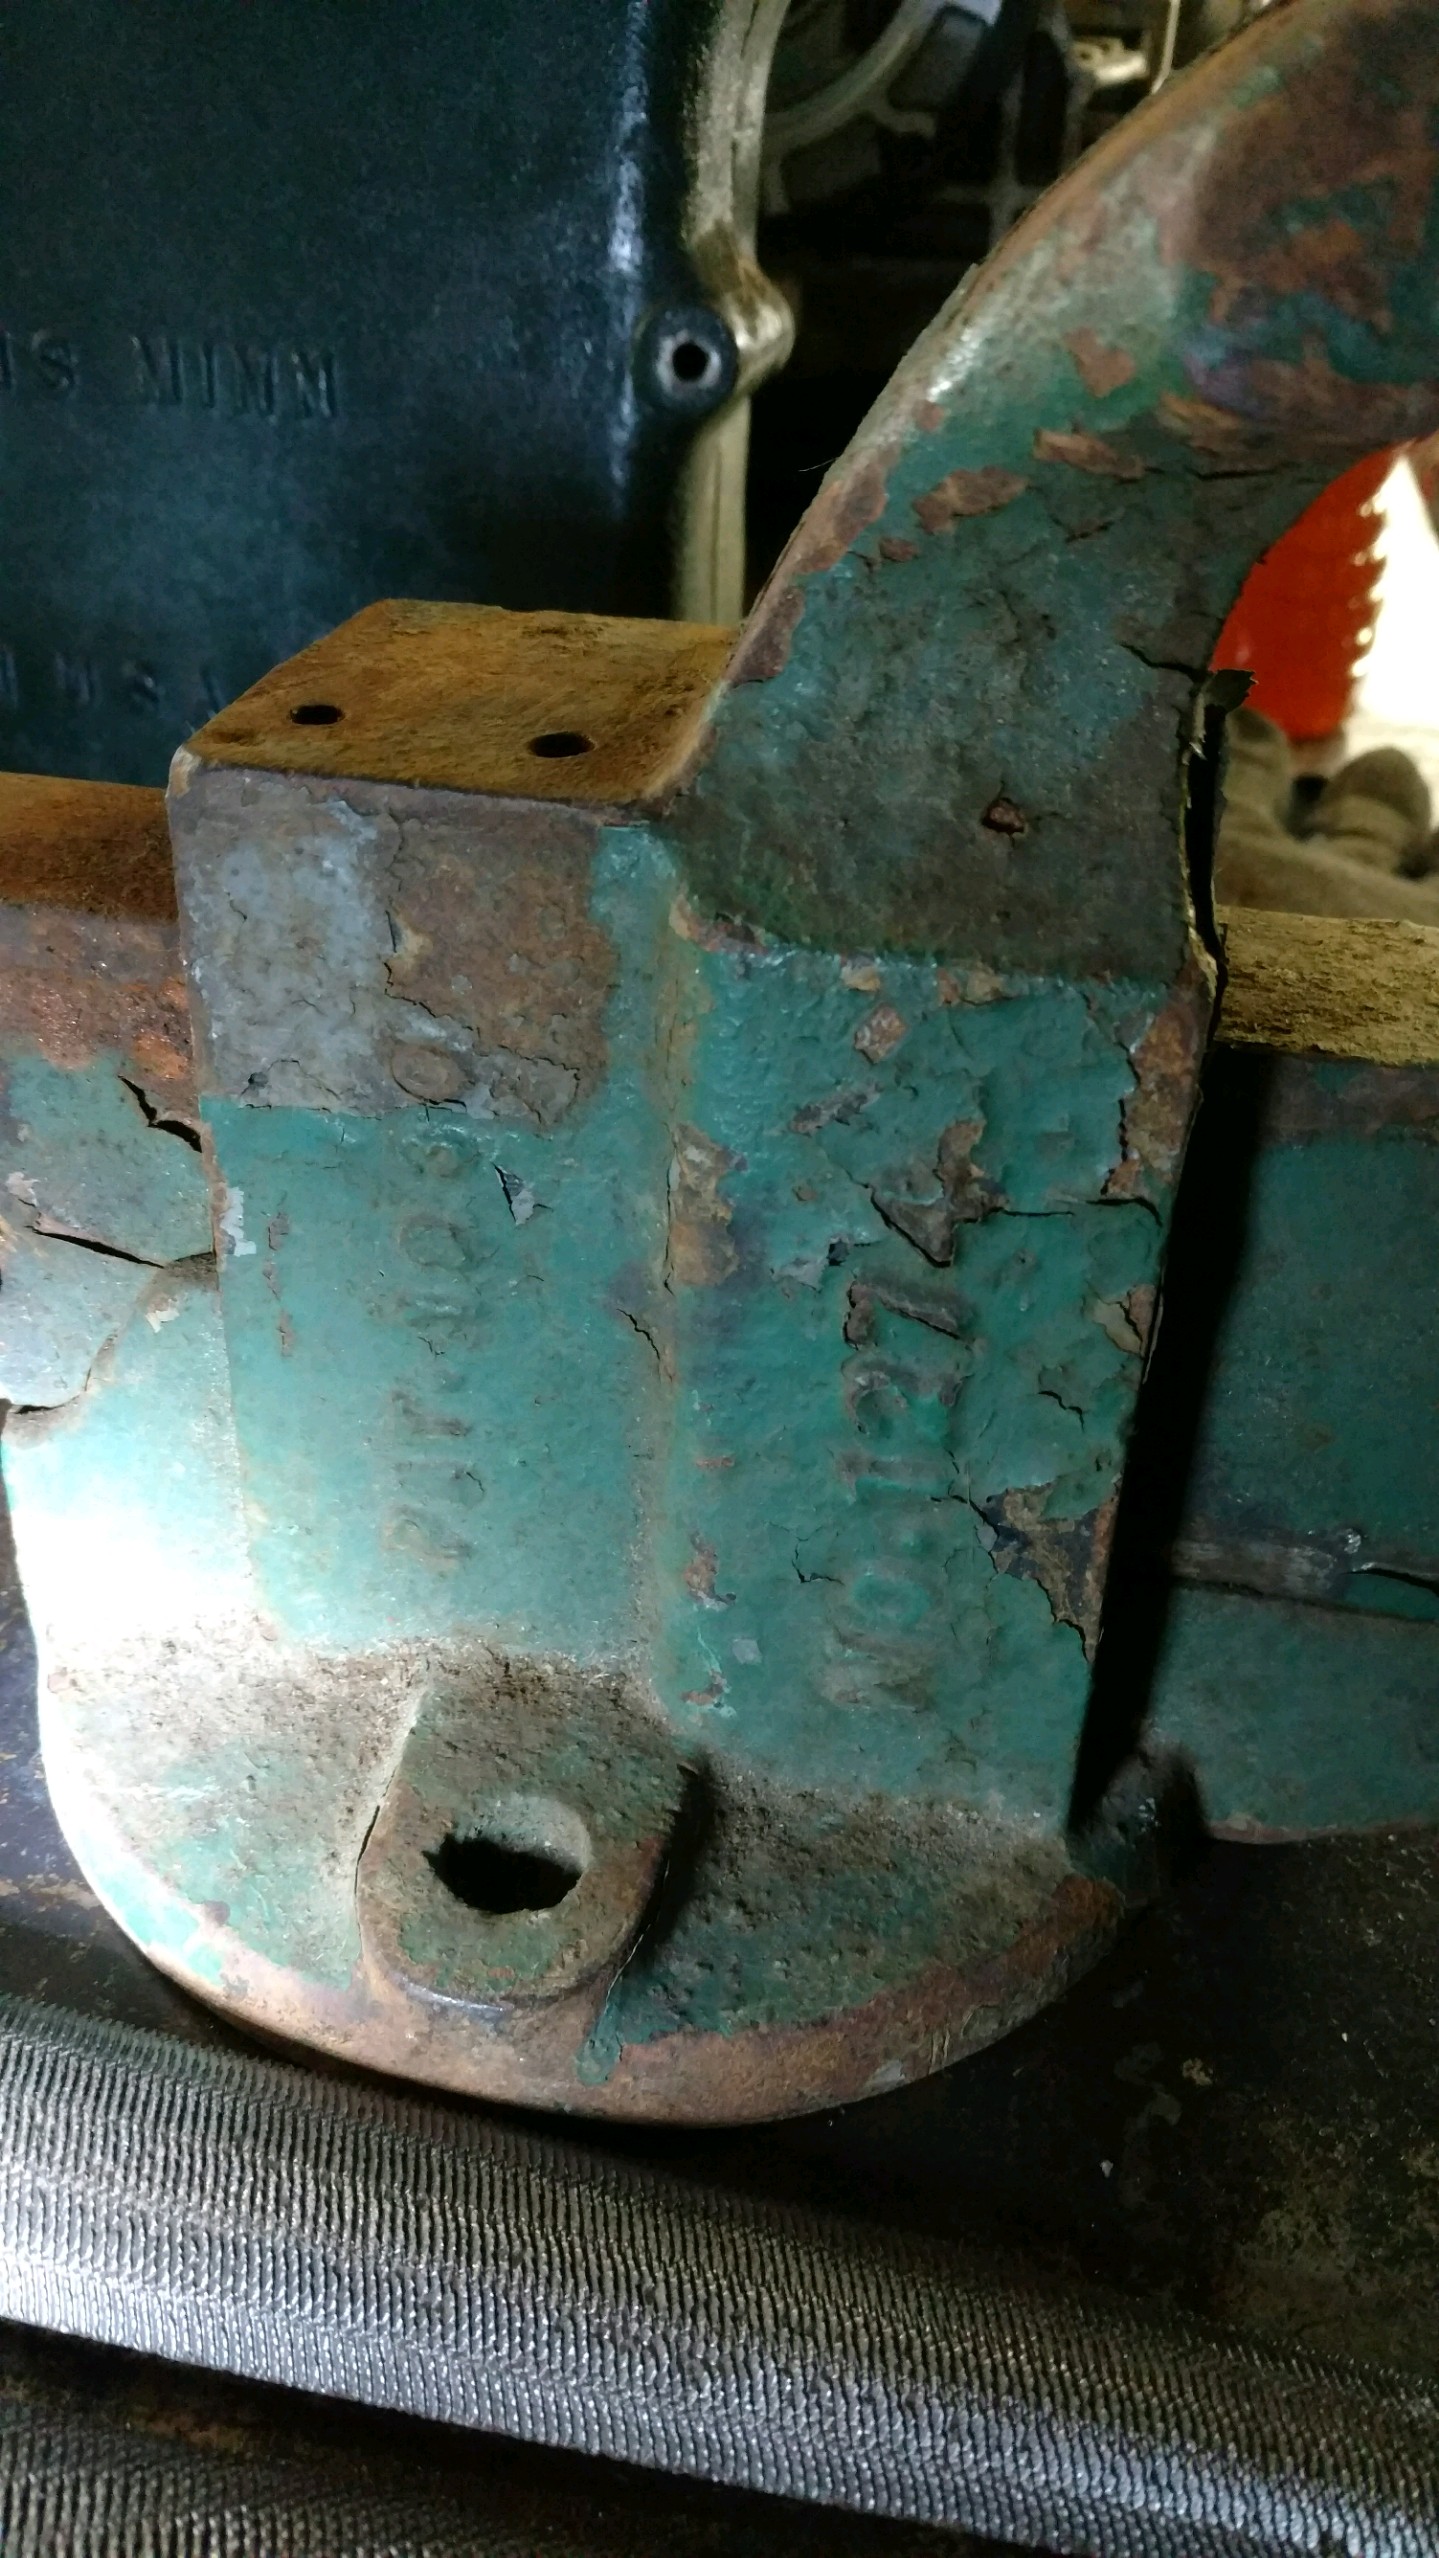
I have one just like the top one. I was told by an antique store owner that they're railroad hammers, but was offered no information on their intended purpose. I can't speak for how accurate the railroad bit is, but they're all over Ohio. I see them in the antique stores quite frequently. I use it as a really big hammer. Plus it looks good
-
Thanks Frosty, the are some version of them yes. I did not have the actual plans, but I had seen pictures of Mikes and the Trex, and looked at the basic design of a handheld propane torch. Since then I have read alot here and learned about several things such as how to figure tube length and the size of the air openings. Before i just played until they worked. I'll give it a better go one of these days but for now they're working ok.
-
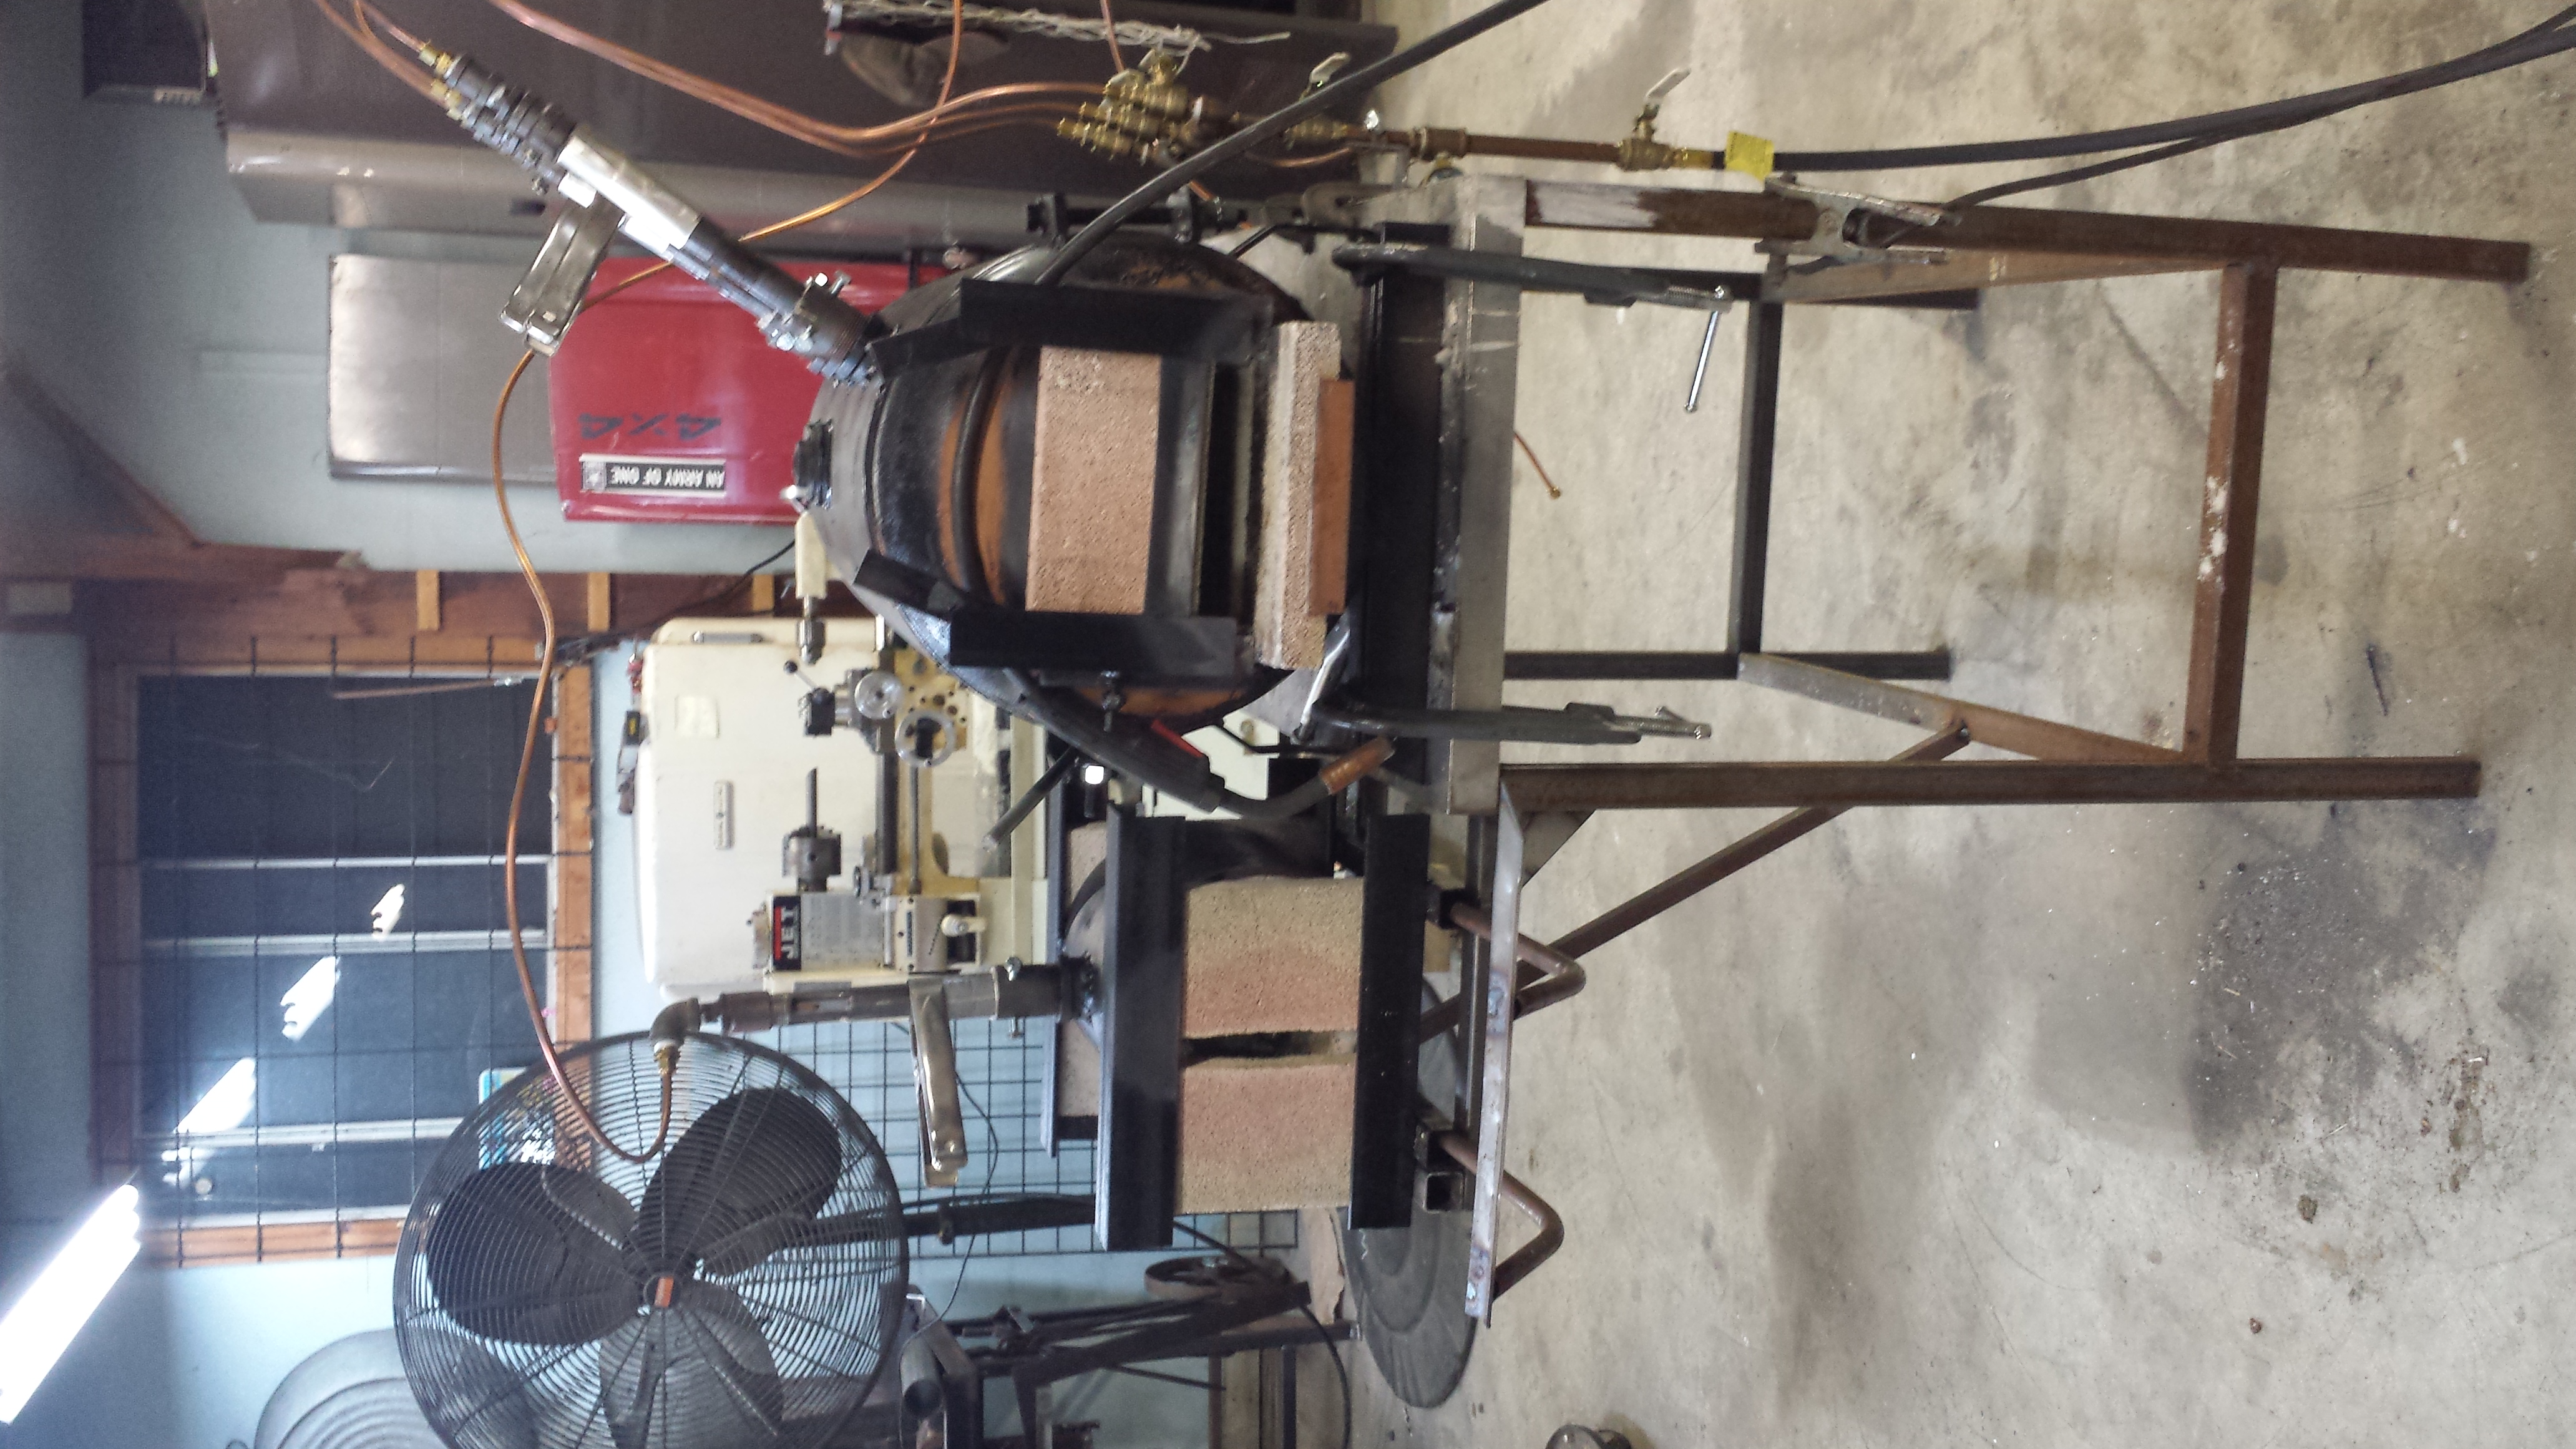
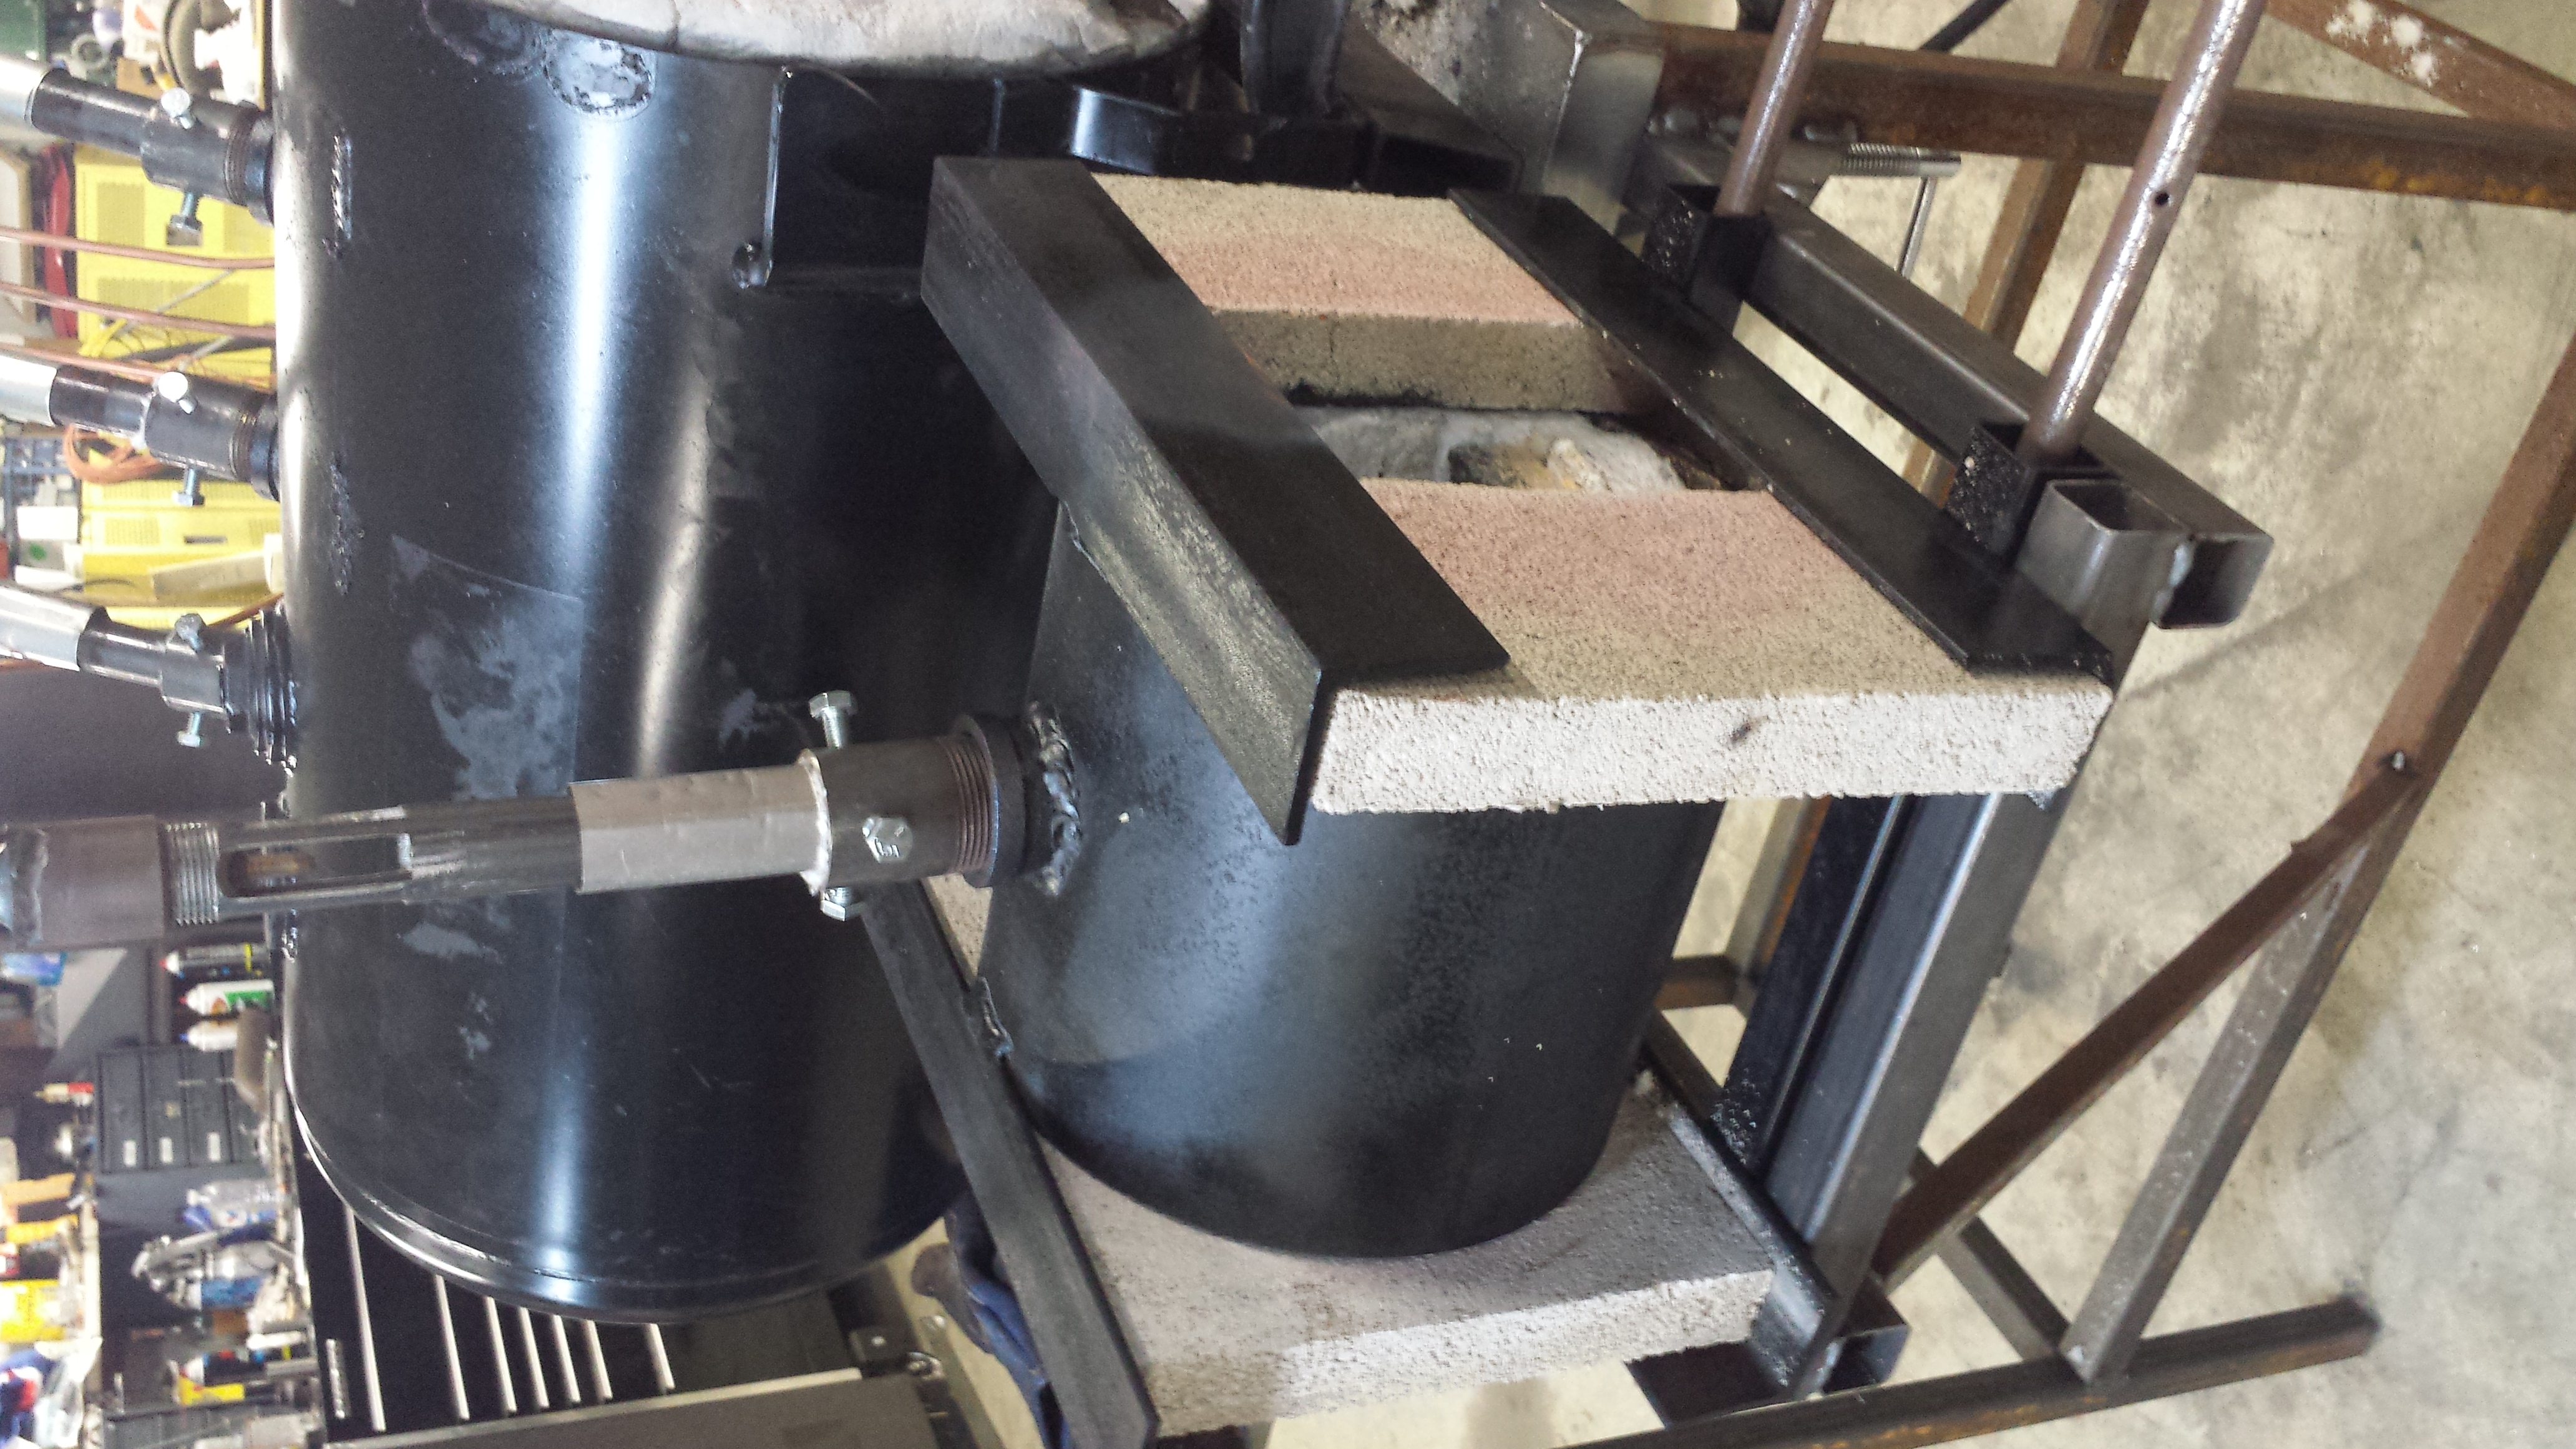
I just wanted to share my experience to hopefully help steer anyone away from the bigger is better newbie mentality. I obviously fell into it and most I see post here do the same. So I'll just post a few pictures of my first and second. The first, built from an old airtank, uses 3 burners, interior dimensions 9"wide, 6.5"tall, and 22" long. I spent probably 40 hours on it, and way too much money. It works well for large pieces, I never tried to reach welding temp with it, so I couldn't say for sure. I only have a 20psi regulator on my tank and I doubt it honestly. It does have a brick floor as well which wouldn't help. The second forge is a 8" ID pipe. Mine happens to be 1/4 wall but something that heavy is unnecessary in my opinion. 2" of kaowool. And a firebrick floor. Which is failing fast. Go for the kiln shelf that everyone recommends. I have some ordered myself, to replace the green glass that my brick has turned into. Interior dimensions are 4.5" wide, 5" tall and 8.5" long. Hard fire brick for the doors, I'm sure there's a more efficient solution, they are failing too. This thing will reach welding temp easily. Only uses 1 burner, and I've used it for a month at least 3-4 nights a week on less propane than I could run the 3 burner forge for a couple days. I built it out of scraps I have laying around and left over kaowool and itc100 from the big one. If you bought everything I'd guess you'd have maybe $100 in it. It took less than an hour to build, minus the burner and waiting for the itc to dry. Feel free to critique either anyway you wish. I would put the burner in tangent as is often suggested if I did it again and come up with a horizontal door somehow like my big one has. But works great as is. Maybe even 2x 1/2" burners instead of the one 3/4" Build the small one first! Easy, cheap, and will get you going far quicker. I found this forum about 2 weeks too late to save myself....don't be like me PS don't mind the wild copper line, I was adding that side shelf and hadn't finished plumbing it in yet. Forgive the sideways pictures.


 Just about a month ago I had a little tiny piece of scale fly up and burn me in the nose. Before that I was lax on wearing eye protection while forging, half and half. Not anymore. I've been burnt in the eye before by hot metal, it's not pleasant and I am in no hurry to have it happen again.Buzzkill, I missed this earlier. Thanks for the reply. I've noticed that exact principle in mine. Once I got the choke tubes set I could adjust up and down with pressure and not need to adjust the choke much, if at all. I found Mikey's burner plans early on and later, after I'd built a couple, that is what led me to this forum. And then any confidence I had in my relatively small understanding of how these worked was crushed by the amount of information I found here.I don't think you're off the mark at all Andy, I agree with both points. Following proven plans as everyone here advises is the smartest way to go, in both burner and forge construction. I built my large forge before finding this website. I have nearly a week's worth of labor in it, well over $500. Used it for awhile, works very well but is 4 times the size I need for most of what I've been doing. I can heat 20" of a 1" bar in no time at all. Which, is sometimes useful I guess, but most of the time wasteful. So after I did the research I should have done in the first place, and found this site, I built a small 8" long single burner forge based off of a video David Hammer(if memory serves me correctly) has on youtube. I built it in under an hour. with scraps I had from the larger burner for under $40. and have been using it for a couple weeks now. Even managed to accidently melt a firebrick! It is far from perfect, but much better suited for my everyday use. So in short; I am, without any shadow of a doubt, the poster child for the "Newbie building a forge 9 times too large" lesson. My advice. Keep it small, basic, and definitely add the idle circuit.