

jlpservicesinc
-
Posts
5,761 -
Joined
-
Last visited
Content Type
Profiles
Forums
Articles
Gallery
Downloads
Events
Posts posted by jlpservicesinc
-
-
Great work. thanks.
By the way the coat hangers are cool.. I might copy your design.
Wide shouldered hangers are tough to find.. -
Chad be looking forwards to seeing your tongs.. Surprised you did not show progress pics. Very suspenseful..
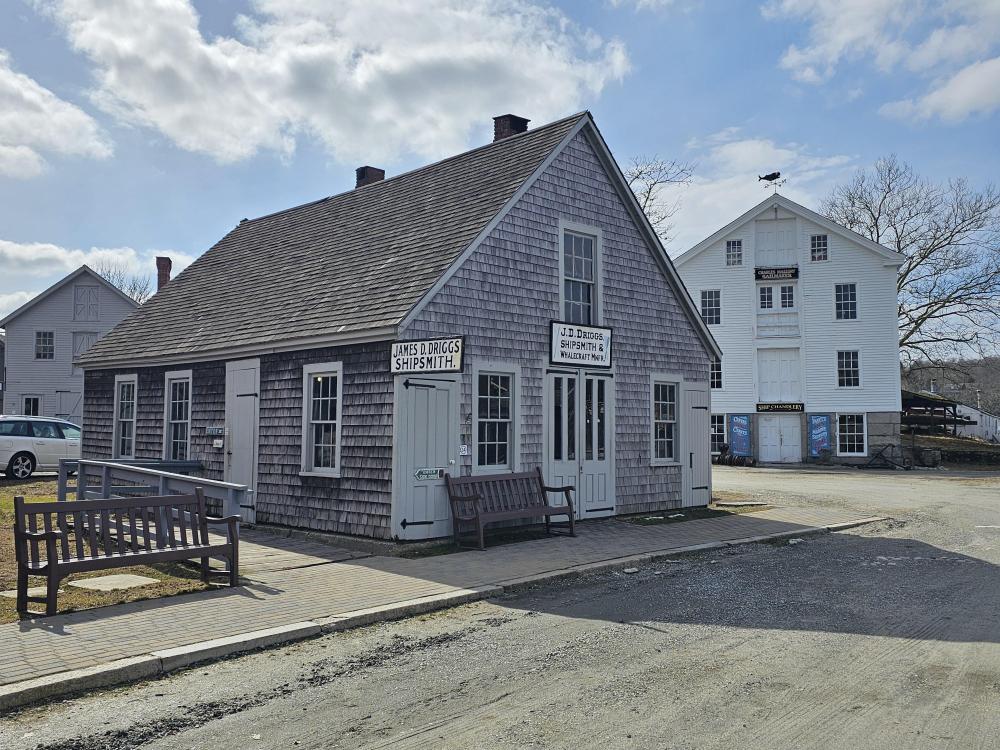
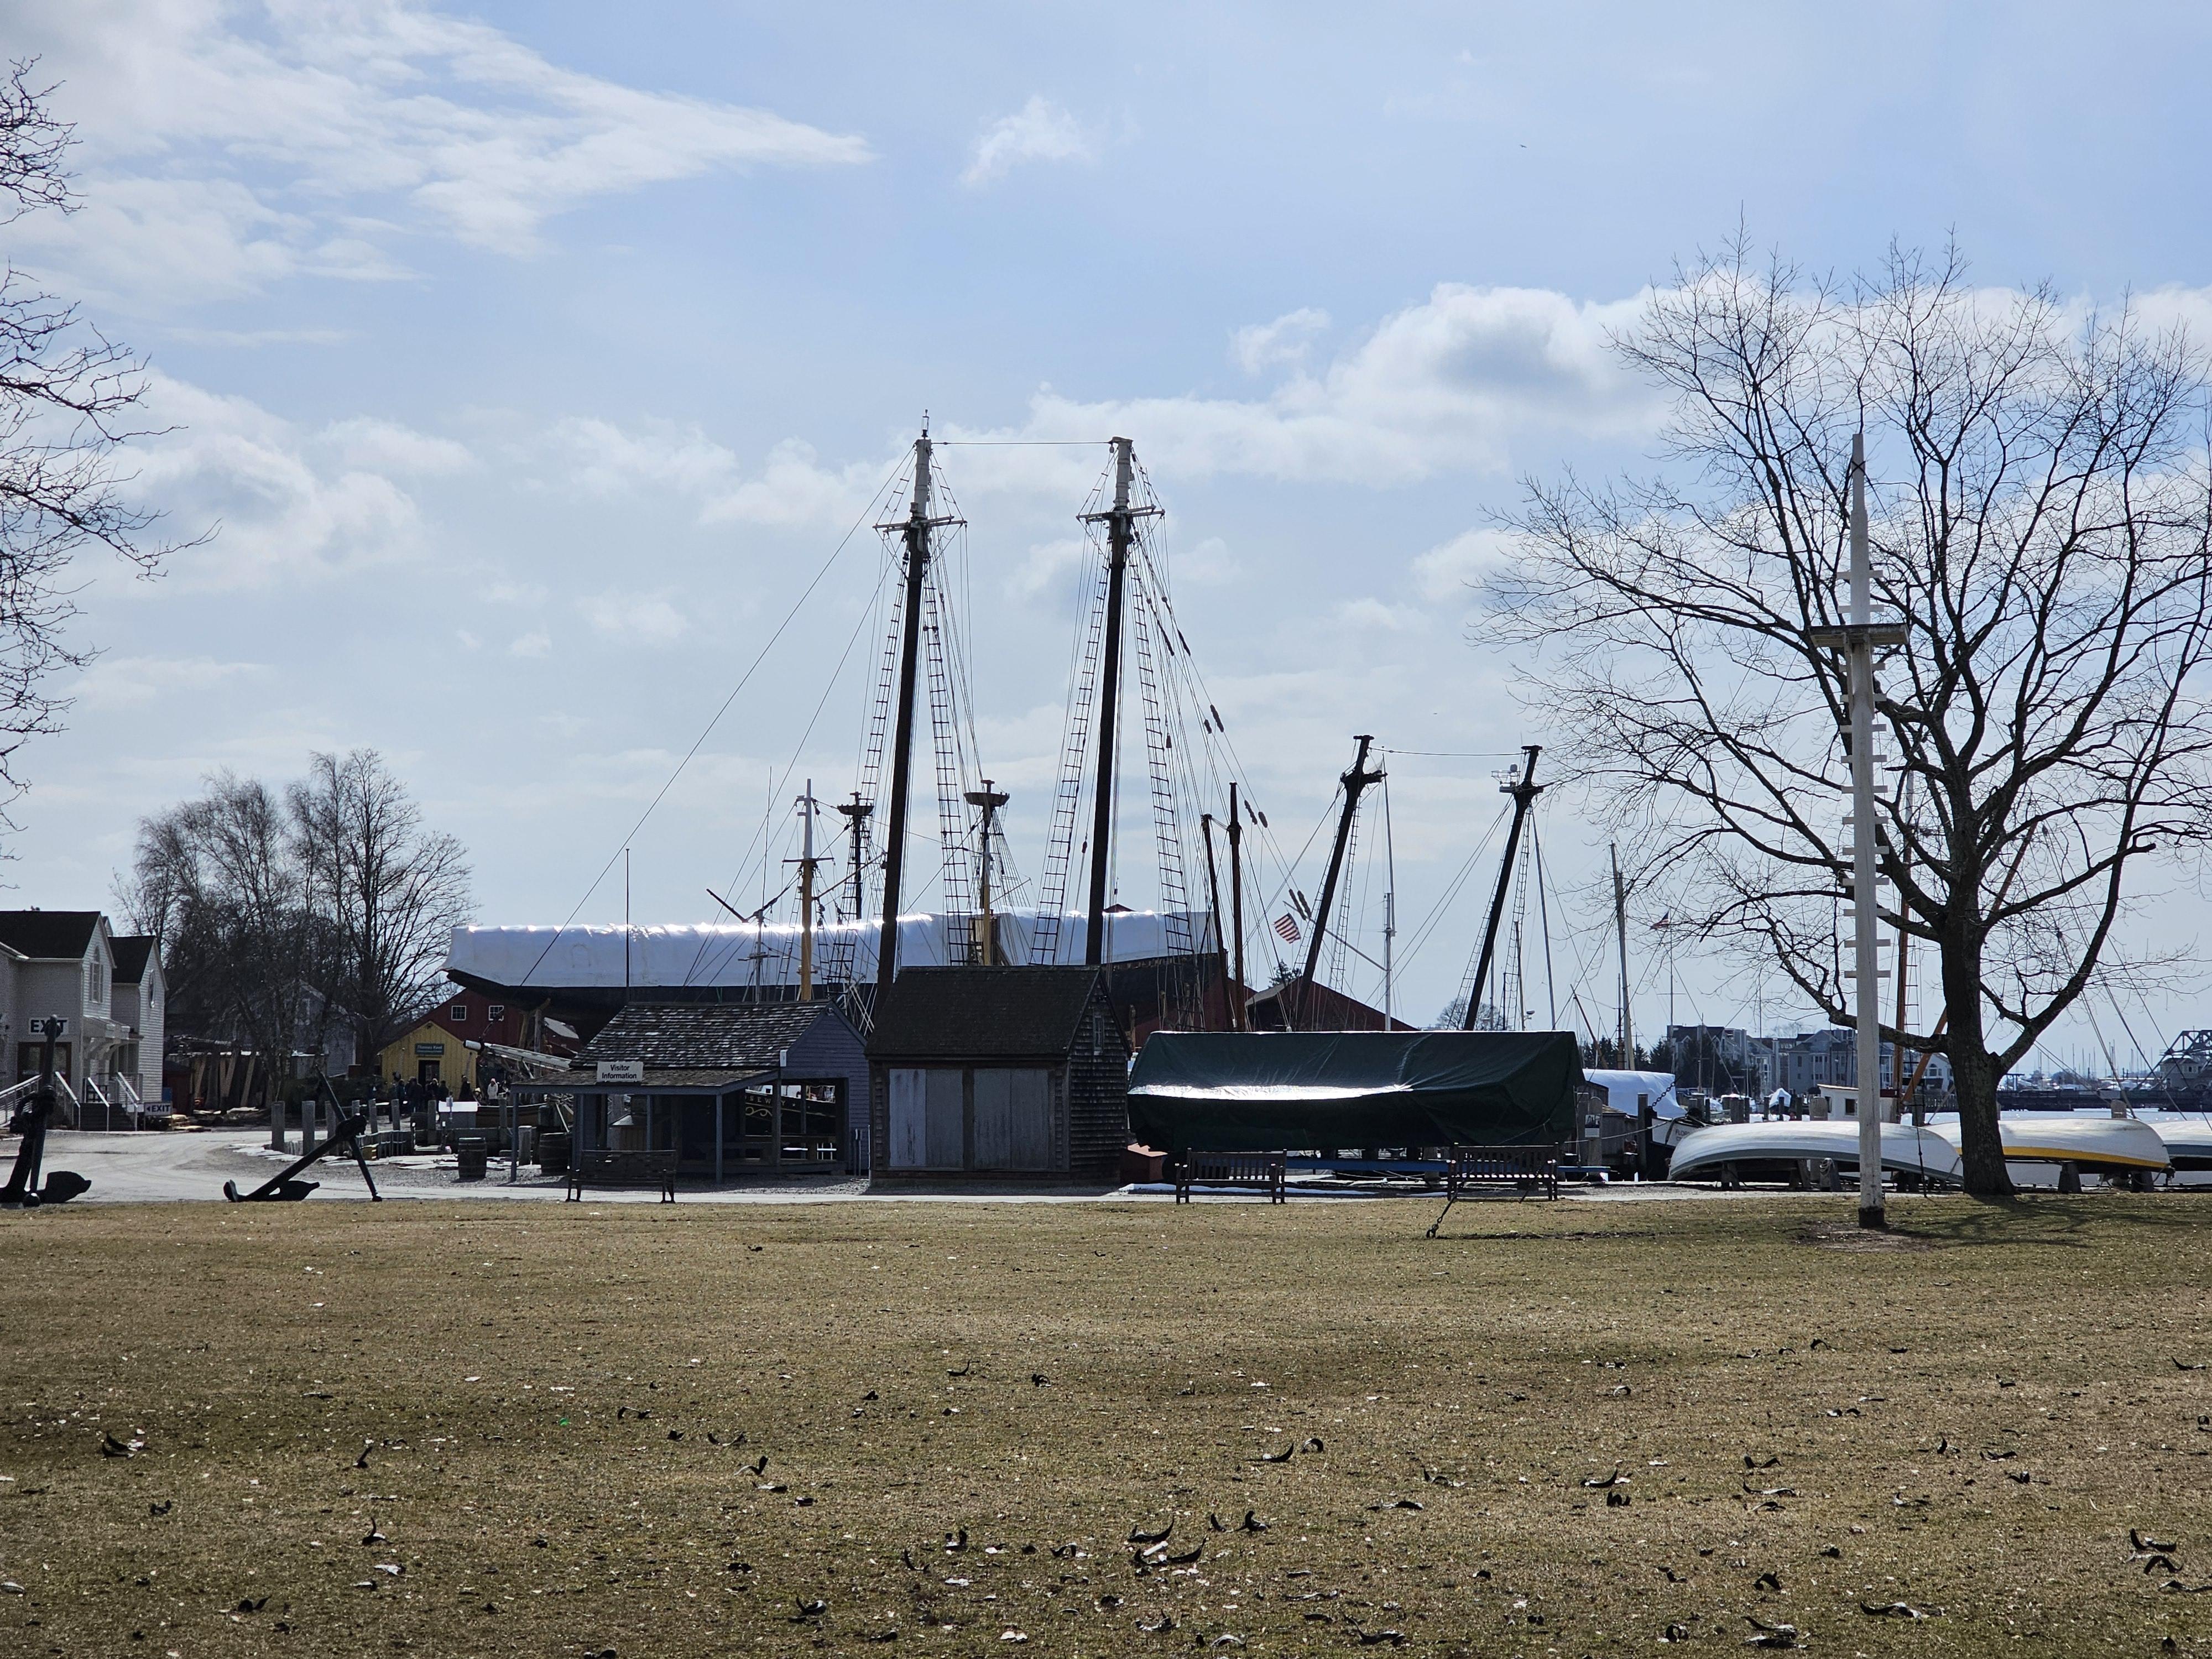
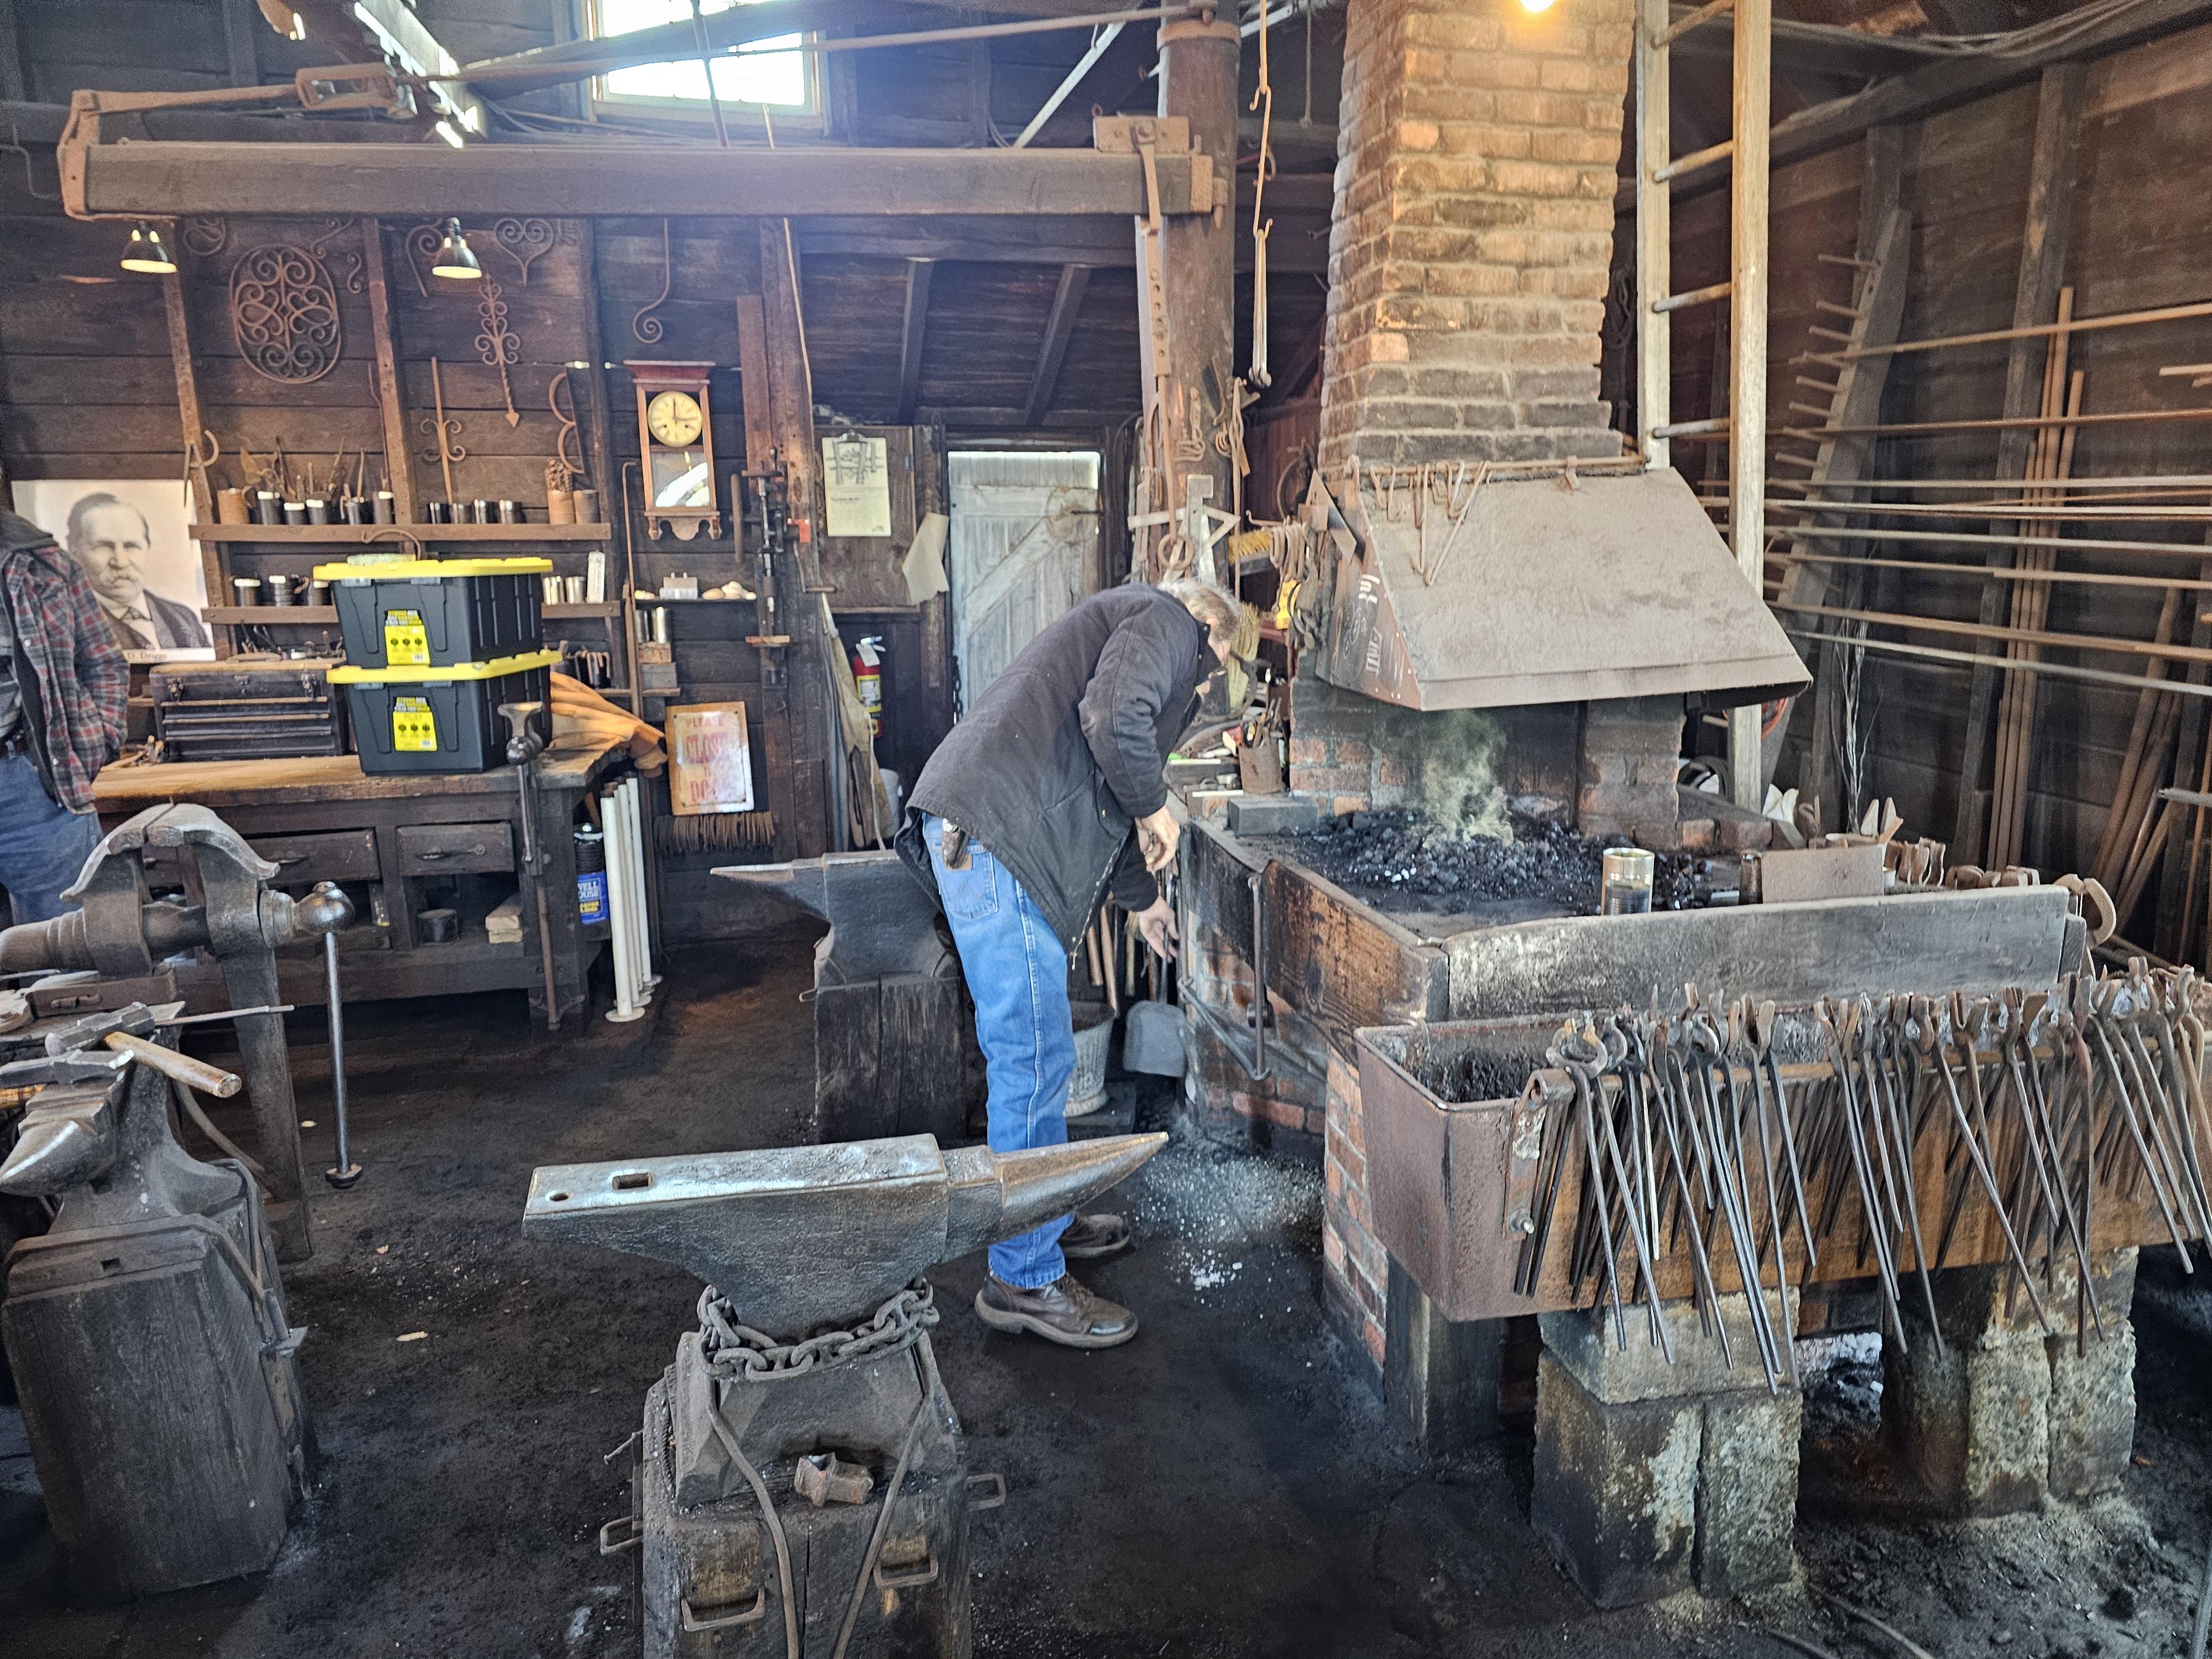
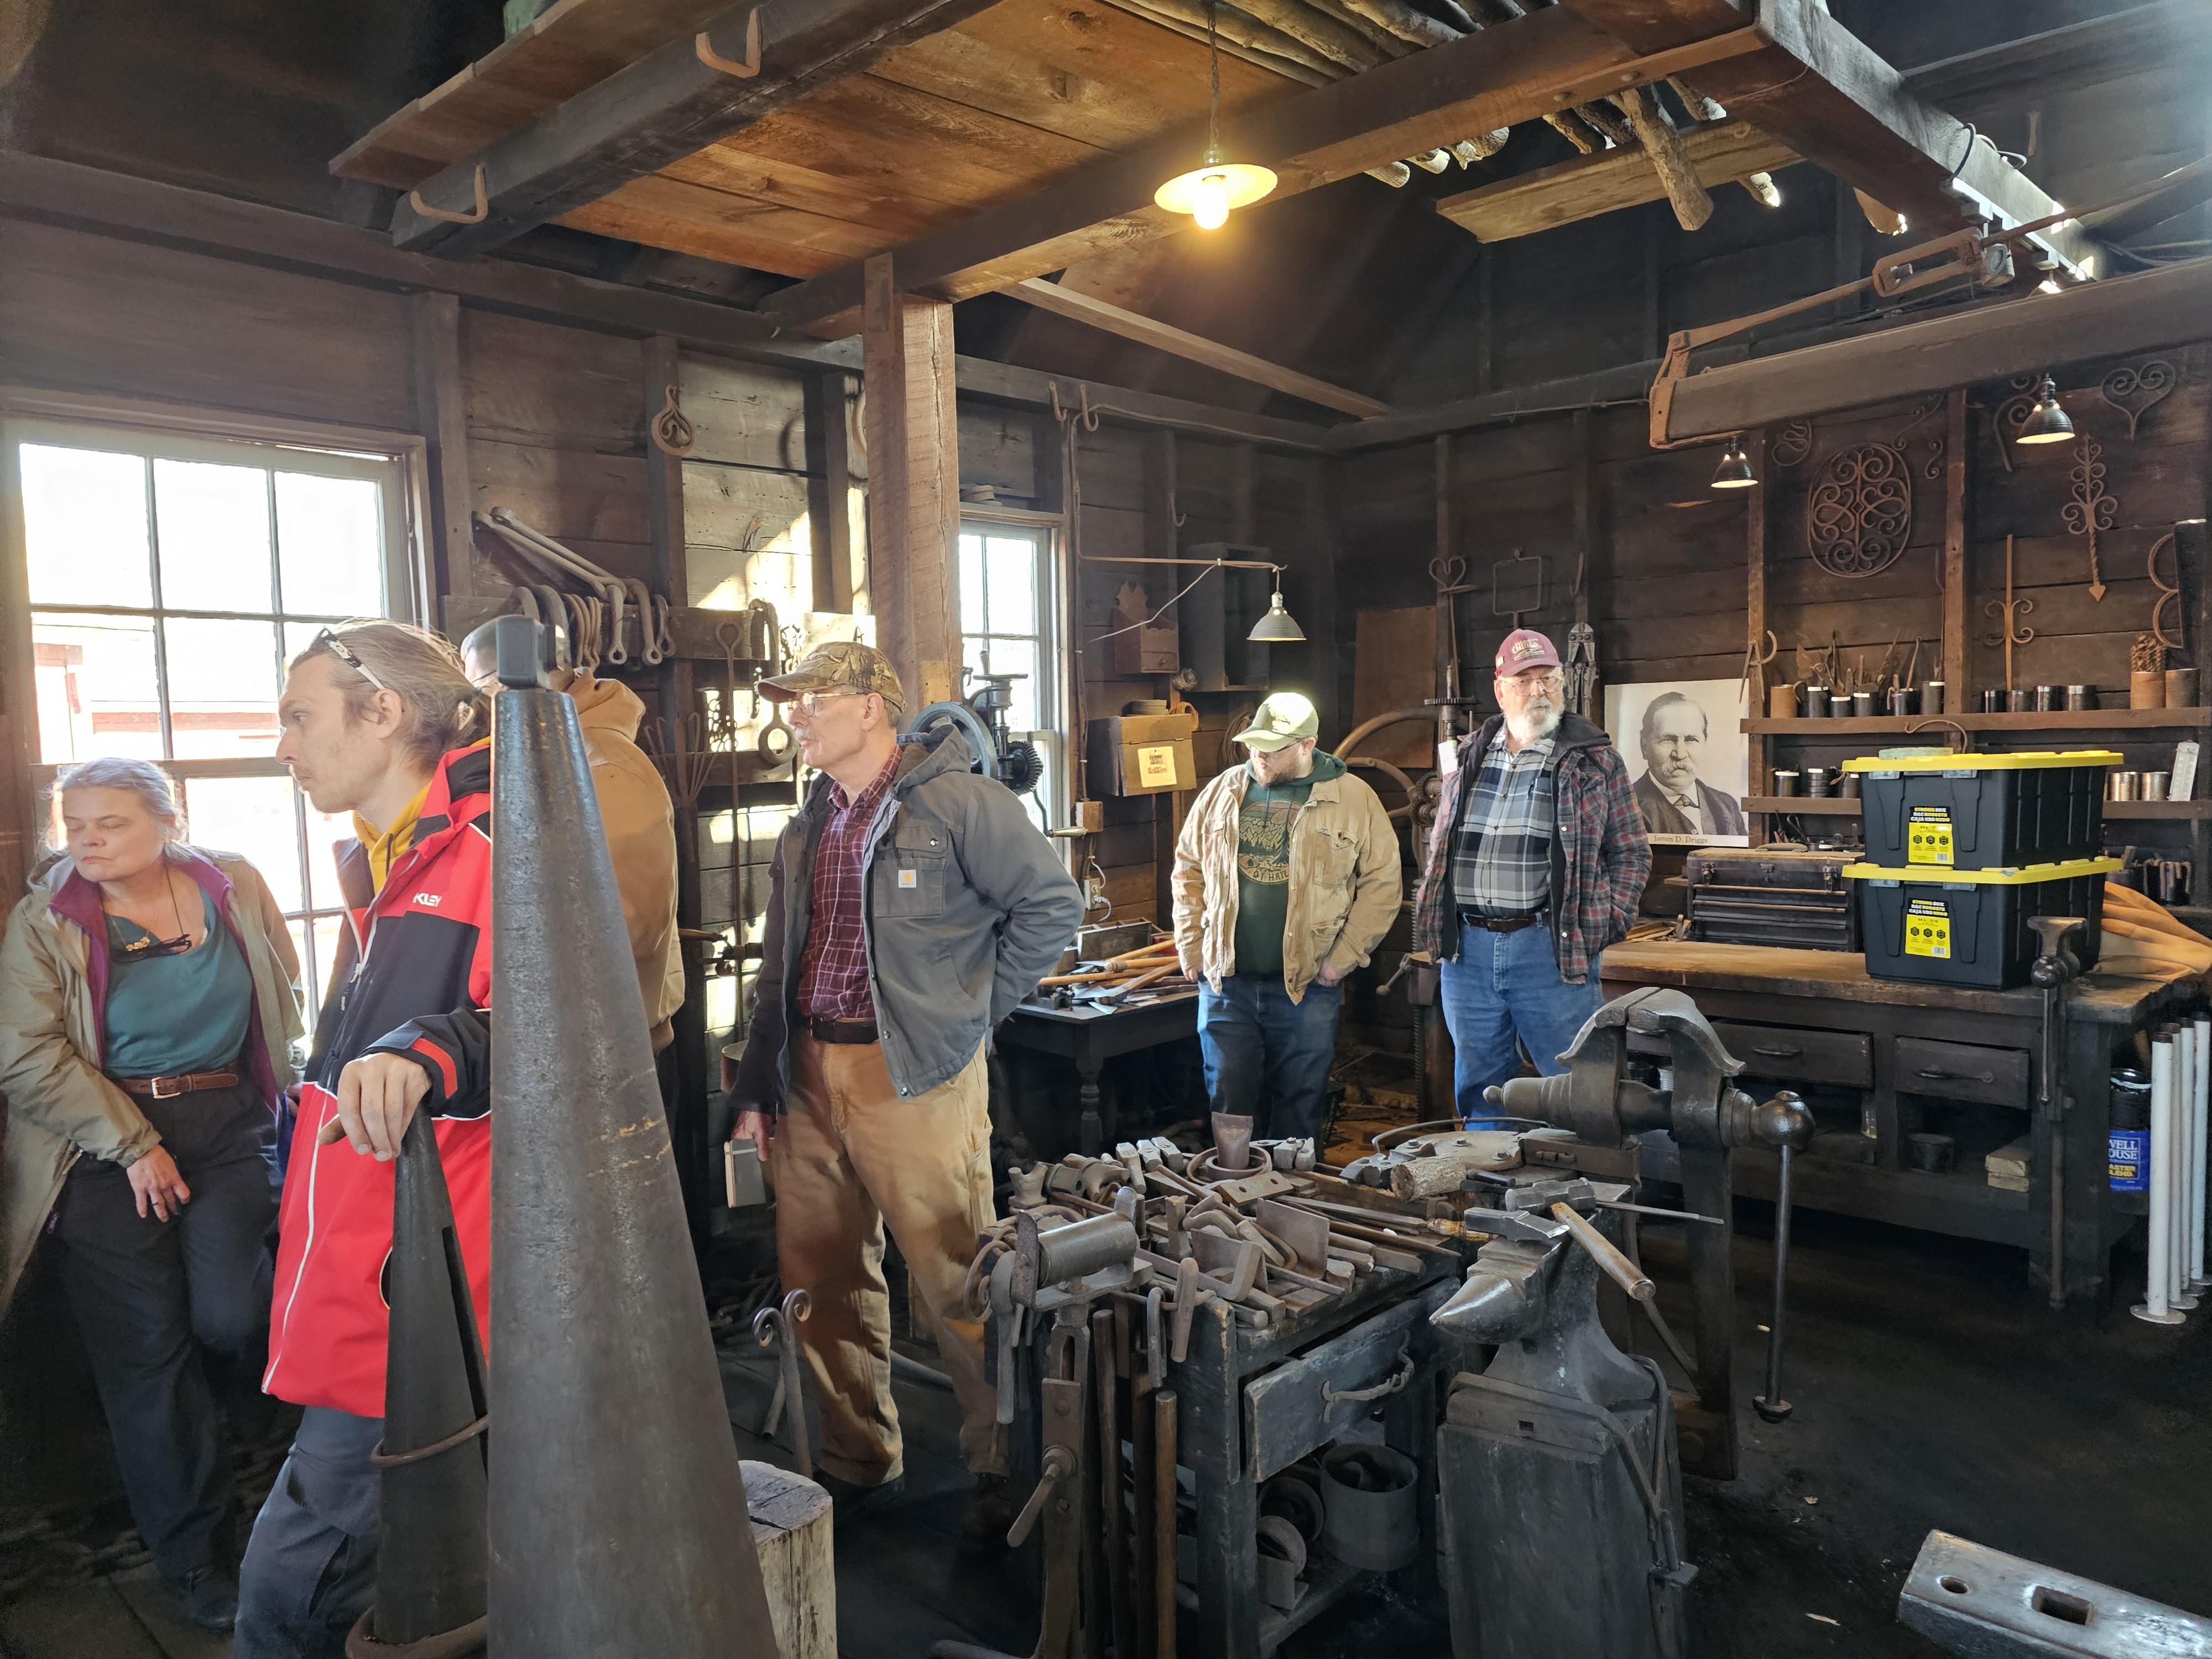
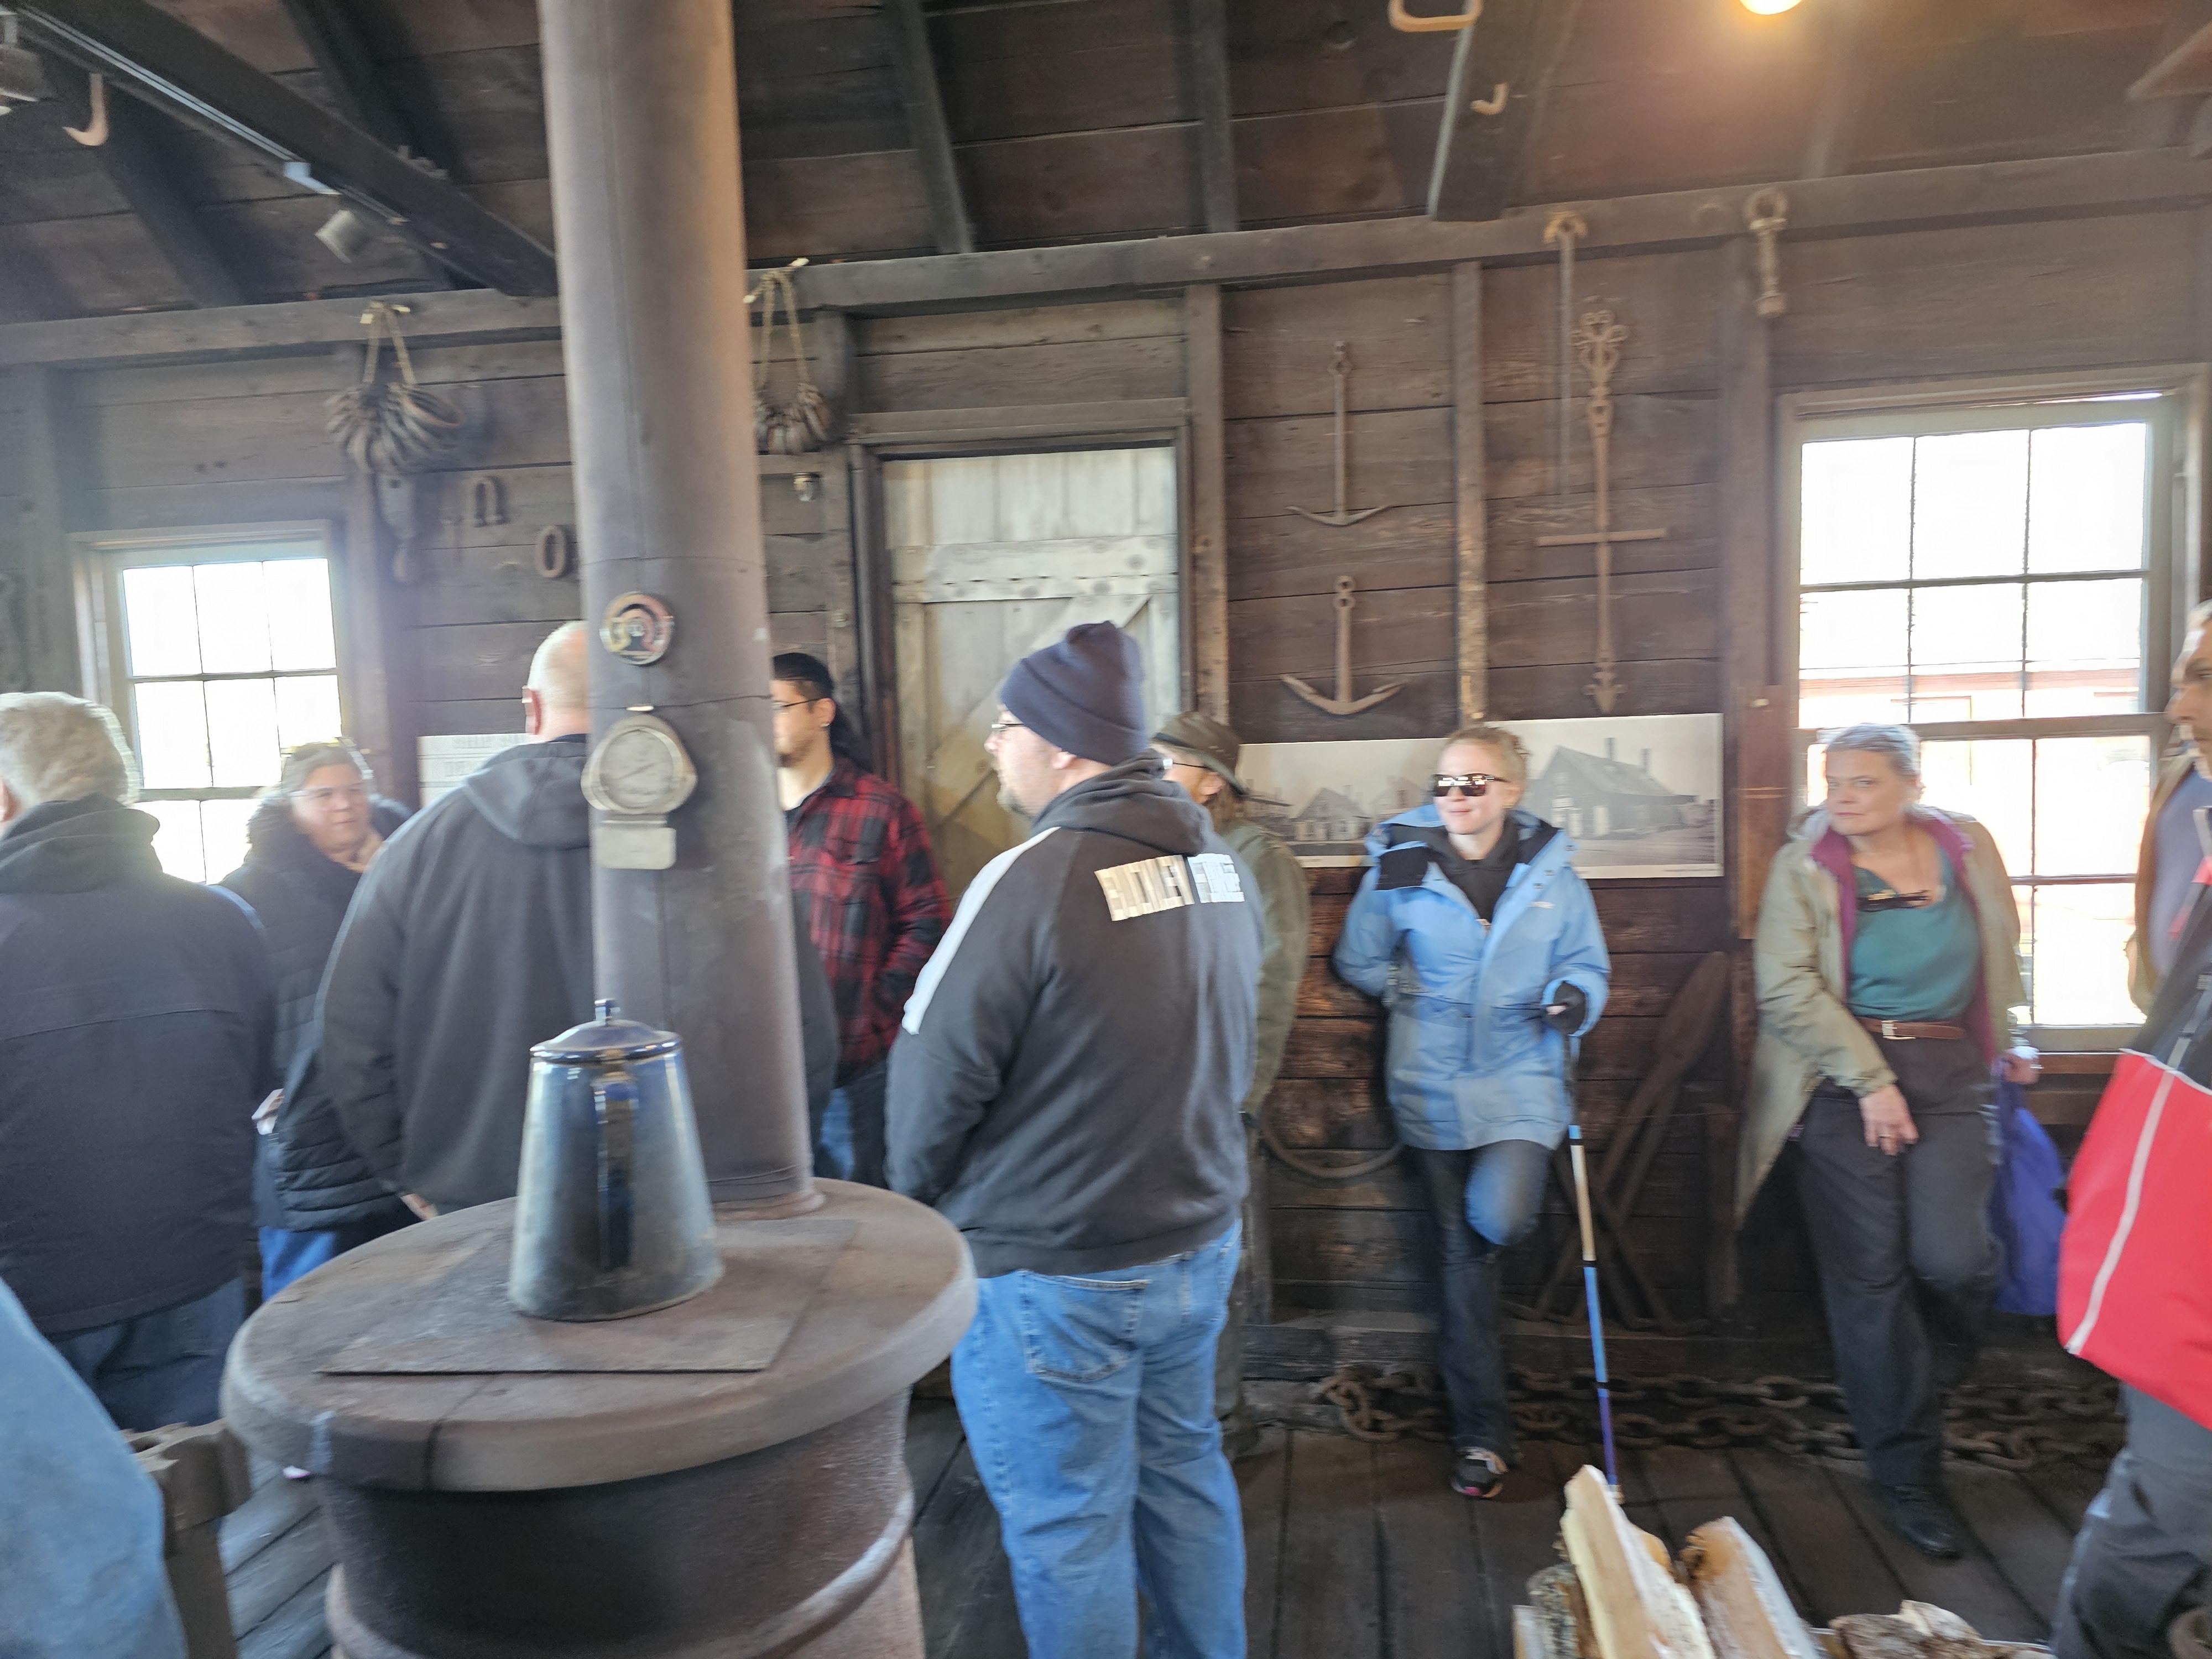
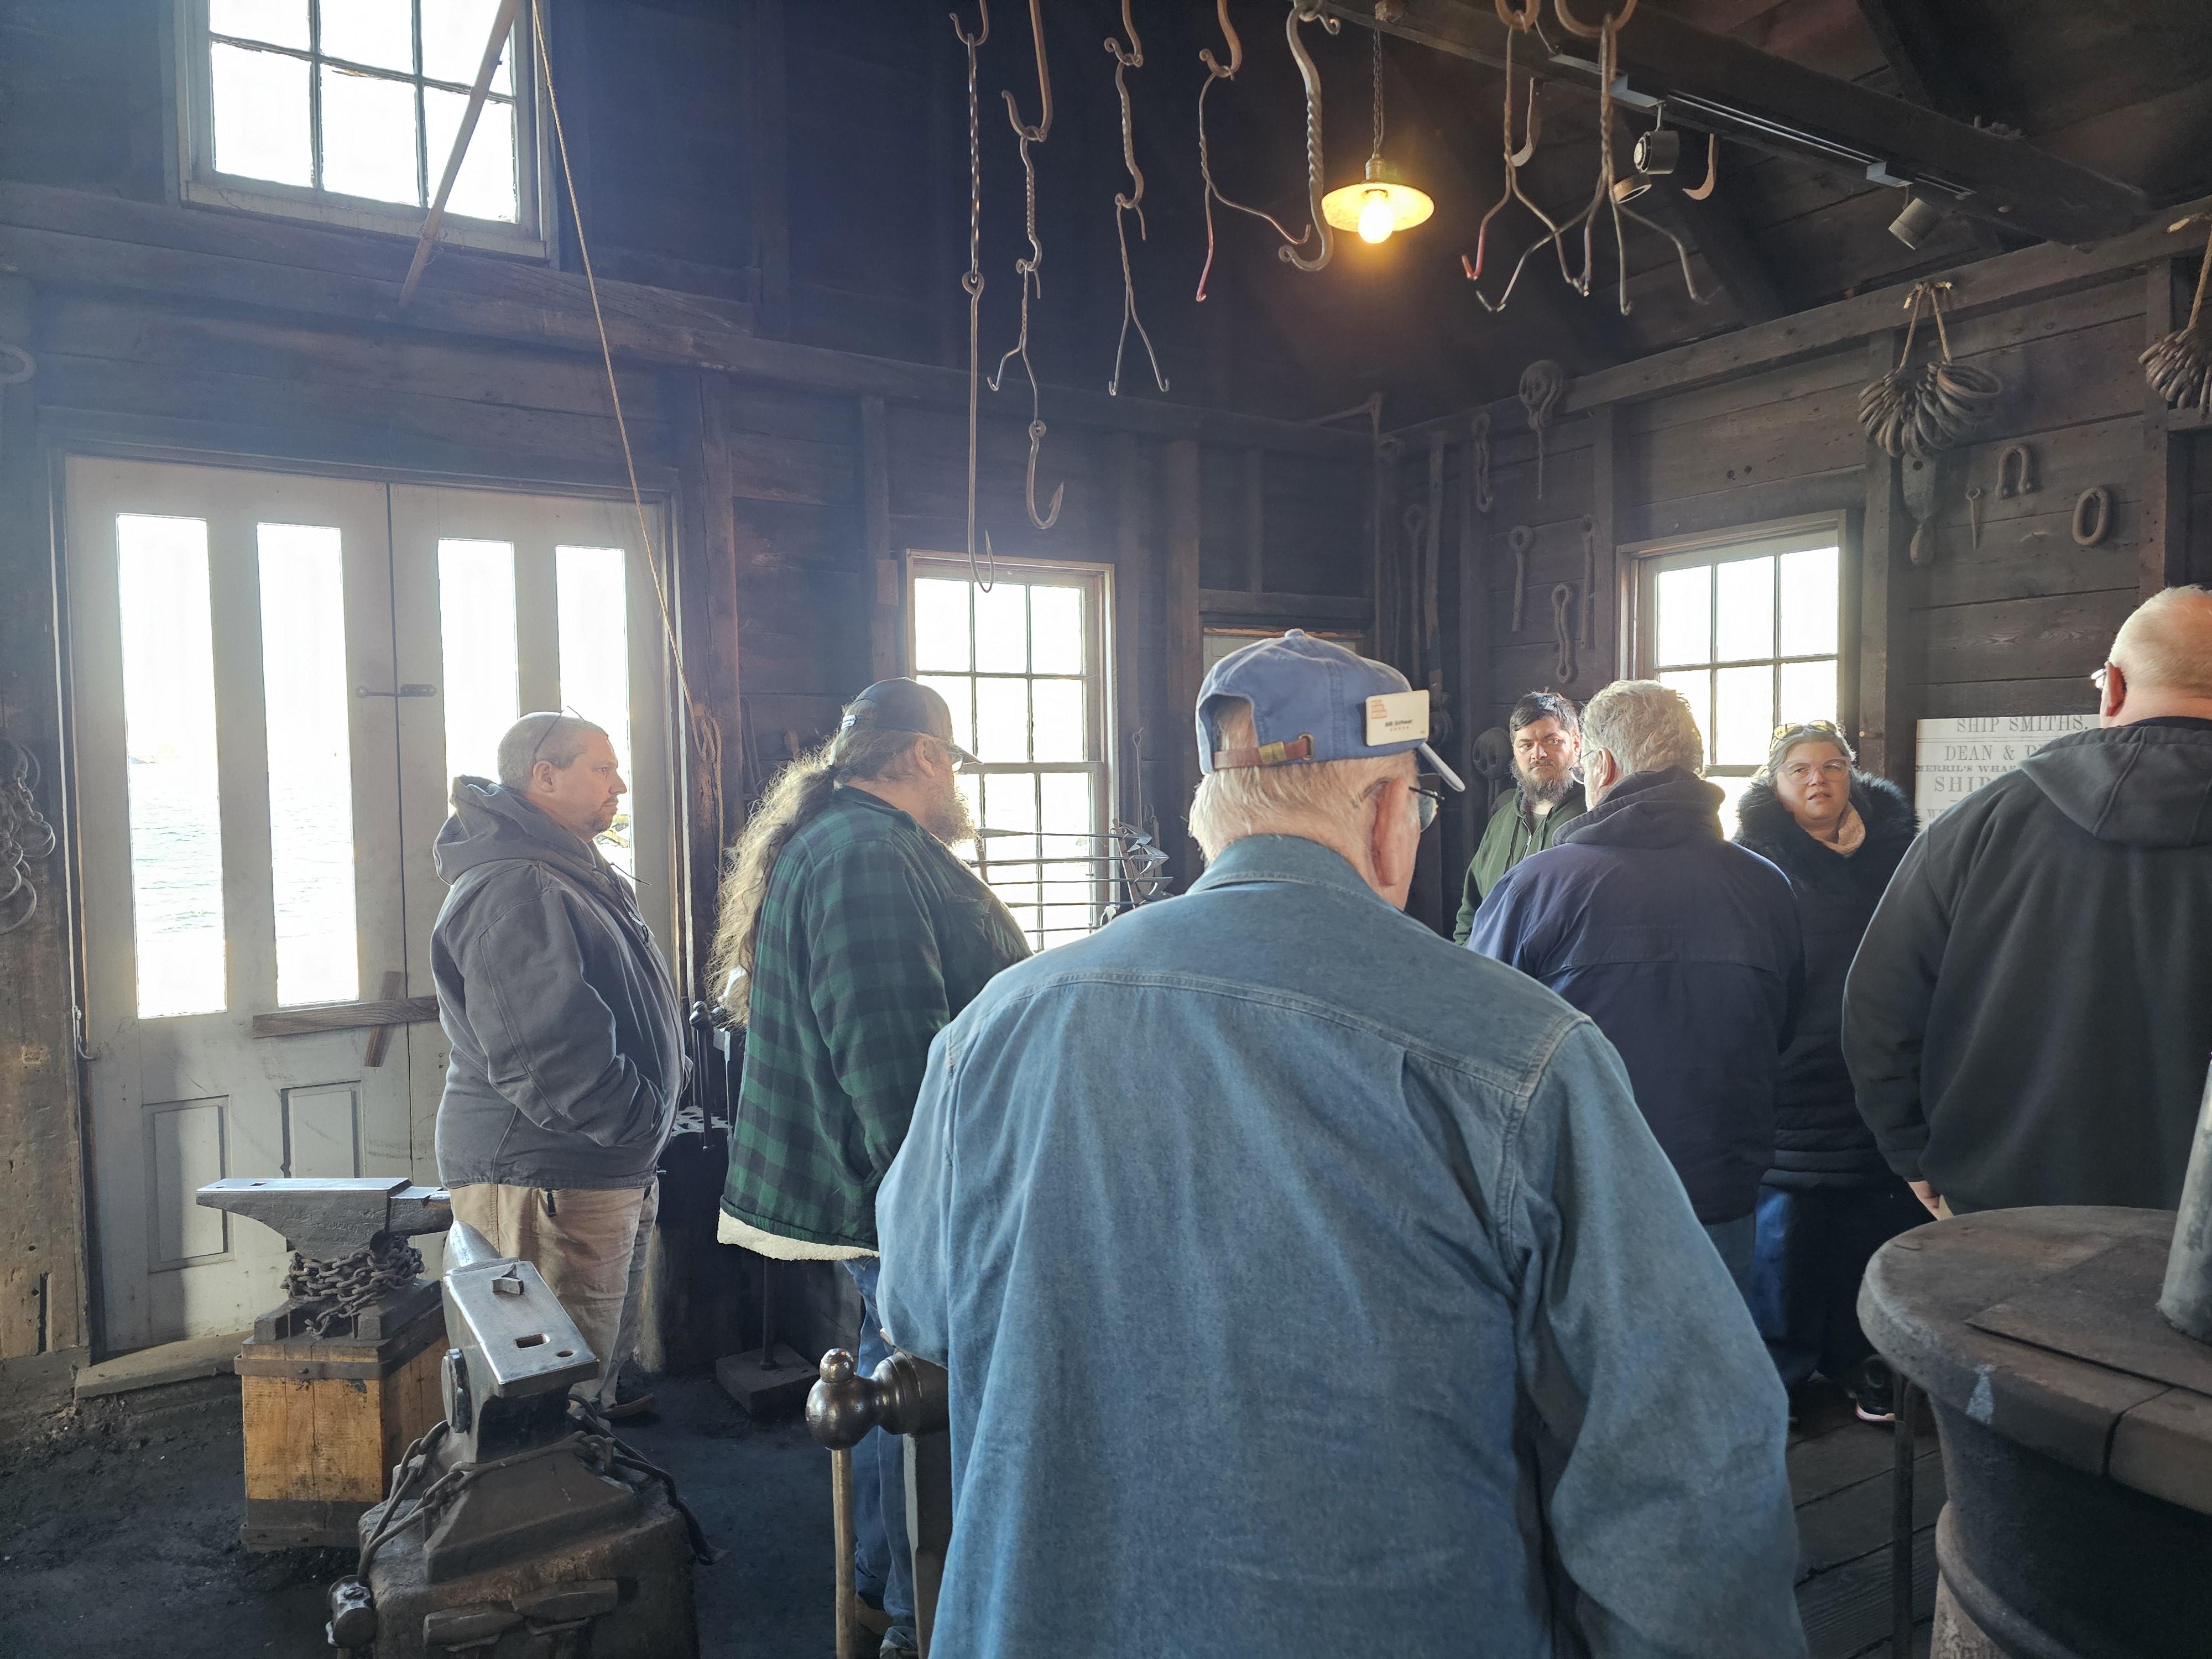
I went down to Mystic Seaport Museum and demonstrated for the Connecticut Blacksmith Guild on forge welding.
Got to work in the historic blacksmith/shipwright/whaling shop. It's always interesting working in other people's shops and while it's good.. learning and picking up on the little nuances. It gives me an appreciation for what I've set up in the way I like based on how I work.
Matthew Parkinson a very popular bladesmith (AKA instagram SwordMatt ) did a lecture on welding as well coming from a bladesmith perspective.. I love hearing about where people are in their journey, his lecture was very good..
He talked about some of his observations over the years.. The session was really for newer type people and while the basic forgewelding topic was covered pretty well. There was some more in-depth stuff I would have liked to talk with Matt with.. Sadly 4hrs went by very quickly and like that, the day was over.
I love going to different groups.. There is something about each group that is slightly different.. Different focus, different vibe, etc, etc.
Was a bunch of fun..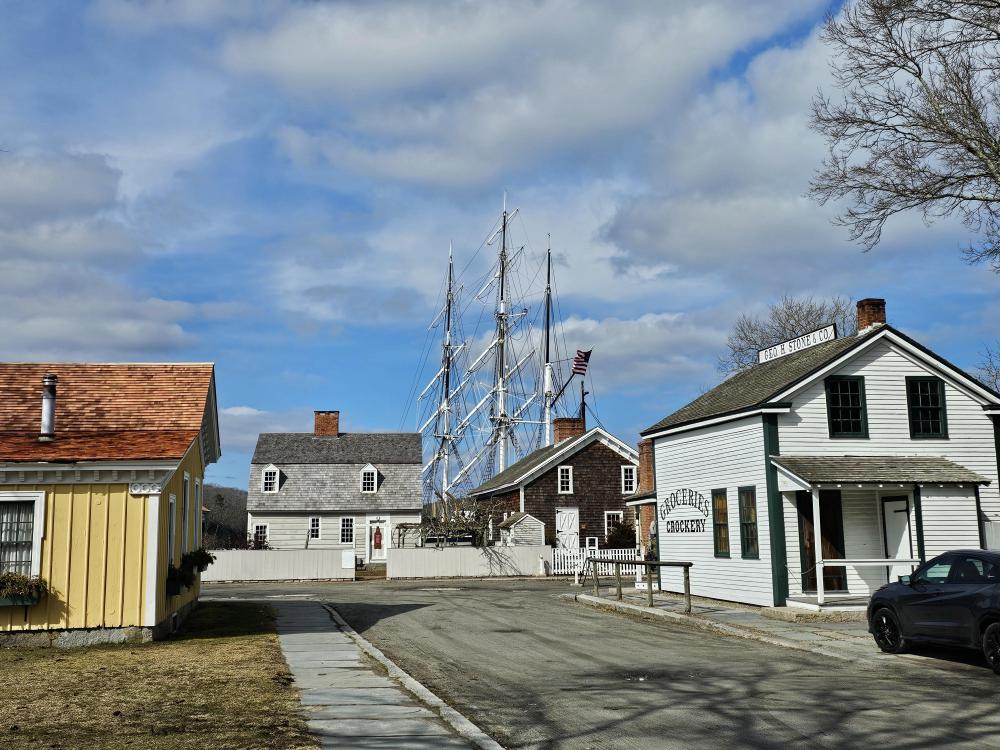


-
Frosty, I like doing stuff like this.. I've been enamored with oil burners as a mystic art since childhood.
As with everything I do, I research and learn, then try to implement what I've learned. Kind of like treasure hunting but with tidbits of information.
Finding good information on oil burners was a real problem.. That was solved when I discovered NORA (National Oilheat research alliance).
Besides it's a good distraction from what I should be working on..The possibility of getting it running just the way I want through a little innovation and redesign is super exciting.
-
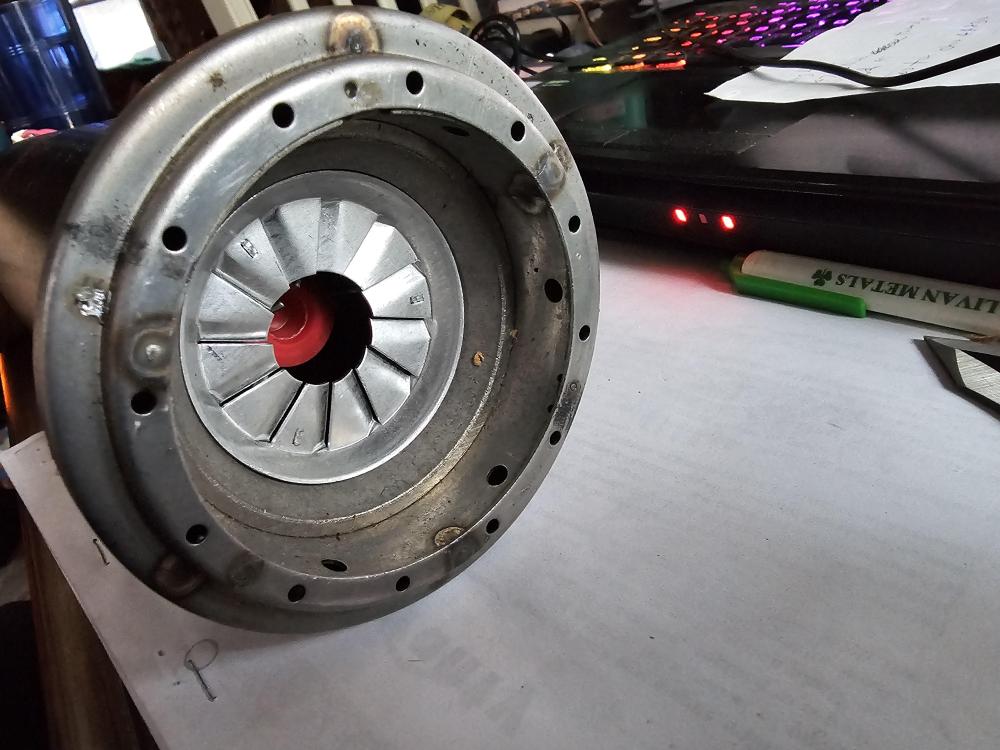
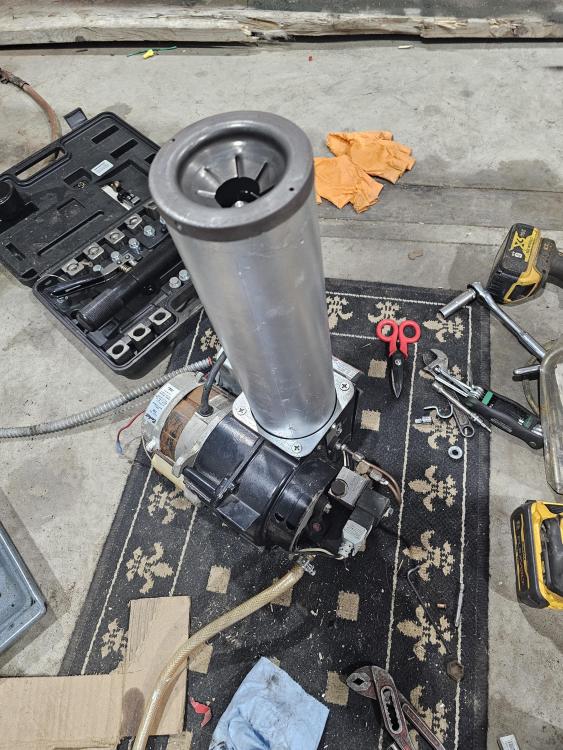
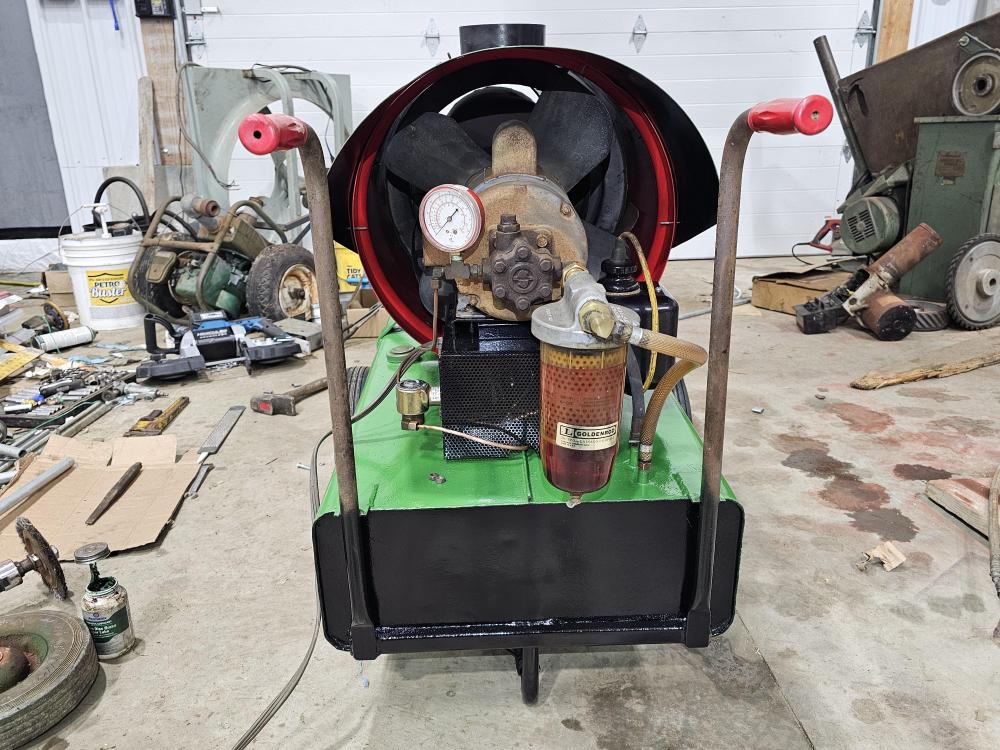
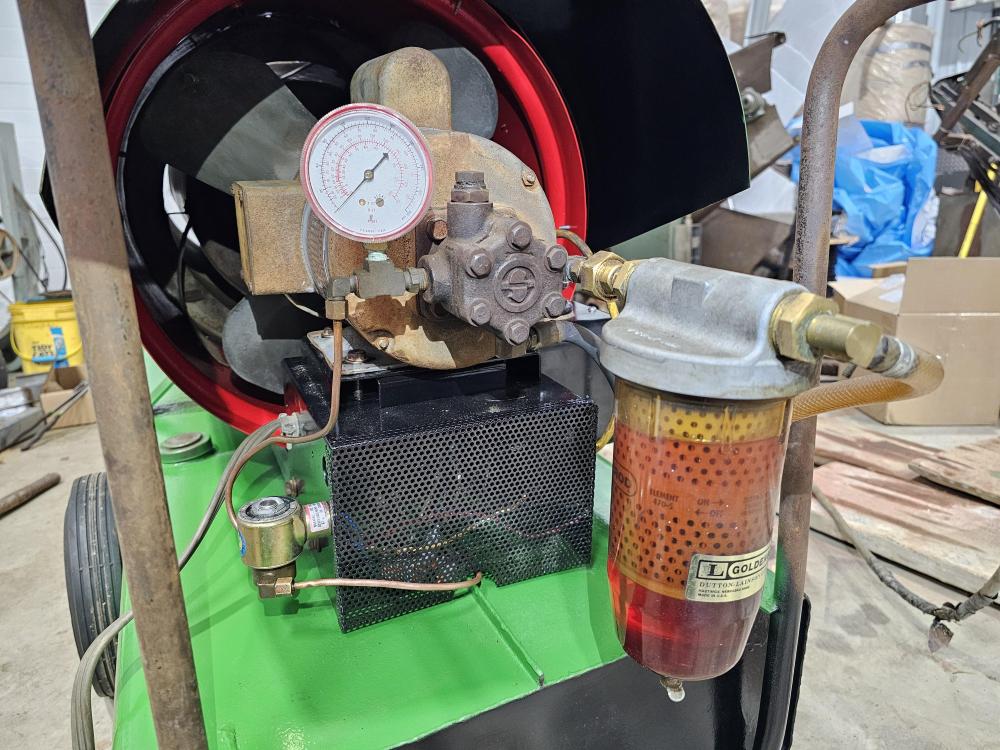
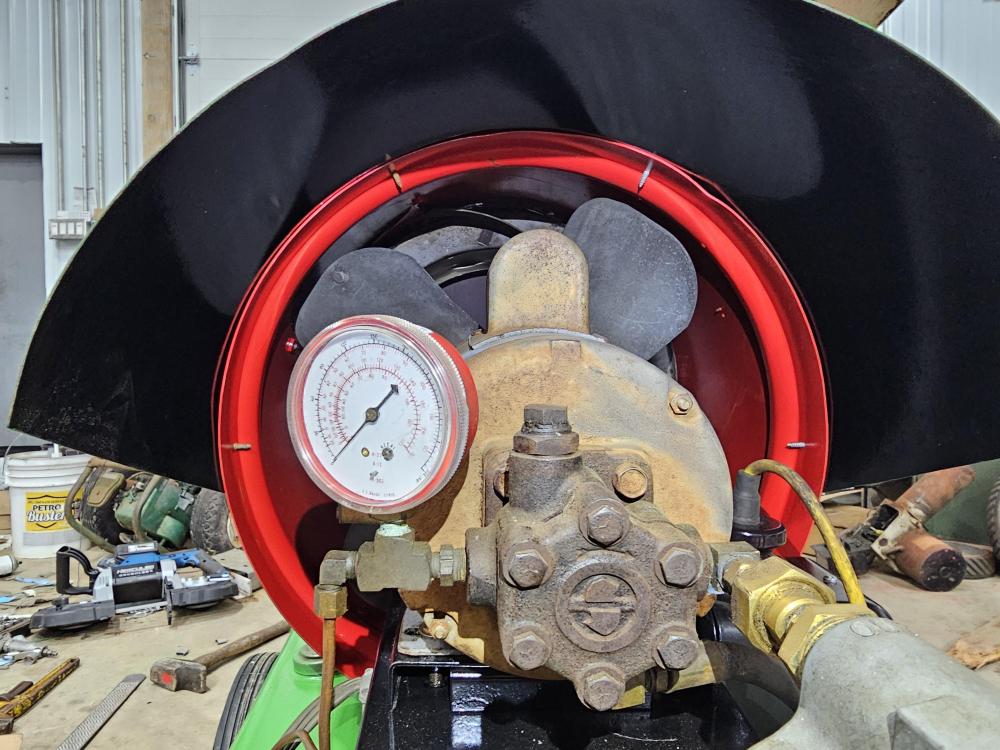
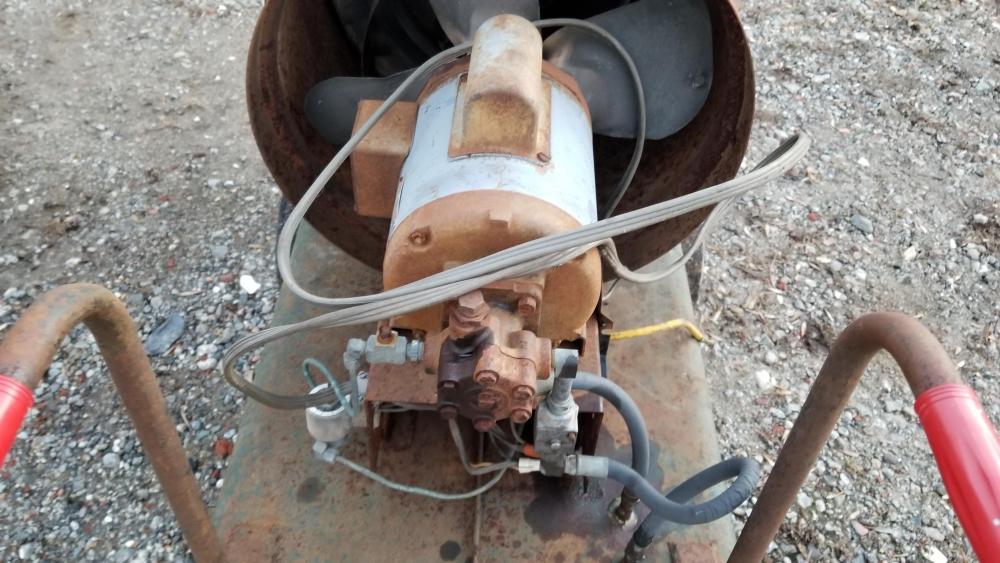
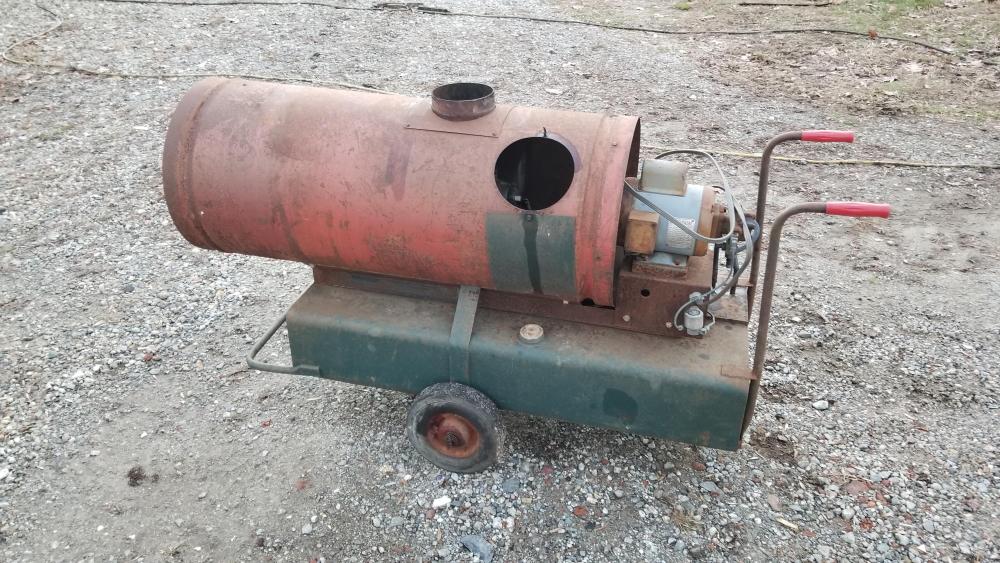
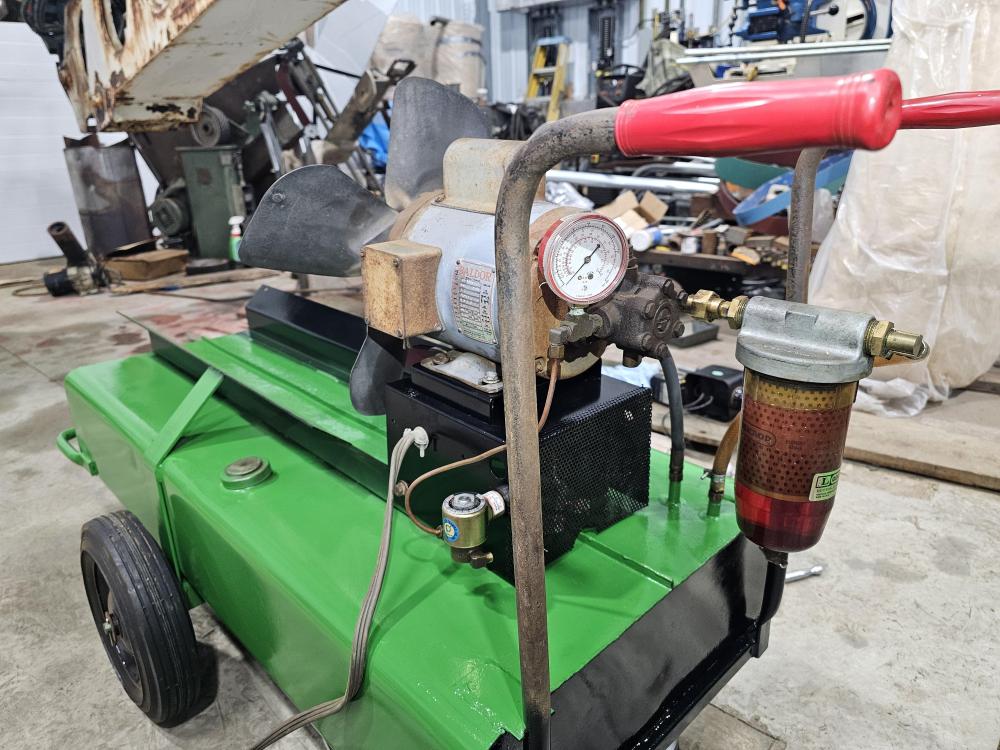
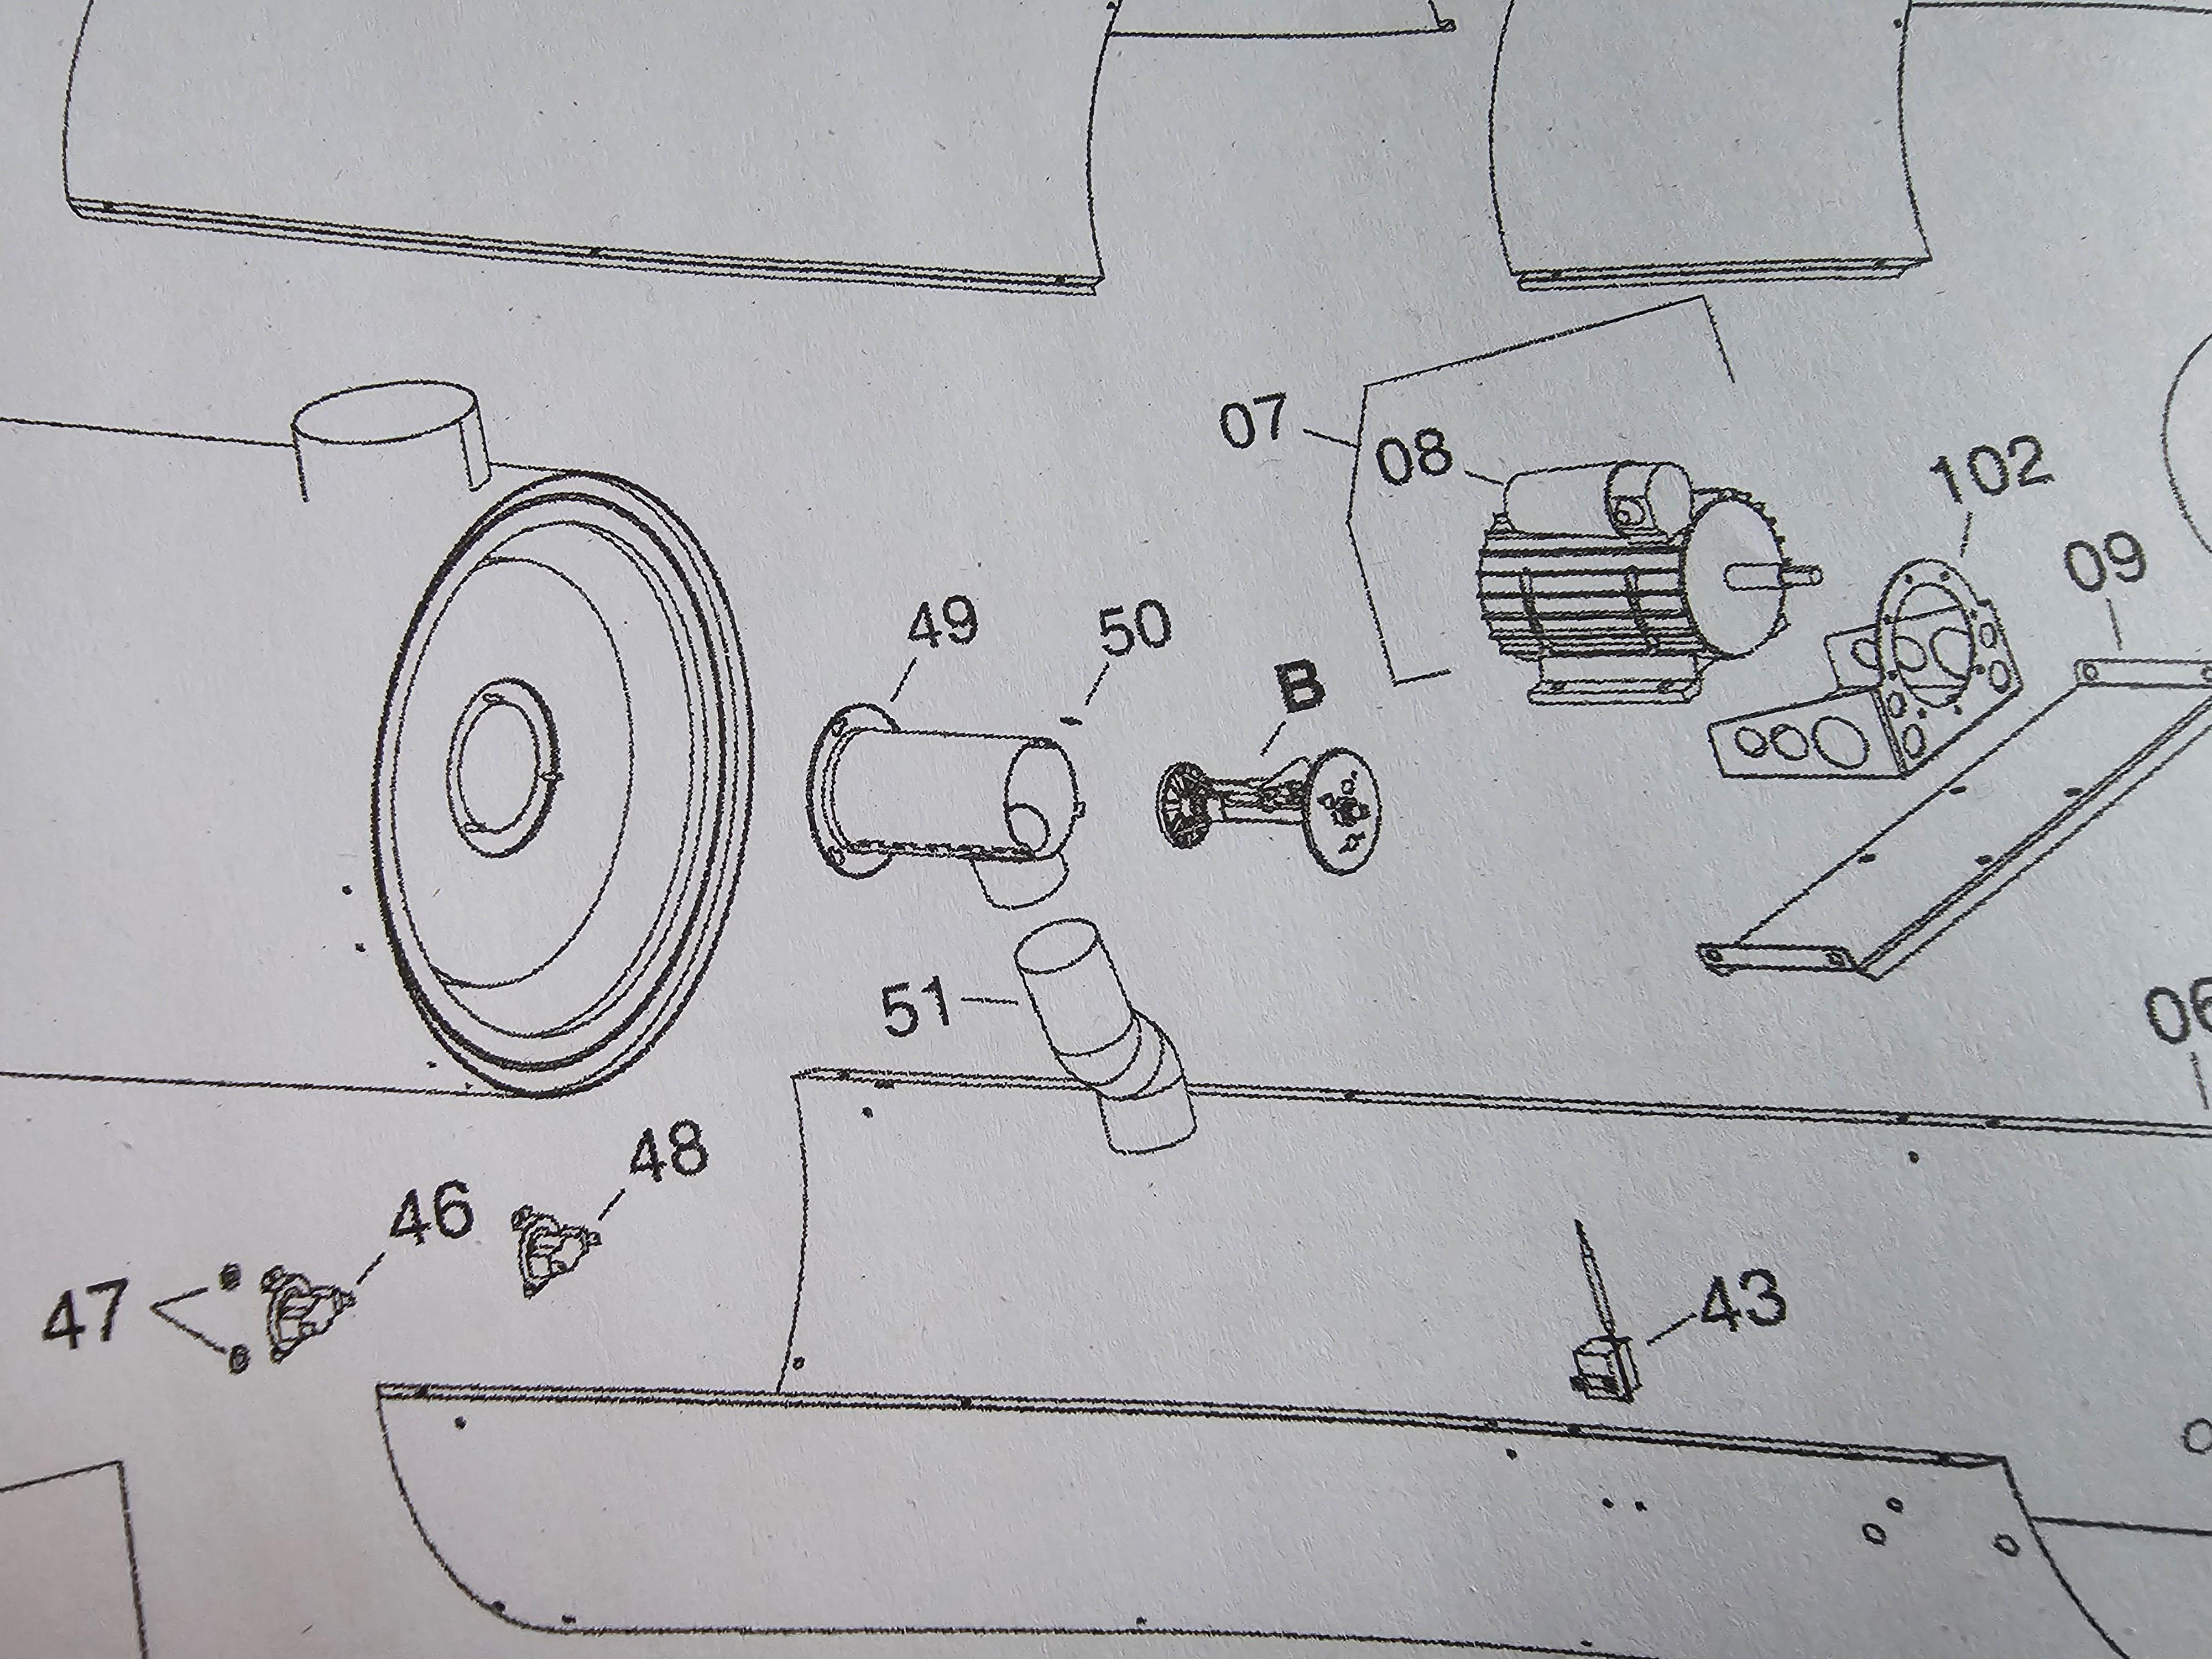
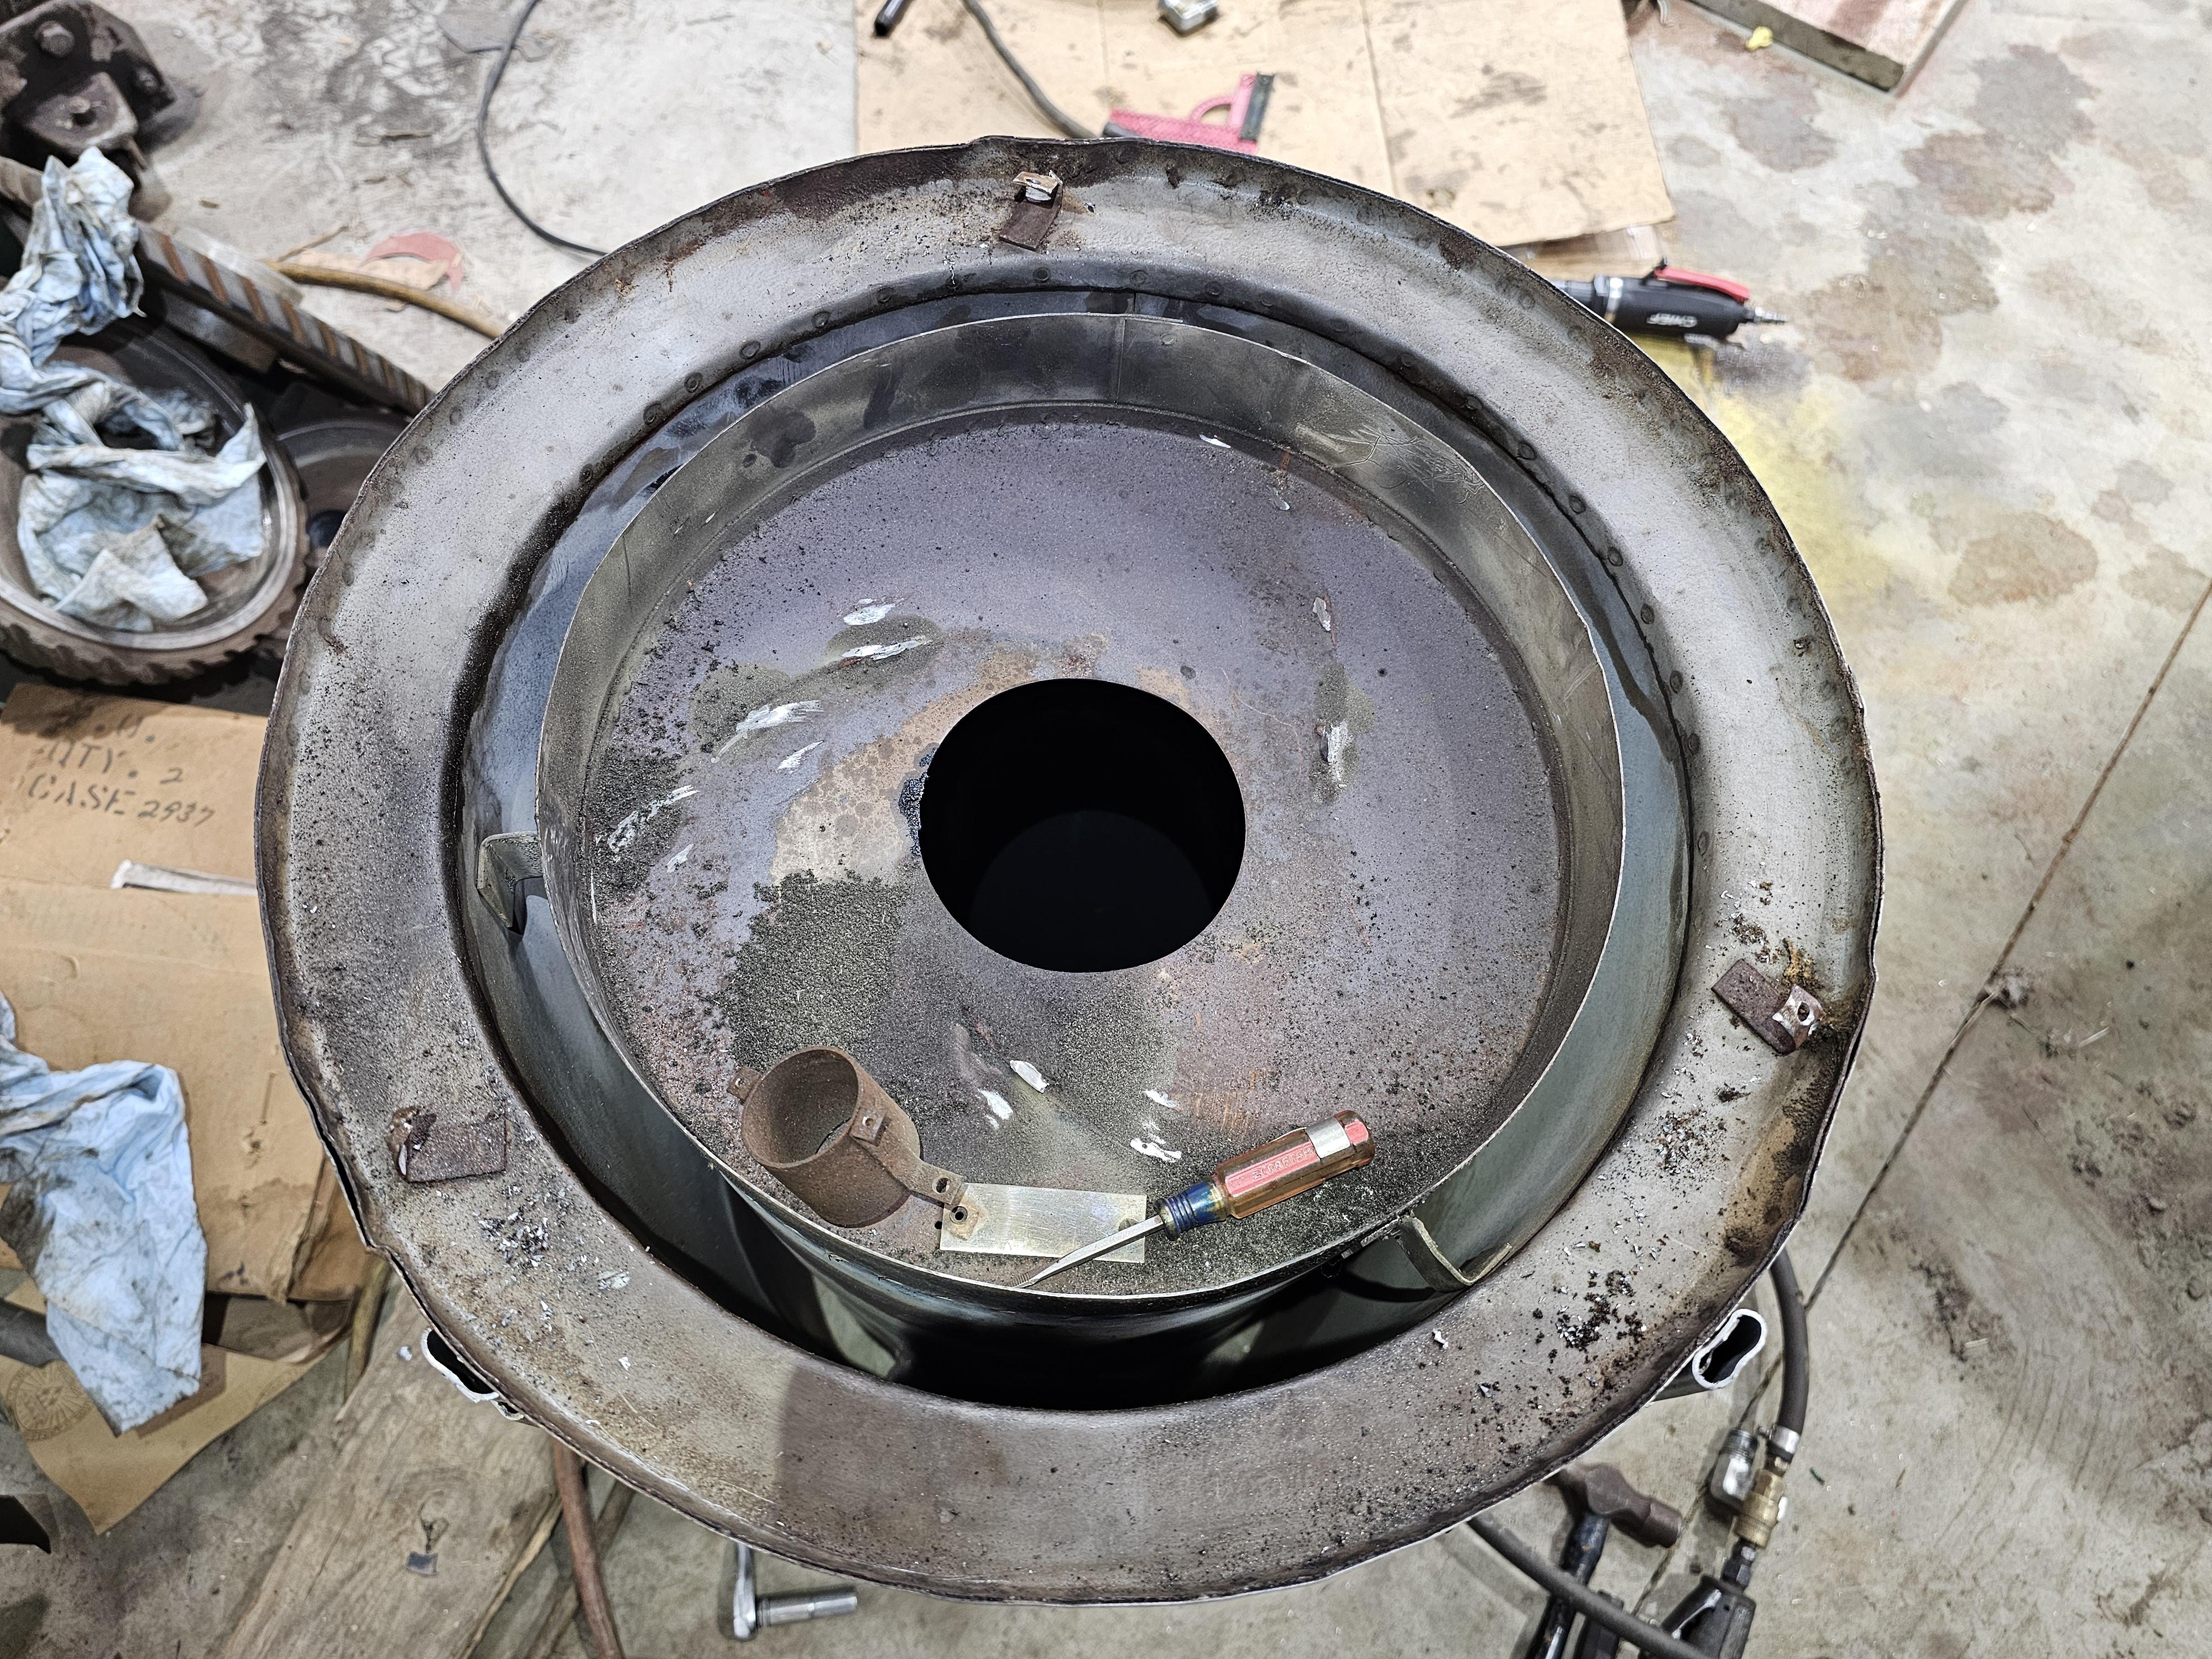
here is the 400k unit.. YOu can see the pipe system for the burner air.

-
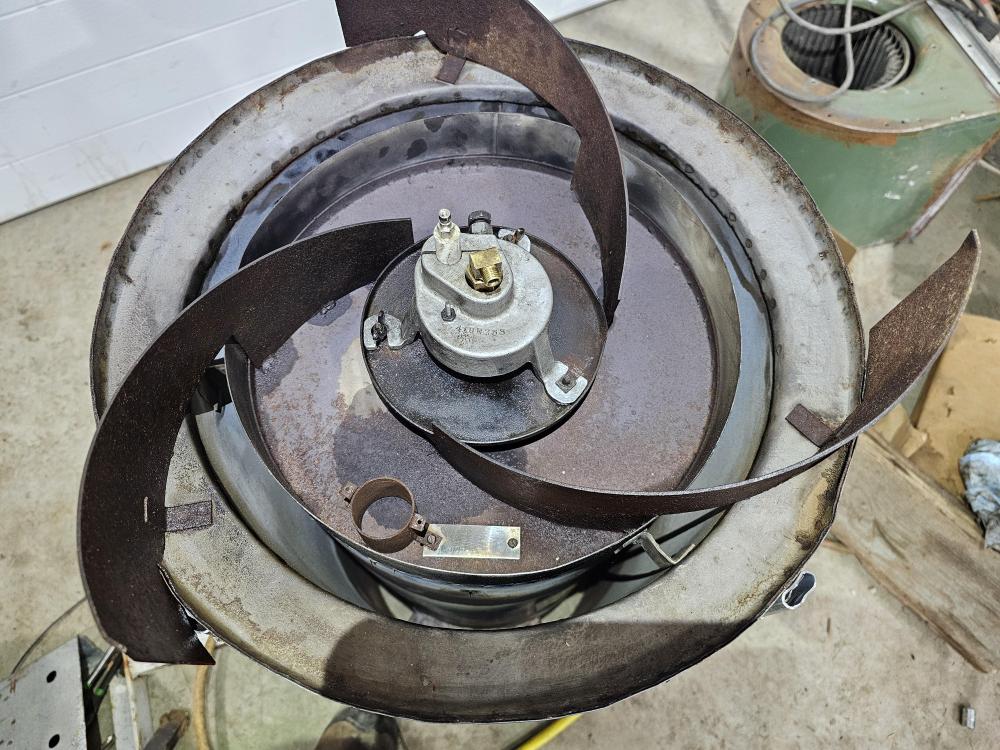
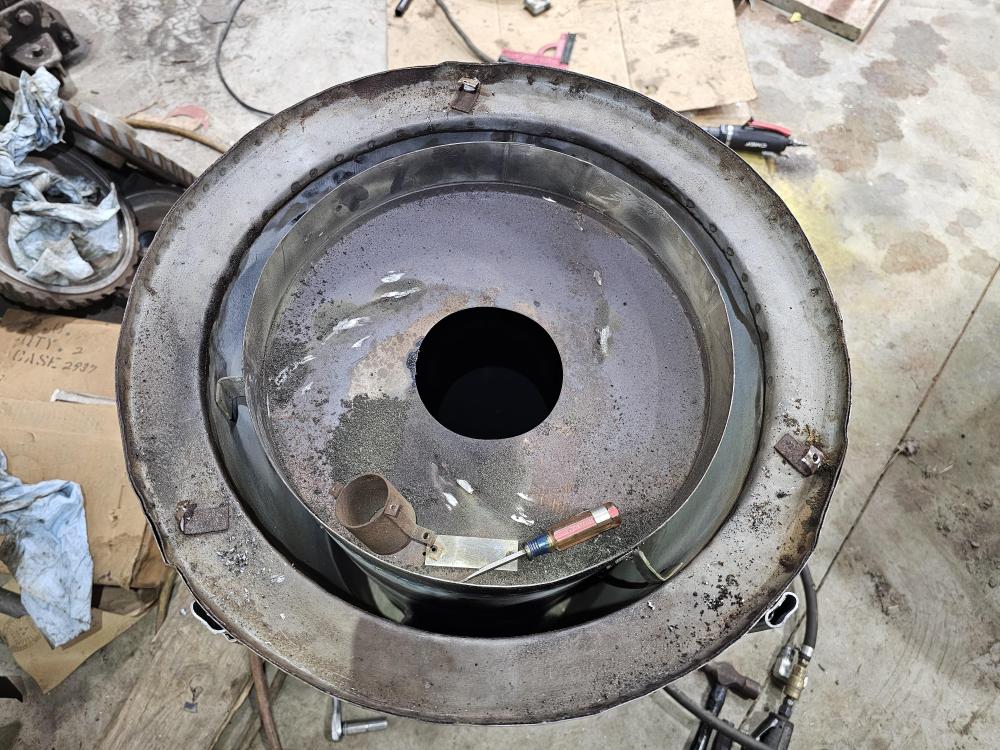
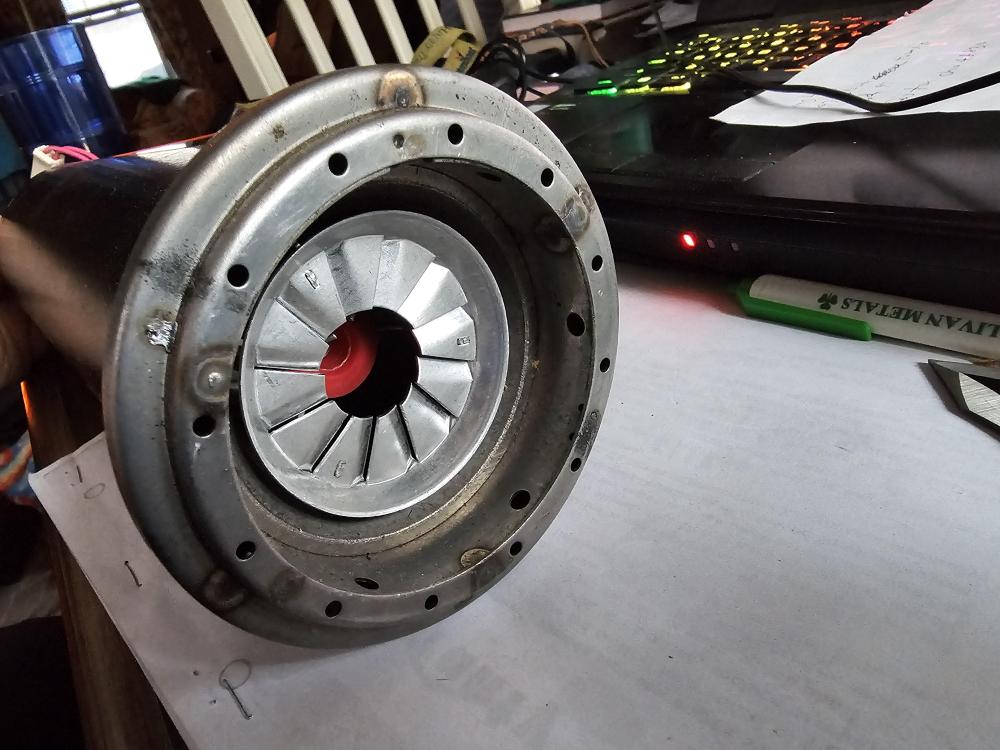
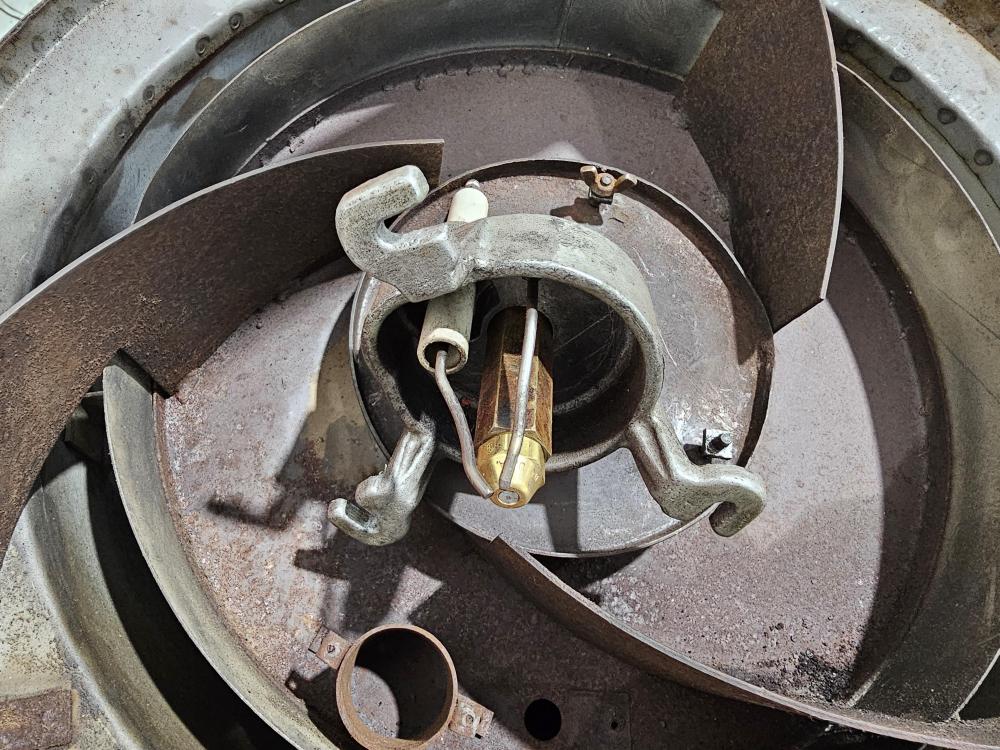
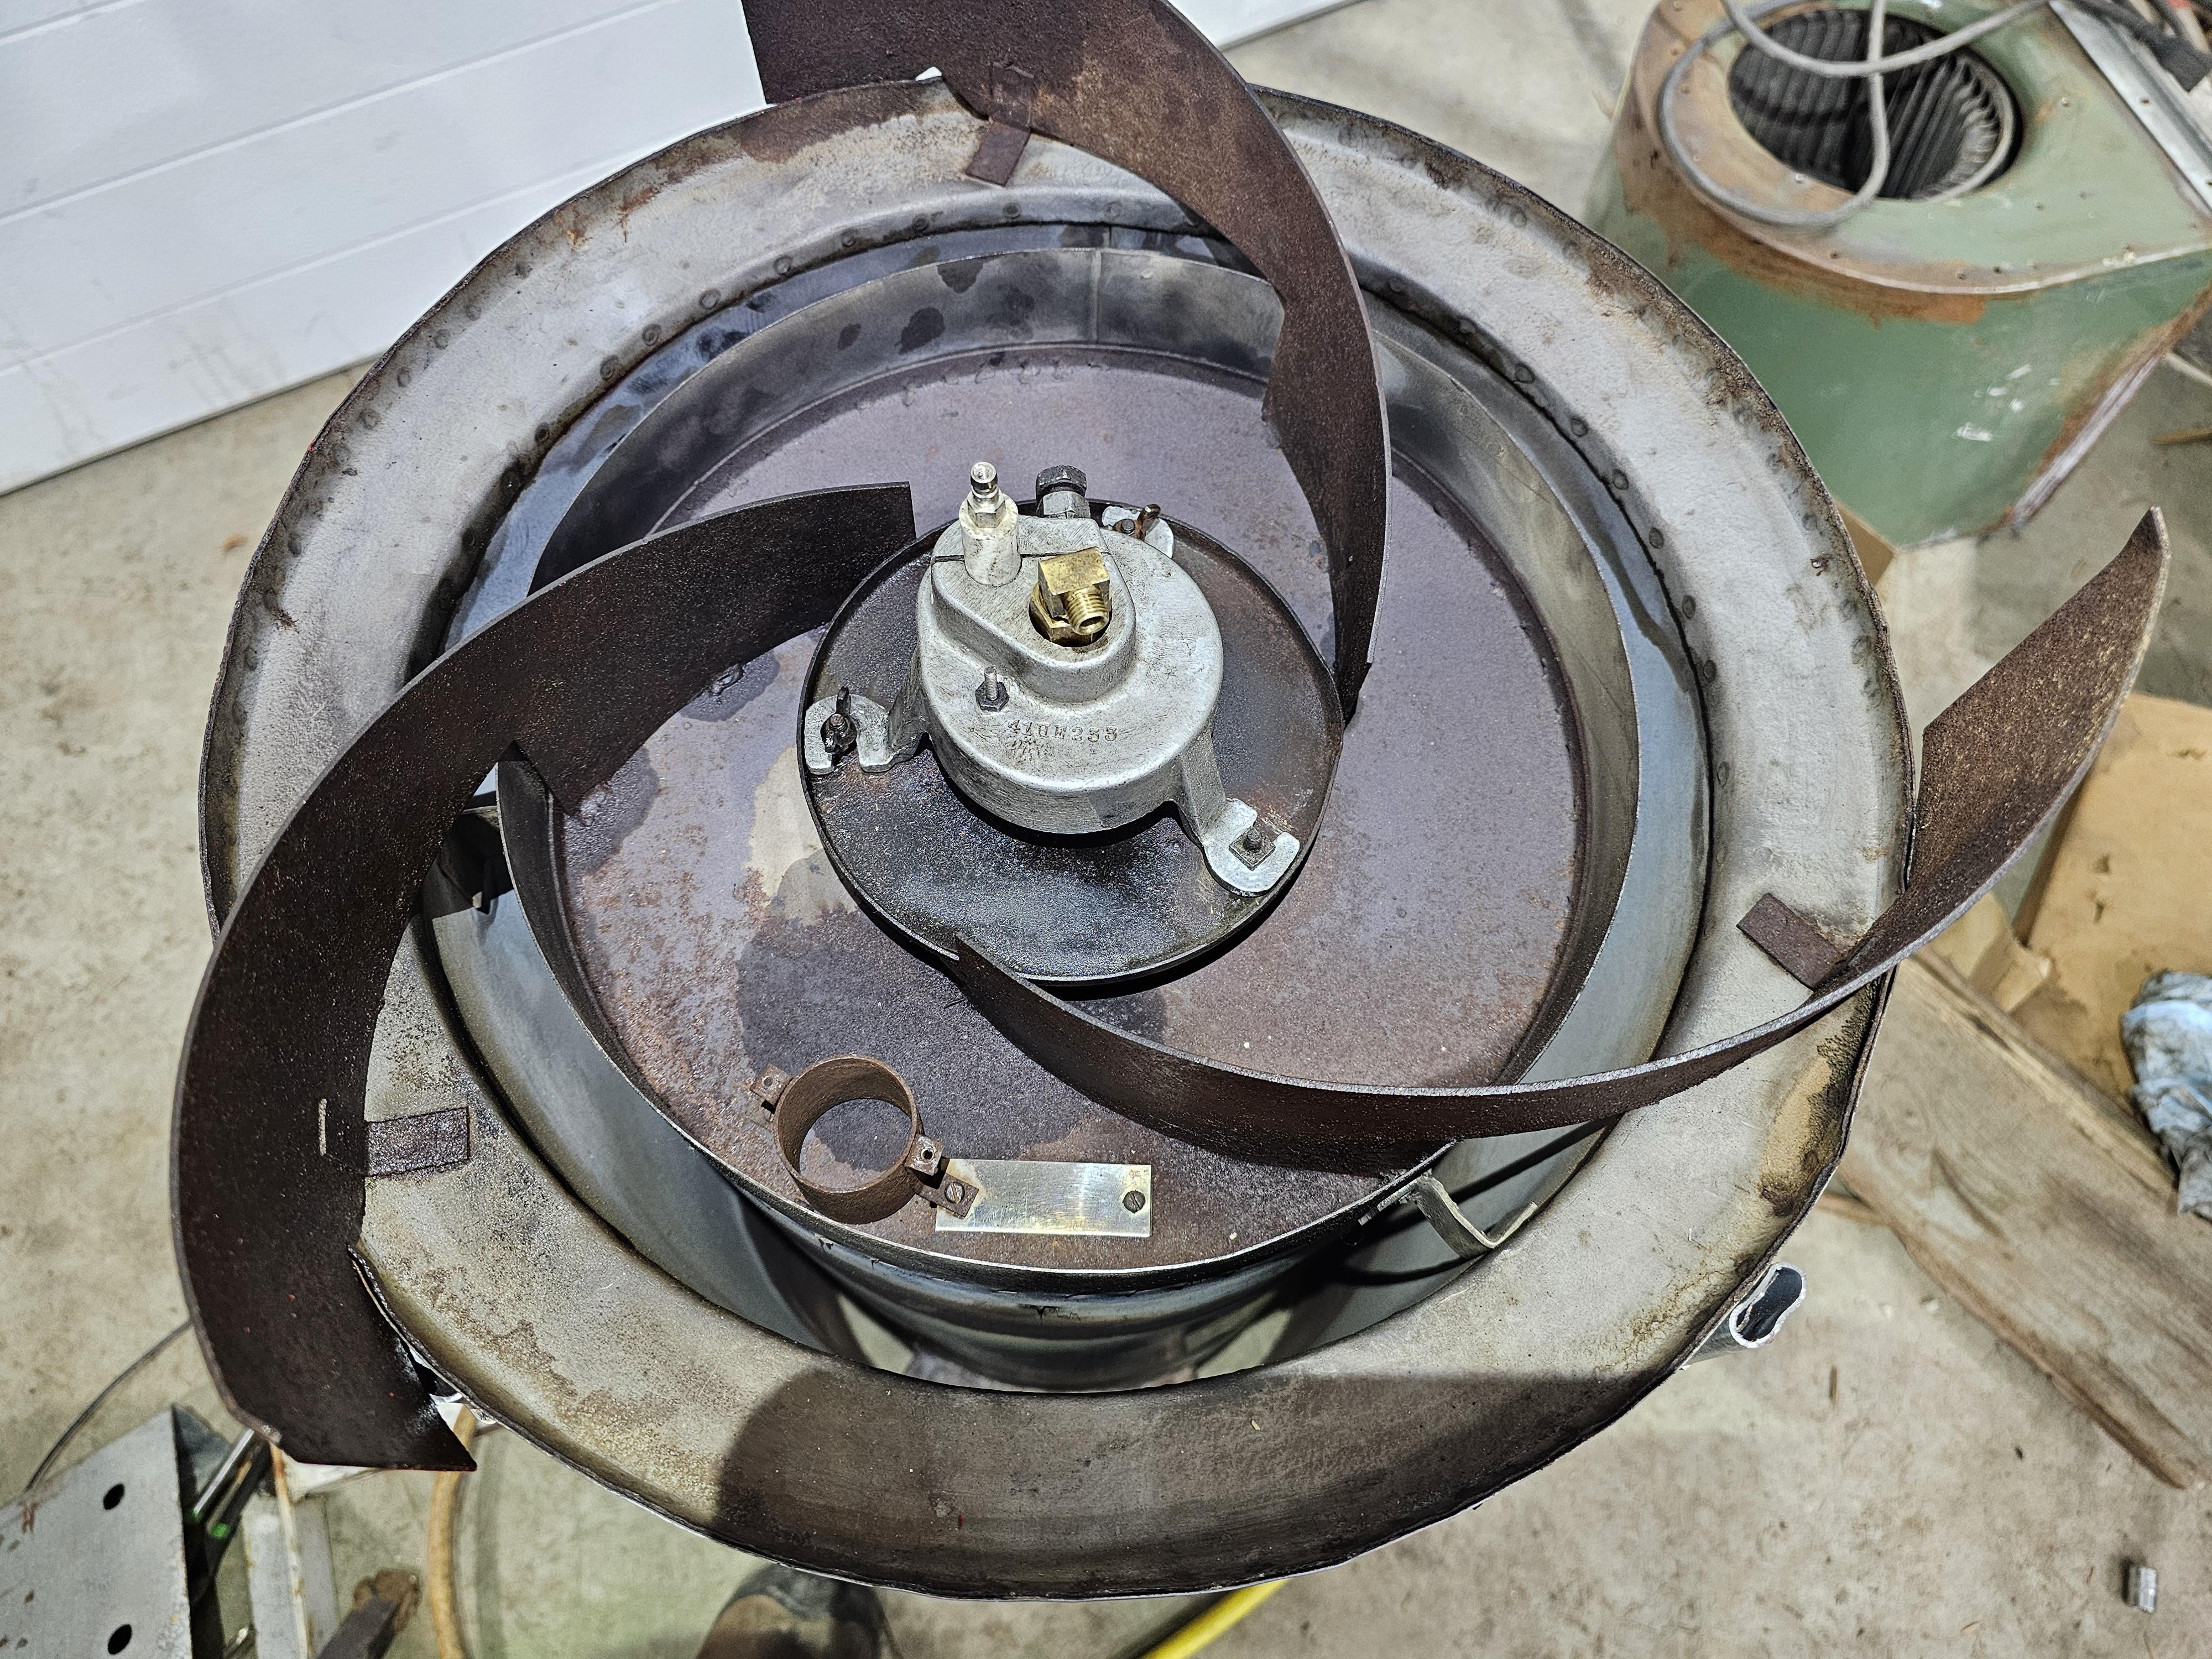
So got it apart without to much destruction of the original mounts and pieces..
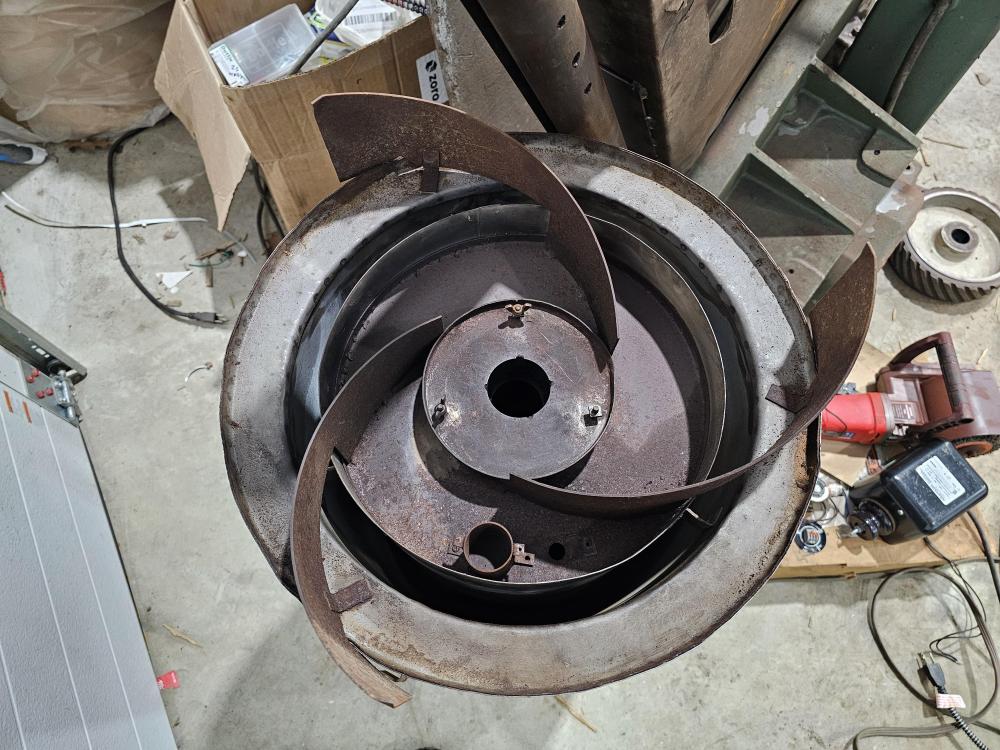
I will leave the original tabs intact.
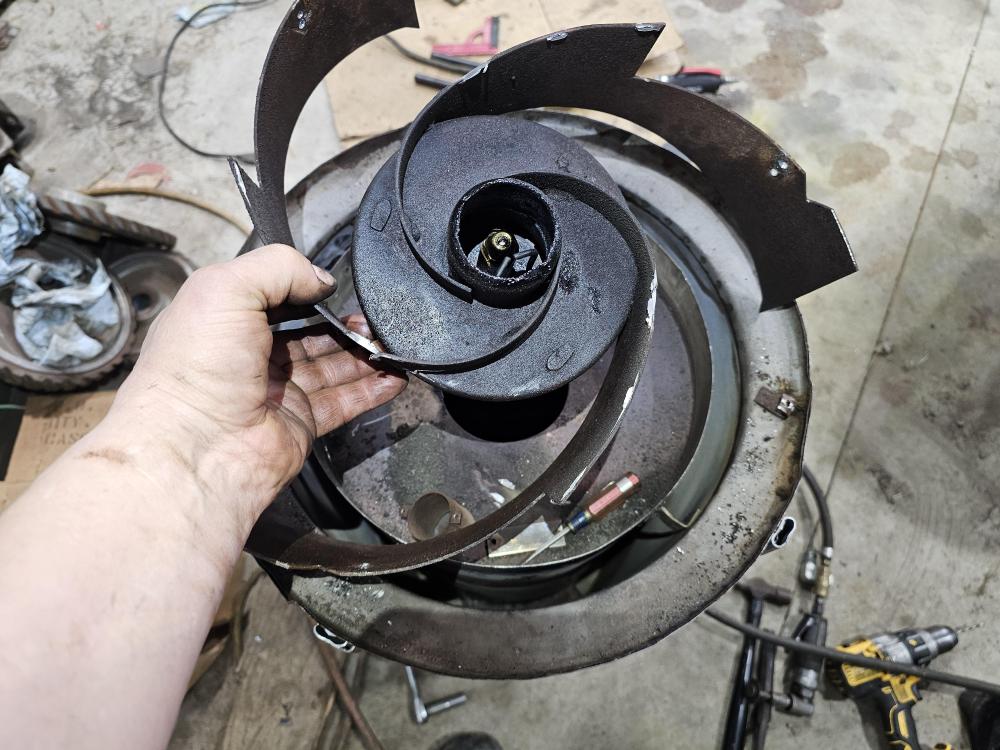
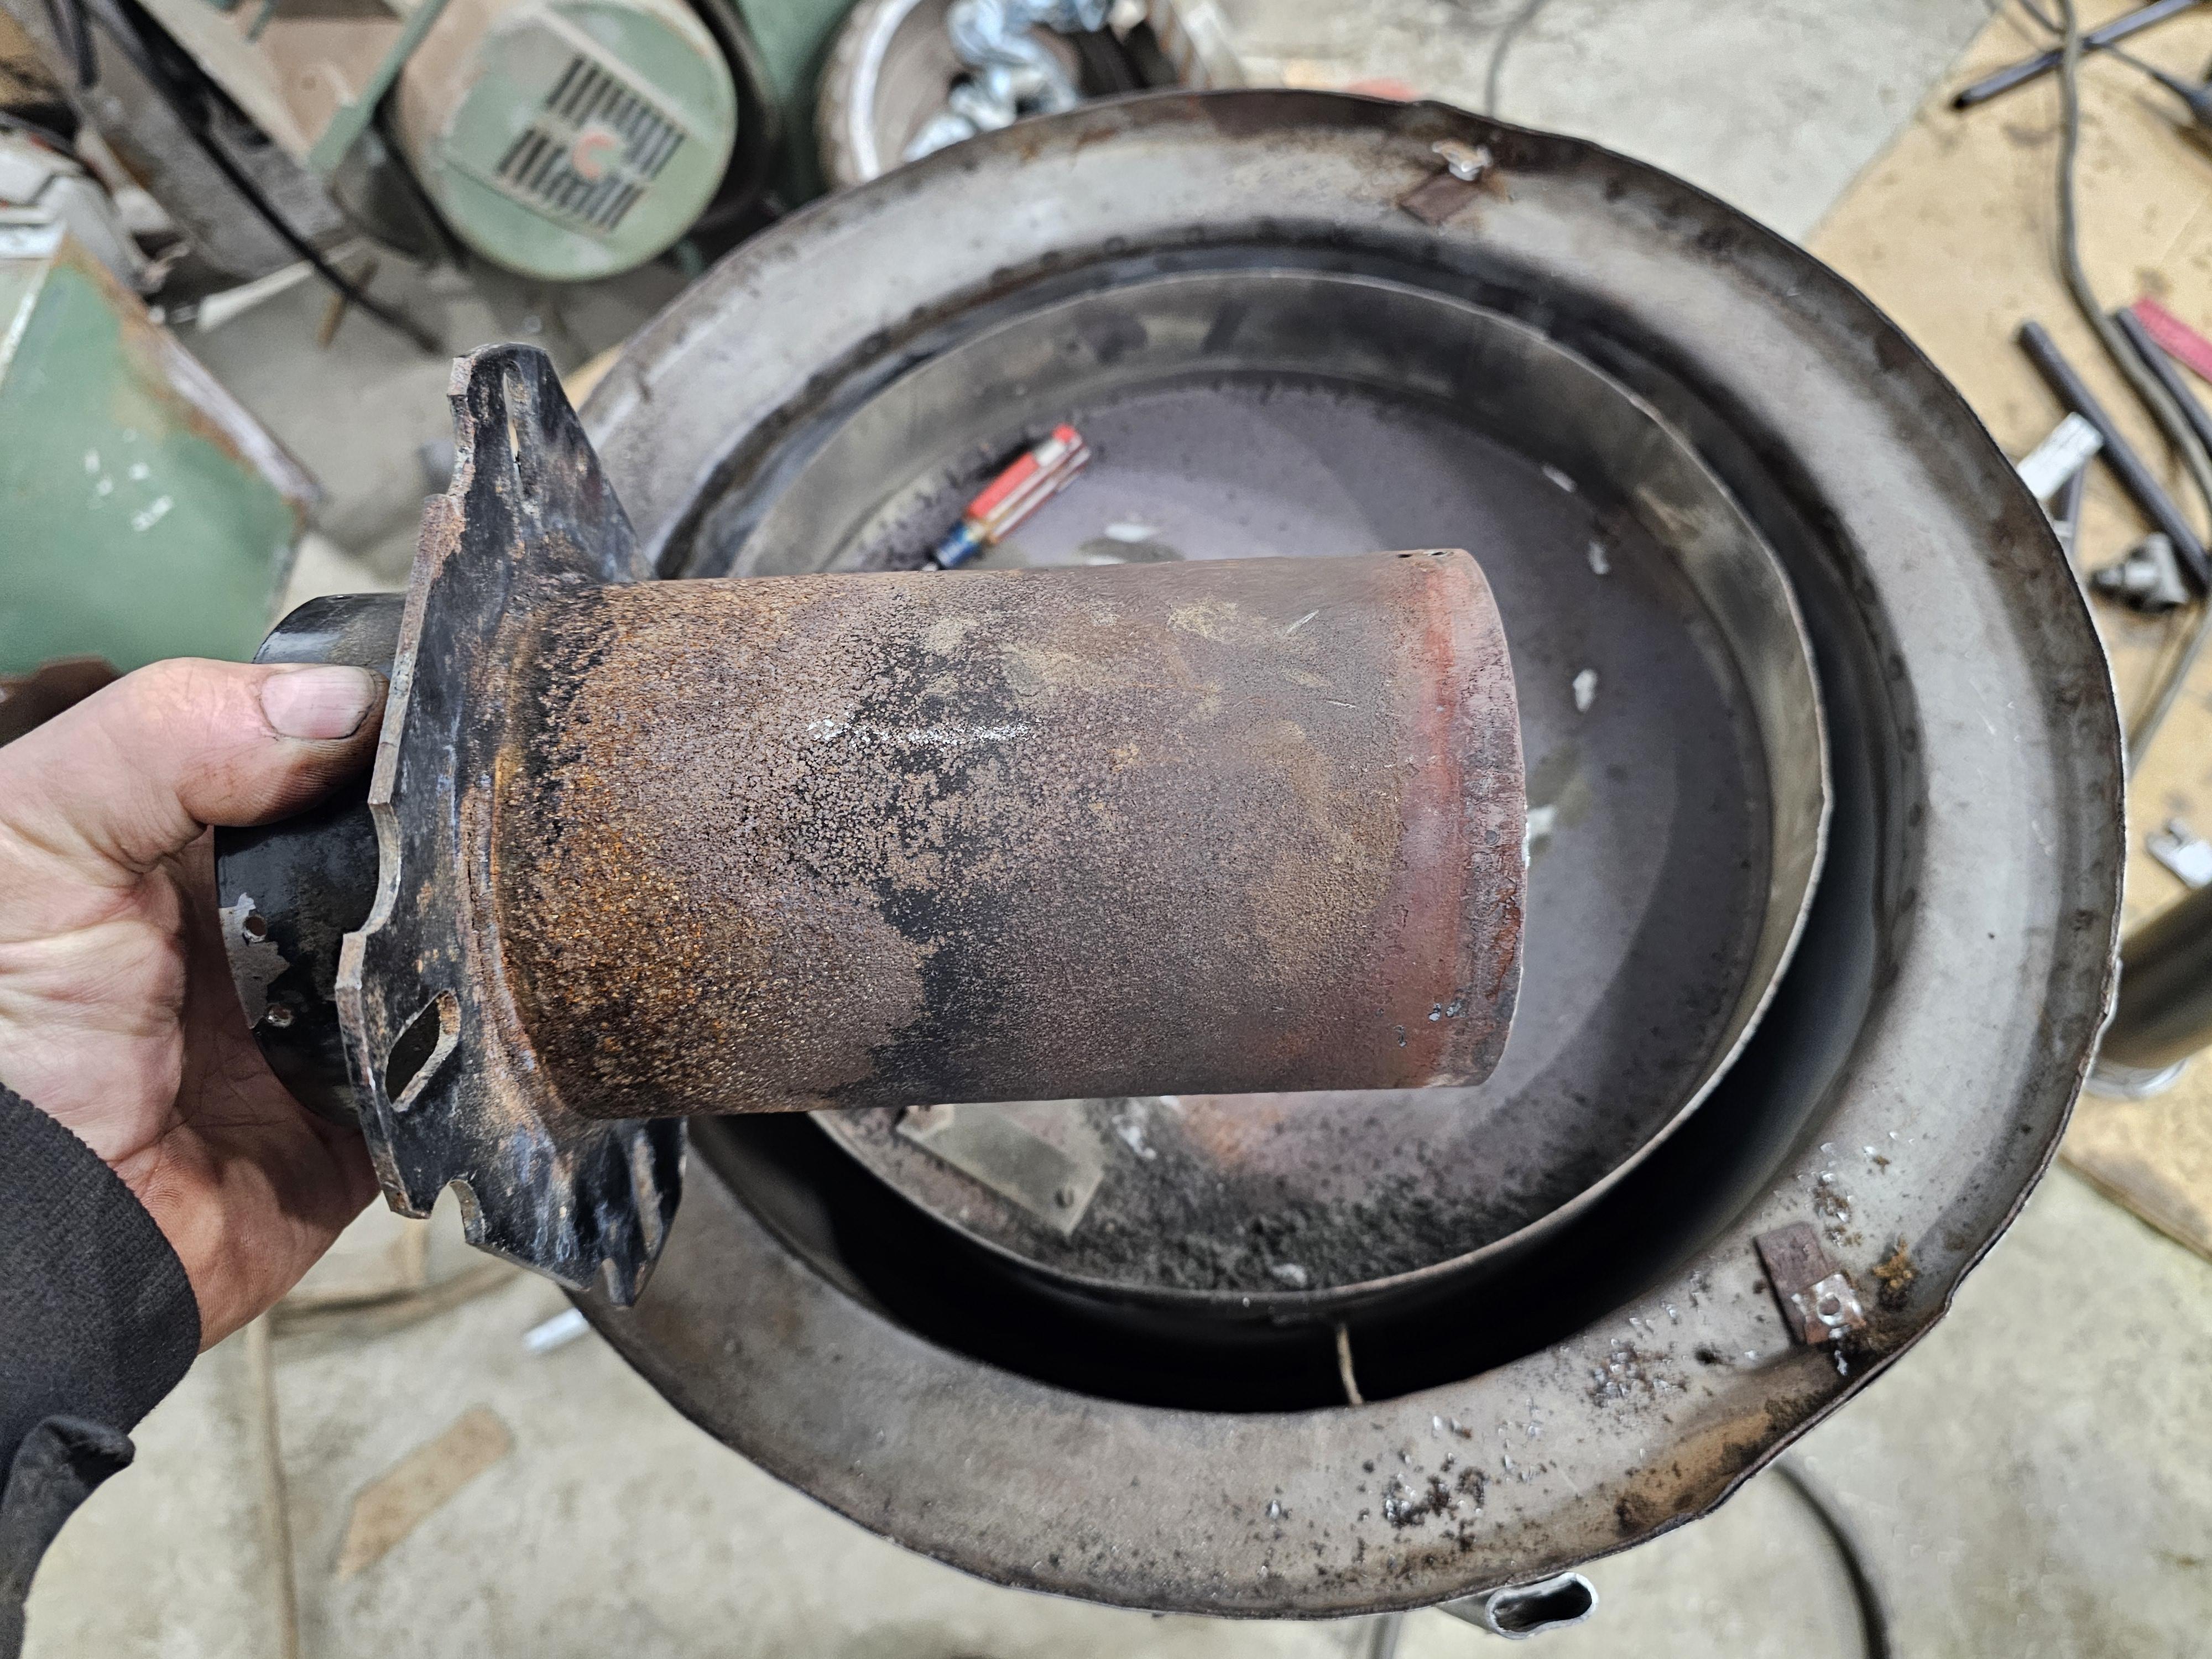
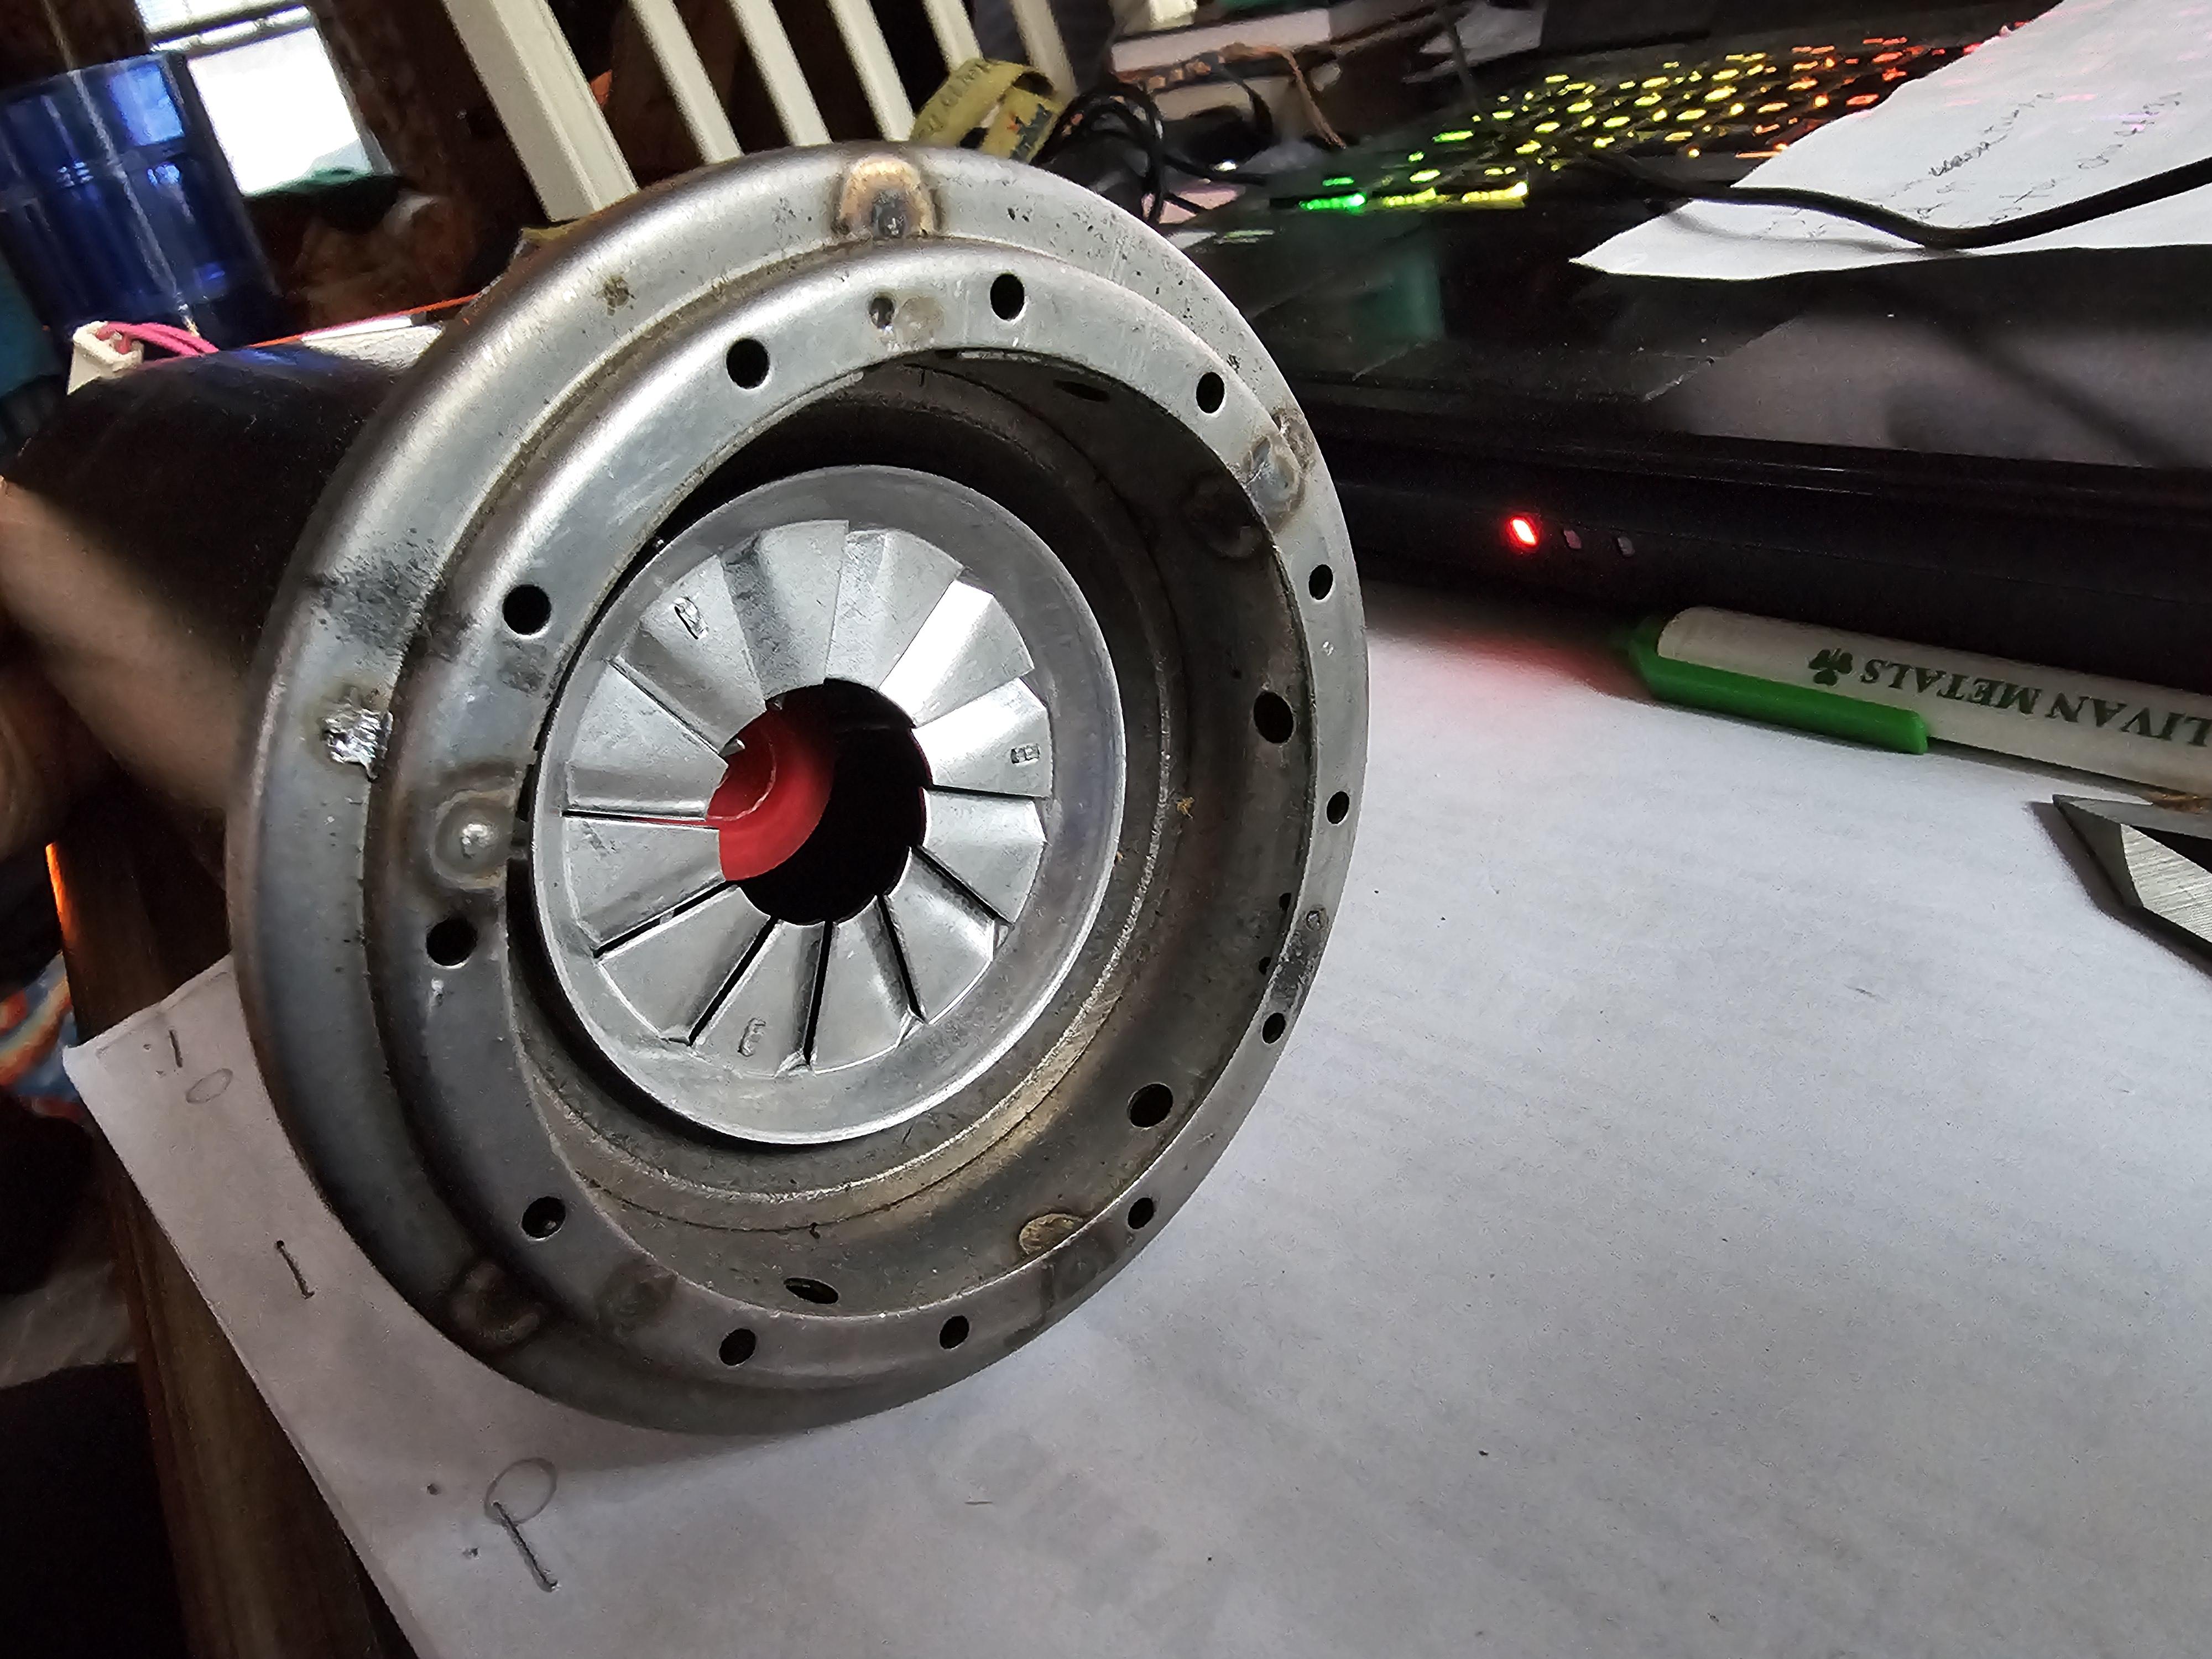
Interestingly there is no reinforcement in the sheet metal and the nozzle just poked thru.
Also interesting is the modern burner air tube fits right in the hole like it was cut out for it. +
I will create a flange and plug weld it to the outside of the sheet metal face. this flange will have studs that will hold a ring over the new air tube sandwiching it in..
The diagram of the 200K model shows 3 flange bolts nearly like the ones on the original Aeroil mount.
Because this new air burner tube does not have a mounting flange and because the sheet metal on the back of the burn chamber is thin I'll do as mentioned.
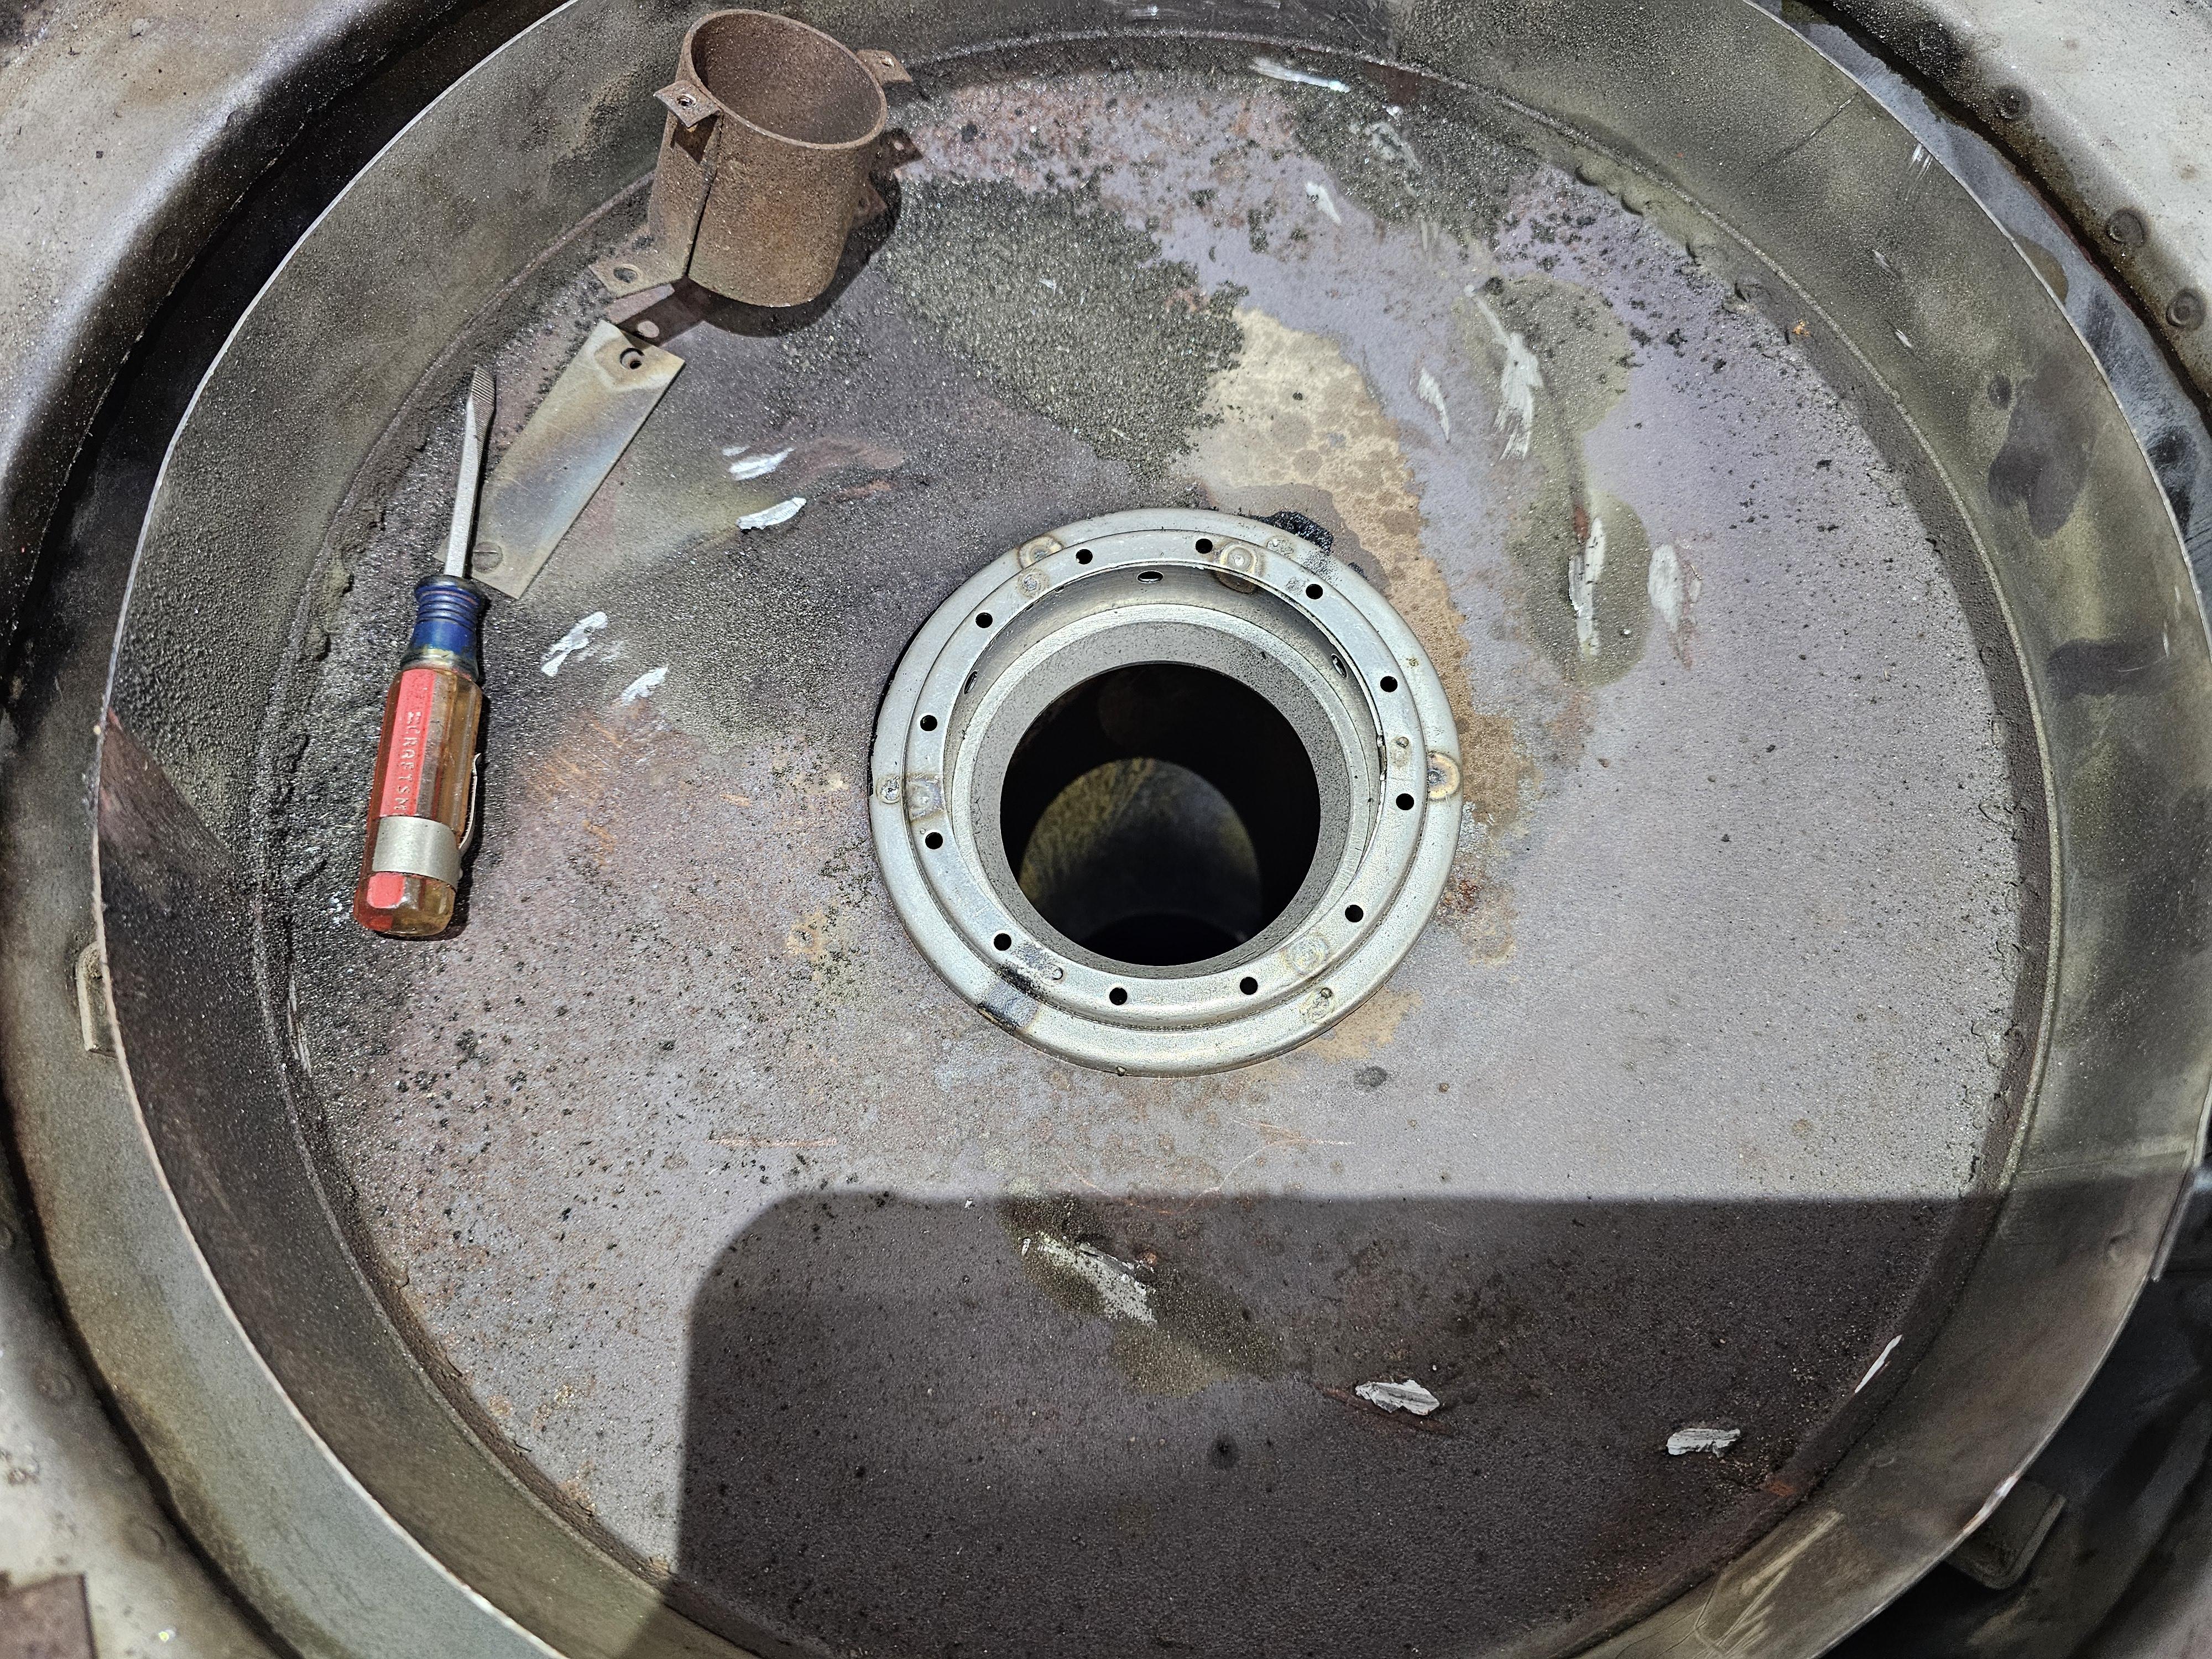
Interestingly as well is the chamber looks pretty clean inside it.. But the secondary heat exchanger shows liquid oil This tells me the fuel oil did not combust all the way and recondensed in the secondary heat chamber.
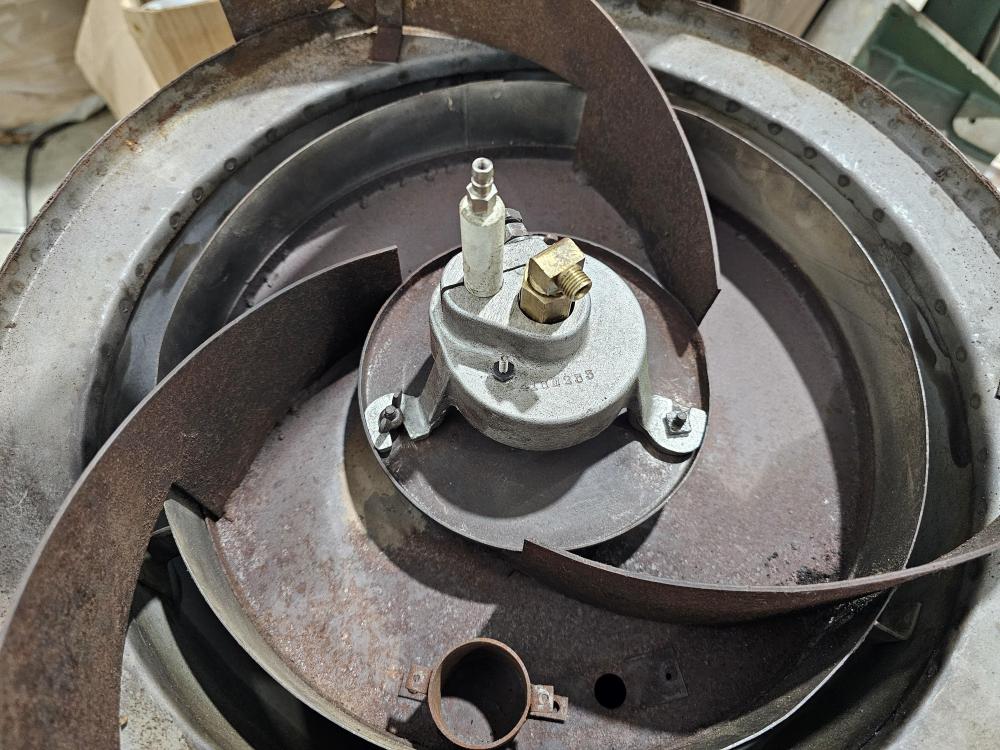
Happy with the progress so far.. Because of how this burner is setup from the factory the options are limitless as to how it is setup.. Could be like the 200K with using the fan as the burner blower or like the 400K with a separate blower for the burner..
Either way the burner face flange will have to be done.
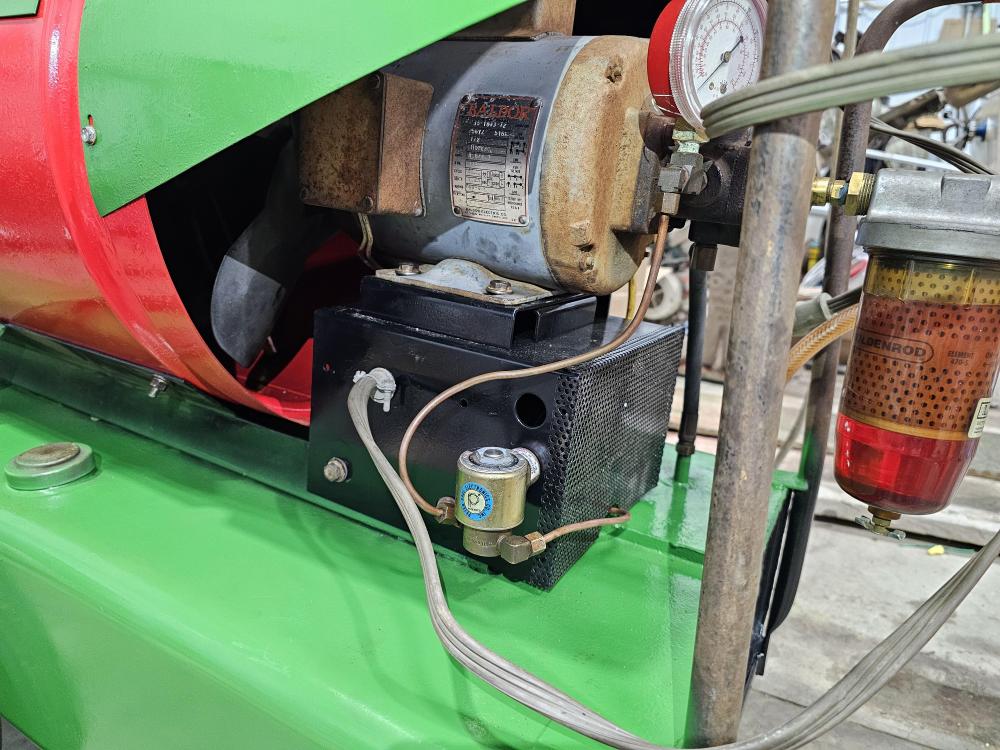
The last photo is of a standard Beckett burner tube.. The Carlin burner tube is a little narrower. but the air tube diffuser is the same size..


-
Frosty, love a visit.. Might go the other way to boot.. Once I'm done with the school build, I'm planning on taking my show on the road..
So might end up in your neighborhood.
I'm frugal and kerosene is crazy expensive here compared to diesel or gasoline. Which kerosene used to be cheaper.. Ah..
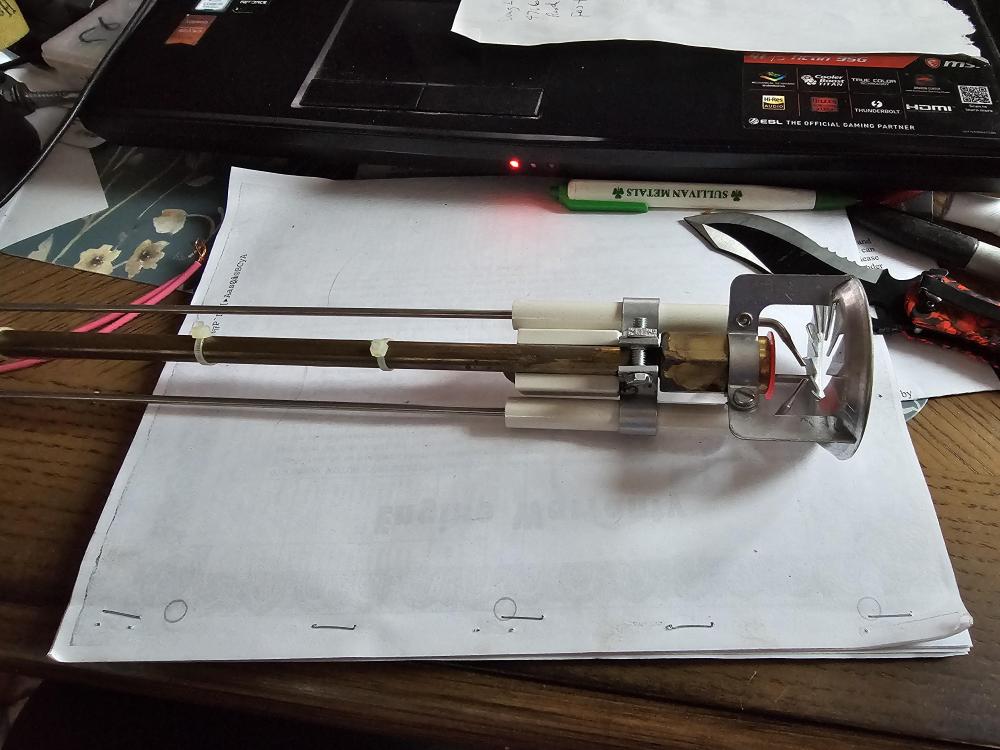
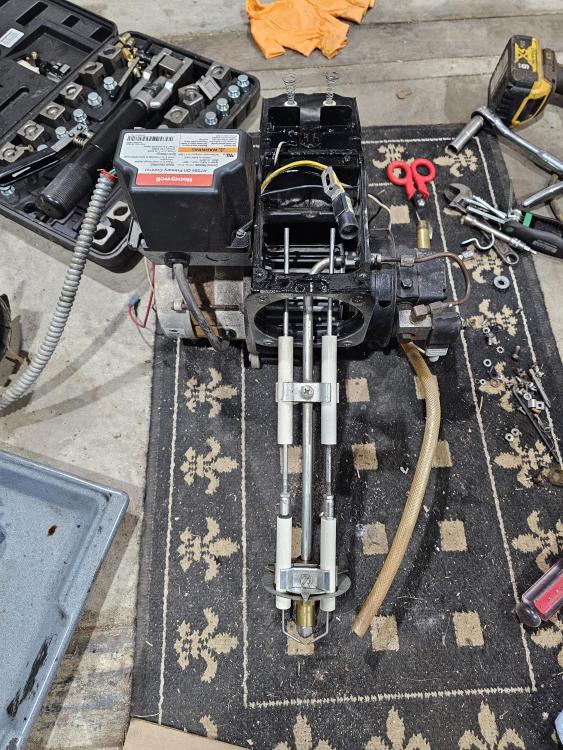
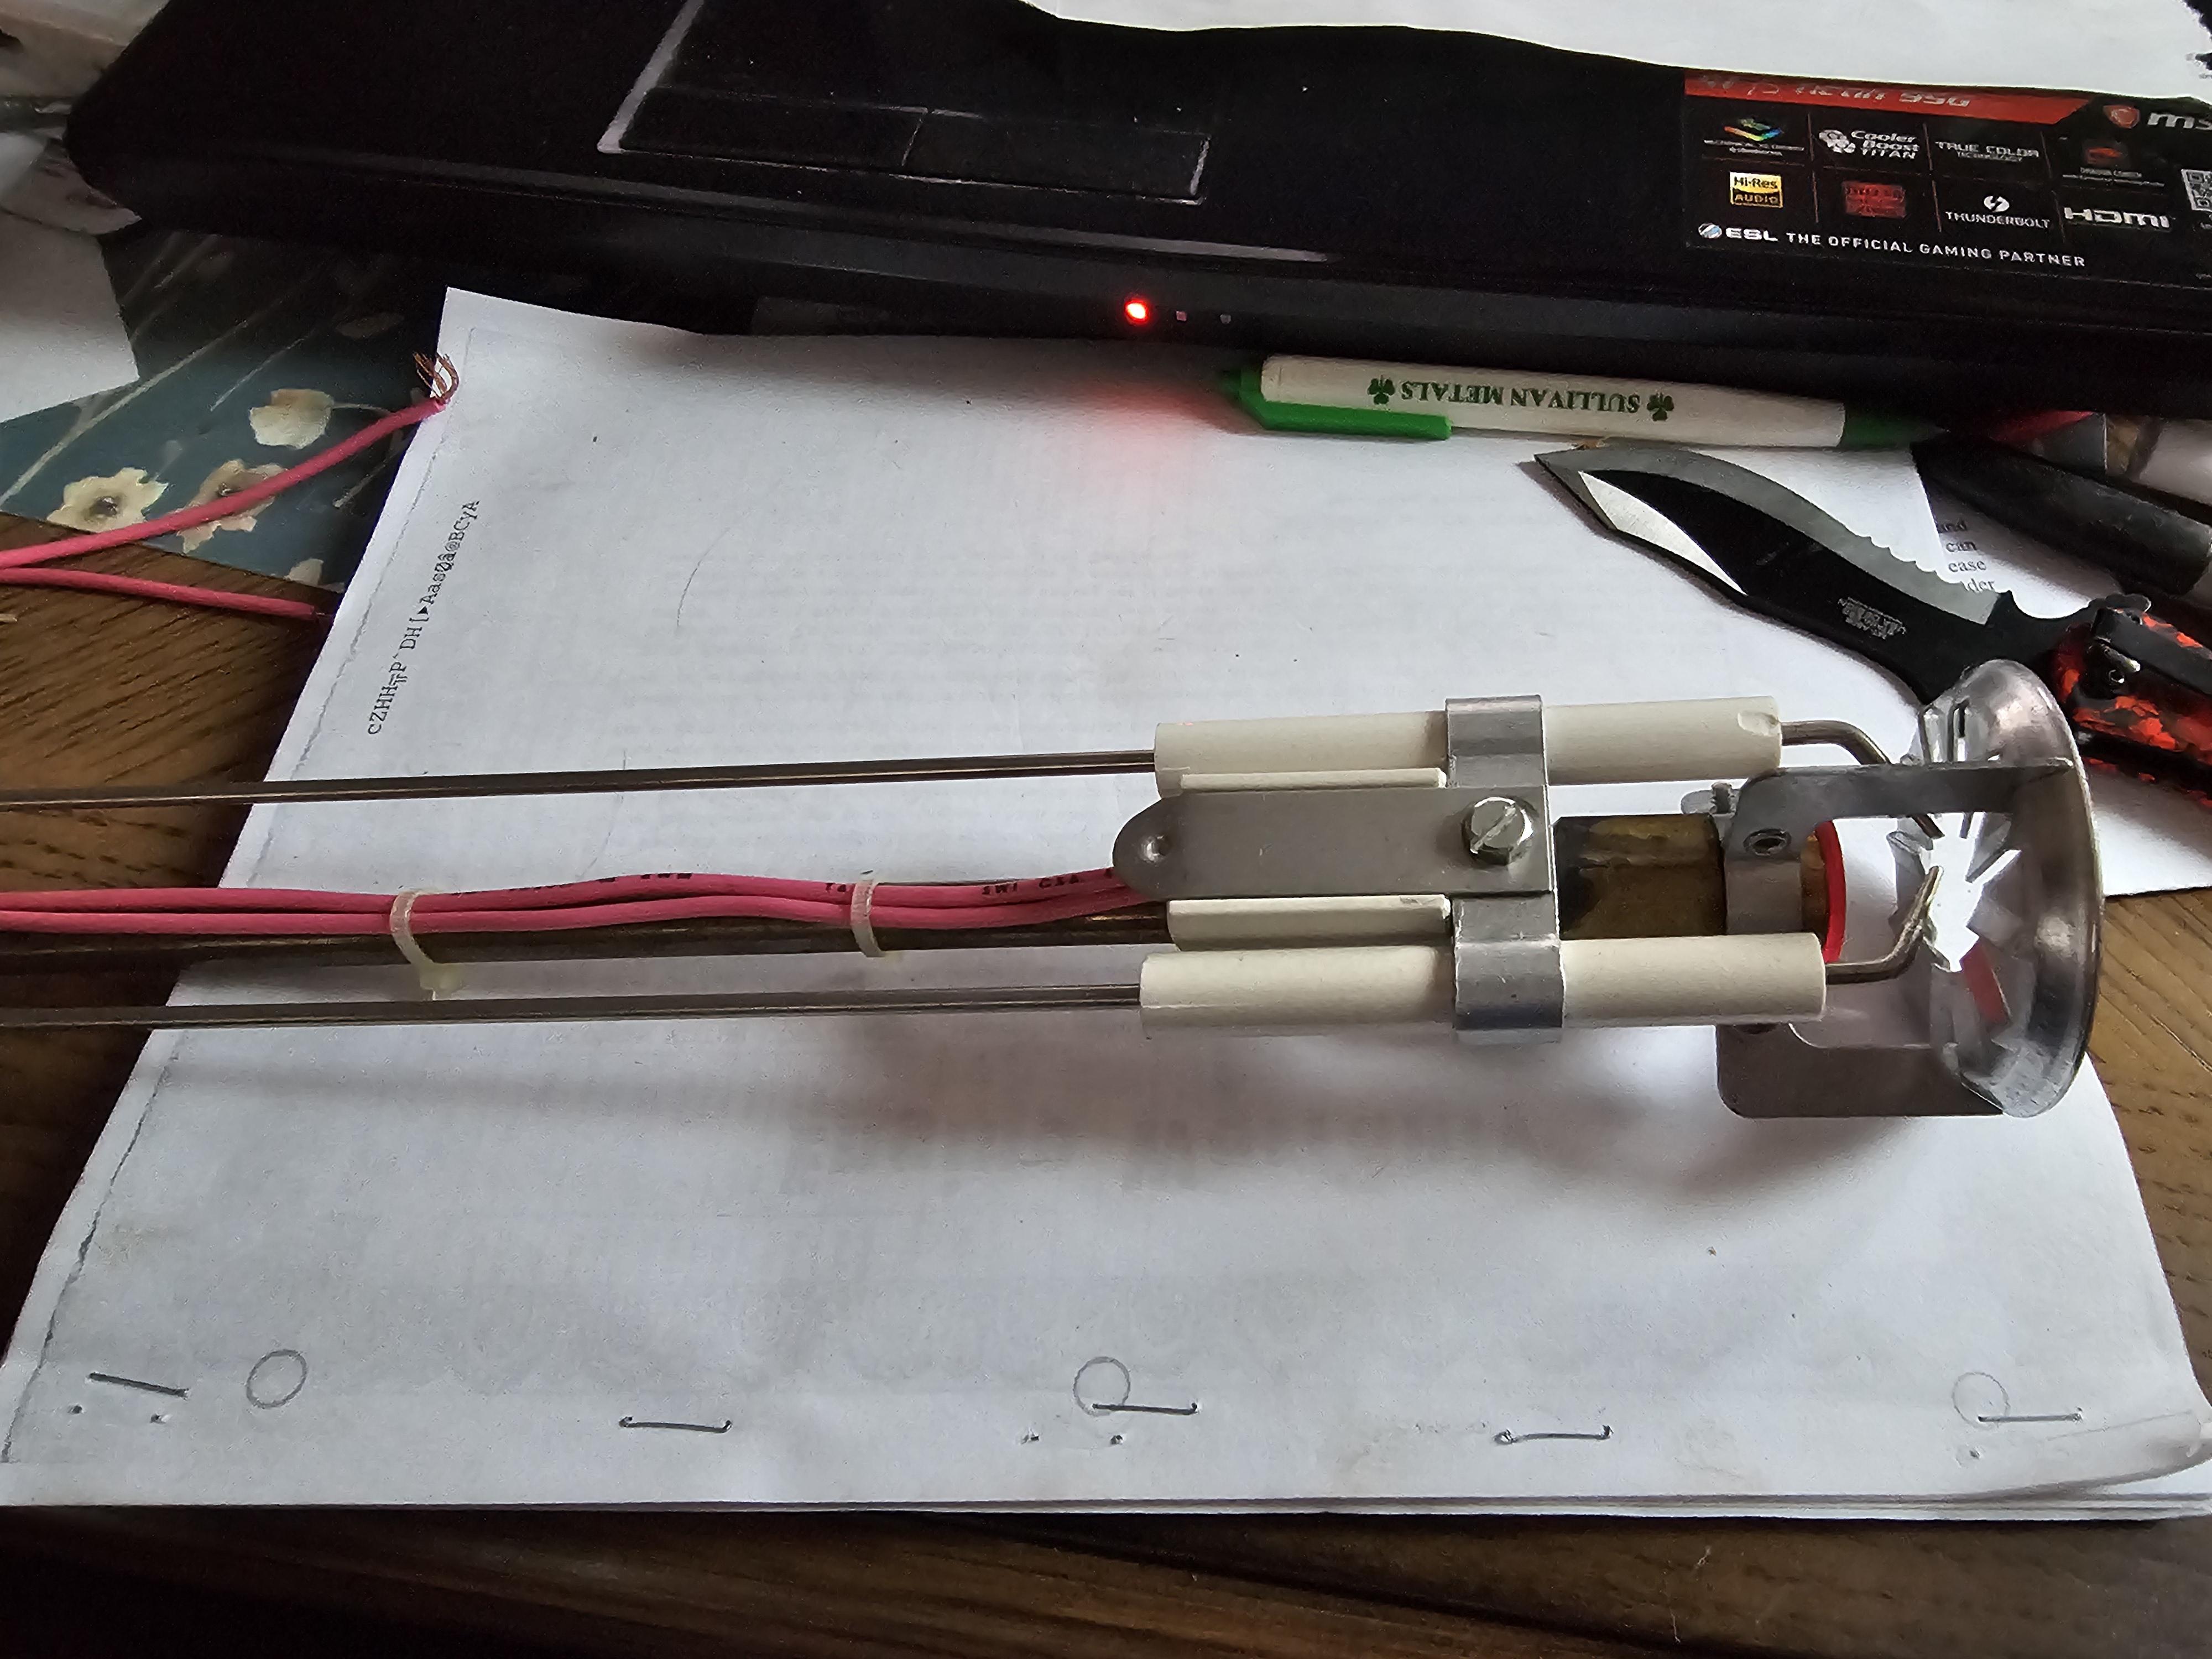
So I ordered the parts which I think I can retrofit to the Areoil unit and have the results I'm looking for.. Carlin oil burners use a sliding adjustable burner nozzle/flame retention head.. Found a complete new one on Ebay for 80.00 delivered.
I'll have to make some parts and will remove the spiral fins from the aeroil unit saving the assembly to put back in for the future owner. I'll document the assembly with photos and notes..
The Carlin EZ burners have adjustable burn rates with an adjustable retention head.. Much like the Weil Mcwellan burners QB180 which were some of the first with the adjustable nozzle/burner retention heads.
Heat wagon on their 400K unit use a separate blower and duct to air the burner..
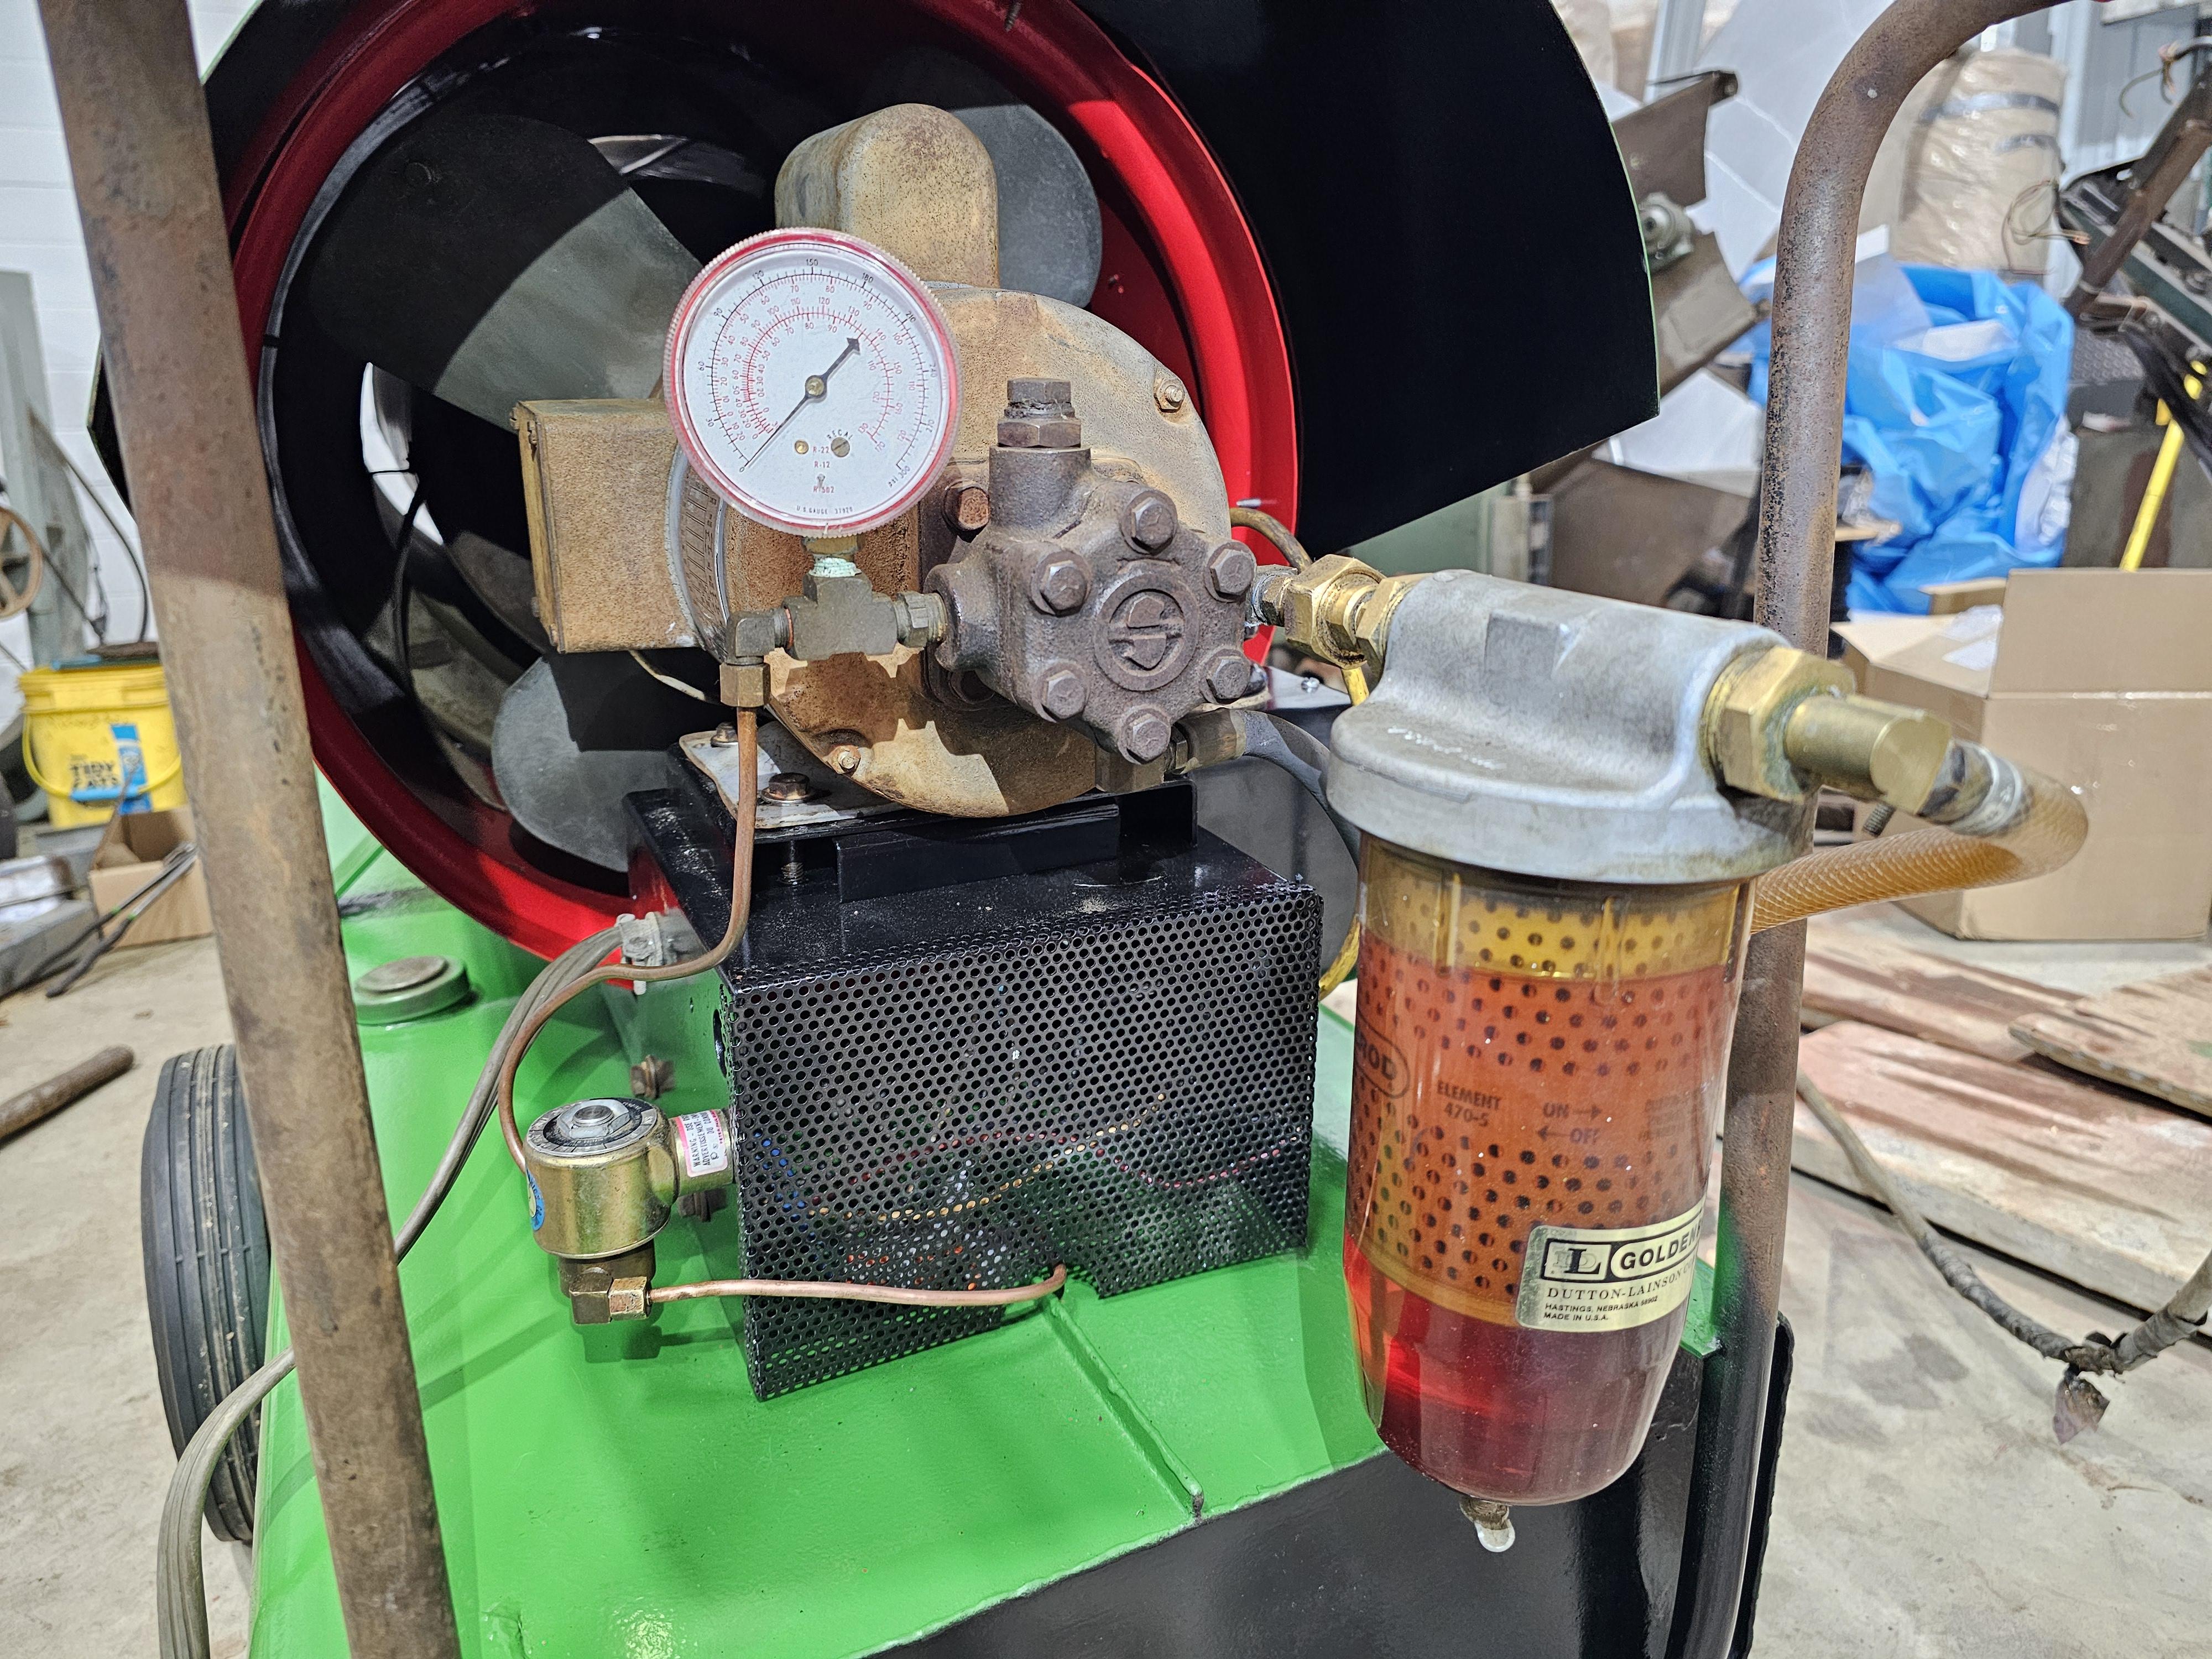
The smaller models use What is shown in the photo below.. I'll make something like this as the internals with the fan are about the same as my unit.
The nice thing about the adjustable nozzle/air tube is nozzle size is adjustable. This one is for .75 to 1.05gph.
This one has an oil heater all ready.. Nice.. This will preheat the fuel oil coming down the tube.
With the air grate in its for the lower firing gph nozzles.. With it pushed out some is for the larger gph nozzles.
![20240222_165054[1].jpg](https://www.iforgeiron.com/uploads/monthly_2024_02/20240222_1650541.thumb.jpg.180afe7efddbe5afd1fbefbf6591e60c.jpg)
-
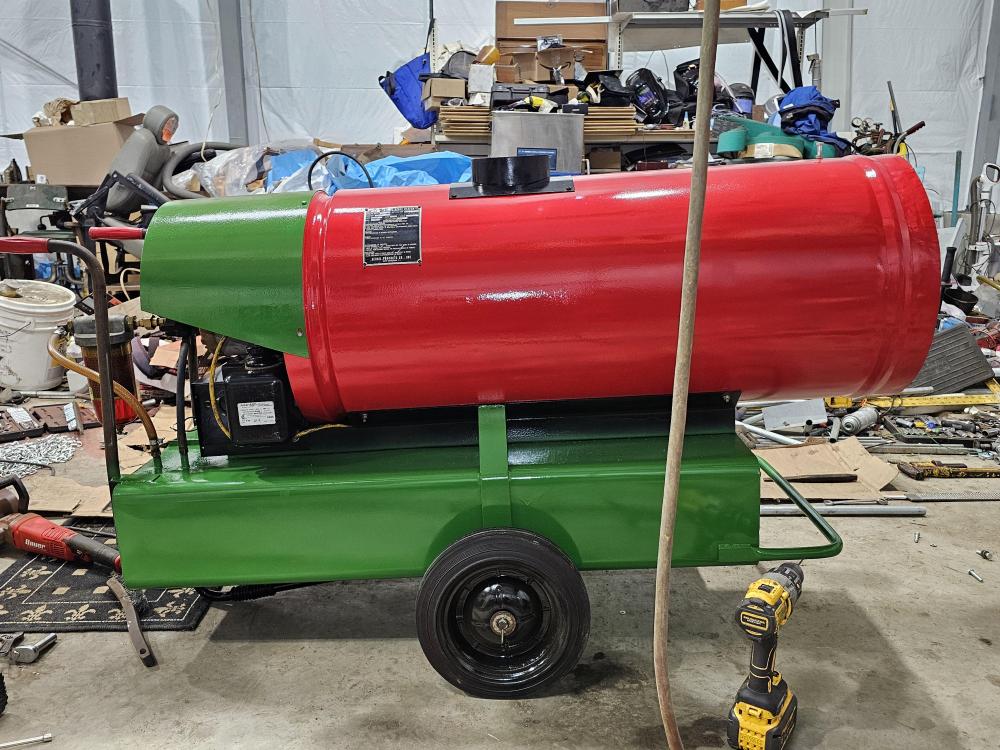
Frosty, because this is a forced burn chamber unit, the exhaust is pressurized. The stack temps are pretty high because of this factor.. It's not as efficient as a "draft over fire" model which uses a chimney and barometric dampener.
What is good is this can be put nearly anywhere and ducted to outside even with nearly a 90 degree elbow and ran 50ft out the side of a building easily with some upsized pipe.
The stack temperature even at the 14ft mark with 20F and wind blowing temps is 180F at the top.
The 14ft is to get the smoke as high up as possible to keep it away from the blower intake. Or else it just blows the smoke into the trailer..
It's an interesting machine.. Basically a "home or building" hot air furnace with the same cold air intake and heat output into ducting. Both the intake and and hot air output can be ducted as well as the chimney..
This model at 300K is designed to work even at low temperatures and still output ample amounhts of heated air.
If you look up "indirect oil fired heaters" there is a ton of great info out there..
Some of the newer units use nearly the same arrangement for burner setup.. they use a flame retention head held in a tube with little windows on each side of the tube to collect the right amount of air.
These being dialed in at the factory.. The output is very clean but these types of heaters are not as efficient as the totally separate burner models which use a separate blower..
Some of these burner/blower units use a venturi assist in the stack since they are "Draft over fire"
And yes.. Having a heater blowing warm/hot air out into open space is still useful when working on equipment in the cold. I love the crispness of -10F to 16F winter air.. I really enjoy it.. But working in it.. Ah, not so much.. -
Nice key.. Forge brazed?
-
That is a great design for a knife angle jig.. I love the old chainsaw file holders for handles.. Brilliant..
-
Frosty, thats the thing right.. I'm super happy with how it looks and overall it functions well "enough".. I have a 14ft stack on it now.. but when the wind blows oil smoke is pretty heavy and it floats low gets sucked into the blower and ends up inside the trailer. Much better than it was but still.
Be really nice to find an owners/service manual..
I just got spoiled with the heater I made.. it was smoke-free and had plenty of heat..
The main part is limited service life.. What I mean is.. In another few months, I won't have a real use for this heater except to heat space and tractors when I'm out in the snow fixing them.. Which can be a really nice thing.. could have used it last week when I replaced a wheel bearing outside in 20F..
I guess this becomes the true answer since I have all the parts and burner.. It simply means having to adapt a holder plate and a fan shroud since I won't modify this unit.. I'll just make new pieces to keep it original.
Some old oil burner tech guy would probably have an answer as to the question quickly in terms of how to clear the smoke.. -
Thanks..
On the subject of creams.. I like the Goldbond medicated.. I get alligator skin and funky breakouts this time of year.
I've tried all sorts of over the counter and even some prescription stuff.. Nothing would touch it..
On a whim I tried goldbond extra strength and a week later it was cleared up.. -
Heater is back together and a full 3hrs of use today.
While its certainly a lot less smokey, it's still not burning as cleanly as I'd like..
I have a burner I can fit since I had all the parts to make a long tube burner..
The real argument is, do I spend the time to make this 100% of what I think it should be.. Or should I just leave it alone since by this time next year, the school will be up and running and I'll have someplace warm to forge and won't need to heat the trailer to work in.
I know the true potential.. Thats where I fall apart between logic and reason.
Install the retention head oil burner and have a more effective and efficient portable heating unit (which is nice when outside working).. Or leave it alone and suffer with the extra smoke and smell..

-
John, very nice.. Steady improvements..
-
Very nice.. Are you still able to rotate it?
I love the slice of RRtrack as the mount.. -
I forge with the left hand too.. But it's just roughing stuff out.. Sadly I'm just getting to be at forging speed after all those years away..
only to get this far and the accidents.. Eh, I'll push thru or I won't.. Time will tell..
So I have to ask because of where you are at..
Your trying to make a Tanto? Wakasashi? with traditional HC outer skin with inner softer metal?
Don't take this the wrong way.. Your kinda going about it the hardway.. Or the ultimate skill way..
I often lose heart when I see someone trying something in which the chances of success are very low..
The best way is to forge a Sunobe and forge from there.. Put in all the correct markers and lines and then go from there.
I'm a huge fan of "Success breeding success" and within a few blades, you would be right where it would be much easier.
Way, way back I had experimented with taking the little shortcuts and what I learned is, that there are no real shortcuts if the desired outcome is something that is "known".. IE chasing after..
Way, way back. I had done the very thing you are doing on more than a few occasions.. A few of the blades I had forged right thru the HC on one side. Yes it is possible. At welding heat, each blow of the hammer has to be counted.. Also a flat faced hammer is preferred vs rounded face unless trying to manipulate the grain..
Anyhow, keep after it. -
Chad, thanks..
") Love the hearts and hair pin..
Love the hearts and hair pin..
I'm not sure exactly what will happen with the hand/wrist. I keep forging but it's awfully painful. Today I picked up the large hammer and it really yelled at me.
Peening is where it's the worse.. Having to control the hammer in flight to the target is excruciating.
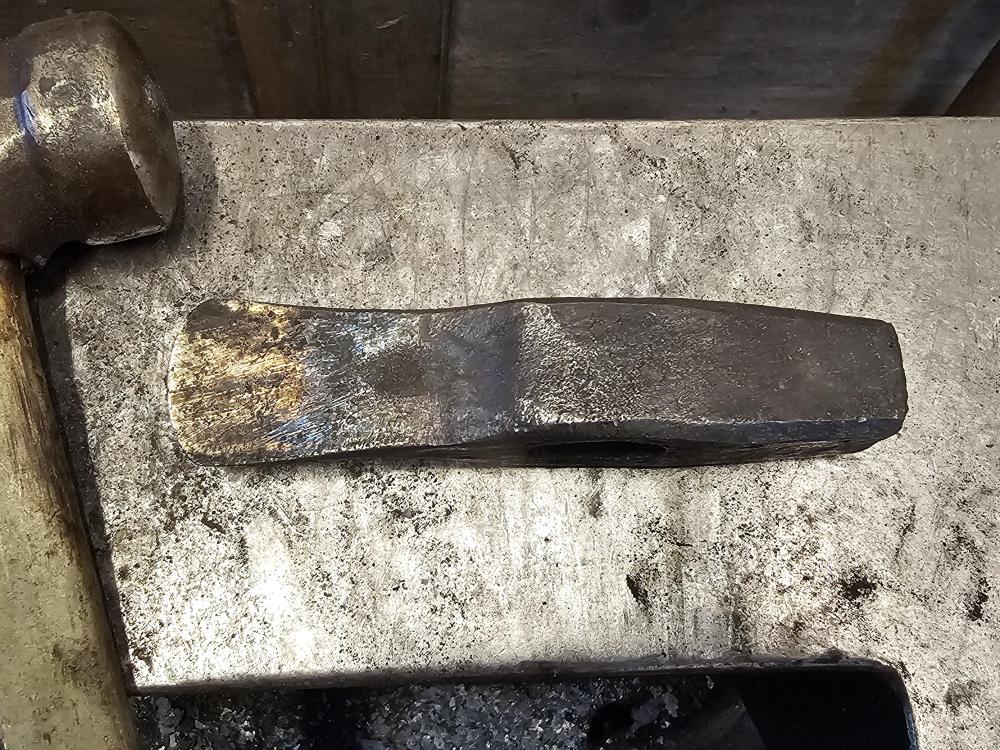
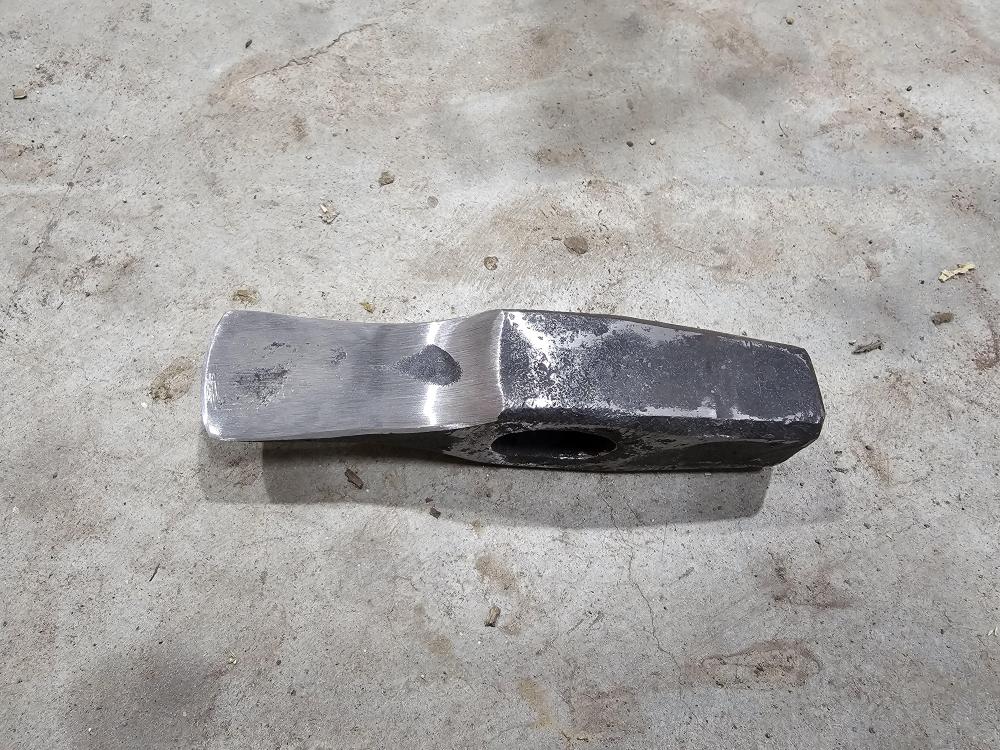
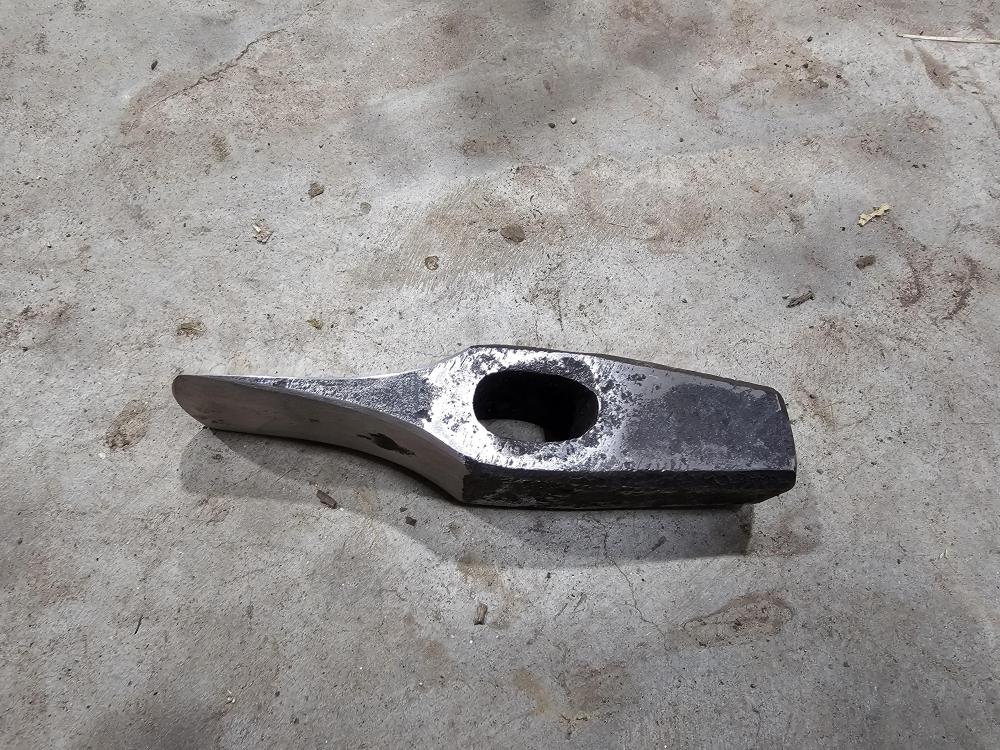
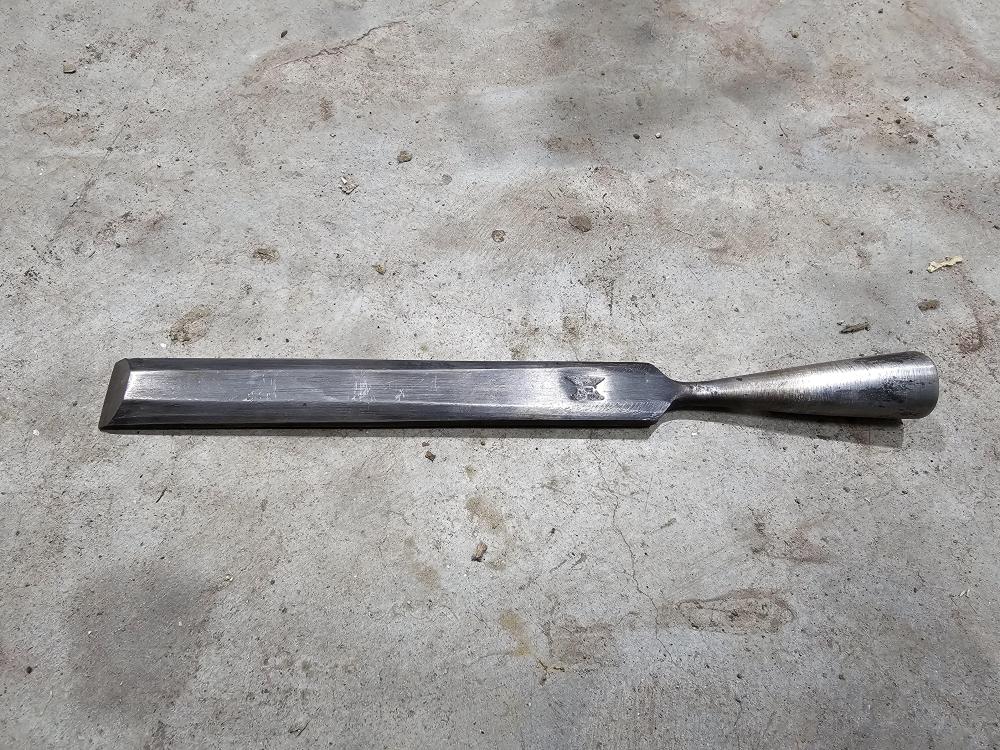
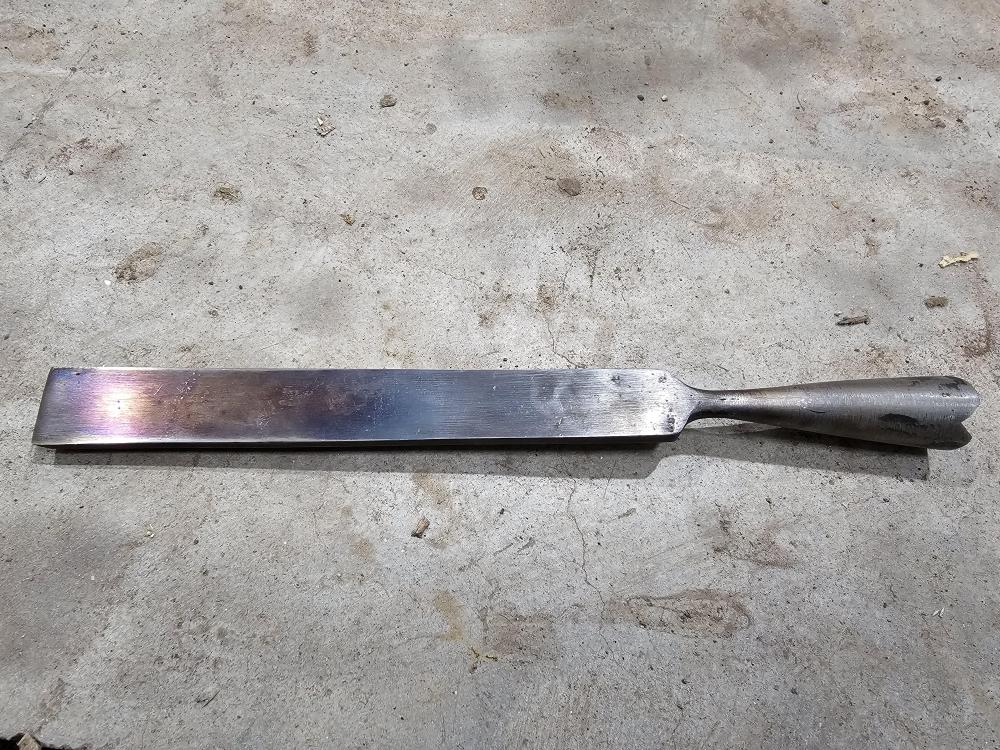
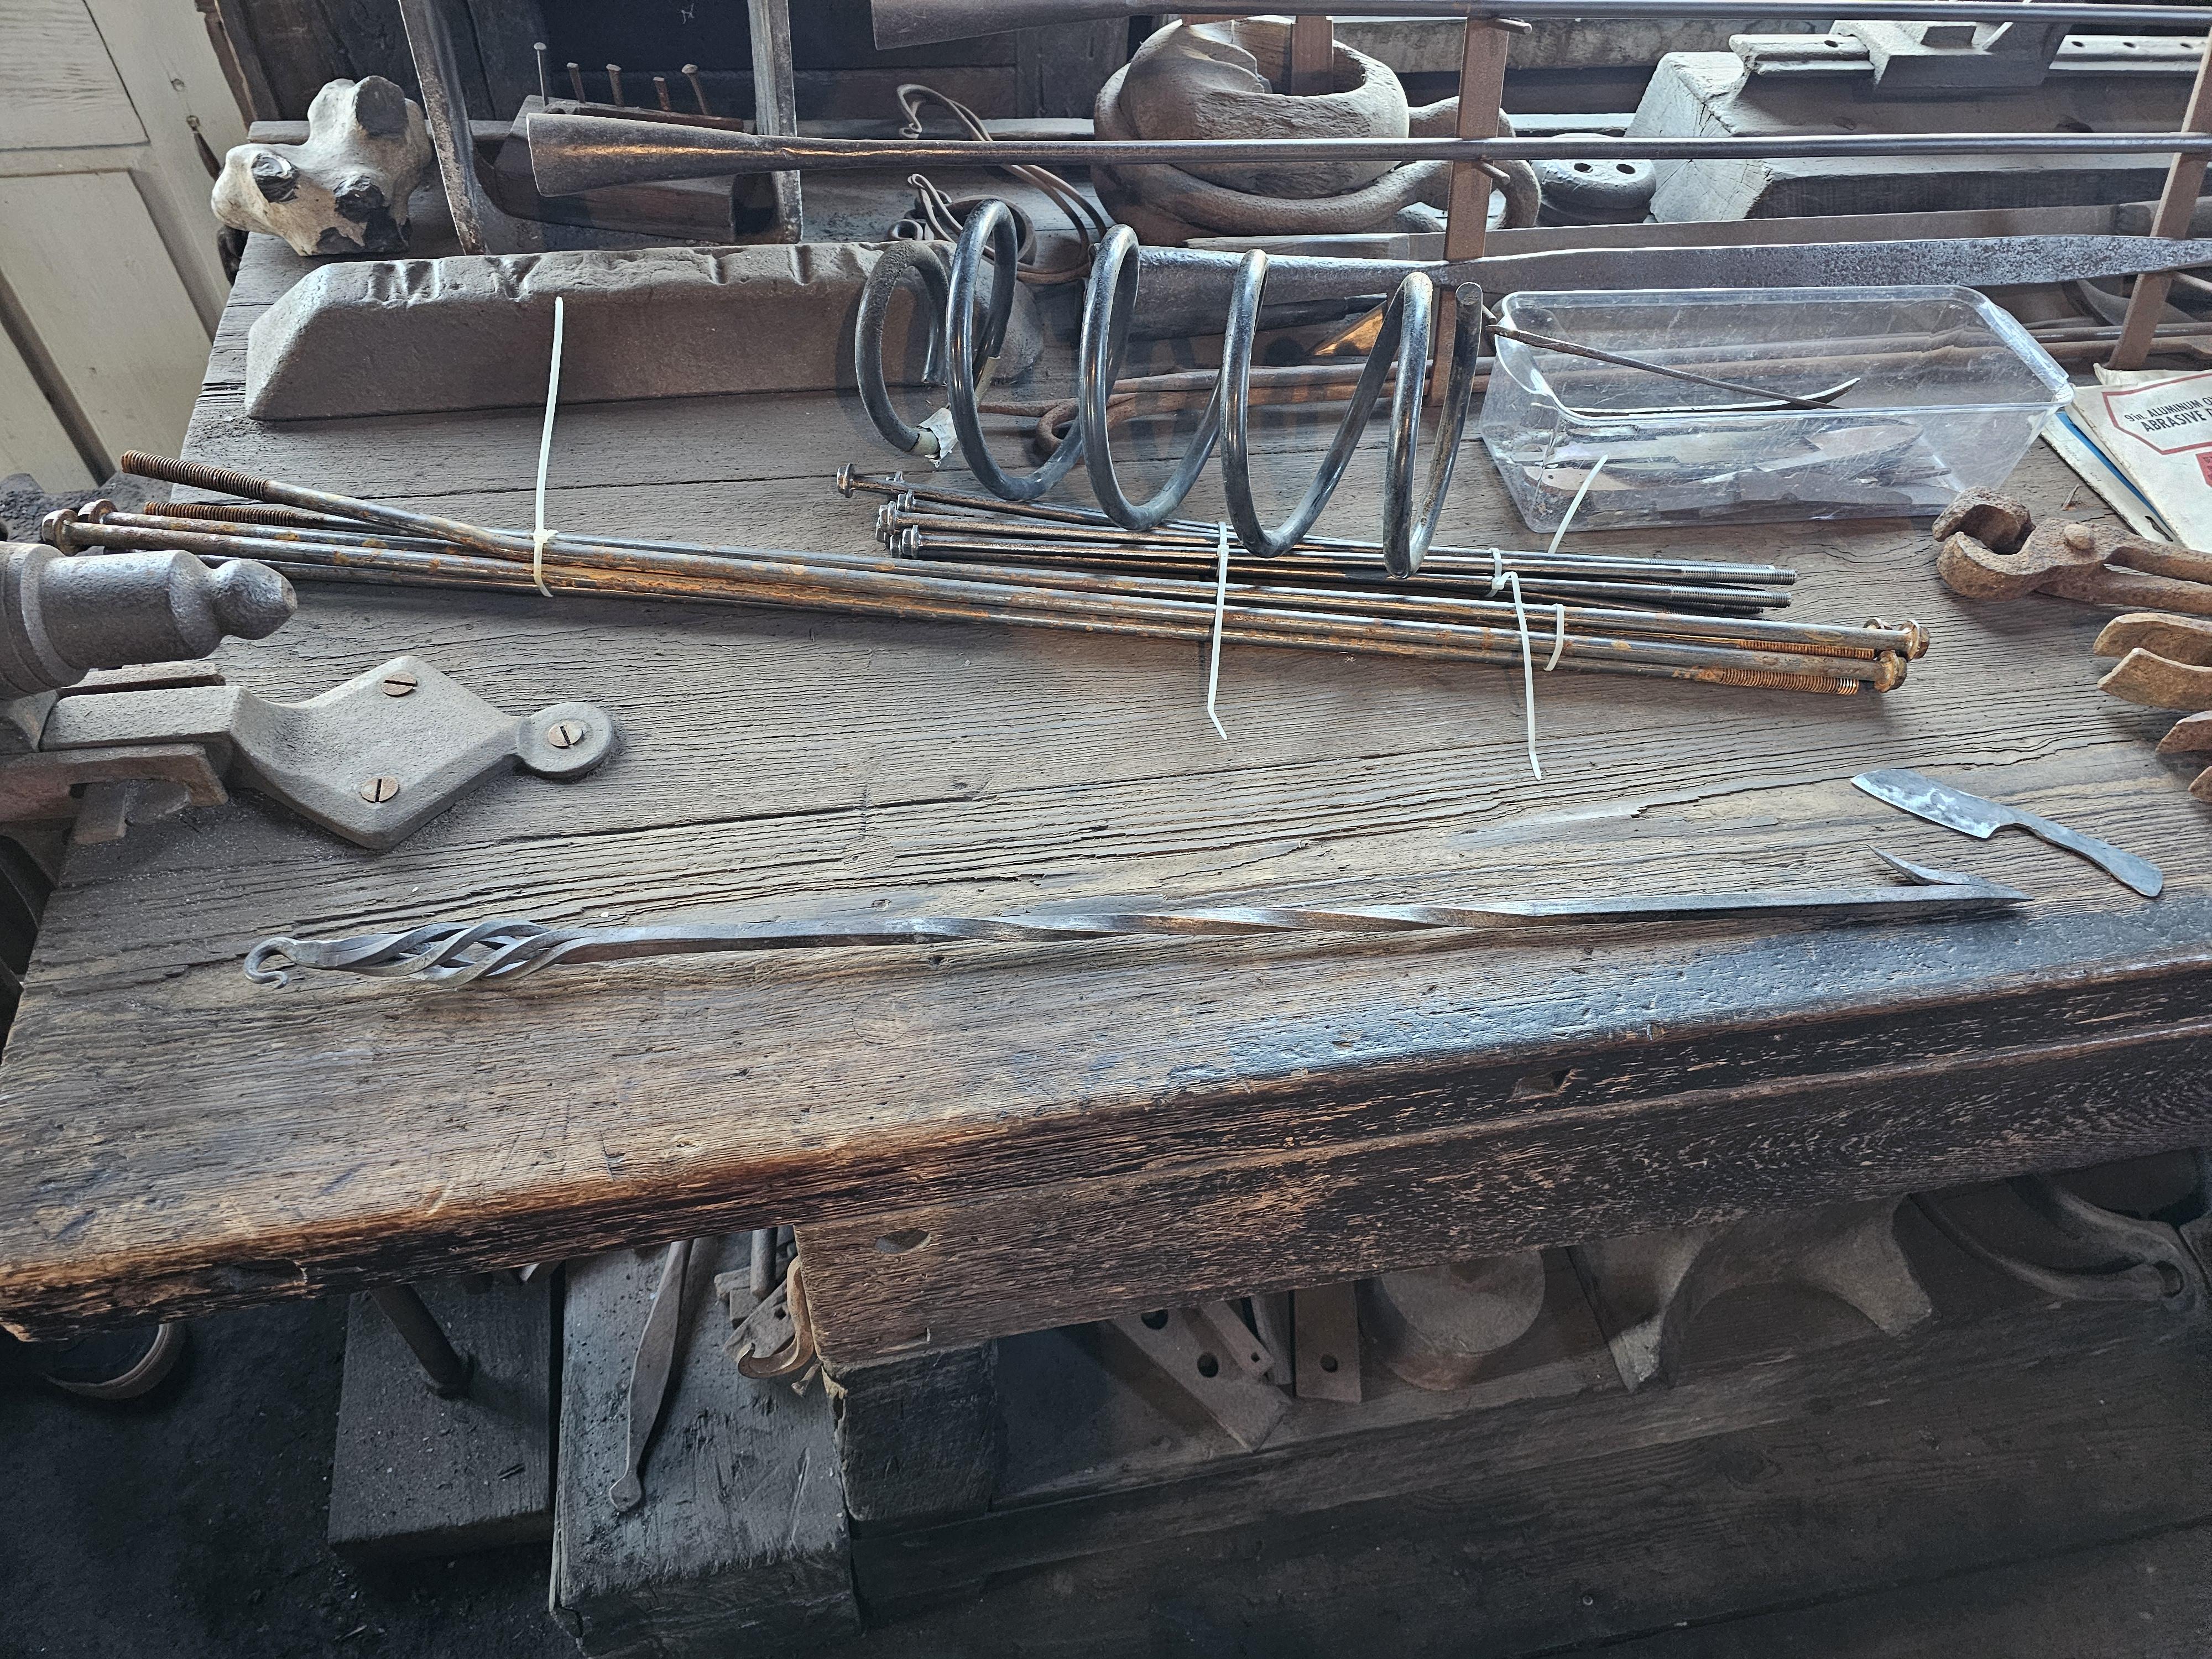
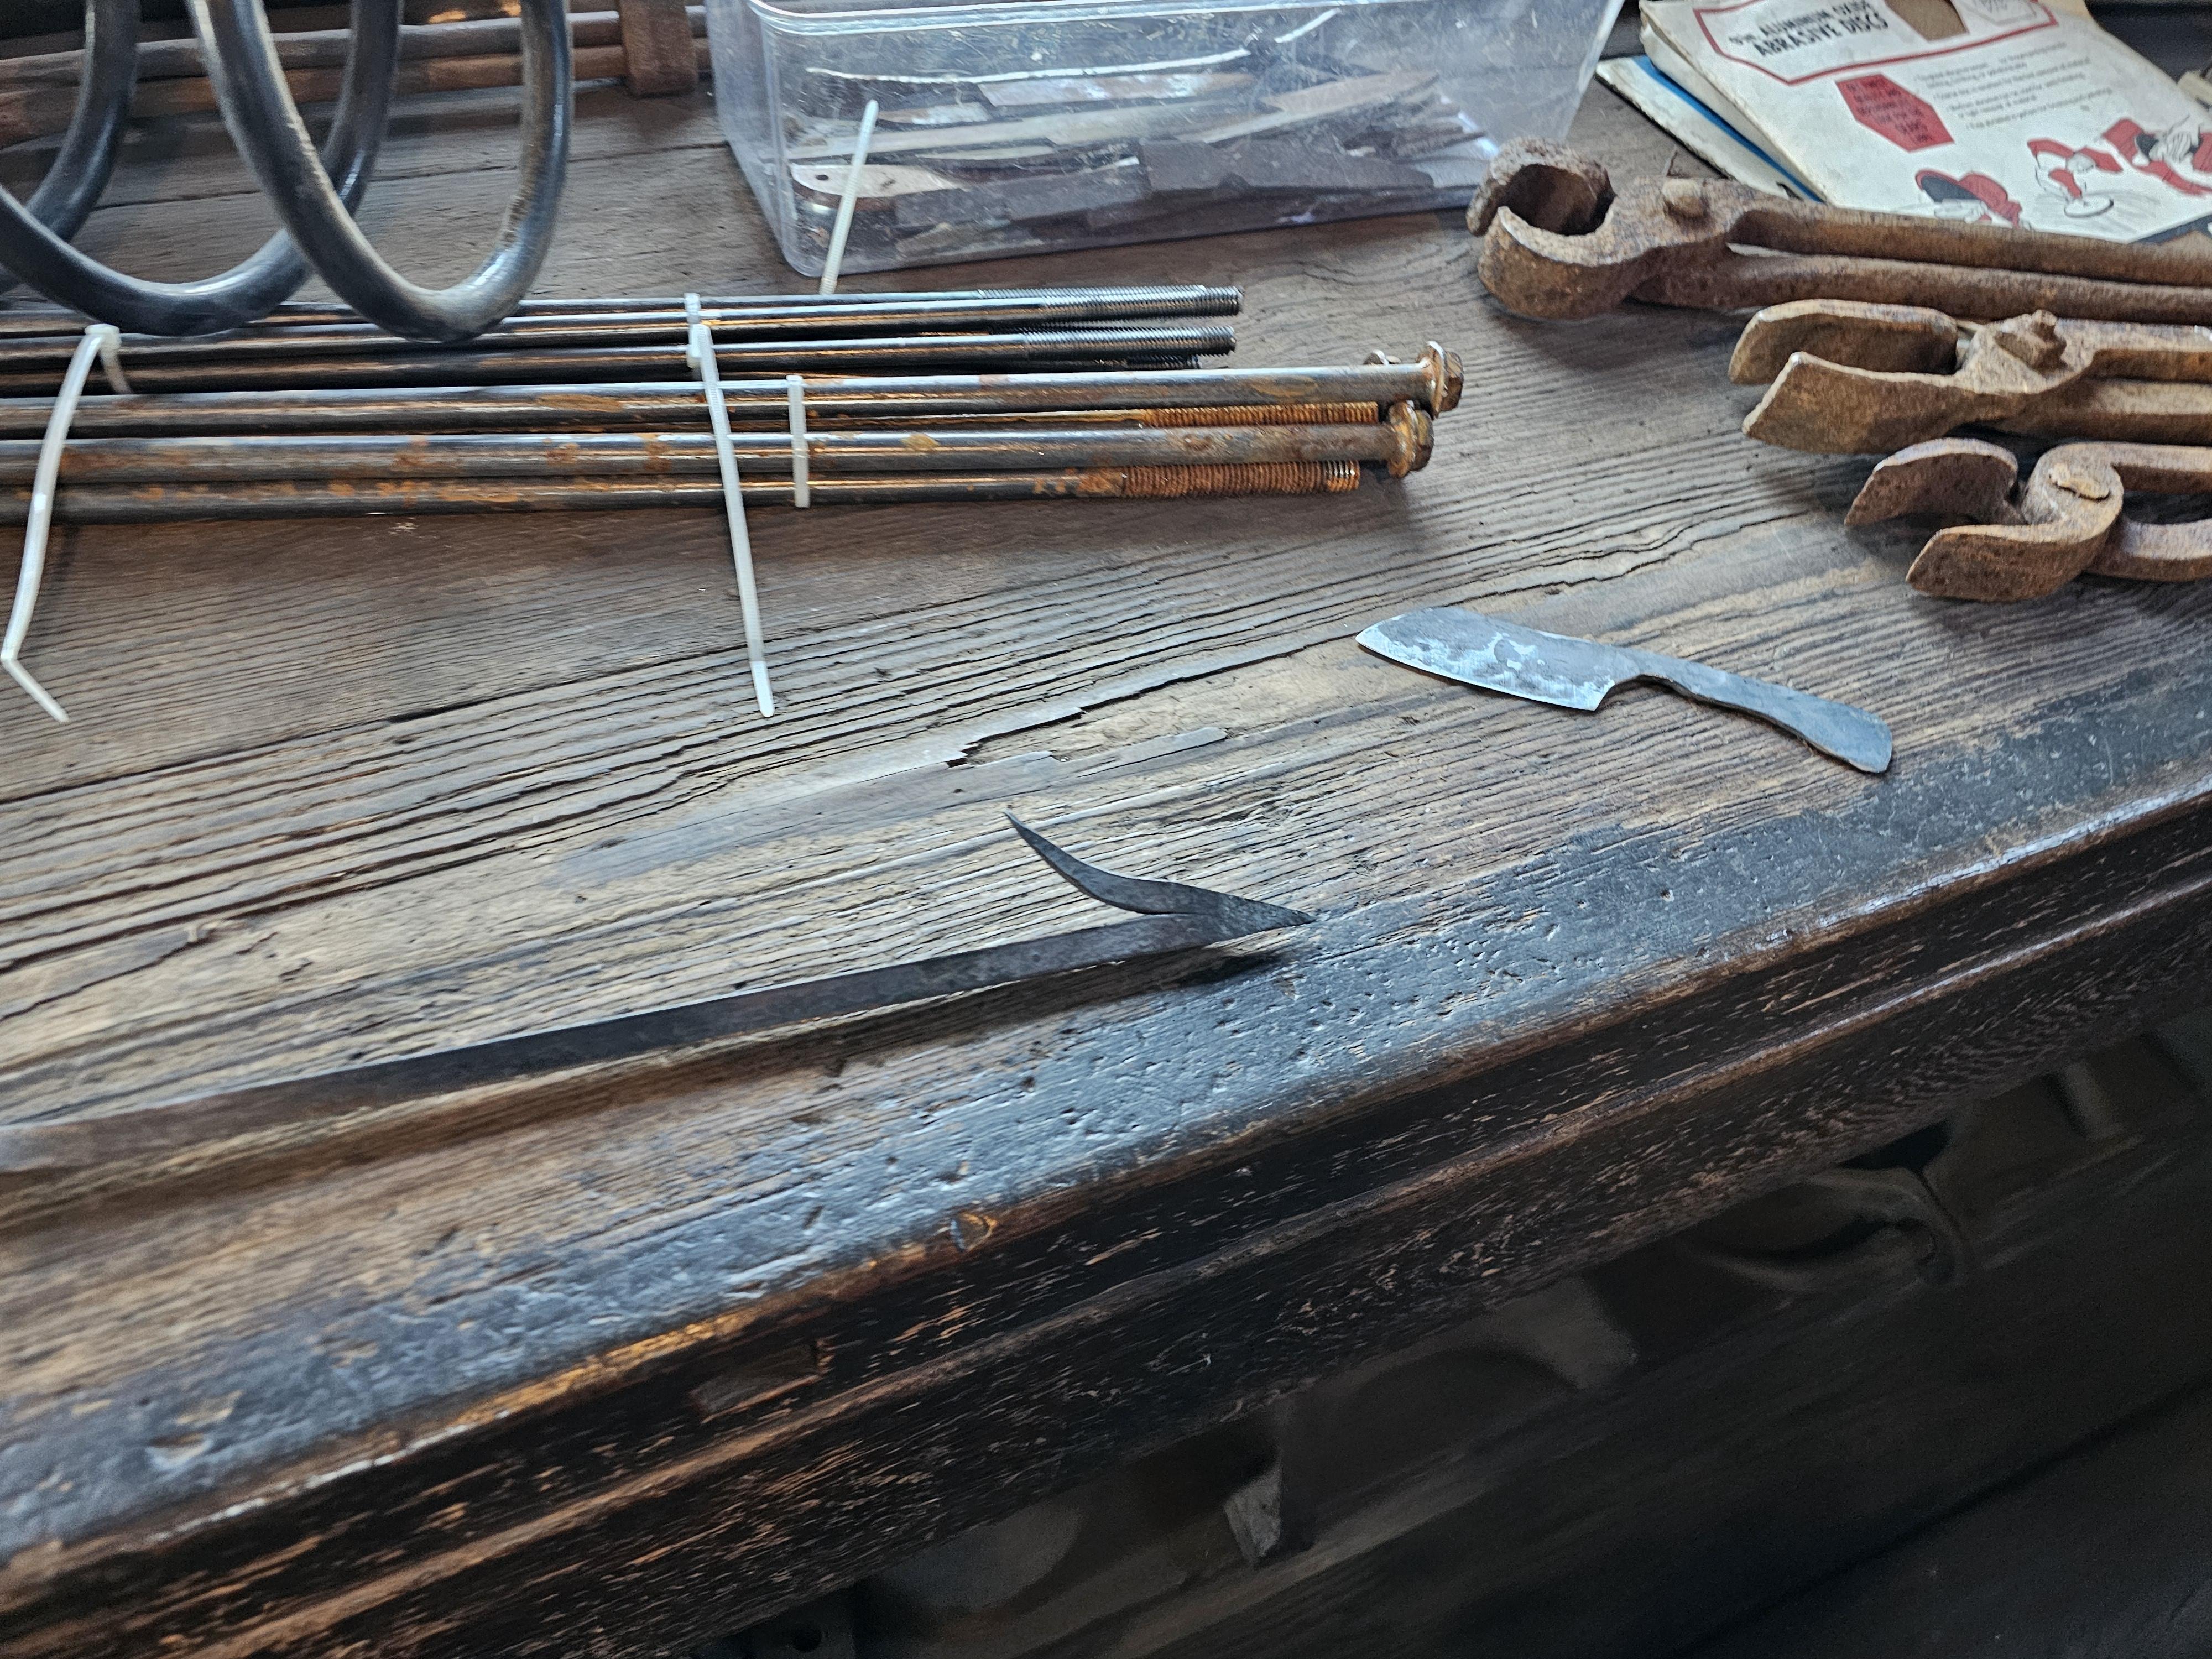
With that here are the items I forged and finished today. The handled cold cut.. Yes, this is a cold cut, not a hot cut.
Tempered correctly I've never seen the need for a wide cold chisel affair.. This is forged a little thinner than I'd like but will be dressed back more after a few uses. Wanna see if I can get away with the edge being so thin with very little side to side support the blade has a () shape.
Forged from 1.25sq 4140 by hand the eye did the old fashioned round punch way.. I filmed it for a video..
I'm going to be at the ABANA conference competing in the grill comp and we are making/using different tools for others in our group to try.
As forged and then a little cleanup. Still not a fan of going at things with the grinder but have my new-to-me Bader clear space running with VFD.. Just wired it so get to test out.
The chisel was all done by hand steeled mild steel. Socket welded with floating mandrel vs horn. No grinder here.. I did the initial cutting edge on the grinder though.
-
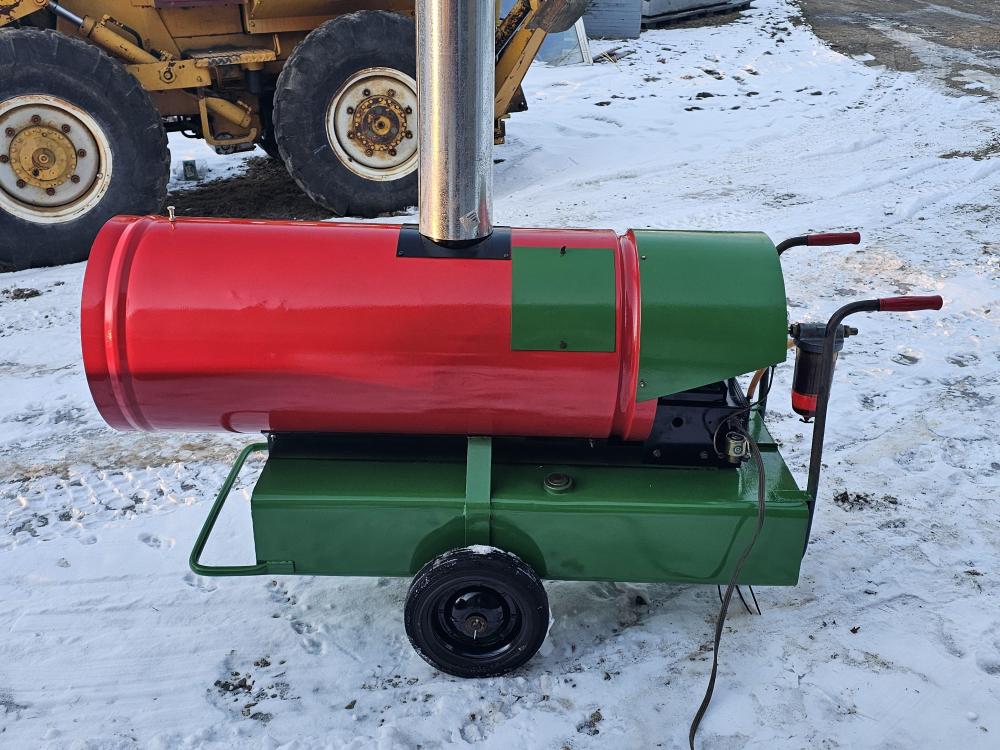
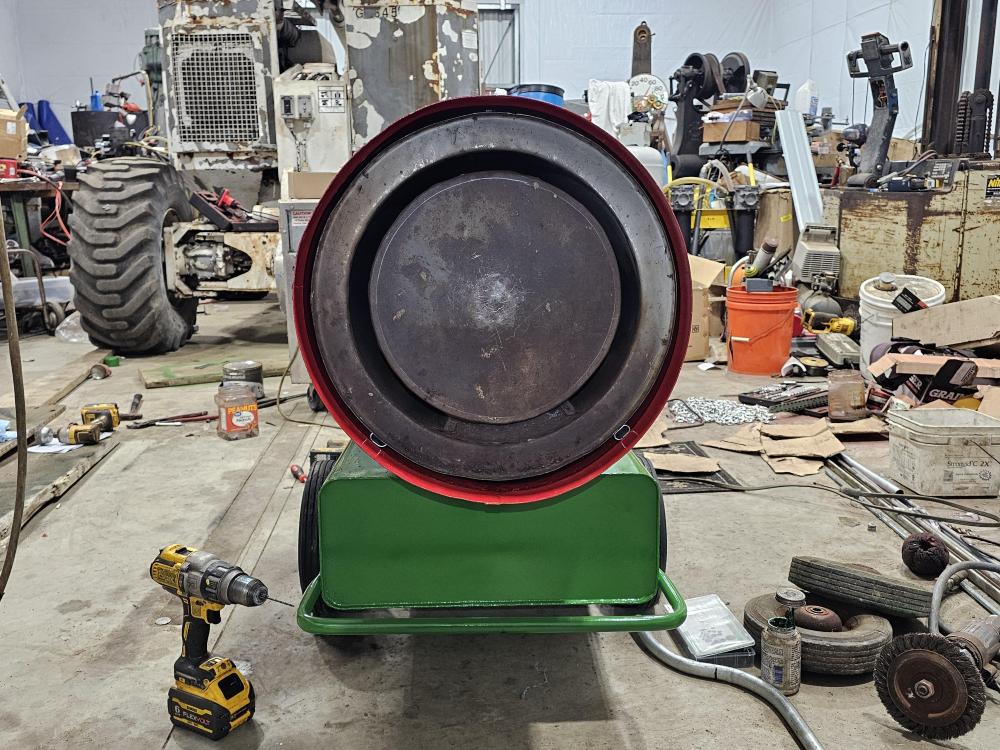
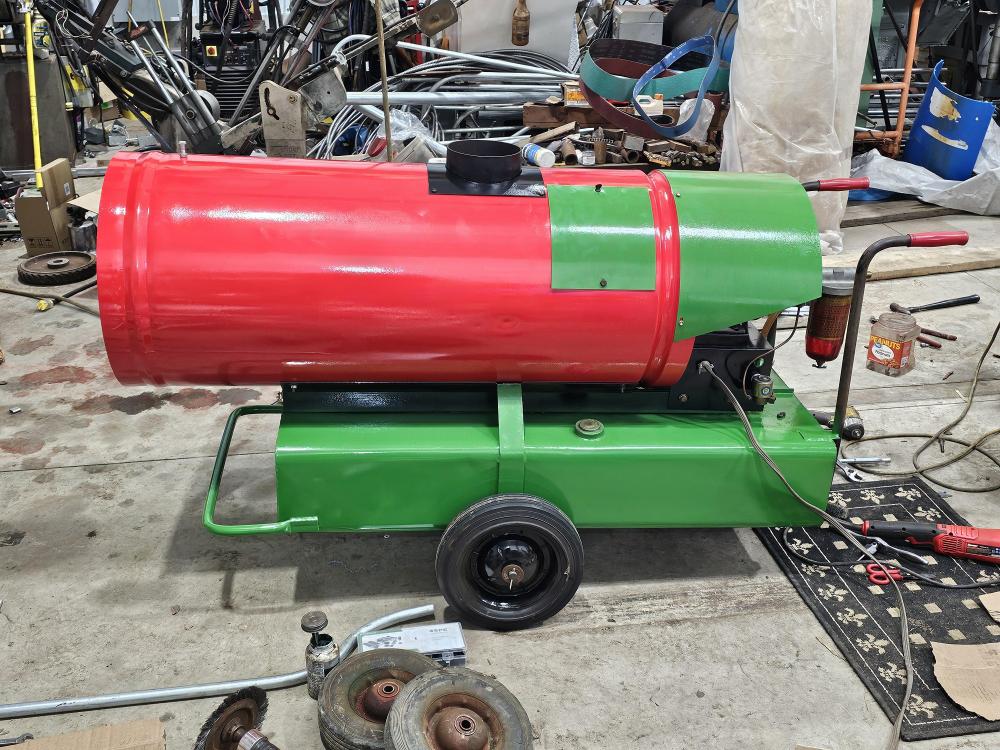
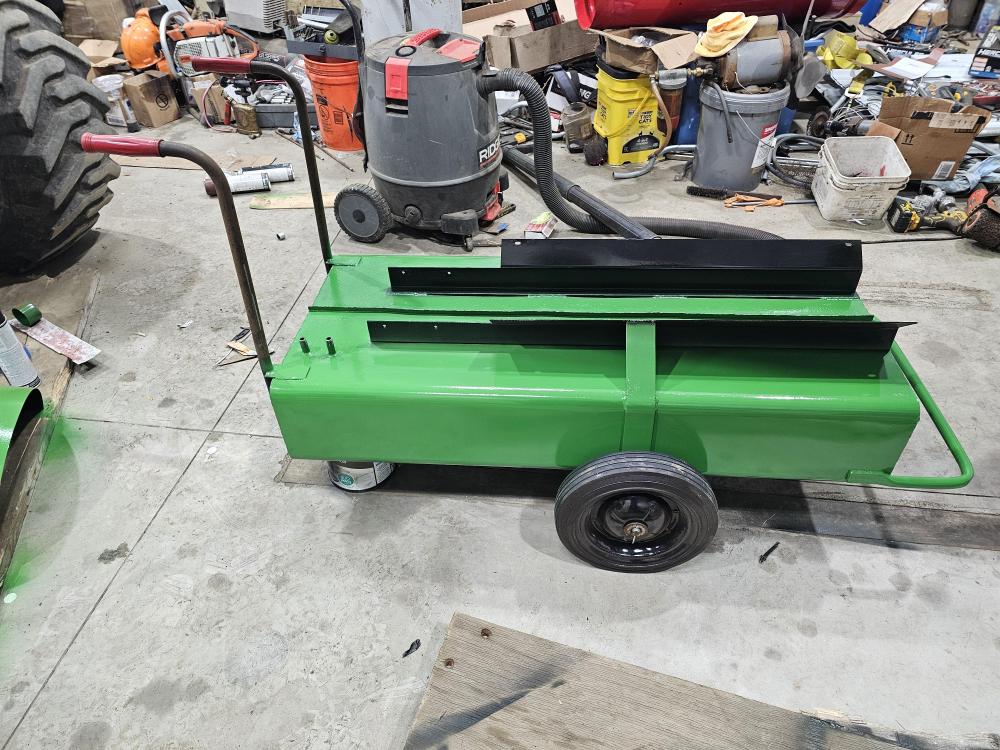
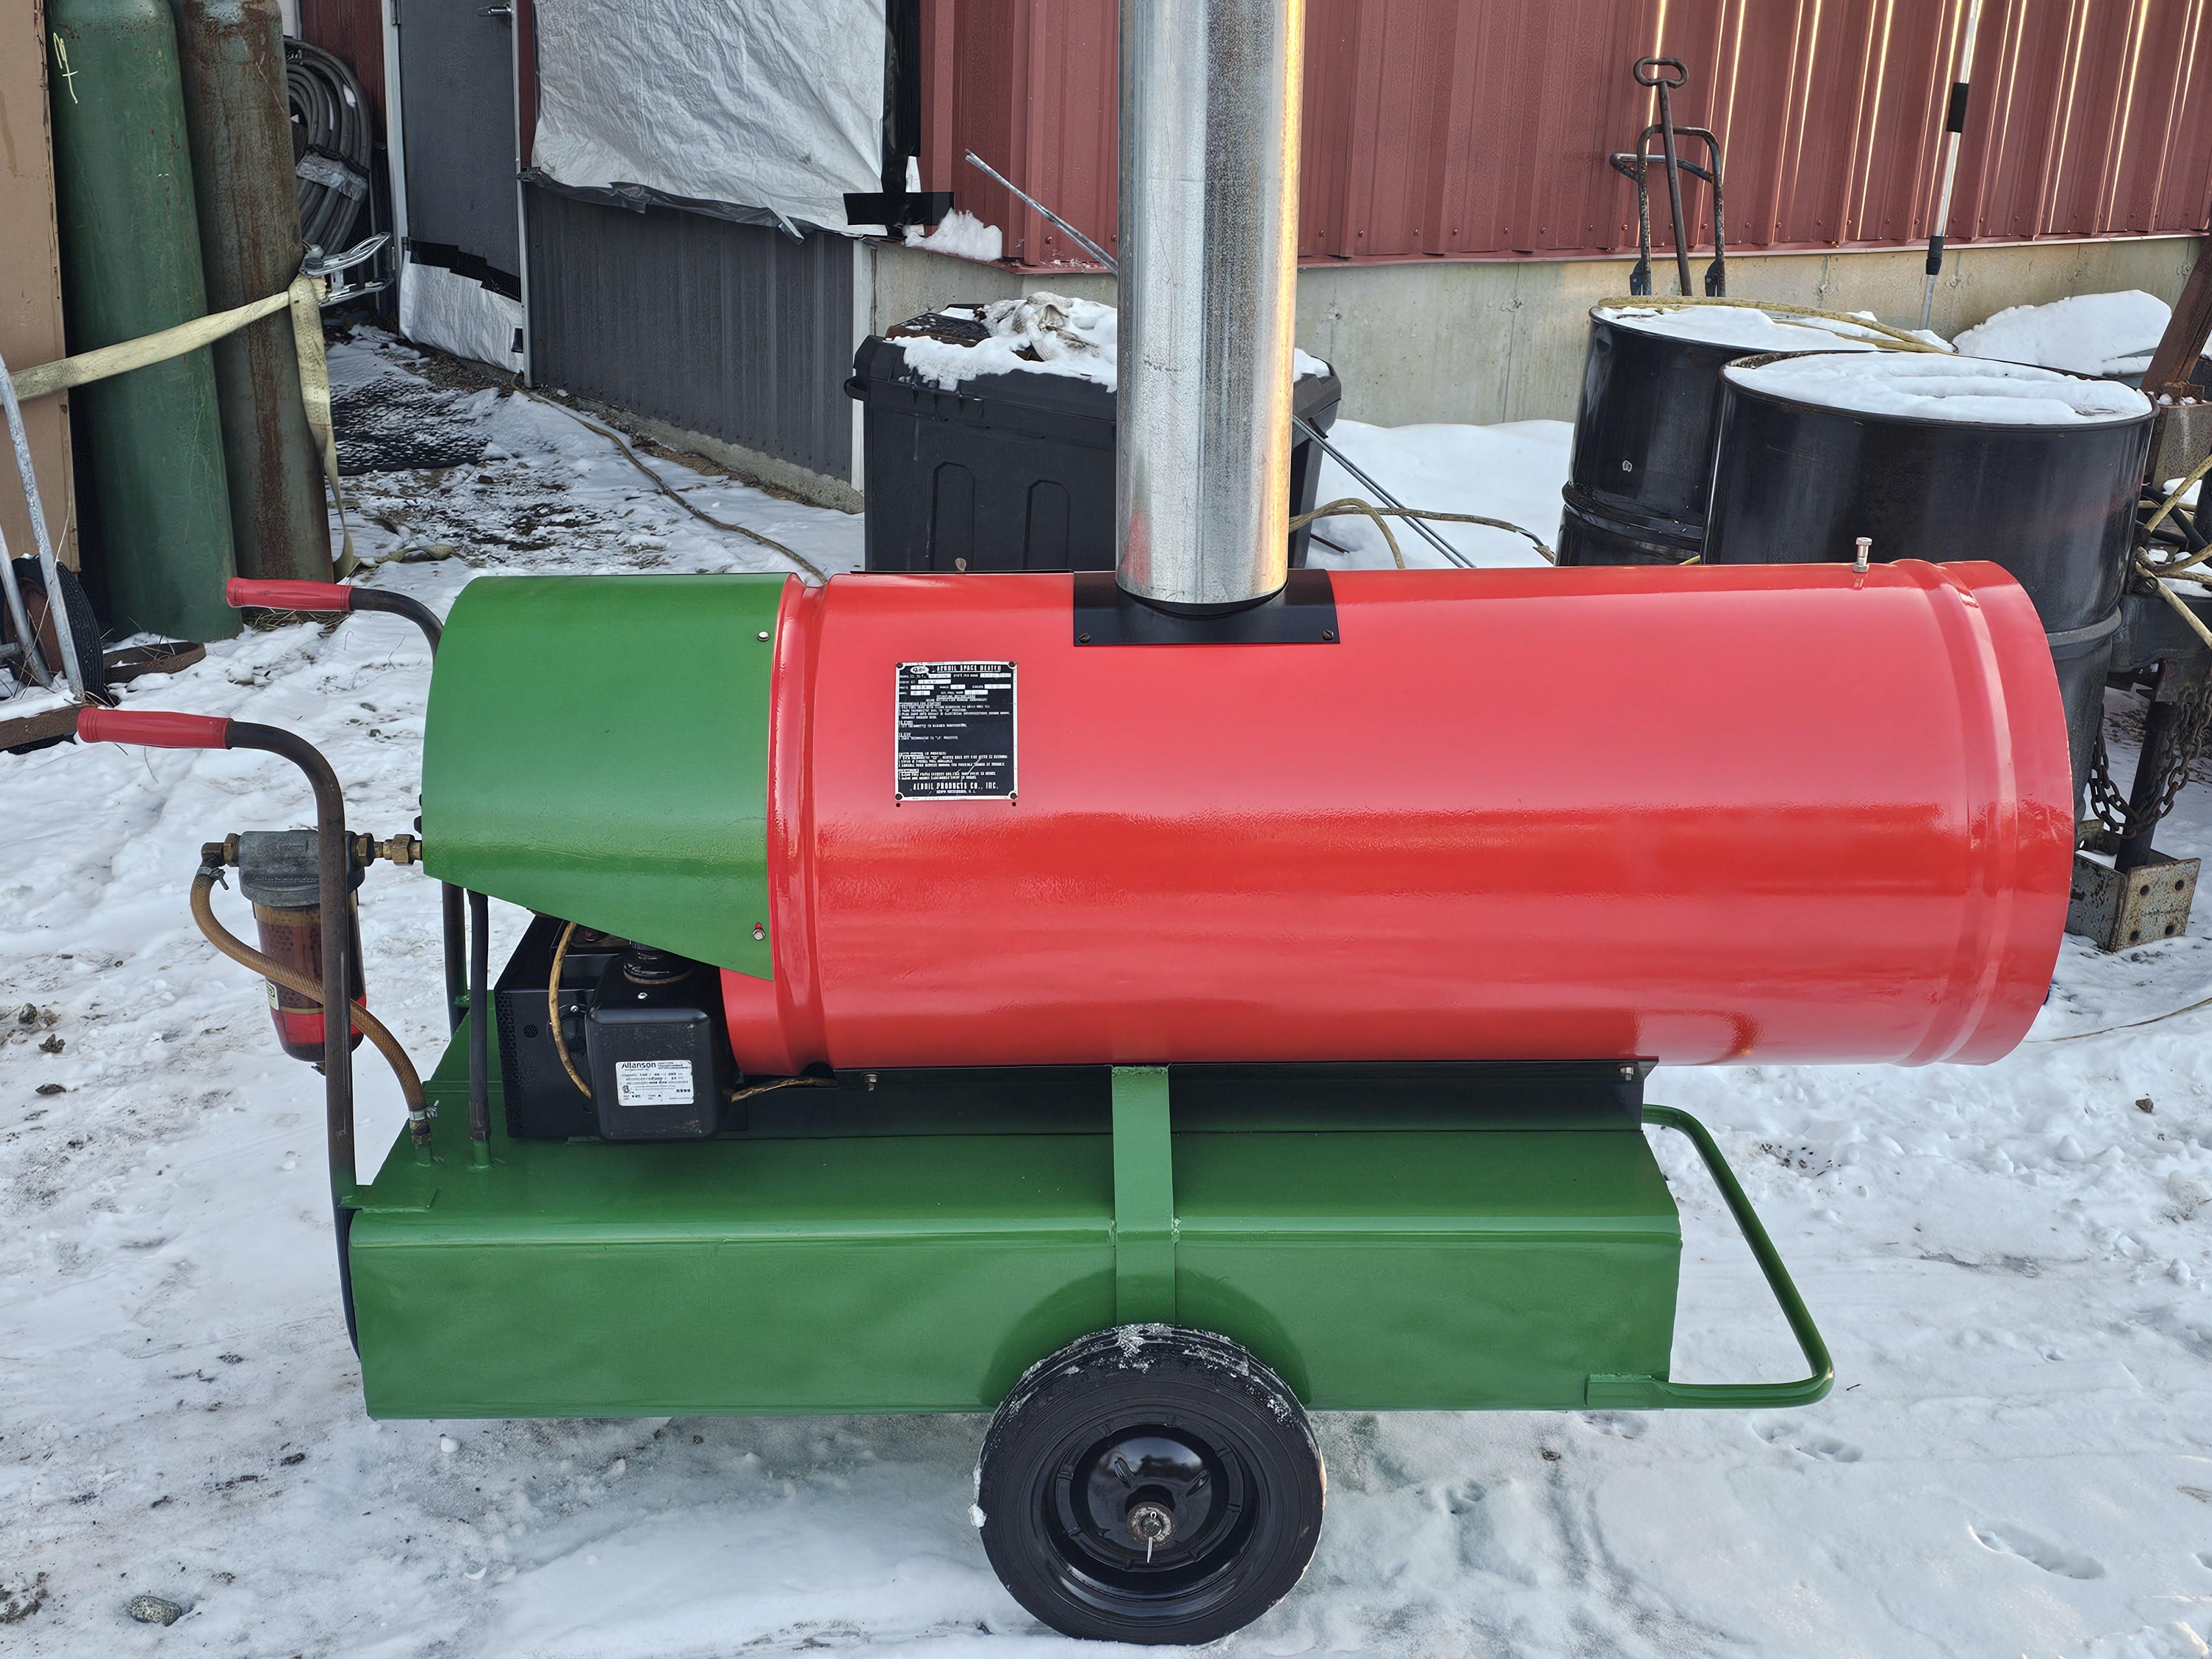
Well the heater is painted and assembled.. I have to hook up the thermo switch and then it's test fire time.
I'm hopeful that the smaller nozzle will take care of the smokey stack. If not I'll look at ways of putting a modern burner in without destroying the unit.. Sheet metal is cheap and this design leaves some room for expression.
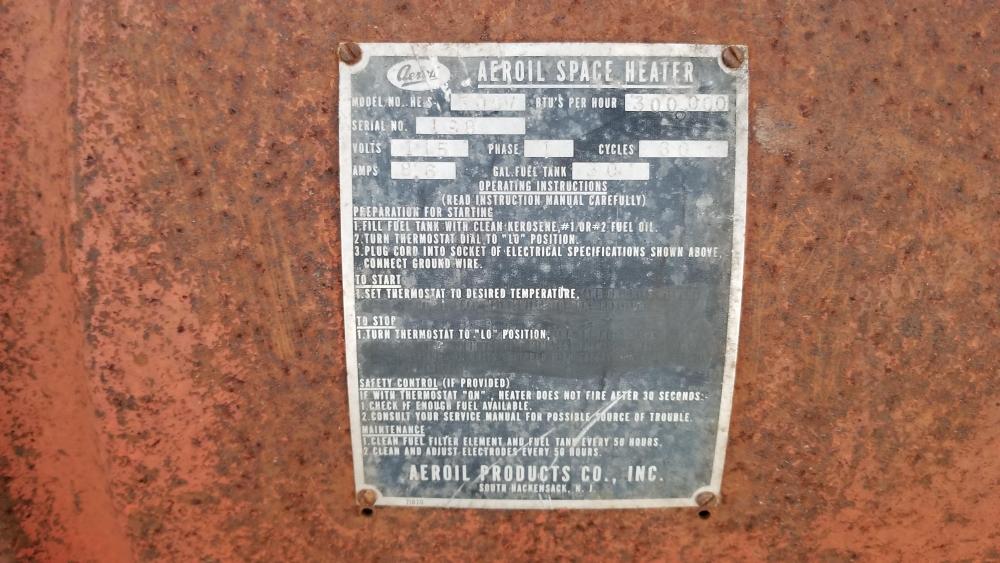
I've included a flyer by Aeroil.. They loved green, red and black.. Seems like everything they made were those colors..
I hope the paint darkens up a little more but I think it's about as close as I could get swatch wise from areas not exposed to UV and rust.
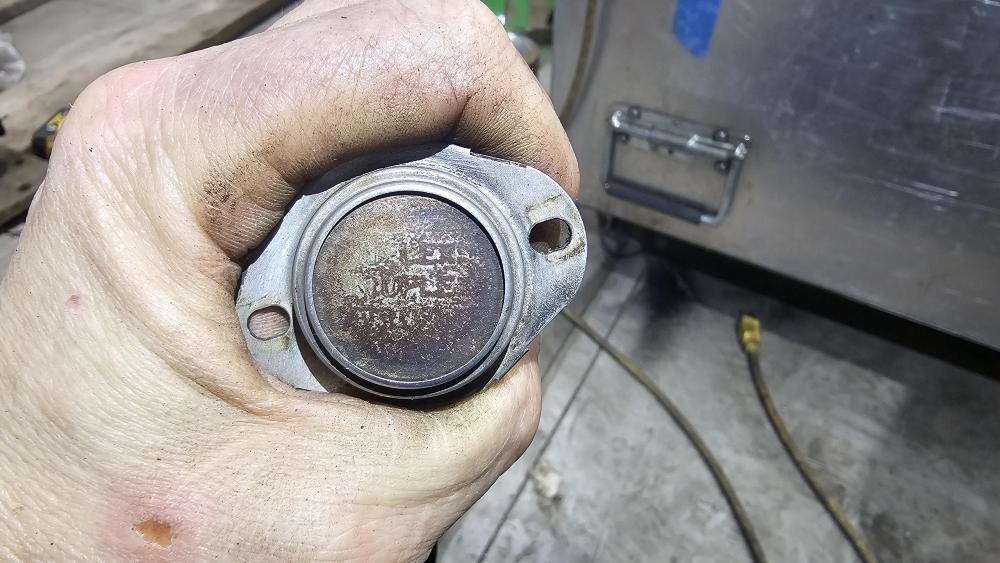
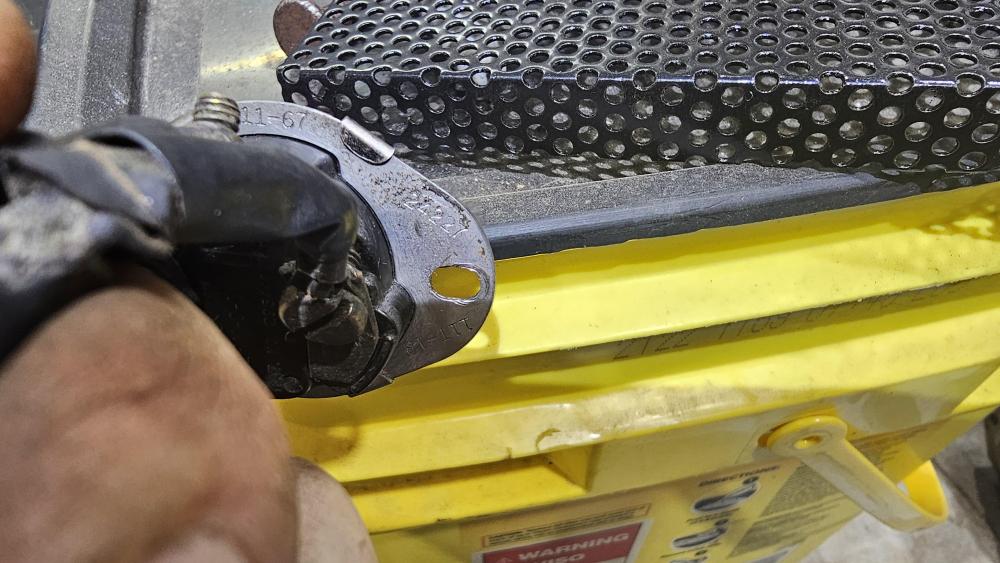
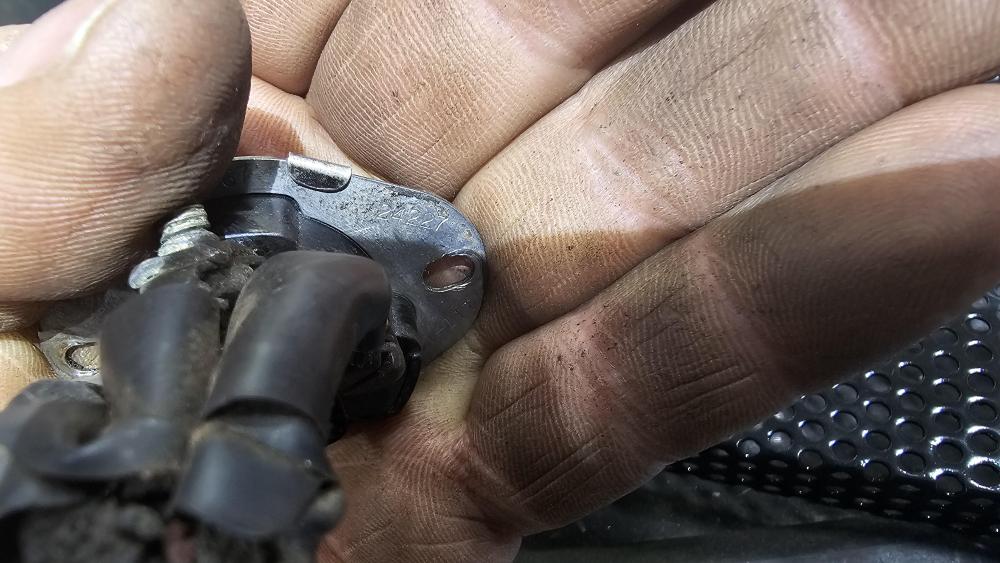
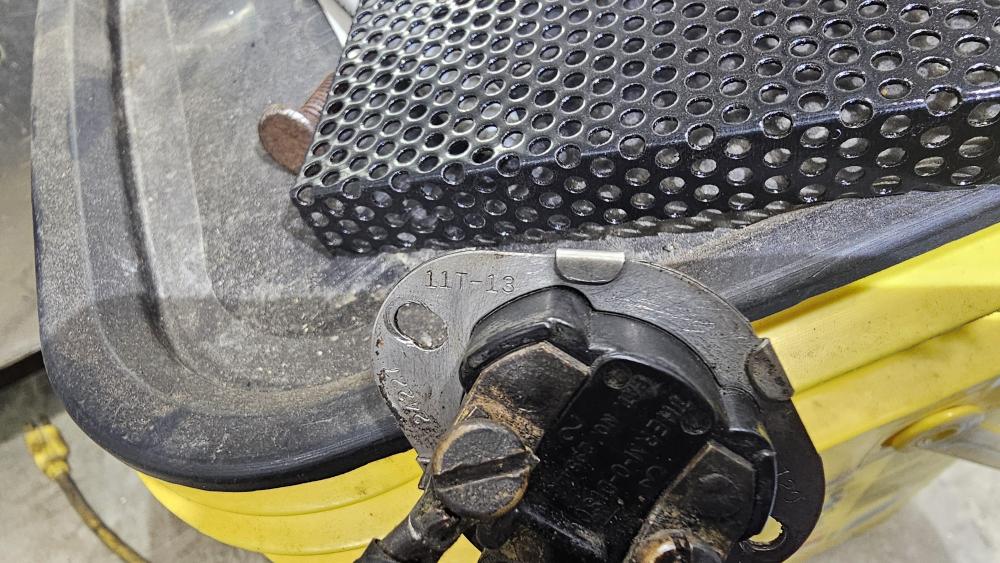
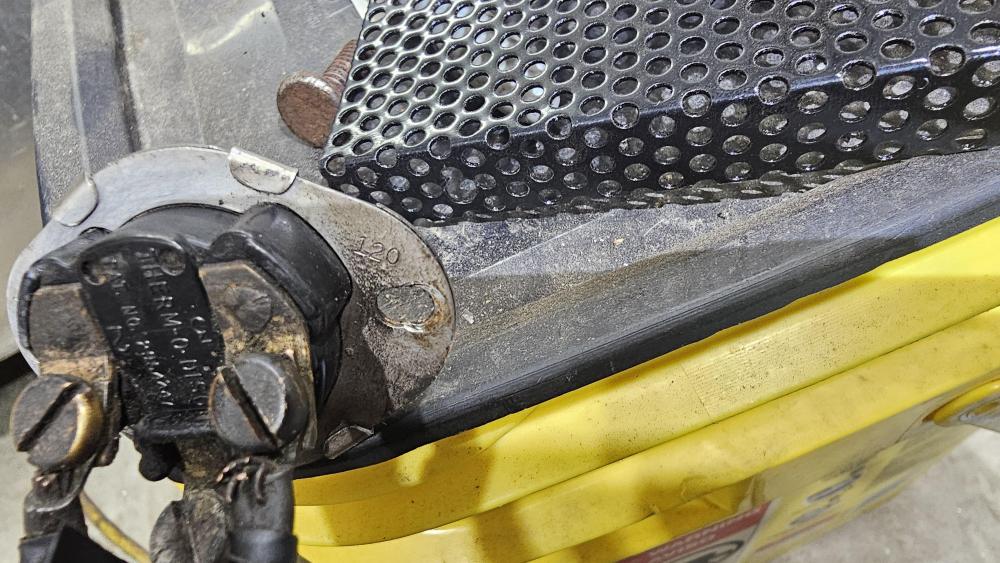
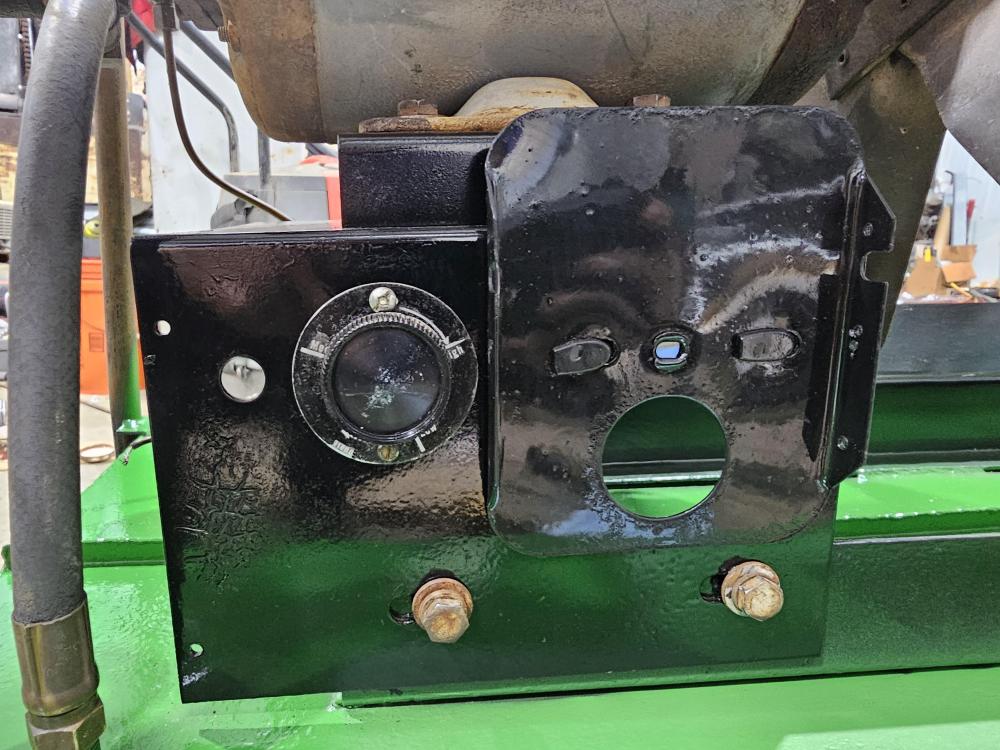
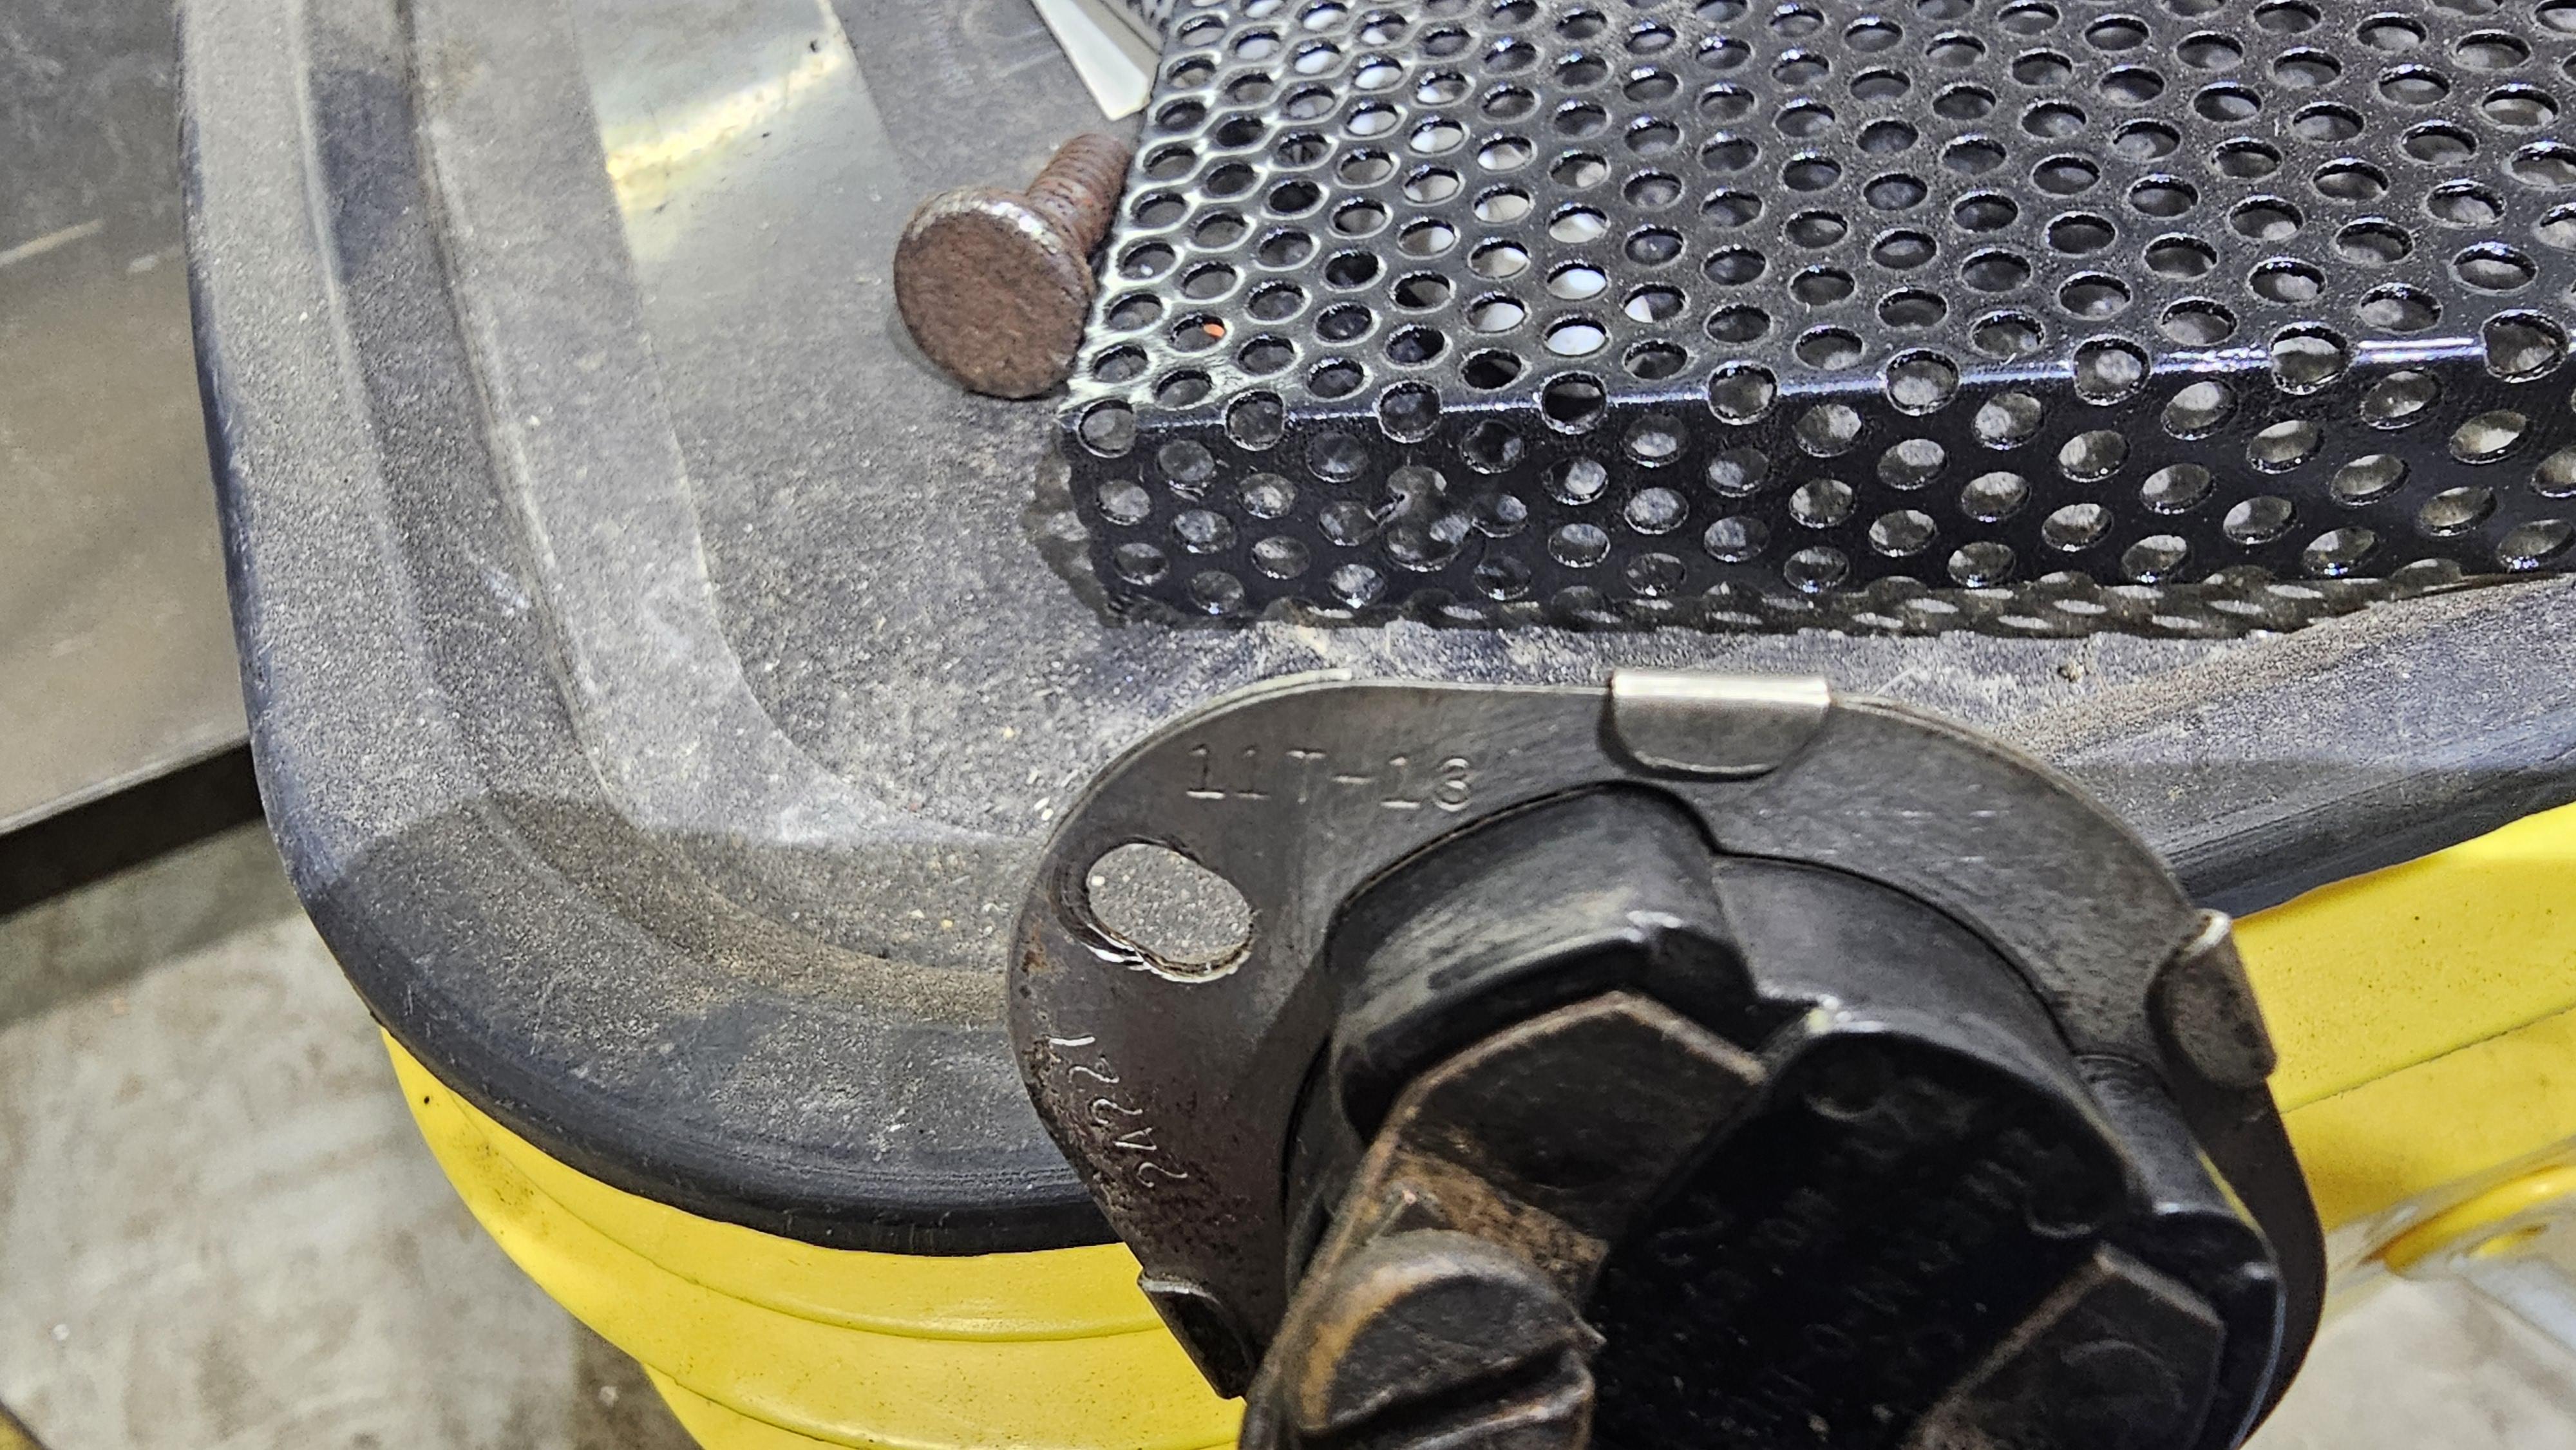
Do you guys know anything about Thermo-snap switches.. Looking for a model number.. 24227, 120, and 11/67 mfg?
There is also a 11-13
.thumb.webp.7dac0895fe454e84372d68d3149f0537.webp)

-
21 hours ago, Steve Sells said:
Young lady, its amazing how resourceful you are
Thanks Steve..
I'm not really sure what came first.. Frugality? I think.. When I was 3 I asked my mom for some money so I could go eat.. She looked at me and said " Go work for it".. We were in an environment where at 3yrs old I could in fact go to work and make the money to go and eat..
I soon learned if I don't spend it, I don't have to make it.. Lucky I suppose that money has not been the only goal.. (getting rich is not a goal).
But, it's also a down fall.. Getting older and this past year has been brutal physically.
So, now I'm super envious of people who work for a company with paid sick time, paid vacations and such.
One of my more archaic sayings is " Do with or do without".. -
George.. Nothing involving the government is simple,, Well other than they will tax you on nearly everything they can.
I could get a tank, and then contact all the correct government officials, file for my gas tax stamp, etc, etc. and after all the time not really be worth it..
Heating oil is red here.. Not sure about off road diesel..
John, given time, money or both.. You can burn what ever one wants to with enough research and equipment.
My used oil burner that I use to heat the school can burn any oil.. Veg or fossil.
If one wanted to invest in a used oil burner and attach it to one of the expensive IFH (they take a regular oil burner vs special parts) than it can be done. The furnace in the school doesn't smoke nor does it smell like burnt oil.
Look back at my inderct fired oil furnace.. It worked really well.. Had a .65 gph nozzle in there and a24gallon fuel cell..
Frosty, the heat exchanger/burn chamber in this old furnace is in very good shape.. No cracks, holes or the like.
It seems in some ways the older items were made differently. Heavier maybe..
The new retention head burners burn a little hotter and they only use enough metal thickness to have it last long enough as you pointed out.
-
Kerosene here is nearly 5.00 a gallon.. Vs road diesel at 4.09 gallon.
What you are calling Petroleum might be our #2 heating oil..
#2 fuel/heating oil and gas station/ petrol station, pump diesel are nearly the same and can be used interchangeably. the only real difference is they add a color agent on heating fuel..
The difference here is that road fuel is taxed at a slightly higher rate.
Kerosene is a cleaner burning fuel as it's more refined but I'm not willing to pay the extra amount.. If the burner is tuned correctly it will burn just as cleanly with road or heating diesel fuel.
Aeroil designed a bunch of heaters and burners that were designed as multifuel, meaning kero or diesel or heating fuel.
Be nice if I could actually find a manual for the heater.. It might have suggestions in it for just such a thing. -
The original rating was 300K.. Yup, good for large area.. When I fired it up it was super smokey.. I don't know if this is typical of this vintage oil burner or not.. But, I'm not happy with all the smoke.. Smells like unburnt diesel..
I'm sure there is unburnt fuel..
So have installed a much smaller nozzle .60 gph with 45d solid. I'll see if this cleans it up some.
There is no air adjustment just nozzle size.. I know that a .60gph nozzle does not put out 300K btus..
The trailer only being 8x8x10 heats up super toasty quickly.. Quickly enough I open the roof vents and the back..
The indirect heater I made worked super well both in the school and heating the trailer and burned clean.. So the clean burning is where I'm heading.
If I can't get this to burn clean, I'll start looking at ways of installing a modern retention head oil burner and do away with the older tech.. I hate modifying older tech so will try to figure out a way that won't destroy what's there.
I just stop and get 5gal at a time. I don't use enough diesel even with all the equipment to justify a bulk storage tank though when I see one cheap enough I'm like oooohh..
Manlift, mini dozer are gasoline.. The Kubota B6000 and IH 3800 are diesel but don't use any of them enough for bulk..
George what model do you have? Have you taken it apart for maintenance? -
Well it's been sometime since an update.
The lights working has led me to work on another project since I'm still forging in the trailer and it's winter..
Heat is a great thing and to heat the trailer I used my self made indirect portable heater.. But, last year a guy had an old commercial one for sale free so I went and picked it up and have been working on getting it running. And since I now had a commercial made unit. Tore the unit I made apart and thru most of it in the scrap heap..
Once I figured out it was the transformer that was bad I fired it up but it is awfully smokey..
Being an older burner without a retention head and no way to adjust the air flow to the burner I ordered some smaller nozzles..
With this, I feel badly having a piece of history just outside weathering and decided it needed a new coat of paint to help it survive another 70 years.. So cleaned it all and painted it..
I believe these are the original colors though it's hard to tell.. The color swatches were from areas not exposed to light/enviroment.
The green looked correct on the computer monitor but looks a little bright.. Maybe it will darken up a little more.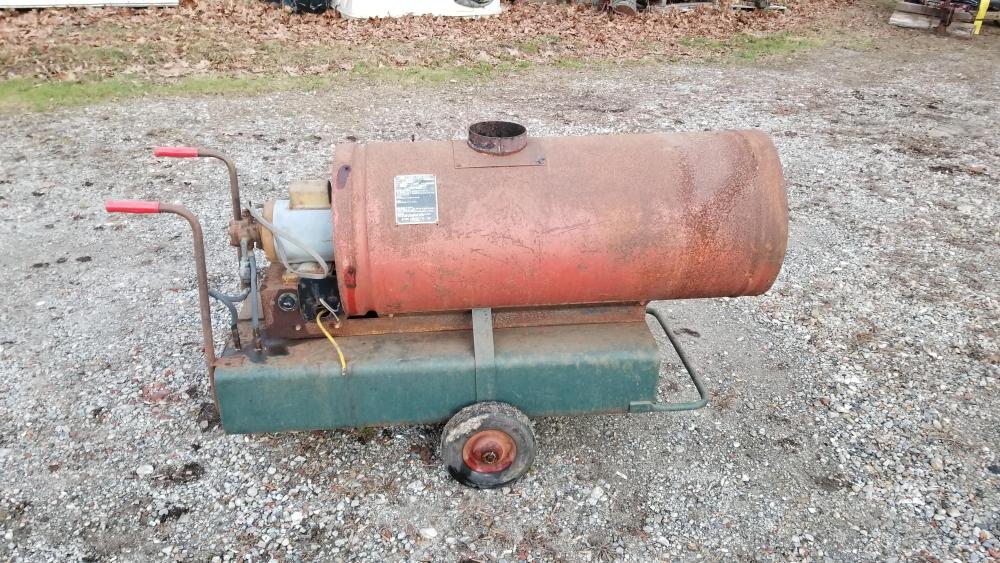


-
This type of sandwiched knife/sword you are making is a tough one.. The welding has to be even side to side and the likelihood of a warp is off the charts.. This is a great time to learn about tension and how hammer blows are used to change this tension and straighten the blade after hardening and tempering.
Yeah, not sure if forging therapy will make it better or not..
It does show me the limitations at this current time and then I can make adjustments to be still functional.
Today I forged a little again. Few more samples..
Ones showing how the scarf makes a difference in how the item turns out, a hinge barrel, and finished the socketed chisel.
I also did another set of leaves and was overall happier but it's a huge struggle as the hammer is everywhere since I can't apply any kind of support in the swing.. So once the swing launches, there is no correction during the swing.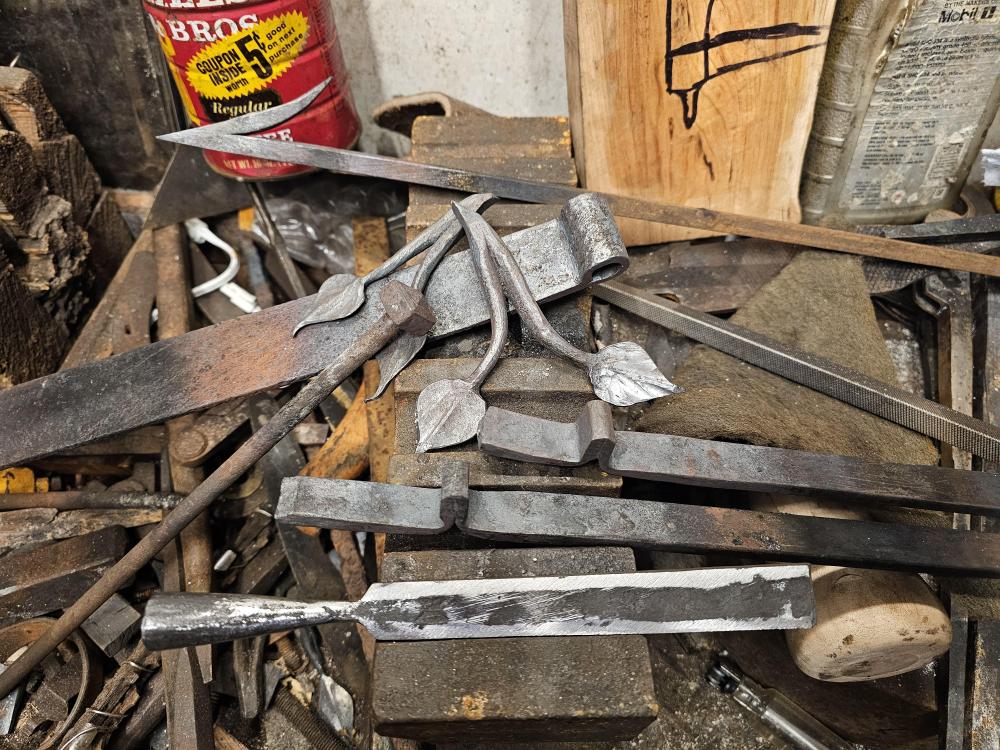

-
yup.
Nearly lopped off my right hand at the wrist.


![20240222_165054[1].jpg](https://www.iforgeiron.com/uploads/monthly_2024_02/20240222_1650541.jpg.ba8971f7cf368640e57c788e58f82651.jpg)


.webp.1e40b9db2aa230707dedbd14db7ddd63.webp)


What did you do in the shop today?
in Blacksmithing, General Discussion
Posted
Sorry to hear it's kaput.. Way back in the day when I was forging these blades for use 1 out of 10 would shatter in hardening. I felt very good about the average..
Ninja-to were between 18 and 24" blade length. with a longer handle and sq tsuba.. I've never broken one in use..