Kevin A King
-
Posts
38 -
Joined
-
Last visited
Content Type
Profiles
Forums
Articles
Gallery
Downloads
Events
Everything posted by Kevin A King
-
Daghrim, if you are a good welder, I have some forklift tines I'll let go very reasonably. Although I haven't yet Made one myself, I've seen some great anvils made from Forklift tines. I'm east of you in Fayetteville AR. All the best. PM me or whatever the IFORGEIRON equavilent of private message is if you are interested in the Forklift Tines.
-
Anyone with a copy of AIA handy? Who was the Trenton (Columbus Forge and Iron Company) Anvil Smith who used K to mark the weight of the anvils he forged? Trenton Anvil Foot Marked Weight K166 Serial 130980 - I'm just curious which anvil Smith used the K. If I remember right, there are a list of Anvil Smiths in AIA for Columbus Forge and Iron Company. thank you in advance. Kevin King
-
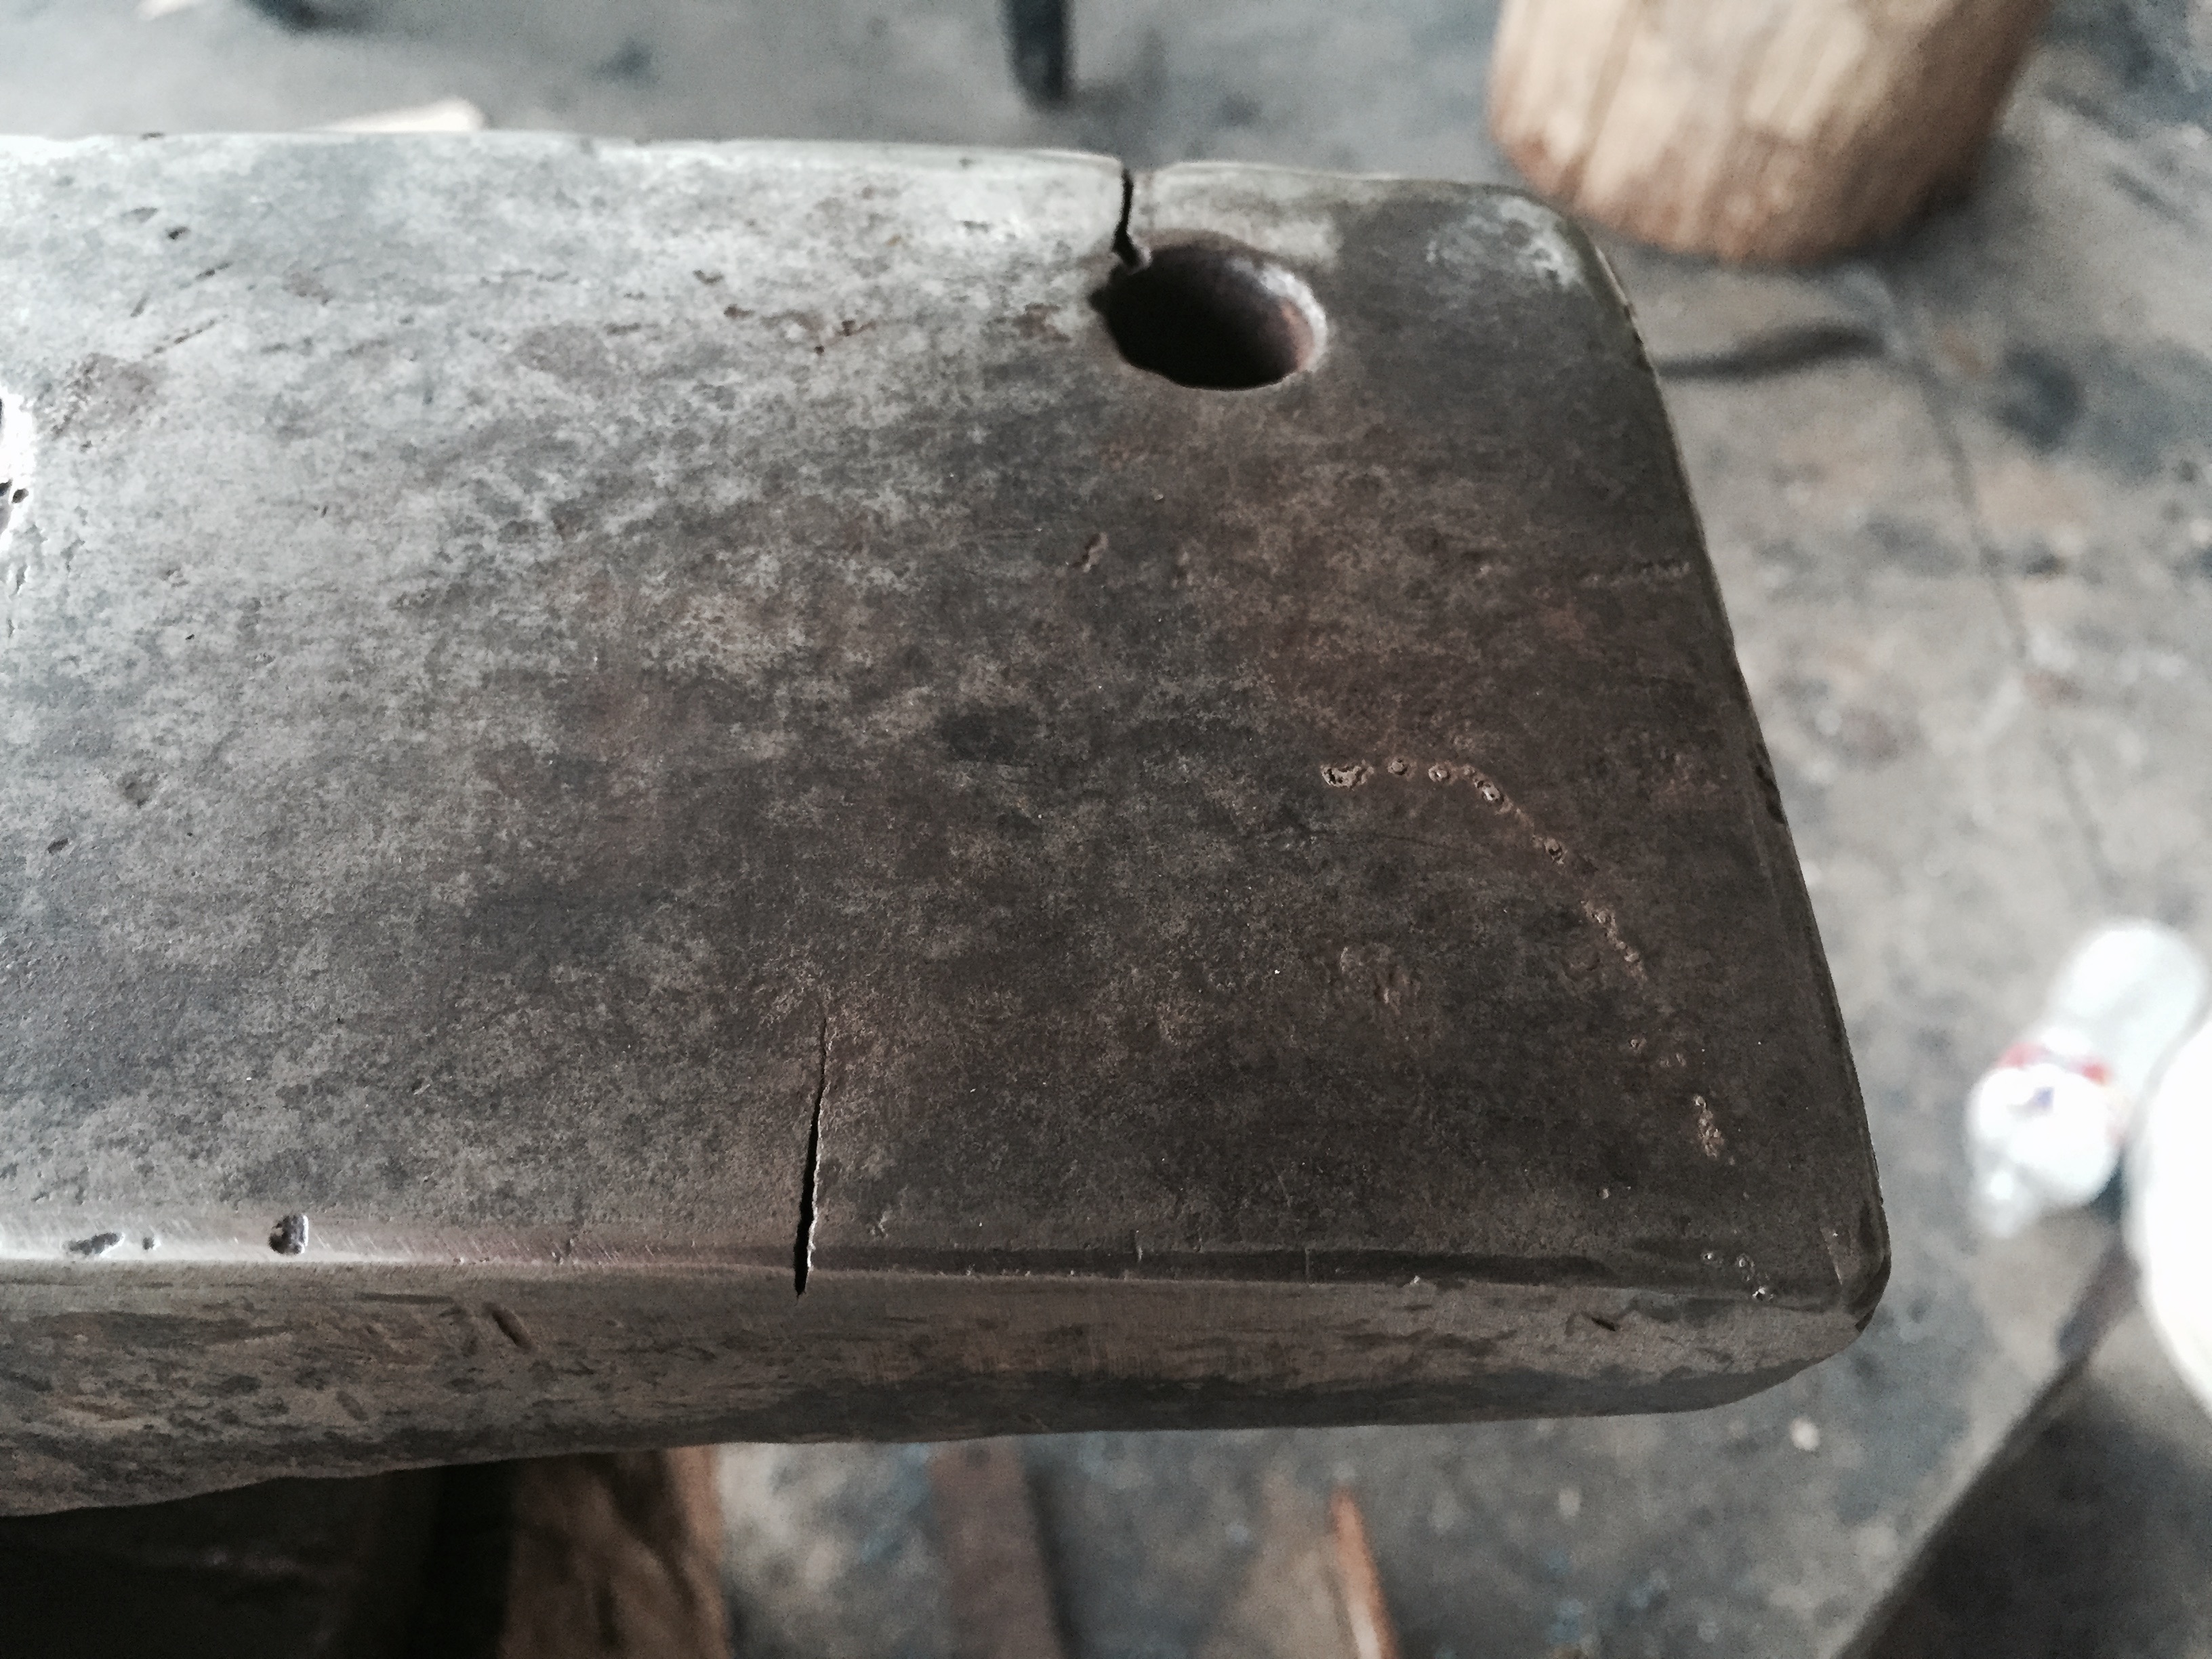
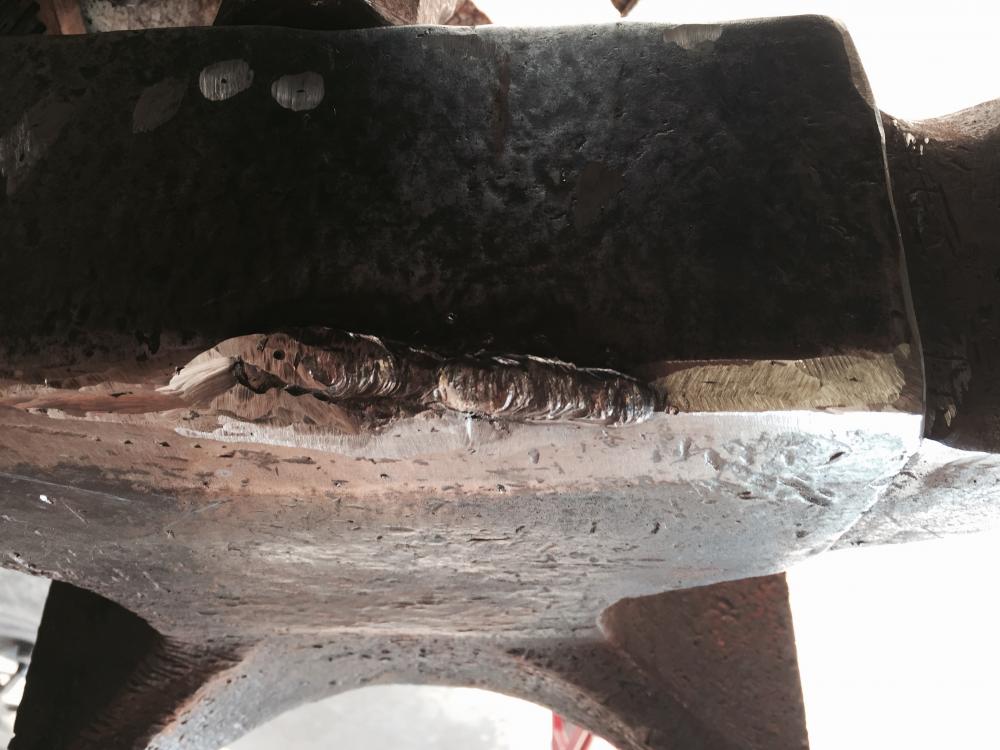
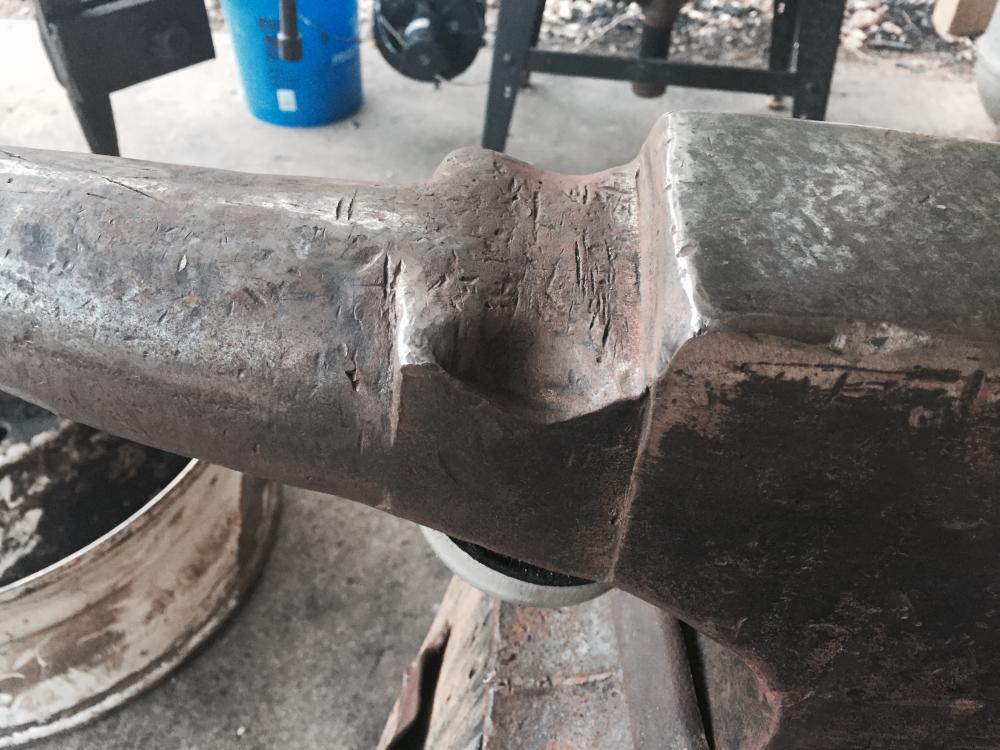
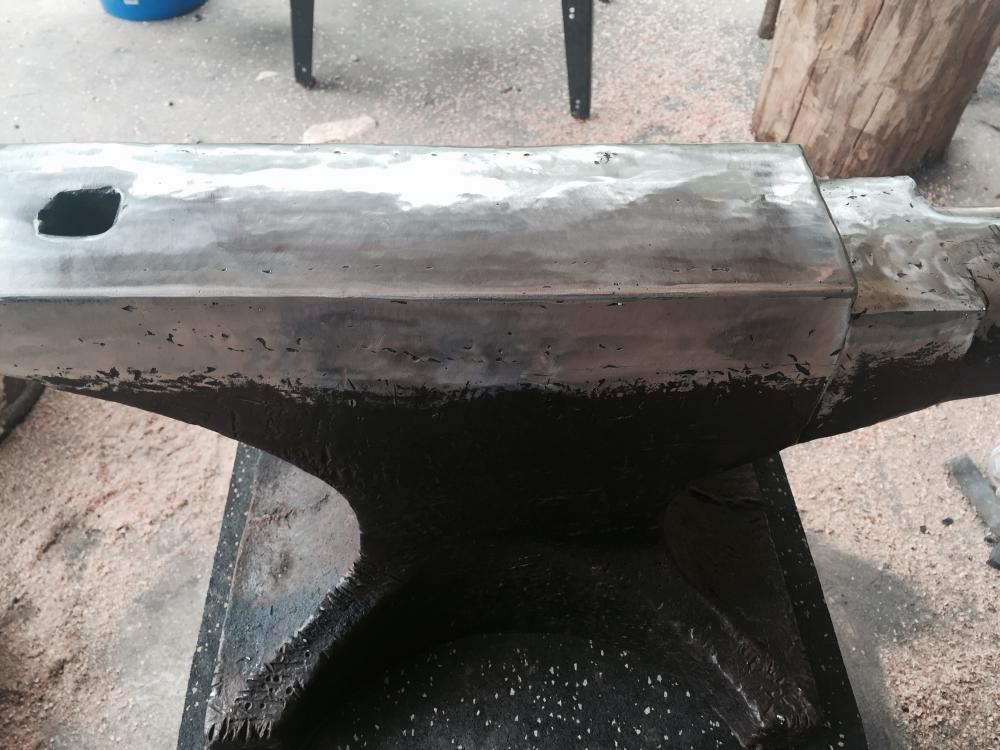
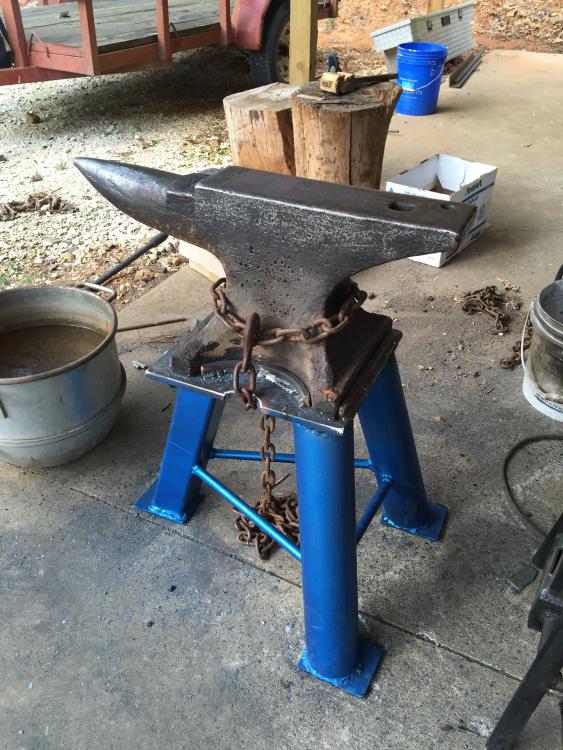
Indeed it is Thomas! I'll likely keep this one for the duration of my lifetime. Function is perfectly fine on the repaired anvil. I am careful not to do heavy sledge work on the previously cracked heel of the trenton. I do not want to find the heel laying on the ground! The below is a more recent photograph of the Trenton Repaired anvil. Notice the weld beads and how they are a different color from the Factory Rought and the Tool Steel Face. These repair weld beads do not rust.
-
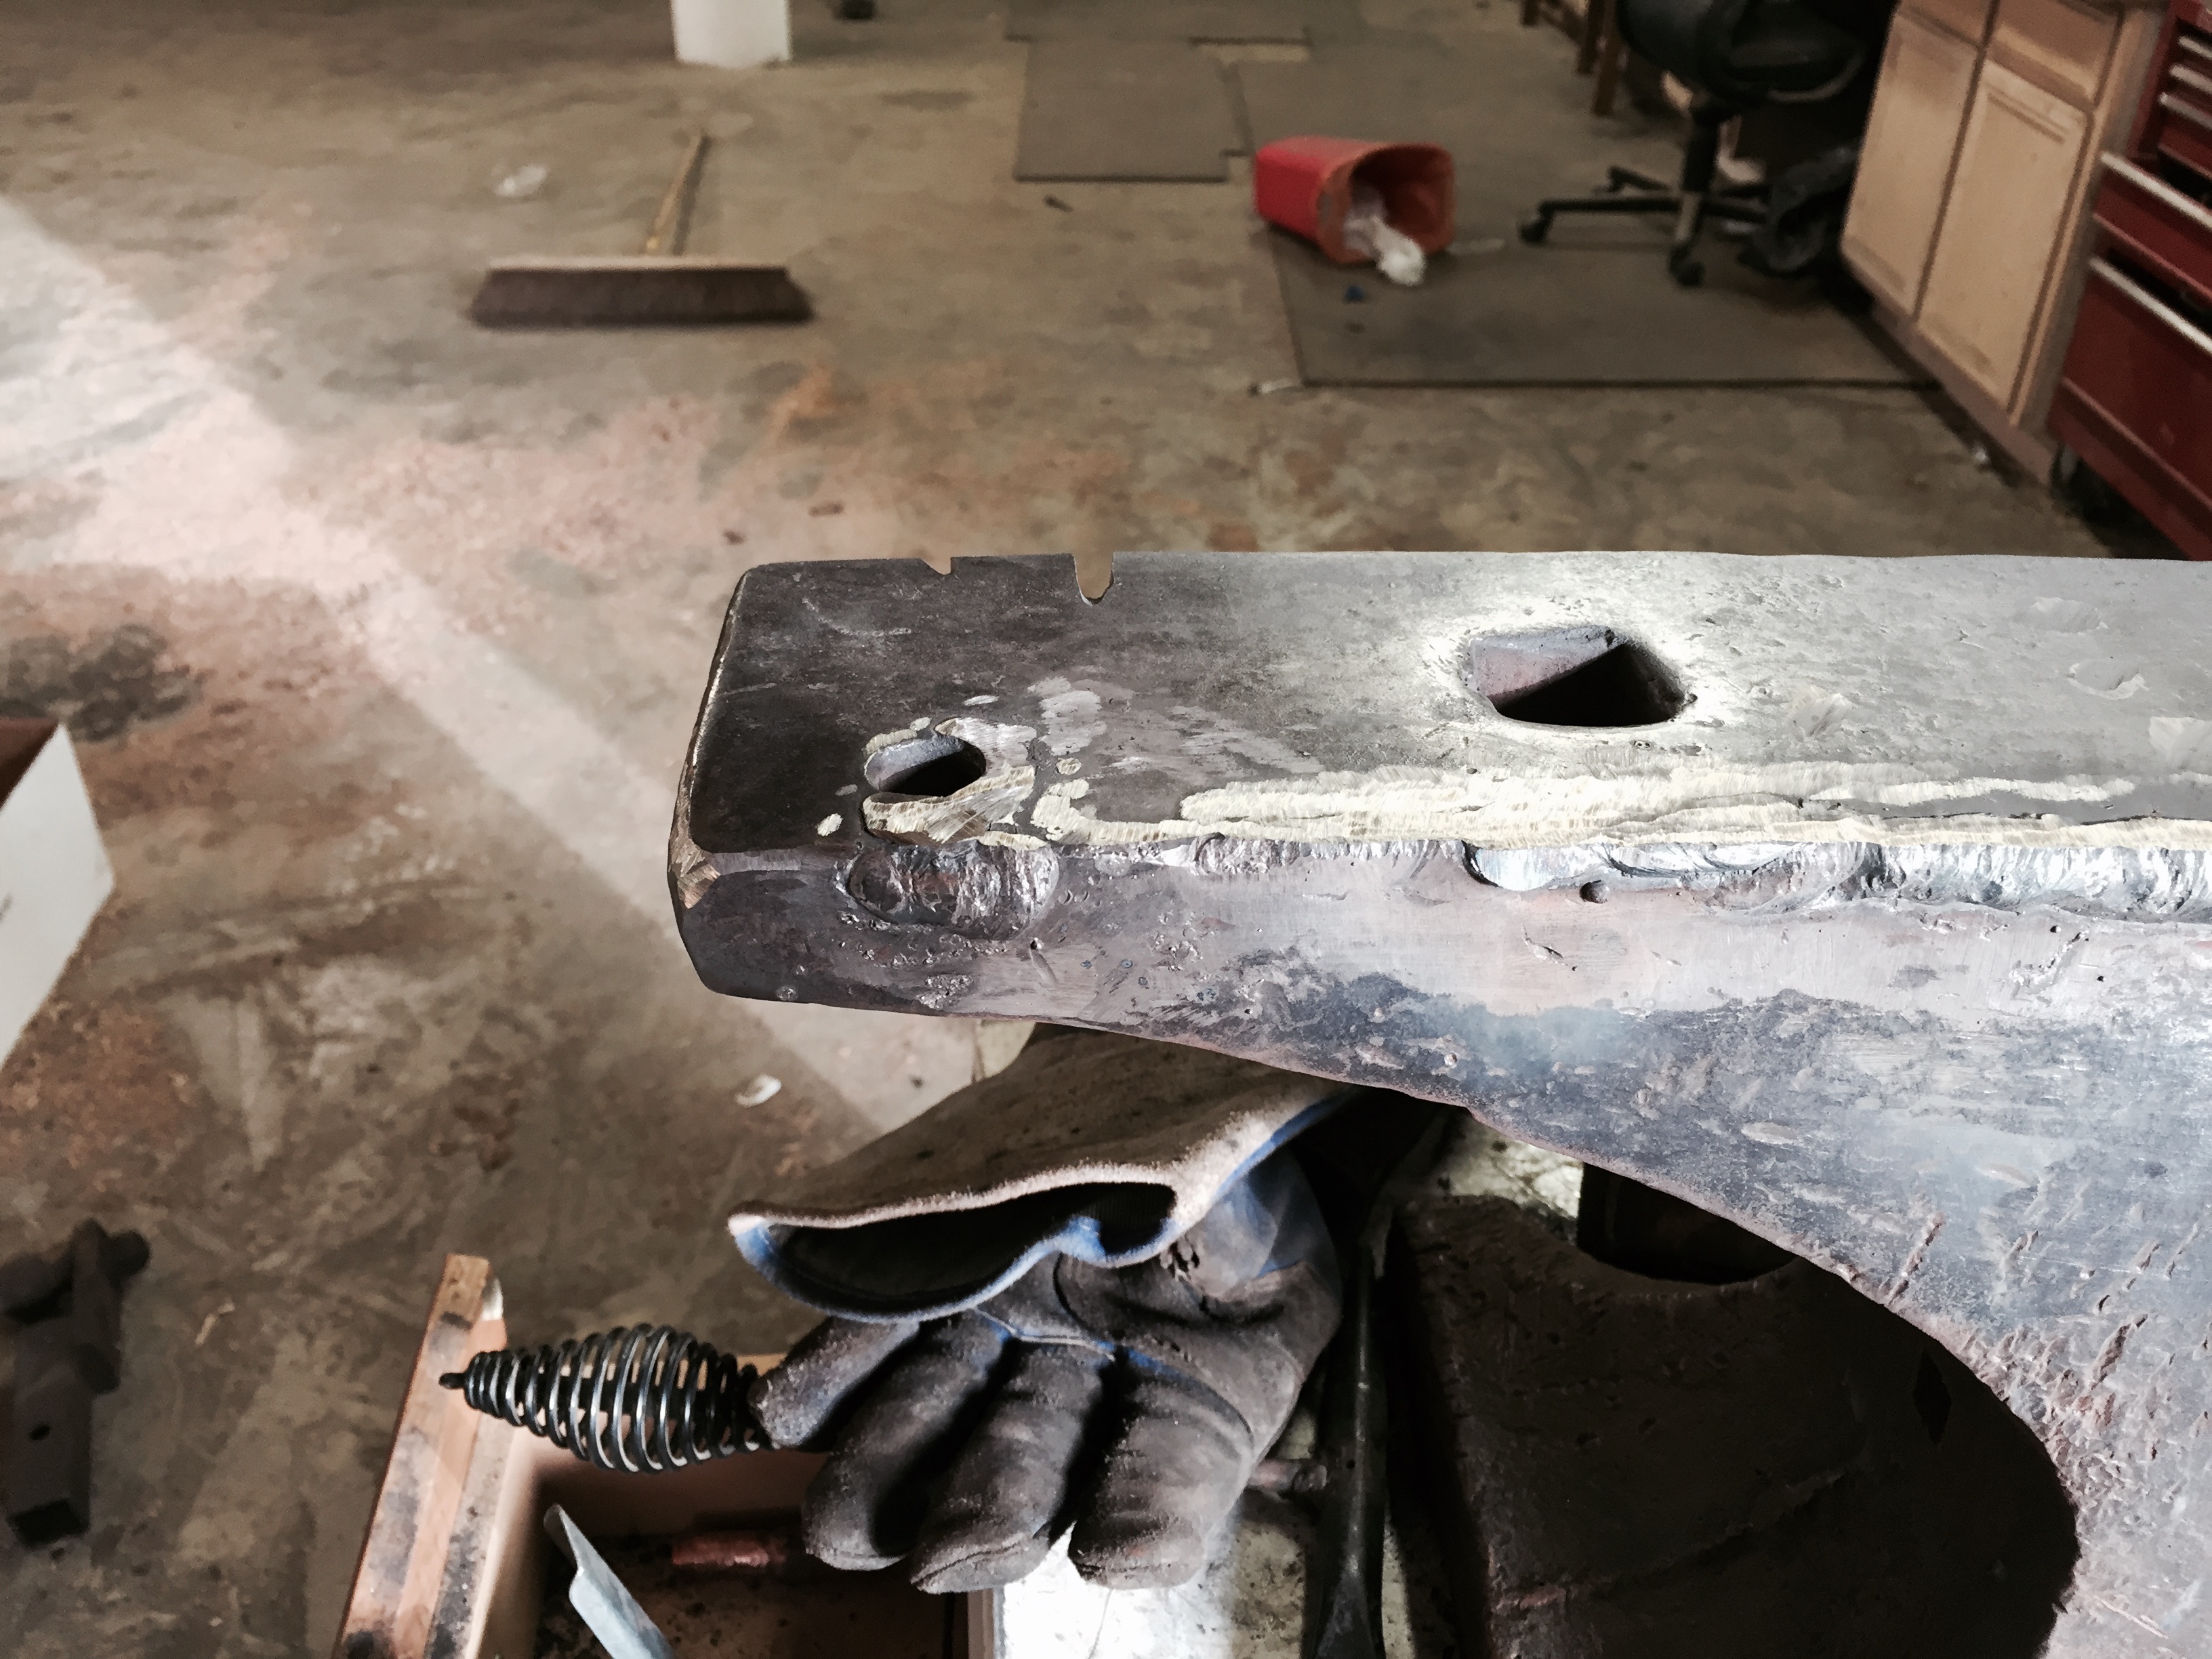
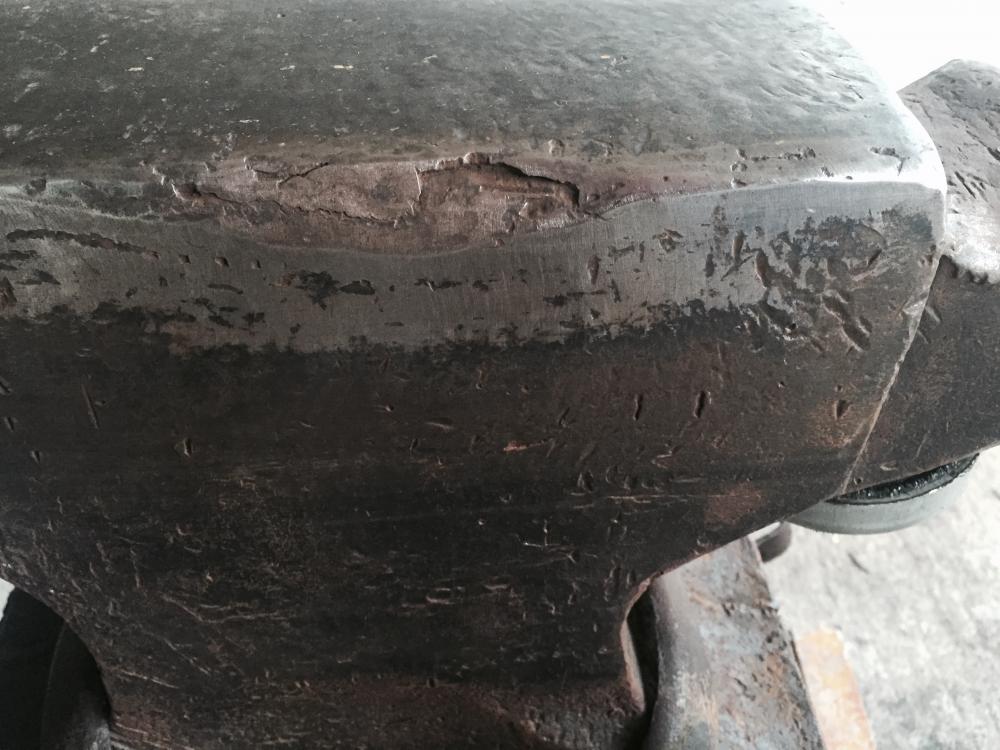
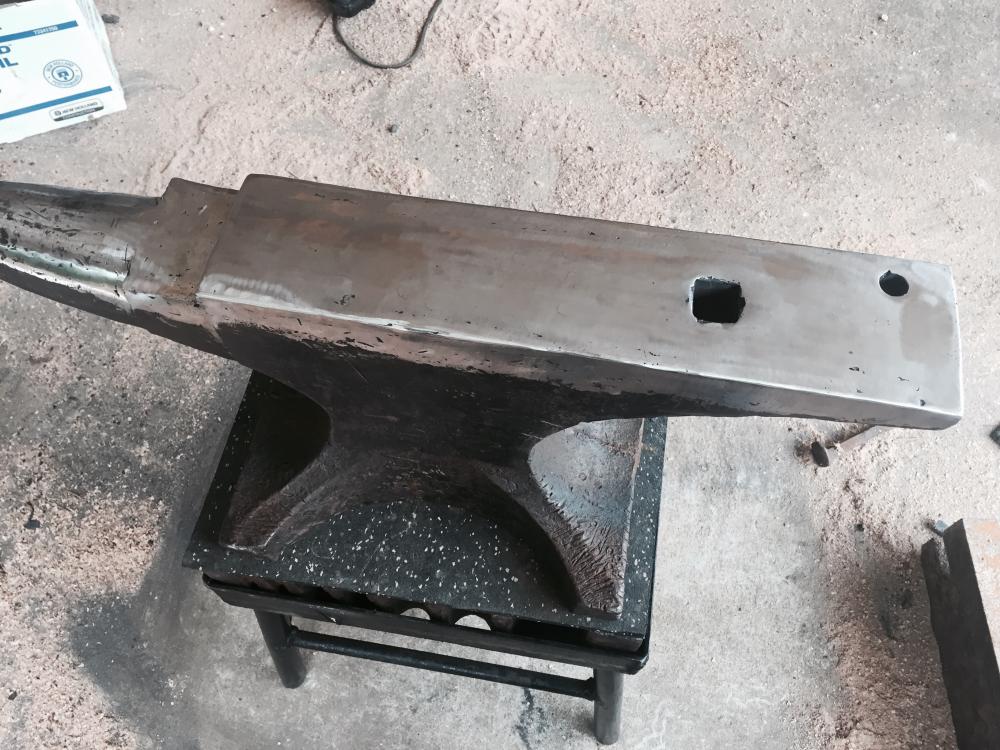
Good question JHCC! whatever he did he did it a whole lot of it!!!!. That groove was not ground, it was pounded. As far as the delamination in the face - I ground all of it out way back into the face until I found clean, uncracked face steel. The far side when fully gound out was horrible, and about an inch into the wrought. It took an aweful lot of beads to build up. Rebound is spot on at 90% for this anvil, even over my welds. The Amtec 64 (hard face) rod was suppose to be 59RC but is softer than the original factory face. All my buildup was done with AMCTC Railtec. Hardface with AMTEC 64 but could not be more than 3 Beads Stacked. I have put some nicks in my Weld beads over the months since the repair. Amtec 64 rod must have a lot of nickel in it b/c it doesn't rust. NOTE: ATTENTION!!!! I AM not suggesting nor recommending anyone repair an anvil. Truthfully the welding rod for this job cost 1/2 as much as the anvil originally. It was laborious job and took an awefully long time. The results were NEVER guaranteed and I ran the risk of completely ruining this anvil. Truthfully, even though the repair was completely successful, I likely decreased the collector value of this anvil by repairing it.


-
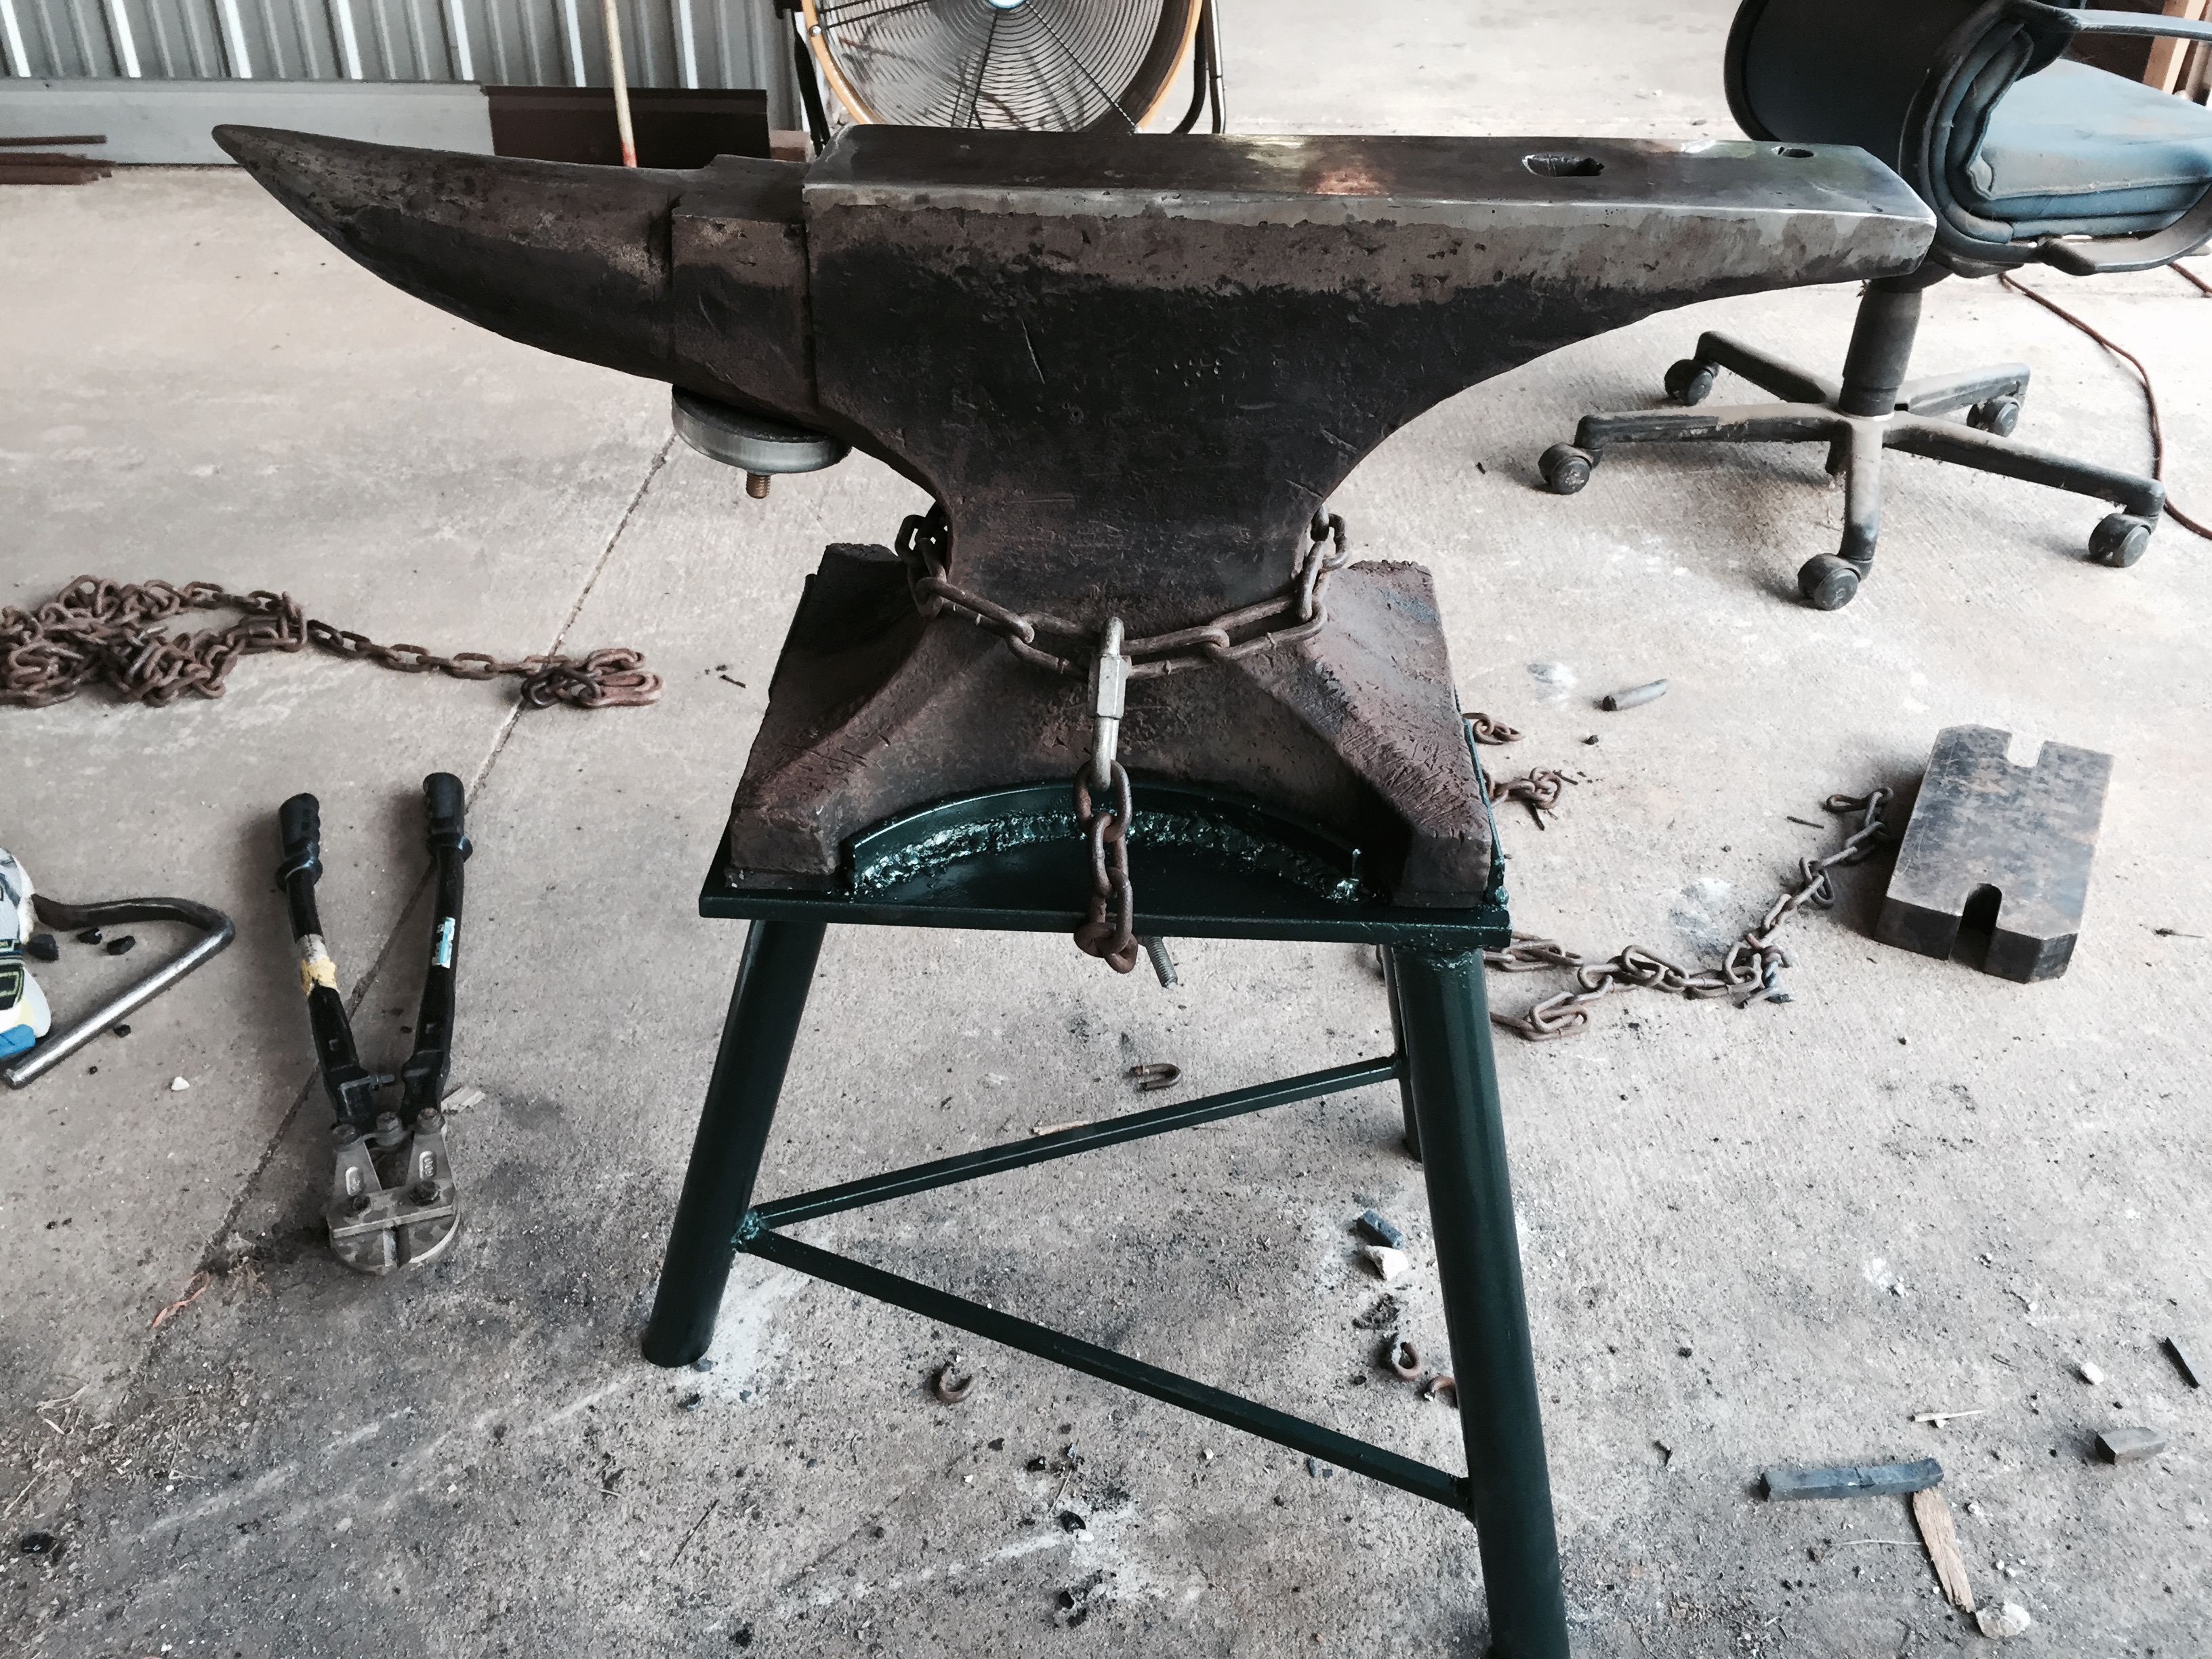
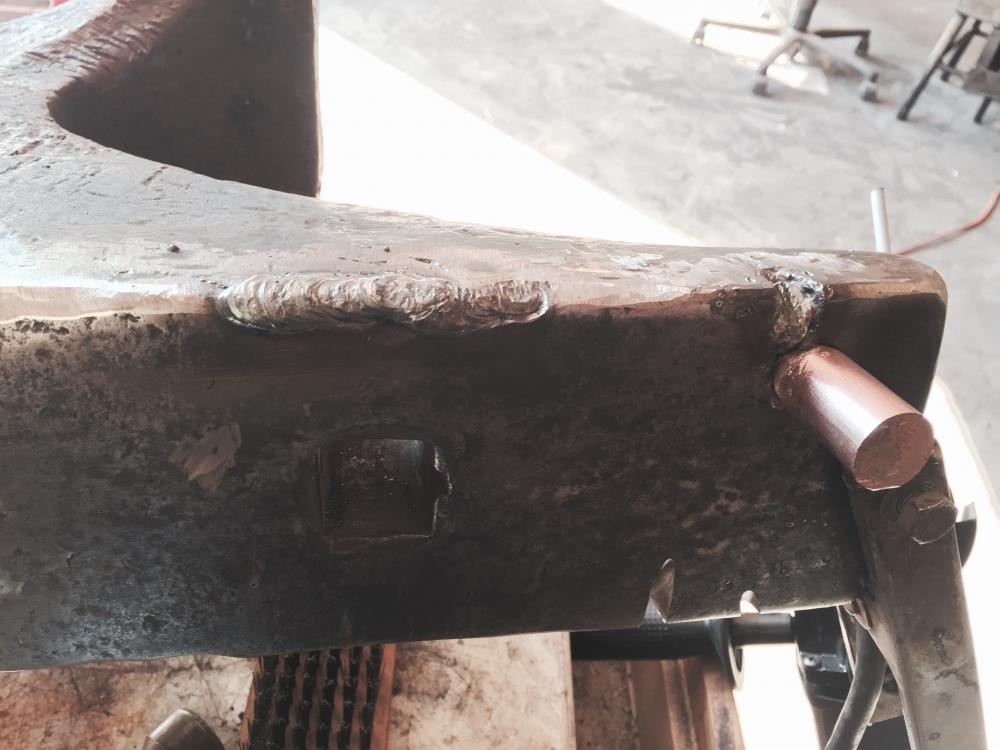
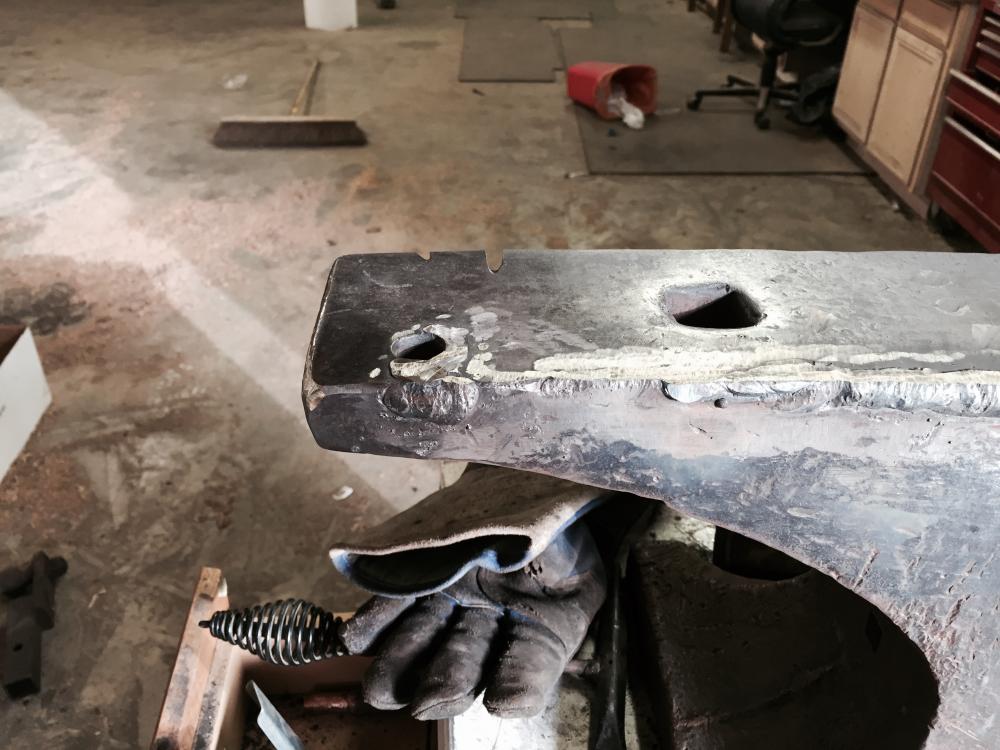
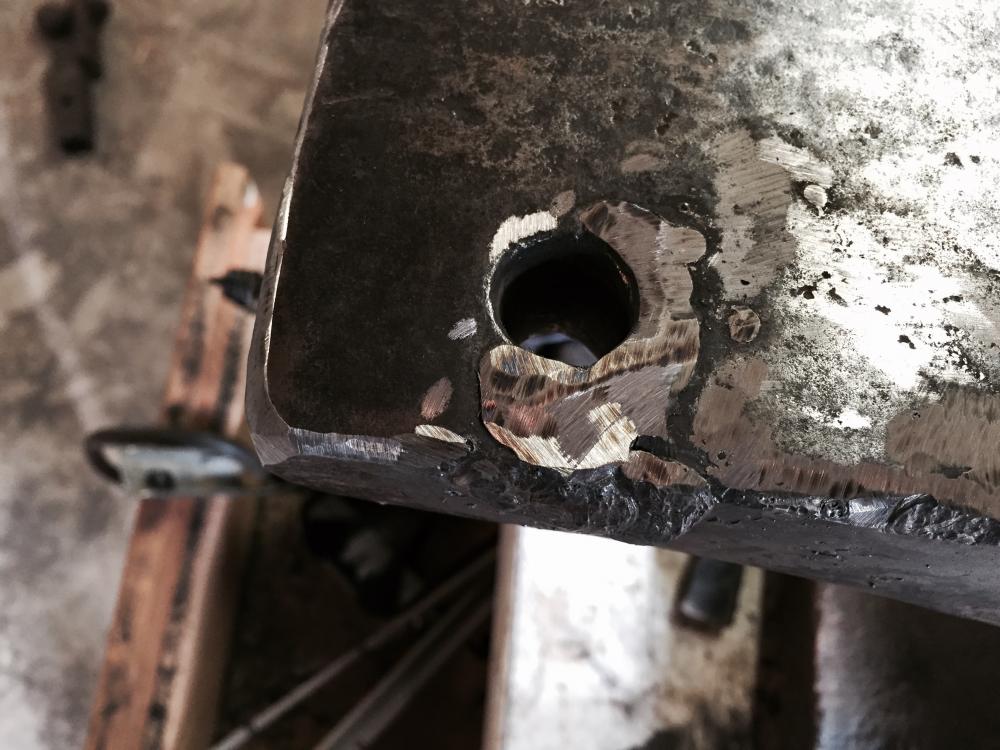
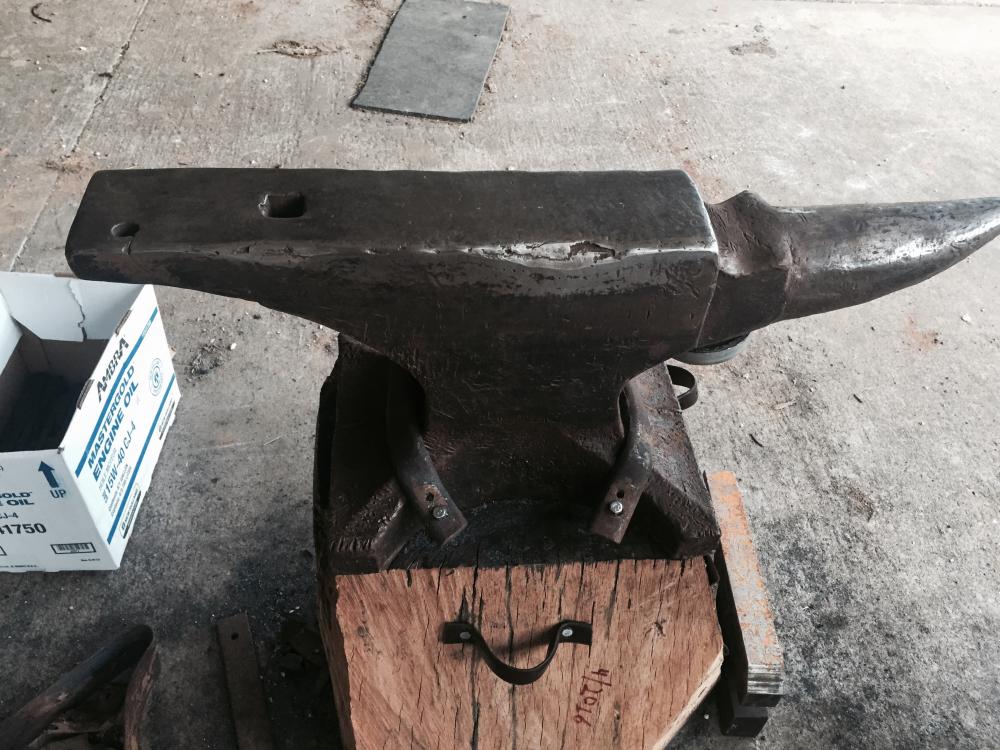
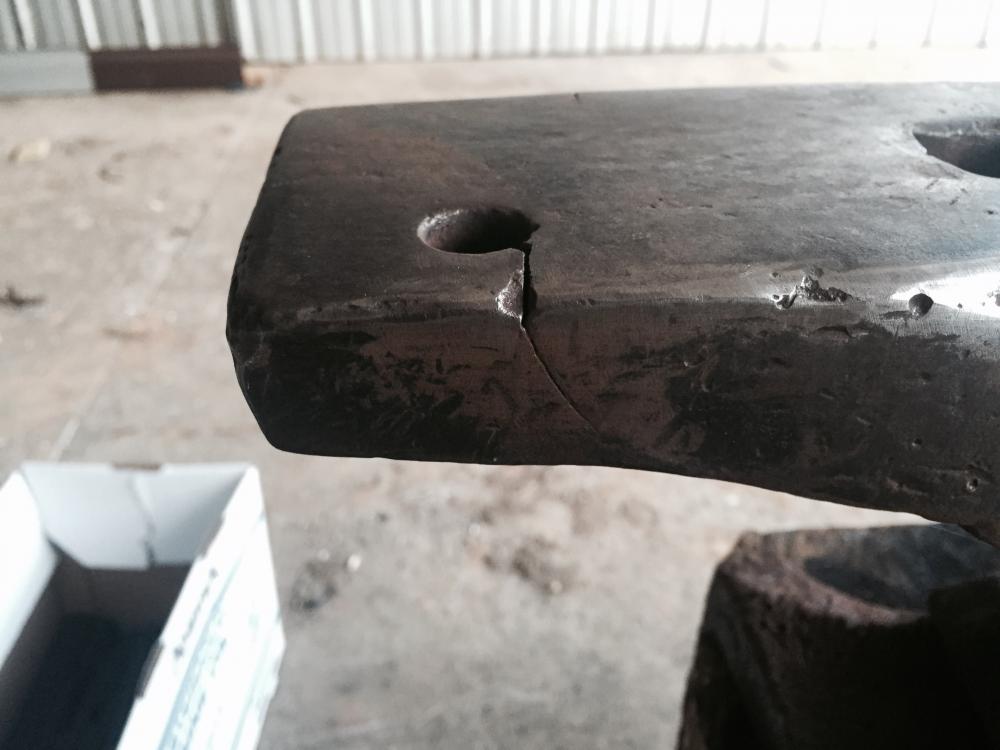
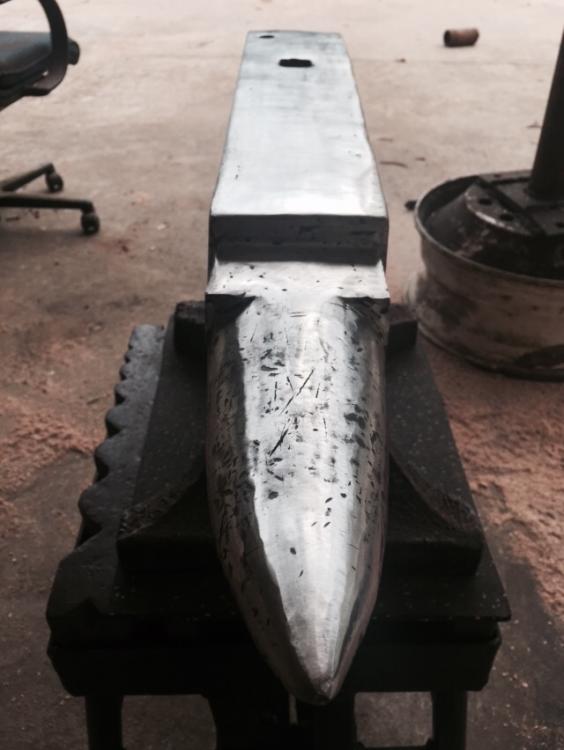
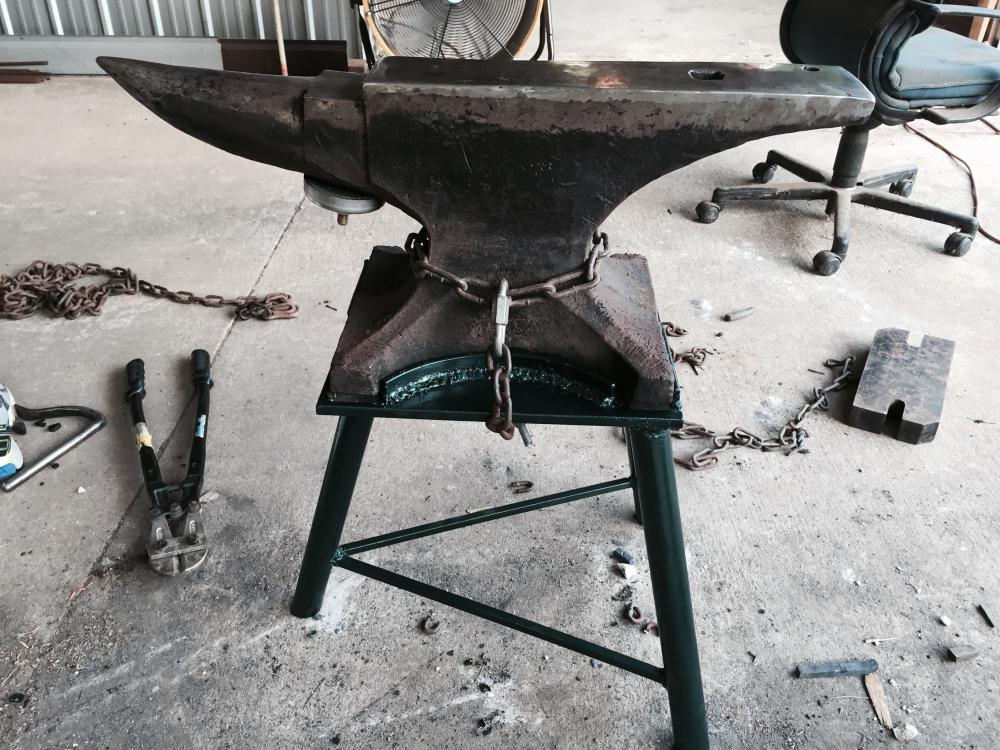
It was suggested on the welding page that I post these to the show anvil page. I read, learn, borrow, appreciate your posts and lurk quite a lot but rarely post. The 2 below anvils are my weekly users. The first is likely a Peter Wright and is 167lbs with almost no markings. This 167 PW is in exceptional shape with only a slight sway in the face. I can make out the W in SOLID WROUGHT is the only mark I can find on the PW. The second and all the remaining photos are a 203lb Trenton 1903 production and is my first large 200+lb anvil. The Trenton was beaten nearly to death before I repaired it. The heel was cracked in 2 places and nearly broken off, the face on far side (Horn left) was beaten a full inch down into the wrought. The cutting table was completely hollowed out and rounded on both sides. This TRENTON anvil was rough which is why I could afford it. I ground, pre heated, and welded the edges to bring it back to function. Disclaimer: I would not recommend repairing an anvil, and I am encouraging NO one to do it. This Trenton was all I had at the time and I not only wanted a functional anvil, I wanted to repair it. I likely REDUCED the collector monetary value of this anvil by repairing it. These 2 are my weekly users


-
You got it! I'm a lurker and rarely post. I'll see about putting some photos on show us your anvil.
-
The photo above, the little hay budden in the front is 84 lbs. It is my leather work, riveting, small work, copper, brass, tin and jewelry work anvil. The other 2 are works in progress and will eventually be put into production. See photos below, I have 2anvils that get used weekly. All kidding aside - thank you guys for your input. MAybe you are right JHCC, maybe that is what Blacksmith for Beginners on FB found offensive.

-
Thanks Guys. marc1, I have no idea what the administrators for Blacksmith FOR Beginners on FB found offensive. It was pretty much the same quote. At any rate, thank you guys for your input.
-
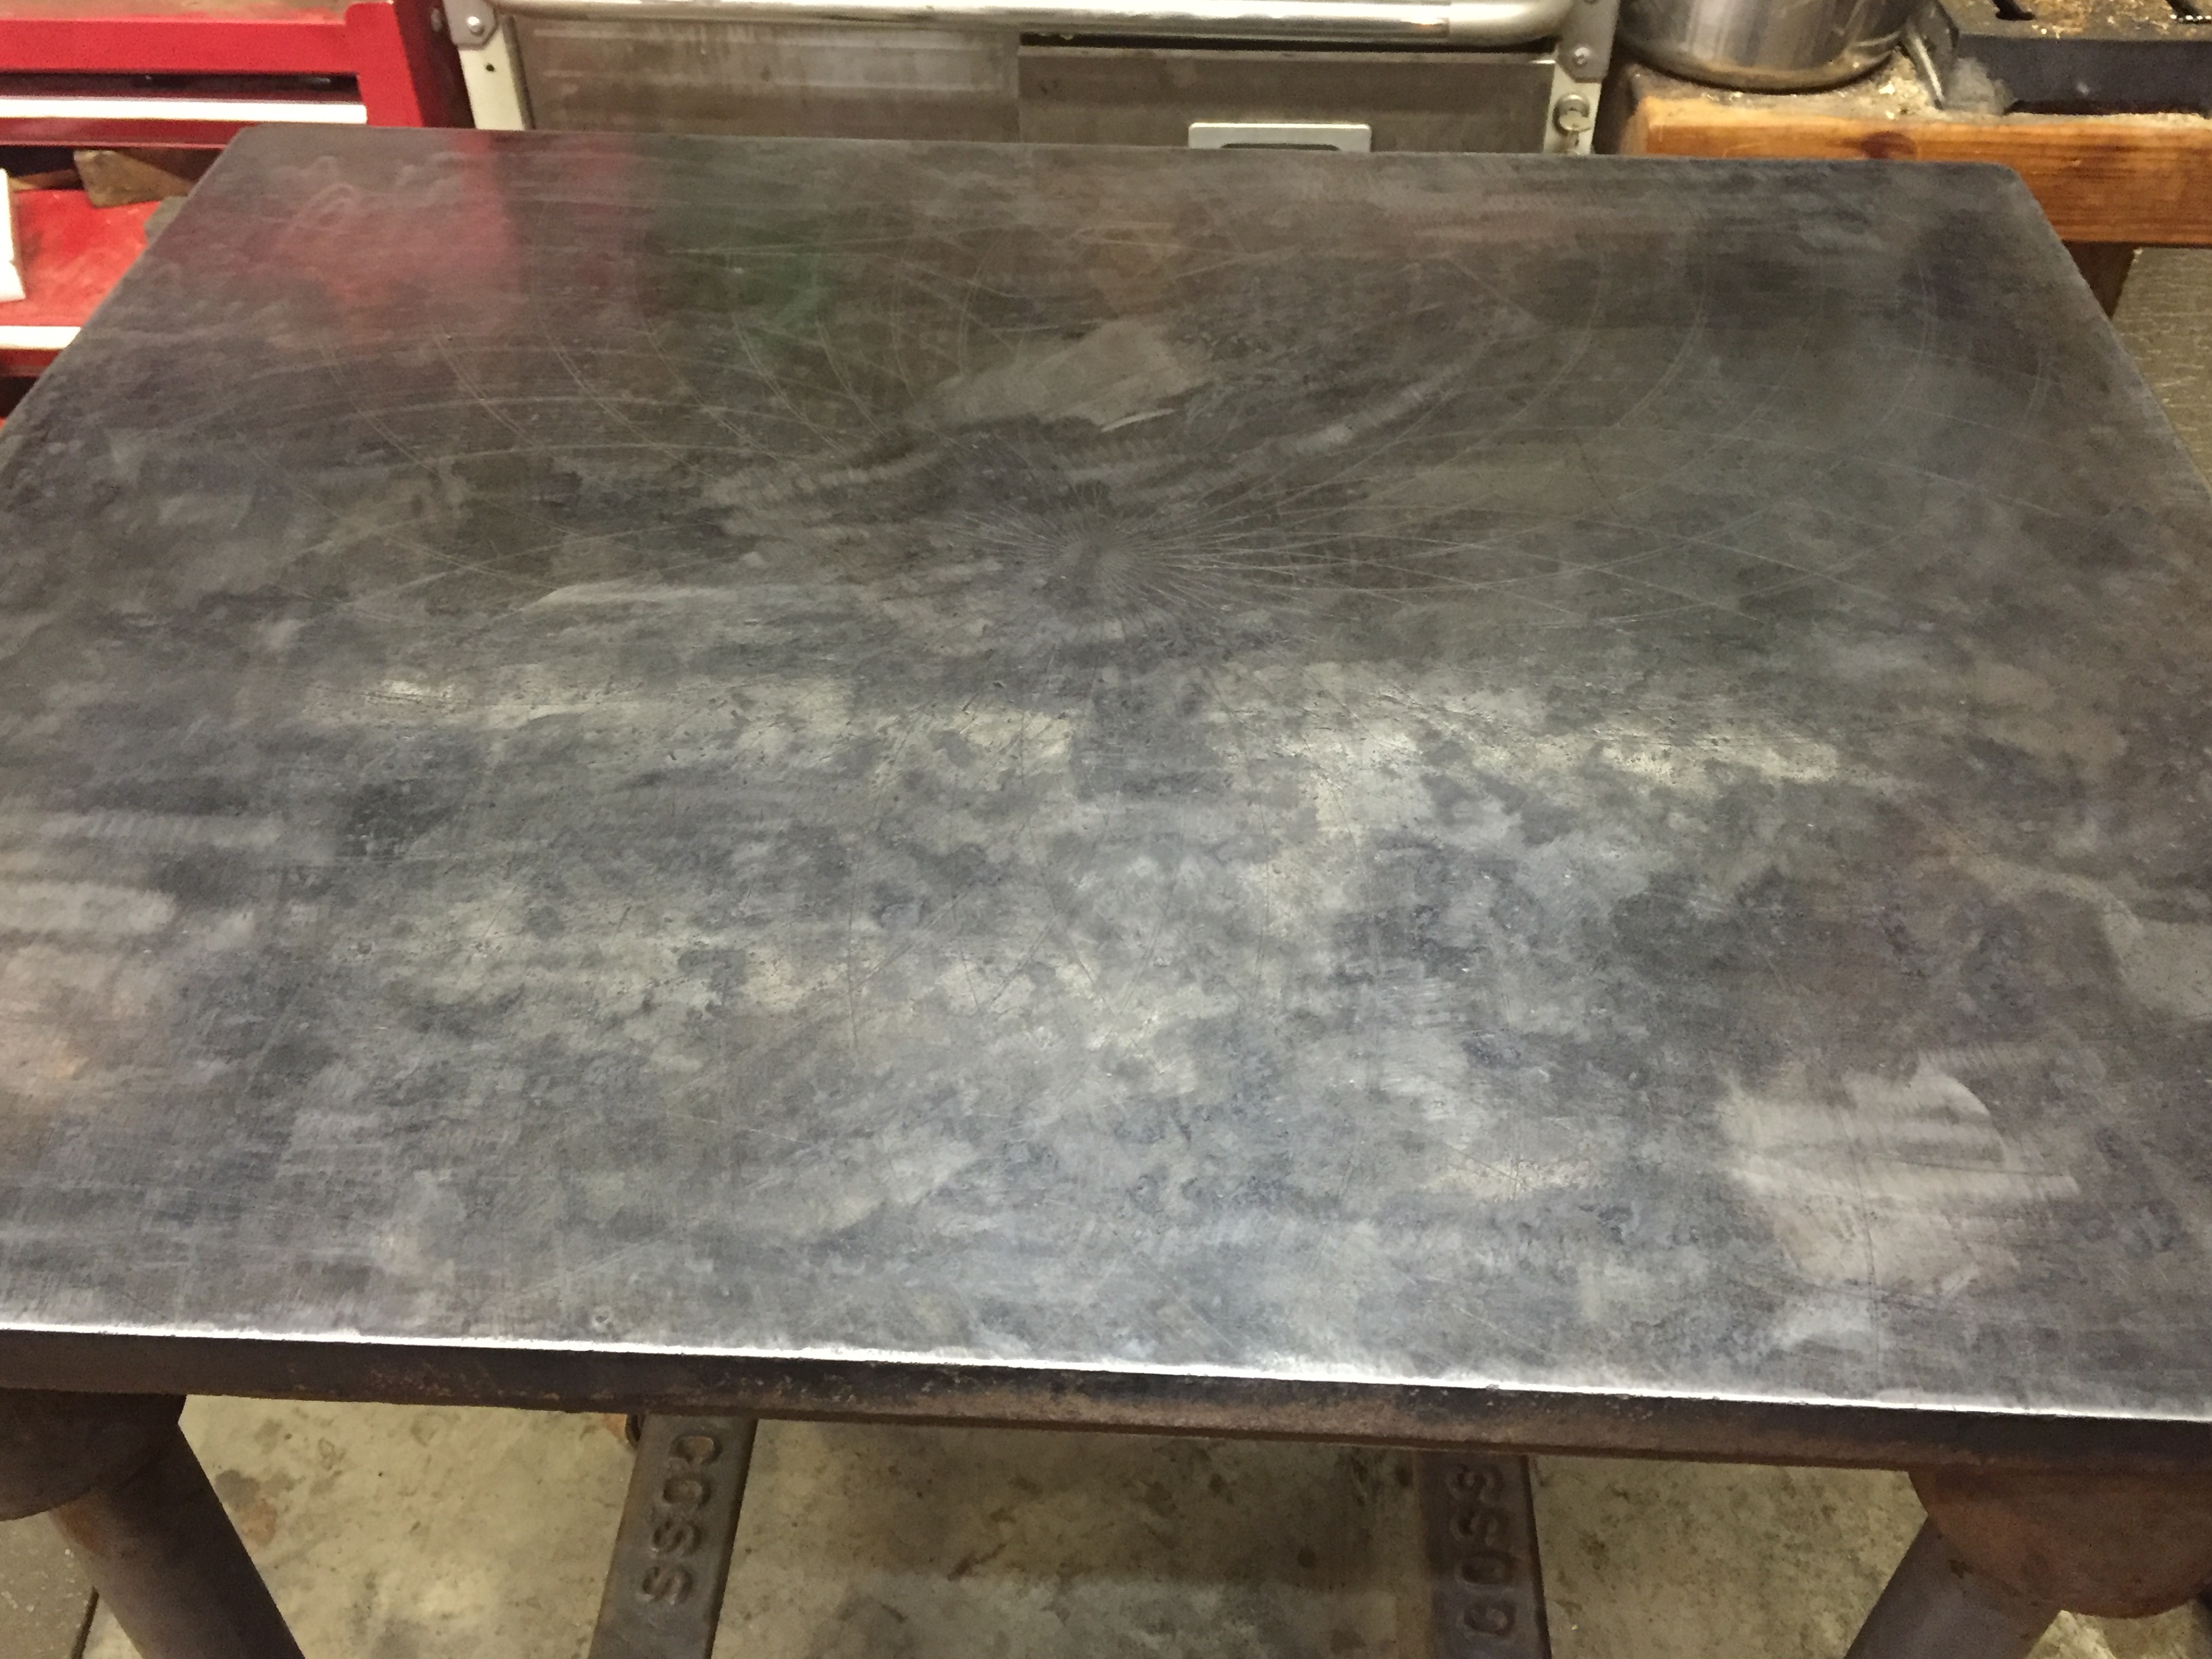
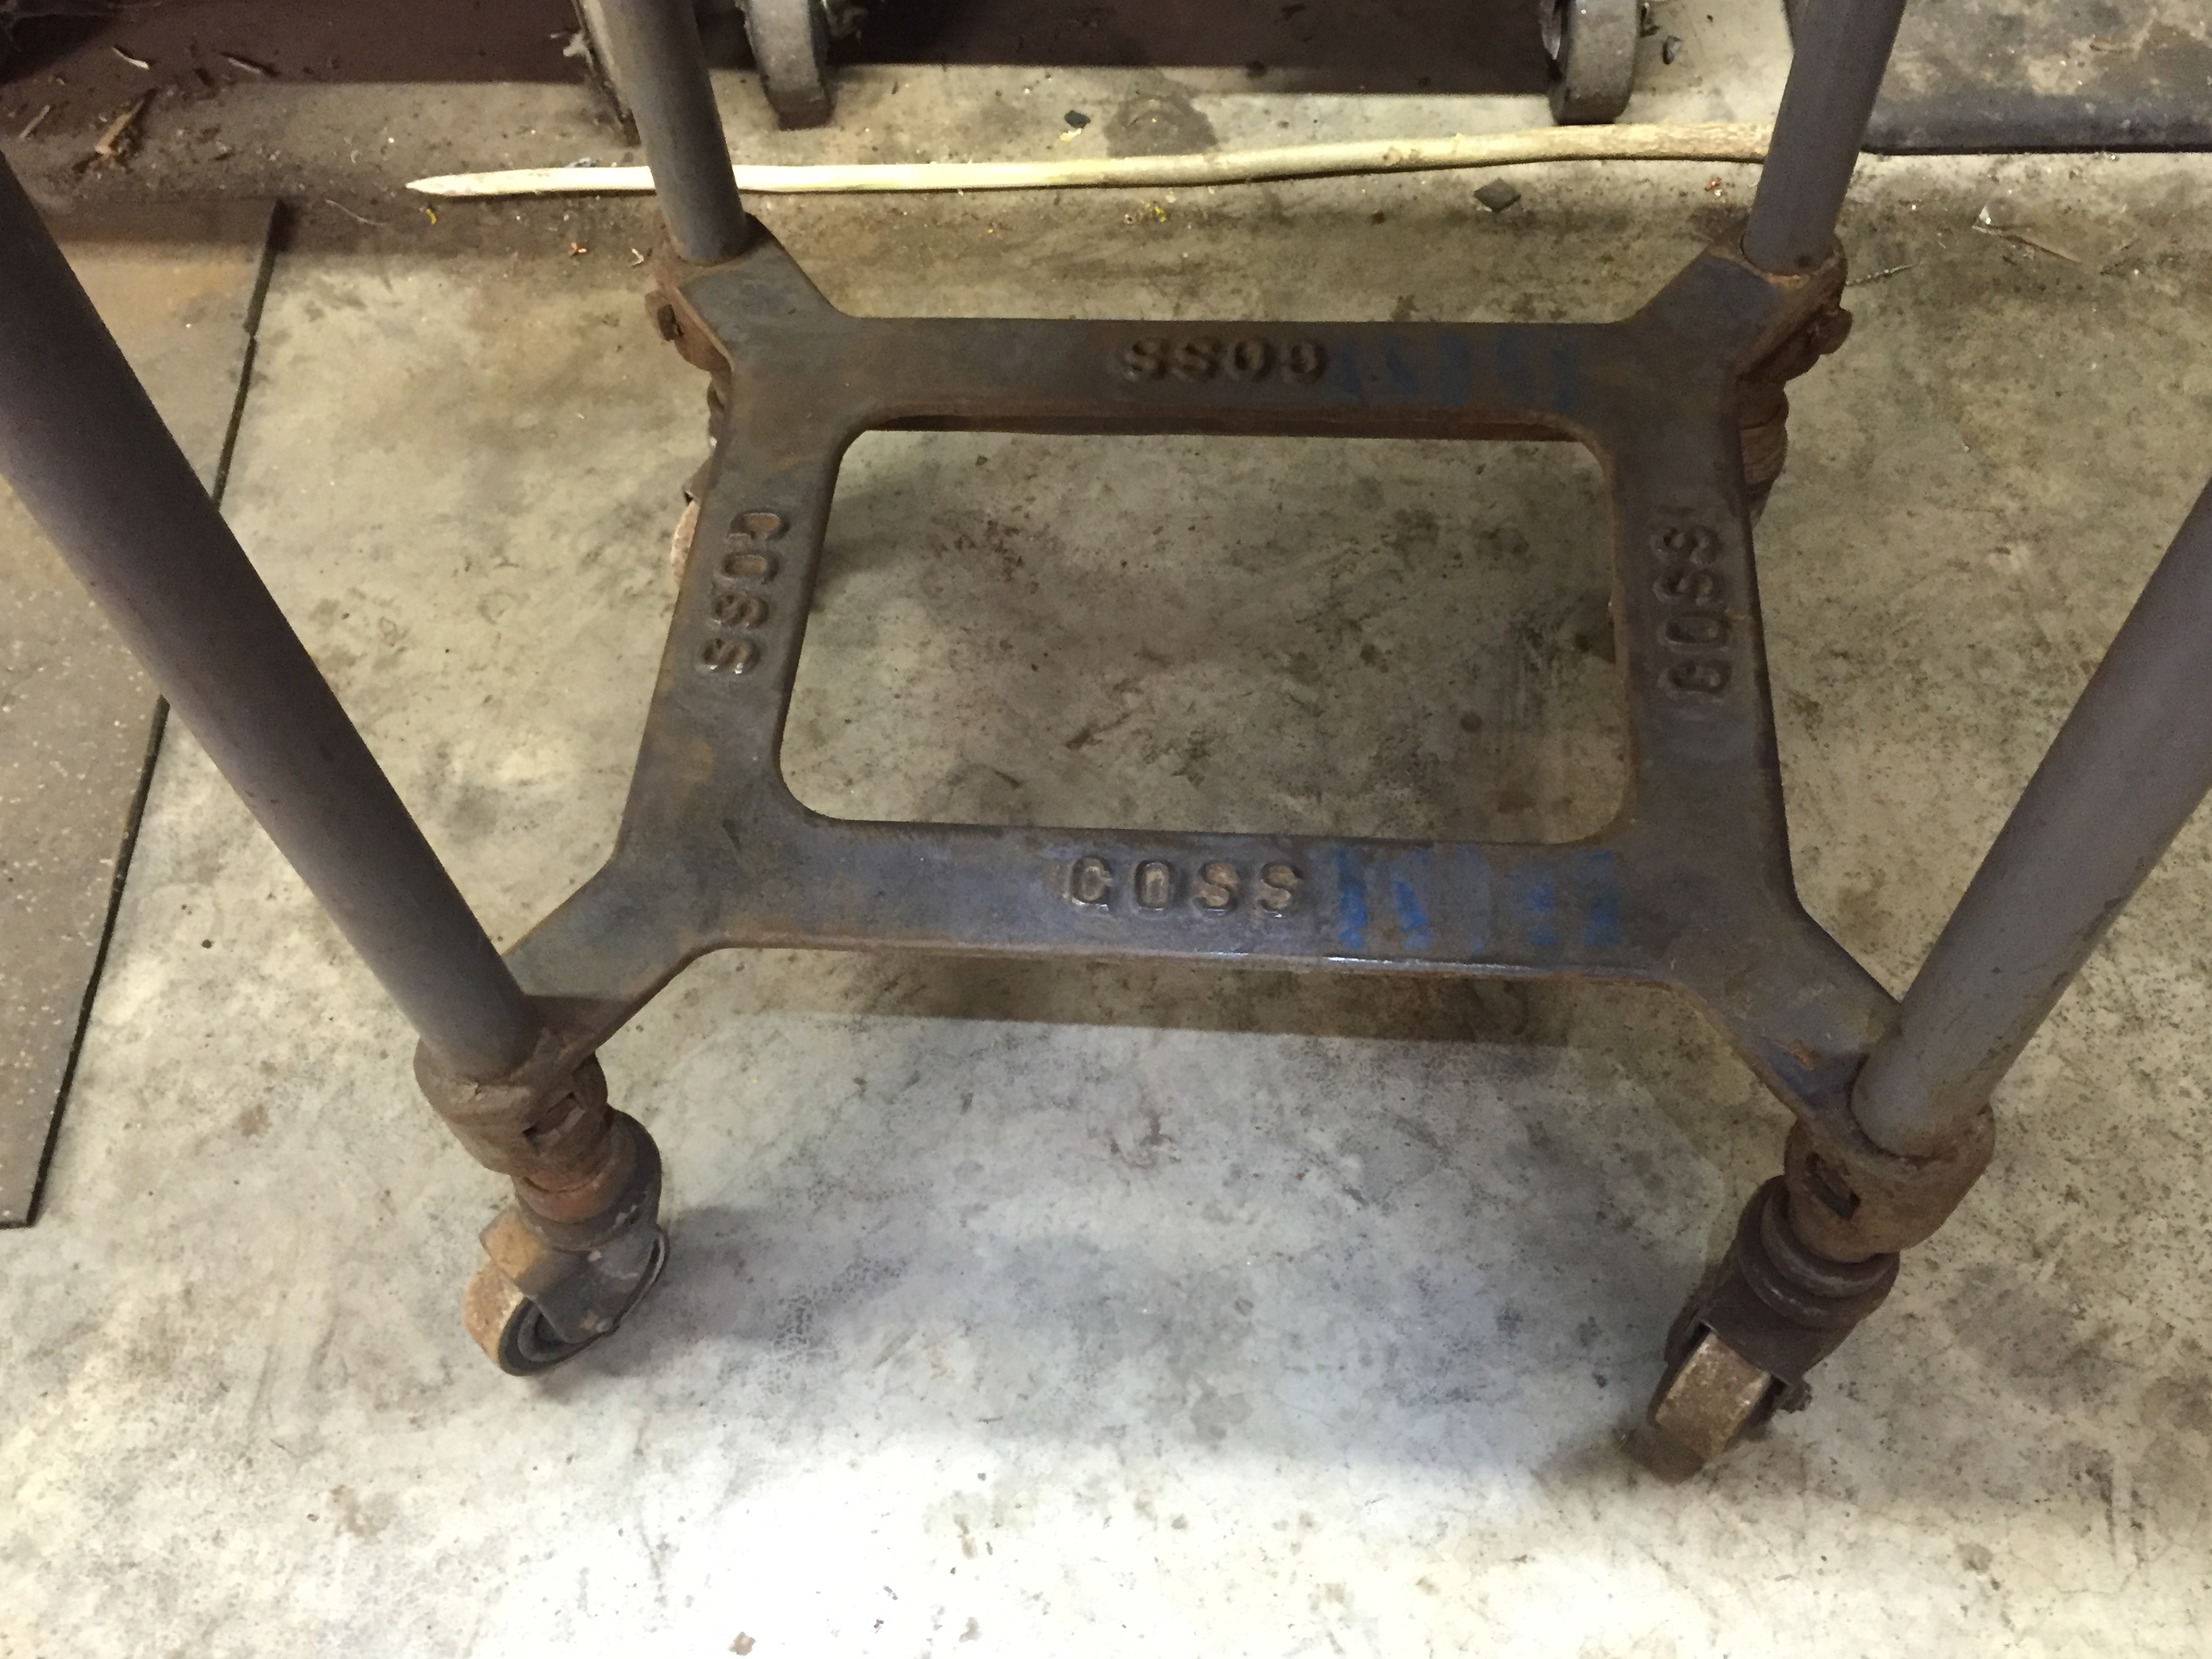
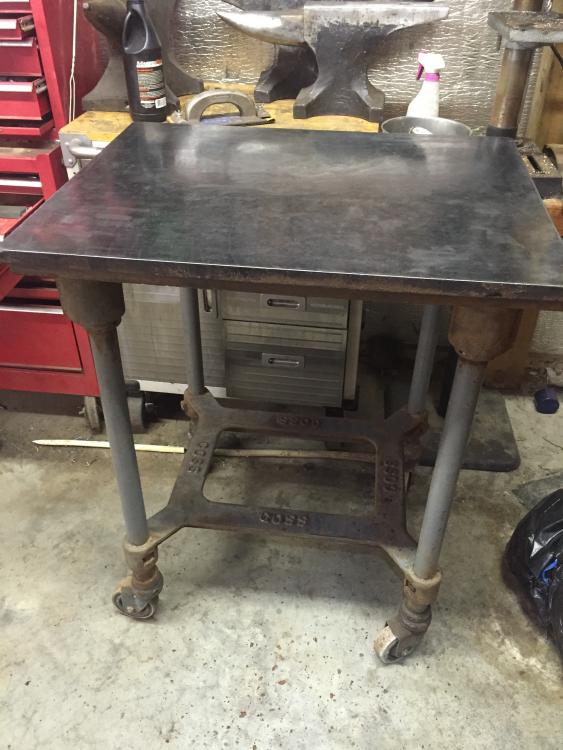
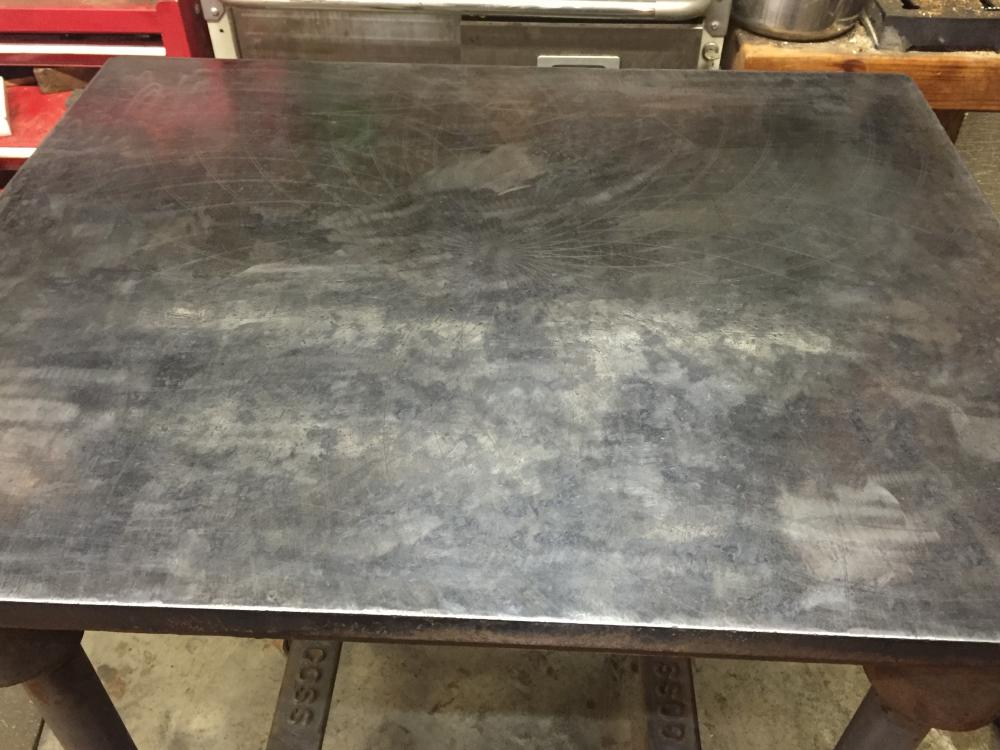
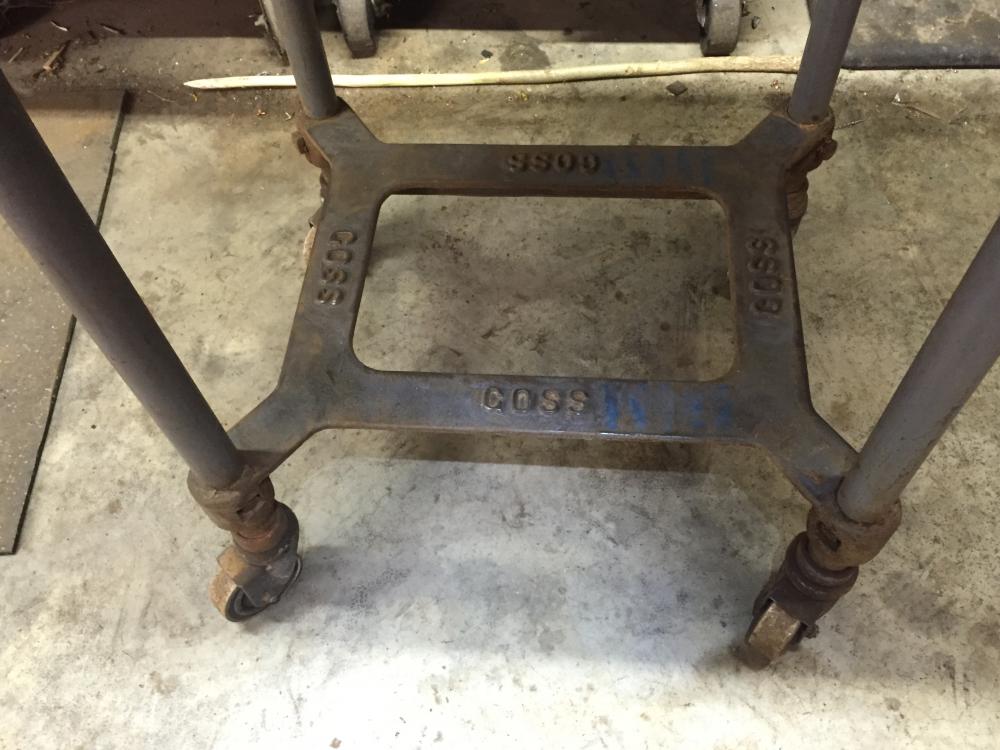
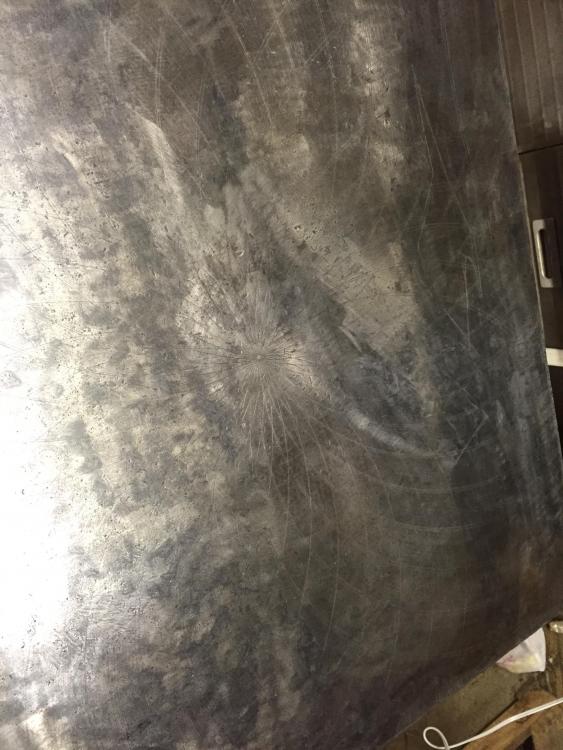
I originally posted this on Facebook in the Blacksmith for Beginners site looking for information on this heavy steel table. Someone took offense to the post and deleted it. SO: Who on here knows anything about Type Setting tables (turtle Tables)? I originally bought this table in horribly rusted shape from a picker thinking i could use it as a welding table. Upon further investigation and cleaning this thing is really NICE! I figured out searching the ole interweb that this is an Industrial turtle table, used for transporting type set pages from setting table to printing press. Weight 300 lbs, 24 x 30 x 1.25 inch top, 36 inch height. Top is machined to an almost mirror finish. The legs are all adjustable and everything is built like a TANK. Does anyone here know anything about these industrial turtle tables? Thank you in advance. Kevin K.

-
None of my suggestions above require a GYM. I'm not saying "Do not Join". Best wishes to your trip across the pond to the "MOTHER COUNTRY" I hope to see your work posted up and maybe even a video from Alex with you in it. All the Best.
-
I did a 3 day class with Robert Patrick here in Arkansas usa during November. I am in Really GOOD physical shape and this 68 year old gentleman worked me down during 8 hours of forging each day. I was able to hang with him, however I was really tired at the end of each day. Given the above, here is how I would specifically train, should I choose to do this class again. 1. Dips each day several sets until muscle failure (can do them off a hard bottom chair) - Triceps and lats 2. Pushups each day several sets until muscle failure. Triceps, chest and back 3. shoulder raises, would be ok with as little as 5 lbs. Front raises, side raises, until muscle failure 4. Chinups or any equivalent daily until failure, several sets. It amazes me how much my lats (latimus dorsi) back side muscles are engaged during hammering 5. Situps each day several sets until muscle failure. Everything starts with the core. 6. Planks a minimum of 3-5 times per day until complete muscle failure. CORE, CORE, CORE. core. During your classes, be sure and drink lots and lots of water. (Clear urine means you are properly hydrated) All the best, enjoy your class and post up some photos of the tools you make.
-
Regardless of the weight, you made a good purchase in my opinion. I'm still chuckling at your comment, "I'm strong like BULL!" Please post back when you get the anvil cleaned up. I find myself hoping you don't grind on, or weld on this anvil. As I mentioned in a facebook post, If Trenton, the anvil will have a weight on the left front foot and a serial number on the right front foot. Even trentons with no markings often have these numbers on the foot under the horn. I have very little experience with Arm and Hammer. AIA states that there is often rough fullering marks under the heel of an arm and hammer. I've never actually seen one in person. Congratulations on your purchase STRONG LIKE BULL!
-
124 lbs. SS Hay Budden Anvil Clean up
Kevin A King replied to Forrest Betts's topic in Anvils, Swage Blocks, and Mandrels
Someone with more knowledge than me will chime in. IF this is truly a 1 Piece Hay Budden Anvil (Which it appears to be), it is extremely rare. Your antique collectible value will be quite high. Possibly consider researching the collectible value before weld repairing the face. You may be surprised at the value of this anvil due to the rare 1 Piece forging. If my memory serves, Hay Budden did not make very many of these true 1 piece anvils.