
Donniev
-
Posts
189 -
Joined
-
Last visited
Content Type
Profiles
Forums
Articles
Gallery
Downloads
Events
Posts posted by Donniev
-
-
Finally got a ton of time off, getting back to this. I've got 2 sets of 14 holes on either side of center, I didn't drill the center two holes instead of using a diffuser (tho as frosty noted he didn't use one anyway) seems to be running ok for now. I've got to get a mock up made of my forge tonight so I can stick this in and see how it runs inside the forge. So far it looks ok to me, unless someone smarter than me sees something amiss I'll keep plugging away

-
-
I can hardly find time to get it front of the anvil anymore so I try to make good use of the opportunities I do have
-
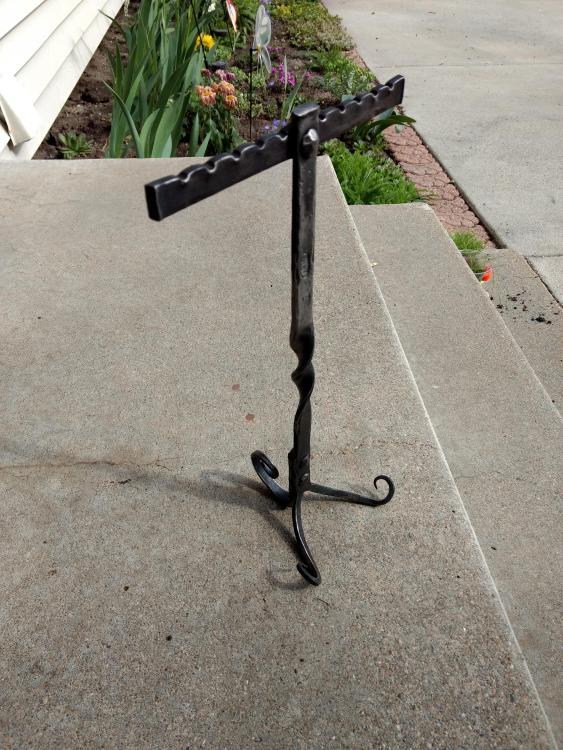
Made my wife a necklace holder today...I see quite a few flaws and improvements I could make on a 2nd try but it stands up fine and will serve it's purpose well...plus she likes it so I guess I passed my test!
-
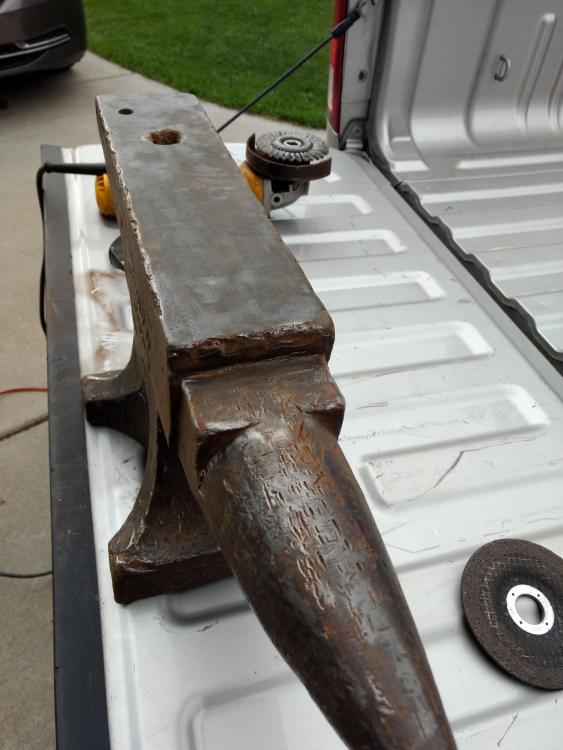
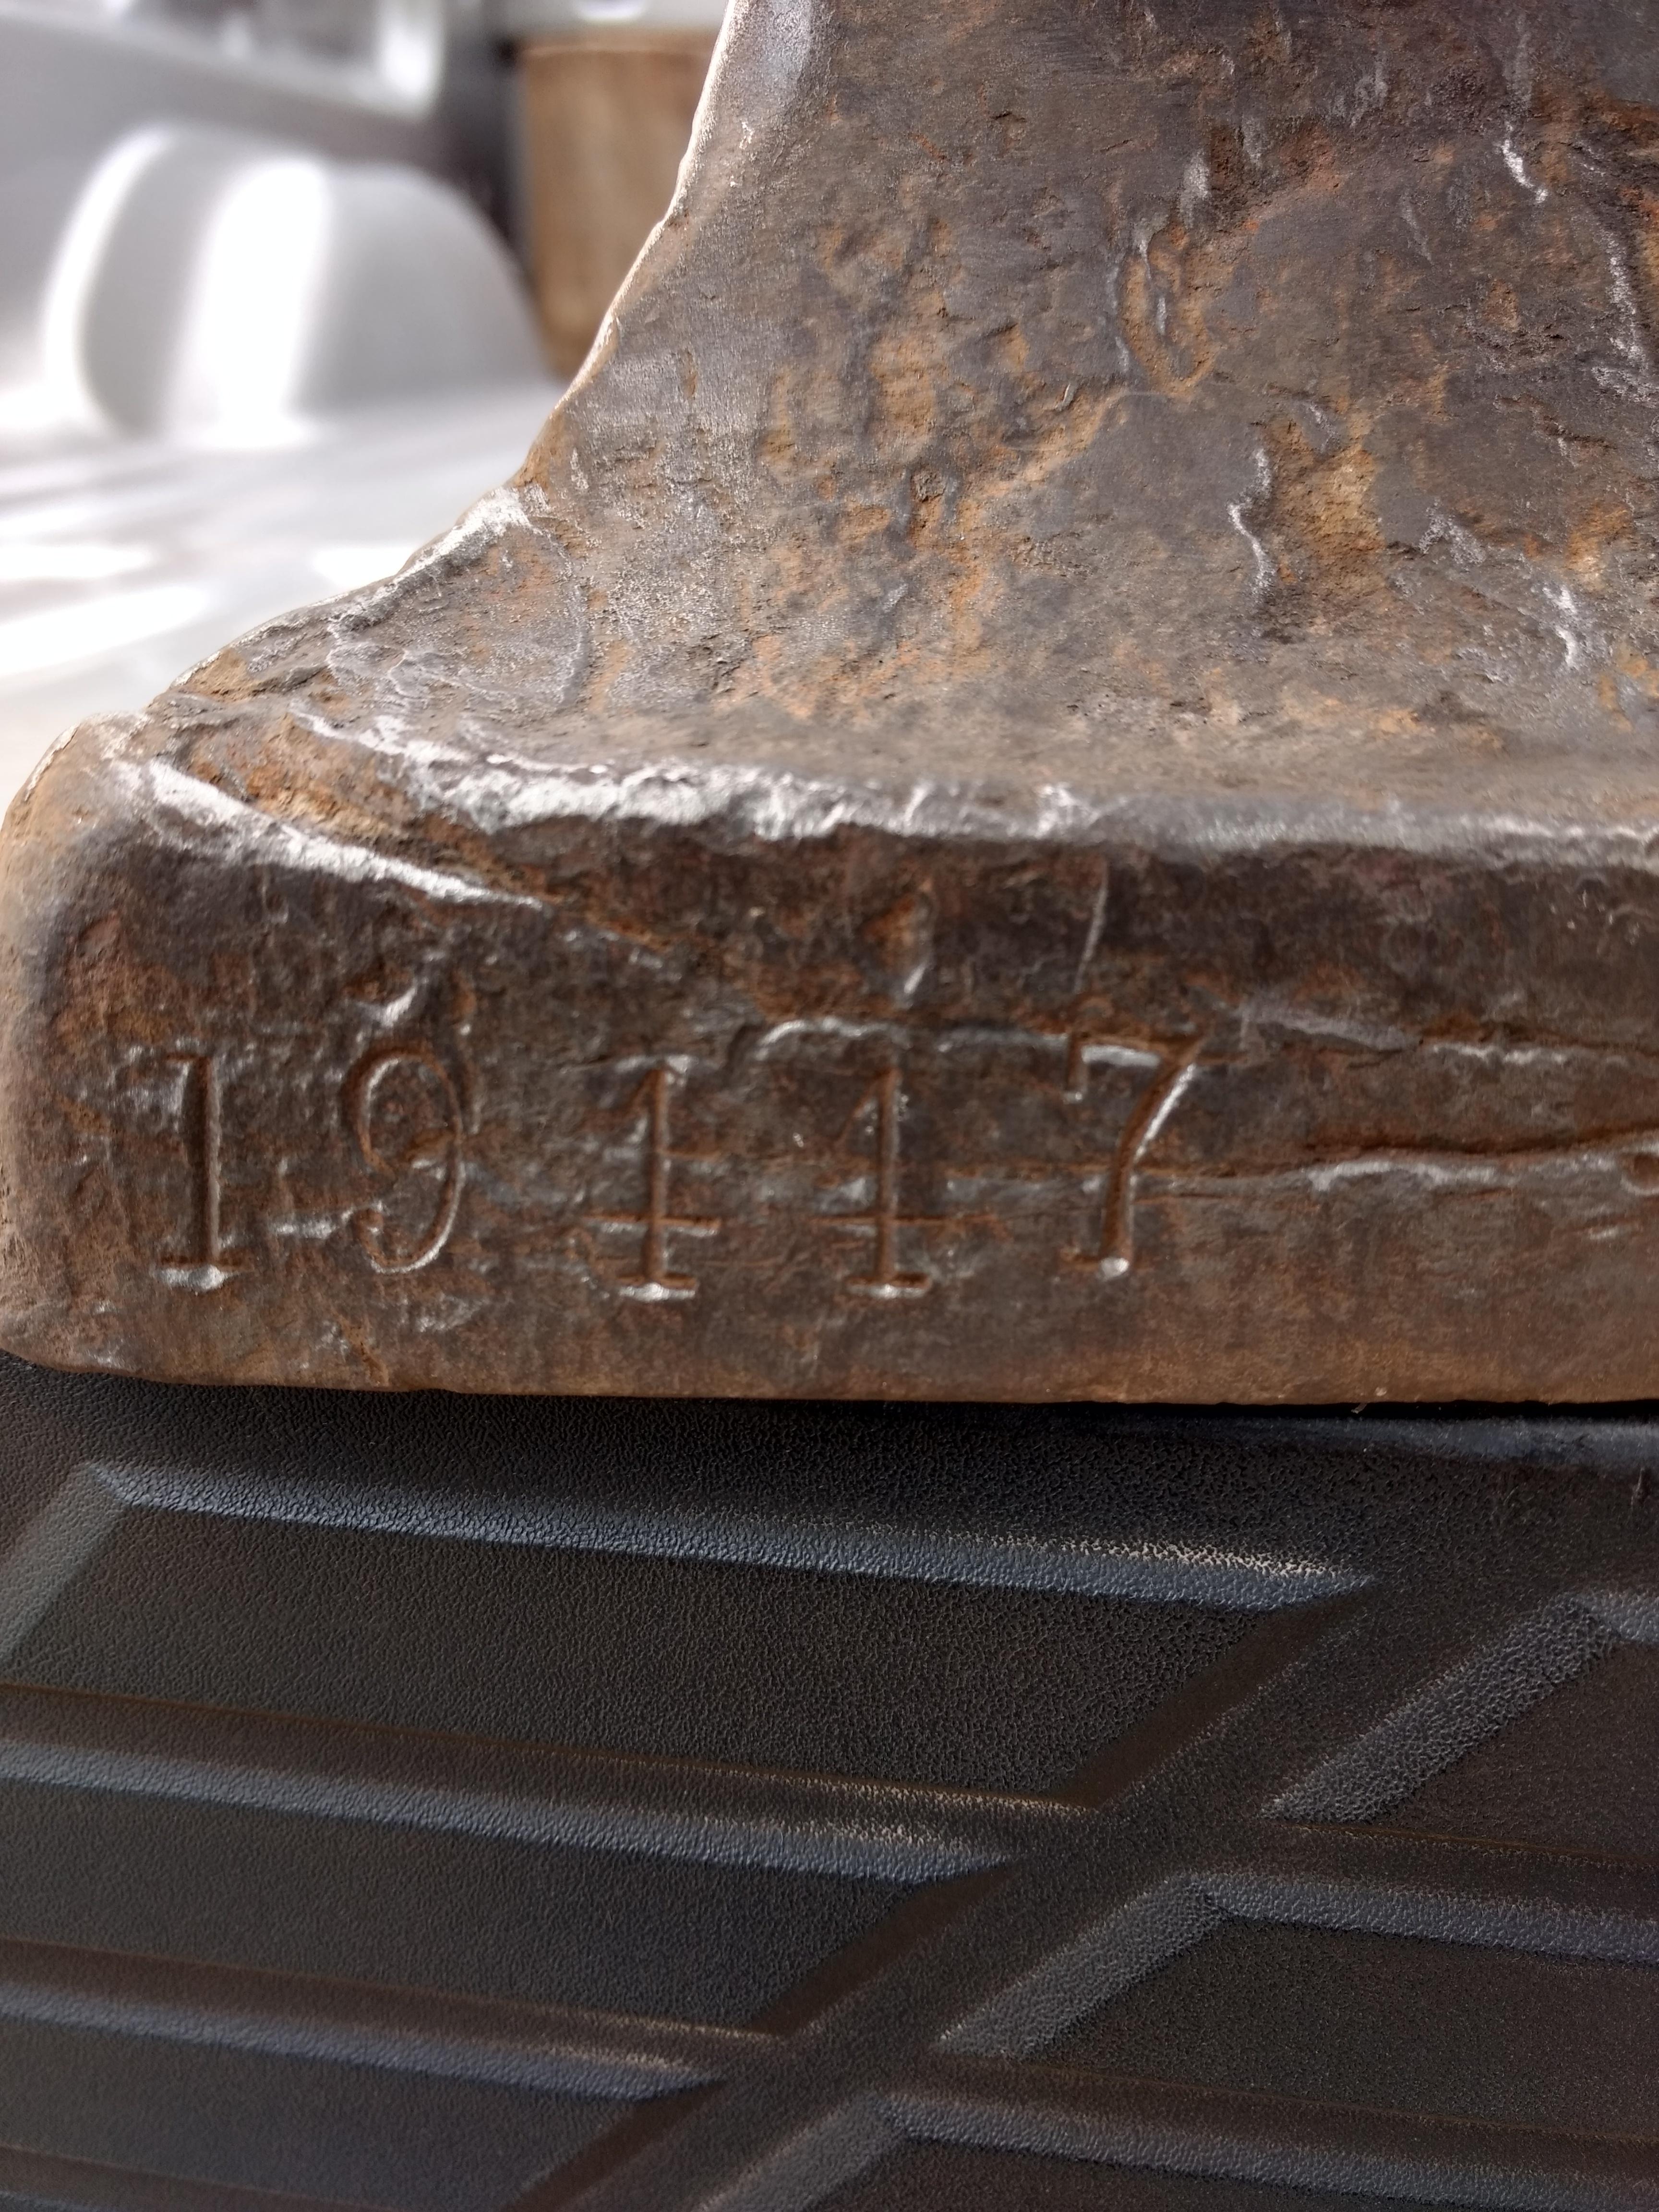
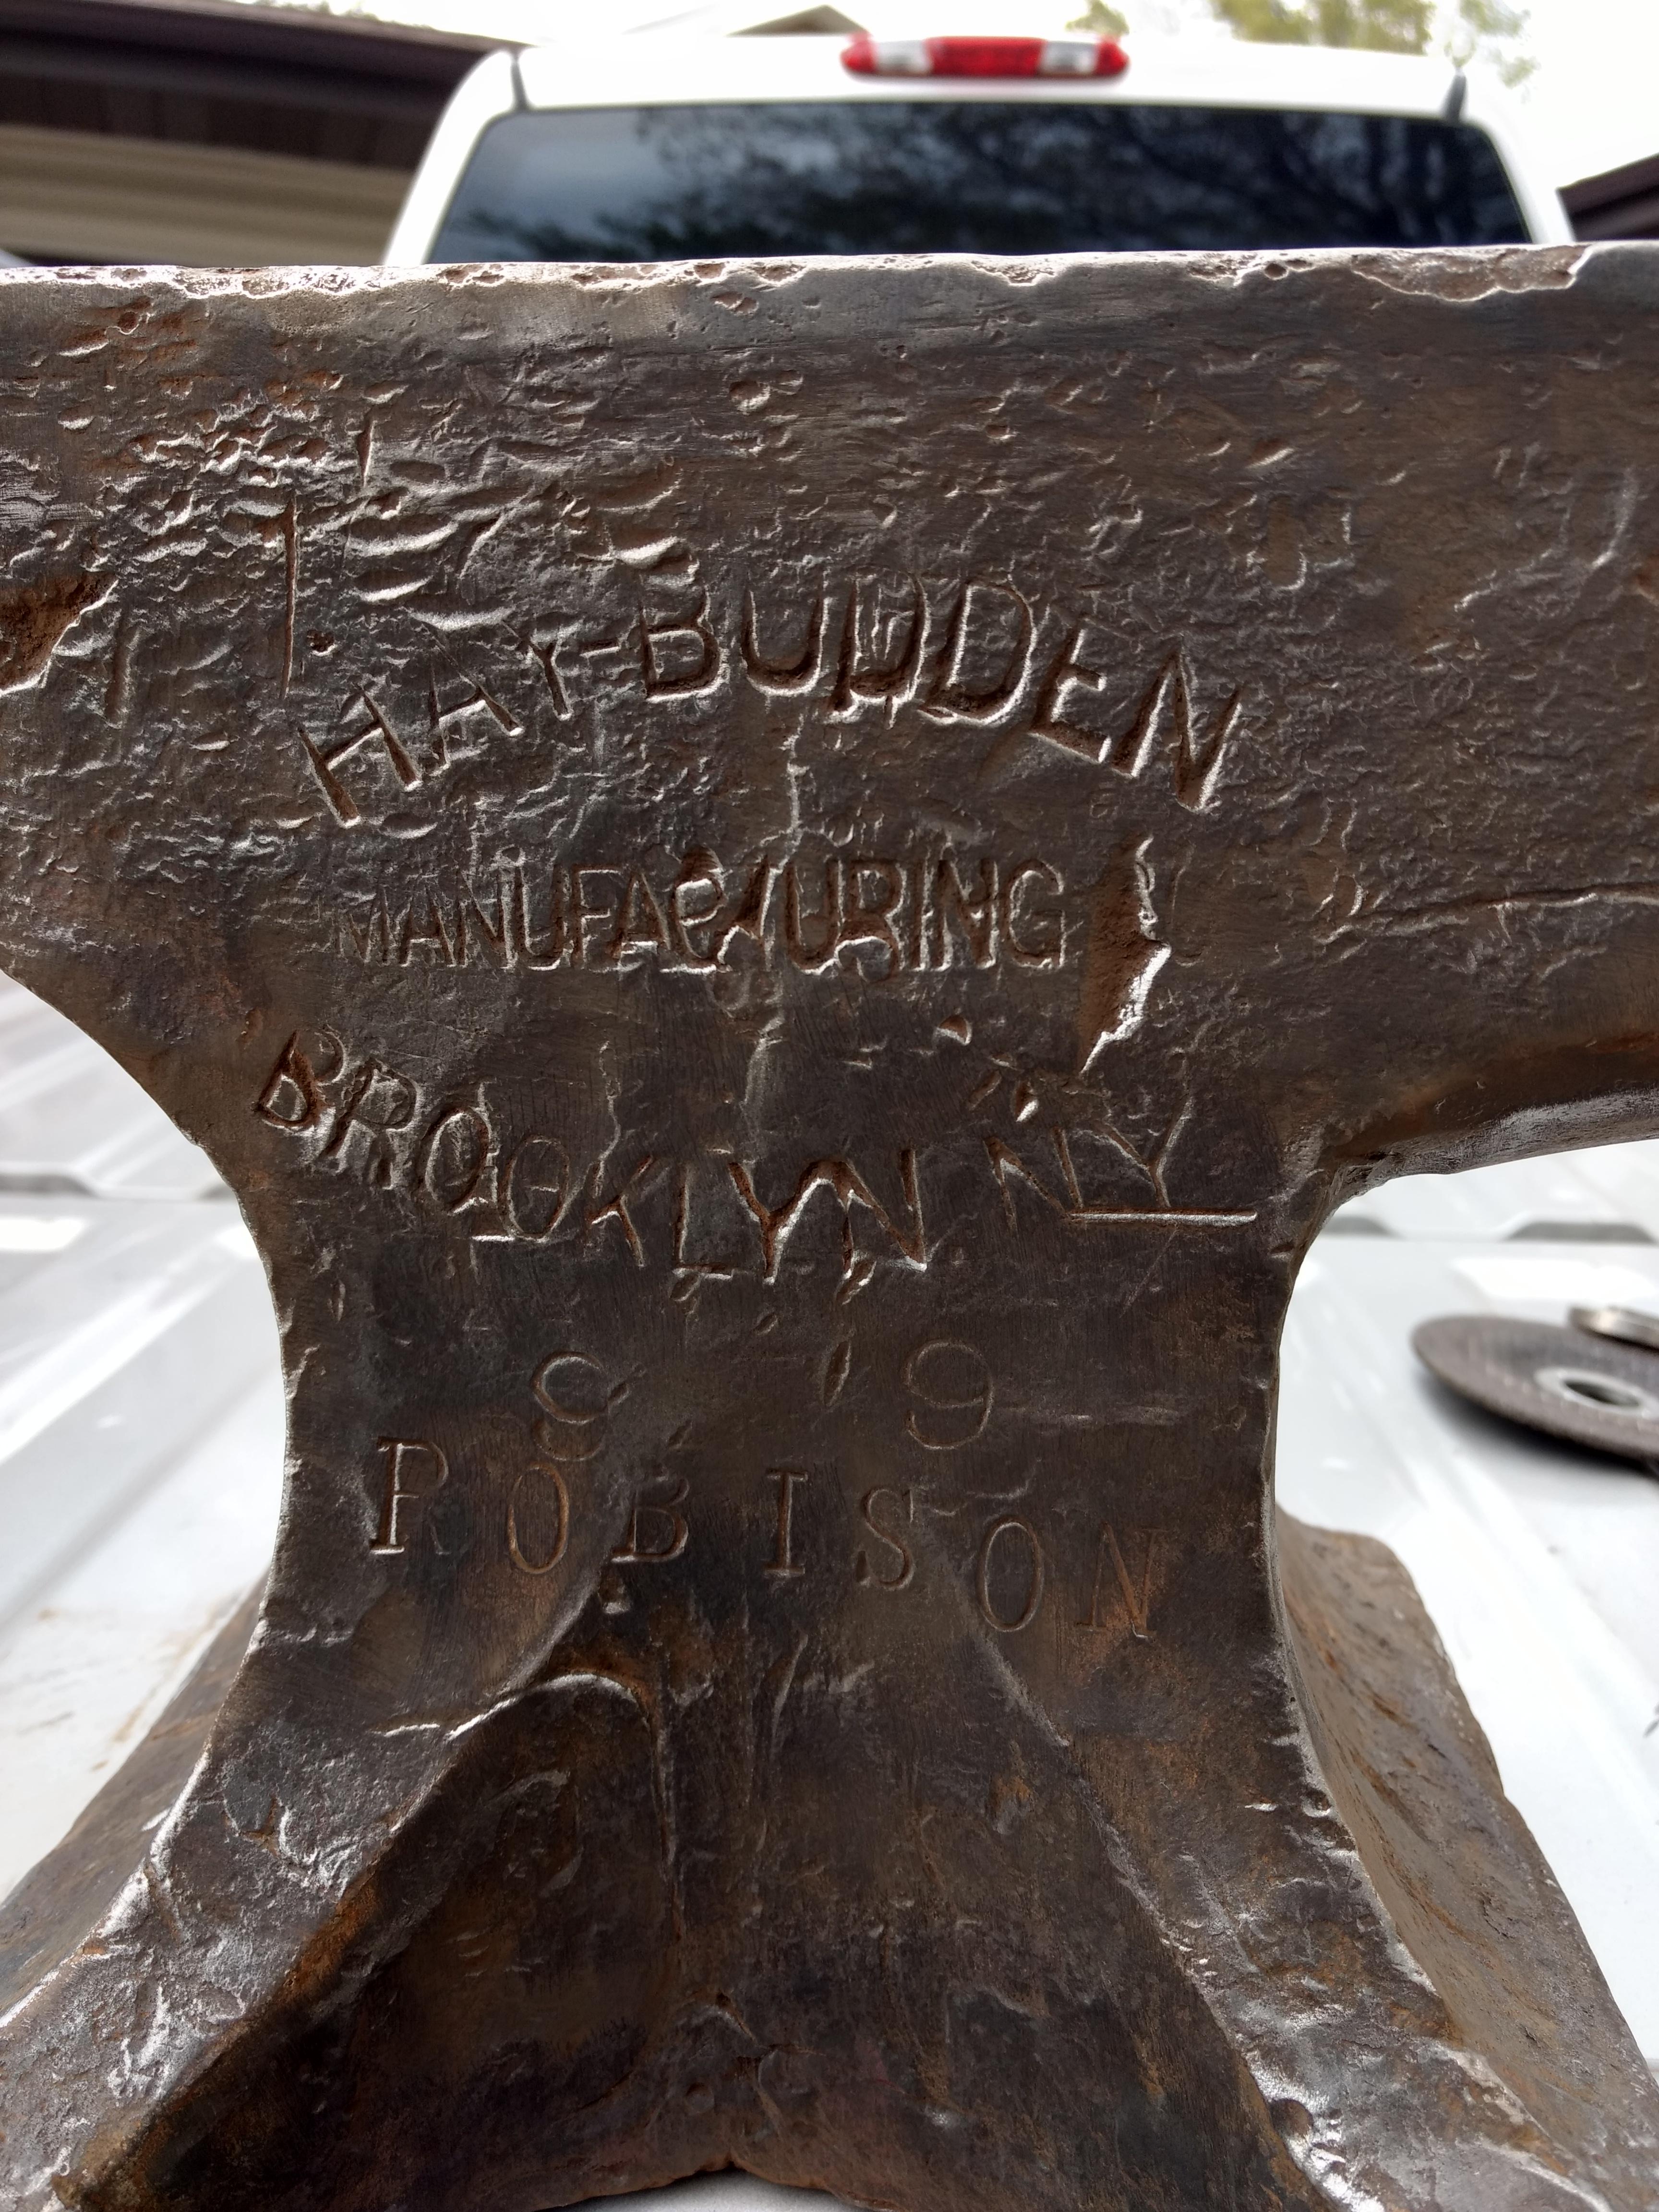
My brother is friends with someone down the road from him who inherited this and didn't want it so literally gave it to me. It's a bit beaten up, but there's no swayback on it so I wonder how often it was actually used other a table. Gave her the wire treatment and now we're on to mounting it! Anyone know what the numbers mean? There's also a lone "3" on the other side of feet from the 19447 leg


-
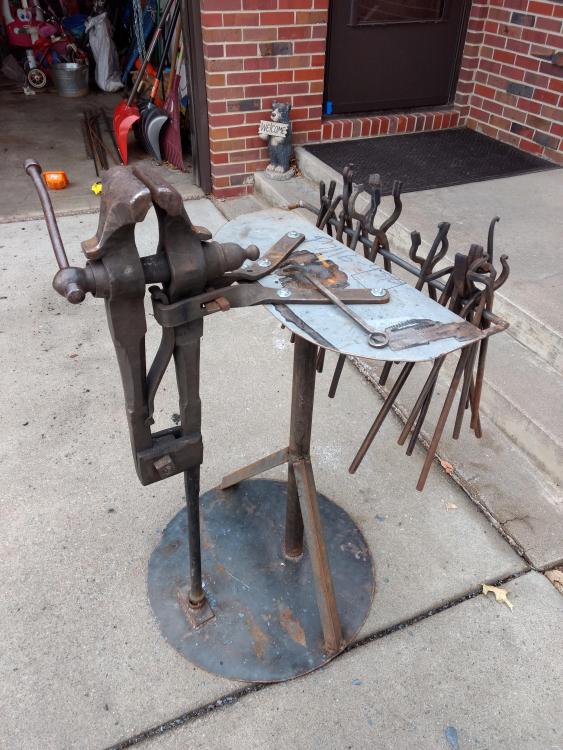
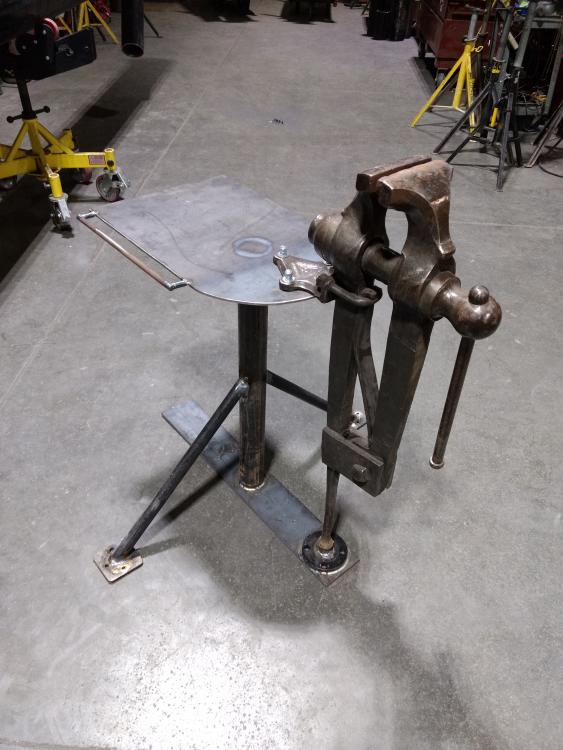
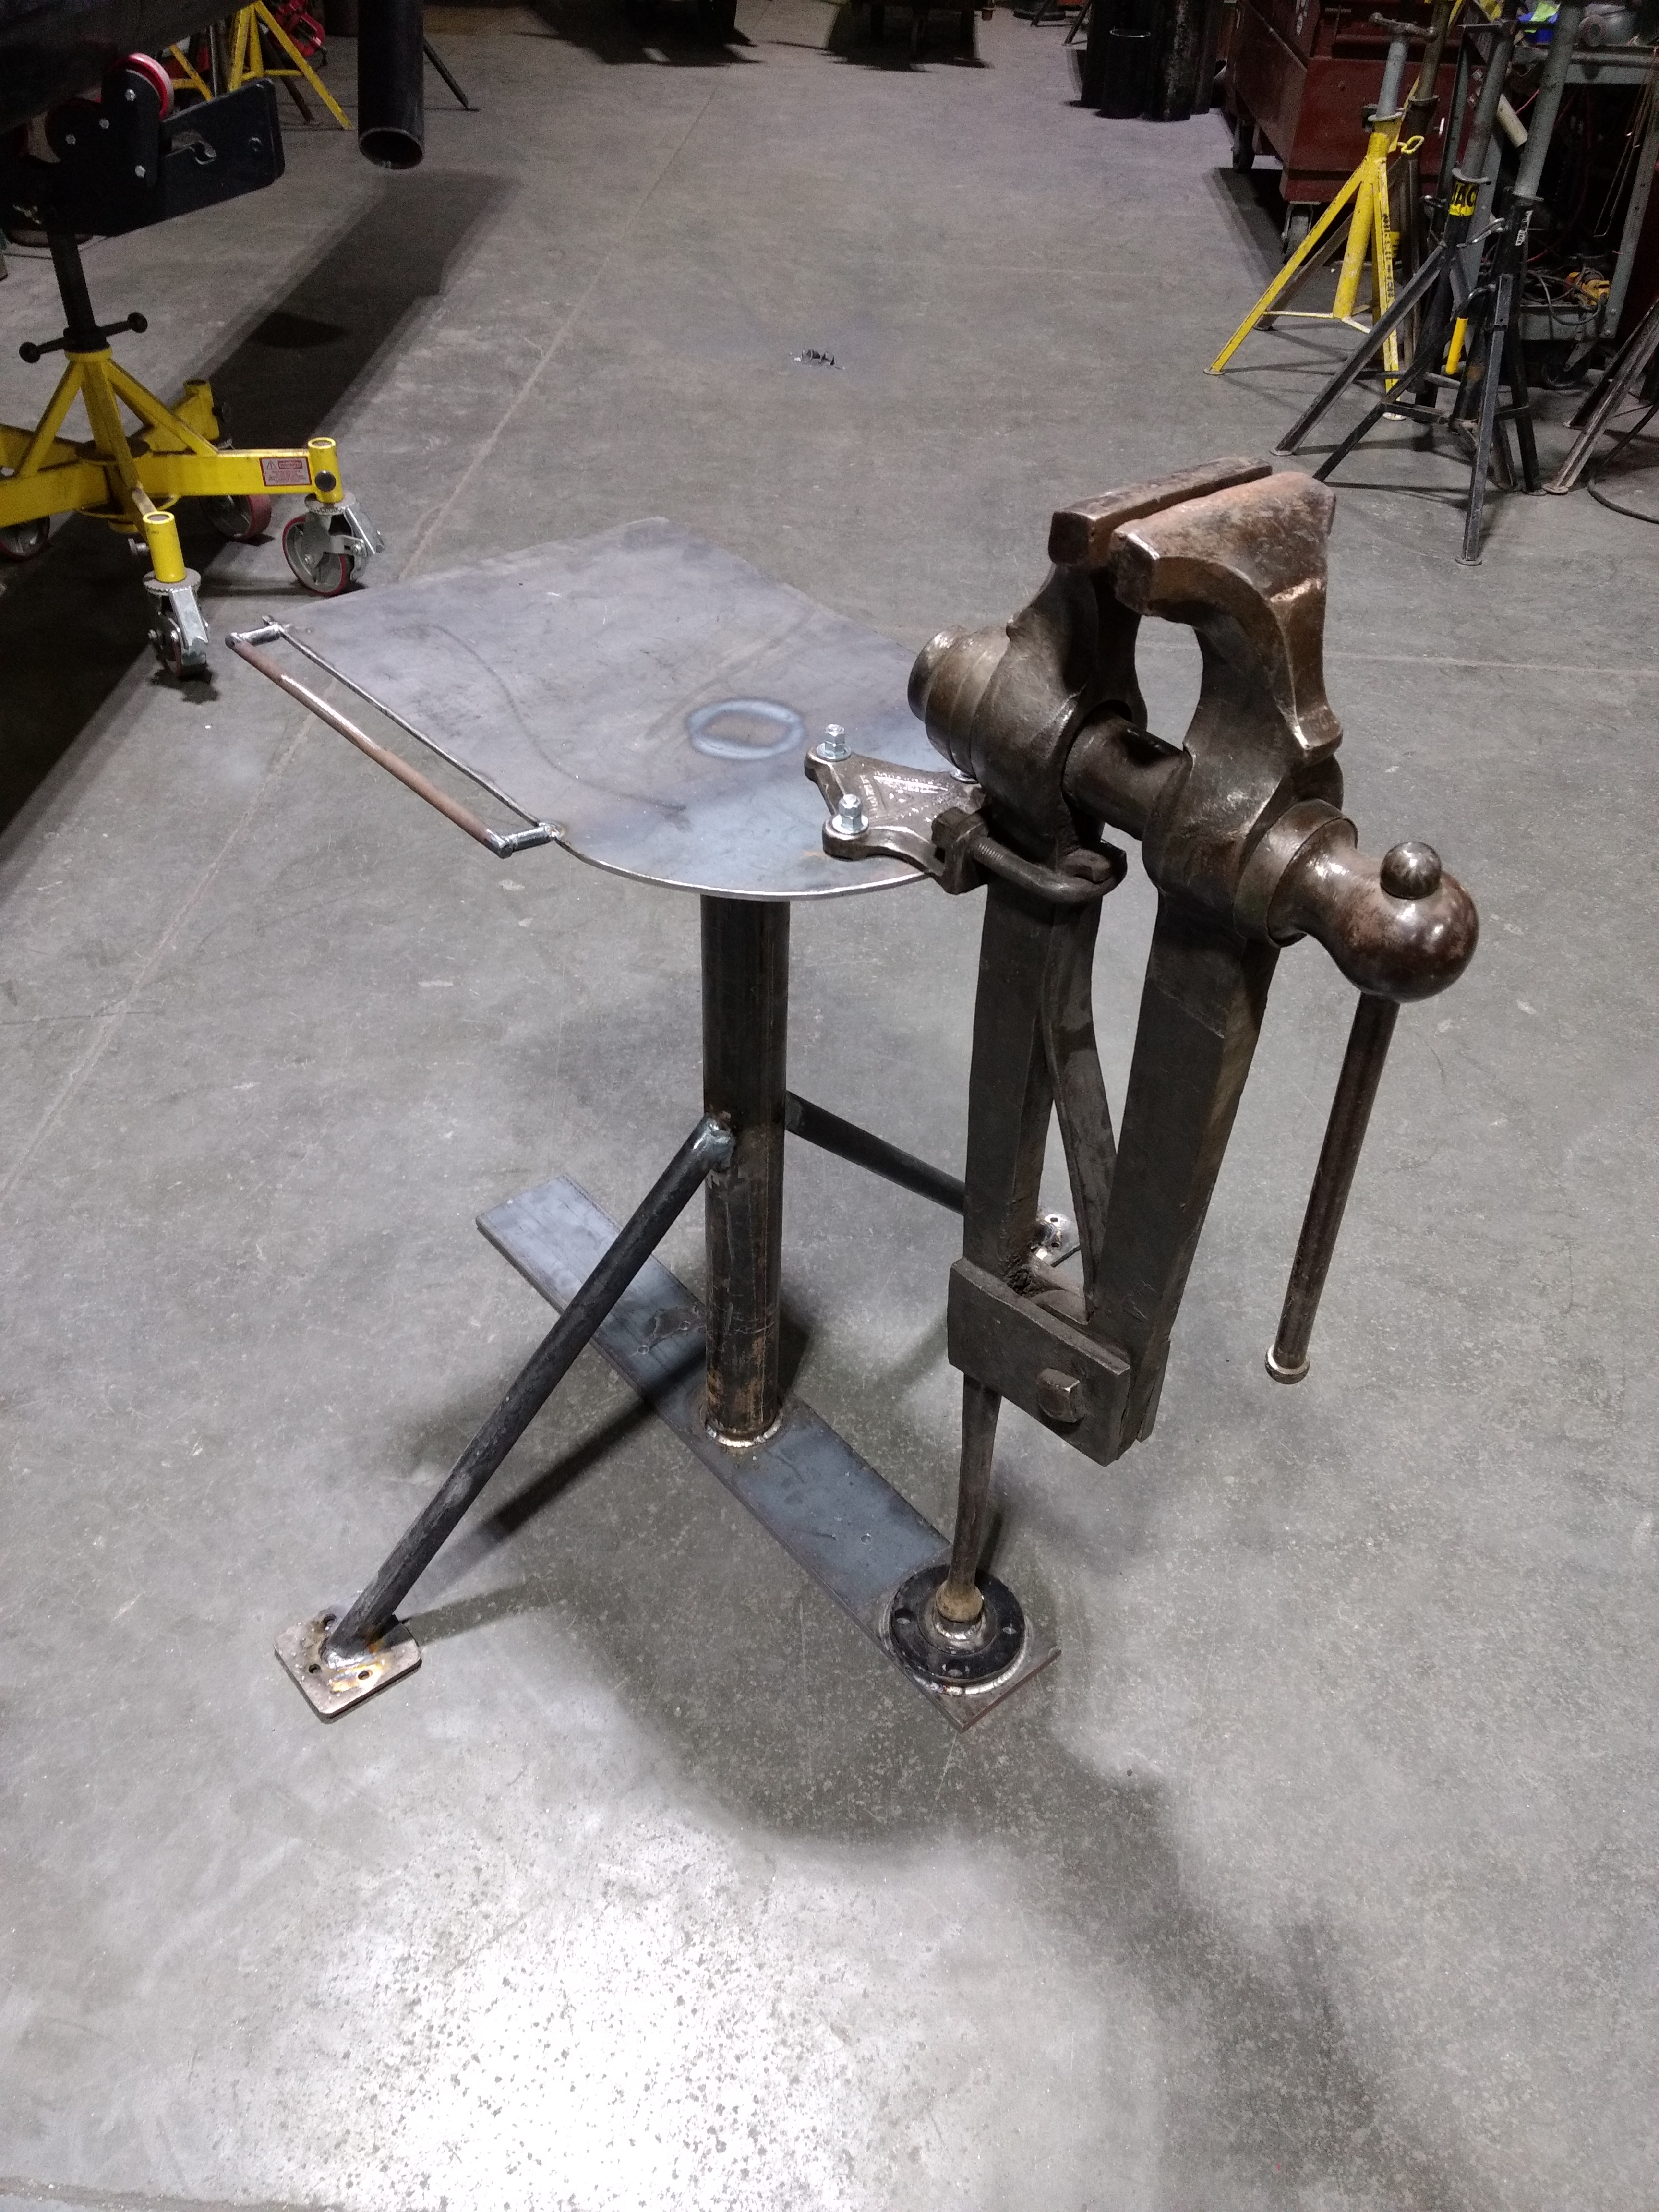
Well after over a year without being able to forge, I finally started doing some driveway forging, so I set up my smaller vise to be easily moved. 4" jaws
-
There's 3 holes in each leg for it to be bolted down, and 3 more in the center base. Definitely couldn't use it unless it's bolted down, right now it's sitting in my storage unit. Just getting to some stuff I've put off done now, had to sell my house recently, but that just means I have some time now to look to the future and "gear up" for when I buy again next year. Propane forge is next, just have to go buy a few things and I'll finally resume my frosty NARB build
-
Been meaning to get to this for a while now, couldn't sleep last night so I went to the shop and welded this up. 6" jaws, probably pushing 200 pounds
-
Judson is that first picture something that you just glue to the top of the screw to hide it?
-
I'm curious of how you go about hiding screws holding your work into a wall. Ive seen small squares of textured steel over the screw in pictures, but I'm unsure of how it's done
-
Have you tried it yet? H13 is great stuff- I've used it for a few tools, I don't enjoy forging it, but love using the tool later. I personally wouldn't try to hand forge any h13 over 3/4"
-
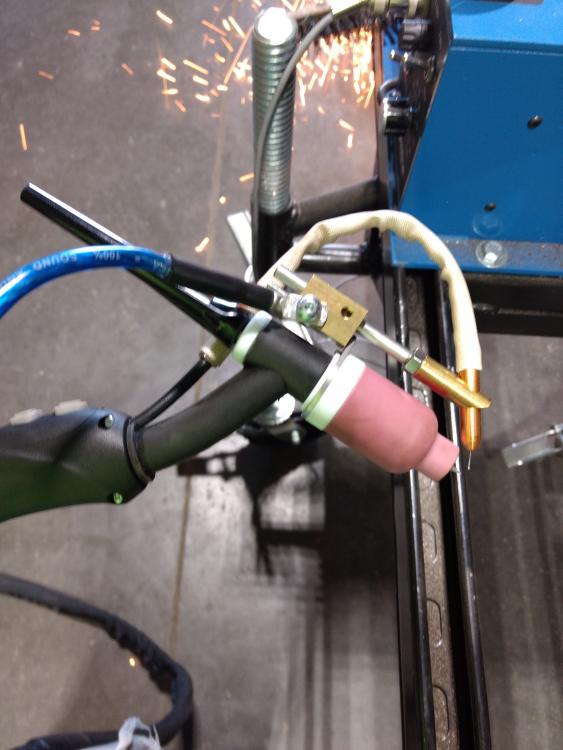
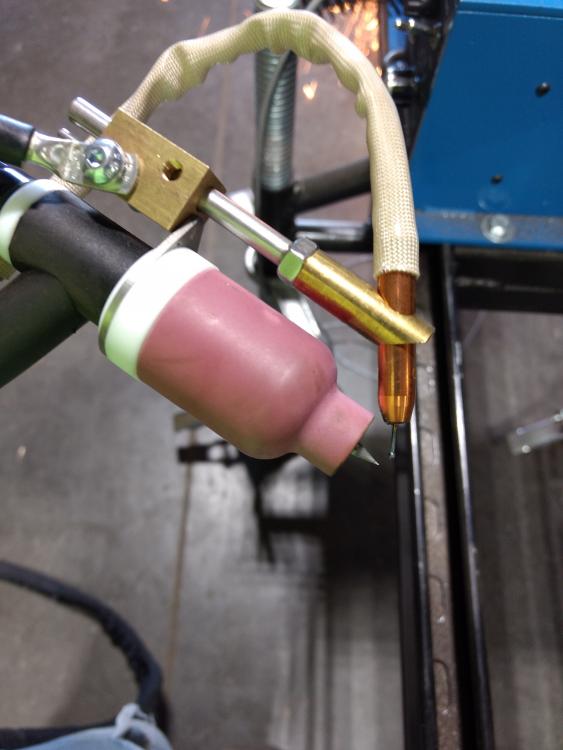
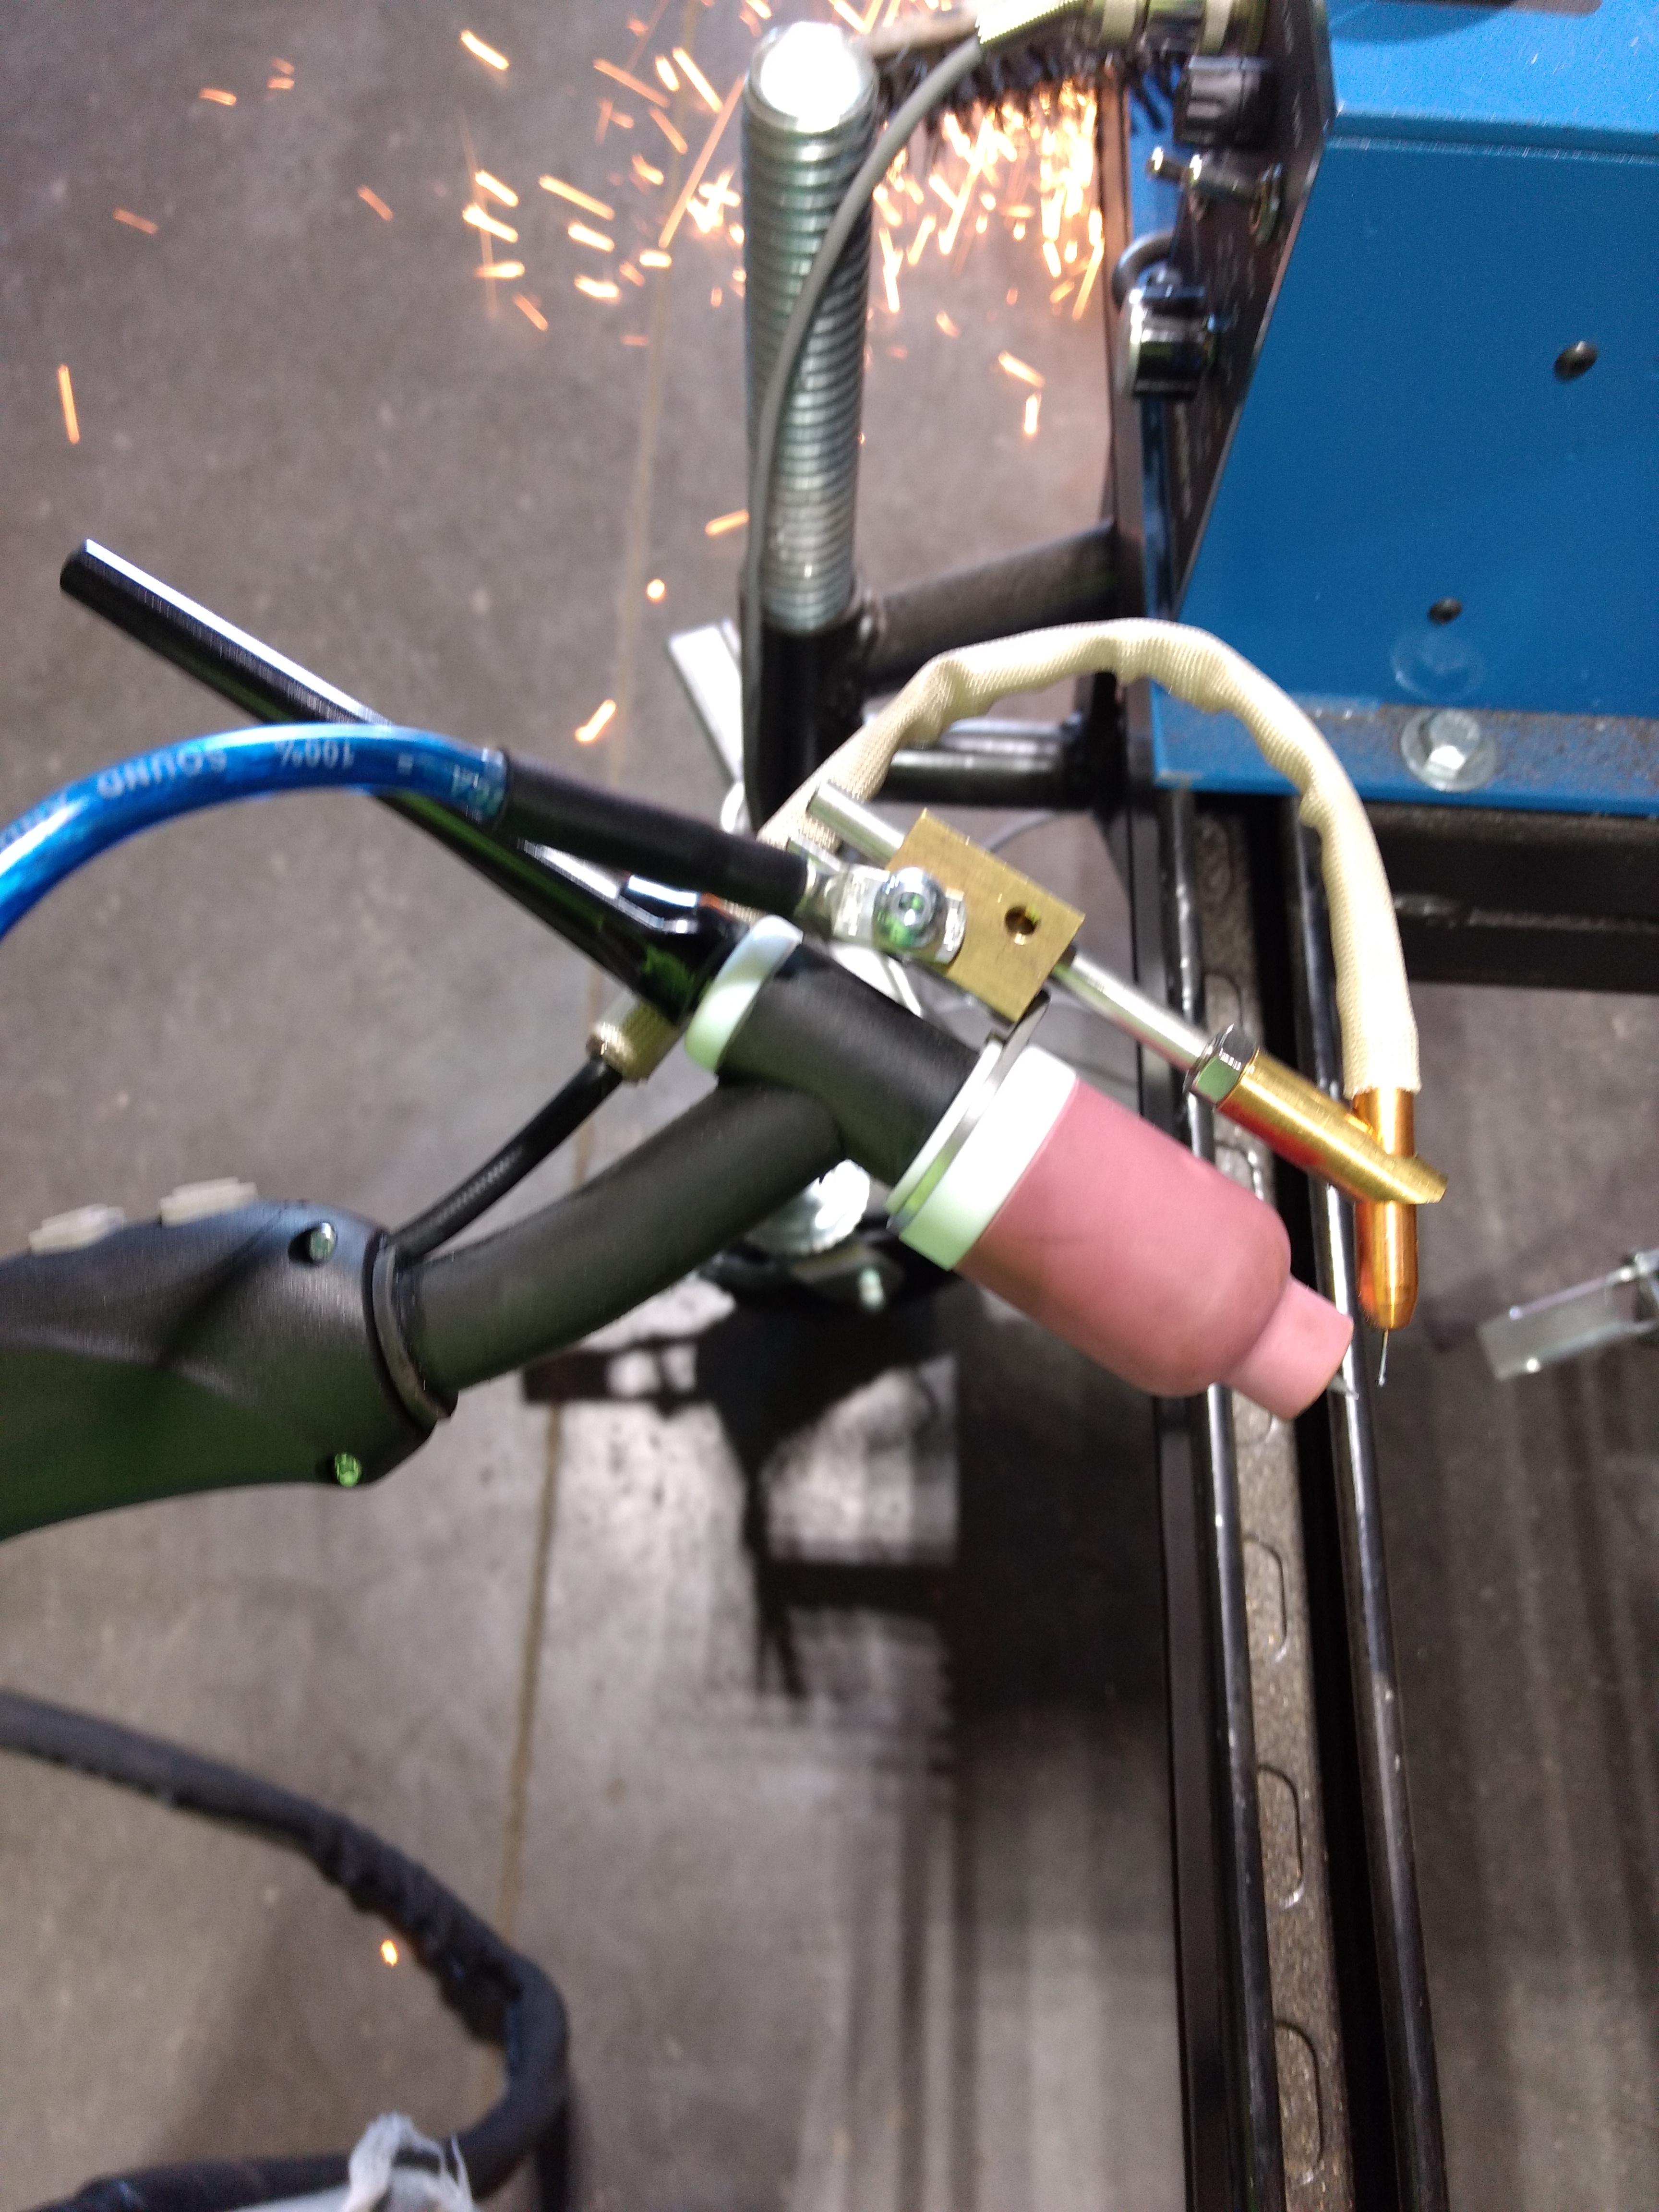
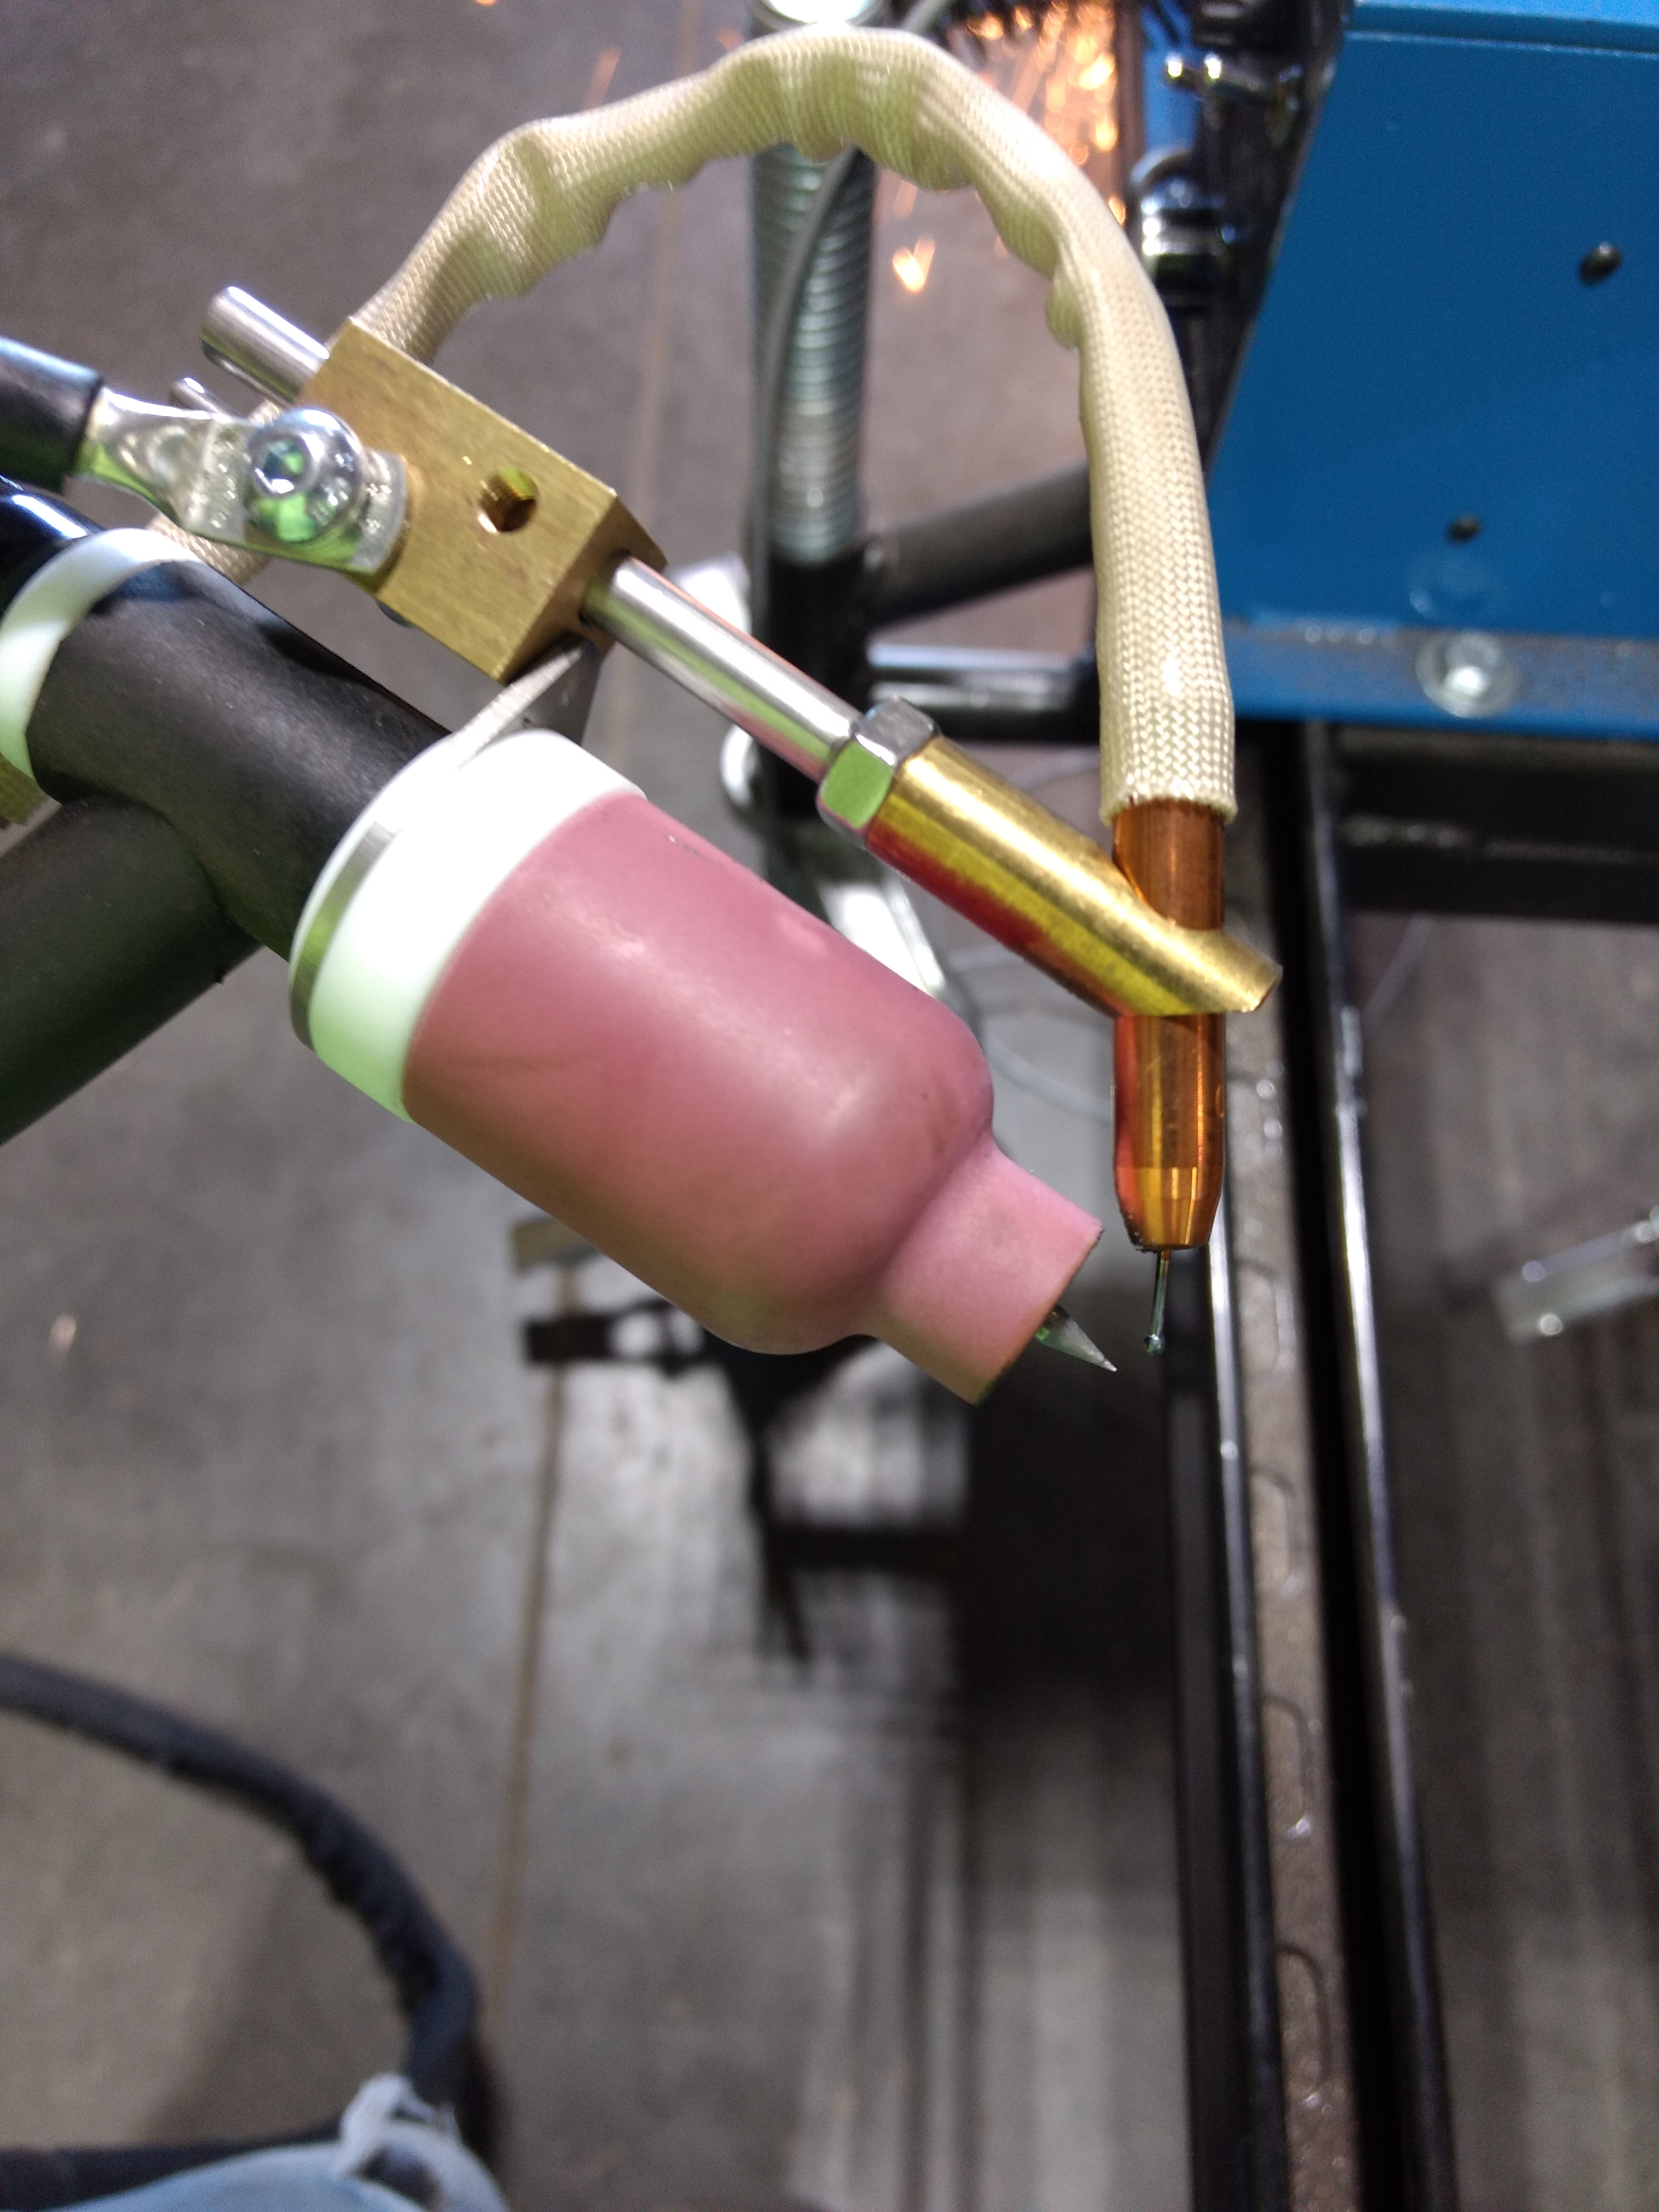
Nothing comes to mind immediately...most of it is getting used to the weight of it, the other battle is fighting the tungsten/ wire distance, it has to be a perfect 1/8". Also we change tungsten frequently...since carbon is so dirty if any impurity gets pushed out near the tungsten it grabs on, and this isn't like doing it by hand, can't continue even with a slightly dirty tungsten. Has to be perfect...not sure if that'll help you too much or not, but that's all I can say on this so far
-
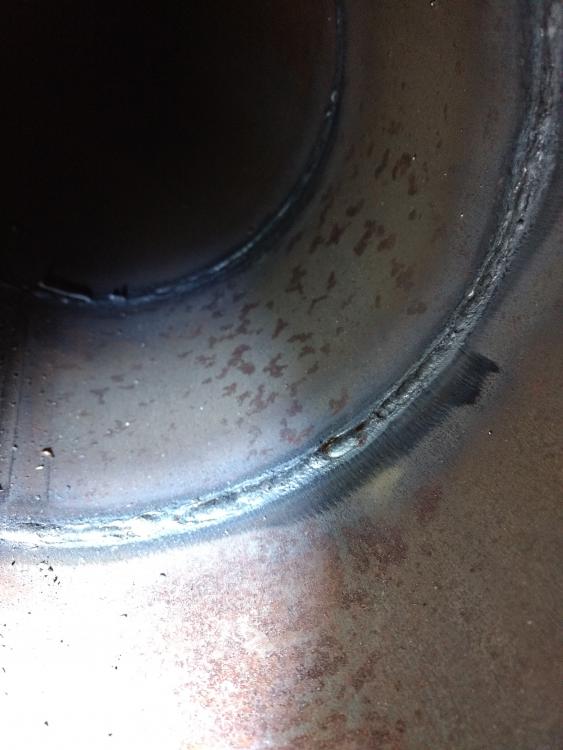
Schd 40 this was just a practice one. Were not going to put the root in with it, I'll root everything by hand other guy will hot pass and cap it all with tip tig
-
As you can see with the cold wire in the back, that weld was used to fine tune and adjust the welder, 2nd one is good
-
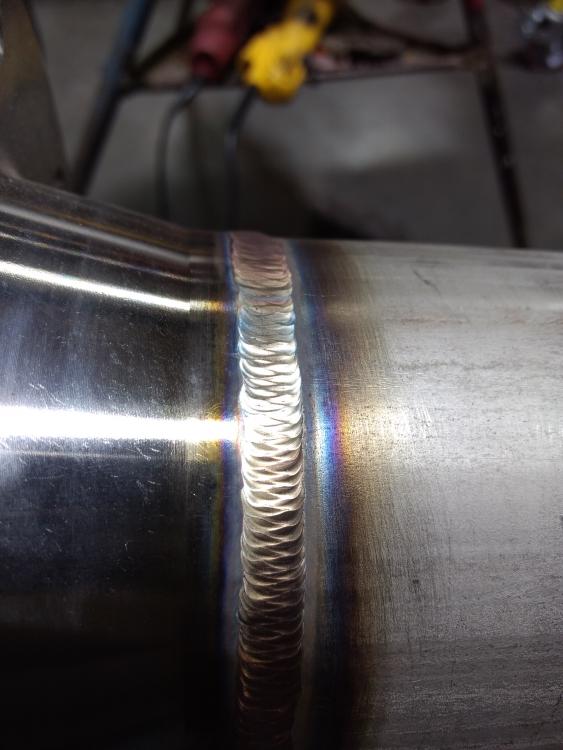
Were not going to attempt to put the root in right away with tip tig until we've got a few weeks on it and used to it. My first root with it is almost perfect, key word almost doesn't mean much for an x-ray job though. The plan is for me to root everything by hand and other guy will hot pass/ cap with tip tig.
If I remember I'll get a picture of my tip tig root tomorrow
-
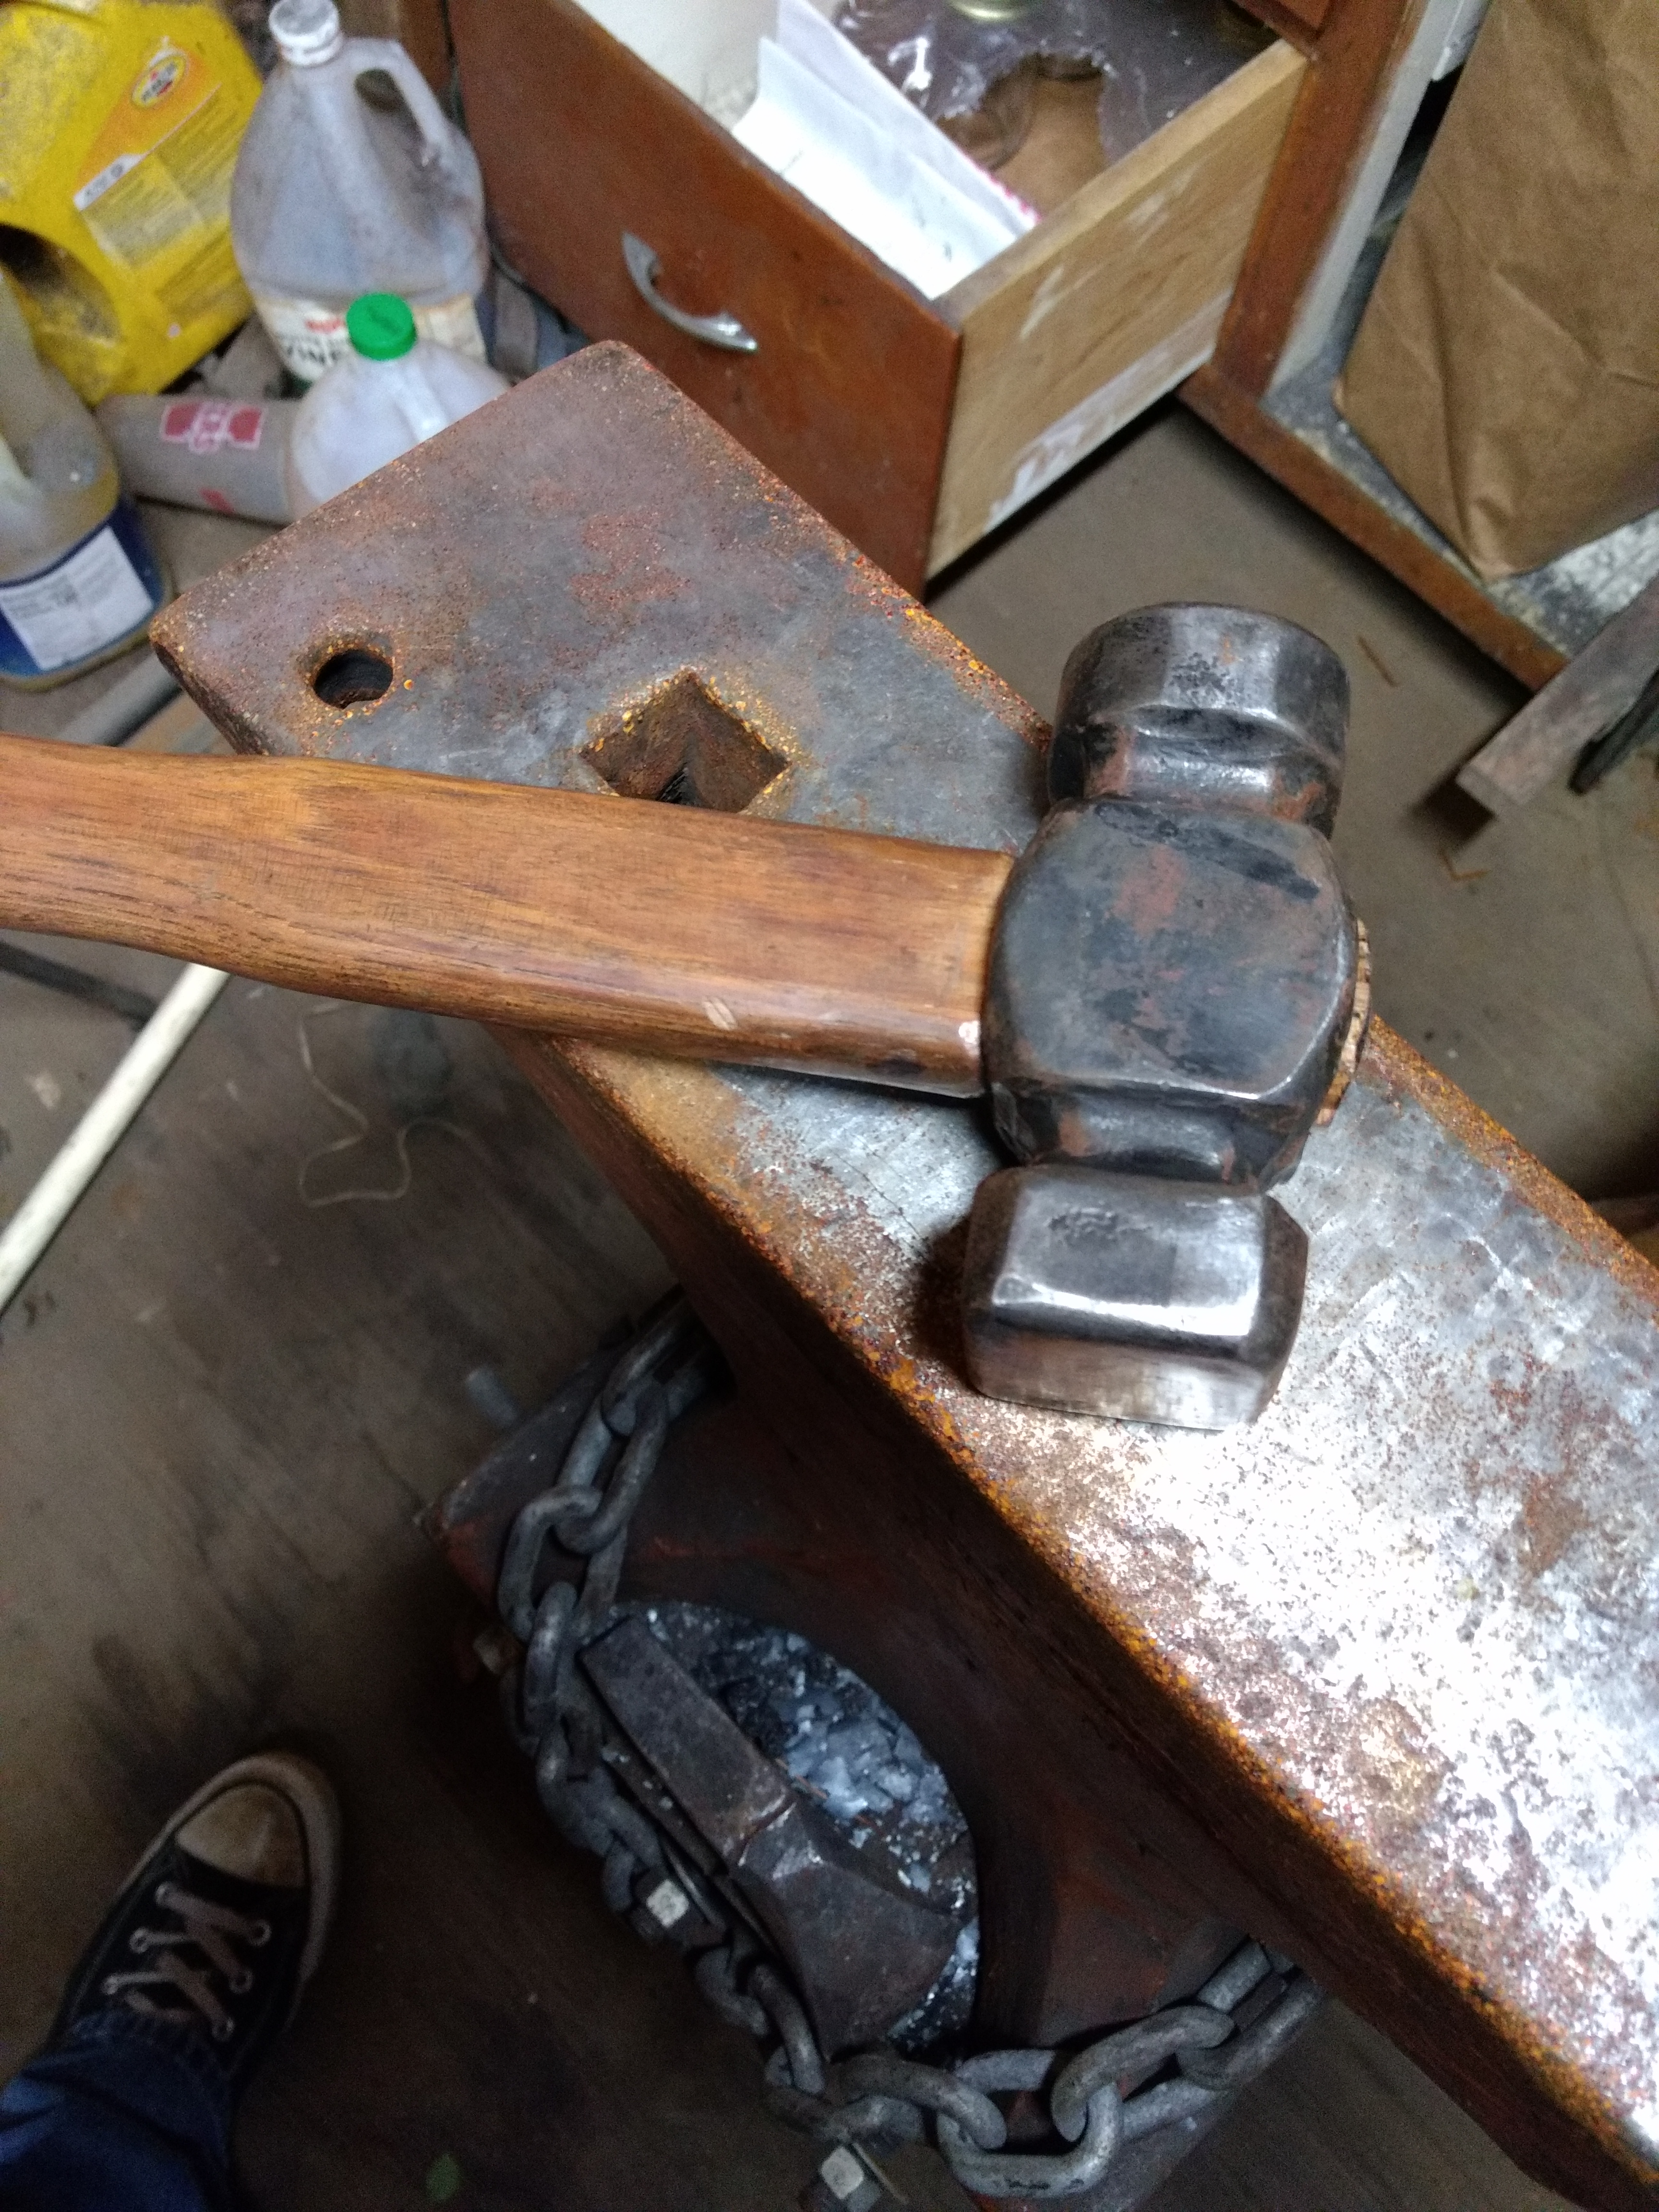
Yup, that's rust on my anvil and hammer... hopefully my sacrifice of the leaves sitting in my forge will suffice as my sacrifice to the blacksmith god's for this deed

-
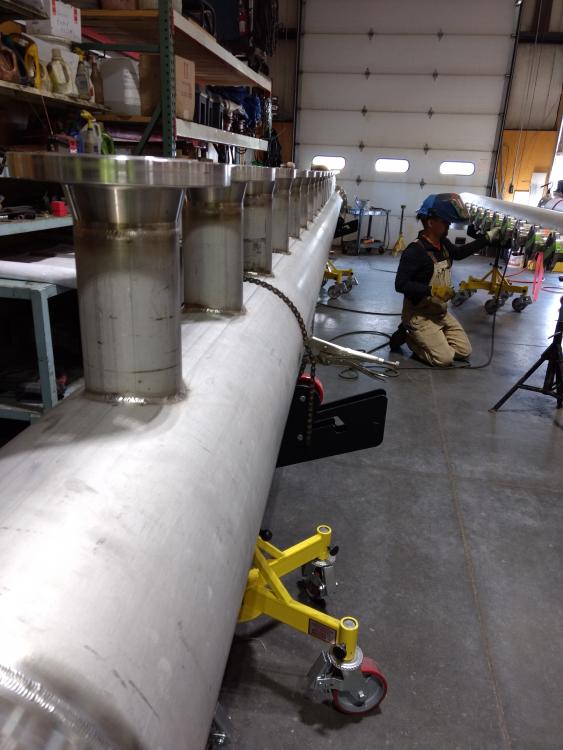
Headers are about finished then we're on to carbon for the next 4-5 months
-
Wolf they're requiring x-ray because the previous contracted welders migged everything and I guess basically every other weld leaked. So leaks coupled with the fact that it was buried downtown with new concrete poured before they found out it leaked lead to their engineers getting pretty XXXXXX off, hence the x-ray requirement now.
It pulses in and out of the puddle like John said around 30 times a second, and the wire is preheated right before it comes out over the cup (that's what that blue ground wire is for). It's a pretty impressive set up honestly, once we both get accustomed to the weight of it we'll be able to fly on these welds
-
I hadn't even heard of it 2 weeks ago, and my boss ordered it after looking at it in action. We do process piping for hydronics, we'll have 1500 welds to make for the new power plant going up in town and this is supposed to speed us up. Just gonna take longer than usual since every weld has to pass x-ray (despite it being a 28 pound system) I like it, but the death grip is definitely back- this thing feels huge in my hand compared to my 150 amp rig rig.
Anyone else used this?
-
I'm following laurabpilates on Instagram, her husband Jon Grant suffered a massive TBI earlier this year getting t boned. He was a navy seal, and seeing where he was 6 months ago compared to now is pretty dramatic. For doctors only giving him a 10% chance to live He's doing great he's finally starting to talk again in whispers, each post she makes I can see improvement, hoping for the best, but they still don't know what his ceiling is, he certainly hasn't reached it yet
-
I'm starting to gather everything necessary for a frosty multi port burner (NARB...he said it's not so much a NARB as it is a multi port so...) I think I have everything figured out for the most part but I do have a few questions.
I'm going with a box shape forge 8"*5"*12" unless I'm way out of line at 480 cu inches. I know it's best to have 1 t burner per 350 cubic inches in the forge, but if I remember correctly that was if forge welding temps were desired. My main needs this forge needs to meet is the ability to get a 10-12" long piece heated for bending/ scrolling, and I want to leave 3-4 pieces in the forge at once, I don't want to reach forge welding temps- I'll always have the coal forge for that.
As for the door on the forge, should I intentionally make a fairly loose fitting door to allow for warping, or would leftover high alumina kiln shelf be more appropriate?
If there was only say a 2*2" hole in the back of the forge for a pass through is that something a firebrick could be ok to use to cover it or just don't use firebrick anywhere ever on a forge because of their heat sinking?
I'll have more questions down the road, just trying to get everything somewhat close to cemented in my head so I can start rounding up everything. Daughters having another open heart surgery later this week, so I'll have plenty of time to order stuff online and run down the 6 blocks to the harbor freight and supply house and grab things.
-
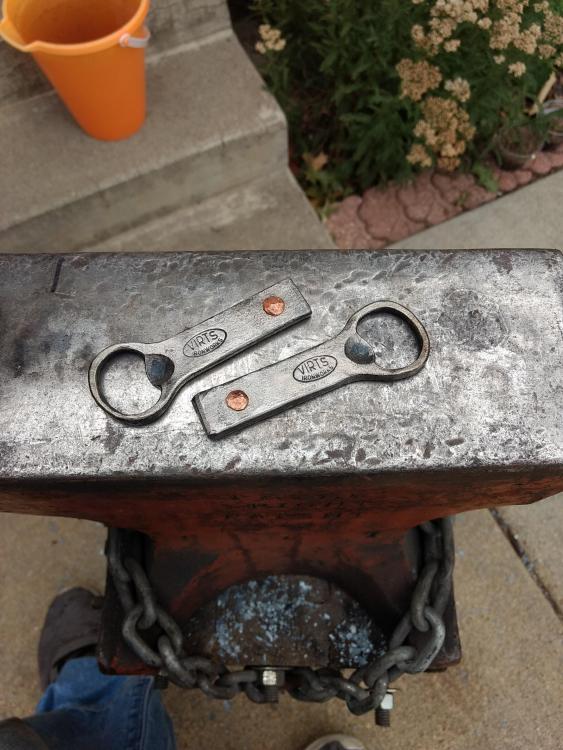
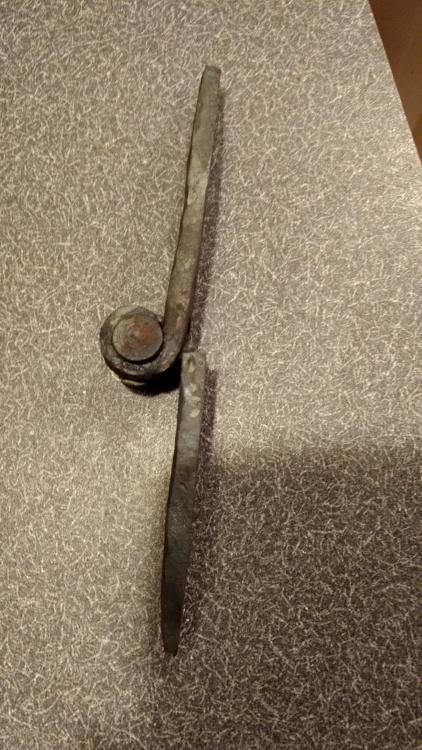
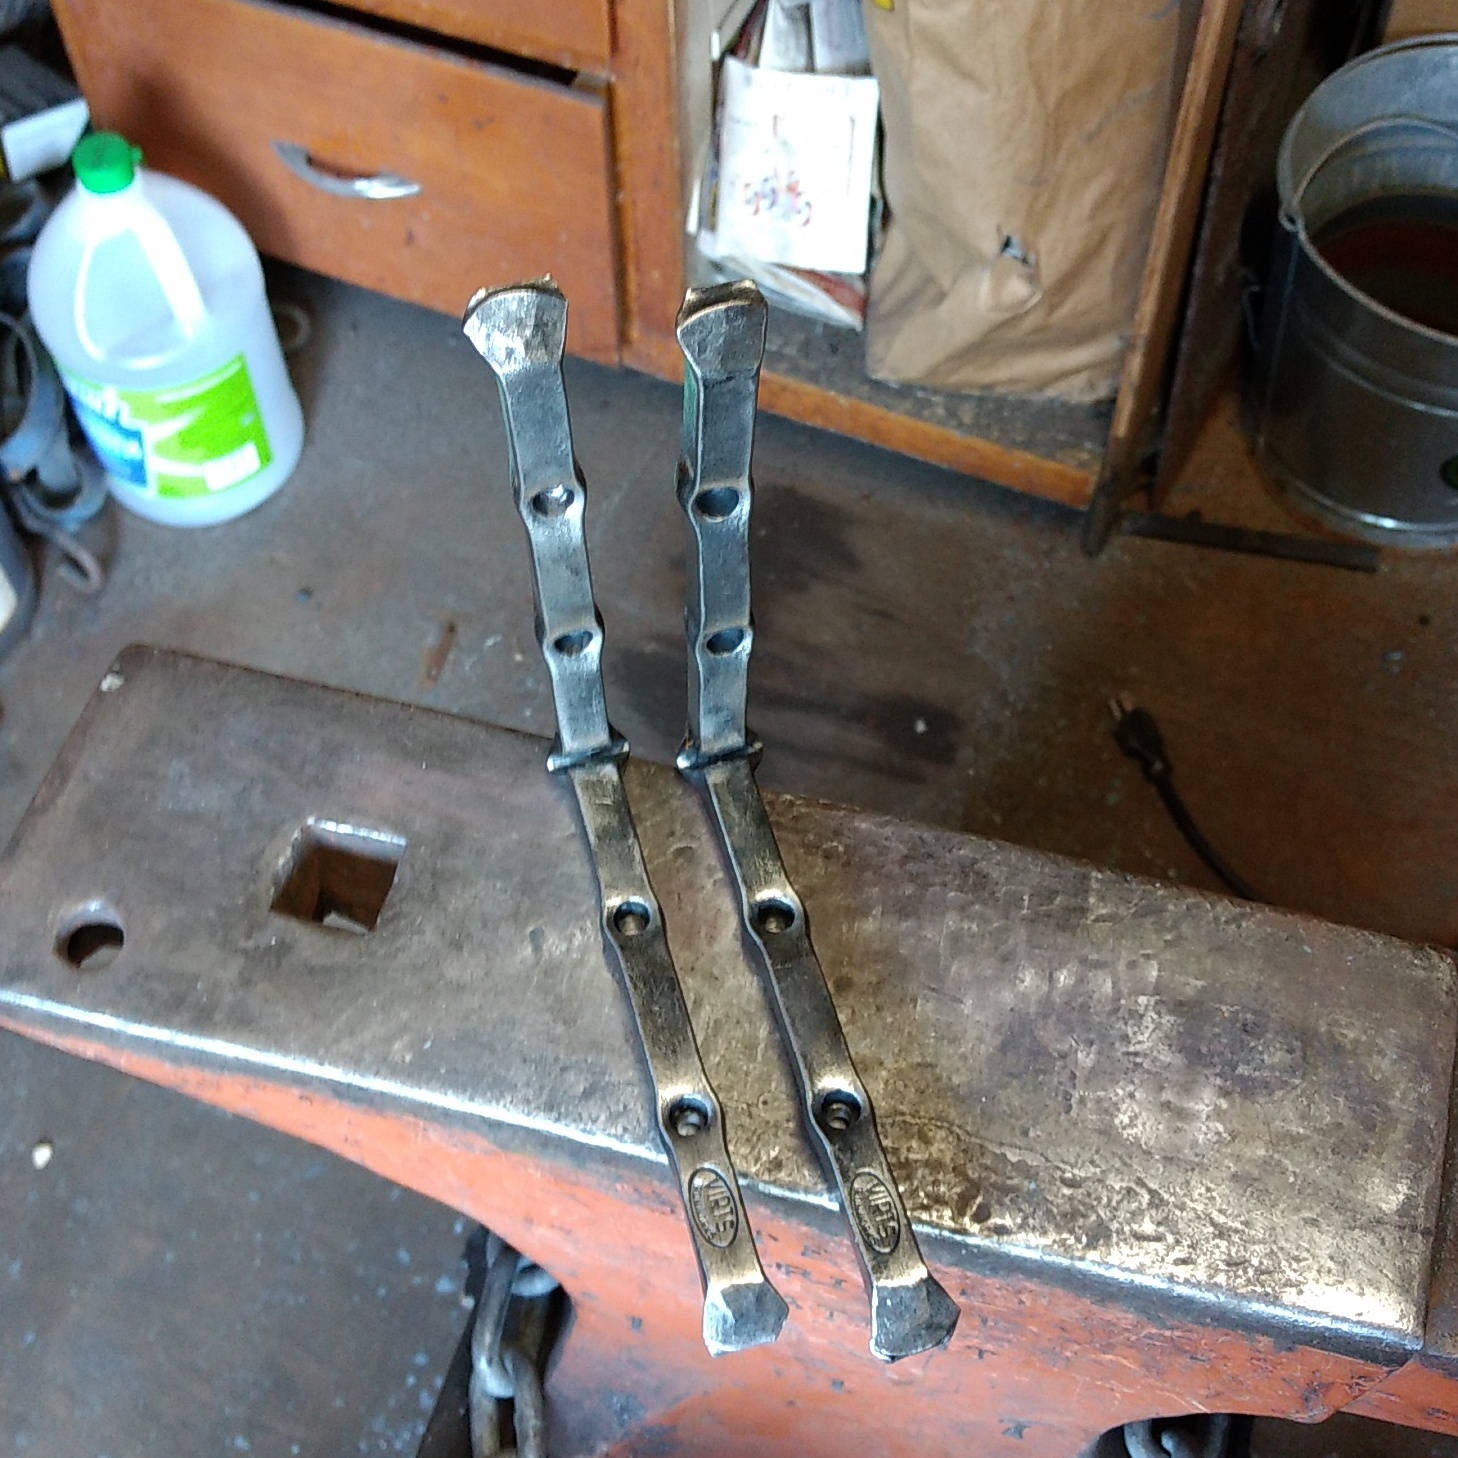
Got two really quick shelf brackets made from 1/2" steel, saw Alec Steele make some this way on one of his vlogs and had to try it myself.
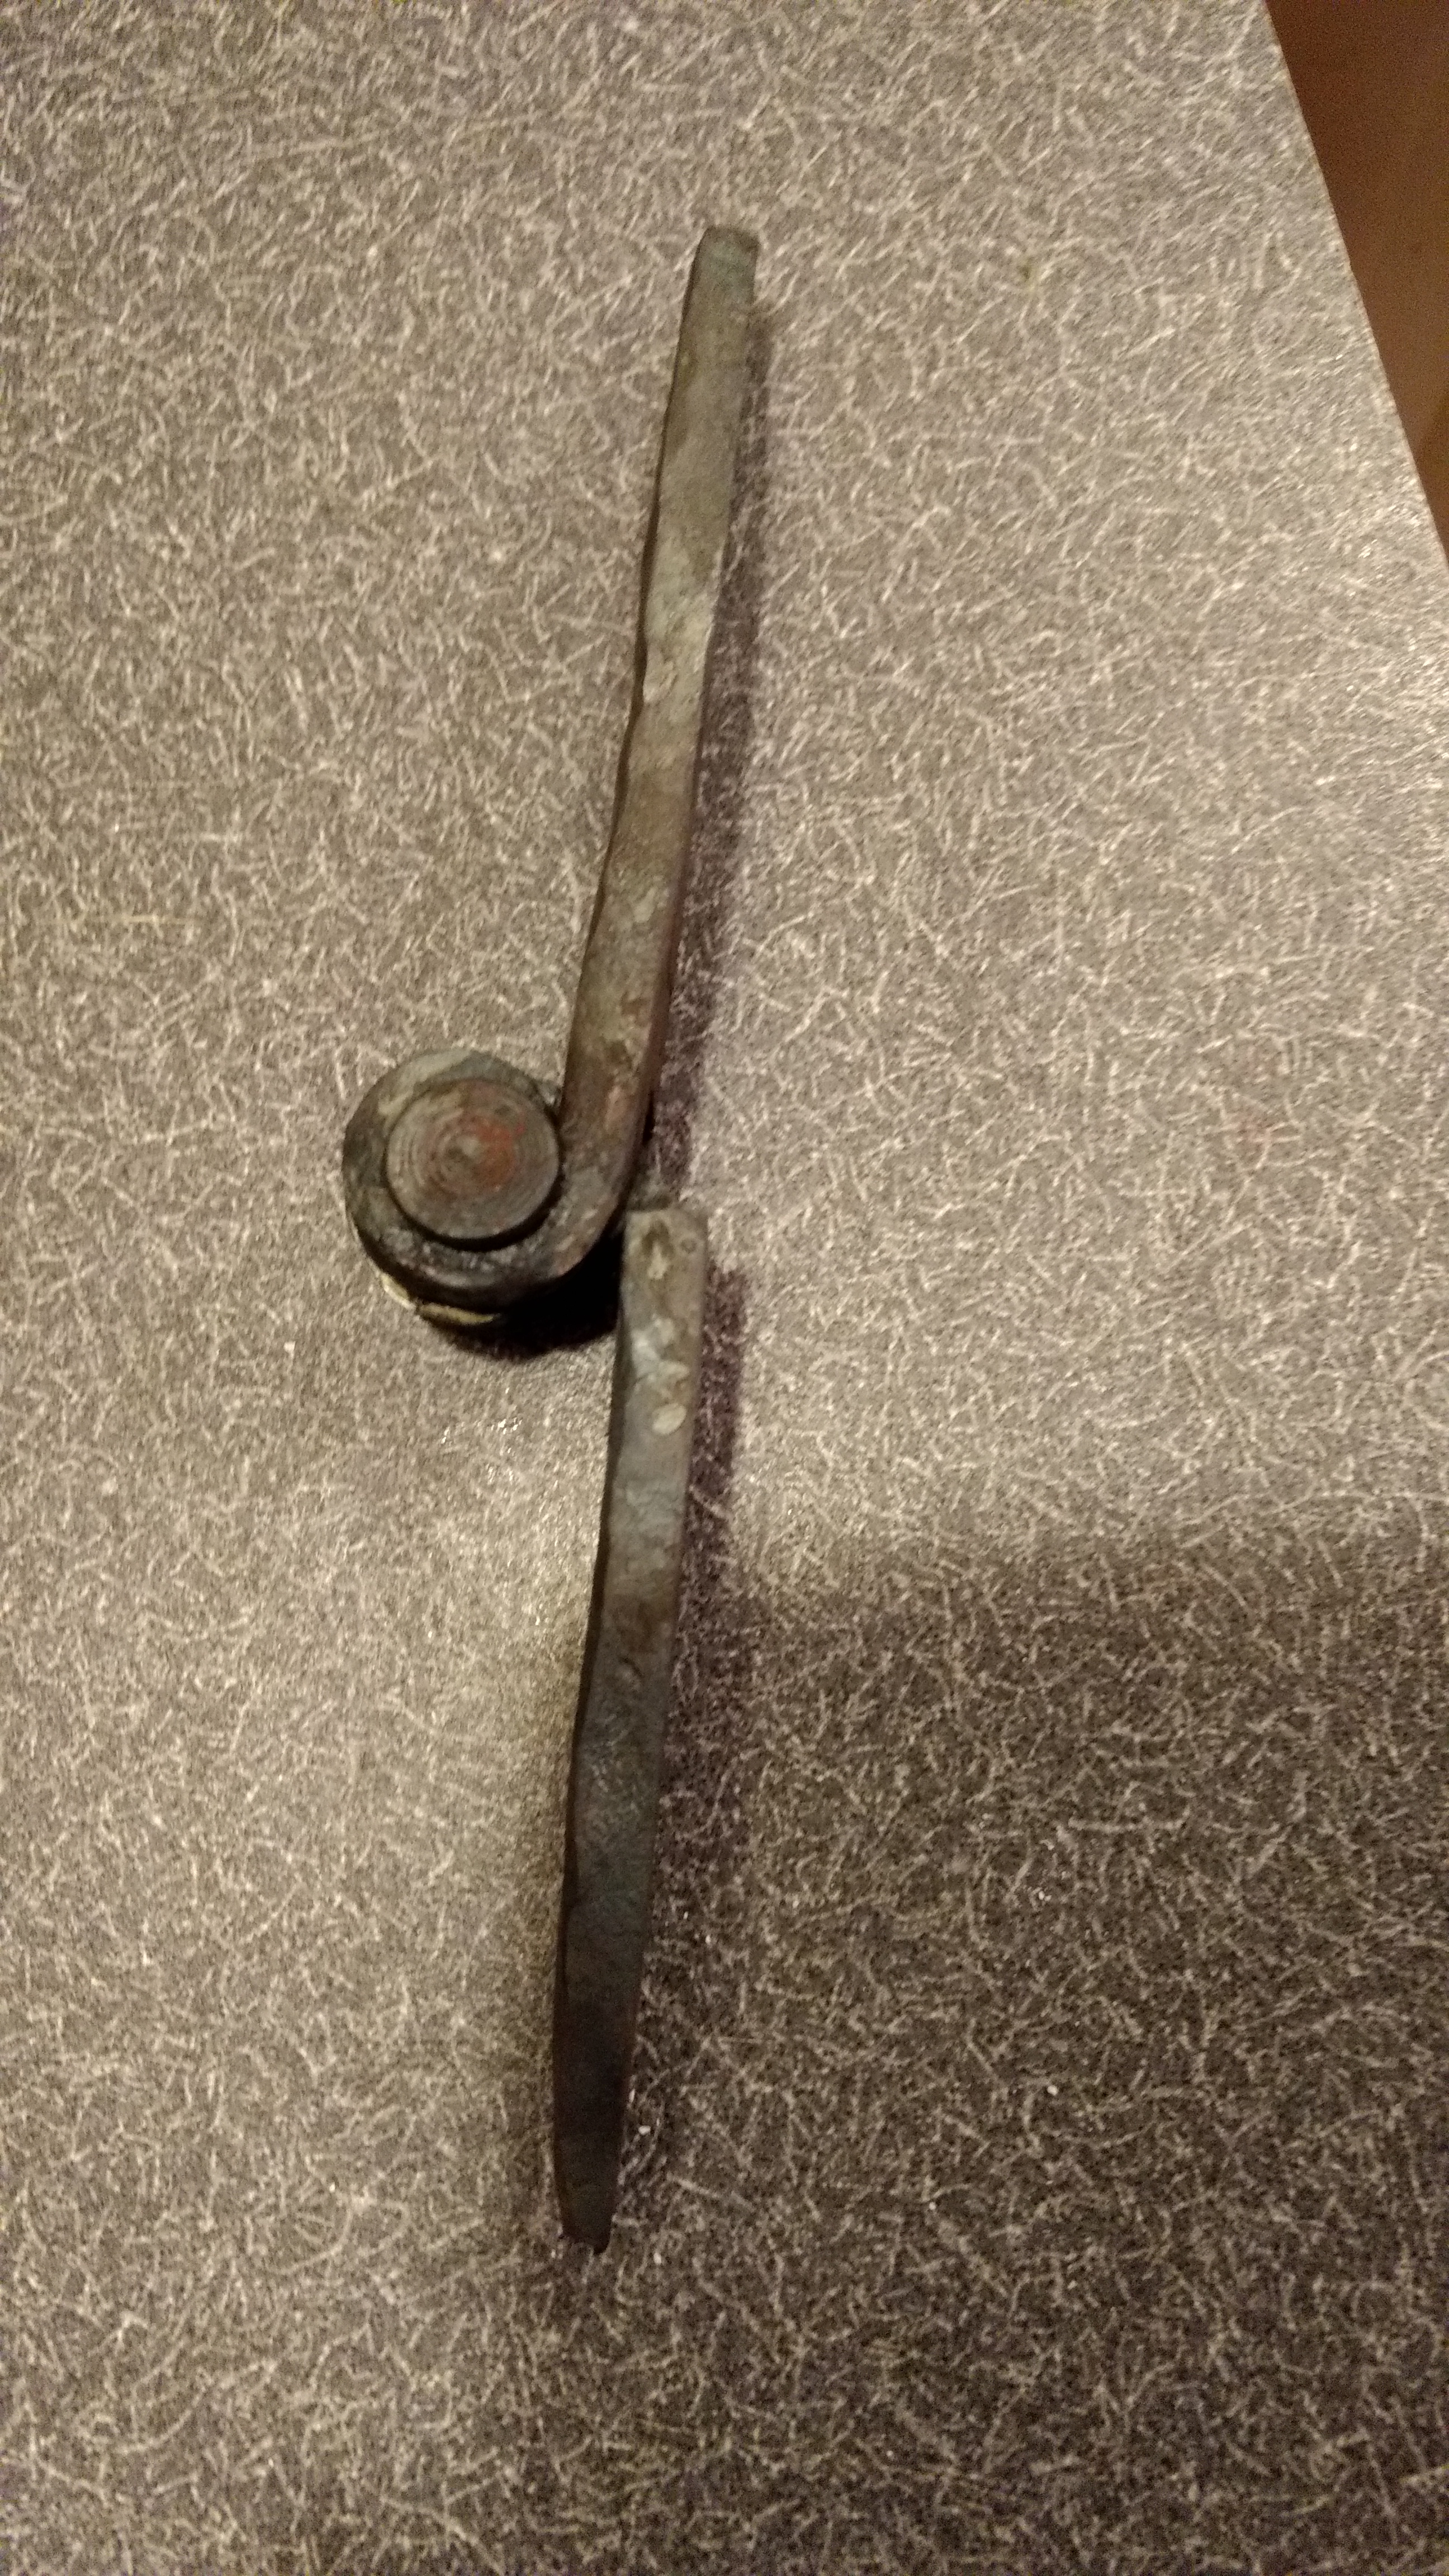
Also made my first attempt at making a hinge. I really really really hate 1/4" and under rivets. As you can see as well, the hinge does not sit flat as it should, all it took was 1 errant hammer blow when riveting... another try or two and I should be better at it

-
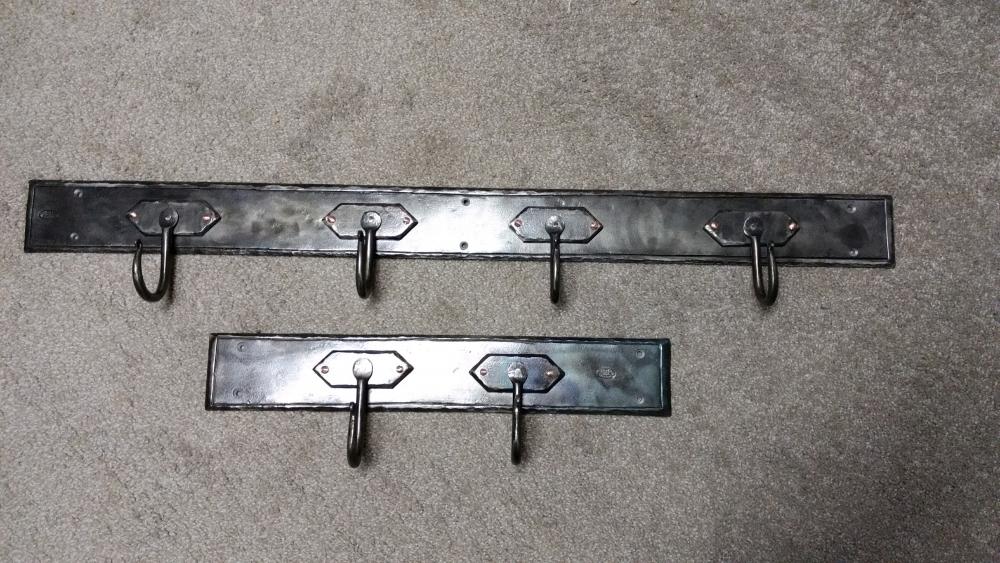
I got both racks finished up yesterday. The small one is 20" long, and I was laying it flat in the coal forge to heat an entire section up, but it starting twisting pretty badly. After 30 minutes fighting it back flat, I stood the steel straight up in the fire so I would get about a 1"*6" area hot, and just chisel and work one side at a time. This went much better, after the chiseling was done I easily got it back flat with 2-3 blows since I was only working one side, as opposed to heating a section of the 3" wide steel. Also went with Thomas' suggestion and used 1/4" stock, I do agree that it's easier to keep flat than 3/16 (what I'd used for the last one I made)
-
Me too- I'm going to make one soon, right now I'm just reading everything and trying to grasp what's happening. I'm not someone who just wants to follow step a,b, and c for a forge build and call it a day, I want to understand what's going on and why, but at the moment I feel like I'm trying to fit 10 gallons of information into a 5 gallon bucket


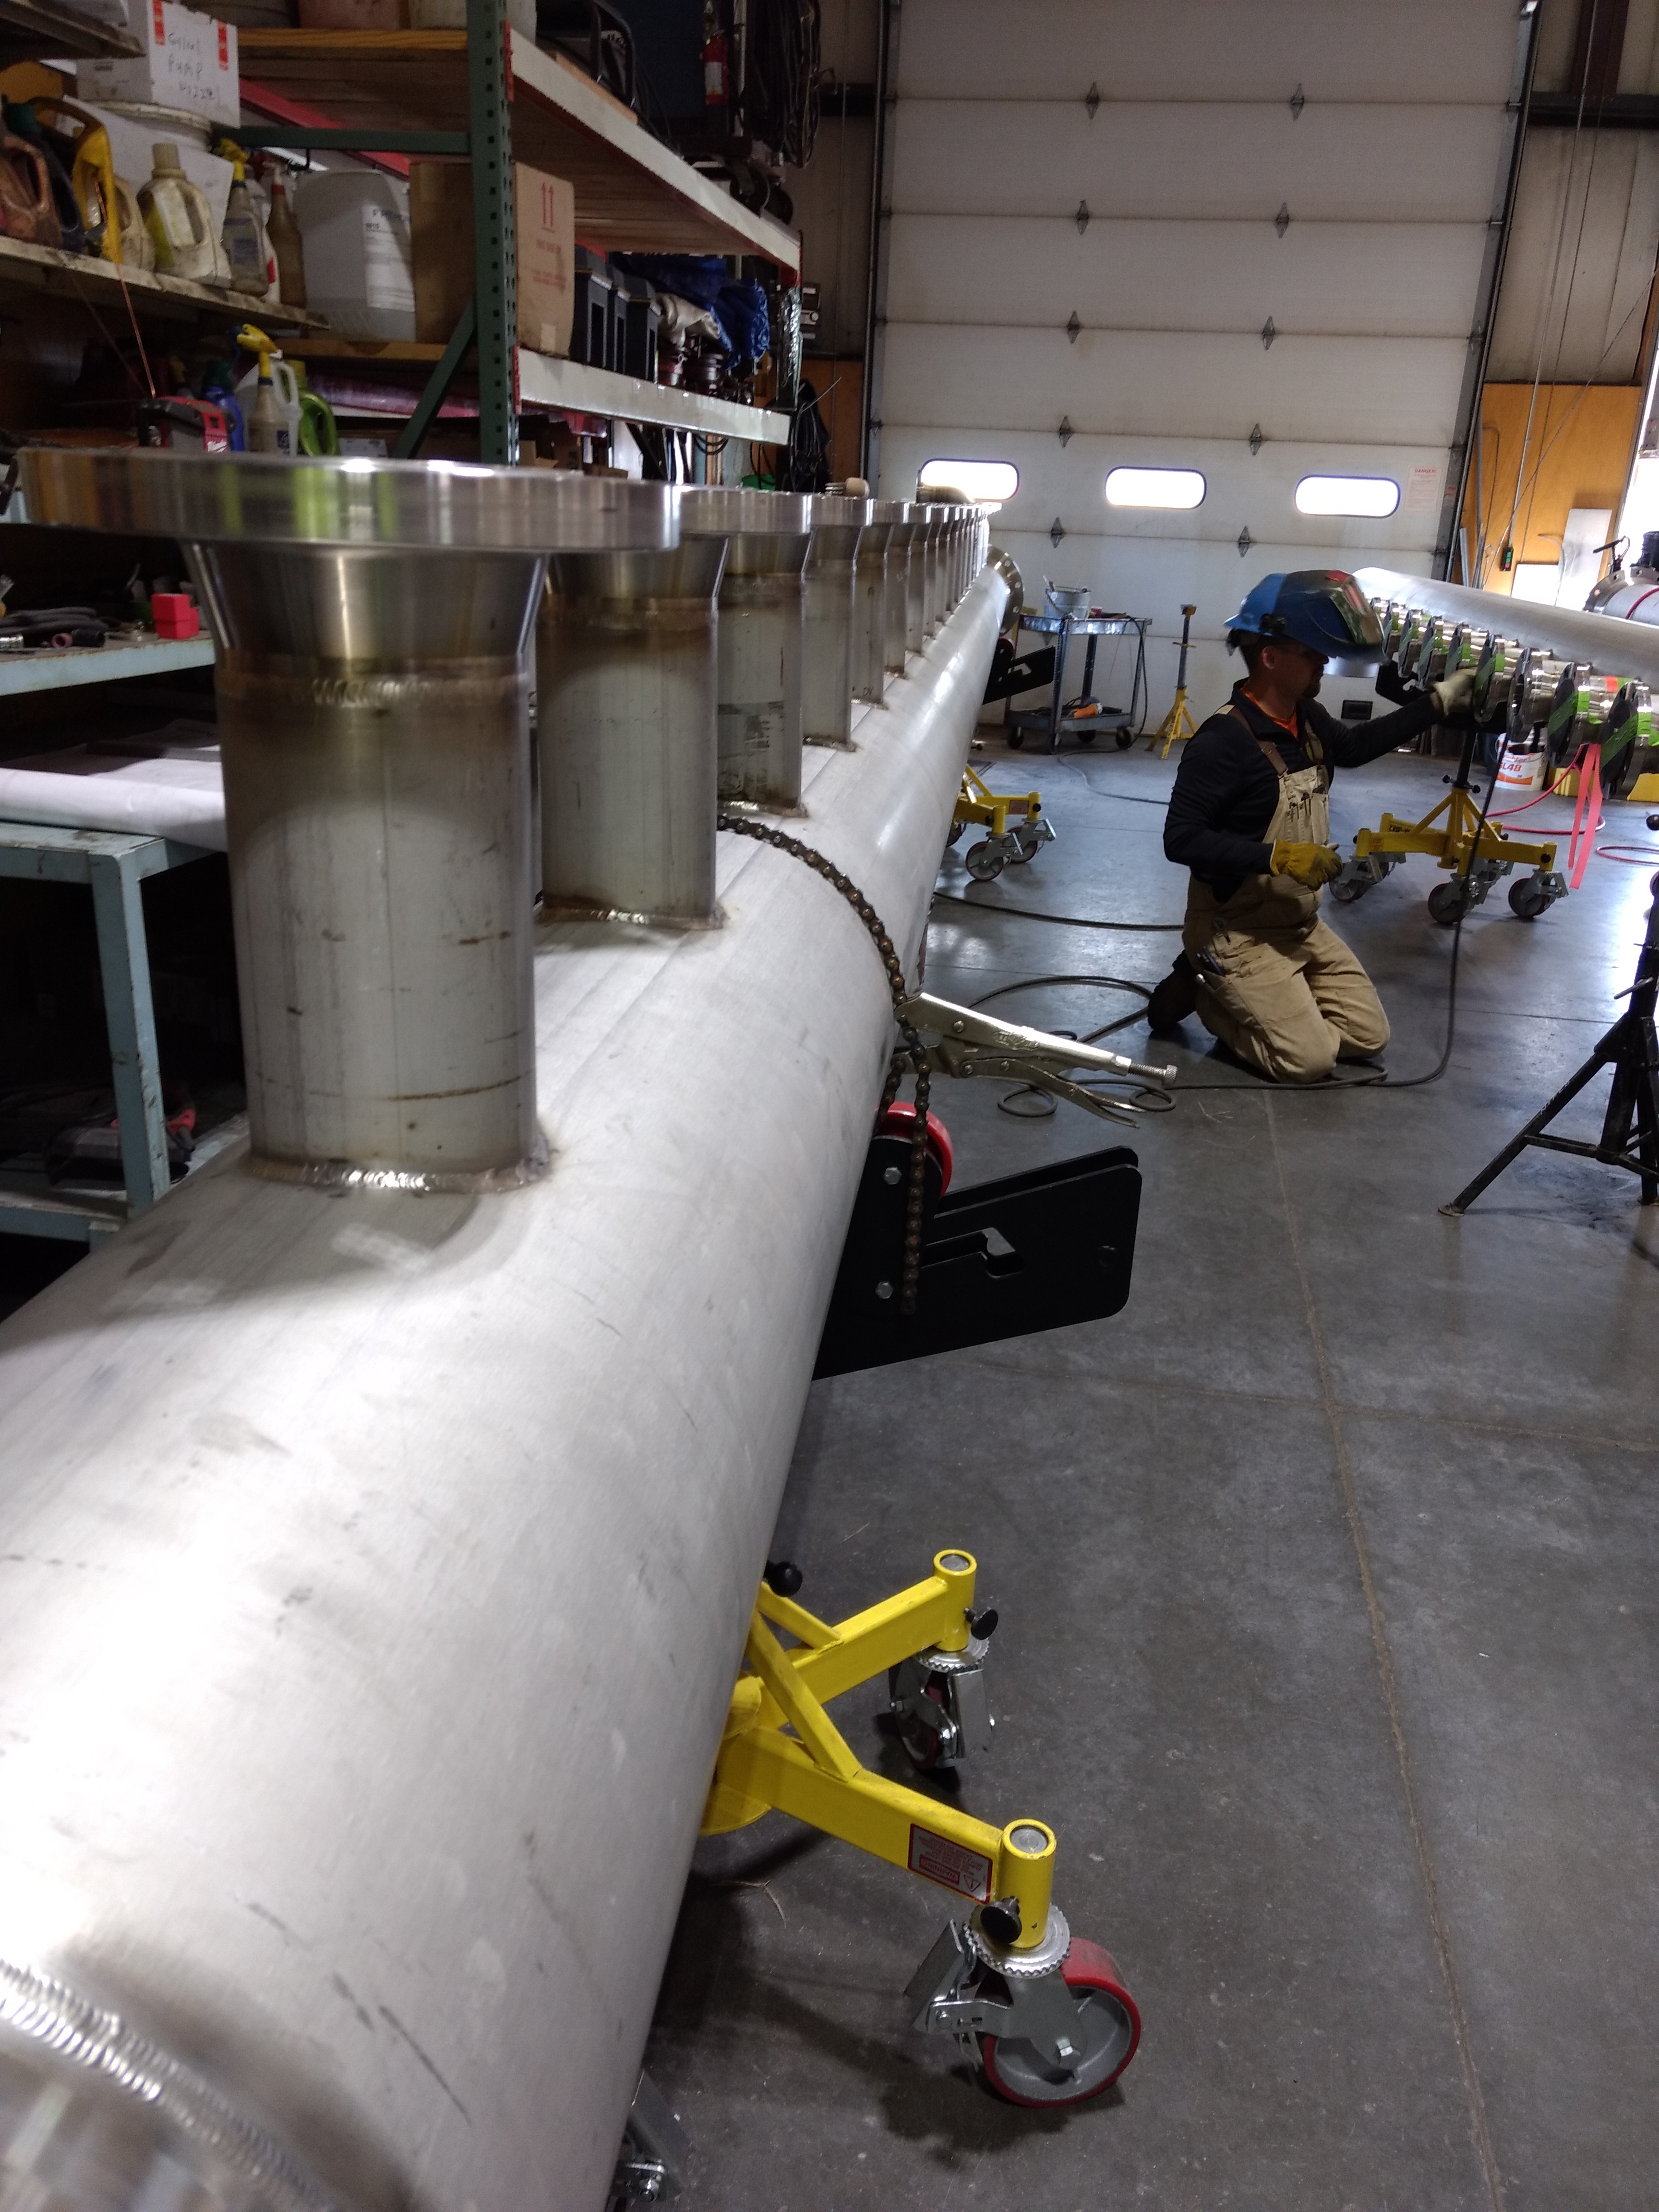


Naturally Aspirated Ribbon Burner. Photo heavy.
in Ribbon Burners
Posted
In thinking about it again I think I'll scrap that 12" burner and just go to what I know works already since this is my first gas forge. KISS right? Anyway first pic is at 5 psi 2nd is at 10 psi
7" long, 19 holes