

MonkeyForge
-
Posts
142 -
Joined
-
Last visited
Content Type
Profiles
Forums
Articles
Gallery
Downloads
Events
Posts posted by MonkeyForge
-
-
Frosty: CO monitor is always a good idea, though I only use the forge outside in the open air. (which is challenging in rainy country).
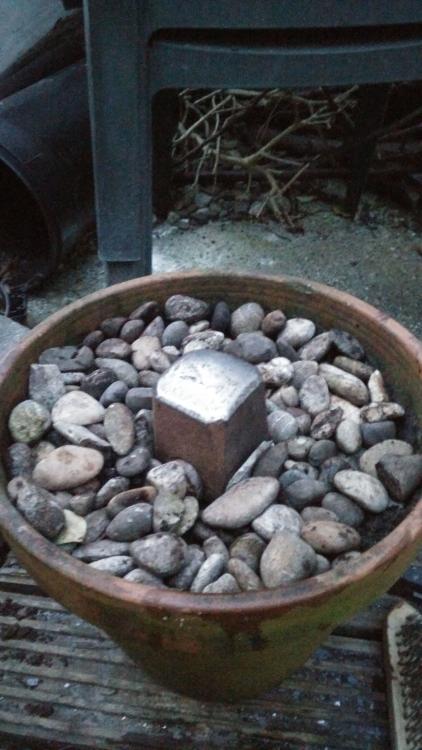
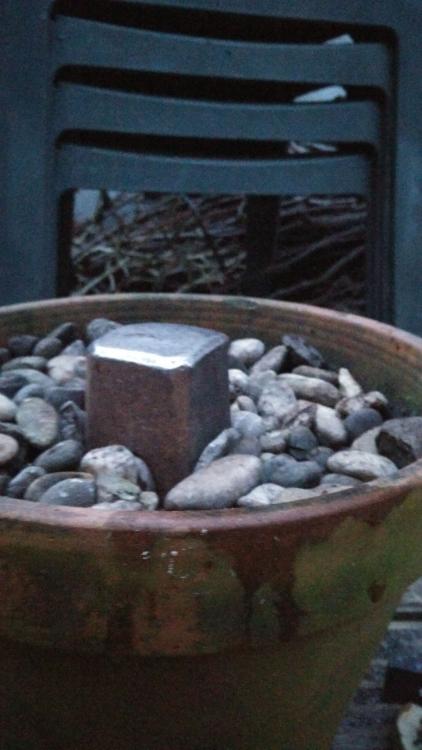
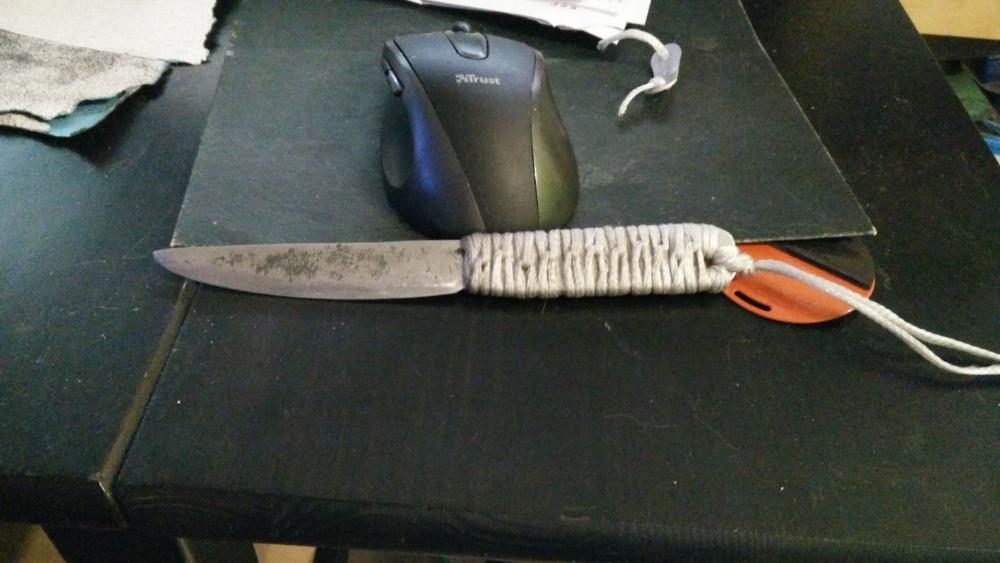
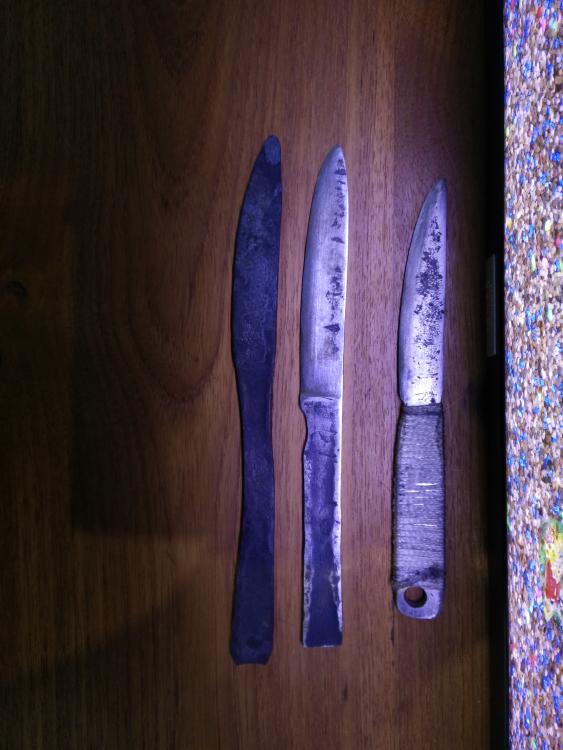
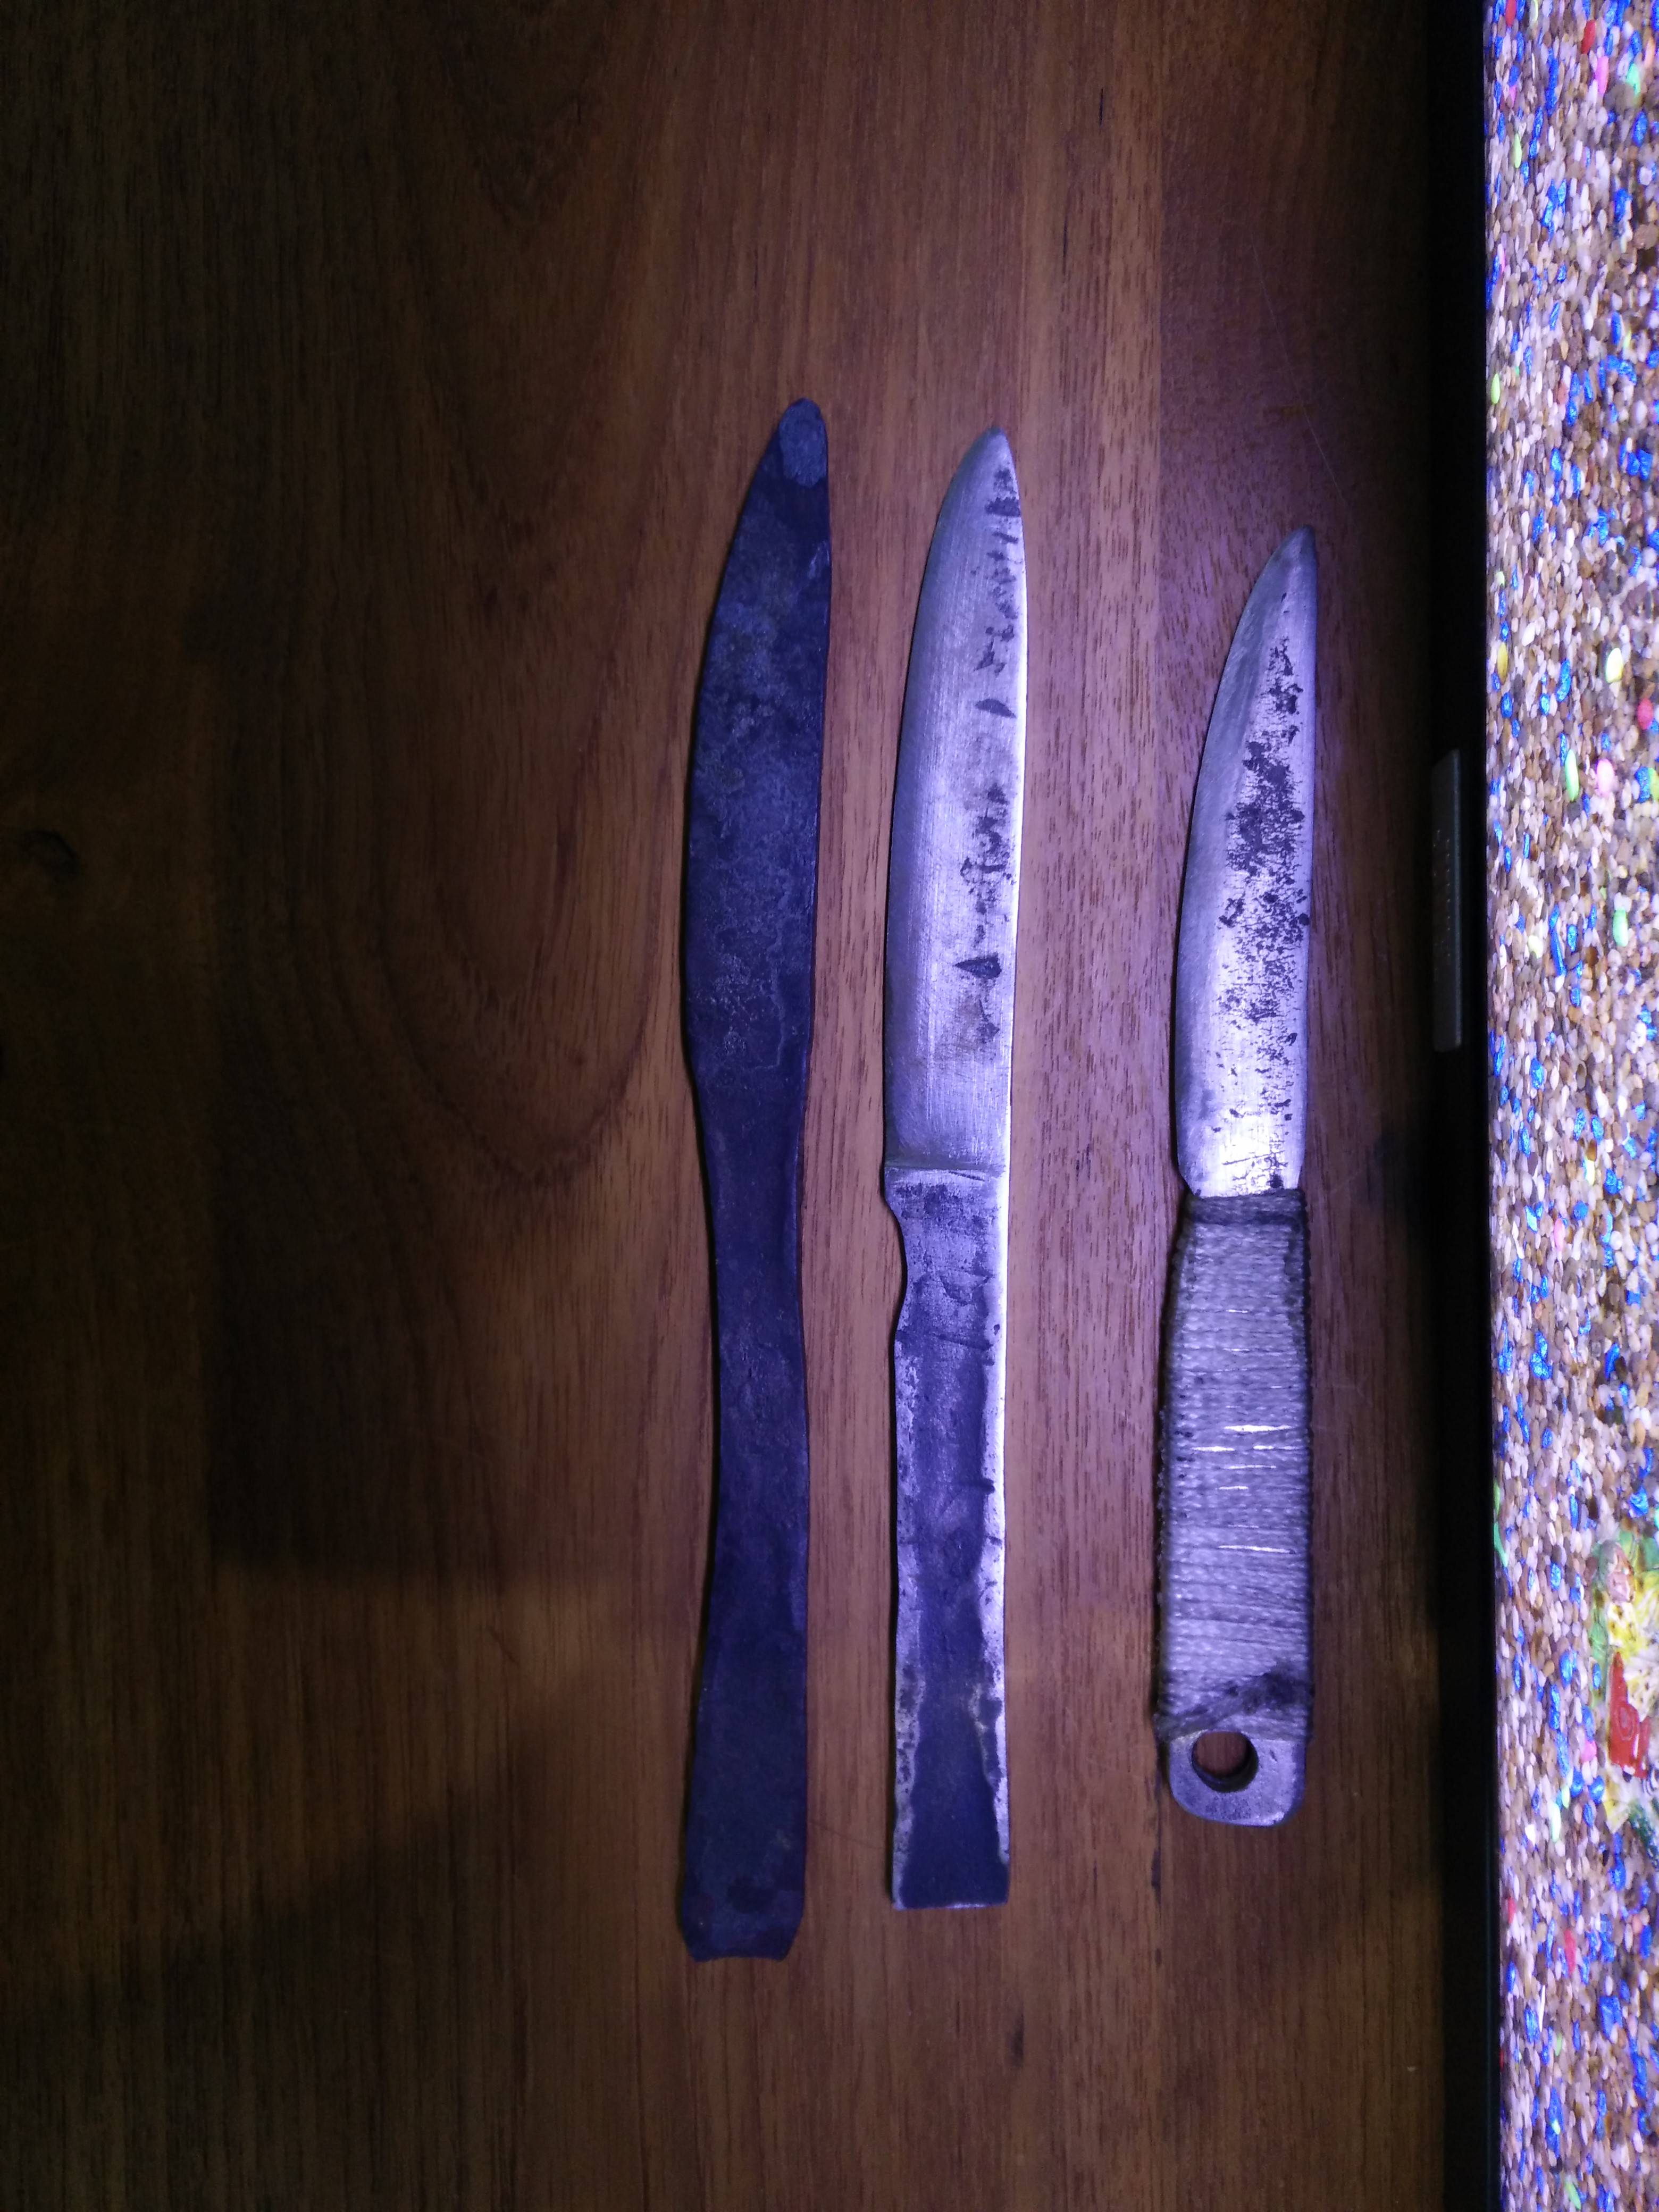
I have been able to forge quite a bit lately, mostly knife blanks and just practising drawing/tapering. I have been using an old sledge hammer as anvil, as well as a paving tile.


-
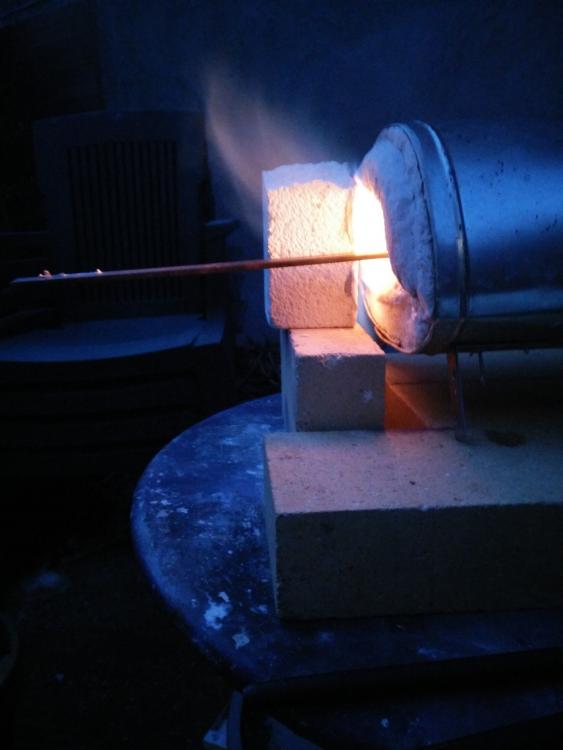
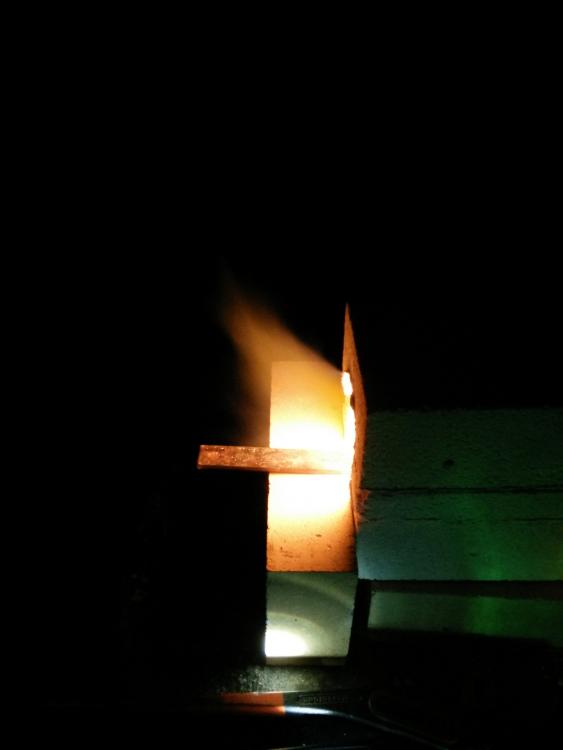
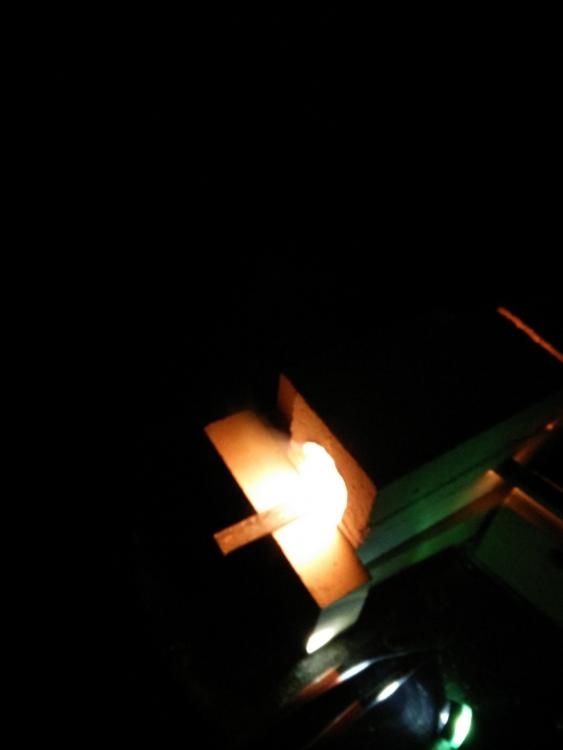
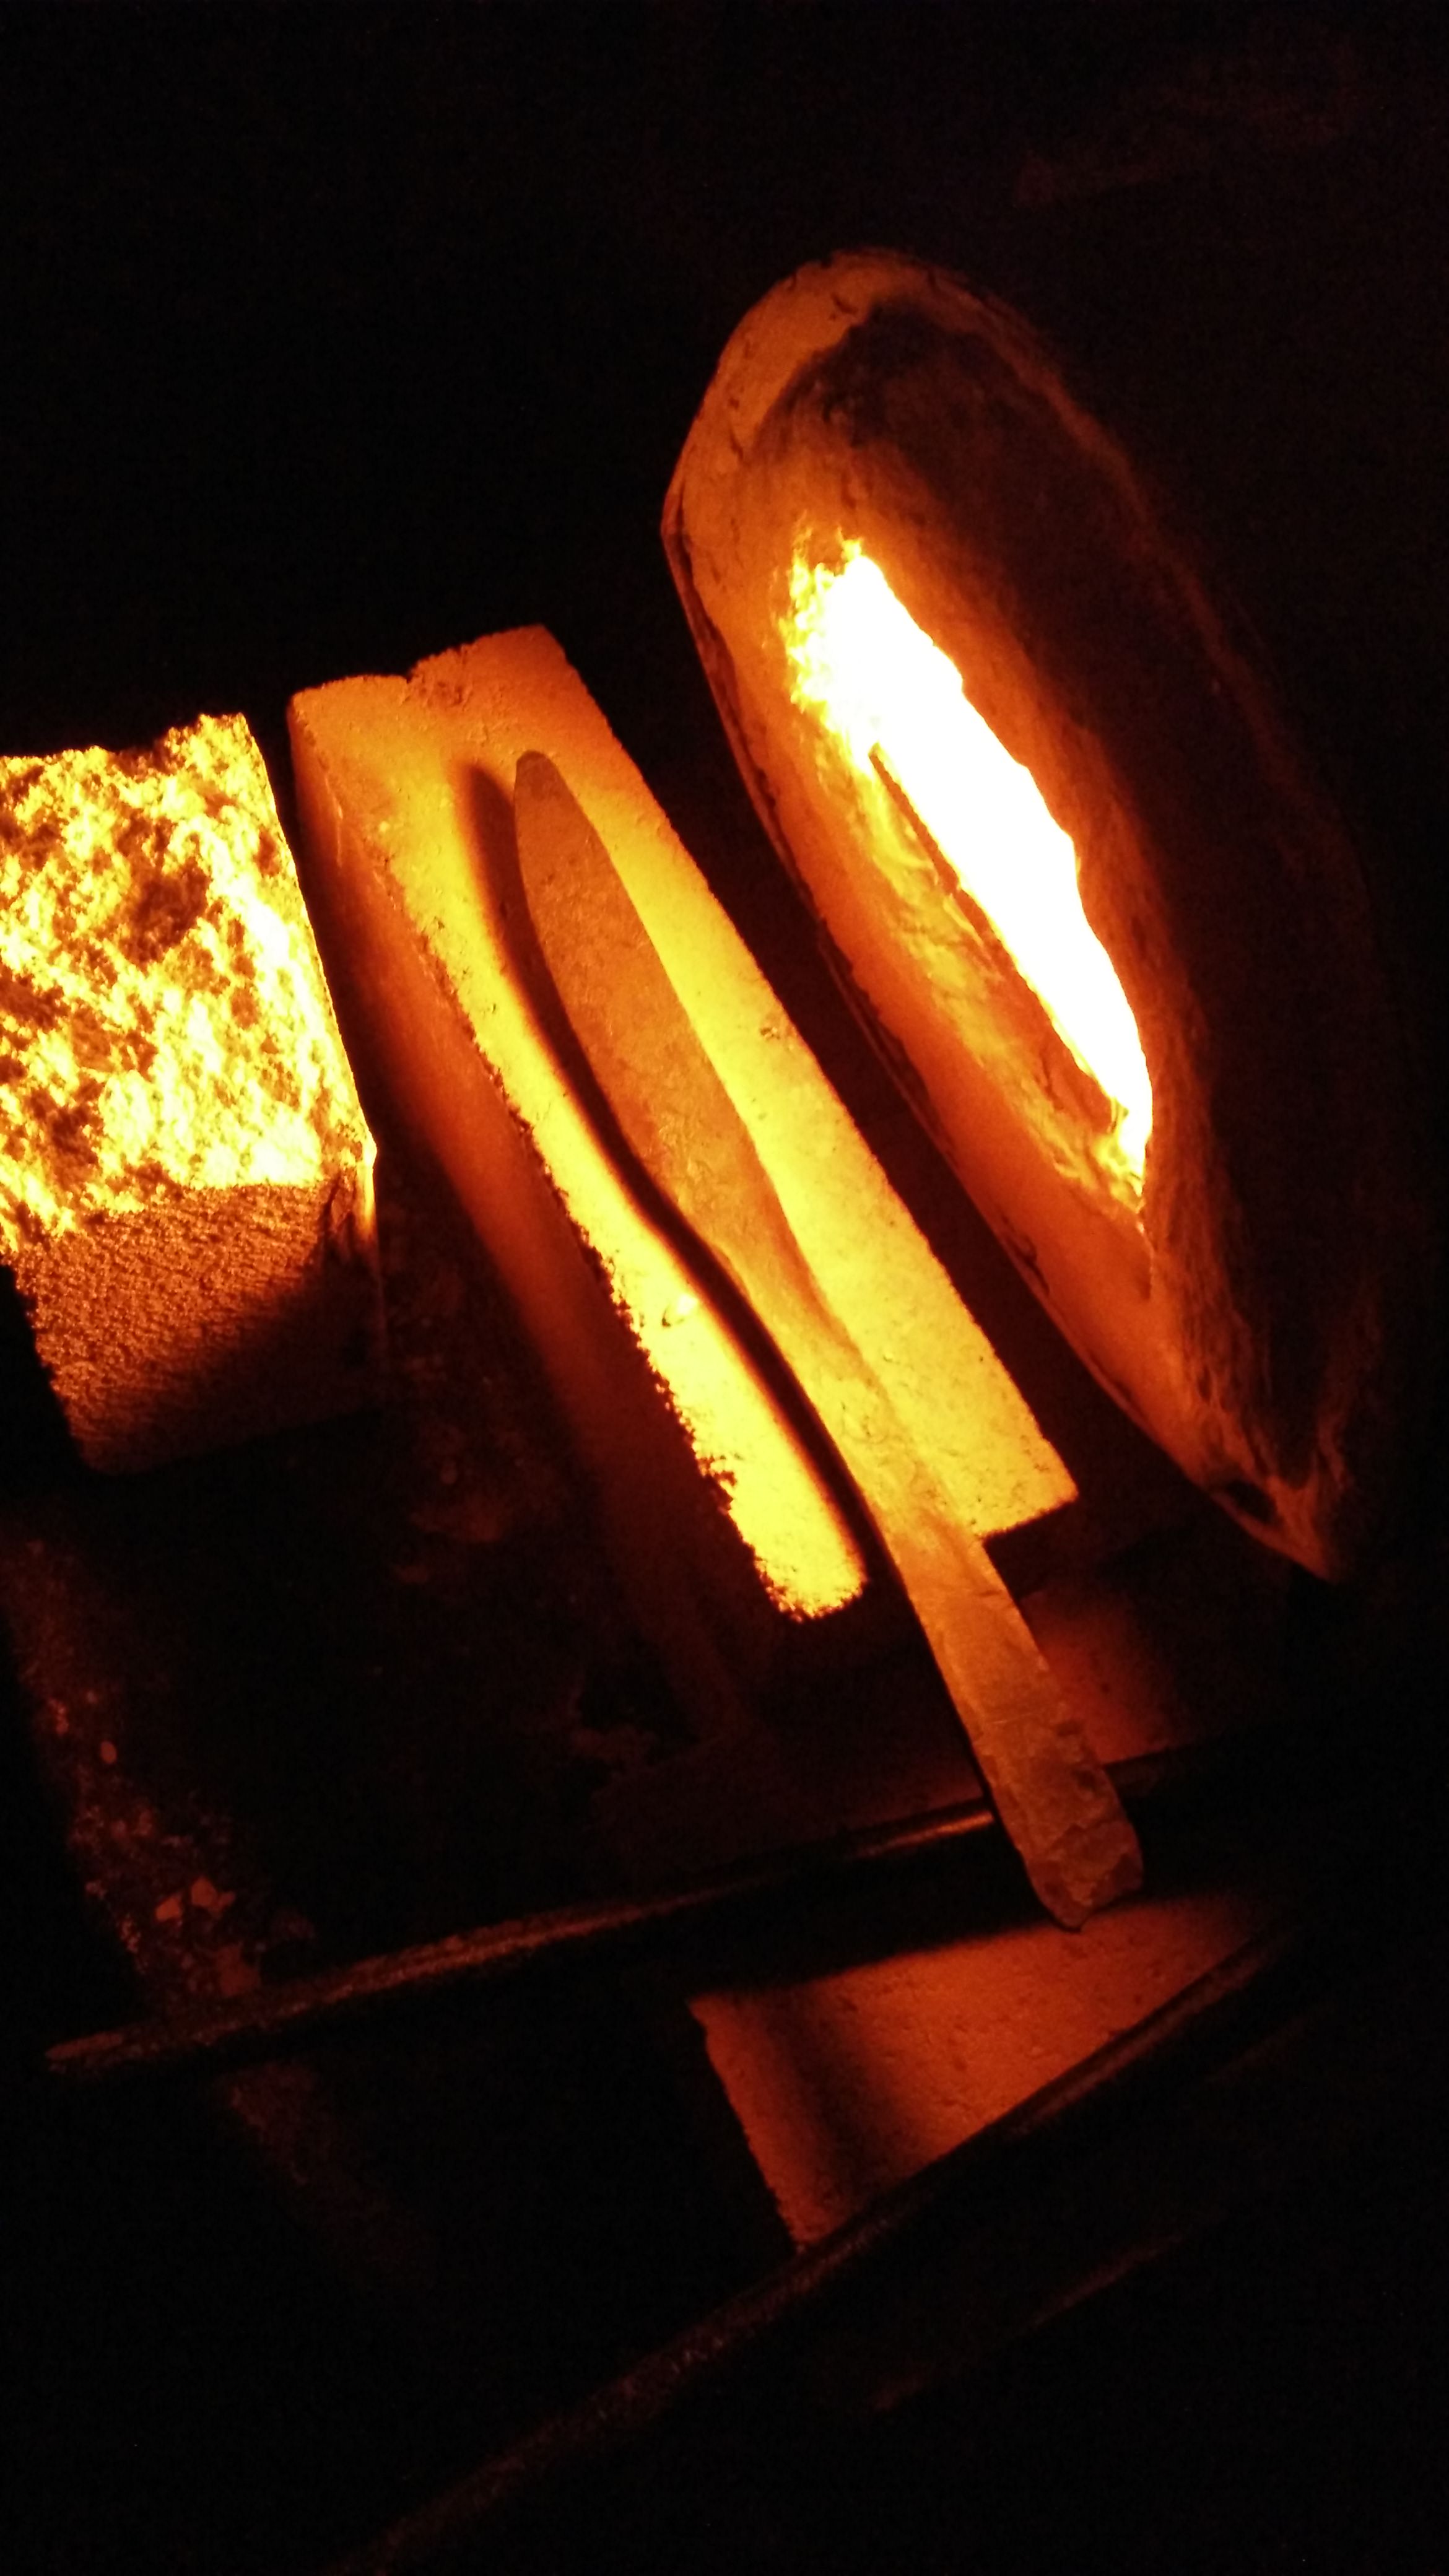
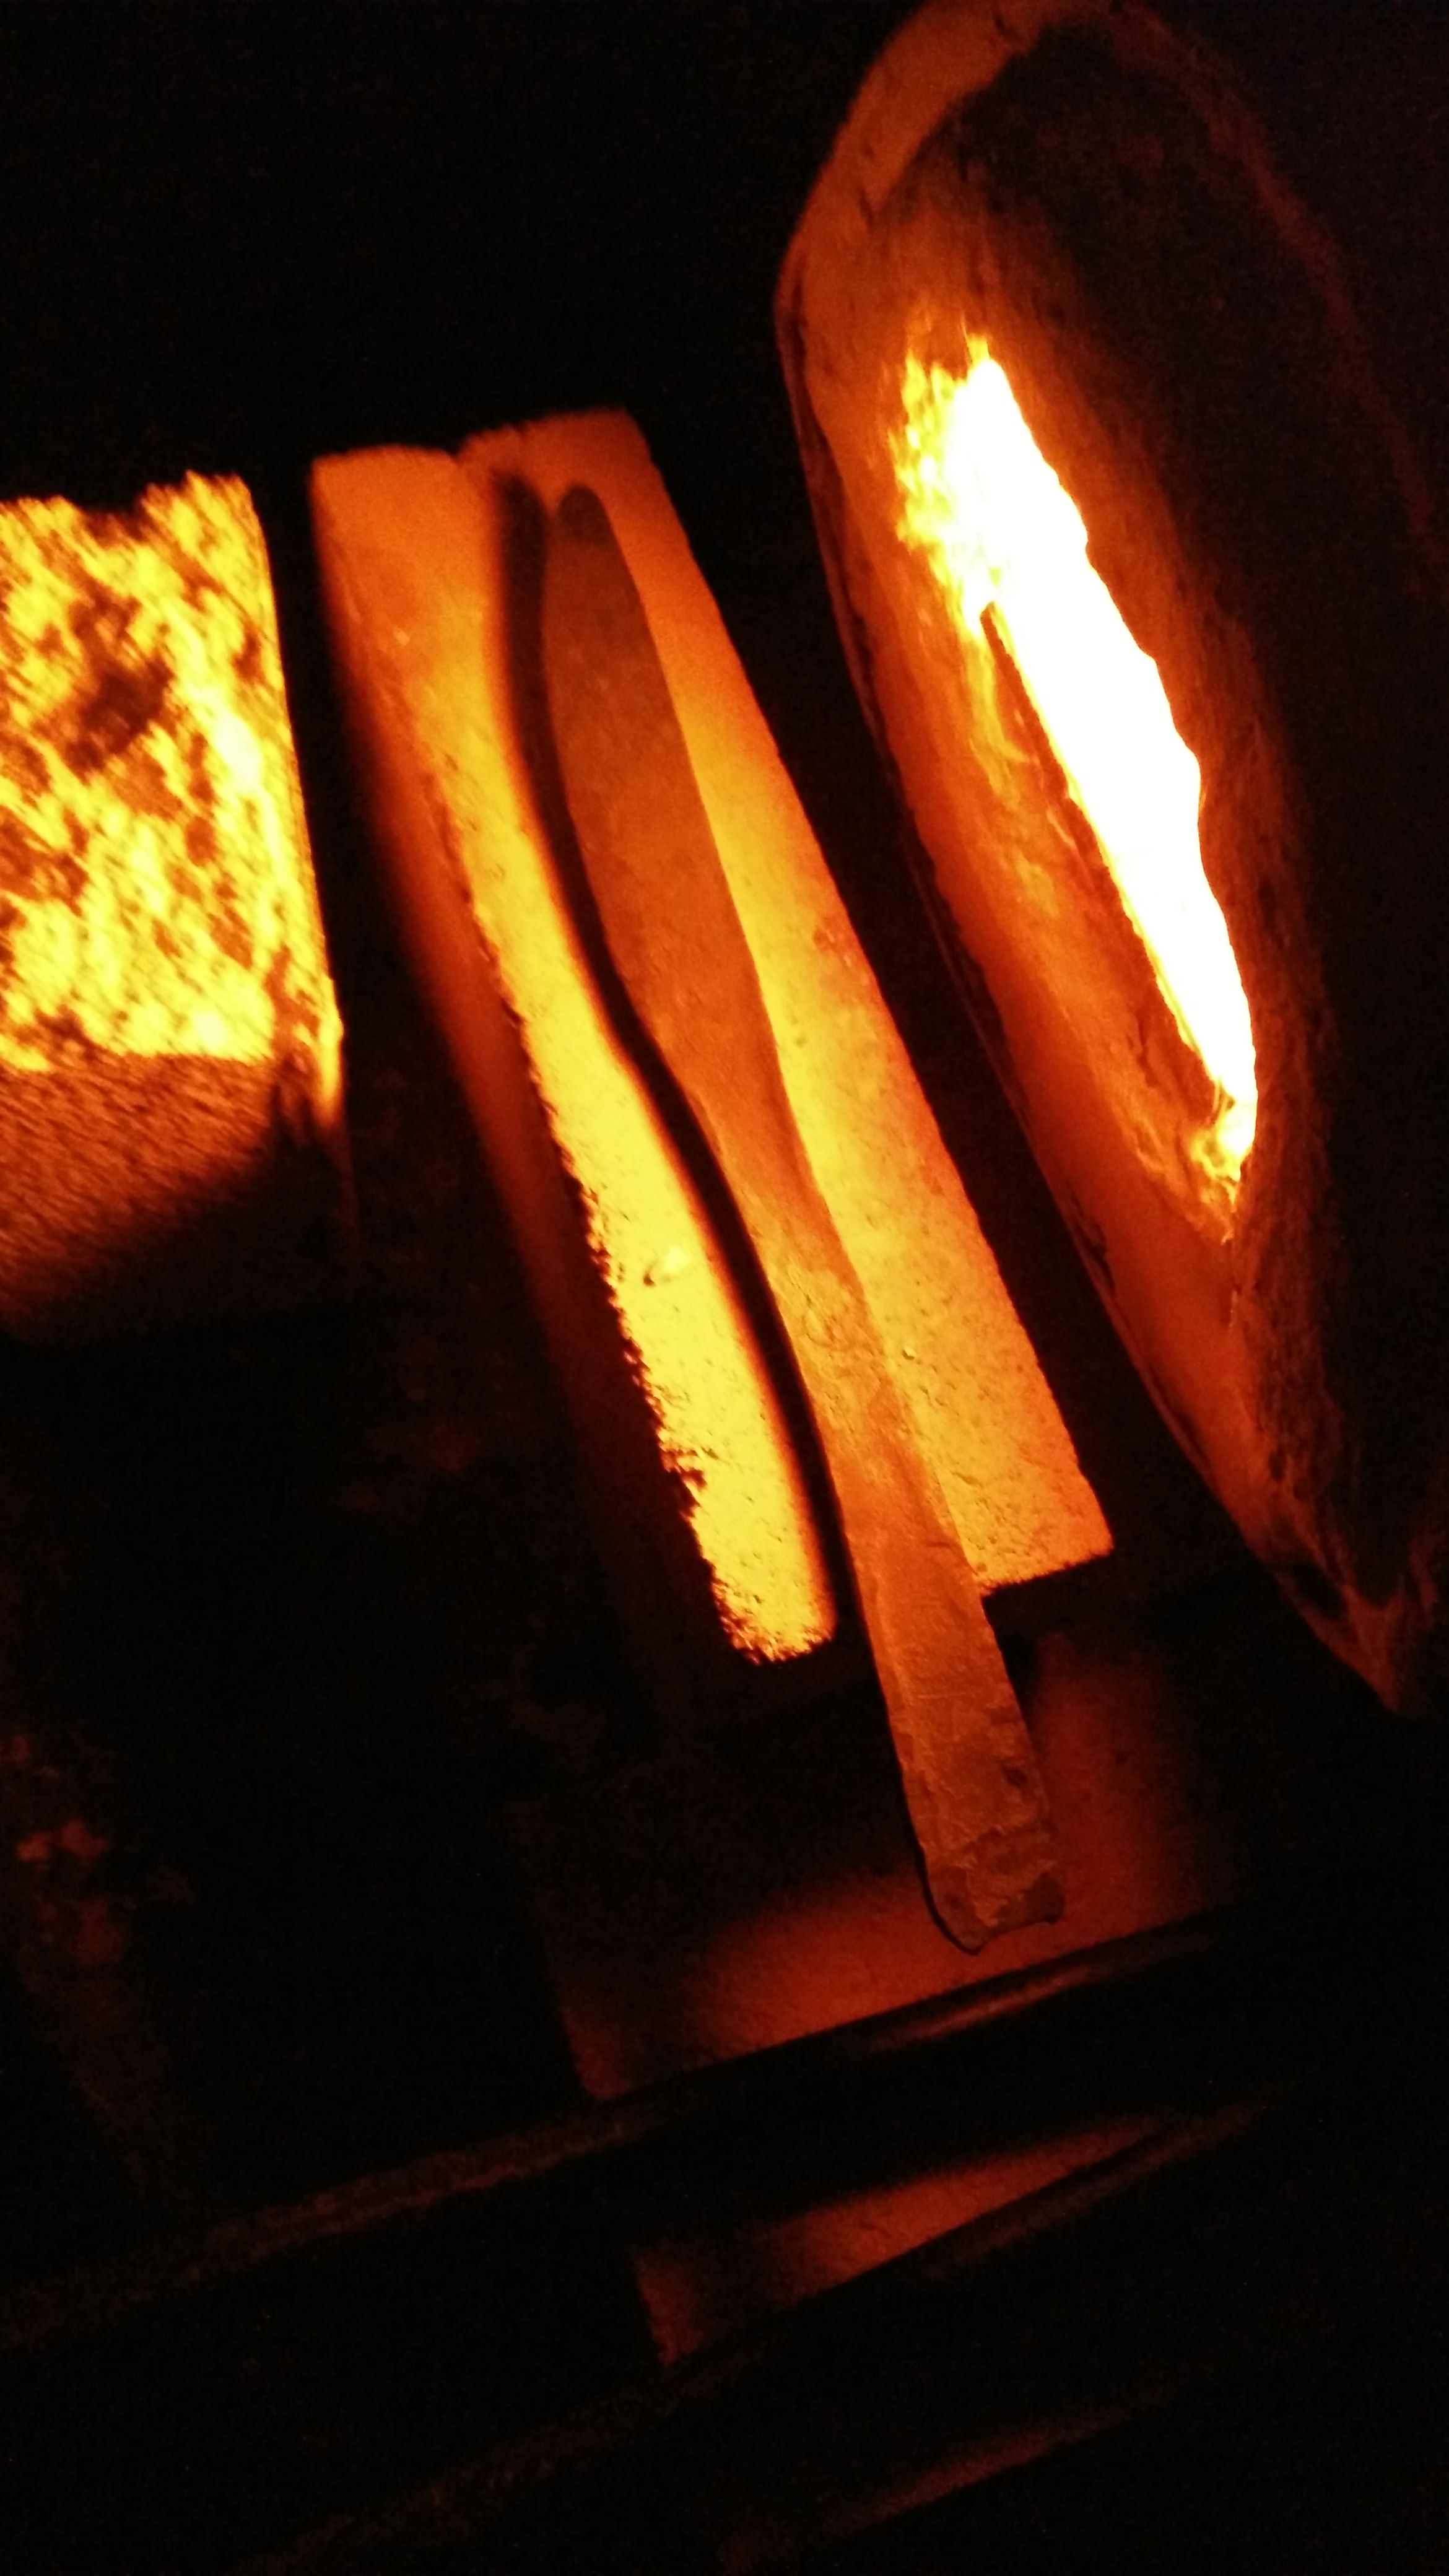
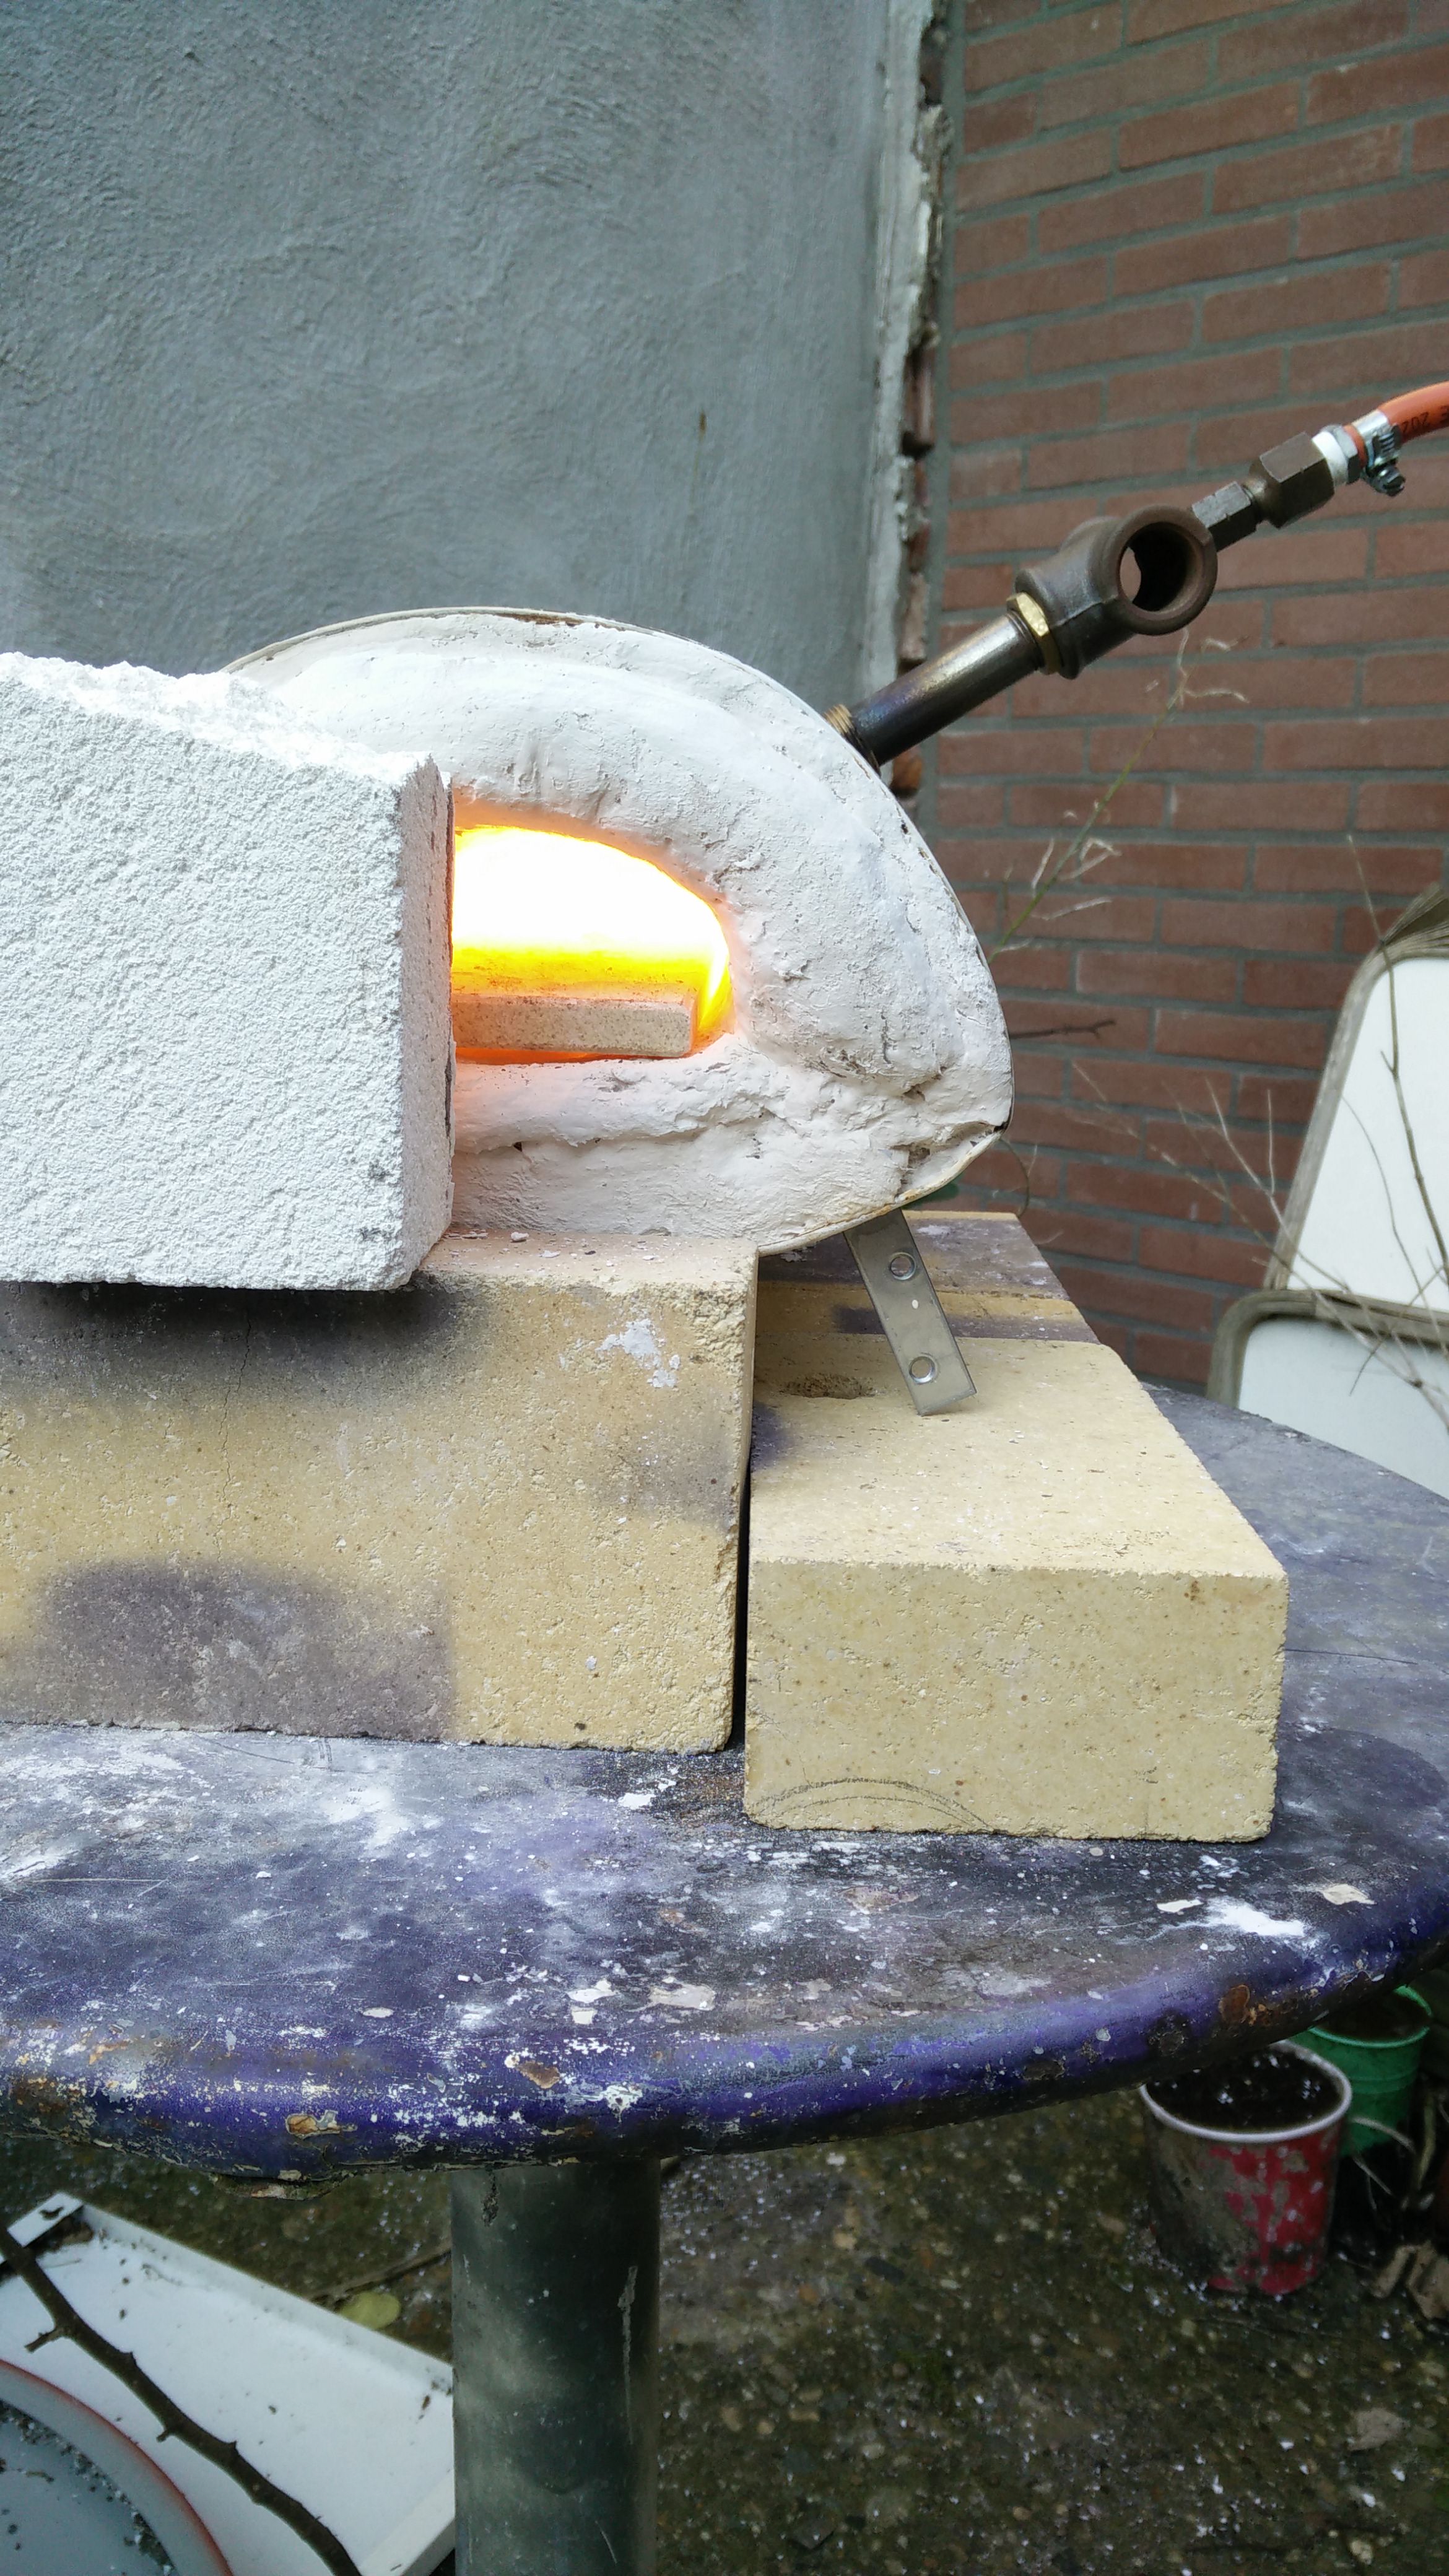
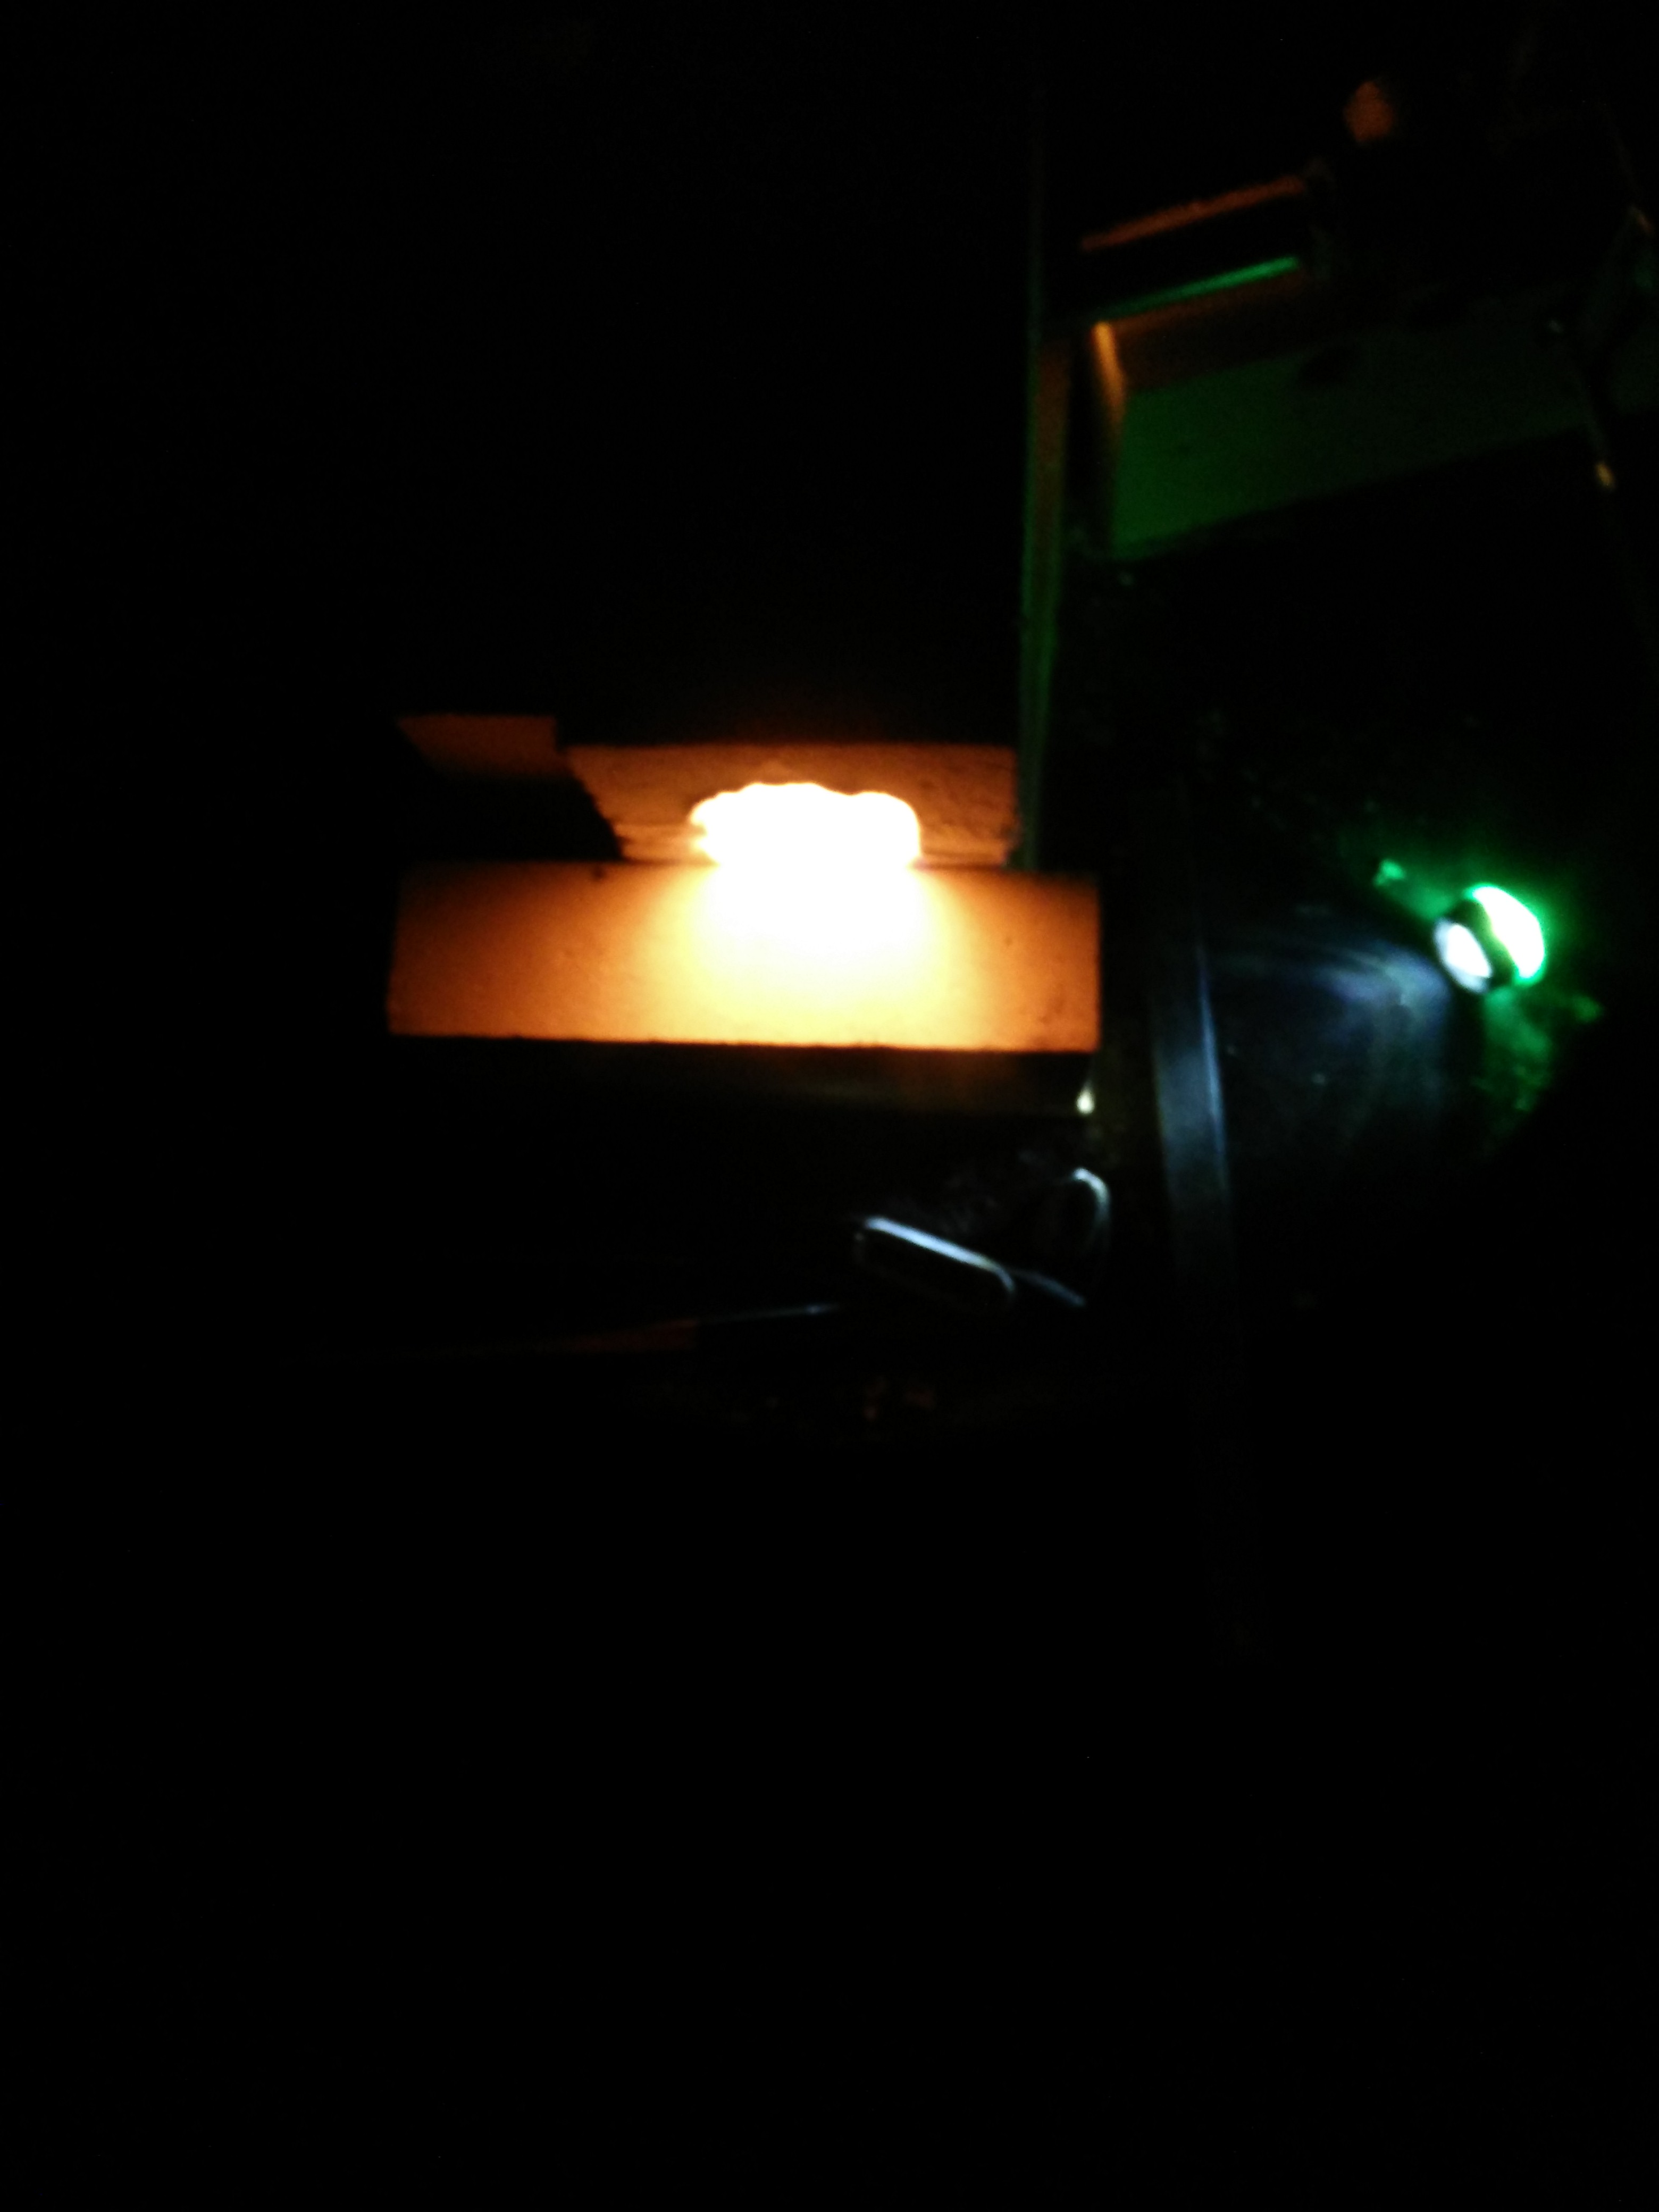
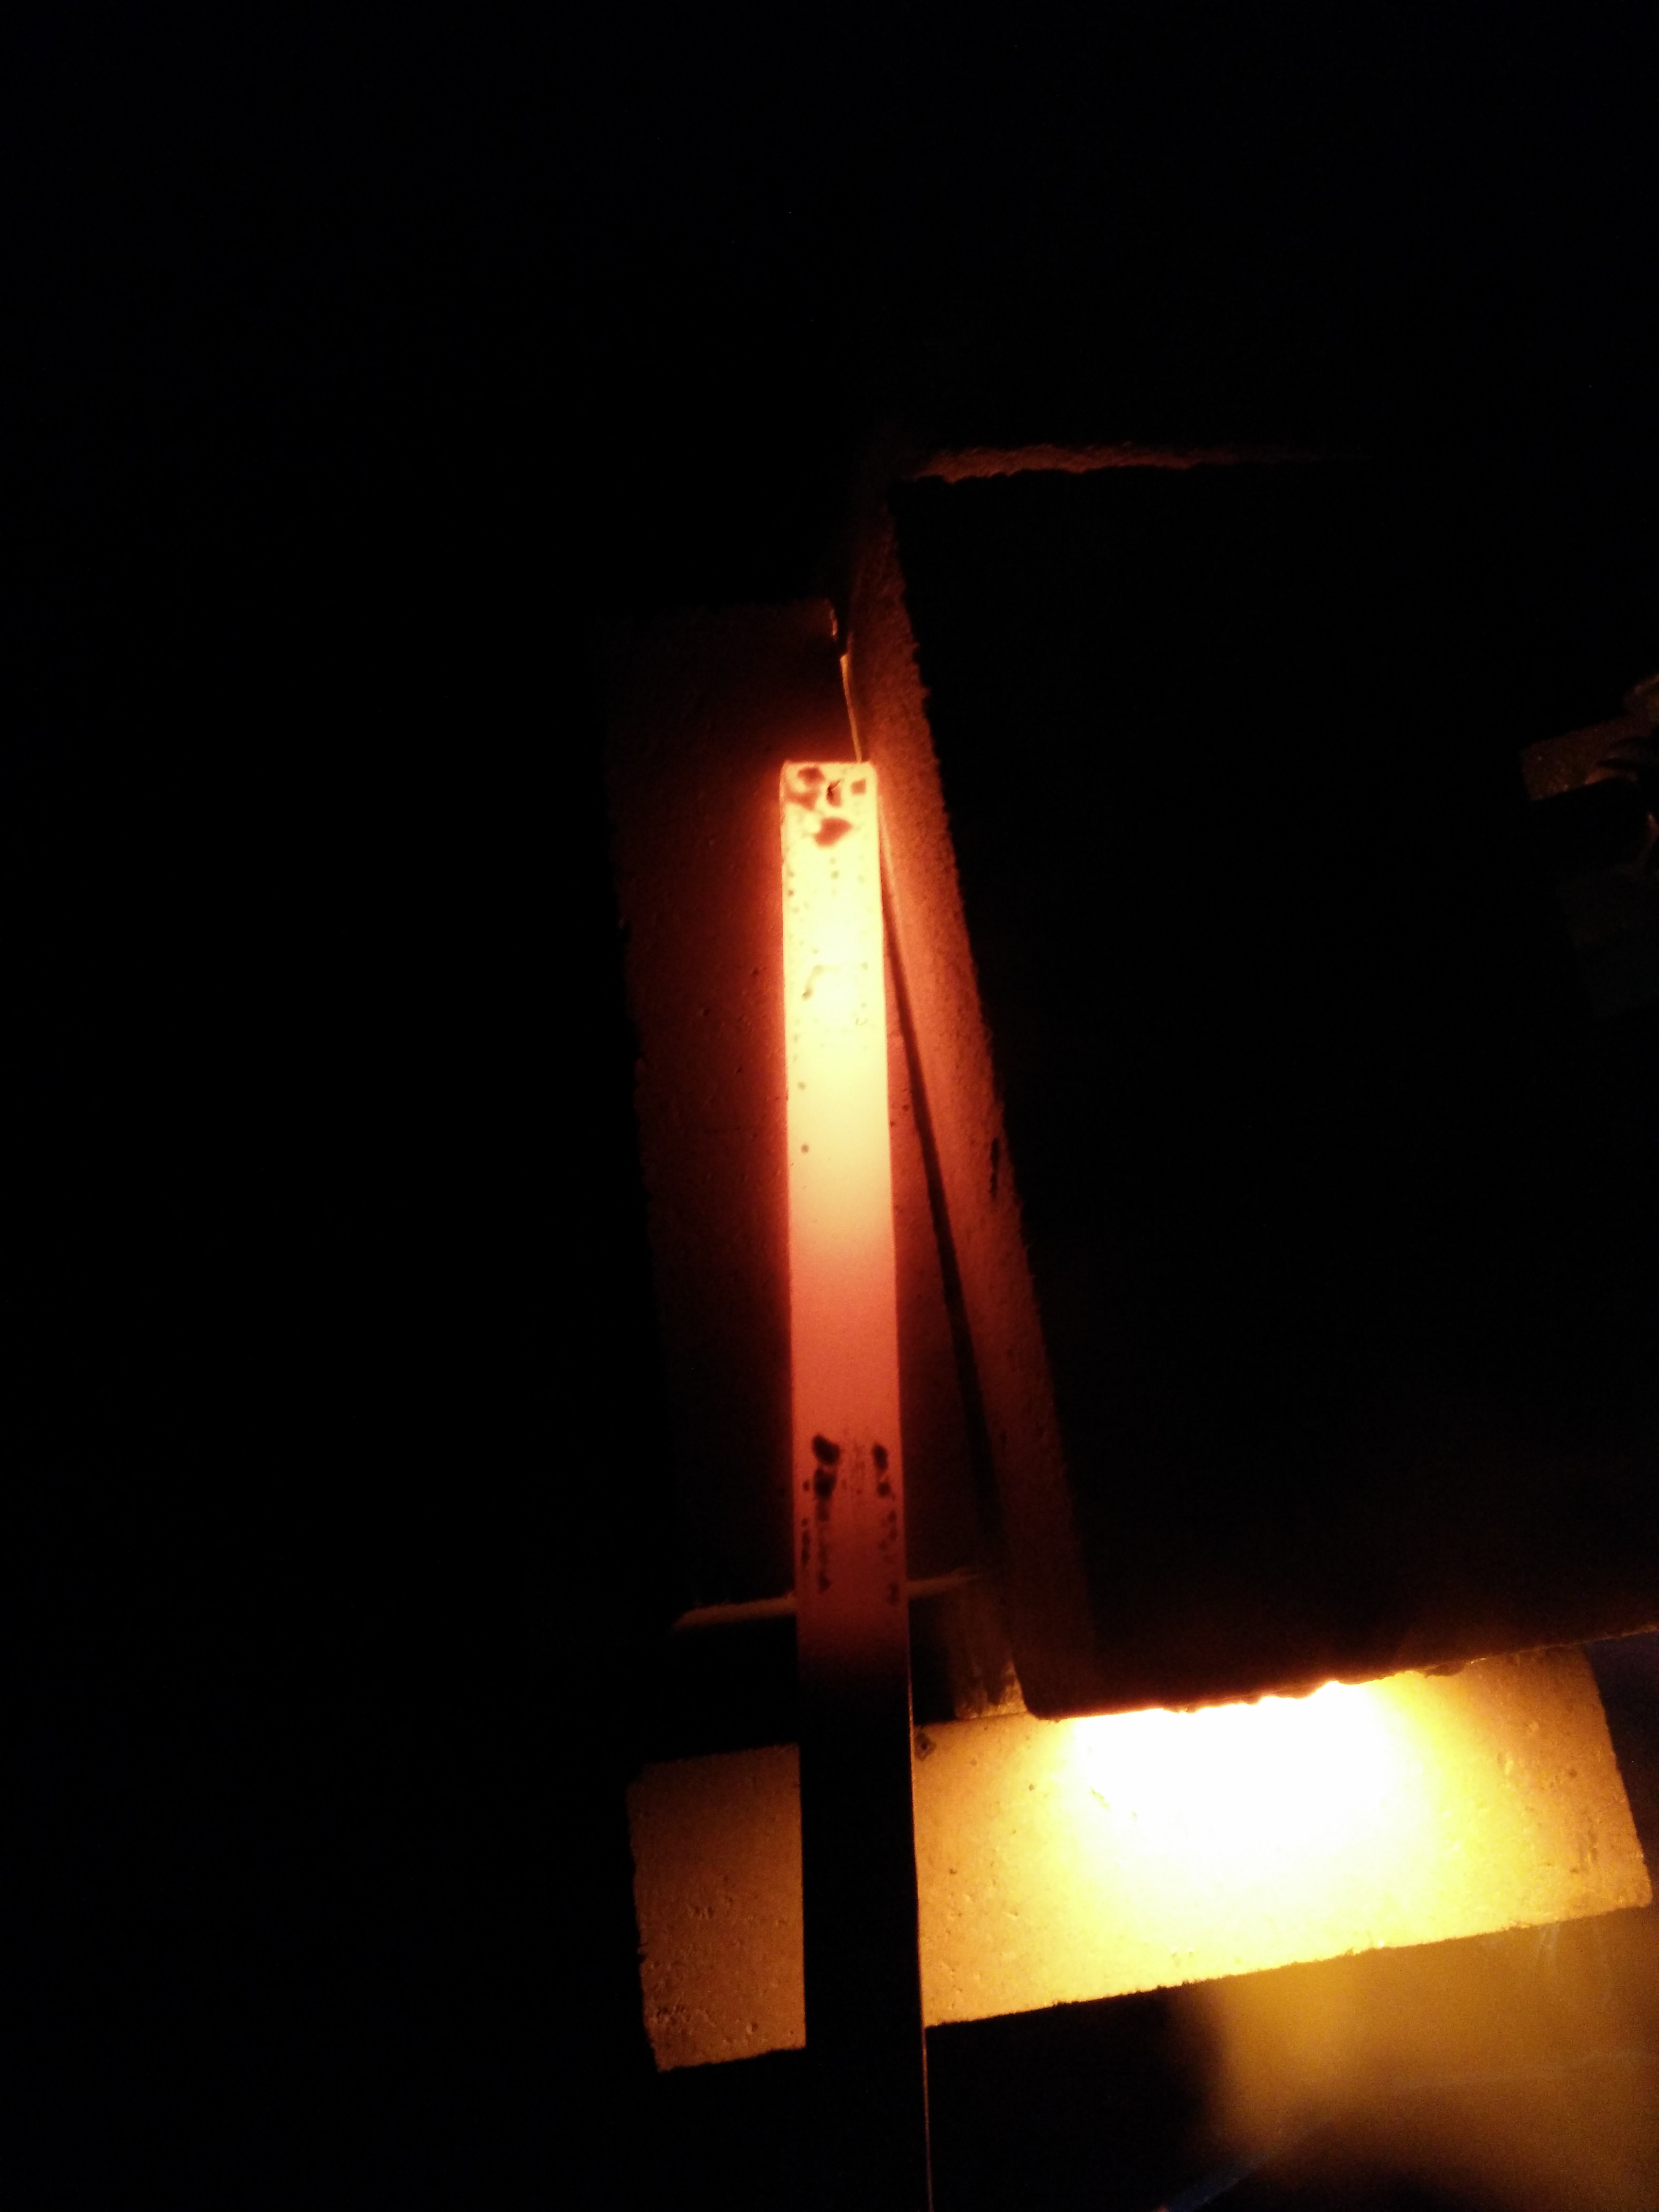
As promised, some pictures of fire. I made a couple of knife blanks (not very pretty but I will show later). I only have some thin stock at the moment (see picture) but after leaving it in the fire chamber for about 2 minutes it is a yellow hot.


-
I like it
") the fact that it takes some time to heat all the way to the front is ok. I prefer long stock, work the end and cut. Use my hands, rather than tongs, if I can. If I have something shorter I can use tongs. When I get the thinner kiln shelf in I'll have a bit more space for the work piece and for hot burning gas. The shell gets pretty hot pretty fast (it's pretty thin) but that is ok since I am not touching it.
the fact that it takes some time to heat all the way to the front is ok. I prefer long stock, work the end and cut. Use my hands, rather than tongs, if I can. If I have something shorter I can use tongs. When I get the thinner kiln shelf in I'll have a bit more space for the work piece and for hot burning gas. The shell gets pretty hot pretty fast (it's pretty thin) but that is ok since I am not touching it.
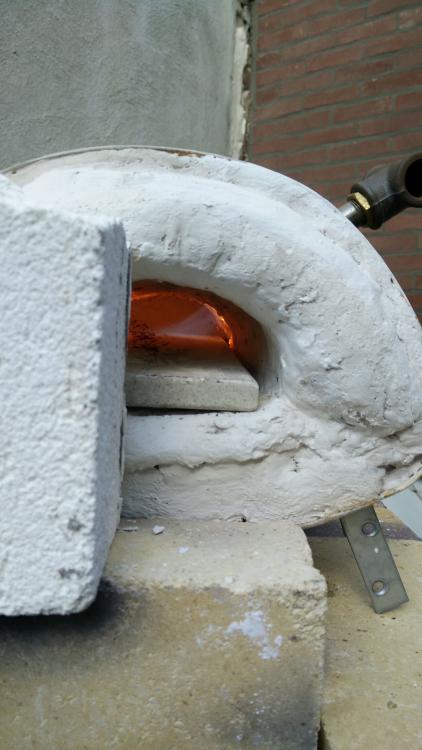
All in all for a first attempt (after the brick forges) I'm quite happy with the outcome.
I might get some dragons breath pictures tomorrow, just for completeness. (and because pictures of fire)
-
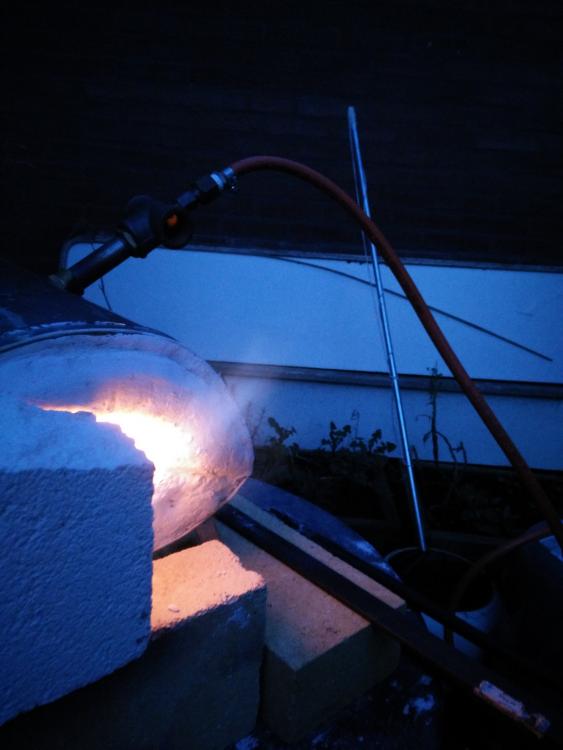
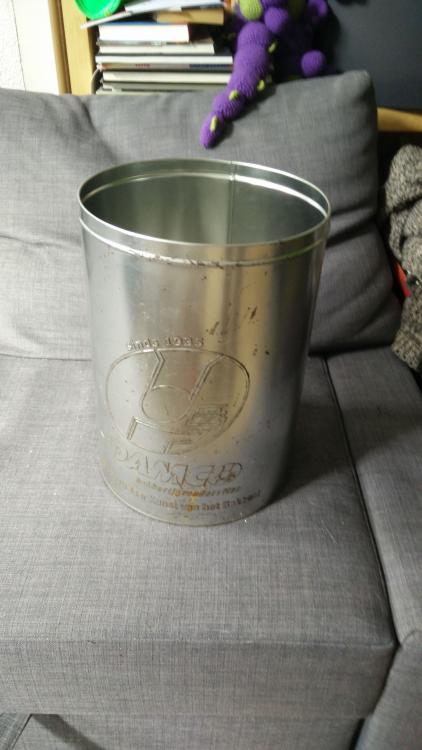
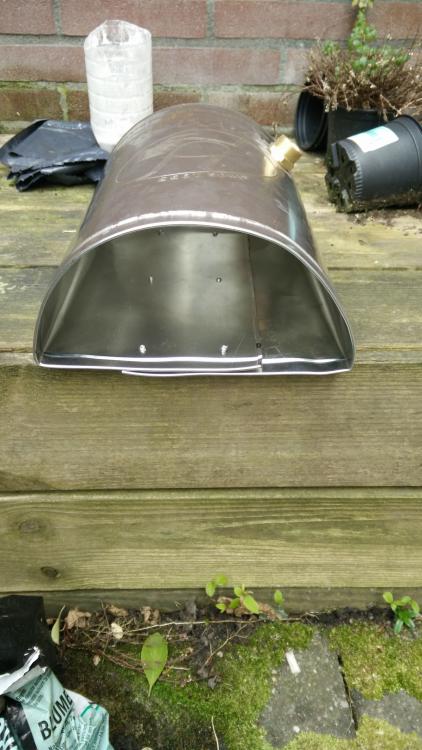
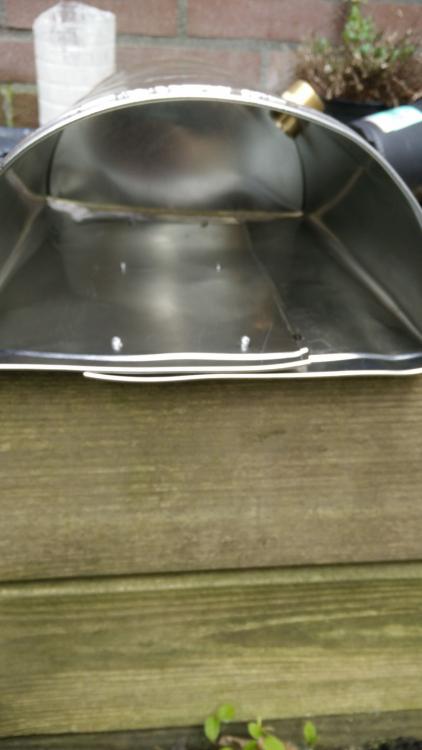
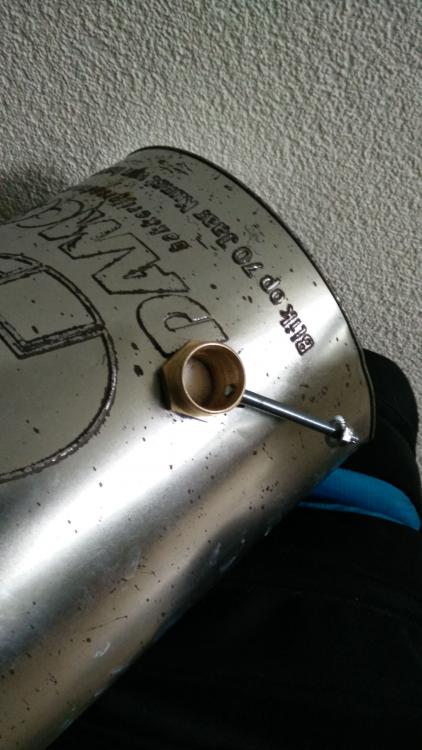
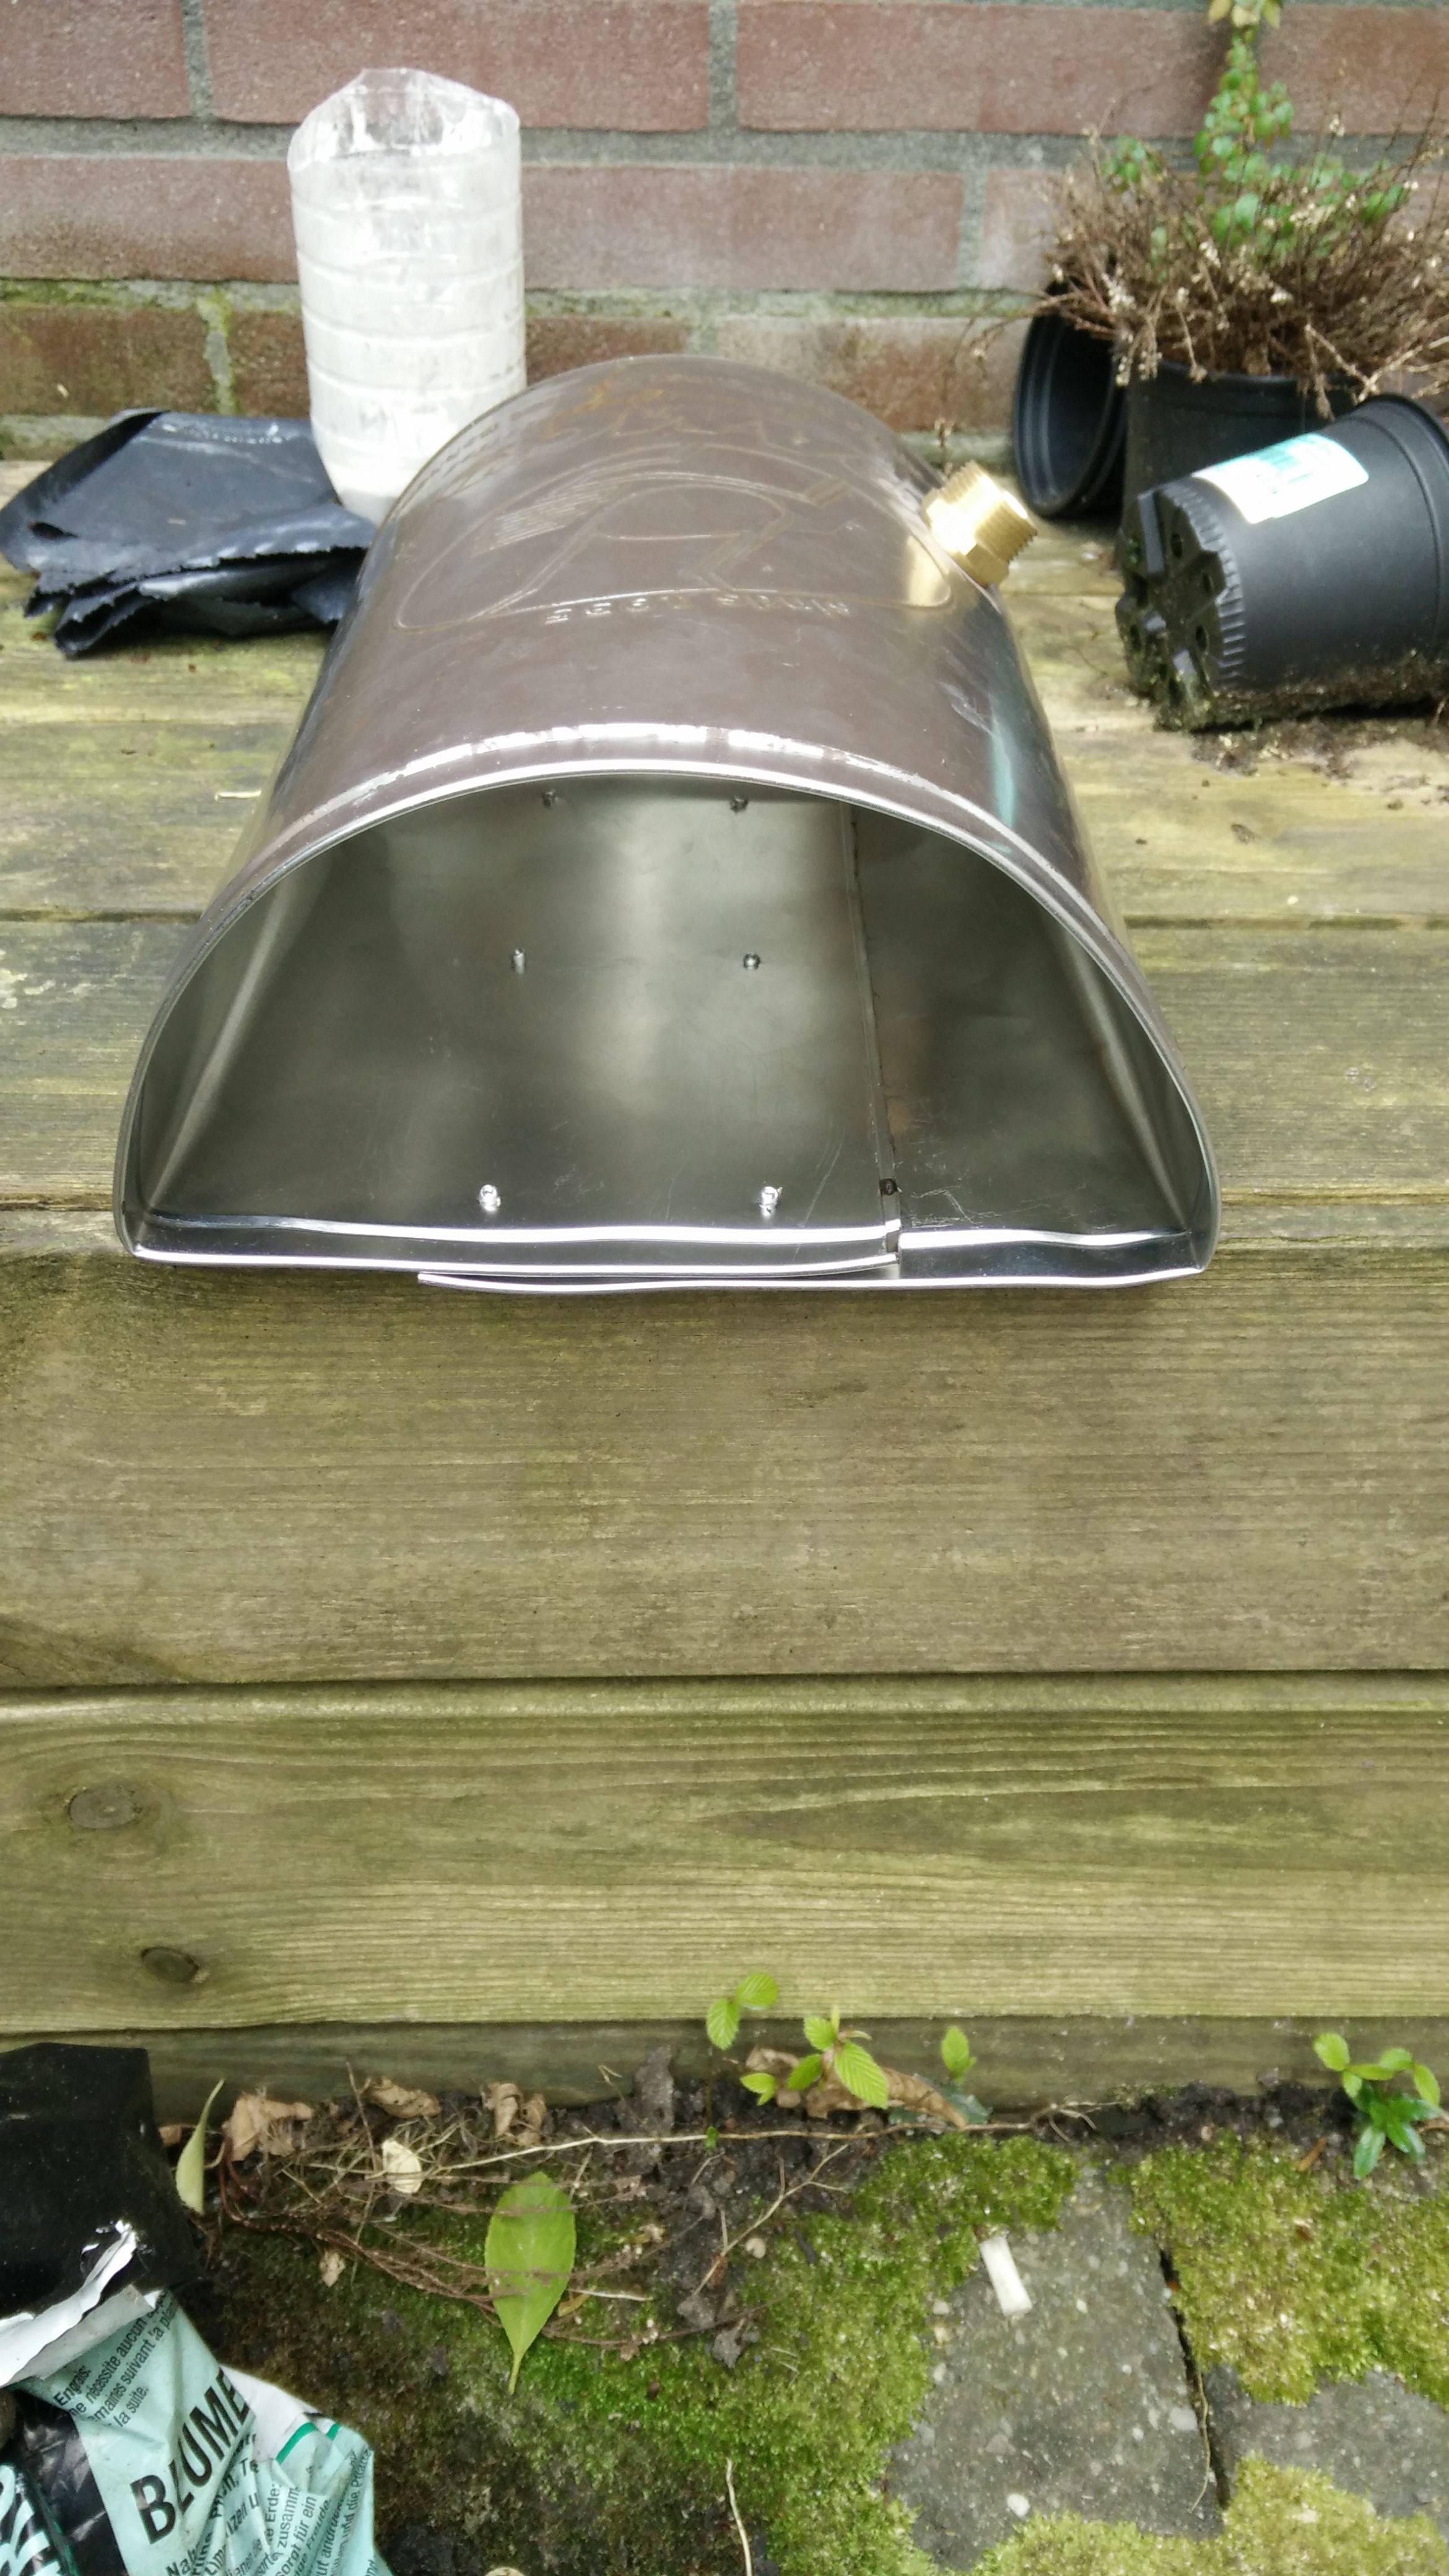
I finally found a container for my ceramic wool. (could only find aluminium stove pipe and chromed stainless steel tubing for awhile). And I wanted to share my progress, see what you think.
The shell is an old flour bucket, 22 CM diameter 30 cm deep. I cut it lengthwise. On the inside I put 2 layers of 2.6 Cm ceramic wool (128 Kg/Cubic M), rigidezed, cured and then kiln washed (rigidizer/water, 75% zirconium silicate, 25% Kaolin clay) after air drying the kiln wash I fired up the forge. After that the inside had set and I applied another layer of the wash.
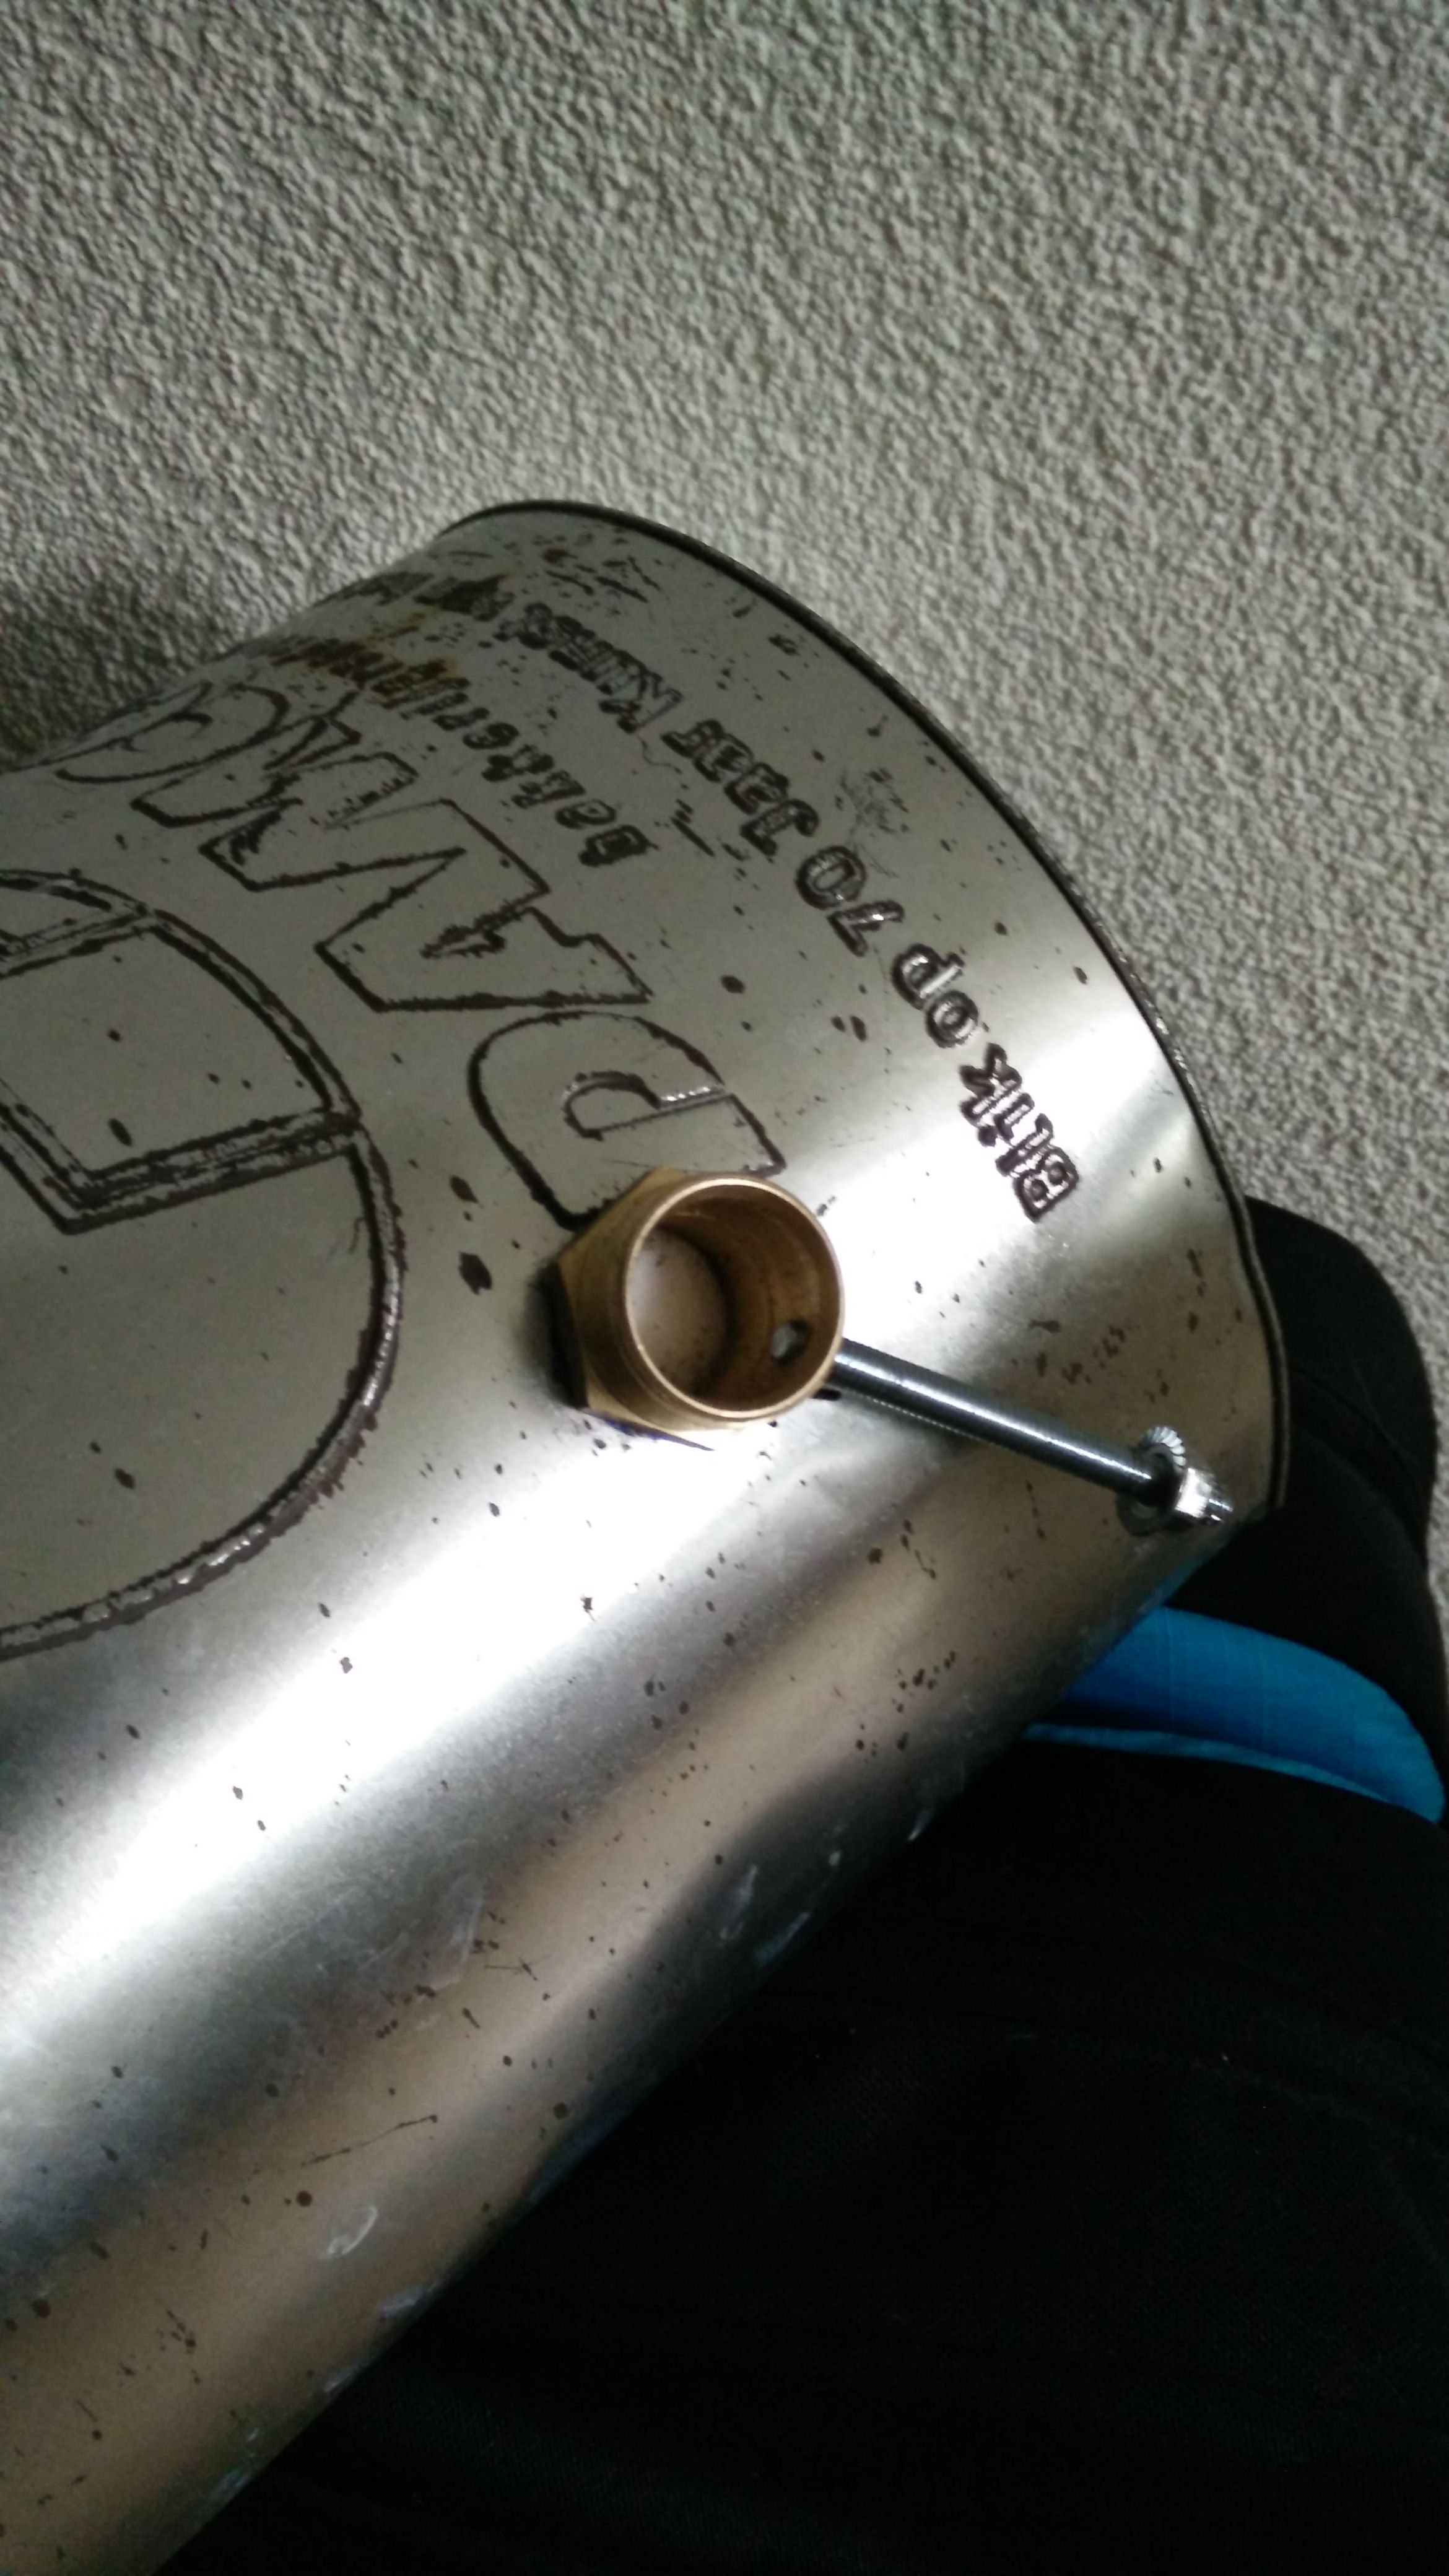
For a floor I use a ceramic kiln shelf coated with the same wash. (which is 1 cm thick, I will replace it with 0.5 cm thick shelf) The burner is the 1/2 inch T burner that I built earlier.
I wanted to go with a vaulted design but ended up with something between vaulted and oval because I needed to fit the 2 layers of wool all around.
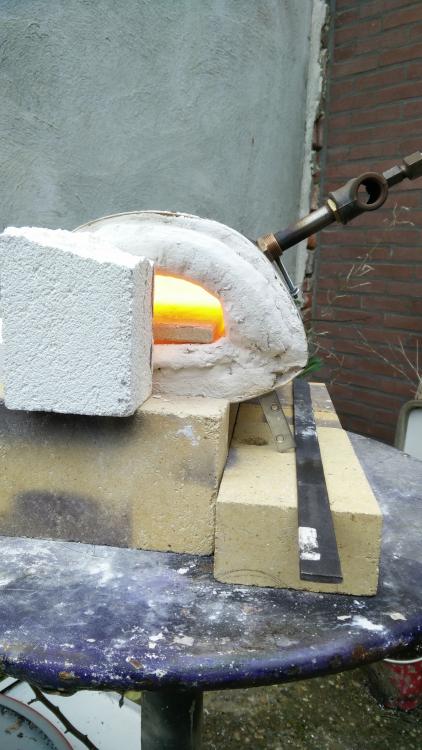
I am still playing around with the burner position, I put it a bit to far back but I should be able to aim it a bit forward still. The first 10 minutes the back 2/3 are even heat and the front a bit cooler. after about 20/30 minutes I can use the front to get to forging temp as well.
Pop rivets are my new favorite fastener.


-
The soft bricks are more sensitive to thermal shock than the hard ones (expanding and shrinking during heating/cooling), most of the prototype forges I built cracked after just a couple of firings. A good kiln wash will lengthen the life of soft brick, in my limited experience, but not by much. Both Frosty and Mike recommended kiln shelf, which I use as a floor now. It holds up much better. I do agree that processing the soft brick is more pleasurable than trying to get a desired shape from the hard ones though :).
-
I have no experience with ribbon burners, or much at all. Still the answer to your question will depend on the size and shape of you forge. ( volume, depth, hight, lining, etc. ) I am relatively new to forges and burners in general so I am curious about the answers in this thread.
-
My thoughts and my wish for strength and luck for Mike and Kathy.
-
@Exo313 I use a .6 mm (.023) tip in the 1/2 T burner. See http://www.iforgeiron.com/topic/45410-first-forge-first-post-forge-not-heating-taking-a-long-time/
I made a couple of mistakes which you can read all about. There's pictures, too. I managed to get it to work in the end with everybody's help.
-
Orange: Before you do anything; address Frosty's concerns first.
Frosty: it is more the material than the size. Black iron is used less here so it is usually leftovers you find(galvanized you can find a bit more but not much). I could have used brass or coper which are more easily available but I wanted to stick to the plans. I am at or below sea level (in funny country) l, I started out with the mig tip just over half of the air intake and ended up with just a little less then half.
jcornell I wanted to just use a ream, hard to get the ones that work for iron and are affordable. To again prove your point :).
-
jcornell makes a good point.
I ran into the same issue with my 1/2 burner. Could not get the reducing T. I used files and then a rotary tool to smooth the transition between bushing and burner tube.

-
AdamG, that is correct. I use this to find out if a remote control is infra red or radio frequent. Try it out, take pic of the remote while pushing the buttons. Ambient light will influence where your camera focusses (and it's settings) so take that into account. It is hard to get a picture of the inside of a forge with no ambient light. (I have not yet mastered this, even knowing how it works. see other threads for failures
)
-
I would like to thank all of you for you input on my project. It has been fun and this forum has given me a wealth of info for future projects. Experienced my first frozen cylinder yesterday, which I was kind of waiting for since it is only 1 KG (2.2 pounds). Gas has now run out but I managed to taper and bevel a piece of mystery steel, it would be nice if I can harden it, if not no big deal I need the practice. Thanks again and until next time.
-
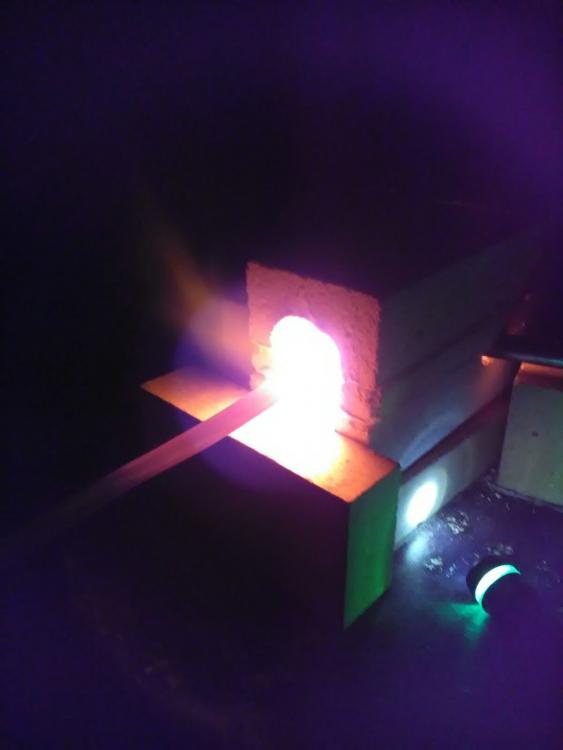
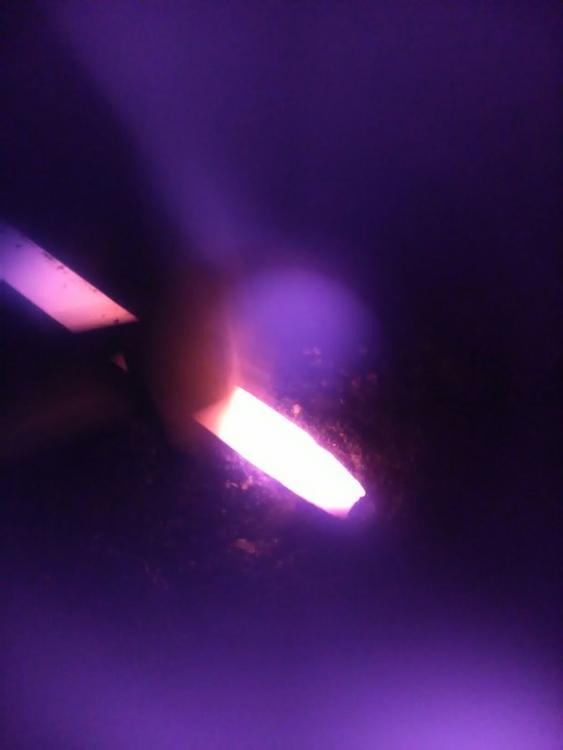
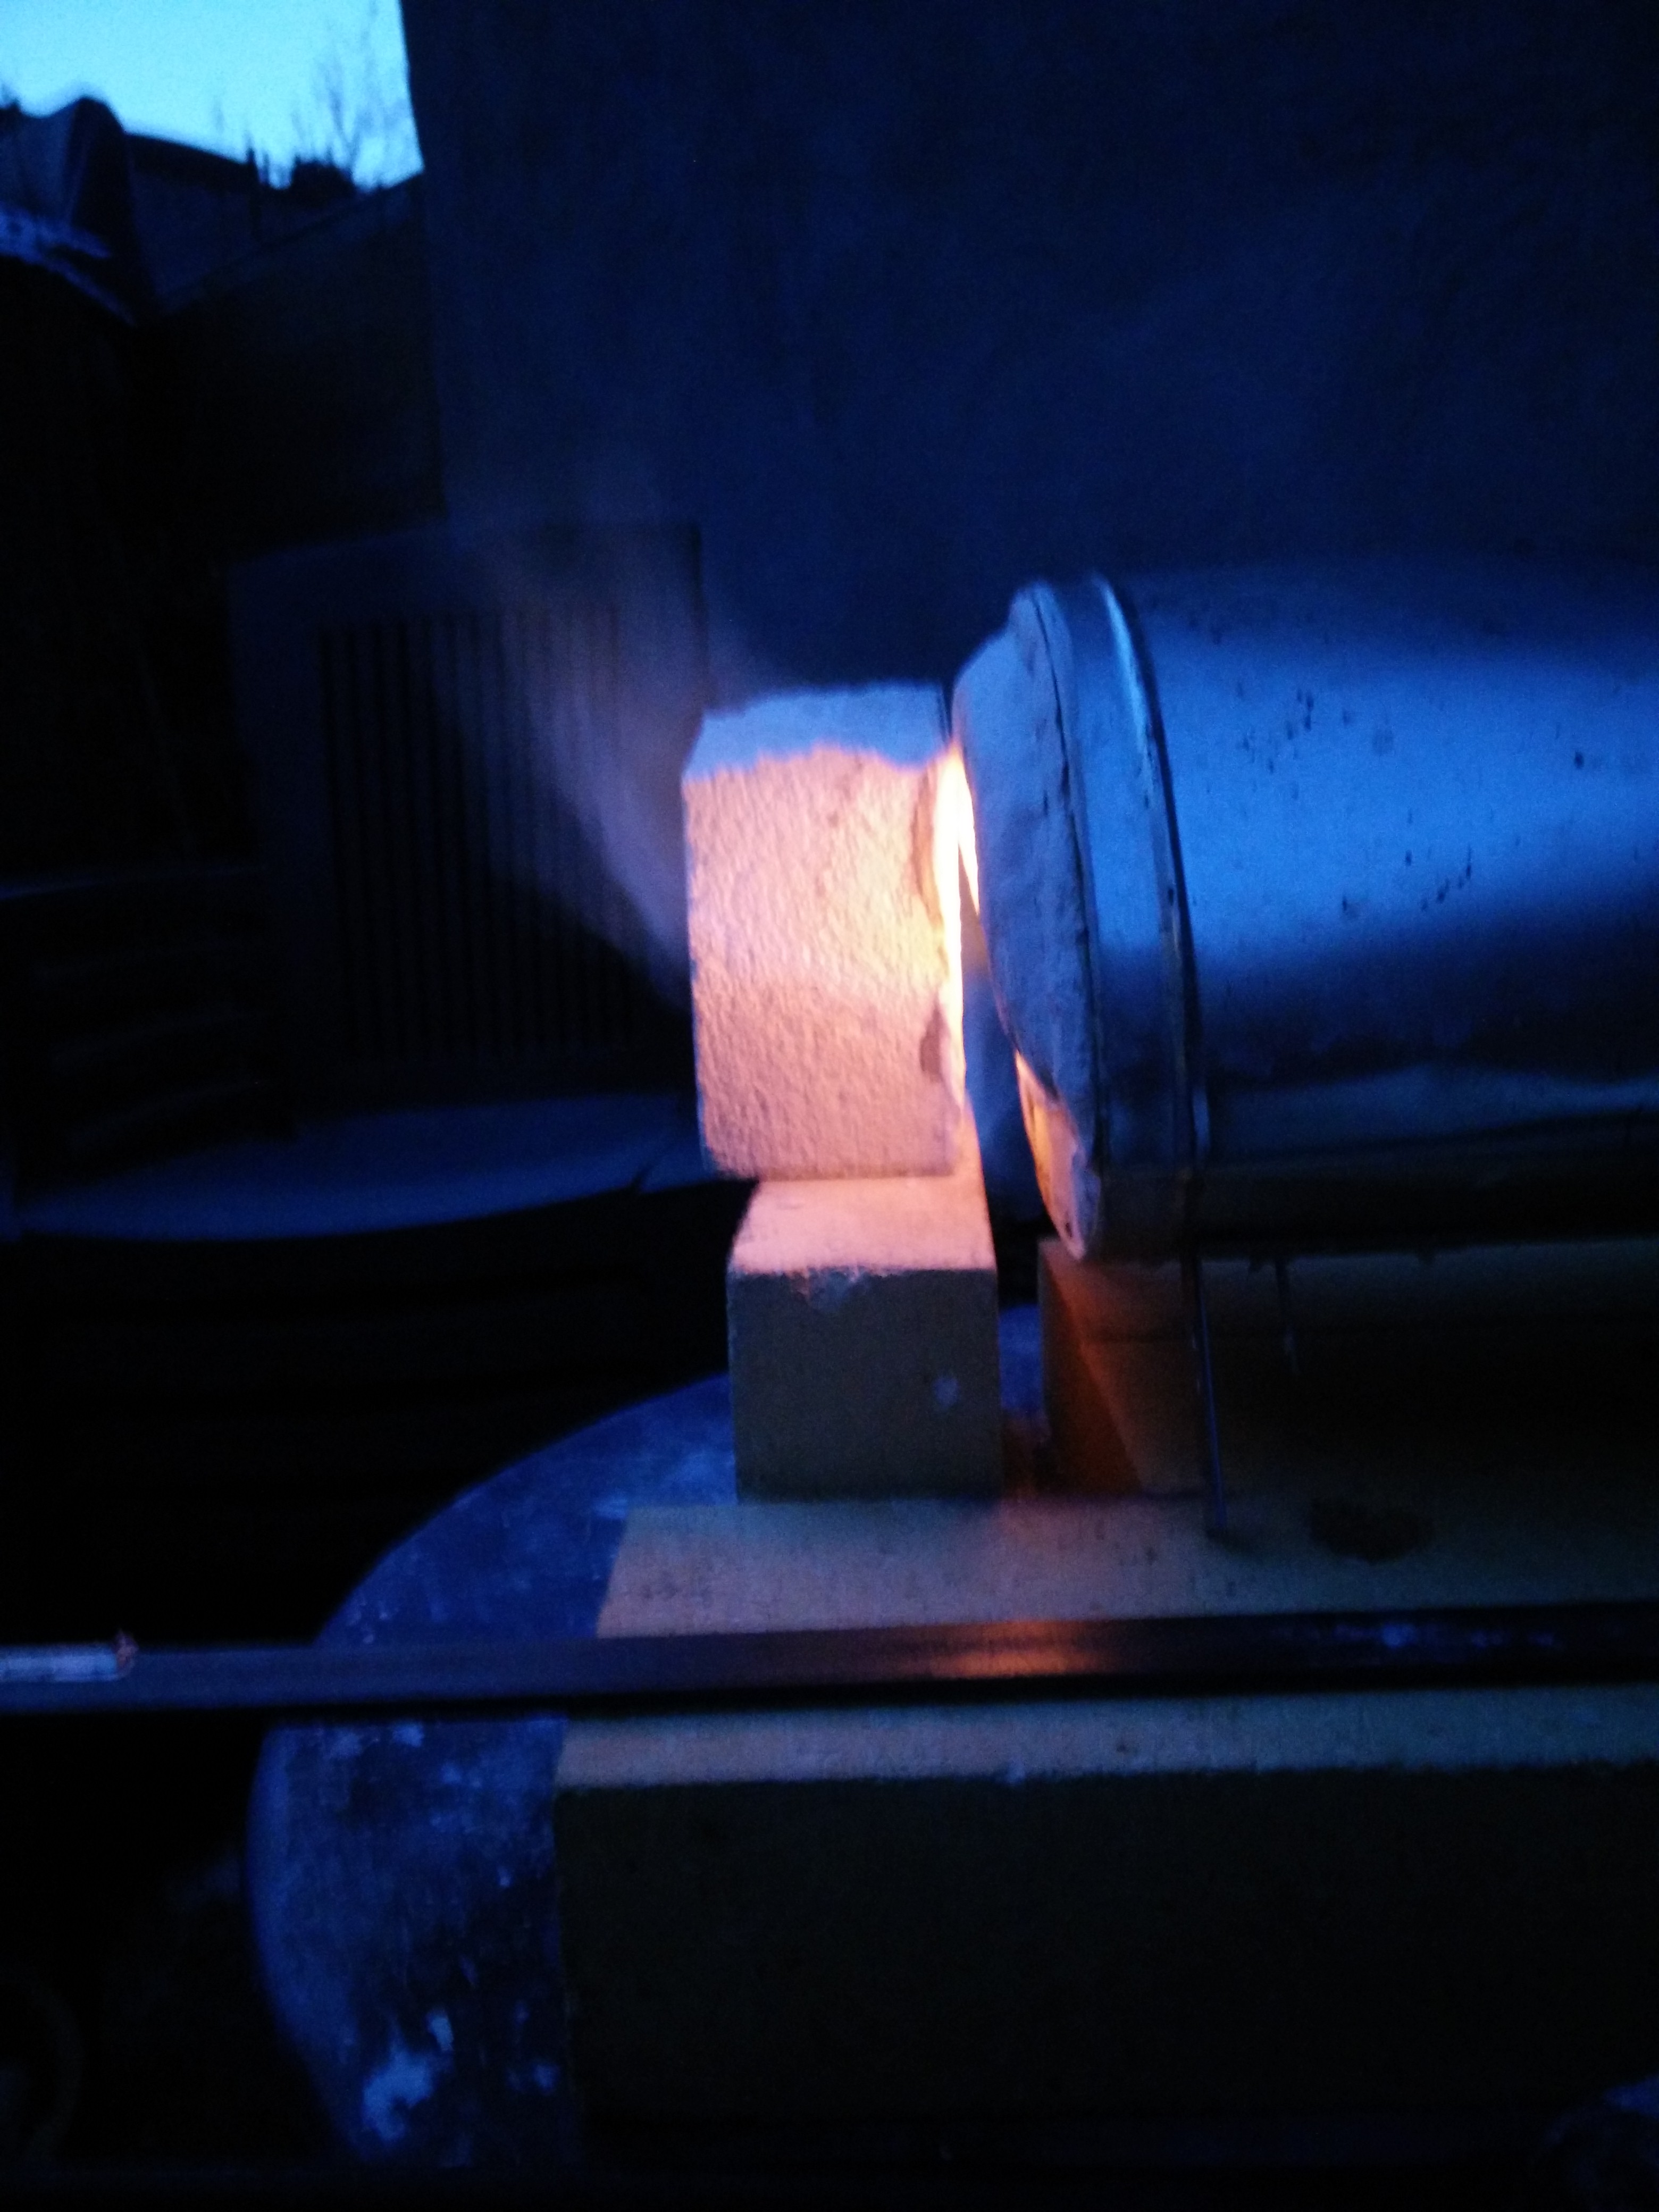
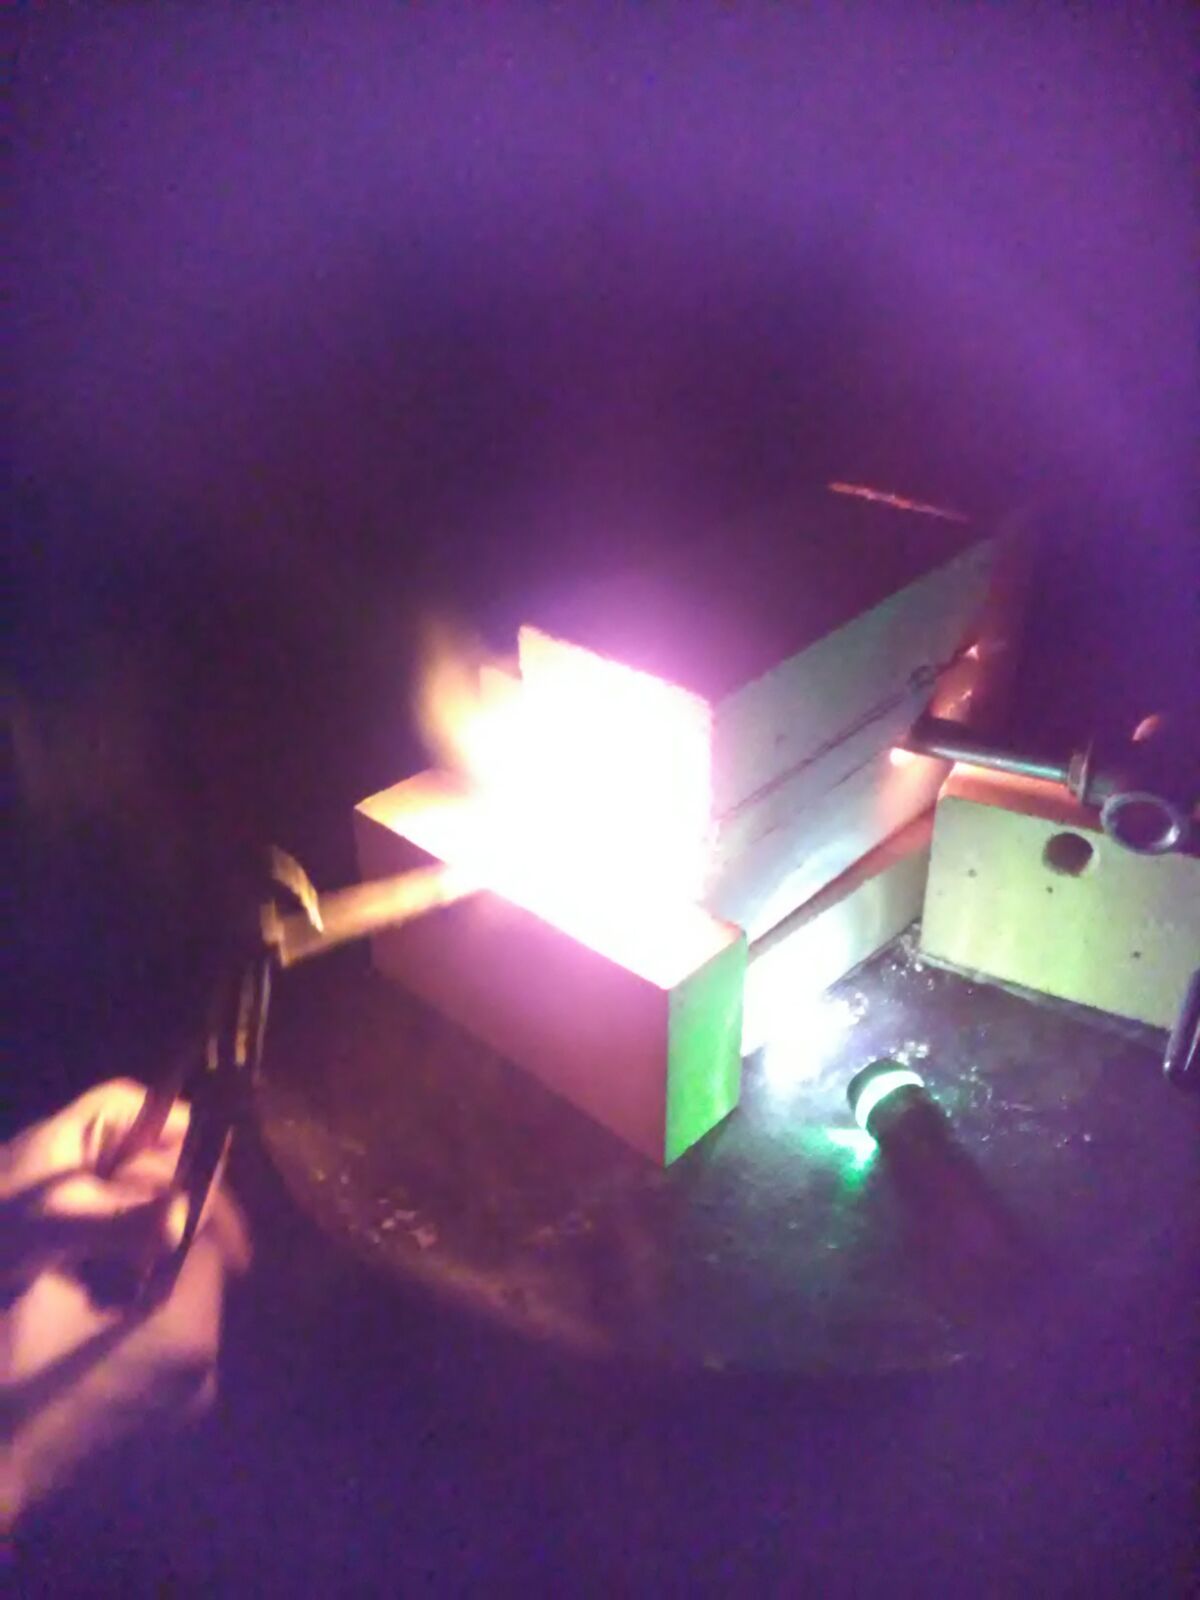
So....... Enlarging the chamber works
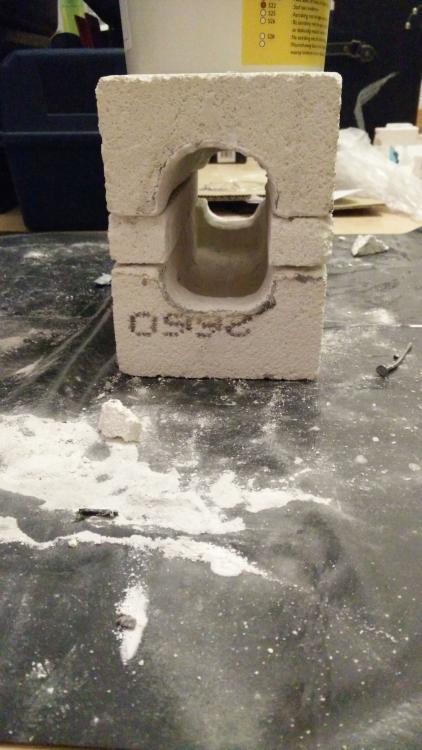
The dragons breath is a little less rich, chamber heats evenly so that is ok. I managed to make something square into a point. The kiln wash has prevented these bricks from cracking. ( I am sure they will eventually) And makes it heat up a bit faster. I'm sure this forge is going to disintegrate soon, now the question is; should I get more fire bricks or build something else. (next month's question, I think in a different thread). Pretty happy to be hammering hot metal for now, Pictures:


-
I cut the head of a nail, put that in my drill and pre-drilled through the spacer and the top half brick. (3 holes on each side of the chamber). I than used same size nails as pin. coated them with the fireplace cement to make them stick. I'll put on an extra coat of kiln wash in a bit. For now I like to be able to take the 2 halves apart, that's why I attached the spacer to the top half only.
-
@timgunn1962 Thanks, sounds so obvious now that you point it out.
-
Just finished relineing the bricks with Kaolin/Zirconium silicate. Curing now. I will cut the slices tonight. Just trying to think if a way to keep thinks together. Wire works, and it dos not have to be pretty, but cementing the strips to the lower half of the chamber seems like a good idea, too. I de have some fireplace cement, that has quite a low heat rating though. Could try mixing in some kaolin. Just thinking out loud I guess. I'll keep you all updated.
-
I like the idea of making a spacer. Will be easier to hold together as well. I have one cracked brick that I can cut up for the job. The forge-bricks are showing cracks where the flame hits the wall, I'll reapply the kiln was after putting in the spacers. (Lost the kiln wash when enlarging the chamber.) Does anybody have experience making a rudimentary cement with the powder left over after grinding insulating brick? (I saved some) Just to keep things together.
-
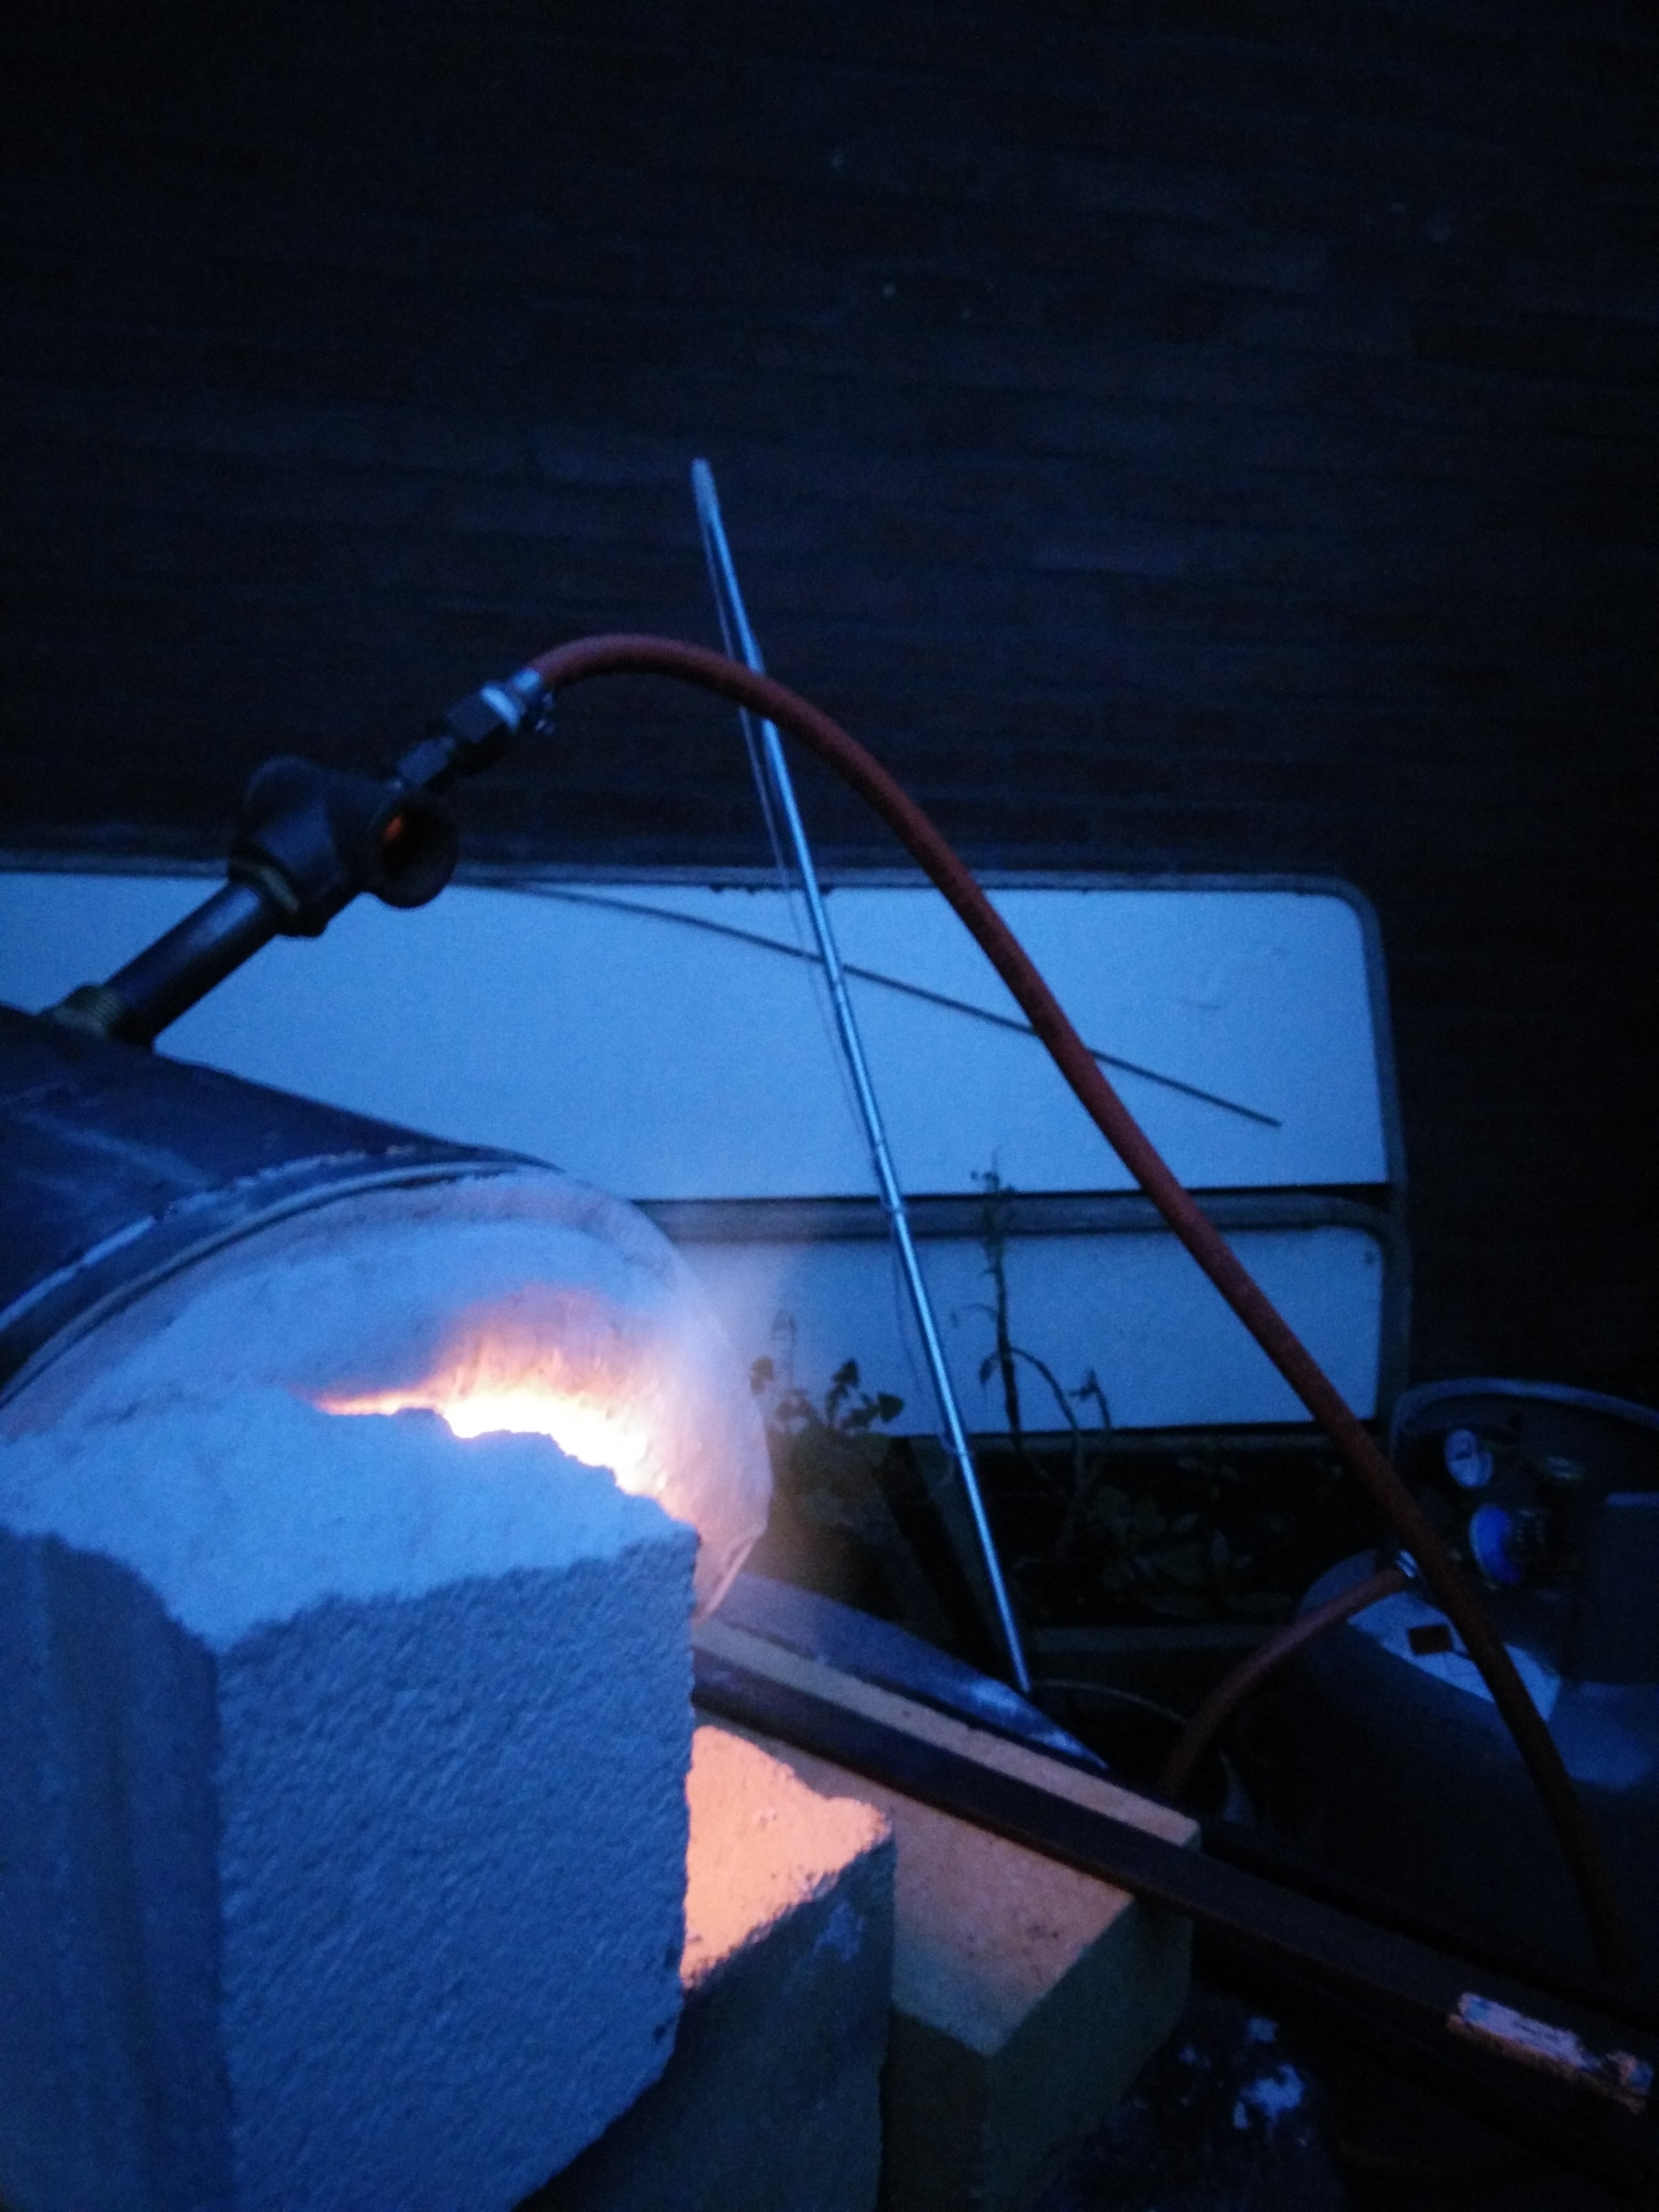
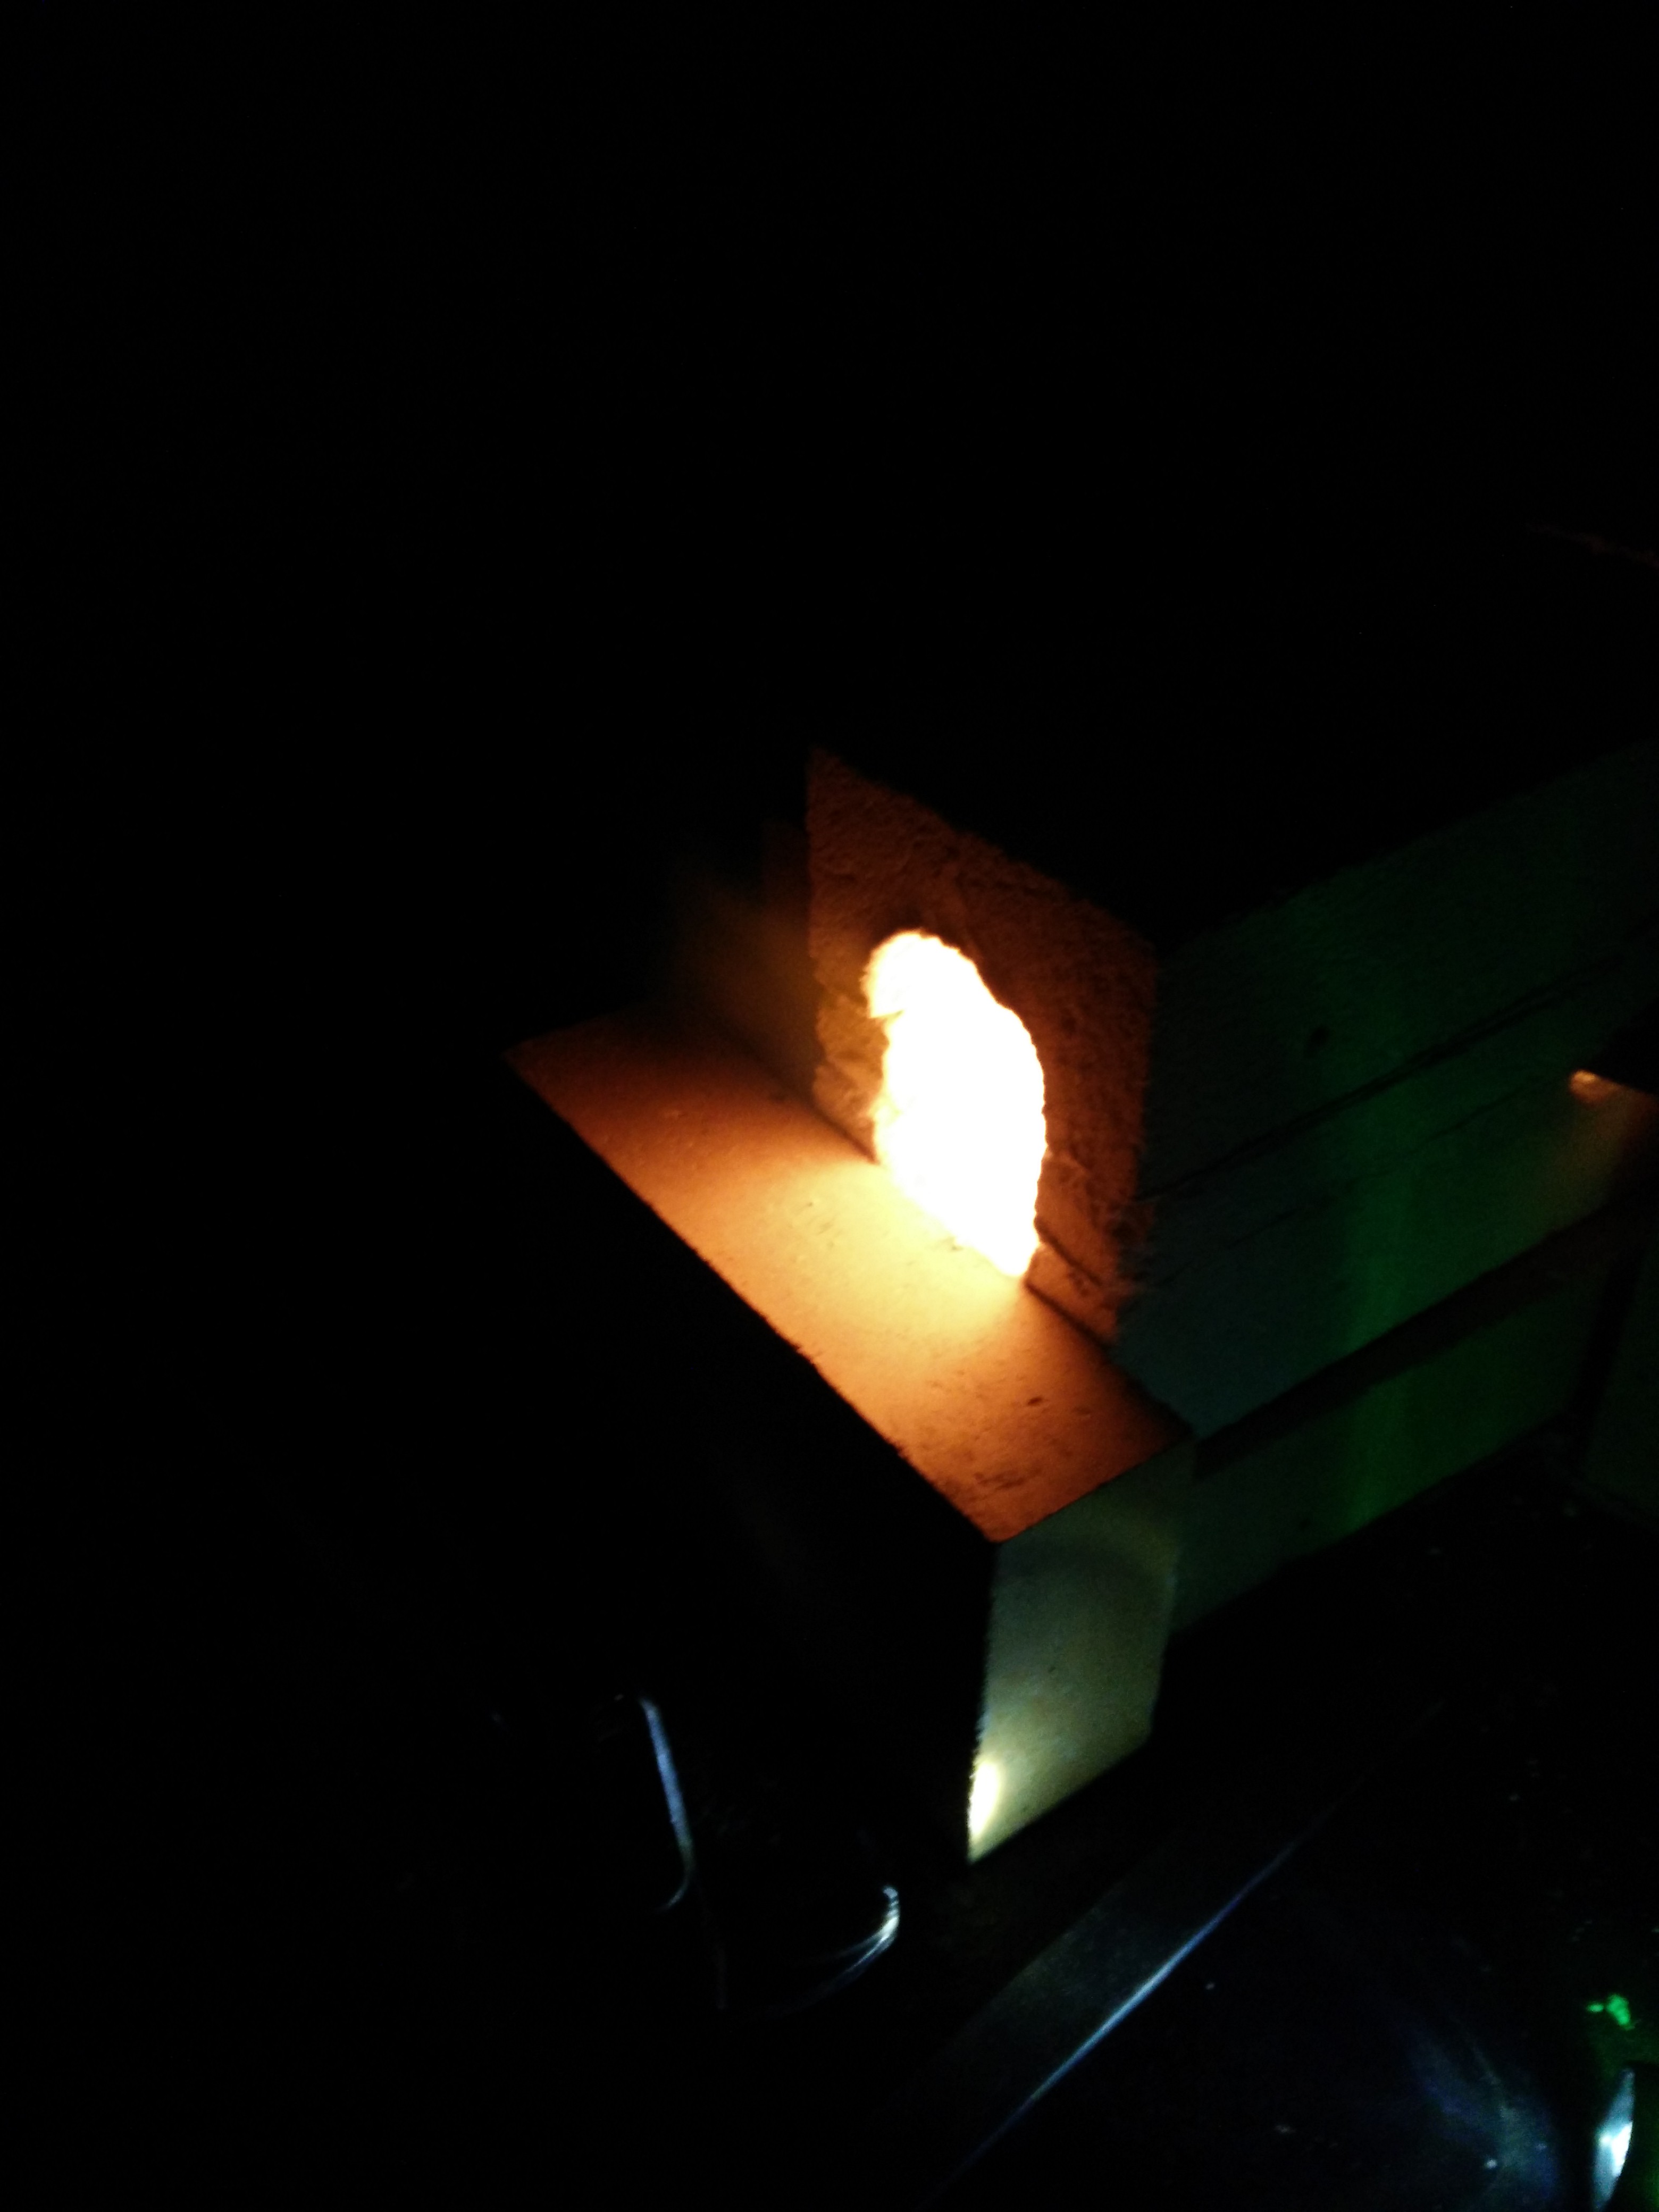
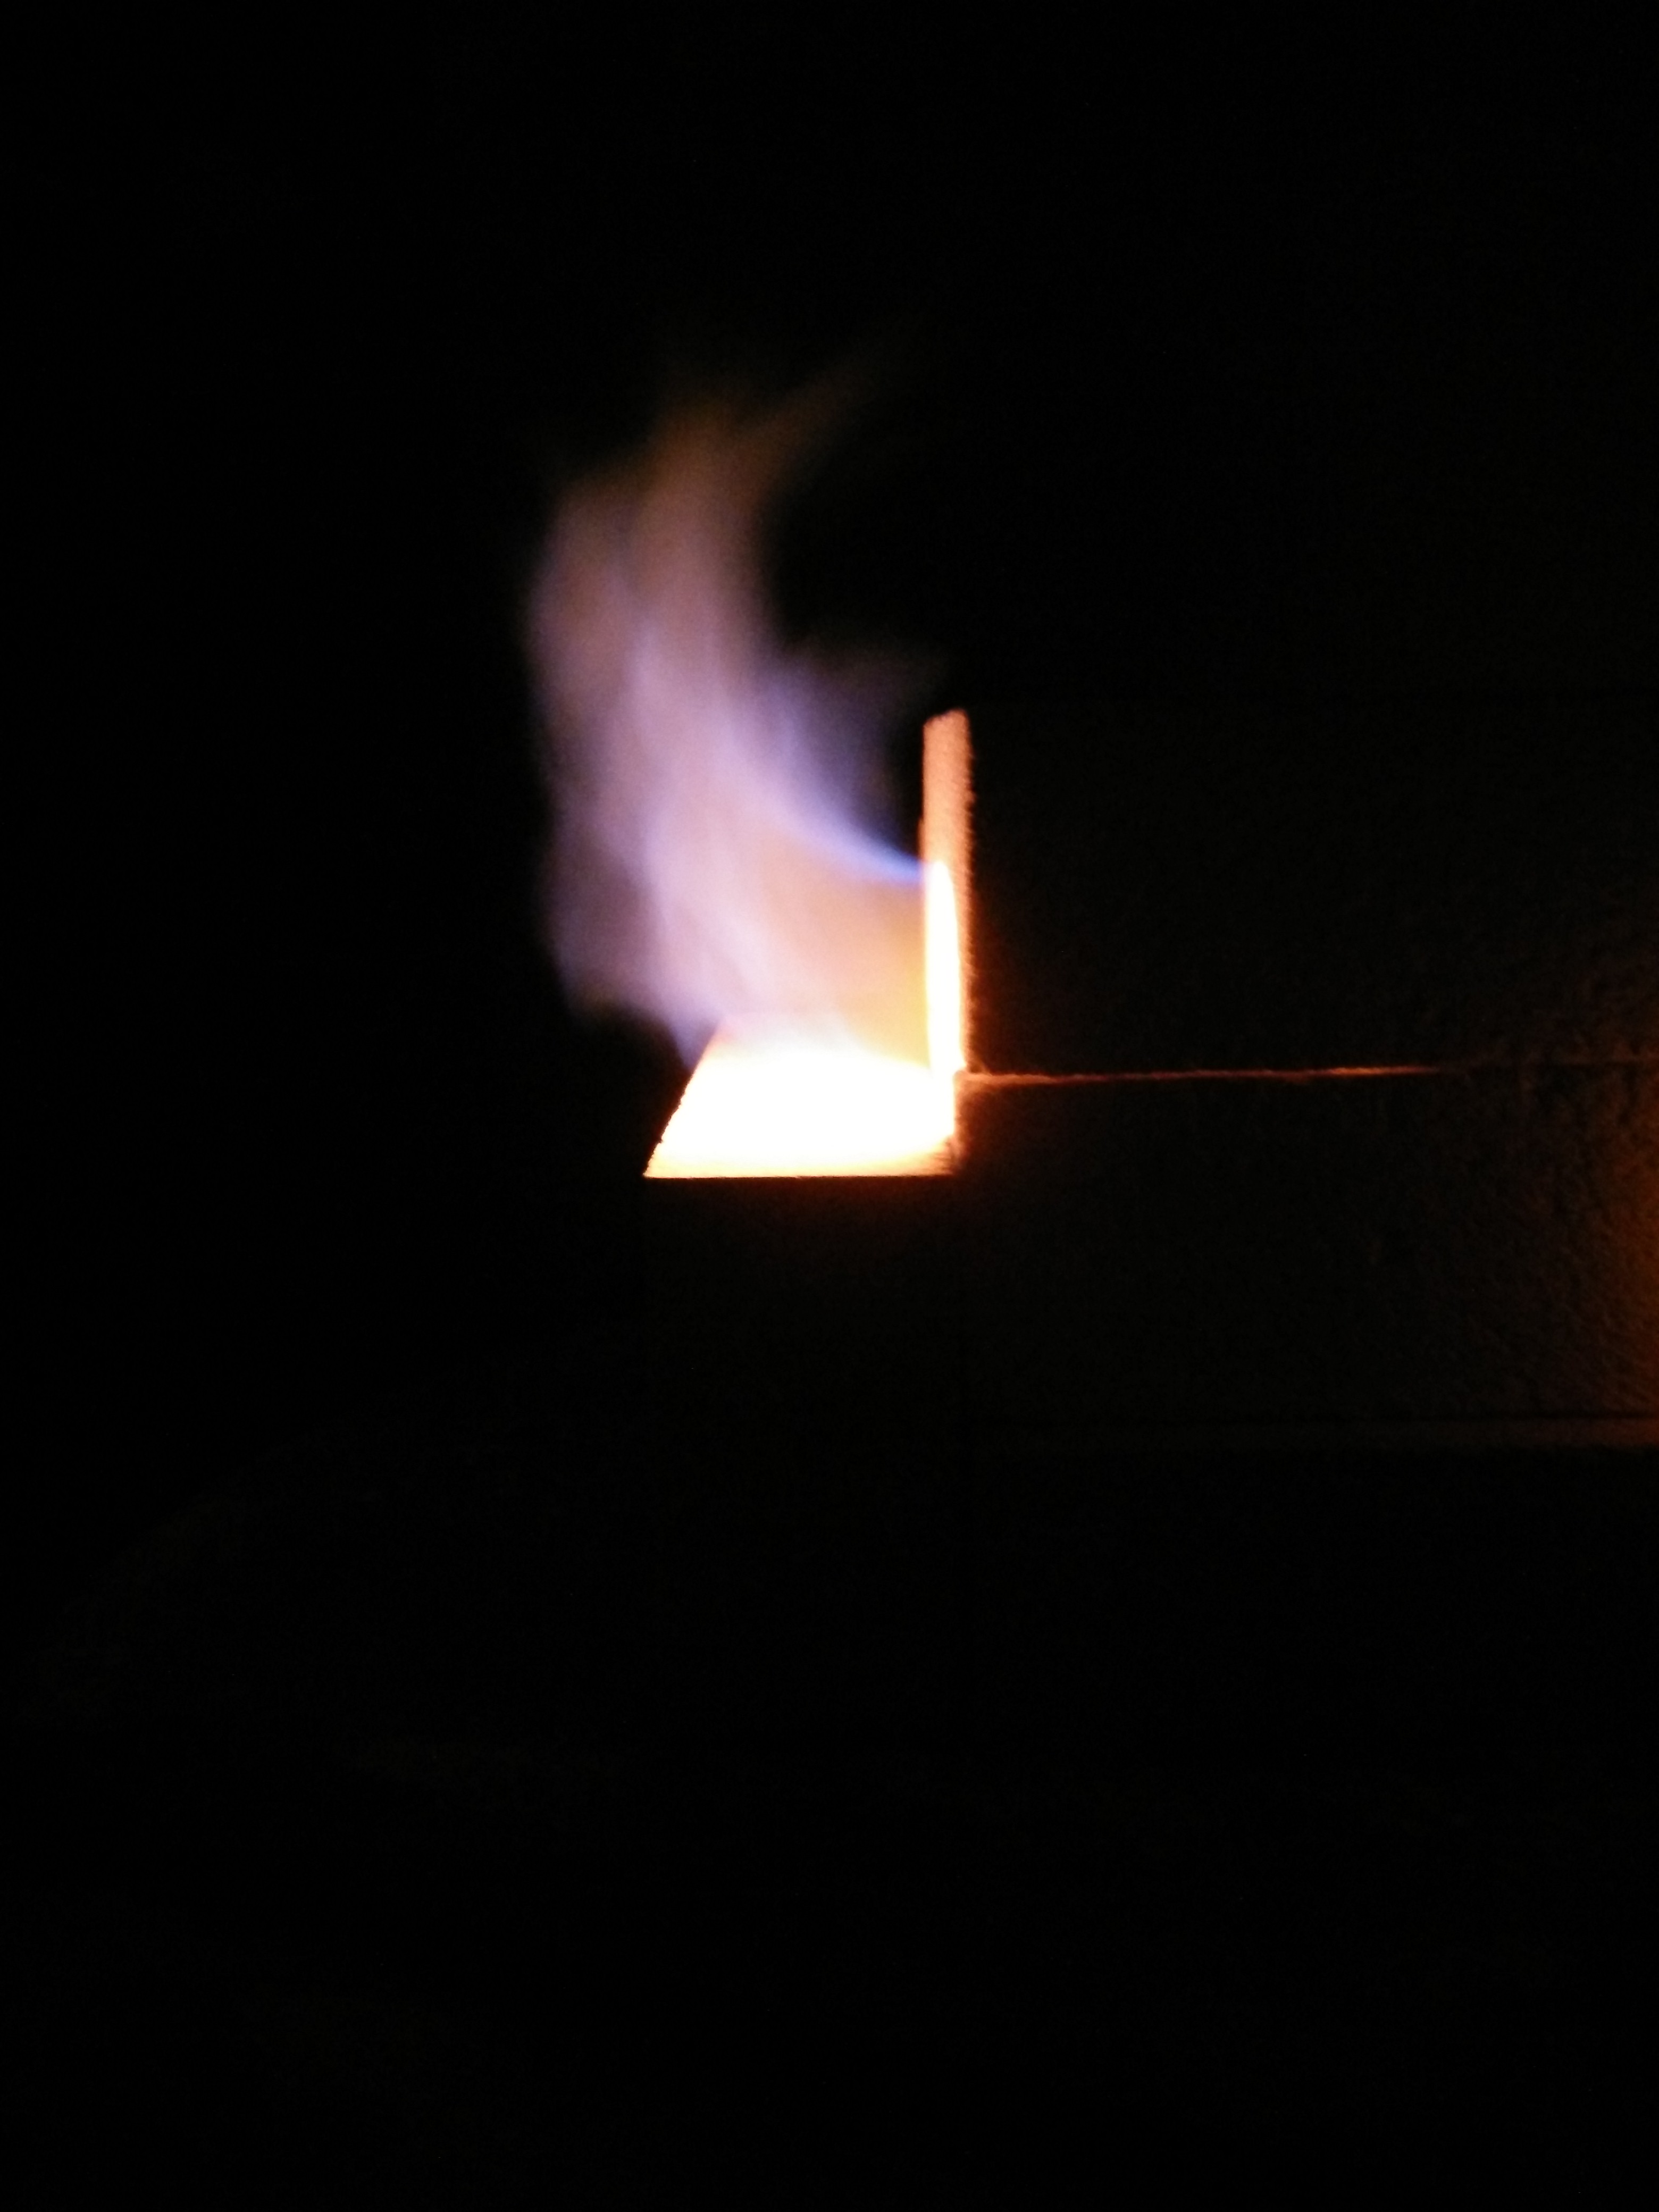
To illustrate the problem I made some pictures to the best of my ability :). This is after enlarging the chamber. The front opening is also larger now. I am not sure how to fix this. (I like pictures of flame though) I still have some brick left, Might be worth checking if making the chamber a bit longer will work. (I do not want to dig any deeper into the 2 bricks)

-
rjs: I used the smallest tip available (0.6mm). Running at about 0.5 to 0.6 bar seems to result in the most stable flame. (around 7 to 8 psi)
Frosty: I had a file and went to the rotary tool when I got lazy. No excuse to buy a new tool, unfortunately :).
I think for now I will re stack the hard brick until I get a good result, then adjust the 2 brick to have that volume of chamber. Funny how you can start solving the to little burner issue an then end up with a little to much.
-
I ground the end of the 1/2 nipple to flare into the fitting (I might grind away the inner thread if needed):
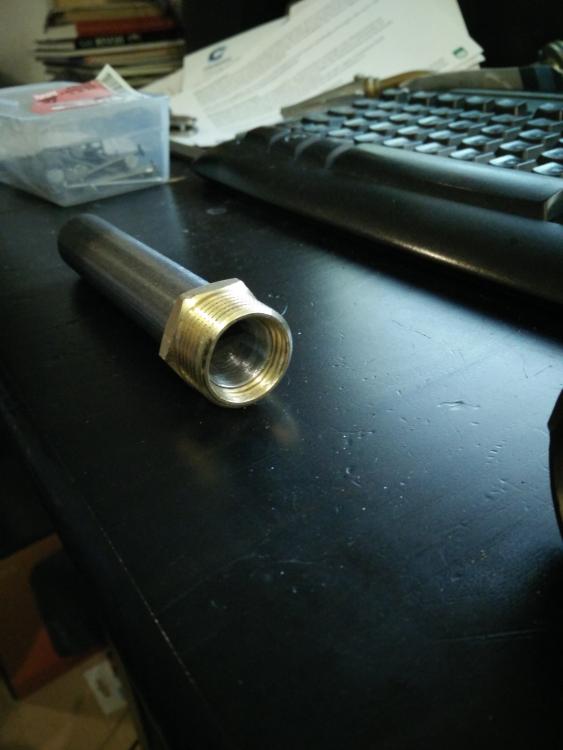
One test burn for tuning (I still need to figure out the ideal pressure):
When I run the burner in the 2 brick forge I get a lot of blue/orange flame from the front/back. Turning down the pressure eleviates this somewhat but at some point I start getting less heat. To be continued. Tips welcome, as always
-
Frosty, I do not have a pipe cutter. I can think of a couple of ways to get the same results. Or get a pipe cutter, which I need anyway. Would it make any difference to have flaring on the other end as well? Or would this have a negative effect on the flame?
-
While I Wait for the weekend, and to have my tank refilled I thought I might share some pictures. (thanks ,Mike, for encouraging me to share )
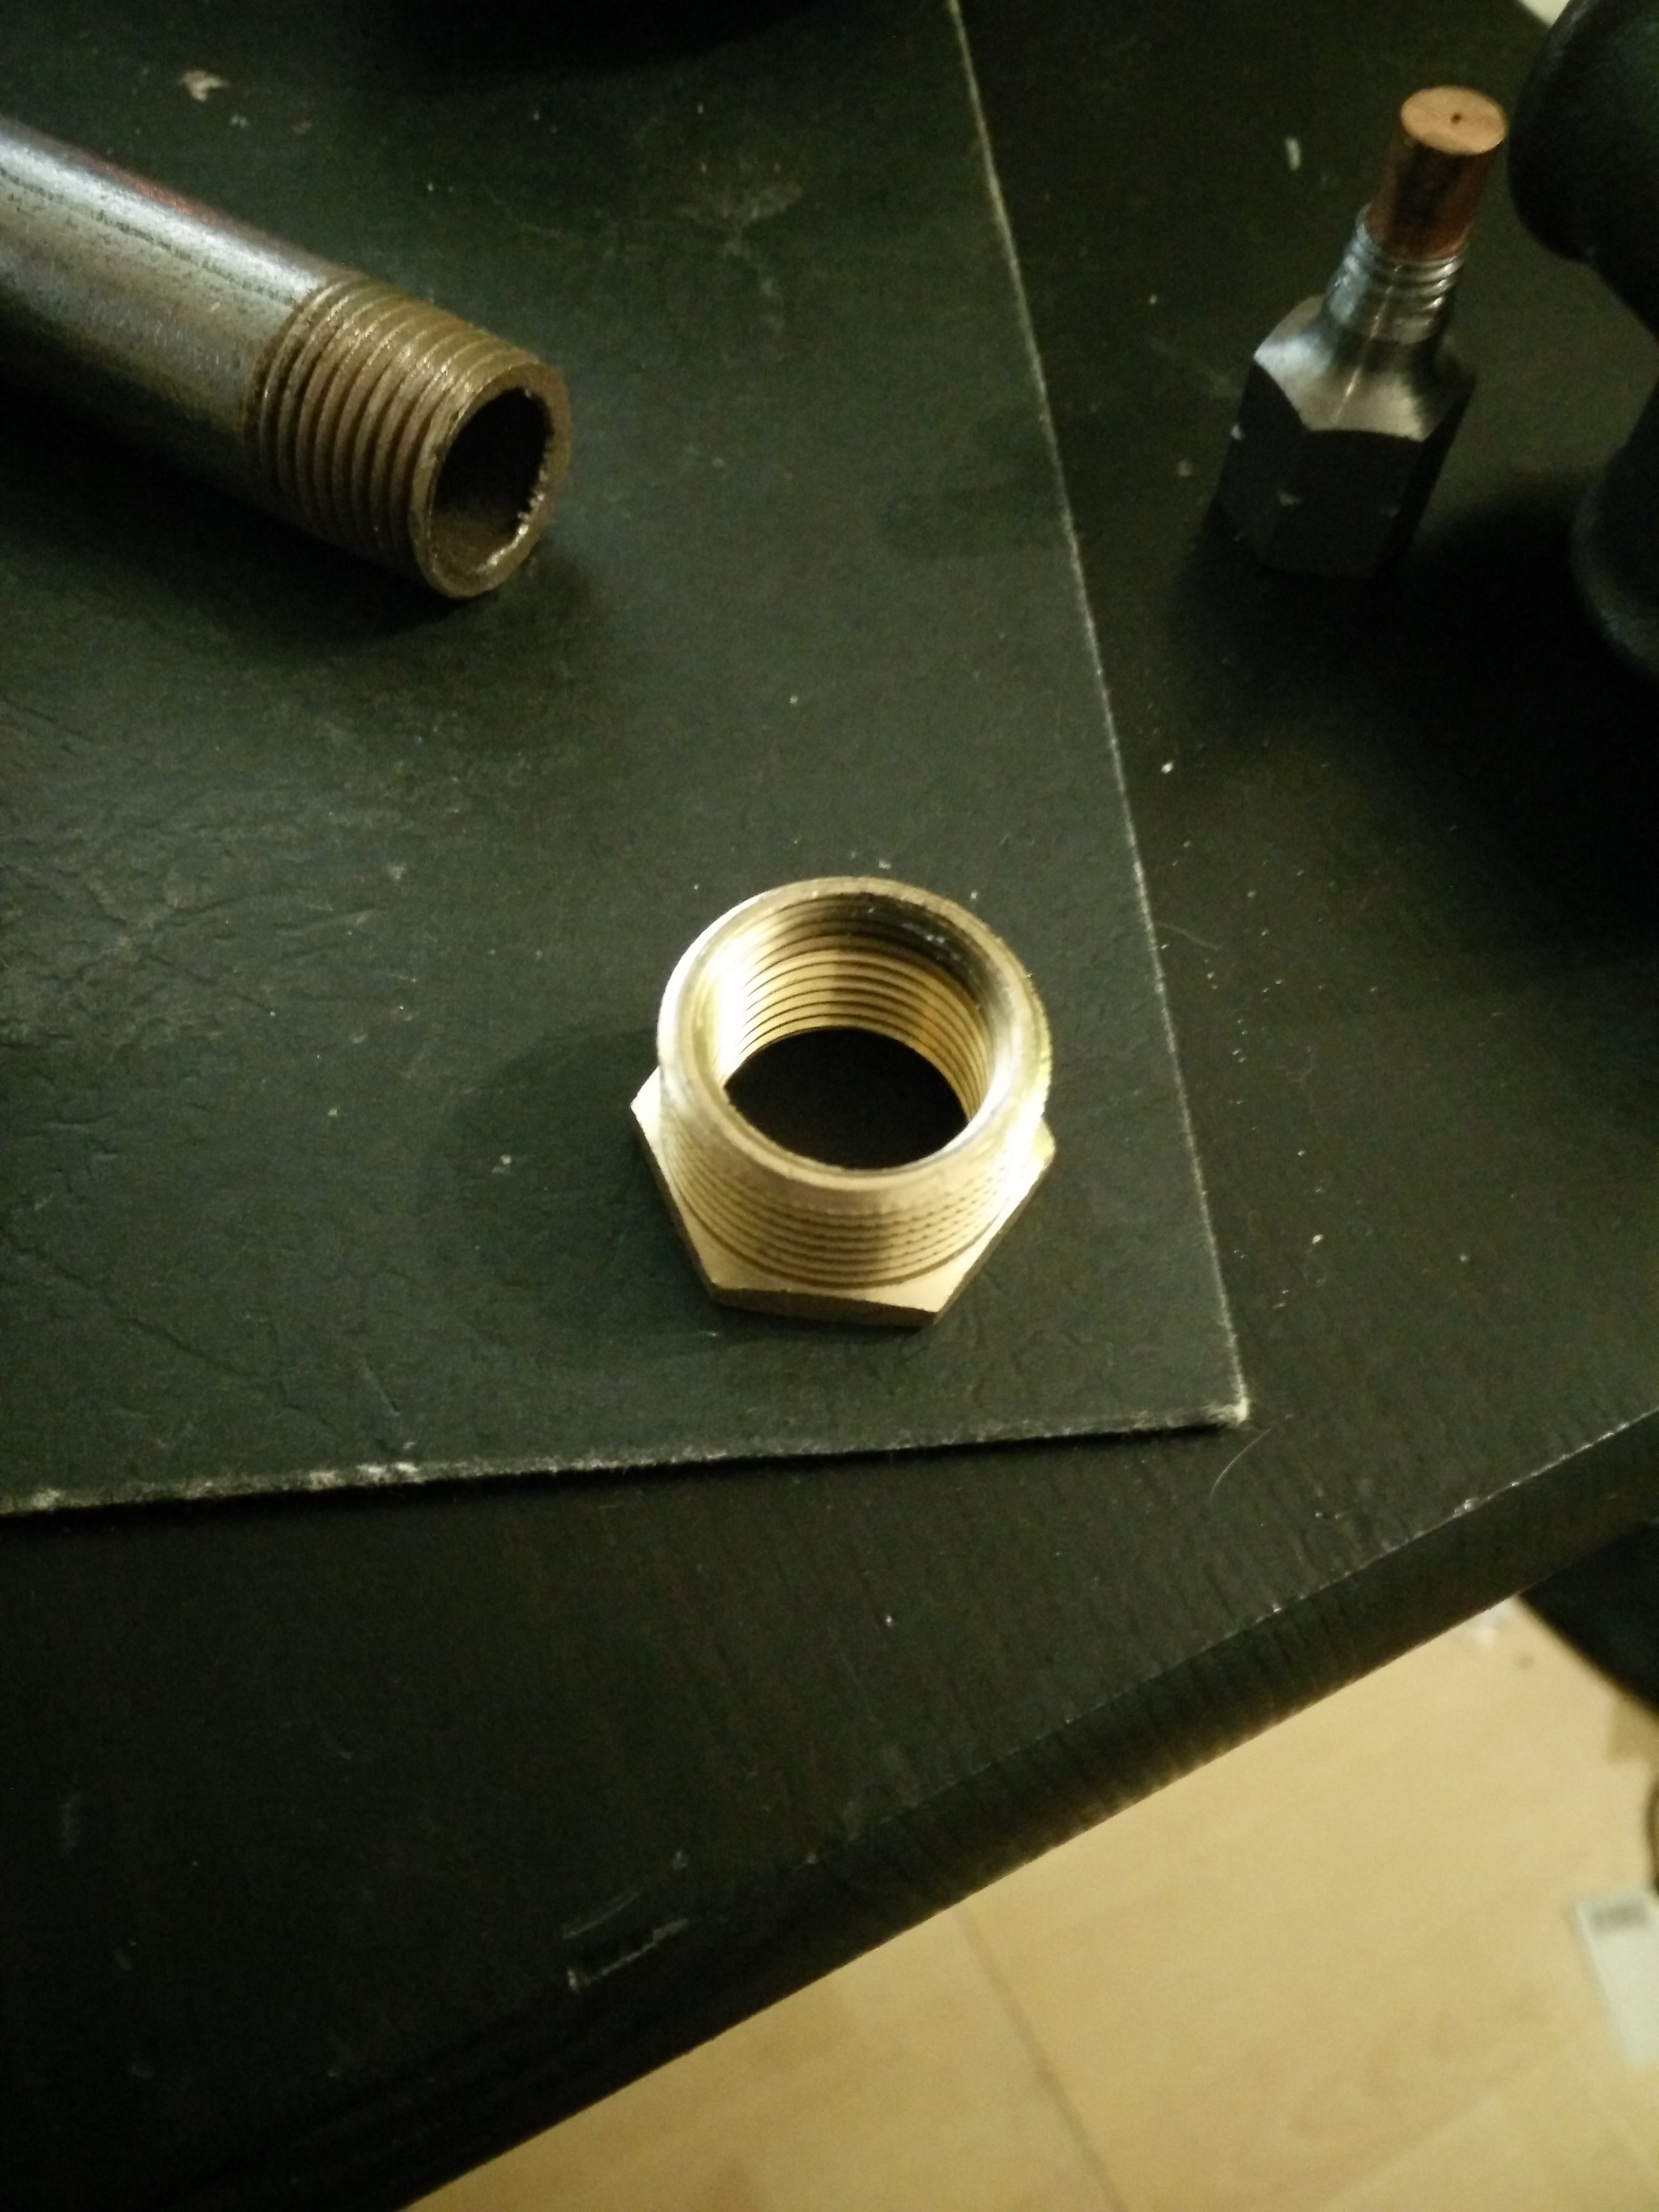
I could only find a 3/4 all around T for some reason. And the reducing fitting I got at first was causing issues while running the burner. (sputtering, disrupted flow/mixing) I found this one that seems to perform better:
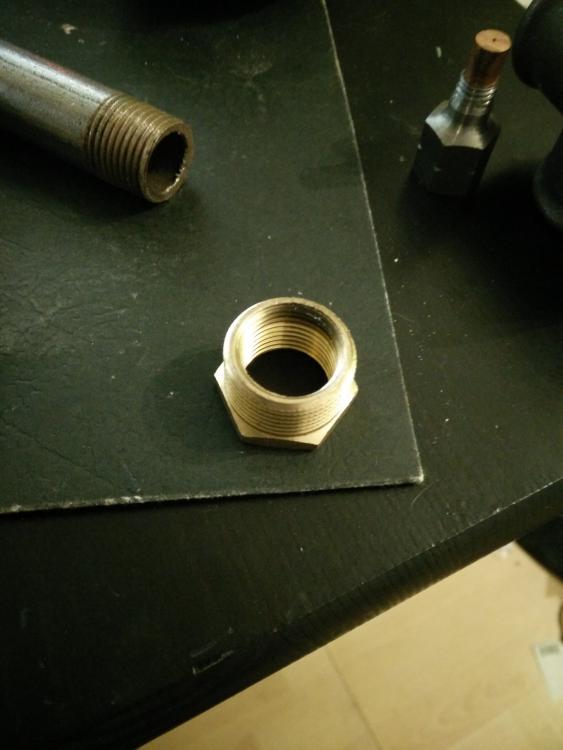
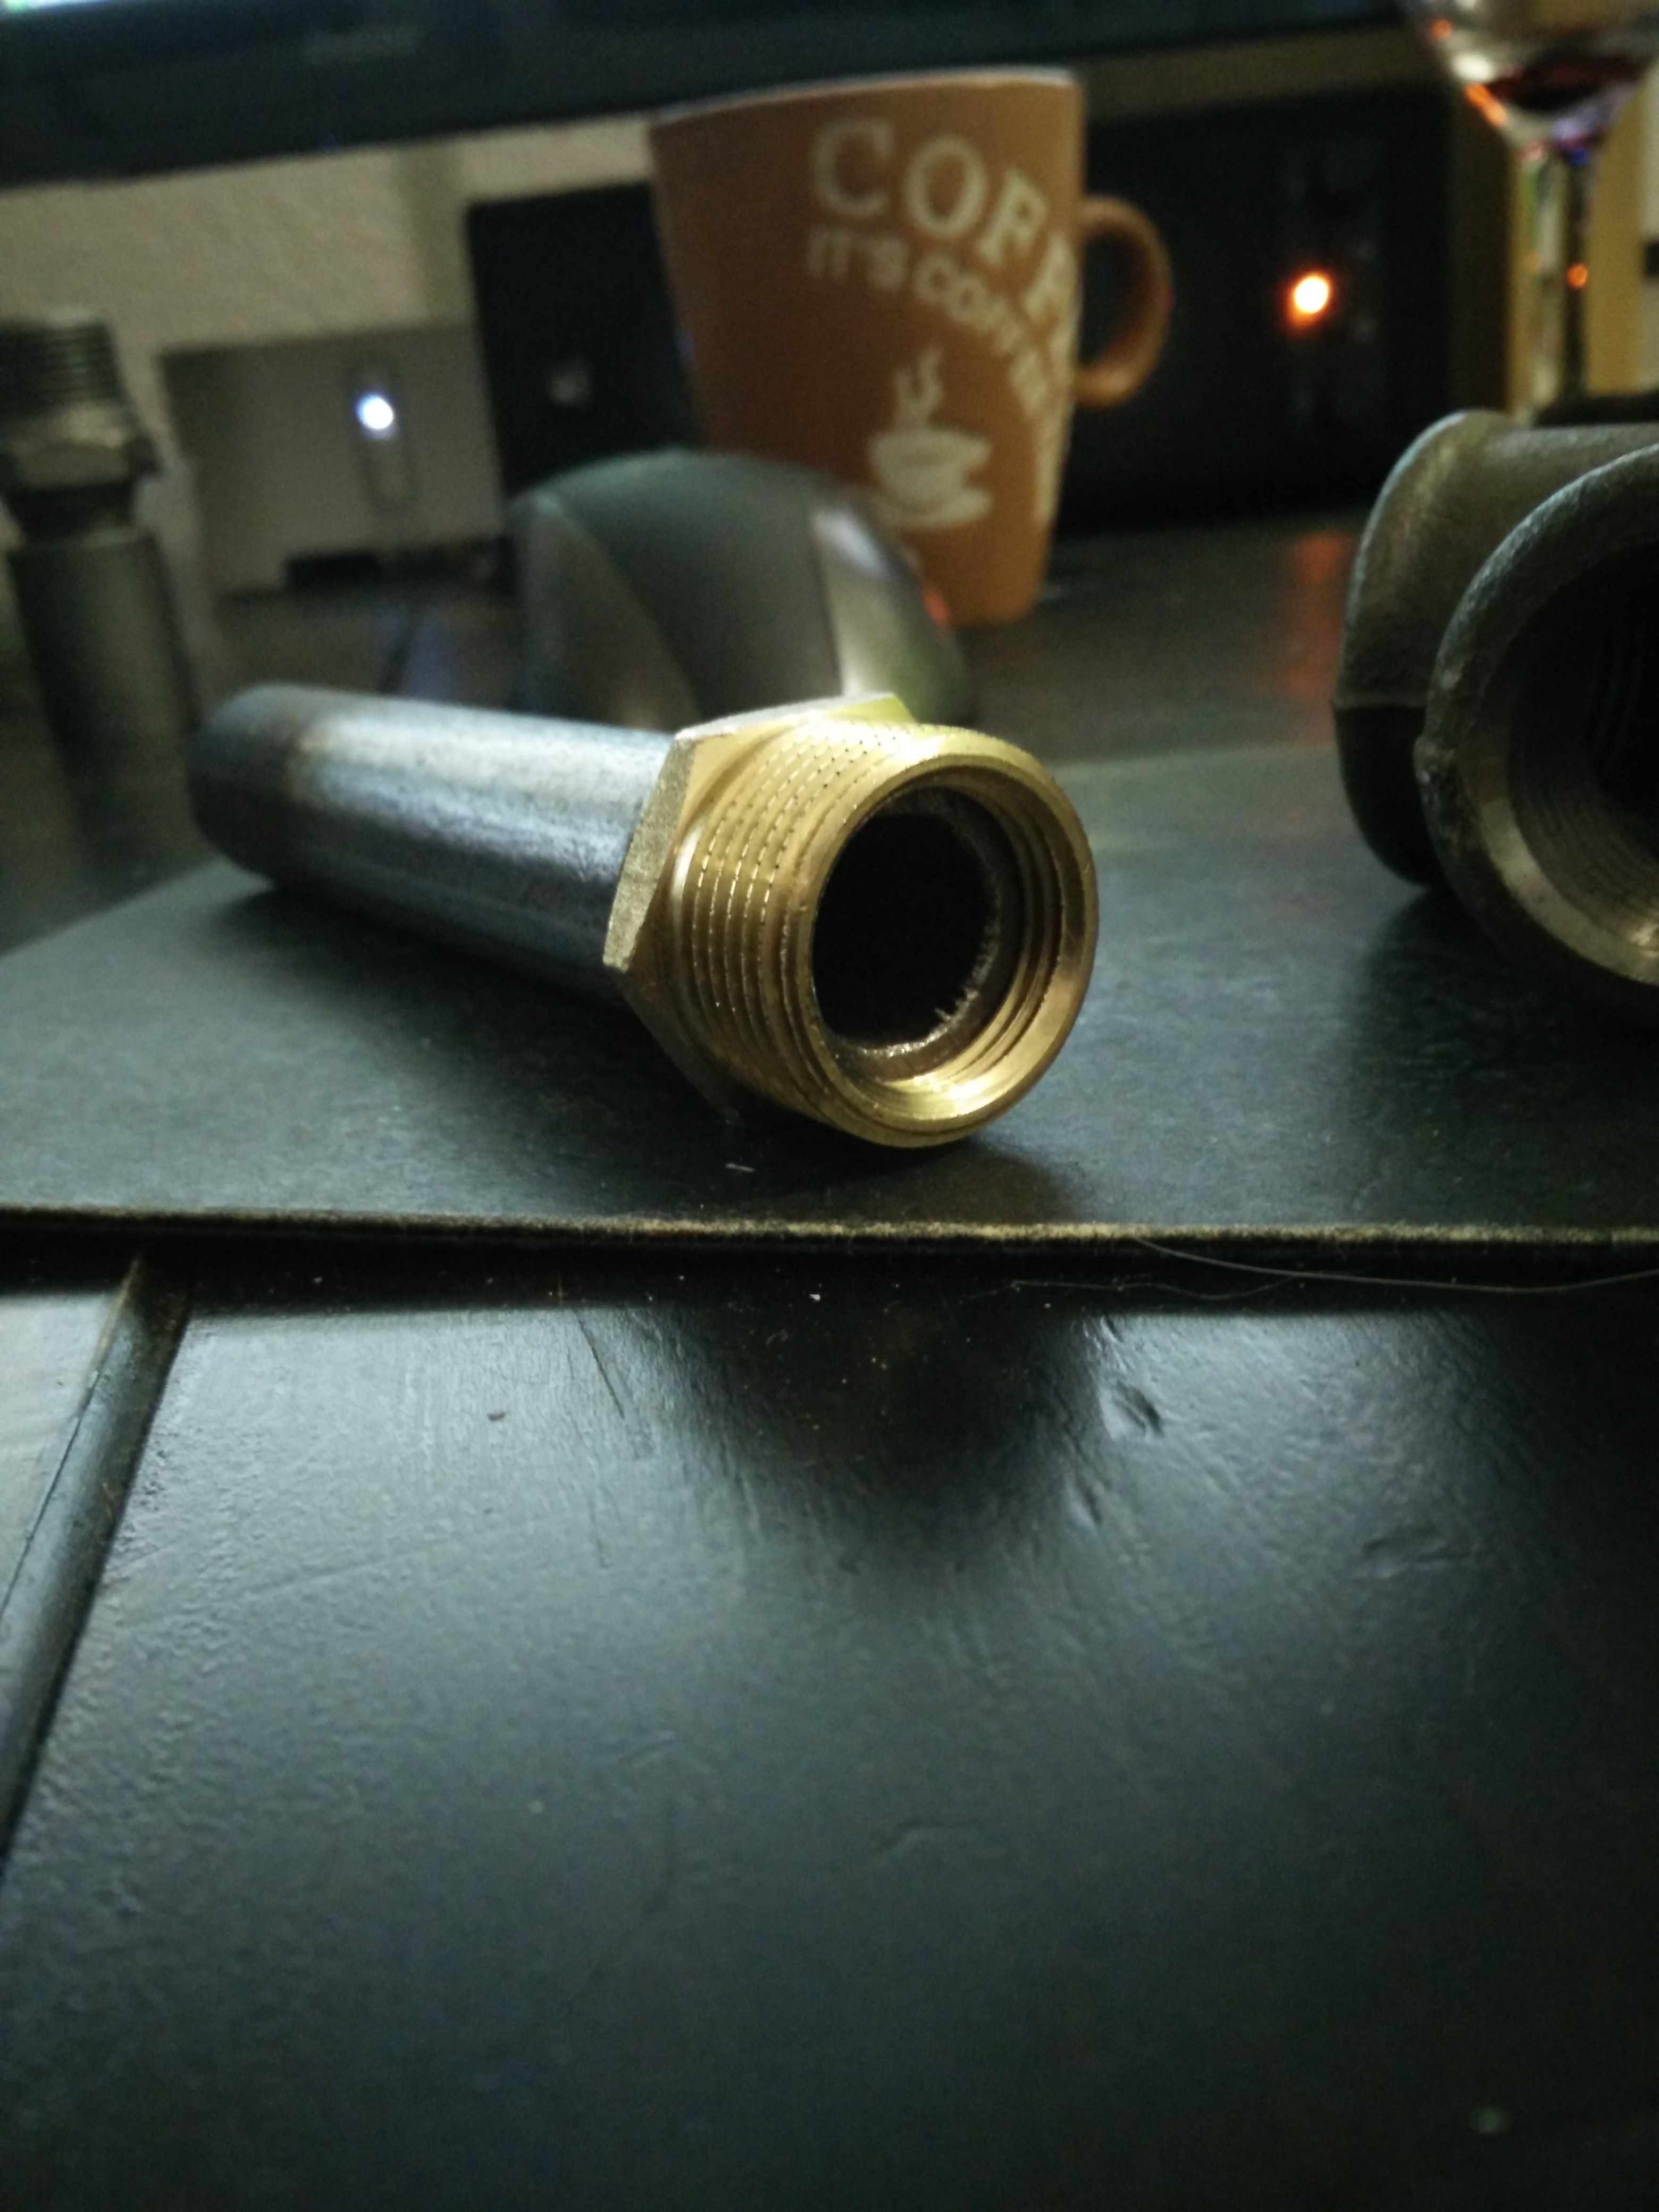
that fits like this, with the 1/2 inch nipple almost al the way in:


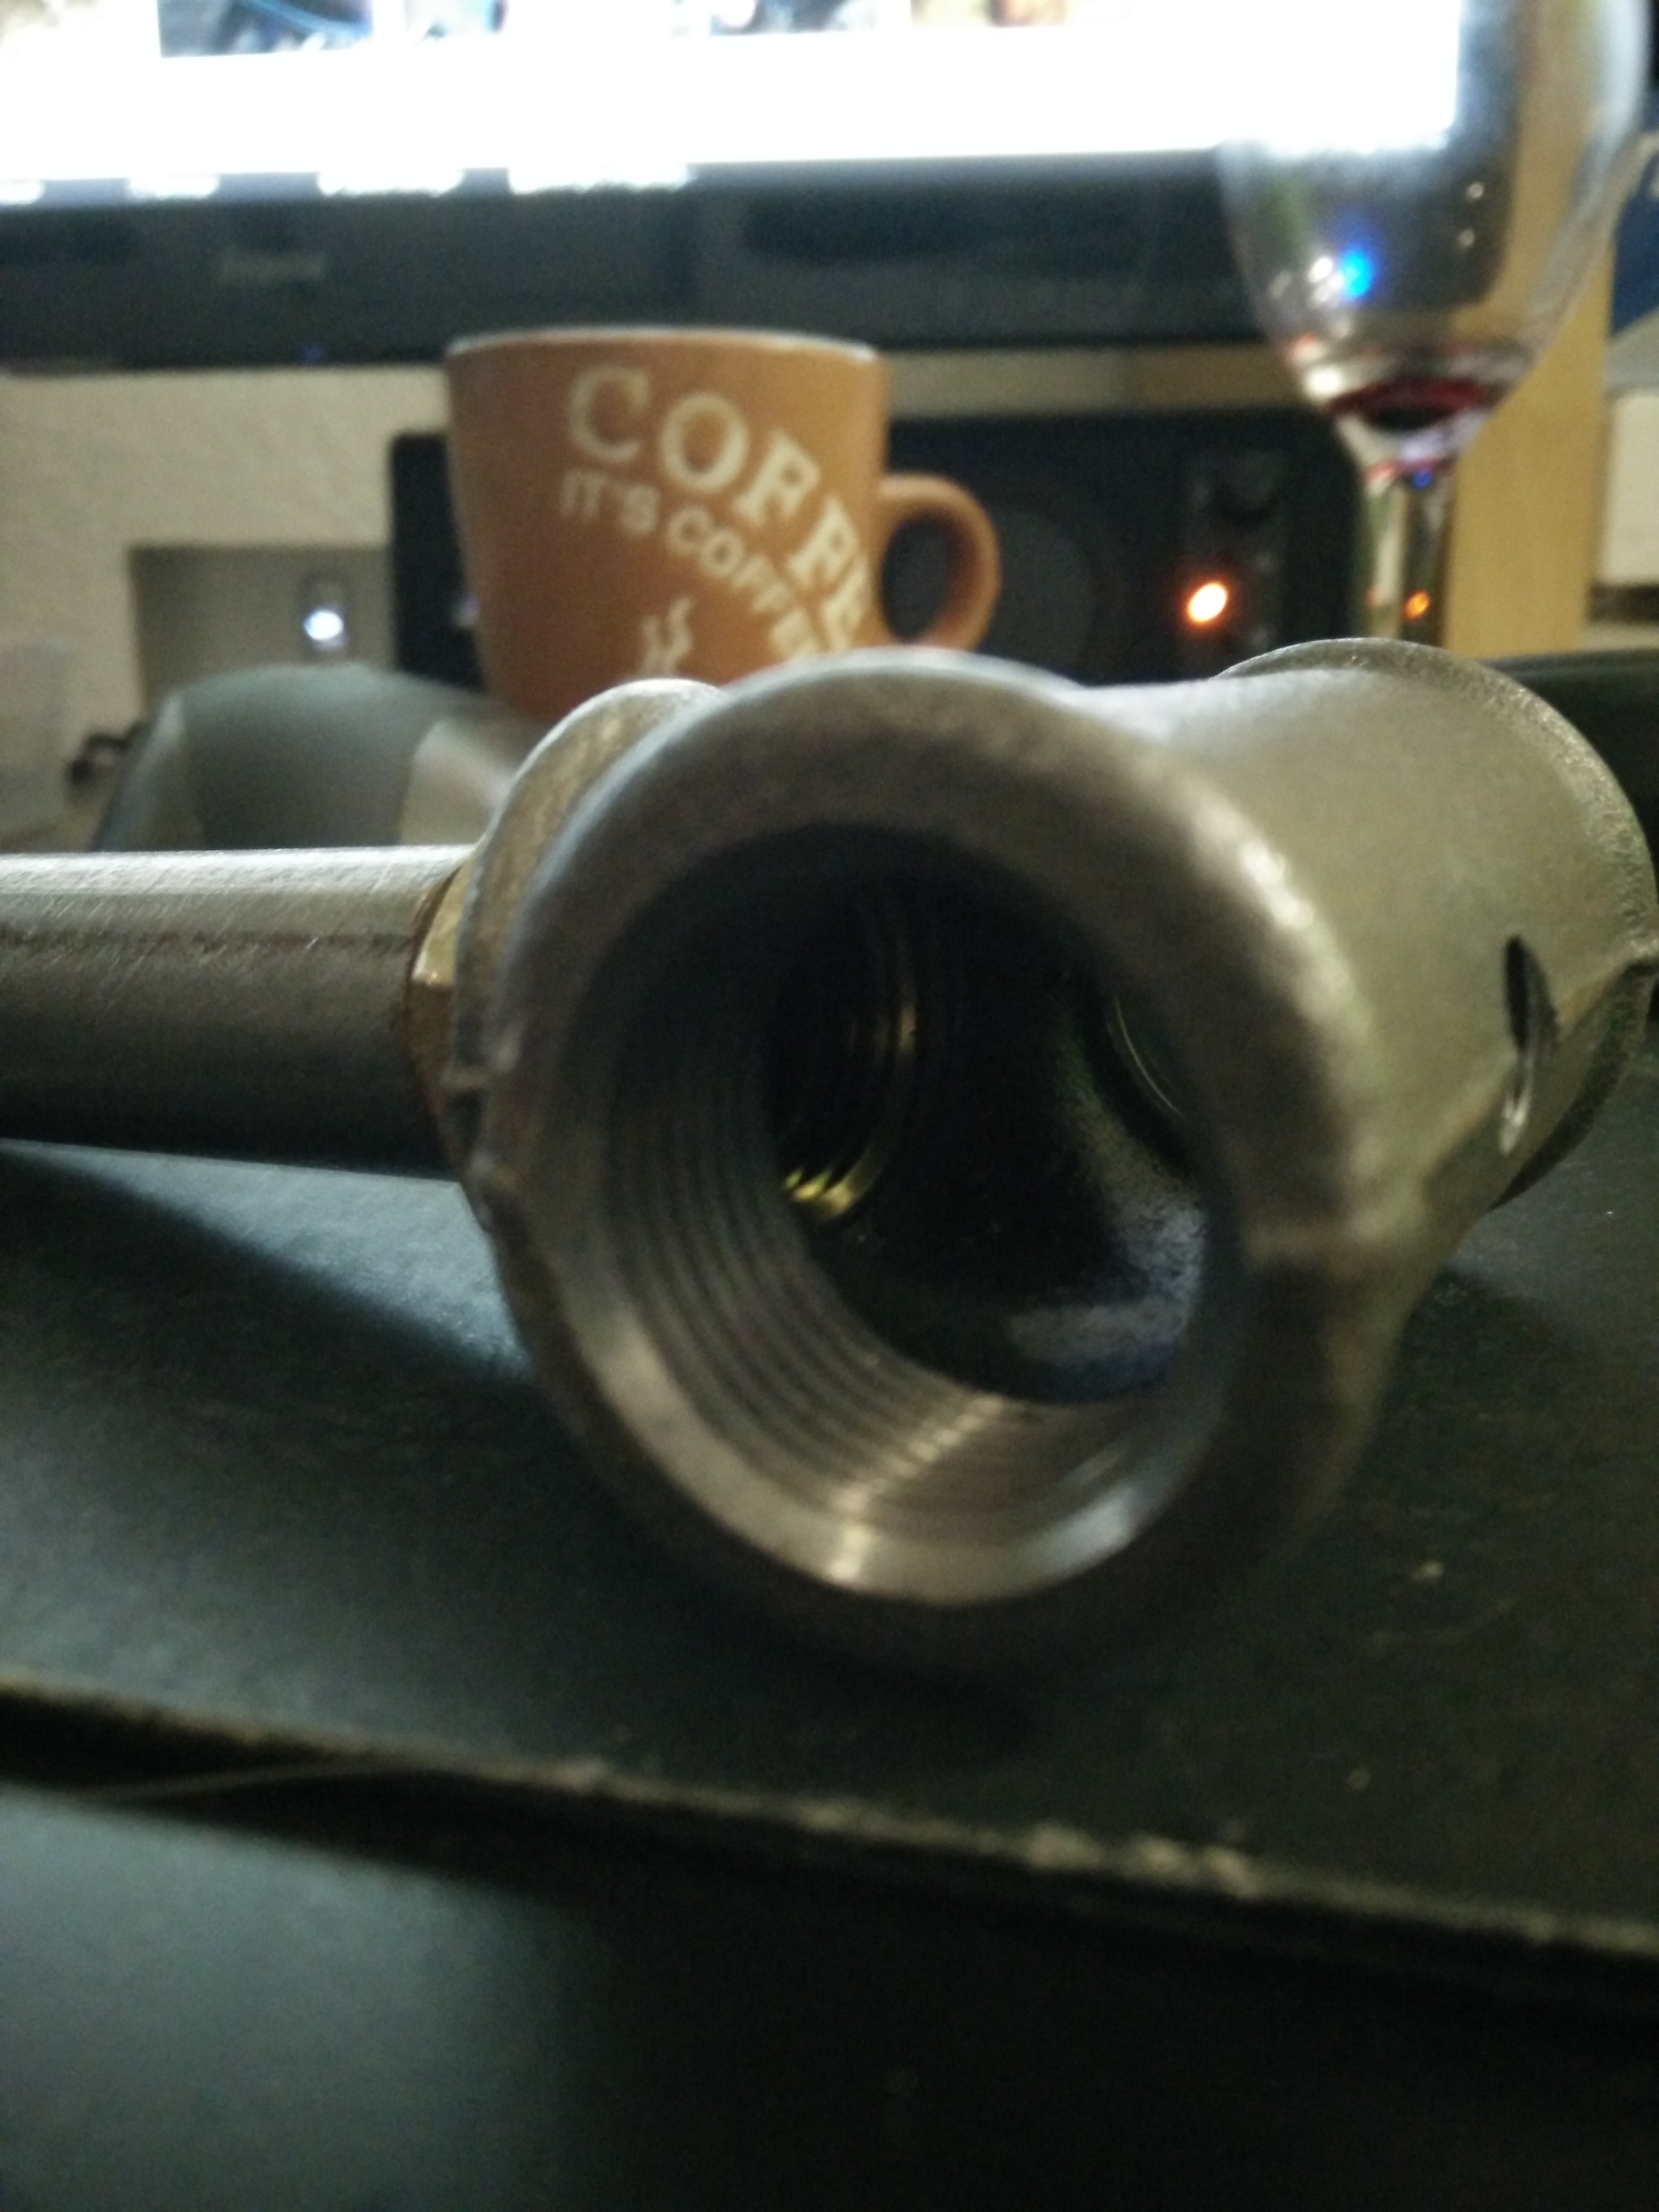
Entire T burner disassembled:

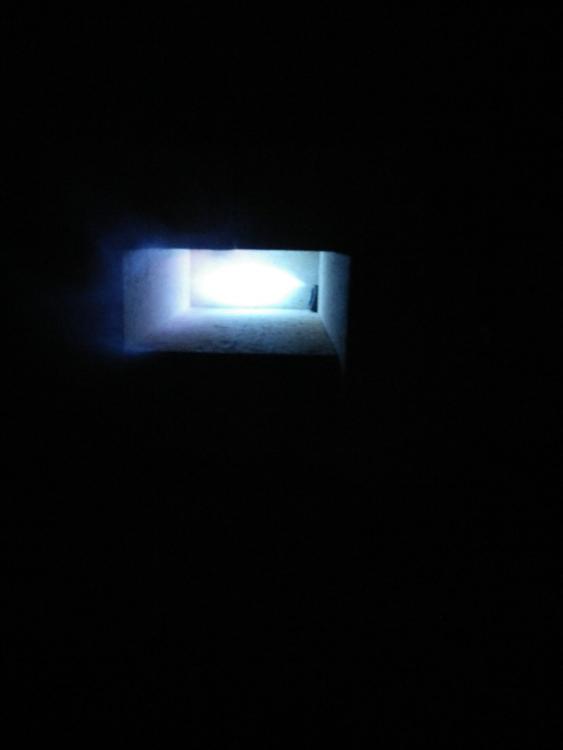
This produces a steady burn, though I have not tuned it and still need to put it to work properly.

-
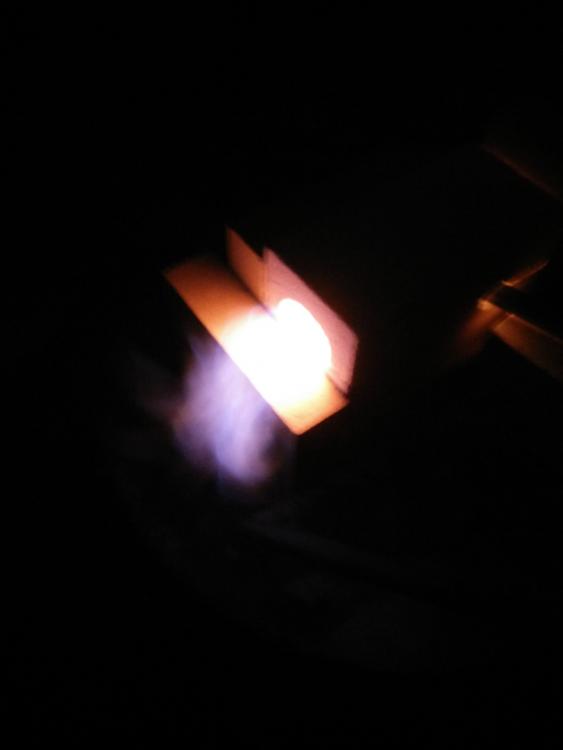
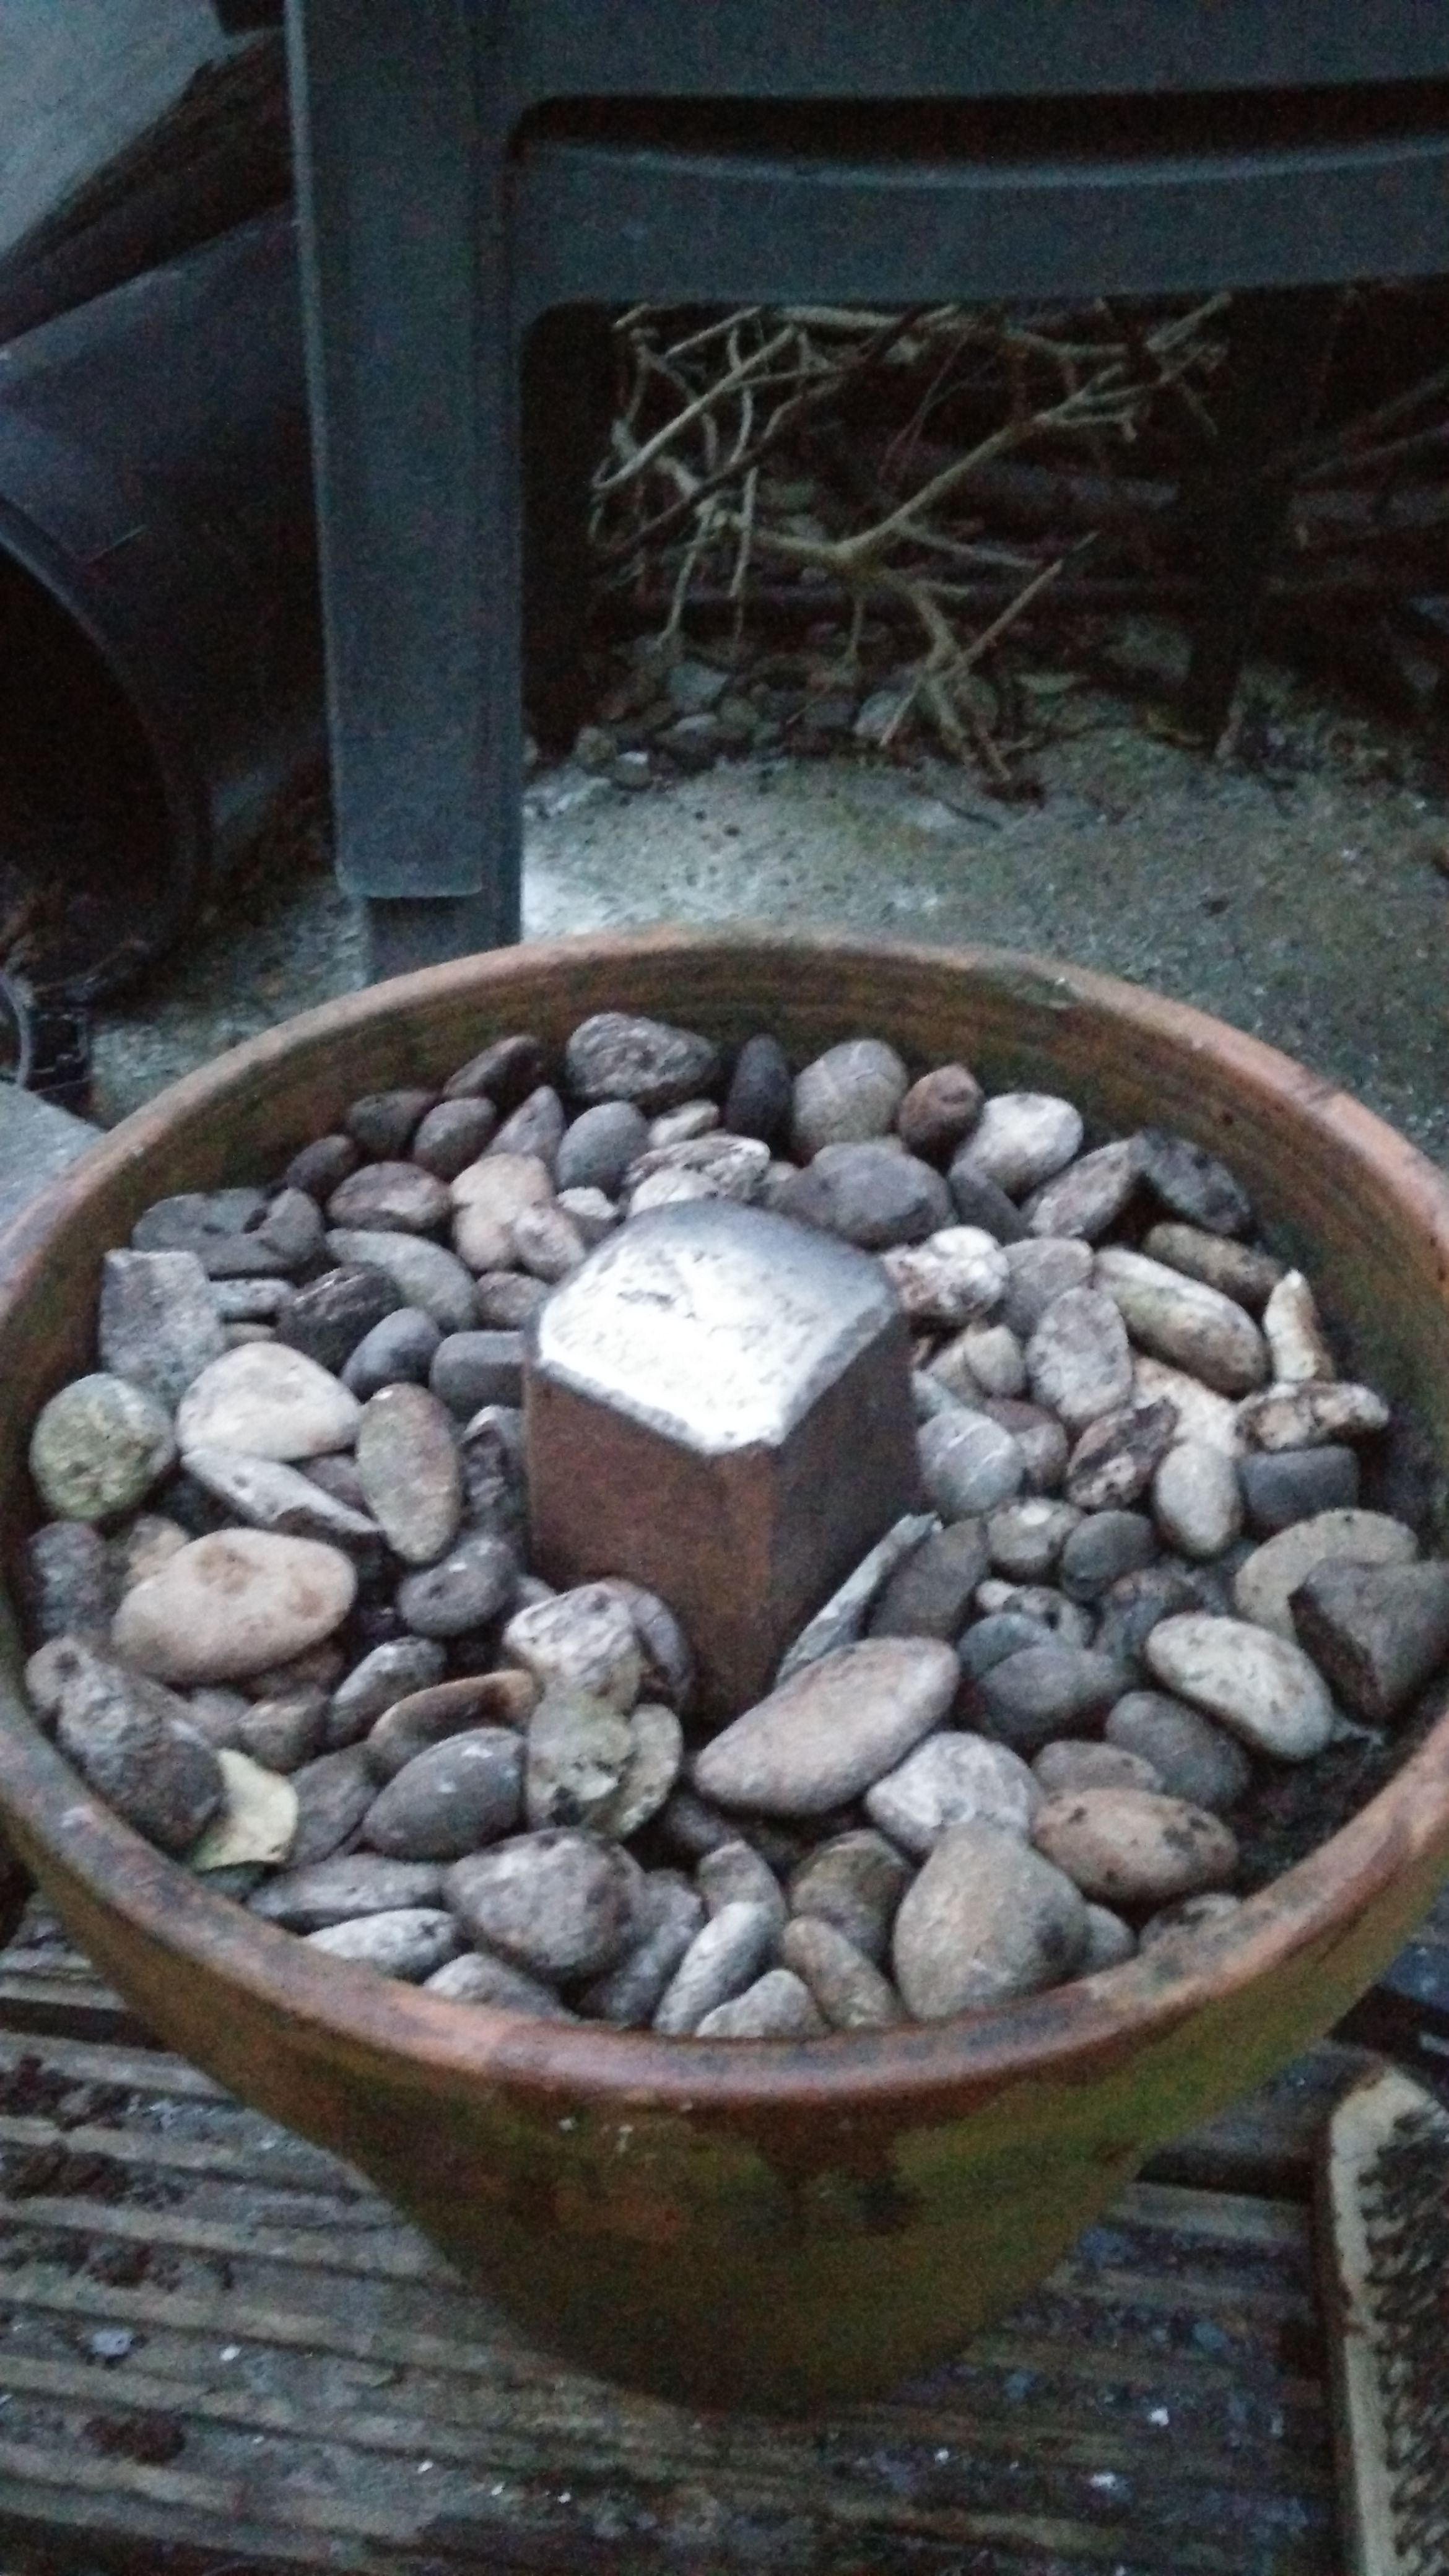
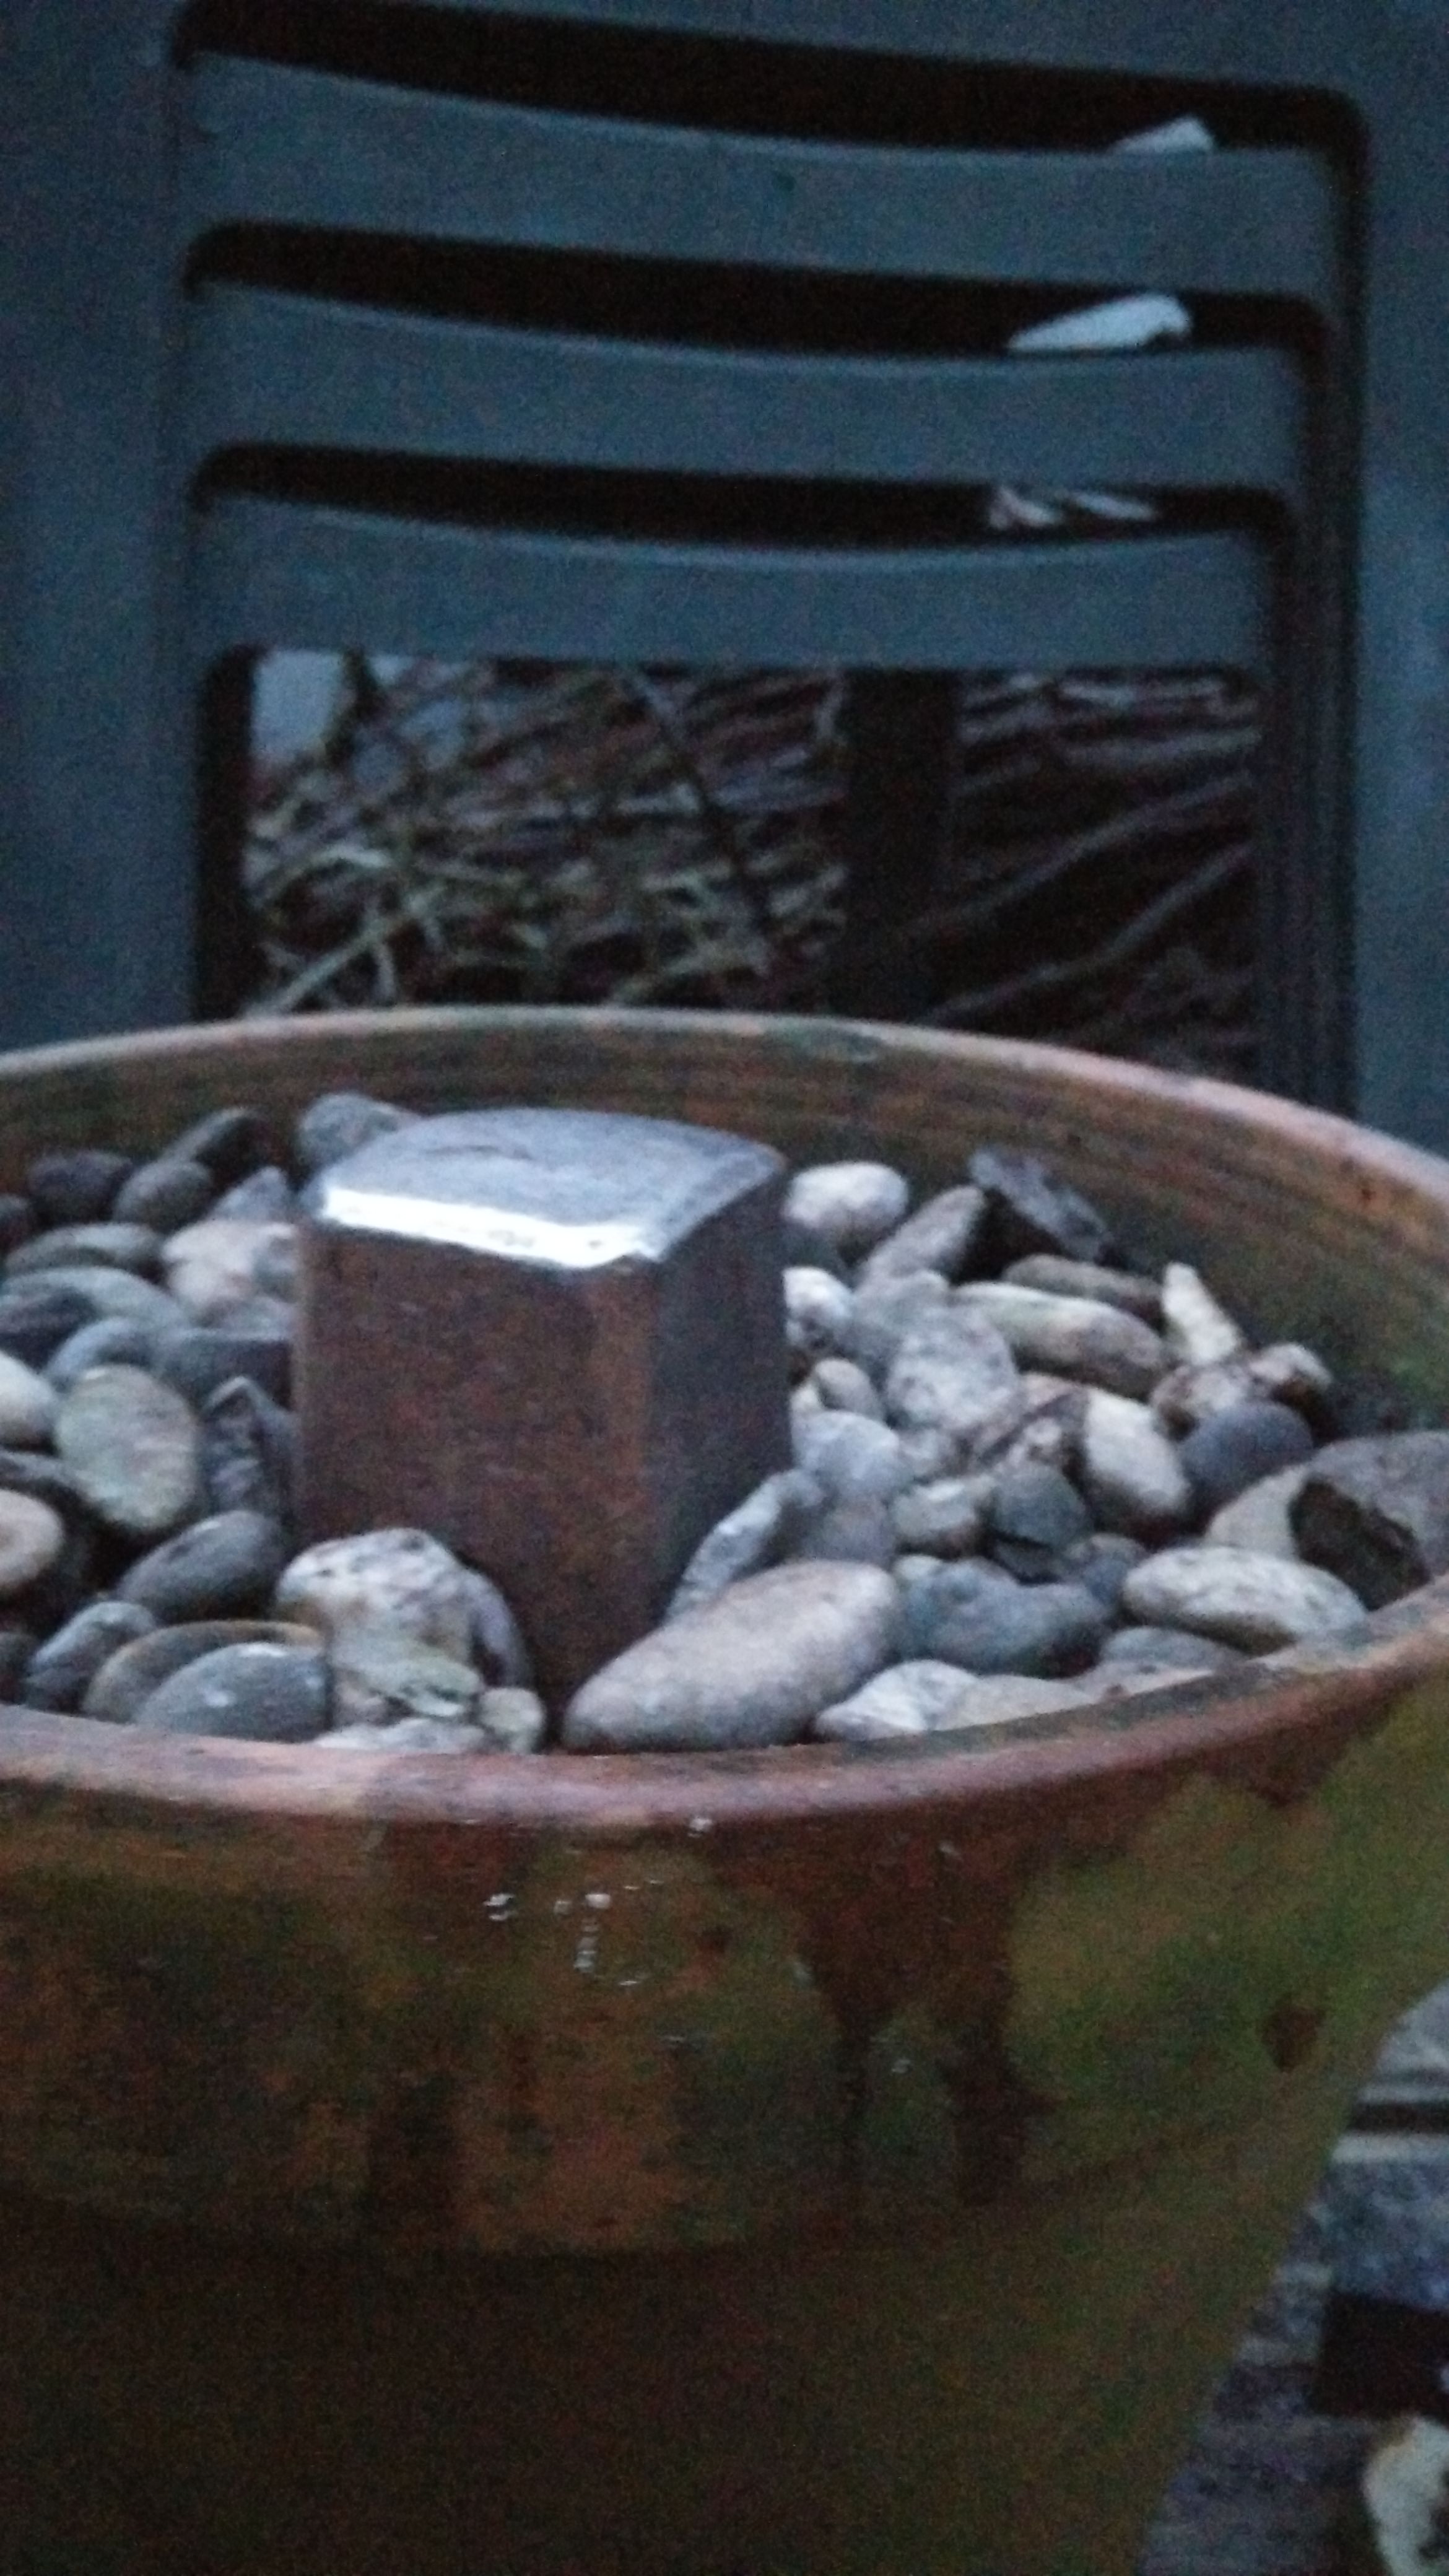
I wanted to share a picture of the burner flame so I stacked some of the hard bricks I have. As you can see it is still in a small chamber and aimed directly at the wall. Again, the set up is just for the picture and the burner has been running for a minute. I would like to know what you think. (And I ran out of gas)

-
For everybody's info, the burner with all the fittings forming the tube huffed and puffed. The one with the single brass ring worked better, just to prove mike's point.The fuel mixing is disturbed . I still need to do another burn and get a good picture. I have an odd shift this week so if I run the forge it going to be daylight... I applied a coating of 70 % zirconium silicate to 30 - ish % kaolin to the chamber. I let it air dry but now it needs another burn to cure fully. I got lucky and found a pottery warehouse within walking distance from my house. The stuff you find out when forging iron.....
And to the credit of @timgunn1962 I used my butane plumbing torch with the inward-funnel to cure most of my coating.


New gas forge (Version 0.2, some pics)
in Gas Forges
Posted
The face of the hammer needed flattening the tile was heavy and flat. I flattened the hammer face since, works a charm now") I'm drifting away from the topic here ...
I'm drifting away from the topic here ... 