

EJRailRoadTrack
-
Posts
124 -
Joined
-
Last visited
Content Type
Profiles
Forums
Articles
Gallery
Downloads
Events
Everything posted by EJRailRoadTrack
-
best anvil for a beginner
EJRailRoadTrack replied to chaddey99's topic in Anvils, Swage Blocks, and Mandrels
The different radii and the fact that this anvil is mild steel, in my opinion makes this the best. But really, if you can mount anything solid it will work well as anvil anvil. Let us know how you get on with it all! -
What did you do in the shop today?
EJRailRoadTrack replied to Mark Ling's topic in Blacksmithing, General Discussion
Looks great! Did you use a ball fuller? -
What did you do in the shop today?
EJRailRoadTrack replied to Mark Ling's topic in Blacksmithing, General Discussion
Thank you! Now i just have to to through everything again and make it all look better. Haha Thanks Arkie! I sure will. Maybe we could meet up sometime this summer/fall and run through and make some tools. -
What did you do in the shop today?
EJRailRoadTrack replied to Mark Ling's topic in Blacksmithing, General Discussion
Forged my first hammer today! It's weighs a little over 2.5 pounds! It went great and turned out well if I do say so myself
-
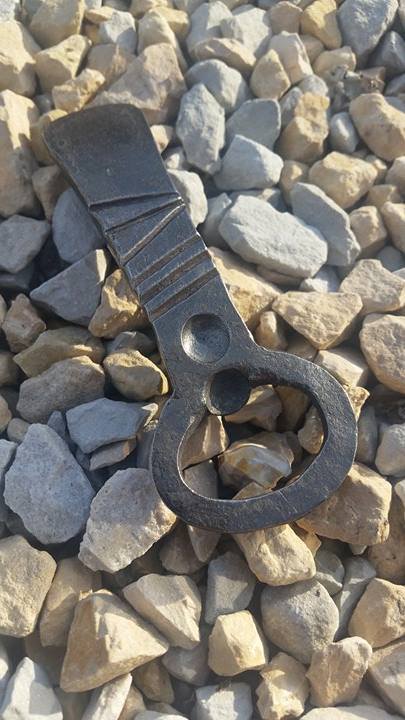
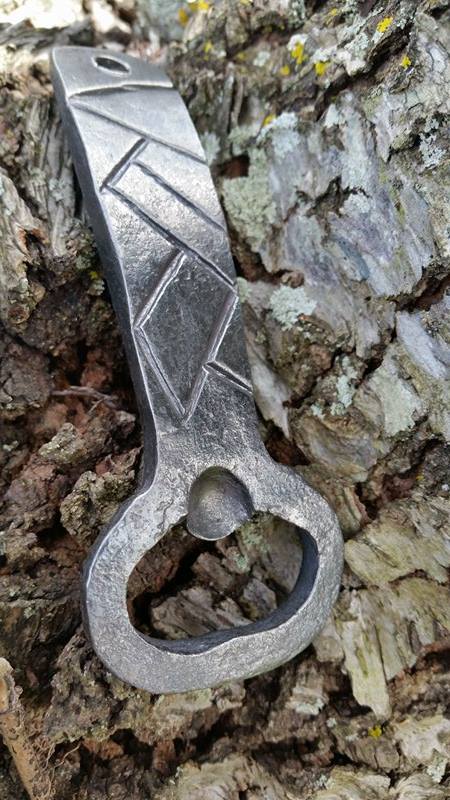
Show me your Bottle Openers!
EJRailRoadTrack replied to Arbalist's topic in Blacksmithing, General Discussion
I've been making these quite a bit. I have a commission set out at a local package store.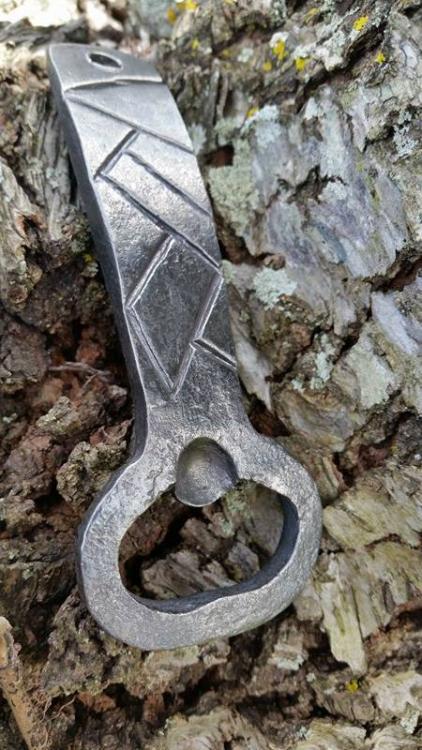
-
What did you do in the shop today?
EJRailRoadTrack replied to Mark Ling's topic in Blacksmithing, General Discussion
Hmm, Looks like a treadle hammer could fit on that back wall to me! -
What did you do in the shop today?
EJRailRoadTrack replied to Mark Ling's topic in Blacksmithing, General Discussion
Is this cable damascus? I love the pattern so much! -
My Journey Through The Online EVO curriculum!
EJRailRoadTrack replied to EJRailRoadTrack's topic in Tools, general discussion
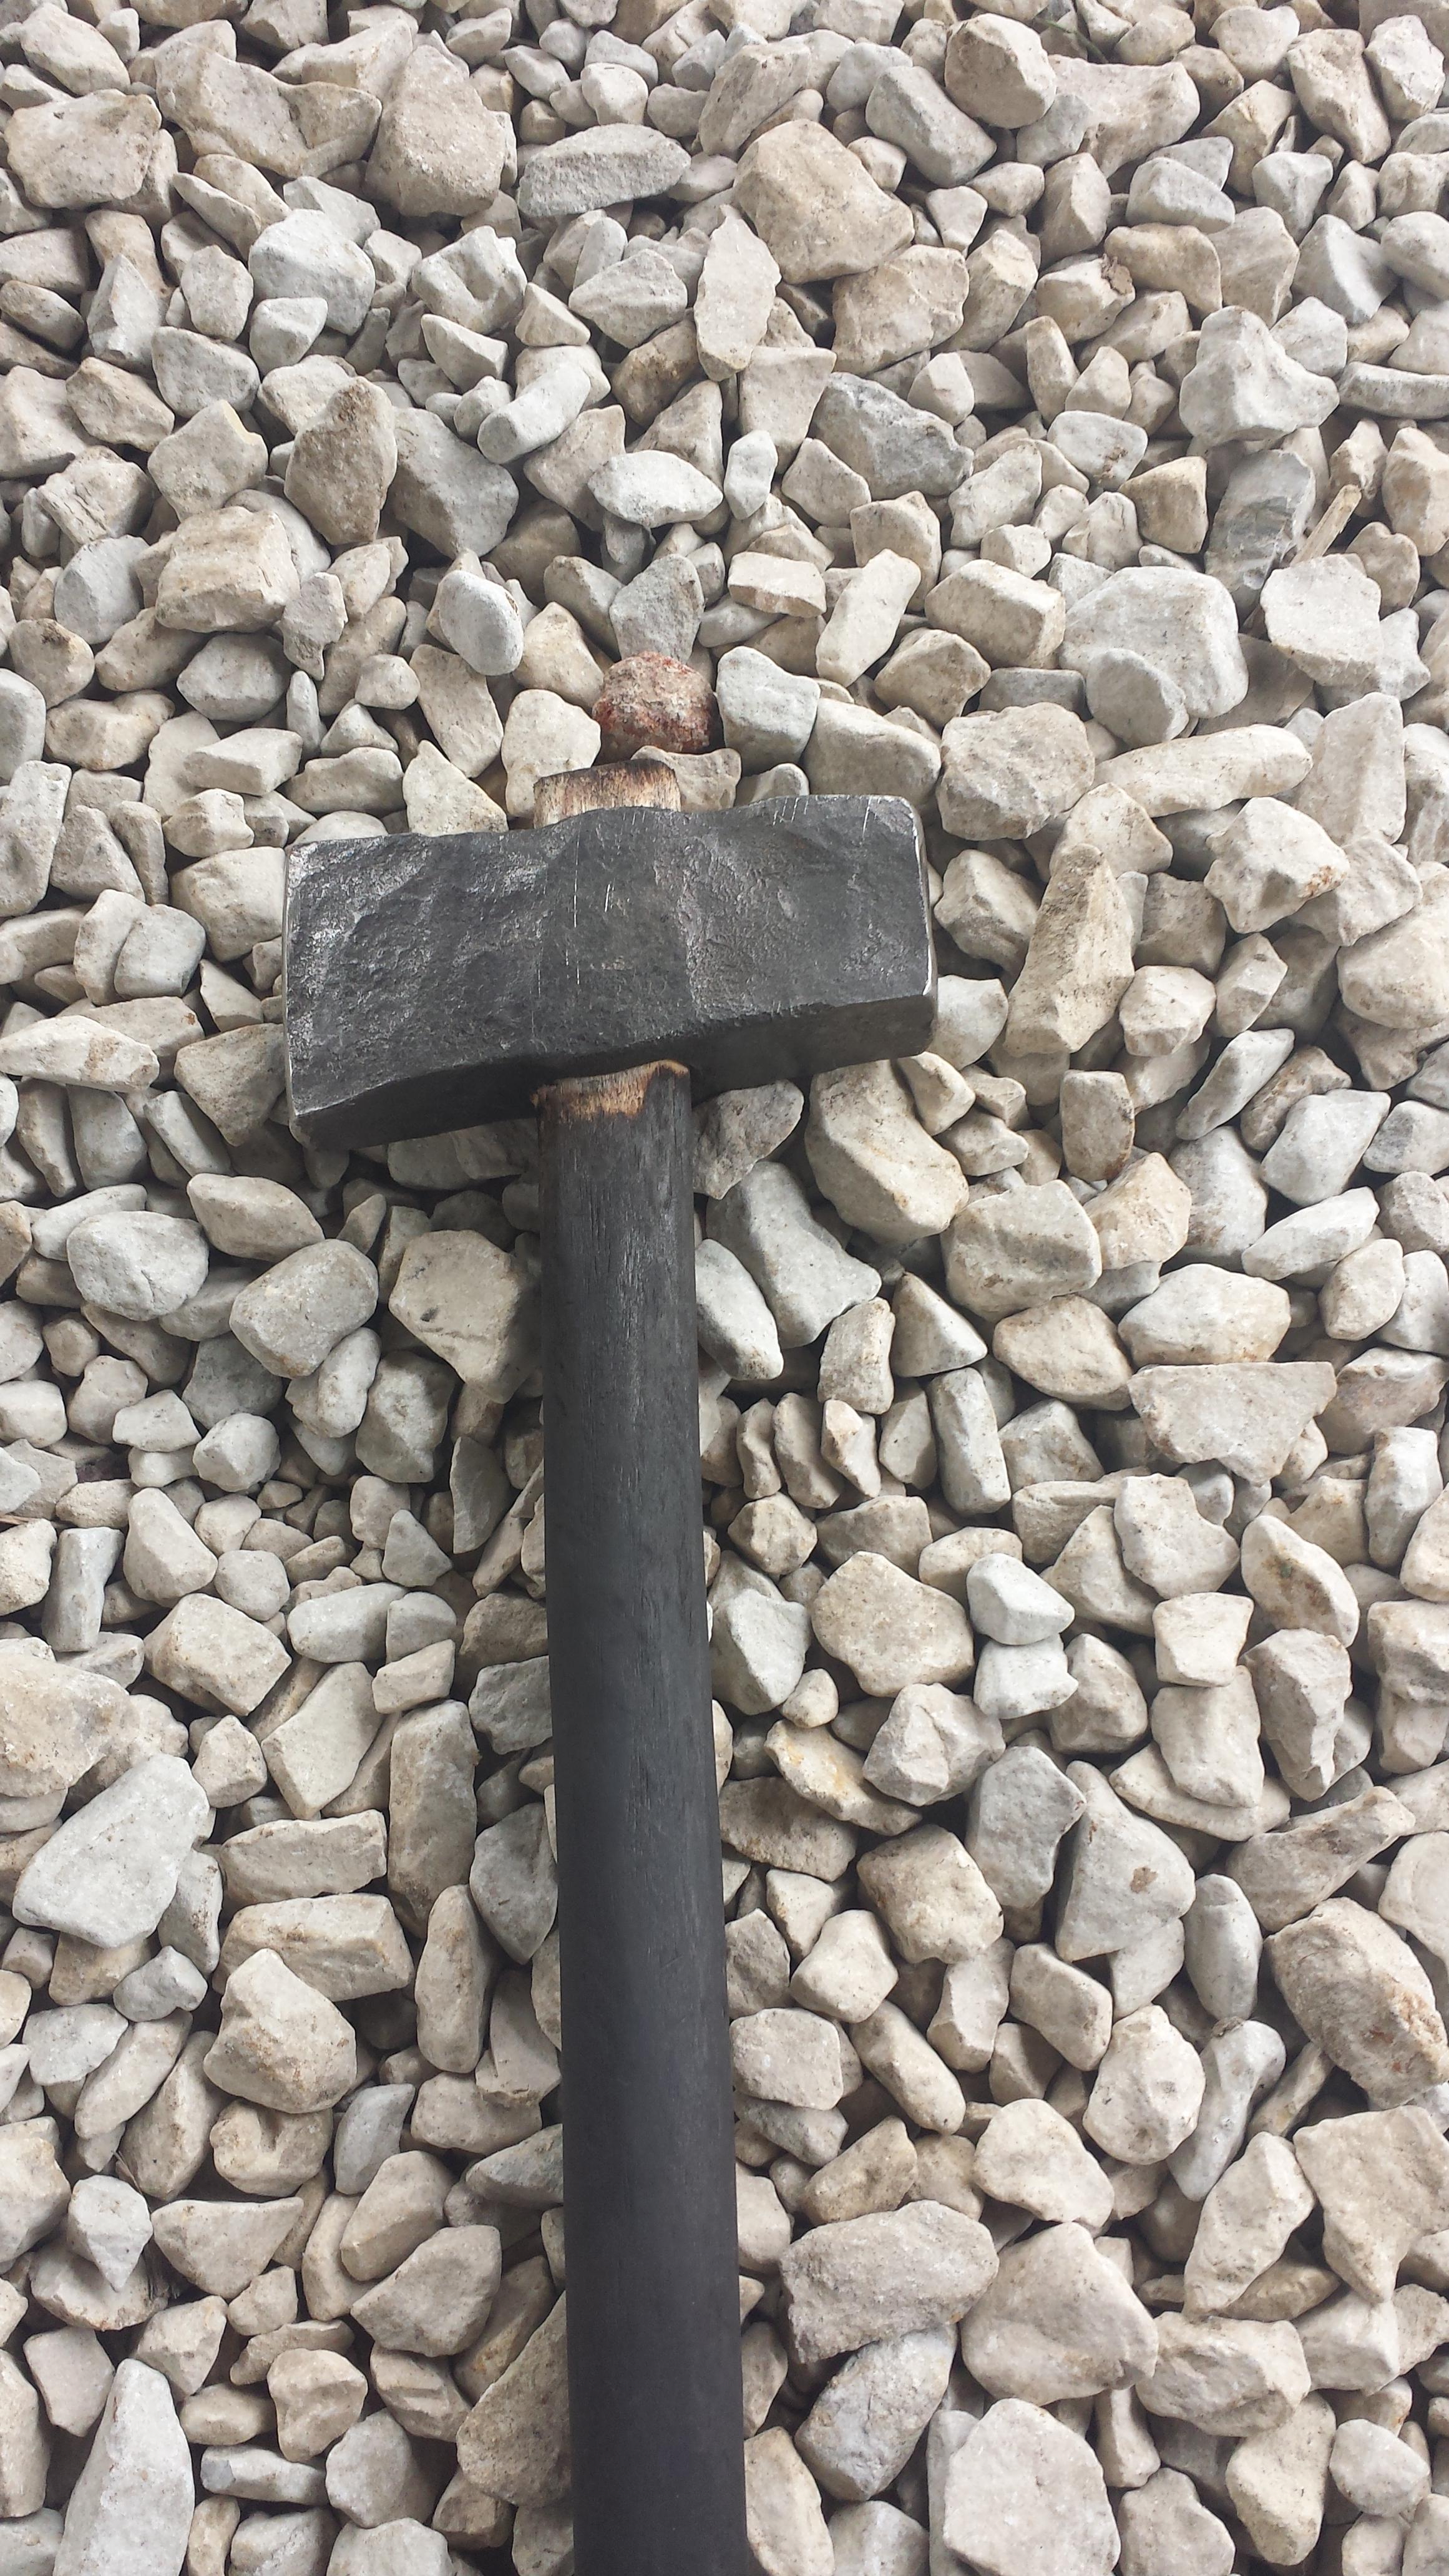
If you stand at the same height as the striking anvil it's about perfect, for me anyway. But it's buried in the gravel, so therefore it's a bit short. I'm contemplating a small concrete slab for it, to get it up higher and to make it more stable. -
My Journey Through The Online EVO curriculum!
EJRailRoadTrack replied to EJRailRoadTrack's topic in Tools, general discussion
Top fuller and hot cut hardy done! Forged the top fuller a few weeks back. And my older brother came a struck for a hot cut hardy on tuesday, Just a couple more tools and I'll be forging hammers!
-
What did you do in the shop today?
EJRailRoadTrack replied to Mark Ling's topic in Blacksmithing, General Discussion
Suppose i should have asked more people before dismissing it. Maybe if i ever build another grinder I'll look into those plans a bit more. Don't think I could. The closest picture to what I'm going for I would have to rip from someone's social media. plus the picture I would link doesn't use the shock. I will have to say I'm taking a much of different aspects from different grinders, different info and specs and putting them together into my own Frankingrinder. Hopefully, HOPEFULLY it will all work out in the end. Gergely: I LIKE those brushes! Where do you get them?? -
What did you do in the shop today?
EJRailRoadTrack replied to Mark Ling's topic in Blacksmithing, General Discussion
That's a nice looking grinder! I wanted the tracking wheel a bit closer to myself, So there will be another arm that comes of the back piece of tubing that will have the tracking wheel on it. I think I had seen the blog/plans to that grinder. I ended up backing away from it since I wanted to have 30 pound shock instead of a spring. Little less vibration was my thinking. I'll make a thread of the finished grinder in case anyone wants to build one similar. -
What did you do in the shop today?
EJRailRoadTrack replied to Mark Ling's topic in Blacksmithing, General Discussion
I'm sorta following a friend's design. He hasn't finished his yet. So i followed his design that he made up, While using another set of plans to get the size of pieces "correct". Could I see your grinder and maybe the plans too? -
What did you do in the shop today?
EJRailRoadTrack replied to Mark Ling's topic in Blacksmithing, General Discussion
Back in December I was given a very old Hollup stick welder. My dad and I cleaned it up about a month ago and I've been practicing with it. Today I did my first "practical" welding project. Which was starting on my 2x72 belt grinder. The welds aren't great. But it will hold.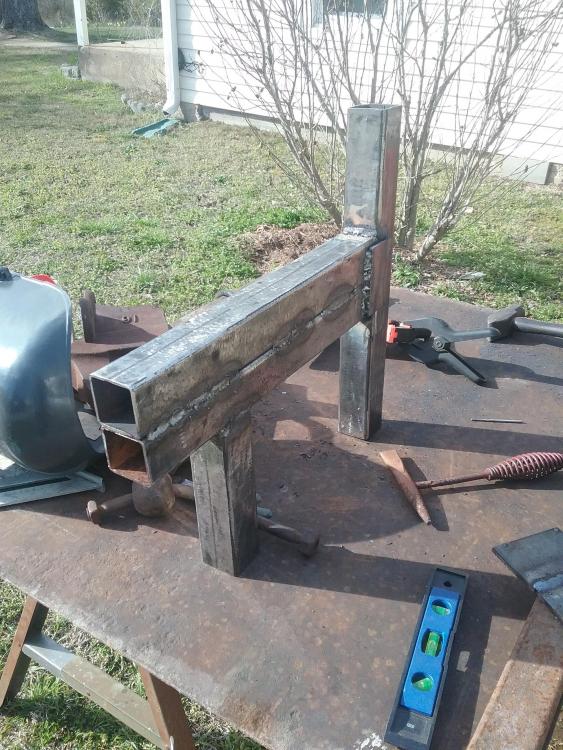
-
Sorry Ben and Frosty. I didn't catch that there was floor in the half round forge body shown in the picture. If were to take a propane tank, freon tank, or even a large round pipe, You cut it in half, Very close to what's shown in Ben's picture. Then build a stand with the burner in the bottom and firebricks for a floor. So if smaller things were being forged in it, you could simply turn you burner down and put a smaller "top" on the stand. Forging something smaller or forging several things at once? Grab a larger top and turn your burner up. I would use kaowool coated with uv coating or something similar to insulate the top.
-
Personally, I would make your floor firebrick.Then mount your burner in the bottom on the side. It would swirl around your top, Plus, you could interchange tops for different jobs.
-
2 questions for you guys
EJRailRoadTrack replied to O'Reiley's topic in Anvils, Swage Blocks, and Mandrels
I have heard of Buckworth anvils before. I believe they are a Canadian maker. There are a few members floating around with Buckworth anvil. Maybe they will chime in. If you do a google search, many different stories come up. One stating they were made by Boker, and a few saying they were made by Henry Wright. Who knows -
My Journey Through The Online EVO curriculum!
EJRailRoadTrack replied to EJRailRoadTrack's topic in Tools, general discussion
At last! I make it back to this topic. I've finished the cupping tool, the bottom fuller, and the hammer tongs! I wasn't happy with the cupping tool, Before trying to lip the tool It was not fully flat, So I had flatten it back down then re-lip it. But, it should work! The handle had been hit a rasp fairly heavily. I like to just put a bit of oil, of any kind my handles, I char some of my handles too, I think it gives a nice look and feel..thumb.jpg.65c183868ef3d828168fb7c07240a83e.jpg)
.thumb.jpg.1ba075973acfb47cf698df462006de08.jpg)
.thumb.jpg.2068484b0198c79f862e86cf2d970c4b.jpg)
-
Personally, I don't think it would be smart to forge weld the springs together to make a hammer. In all that forging you're putting a lot of stress into the steel, so when take a potentially faulty material, such as used springs, and forge weld them together, making MORE flaws and faults, the results could very well be dangerous and even deadly. I Would take the springs, and make the tools you need to make the hammer. And then buy known steels to forge your hammer.
-
The evolution of tool making!
EJRailRoadTrack replied to Mark Ling's topic in Tools, general discussion
Nice demo! Looks great. I love when the steel lights up on the end. Makes me feel all warm and fuzzy inside -
My Journey Through The Online EVO curriculum!
EJRailRoadTrack replied to EJRailRoadTrack's topic in Tools, general discussion
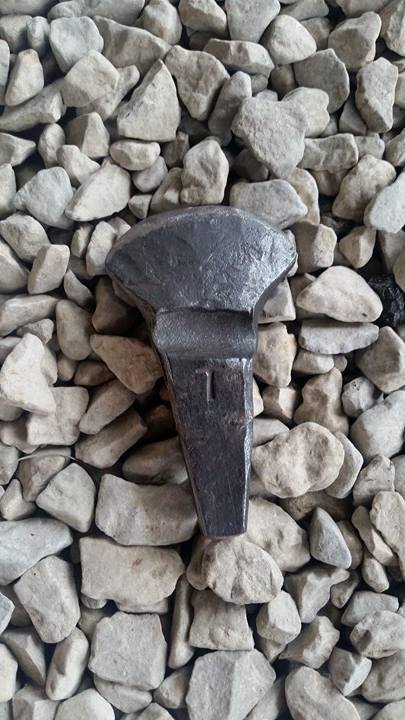
Thank you Frosty! I sure will! I know, It's kinda fun to think that Alec, Ethan Harty, Brian, Lyle, Joey, Arron Cergol, And many others have started on this forum. I hope to make a few bucks blacksmithing, but I don't to rush in, because I still want to enjoy it. I'm pretty sure the geometry is correct. However, the punch is somewhere between 8-12 degrees off from the eye, Which is something I didn't see until it was too late. We'll see though! -
My Journey Through The Online EVO curriculum!
EJRailRoadTrack replied to EJRailRoadTrack's topic in Tools, general discussion
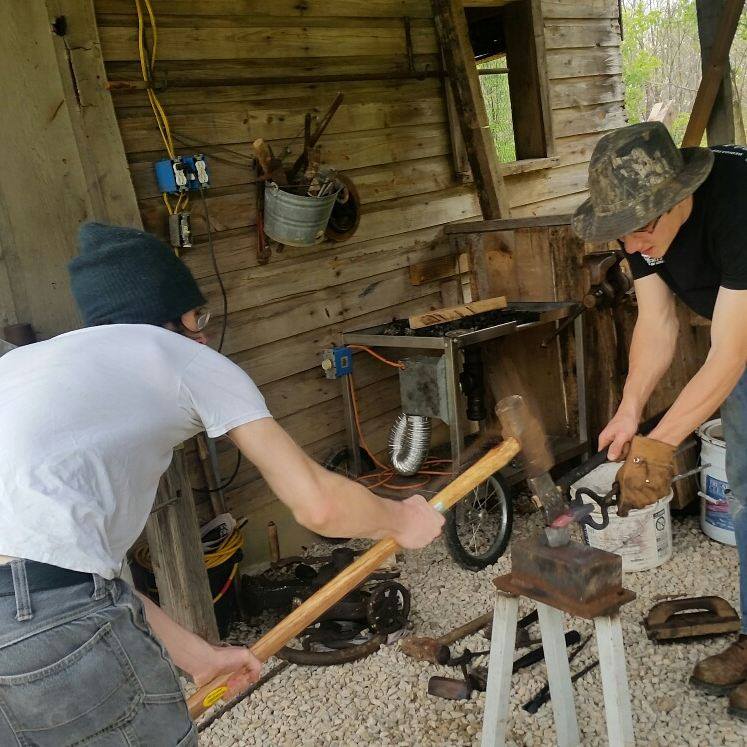
Thanks guys! LB: Yeah, One of my favorite blacksmithing sayings is, if you want it perfect make it perfect. I will admit, I didn't put any real work into that handle, It was a broken sledge hammer handle that I was re-handling a hammer with, But I finished the punch and handled it right away. I get more coal on saturday, So then I will finish my hammer tongs, and tools making will proceed! I'm getting very excited at this point! -
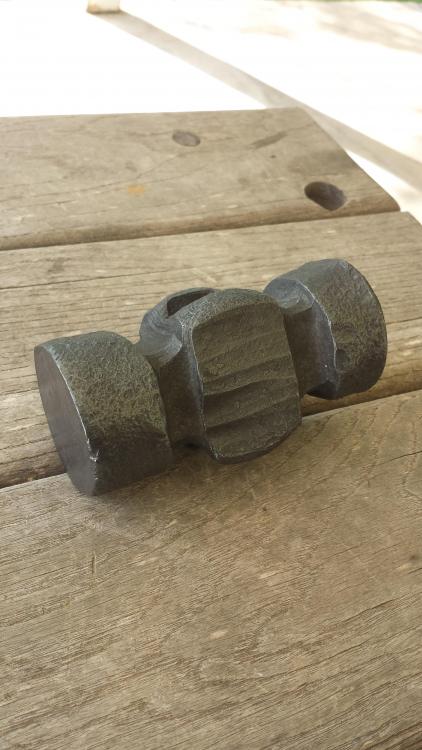
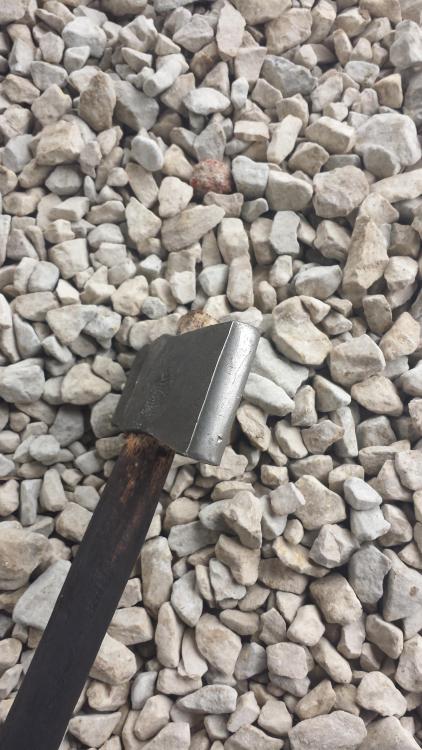
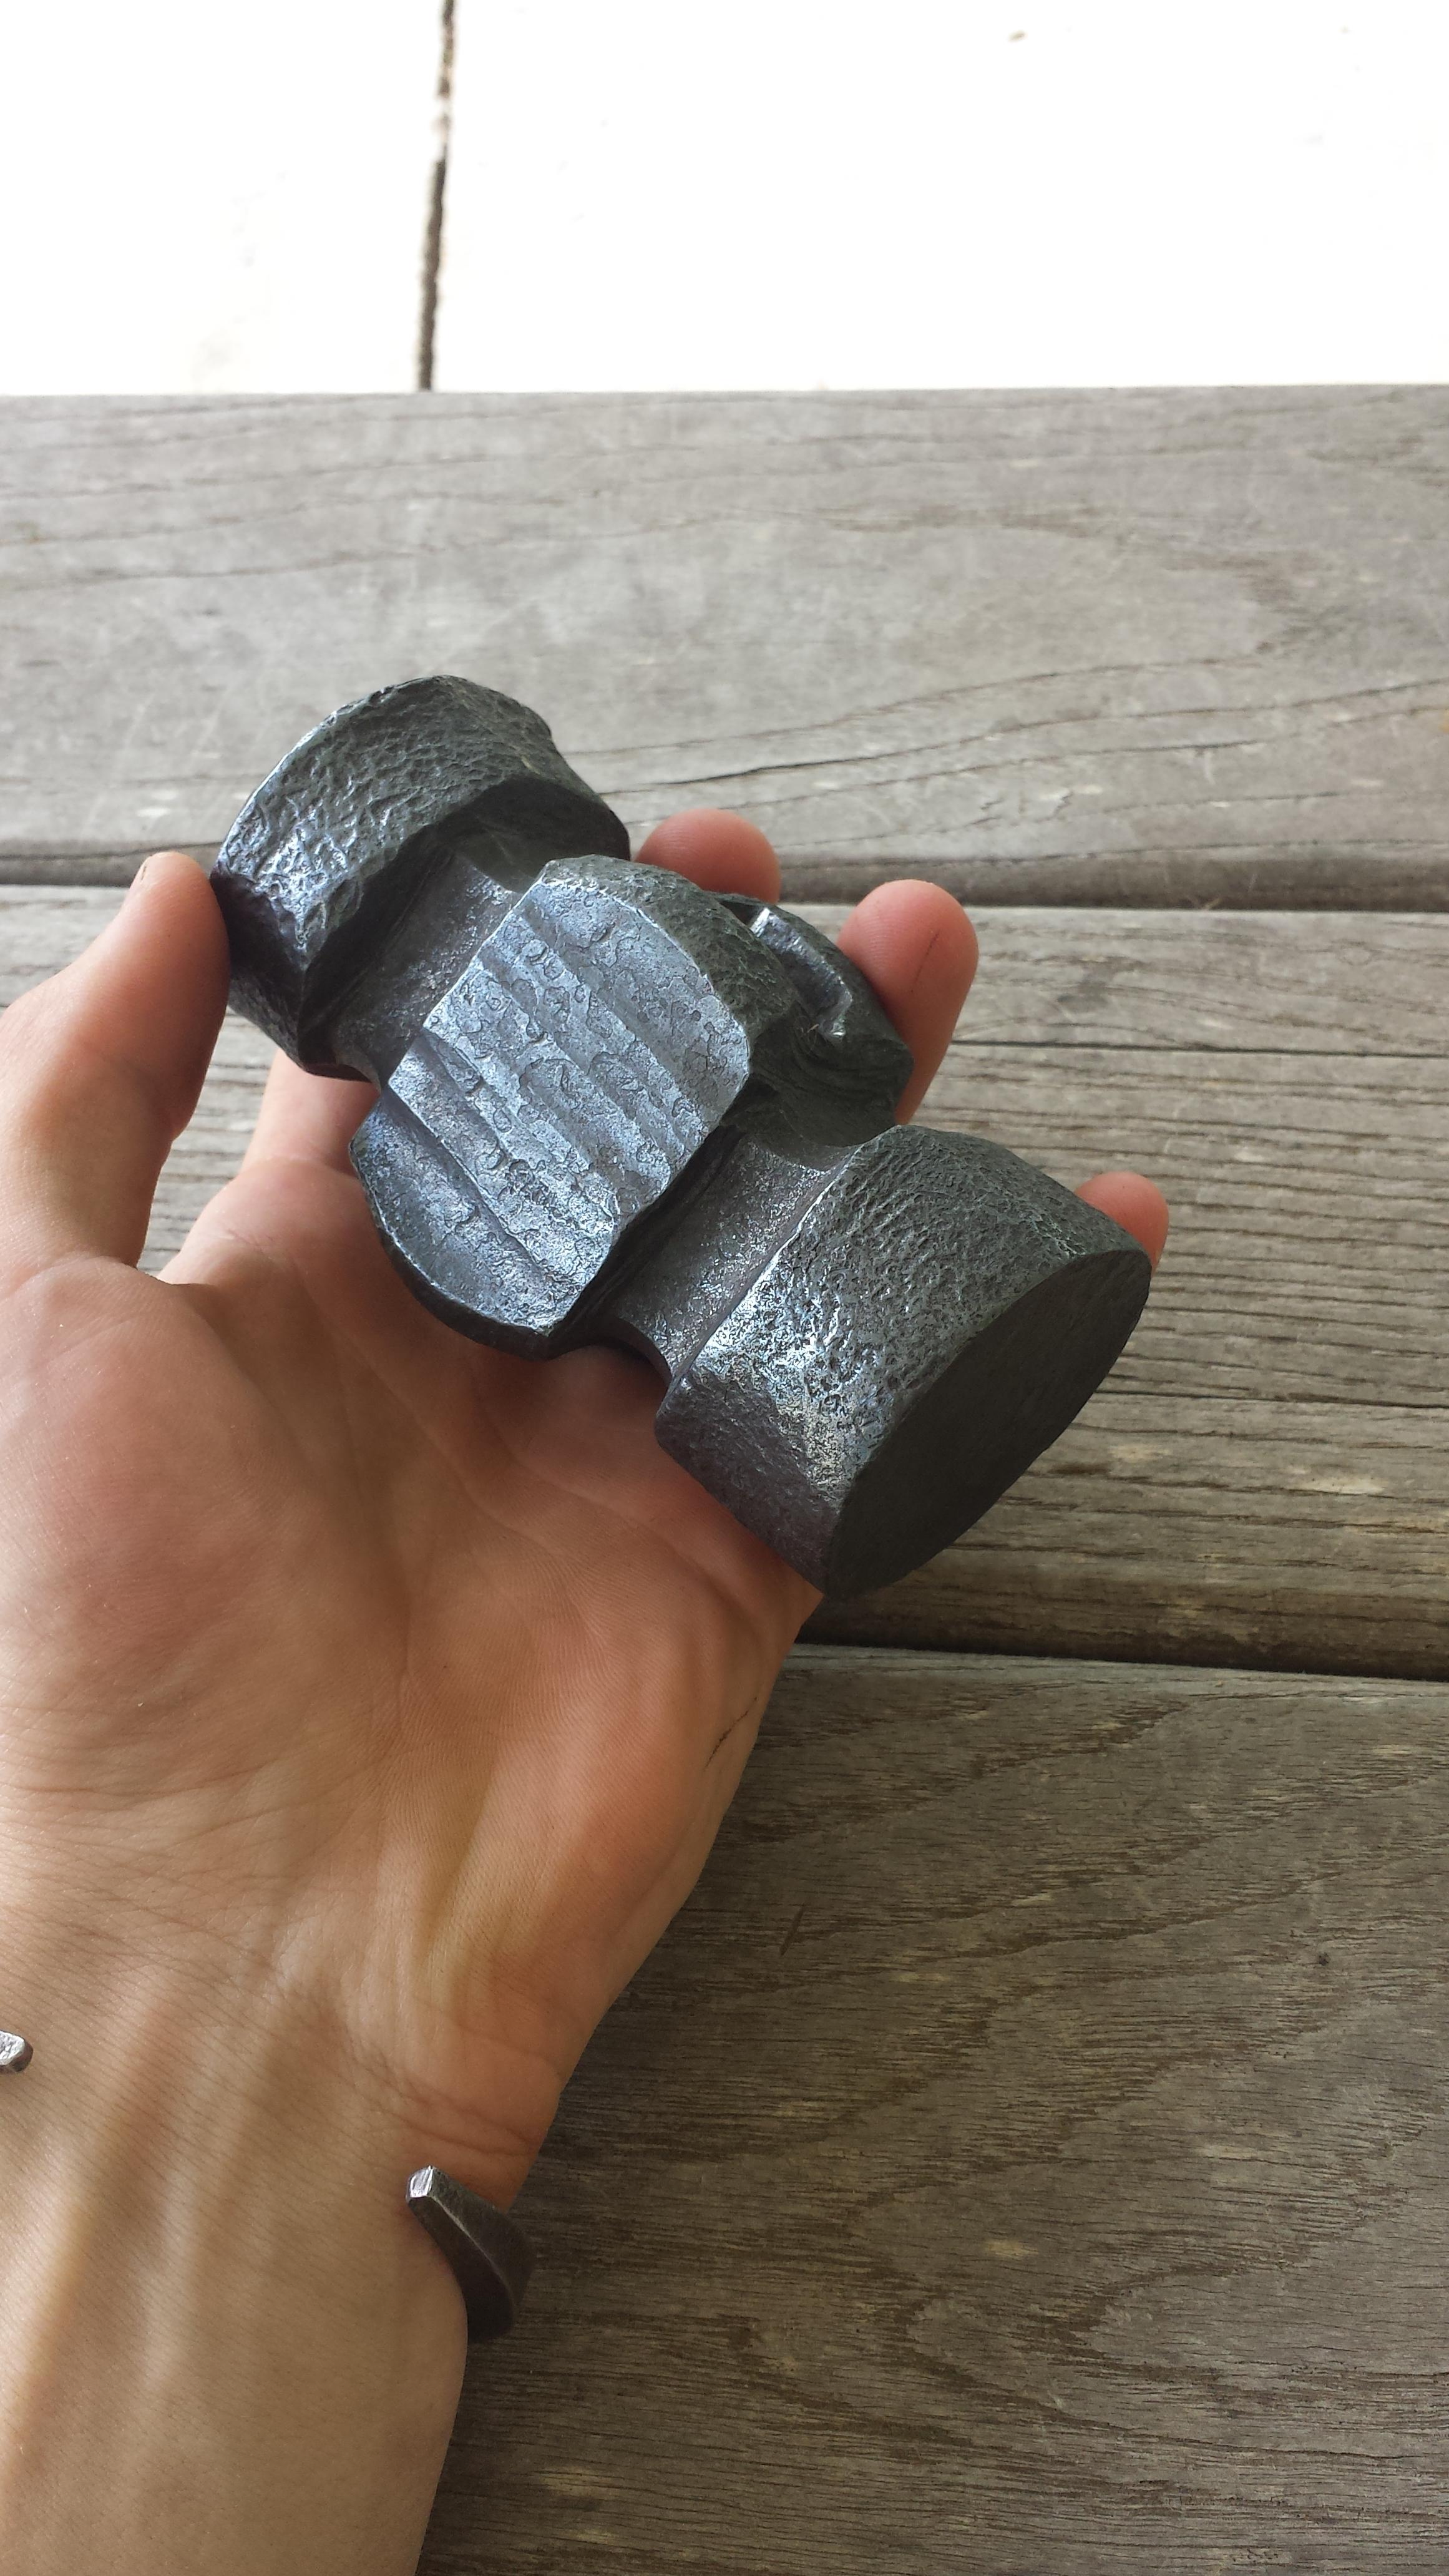
Back in May of 2016 Alec Steele posted a video to his Youtube channel. That video was about him giving all of his online classes to young smiths (Under 18) that applied For FREE. This was to give back to the blacksmithing community. From about my 2nd month blacksmithing, I wanted to make my own tools. It was what blacksmithing was to me, Taking what you have, and can get, and making what you need: being self sufficient. It also included was his How to start Blacksmithing and Intermediate classes as well. I could use the First one of sure. I couldn't afford classes, Or to buy the online class. So this was going to be HUGE in my blacksmithing journey. So I applied for the scholarship. I was very fortunate to have been picked for the scholarship. So here is my journey through the tool making process. Just last week I finished my striking anvil. So tool making has begun. If you want see someone do this better than me then go check out Littleblacksmith's thread, as he goes through the same class. https://www.iforgeiron.com/topic/48959-the-evolution-of-tool-making/ Here is my first top tool. The hammer Eye punch with just a hand hammer!
-
The evolution of tool making!
EJRailRoadTrack replied to Mark Ling's topic in Tools, general discussion
Aha! I had this video in mind be couldn't find it! This was one of the first blacksmithing videos I ever watched. This is going in my playlist of stuff to learn from. Another thing i like to do when using a large hammer, is tapping. It's gives your arm a short break during the heat. Needing to tap too much is a sign, that you/I have poor form, Which I really like that video because Alec doesn't tap too often. I think Alec shows very well how to stay relaxed and to be able to work as long as you can. Weather it's at the power hammer, anvil, grinder, striking anvil, etc. This is a video I like too. -
The evolution of tool making!
EJRailRoadTrack replied to Mark Ling's topic in Tools, general discussion
I agree with technique is a big part of swinging hammer. Just watch a beginning smith. He will not have the same skill in just swinging the hammer as someone who has been forging for a year+. When you start, a 2 pound hammer or a 2.5 is a GREAT place to start. Let your muscles develop. But don't feel like that's the only weight you can use. If you use the edge of the rounding face on a smaller rounding hammer and use the edge of the anvil you will move steel than using, say a 3 or 4 pound cross pein on the flat of the anvil face. When using larger hammers, you will not be able to swing as fast or as long as using a smaller hammer, it's true, and it's sad sometimes. But In MY opinion, using a bigger hammer correctly is about two things. 1. Staying relaxed. Don't grip too hard, Just as you said. You will end up sloppy. This one also goes hand in hand with my next point. 2. Work pace. Making your blows count is HUGE. This video shows this well: https://www.youtube.com/watch?v=0BLlGLnSn0E . Not just swinging a hammer. If you slow down just a little bit, Planning out your next heat by putting your tools on the anvil that you will use in the next heat. Plus less mishaps will happen in the shop. They're both simple. Using these two thing, personally, I can swing larger hammer for longer than I "should". And working the right hammer for the job is key too. I'm not going to forge a leaf from 3/8s round with a 5 pound rounding hammer. And I'm not going to forge 1.5 inch 4340 with a 2 pound hammer. Just my 2 cents. -
The evolution of tool making!
EJRailRoadTrack replied to Mark Ling's topic in Tools, general discussion
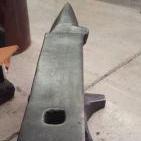
All looks great! I just finished my striking anvil today, so I'm going to start on the fullers, and cupping tool at my next blacksmith meeting! Maybe i'll start a thread like this once I get my projects going! I really need to slow down when i'm forging my tools, and get them cleaner. Always moving forward though ....Proabably


.jpg.2c8e7855ca597cf0697fe9132fe0d3c1.jpg)
.jpg.352005fc82514fbe09ed8a3749b1439c.jpg)
.jpg.f7287bfbc1a2c6230311b3762ccbe505.jpg)