

BeaverNZ
-
Posts
351 -
Joined
-
Last visited
Content Type
Profiles
Forums
Articles
Gallery
Downloads
Events
Posts posted by BeaverNZ
-
-
One way of getting an idea if the old regs are dammaged is to turn the cylinder on but just leave the torch turned off and if the pressure creeps up on the outlet side then they are faulty and can be dangerous if the fuel gas is acetylene as above 15 psi it can become unstable. When you turn the cylinder valves on do it slowly as if you just crack them open the high pressure gas can surge through and this slams the internal metering valve onto its seat and will damage it, with care regs last along time. You can usually get new gauges as well and fit them to the old regs, just make sure they are made for use in a gas set and a side note dont use copper pipe as hose joiner with acetylene as it can form copper acetylide or something like that that is shock sensitive if i remember correctly.
-
JPH
From what you are saying and the fact it works now but the saftey and the gauge dont work I think you may have the control bank plumbed the wrong way round, the outlet and inlet swapped. have a look at the valve bank and on the outlet spigot there is often a letter T for Tank cast in it other than that take it to an expert Cheers Beaver
-
18 hours ago, the iron dwarf said:
quote removed
Actually thats right you can also often put an allen key or such down a hole in the solenoid spigot and push it in to manually trigger it as well
-
That looks so good I really like the stand as well
-
Thats facinating and looks really nicely done can you put up a bit of vid of the spinning part if its not a secret squirel process I have never done any thing like that before, Cheers Beaver
-
Hydraulics dont usually give off sparks unless it does turn out to be the solenoid My first thought was a problem with the coupling between the motor and pump and maybe a stripped or missing key/keyway or a tapered shaft and couplig being loose or damaged and starting to slip when the load comes on I have come across this in the past and its not obvious what the problem is
Cheers
Beaver
-
That looks really nice
-
No problem its easier to do it a bit too strong and not have it bend than remove damaged materail and then redo it and a rigid press is much safer to use as well, Enjoy cheers Beaver
-
Hello there Ross
Yes thats much better though you could box in the whole bottom beam which would support the edges better or if you wanted to go completely over the top put stiffeners in and box it with some plug welds to tie it all together, this is what I did when I was making my press though its much bigger and intended for general workshop duties
-
Hi if if want to do it to a best practice standard then you need to put in stifeners or continue the sides of the H as this is the part of the h beam that carries most of the load and the center part is mostly just to hold the sides of the H apart, And as Jspool said you are making a lot more work and getting a lesser result while probably still strong enough its not the proper way of consrtucting the frame. Cheers Beaver
-
On 3/19/2013 at 7:47 PM, forgemaster said:
Just for interest we have No.s C1037, C1891, C1265, Y4323 Y3947 and press No E764, also have another 7cwt but its down the yard and I don't feel like a walk at present.
Woody for kevlar packing try Walkers PL, for a 5cwt you will need 2 lengths of 800mm long 5/8 x 3/16 neoprene proofed kevlar tape talc finish (3 or 4 ply depending on the wear between the rod and the gland) I am currently using 3ply in our hammer and this packing has been in since 8/1/09 and our hammer runs every work day. Easiest way to change packing I have found is to remove the top block,and drop the gland using a forklift (put a blade either side of the rod) and using a packer to hold the rod up about 300mm (lift the rod up without the top block while the hammer is still operable, before you remove the gland), put the gland down onto the bottom block then use the forklift to lift the rod up and chain it up so as you can remove the packer (the packer must be able to let the gland go over it) thern remove the gland with the forklift to a sturdy table or bench to work on it. Give gland a good clean and blow out all the air holes that are drilled through it. Fit the new packing in and trim it in there, make sure you stagger the 2 joins to opposite sides of the gland. Replacement is reverse of removal just remember to oil the rod really well as you are sliding the gland back up, and make sure the packing stays in the groove as you begin to lift the gland up the rod. Make sure the hammer is getting plenty of oil through the pump so as the rod stays oily and helps the packing stay nice.
Phil
Hi Phil
I was just reading your post here and saw that one of your hammers is only a couple of numbers from mine which is Y4348, its a 2CWT inslide whats the approx age of yours if you know. Mine was from the invercargill railway work shop Cheers Beaver
-
Big gun doctor the blades have stellite tips fitted but the actual blade band is the same material as what the last lot of blades were made from which apears to be 15n20 or such like. The saw doctor at this mill is one of my old motor bike racing mates
-
I was out at a sawmill today and did a bit dumpster diving and aquired probably over 100 kg or 220 lbs of large bandsaw blade I think I will give some of it away to a couple of other guys doing abit of forge work

-
I was given a large piece of 20mm SS400 which was a structural steel and I used it in the guide of the cutting head of a log splitter I made a few years ago and it proved to be prone to picking up and gouging when it wore against its self I think it is intended to have a lot of ductility for earthquakes so it gives to absorb energy. I wouldnt use it again instead I would use just mild steel or a higher tensile steel
-
Yes I do some thing similar to Frosty, I used to have to go to the local aluminum smelter and after you came back every thing was magnetised which seemed to make any needles from the grinder or die grinders stick out at right angles and stick into your fingers and pulling out a string of spanners out of your toolbox gets old real fast. But anyway my method is to loop up your earth lead of your AC welder into a circle big enough to pass the said items through conect the earth directly to the hand piece terminal set the welder at a fairly high amperage turn it on and pass the items backwards and fowards a few times and it will be done
-
When I do it the press often using three pieces of flat bar I call it Joggling, Probably a term of british origin
-
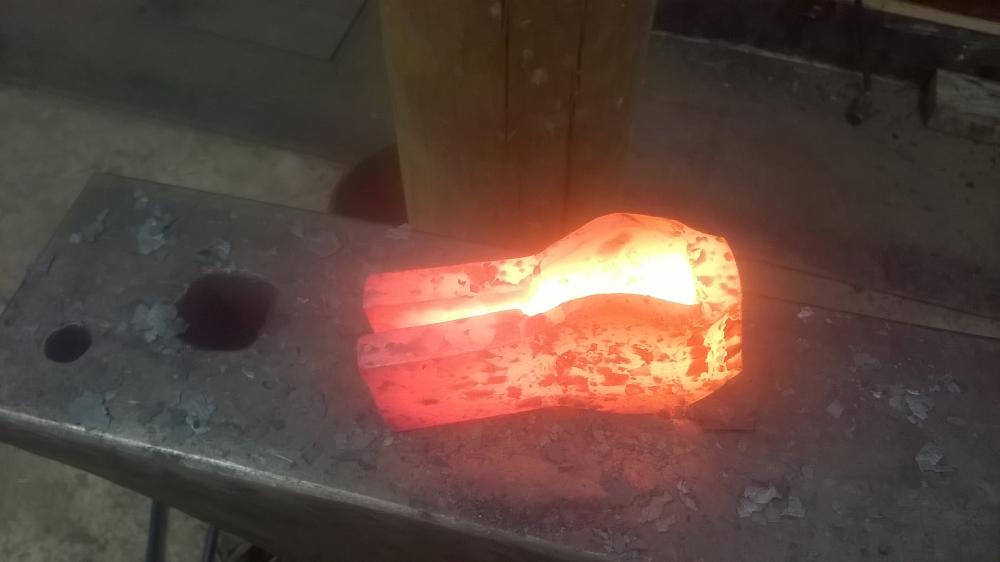
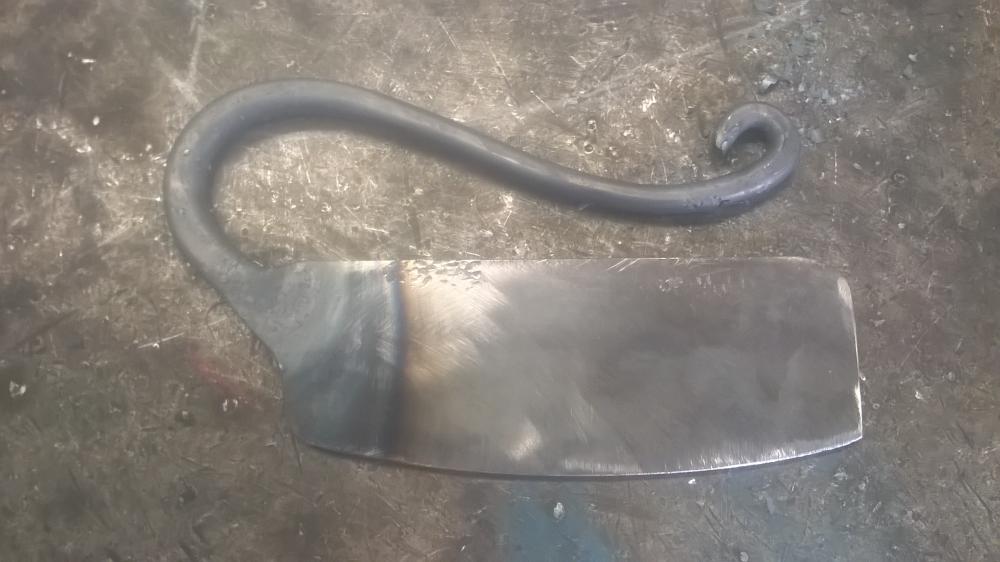
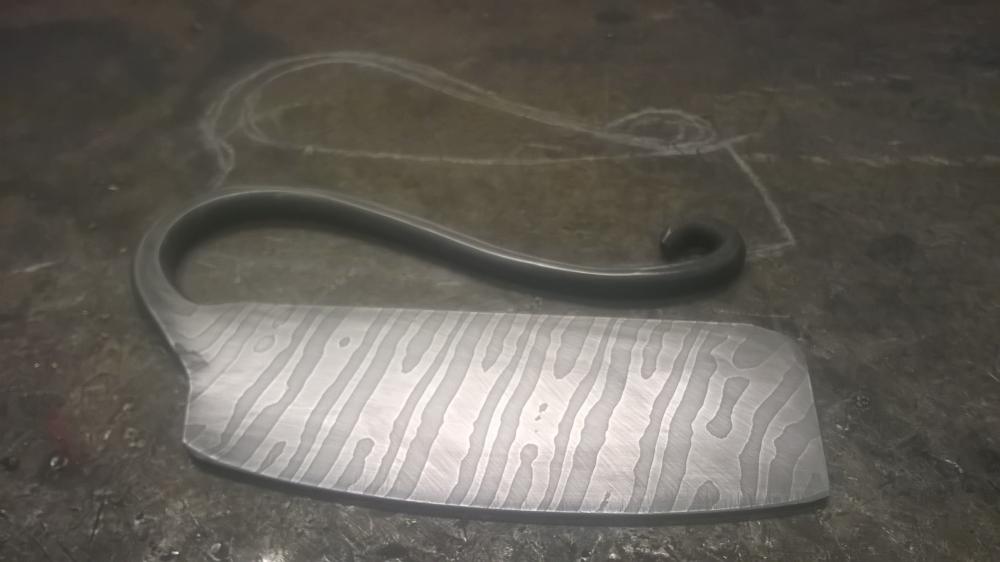
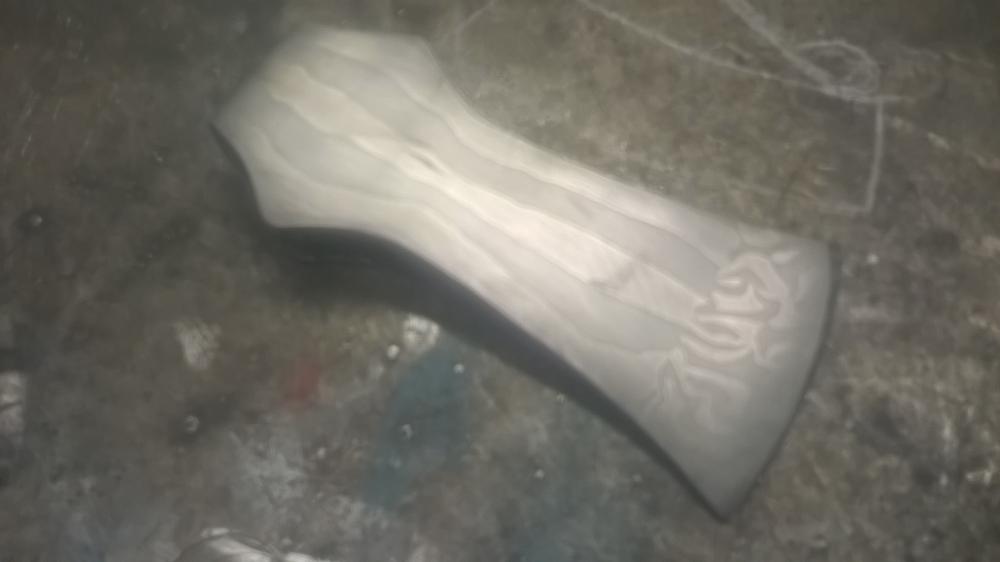
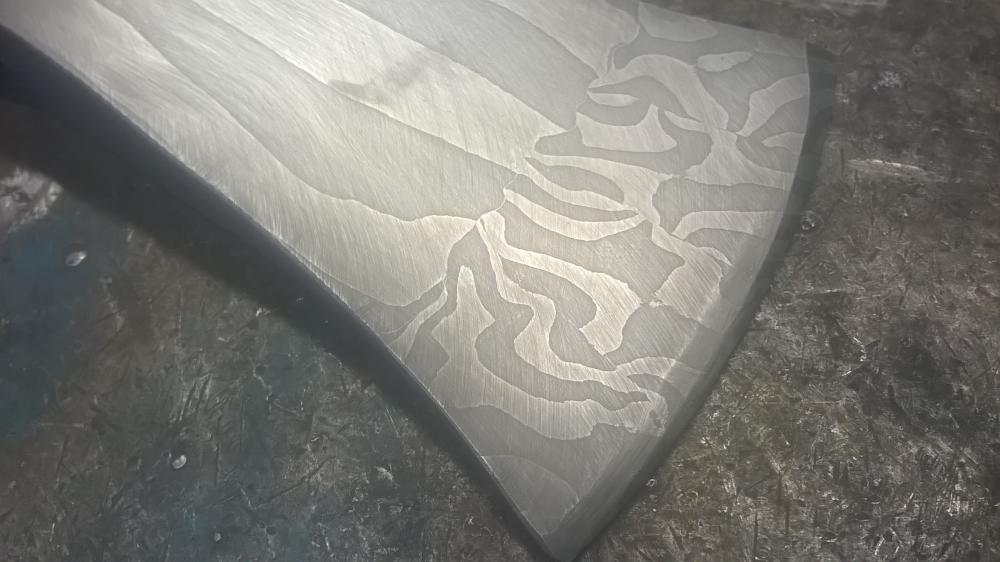
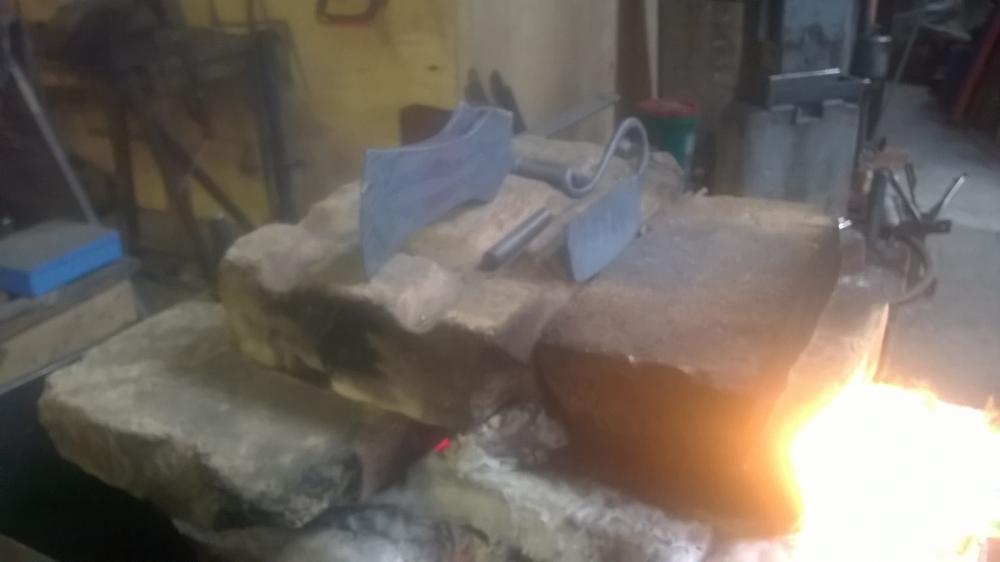
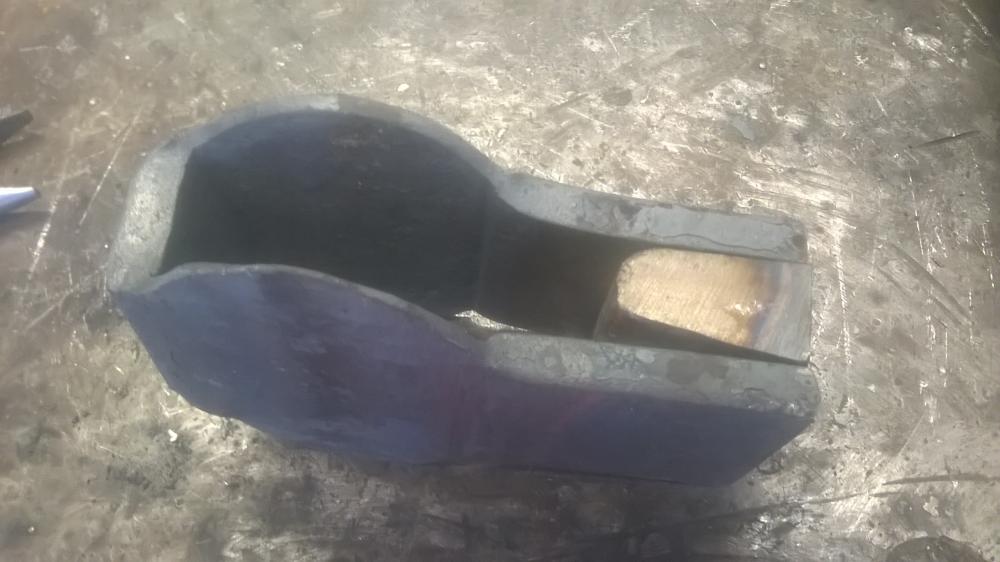
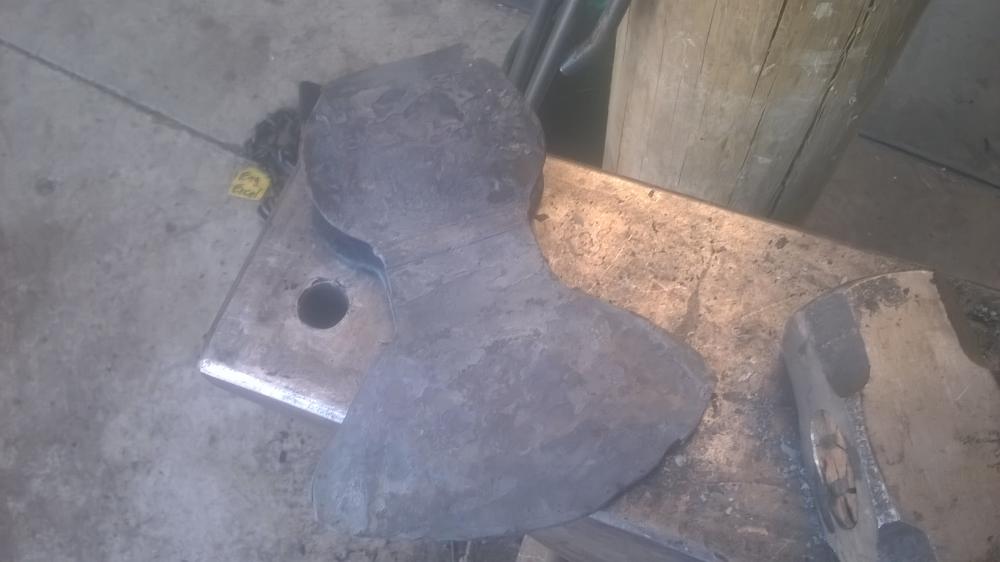
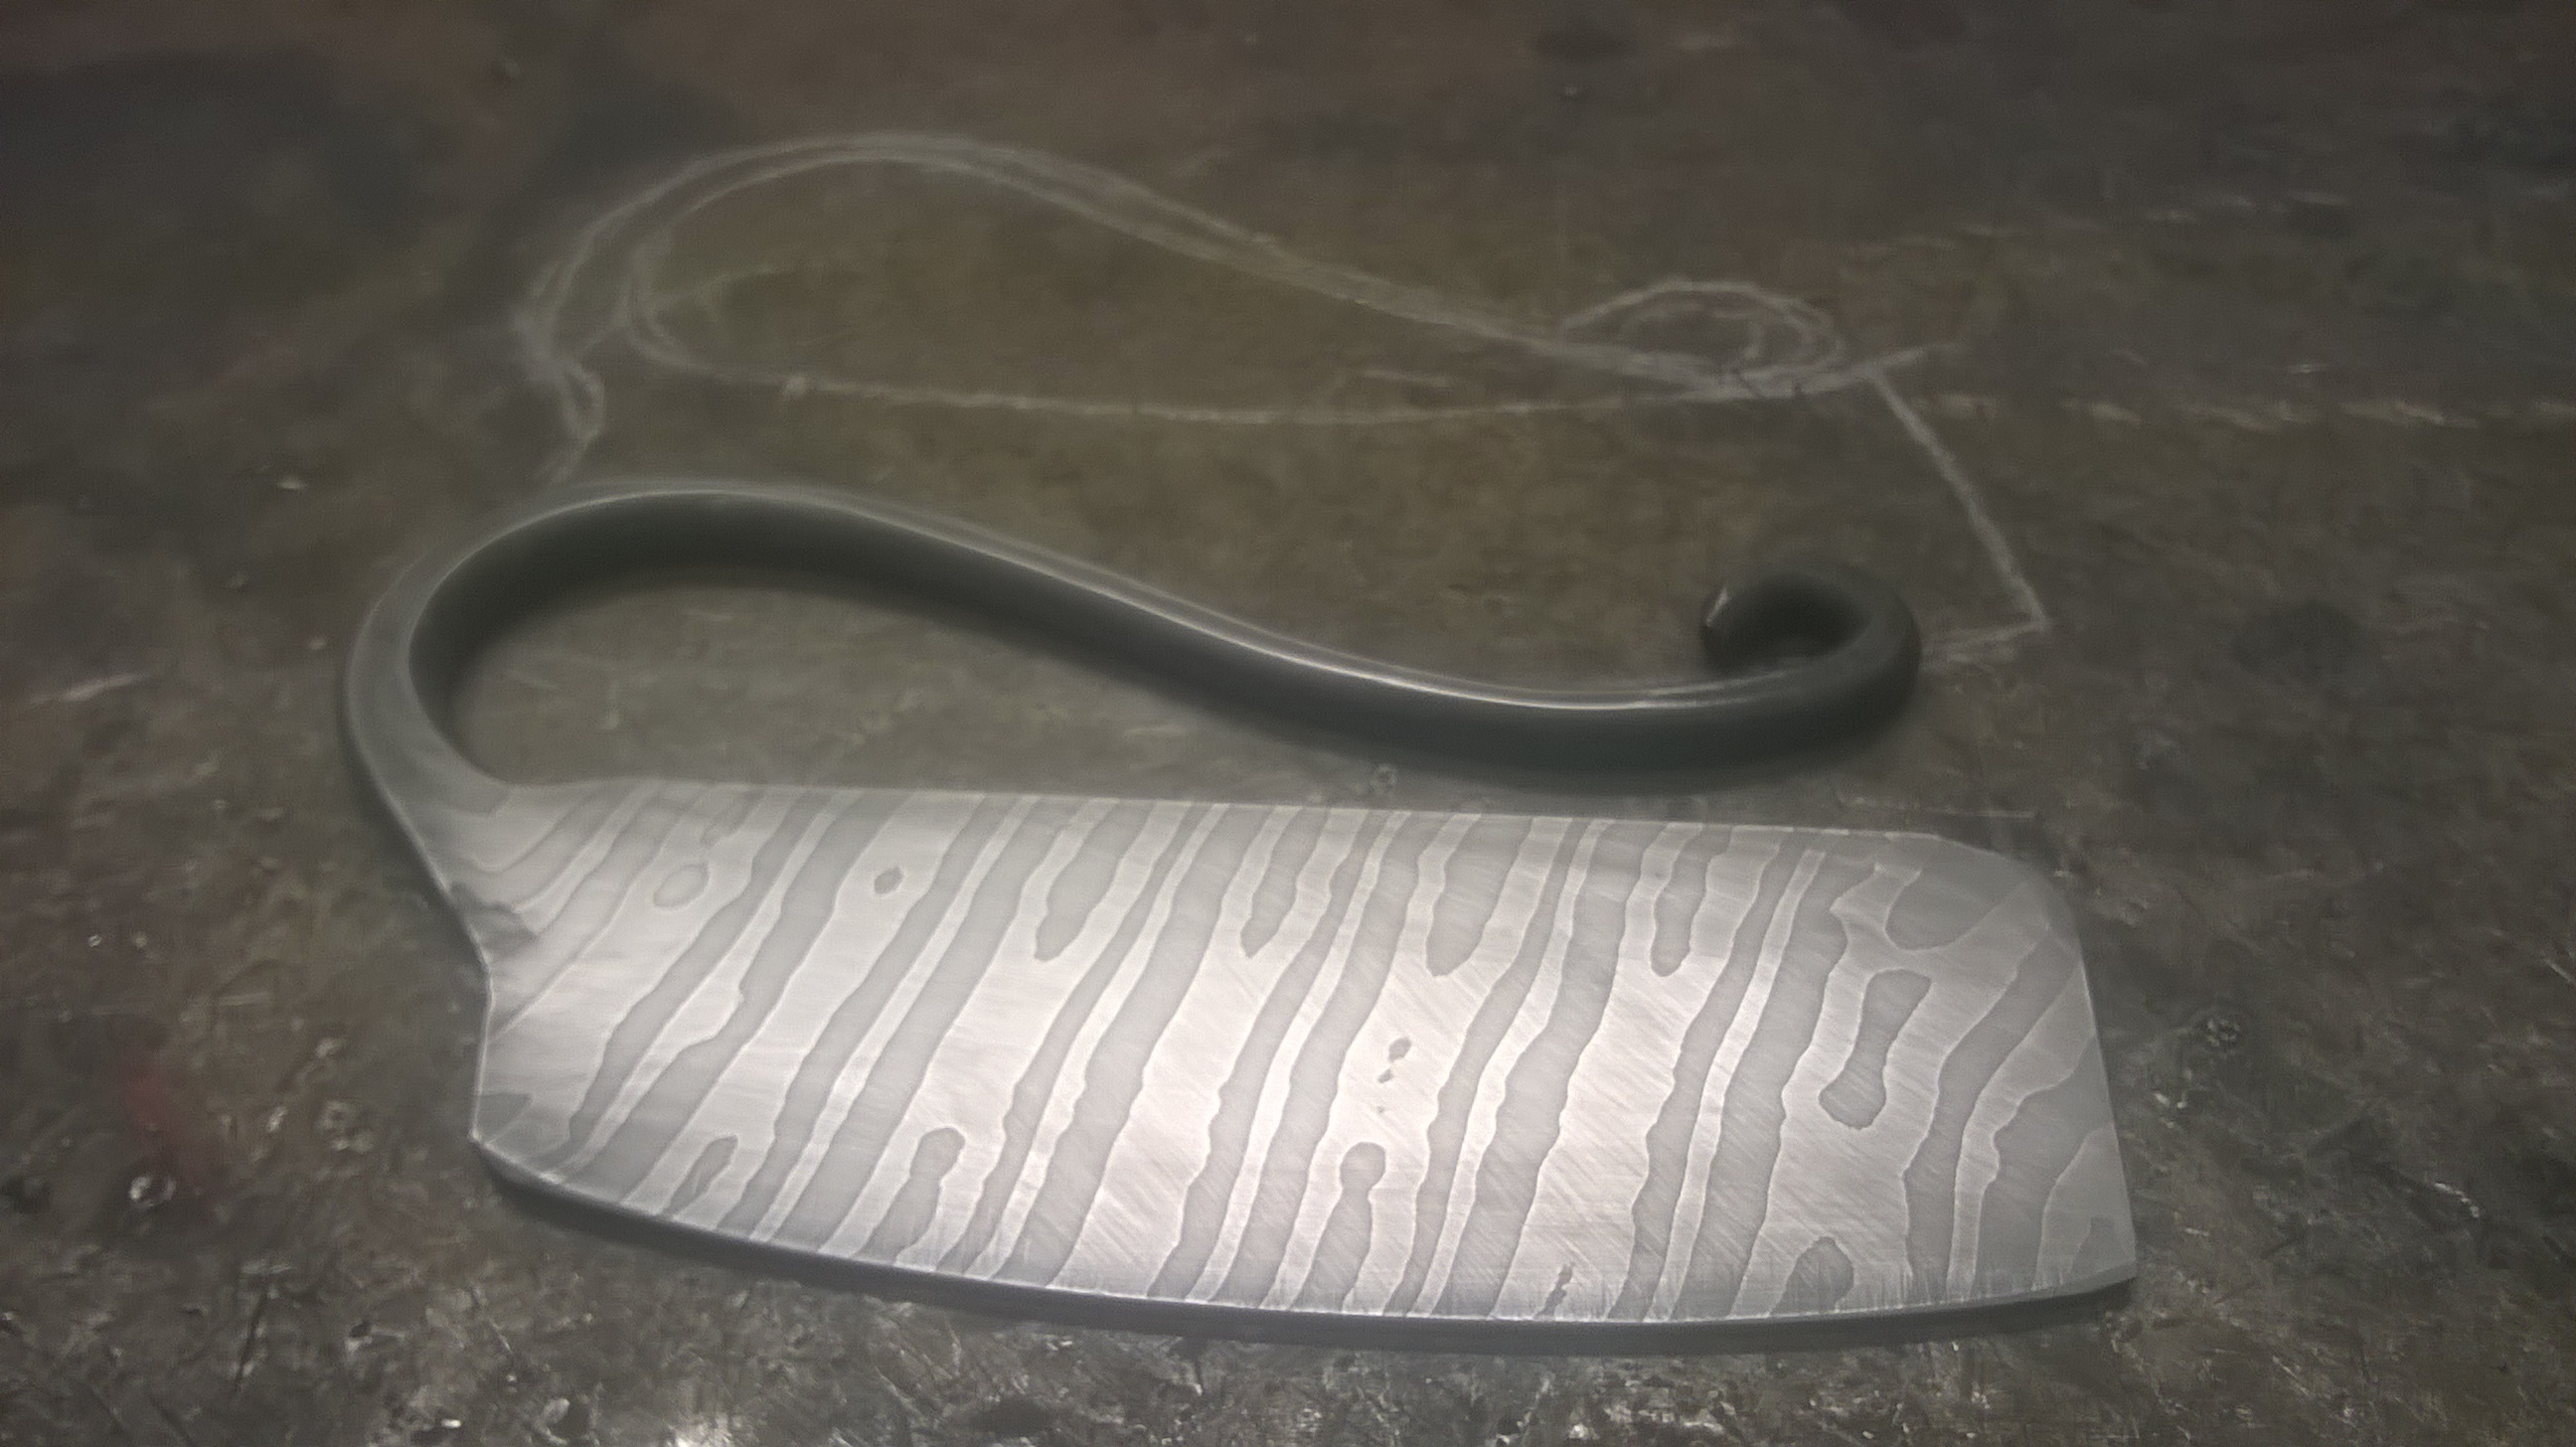
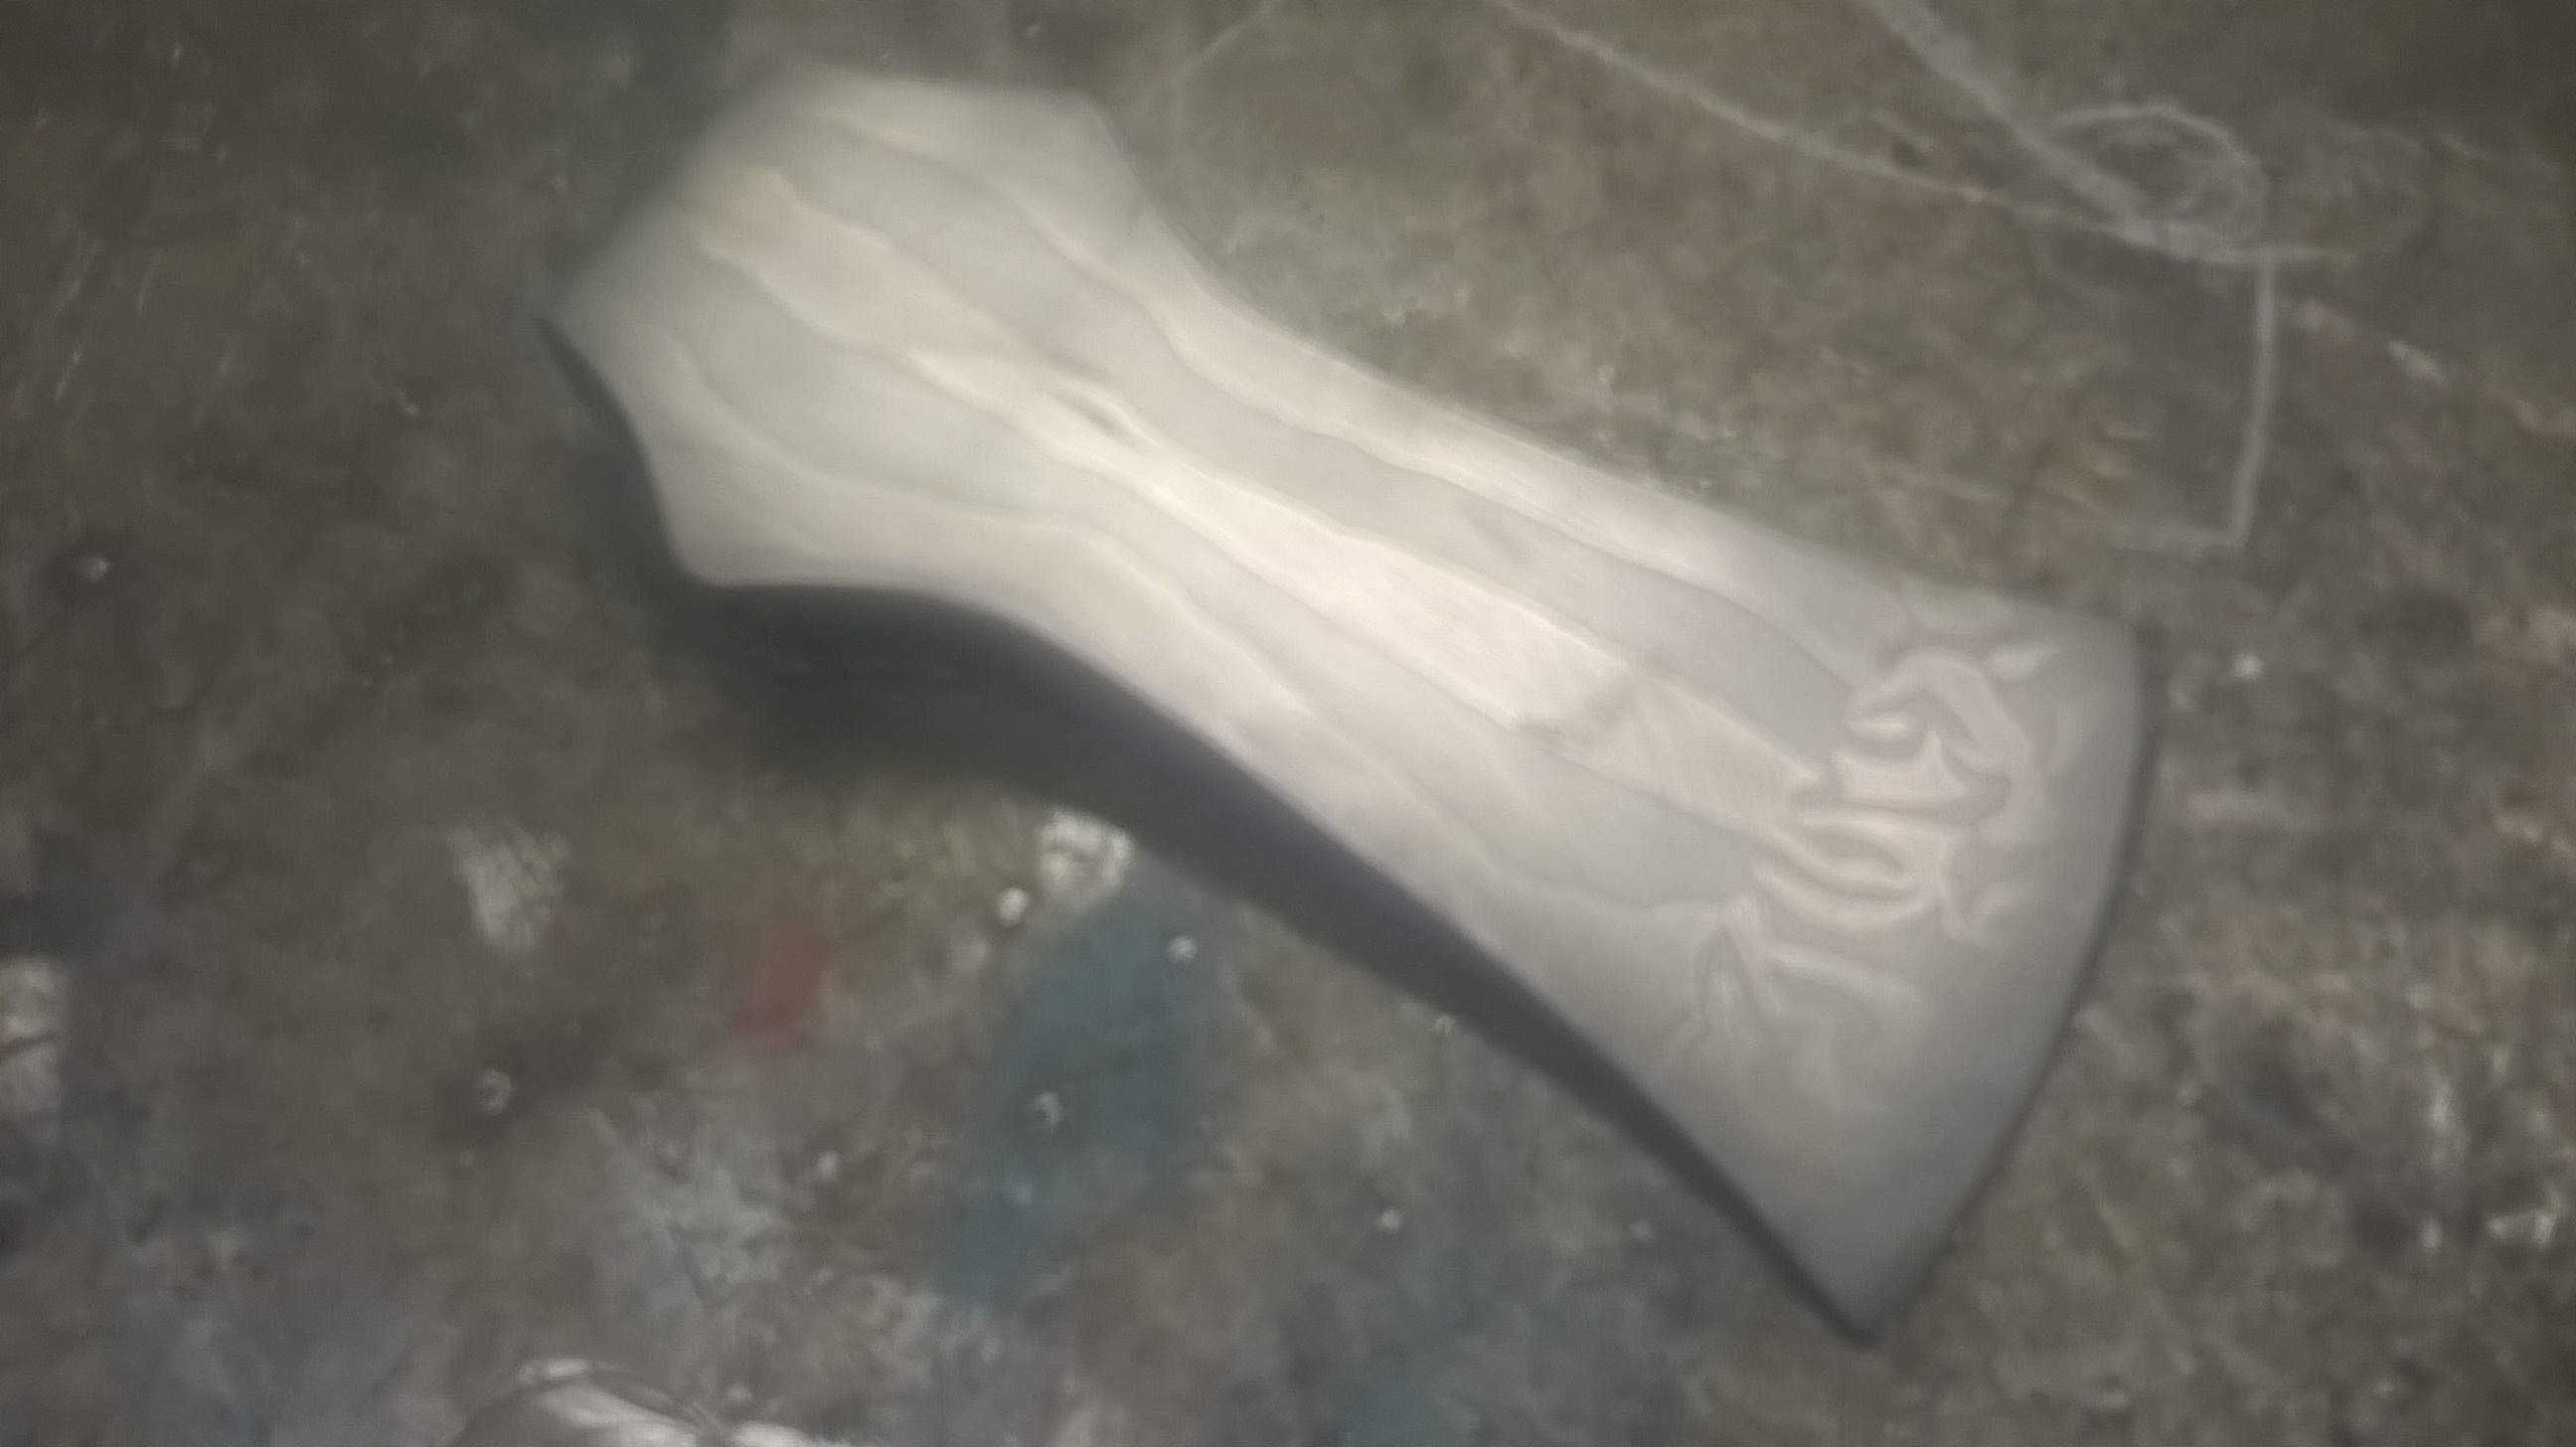
I have had a very productive day its bucketing down with rain outside but nice and warm in here. It turned out I had a bit too much materail in the centre of my axe billet and it made the axe longer than I first planned but its turned out ok this is my second axe shaped object and first pattern welded axe. I havent heat treated either item yet so could still have a disaster and the pattern will be more vuvid after that as well


-
Wow Just wow thats so amazing fantastic work
-
9 hours ago, the iron dwarf said:
great tooling, may suit a forging press more than a hammer but how to load faster and eject?
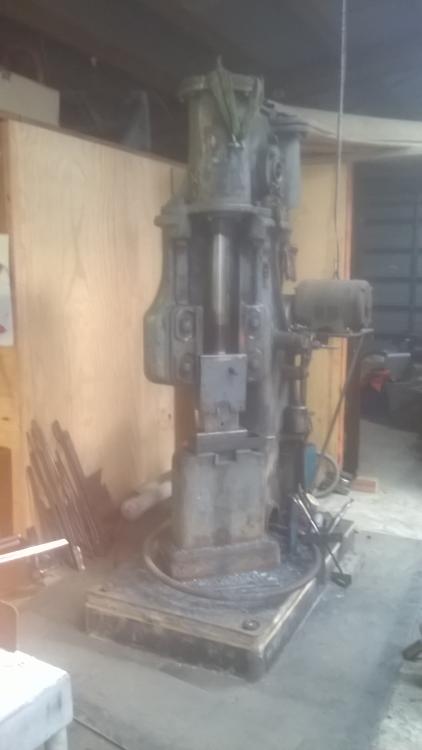
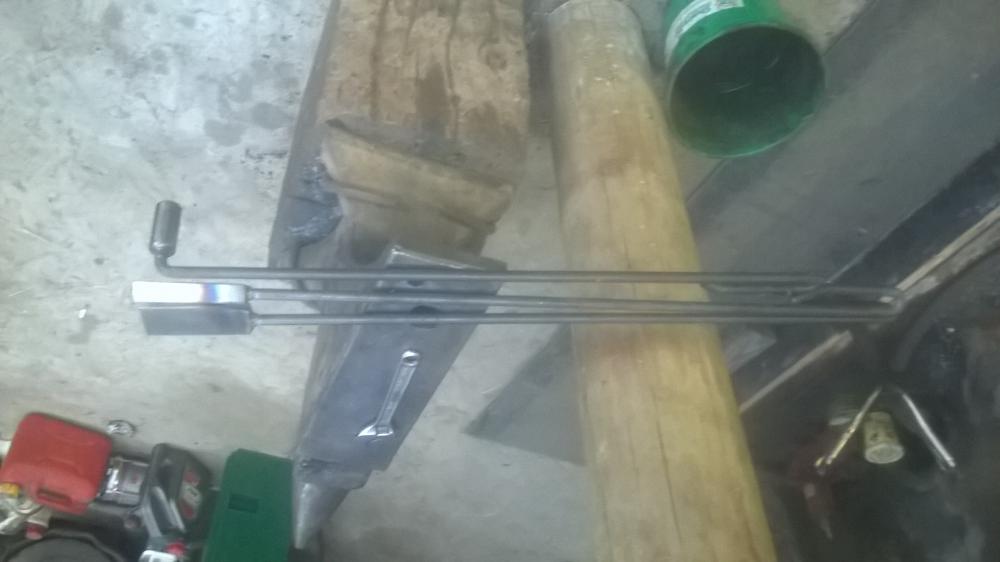
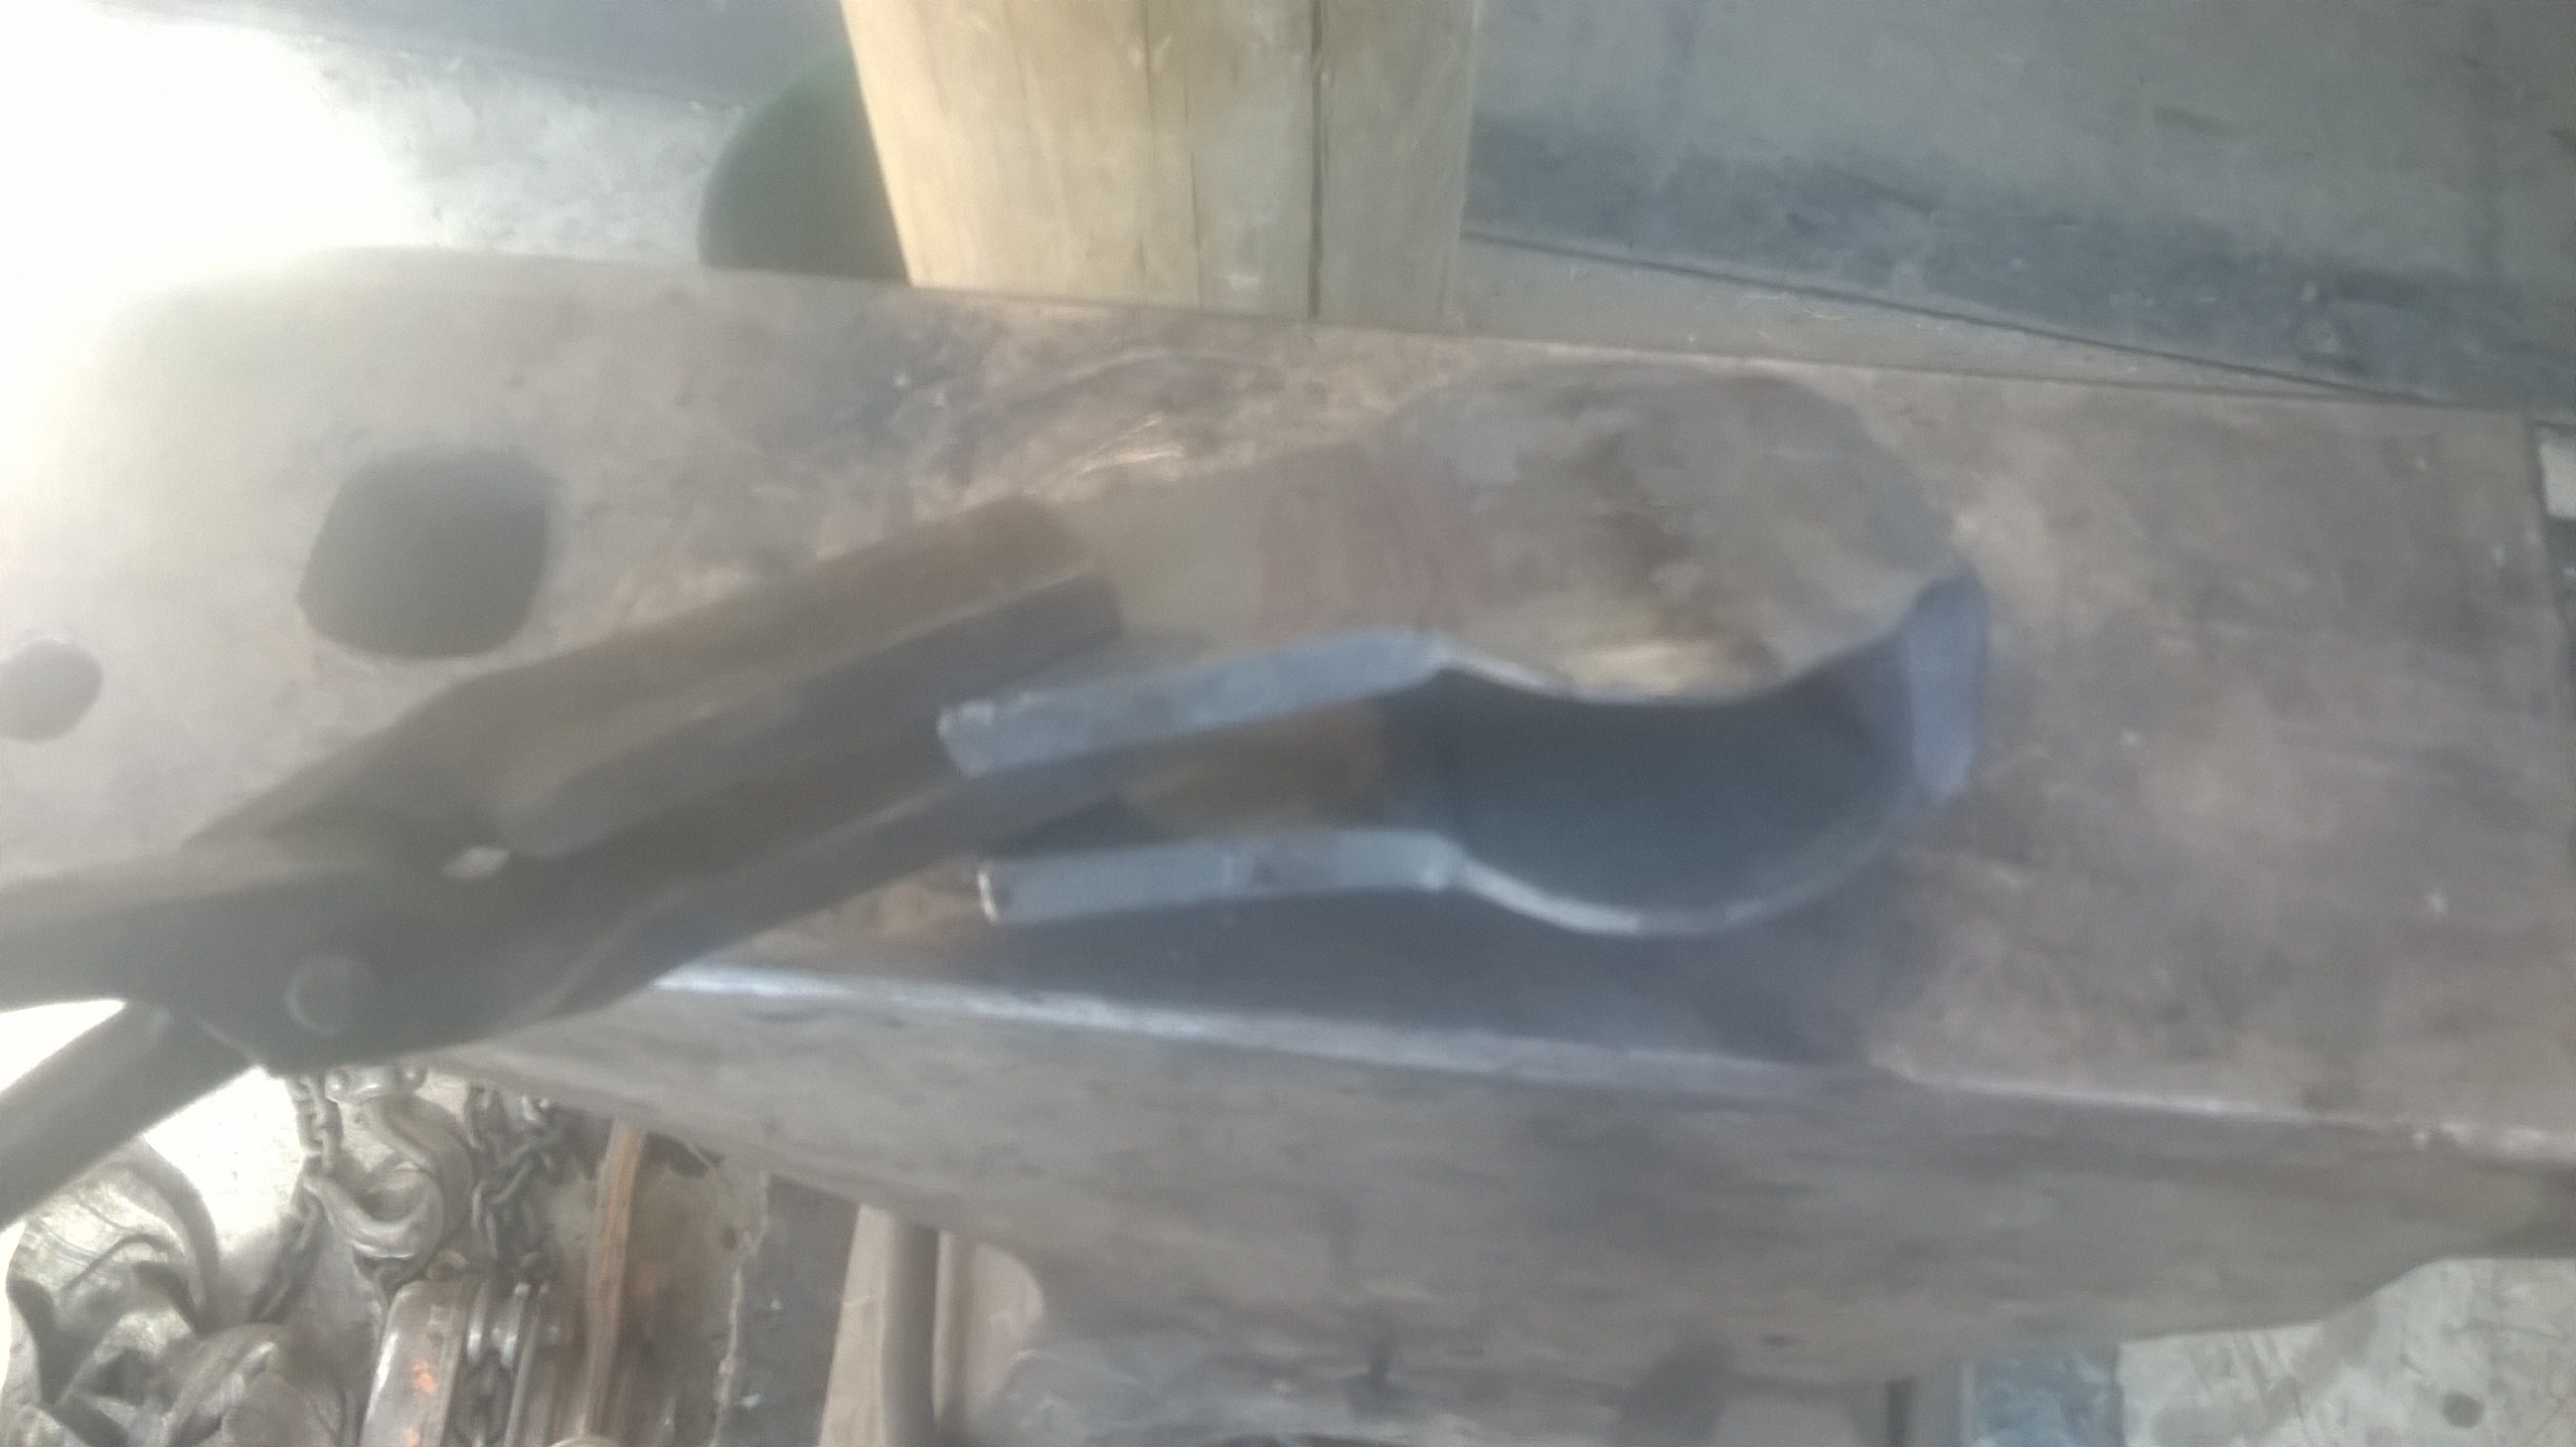
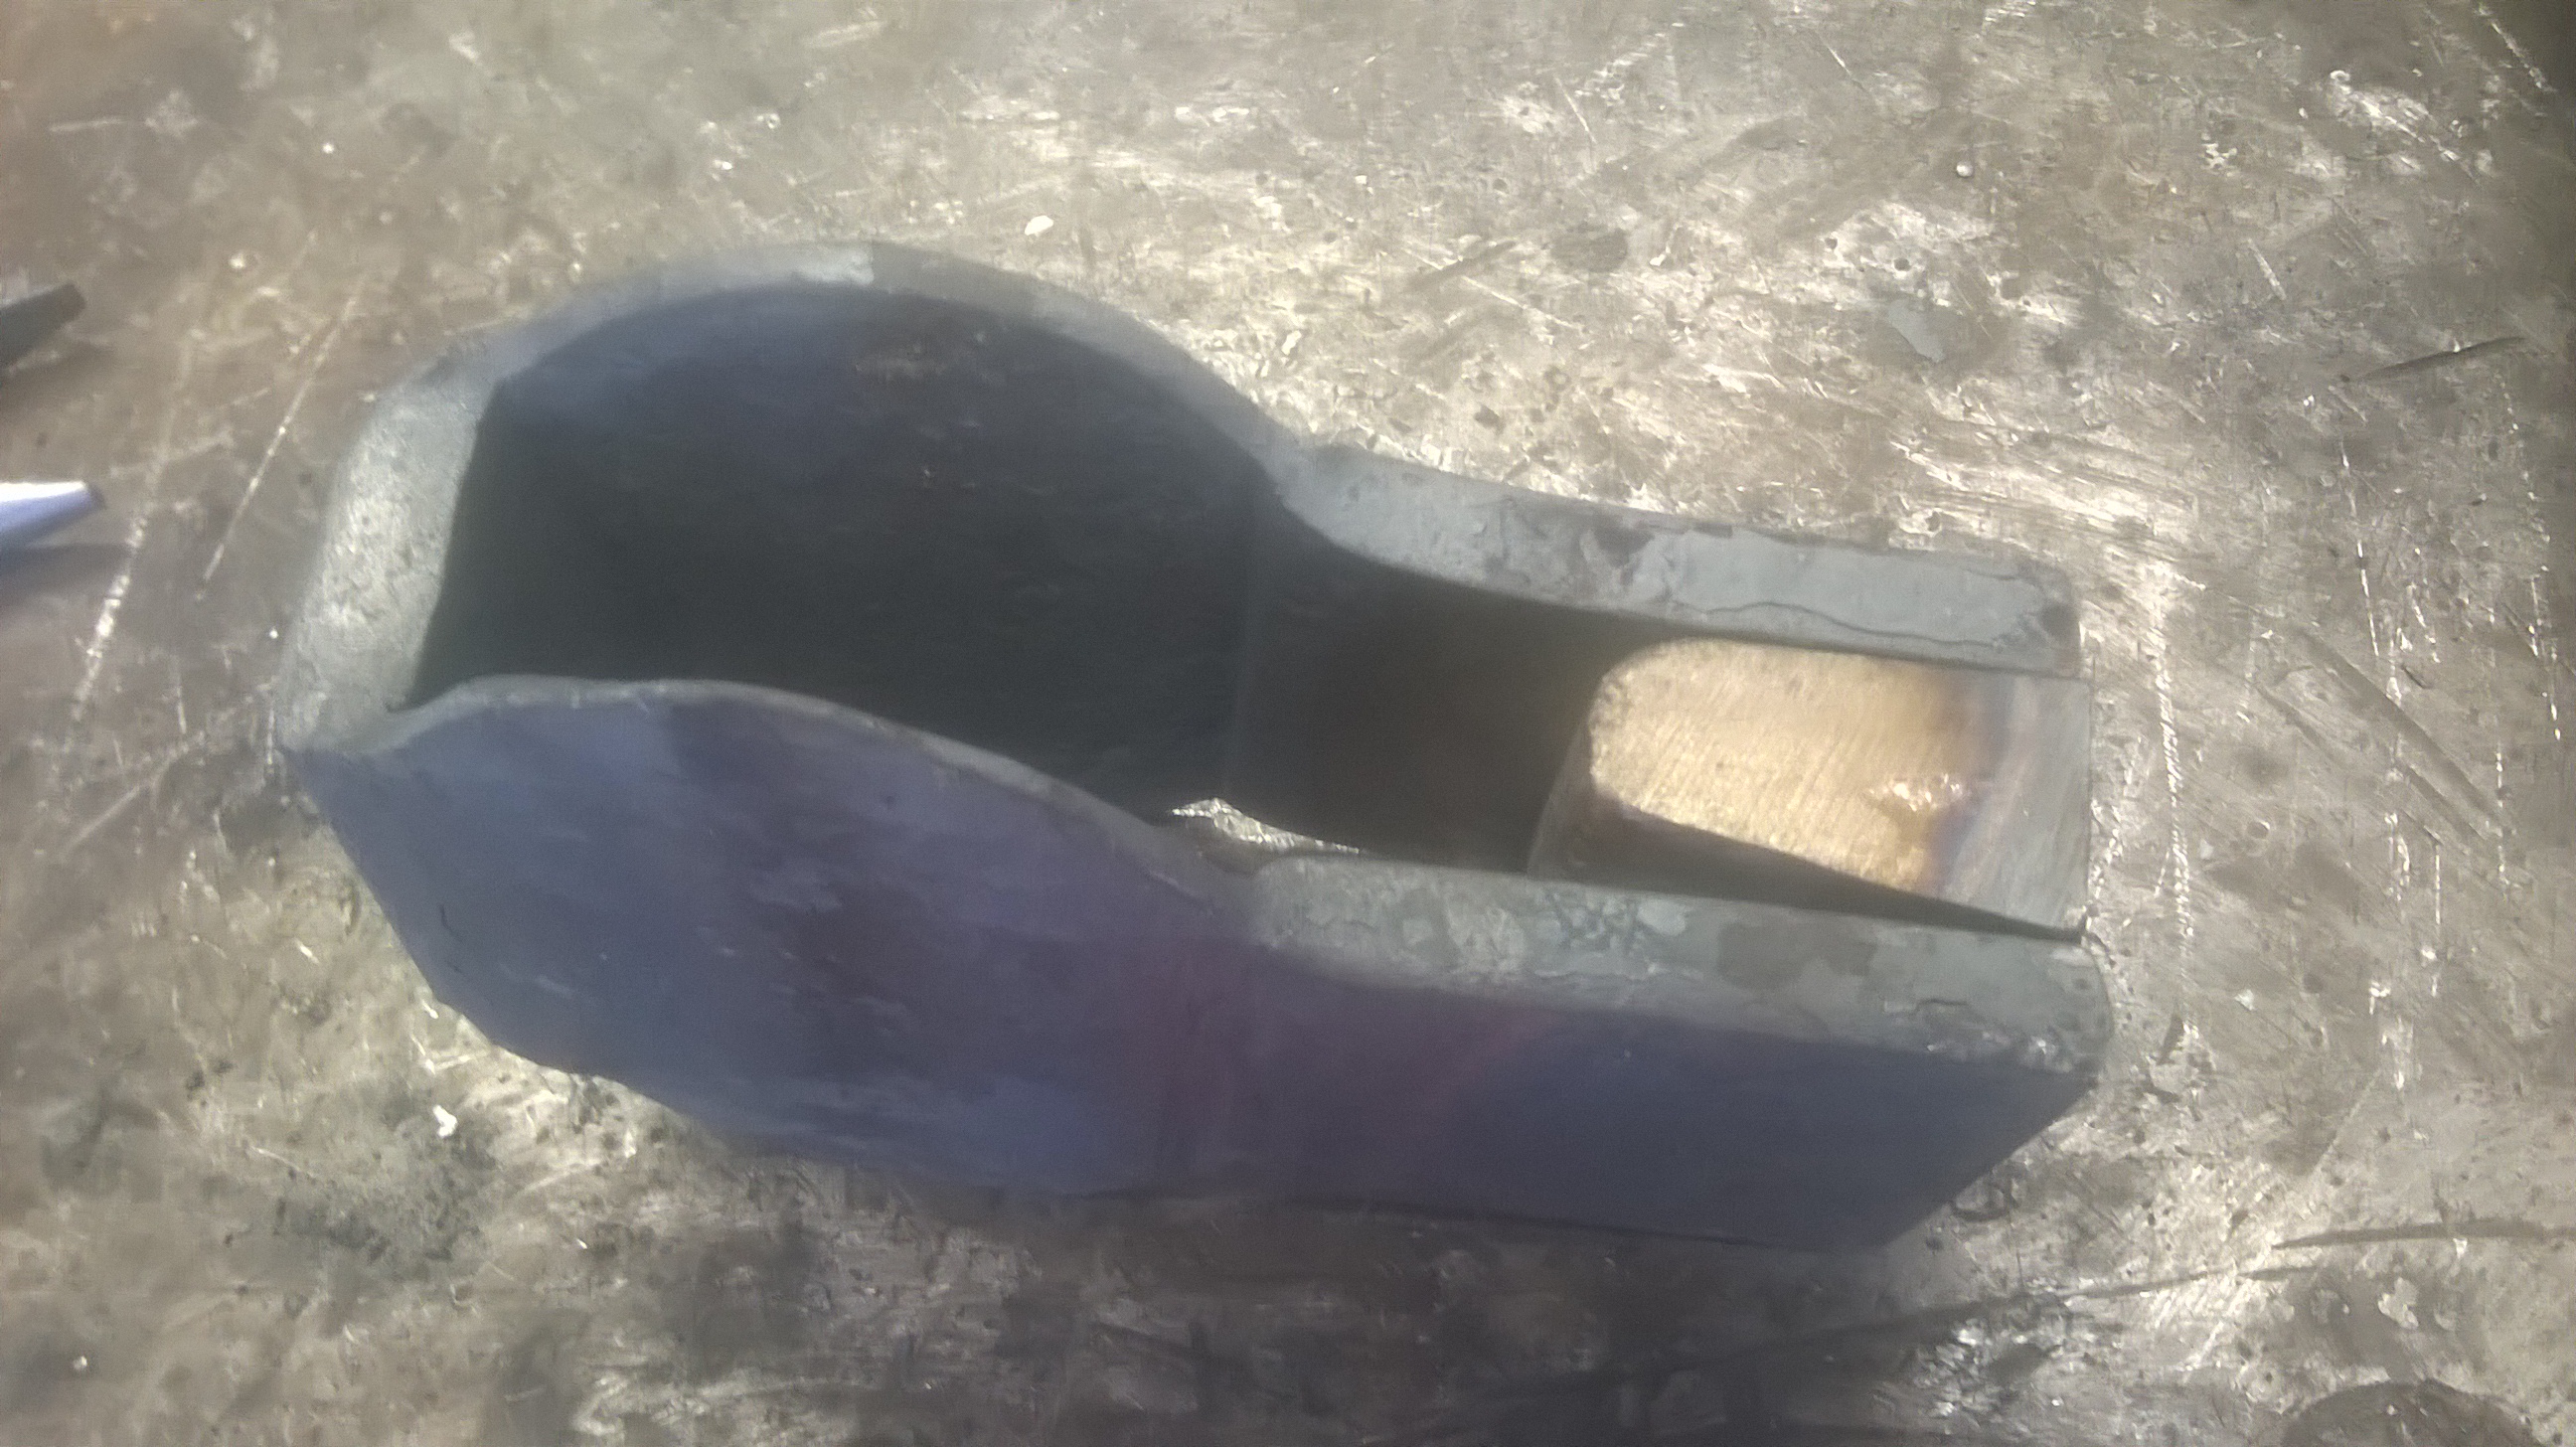
I have a larger version for making 3/4x4 inch rivets that goes in the press, mainly because the tooling needs about 350mm of travel I will have to post it here Cheers Beaver
-
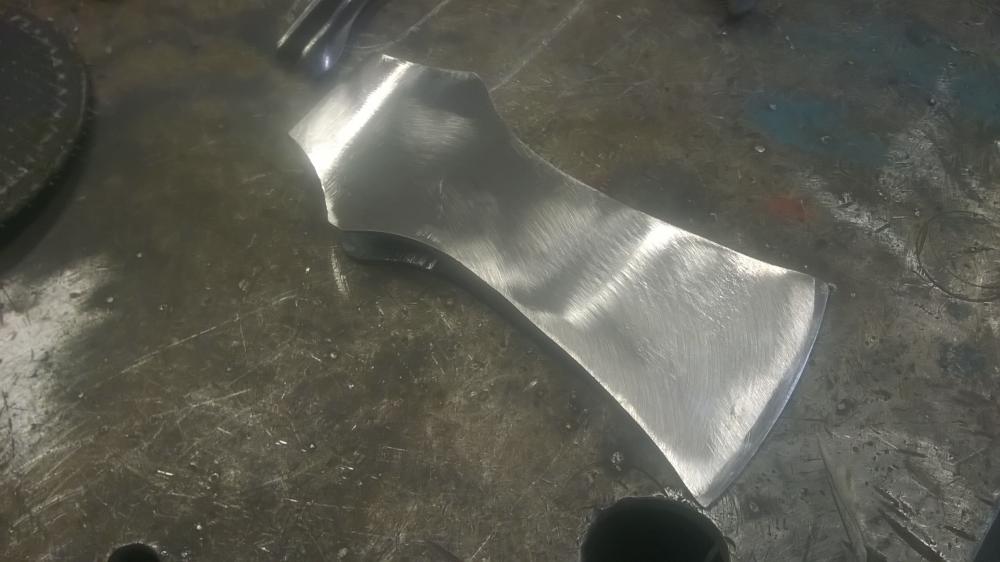
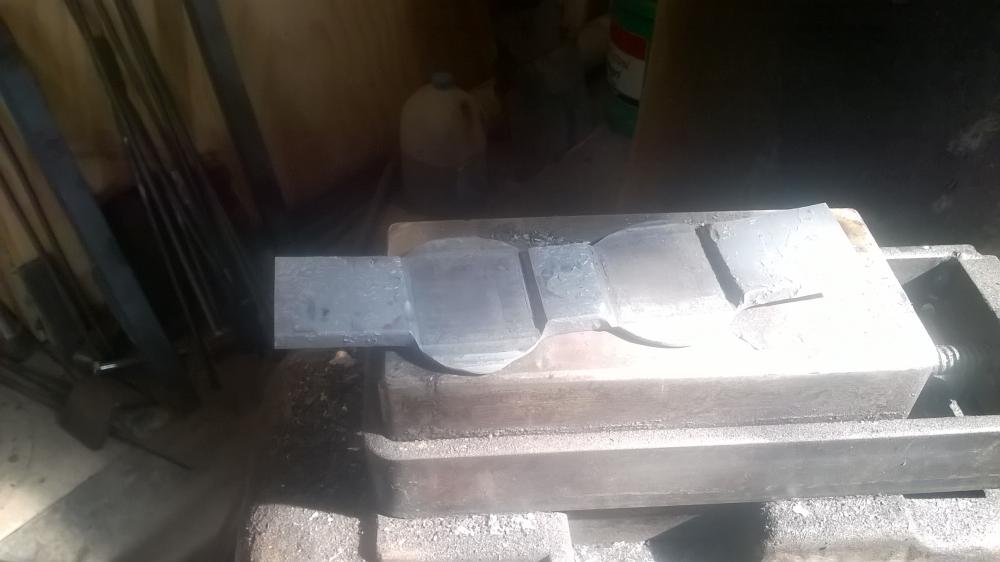
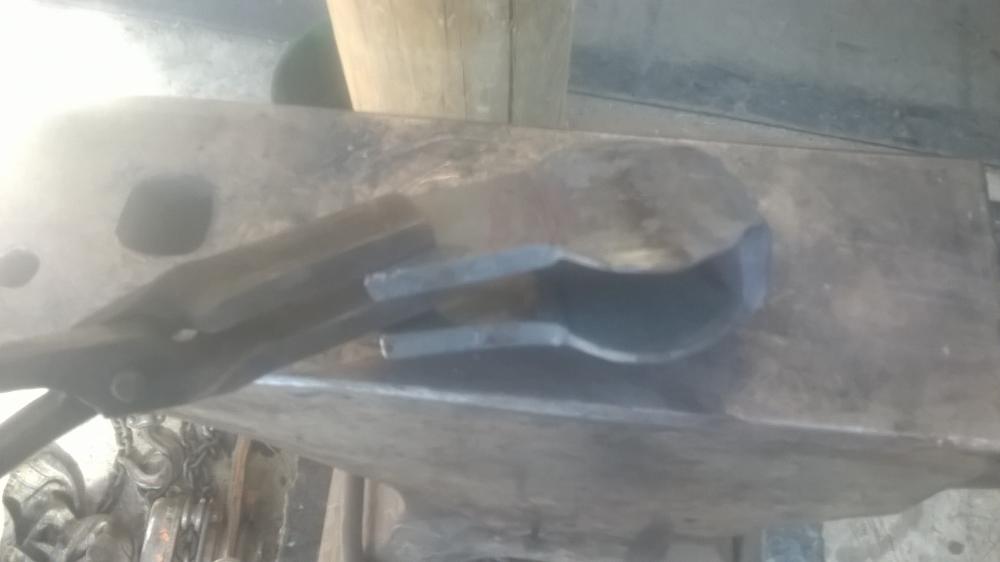
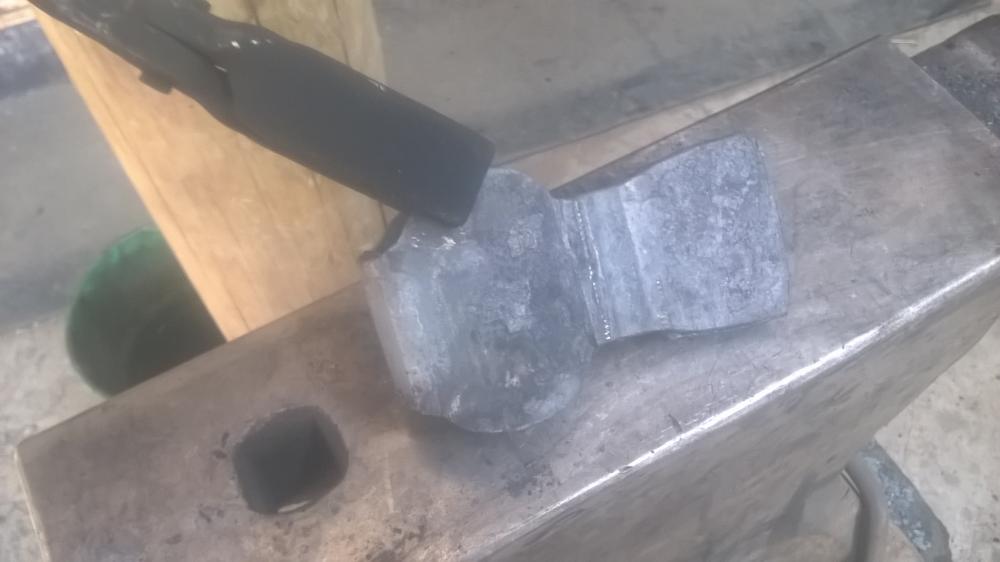
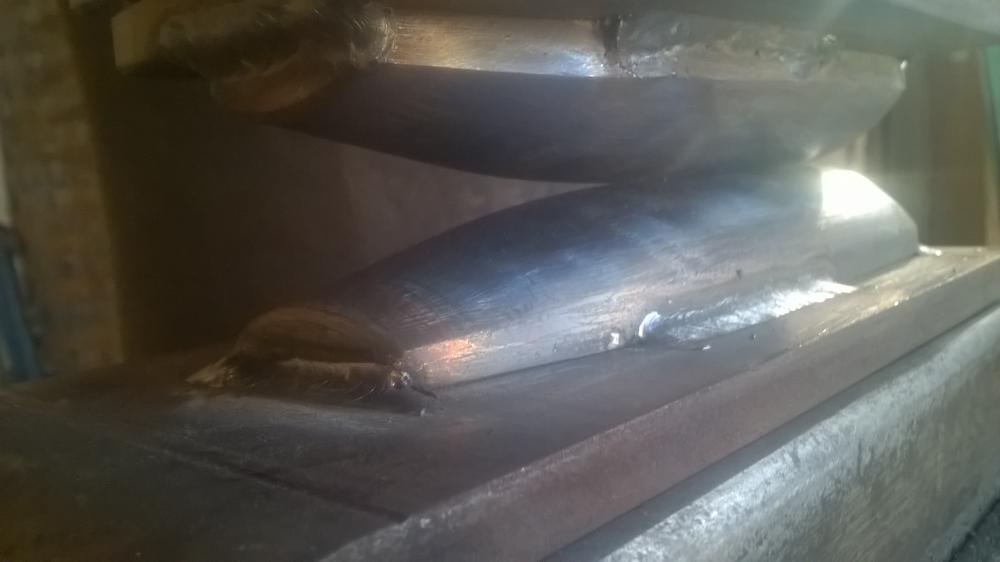
There is no video of making the axe unfortunatly I will wait until I get better at it first, and nothing apart from a few pics of the tooling I cut the three inch bar down with the horizontal metal cutting bandsaw and then bent it cold in the press which took about 50 tons force as I used two pieces of aluminum close together to get a small radius bend then removed the excess with a cutoff disc and clean up on the linisher platten. I have just found the video that I got the idea from, its in the axe section of IFI have a look "Forging a colonial axe" its a good old youtube vid
-
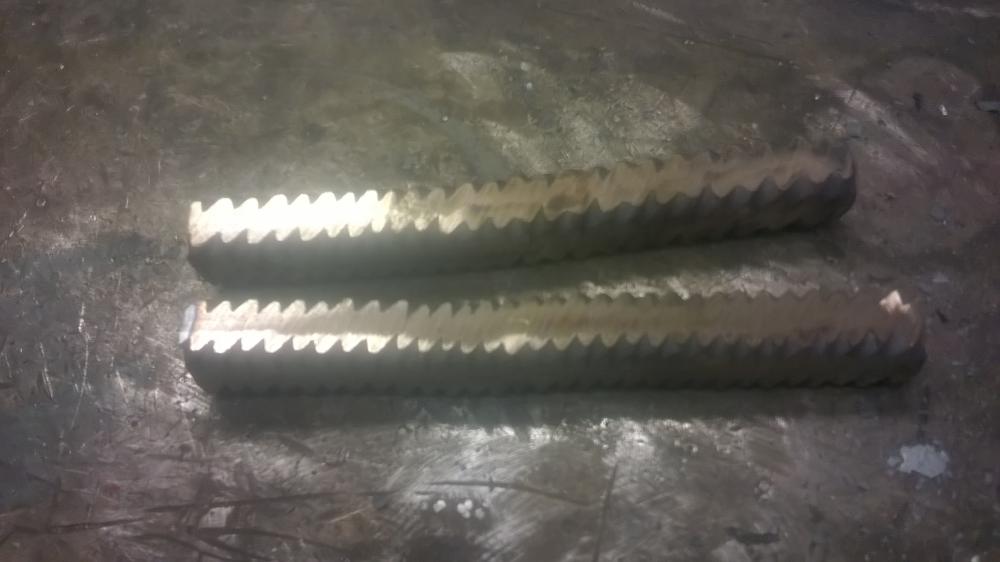
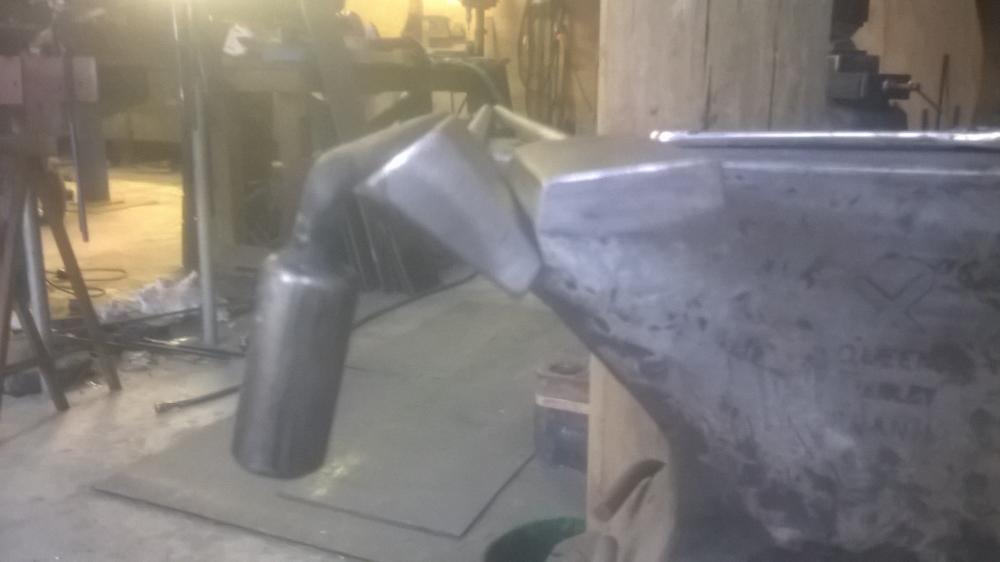
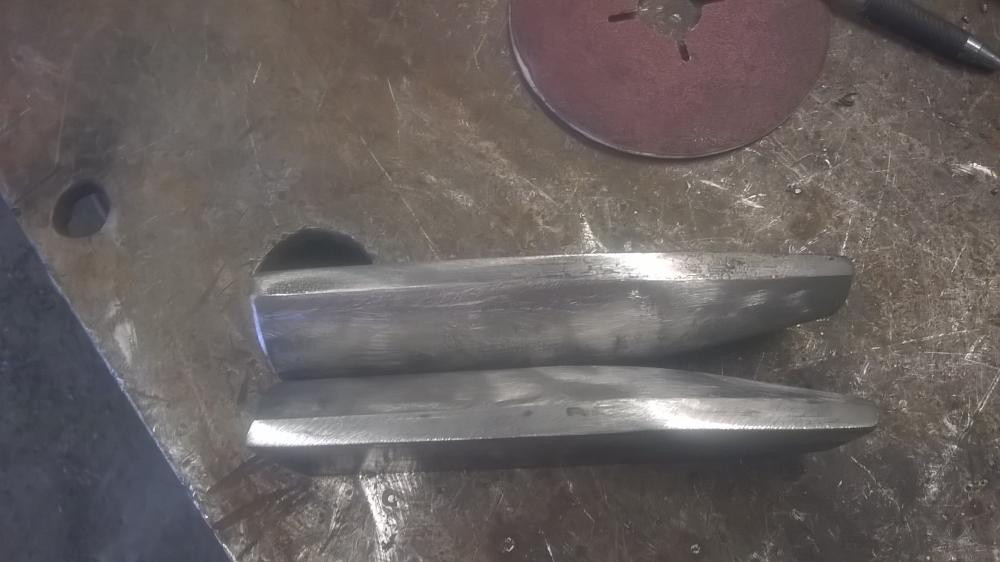
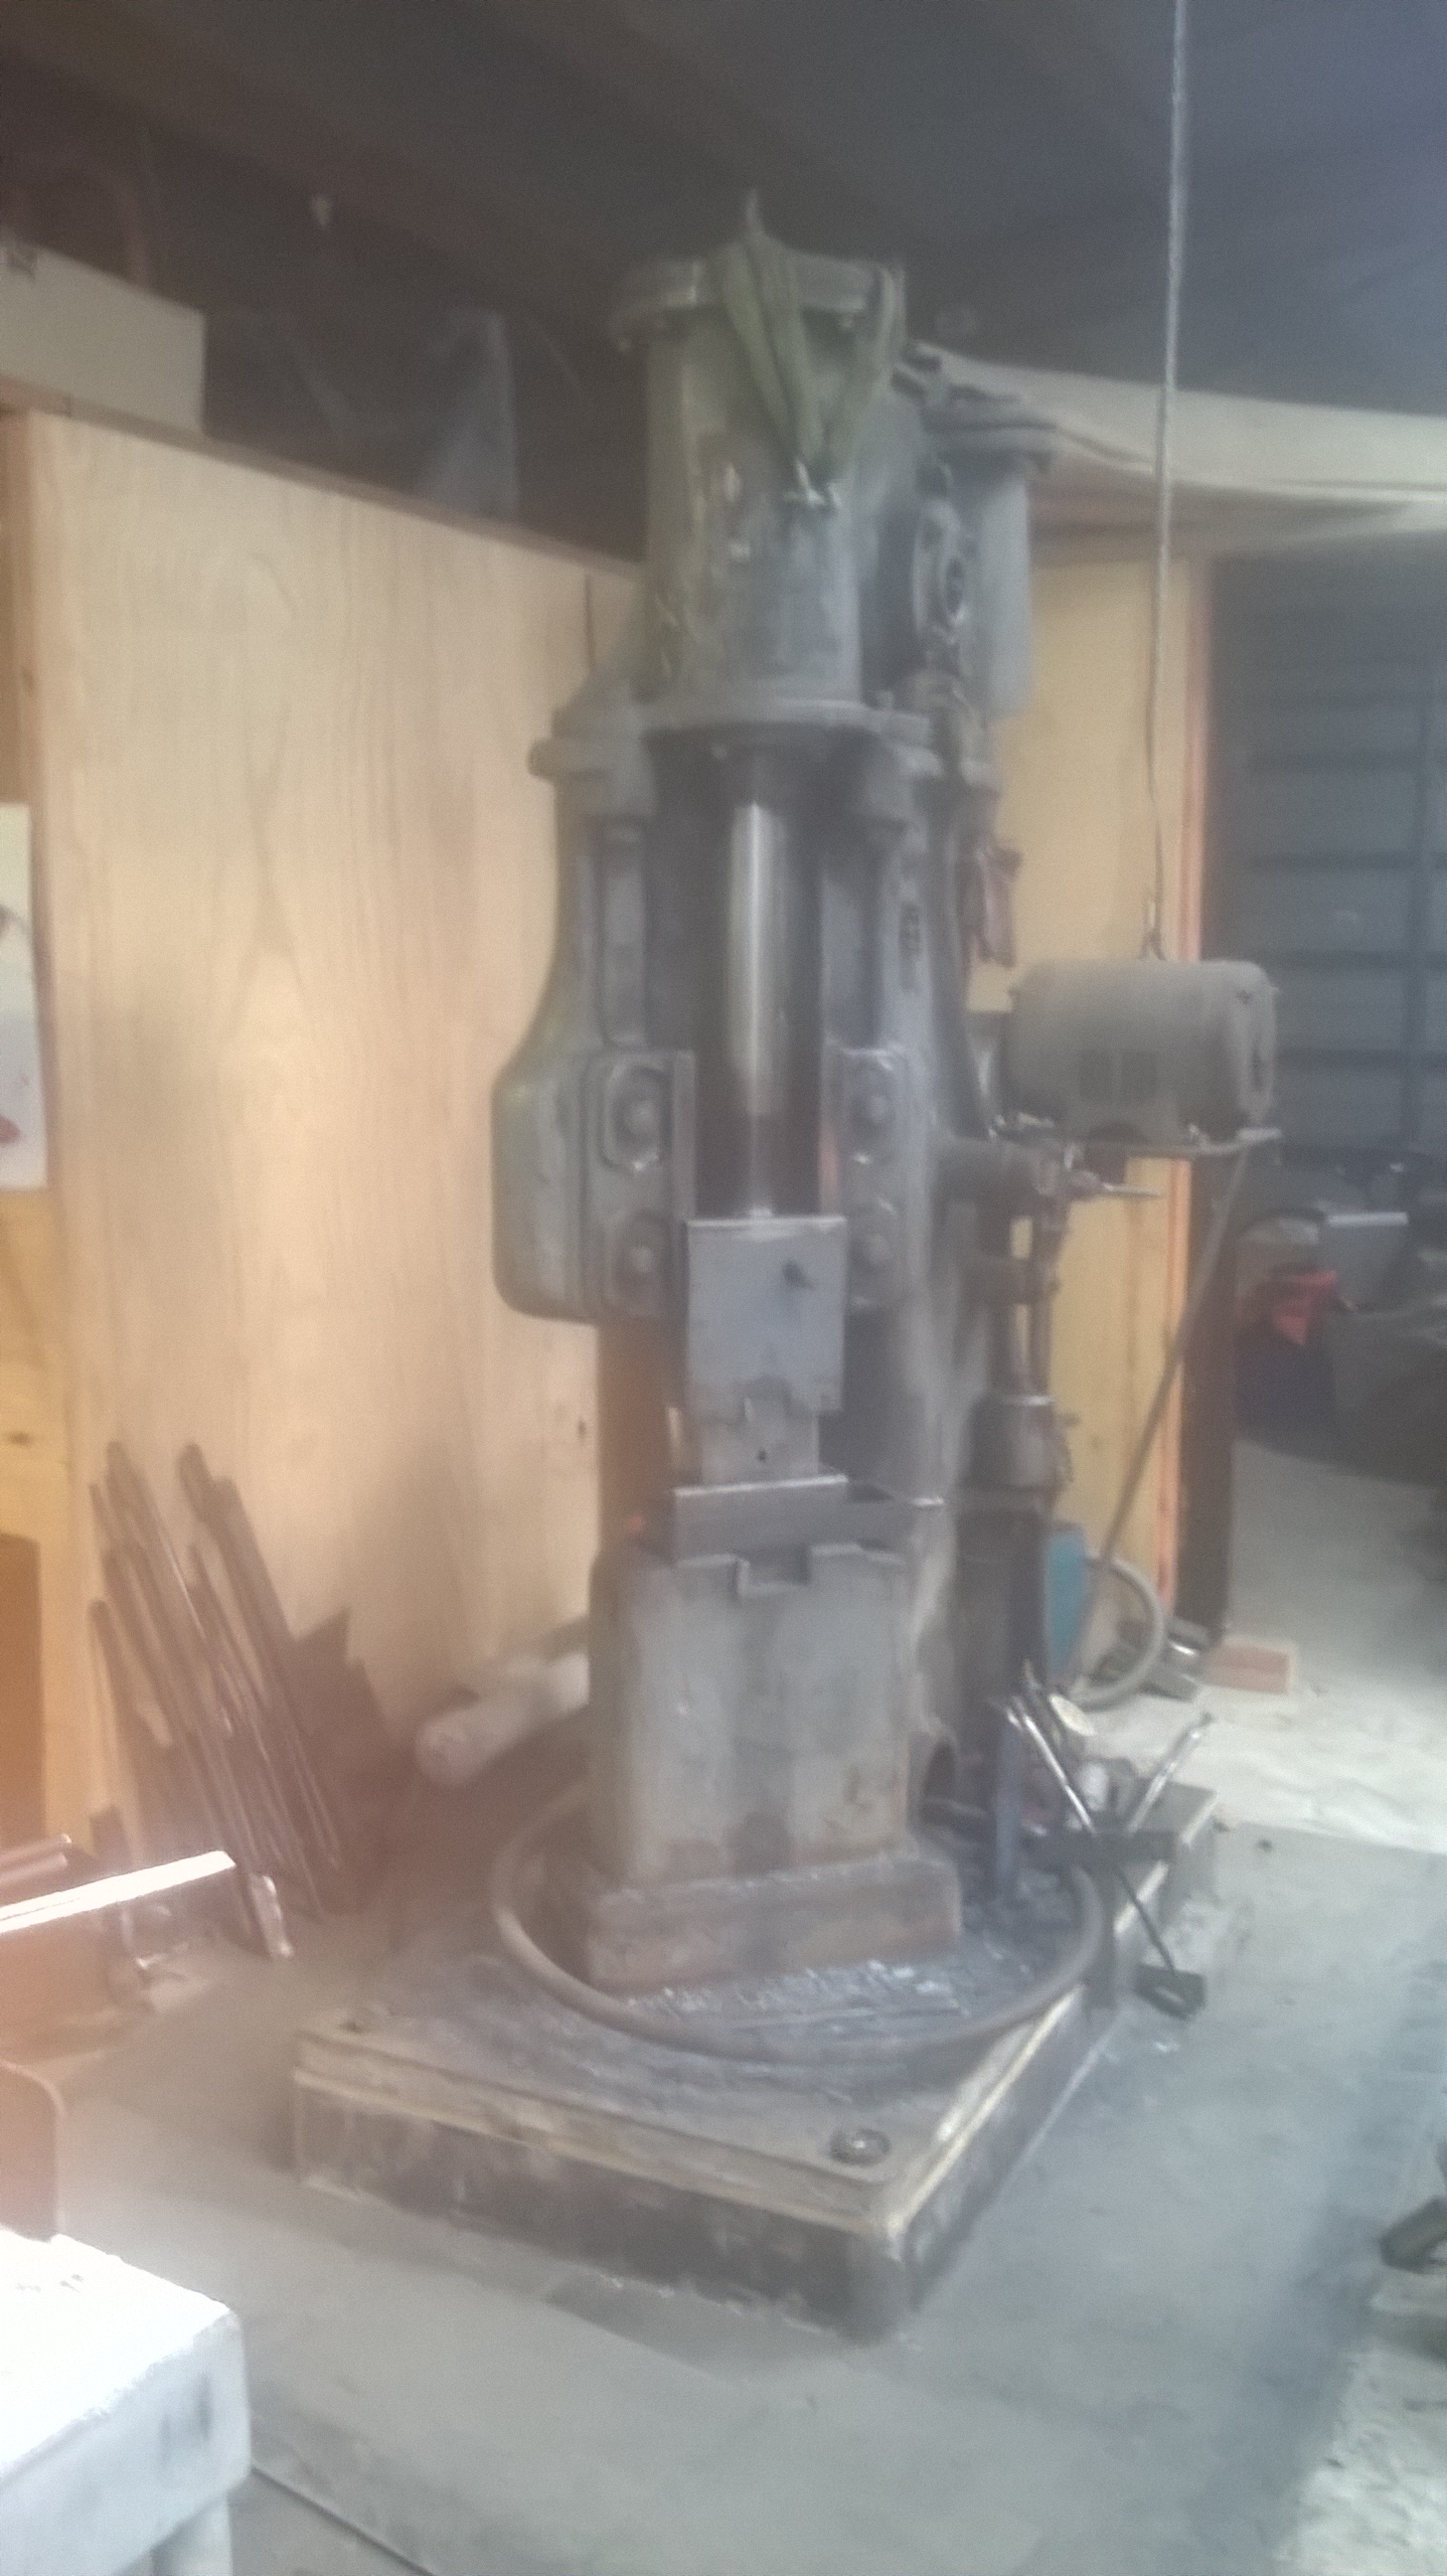
Over the last couple of weeks I have been making some tooling to make axes in the power hammer and got to use them over the weekend, It all worked as planed untill my diesel forge burner packed up as I was doing the forge weld. The hand held tools are made from digger track spring so should be a 5160 ish type of steel and the power hammer mounted tooling is just heat treated 1040


-
On 3/9/2018 at 12:14 PM, Steve Sells said:
didnt you read the post? he did anneal it... thats the problem
Hi Steve I have been thinking about this thread and have read the info you put up and just wish to understand better if i am incorrect. He said that he had annealed the said item and what I have read from some of the other posts along soak my of produced Bainite that was I suggested tempering which is as I understand a differnt process and done at different temps, Heat treatment is not my field of expertese and wish to understand more
-
I think the best answer is talk to a hydraulic service specailist shop that way you will be talking to a profesional who knows what they are talking about. The other units you talked about may have been setup so the motor is overloaded just for a short term which most motors will cope with for short periods so long as they are lightly loaded after to disapate the heat from the windings, most small air compressors are like that or the said presses may have different sized second stages in the pump if they have two stage pumps to pump less oil so take less power but will be slower. Speed and tonnage reqiures HP Cheers Beaver
-
That line around the edge is often from the blade teeth vibrating I think you will find the line is the pitch of the teeth back from the edge, but rail is often sometimes very hard on the head and in New Zealand is usually a 1085ish manganese steel but is sometimes a much lower carbon content though this is less comon. I have a good friend who works in the engineering side of NZ rail and he told me this Cheers Beaver


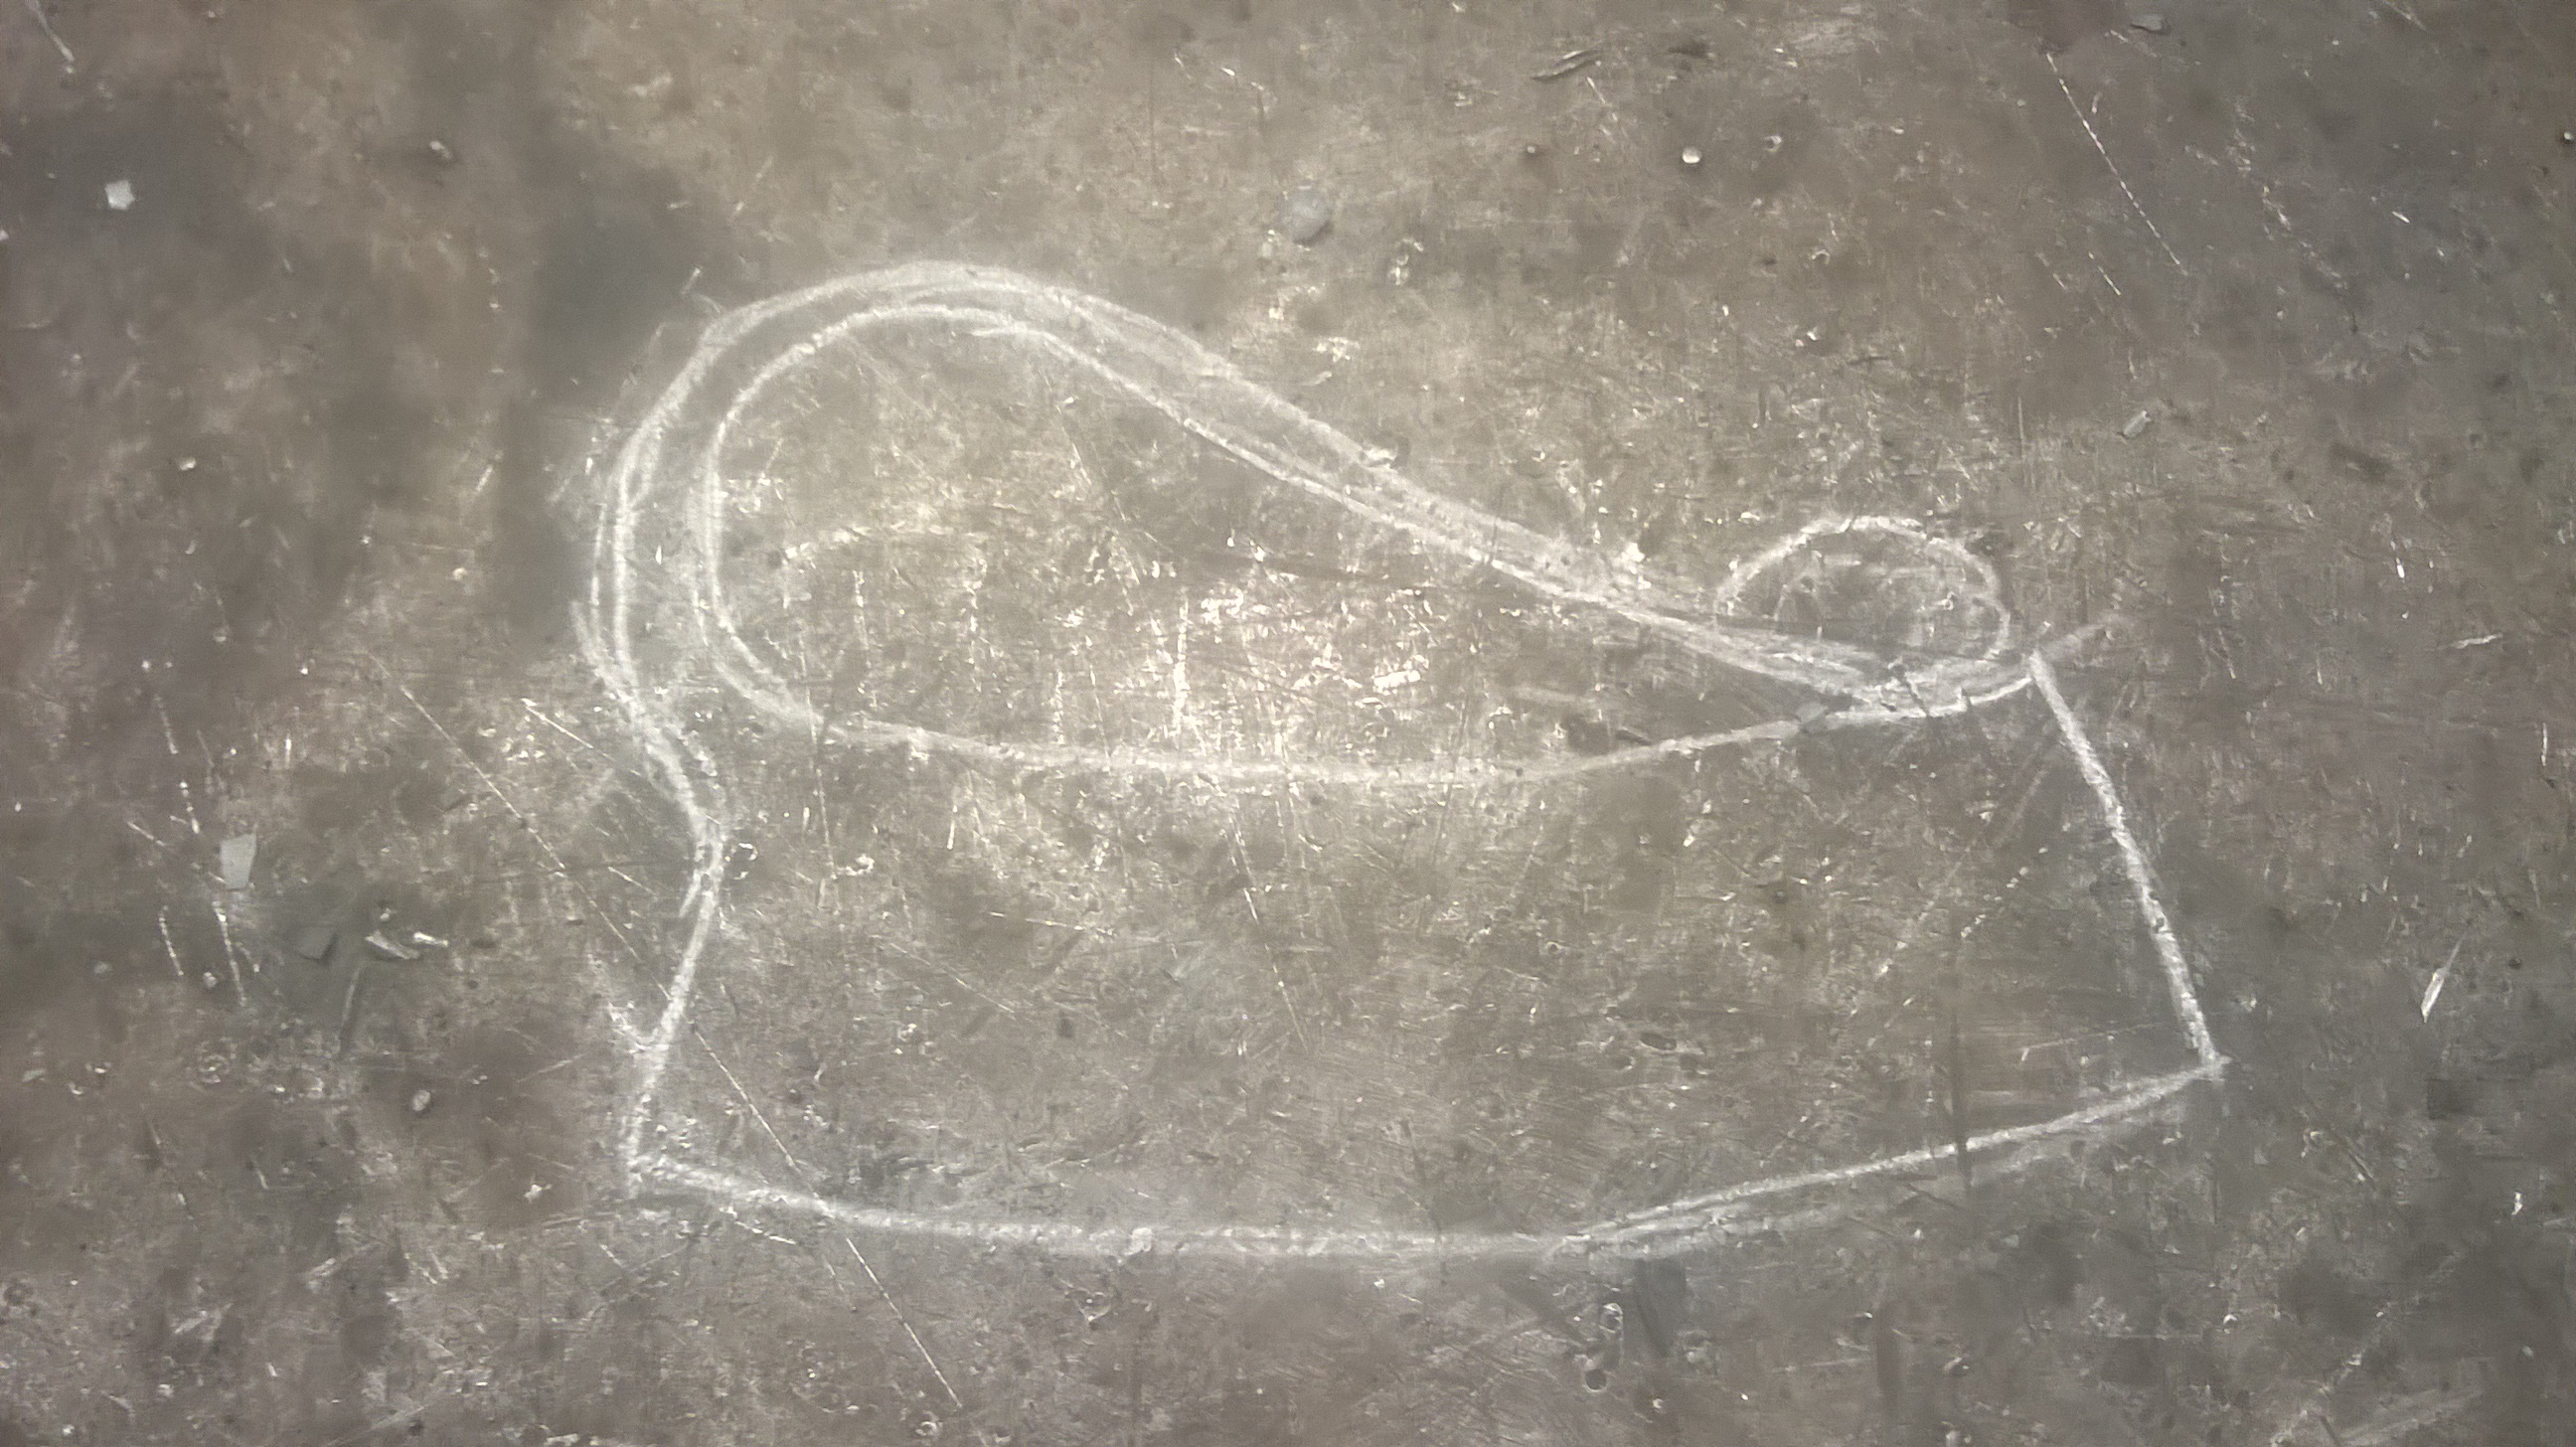


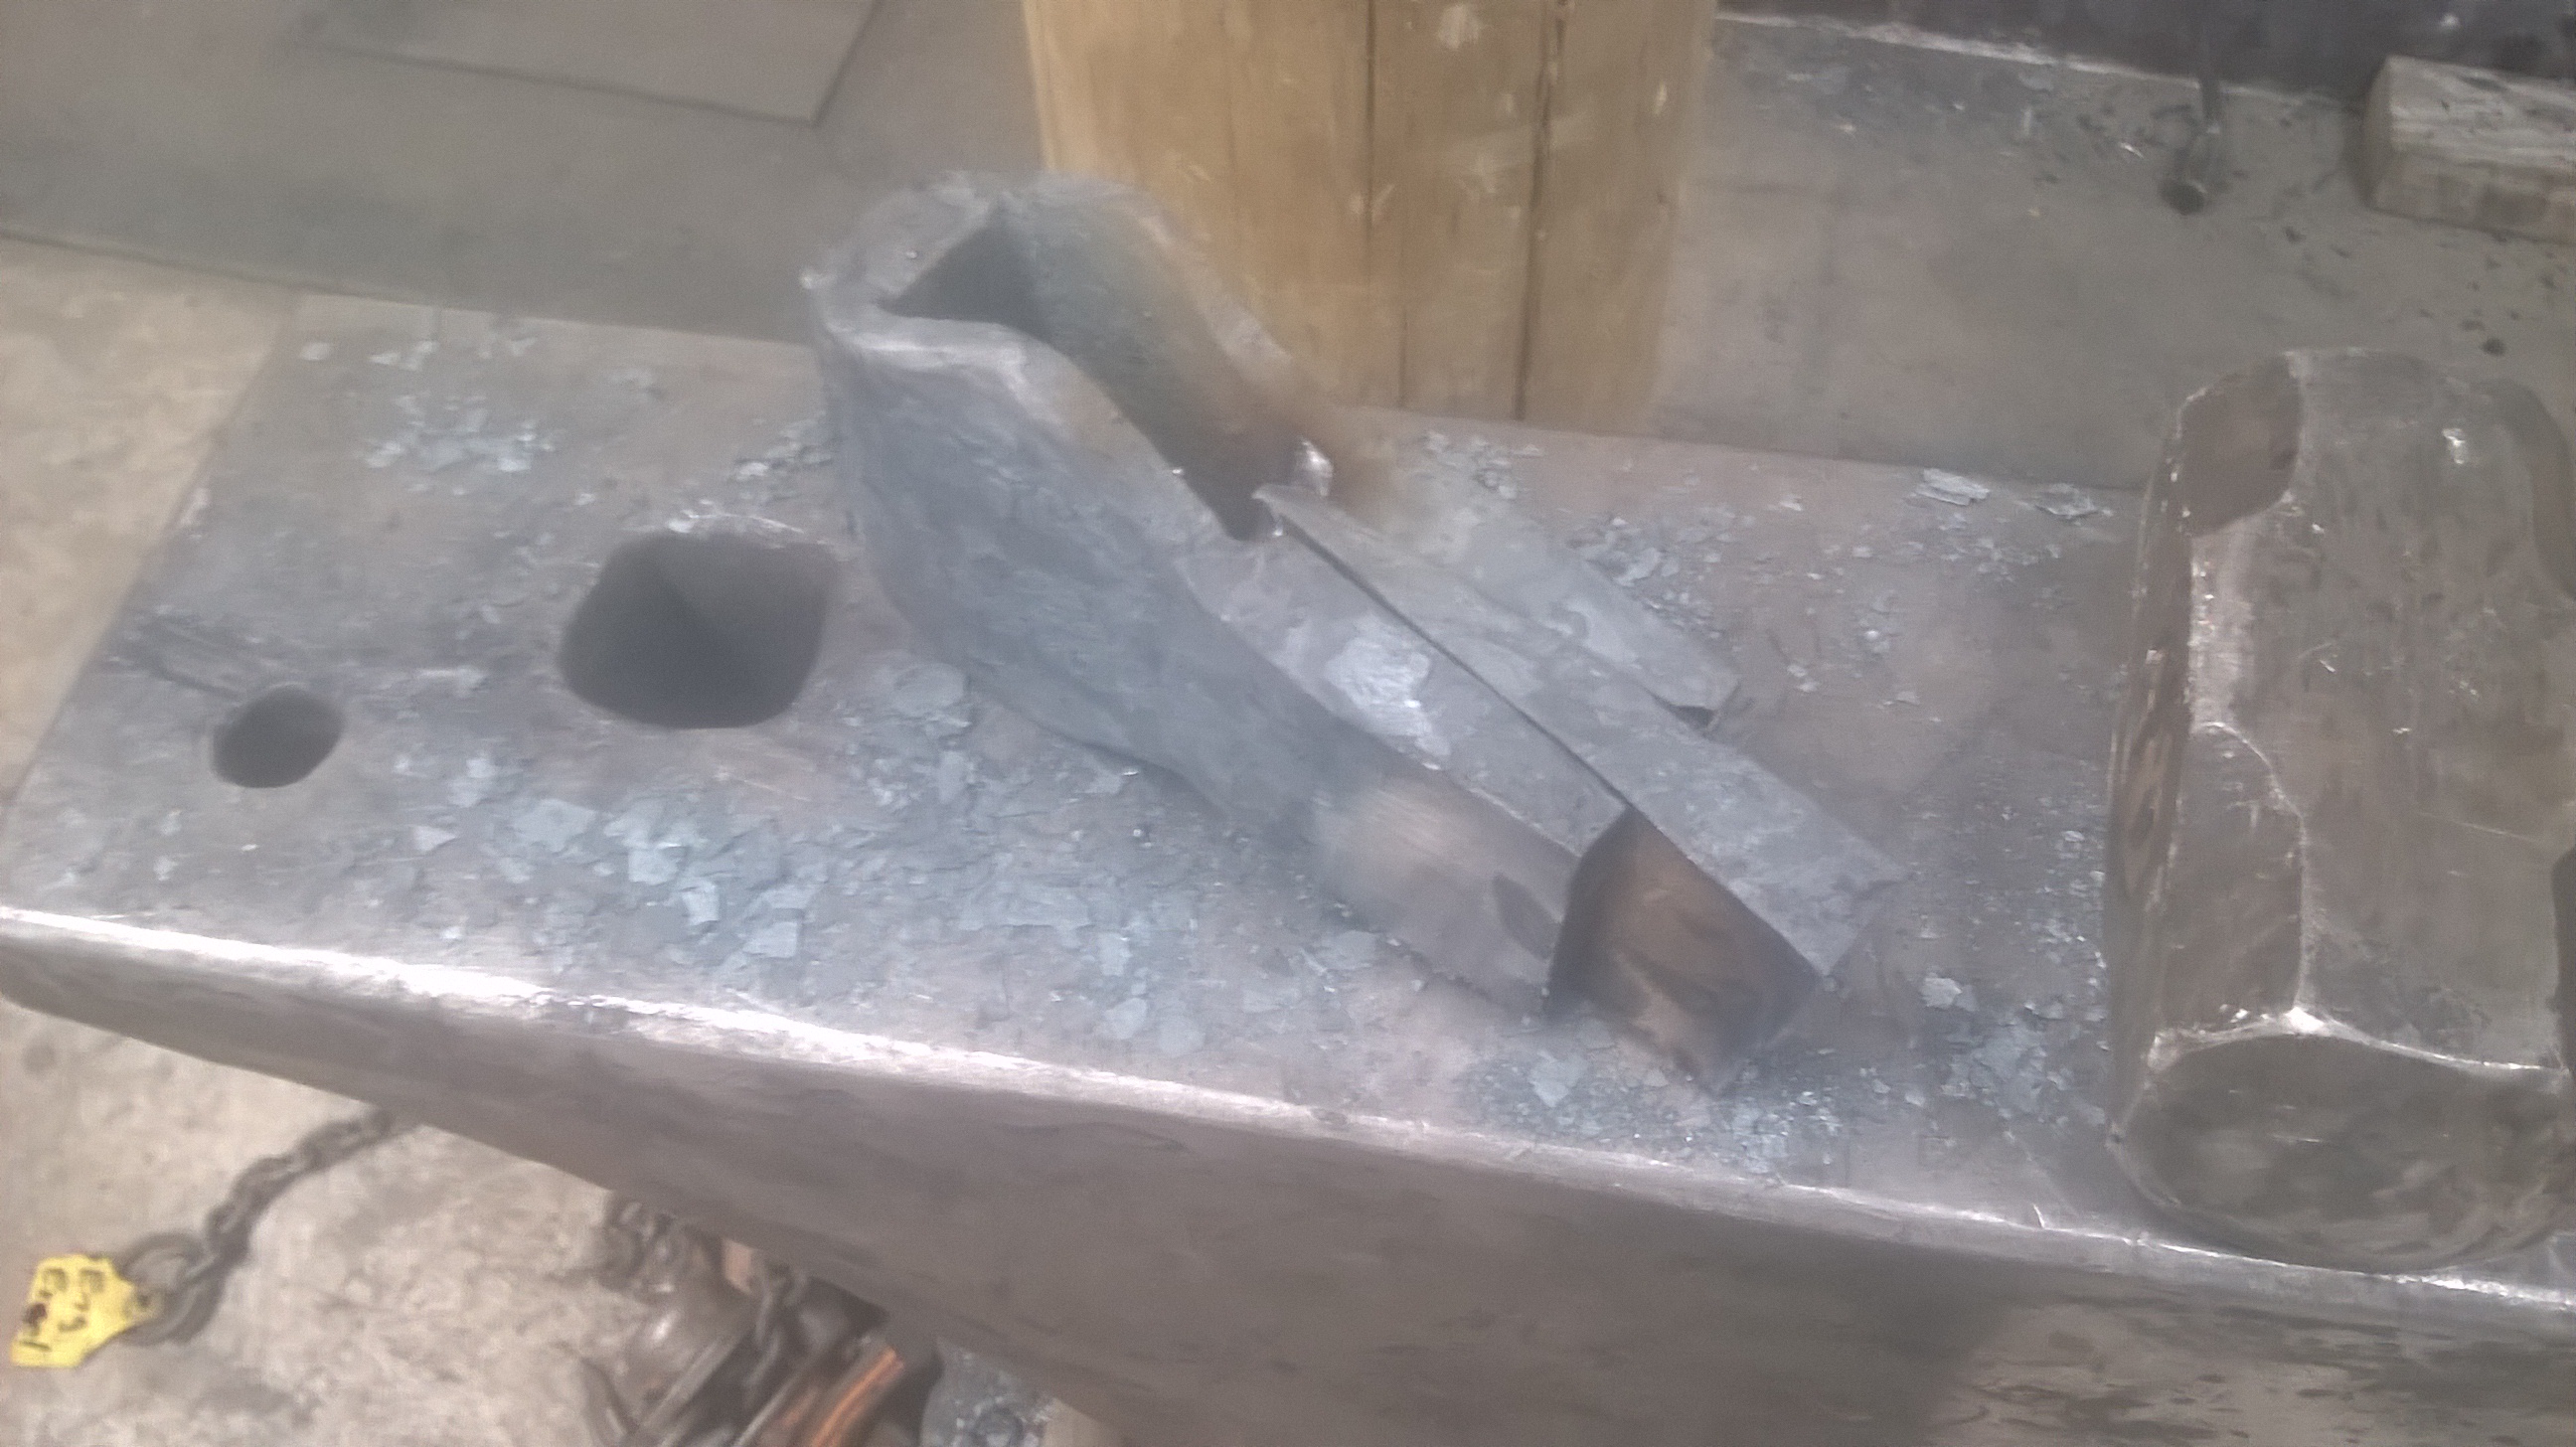
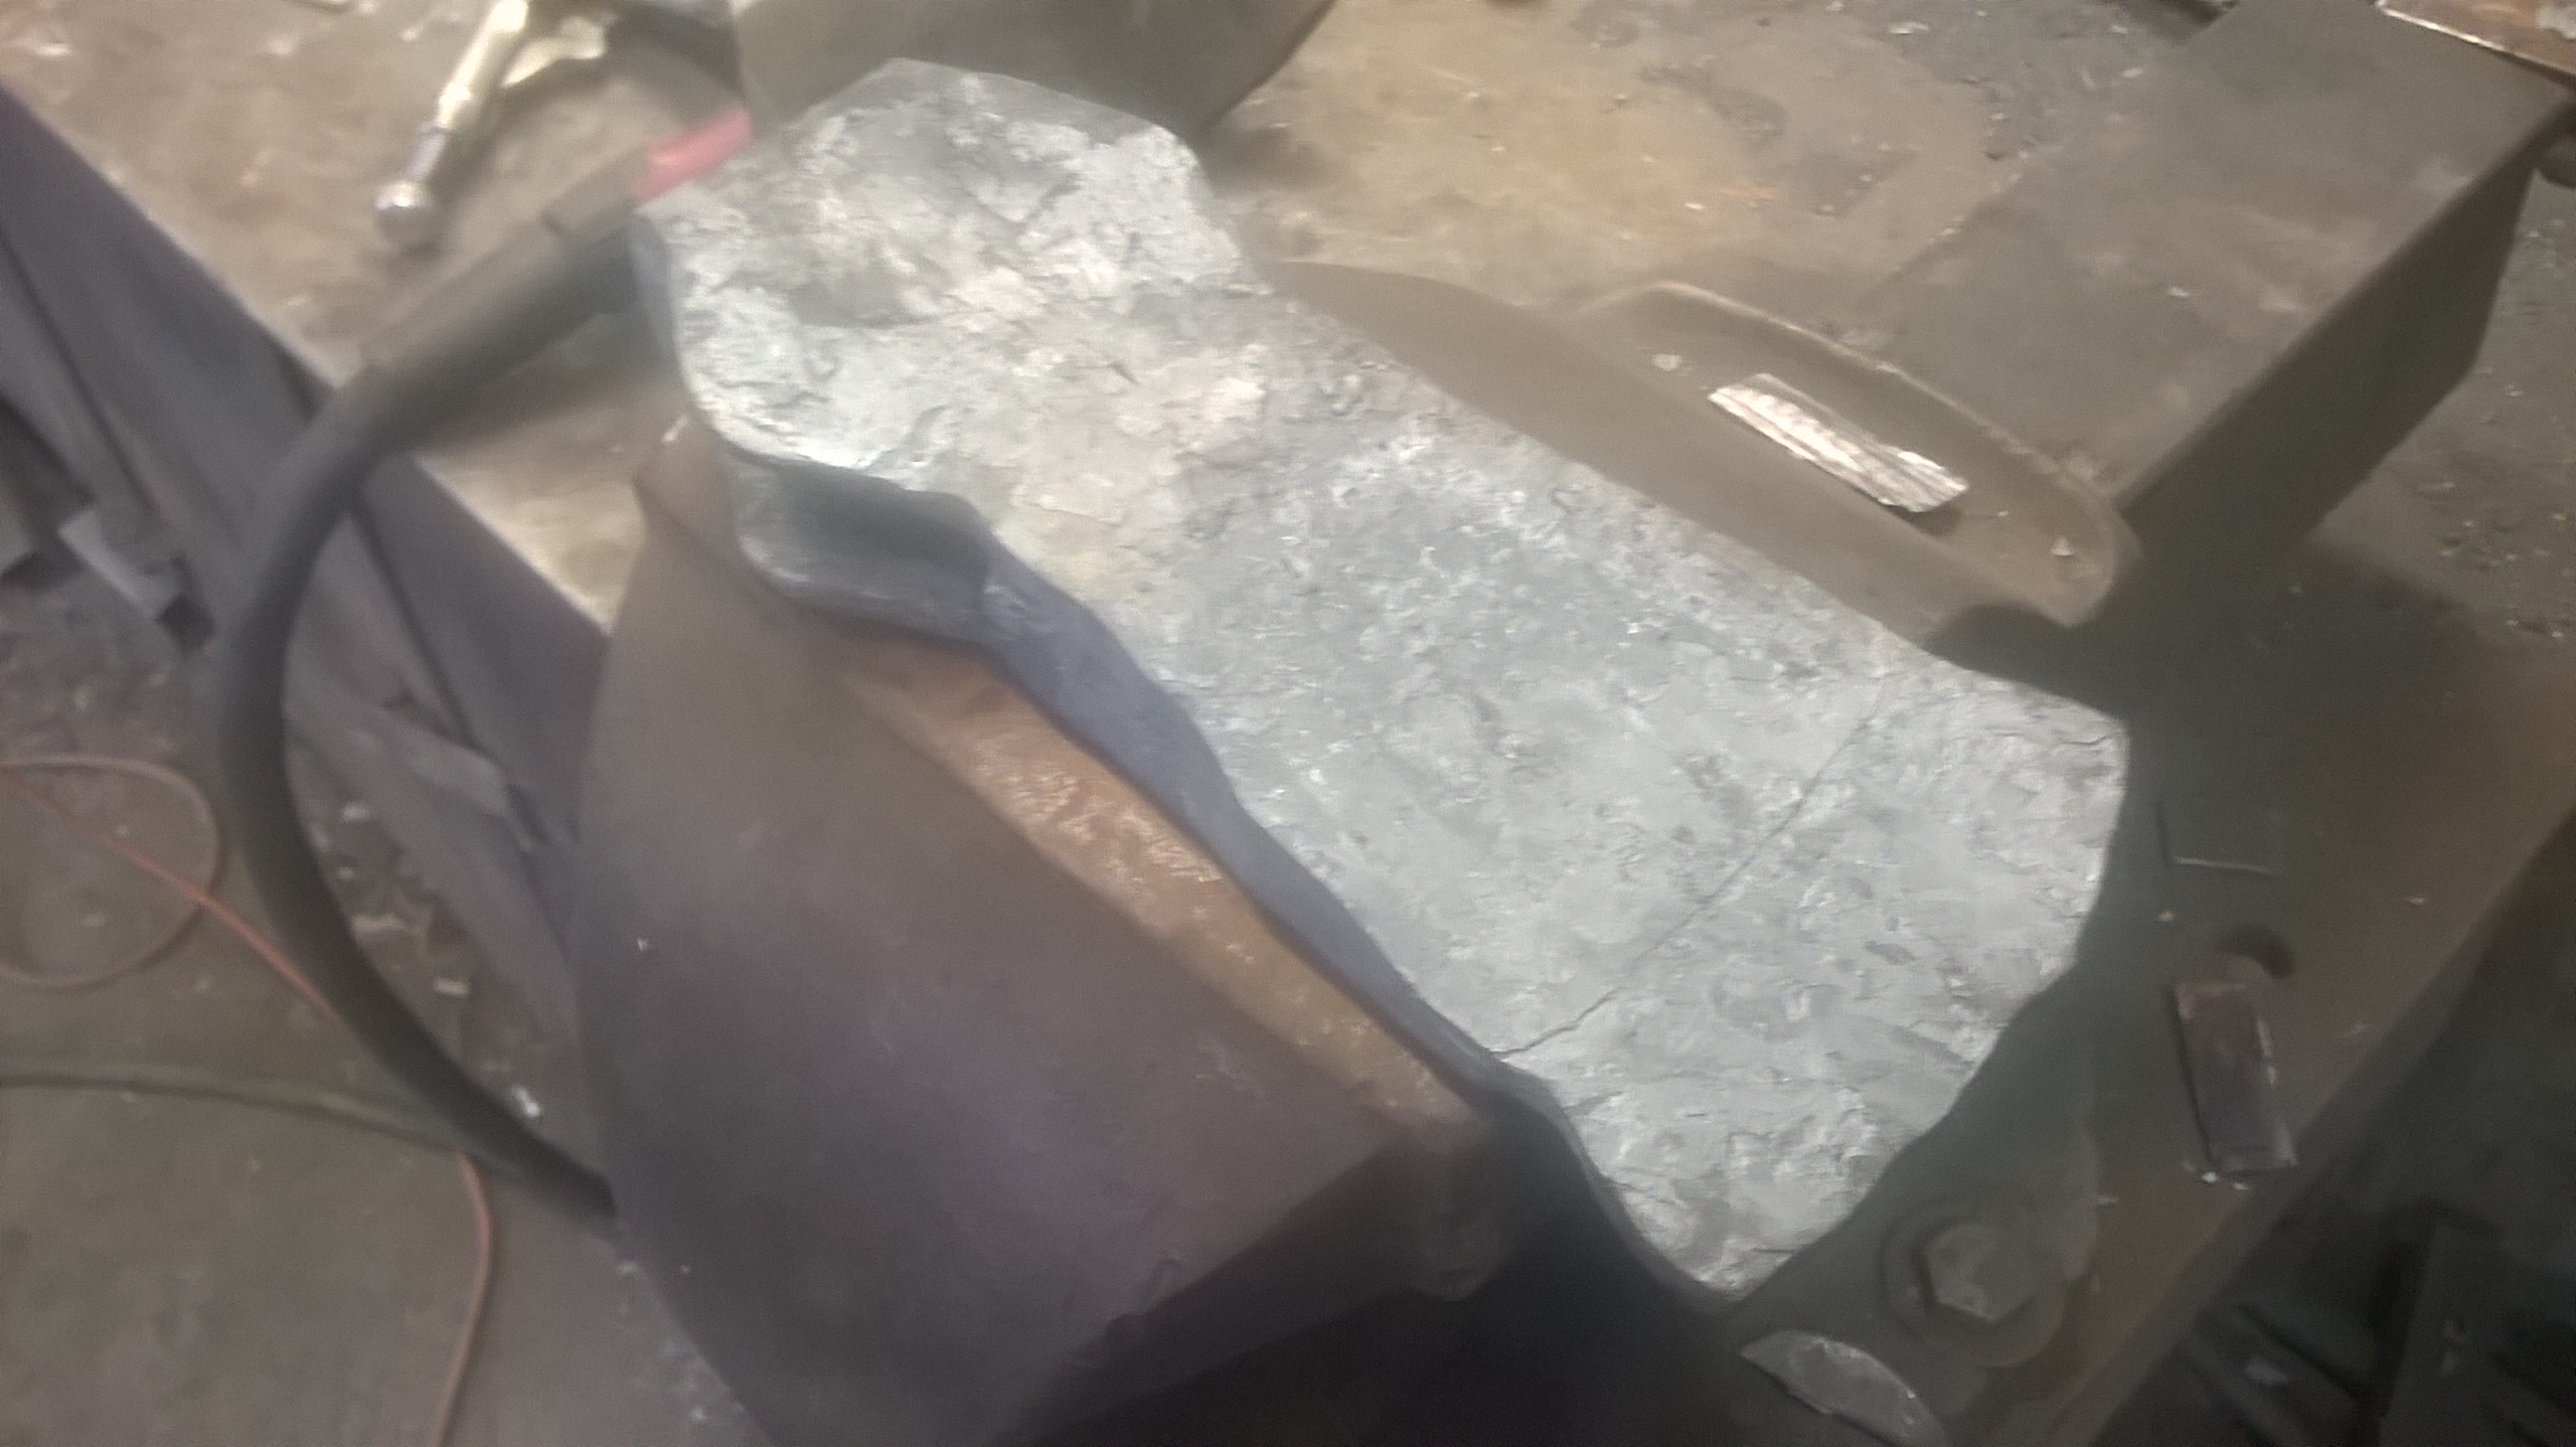


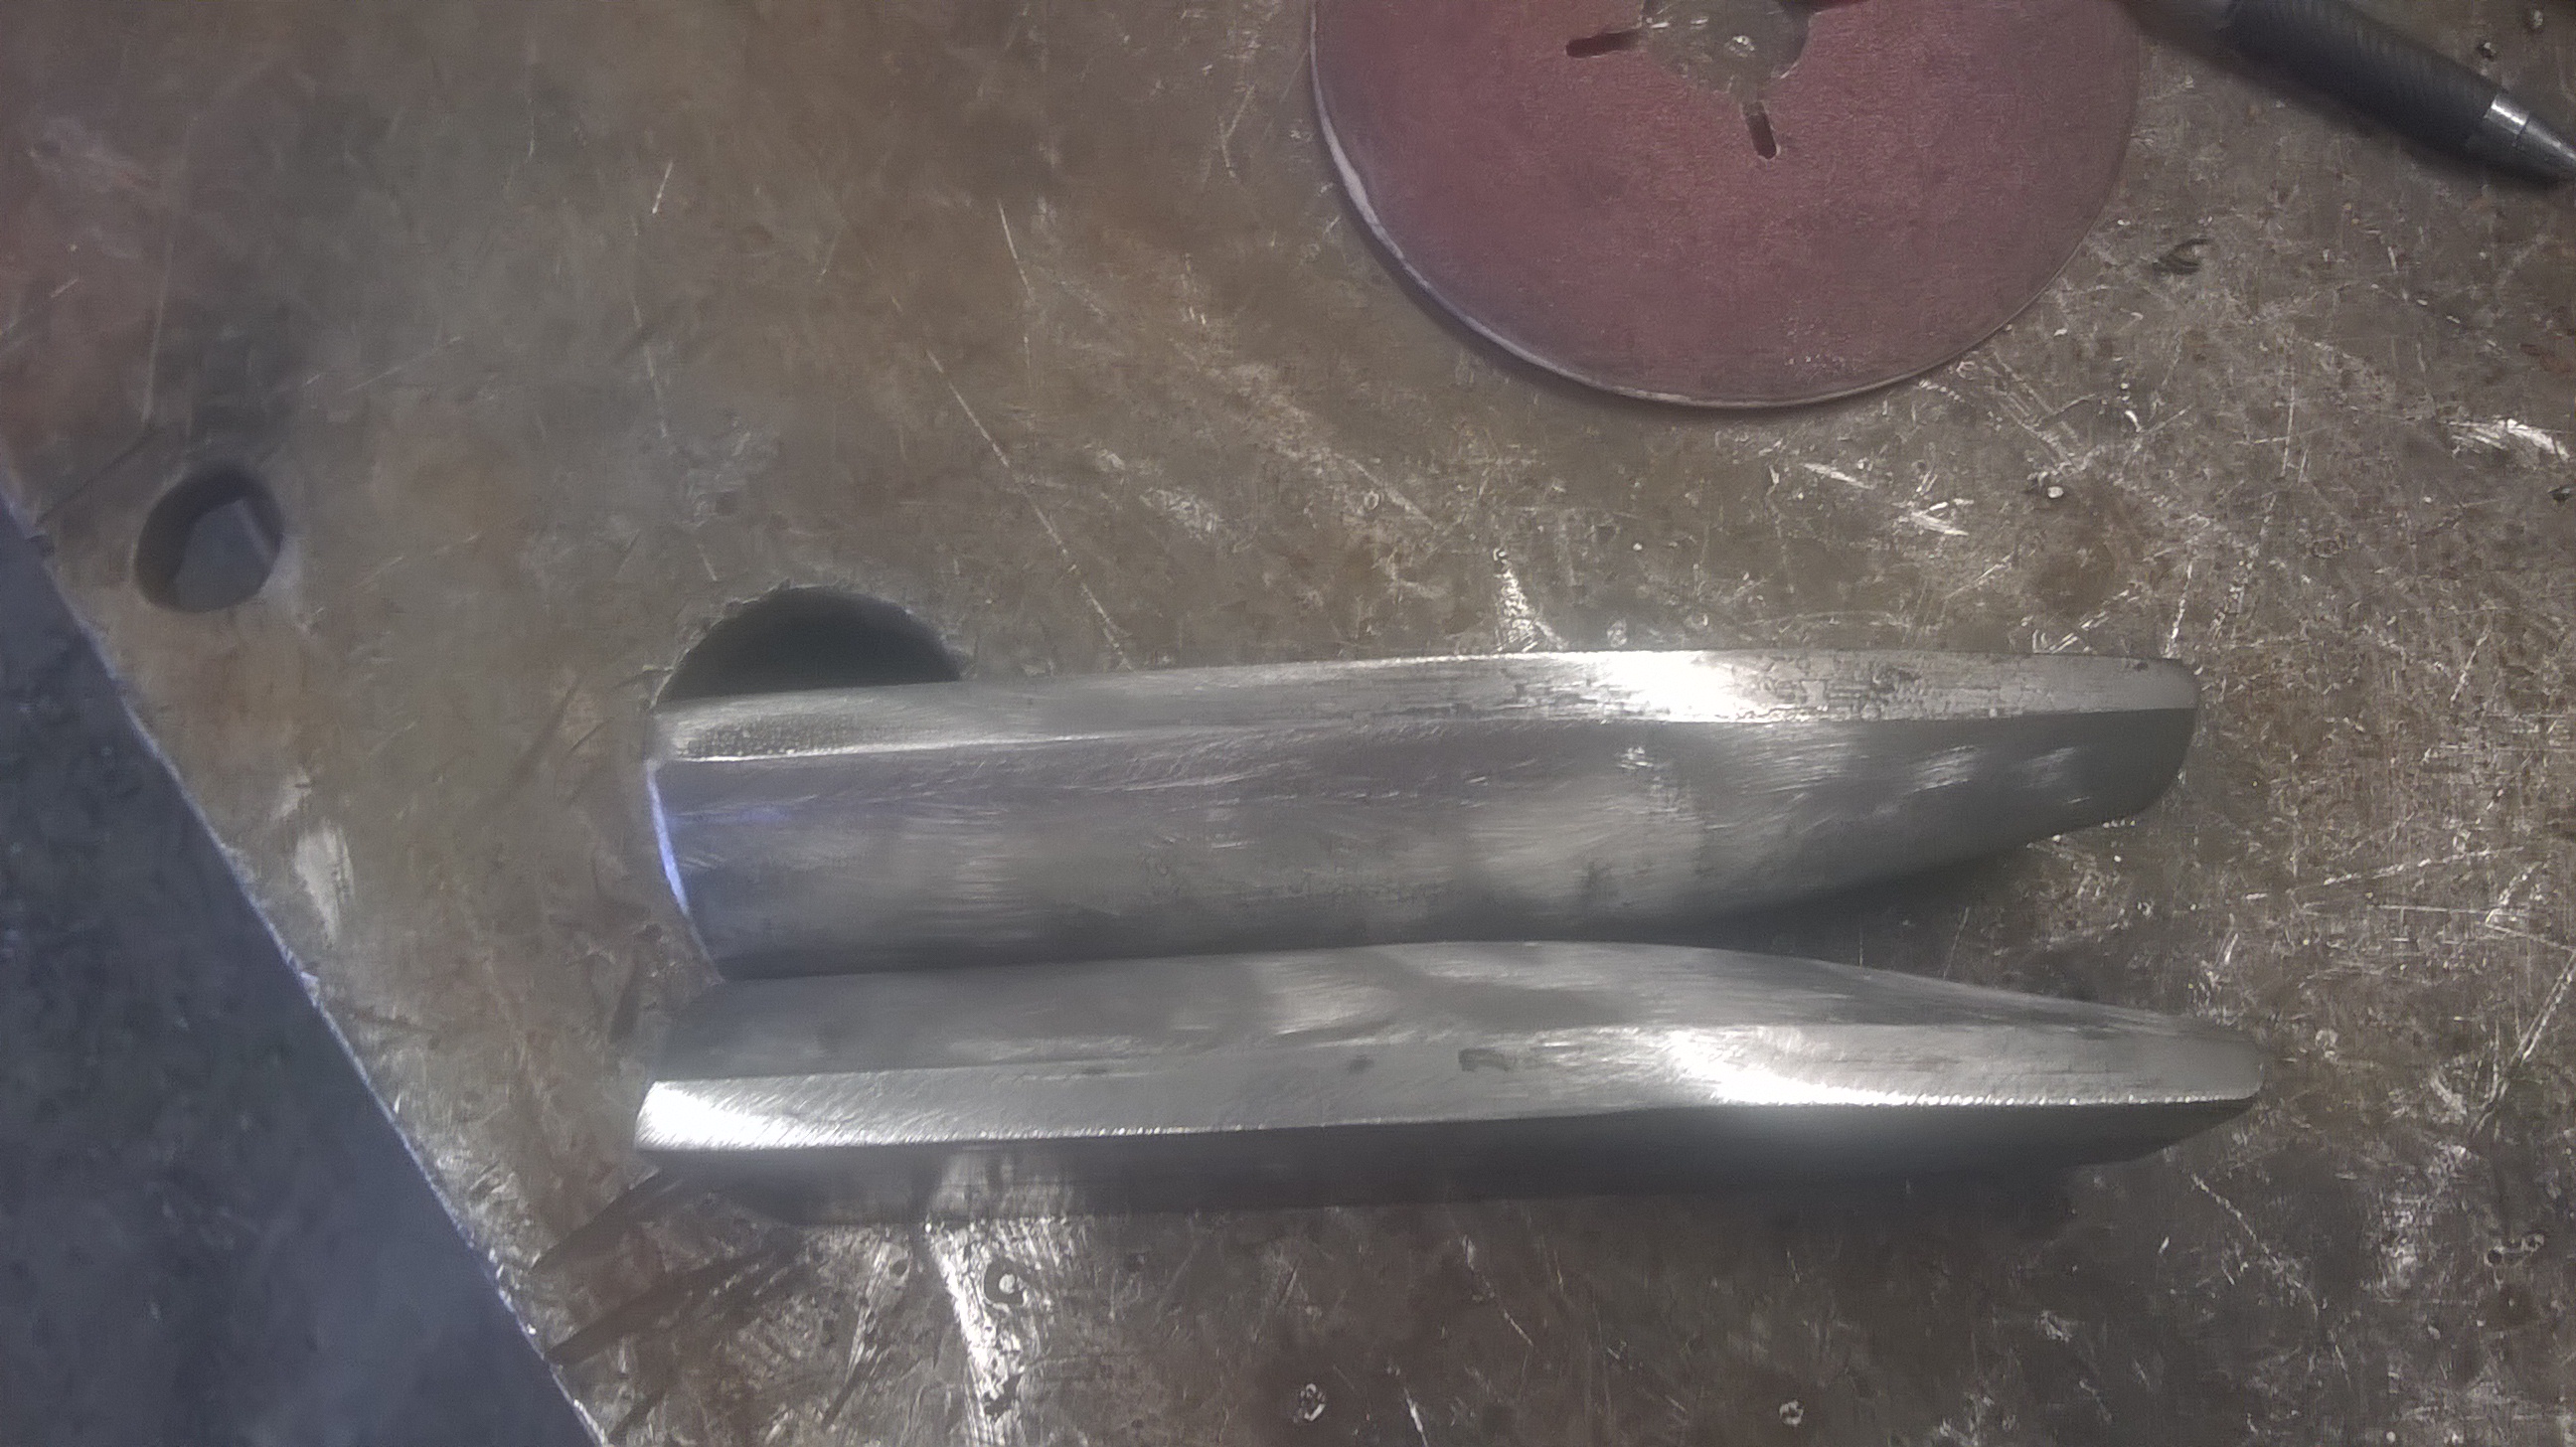
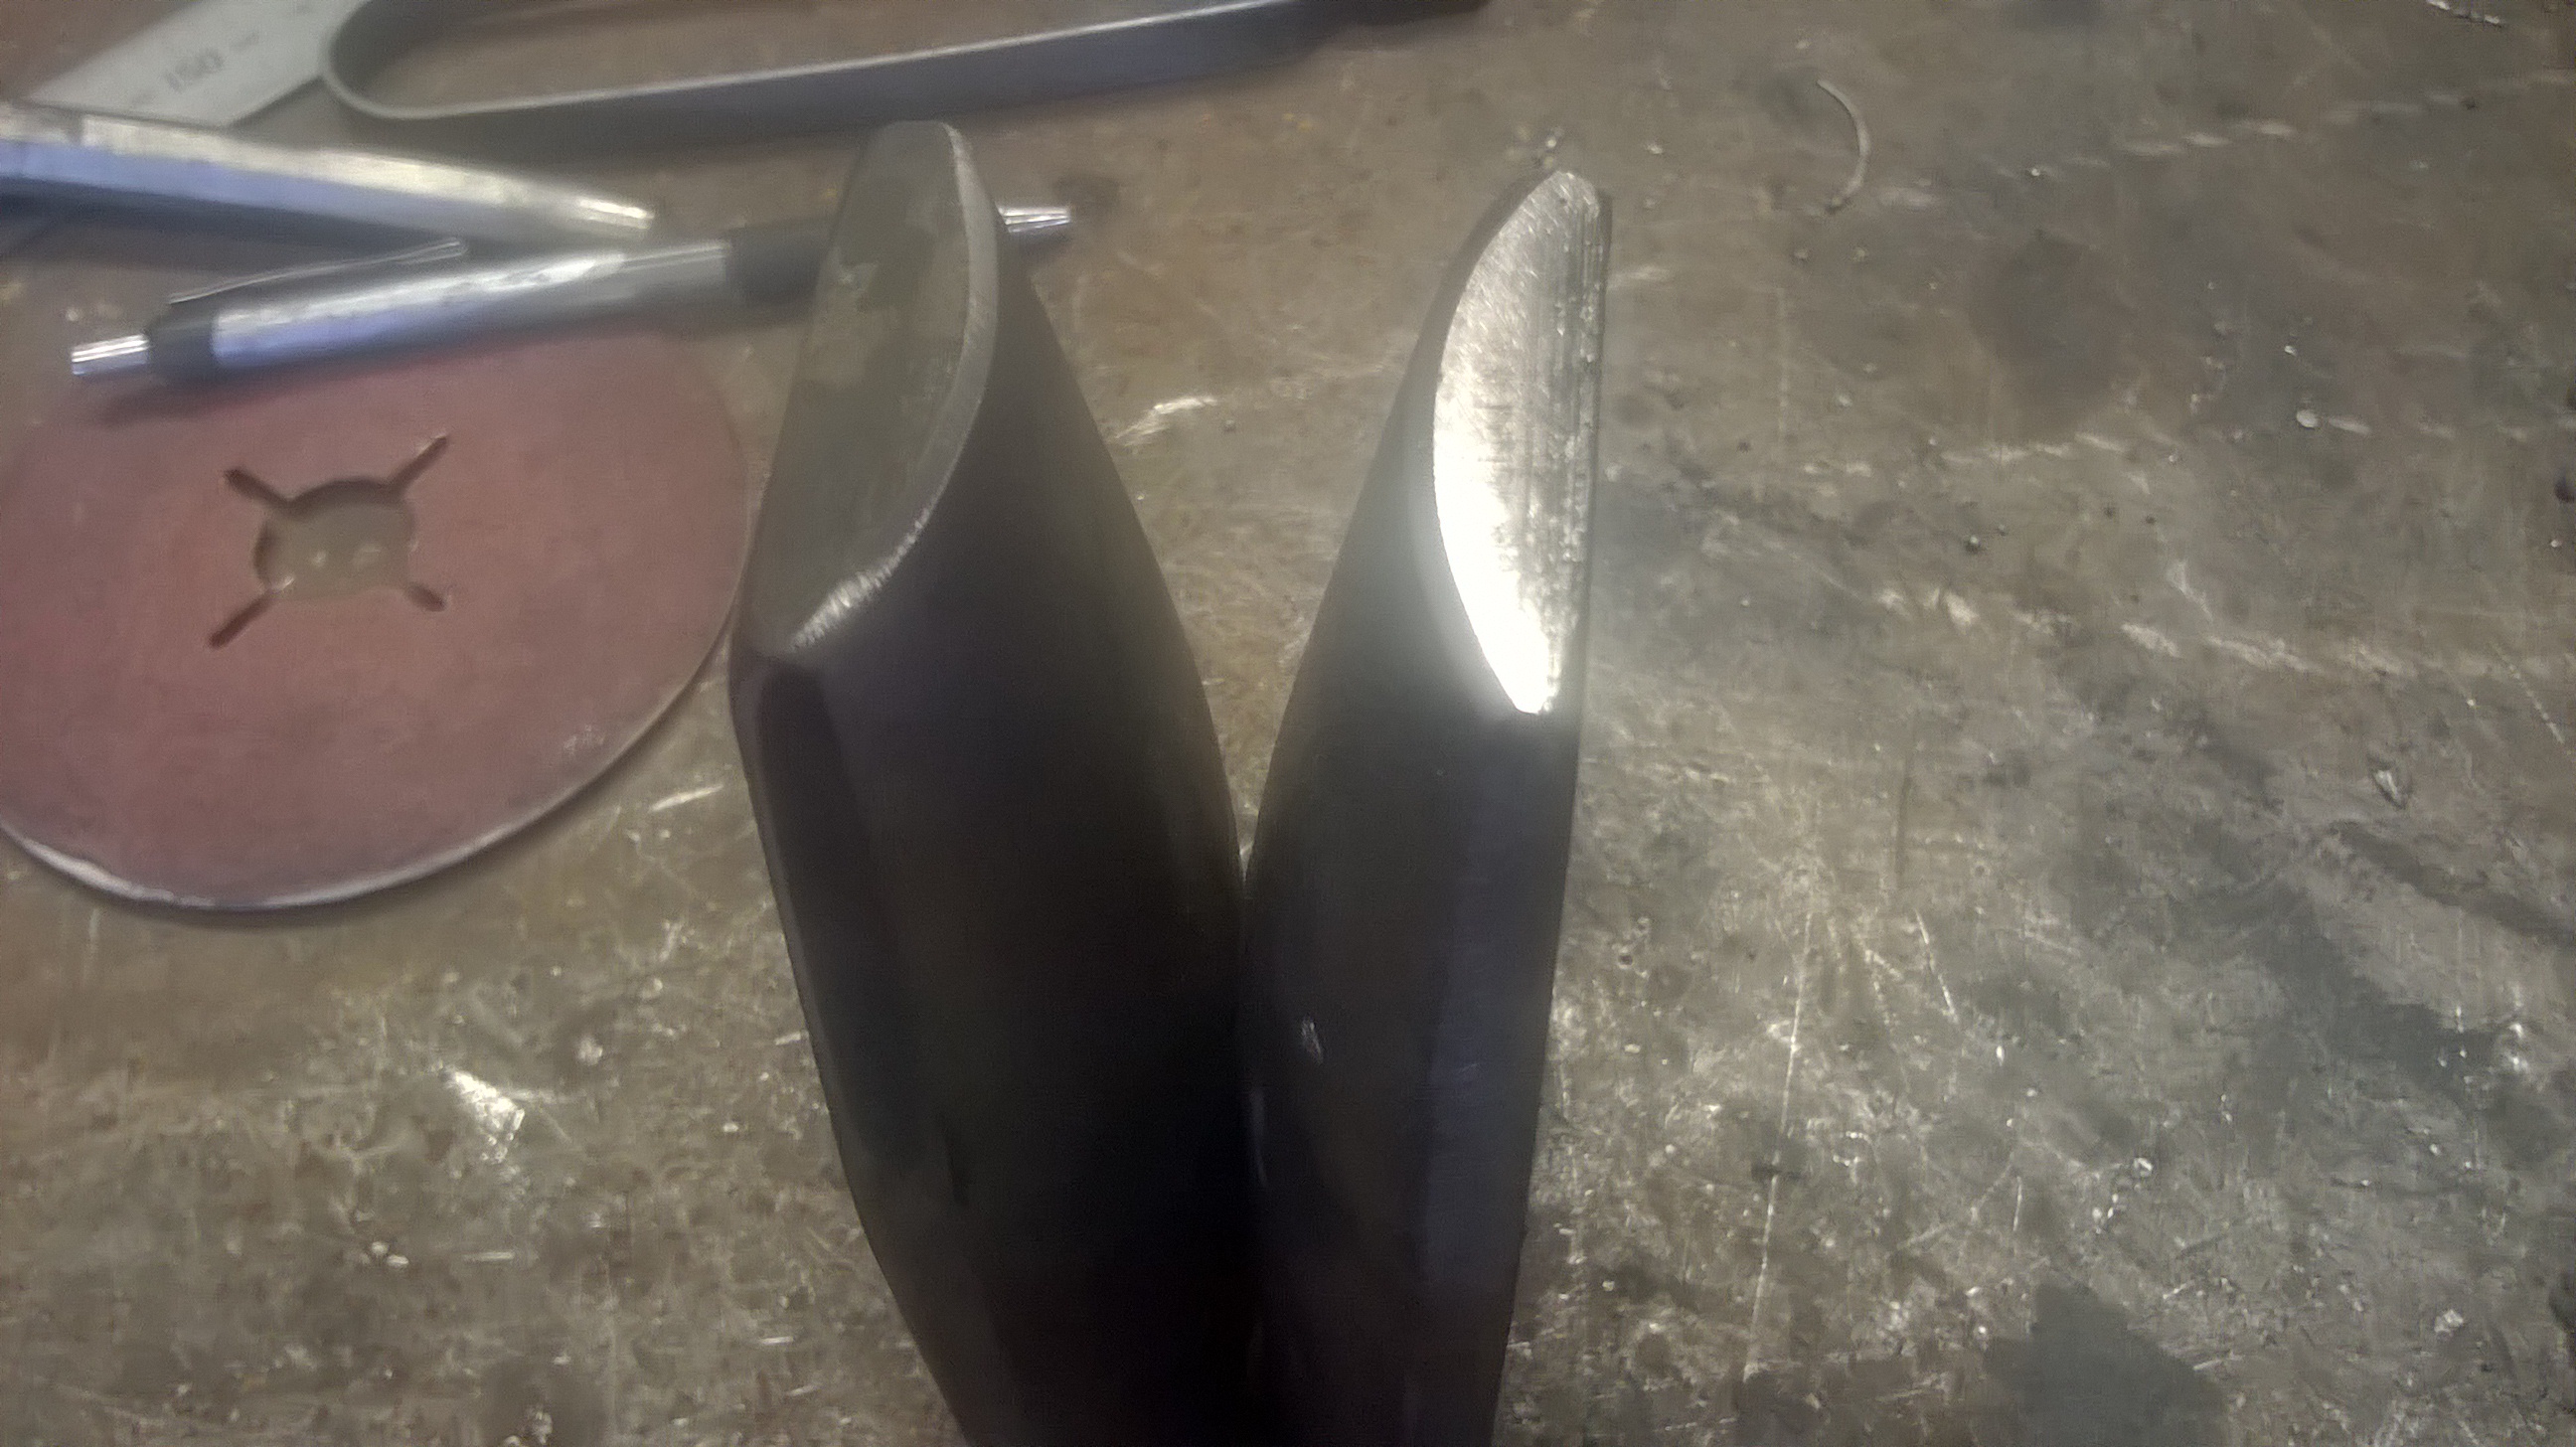


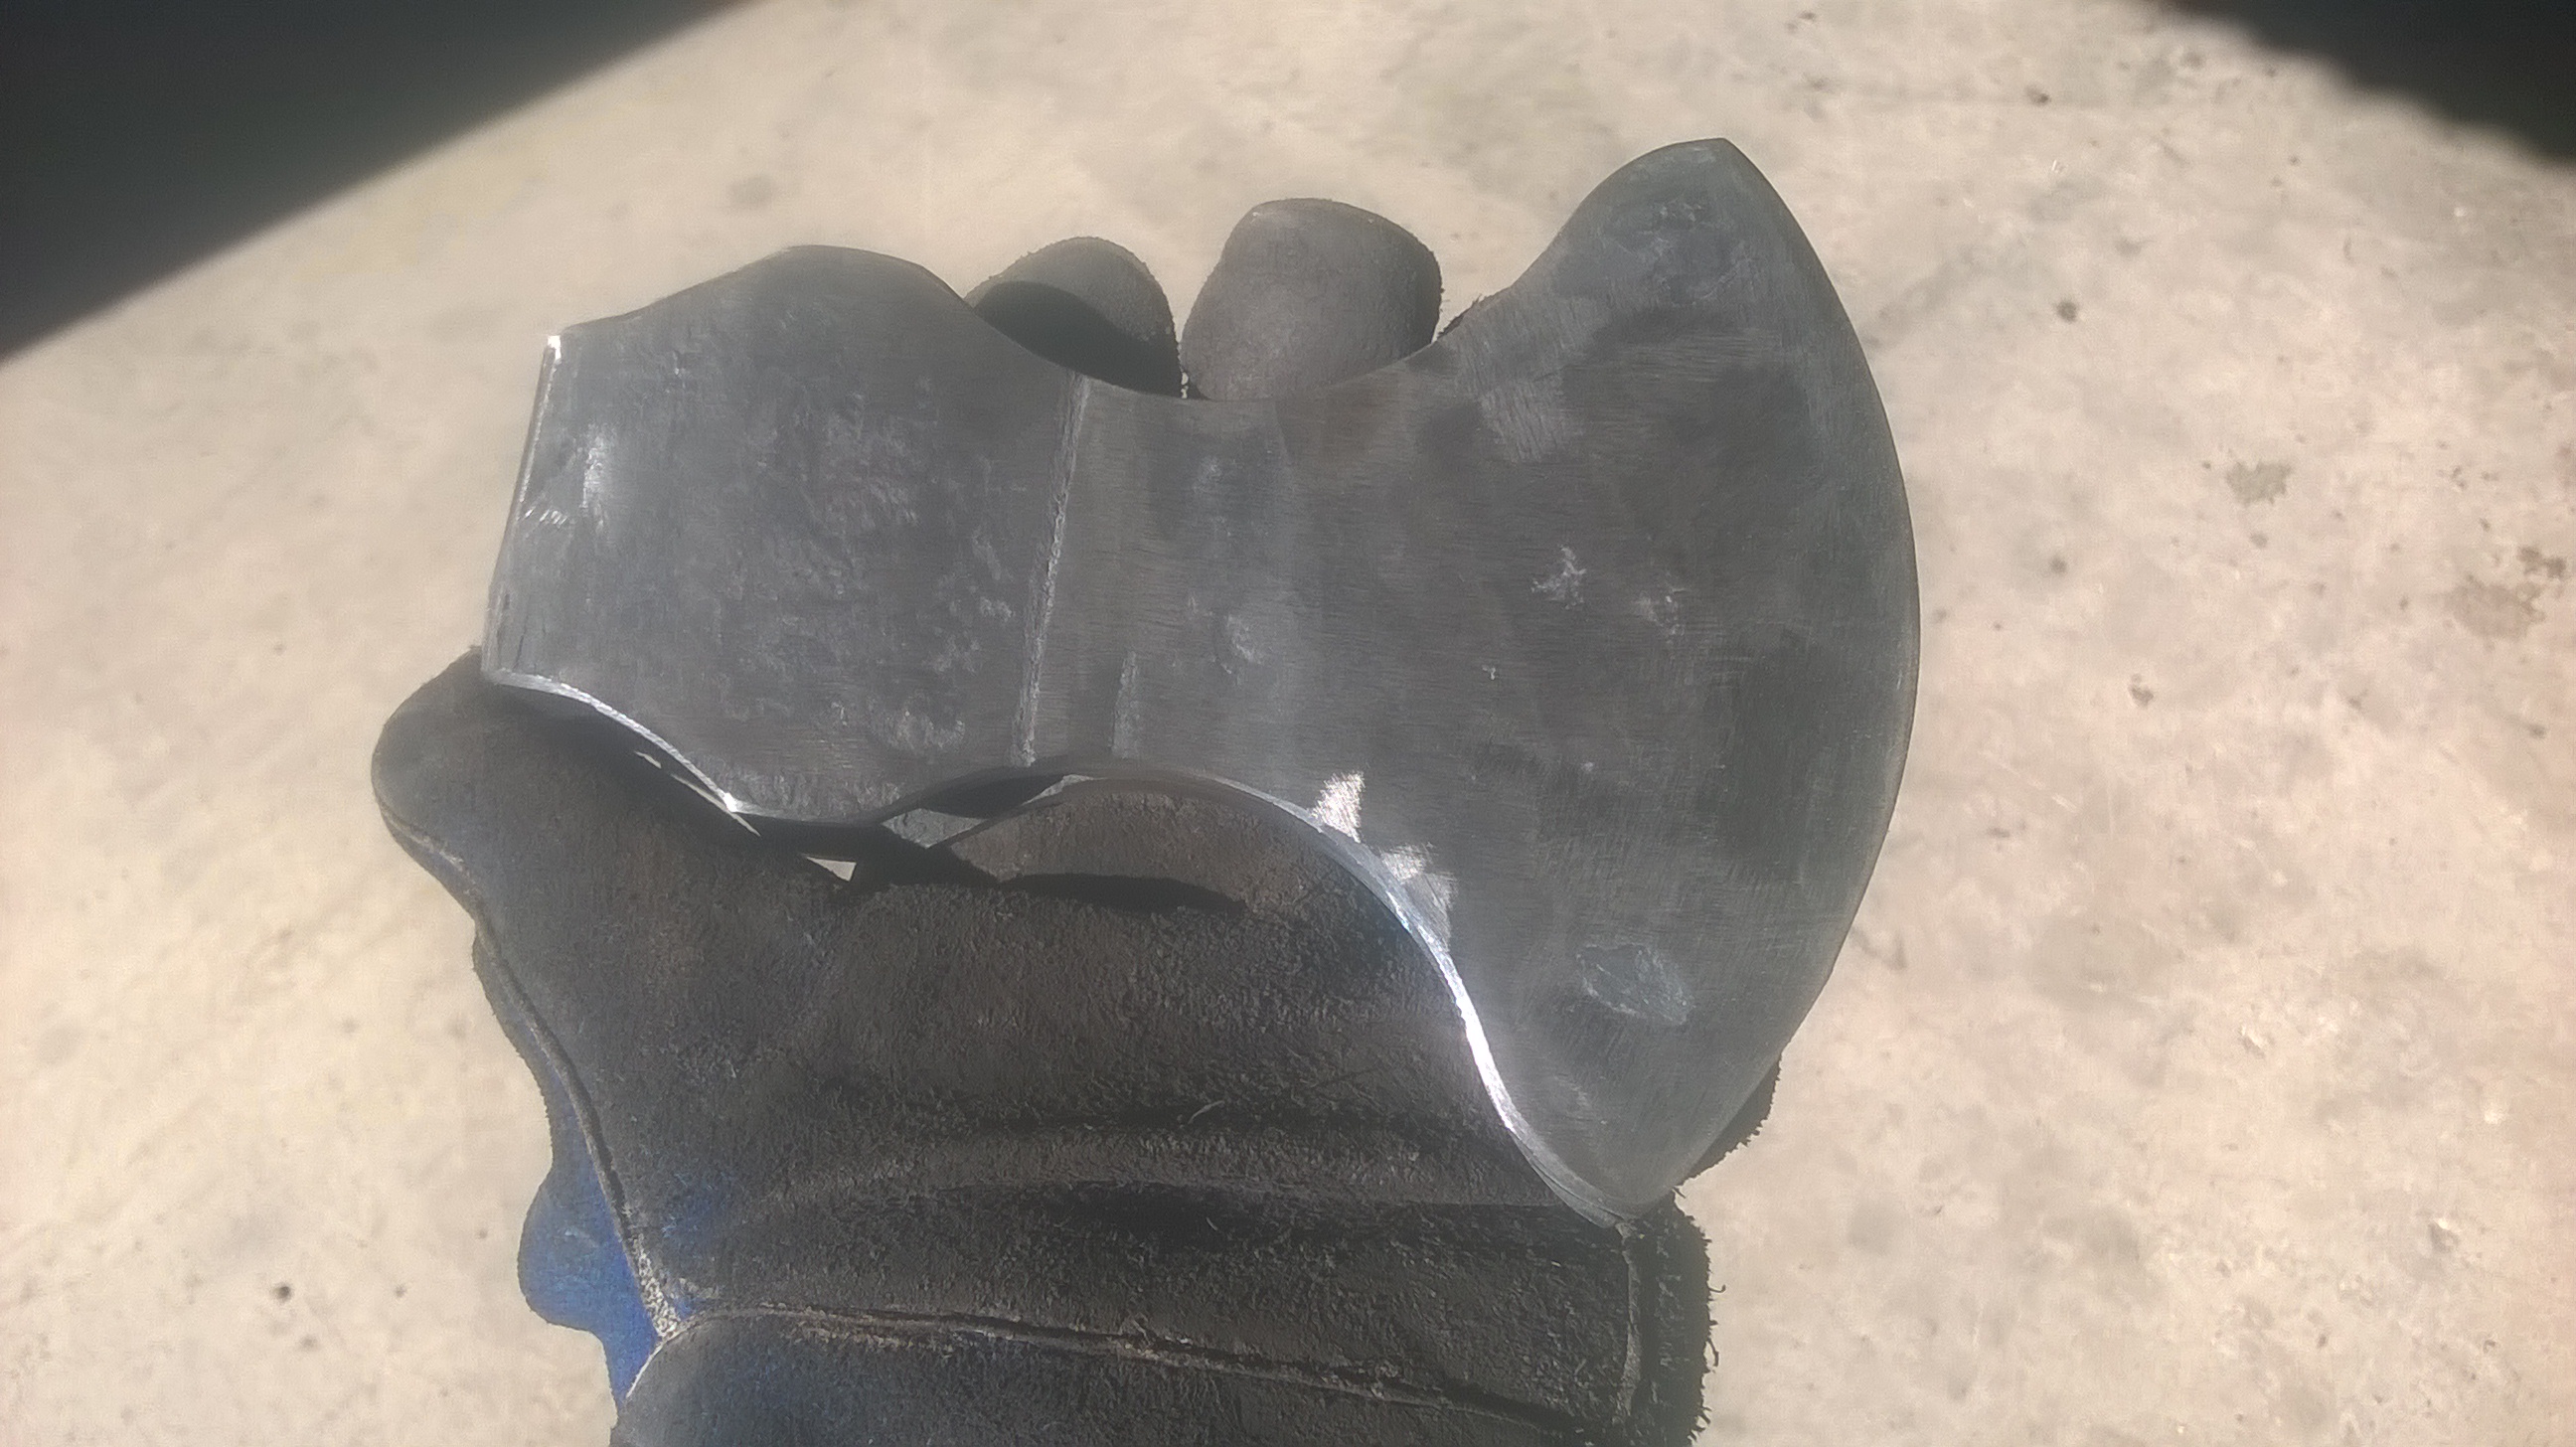
Simple folding Knife or Peasant Knife
in Folding Knives
Posted
I am having a go at making some folding pocket knifes, the blades are made from Sawmill bandsaw blade and railway track, I am going to try a coffe etch to see what happens