
D.C.
-
Posts
207 -
Joined
-
Last visited
Content Type
Profiles
Forums
Articles
Gallery
Downloads
Events
Posts posted by D.C.
-
-
Flatters aren't really hammers, and are usually used like a top tool. Meaning that you place the flatter on your workpiece, then hit the back of the flatter with your hammer. So your workpiece has the Anvil below, and flatter on top of it. Great tool for removing hammer marks on your work.
One piece of advice I was given was to radius the faces of my hammers. It helps us newbies from leaving big divot and possible cold shuts in our projects.
-
My 148 lb is also sporting some green paint, though since the block is painted to match, I blame a previous owner!
-
Holy smokes! So many good ideas in this guy's videos. Thanks for the link!
-
TSC stores down in the Salt lake area often carry 50lb bags of coal as well. search the forum for info on this type of coal.
-
Mr. Powers, glad you chimed in. I must have missed it in my reading, but what is the adverse effect of room temperature oil? or is it just a matter of controlling variables to achieve a more consistent result?
-
That. .......sounds. .........awesome. Just picturing that in my head. Thanks for the info Frosty.
-
Hey, sorry it took me so long to spot this post! I'm in the SW corner, down in Uinta county. Not real close, but closer enough by Wyoming standards. Any luck finding local smiths up your way?
-
I'm low tech and have used old motor oil, however if you read up in the knifemaking areas of the forum you will learn lots about the various quenching liquids..very helpful info. Most folks use vegetable oil to quench when oil is called for. Not sure why, perhaps someone far more knowledgeable can chime in.
-
The recommendation is always to quench mystery metal in oil. I failed to do this on my very first hammer made of a coupler pin, and ended up with a fun conversion piece. It split in four different directions. ...just from the quench. Lesson learned. Great steel though.
-
The "pin" is exactly that, a locking pun used to secure the train car couplers. They have multiple redundant locking systems, and apparently the pin is the first to fail. At least that's according to my buddy with the railroad. And it will make an awesome hammer. ..BUT DO NOT WATER QUENCH. Feel free to ask how I know =)
-
You're probably right Frosty, a bit narrow for torch cut. Since your our resident Soderfors connoisseur, I'm curious what you've found about the depth of hardening on the face. I don't plan on grinding or anything, but is there any info on how the foundry tempered the working surface?
-
It is DEEP. At least 1/8". Only thing I can imagine is that it's from someone using it as a cutting table with a torch. But only being 3/4" long, I'm not too worried about it.
-
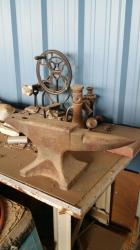
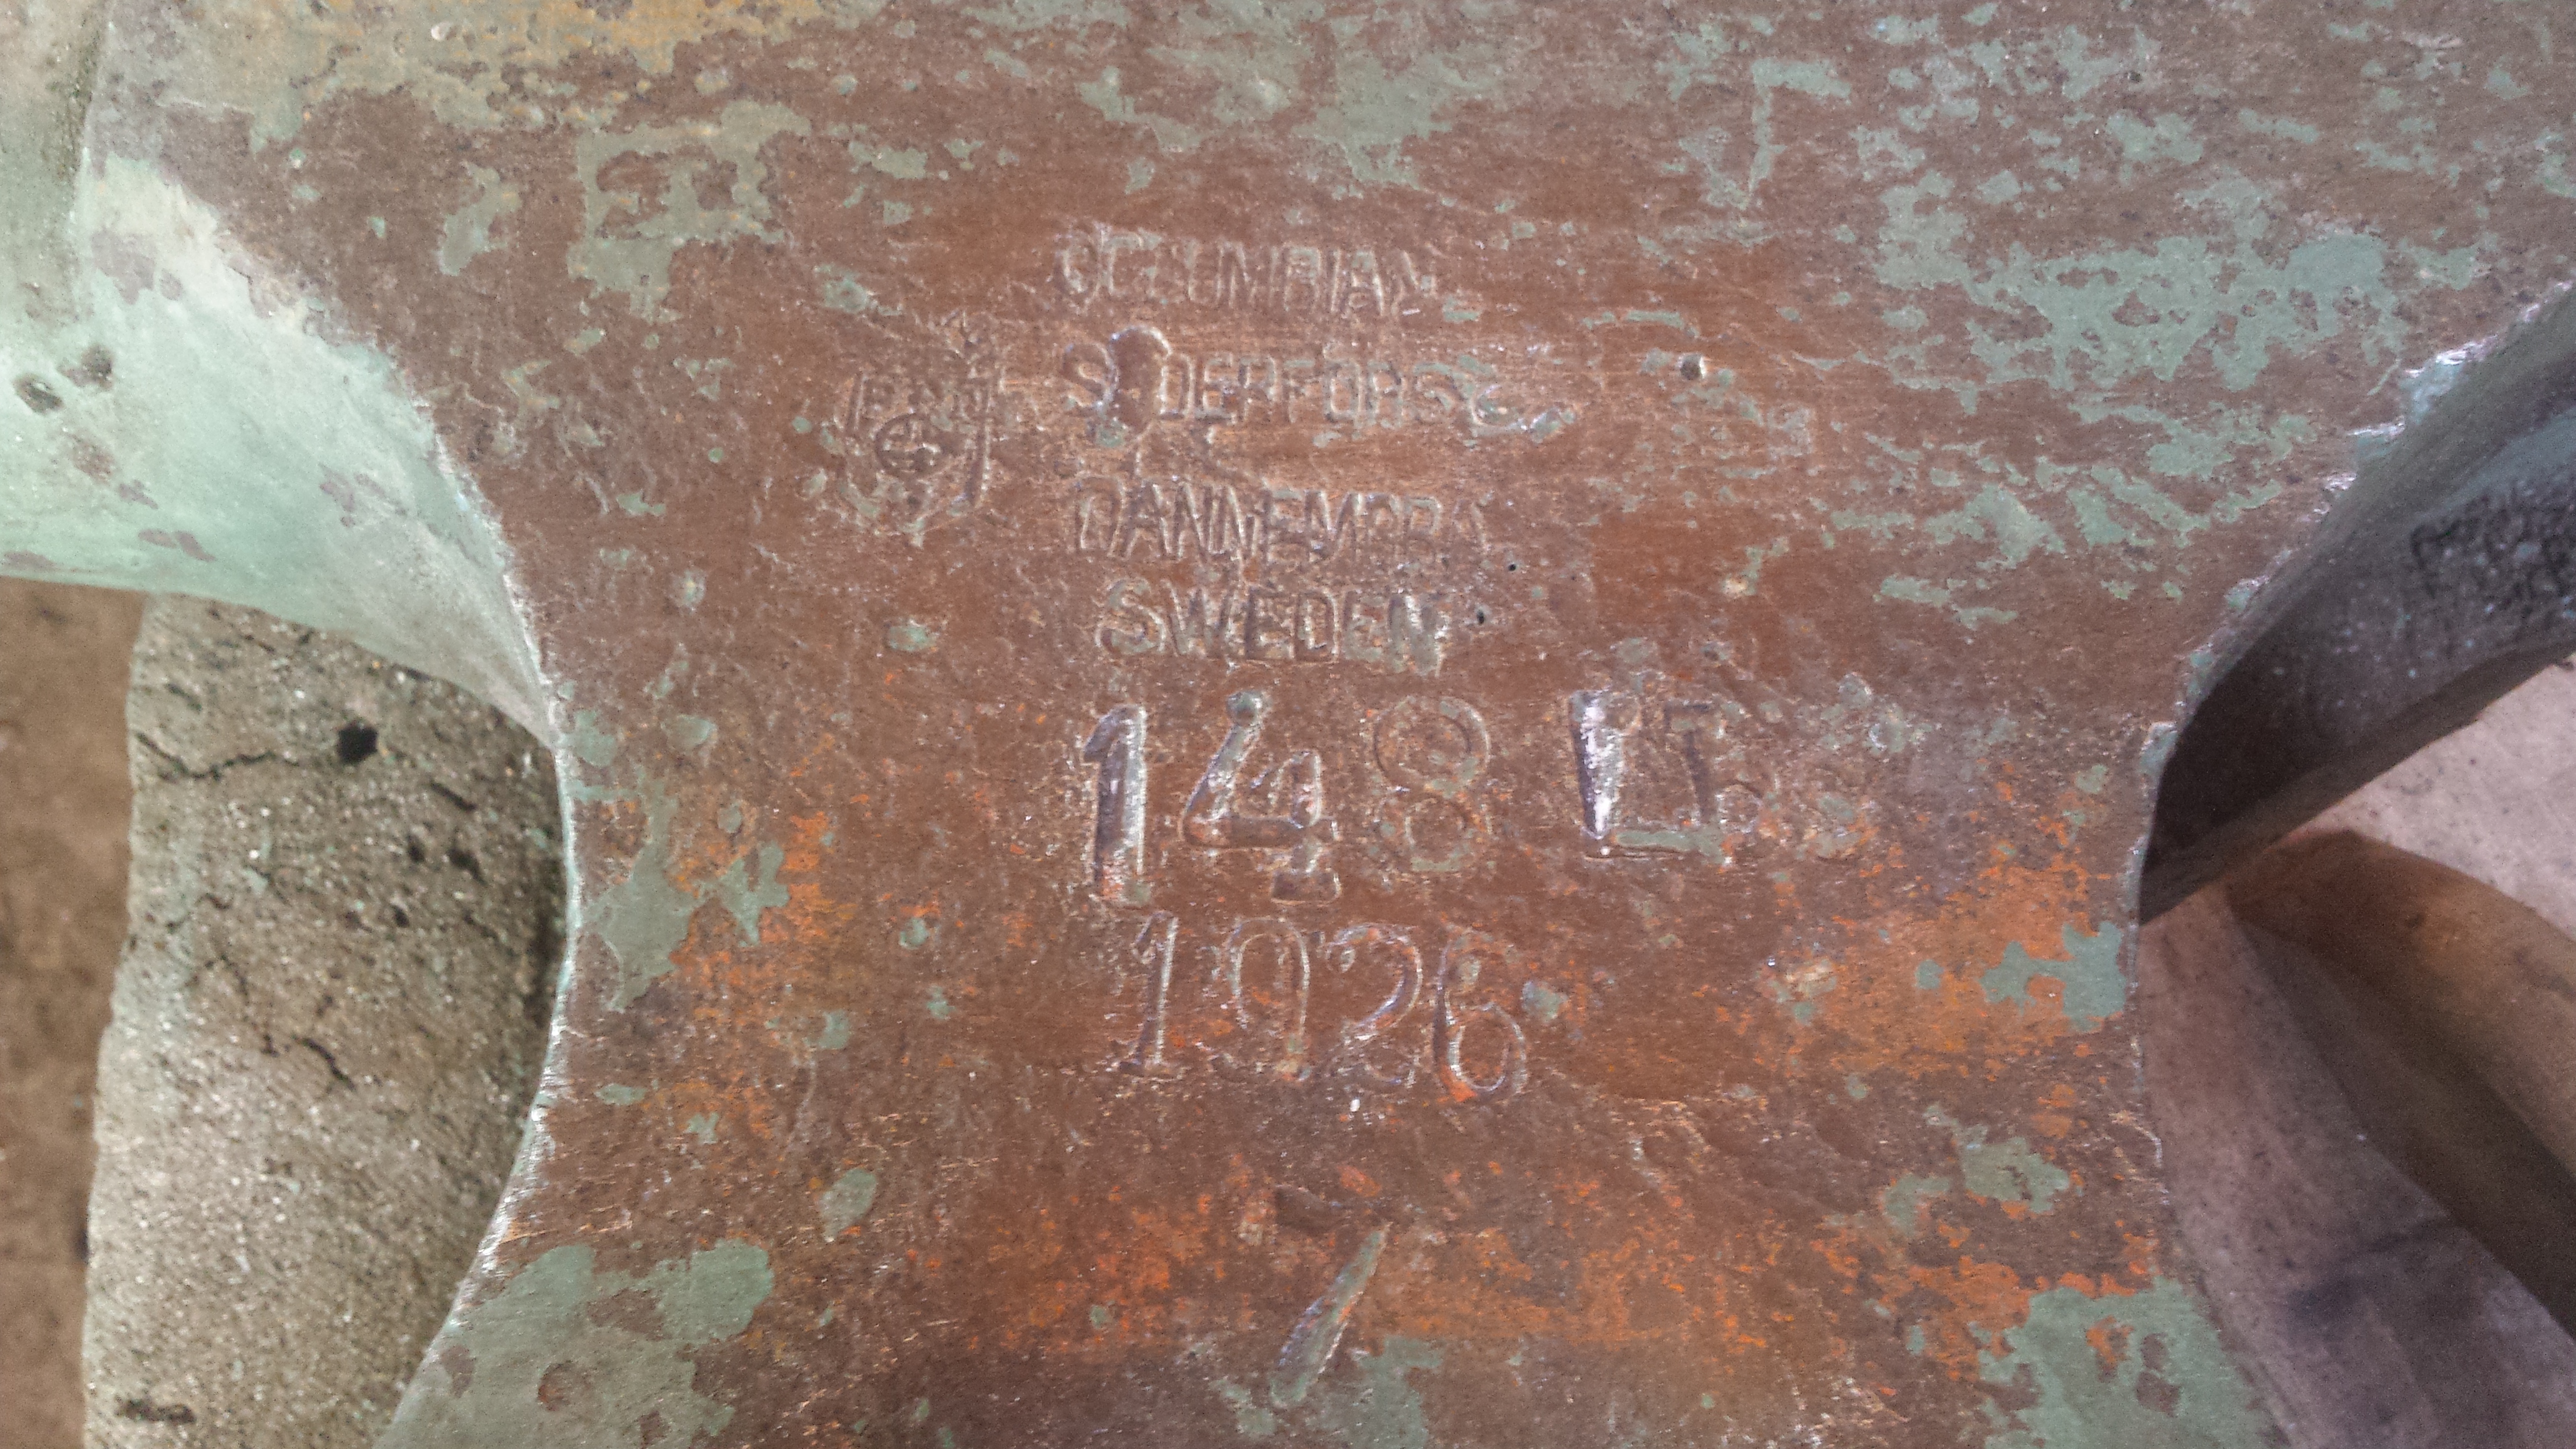
First TPAAAT success! This little guy has been in a local ace hardware since the building was built in the 40s. I had inquired about it 2 years ago, but the owners wanted to hold on to it at the time. So I figured it was time to check in again, this time, with a couple leaf key rings and a business card. 20 minutes later, I was loading it up in my truck, with the owners happy it was going to get used.
1926 Columbian Soderfors Dannemora
148lbs.....
And I paid a whopping 150$ To be fair, I did tell them they could get more if they advertised it, but they happily accepted my opening offer.
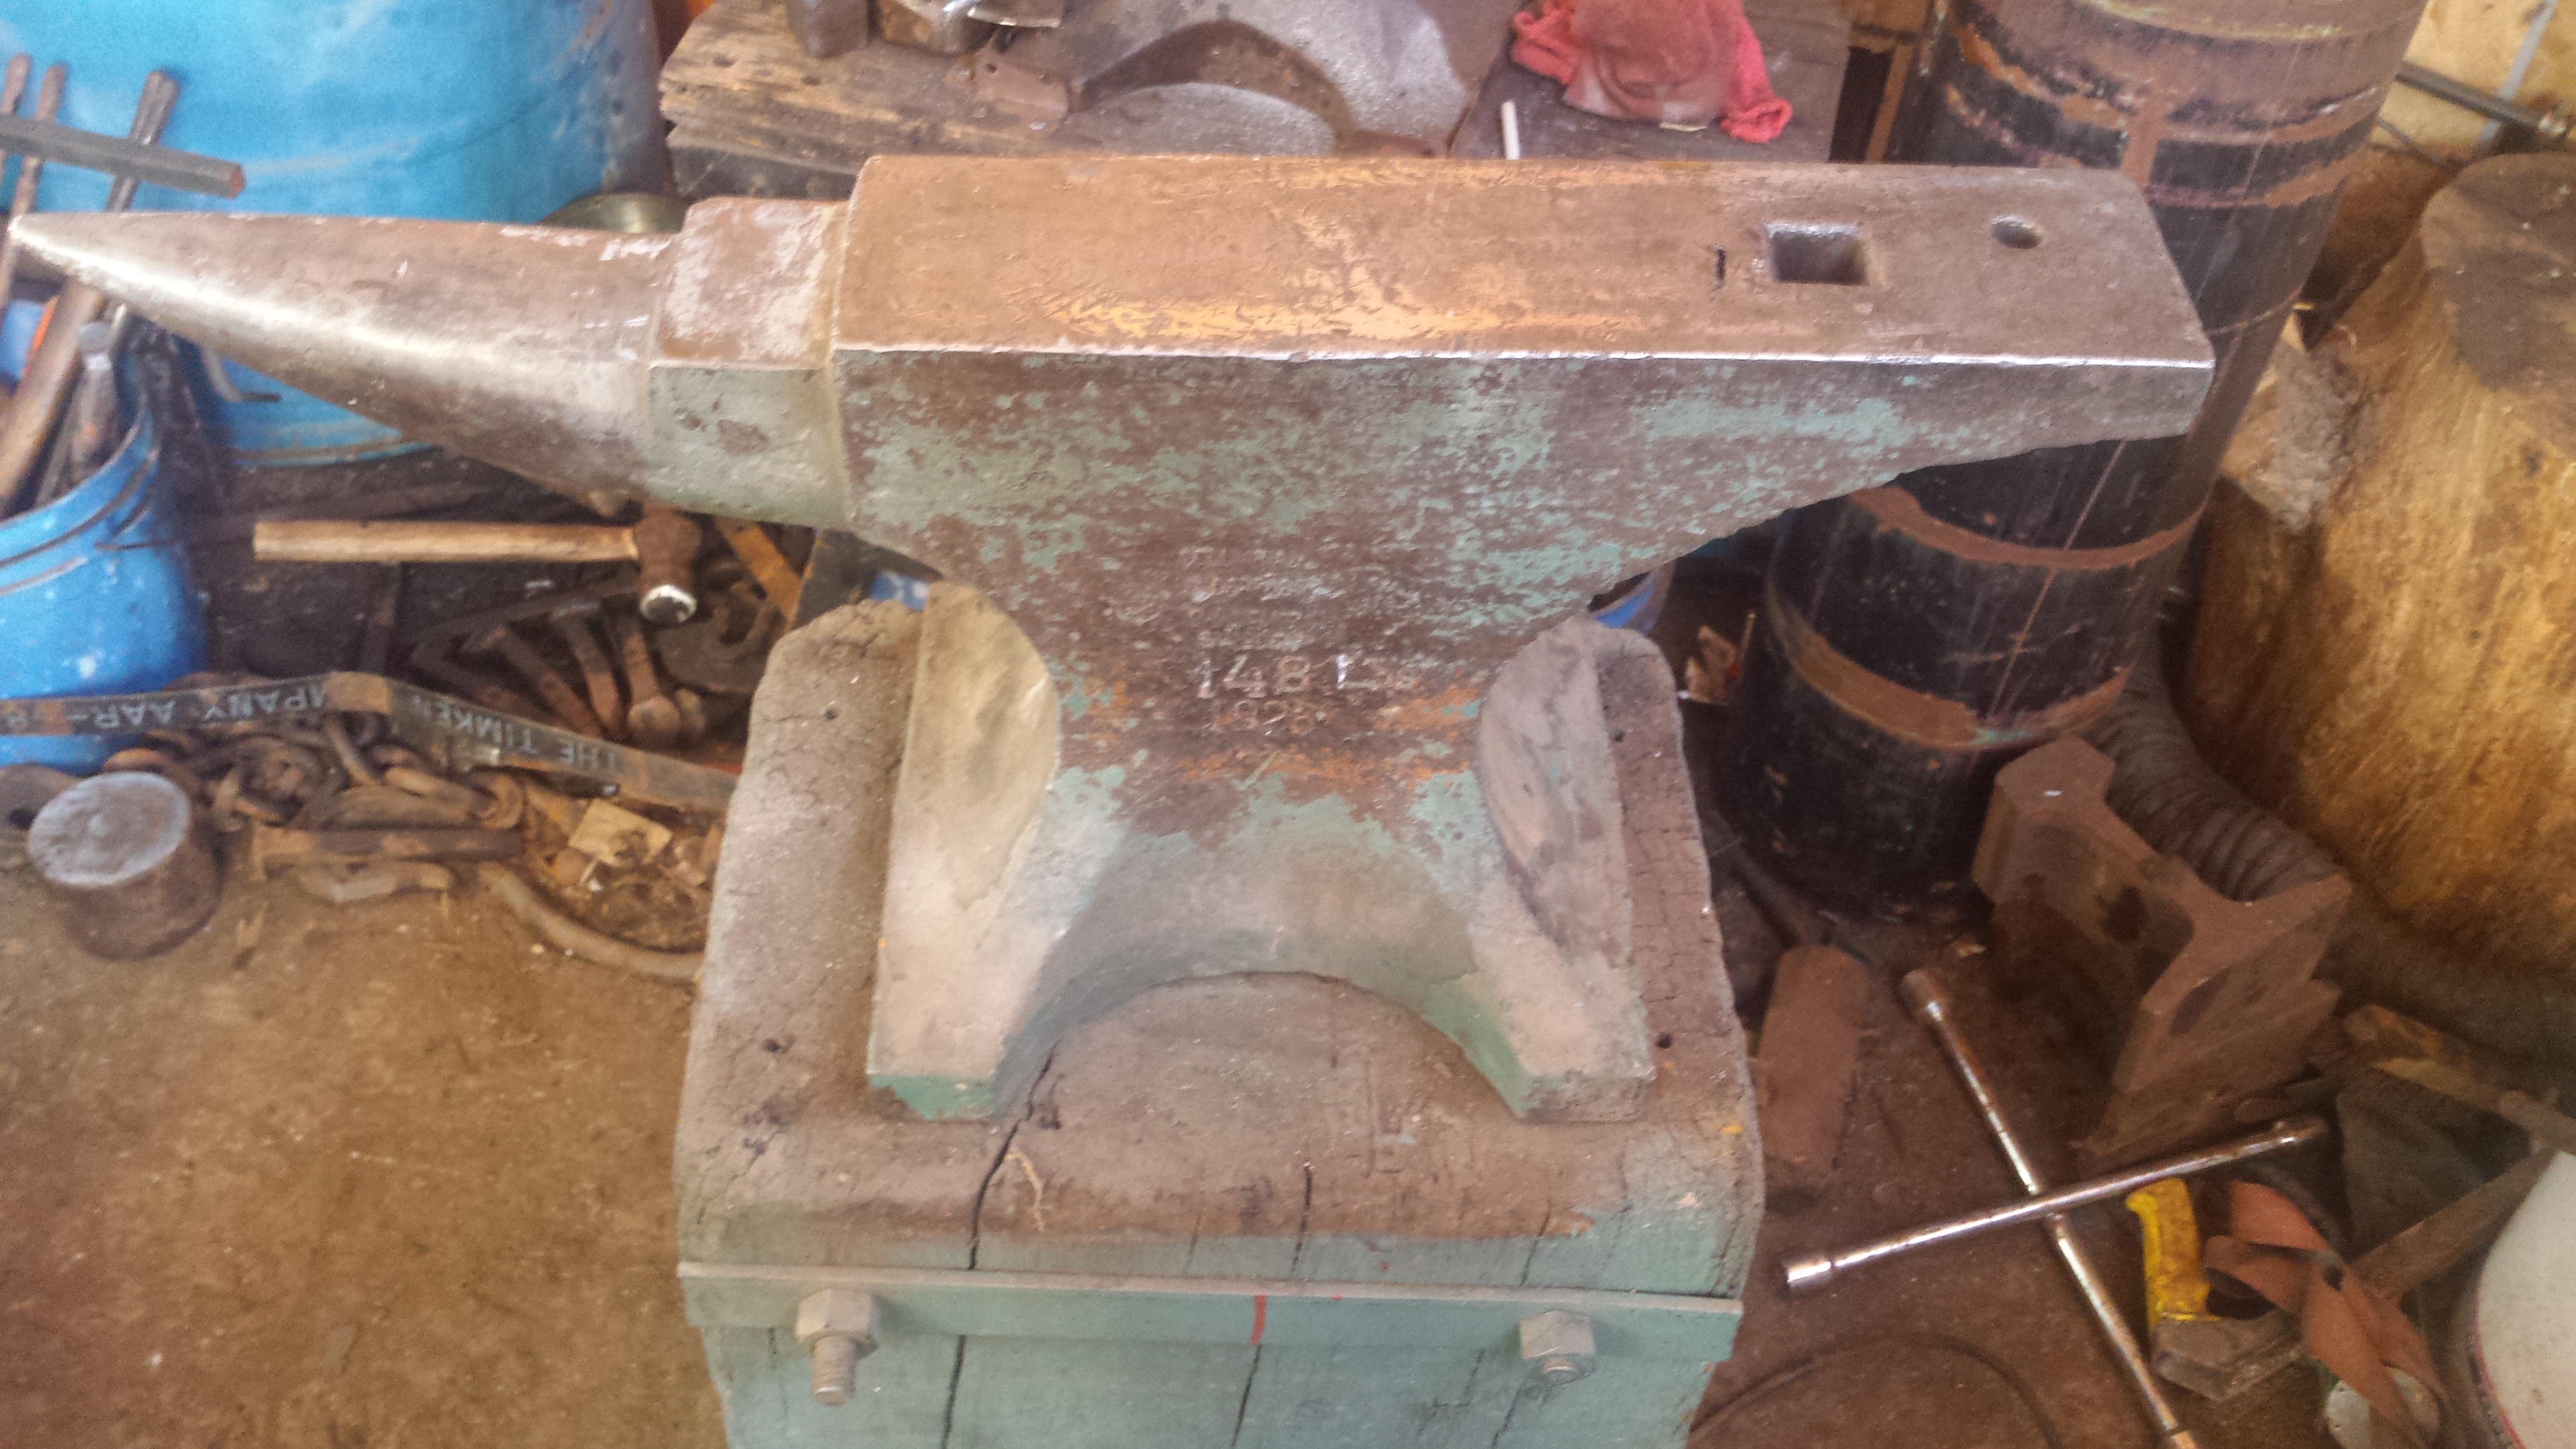
It is in great shape by my standards, with just one odd gouge in the face. I was concerned at first because it didn't have the ring I expected of a soderfors. .but it turned out that the angle iron brace that secured it to the stump did an amazing job at neutralizing the ring. I had taken it off in the pics, but I'm DEFINITELY putting it back on.


-
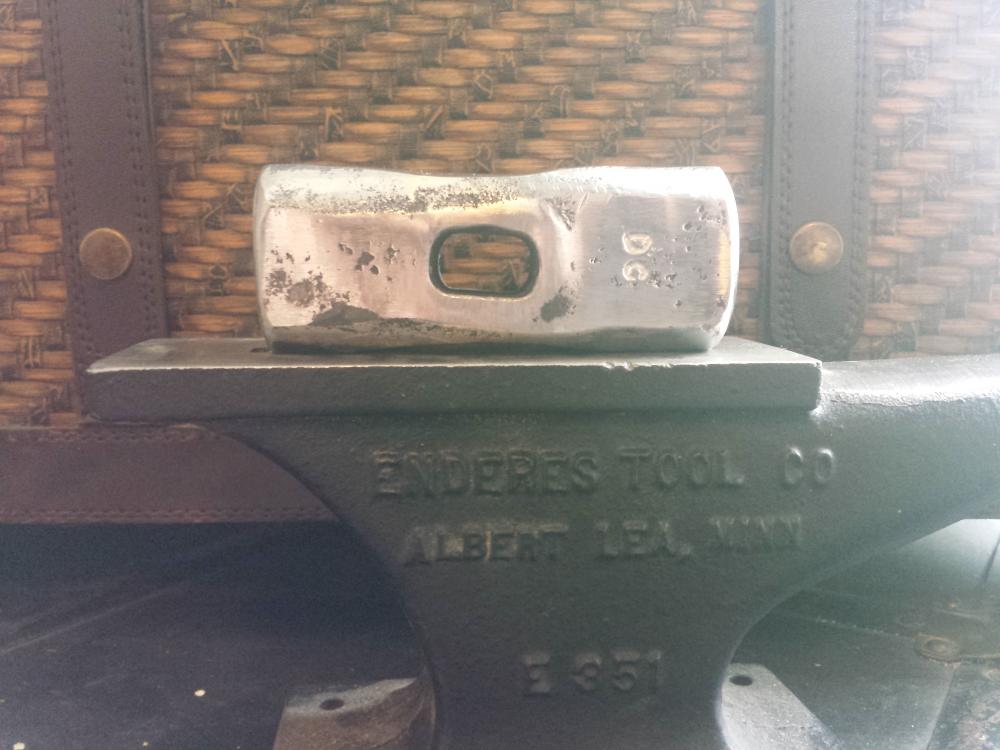
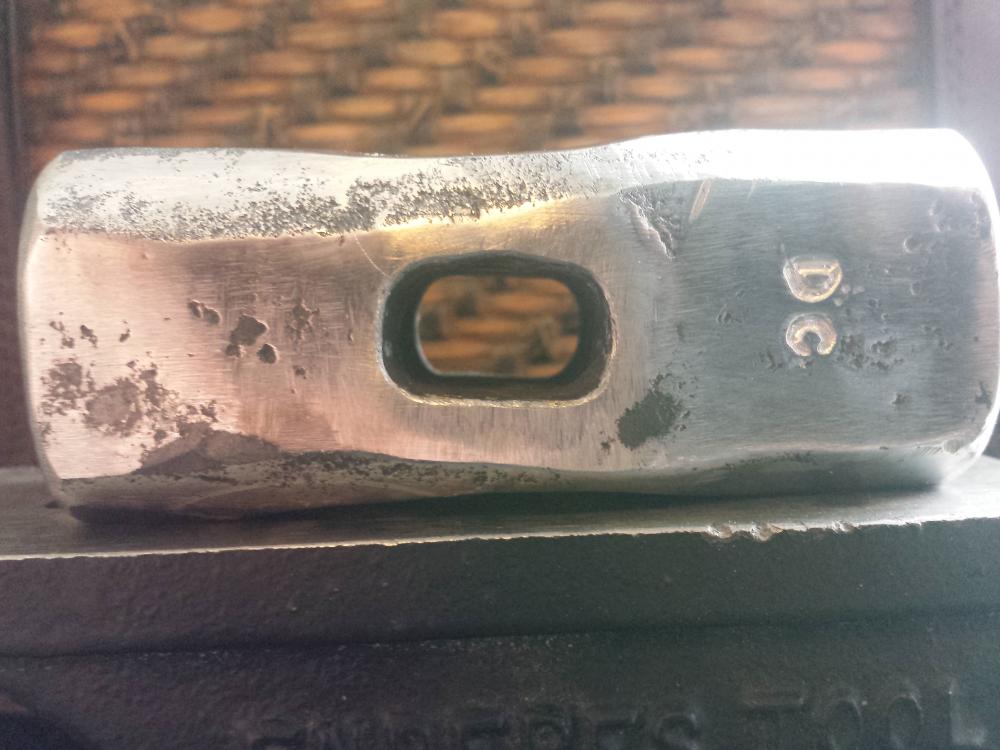
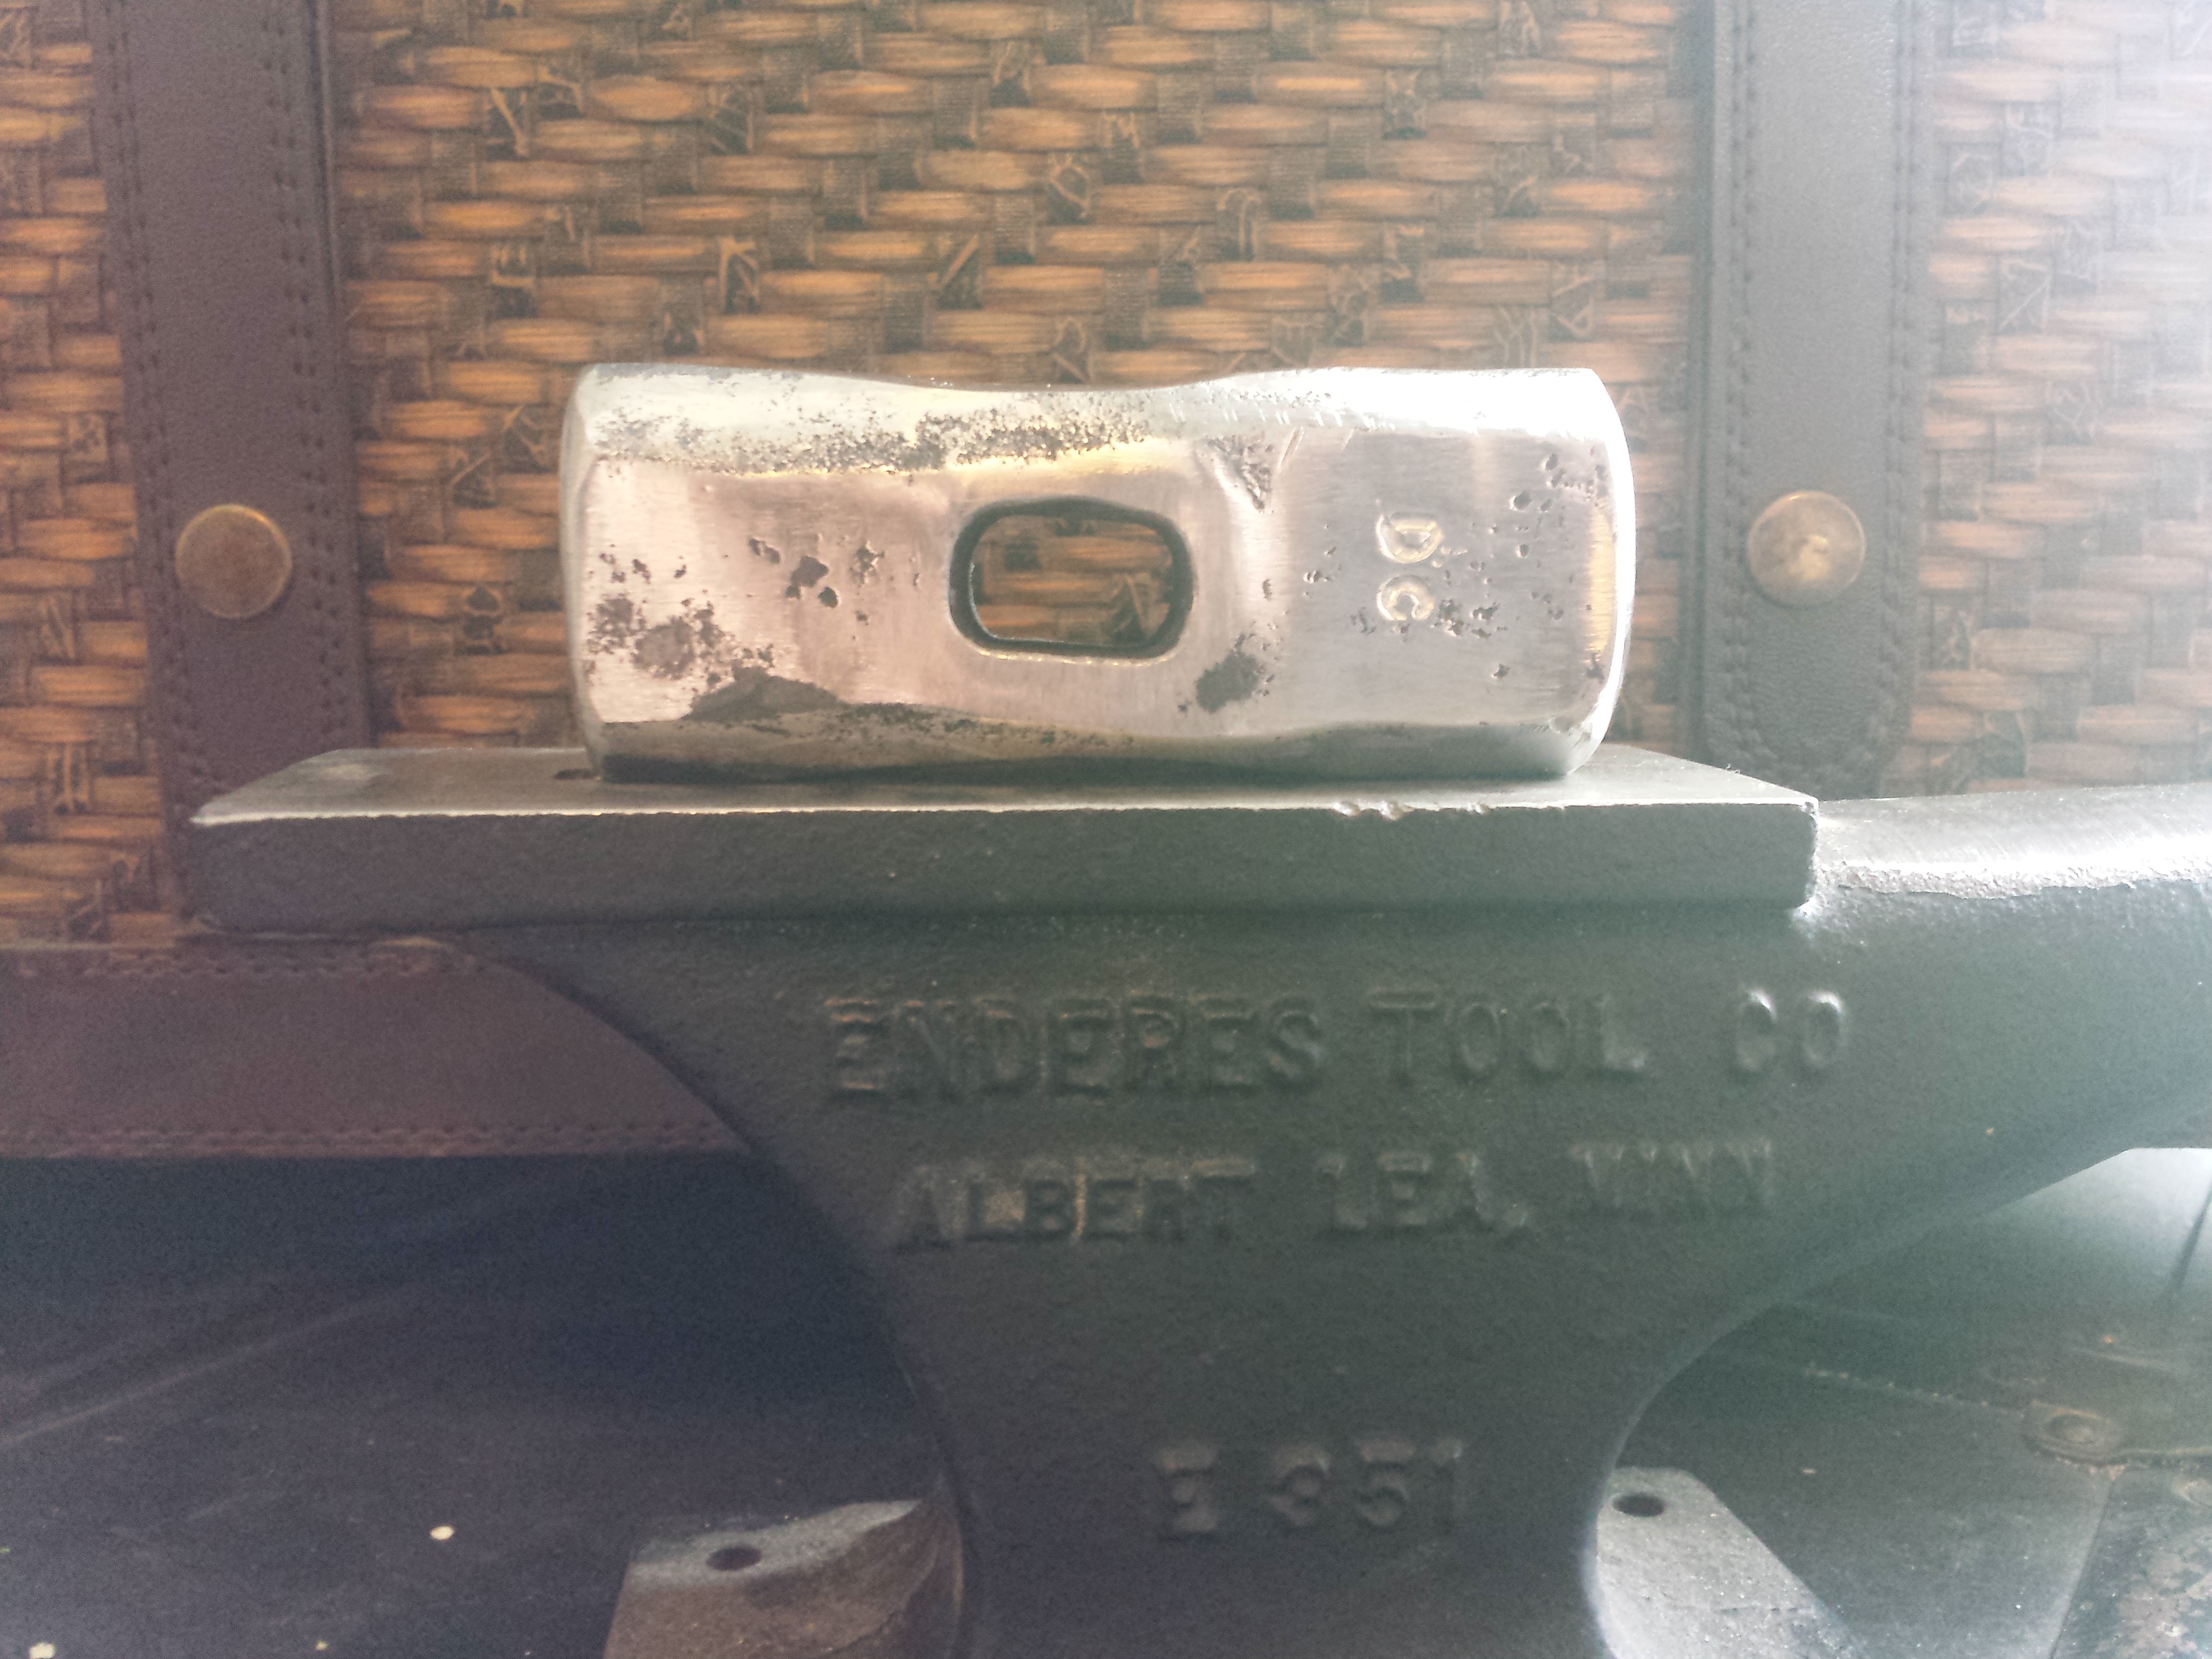
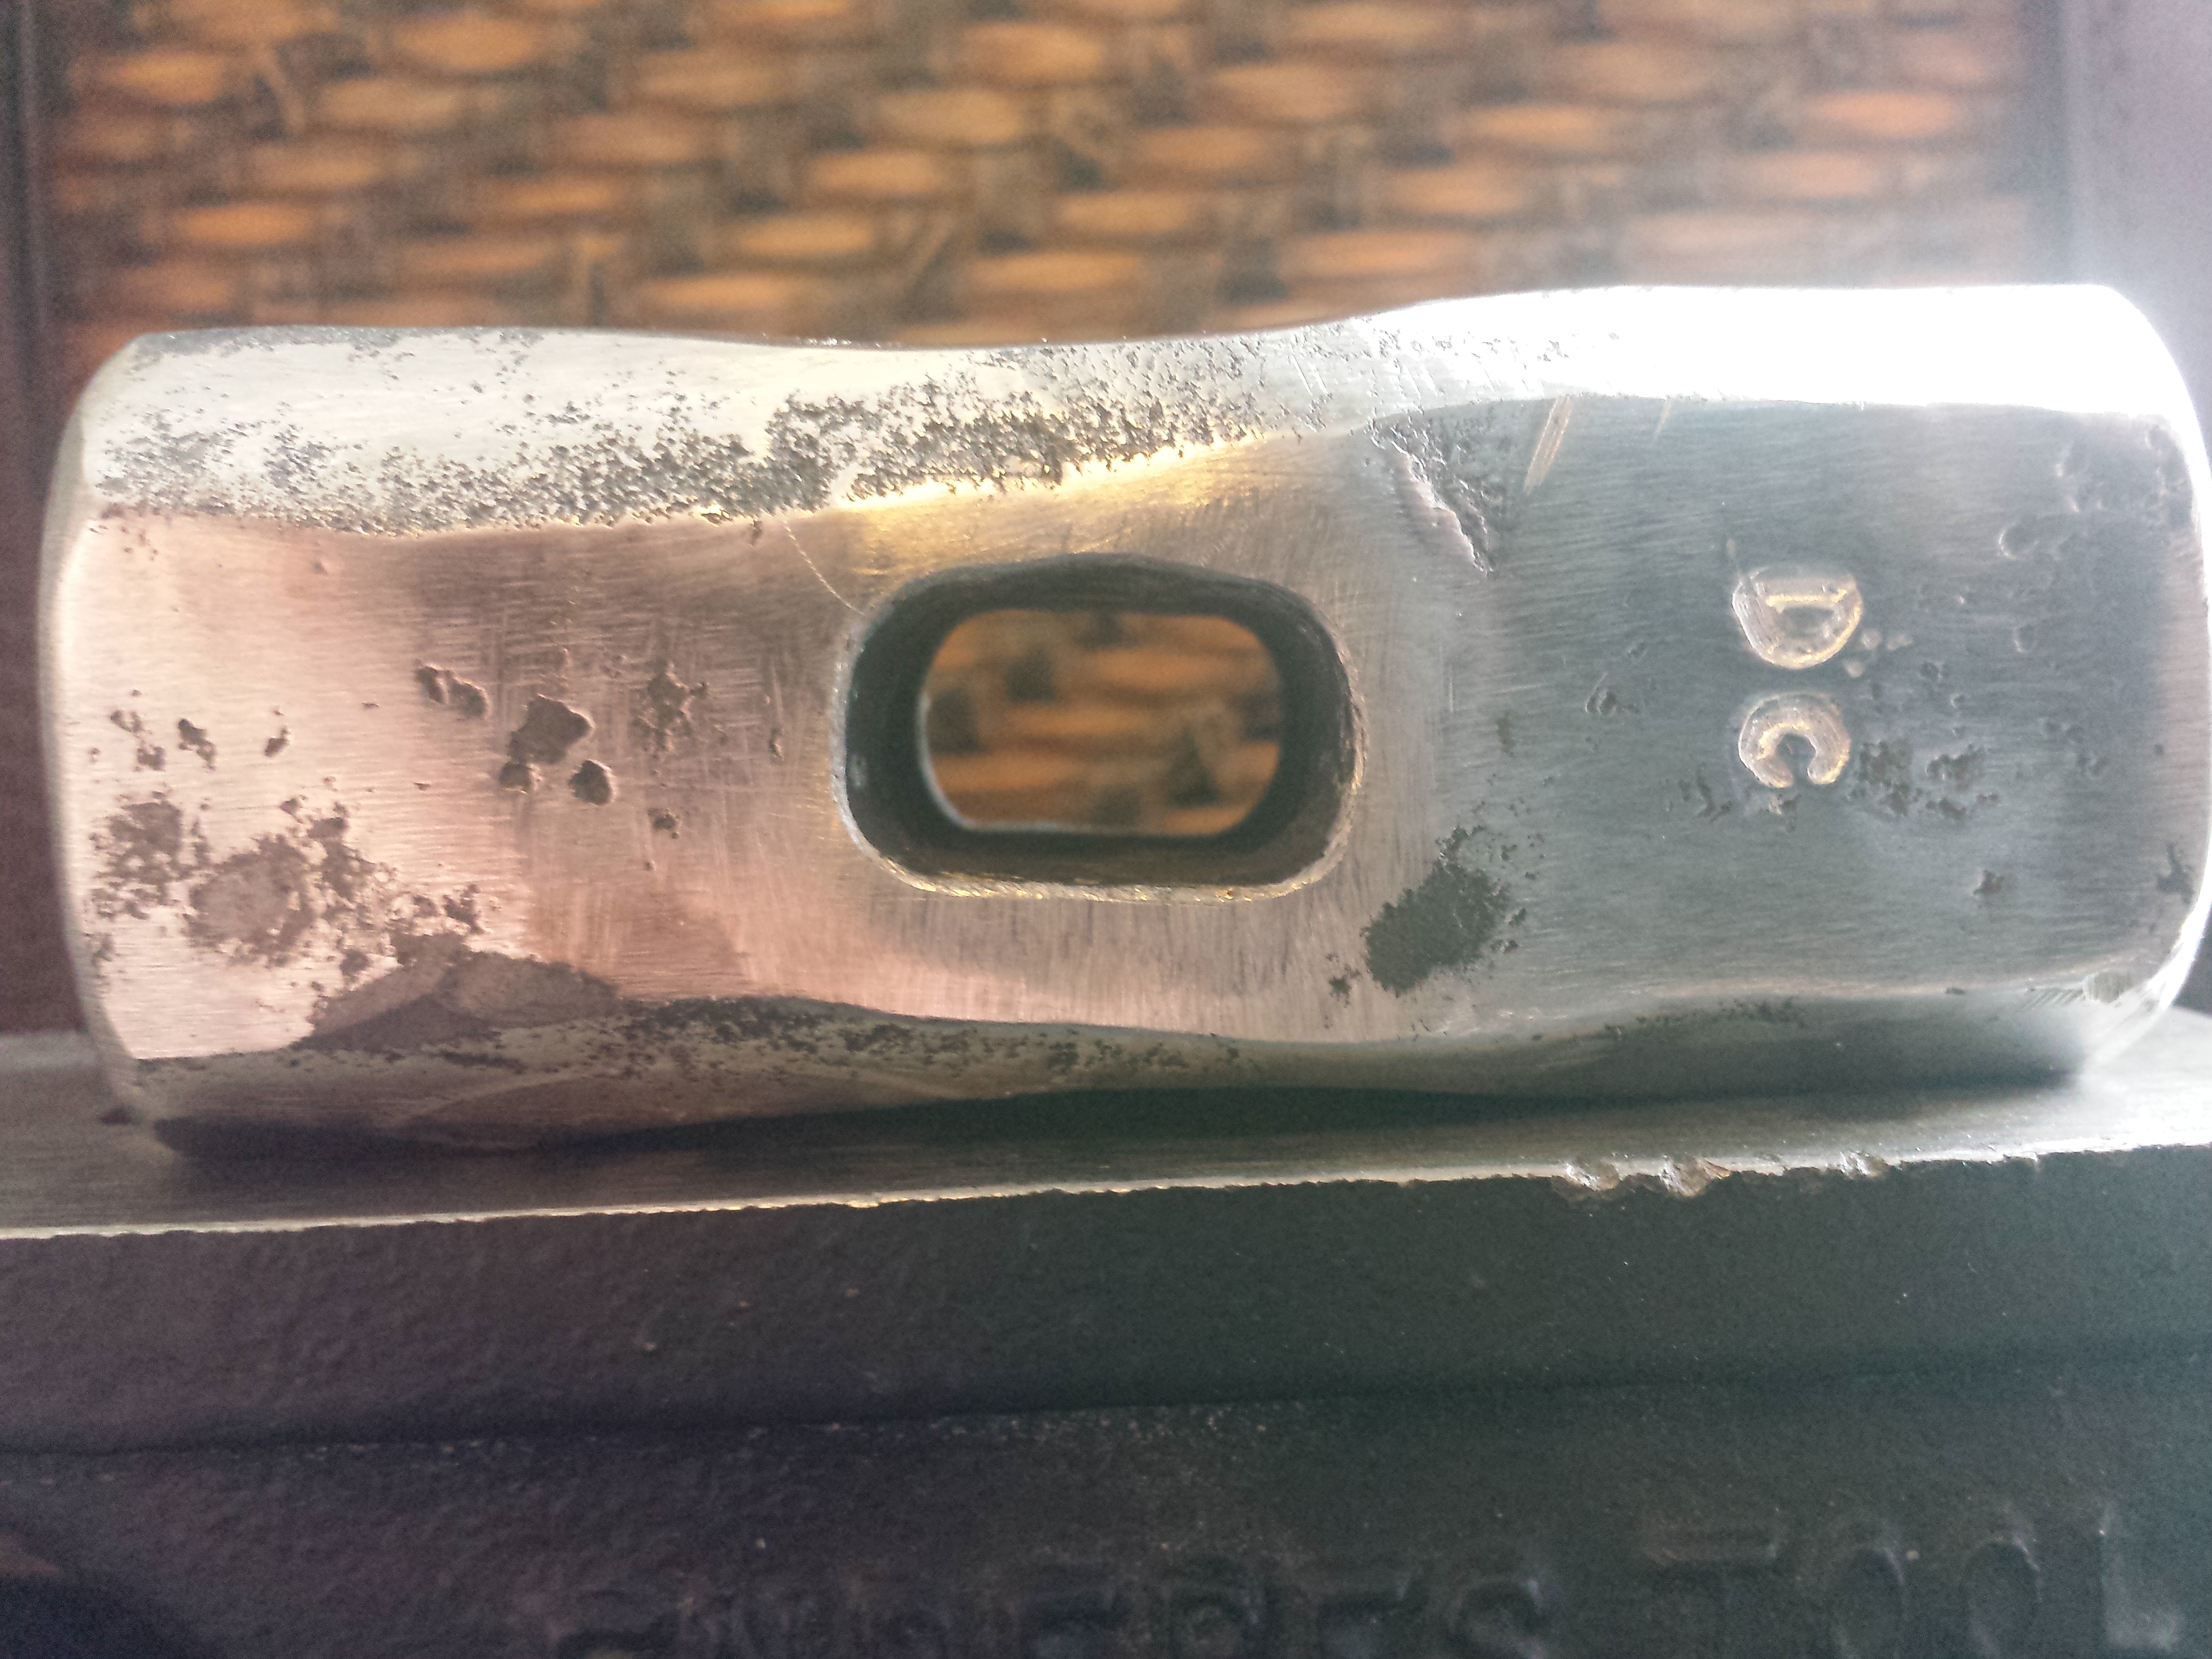
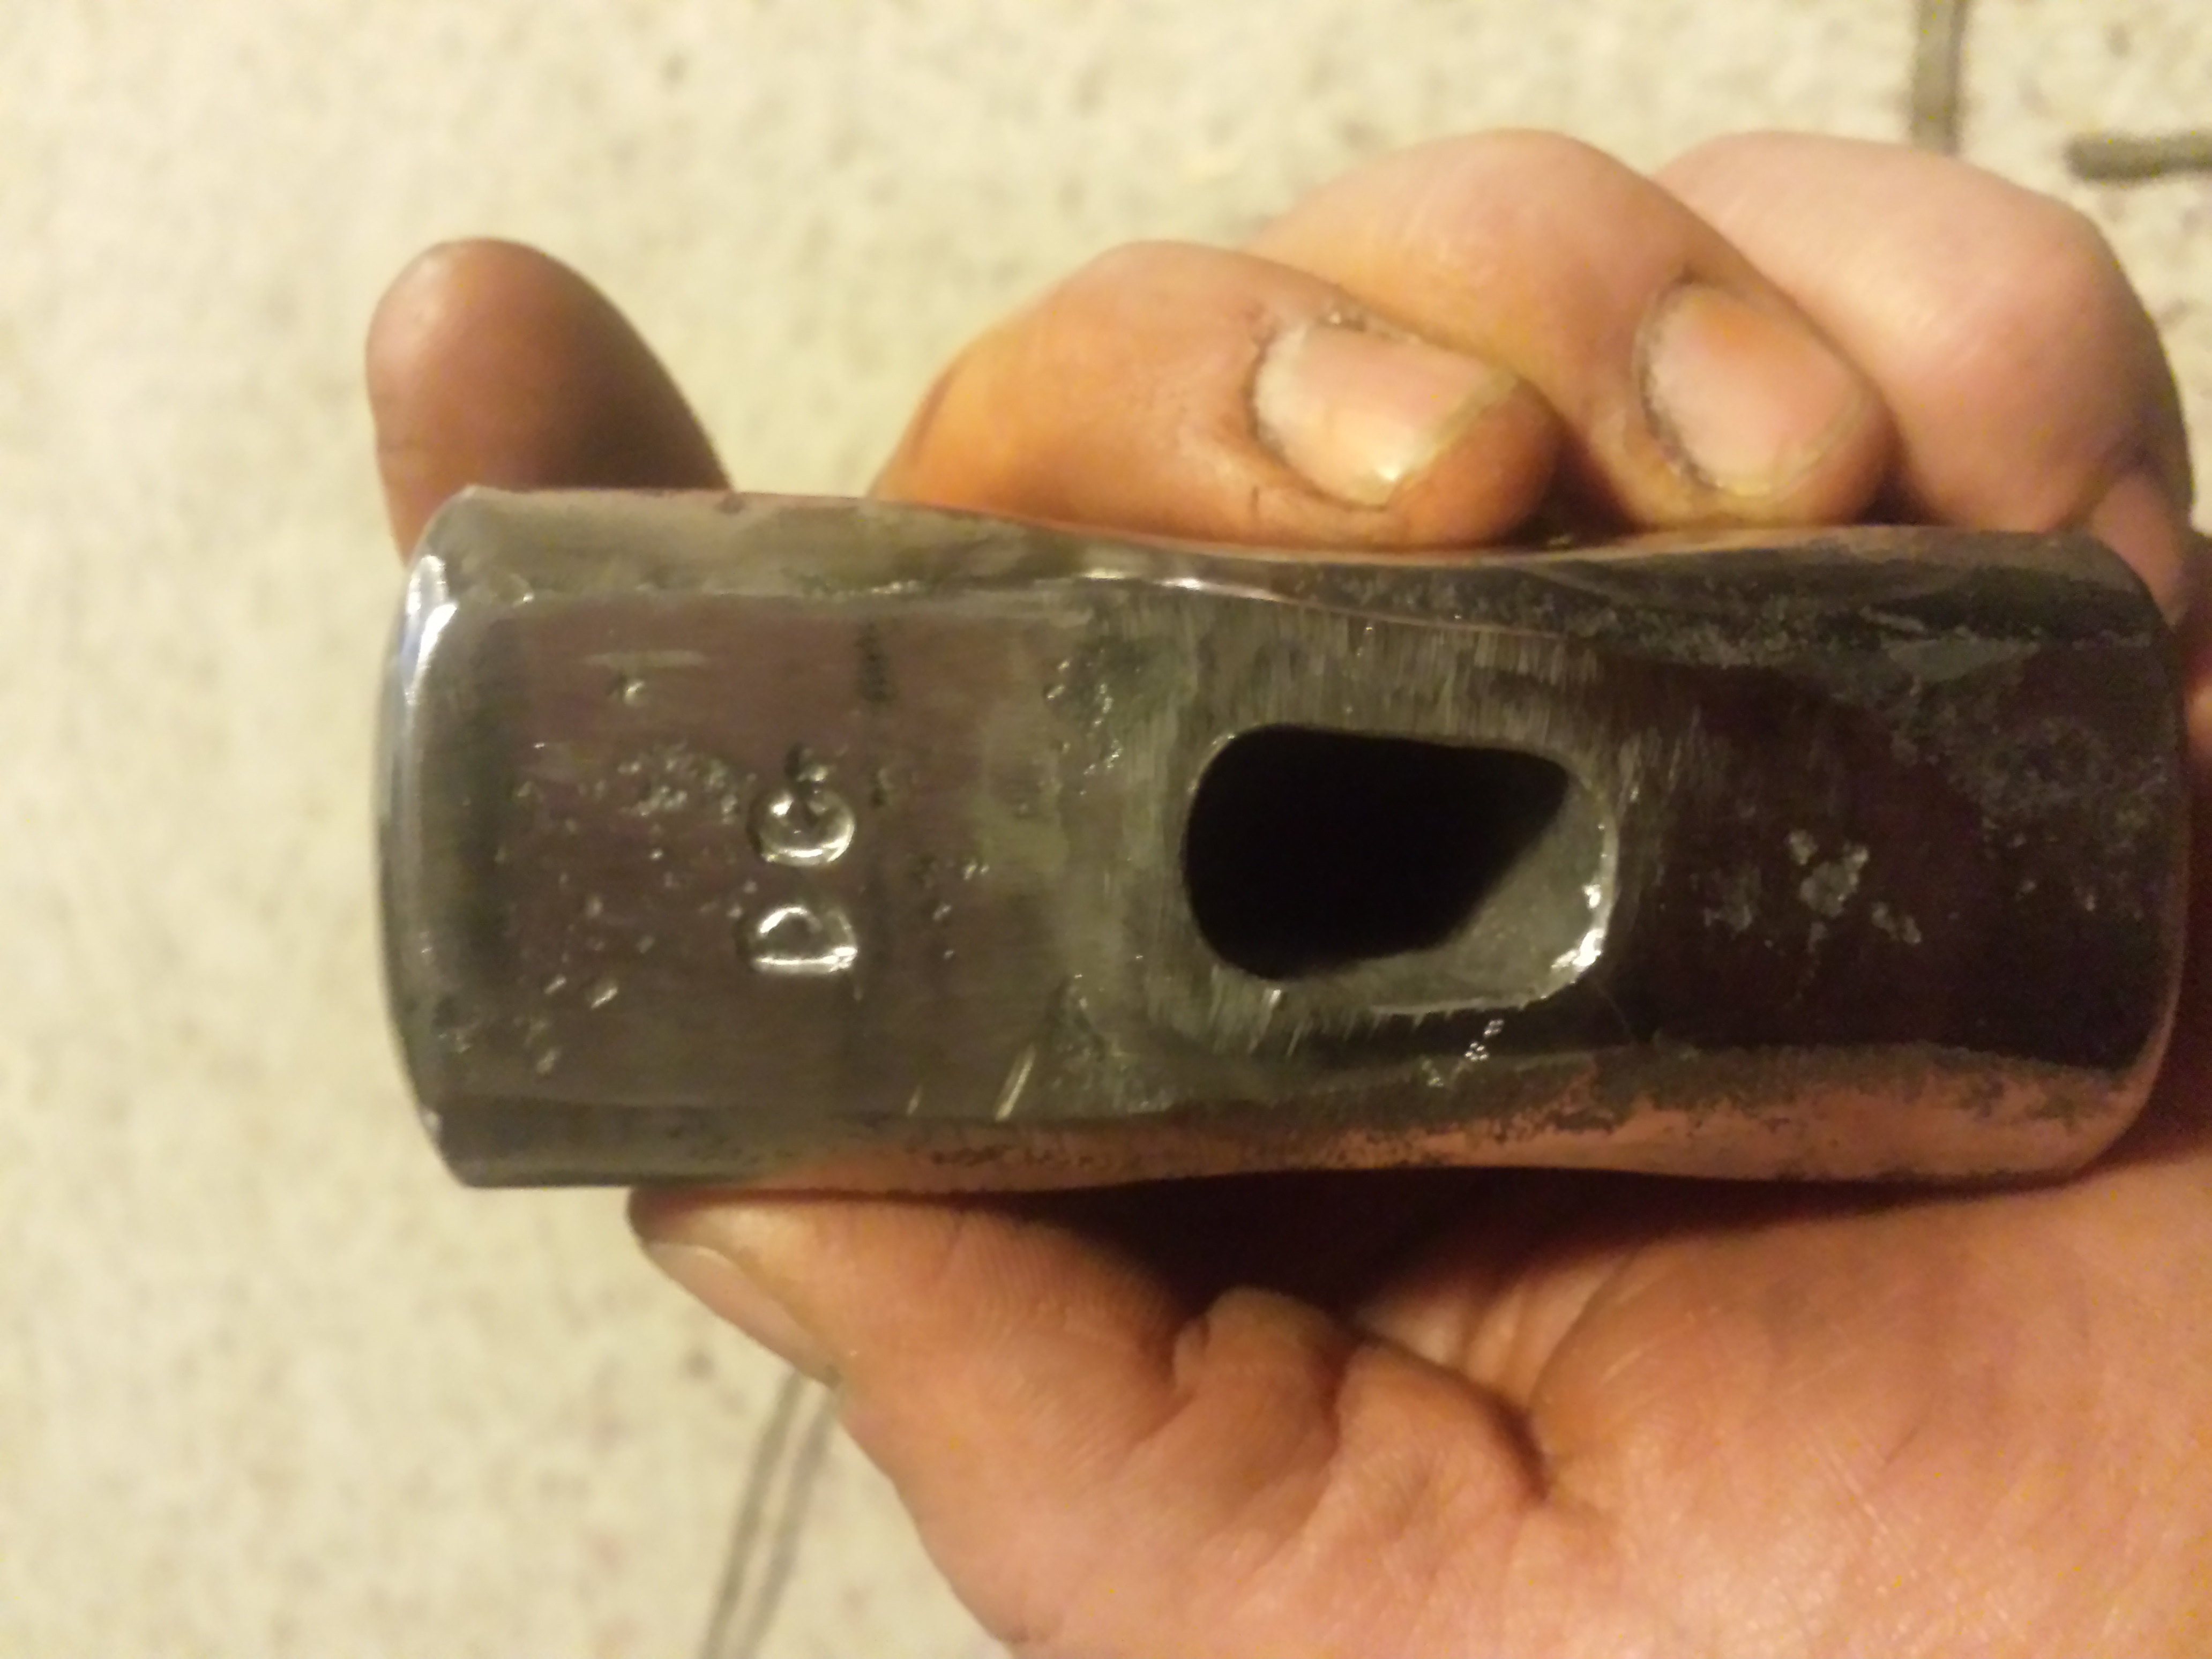
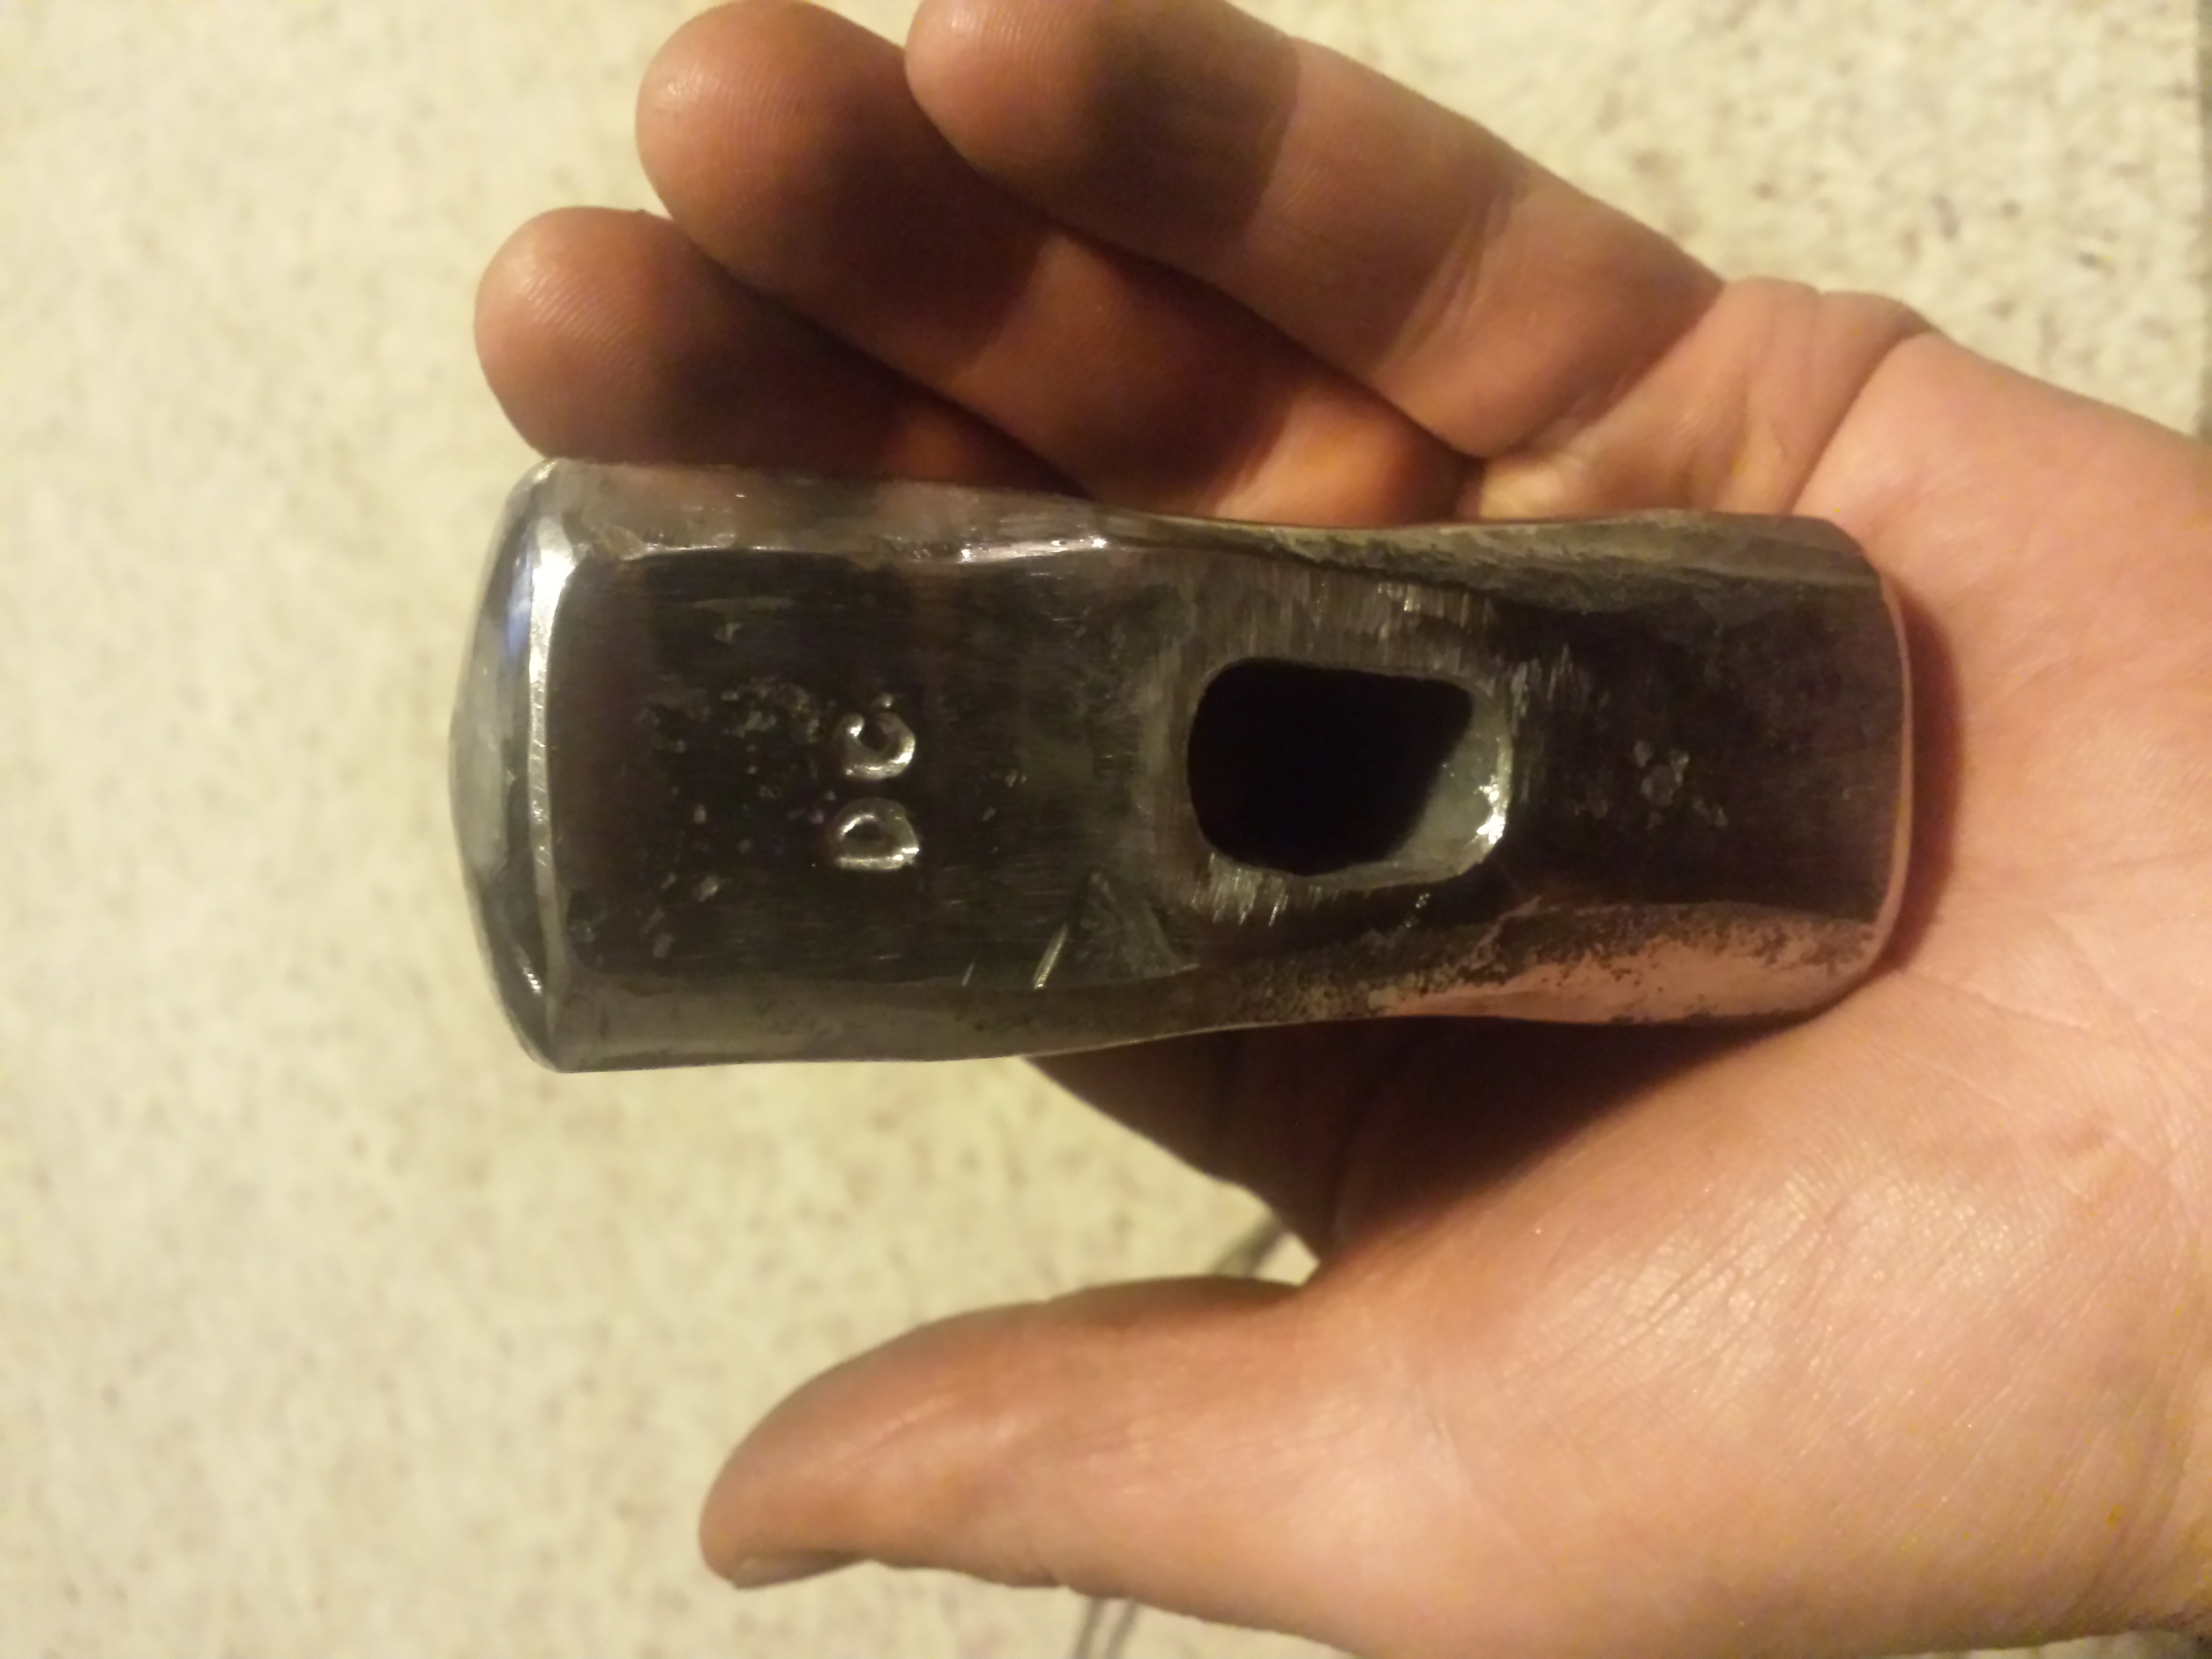
It's hard to see in those crummy pictures. I marked my center well, but while drifting I must have twisted it resulting in [\] instead of [|](if looking DOWN at the eye of the hammer). I'll try to get a better picture. And thanks for the compliment Frosty, haven't heated her yet. I may still do some forging if I can fix that crooked eye.
Ok, I'm not imagining it, when holding this thing it's obvious, but the pictures barely show what I'm taking about. It's only 1/16 of true.
-
Welcome! Although new to the site, I can give you the same response as our veterans. "Post pictures" , hopefully someone will be able to recognize it and give you the info your looking for
-
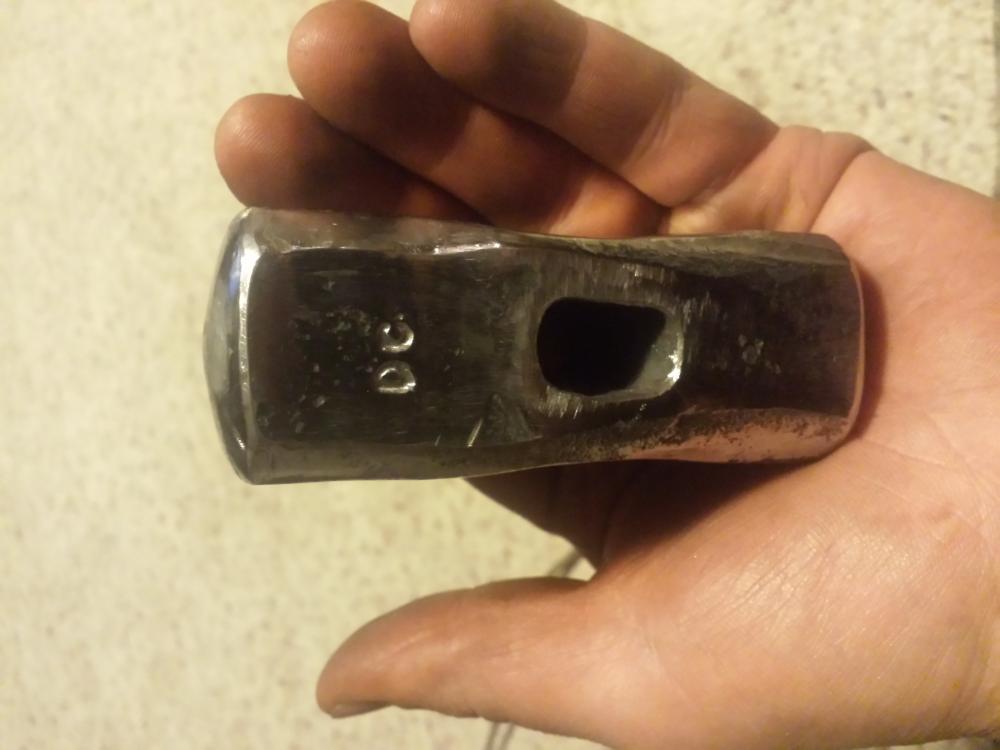
Almost hesitant to post this, since it is rough. Especially when compared to alot of the tools posted here. But it's my first, and like every parent of an ugly child, I'm blinded by happiness. About 2#, made from 4" of the pin that locks the couplers on rail cars. One question, I managed to drift the eye a little askew. Any advice as to how to keep it straight next time?


-
That is some beautiful steel. Well done!
-
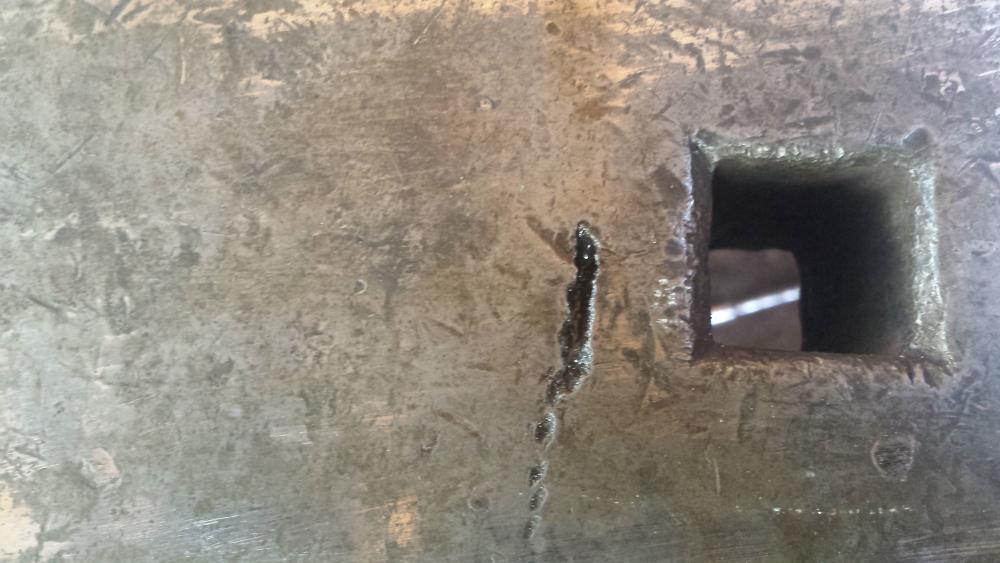
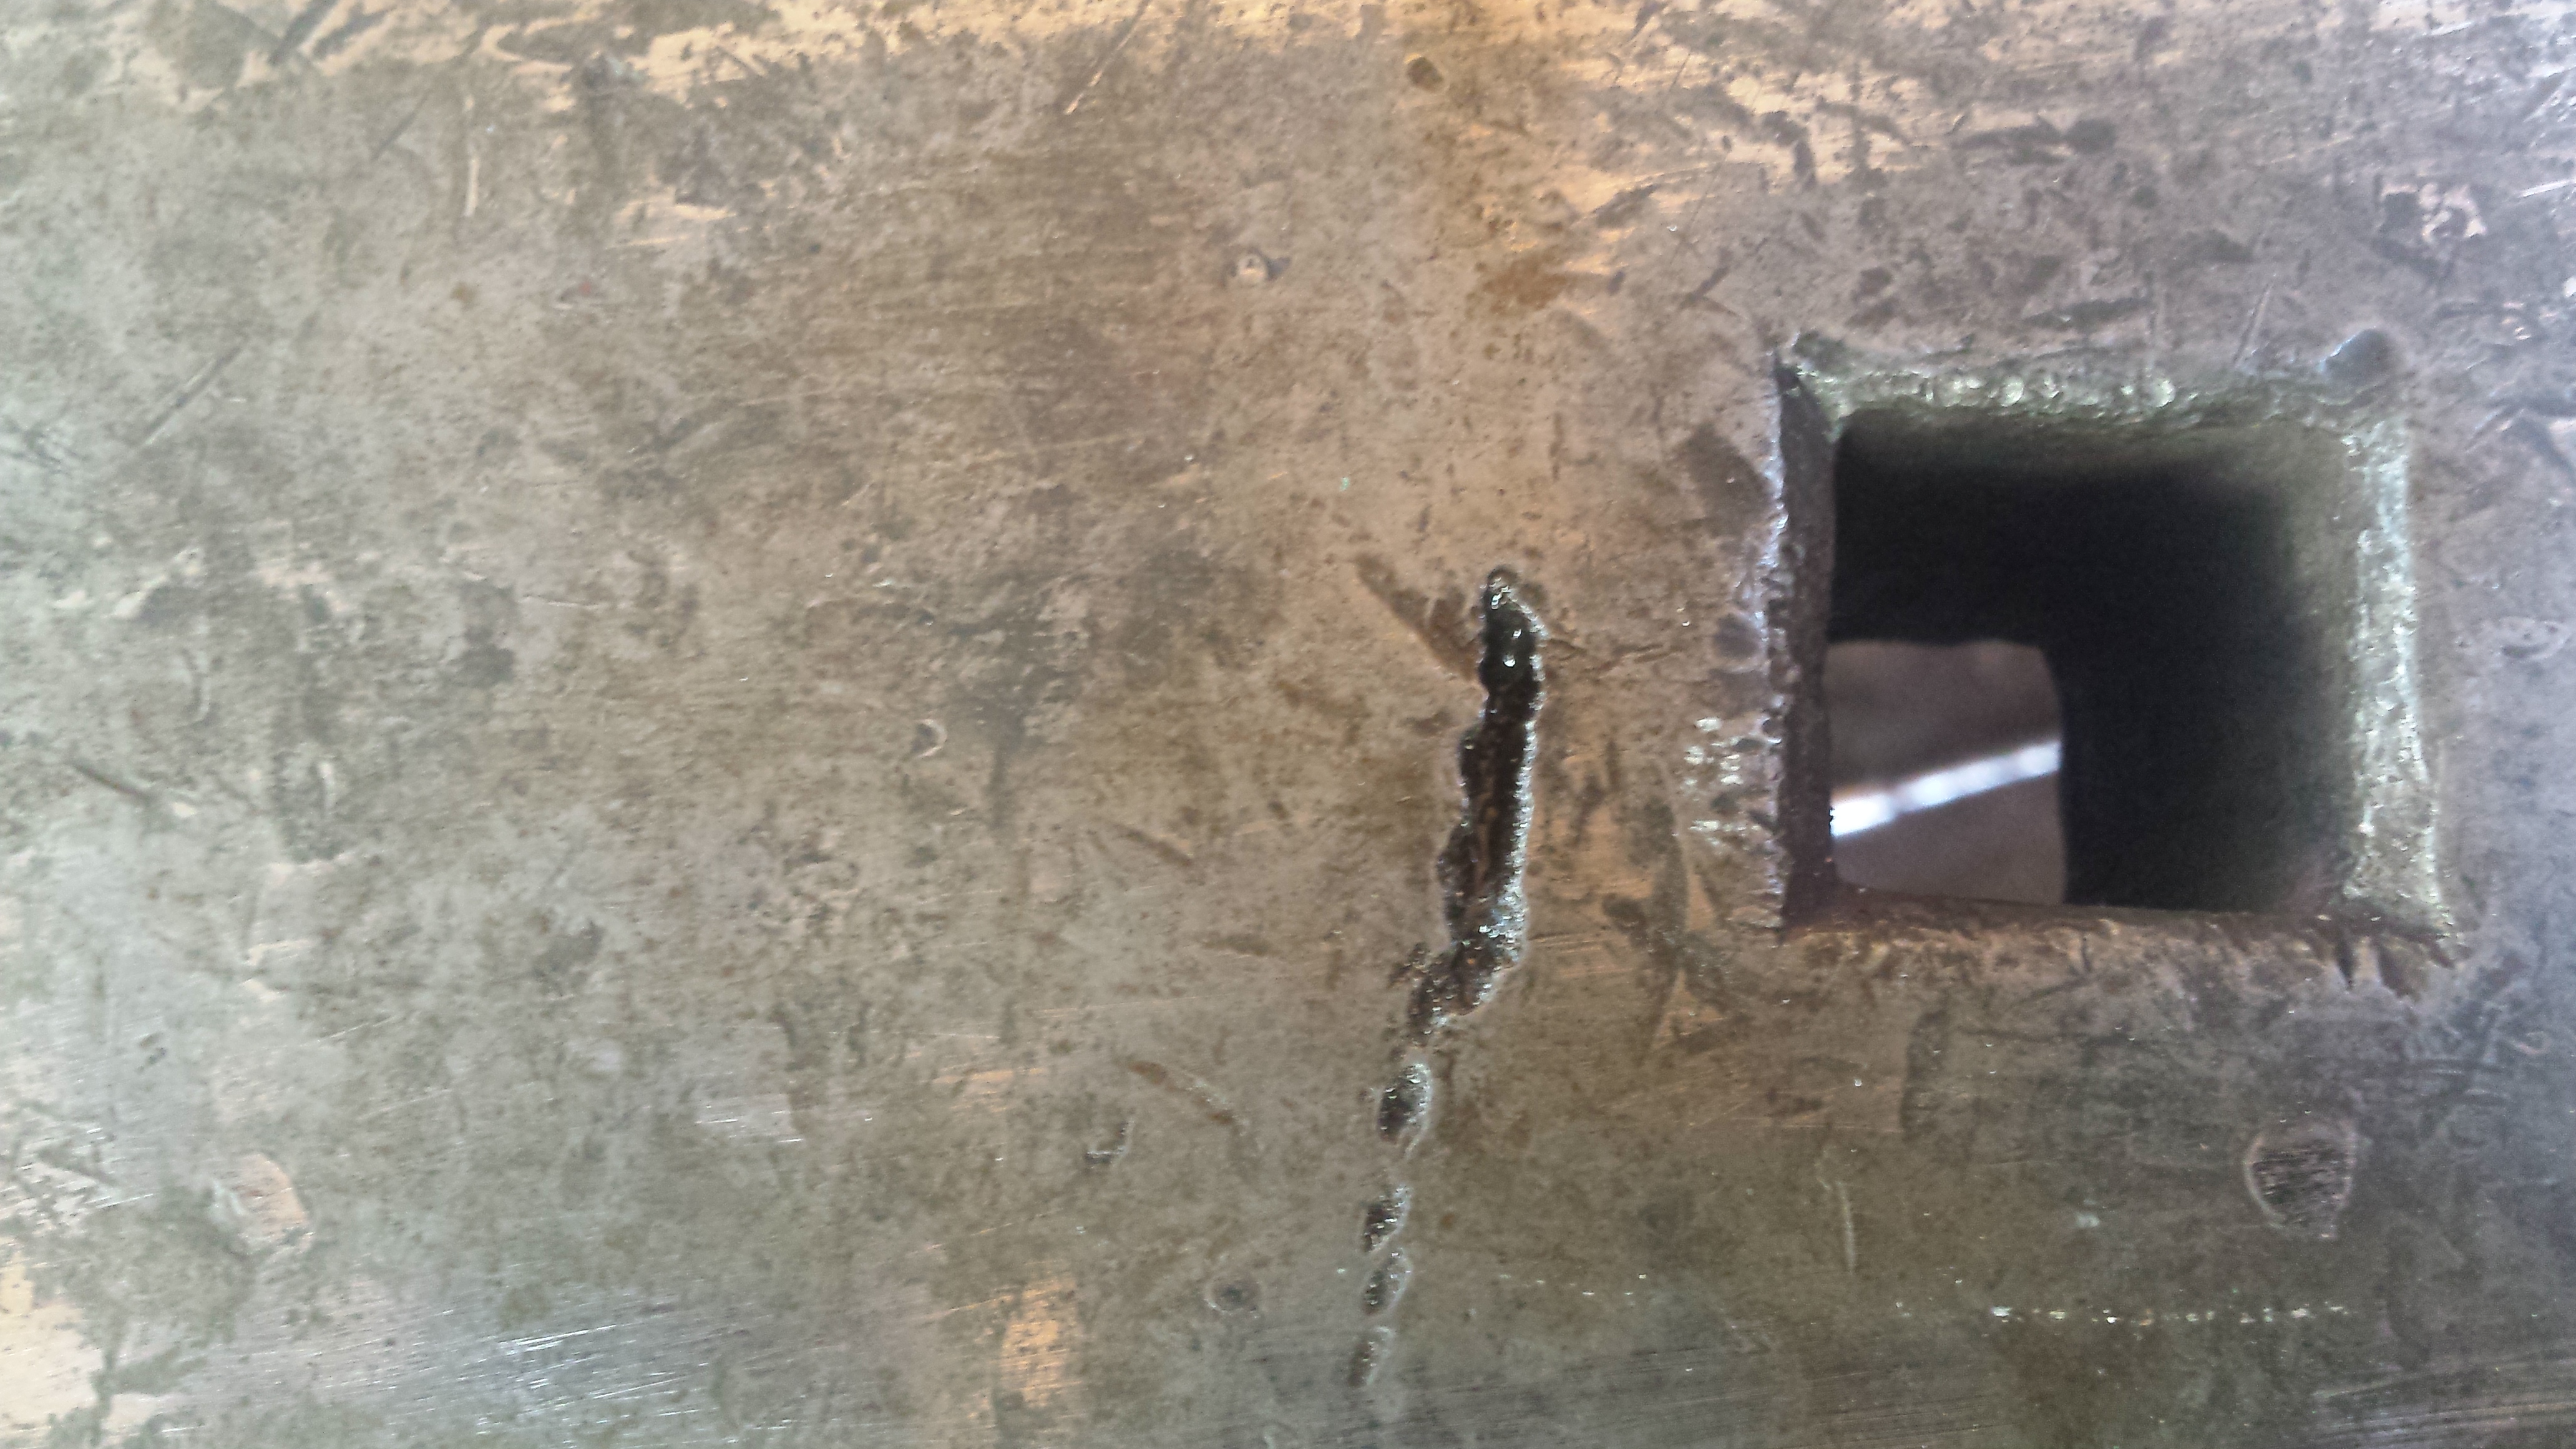
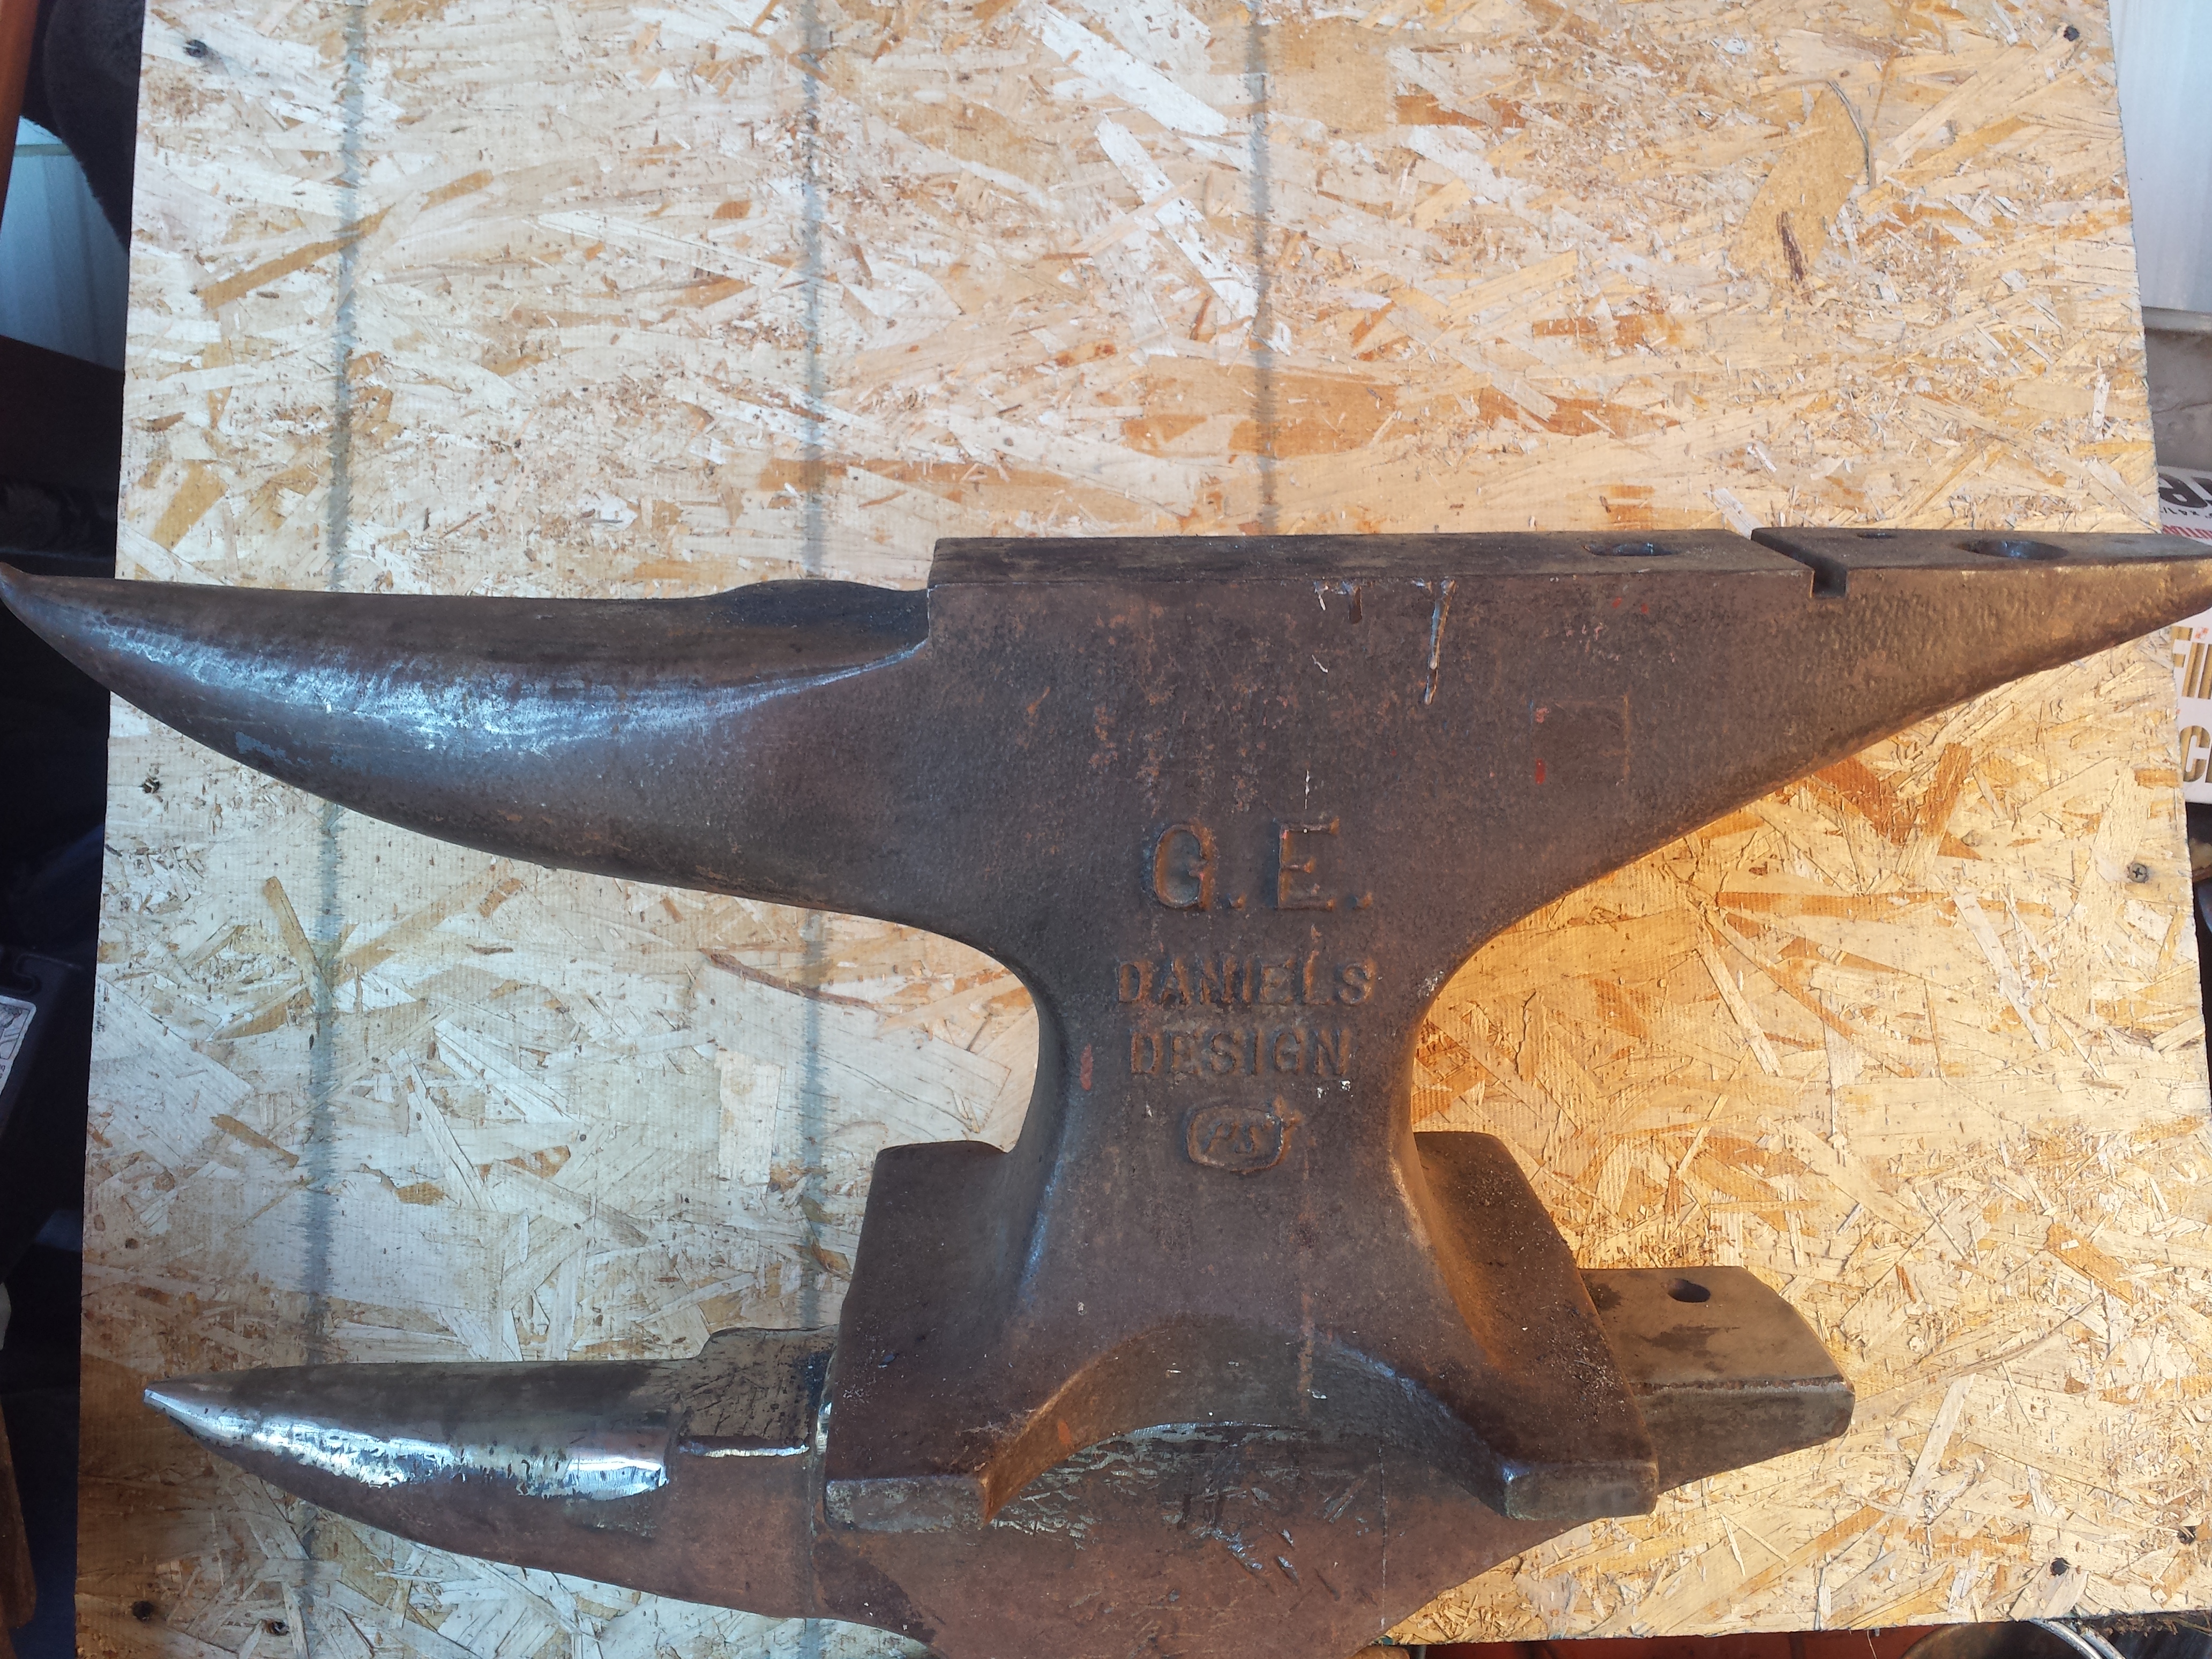
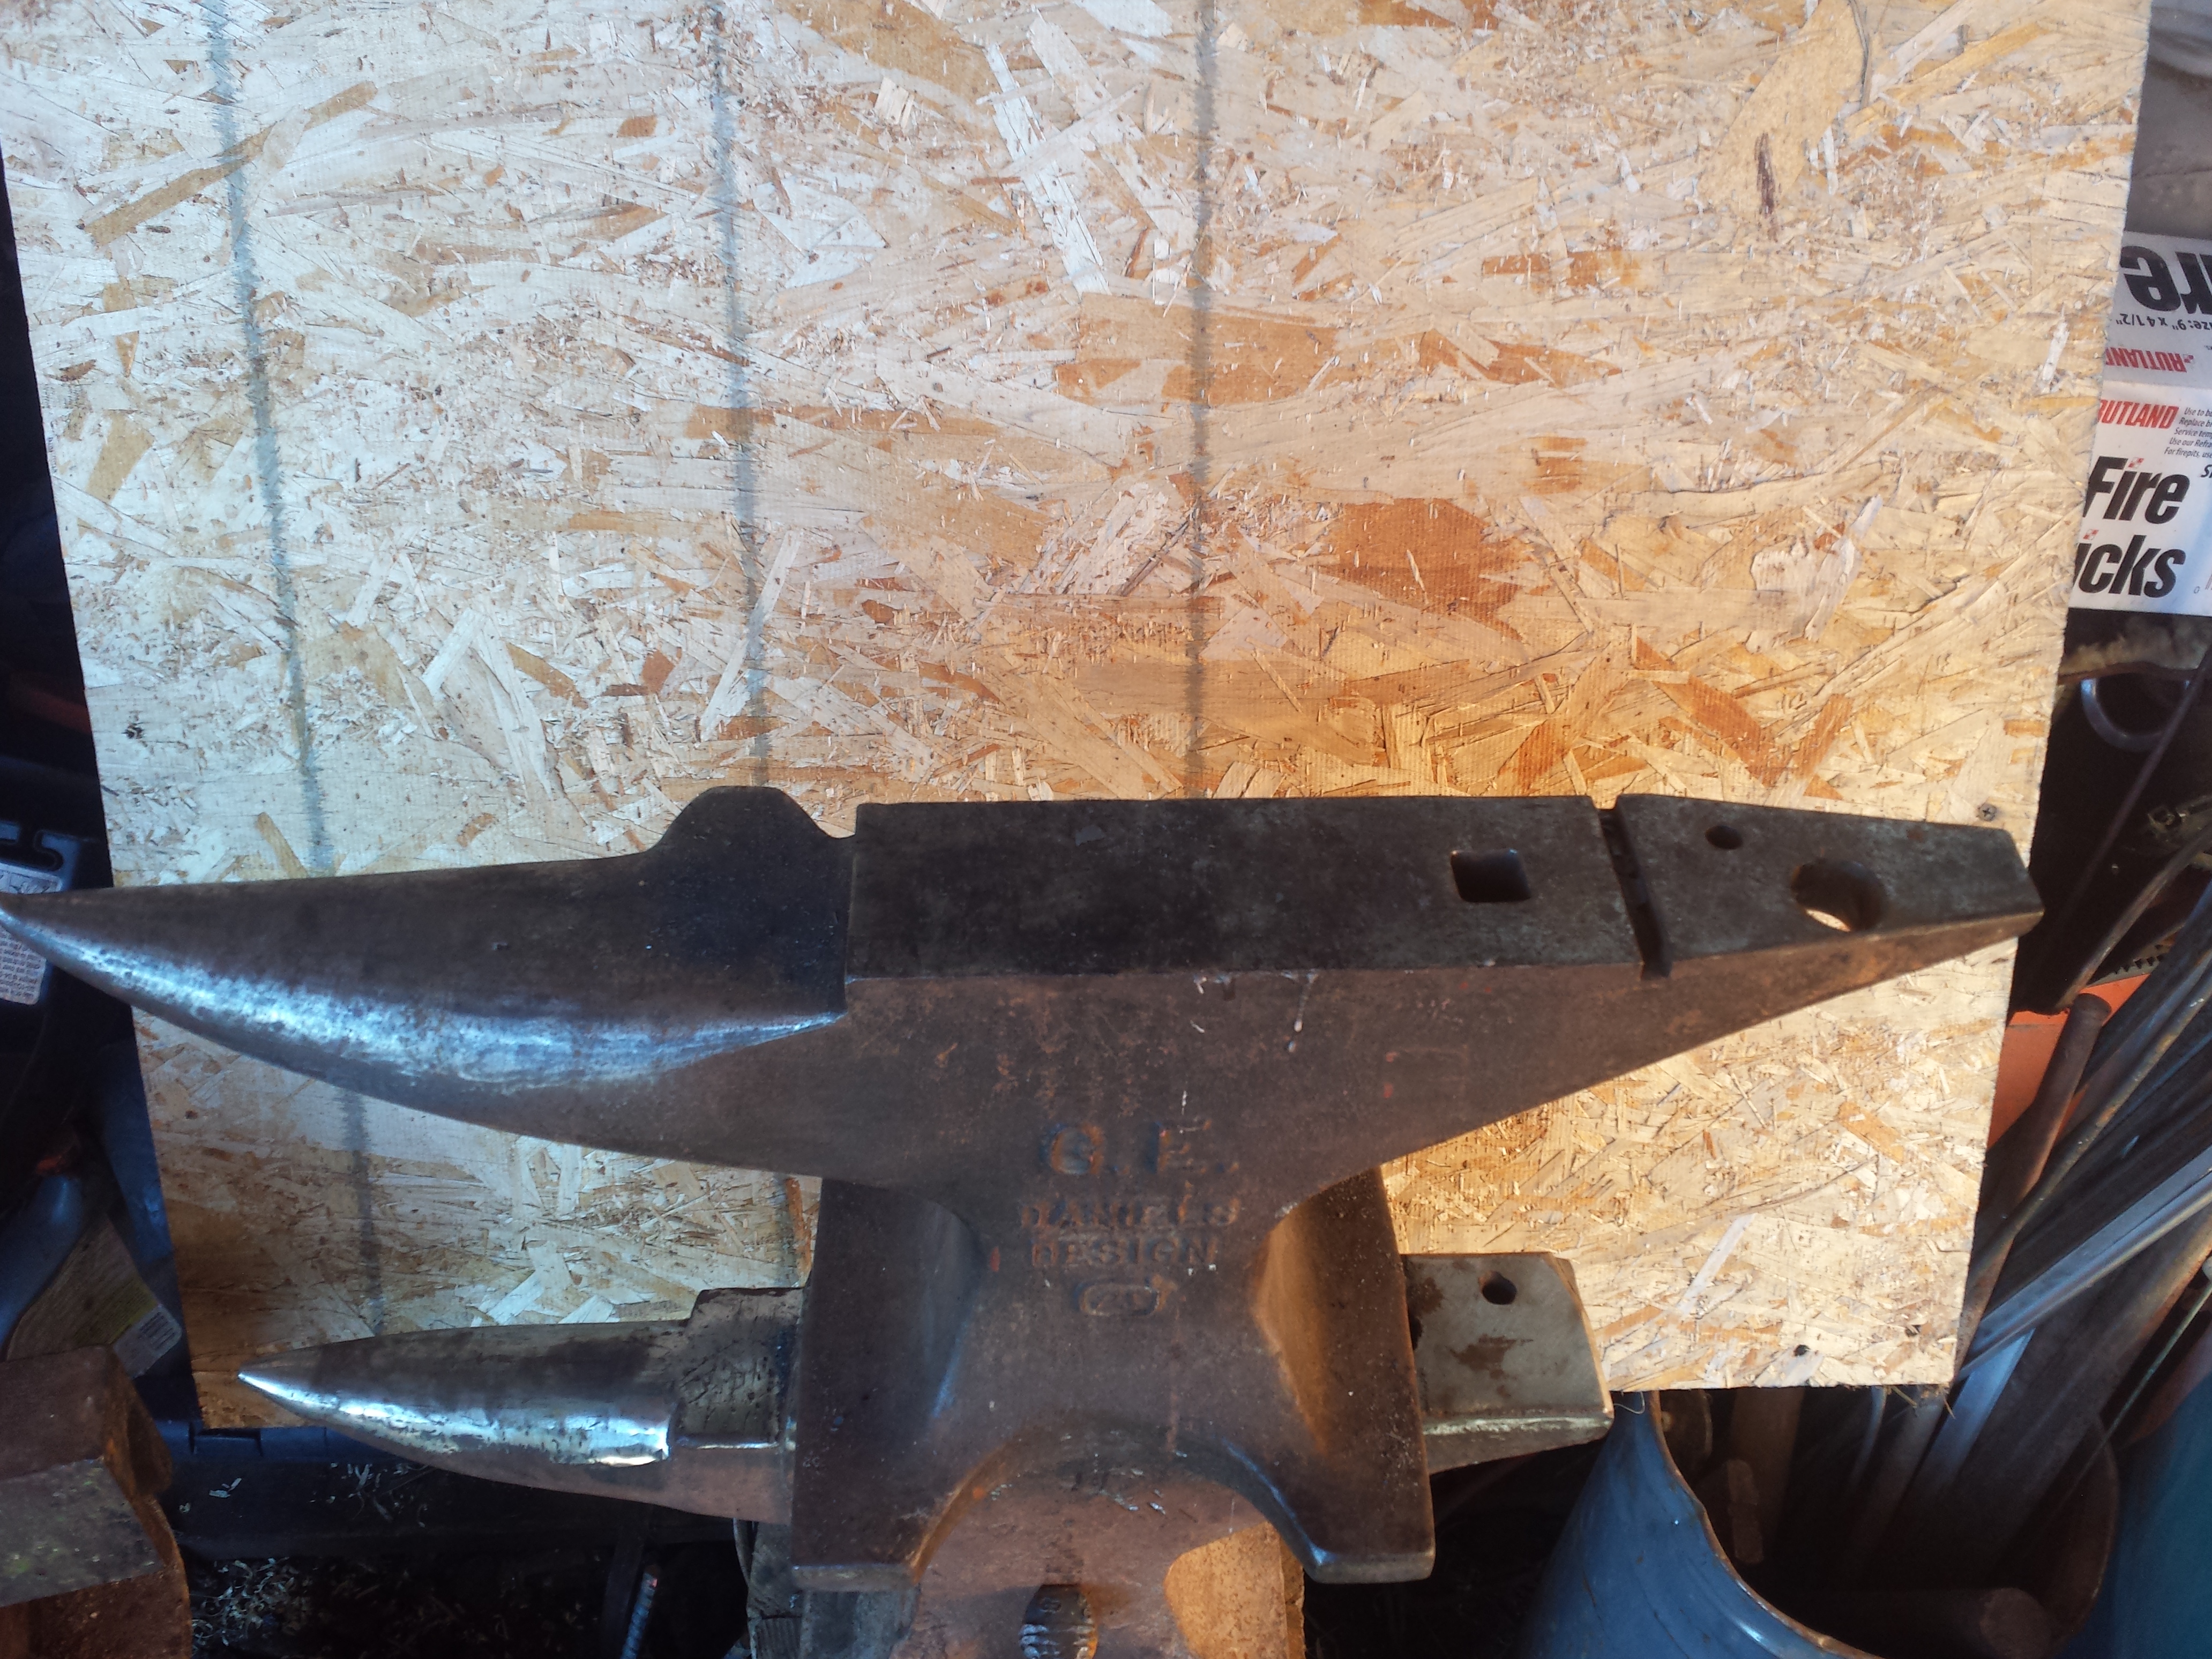
Unfortunately that large hole was aftermarket...It is very clearly torched. That is what makes me wary. Worried about the loss of temper combined with that groove being so close. Probably not a real issue, and I really have no good reason to be pounding away at the heel, but it made me focus on the sweet spot and Not go crazy making hardie tools
-
The other side of the Trenton is not quite as bad..overall I have 2" of lightly rounded edge left. Since that photo I have dressed the edges. Most of the damage looks like just chips in the photo, but in reality there were long cracks running back from most of them. Not deep into the face, but parallel with the edge.. So I'm left with a good face and possible candidate for repair later. Still, I'm loving it. Nothing quite like your first anvil.
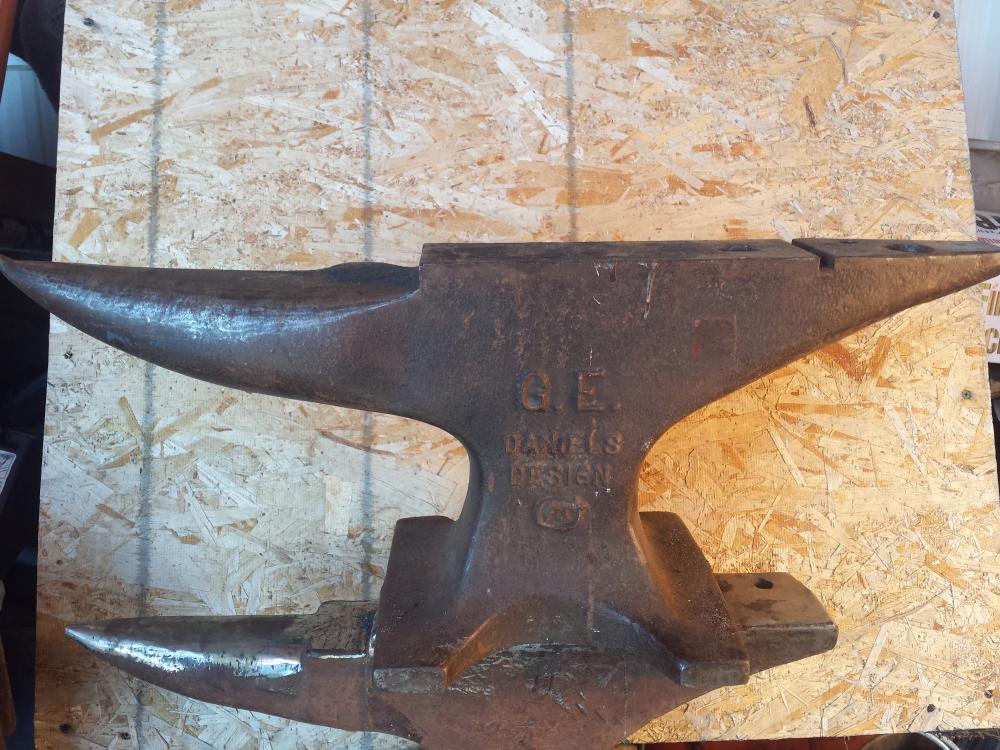
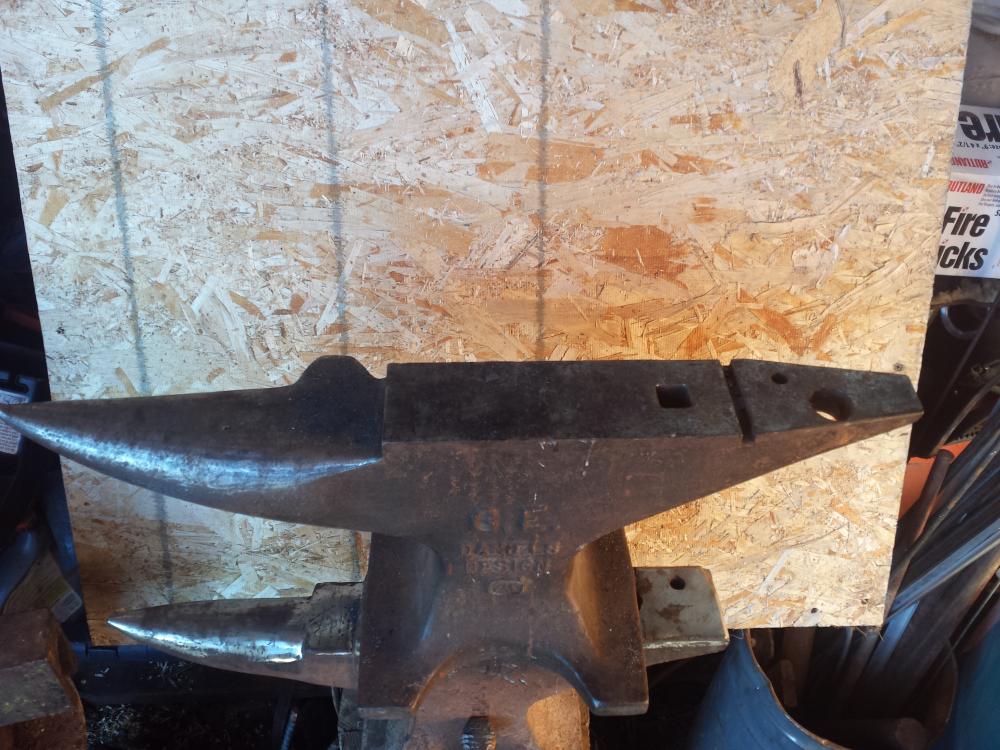
Here's some shots of the G.E. Its a good anvil, and has served me well. Though the hole in the heel and the odd furrow across the face made me wary of putting too much stress on that end. The face is as hard, if not harder than the Trenton.
-
Hello all. I've been lurking this site for ages, but now that my forge/work area is coming together,I felt like it's time to join in. Been working on a friends 125# G.E. , but just picked up my own baby..a 90# Trenton. No pics of the G.E. But I have to say I love it. It has some weird home brew farrier modifications, but it was a great anvil to start on. In anycase..I'm a little over an hour from the Salt Lake valley, where there seems to be a thriving community of smiths. I look forward to getting to know them, and all the members here. Here's a shot of the Trenton as I found it


Any Wyoming Smiths willing to teach?
in Events, Hammer ins, Where to meet
Posted
Just north east of Powell is RIK METTES shop. He owns Wyoming Metalsmiths. I've not met him, but heard that he teaches through one of the local colleges. ...