

medieval
-
Posts
98 -
Joined
-
Last visited
Content Type
Profiles
Forums
Articles
Gallery
Downloads
Events
Everything posted by medieval
-
I got some 1/2" dia O-1 from a friend. He had tried to make a triangular spear point from a piece. It looked pretty good, until he noticed a crack in it, where it trasitioned from round to triangular. I thought it may have been from forging at too low a temperature. From what you say, it would seem that O-1 is finicky regarding the temperature range, both low and high. Am I correct in this assumption? :confused: Thanks.
-
When I finally found real blacksmiths (around 1992), I was like a dry sponge. I couldn't get enough. A subscription to ABANA opened the door to the realm. The skill......the artistry. I will always remember when I first saw the lamps by E. A. Chase, I couldn't believe that these masterpieces were not in the Louvre. It is remarkable that these are unknown to the public at large. He was my first true inspiration. After that I must say Cyril Colnik still draws me, when I see his masterpiece. I went to Italy 2 years ago and got to go to the Carlo Rizzarda museum in Feltre, northern Italy. I was not impressed with what I had seen of his work in books, but when I got to see them in person. I couldn't get enough. My wife had to drag me out of there. We went back the next day, for another two hours. Absolutely unbelievable. They all inspire me to do the best work that I am able to do. My satisfaction in life is using my hands to create what otherwise would not be. I thank all the smiths who went before. Metal magicians, all.
-
I teach blacksmithing at the local community college. I brought some automotive coil springs to class to make punches/chisels. Forged to shape, brought up to non-magnetic and quenched in water. We got cracks lengthwise, so I tried an oil quench. Some cracked, some didn't. I tried air hardening, some worked, some didn't. Testing with a file produced a strange result......:confused:......Outside layer of piece was not hardened, center was hard. I am pretty knowlegable, but this one has me stumped? Any opinions will be welcomed. Thanks
-
I don't know exactly what you did. One way to tell if your cable has a high carbon content is to heat the very end to non-magnetic, and quench in water. At that point, if it is high carbon cable you should be able to lay it on the anvil, tap the end with a hammer, and the fibers will break off. What I would assume if someone told me this, is that they had heated, and , possibly worked the cable. Quenched it. Then heated a spot to enable it to be cut across a hot cut hardy. A cable (wire rope) to work as such, needs to be tough, and flexible. What did you do, between acquiring it and cutting it??
-
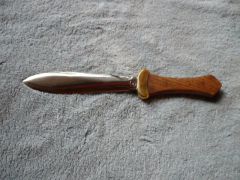
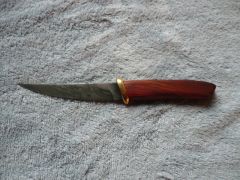
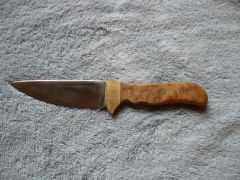
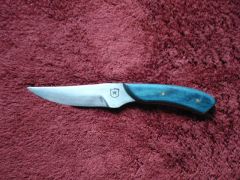
Anyone thinking of making forged knives or patternwelded knives NEEDS to buy 2 books: "The complete bladesmith" and "The pattern-welded blade". Both by Jim Hrisoulas. Read them and keep them handy. Happy forging.
-
What is a shuriken??:confused:
-
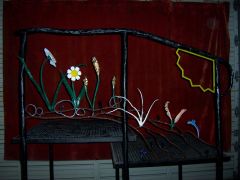
There is a common assumption that pipe and tubing are the same thing Pipe is manufactured for transporting liquid and gasses. Tubing is a structural form. Pipe has a welded seam. Tubing can be a weldment or it can be seamless (as in DOM or Drawn Over Mandrel). Tubing is called out by the outside dimension. Pipe is called out by the inside dimension. Off the top of my head.....schedule 40 pipe is rated at 150psi burst strength. Schedule 80 pipe (extra heavy) is rated at 300psi. The pipe id is not exact (ie 1/2" pipe is about 5/8" id).:confused: This is because when pipe manufacturers got together to set the industry standard they started with an id (ie 1/2") and calculated how thick the wall needed to be in order to meet the pressure requirements. From that they agreed on the thread size so company X could buy pipe from any manufacturer and it would all work together. As time went by, improvements in metallurgy and manufacturing processes allowed a thinner wall to be used, to meet the pressure requirements. Rather than reduce the outside diameter (which would have required a new thread standard) they increased the inside diameter. As far as forging pipe (or tubing), it requires a different technique than solid stock. David Thompson, of Oregon, has done some very cool stuff with pipe/tubing.
-
Hi Bob.......I'm new to the site, but have been making knives for about 3 years. I have been making cable damascus for awhile. I figured that it would be a way that I could practice my forge welding. If you are unsure of the hardenability of the cable, heat the end to dull orange and quench in water. Then put it on the anvil and tap the end with a hammer. If it breaks off it is brittle, and you have cable that will work for making a knife.;)
-
Treadle hammer size questions
medieval replied to Geoff's topic in Power Hammers, Treadle Hammers, Olivers
I built a parallel-arm treadle hammer about 12 years ago. It has a 90# head made of 4" square tubing filled with lead. At first it didn't get much use, because I didn't know what to use it for. The day that it became invaluable was when I needed to make some hammers, for repousse work. I could not get enough power with a hand held hammer to puch a hole in 1 1/2" stock. The treadle hammer makes it (almost) easy. The return spring is a balancing mechanism and the tension setting determines how fast it returns to the up position. No matter how heavy the ram is you need to overcome that tension when you use it. I once tried a hammer that was being used in a demonstration. The guy used it for chasing type work. My first impression was that it required more effort to operate than my hammer, and that, the farther it moved from its rest position the more effort was needed to bring it down. :mad: As a designer, I can tell you that there a variety of factors in the design and setup of a treadle hammer. :confused: Linkage position (on the treadle as well as the parallel arm), spring position on the treadle arm, and where the anvil is relative to the ram. If you decide to build an in-line hammer you will also need to take into account the pivot points of the rocker, linkage length, and that it will have more drag than a parralell-arm design :confused: I have made tooling to adjust the height of the top of the anvil. This allows me to use tall, or short tooling. If you plan to do lightweight work with the hammer, I suggest you include a seat for working as it gets very tiring to stand on one foot for very long. The seat should be removeable so that it doesn't get in the way when you want to use the hammer at full force. I don't mean to deter you from building anything, just that there is more to building tools (simple as well as complicated) than meets the eye. -
self containted air hammer?
medieval replied to Glenn's topic in Power Hammers, Treadle Hammers, Olivers
I make plans and kits for a home made air hammer. It takes me about 45 hours to complete building one. If you start with flat dies there is no machining. It is quiet running, runs clean and takes up little floor space. It is very controllable. I am still running the prototype after 5 years. The design is such that any welder/fabricator can make it. You wont find any hammer that can be made from Home Depot parts. At the very least you will need to find a local pneumatics supplier. And, of course, a steel retailer. It is very satisfying to build your own equipment. For more info look xxxxxxxxxxxxxx -
-
-
-

-
-
-
-
-
-
-

-

-
-
Depending on what tools you have available. Cut to the length you need (7"?), then split with hot cut, plasma cutter, torch or vertical bandsaw.
-
I got a nice teardrop style drift from Centaur Forge.