
Rainbows
Members
-
Joined
-
Last visited
Everything posted by Rainbows
-
Confused as to why, its just a forge with a hole in the front and back to make the 7:1 output input ratio (think that was from anvilfire) + some doors. The outside is square cause I don't have rolling equipment but the inside will be semi circle/ellipse. Seems like same sort as forge as others have? Thanks for the tip on the tapered jet. I guess in real life there would be some taper just from the end of the drill bit but I will see about grinding a D reamer to make a fine taper or check if I have any tiny boring bars. Bit confused on the ventrui part. Doesn't the tube count as the venturi throat? I might be getting my terminology mixed up. Should I add a parallel pipe section before the reducing venturi? Also yeah I have access to a DMG MORI so I can blast these out pretty fast. Originally I was gonna lock the jet holder in place with two thin nuts but since then realised it makes way more sense to just use a grub screw in the burner to hold it in place. Will make it adjustable at the same time I make it grub screw held. The material cost (for the part that would be replaced by the Amal) is only going to be £5 but that's without considering labour cost. If time was a cost factor I would go for the Amal but for me the blacksmithing is just a fun thing on the side and I like the idea of having something I made making all the heat. The retaining cup was just gonna be mild steel for any miscellaneous blow torch applications. I was thinking that if the forge did need one (now know it doesn't) I would build the retaining cup into the refractory. Theoretically the two windows should follow the rule from here on having a 7:1 exhaust - burner pipe ratio. Will recheck all my maths before I finally put refractory cement to mould though. not much thought went into the placement. Could easily change the burner so it comes in from the side with the top of the burner tube being tangent to the top of the forge cavity. If it works better could also get it on a 45 degree angle like propane bottle forges do but the square body would make that a bit more of a pain. Yeah you got me, they were more or less the design inspiration. I remember people on a australian forum seemed to like them so I went with them. Your right on them either being imports or maybe just a copy. Alec Steele mentions them being based off an australian burner.
-
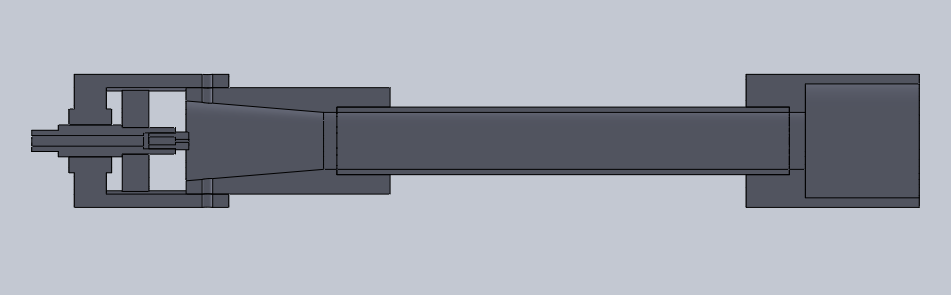
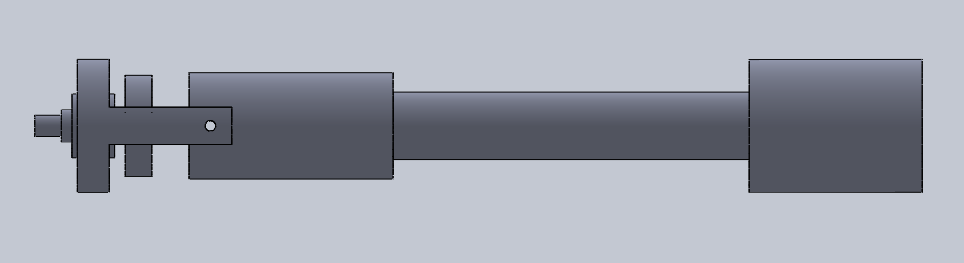
So here is my theorised burner. to the left is 8mm tube to take a compression fitting leading to a 1.1mm tip and a threaded plate that will run up and down for air adjustments. Then a venturi going from 40-21.4mm (this halves the area) with a 12-1 taper or a 24:1 maybe depending how you look at it. Then a 25.4 OD, 21.4 ID 170mm long tube. Then the flare is made as amal does so the internal diameter and length is 42.8mm. Does this look like it would theoretically work? I wasn't sure where to put the jet in relation to the venturi. Other designs looked to have it just on the lip of the cone so I copied that.
-
Its over a year on but I thought I would come back to say that over time I have had to use smokeless a few times cause I ran out of other sources. Avoid it if you can. One brand would rapidly disintegrate and all the tiny yellow glowing blobs of coal suddenly fly at you. I think that the binder that kept the nugget together stopped working once it got to a certain temperature. Fine for a house fire, not so much for forges with higher temperatures. Another brand just did not get as hot but thankfully it avoided trying to explode on me like the other brand.
-
Woops :x
-
In their defense if you only plan to melt aluminium in one off melts that home made refractory holds up fairly welll. I once melted iron in a coal forge and the steel crucible wasn't even glowing by the time the aluminium was melted. The backyardmetalcasting guy used the oil burner later to try and melt iron, which he did but his final comment was to get proper refractory. Final design will get a steel stand and be used outside so shouldn't have any problems with fire.
-
Why does it keep eating my replies aaahhhh Edit: Woops I can't blame you for not being able to find it, managed to misspel it. Ursutz rather than Urutsz Here are some examples http://www.abymc.com/Articles/Gallery/Peter_OddDuck.html http://www.backyardmetalcasting.com/oilburners02.html http://www.instructables.com/id/Waste-Oil-Furnace-For-Melting-Metal/ http://www.oupower.com/index.php?dir=_My_Projects/_Shop_Projects/WVO%20Ursutz%20Burner Now this guy managed to get himself banned off here a while ago. He also got banned from a hobby casting forum I occasionally look. Not the brightest cookie but his burners sure were something. [originally I linked a video by the youtube channel "oil burner" here, wouldn't let me submit the post while it had a video embedded though] Essentially you get a hot box, pour oil in it to vaporize it then add some air. Also this forum has a lot of missing images. Getting to be a pain trying to visualize what peoples past plans have been.
-
No idea where to get ITC 100 in the UK. However zirconium silicate was much easier to find. Also recently discovered my local builders merchant does firebrick, however they only do the dense kind, no insulating brick. Would reduce cost of shipping compared to posting castable refractory but not seen any existing furnaces use it.
-
The wool from my planned supplier is rated for 1300C (2372f). The refractory is 1700C or 1600C (3092 or 2912F) but doesn't mention Zirconia. 1" appears to be the standard that people using oil burners for foundry furnaces seem to use. Might just follow their footsteps. Also the original design was based off pictures of a Devil Forge forge. Thats why I thought a square box would be a good idea.
-
I had to google the ribbon burner, I see the resmebelance. The burner is actually based off the urutsz burner and is designed to burn oil (vegetable,motor, diesel or other). However the use of refractory in gas and oil forges seems similar and since the oil section is pretty dead looking I thought I would ask in the much more active gas section. The oil burns in the chamber above the refractory grill and the flame is pushed down into the forge. I was going to use tapered steel pins to create the holes in the refractory but after getting a PDF written by Emmerling I much prefer his wax crayon idea, much easier. Since combustion occurs in the burner instead of in the forge body there needs to be refractory in the burner too. Since oil burns hotter than propane I don't think coated ceramic wool would last. Gas Burners for Forges, Furnaces, & Kilns was still an interesting read though. Would something like this be better? Roof and walls one piece, floor and ends seperate pieces. More room to breathe. Just unsure how well the wool surrounding would keep it located. Pretend the sharp corners on the end piece have slight radiuses on them. Edit: And yeah my expierence of gas forges is pretty non existant.
-
So heres the furnace I plan to build Steel body, ceramic wool insulation (50mm of) and surrounding the interior 1600C dense castable refractory (I don't think the £3 upgrade to 1700C is necesarry?). For scale the pipe at the top is 2" and the interior will be 100x230x550mm. These are the parts that need to be made of refractory. Having two flanges on the middle one seems difficult though. If I split the middle one into two parts to be cast does anyone know if there is a way to join the two pieces together? Also the refractory is 12mm (~0.5") thick, is this a suitable thickness or should I increase it to 25mm?
-
I have done some amount of small aluminium castings using a welded steel ladle in my forge and recently was able to buy for next to no money a small lot of commercial foundry tools. Graphite crucibles, pouring shanks and steel flasks. Also got a lid off a crucible furnace. Apparently the rest of it had been destroyed in a transporting accident but the lid is in good condition. The two significant things about this is that I now have crucibles that can take cast iron temperatures and the pouring shanks aren't built to be used on a forge but a furnace that sits on the ground. So to use them I need to make a dedicated furnace. I was thinking an old propane bottle that I have with an air pipe in the bottom and the top cut off and replaced with the commercial furnace lid. Basicly just a really deep forge. I don't have easy access to commercial foundry cement so I was going to line it with a small amount of clay and see how well it goes. My curiosity that I wanted to ask here is that does anyone know how hot coal can get a crucible to? I have lost a fair amount of small items in the forge and found them later as a little steel blob. Would it be possible to melt cast iron in small amounts?
-
-
Assume the insulation on the cord to the light gets frayed or otherwise damaged. The wire within gets to touch the metal of the fixture making the entire thing live. If the fixture is connected to earth then there will be a massive current surge, the fuse blows and the user has to replace the cord. If there isn't a earth then the metal waits around for something to ground it which could include someone touching the fixture in which case the mains current passes through them to ground and then the fuse melts after they are nice and toasty.
-
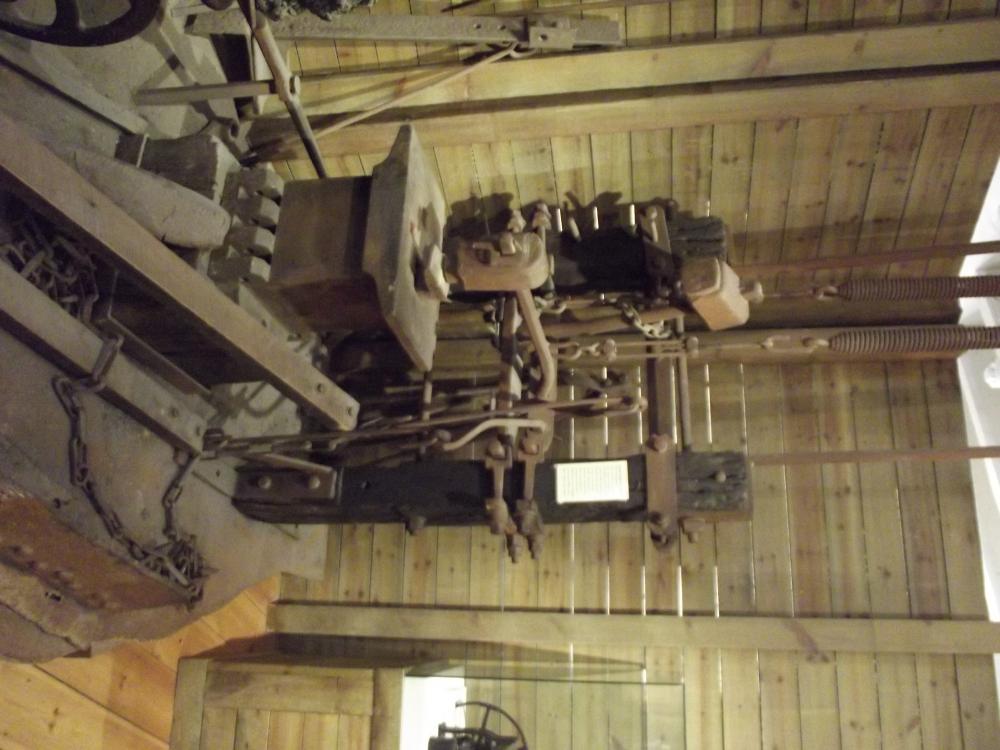
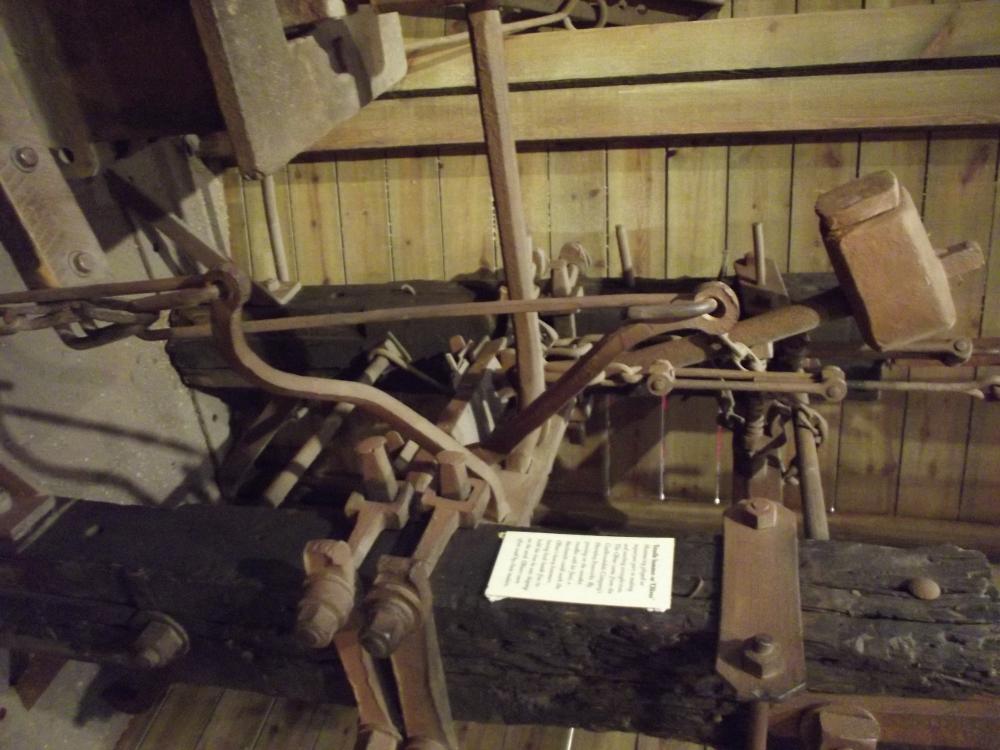
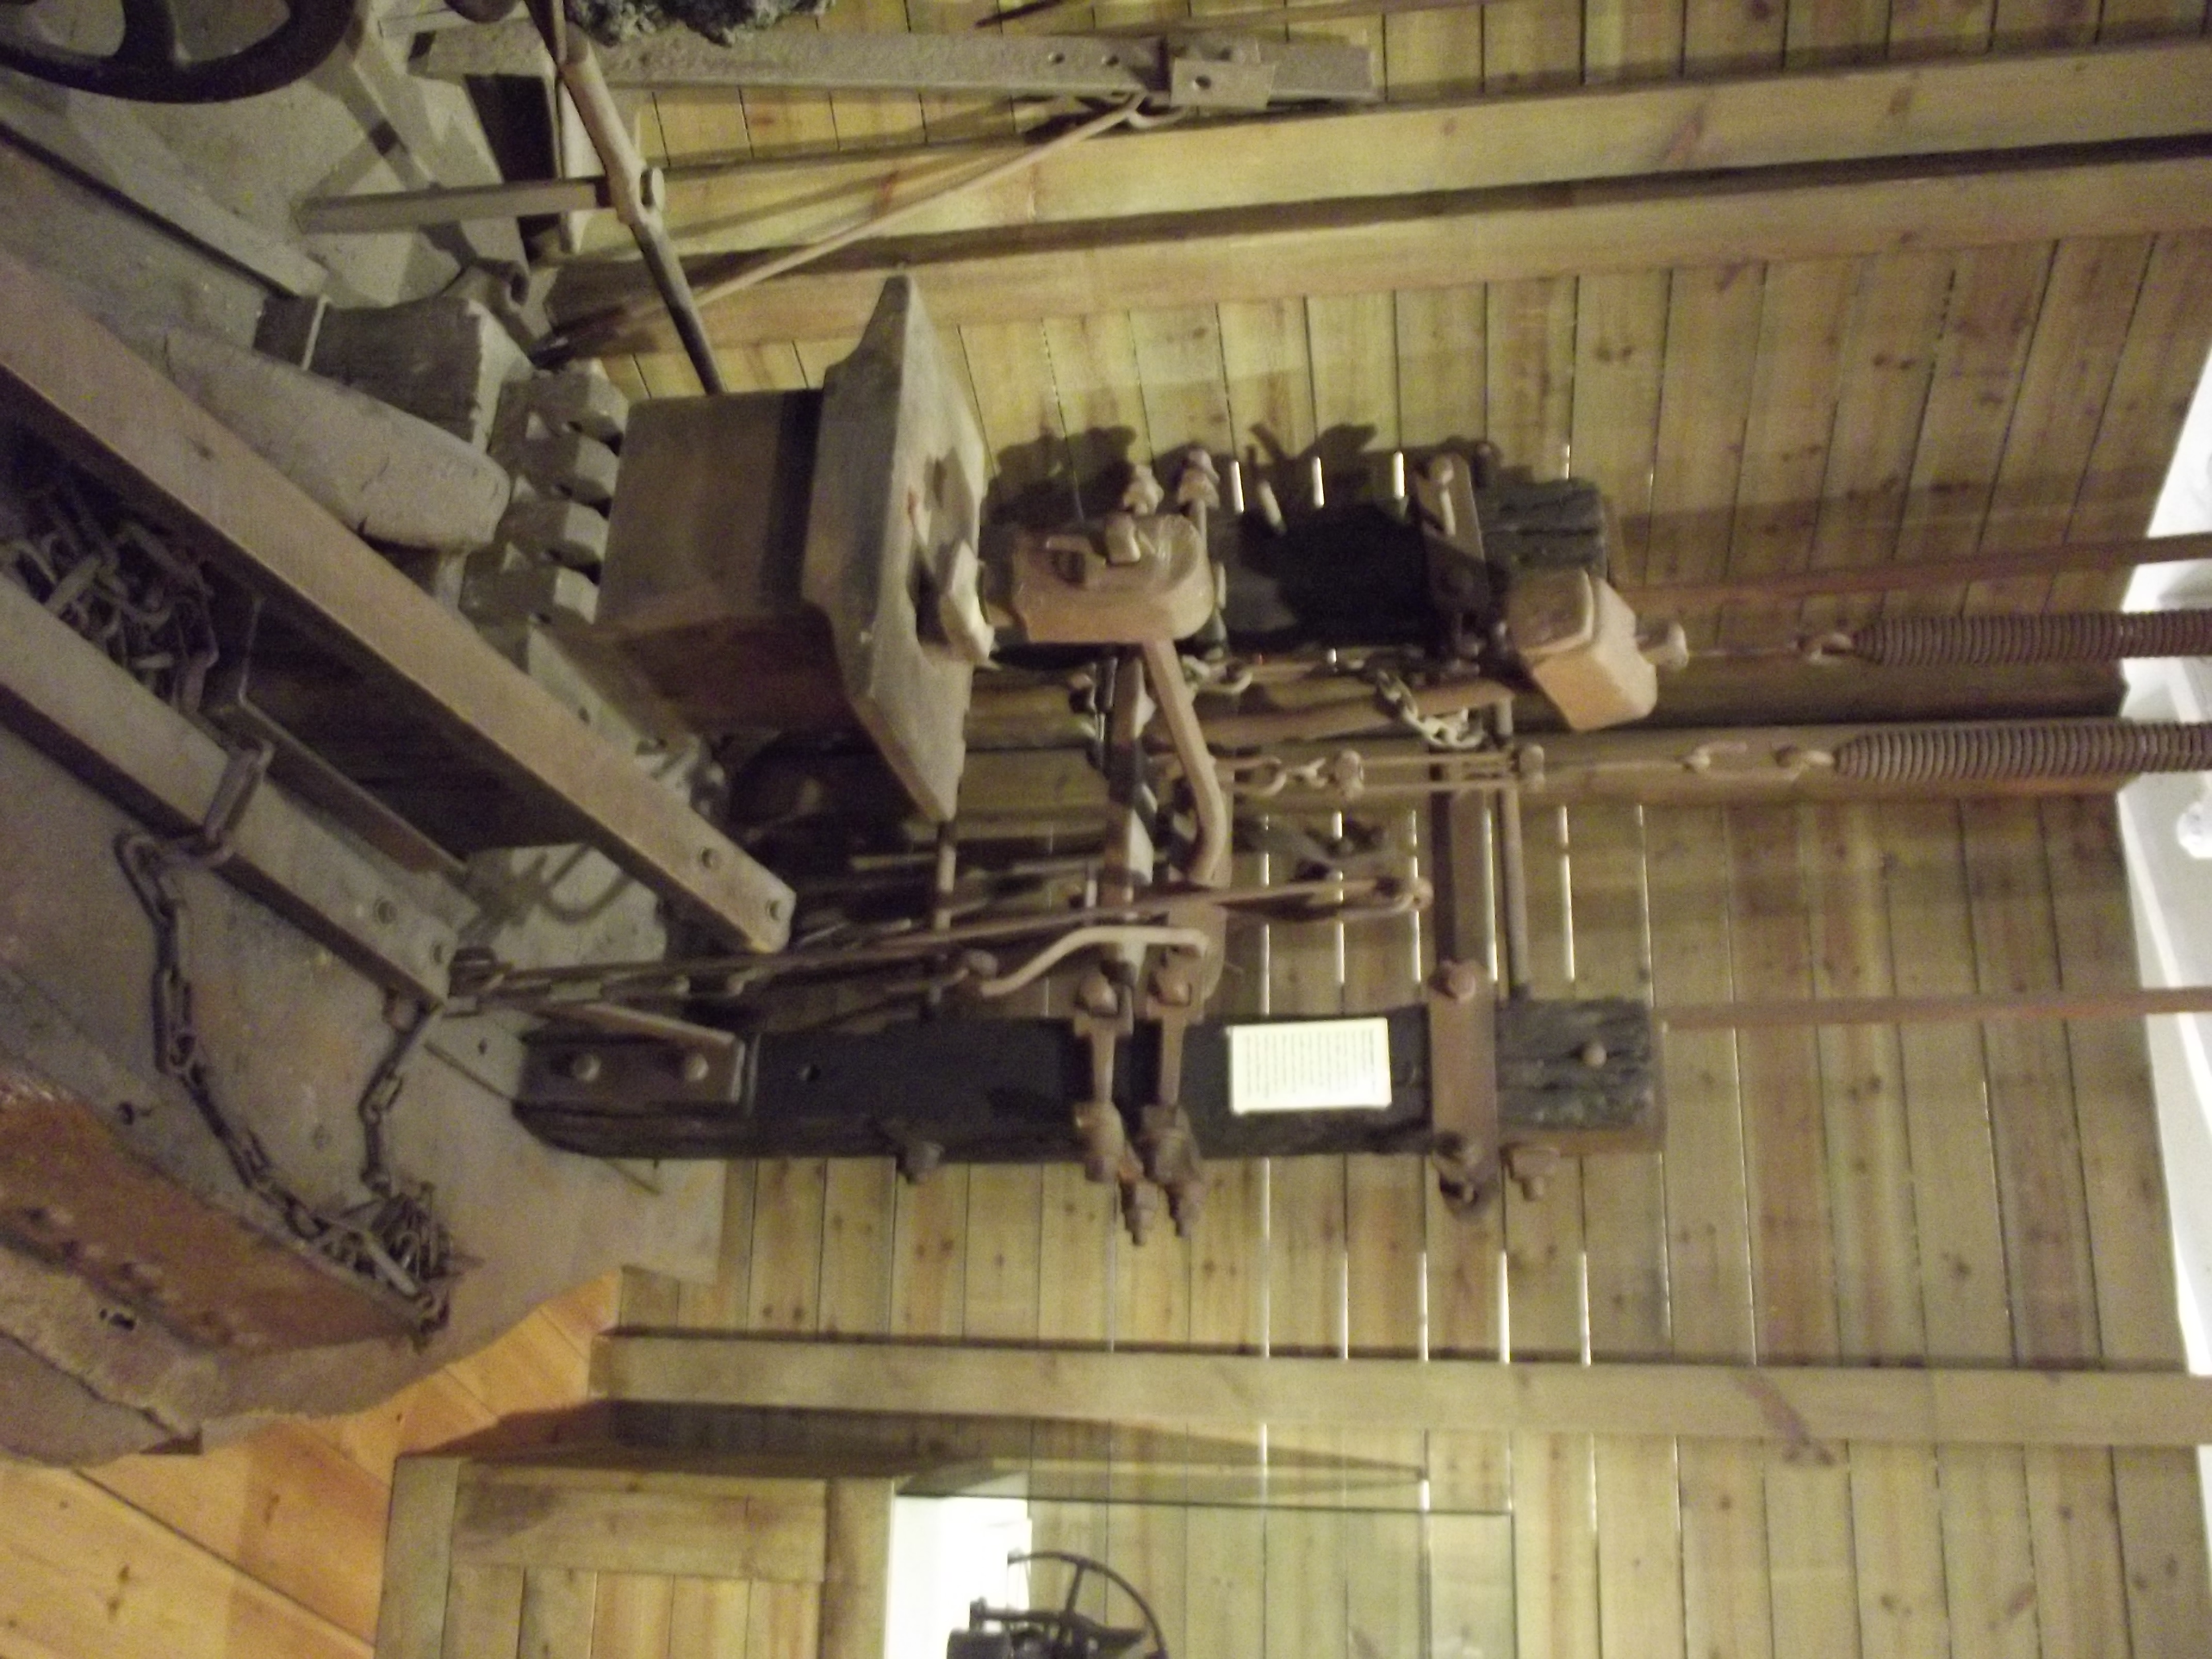
Forgive the sideways picture but this could give you an idea for a treadle hammer. Anything where you pull an arm down to make a hammer rotate around a pivot will do.
-
-
I once saw that pattern screwdriver handle being labeled a "gunsmiths screwdriver". No idea if that was just to increase sales. I think those chisels could be hand forged.
-
Well we got Mixed Ovoid, Supertherm Ovals and Taybrite Ovals. Is dry steam particularly better than house coal (other than being less smoky which is still a bonus) because I would have to have it delivered. Alas charcoal just doesn't have the economey as someone who doesn't have a forest to make it myself.
-
I checked and I think smokeless coal is based on anthracite and somehow processed. The propane men shall never catch me alive with their refill agreements and bottle rents, I will sooner go to the wonders of oils.
-
I was curious if anyone has used smokeless coal for their forge. I have seen it sold at the places I have gotten coal at from petrol stations to the coal merchants. Usually slightly more expensive and often advertised as burning long and/or hotter aswell as being legal in smokefree areas (though no one has been bothered by the occasional hobby use of house coal anyway). I'm not entirely sure what smokeless fuel is even made from. Pictures from my coal merchant make it look like something artificial. Possibly a purified coal or maybe a bbq briquette style thing. I'm going to experiment with anthracite and wondered if this might be worth a shot too. (I know anthracite isn't often recommended but I want to be good to my neighbours when they try and sunbathe or something and don't want smog wafting over)
-
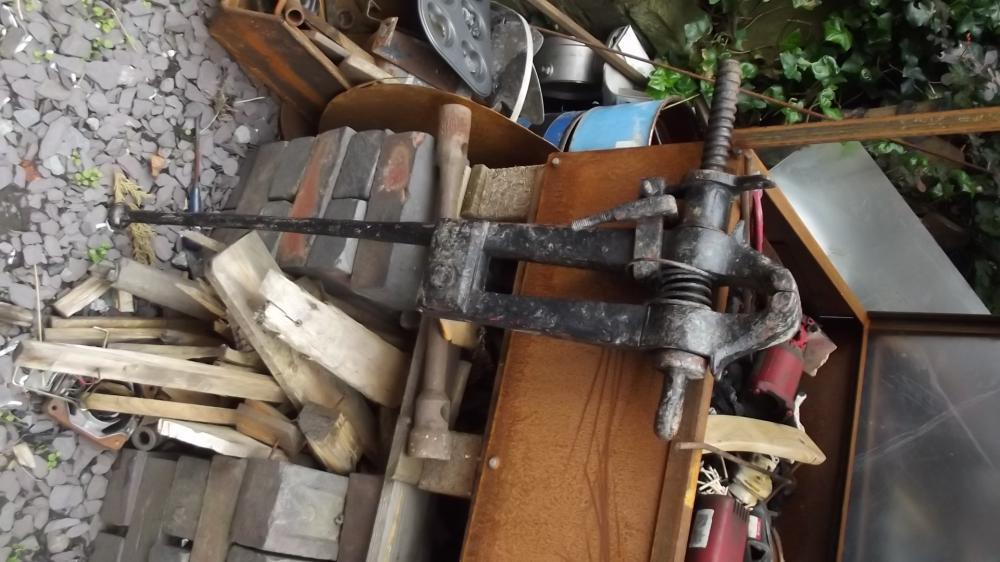
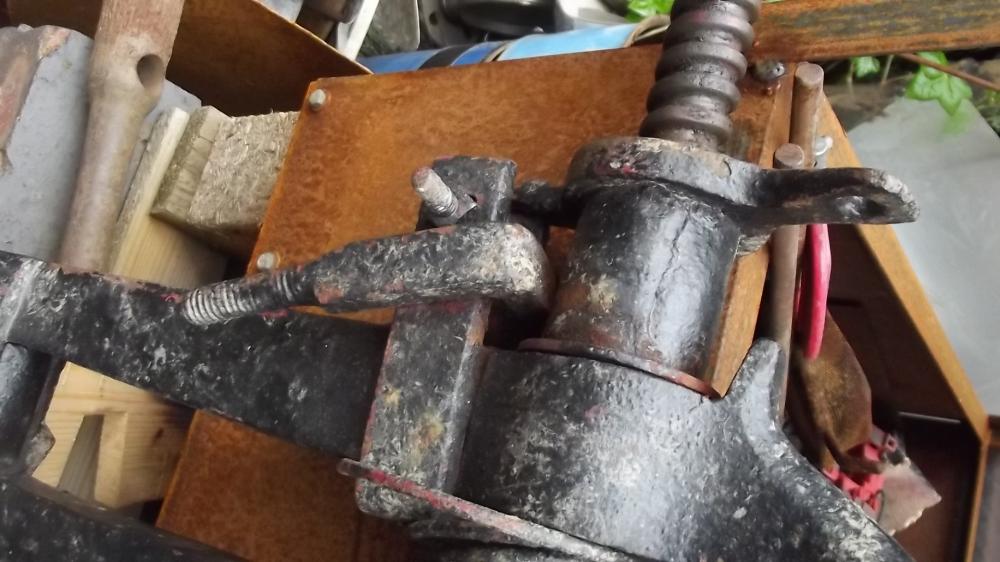
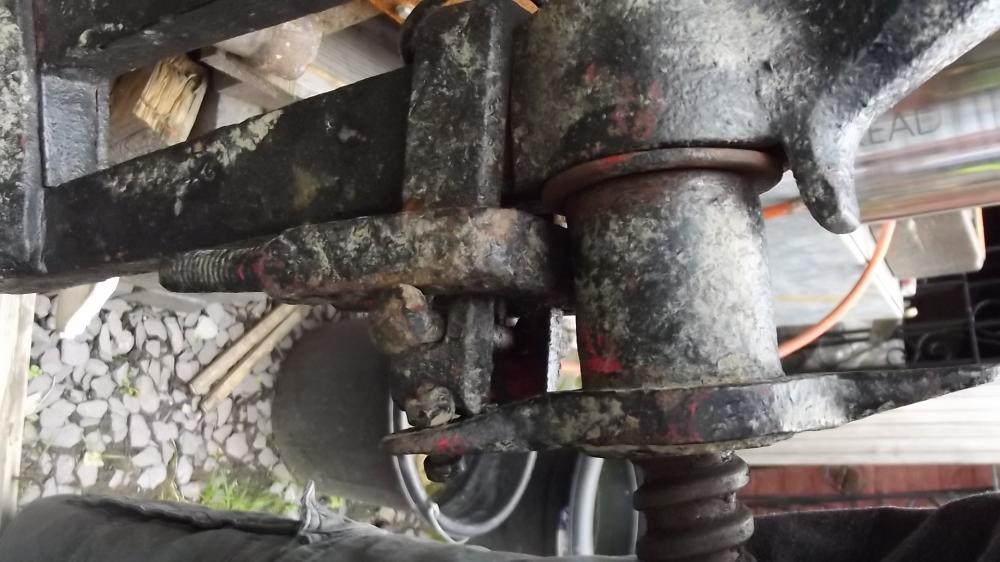
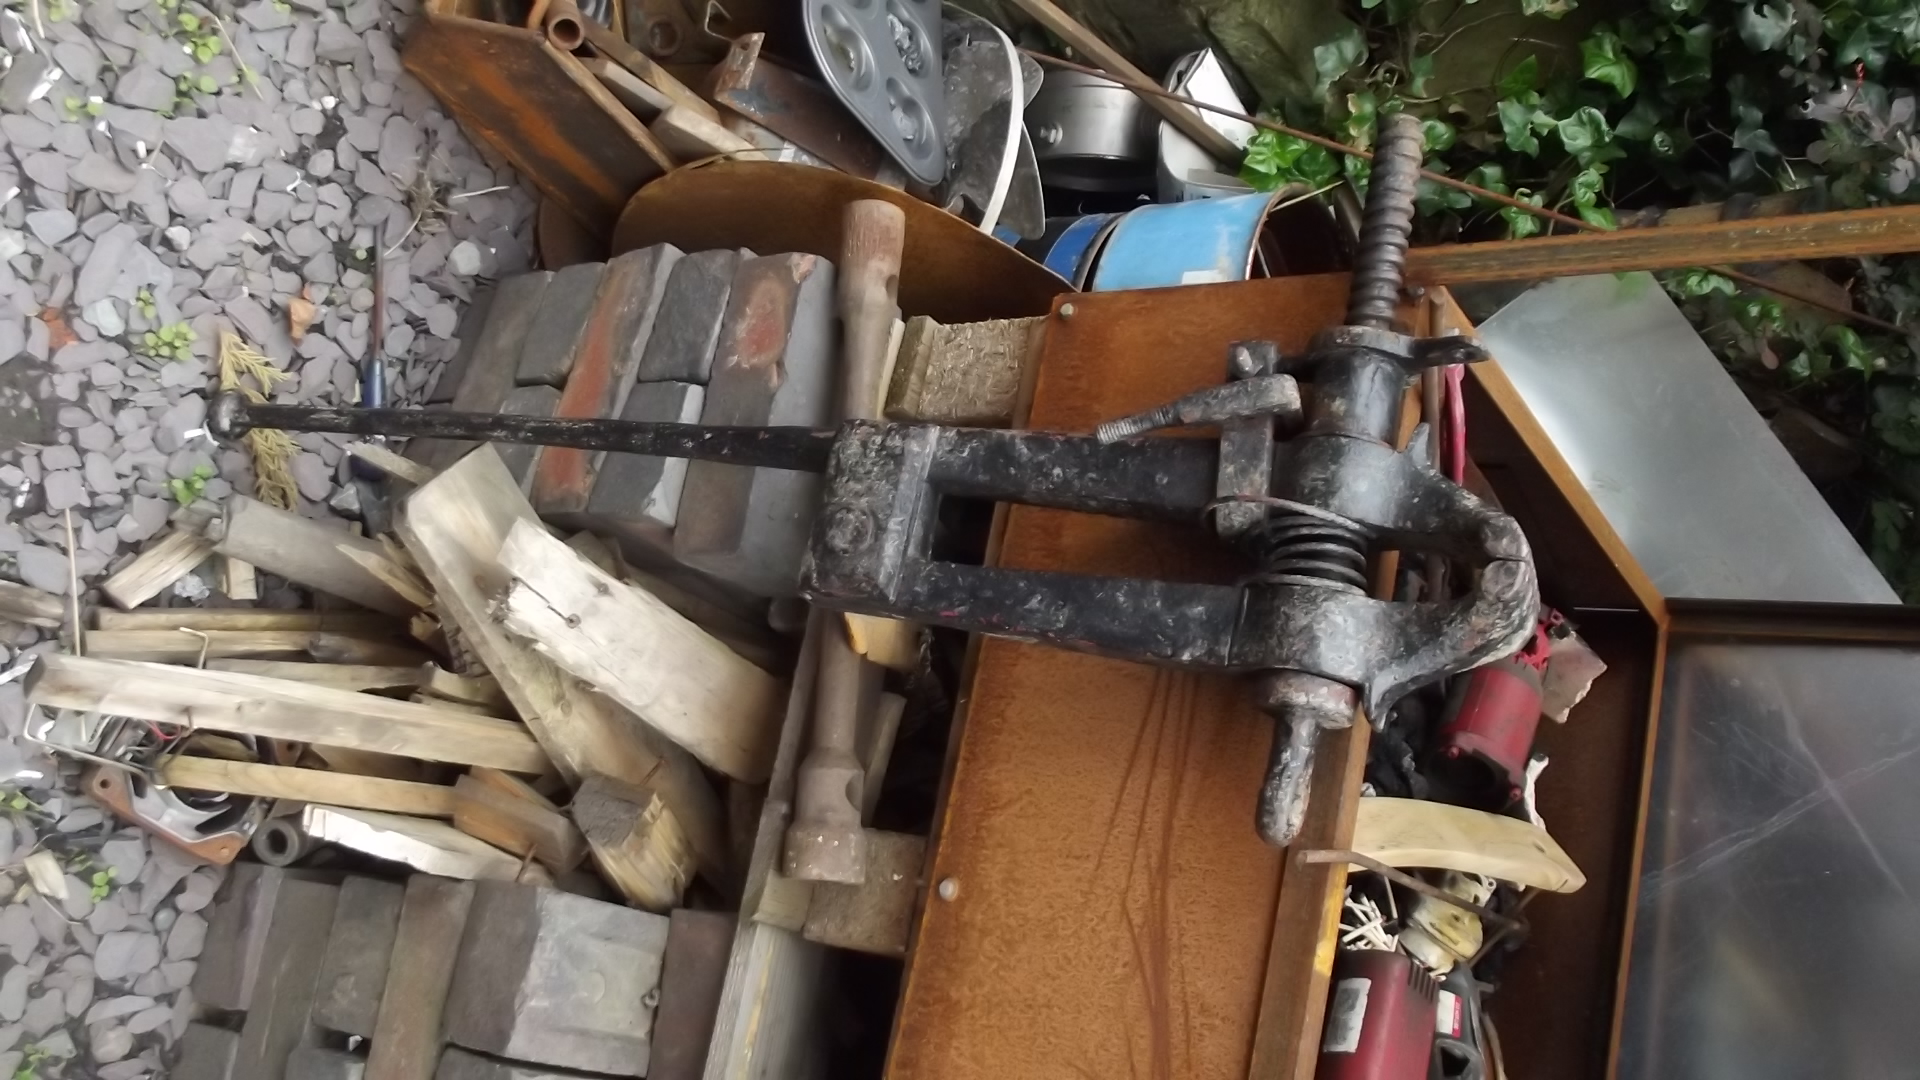
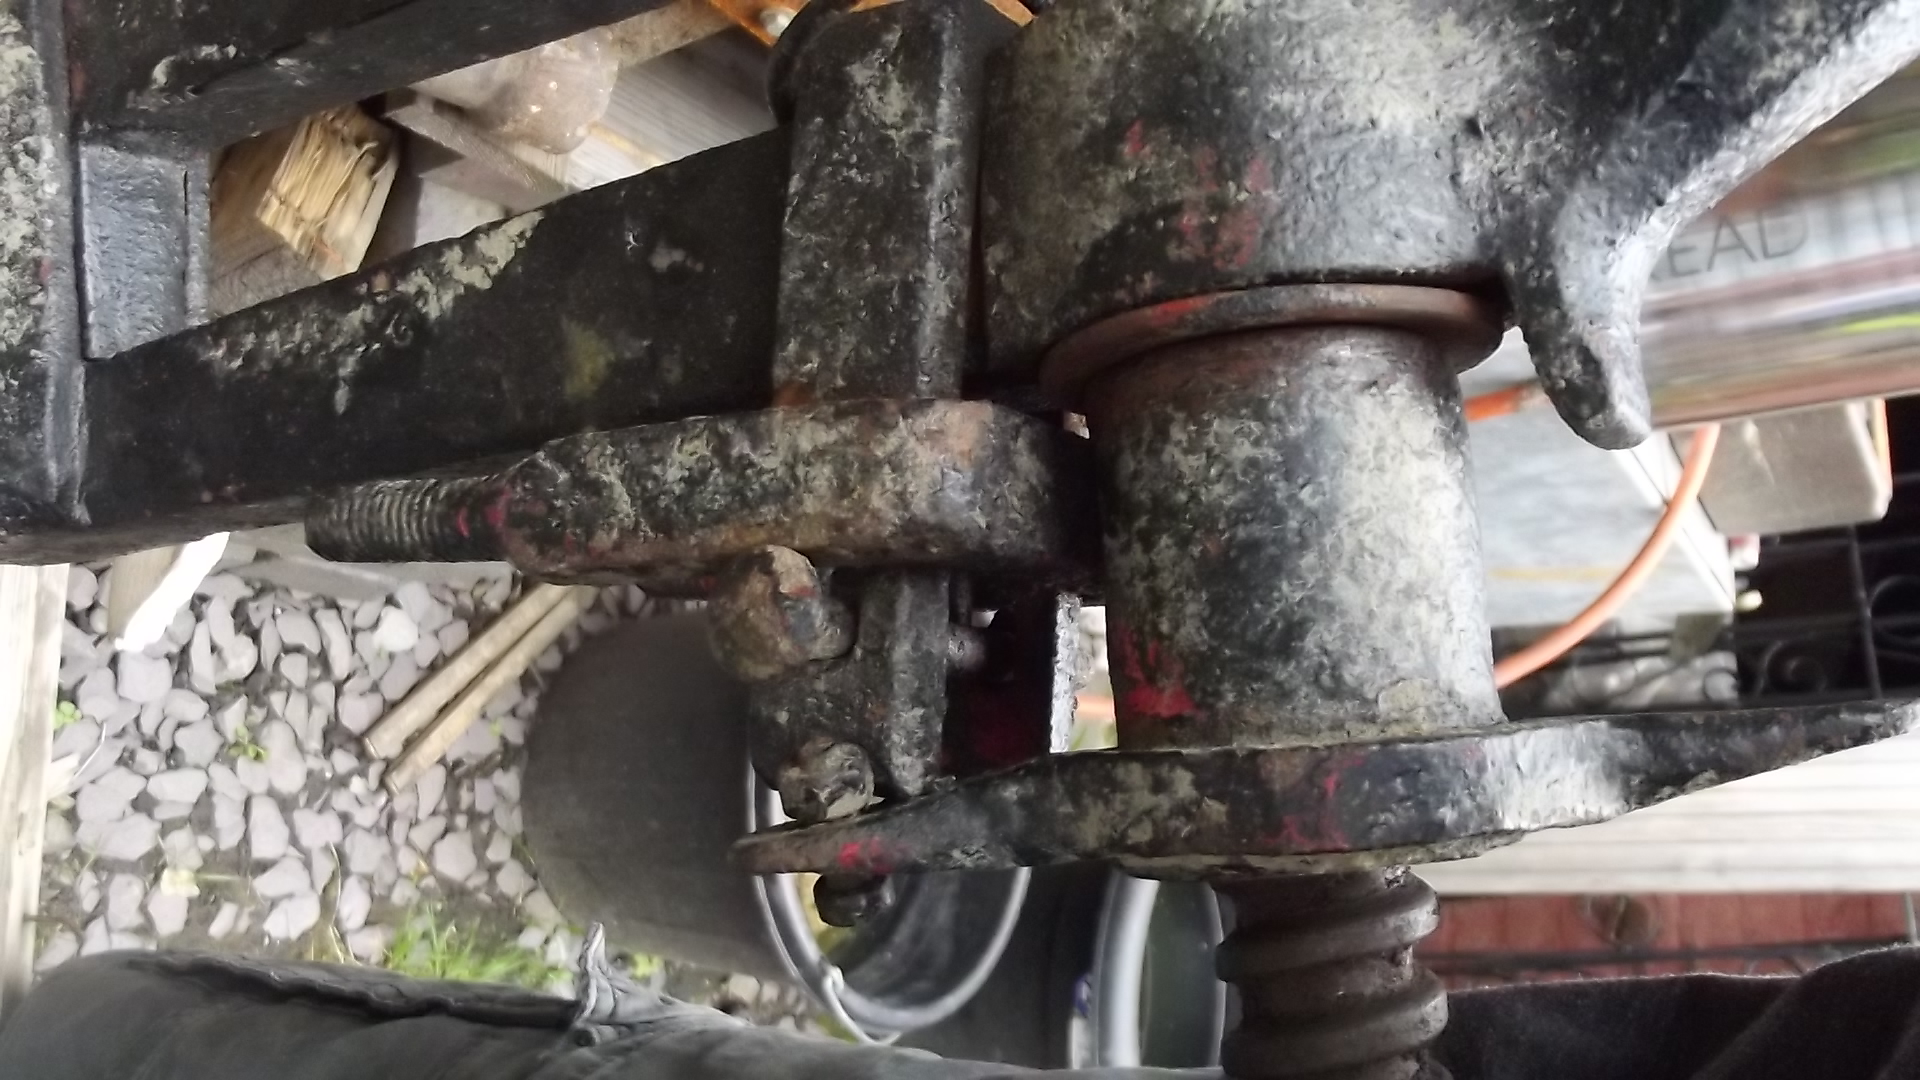
The problem there is that the flanged bolt has to be held or bolted onto something to make the screw work. Don't know if that is original or if the original screw box ( might be horribly buchering terminology there) broke and the owner forged a new one but either way I don't really have the ability to make a new screw thread for it. A more traditional mounting bracket would get in the way of the post that has to reach the screw height.
-
Walked into the first traction rally of the year and first stall I found had a post vice. The asking price was £40 which I took down to £25. Might have still been a bit much but the nearest vice on ebay is 55 miles away so the difference was the cost of petrol. Now I am not a expert on vices but the thing I noticed was that there isn't the usual foot for mounting to to a post. Instead on the screw there is a nut with two flanges for bolting to the post. Below it you can see another mounting point with a U shape with threaded ends. I was just putting it here cause I was wondering if this is a particularly rare set up. Edit: Those pictures were the right way round till I put them on here! I hope everyone can tilt their heads suitably.
-
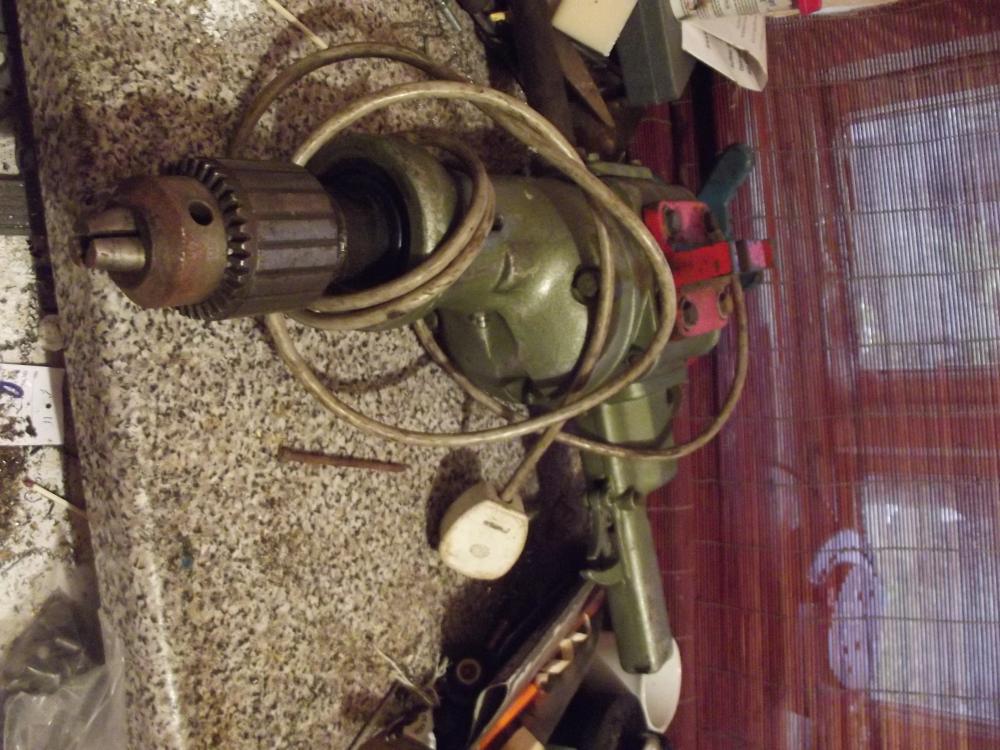
Turns out I now have a new pedestal drill instead of bench drill. Not put it to action yet but I expect this is going to replace the old drill. A good £20 spent
-
Conclusion: Oh my god it is big
-
I think a pretty old pedestal drill went for something in the region of £80 locally. Never saw it close but based off the images I think it had a auto feed and a form of backear for tapping but alas you can source or make bargain price - high quality tools but getting the land to put them on is an entirely different matter. Think I will buy it, see how well it works and decide which to keep after testing. I was checking through ebay and the drill model without the stand went recently for £50. Its a win win win situation whether I use it as a drill press, hand drill or sell it! I don't think they make drills of that calibre any more.
-
As far as I can tell it is single speed. I might indeed buy it as a hand drill and put the stand on ebay or long term storage. I think the stand is a bit bigger thans Frostys so it might be awkward to clamp to stuff. Also does anyone know how it would be attached to DC electrics? It has a standard UK mains plug and I am just trying to work out where you would get 250V DC from.
.thumb.JPG.7213b366487275d9ad66266b51cbc0f9.JPG)


.JPG.05bec0ab972c6579b5876e8c8db6e559.JPG)