

Latticino
-
Posts
2,169 -
Joined
-
Last visited
Content Type
Profiles
Forums
Articles
Gallery
Downloads
Events
Posts posted by Latticino
-
-
Even before reading your heartfelt narrative I didn't have a problem with the abstract nature of your sculpture. It reminds me of Louise Nevelson or David Smith's work, both celebrated modern sculptors, just on a smaller scale. Balance, composition and technique are all strong. Scale your piece up 10X and it wouldn't be out of place at Storm King. I think your post title mislead other reviewers, but everyone is entitled to their own aesthetic sensibilities.
Art is inspired from many sources, but I believe that passion is one of the most important ones. I could digress into a long discussion of my philosophy of art (possibly even digging up my old masters thesis from my MFA), but don't want to bore everyone. You clearly are passionate, that is the key.
-
You may just be looking at an angle. That type of chuck can have a tapered bore (maybe a #3?), and you need bits with a taper to fit tightly. Of course you can get a Jacobs chuck with that same tapered shank, and that is what I used. Of course the previous owner may also have tried to drill it out, which would make it only useful for one size of bit shank.
-
That is what I put on mine, and it works a treat.
-
G-Flex is the go-to epoxy for most of the knife makers I know.
-
Mike,
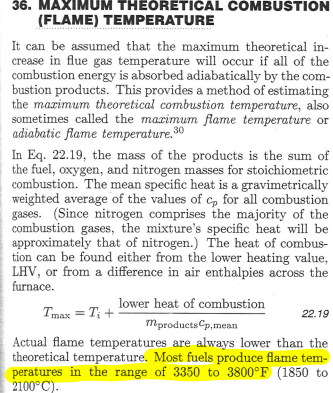
I pulled the following from the Lindeburg Mechanical Engineering Reference Manual, a fairly reliable source. Hope it proves helpful.
-
Frosty,
Your contributions are always welcome. Sorry for getting so pedantic.
rls1160,
Some thread drift is inevitable. I don't have a recommendation for a cheap forge blower for you. However I did once locate a perfect one at a liquidator for $25, so they are out there. If you are on a serious budget you may consider trying to find a used one from a furnace repair shop. Some of these new condensing boilers and furnaces have good ones.
-
Ferric, even diluted, may be far too aggressive for hamons. Those who do a lot the subtle hamons that result from differential hardening (like the claying used for Japanese swords) polish up to very high grits (2,000+) before doing a very mild etch with diluted vinegar, then repolish. As I understand it the hamon should start to show up from the polish alone, though this presupposes that the careful polishing standards are followed (I believe typically this is traditionally done with stones or similar). Buffing wheels are certainly not used.
-
Frosty,
You and I differ slightly in our use of certain terms. In my engineering world an orifice is a special subset of "hole". Specifically a hole that is a reduction in crossection from the size of the main body of the fluid conveying structure (pipe, duct...). While it typically will result in an increase in flow, it isn't always used for creating a jet (per se), but may be used for things like flow monitoring. In this case I would term the gas connection to the burner mixing chamber a port or reducing TEE rather than an orifice if the OP doesn't provide a drilled orifice, as he initially planned.
Please also note that any realistic blower for this system won't produce anything more than at the very maximum 4" water gauge (~0.14 PSI). I am having trouble envisioning a situation where the static pressure induced by the blower would prevent flow from the 5-30 PSI propane source.
-
Looks even better from that angle. Nice work. Is the guard slip on from the blade edge side and pinned in place? The fitup looks very clean.
-
Recommend a tempering pass at around 1200 deg. F (up to just barely glowing in a dark room) before attempting to drill. Let it cool to touch before drilling to avoid ruining the temper on your drill bits. If you can put in an insulated container afterwards that will help also (wood ash, vermiculite, even a gas forge that is turned off and cooling overnight - not sand)... This will soften the tang and allow easy drilling.
As previously mentioned, learning how to sharpen these bits without destroying their temper makes a huge difference as well. Cheap bits lose their edge quickly.
-
Buzzkill,
3 bar twist pattern weld. Sweet. Nice clean billet, fitup, and saber beveling. I still struggle with the last. Appears to be a "hunter" style blade (the the pronounced guard). Does your wife do a lot of hunting? Also, is it just the photo, or does the spine protrude above the top of the guard?
-
Hard to say. Certainly looks promising, but output is directly related to impeller RPM and motor size. My gut says using a 1/2 HP motor at an RPM just below blade and bearing allowables should be enough, but it is difficult to predict without knowing details of your piping design and performing tests on your custom ribbon burner. Note: I am not offering to perform this analysis.
-
Peters Valley School of Craft is relatively nearby for you and a great place to take classes. Strongly recommend taking a class BEFORE making any other investments. If I recall they don't have a lot of gas forges there, but working coal is great training as well.
-
Also, try to avoid hitting that protective castable with large Damascus billets and breaking off a section like I did last weekend... I need to take my own advice and stick to casting refractories at 3/4" minimum thickness (or just get more careful, but that was the largest billet I've attempted in my home forge: 6" x 2" x 1.5" - only around 5.5 lbs; but it felt like a lot more, particularly when drawn out to 27" length).
-
Lovely work. That's quite a good size chef's knife.
-
Keep the hard brick. They make fairly good doors. Soft brick does have a tendency to crack and break after repeated heating and cooling. Consider designing your shell to allow some compression. Note: when it finally gets hot any gaps in your insulation will really show up in the metal skin.
-
Actually the way I calculated it I included extra for the top and bottom disks, which I had already included in the two cylinders. So volume needed is just 1869.5-1296= 573 cubic inches (0.332 cubic ft), or 30 lbs. Use the extra for casting doors (you will thank me). Weld up simple frames and cast them at the same time. Frosty is correct about the need to tamp down the castable in between the forms. I usually cast lids separately so I can open things back up to reline. Bring your door opening proud of the steel liner and you won't have problems with the dragon's breath overheating that. Also cast your burner port in place.
Good luck.
-
So lets assume a simple can shape with closed top and bottom. This will be the approximation for the amount of castable needed. If you have a 2" thickness of insulation all the way around the outside of the can will be approximately 18" tall and with a 11.5" diameter. If you go with the 3/4" thickness I would recommend (so you can do a much simpler casting with inner and outer cylindrical forms) the inside of the can is 16.5" tall and 10" in diameter. The volume of castable needed is just the outer cylinder volume less the inner cylinder's volume, with the two end caps added. Outer cylinder is 1869.5 cubic inches and the inner one is 1296 cubic inches. End caps are a nominal 11.5" diameter and 3/4" thick (78 cubic inches each). 1869.5-1296+ (2x 78)= 729.5 cubic inches. 729.5 cubic inches is only 0.42 cubic feet. at 92 lbs/CF you only need 39 lbs of castable.
I believe you can purchase this castable in 50 lb bags, so that is what I would do. I got mine from an industrial insulation supplier nearby. Maybe you will be as lucky, or you could always take a road trip to one of their sites: https://forum.brickwoodovens.com/t/harbisonwalker-locations-global-sourcing-centers/1122
-
May want to amend that. Looks like kiln shelves have changed a bit since my ceramics days 30+ years back. Silicon Carbide are still the same, but what they are calling "high alumina" is apparently not always the older bright white I remember. Now they look a lot like mullite/corderite, so much so that I doubt that it has the percentage alumina that I would recommend (the true high alumina shelves are still out there, but buyer beware). These days I don't trust suppliers and would prefer to cast my own 97% high alumina refractory bases using material like Greencast 97 for very good flux resistance.
-
I vote for wide side on floor, for stability.
-
Fairly easy to identify. For typical pottery kiln shelves:
- Silicon Carbide shelves: Black/Grey, heavy weight, medium coarse "end grain" and surface
- Corderite shelves: light yellow/tan, relatively lighter weight, very smooth "end grain" and surface
- High Alumina shelves: bright white, medium weight, medium coarse "end grain" and surface
Most will be corderite, as that is the budget alternative.
-
12 hours ago, ThomasPowers said:
cattywampus
I've always understood it to mean: not according to the original plan, typically in a wild and unexpected fashion. As in: "I expected to get there at 9 PM, but it has all gone catawampus". Of course I'm hardly a southerner, so I could be way off base.
-
My process with cable is as follows:
- Select the right cable stock (3/4-1 1/2" overall diameter for me) elevator or crane cable seem to work well. Not all cable is created equal. In addition to avoiding galvanized, avoid cable with a non-metal core.
- Soak greasy cable in kerosene overnight. Note: lots of folks prefer to burn off the oil and grease, but I feel it leaves behind contaminants.
- MIG weld ends securely. SS hose clamps might do in a pinch, but will make the next task harder.
- Heat only the end 2" and forge weld about an inch of that. Liberal use of flux helps with forging cable, so a coal forge is preferable as it is less likely to get damaged. You also can better concentrate a hot flame.
- Repeat on the opposite side of the cable.
- Can untwist a bit and tap stock and brush with wire brush to remove any debris, but not always needed.
- Take a long heat and twist tightly. Repeat till twist is almost circumferential, heating to hotter heat each time and brushing and fluxing between heats. Last twist should be as close as possible to welding temperature and should start to weld the billet.
- Heat about a 4" section to welding heat and lightly hammer into a v or half circle bottom swage. This helps compress the cable better. Rotate the cable to twist it tighter while you are hammering.
- Once the cable feels solid repeat a welding pass with heavier blows. Flux regularly.
- Move heat down the billet and continue the weld until complete.
-
It all depends on what kind of things you are going to be forging. I might be able to make a dozen 3/8" tapered S-hooks with a couple of handfuls of coal (I have large hands...), but for making a large forge welded axe head I need a deep hot fire for hours. I might use a 50 lb bag almost completely for one large axe head.
All I can say is....Brain vomit.
in Metal Sculpture & Carvings
Posted
John,
I agree, not as close as Smith, but still:
Here is one of her tabletop maquettes:
And the one I lived next to for four years back in the late 70's early 80's (also not universally accepted):