

Nick
-
Posts
583 -
Joined
-
Last visited
Content Type
Profiles
Forums
Articles
Gallery
Downloads
Events
Everything posted by Nick
-
That sounds like a good idea, especially to keep the stock for each blade even. Do you have any pictures of finished products? I'd like to try a double bit down the road, and haven't decided if I want to weld two pieces or slit and drift one yet.
-
Langets
-

From the album: Untitled Album
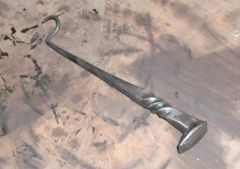
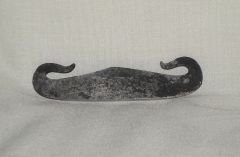
A larger Viking-era fire steel with filed scalloped decoration.© Iron Bay Forge
-

-
-
-
From the album: Untitled Album
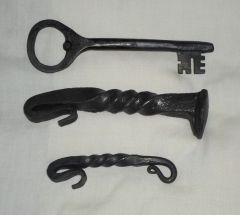
Three bottle openers, one a 'church key', one a railroad spike, and the third a small one from 3/8" round.© Iron Bay Forge
-
-
From the album: Untitled Album
A little pen holder, the nib is held in by a small steel plug.© Iron Bay Forge
-
From the album: Untitled Album
A little fire steel, forged from a spring tooth harrow.© Iron Bay Forge
-
From the album: Untitled Album
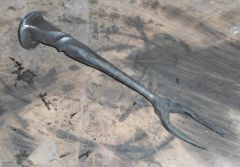
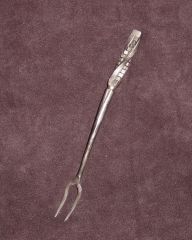
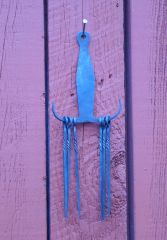
A reproduction of an 18th century, colonial American skewer set.© Iron Bay Forge
-
Beautiful!
-
I don't think my technique is unique, though we all have our own unique methods and styles. One thing I do, though, is I always upset the point of a railroad spike back, not to completely remove the taper but to make it easier to shape the end as needed. Here's a couple things from today, another fire striker and an 18th century, colonial American skewer set.
-
Thanks. I drilled this hasp, but I think I'll punch and drift the next one. Donald Streeter has a neat punch for making slots in his Professional Smithing book.
-

How much do you pay for coal?
Nick replied to P. Bedard's topic in Solid Fuels: Coal, Coke, Charcoal, Wood, etc
I paid $100 for 480 lbs at Streat Fuel in Flint, MI. It was an eight hour drive, but I was going to visit family nearby anyway. Doesn't coke up very well, fairly high ash. Not as bad as the coal I had been using before, which was actually from an abandoned blacksmith shop (it was a rural farm, I guess he took what he could get), and not nearly as good as the coal I got at Quad State several years ago. -
That's a nice little pan. What did you use for a final finish? As an alternative to dishing the sides, you could try raising them over a T-stake or side stake. Then you'd start with a more defined corner where bottom and sides meet, and the bottom would be kept mostly flat, then you can use the big bottoming tool to clean up the edges and the bottom. I don't know if it would be easier or quicker, just a possibility.
-
I've been working on making a lot of small, quickly forged pieces to sell, these are a few of them. Some railroad spike utensils, a hasp for a shed or gate, and a Viking-era fire striker. The striker is made from a spring-tooth harrow. I had tried making them from some coil springs I have but I was having trouble with cracks, these harrow teeth forge better, spark great, and I haven't had any crack during forging yet.
-
My first anvil... How ugly is too ugly?
Nick replied to Sleprac's topic in Anvils, Swage Blocks, and Mandrels
Well, I'd buy it, even with the chunks out of the face. Horn's good, there's more than enough clean area for forging, and the face looks flat and undamaged other than the obvious bits. -
I think I have enough black paint to try that. I'll lower the whole thing a bit when I get a chance, a fan I'll see if I can find something. There's no need to open a door or window, in fact the workshop's a bit more open than I'd like, though it's closed enough that there isn't much draft. It's been fine the last couple days, some occasional spill but not much. The draw seems to be inconsistent, but when it's drawing well it'll suck up a whole column of green coal smoke, and even some of the steam from my quench tank. I left a space around the chimney in the ceiling, and any spill goes up through that (and other spaces, too) into the roof and out through the wall, so even with the occasional escape the shop isn't smoky.
-
Glenn, the chimney pipe is supported by a 2-piece collar suspended from the rafters, so I can loosen the collar and adjust the height of he hood by moving the whole chimney down and still have 4' of clearance (I have to go up to take off the braces on the outside, but if I have to take the raincap off anyway I'll need to drop the chimney down so I can reach it.) Thanks for the help, gents. Might take a few days, I'll need my brother to help out moving things around.
-
I'll give that a try tomorrow, Frosty. I'm going to close the ceiling tomorrow and stop up some of the spaces and holes in the walls, to reduce any crossdrafts that may be there. Fe-Wood, as a matter of fact I think it was about 42F in my shop while it was around 50F outside. I might try putting in a piece of 10" (given my setup, maybe a piece with a flange put up inside the existing 12"?), but I was wondering if maybe I have too much chimney. At 20', being single walled, I'm guessing it's not warming up at the top. It was warmer on the days it was working, but the snow is going to fly soon. Frosty, is your chimney single walled?
-
I just checked, there's nothing in there. I also put some burning newspaper in the hood and shined the light up the chimney. All the smoke went straight up, I couldn't see any evidence for a downdraft, so that's probably not it. I still can't figure out where a strong enough crossdraft could be coming from, though. My shop isn't sealed tight, it's a barn and there's a bit of space between the boards. One thing is that the ceiling isn't there at the moment, it was just boards and sheetmetal over the rafters that I moved over to put in the chimney and haven't put back yet. Maybe that's effecting it, but it doesn't account for when it was working fine. This bad Paint drawing shows about how the smoke is behaving. I could fabricate a back to go on the hood to the forge, I guess, but I'd rather not.
-
Rainy (the other two days weren't), but only a breeze, no real wind. I'll check up the chimney and see if something's in there. Would it be worth trying a smoke shelf in the pipe just above the hood? Or would it not be effective since it's a hood and stack instead of an enclosed box?
-
I just finished my new forge chimney, and the first couple days using it I didn't have any trouble with it, really. But today it was hardly drawing at all, almost all the smoke was coming out the side, mostly to the left and the opposite side from me. The chimney is 12" diameter, 20' in length straight up and the top is about 4.5' above the ridge. There are no obstacles within 10'. The rain cap is 12" above the top. The hood is overhead, the bottom edge is 14" from the firepot. What really gets me is that it was working fine. There was a very little bit of smoke escaping every now and then, but hardly any. I preheated the flue with a piece of burning newspaper in each instance. I walked around the workshop with a piece of smoldering newspaper looking for drafts and couldn't find any that would account for the apparent draft pushing the smoke out from under the hood. I stuck my hand up the hood and I think I felt a cold draft. The direction of the smoke could have been from a downdraft, though there was still some going up the chimney. So what exactly did I do wrong? Is it the weather? Chimney too big? Hood not big enough? The picture is from the first fire with the new hood, heating up a big ladel, not doing any smithing.
-
My anvil is uglier than yours!
Nick replied to stuartthesmith2's topic in Anvils, Swage Blocks, and Mandrels
I went to an estate auction in 2008. The newspaper ad said there was an anvil so I went to check it out. Aparently I wasn't the only one. The auctioneer was surprised by the laughter when this went on the block. I give you...Frankenanvil!