Steven Bronstein
Members
-
Joined
-
Last visited
Everything posted by Steven Bronstein
-
I have a 50# Beaudry Utility Hammer. I just replaced the clutch lining and noticed that the clutch sleeve was really dry and the hammer has not been running as smoothly as it has in the past. I have grease fittings to lube the main drive shaft and the crank pin., The Main Drive Pulley rides on a sleeve that is attached to the clutch. The clutch slides towards and away from the pulley in order to engage. it is not clear to me how to keep that sleeve oiled. There are cut oil grooves in the sleeve to transport oil but there are no oiling ports and when I squirt oil on either end , it tends to just fly off before it has a chance to seep onto the contact surfaces. Any suggestions? This is a picture of a 25# hammer but it is the same setup.
-
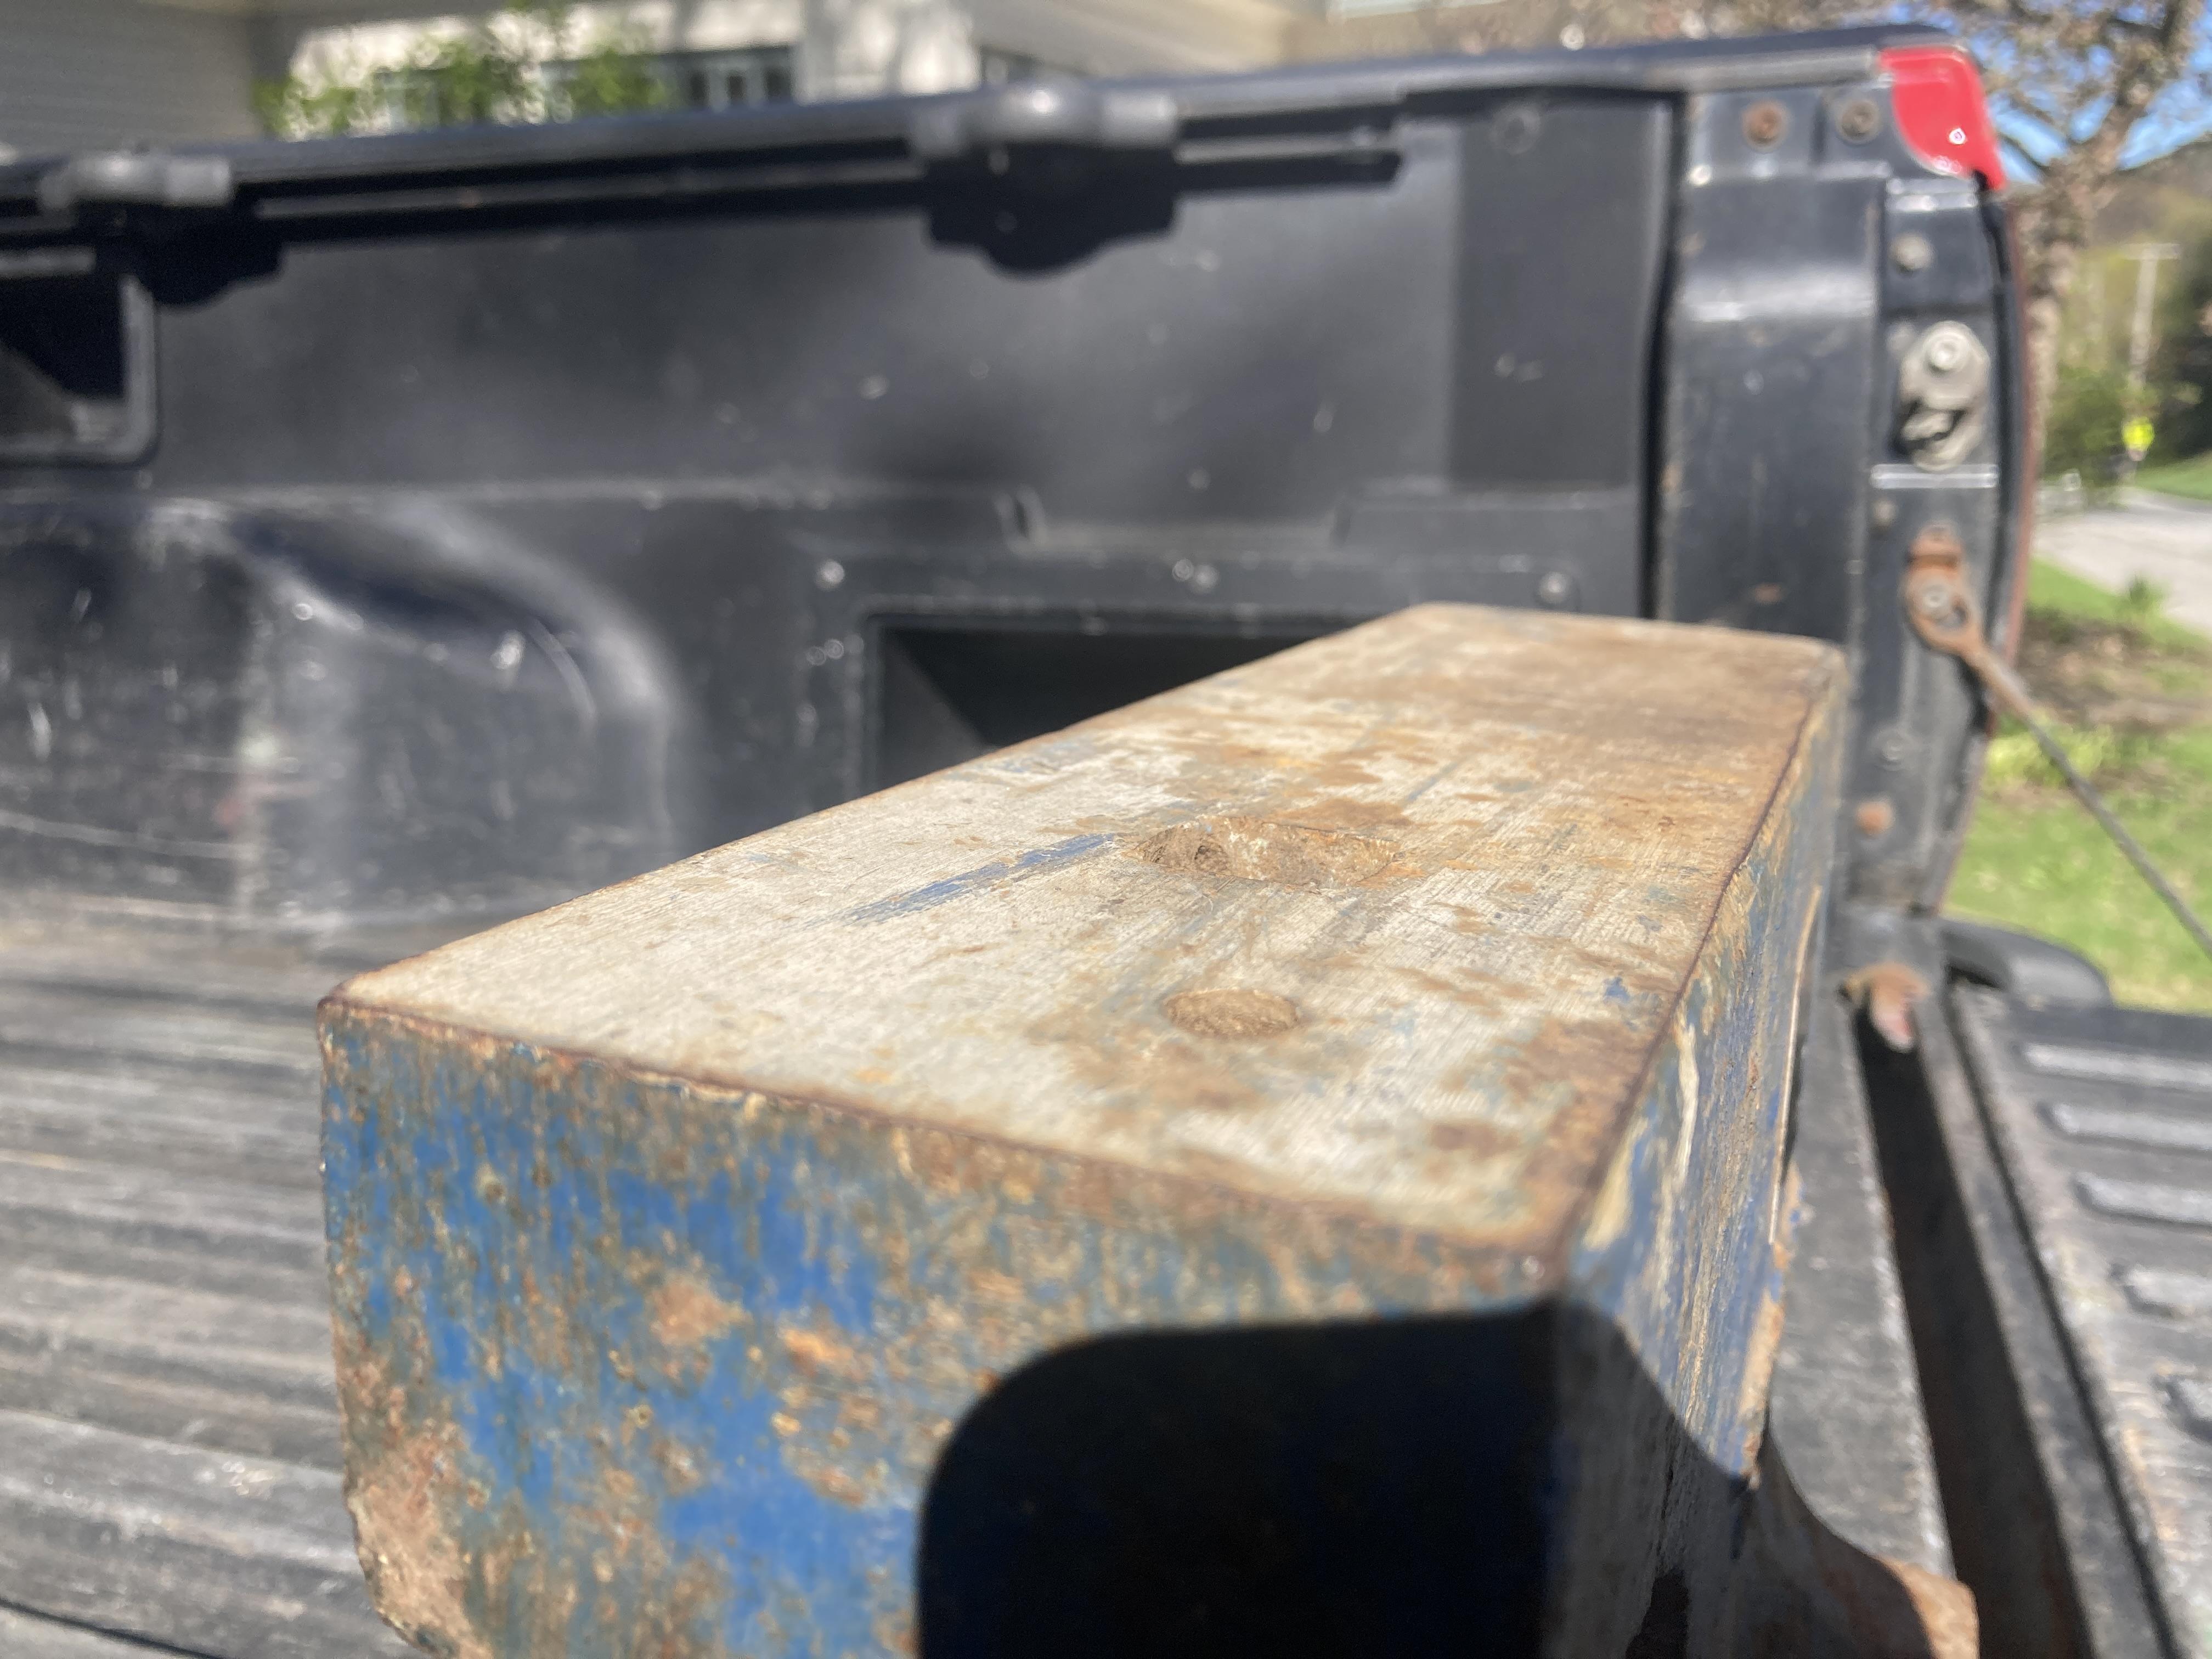
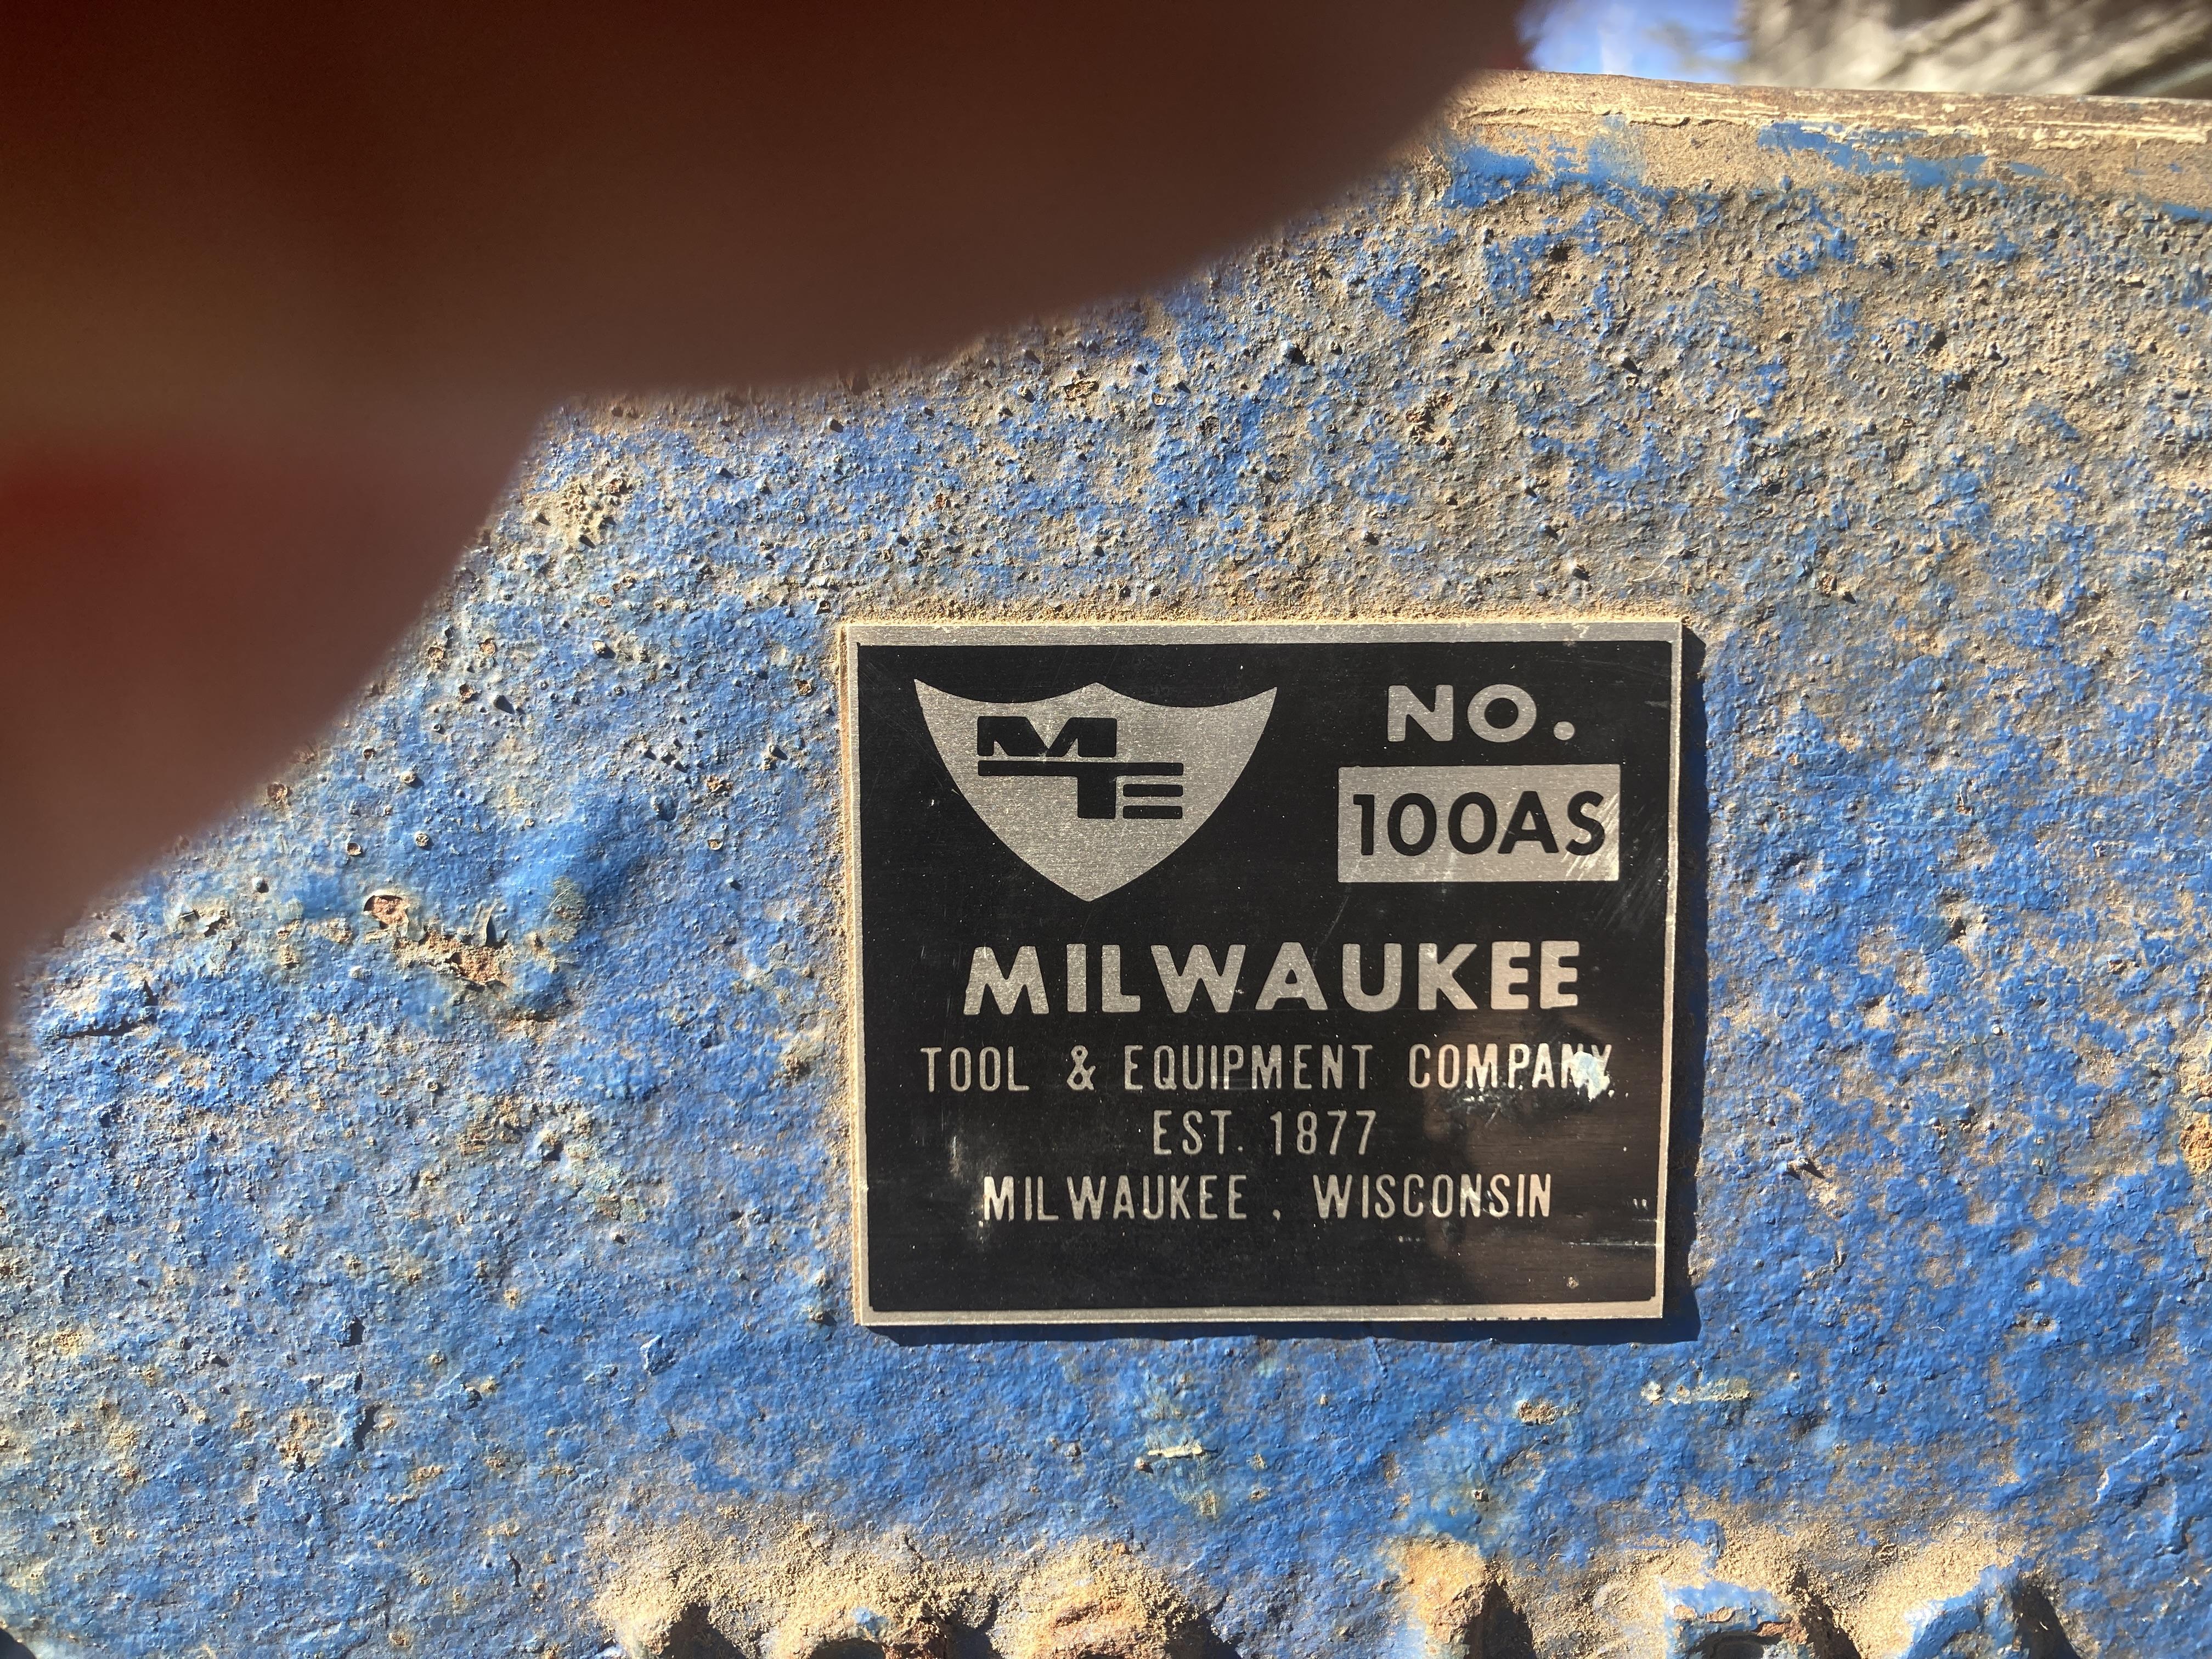
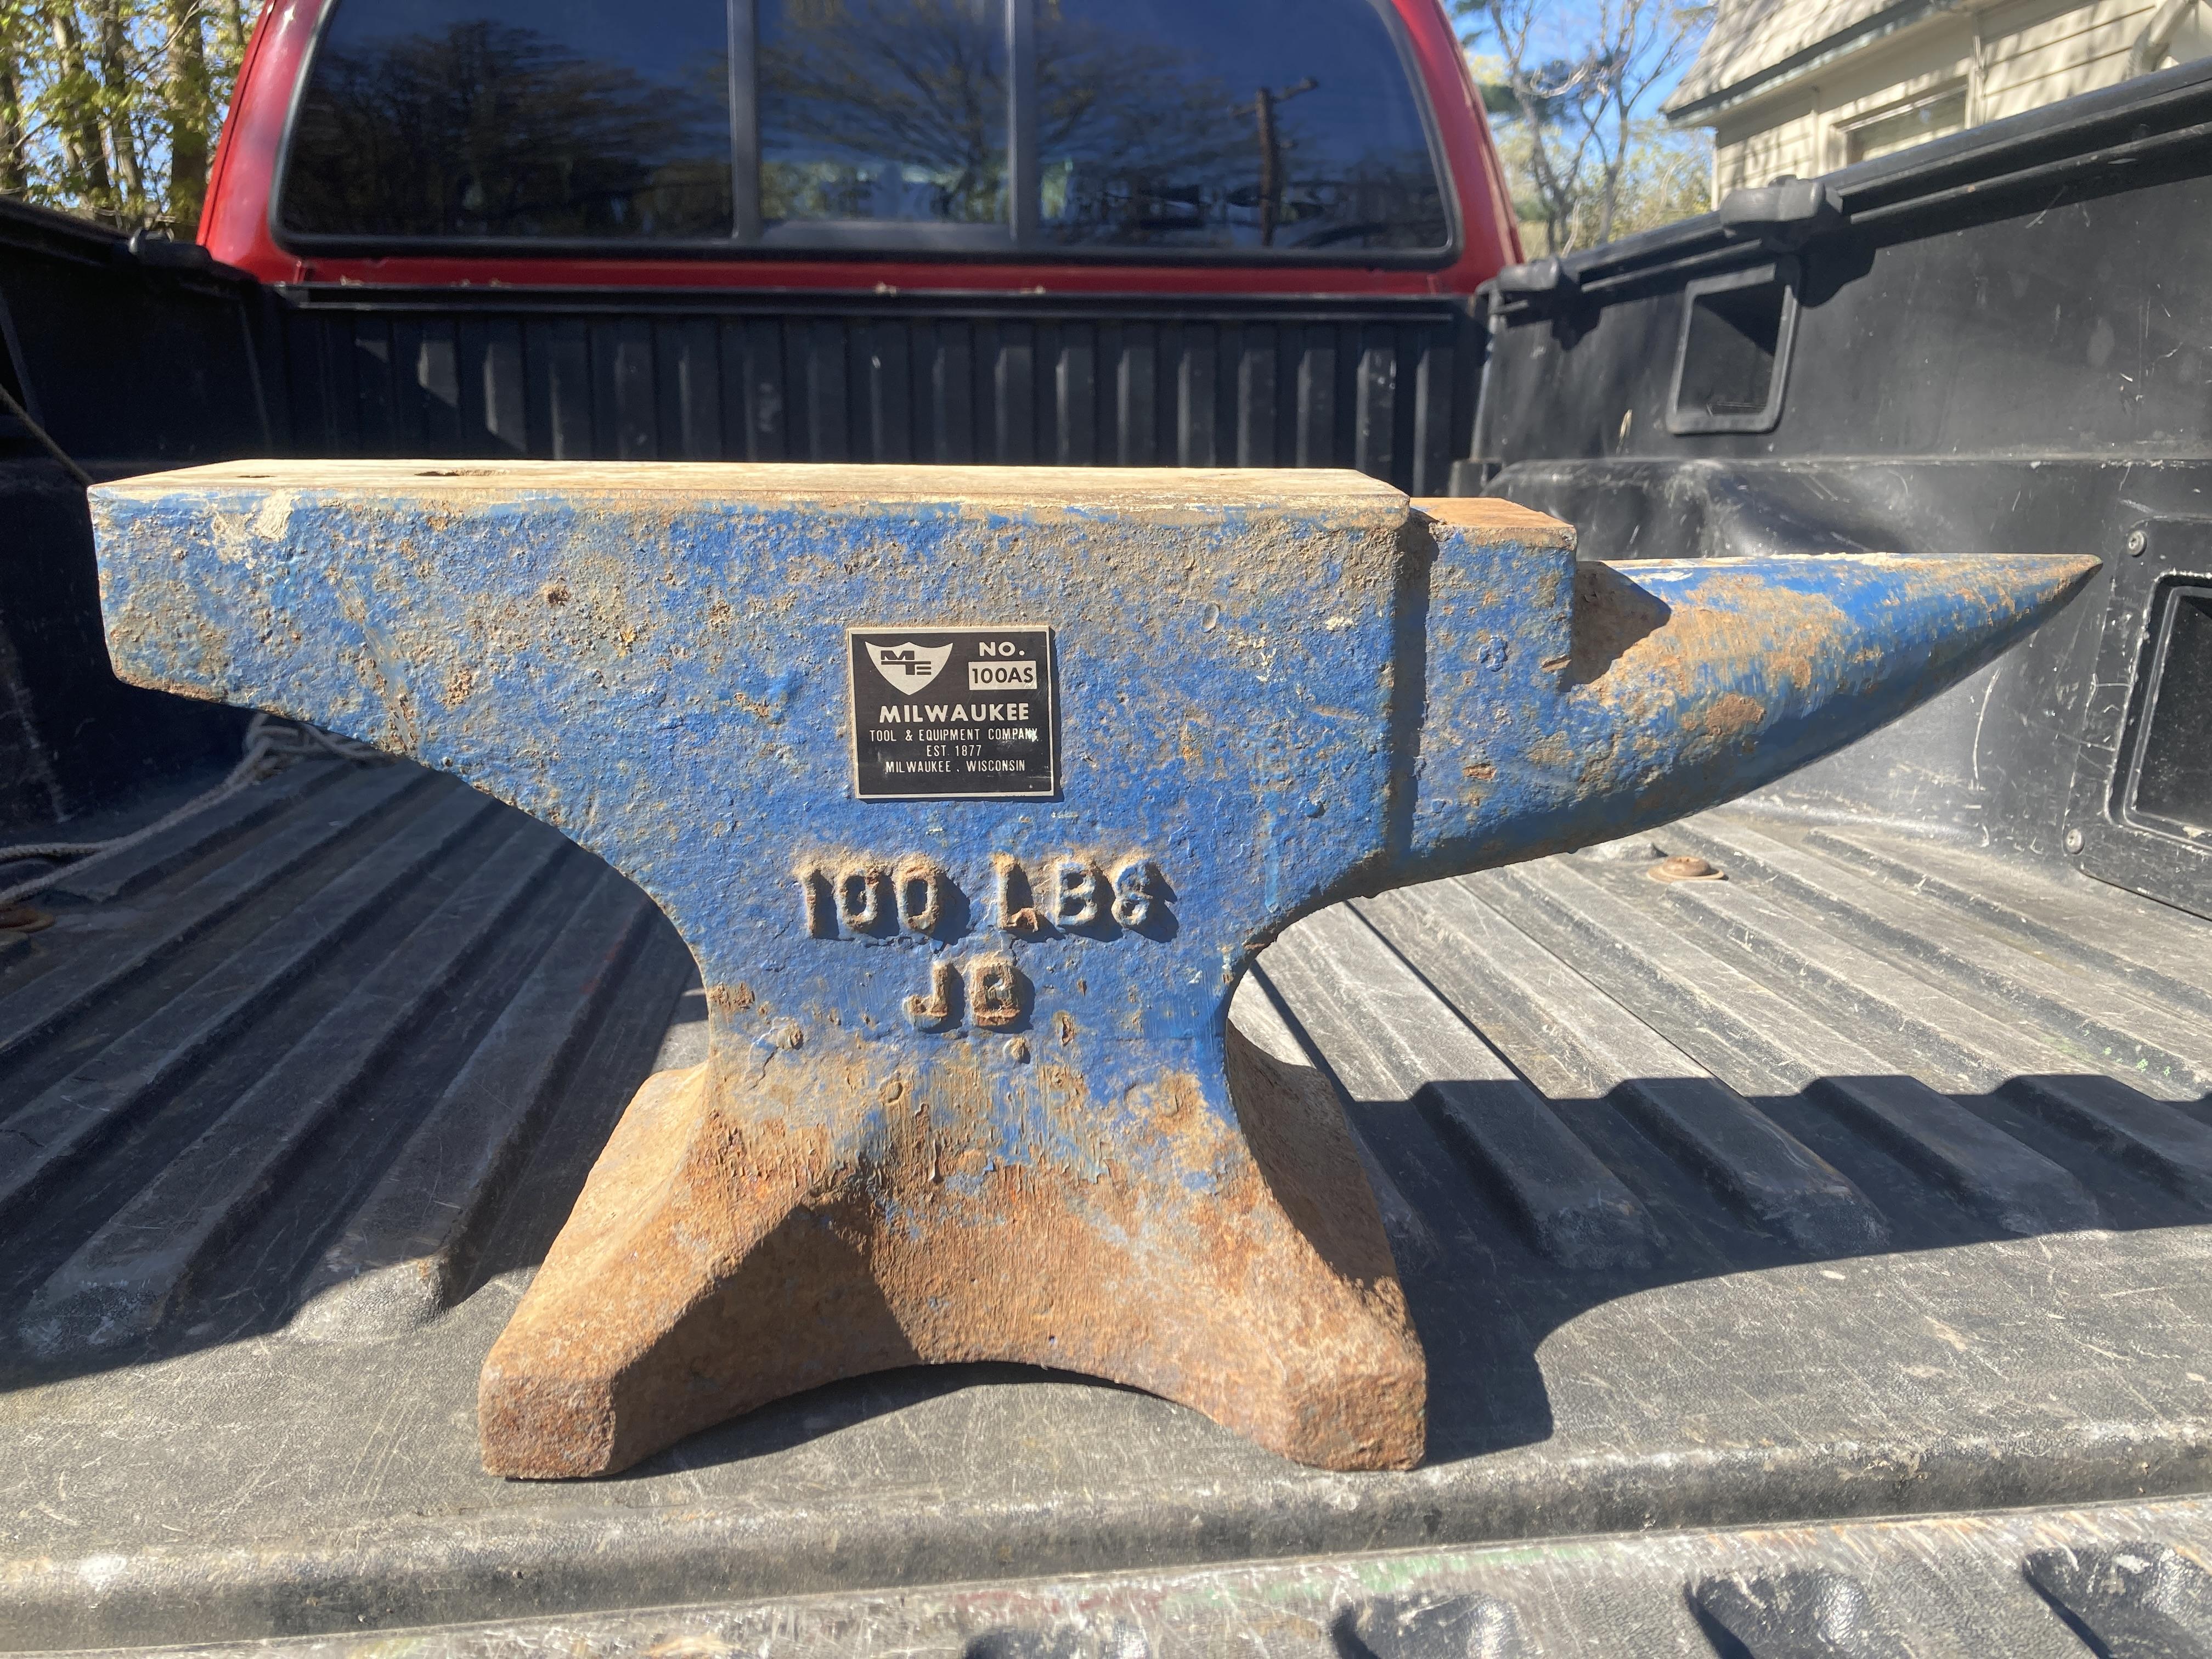
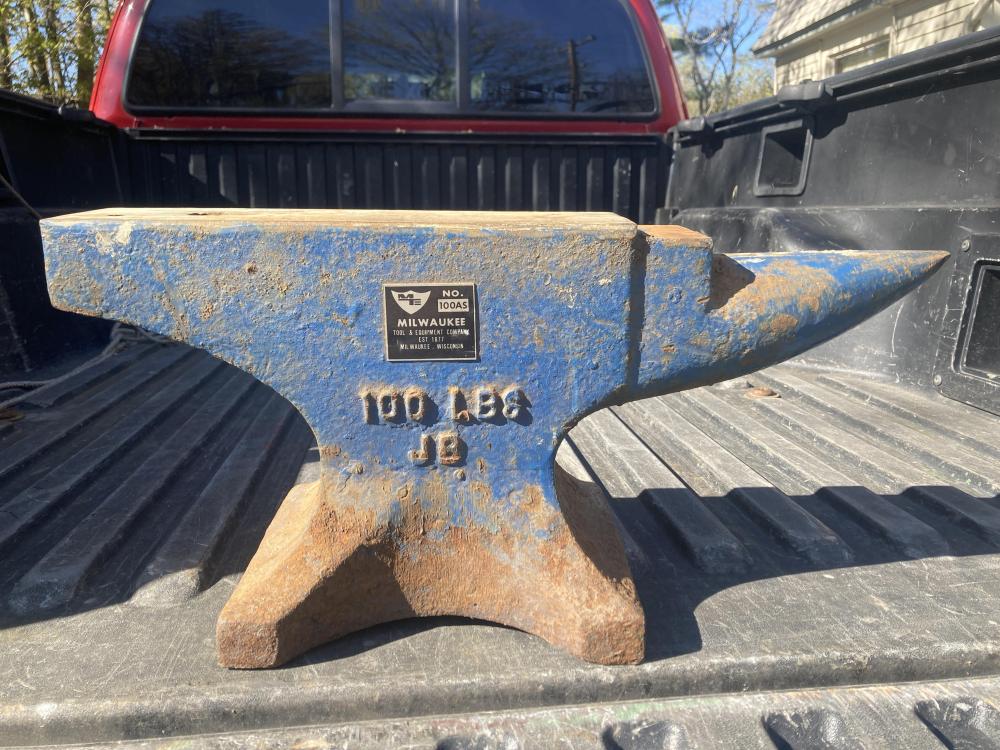
I have a working blacksmith shop in Vermont. I was just contacted by a stone mason who had bought a Milwaukee 100AS Anvil 55 years ago when the local hardware store was going out of business. It was new then and has never been used. Thought you might like to see it. Wondering what it might be worth.


-
I have a 50# Beaudry Utility Hammer with the markings U501. The clutch lining has worn out. I have it removed and the lining is held in place with 5 copper rivets. My questions are: Can I use composite Flat Bell Pulley Belt for the clutch lining or should I get brake lining? I have seen some linings attached with adhesive which would mean I don't have to worry about scoring the clutch drum when it wears down. So is adhesive a reasonable alternative to riveting. I have the rivets, just curious about what modern best practices might be. Any thoughts?, Thanks.
-
I really value iforgeiron as a resource. Thank you all for your generous sharing of your expertise.
-
I understand what you are saying. My meaning was I wanted to get to the point that I could retemper my tools. I think if I said I wanted to harden my tools folks would say I forgot that I still needed to temper them. I could have said I wanted to harden and retemper my tools, which is absolutely correct but thought that was implied but I guess not.
-
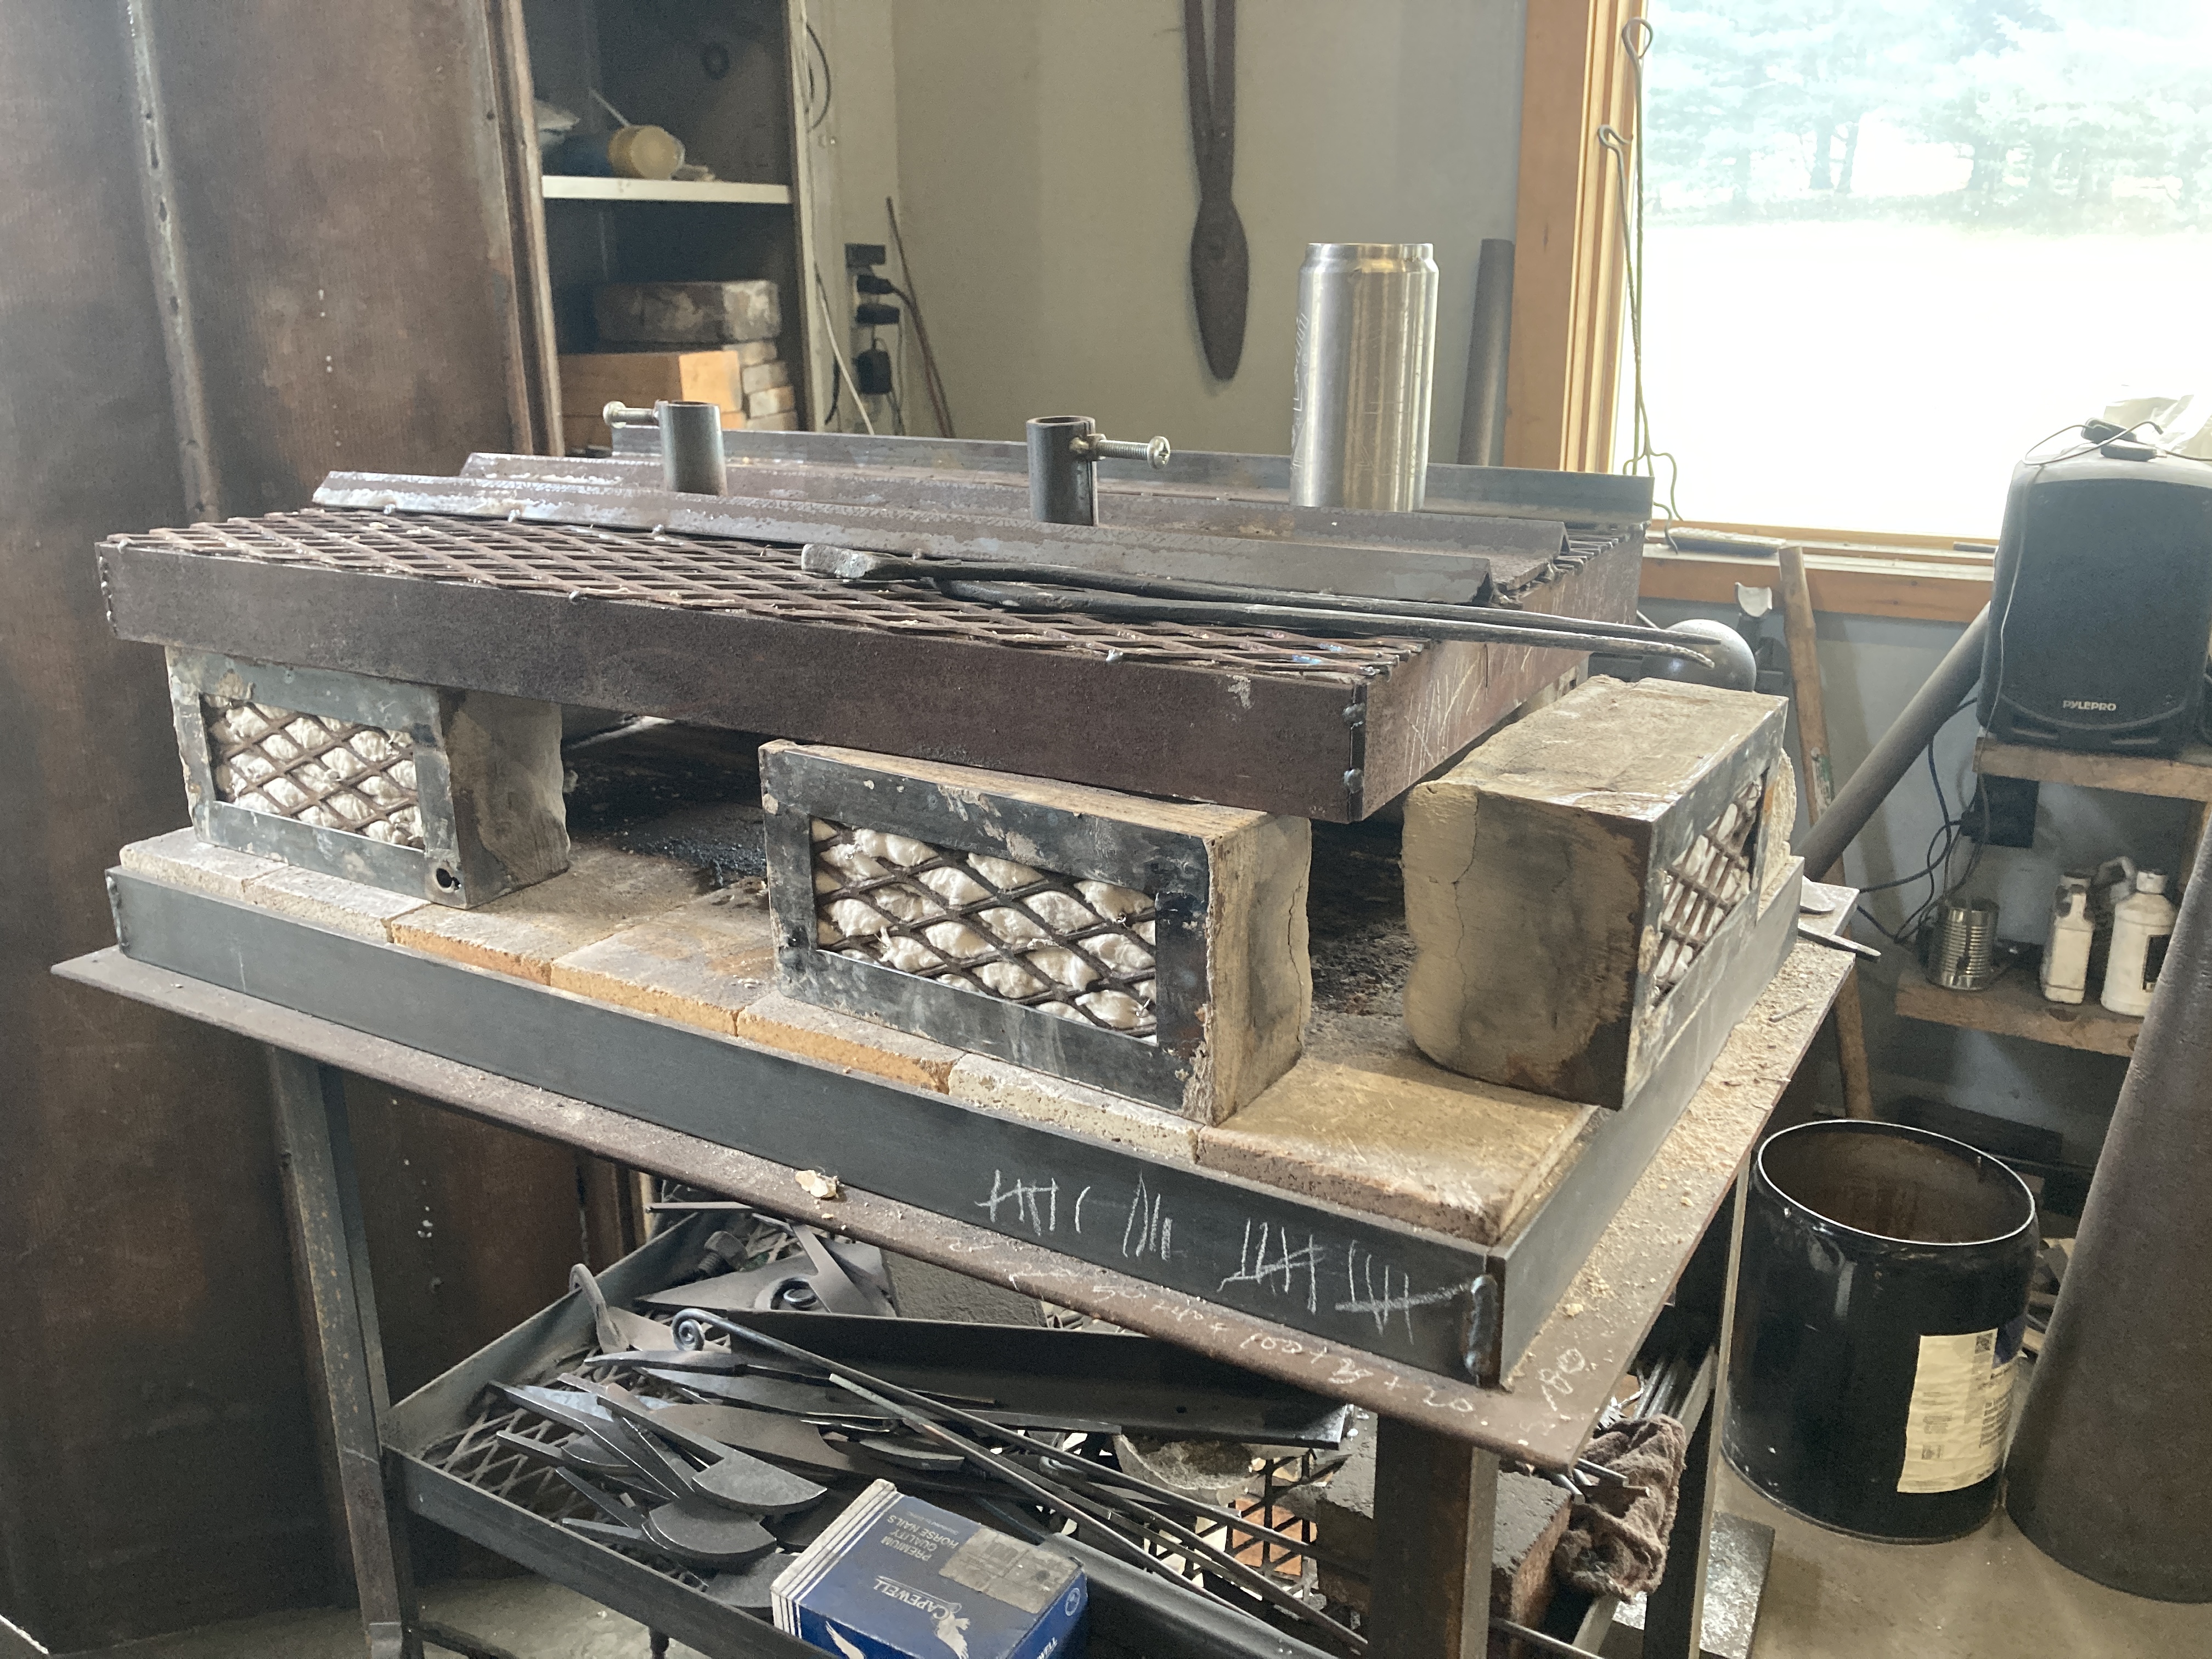
Thanks, I put Instuff all the way around to rigidize the kaowool and Satanite on the interieror kaowool face and sides to just cover the expanded metal. Because the outside kaowool face is protected by the expanded metal, I am not too worried about it getting knocked around. If that changes I will cover that with Satanite too. Interesting, I wonder if that would improve the durability of the outside face, rather than just brushing it on. Because the wool is so well protected in the frame, I think the only source of abrasion in getting poked on the interior face
-
Well, I am a blacksmith with 40 years experience and I still have a lot to learn. We had a shop fire 5 years ago. I was able to recover nearly all of my tools out of the ashes. One lingering problem was I was not able to successfully retemper my hammers. I retempered my chisels and could easily temper new hammers. The old ones would go through the process and still come out soft. I went on multiple forums and discussed this problem with friends to no avail. I described my process as follows: Heated them to bright red and let them cool slowly to normalize Heated them to above magnetic and quench in oil ( tried both Canola and Parks) They would not harden. I finally gave up and handled them and just resigned myself to the fact that they were some how negatively affected in the heat of the fire and that was it. I was playing with tempering some new hammers, out of old drive axles, and got to thinking that I tend to work with mystery tool steel so I use a magnet to let me know when I am at the critical temperature. I realized that for reasons I cannot explain ( I think because I was so worried about saving my favorite hammers and doing it correctly ) when I retempered my old hammers I put them back in the forge after they reached critical temperature, just to soak " a little bit more" to make sure I had it right. Well....I have realized that what I was doing was raising them up too high above the critical temperature so that when I quench them, they were not cooling off fast enough to achieve a hardened state, so they stayed soft. I went back a retempered all of my old hammers, when I reached the non-magnetic state I quenched them and they hardened just as they were supposed to. Tempered to a dark straw and they are perfect. I was thinking too much, worrying too much, and could have save myself a lot of trouble if I had just followed the directions.
-
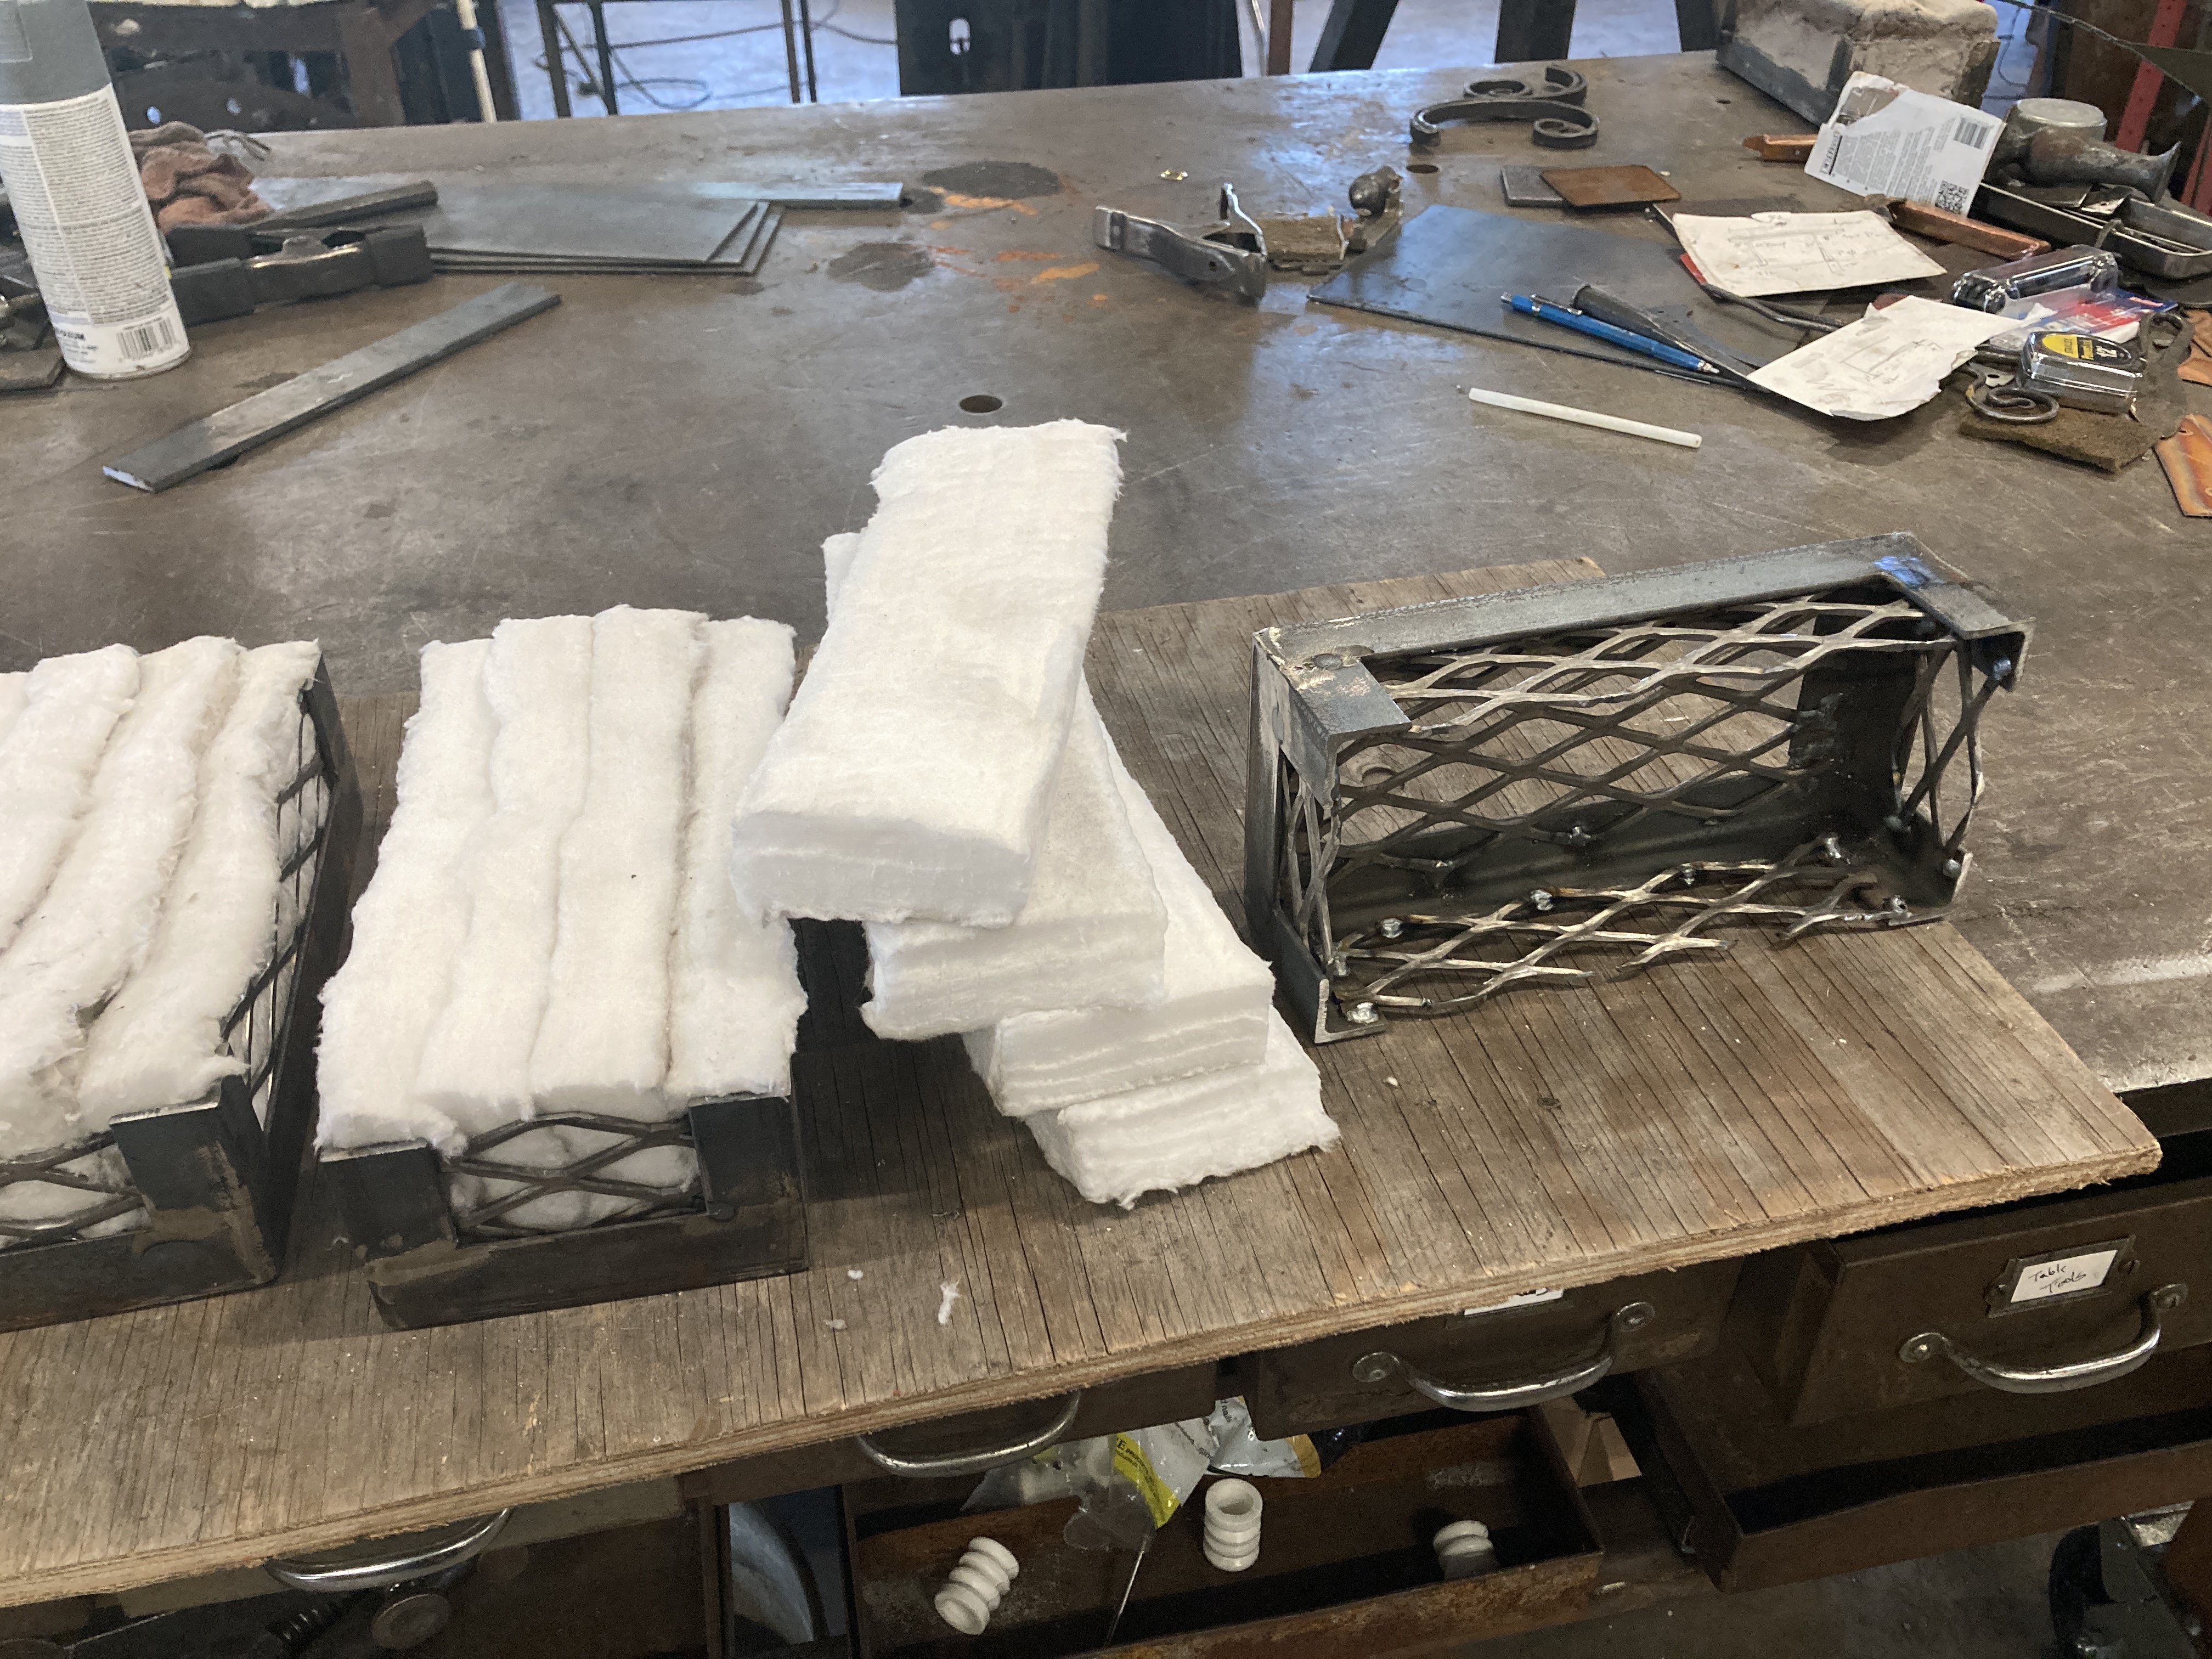
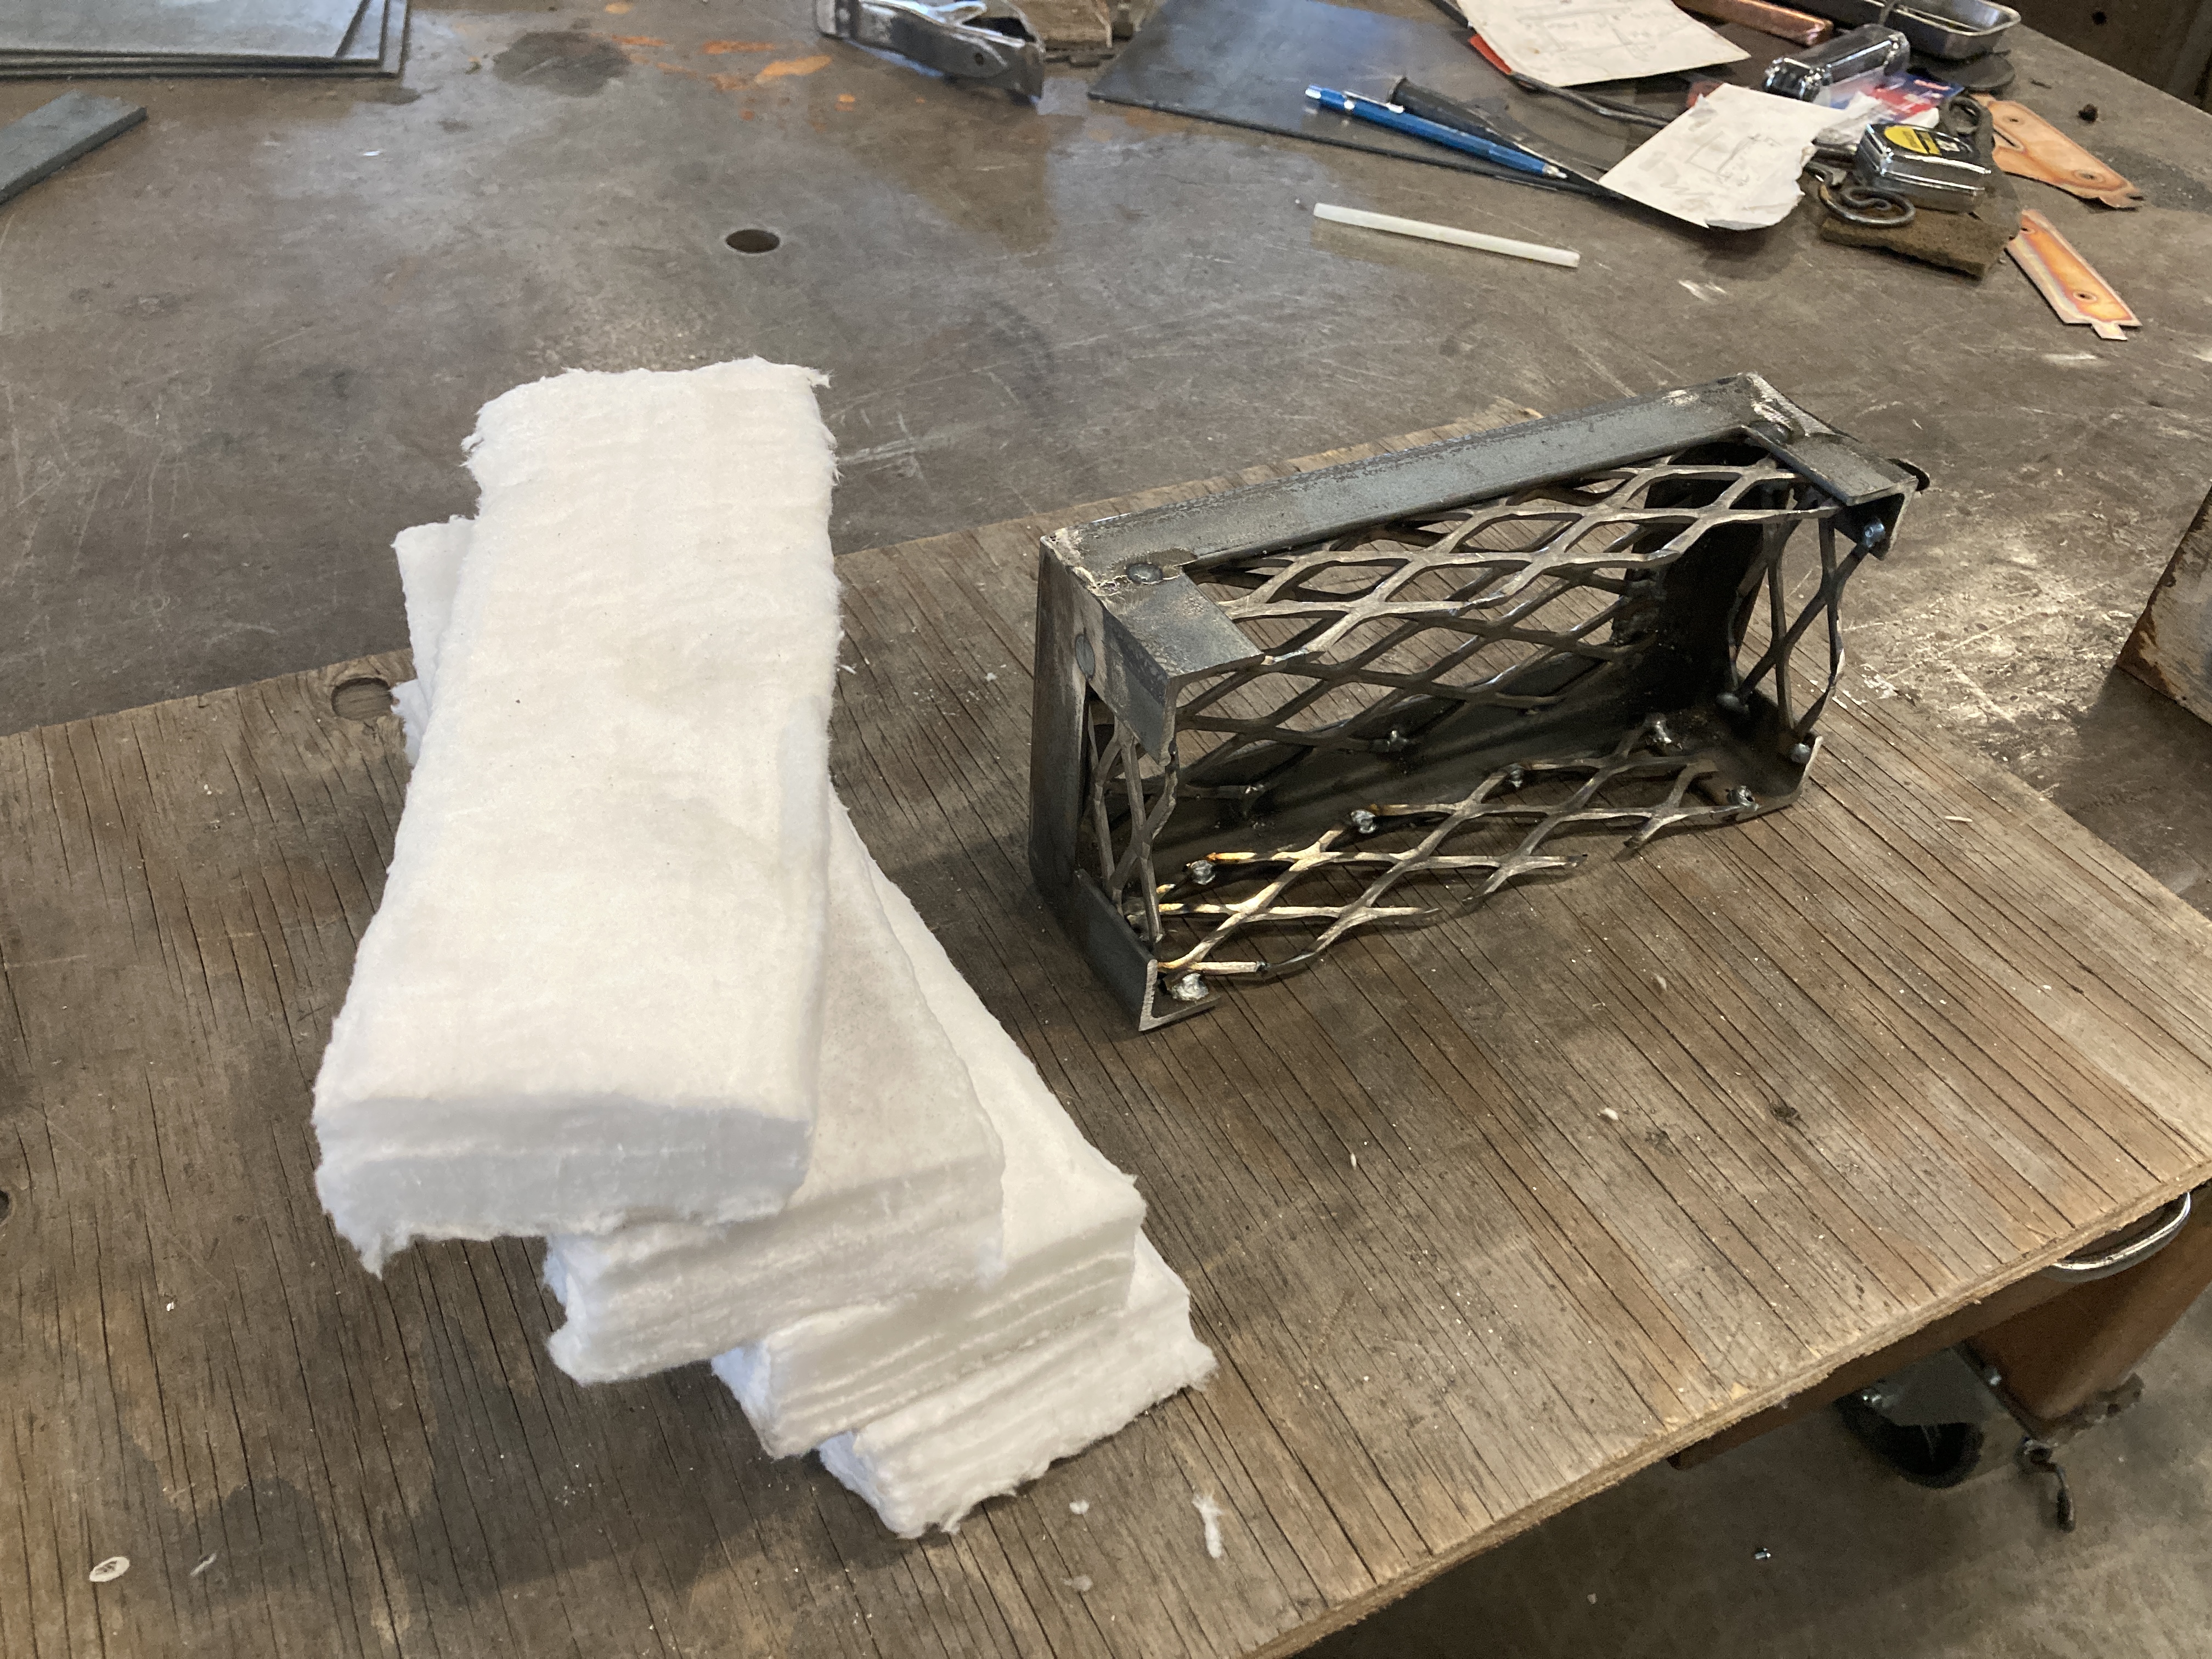
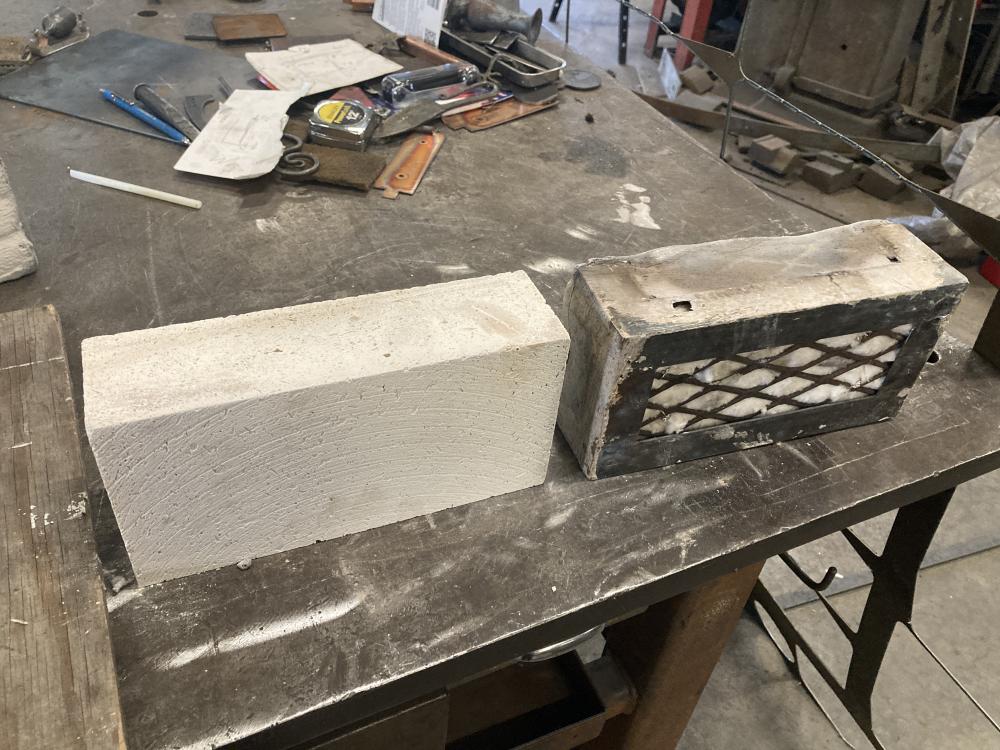
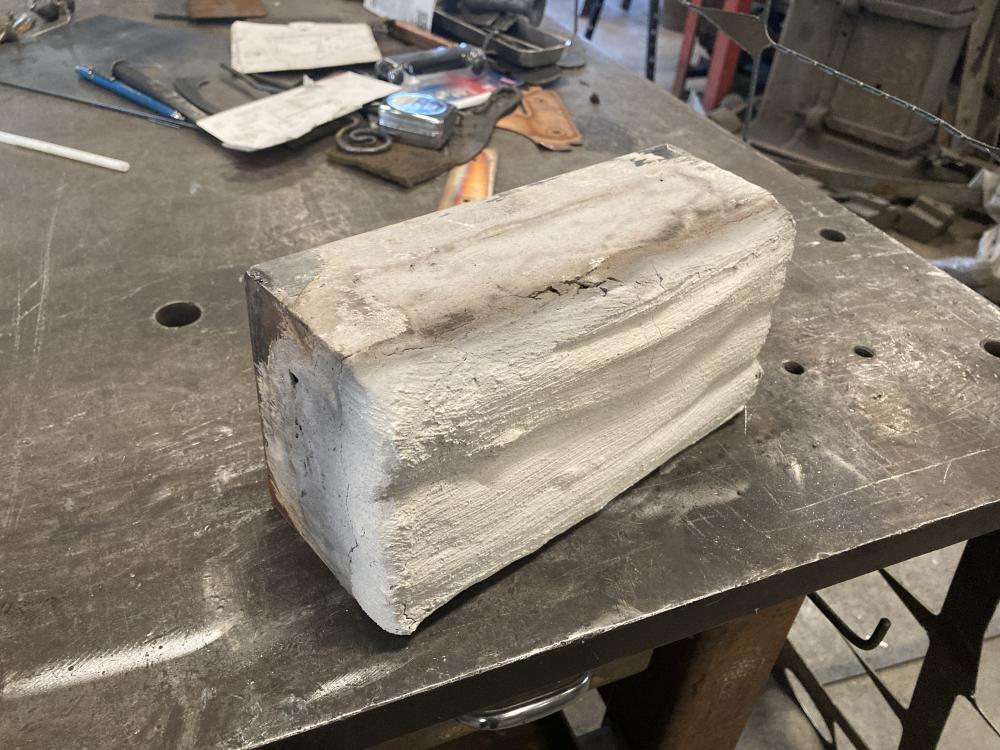
Here are some progress photos. I wanted to create "kaowool bricks" equivalent to insulating firebricks (IFBS). I am rough on my forges. They get moved around a lot going to do classes and reshaping my forge shapes as my jobs needs change. I welded angle iron and expanded metal to form open frames 2.5" x 4.5" x 9". I then cut 4 kaowool strips 1" x 3" x 9". These were stacked into the frames and coated with Satanite. The kaowool extends beyond the frames so that the metal does not sit inside the forge interior and is protected from the heat. This results in a "brick" ~3" x 4.5" x 9", the same size as a thick IFB. The Satanite makes it a little thicker and I am ok with that. I could have changed the dimensions accordingly but a little extra wall thickness is not an issue for me. I did the usual cure letting them dry for a day or so and fired slowly. When finished they feel and almost just look like IFBS. but are rugged and will last me many years. Depending on how hard you are on your forges and how much you pay for IFBS will determine if it is worth it to you. I am very happy with the results and no longer have piles of broken soft brick everywhere I turn.


-
I will check these out. My kaowool bricks are helpful to me because I am rough on my bricks . I load them in the truck to do demos and not gentle when I am rearranging my forges. For more sedentary setups I can see why these would be great. I think I use to have ones like the K-26 and my smaller forges last a year or two.
-
Based on advice from Jock Dempsey I started making my gas forges with folded kaowool tops. I like having loose soft brick sides so I can rearrange as the jobs require. They are always breaking so I just made modular "bricks" of folded kaowool. I fabricated frames with 1" angle and expanded metal 2.5 x 4.5 x9". I fold the kaowool so it is 3" wide and extends out of the frames 1/2" on the interior side ( making my "bricks 3 x 4.5 x 9") . I coat with satanite and use just I would regular soft bricks. As my soft bricks break I am replacing them with my modular bricks. It is working really well. PDF removed due to copyright.

-
Thanks JHCC - I see that Harris has a heavy duty rosebud with a 36" handle. I will have to heat up 1 foot sections of pipe at a time to create the gradual curve. Thinking that will be easier than setting up my gas forge on site and moving back and forth.
-
I have a railing job that requires I do a fair amount of field bending of 1.25 pipe (2-3 foot sections have to get curved to match the natural landscape) I decided it was too hard to make a jig so I think field bending is my best option. I have a lightweight gas forge that is easy to move. I am trying to decide if it would be easier to use that on site or weld one end of the rail in place and use a torch to heat and the bend the rail to line up with the in posts. The customer wants an organic feel so not needing to make perfect radii. Any suggestions and how big a rose bud is available to do this? Wondering if the 500K BTU propane torches could work. Thanks
-
Glenn, thank you
-
I am having great success with electrolysis and small parts. I have a big rusty leg vice with frozen threads. Do I need to heat , free up ,and separate the parts first or is there a benefit to putting them in the electrolysis bath as a whole assembly? Thanks
-
I am going to try pulley the pulley with a porta bar attached to the two bolts I tapped into the inner rim of the pulley. hope 10 tons is sufficient. Wondering if I should heat first, hesitating because it will make attaching the porta bar a little more challenging when the pulley is 500 degrees
-
-
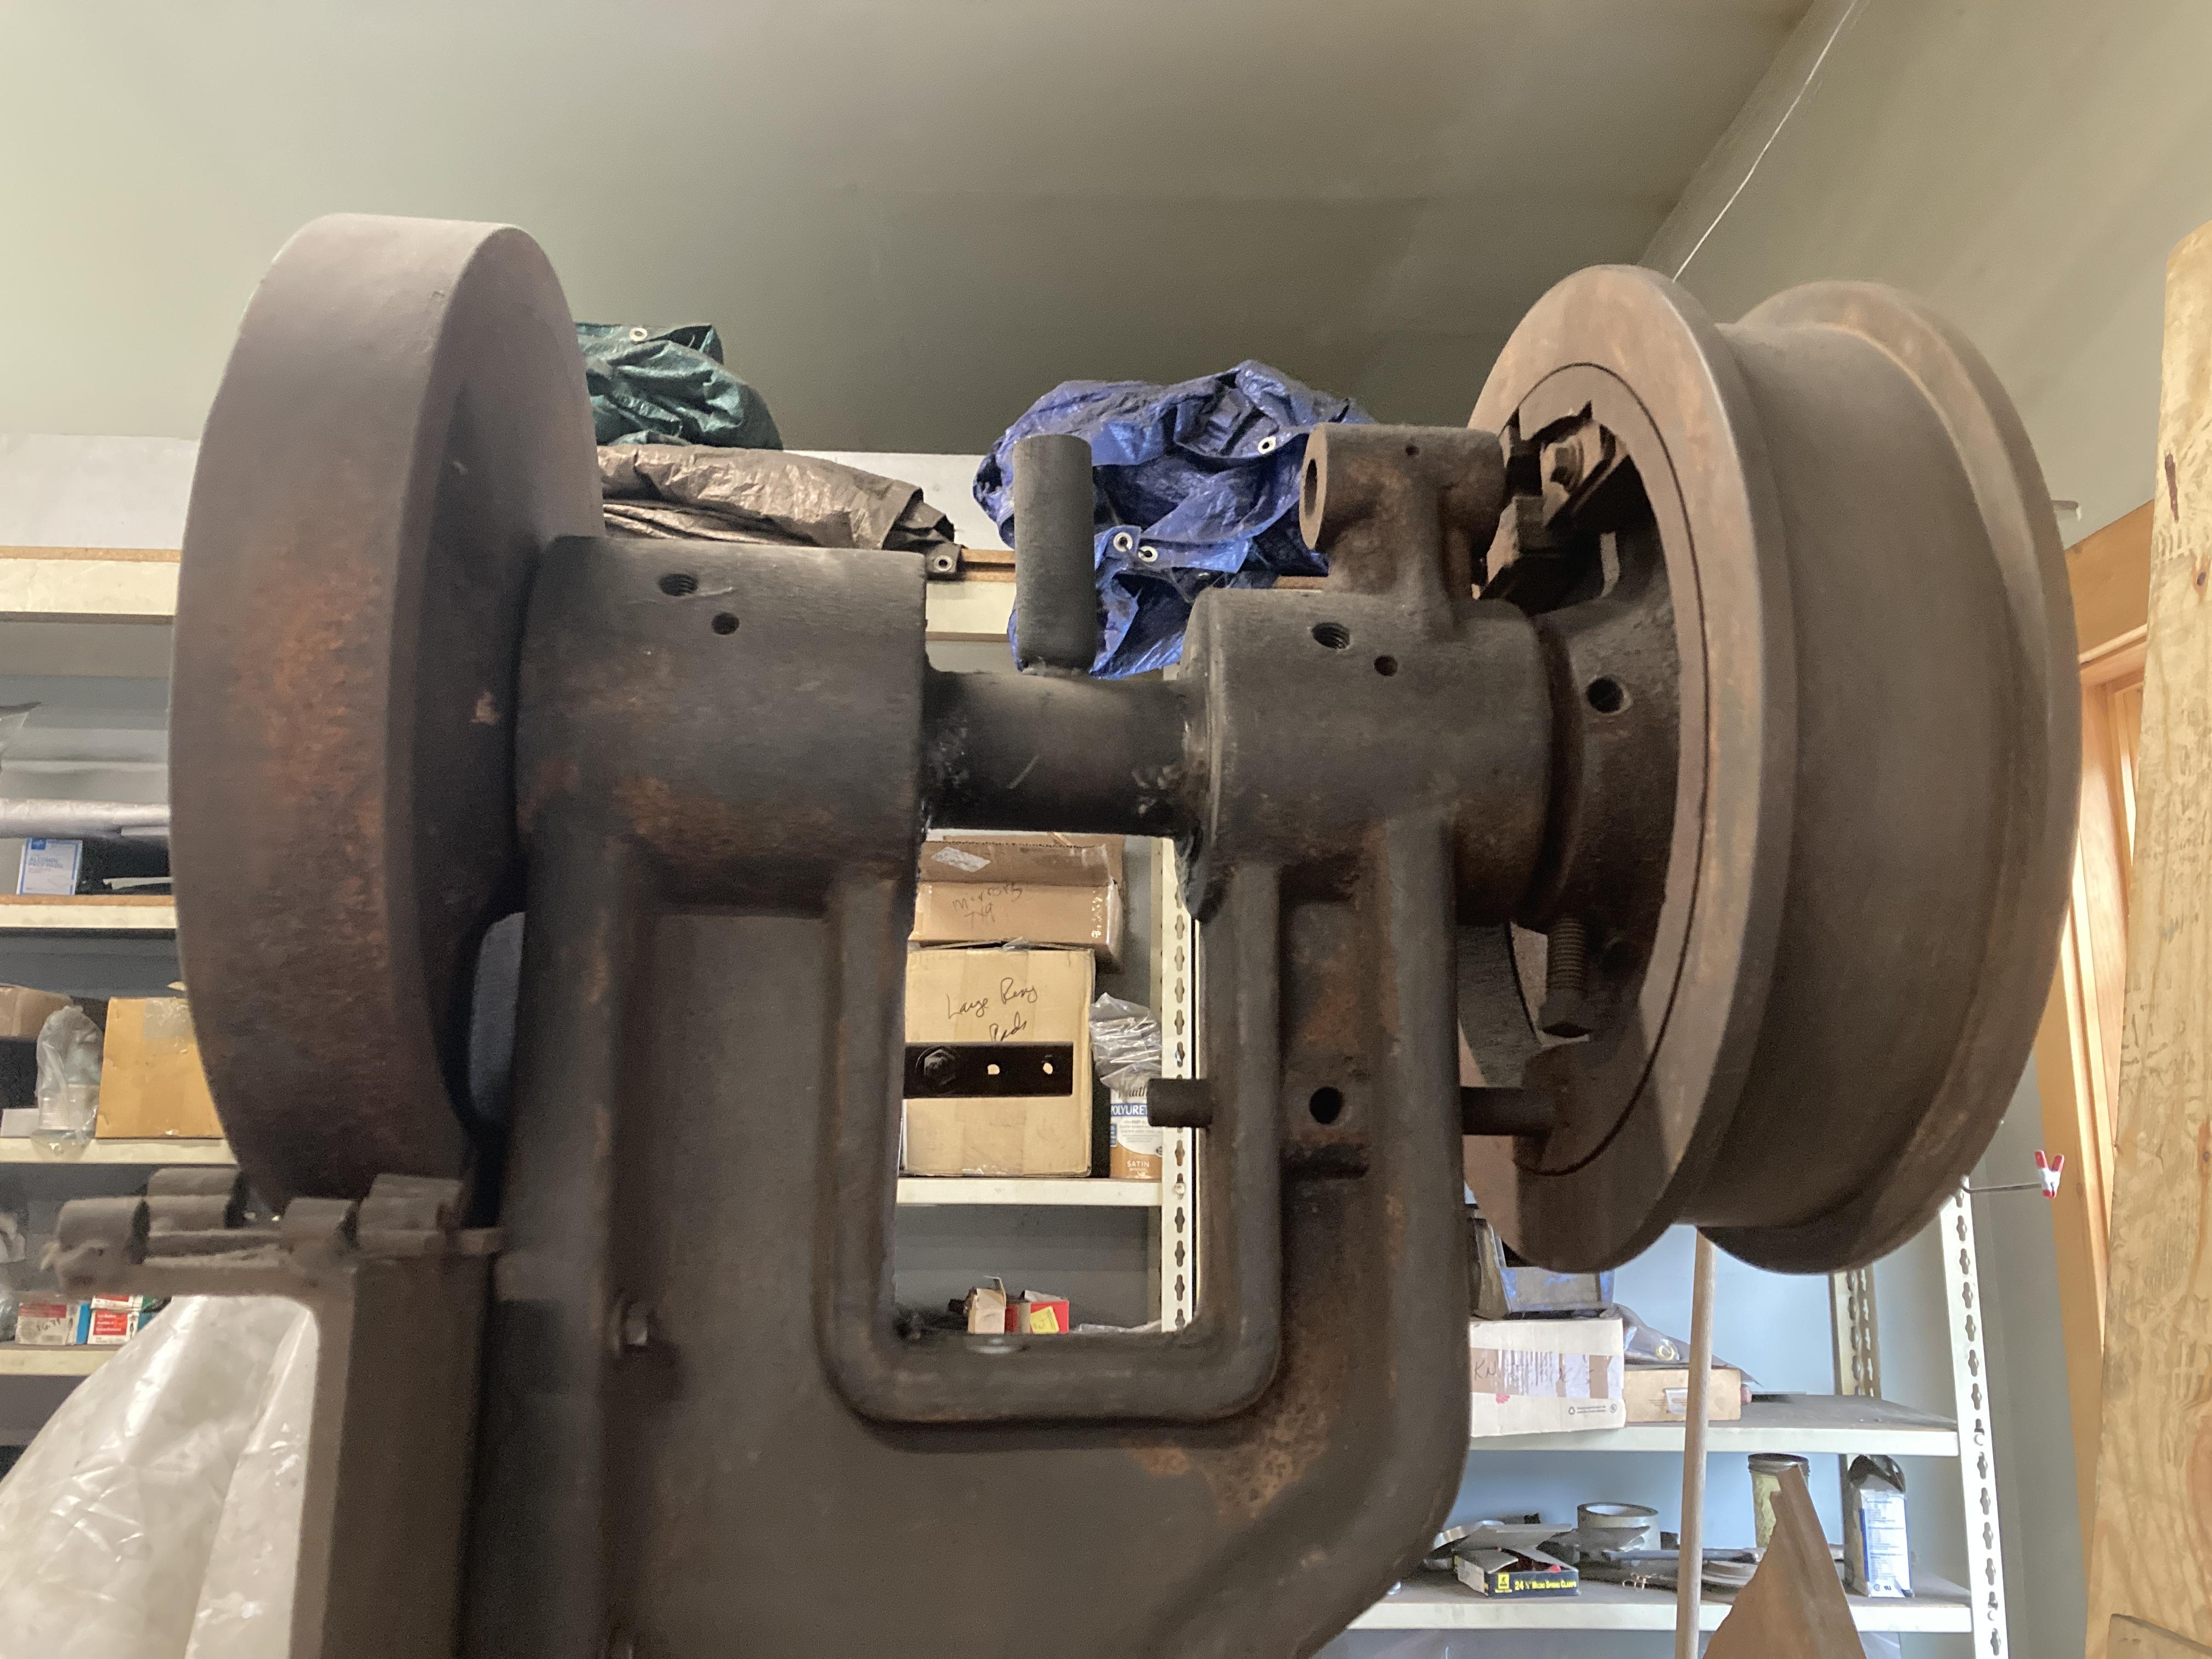
There is a loose metal sleeve over the exposed shaft section between the two bushings. I think it is there to allow some safety separation from the spinning shaft. I caulked each end closed and added that vertical pipe to be a penetrating oil resevoir so that oil could flow towards where the shafts enter the bushings.
-
Got it, sounds like a large weedburner head will be enough heat. I like the idea of on the outside and then dropping dry ice on the shaft. Gazz, that was my thought. I have two 1/2" bolts that I tapped into the center area of the pulley. I thought to lay the machine on its side and attach a lever to the bolts so I can bounce the shaft while heating and cooling. Hope it works. Thanks All
-
-
-
I have a 100# Fairbanks that went through a fire. It appeared to weather the fire pretty well, unfortunately it was outside (under a tarp) for a year while I rebuilt. The shaft will not turn ( I am not really sure if could be turned then). So now, I am not sure if the shaft rusted/welded itself to the steel bushing. I removed all of the other parts and they all look good with no obvious distortions. even the brass bushings on the pitman look good. I have been dripping PB Blaster into the oil ports for a year and tapping regularly but no luck. The oil does seem to eventually flow away into the oil hole. Since this machine does not have pillow blocks I cannot just lift it off. I am considering buying a 1,000,000 btu weed burner to heat up the whole shaft head assembly. There is a 5" cast steel outer casting holding a 3" diameter steel bushing which the shaft goes through. I am wondering if I make an enclosure/forge around the head with kaowool and use the weedburner to heat the space will I get all of that mass hot enough to expand the parts enough to make a difference. I was opening to heat/cool/oil and repeat until I can get it to move. Any thoughts? Thanks in advance
-
I have access to a Kuhn KB1 hammer. It is set up with a 3 phase motor. I want to swap out the motor for a single phase one. What other problems should I anticipate? I understand I may need need a new Mag Starter. Anything else for me to worry about? Thanks. Also, are parts still available for the KB1
-
Thank you all
-
-
I have a number of leg vises that were out in the weather for a long time. They are heavily rusted. Before I started to wire wheel I am wondering if there is an easier/better way to remove heavy rust. I was considering renting a sand blaster....Thanks