Steven Bronstein
Members
-
Joined
-
Last visited
Everything posted by Steven Bronstein
-
Well, I messed up installing a railing into a hardwood floor. I did not drill big enough pilot holes and two of the lag heads sheared off halfway into the hole, though of course they sheared at the wood floor line. I have a left hand drill and ez out coming from McMaster so I think I can solve this problem. However, I would like to find an alternative to lag screws. I am considering the 1/4" x 2" GRK structural screws for installing interior baseplates. Any thoughts? I am going with the 1/4" because the larger diameters only come much longer. Any suggestions. Thanks, Steven
-
this is a tangential question. I have always wondered how the punched the eyes in sewing needles......
-
I tried it with drilling a 1/2" hold on the flat and then set it at the proper angle and drilled again with an aligning reamer, in the drill press, and that seemed to be the ticket. Ended up with a clean oval hole at the correct angle in the correct location and no chatter.
-
Better version is to predrill 1/2" holes in the correct locations, tilt the drill press table to the correct angle , and redrill with a tapered reamer. At 35 degrees it seems to be a reasonable procedure. Any suggestions? Thanks.
-
I want to cut oval holes in the top and bottom channel rails for my pickets to go into. I usually plug weld them inside the channel so it will be hidden. The holes are 1/2" and the angle is shallow enough that I cannot drill two side by side holes to create the oval. I am thinking about trying to drill at the proper angle with an end mill in my drill press. The cutting will be straight down and I will not be doing any side cutting but the end mill corner will contact the metal at an angle and I am not sure how that will go. Any alternatives or suggestions? Thanks,
-
thanks I am going to switch to A2 which is much more forgiving
-
I am replacing one of the ram rollers on my 5# Beaudry Utility Hammer. I was told to use 2" round D2 for the rollers and a machinist is turning them for me. I only have a gas forge for tempering. I do have access to stainless foil heat treat bags and an infrared temperature gun. The instructions for heat treating D2 may be more specific than I can manage. Do I need to send it out or is this something I can do myself. It is holding the heat for a consistent temperature over an hour that has me concerned. Any suggestions.
-
I have a 50# Beaudry that gets used every day. The Drive Pulley slides on the Clutch Sleeve to engage the Drive Shaft. The pulley moves back and forth over the same section of the clutch sleeve and it has become worn so it is wobbling enough that is not engaging with the clutch plates smoothly. I would like to build up and turn the two surfaces so that it runs correctly. Does anyone know of the original specs for the parts. Or has anyone dealt with this before. Any help would be appreciate. Thanks.
-
I haven't been able to find the pics from GiFerro's post at the beginning of this thread. Any suggestions? maybe i am entering the query incorrectly.....
-
The perspective was great. I totally got the humongous Bear and the fearless/foolish hunter. I recently went to an Inuit Art Gallery in Quebec City and your piece would have fit right in. Their work seems less interested in being anatomically correct and more focused on the feelings you get when you see it. Totally works.
-
Here is a pic of the buffalo. In between the two bodies is a 10" version completed. The larger pieces still need the head and horns. When finished it should be the size of a big Newfoundland. Frosty, Your Polar Bear and Hunter are fantastic. Well Done! Steven

-
Here is a report of my progress. I used a flat nose tool with a 3/8" radius. I was easily able to texture the surface of cold 16 gauge making dimples that added, I think, a lot. Here is a video of my buffalo maquette and the body parts nearly completed. The head and horn are to come IMG_1159.MOV
-
Has anyone recovered the images. It sounds like GiFerro had a great hands on method and I was hoping to use it. The best I can come up with now is to locate a center axis pole and measure to each of the tread noses. Then measure each rise and run and I should be able to recreate the stair treads in my shop and use that as my template for the handrail curve. If anyone has pictures that would be helpful. Thanks.
-
Th
-
Good points: My helper will be holding the steel and it will be set into depressions in the dirt so it should locate reasonably well. His job will be more to stop if from bouncing, rather than horizontal control. I will be working cold so I am hoping that the small electric hammer I am looking at wont be too aggressive. It weighs 45# so should be pretty manageable. The Buffalo head and shoulders need to be highly texture so i think it will work. If it is too fast, I can make wider and textured heads for the hammer bits so the forces get distributed and be less aggressive. I will let you know. Thanks.
-
I have a job where I need to dish 12 gauge steel into rough depressions. I am making a 36" tall Buffalo. I have been doing it in the dirt with a sledge hammer. It works but is slow going. i am wondering about a small electric jack hammer. I can stand over the steel with the hammer and drive the steel into the depression dug into the dirt. The jack hammer has 60 joules of force. I think that is a lot less than swinging a sledge but at 1900 BPM I think it will work and be easier for me. I have attached a pic of the model that I made which is 6" tall. It was mostly done with a ball pein, First textured the outside and then created volume from the back. it is two pieces of 12 gauge welded along the midline. Crazy? I have attached a pic of the model that I made which is 6" tall. It was mostly done with a ball pein, hammering from the back.

-
Thank you Mikey, this is exactly the kind of help I was looking for. There is so much information out there and it can get really hard figuring out how to apply it. I will make up my solution and coat my kaowool just as you suggested. Thank you Frosty. I very much appreciate correcting the technical errors. It is the only way we can ensure real understanding and the ability to make good decisions. I have posted previously about the kaowool bricks I make and this will improve them significantly. I had only been rigidizing the outside layer. This did help stabilize the fibers and facilitate applying the Kastolite coating but now I will more fully saturate them to add more structural integrity. Thanks again to you both for sharing your expertise.
-
Thanks Mikey98118 , If the proportions are approximately 1100 grams silica per liter of water the my 300 gram ( gallon of fumed silica) will produce approximately 1 cup of solution so I am thinking something is off in my thinking about this. I would have thought a gallon jug of fumed silica would create a lot of rigidizer but apparently not....thanks.
-
Commercial solutions usually contain about 1100 grams of colloidal grade silica per liter of water I bought a gallon of Cab-O-Sil fumed silica. It weighs 300 grams including the plastic bottle. I had thought the suggestion was to use fumed silica and am now thinking this may not be the same as colloidal silica and I missed a detail. Is this a different silica than is recommended for making a rigidizer solution? Thanks
-
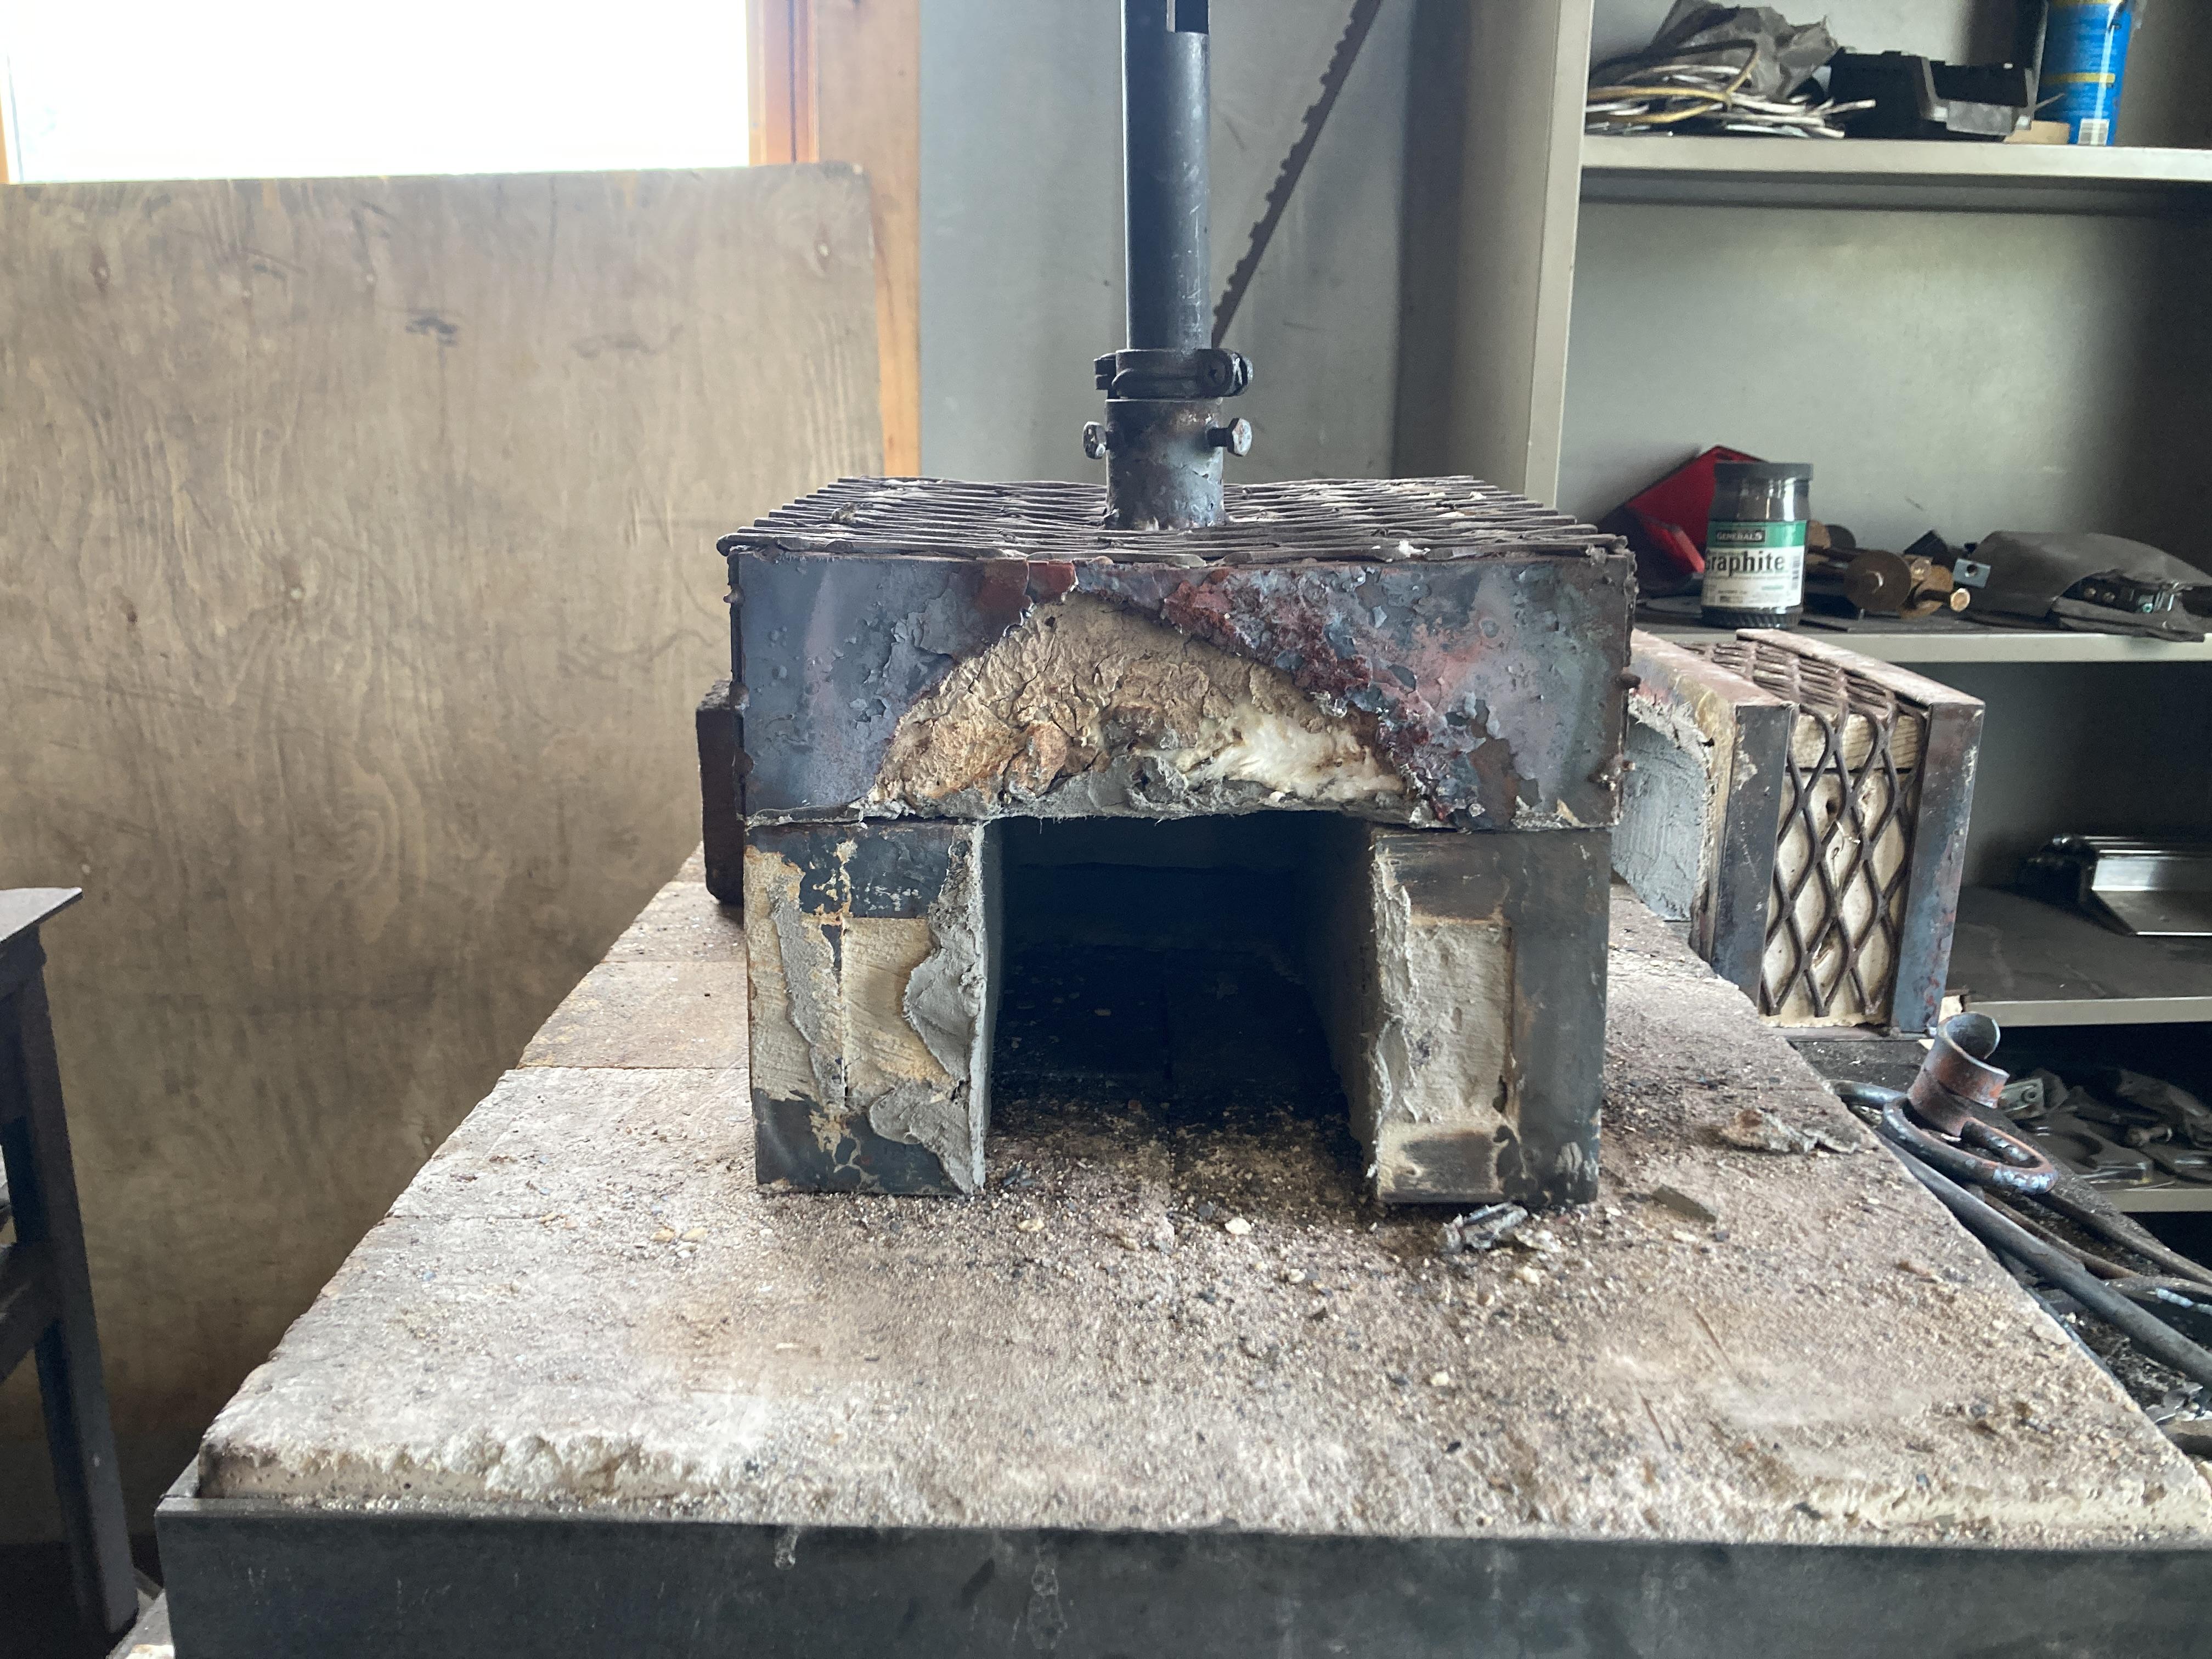
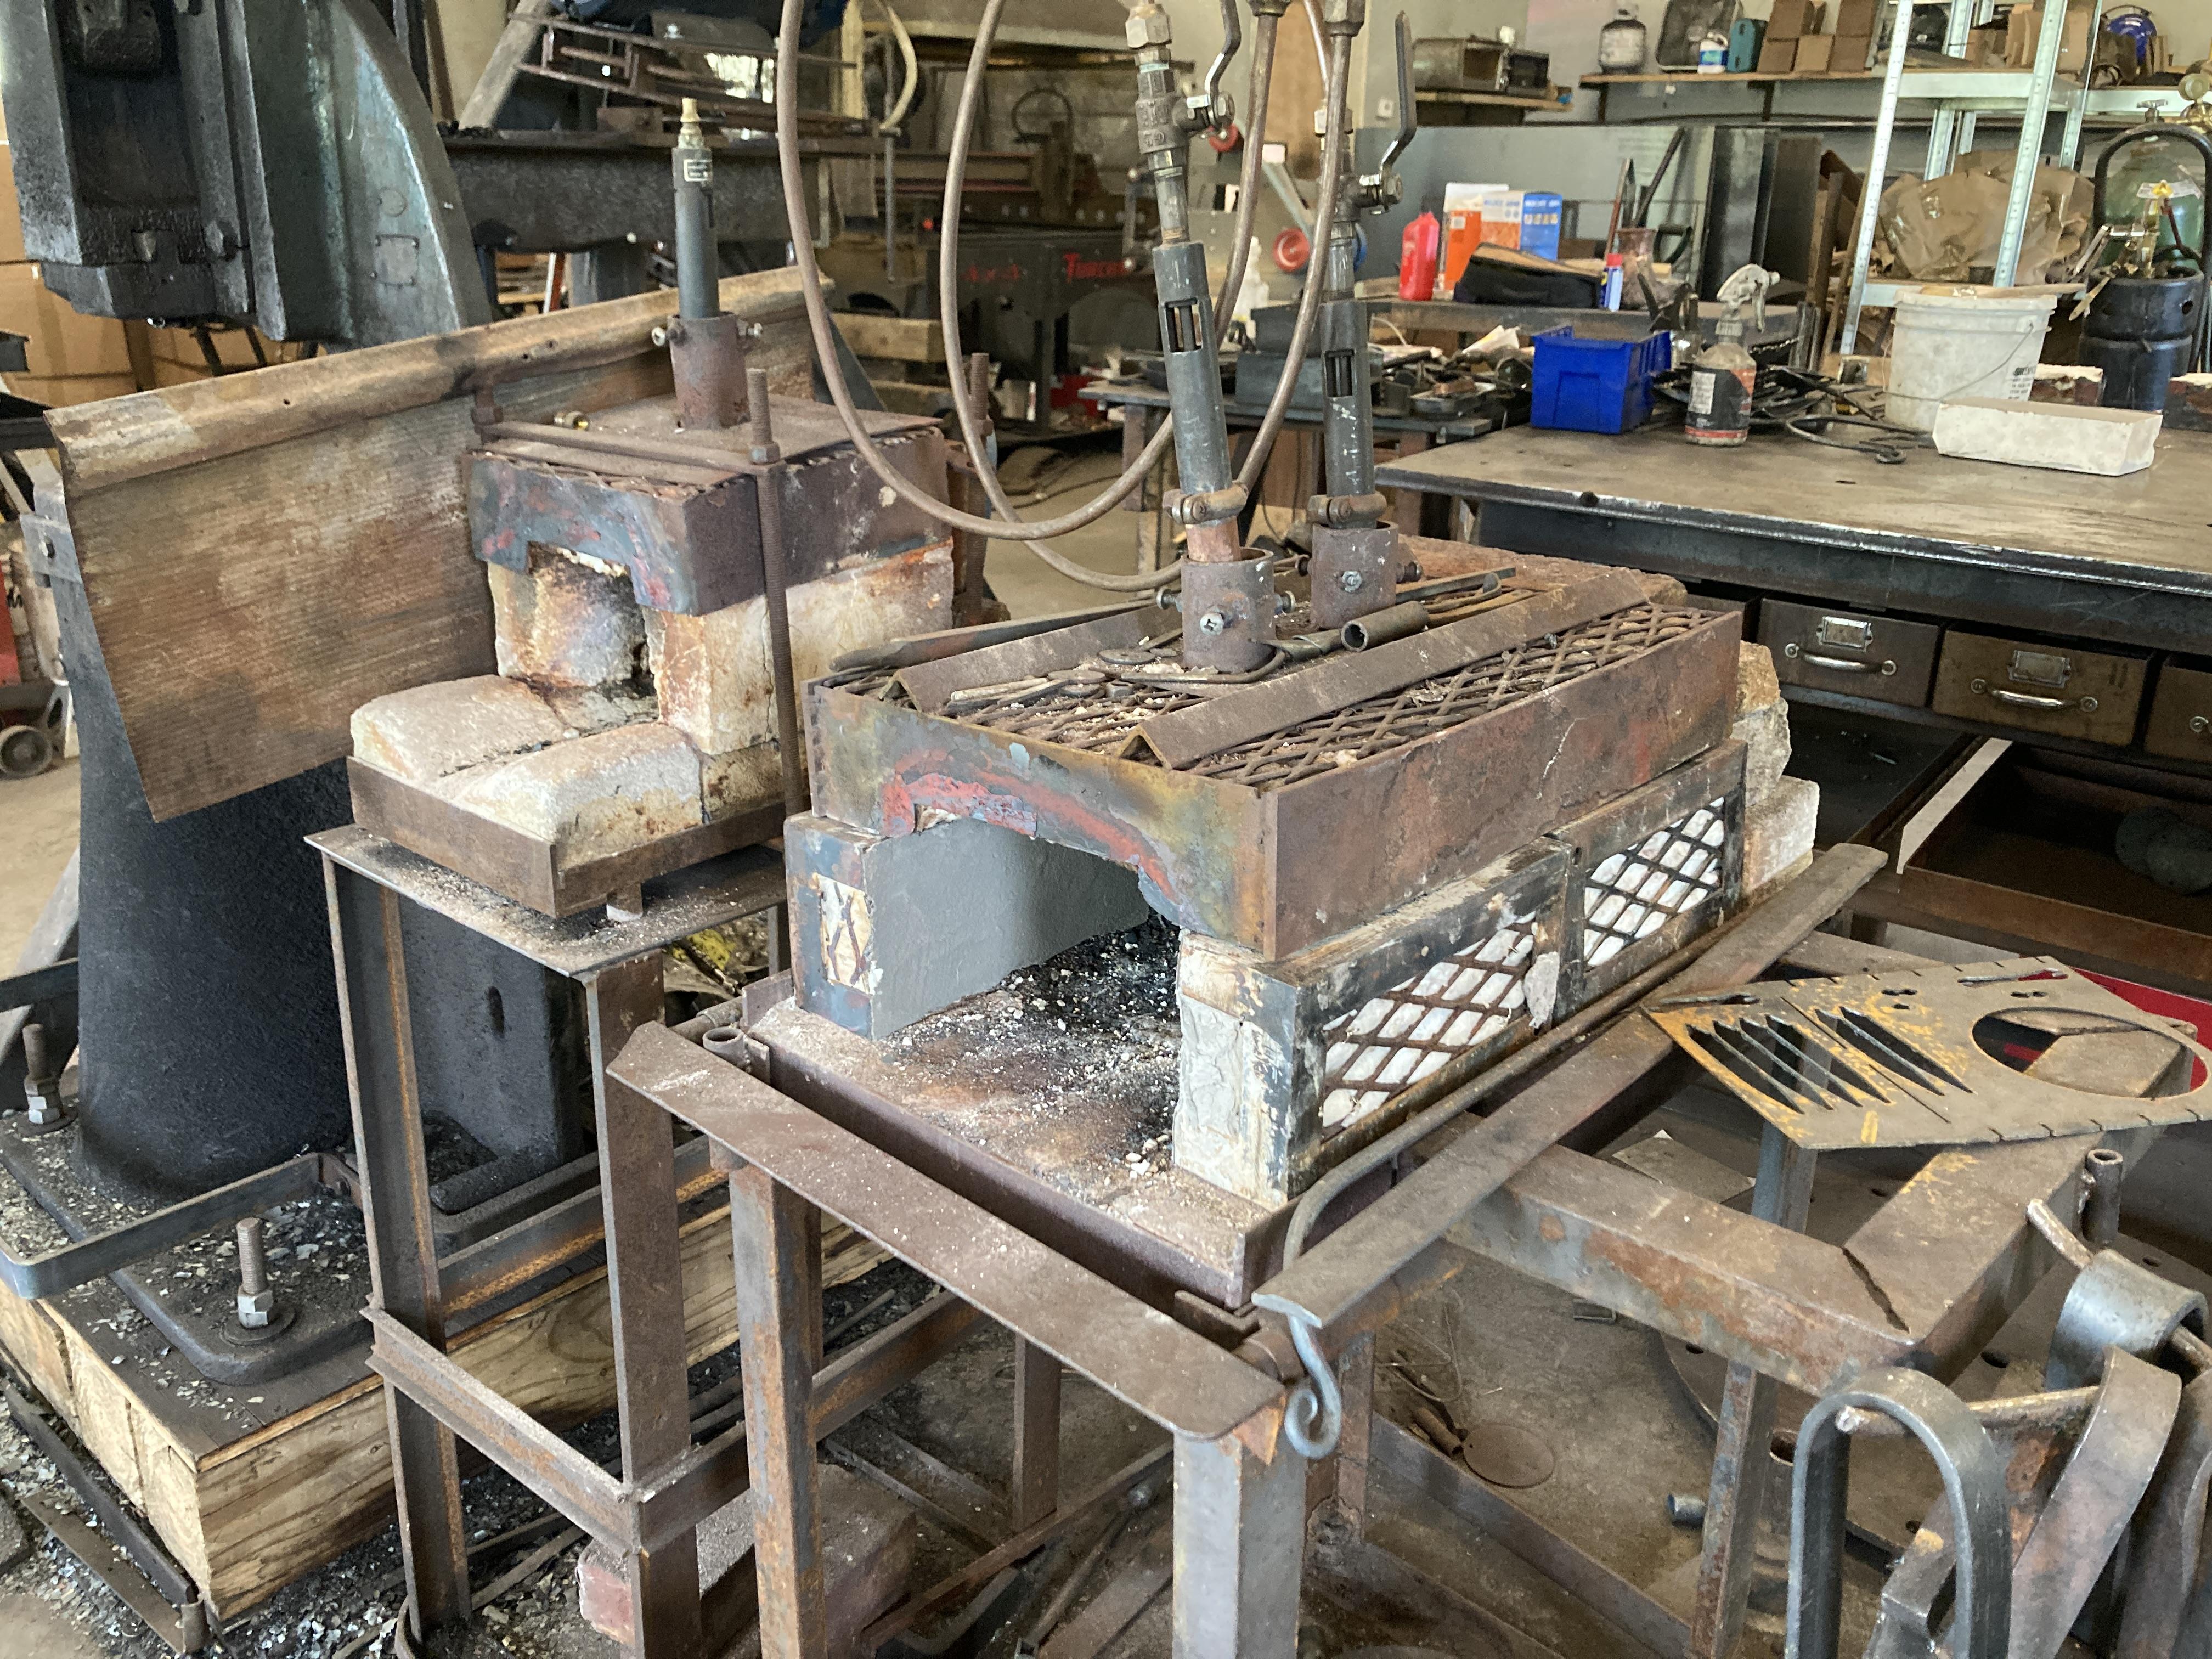
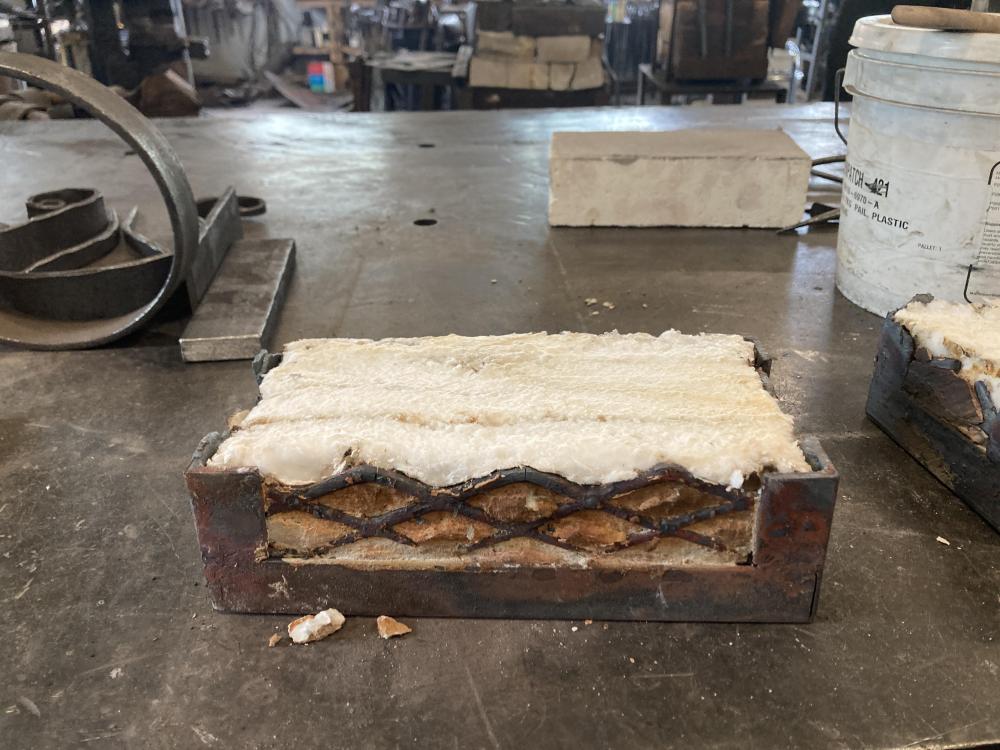
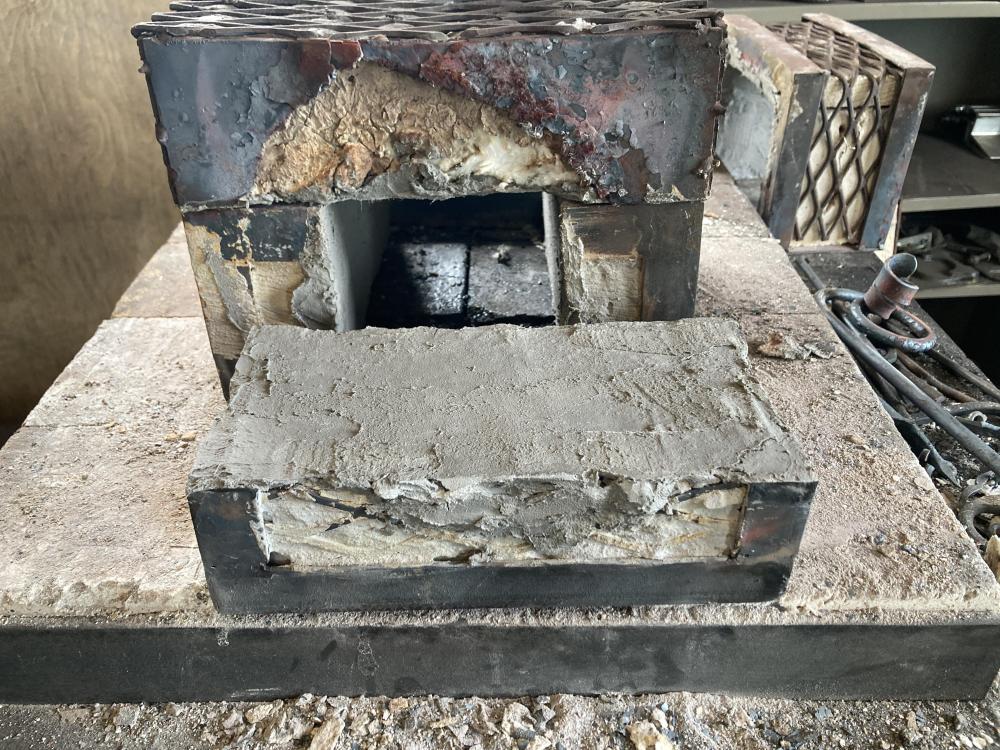
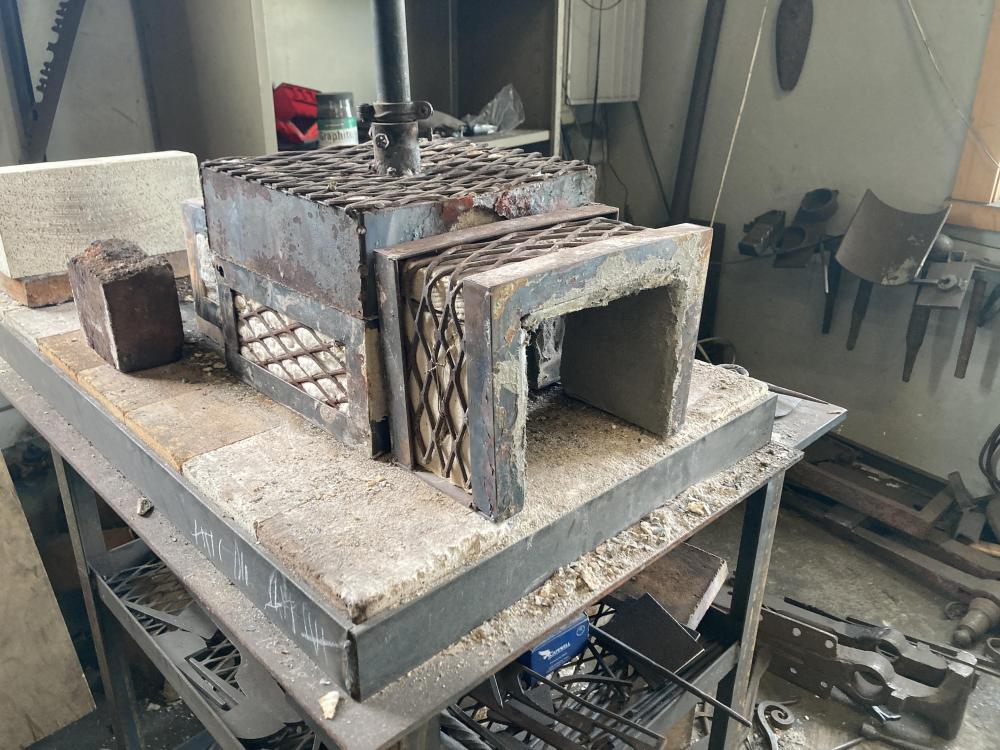
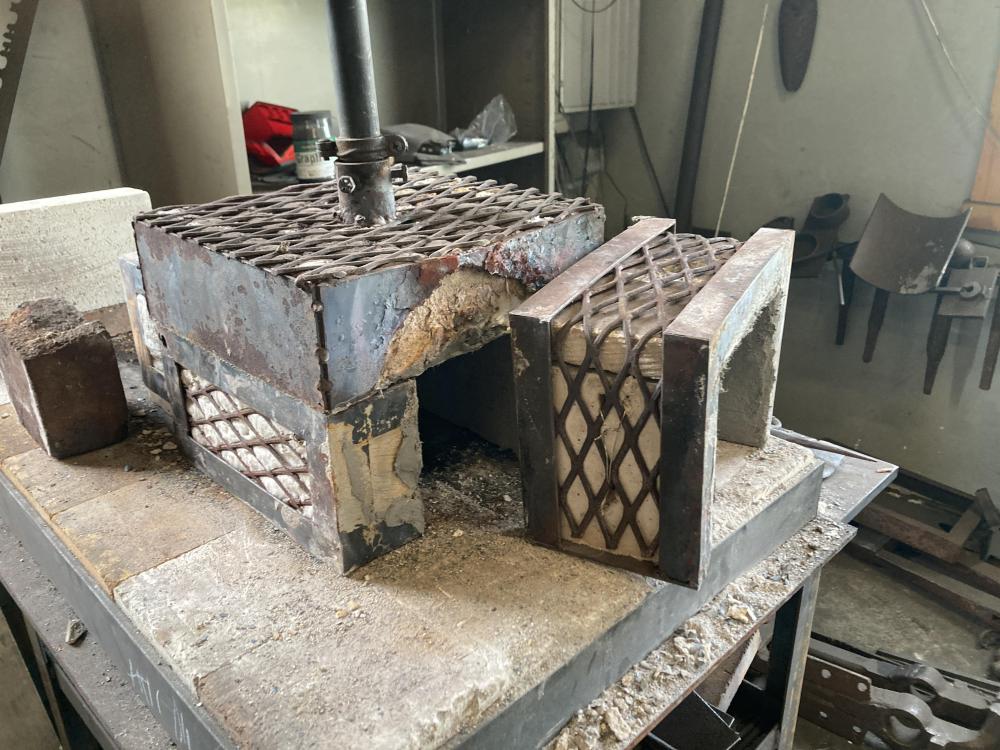
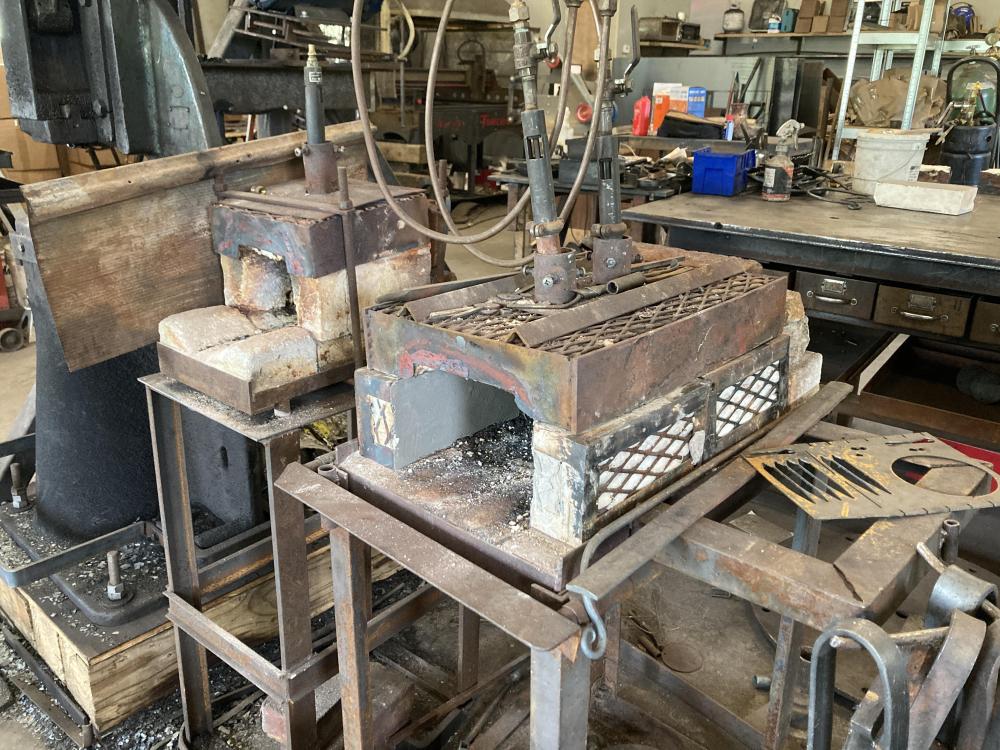
So 8 months later I thought I would offer a progress report. The kaowool bricks are great. I have a number of gas forges that receive rough treatment from my production work and beginner classes. My forges were all stacked soft bricks and as the bricks have broken ( which was often) I have replaced with the kaowool bricks. As Frosty warned, the Satanite coating did not hold up well to withstand impact and I have switched to Greenpatch 421 and it is great. I just did a recoat of the bricks with the Greenpatch. I am constantly rearranging the shapes of my forges to accommodate my projects and the K Bricks make it easy and I get the benefit of a structural brick that is very impact resistant and insulating too. i have attached some images of the Greenpatch repair. Because it is only a skim coat on the inside of the bricks, a minimal amount of Greenpatch is required and it is a quick operation. The Kaowool Arch is an easy way to extend the length of my heat and I add or subtract as needed. It is lightweight and easy to pick up and move. You can see some of the iron frame that is exposed to the heat is degrading but that is the nature of gas forges. Especially after 100s of hours of forge time. As a cost of doing business it is a bargain.

-
Do you mean make the stamps thinner so the space between the letters is smaller?
-
I have a job personalizing a number of products with words stamped into the metal. I can easily hand stamp one but would rather create some mechanical advantage for production. Another challenge is lining up the letters on the face of 3/8" round (though I expect to flatten that area to accept the letters). Using a stamp holder would help a lot but require more force to make the impression. I am wondering what size press would be required to stamp 8 letters 3/6" tall. Any other suggestions would be appreciated. Thanks in advance Steven
-
Sorry, I will try it again. On the power hammer the pulley spins around the clutch shaft and there is metal on metal spinning abrasion happening most of the time, except when the hammer clutch is engaged and the pulley and the clutch shaft spin together and the hammer strikes in a car transmission the spline and drive shaft spin together , while the car is in motion, except when the clutch is disengaged , while the gears are being shifted, so most of the time they are spinning together and it is only when the clutch is disengaged that there is metal on metal spinning abrasion I hope this is a more coherent analysis. If it is clear then my question is that it makes sense that a car spline is run dry because it is running dry for a fraction of the time the car is being used. The power hammer is running , without the clutch engaged, for much more time and that is why I would think that it is necessary to keep those surfaces oiled to fight the greater likelihood for rotational wear and tear.
-
Am I correct that the drive shaft mostly spins with engine ( when the clutch is engaged ) and it is only when the clutch is disengaged that the shaft is spinning, so most of the time it is not spinning dry On the Beaudry the drive pulley is riding on the clutch shaft all the time and only when the clutch is engaged are they spinning together......
-
Thanks Frosty, There is no oil hole on the clutch sleeve. I was considering drilling one. What is most confusing is that this is an old machine and wonder what they designed to occur. There are effective oil/grease ports everywhere else on the machine. I pulled the clutch off and see no holes ( I was expecting to find one clogged and hidden but nothing) The clutch is grabby so I hope it will smooth out as I use it. I did smear some lithium grease on the clutch sleeve before I put it back together .....