
Black Frog
-
Posts
1,623 -
Joined
-
Last visited
Content Type
Profiles
Forums
Articles
Gallery
Downloads
Events
Posts posted by Black Frog
-
-
After giving these new openers a completely thorough workout all day today, I noticed a few changes needed.
While I really like the heaviness and beefy feel of the thicker material, the length is a bit too long for nice balance. I want to keep that thickness on the end and shorten up the overall length. 4.5''-5" would be about right for nice balace and operation with this size design. I want the end ball of that opener there right at my little pinky when I'm using it.
Onto version three.... -
Holy cow is this cool! This pic gets saved into my "Cool Stuff" folder for future reference and stealing of ideas.... ;)
Very nice indeed! -
I like to open to everything...
One day it'll be classic rock, day two top 40, next best of the 70s, then classical, maybe a day of silence, then AM radio, death metal, country, blues, jazz, swing..... It's all good. :) -
If you have the passion, you will find a way.
Amen to that! -
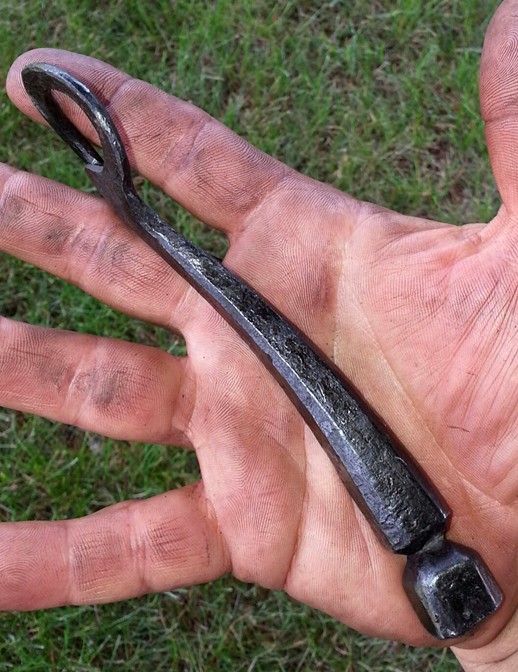
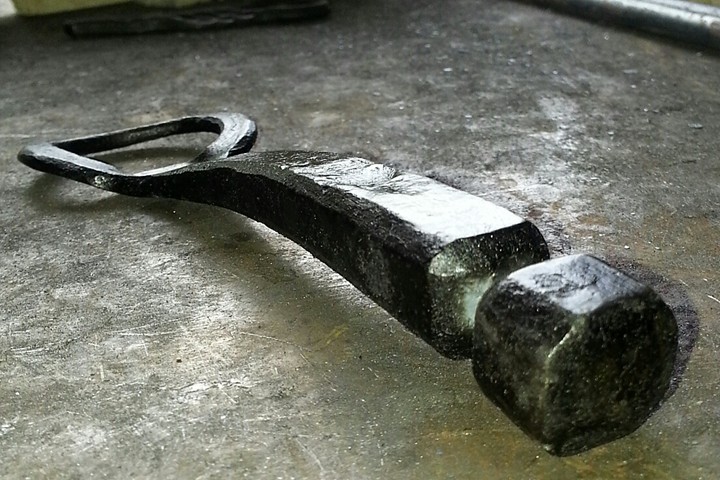
Second attempt at these bottle openers this morning. I have a bunch of 1/2" square 8" lengths of original old wrought iron from some fencing being salvaged, so I thought I'd like to try a little nicer version of the bottle opener with real wrought iron since I've never worked it before.
I upset the 8" bar down to about 5.5", and then tapered from there. I decided to give these some life by adding a gentle curve to the handle, and a functional curve to the opener itself. These are bigger, longer and heavier than the previous ones. They are a full 6+" long and the fat end is around 3/4" after upsetting. The functional curve to the opener end works great. More handle torque and a better "engagement" onto the bottle cap for opening.
I really liked the second try at these, but I put more time into them too. I don't consider these new ones the "giveaway" openers at this point, too much time and valuable material into these.
I didn't add the can opener tab to these, opening cans is beneath a fancy opener like this.... ;)

-
That is one of my requirements, that every bottle opener be quality control test functioned for proper operation.
Not one opener has ever left my place without being tested first. My rule. ;)
JIm, If I'm ever in MI I'll bring one along and come find you and we can test drive one on a few beers. ;)
Maybe I'll add a little tab on the end of the opener for cans- Frosty thanks for the idea! Might be a nice touch.
Gotta make sure enough meat is left out on the end for making that new tab, and still having it look right.
dcraven- This started as 1/2" square bar, upset the end to about 5/8", then taper down to where you're going to slit/drift the hole. I flatten out an area for where the hole goes. Drifted to about 3/4" and then forge the rim to your liking on the horn. I forge the rim to get the width and thickness about right and leaving around a 7/8"-1" hole by the time I'm done tweaking. Just don't get it too thin out on the end- no wimpy openers! After you get your rim shape and thickness to where you like it, then add the cap catch that protrudes the metal into the hole. I use a large round fullering tool.
Of course by adding a can tab to the bottle opener that will then double my quality control method for each opener.....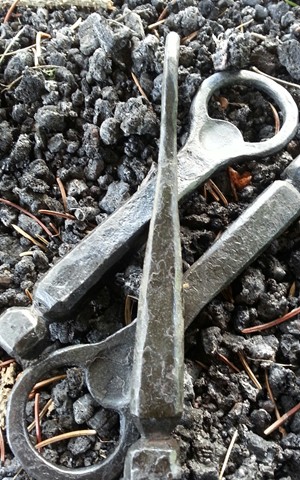
-
When I want to make a nice impression on a new salvage yard owner, or a good place to find scrap treasures, I introduce myself and mention that I really enjoy blacksmithing and ironwork. Once we get talking about things I'm looking for or what I'd like to buy is when I pull out a little forged 'something' to give them and so that they will remember me next time.
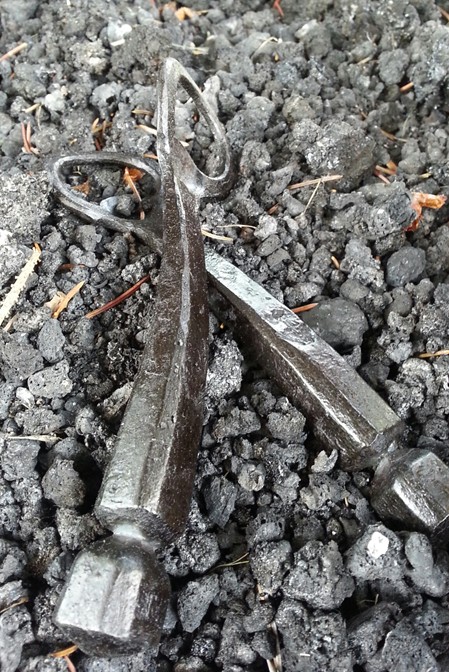
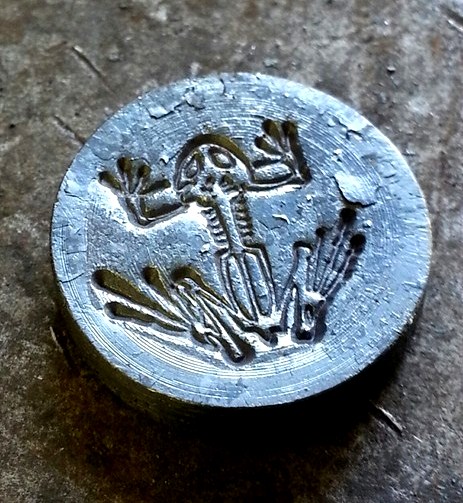
Seems this has worked like a charm for me thus far in making great contacts (and deals) so tonight I made up some giveaway PR bottle openers with my new stamp prominently on them, far from perfect and not cleanly done but plenty fine to make a great impression. They are about 5.5" long, and have a nice, heavy, beefy fell to them. Manly openers... ;)
As an experiment in learning, for some of these I started with 1/2" bar and upset the end with several heats to around 5/8" then tapered down from there. The other ones I started with 3/4" bar reduced to 5/8" and tapered down. I think I like the upsetting method better than moving all the metal from the 3/4" bar. Always learning as I go...

-
For my gas forging, I was aware of the IR radiation, so I found these and like them:
http://www.safetyglassesusa.com/s25arcs.html
They say they block 75% of the IR, and have minimal tint to them.
Been happy with them so far, on my last order I went ahead and bought three sets.
-
Thanks- he was quite surprised and loves it. Now the big debate for him is where to hang it. ..
Is the frame steel as well?
Frame is made from an old wrought iron wagon wheel, I flattenend a chunk and cut it down to 1" wide and left the original outside radius for the edge. -
Wow, what a cool rig!
I'd love to see this thing in action.
-
Wondering how many here have trademarked their name and/or logo for their work?
-
Wonder how much that is going for....
-
Do you sand or blast scale before priming/painting?
With all the fiddling I had to do with the scrolls to get them uniform, there were many many heats and adjustments from the forge so I know there is some stubborn scale on there.
I didn't want to get too aggressive with a brush on the delicate end of the scroll when it was hot for fear of deforming it.
-
I'm assuming he means the faces were not ground and polished, and not heat treated hardened.
To me that means that I would avoid cold work on the anvil, and use good heats for forging. -
Postman's AIA on page 225 lists Rockwood anvils under various makes of cast steel anvils. He said they weigh about 65 pounds, and the face does not appear to be finished or heat treated. The pic in the book looks to be the same as yours.
-
Thanks! Yours is very nice as well, very graceful!
Now that I see mine in steel I realize most I've seen are quite nice and professional looking while mine looks very 'raw'.... kind of apropos for me I guess. -
according to the serial numbers you provided your anvil was made in 1893
My AIA book on page 303 says his anvil was made in 1902. (The serial number is either 77081 or 77681...)
-
I finally had mine done for real.
-
Looks ugly in the picture?!? I think it looks fantastic!
Auctions are always iffy on what people will pay- how much did it run you?
I don't have my AIA book in front of me, but guessing age at early 1900's, like before 1910.
I'm sure someone will chime in here with more accurate info.
-
Somewhere, I dream that there are pallets of NOS Fisher anvils sitting in a warehouse somewhere.
I'm sure there are- probably in one of these crates.... ;)

-
Ok, here's another question- I'm planning on doing a black finish on this. It will be used outdoors in a sheltered area (large porch) during the summer, and then inside during the winter. I have a weed burner to heat up areas on the table to apply a finish. Haven't decided on exactly what to use yet for the finish, but do I need to bead blast this first? Or can something like an black oil finish be applied as is? I've been reading lots of topics on different finishing methods, but I'm wondering if this should be bare steel before the application. There's some tough scale on some of the scrolls. Or I was thinking of brushing it down with vinegar every few hours and trying to wire-brush it?
-
I wasn't thinking of adding more between the legs for structural purposes, but rather for asthetic enhancements. It is now plenty strong and sturdy for most any pot.
But I'm wondering if the corners where the legs meet top need a bit of something.... purely for visual purposes. -
Feet were decided to be some round pads, I'll clean them up when the table is complete.
I added the internal support arches that criss-cross in the middle.
Things are coming out nicely symmetrical for the most part, I'm happy with what I've got.
I'm still undecided if something should be added between the legs on the outer circumference. My last idea of the larger diameter segmented ring was disliked and vetoed immediately by the "customer". ;)
I'll show it to her now and let her decided if she wants more on there, or likes it as it is now.
Then it'll be cleaning it up and putting on the black finish.


-
And here's the next idea.
I think the table needs something else around the top circumference between the legs.
I tried the arch idea and didn't like it. I think adding more scrolls in there would be a bit overkill.
I was thinking about JIm's idea about a hoop on the bottom of the legs also, but (sorry Jim) the woman involved doesn't want a circle on the floor. She likes the delicate look of the legs. But I think the legs need a bit more reinforcement in case some beefy pots are put on there.
What about another slightly larger diameter segmented ring just under the main table? This ring would be the diameter to match the outward radius of the leg, it would probably sit 1" lower than the table and run from leg-to-leg leaving the nice scrollwork inside the leg highlighted. Then adding the opposing arches underneath for leg stability. I could pierce the intersecting arches.


Anvilrama part 1 (viewer discretion advised)
in Anvils, Swage Blocks, and Mandrels
Posted
Wow, tool socialism!
I have nothing against the guy collecting all those. I'd love to visit his collection in person.
Good for him if that is his passion and he has the means for getting them.
All those anvils are not going to melt, and they might someday be back in circulation down the road.
No, he doesn't need all those anvils, but we don't need to have many, many items either.
People don't need a Cadiallac Escalade when a car a fraction of the price would do the same thing just fine.
People don't need a 5000 sq foot house for two people. People collect all sorts of things guitars, cars, drums, firearms, antique fishing gear, whatever.....
Some people collect a great amount, and others marvel at the collection.
When we starting drawing lines on what others "don't need", that is a path I do not like going down.
......I'm always on the lookout for anvils, hopefully finding a good deal.
Do I need another one? Nope, not at all. But that hasn't stopped my anvil addiction. ;)