

ede
-
Posts
254 -
Joined
-
Last visited
Content Type
Profiles
Forums
Articles
Gallery
Downloads
Events
Posts posted by ede
-
-
Not married, but I take off ring/s if I'm working with my hands in general, especially because my hands swell easily. I had a bee sting earlier this year that would of did me in if I had a ring on. My hand swelled to about twice the size!
Note: As long as there's no blood, many jewelry stores will do this as a complimentary service. Just bring it back to them (the gold, silver, or platinum ones) to be re-sized.
What follows is not medical advice or instructions, just my experience as a jeweler:
To remove rings there are several methods and most of them rely on other people doing one of these procedures:
First off, if one has a compression band from a dust mask, they can try wrapping it around their finger to compress the swollen digit. If that doesn't work there are ring cutters that will slip under ones ring. This style generally only cut gold, silver, and platinum and it's a grip and turn procedure. The gripping applies pressure to the blade and the turning rotates the blade. Remember, this just cuts the ring off, it still needs to be expanded to come off the offending finger.
If one ever needs to remove tungsten rings, they need to be removed by gently cracking around the circumference. There's a specialty cracker for these as well, but a pair of gently gripping vice grips will work in a pinch.
For titanium, that's a different animal and I've heard that bolt cutters will work.
After successfully cutting the ring, the procedure to expand the ring is as follows: basically take 2 pairs of jewelers chain nose pliers (or thin, bent-nose snap ring pliers) and slip the jaws on either side of the opening with the palm up, fingers extending, and resting on a table being careful not to impale the finger. If the ring or band is really thick, then sometimes flat nose along with chain nose can give better leverage. Very carefully grab the ring securely with the pliers and pull away from the cut, like opening a book.
Note: The post and the information contained therein is made available by the author for educational purposes only and is not intended to provide medical advice and should not be treated as such.
-
On 10/27/2016 at 5:33 AM, jcornell said:
I use a fumed silica solution (water and fumed silica) for rigidizer. I'll combine this rigidizer with zircopax and kaolin (range of 3:1 or 4:1 ratio of zircopax to kaolin) to make a very economical reflective coating.
There was a guy on a potters web-site that was using just rigidizer and zircopax sans the kaolin and said he used it instead of ITC-100 with great results. Have you tried this without the kaolin?
-
There is a company called West Marine that sells colloidal silica as thickener for epoxy. The ingredient name on their MSDS is fumed amorphous silica:
http://www.westsystem.com/ss/assets/MSDS/MSDS406.pdf
I wonder if this could be used mixed with water to produce a viable rigidizer?
-
Thanks for that, 51 Papy, I will have to try that technique!
-
I once attempted to use a large tree base from a downed Pecan tree in the area for an anvil stump and handles. Pecan is pretty prolific in these parts. Even with Anchorseal on the ends, it still checked badly. Perhaps it wasn't applied in near enough time.
-
1 hour ago, Frosty said:
That'll work fine. What do you have for a hard inner liner? Even rigidized and with a good kiln wash ceramic blanket will suffer mechanical damage so having something hard for the inner liner is a good idea.
Frosty The Lucky.
Frosty,
After lining with the non-pizza oven blanket, I used rigidizer mixed with some food dye and a drop of dish soap to break the surface tension in a spray bottle. Then, I used 30% kaolin and 70% zircopax per what I read here on the forums from several members into a latex paint type consistency. I've noticed that there is some cracking after the coating has been applied, dried and fired. Another member pkrankow recommended a grog that might help with this. One of the guys at the supply house I spoke with suggested aluminum hydrate as a common ingredient as a kiln wash. Has anyone else tried Al(OH)3 in a blacksmithing forge application?
Since this is a new forge, I am going to pick up some kiln shelf. I have some Mizzou as well, and would like to try it again some time but next time just for the floor instead of the entire inner circumference.
1 hour ago, Glenn said:You did read the part about for installation under any refractory or brick oven.
Did that match the label on YOUR blanket or was it just a guess as to what you have?
Hi Glen,
It's just a guess that this is a similar spec'd material as the blanket I received came in a trash bag with no info. The rest is hearsay.
-
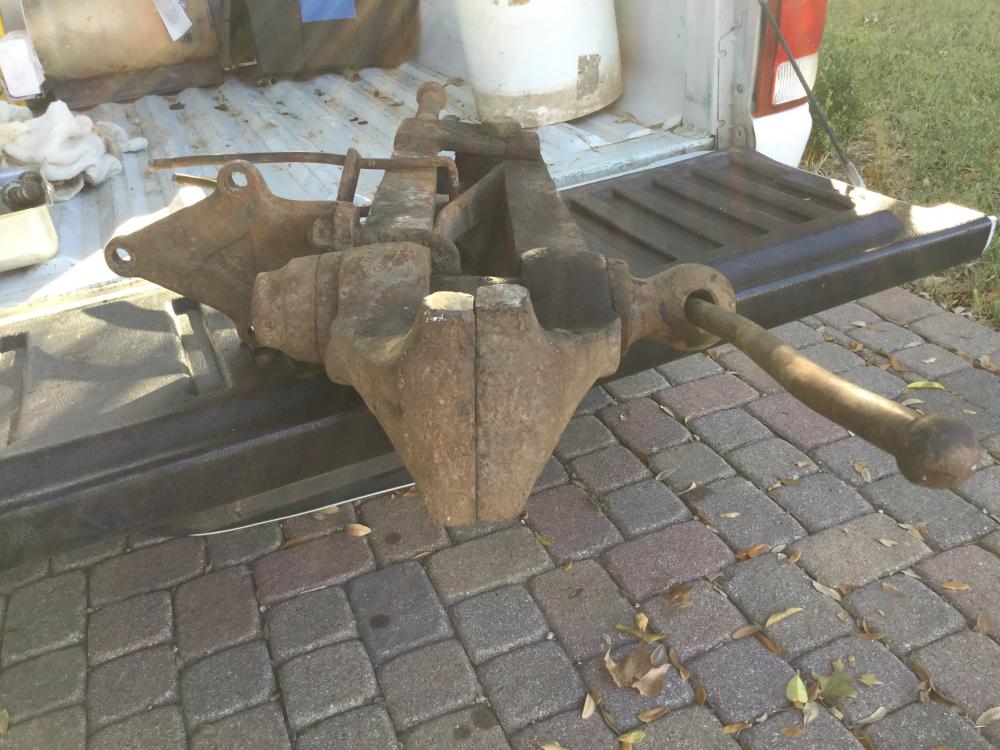
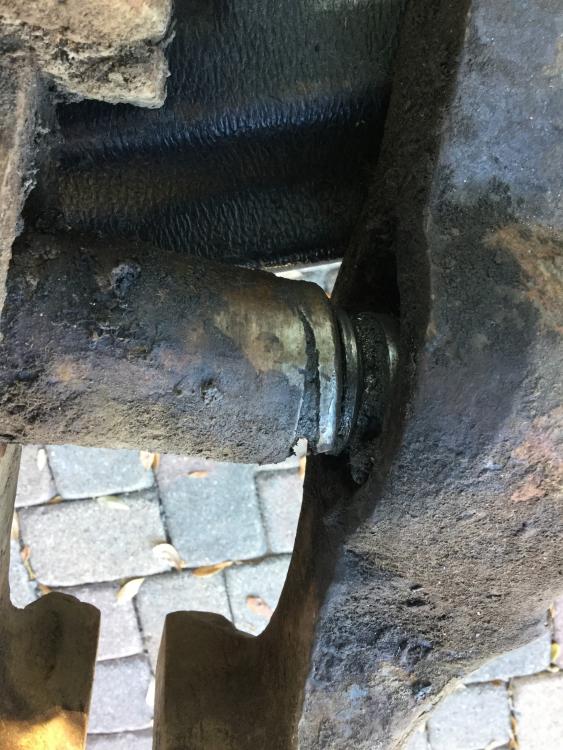
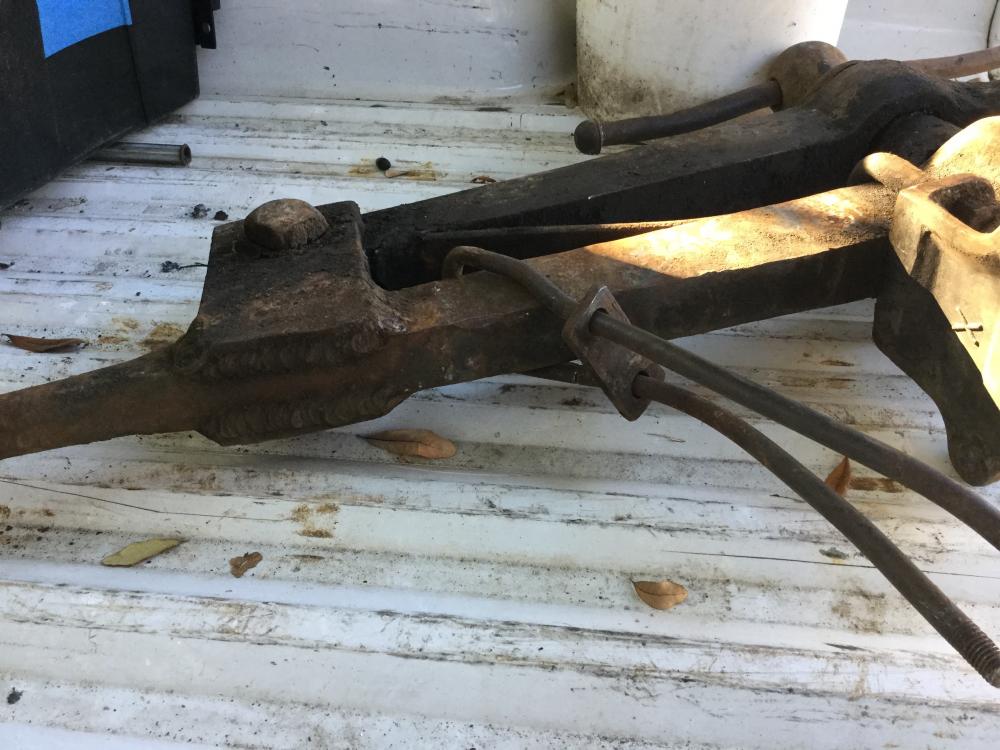
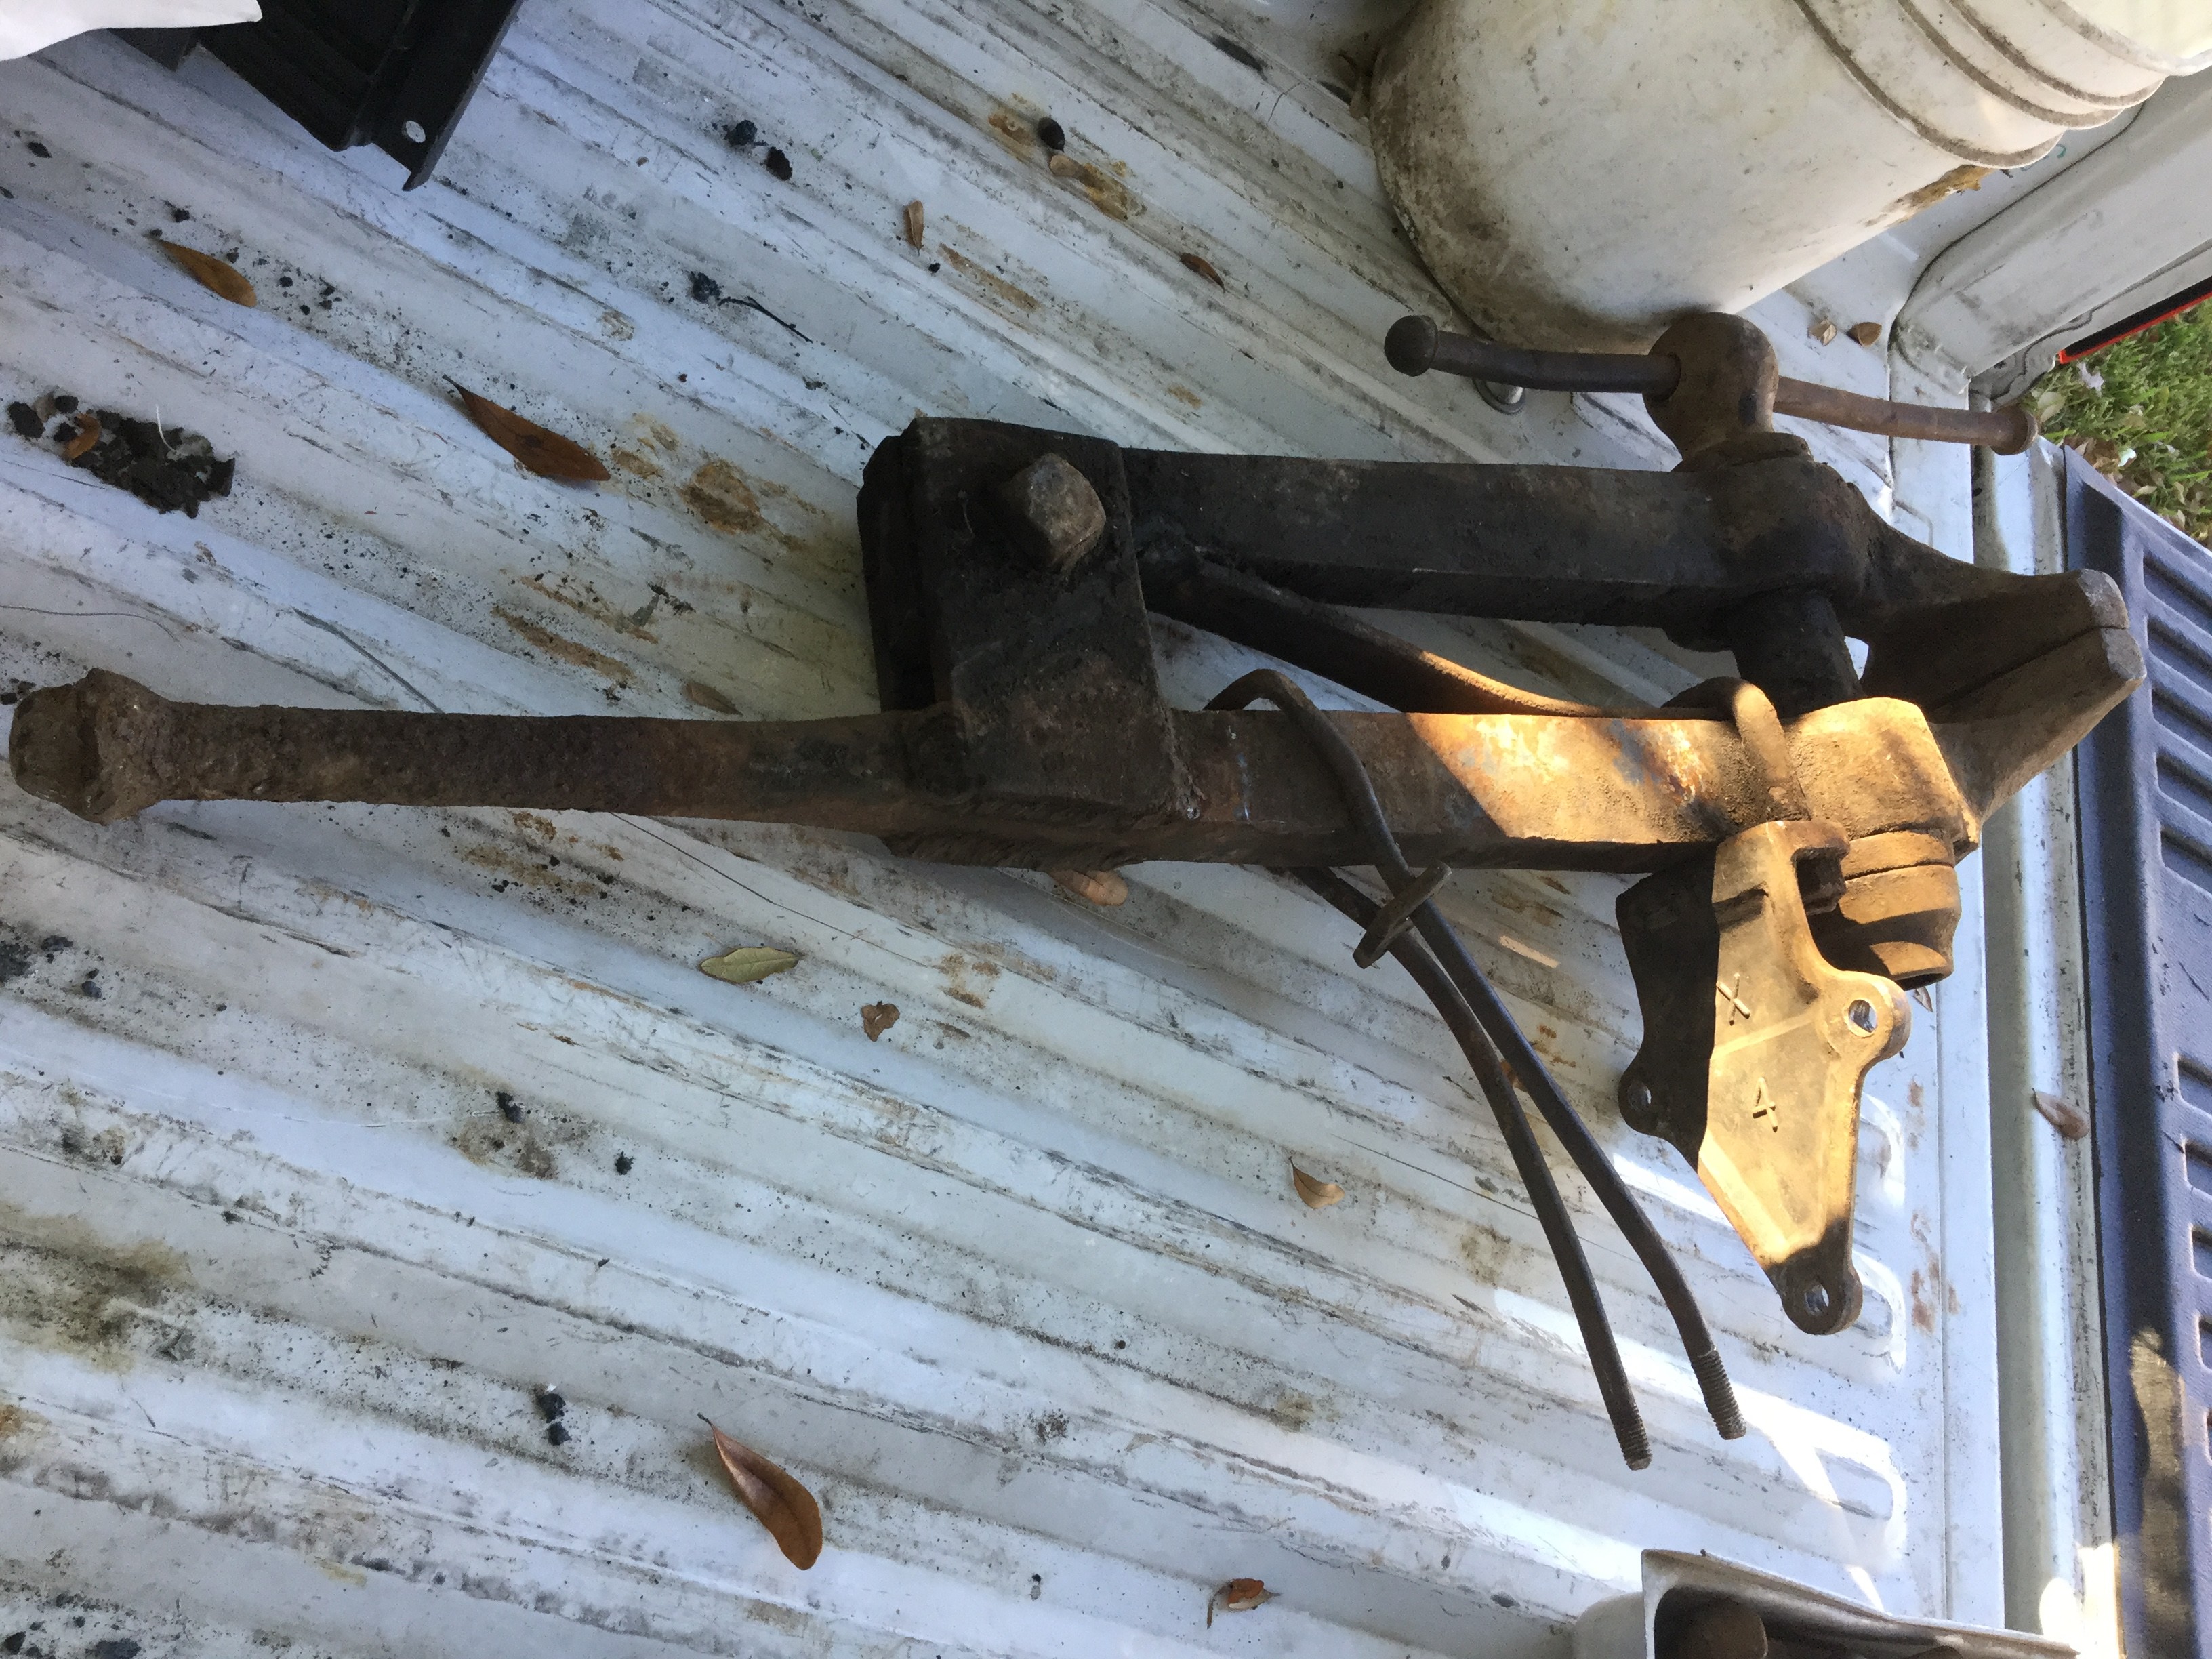
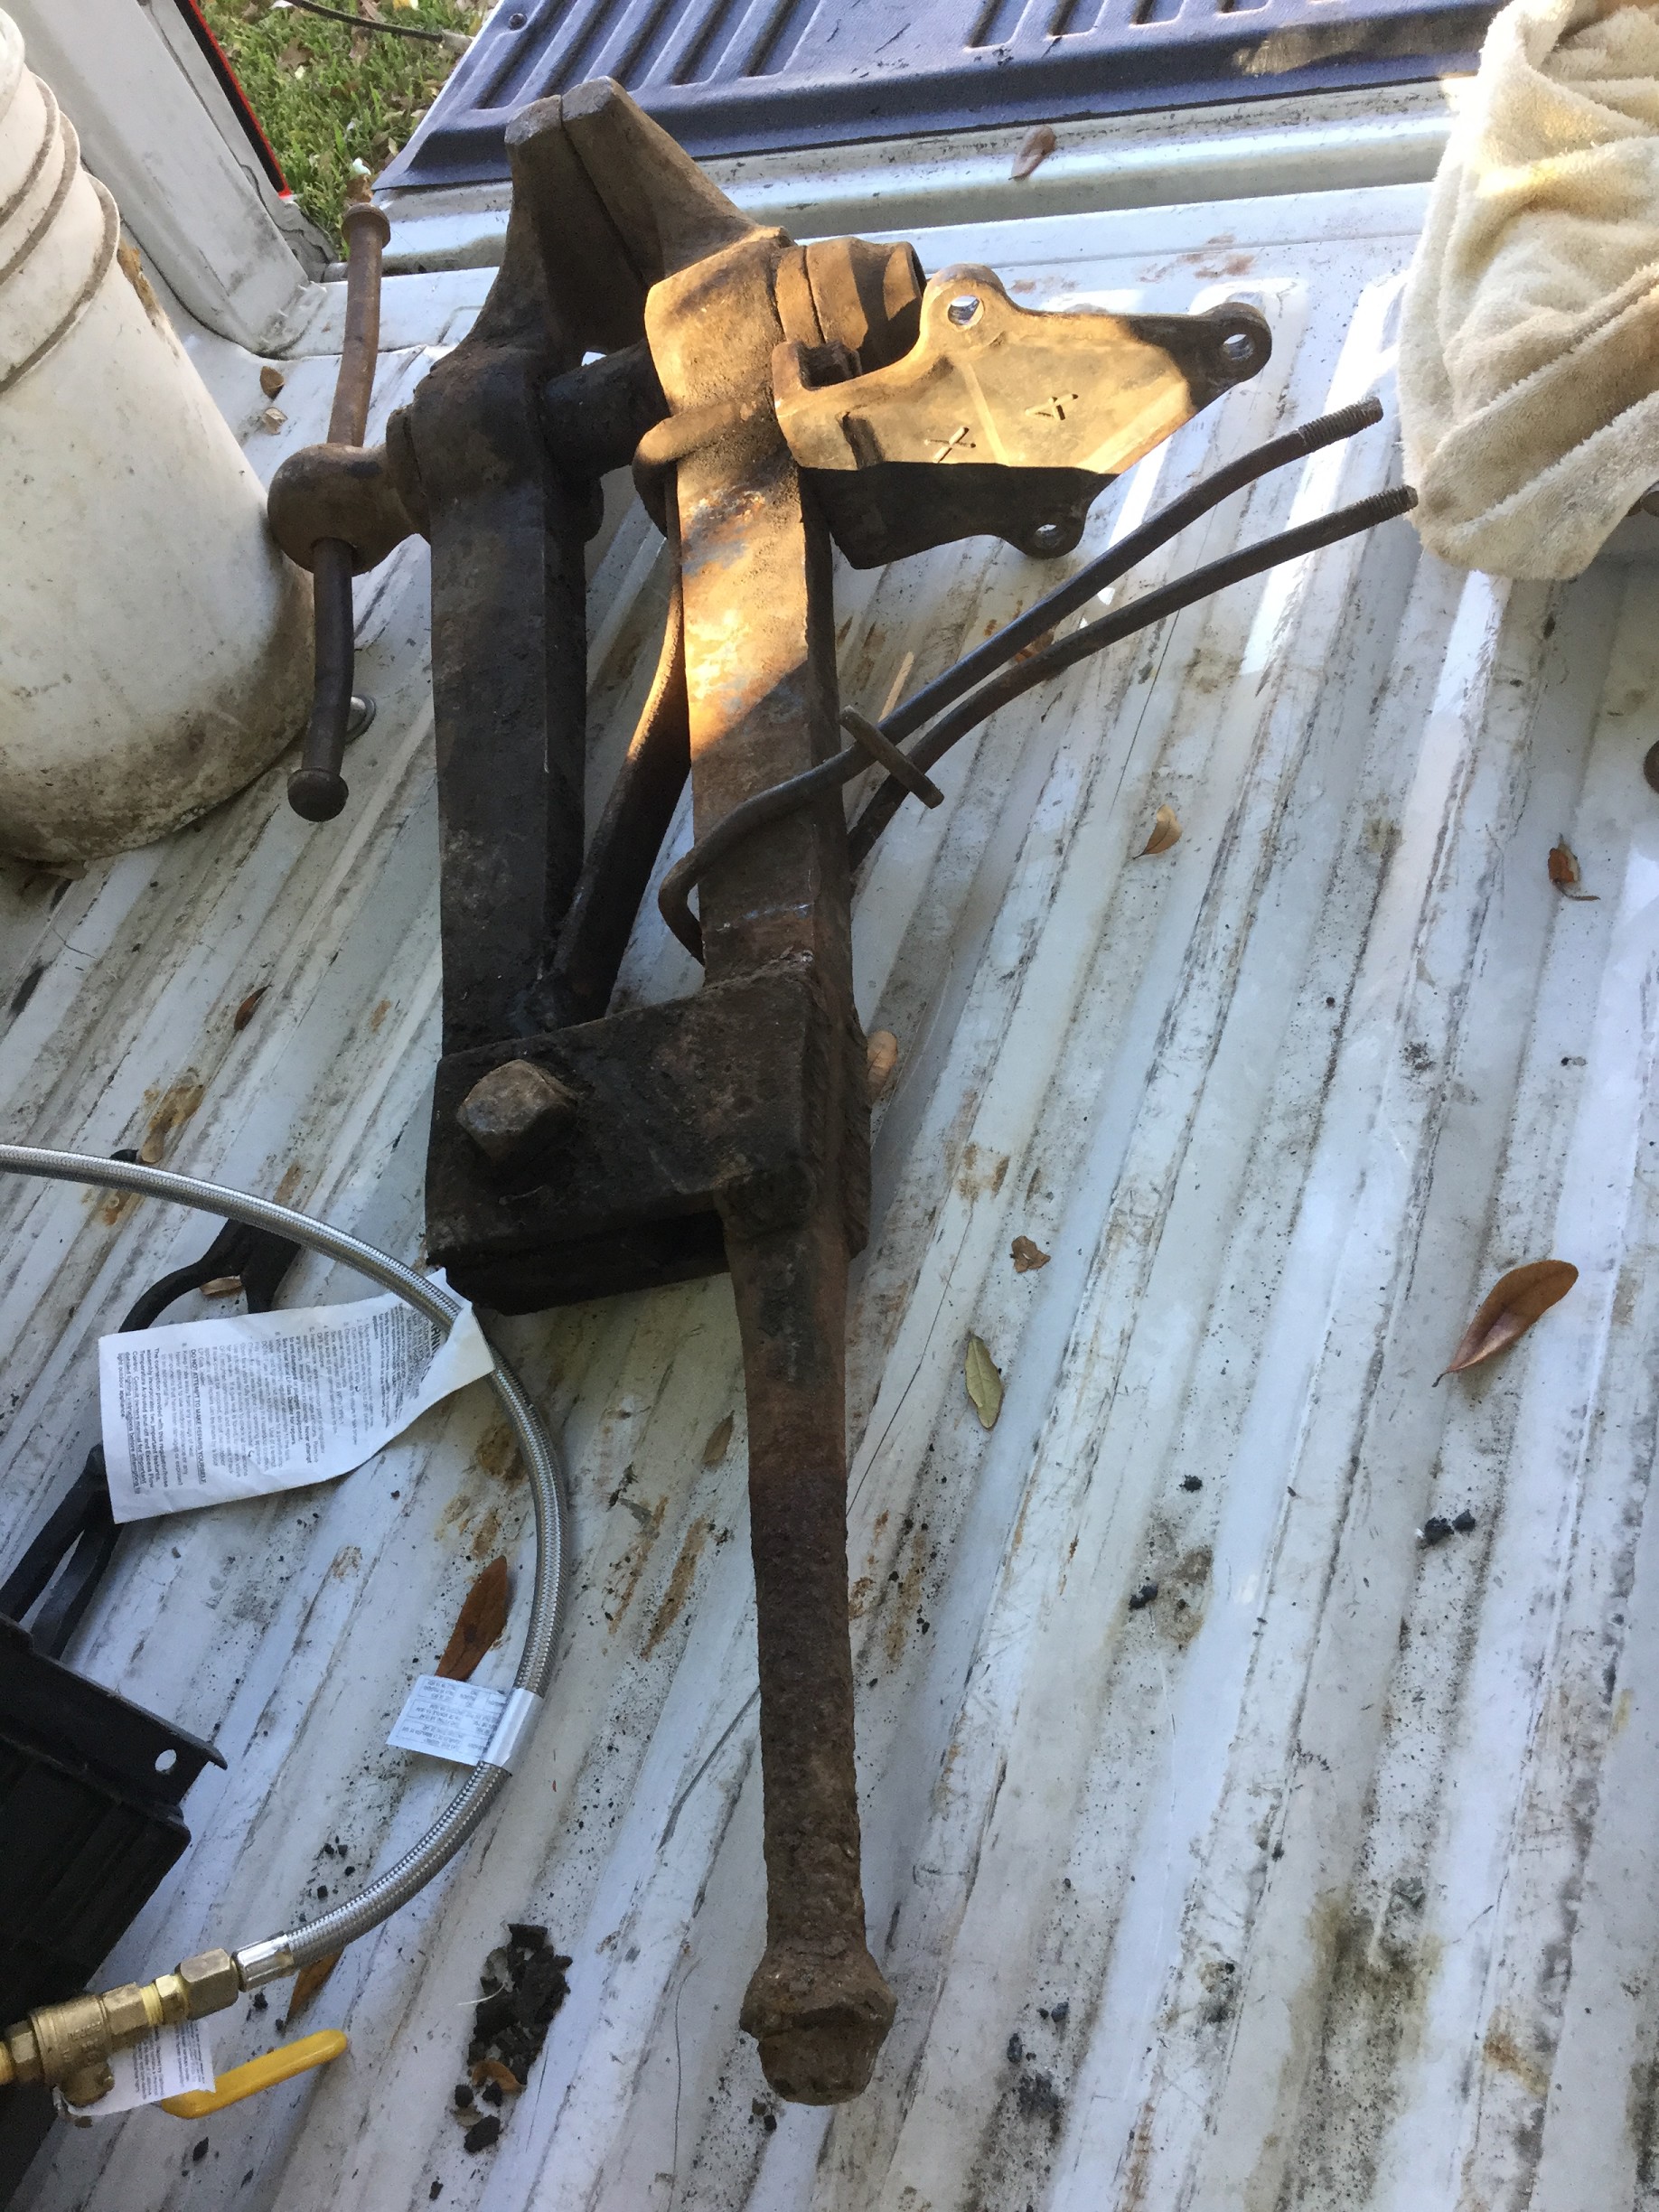
I recently acquired a post vise. It's obviously a Columbian and almost 7" at the jaw. Over all it appears to be in good shape including the acme threads. I did notice that the pivot bracket had been stick welded at one time to the back of the post, but the spring action is good on it. Also, the beginning of the screw box has a small tear at the beginning. The tear doesn't appear to go very far and I'm thinking it won't affect the operation. Would it be worthwhile repairing this?
Underneath the mounting bracket it is stamped X 4--which if I recall, Columbian like to use roman numerals so this may be a model 14?
What follows is my measurements, an old advertisement with their measurements, and some photos of my new baby:
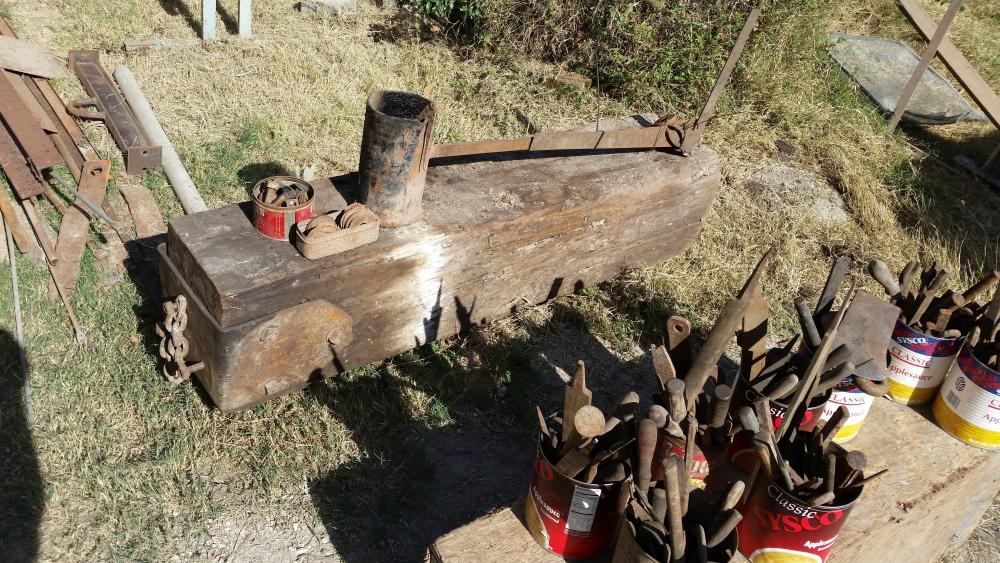
Weight: 134#width of jaws 6 3/4"opens ~7"The weight is short 17 pounds from 150 in the advertisement as well as ~1/4 on the jaws. Their is a slight misalignment at the jaws but they close up nice and tight.The vice itself was attached to a folded steel plate which had been lagged over a 13"x13" creosote railroad tie which was purportedly buried 4' deep in the ground--see picture below. Also, it was fastened with a u-bolt that went through the railroad tie. I heard from the guy that had to dig it out, that it took several hours to do so! I wish I could of snagged that as well, but until I have my shop setup, space is at a premium.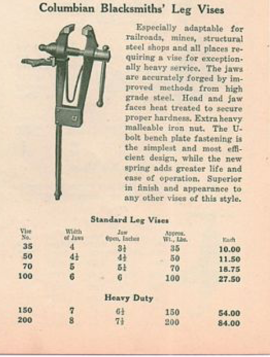


-
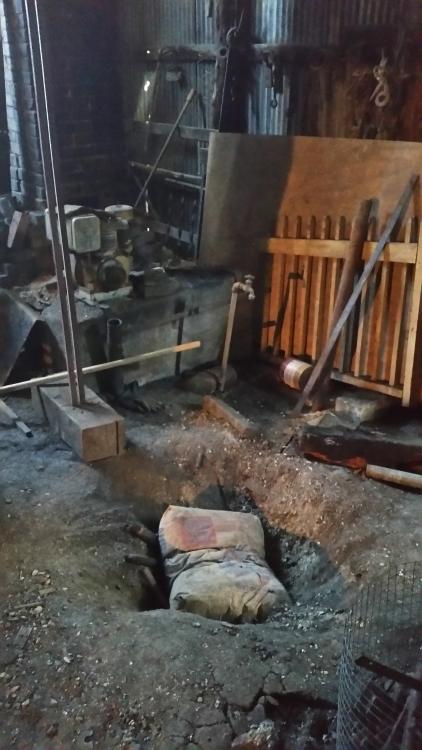
I was given a large trash bag full of unused fire blanket by another blacksmith. He got it from a guy who was doing a pizza oven install awhile back and doesn't have any specs on it. While I have some 8# 1" 2600 degree rated fire blanket, I was wondering if it's worthwhile using this oven blanket as an outer layer in my forges and the 2600 on the interior? A quick google search for pizza oven blanket turned up this product which is rated to 2300 degrees:
Forno Bravo refractory ceramic fiber insulation blanket is used in all our pizza oven kits and fully assembled home / commercial pizza ovens. Also suitable for furnaces and stoves. Woven ceramic insulating blanket comes in 50 sq. ft. roll, 2’W x 25’L x 1″ thick. Easily cut and shaped for creative pizza oven designs. High efficiency insulating blanket for installation under any refractory or brick oven. Heat resistant to 2300ºF (1280ºC), easy to use, and more efficient than vermiculite by a factor of 2 to 1. Fast and simple installation saves time, space and money.
Thanks!
-
For those interested, you can still buy Mikey's book at Pieh tools:
http://www.piehtoolco.com/contents/en-us/p8969.html
I'm going to pick up my copy next week!
-
Ash is the expended remnants of trees or charcoal. How are you going to make charcoal from from used up biomass?
Yes, ash and vermiculite allow for a slow cool, that's why they are used for annealing.
-
I think that C-1 and Michael advised you well. You don't want to make a blade out some steel you have no idea what the alloy composition is, try to heat treat it with what you conjecture the metal to be, and then end up selling it. The results could be catastrophic to yourself, and or to the public:
-
In my opinion, becoming a member of an Abana affiliate will give you the best exposure to blacksmithing for the money. At least the local one by me, Balcones Forge, is an active affiliate. The people in these organizations are generally salt of the earth type. It will provide a place for networking, just get out there and introduce yourself, watch some demos, talk with people, make use of their library, and doors will eventually open up. You'll hear about workshops and people might even invite you to try out forging at their smithy.
https://www.abana.org/affiliates/affiliate_map.shtml
Hope this helps.
-
Hey Mikey!
It's really exciting to see your vortex burner development. I still have to complete the micro burner plans that you supplied before I attempt the Vortex version. I ordered the firepower torch over the summer but got detoured. The new burner design sounds really cool, and with that stainless funnel and axial fan, like it would be something out of a mad scientist movie. Thanks for taking the time to share.
It's invaluable to have people like you, among the many others, who frequently contribute to the gas forges section. I'm learned so much from everyone here from reading these forums. Even those that do stuff the 'wrong', less efficient, or unsafe way as they will promptly be notified.
Any idea on when you will have your next book out? I saw that the last 2004 publishing is out of print--at least on amazon. Good luck with the writing as I eagerly await the next publishing.
Oh, and I saw this cool video over the summer:
How To Make a Small Propane Foundry and Forge Burner
-
Sorry for the late update. Yes, the problem was corrected when I returned it to the U haul company as I bought the cylinder new hoping to get more propane on refills instead of exchanges.
My previous protocol has been to test hose connections and mechanical connections with a commercial leak detector. Going forward, I will be also testing the neck/stem weld.
Here's food for thought: most jewelers use propane cylinders inside there houses/business and generally don't port it in from a stored cylinder outside. Talk about risky business...
Speaking of exchanging tanks vs. refilling them, a friend told me that the exchange places generally don't check to see if a bottle is out of date or not. Has this been anyone else's experience?
-
You be careful, as I was once publicly reprimanded on this very sight by PETA.
Yes, I mean People for the Ethical Treatment of Anvils.
Watch out for the hooligans that will say you are destroying a usable tool, even if it's yours! You know, it's akin to burning books.
-
Are you close to Sugar Grove? http://illinoisblacksmith.org/?page_id=15
-
-
So I bought a propane cylinder from Uhaul about 4 years ago made by Worthington. I noticed it was smelling like sewer gas and discovered a hole in the tank along the weld next to the stem.This is just a word of caution to all the metalsmiths, ie. mostly jewelers, that would have a propane tank inside. So much for hydrostatic testing.Check out the video here:
-
If you go to the second link from the bottom where it says "farrier forge", you can see a video of one in operation.
-
10 hours ago, natenaaron said:
Whoa. Lots to digest here. I appreciate it but it will take a bit for me to understand what you wrote.
Funniest comment on iforge that I've read in a long time! Just sit back and enjoy the show.
-
That's priceless information, Latticino. Thank-you very much the links.
-
Apologies to BHein for hijacking this thread. Can anyone expound on the nuances of Mizzou 3000 vs Kastolite 3000? I've heard that Mizzou is more durable and that Kastolite is more insulating. Also, according to Wayne's website on the ribbon burner pdf, Mizzou can be used for this type of burner. Would Mizzou be a more universal type of castable refractory between naturally aspirated forge interiors and that of ribbon burners?
-
Greetings ,
Just my humble input but not that big of s problem.. Just get a die grinder with long stones .. Rough it out than finish with die long rectangular stones by hand ., All easy to acquire... Looks to be about 4 hours work,,
Forge in and make beautiful things
JimThe die grinder sound reasonable, Jim. I think I will try that. Thanks for the feedback.
-
Whats wrong with a round hole? I mean besides the fact tools may want to spin in it. I'd forge up your tools and then simply tack on an indexing tab that reaches over the edge of the face by the horn so it will not spin. Only real down side is that tools for use in that anvil would have to be single direction only.
That or I'd make yourself up a hardy block. Take a chunk of square tube and weld a plate or angle on the bottom for "feet", and a heavy plate with a square hole at the top for your hardy tools. A big swage block with square holes would also hold a hardy, or so would your vise in a pinch.
Good suggestions, thanks!


Making a micro burner on the cheap
in Gas Forges
Posted
Step one: Preparing the mixing tube. Begin by cutting the mixing tube (part four) to length. Square up and deburr both of its ends. The mixing tube is 6” long, and the doubler tube is going to end up about 1/2” long. The doubler tube will be cut off of the last 1/2” of the old torch head (the threaded section), only after it is press fit into the sanded end of the mixing tube. Next, power sand one end of the mixing tube until it will accept the doubler tube in a press fit. Remember that tubing isn’t perfectly round, so you will get the best fit with the least work, by rotating the parts together to find the place where these two parts are closest to the same shape; stop here for now
Mikey,
I'm earnestly trying to follow these directions and am seeeking clarification with this step. Are you saying that the doubler tube needs to be flipped around so that the female threaded end of the brass nozzle on the firepower, gets turned 180 degrees before being press fit into the mixing tube? And once it is press fit, 1/2 that sticks out gets cut off?
Does this look right now? Doubler is reversed and I've put a pencil at 1/2" where to cut it. This would allow the round holes to be on outside of mixing tube over the gooseneck.
Thanks,
EDE