

Anvilfolk
-
Posts
63 -
Joined
-
Last visited
Content Type
Profiles
Forums
Articles
Gallery
Downloads
Events
Everything posted by Anvilfolk
-
Hi everyone! As promised, here a couple of (unfortunately bad quality) pictures. First there's me welding it: Then forging on it! I am so glad to be forging again after 7 years I cannot even begin to describe it! Hope you guys enjoy it :)
-
Hi all, I'd like to thank you all again for the help. It took me the best part of a day to do the anvil stand, but it's done. My design is pretty much like Sweany's! I don't have photos as of yet, but will try to get some too. The next day I put in a couple of hours of forging and managed half of a set of tongs... it's not much but my arms aren't what they used to be. It's something though. All I'm missing is the block of wood to deaden the ring. I've put chains around the anvil, which partially worked, but I think the wood will make it all better. I will post pictures soon! :)
-
Thanks Thomas and David, I think from all the plans I've seen and what I've got to work with as a floor, the tripod design works better. I really like the almost vertical 8º suggested, and the back legs at 45 degrees off the front leg below the horn makes perfect sense, so I can go with that for now. My big concern at this point is whether the structure made 3/8" angle iron (which I have available) will hold the anvil or whether it runs the risk of 1) toppling over when I pull on it, 2) toppling over if I get up on the bottom reinforcement to do some upsetting, or 3) simply collapsing from the weight. I trained on angle-iron stands with four feet, but forget their thicknesses (it was over 7 years ago). I recall getting up on the bottom reinforcement for upsetting like I said on 2) above, I recall the lead sheet beneath the anvil to deaden sound, and I recall them being bolted. I don't recall whether they had a solid steel sheet base. Thanks again! You guys are wonderful. I will try to remember to post pictures, and I hope you will too, David! Best, João
-
David, Thank you! That was a wonderful, helpful and thoughtful response backed by practice. It is heartily appreciated! I am afraid I forgot to mention a few things that only occurred to me after reading your post. I apologise for that! I cannot bolt anything to the floor, since I do not quite own the premises, and will need to move these things around. I will also check what's available at my local steel supplier, but I don't think I can find thick plate to stand the anvil on, so I might use the angle-iron structure, put a beam down the middle in a diagonal, and make a base out of wood. Do you mind if I ask what you mean by being springy? Is it that the structure not being totally solid will absorb the hammer impact? I can see how thick plate would help. I will see if my supplier has some thick spare plate. Your build sounds perfect for someone with more experience than me at fabrication, more time, and workshop that will not have to move. I don't even have working table yet. It will take me more than two hours for sure! Do you think thicker angle iron and reinforcement at the bottom will not work for a more mobile set up? I will take your advice on the angles at which to put the angle iron and on the welds. I have 2.5mm rods and I can bevel the surfaces and do a triple pass or so. Once again, thank you!
-
Thanks! I'm just worried the angle iron isn't thick enough and might collapse. Four feet would add extra stability. I'd like information from someone who's done more anvil stands than I have :)
-
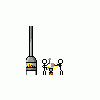
Hi all, Haven't been around for far too long, but it looks like I'll having a nice forging workshop set up in the next few weeks. I want to do my anvil stand this weekend, and I've been looking at plans. The easiest material for me to get and use right now is angle iron, about 6x35mm, or around 1/4" thick and 1 3/8" wide on each side. My plan was to make a tight fitting angle-iron base for the anvil, and then weld 4 feet at a slight angle. Of course, I would then use either the same (or slightly lighter) angle iron to make bars going between the feet for added stability. Most builds I see here use tubing, that I reckon will ring a lot more unless you fill it with sand and/or oil, which I'd like to avoid. Time is limited, and I would prefer moving on to smithing instead of fabrication. The question is whether this will hold together nicely. The anvil must be somewhere between 200 and 250 pounds, or between 90 and 120kg, I think. I was also wondering whether I can reduce this to 3 feet instead of 4, since I am on uneven ground. I'm worried that I'll topple the structure over while pulling or pushing it around. The concrete floor isn't exactly level or smooth. Thanks in advance! :)
-
When I was training we used to have the forge to our right, and the anvil in front. If you're doing bending, I can understand why one would say the horn should be to the left. We're holding the metal with the left hand anyway, so you don't have to get intro strange positions or shift yourself around much to use the horn. I also recall quickly moving to the other side or to the front of the anvil when I really needed unimpeded sight of the piece and the anvil face was in the way, but that wasn't often in my experience. I'm sure there are situations where the same is true for the anvil table on the other side though, so having a moveable anvil stand is a plus :)
-
How to identify Steel vs. Cast Iron Anvils
Anvilfolk replied to a topic in Anvils, Swage Blocks, and Mandrels
Hey, there's some really nice tips over at a thread I started recently too. Might help you! Good luck! -
Thanks for the response, Rob! Why is spark testing the bottom important? Does it affect the rebound much, even if the face is good quality? Cheers!
-
Wow, so many responses already! Thanks a lot everyone! I'm afraid I'm on your side of the Atlantic right now and can't make it ring myself, and the person getting it hasn't had a chance. I'm hoping he will! He also looked for markings (to get the weight), and found absolutely none, which is strange. From my understanding, cast iron would chip instead of bend/compress, and the corners/edges of the face appear not to have chipped. Hopefully it won't be too soft either, and leave hammer marks all over the place. The stake anvil appears to have been under heavy use, and the information we have is that the anvil should be pretty old. The fact that the table juts off from the main body and that Old World Anvils appears to be USA based makes me sceptical that that's the origin. I can't get a clear picture of a B31 pattern, but from the small one here it does seem rather similar. I'm not going to dare hope for that though, since we could find no markings. I think we are going ahead with the purchase. If anyone has any more ideas or hints about what to expect from this piece, let me know! Thanks again! All this is really appreciated!
-
Hi everyone, We are going to buy an anvil that we know little about. The problem is we don't have the time or resources to beat around the bush enough to find alternatives. This is in Portugal, the other side of the Atlantic, so it might be an interesting challenge to all the anvil-identifying experts around here I've never heard about the quality of anvils of this pattern, and am wondering about it. There is no writing on the visible side of the anvil, the edges are somewhat worn but holding, and anvil face juts out slightly on the sides, which is what I'm most suspicious about (maybe it was welded on?). It's displayed along with a nice looking stake anvil, which is such a speciality item that I hope both have been used together and are good quality. The face looks OK, but that hardy-looking thing doesn't seem like it comes off (though we've been assured it does). So again, I'm suspicious but I'm willing to give it a try since the alternatives are really slim. As long as the horns don't break off it should do for now! Does anyone know anything about this type of anvil? Thanks in advance for any info! :)
-
Heheh, yeah, that I've heard of They're not briquettes. The bag I bought was charcoal made by a couple of the townsfolk. Since the trees around the area are either pine or eucalyptus, I guess I'm out of luck. The search for fuel continues! *grin*
-
Thanks again! It does burn rather quickly. I bought a nice large sack, and it fed around 3 or 4 one-hour fires, maybe a bit more. It must be the type of wood. We do have some types of oak here in Portugal, but they're not "natural" per se, they're the ones grown for cork. It takes a long time until you can harvest the cork, I doubt they'd like the idea of oak charchoal Anyway, I do not have much time (university) at all, I do not want to go into making charcoal right now. It's an open option for the future! The man at a small steel warehouse near here said he might be able to get me some coke, I'll have to go and see him. I'm suspicious that the owner of the coke might not be aware of this arrangement....... I want to go to the source, be a little more direct. I can't keep on buying fuel by small bags. Any ideas about what charcoal he was using, Ten Hammers? Thanks again!:)
-
Requesting assistance
Anvilfolk replied to texassmith11's topic in Blacksmithing, General Discussion
Hi! I'm planning to get some rail for an anvil too. I wasn't thinking of having it upside down. Don't you loose too much of the impact by not having any direct support from below? Because if it's upside down, you have a much nicer and larger face to work on! -
Hahahah, excellent! I really like Clinker, actually!
-
Good point about not cutting. I guess I'll just use them as-is. Maybe I can find a nice, thick plate to weld on it... I think we might have some leftover cement, but then I need to make a stand. I'm on a tight budget, can you tell? *grin* Anyway, I guess I'll just screw it down to the trunk. The top should be pretty hard from what you've said, which is good. Any risk of shattering? I had a small piece of steel cuddle itself inside my arm this summer from a piece of steel that was too old&hard. I can use the side (cut) part of the rail for setting, which should be pretty square. I can round one side, and keep the other nice and sharp. Thank you all for your suggestions. This weekend hasn't been spent on the Anvil Quest, unfortunately. I'm trying to finish a bellows for re-enactment :)
-
Oops! I'm really sorry, I somehow missed these replies! Thank you both very much! I'm not going to go for it unless I'm really, really desperate then. Thanks! A friend of mine managed to pick up some rail, two pieces about 19 pounds each. It's not perfect, but with some drilling&screws they should be nice and solid on some tree trunks I've got. I can also grind the rails and get a pseudo-horn. Also, I've heard they're pretty hard. Is it still OK to use an angle-grinder with one of those slim cutting disks? The hacksaw is out of the question, and I think the blade on the jigsaw is too short. What worries me is the hardness. I -HATE- angle-grinders, and one of those disks "blowing up" on my face is not a thought I cherish! I can use the regular grinding disks, but it'll take ages Thank you again!
-
Hi! It's great to see people are still using apprenticeships for such wonderful things as blacksmithing! It's inspiring! Someday, I hope to be able to have that kind of training, if even just for one year. Did you notice this link while browsing the site you gave us? It has some information about collaring, even though half of it is about welding (which doesn't interest you, I think). And also, funny thing you mention candelabra. Just last weekend I was visiting the Museu do Carmo here in Lisbon, and one of the few sections that didn't collapse with the Great Earthquake of 1755 had a huge candelabra, hanging from the ceiling. I gaped at it until one of my friends clouted me and told me to move on Anyway, if it wasn't original, it was a replica, and the whole thing was joined together with collars, so it was possible to make a thing that big without welding The one collar I've done is pretty tight, but if you knock it around a bit, it will move. It may depend a lot on the tightness of the bend. If you have a really tight bend, it won't have anywhere to go, but if you have a loose, open bend, it might be easy for it to move around. I'm sure you can there are other solutions... instead of a "regular" collar, you can do like that link I left here, where they wound a finer piece of steel around the area, so even if one isn't perfectly tight, the others compensate. You can probably also make a few grooves on the pieces, and then make the collar fit snuggle against those, which should make it pretty solid. Good luck! And do post some pictures when you're done, or even before!
-
I like those stories about the little elves doing the shoemaker's work while he was sleeping and that sort of folklore, so I thought to myself, "hey, there's an idea that might work"! It was also the one nickname I thought up that no one had ever used before anywhere (zero google finds) I did think about using my name, but Jo
-
Salut! J'ai
-
The pink got to me! I want one of those! Heheh! The can idea is awesome though! Since the forge probably going to have to move somewhere else, I want to avoid anything that makes it heaver than it is. If I ever find a permanent workshop, I'll start making modifications to perfect it. For now, the fine-mesh seems like a great idea! Shouldn't weigh a thing! 8" deep? Wow! I had no idea charcoal required that much! Good thing I have enough clay! I'm going to make a wide, kind of V shaped pot, 8" deep then. Kind of like a volcano shape, if you get what I mean. I'm itching to try all the great ideas! I'll let you know how they went! It'll take awhile though!
-
Luckily, we've been cutting some trees at the farm, and we've plenty of sections of pine trunk. That's what I'm currently using, with the small anvil screwed on. It doesn't move... much The floor is concrete inside, and full of stone on the outside! Oh, grassy, grassy lands, where are you? Using the TPAAAT today, I found a shop that sells anvils! First day I tried it too! I'd like your opinion on it though. No photos, but they don't seem very blacksmithingy... they're painted (the horn too, not the face), so I doubt they were made for putting hot metal on them. The horn is also really small and chunky. They can order an 88 pounder for around $200... seems like way too much. Sounds a bit worse than the $5! But I've still got to hit the junkyards! Thank you, Thomas Powers, whoever you are! I seem to be on the right track! ;)
-
Hahahah! That was hilarious! I sure hope that technique is cross-continental! I live in a really small country, and blacksmithing's near extinct. I'll have to give it a go, though. I'll have to go to all the scrapyards I can find and start from there. Thanks! P.S. Oh, and I might be able to get my hands on some rail track! Maybe long enough to be a two-person anvil! My mom wants in on it too! *grin*
-
Wow! Nice one! And here I am, using a 10 pound anvil (yeah, the number is correct. 10 pounds)! Heheheh!
-
I saw a demonstration by a blacksmith from the UK once (unfortunately, I can't recall the name, sorry). He had some sandblasted pieces of mild steel sheet, and what he did was put them in the middle of several types of wood shavings (in a tupperware box). He added some water by fine-sprinkling it, and after a couple of minutes, some sort of acid in the wood shavings had reacted with the metal, giving it really, really nice colours and patterns. I can't remember the types of wood, but I'm guessing wood shavings aren't that hard to find/make - I'd try oak, but loads of others ought to do the job. You can also use different types of shaving to give different patterns. It was amazing! Maybe leaves work too? Never done it myself, but I've seen it with my very own eyes! Just make sure the pieces are clean. Not polished, just clean!