Feukair
-
Posts
460 -
Joined
-
Last visited
Content Type
Profiles
Forums
Articles
Gallery
Downloads
Events
Everything posted by Feukair
-
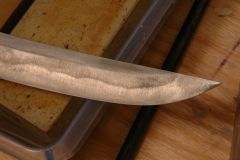
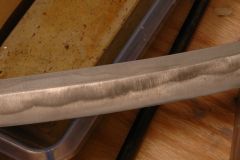
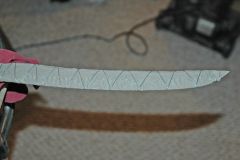
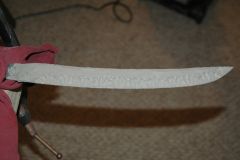
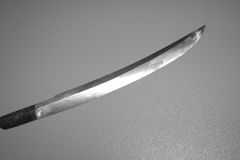
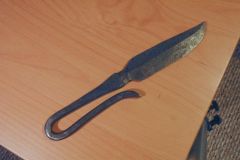
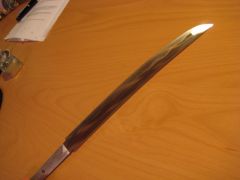
Here's a knife i made for a friend of mine. Now that I've got a grinder I can output much easier... ;-) I've also been practicing hammering alot, this one was completely formed with the hammer, the only grinding was to finish the edge as shown. It's made from W1 drill rod. I hardened by heating the edge in the forge and quenching in hot water which left somewhat of a hamon along part of the edge. Before grinding... After grinding...
-
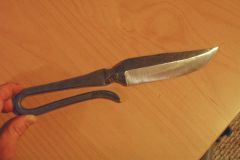
From the album: Feukair's Knives
-
From the album: Feukair's Knives
-
Awesome blade Sam!
-
Yes, you can see how the tracking mechanism works in the pdf. If i get time this week i'll grab more pictures of the arm and tracking hinge and post them. Just got back from two weeks out of town...
-
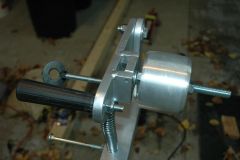
I got the drive, contact, idler, and tracking wheels from US Knife Makers! but they are beaumont metal works parts. usakm sells for the same price as beaumont and also carries some other accessories and a selection of belts as well and he takes paypal. I got the bearings from someone on ebay but you can get them here.
-
Here are the plans i found on line, same doc, linked to in two different places. I didn't follow these plans exactly, mostly just used them for ideas to to verify dimensions of some of the pieces. http://www.az-blacksmiths.org/pdfs/GrinderPlans.pdf http://www.dfoggknives.com/PDF/GrinderPlans.pdf
-
Yep, i agree, with the belt tightened up it's not really as easy to stop the grinder with pressure as it was before. So i might be able to use this motor for longer than i expected. Less likely to hurt myself or the piece i'm working on...
-
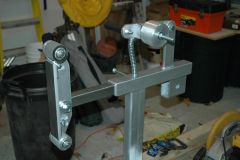
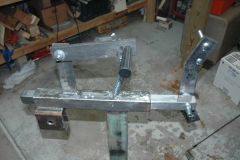
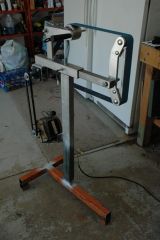
I may re-design how the motor is mounted so that it mounts on the lower T bar instead of the vertical stand bar. The belt was slipping some because the motor is not really heavy enough to provide a tight enough grip. So i devised a spring mechanism that pulls down on the motor from underneath. This causes it to run faster but now there is a little more vibration that runs up the stand in to the grinder face, not bad enough that its really a problem but still bad enough that i'd like it to go away. With the design the way it currently is, the mount of the motor parallel to the motor's axle it makes it difficult to apply downward force without the position of the motor wanting to twist in an odd angle between the drive pulley and the motor mount. I plan to build a mount that comes up from the T stand, turn the motor on that hinged mount plate so that the hinge pin is at a 90 perpendicular to the drive shaft and behind the back of the motor, then i will be able to mount a spring directly under the center of the shaft. All the forces should be going at right angles and there should be less vibration, and with the motor mounted this way i will be able to put some soft rubber between the plate the motor sits on and the hinge, which should almost eliminate any vibrations being able to run up the stand. Once thats done i'll post some more pics, probably a couple days but might be longer, i leave monday out of town for work for two weeks.
-
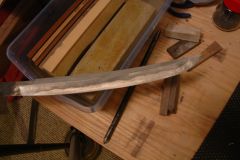
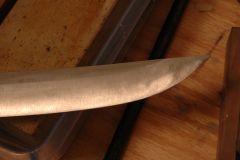
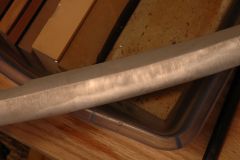
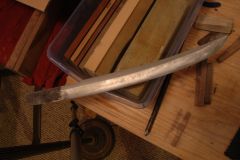
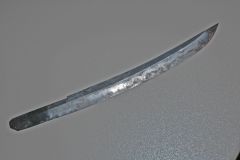
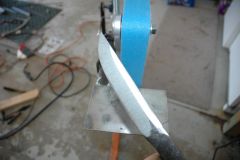
It's been a long while since i worked on this blade, but i just realized i never posted a picture of how far i took it. Well the blades pretty much done, someday i'll probably make a saya for it... This was mostly a practice blade for me. I think this was the 2nd hamon i ever made...
-
-
-
From the album: My 2nd Hamon
-
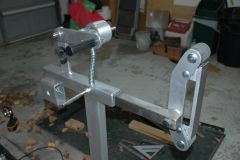
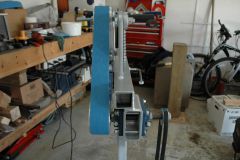
Grinder's workin... The 1/2 hp motor i'm using doesnt have quite enough power for me but it'll do for a while. I can handle grinding a little slower while i'm learning and keeping my eye out for a better motor. It's awesome!!!! Here's some more pics And here's a video of it runnin I put on youtube... YouTube - DIY Belt Grinder
-
-
-
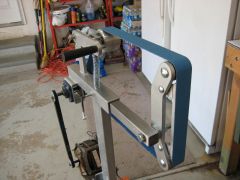
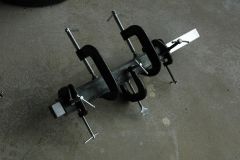
From the album: Grinder Build
-
From the album: Grinder Build
-
From the album: Grinder Build
-
From the album: Grinder Build
-
From the album: Grinder Build
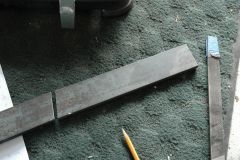
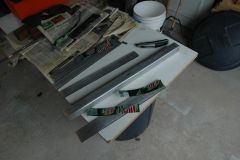
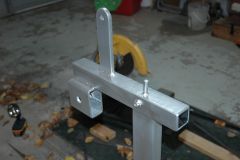
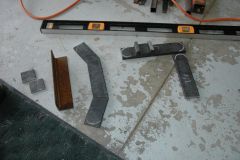
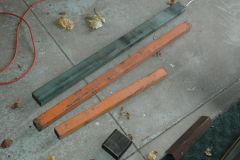
The track support and platten pieces layed out. -
From the album: Grinder Build
-
From the album: Grinder Build
-
From the album: Grinder Build
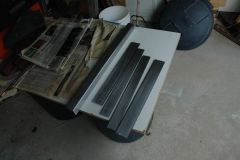
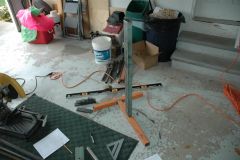
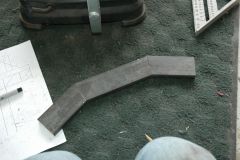
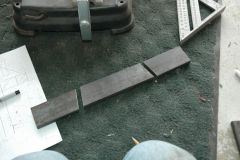
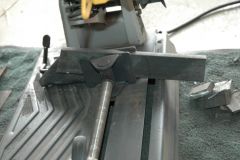
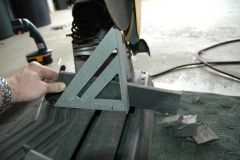
I made 2 roughly 10 degree cuts and flipped the pieces around to make the support for the rollers and platten. -
From the album: Grinder Build
I made 2 roughly 10 degree cuts and flipped the pieces around to make the support for the rollers and platten. -
From the album: Grinder Build
I made 2 roughly 10 degree cuts and flipped the pieces around to make the support for the rollers and platten. -
From the album: Grinder Build
I made 2 roughly 10 degree cuts and flipped the pieces around to make the support for the rollers and platten. (the triangle was used just to line up the saw blade with the line i drew on the bar)