Feukair
Members
-
Joined
-
Last visited
Everything posted by Feukair
-
Amazing man!
-
Very nice! Love the shape.
-
Yeah that is wierd. Not sure, i think its just shaking the camera. For this vid the camera was on a tripod a few feet from the hammer. When you hand hold the camera it doesnt do that.
-
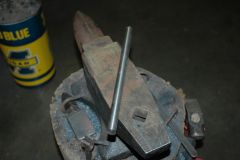
The anvil is a piece of the ibeam same as the hammer frame. I welded a piece of 1/2" plate on the end. Put two lag bolts thru for mounting the small block and welded those underneath. Then i welded some 3/16" plate on both sides of the ibeam. Put it upside down and filled it with cement, let it dry and welded 3/16" plate on the bottom. I weighed it, came poy to over 250 lbs. It works great for an anvil.
-
Thanks, no specific plans, modeled it after the clay spencer design, scoured the web looking for pictures and kept my eye out for pieces i could use. The steel drive wheel i got from a tractor supply store it is a hub that u would weld a sprocket on to. The sell lots of different sizes and shaft diameters, only about $6 for that piece.
-
Hey Sam, yes i did model the ram and anvil after the japanese hammers. But mostly be cause it was the simplest design that i had seen. I had considered making the combo drawing flattening dies that most hammers have but i just couldnt come up with the materials or a design that would fit with the rest of what i had to rig. In the end i had an old 3"round 10 pound sledge hammer head and some square tube with a 3" ID so i decided to weld the hammer head up inside the tube and fill it will lead to make the ram. Then i chose to make a larger square anvil because it occured to me that this would be a model similar to the japanese ones. I don't know if i'll ever forge bevels with my hammer, i've tried on a couple of scrap pieces and it does seem possible to rough in some of a bevel, but until i'm better with it i like the hand hammer control for that. Thanks for that video, i actually had not seen that before. Man he really runs that hammer fast sometimes, seems as fast as a sewing machine a couple times LOL...thanks again.
-
The ram weighs 45 pounds.
-
Yeah I was worried how the alignment was and how consistently straight it would strike. A coke can was the first test then we had some fun with the video editing software.
-
Thanks, I have added some lead weights I molded up of various sizes since that video was filmed. No weights in the video. I have less side to side wobble now but was not able to eliminate it completely. I was surprised when I first fired it up how much speed control I could get my varying pressure on the pedal.
-
I'll throw in a few of my thoughts... I know of this process being described as clay ash flux and straw ash flux. I think that when pursuing traditional japanese swordsmithing practices you have to leave a little room for loose terminology. The term "clay ash flux" or "straw ash flux" is as much the name of the process as it is specifically the flux being used. It's a process of rolling the hot billet in ashes from already burnt straw, then coating it in a slurry of powdered clay and water. I've had success simply buying terra cotta modeling clay, slicing it into strips that you can lay in the sun to dry out for a while then grind into a powder, this method was taught in a class I took. More recently I've purchased some clay called "redart" which is simply an already powdered mix of terra cotta-ish clay. Mix the powder with water using a wisk until when you dip your finger in the mix and remove it you can see the clay coating your finger so that your finger print is not visible. There's not much specific science here, I mean when when at one end of the spectrum you've got people successfully forge welding with no flux, and at the other end some forge welding with anhydrous borax and commercial fluxes, and in the middle people slopping clay mud on the billet, there's not going to be much of a noticeable difference in success just because you don't have the straw ash flux exactly right. In this case the clay is doing more fluxing than the straw ash. I don't think you've have much of a good time using just straw ash as it will mostly flake and burn off the steel before it could ever perform any "fluxing", but you could get away with the clay slurry only and no straw ash. The clay slurry melts onto the steel and forms a kind of oozy glassy glaze. The link that beatamax posted http://www.youtube.com/watch?v=3n_XpjOw0rA is actually a very good example of a smith performing the straw ash flux process. The clay slurry and ash method works for me, and it's a heck of alot of fun and personally satisfying to play at doing it the same way the japanese smiths do.
-
Hey everyone, I spent most of my free time the past few months working on building a power hammer. It's not the most elegant one but it sure saves me alot of pounding. I modeled it after the japanese style of hammer where the anvil is a block and the ram is a simple round hammer. Maybe someday i'll make some dies for it and a different ram but for now this does it for me. http://www.youtube.com/watch?v=wDI4ond4c_4 Theres a few other videos of it there in my youtube profile...
-
Hello all, I havent posted in a while but I've sill been keeping up with this hobby of mine. I may be spending alot of time in North Carolina in the Hillsborough and Raleigh/Durahm area over the next serveral months. I'm looking for a place where i can use a forge and anvil and do some forging just to keep my practice up. Of course I would pay for materials used and etc... I found the John C Folk school in NC but it is too far from where I'll be. Does anyone know of anything in this area? Thanks
-
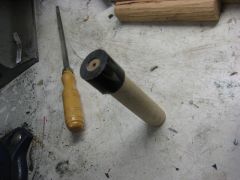
Thats a beautiful handle, cant wait to see the blade it goes on. What are the thin red lines made out of? That handle would look awesome on my next sashimi knife! ;-)
-
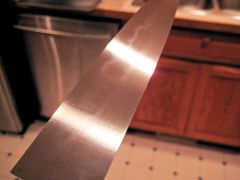
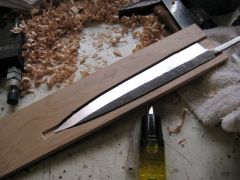
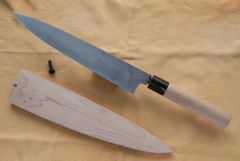
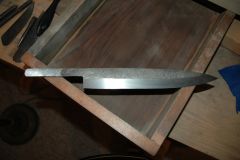
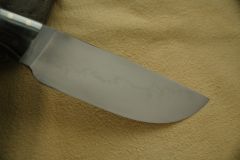
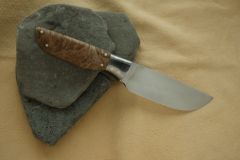
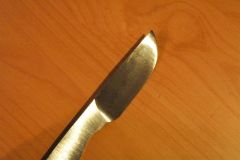
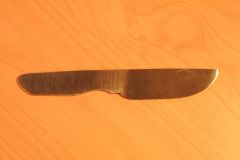
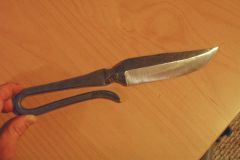
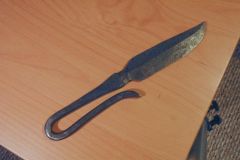
Here it is. This is the 2nd knife that i've put a handle on (not counting the leaf blade which doesnt have a handle of course...) I etched the hamon out a little with lemon juice and flitz polish, it's now easily visible on the side of the blade in plain daylight. I got a few more knife's in the works but i'm really itching to get back to playing around with the japanese style ones...
-
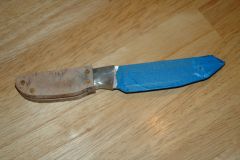
One more pic after some rough grinding on the stainless scales. Got the burl scales mounted. "]
-
-
 DSC_7155
-
 skinner from file 6
-
 skinner from file 5
-
 skinner from file 4
-
 skinner from file 3
-
 DSC_7150
-
 DSC_7145_close
-
 hunting knife from file 5
-
 hunting knife from file 4
-
 skinner from file 2
-
 skinner from file 1
-
 hunting knife from file 3
-
 hunting knife from file 2
-
 hunting knife from file 1
-
 DSC_7074
-
 DSC_7068
-
-
I was speaking more in terms of using wood as a base or frame. However some parts would definitely have to be metal and rigidly mounted to each other like the tube the tooling arm slides in and the riser that holds the tracking wheel, and the tooling arm and platten holder of course. If you do throw a wood based one together though i'd love to hear about it. Please start a thread to show it.
-
Some of my steel was scrap or given to me, all the tube steel was. I purchased beaumont drive, track, and idler wheels which together were about $200. I also had to buy the bearings. I used a scrap 1/2hp motor which is working fine so far. Overall i probably have about $300 into it not counting grinding belts. I will definitly want a motor with more hp in the future, but while it's still too freezing cold most days to use it in my garage the 1/2hp is enough. ;-)
-
-
I though i posted a vid link here of the difference made by switching to a link belt, but i guess i didn't. Here it is YouTube - Grinder Vibration.
-
Very cool. Definitely get some fenner drive link belt, i was amazed how much this simple changed improved my grinder. I got most of my parts for my grinder from usaknifemakers. Great guy and he ships fast. You can build a grinder from just about any frame if it's solid enough. And yeah, if you've got access to some kind of a welder then lots of the joints on the no-weld grinder could simply be welded to save some fiddlin round with nuts and bolts and making the spanners u use to clamp with. I love my grinder, in fact I love it even more recently since a I got it's electronics all wired up. I've also moved up to a larger pulley on the drive motor so my belts are moving alot faster now and i can grind much quicker. Gots ta be xtra carefull though grinding on an already heat treated knife cuz things warm up quick.
-
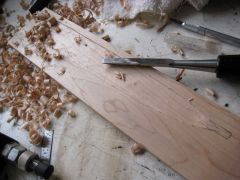
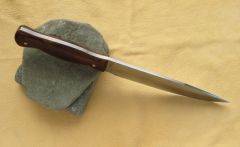
Did some more work on this blade in the last few days. Got the scales cut for the handles, including some stainless pieces and holes drilled. The scales are maple burl. I also did some more polishing and got the hamon showing more. I'm really happy with this hamon, it's the most beautiful i've made so far. I'm going to polish it some more and try to etch it out a little too. I was able to get it at just the right angle and snap a good picture of it.
-
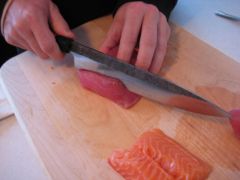
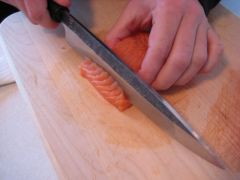
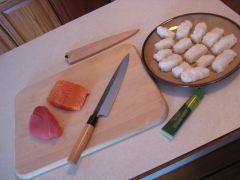
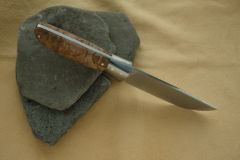
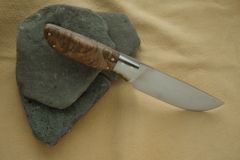
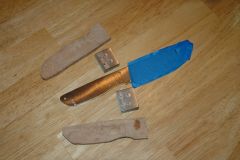
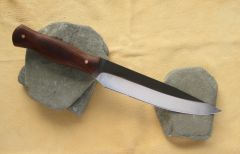
Here's some more pictures. Delivered the knife to my friend today and had a little sushi party for lunch using the new knife. I'm not a big fan of sushi but i do try it a couple times a year or so, and what we made today was not the worst I've had. Anyways, heres some pics:
-
-
Sorry if these have already been posted, i just found them the other day. There are some pretty cool katana forging videos on youtube. Here is one showing the wet forging technique that I really like to do once i got the habit going... YouTube - ?????????6 Lots of others in this guys youtube channel: YouTube - TheJapaneseSword's Channel