
lordcaradoc
-
Posts
139 -
Joined
-
Last visited
Content Type
Profiles
Forums
Articles
Gallery
Downloads
Events
Everything posted by lordcaradoc
-
That's very nice. Even better to share a hobby with your Sweetheart. Best regards, Tim
-
So, where are you active? Is it SCA, or another group? I am in Washington, in the Poulsbo area currently, just moved back from Ohio and have only gone to a couple events myself.
A agree about being very proud of my Scottish heritage, I have a 6" disgusting Penanular a friend made me out of Silica Bronze that I wear with my kilt. :D
Regards,
Tim -

Double Duty blanket pin
lordcaradoc replied to Dragon Droppings's topic in Blacksmithing, General Discussion
I would just like to say that no self-respecting Celt would want to use their jewelry for a striker. It's got to stay Shiny dang'it! They must be some sort of mixed up practical American mutt or something. Now, to offer something constructive. I think you could do like you suggested and do File work around the outside of the ring, maybe flatten slightly all the way around, or you could make it out of square stock and do a pattern of twists all the way around for there to be a rough surface to make sparks. I made some small penannulars years ago like that with curls at the ends and a back and forth twist for the body. Made them out of 1/4 square stock mild. Don't know if you need to harden a striker, if so, you may want something with more carbon. Best regards, Tim A self-respecting Celt (mostly) -
I would add Brian Brazeal and Uri Hofi, not only for their exceptional skills, but for their very generous willingness to teach others. Regards, Tim
-
Finally got hammering
lordcaradoc replied to bipolarskizo's topic in Blacksmithing, General Discussion
Great job forging ahead. Here is a cheap upgrade for your tongs: Looooon Locking Plyers These were posted on another blacksmithing forum site I frequent and I will be buying at least one pair this weekend. Best regards, Tim -
Champion Lancaster #40 Forge Blower Restoration
lordcaradoc replied to cvmikeray's topic in Bellows, Blowers
Great work Mike, I picked up a Royal Western Chief blower last year from DiverMike here on the forums. He gave me a smokin' deal and I finally got around to tearing it down to get ready for rebuild. Mike said when he got it that it wouldn't turn, but then dropped it and it started turning and coal fell out of the housing. When I tore it down, I found quite a bit more coal and luckily, no issues with the gear box other than water. Cleaned all that out and jut need to put it back together and mount on a stand and filler up with oil. Regards, Tim -
Forge13, The cores in a tattoo machine use two alternating electromagnets to move a needle bar up and down. The cores are wrapped in a copper coil to create the electromagnet (remember school science class?) and if I remember correctly, the "Pure Iron Core" simply helps them be stronger magnets, so you get a better, stronger action of the needle. It is a matter that, just like in any hobby/vocation, people want to make their tools the best they can. The same thing can happen here, just don't start any conversations about who makes the best power hammers. Here is the article I got my info from: Wikipedia: Tatoo Machine Best regards and good luck, Tim
-
That looks really nice Dave. Both your sets look loads better than my first pair, but we are always learning. Regards, Tim
-
Hey now, lets not be mixing out threads. Regards, Tim
-
My latest project
lordcaradoc replied to therepairman1557's topic in Blacksmithing, General Discussion
Repairman, Looks like a beautiful candle holder so you can read by candle light easier, rather than reading through the candle's light. Regards, Tim -
Blacksmiths and Beards
lordcaradoc replied to Luke March's topic in Blacksmithing, General Discussion
As you can see from my pic, I have a chinstrap with a shaved head. I've sported this look for over a year now and I really like it. I grew my mustache in High school and kept it for around 15 years, hated the way my face looked without it. Then when I finally said goodbye to it, I kept getting compliments on how much younger I looked. When I grew the chinstrap last year, it was kind of a compromise. I was going to shave my head (receding hairline since college and no vanity ) and I suggested to the wife I could grow mutton chop side burns. She hated that idea, so I let the chinstrap grow in. I love it now and will likely keep this look for a long time. I shave my head and the bits of my face every other day and trim the beard to about 3/8" every couple weeks. Regards, Tim -
-
-
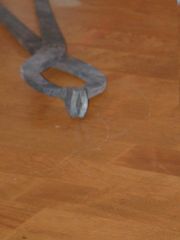
 Bolt head tongs
 -
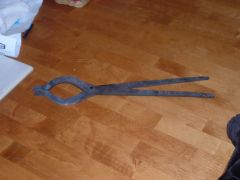
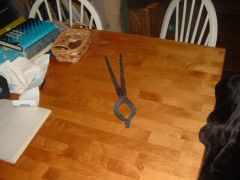
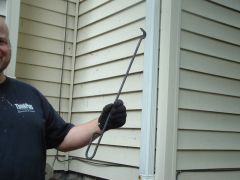
 Another, better view of the changes.
 -
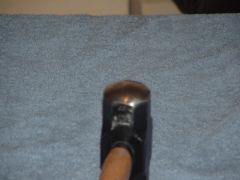
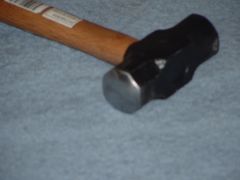 I made one face dished for moving metal.
 -
-
Still Around, found my first anvil, again
lordcaradoc replied to Jack Evers's topic in Anvils, Swage Blocks, and Mandrels
OK, so from that picture, how did you recognize your work? I mean... its not like you welded your name into it... oh, sorry. :) -
Spike, that's a great find. Wish I could find things like that. Frankly I am a fair amount jealous. Regards, Tim
-
From Humble beginnings: My smithy (so far)
lordcaradoc replied to Brasilikilt's topic in Blacksmithing, General Discussion
Iain, That is better than I have done as far as acquiring the tools of the trade. I have a good lively style forge now, but still need a hand crank blower. I have a little rail anvil as I have not been able "yet" to find a full size anvil that I want, but then, it works pretty well, so I am set. I found what I originally thought was a deal on a post vise, but it is some kind of frankenvise and needs more work yet before I am happy. Nice job and don't worry about the addiction, you wanna make a living at it. Just get the forge fired up and start makin' stuff. Great job and Best regards, Tim -
my workshop (in the works)
lordcaradoc replied to Danz409's topic in Blacksmithing, General Discussion
GFS is Gordon Food Service and there are several in your area. Here is a link: GFS Marketplace Locations Search Results You will quickly find that getting the heat you want is no longer a problem with the lump charcoal. By the way, I really like your anvil. I am using a nicely cut out rail anvil for now, but it is stable and held at a good working height. I don't have a covered area to work in though, so I'm kinda jealous about that. Best regards, Tim -
my workshop (in the works)
lordcaradoc replied to Danz409's topic in Blacksmithing, General Discussion
Two things Danz, First, for a better fire, you can get lump charcoal pretty inexpensively at GFS, they sell a 20 lb bag normally for $12 and it does go on sale for as little as $7.50. I find that I have to break up the larger solid pieces, but the large flats get laid on top of my lively style forge as reflectors to keep the heat on my work piece. Second, you can make tongs yourself. There are several very good tutorials either in the Blueprints section here or videos (I find them to be a bit more helpful) on Youtube. Tutorials in the blueprints section: Blueprints 000-100 | articles Youtube videos: YouTube - Forging Blacksmith Tongs or YouTube - Forging a bolt head tong, part 1. (several parts). Best regards and welcome to the craft, Tim -
What can a blacksmith make?
lordcaradoc replied to Glenn's topic in Blacksmithing, General Discussion
A agree with the others in that a list of what a Blacksmith can't make would be shorter, especially regarding the other disciplines they work in, like wood and leather. I think it is fair to note that the Blacksmith is the only traditional tradesman who could make his own tools as long as he had a fire, something to bang on and with. Regards, Tim Who started up his own forge today and made a fire rake and started his first set of tongs. :) -
I'm not an expert on these old rivet forges, but that looks to be in very serviceable condition. Does the blower work? I may need to be re-lined with clay, but that is easy as well. Regards, Tim
-
OK, so I finally got all the real life stuff out of the way and fired up the forge today. Here are some pics. My first project was a fire rake, made from some scavanged bar stock found under the deck. Then I started working on a pair of tongs. I am building them based on the Tongs video David Roberston did on YouTube. I also took the very good advice a friend offered and moved the forge out from the house before lighting. This turned out to be an excellent idea with the sparks. The fire started nicely. The hardwood lump charcoal was sparky though. I may start making my own from scrap softwood eventually. Otherwise, this wasn't too big of an issue. These next two are for my first completed project, a fire rake and it was very useful. I was plagued by a sneaky little imp who kept wanting to help daddy. We were very careful, especially with the sparks. The last picture is starting to draw the reins for the tongs. This was fun (read the sarcasm), especially as I have not swung a hammer in nearly 2 years, had a couple cramp issues in each hand until things warmed up. I also improvised a spring fuller for when the jaws will be formed so I can back draw behind them, not really spring, but they should work for this project until I can work out a real spring fuller. I did most of the drawing out on the reins today, tomorrow, I will round them and finish the tongs. I am very happy with the setup for my little rail anvil, it is very stable and works as an anvil should. I need to make a board that the bottom of the post vise will sit in that I can stand on when working it as the foot kind of wants to wander around a bit. That should be no problem though. Best regards, Tim