

Jobtiel1
-
Posts
521 -
Joined
-
Last visited
Content Type
Profiles
Forums
Articles
Gallery
Downloads
Events
Posts posted by Jobtiel1
-
-
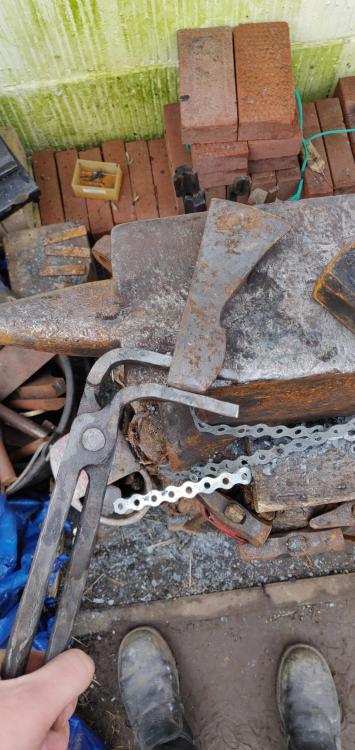
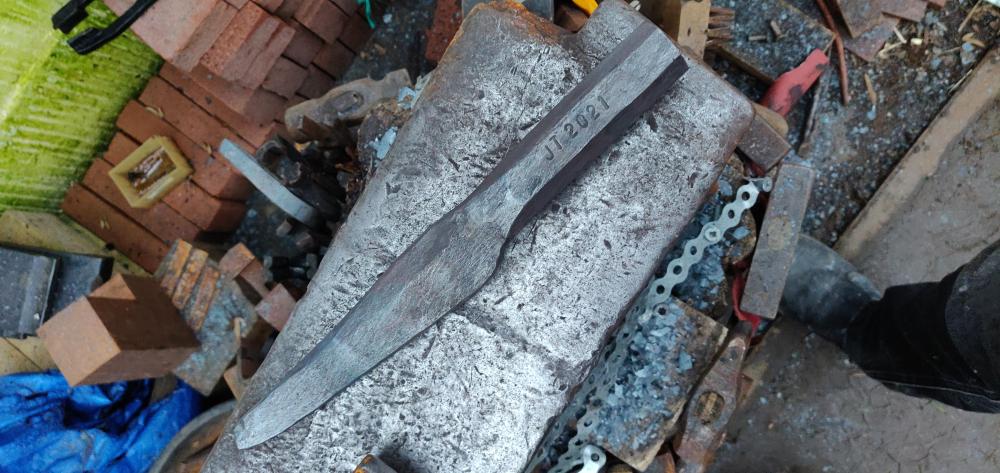
Forged this small hatchet from 25mm square construction steel today! The bit is a piece of old knife file forge welded in. On the backside the weld is nearly invisible, on the front you can still see the weld line a bit. Overall I'm very happy with the profile and the weld!
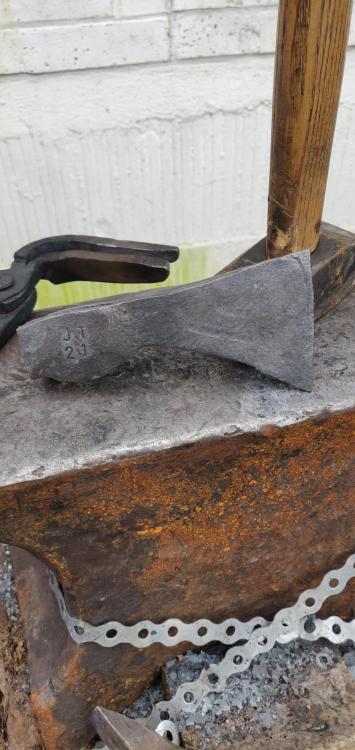
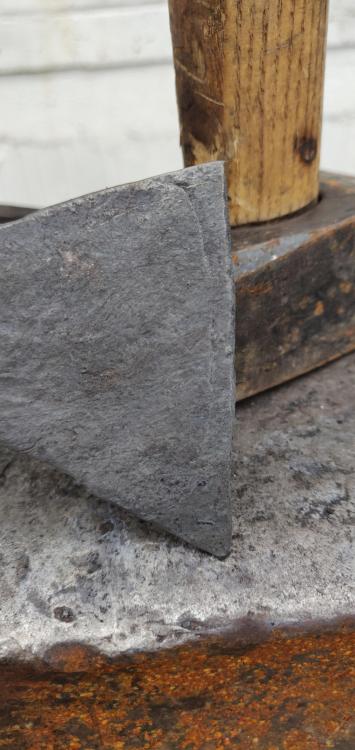
~Jobtiel
-
I love the fire set rack Billy, really simple and cool finials.
Over the last couple of days I have been working on different stuff.
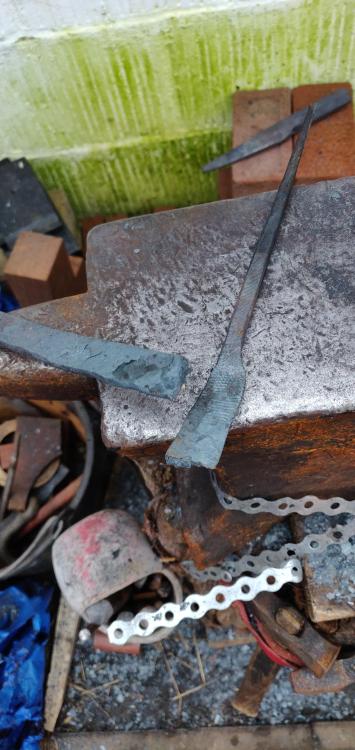
First up one of my first paid commissions, a drawknife! It's as if a curse, but for every drawknife I made one had to break first. The left pick is after the piece just broke in two during forging, made from an old file, so my guess is that I overheated it. The one one the left is the finished forging, and is made from old coil spring.
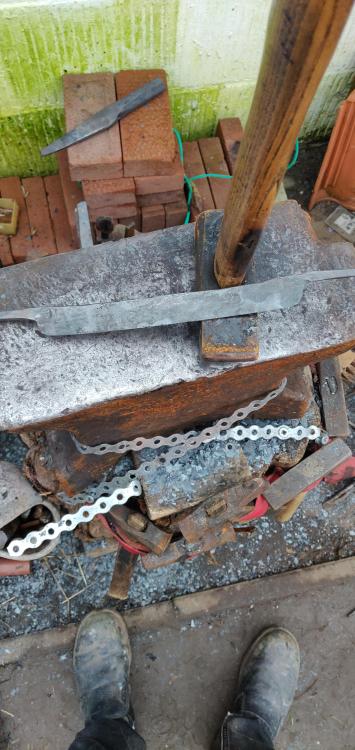
I also worked on some tooling to make my life easier for when I'm going to start making some axes to maybe sell.
Axe eye tongs and an eye drift, the previous one I had was small, and I was unable to hold on to the drift during forging, I believe both the tongs and the drift makes it easier to keep everything straight during forging.
Next time I'll try making an axe again! I got some more practice in with forge welding, especially in fire maintenance during forge welding, so I'm quite confident everything is gonna work out well this time!
~Jobtiel
-
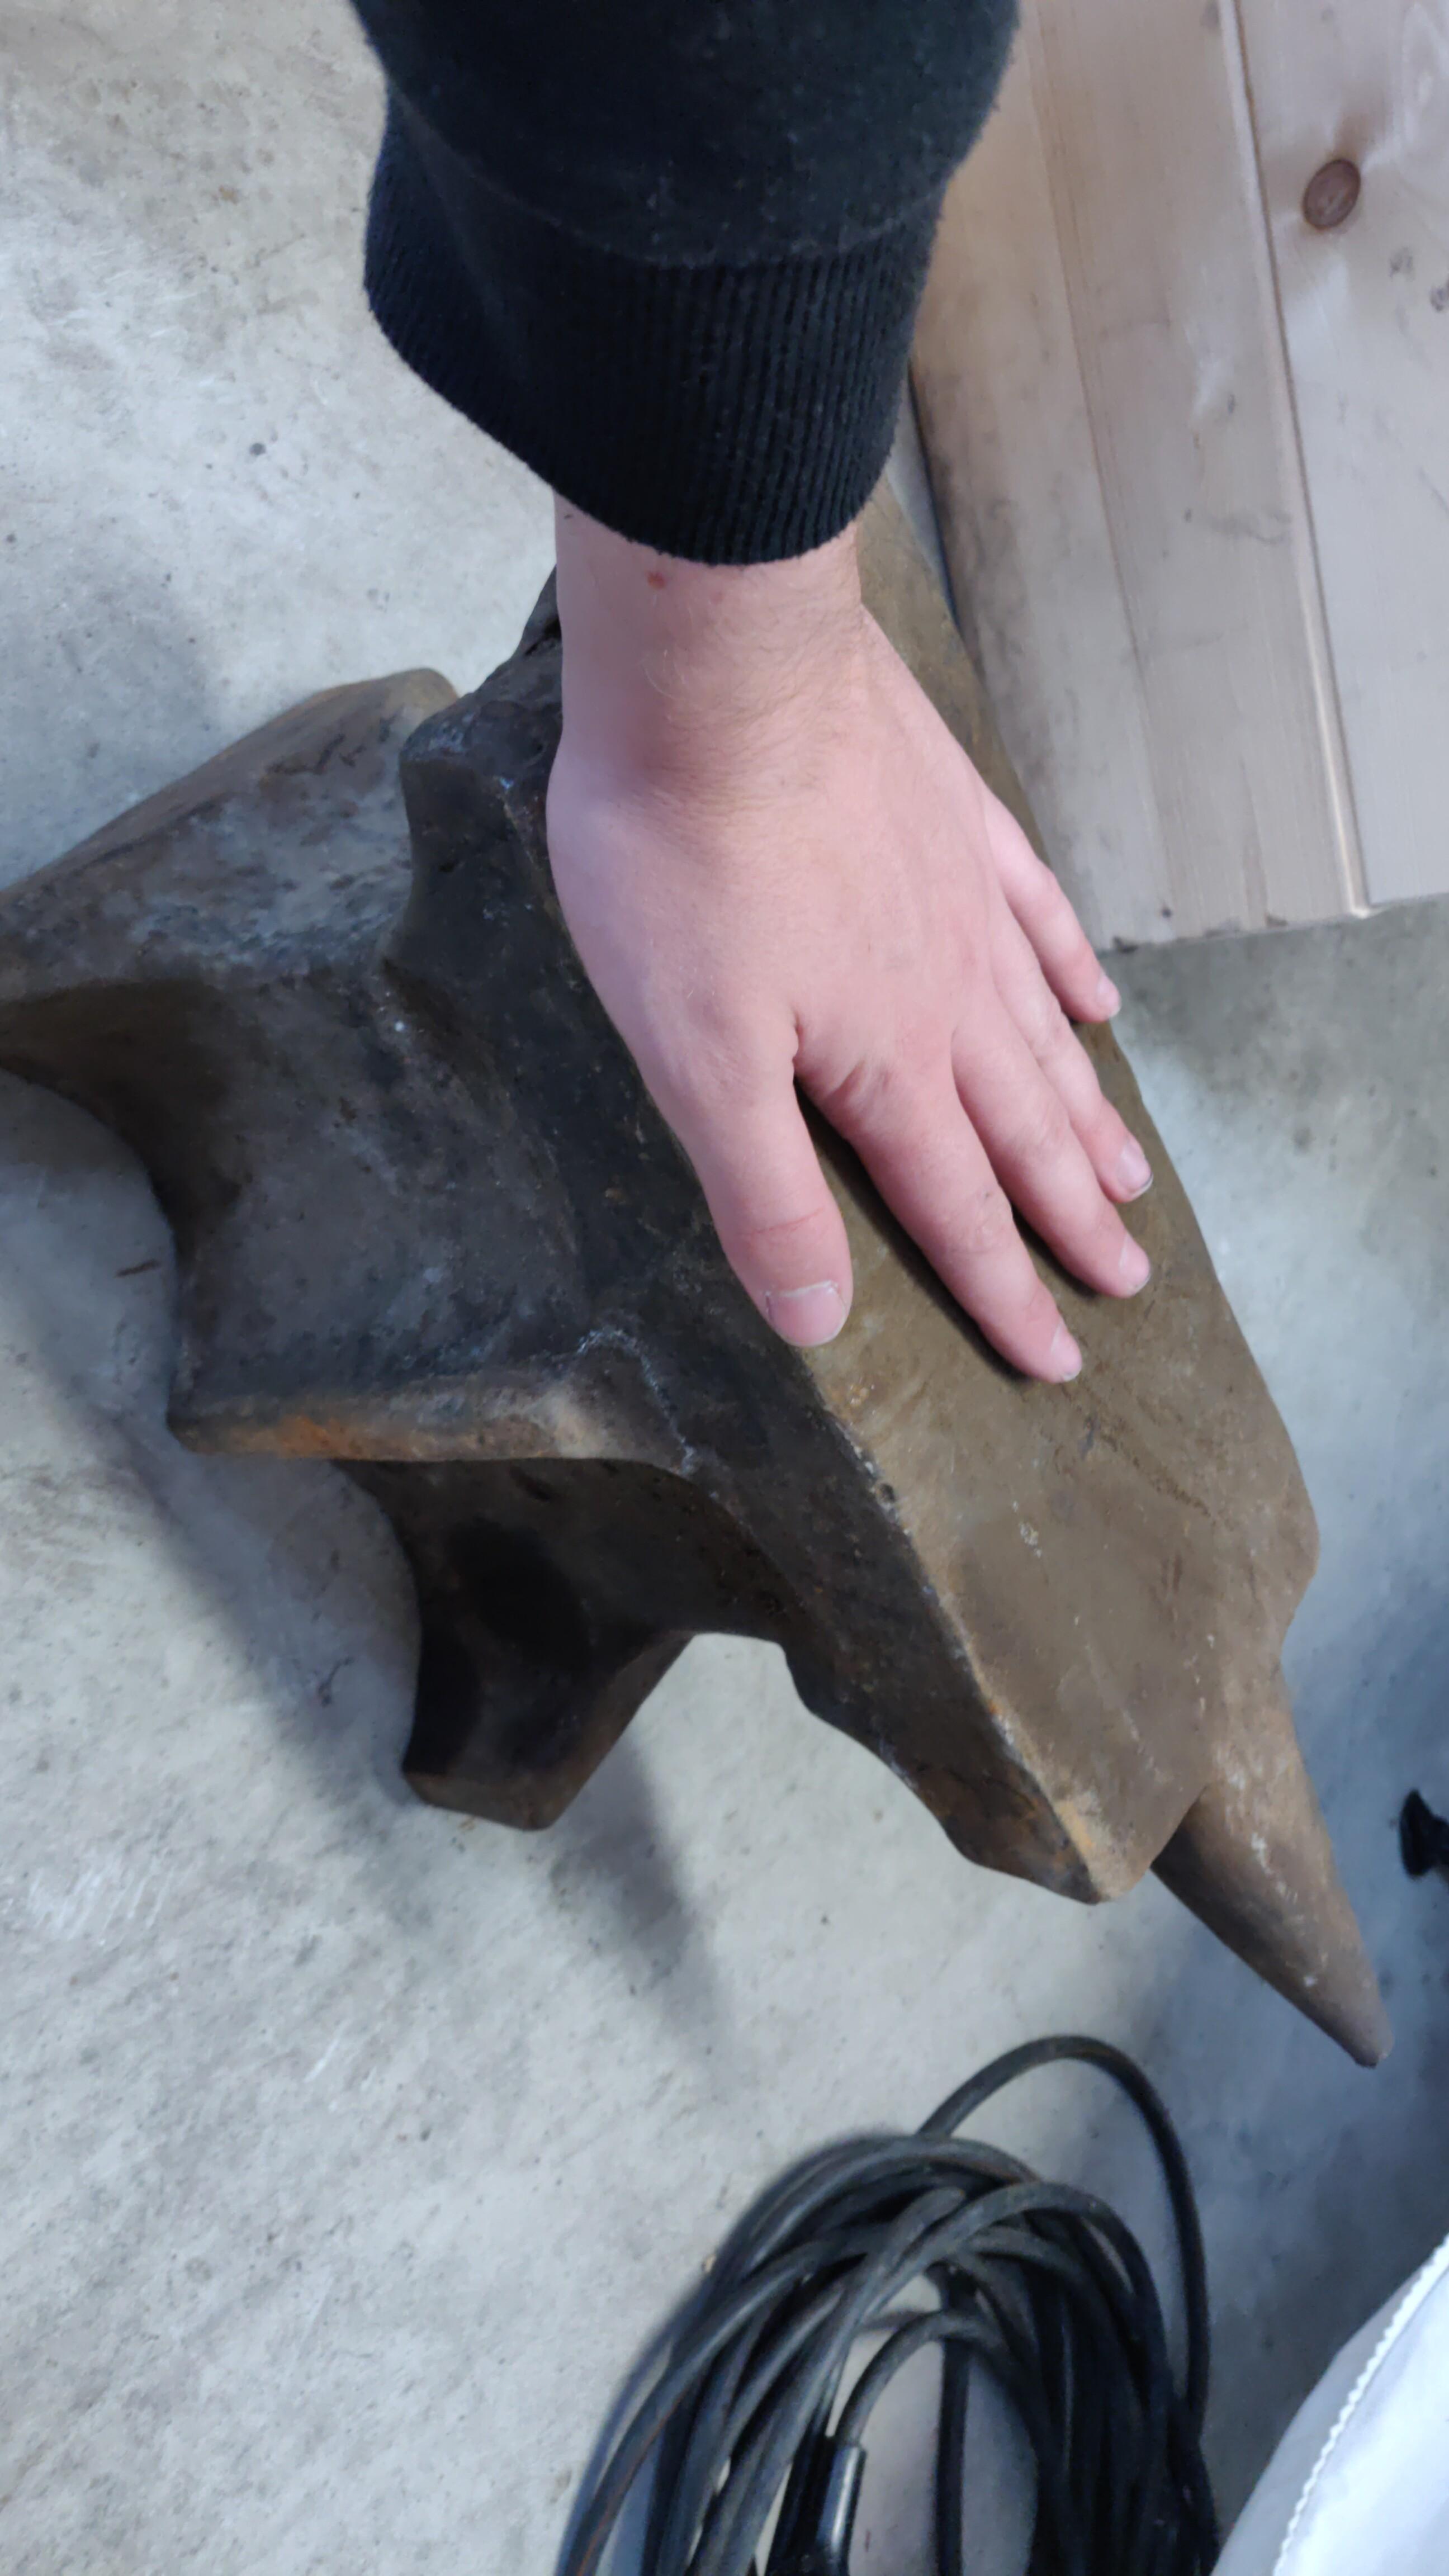
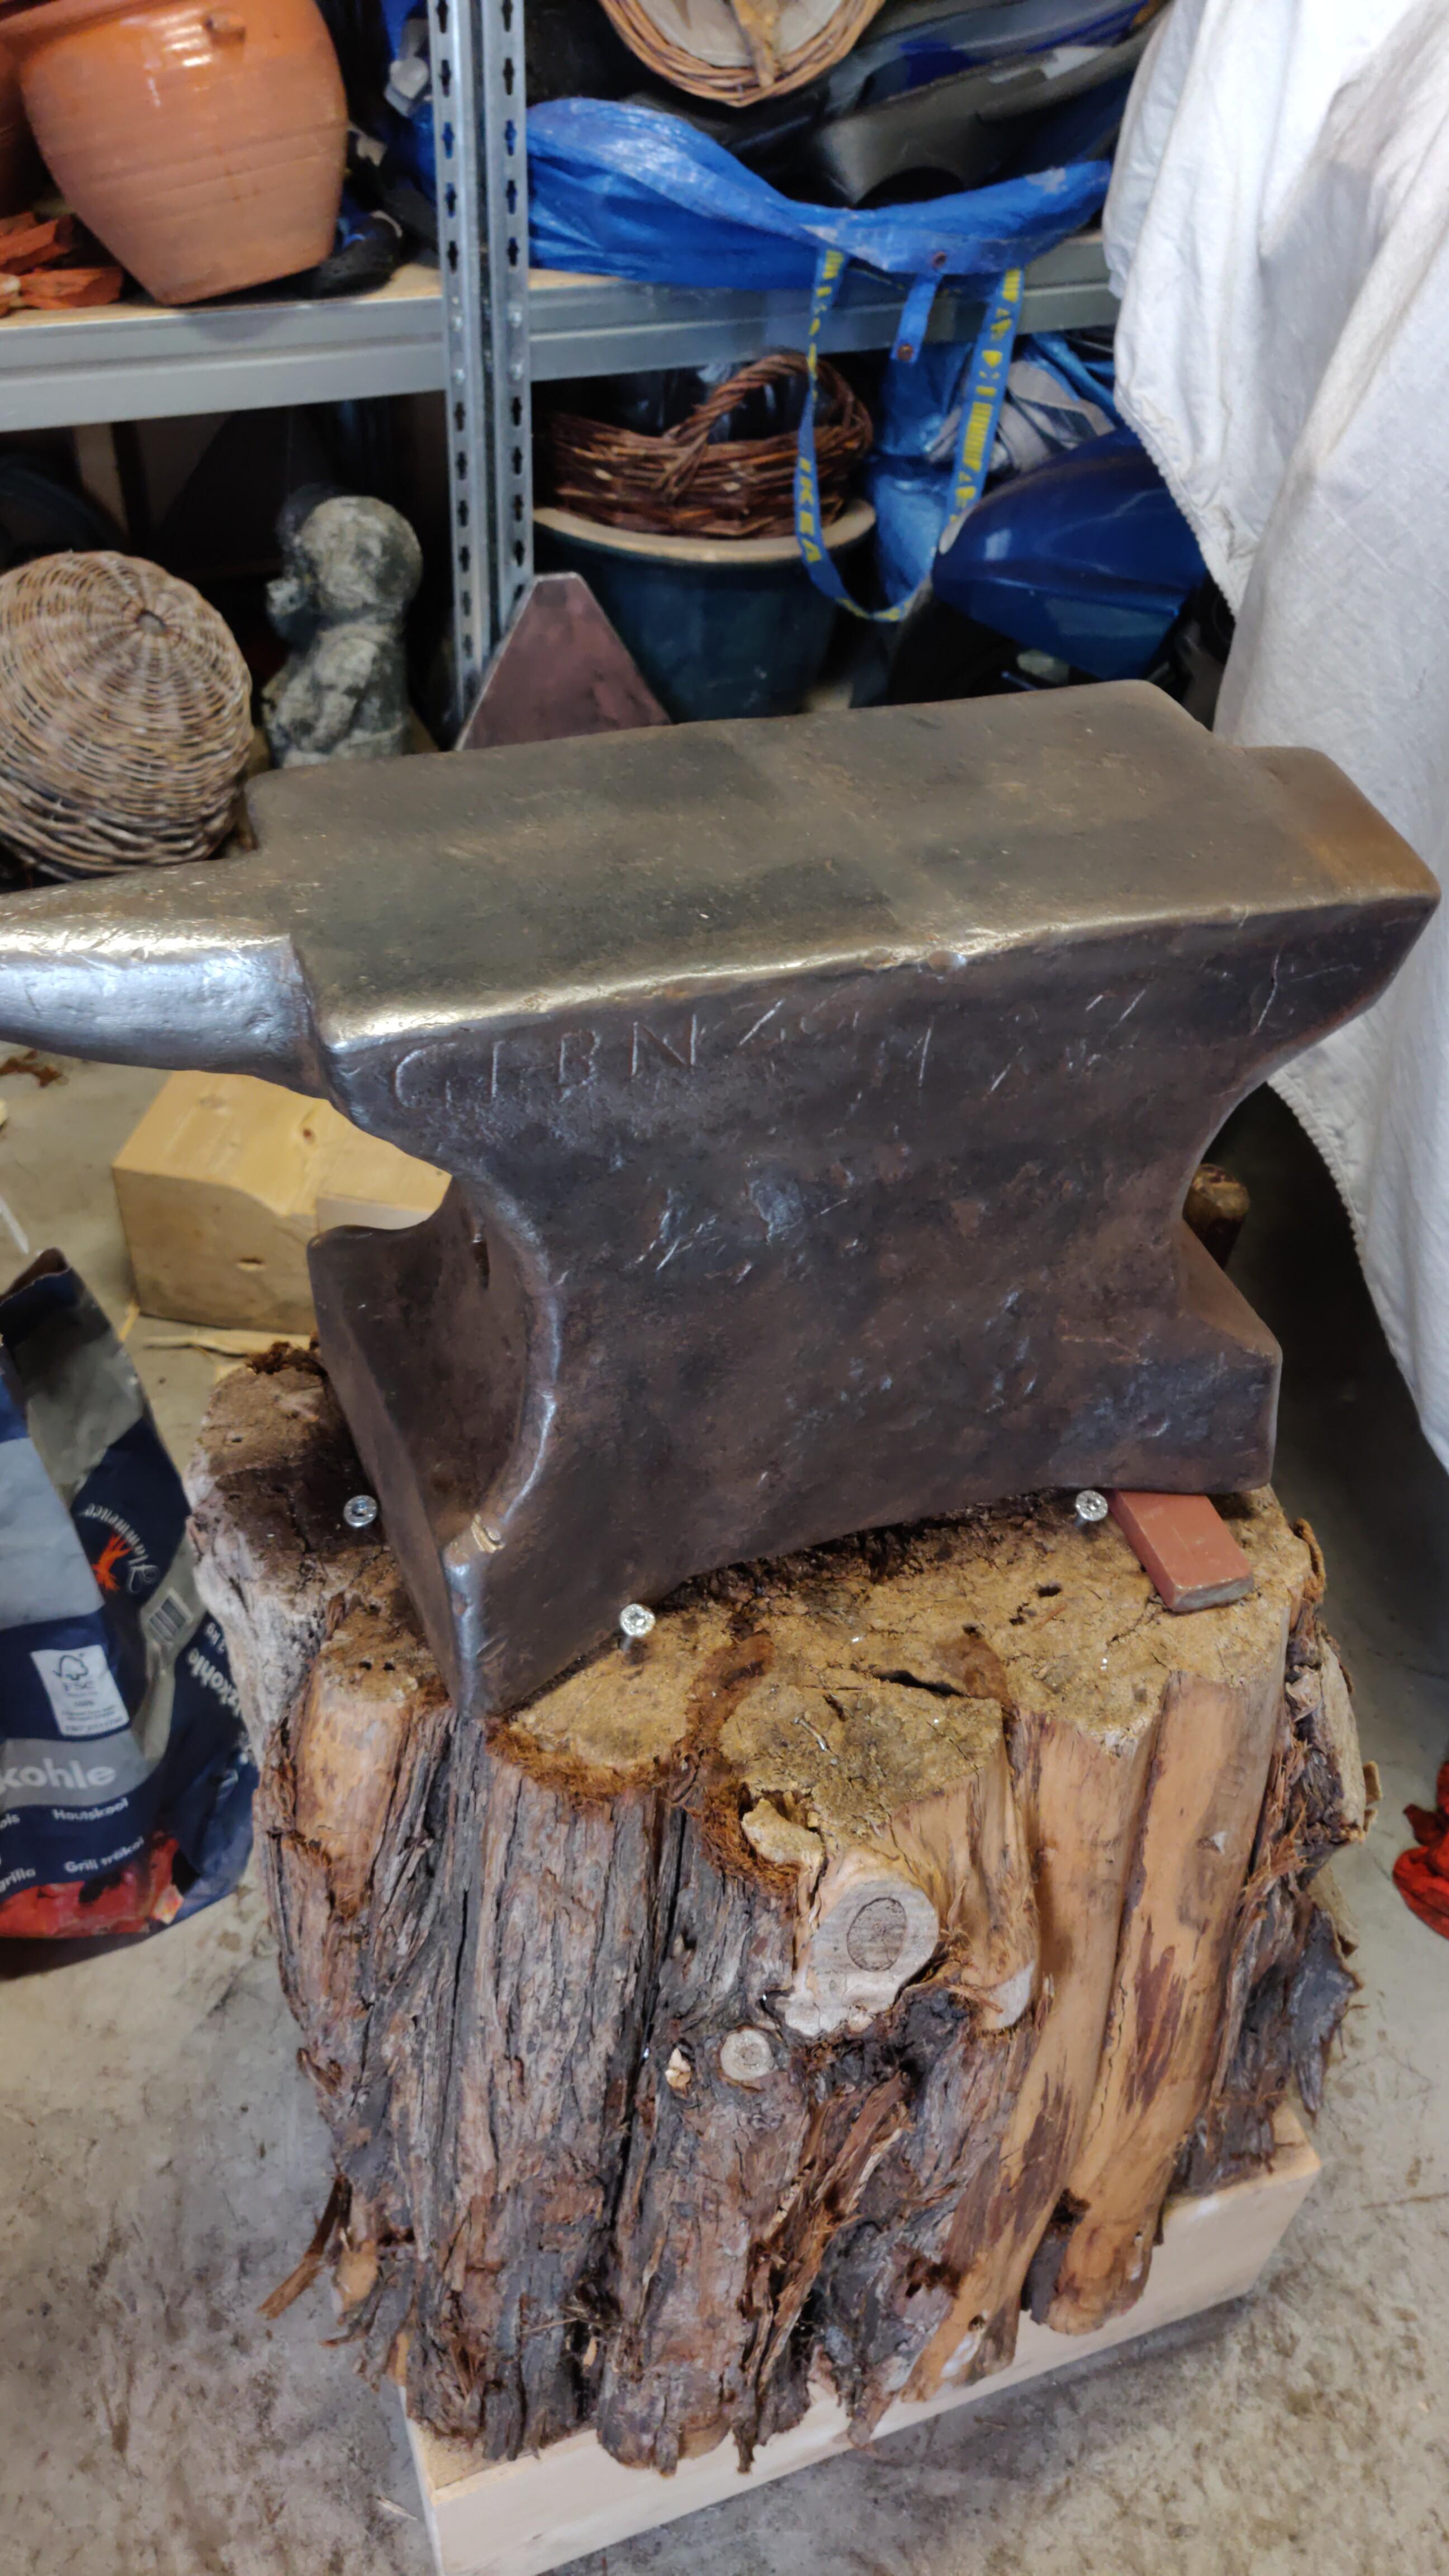
I have seen a video by Joey van der Steeg about church window anvils, but he has since deleted the video, I will try to stay true to what he said about functional and non functional church window anvils.
What Julian mentions about the "nose" being thinner is indeed a characteristic that appears on anvils that have less protruding feet on the opposite side to allow the anvil to lay flat, and to allow the thin "nose" to be used as a bottom fuller, and the indentations to be used as swages for shovels and curves. Your anvil has the thick "nose" that is not functional as a fuller. Now comes the realm of speculation as I don't recall what was exactly said about your style. But I know that flipping the anvil on its side is not very practical whenever you want to use a bottom fuller, while the indentations are really useful, and you don't need to flip the anvil to use them. therefore I think the thinner nose is left out while the indentations are still present in later models.
I have pictures of my anvil, which is an example of a "functional" church window. here to can clearly see that the feet on the opposite side of the church window are sticking out a lot less to allow it to lay down flatter when you want to use the church window as a fuller. I have done this once. It is a bit more useful in my case because the hardy hole broke off at some point in this anvils life. The year stamped on this anvil is 1778.
I'm in no way an expert on anvils, but if I recall correctly this is some of the info Joey gave in the video.


~Jobtiel
-
Did you try the plating on clean steel? I can imagine that scale will prevent better bonding between the two metals.
~Jobtiel
-
Wow, that looks like a really good home made anvil, I have a forged anvil, but yours has a lot more usable things on it than mine. I don't have a hardy hole or step. Very well done! I'm checking this thread to see how it performs!
~Jobtiel
-
Hi, I can't see the picture currently.
~Jobtiel
-
JHCC, also a good idea, I do plan on making it movable, so that I can always decide for someplace else. Right now my hammers and top tools are hanging on my stump I use as anvil stand. It is getting a bit full now though, so a hammer and tong rack are high on the list for the new shop. I do plan on forging it instead of fabrication.
~Jobtiel
-
Frazer, I choke the grip too when needing finer control, I only switch hammers between heats, often leaving my main hammer on the anvil for when I need it again. In my new shop I plan on putting a hammer rack close to the forge, so I can switch while tending to the fire.
~Jobtiel
-
Interesting discussion on the hammer holding, I think you have better control with your thumb on the hammer, but in my now 1.5 years of forging I've never felt the need for that extra control. And hearing how it can really damage you due to the shocks, I don't feel the need to hold the hammer that way anyway. If I want more control for finer forging, I grab a smaller hammer! It does help that I inherited my grandpa's toolkit with 500, 600, 700, and 900 gr cross pein hammers.
~Jobtiel
-
Thomas, that is correct, distillation works kind of similar, where your mixture will stay at the lowest boiling point of the compounds in mixture, until completely evaporated.
The analysis you describe is used in organic chemistry to get an indication of purity after synthesis.
What this basically means is that the more pure something is, the shorter the range of the transition is.
~Jobtiel
-
I can only see the first two photos.
~Jobtiel
-
Yeah I'm not sure if it is 5160, but so far it behaves like it. But yeah spring steel hardens fine in sunflower oil. 4140, known, also does. But it is a medium carbon steel more tool oriented.
~Jobtiel
-
Over here you can buy 6 liters of sunflower oil at the Lidl for about 6 euros, and it quenches 5160 and 4140 just fine.
~Jobtiel
-
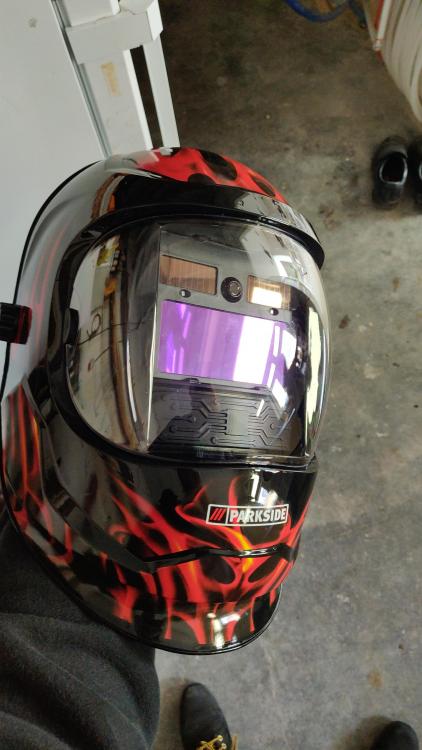
By your recommendation, an automatic welding hood arrived today. And last week Practical Blacksmithing arrived in the mail!
~Jobtiel
-
After buying a welder I figured I needed a chipping hammer. A few hours in the shop later, and I only need a handle for it now.
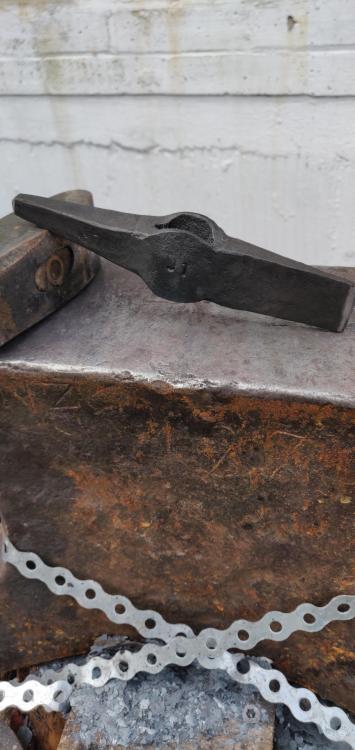
4140, hardened and tempered to straw yellow.
Next time in the shop I'm going to weld up a guillotine tool and some dies from leaf spring.
~Jobtiel
-
I often feel something is too complex or demanding before I start, and most of the things I forge I basically forge for the first time. Complex it often turns out not to be, but demanding it is. Or time consuming really, I'm still not the most efficient smith.
~Jobtiel
-
Oil vapors can be hazardous depending on what oil you use, so if you have an enclosed space it might be worthwhile to quench near the hood or outside.
~Jobtiel
-
The guy said it still works, it's a cheapish brand and still quite new, so I'll see if it works good enough. If not I'll toss it.
I'll keep check on the replacables and see if I need to change them occasionally.
Thanks guys!
~Jobtiel
-
I did find an auto darkening helmet for 10 euros second hand, so like you guys said it should be easier to weld with it than without it. Once it arrives I'm going to start a bit of practice welding.
~Jobtiel
-
That is a good idea, I want to make fuller and butcher dies at least, as I find myself needing them most. I think the butcher can be left soft, don't need them as much as the fullers. But the fullers could use some more durability I think. I'll try it out as soon as I welded the guillotine up.
Welding a sacrificial plate is also possible, but I'd rather learn to arc weld properly first before I start anything with tool steels.
~Jobtiel
-
50 minutes ago, ThomasPowers said:
Jobtiel1; You seem to think that there is only *1* hardness possible with hardening.
You're right, I didn't think of that. That is actually pretty nice. I do think I'll leave the struck ends soft. I plan on using leaf springs as dies, and I already had a piece of that broke off from a drift I made with a crack in it.
Do you recommend hardening the struck ends and draw a higher temper, or is leaving it soft for leaf springs fine? I think that leaf spring is plenty tough to resist the hammer blows sufficiently. My top tools are 4140 and the hot cut already developed quite a lot of mushrooming, so I think I'll try toughening up that struck end the next time I make a top tool.
~Jobtiel
-
11 hours ago, ThomasPowers said:
so some sort of residual hardening will still be present and it will keep the top from mushrooming under the hammer impacts.
Do you harden the striking surfaces as well? I guess you're using a soft hammer on the guillotine dies if you do. I am making a guillotine soon too, but I wasn't going to harden the striking surfaces.
~Jobtiel
-
I was thinking about using the bended variant as shown in this picture:
However, I wanted to to practice forge welding. The legs are completely welded together without seams so I don't think the weld will open up, but for the next one it will look better if the rest is welded up too.
Indeed we use the Dutch ovens a lot to cook on campfires, and we use it occasionally to bake bread and other things with hot coals.
~Jobtiel
-
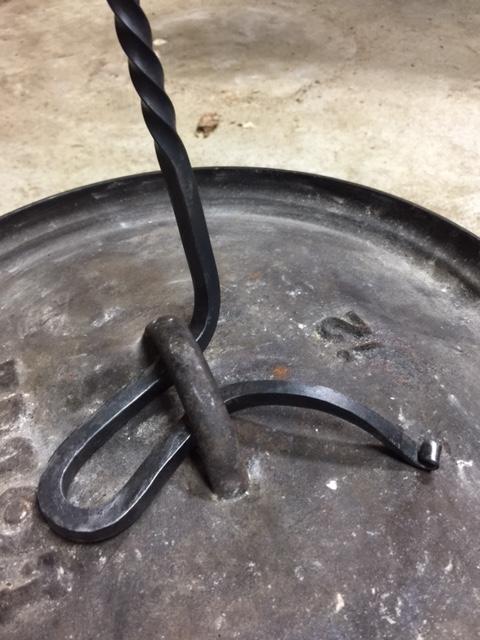
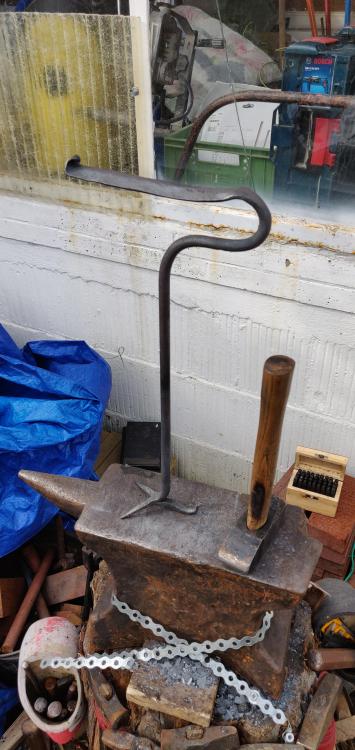
2nd commission finished!
This is for my scouts group, as we lost the last dutch oven lid lifter somewhere. Not a paid commission, but still nice forge stuff for other people.
I got the idea from this design from the iForge.
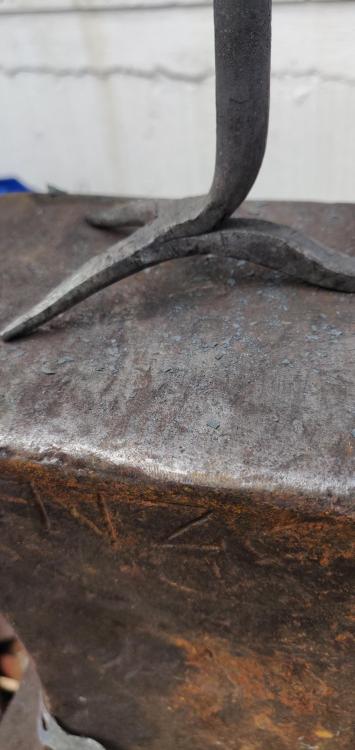
The feet were forge welded, next time I do have to weld them further shut, as I think the stress riser at the bend might cause the whole thing to fail, but time will tell.
~Jobtiel


What did you do in the shop today?
in Blacksmithing, General Discussion
Posted
Thanks Frosty! I'm looking forward to finishing it too! First I have to finish the filing on the drawknife for selling, after that I'm going to start filing the hatchet to finish. I'm definitely going to add a curve, I have to research a bit on what the ideal curves for this profile look like.
I'm really happy that I finally made a working axe. Been a long term goal to make my own axe. Now I'm thinking about selling them!
~Jobtiel