
John B
-
Posts
3,598 -
Joined
-
Last visited
Content Type
Profiles
Forums
Articles
Gallery
Downloads
Events
Everything posted by John B
-
You might be a machinist if it takes you longer than a smith takes to put a square tapered hole in a bar You might be a machinist if you use a hacksaw to put a slit in to make a Celtic / Fredrickson cross, fork end, or animal head etc when it would be more appropriate / economical / and quicker to slit it with a hot chisel/cutter
-
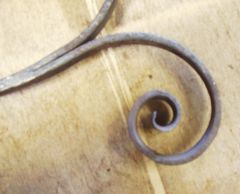
This was an experimental piece for a house sign for a "Wren Cottage", it is approximately 8 " diameter, and the image for the pattern was from an old English Farthing coin about 5/8" diameter second pic. Material was 18swg copper. It was a first attempt at a different technique, and part made at this stage, unfortunately I don't have a picture of the finished item This was made on a flat plywood board, the outline and detail defined with a small lining chisel with rounded edge to prevent it cutting through the annealed material, but deep enough to leave an impression on the base side, (The easiest way of doing this is to stick a copy of the drawing/picture onto the face of the copper, and follow the lines of it with the lining chisel) The next stage was to form a depression, the vague shape of the finished object in the material from the underside to give a relief for the body shape. Using the board with various thicknesses of materials, in this case, squares of softish leather cut from a welders apron, and firm piled carpet tiles, stacked to provide the "give" necessary to allow the tools being used to form the detail required the finished piece can be formed. Patience is a necessity and little and often are key points to remember, just keep adjusting the supporting materials to suit, and work the material from both sides if necessary, a bit of thought may be required how to best achieve this. If you scan in the picture required, you can flip the image to make a right and left versions, make the pieces, cut them out and solder/braze together to form a three dimensional object. The weathervane cockerell head is an excellent example of what can be achieved using this or similar methods, for suggestions on tool shapes run a net search Great therapy ideal for making jewellery, wall hangings, scenes etc
-
 Snub (Tight rolled) parallel ribbon end scroll on 20 x 10 material in side draft coke fuelled forge, made as one of three to form a branch welded feature when welded to two other scrolls of half this materials thickness
 -
 Tapered ribbon end scroll on 20 x 5 material made in side draft coke fuelled forge, made as one of three to form a branch welded feature, lap welded to second scroll
 -
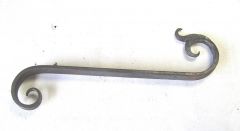
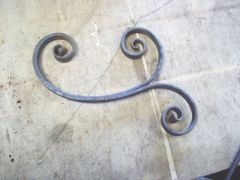
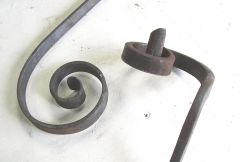 Jig made from 20 x 10, fishtail scroll to prove it works from 20 x 5 material, jig to mount in leg vice, you can see the starting point raised above the jig to enable starting the scroll
 -
 Jig made from 20 x 10, fishtail scroll to prove it works from 20 x 5 material, jig to mount in leg vice
 -
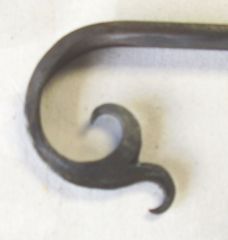
 Fishtail end with rounded corners, scroll on 20 x 5 material made in side draft coke fuelled forge, made as one of three to form a branch welded feature, lap welded to second scroll
 -
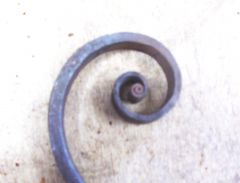
 Split end scroll on 20 x 5 material made in side draft coke fuelled forge
 -
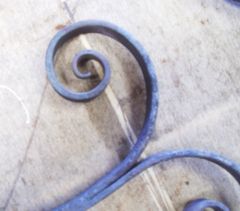
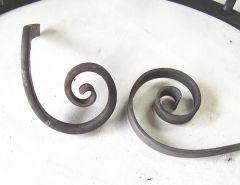
 scroll ends on 20 x 5 material made in side draft coke fuelled forge, a tapered ribbon end, and a split end
 -
 Scrolls made on 20 x 5 material made in side draft coke fuelled forge, scarfed, and fire welded prior to adjusting to fit in situ
 -
 Scrolls made on 20 x 5 material made in side draft coke fuelled forge, scarfed, fire welded and adjusted to fit a bracket frame
 -
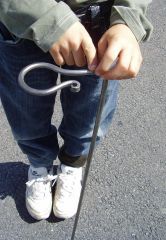
 A forging experience day at Westpoint Forge UK for a ten year olds birthday present, made from 8mm square mild steel, pictured before oil finish applied
 -
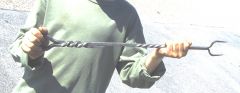 A forging experience day at Westpoint Forge UK for a ten year olds birthday present, his second attempt at forging, only assistance was in splitting and drawing down the tines, the rest he did himself under guidance
 -
 A forging experience day at Westpoint Forge UK for a ten year olds birthday present, his first solo attempt at forging
 -
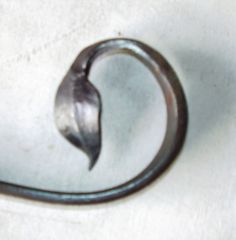 A Leaf End scroll, sometimes called a Blow Over Leaf scroll on 20 x 5 material made in side draft coke fuelled forge
 -
 A Bevel End scroll on 20 x 5 material made in side draft coke fuelled forge
 -
 I inherited this anvil a number of years ago and it is reputed to be over a couple of hundred years old (Have to get Matt89 to run a carbon dating check on it?) I had thought of repairing it and started to dress around the missing piece on the table, but decided against it, and have found the area to be quite useful for straightening items over. I don't use tools in the hardie hole as its very thin around that area. Although it has seen better days it still does its job, doesn't complain or cost much to run, and has just come back from holiday as a loan to a budding smith who now has his own anvil. What a tale this one could tell.
 -
Try pushing (sinking) the dome deeper over a large ring rather than a resisting surface, it will work quicker, then push the face back to the profile and detail required after filling the void with whatever medium you favour. Try sand and hold in place with a backing plate and duct tape if you dont like the idea of filling it with lead or repousse compound (pitch mixed with tallow +resin+plaster of paris or similar, or a Chattertons Compound) You may be able to purchase a suitable repousse mix from a silversmith or jewellers suppliers, but it can be a messy operation. Good luck with the project.
-
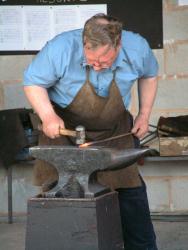
A good course this weekend showing how to make a variety of scroll ends, scarfing and forge welding them together to produce a branch welded scroll, making a scroll jig and producing a scroll with it. Then on Monday, a birthday treat for a ten year old and his Dad, and what he made, a wine glass holder for his Mum, and a Toasting Fork First time on an anvil, and with a bit of guidance, the only help on the fork was splitting and drawing the tines, but he formed them to shape, The boy done good! I think he's caught the blacksmith bug! First picture is a Tapered Ribbon End scroll and a Split End scroll, NOT a Tapered Bevel scroll as stated on picture The 3 scrolls welded together are a Tightly Rolled Parallel Ribbon End, a Tapered Ribbon End, and a Rounded Corner Fishtail Scroll Then a Bevel End, and a Leaf End (sometimes called a Blow Over Leaf end) A Scrolling Jig and a Fishtail end scroll pulled on it to prove it. Wine Glass Holder, and the Toasting Fork the lad made, then a close up of it.
-
To anneal your copper, heat it allover to bright red and quench in a tank of clean water, it can be left to air cool, but obviously this takes time. You can work copper over pitch, lead, sandbags, stakes or carpet material, each have their own characteristics, and some smiths favour one technique over others, all have their place and uses.
-
Sandringham Craft Show
John B replied to John B's topic in Blacksmiths and Metalworkers Association of the South West UK
Maybe, but we would make you welcome, and with a nice cup of tea. -
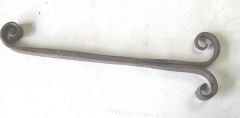
July 18, 19, 20 Sandringham Craft Show, Norfolk, UK. Open Blacksmithing competition, to make a doorhandle without a latch in 2 hours, demonstrations and ironwork on sale.
-
Reminds me of one my father had, he used to work in the steel industry making crucible steel during the second world war, and special steels for the cutlery / munitions industry. He used to have a miniature folding penknife with nacre (mother of pearl) side plates. When it was open, it would fit on a farthing (1/4 of one old english penny,which was approximately 1/2" diameter) inside the perimeter. It had a small steel loop on it and he used to keep it inside a wallet on a ladies hairgrip (bobby pin ?) through the loop so it wouldn't get lost, he also had a miniature pair of scissors about the same size. Despite extensive searches after he died, unfortunately it/they were never found, still, great memories.
-
What hammer? (Don't answer that, I already know)
-
 Strap hinges made in live forging competition at Southwest Country and Game Show at Westpoint Make a strap hinge in 90 minutes