CGun
-
Posts
43 -
Joined
-
Last visited
Content Type
Profiles
Forums
Articles
Gallery
Downloads
Events
Everything posted by CGun
-
Has anyone tried blowing pure oxygen into a steel melt to remove the excess carbon? I am curious if this works on a small scale.
-
First Crucible Steel Run, and Forging.
CGun replied to DanielC's topic in Smelting, Melting, Foundry, and Casting
How much time is the steel spending in the furnace to get it to melt and what are you running for fuel to melt it? I notice the glass on the surface. Are you using it as a slag layer to prevent atmosphere from contacting the steel? I am still working on refractories that will withstand the temperatures repeatedly. How is your furnace holding up to multiple melts and what are you using as refractory? I have to say that the NOVA Ulfberht documentary was AWESOME and I have watched it at least 5 times at this point. It is what got me interested in melting steel. -
Melting points of Metals and Alloys
CGun replied to Glenn's topic in Smelting, Melting, Foundry, and Casting
This is a great reference chart! I am going to put it in my shop somewhere. It also gives you a visible reference as to why melting steel burns through refractory like its free... 2,750 is a long way up at the top of that chart and to cast it, it needs to be up around 3,000! its pretty impressive we (this modern world) have any refractories that can sustain those temperatures time and again. -
Miniature Arc Furnace for Melting any metal
CGun replied to CGun's topic in Smelting, Melting, Foundry, and Casting
A lot of what I applied to this furnace I actually learned by doing research on larger furnaces. A typical DC Arc furnace capable of 300 Ton melts runs at about 600V and 44,000Amps for 26MW of power! It can bring 300 Tons of steel to casting temperature in about 30 minutes with the help of some oxygen lances which blow pure oxygen into the furnace to help heat it (by igniting and burning the steel, releasing a large amount of stored chemical energy). But a lot of the concepts actually hold true even at the micro level that mine is. For example, a large arc furnace starts its cycle at a low power rating during what is called the "boring through" phase. It involves the electrode literally boring a hole down through the metal to develop a small molten pool at the bottom. Once the pool is established, the power is turned up until the rest of the melt comes up to temp. This is ubiquitous in melting steel or other metals which are bad conductors of heat (as opposed to copper and aluminum which are phenomenal conductors), but happens sometimes with copper too if there are large gaps between the scrap in the crucible. The Steel directly beneath the arc melts almost instantaneously, without time to transmit that heat energy to the material around it. Thus, the electrode bores down through it rather than melting it as one contiguous block. For this reason, I built a preheat function into my furnace. It is a sub-routine that runs when a "preheat" switch is turned on. Basically what I have the program do is bring the electrode down, strike an arc, then draw the electrode back up until the arc is extinguished. Then it delays for 200 milliseconds and continues that cycle until the preheat switch is turned off, then it resumes it's normal program, which is what is shown in the videos I uploaded, mainly the machine trying to maintain a constant arc length. I am just waiting on my new control PCB to get here, I design them and have them printed by JLC PCB and then I have to populate it when they arrive... but it takes a while to ship.... This allows the steel a little time to transmit the heat that was just applied by the arc through the rest of the crucible more evenly. I am hoping to do a casting of some single bevel arrowheads I built a master for a while back. Should be a fun project!
-
Miniature Arc Furnace for Melting any metal
CGun replied to CGun's topic in Smelting, Melting, Foundry, and Casting
Thank you. Do I need to remake all the refractory and apply plistex while the refractory is still drying or can it just be applied over the surface of the other fired refractory? -
hoskins fd 104 electric induction furnace
CGun replied to dailyplots's topic in Induction Heating, Oil forges, etc
I know this is an old thread, but was the crucible the one that came with the furnace or a new one? The issue is that induction furnaces generally don't heat evenly and portions of the crucible are glowing while others are just getting heated up. This depends on the geometry of the coils and the frequency of the furnace. Is this a 10kW or larger furnace? I know you said A5 crucible which is like 15 lbs of metal right? A pure graphite crucible should handle the thermal shock, has a much higher maximum temperature and will heat much more evenly in an induction furnace due to the internal resistance of the graphite to the induced easy currents.this is all assuming you are melting non-ferrous metals. Graphite would be expensive, but I cannot imagine the furnace was all that cheap. And yes. Making an insulating refractory cover, while not usually used in industrial furnaces, will help the metal melt faster. -
Miniature Arc Furnace for Melting any metal
CGun replied to CGun's topic in Smelting, Melting, Foundry, and Casting
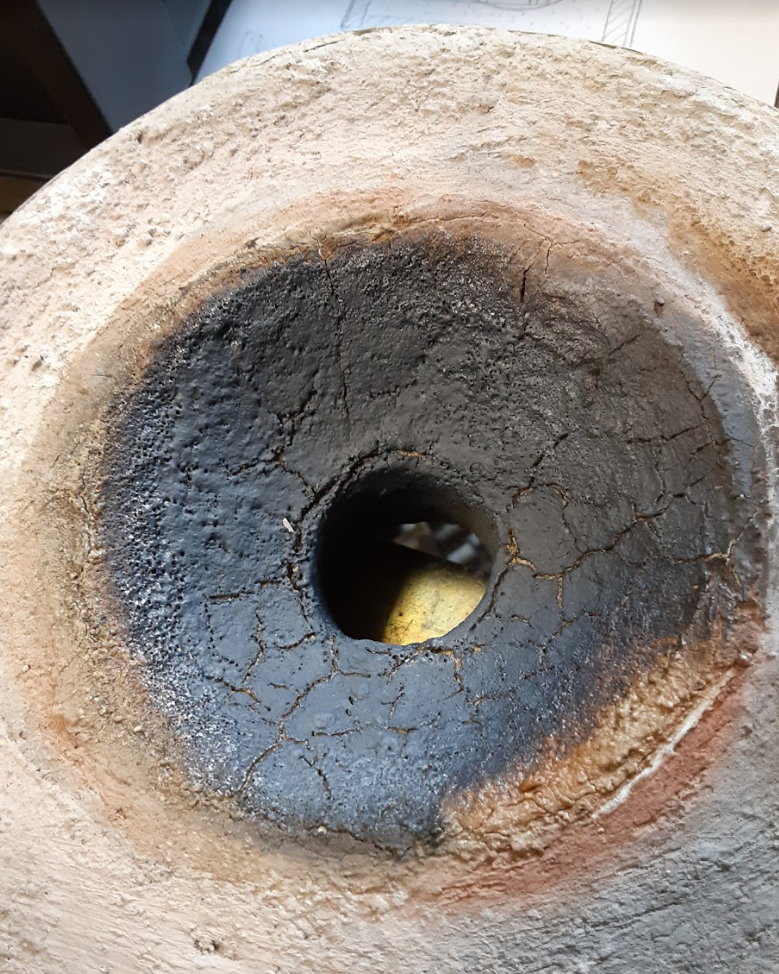
oh sorry. The black discoloration is around the underside of the lid, that is the hole that the electrode enters the crucible from. The arc is about 2-2.5" (about 6cm for you metric guys) below that hole depending on how full the crucible is. The convex shape of the lid is to try to keep the refractory as far from the arc as possible. There is a lot of smoke from impurities burning as well as the electrode slowly subliming away and I am wondering if that is getting into the refractory making it black and "crispy" looking. It is still very hard and doesn't appear to be flaking away, it just doesn't look all that appealing. -
Miniature Arc Furnace for Melting any metal
CGun replied to CGun's topic in Smelting, Melting, Foundry, and Casting
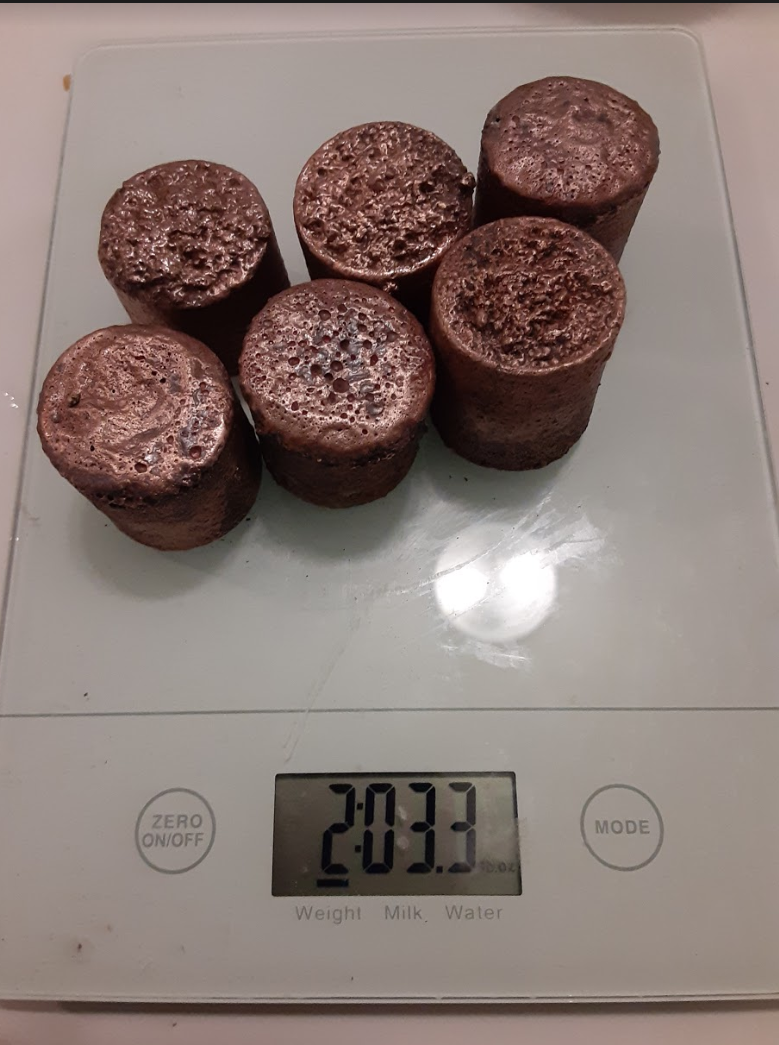
So after all this talk today, I took the furnace out back with the new lid and the old furnace crucible housing as it hasn't degraded as badly as the original lid to fire it up and see how my DIY refractory survived. Anywho....In the process I ran a melt of just over 2lbs of copper in the furnace. Settings were 2,000W for a total runtime of about 12 minutes (about 45A at 44V). The watt meter on the machine said 640Wh consumed. This amounts to a total electrical cost of about $0.10 to bring 2 lbs of copper up to pouring temperature. This is the first time I have run a cost benefit analysis and I am actually shocked it is so low. I forgot to check it for a minute after it was melted and the copper got up over its pouring temp with an estimate of about 2,600F based on its incandescence (so a very rough estimate)... but it looked like the brightness of molten steel. Anyway here are some of the pictures. unfortunately I forgot to take a picture of the melt while it was liquid because it would have been a good shot, but I was trying to move to keep it hot and pourable. I realized after I had the molten bath, in my excitement to get going, I hadn't prepared any molds so I quickly drilled some holes in chunks of old firebrick and poured into those. And just like Frosty had warned me, the Sodium silicate did get a little gummy on the lid and turned to glass. however, it held up OK. I am now thinking that the refractory in direct contact with the crucible and lower anode will be fine for many firings while the refractory of the lid may be more of an ablative coating which occassionally needs to be repaired or restored. (yes it was concave shaped before I started).. It has been cooling for about 45 minutes and is still too hot to touch. I am wondering if this has more to do with the off-gassing contaminating the semi-liquid rerfractory coating and not so much a degradation of the coating itself... What does everyone think?


-
Miniature Arc Furnace for Melting any metal
CGun replied to CGun's topic in Smelting, Melting, Foundry, and Casting
Thank you! I probably only need about 20lbs -
Miniature Arc Furnace for Melting any metal
CGun replied to CGun's topic in Smelting, Melting, Foundry, and Casting
I honestly think a 3000F refractory will work for everything except the lid where it is in direct line of sight to the arc. I will have to order a bag of Kastolite 30 water setting stuff. I hate to pay $40 for shipping. I wonder if my local masonry supply could order some and throw it on their next shipment... Thank you fr all your help and knowledge on the subject! -
Miniature Arc Furnace for Melting any metal
CGun replied to CGun's topic in Smelting, Melting, Foundry, and Casting
Might be fun! plus, I feel like the crushed used crucibles are a good idea. after all, that is the only part that survived the high temperature right? I may end up using a dish zirconia crucible from the surface layer of the lid to resist the intense UV and high heat put out by the arc. Something like this inverted with a hole drilled through it for the electrode to go through: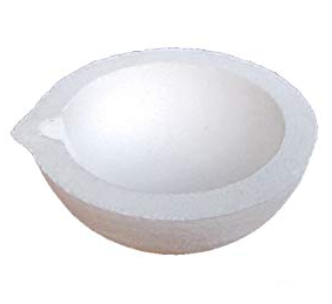
-
Miniature Arc Furnace for Melting any metal
CGun replied to CGun's topic in Smelting, Melting, Foundry, and Casting
I am glad I am not the only one with issues with refractory. As Frosty pointed out.... my refractory has just become a slowly consumed ablative on the lid. I was using a super simple plaster, crushed firebrick, perlite, aluminum oxide and talc. It actually held up to 2 steel firings, 2 copper firings and countless hours of experimentation before giving up the ghost and I could probably get one more copper firing out of it. The crucible is what is crucial and zirconia is going to be the way to go I think as graphite gets absorbed into the steel. I actually am hoping some of the guys, like yourself, on here could help me sort out my refractory issues. I thought I saw somewhere on here (I have been lurking for quite a while before I joined) that there was a DIY refractory page.... -
Miniature Arc Furnace for Melting any metal
CGun replied to CGun's topic in Smelting, Melting, Foundry, and Casting
I originally thought that too but then I read Tim Tinker's (I don't think that is his real name) blog. He was a chemist who turned to making backpacking stoves. He has a whole section on the chemistry of Sodium silicate refractories and how they behave when fired, mainly that the silicate becomes silicon dioxide in the presence of high heat and atmospheric CO2. This is why, when it is used in fireplaces it is becomes water insoluble. I am going to give it a shot and if it doesn't work, I will go on to something else (some form of ablative I guess. I think the 10,000F is the temperature of the plasma in the arc and not a measurement of the surfaces and air surrounding it. but I would say it is still a pretty harsh environment nonetheless. The new crucible is fused zirconia which should survive for a while. It is what is closest to the arc. The lid is probably 2-3 inches from the arc so it gets some heat but not as much as the steel. This is also why it is set up DCEN so that a majority of the heat is on the surface of the metal and not at the electrode. If you hook it up backwards, it atomizes the whole 12" electrode within about 4 minutes. hooked up correctly, each electrode lasts for 45 minutes or more. In doing research, I looked at Magnesium Oxide - Chromium refractory bricks, but those are only available in industrial quantities. so I am just going to have to deal with the fact that the steel crucible will probably need to be reworked every 10-12 firings. In essence... my refractory becomes an ablative for the ceramic fiber beneath. Do you know where I could get Phosphate bonded zirconia in non-industrial quantities? -
Miniature Arc Furnace for Melting any metal
CGun replied to CGun's topic in Smelting, Melting, Foundry, and Casting
Thank you for the welcome! If you have a ranger 9 already, The system I built isn't specific to my welder beyond knowing what it's open-circuit-voltage is for the micro-controller input. I am very excited to actually have this thing working and I am looking forward to learning from the members here. After all... any fool can melt metal, it's what you are capable of doing with it once it is molten that defines the nature of the craft. Most of my challenge was in getting the computer to maintain an arc and make that arc adjustable... everything else was cosmetic or involved refractory and heat resistance which has been known for the past 2,500 years. I can't wait to get the new crucible housing done and start slip casting some lost wax projects. -
Miniature Arc Furnace for Melting any metal
CGun replied to CGun's topic in Smelting, Melting, Foundry, and Casting
Melting the steel and fluxing it should remove a lot of the slag. At least that is what I do with lead (beeswax flux) and Aluminum (borax flux). I have never tried to flux steel because the challenge is always keeping it up above melting. I have heard that calcined lime can be used as a flux for molten steel and should do the same thing as fluxes does for other metals. when steel is molten, unlike other metals, I have read a level of slag on the surface is beneficial to provide insulation and an atmosphere barrier. Steel slag also has the advantage of being electrically conductive so the furnace still operates normally. But again, it has been three years just to get steel to melt reliably, so I am looking forward to the knowledge of the forum members here going forward on metallurgy and casting procedures. -
Miniature Arc Furnace for Melting any metal
CGun replied to CGun's topic in Smelting, Melting, Foundry, and Casting
Currently I have two options. The crucible housing is pretty well sealed, and as you may have guessed, as the steel beings to melt it starts to burn, this shouldn't change the composition of the molten steel other than potentially introducing slags to it. Most industrial arc furnaces have elaborate and very expensive testing methods for the composition of their steel, mine will not be scientific but I feel I could get a decent investment cast steel product using a mild steel bath. As such, if I were to try to make crucible steel, it would need to be cast, then worked out in forge through hammering. As it is, my goal was small investment casts that only need to be the strength of a mild steel for now. The second method is to trickle argon into the crucible with a copper tube at a rat of 1cu. ft./hr. This worked very well to keep the metal pure, but Argon's breakdown voltage is very low so the machine will not produce the power at a given arc length as it does in air. So the arc must be longer which tends to burn through lid refractory. Unfortunately there really aren't any non-exotic materials that will withstand the 10-15,000 degrees of a high powered arc for long... that said, I am making a hot face refractory from aluminum oxide with a fireclay (30% fireclay, 60% Aluminum oxide and 10% Sodium silicate binder) for the new lid currently. I am building a new crucible housing as well. This is for steel as all I had was a graphite crucible when I ran the first melt and, even knowing that the steel would absorb the carbon from the crucible, I ran that melt anyway. It carved a hollow in the crucible so the new one is made of Zirconia with a graphite anode at the bottom. we will see how that goes. It took 3 years of experimenting and lots and lots of frustration to get it to where it is at. The only thing I may end up doing with the Mark VI version of it would be to make the housing contain everything except the external electrode wires and the cooling lines. Does anyone have any ideas on how to test the steels alloy without a digital spectrometer or some other million dollar piece of equipment? -
Miniature Arc Furnace for Melting any metal
CGun replied to CGun's topic in Smelting, Melting, Foundry, and Casting
Sorry. This one is open: https://drive.google.com/drive/folders/1QrslaRjOQTNyxaA5C7mcQu4EX4auMvuc?usp=sharing Thank you. I just read through it. I also added to my profile. -
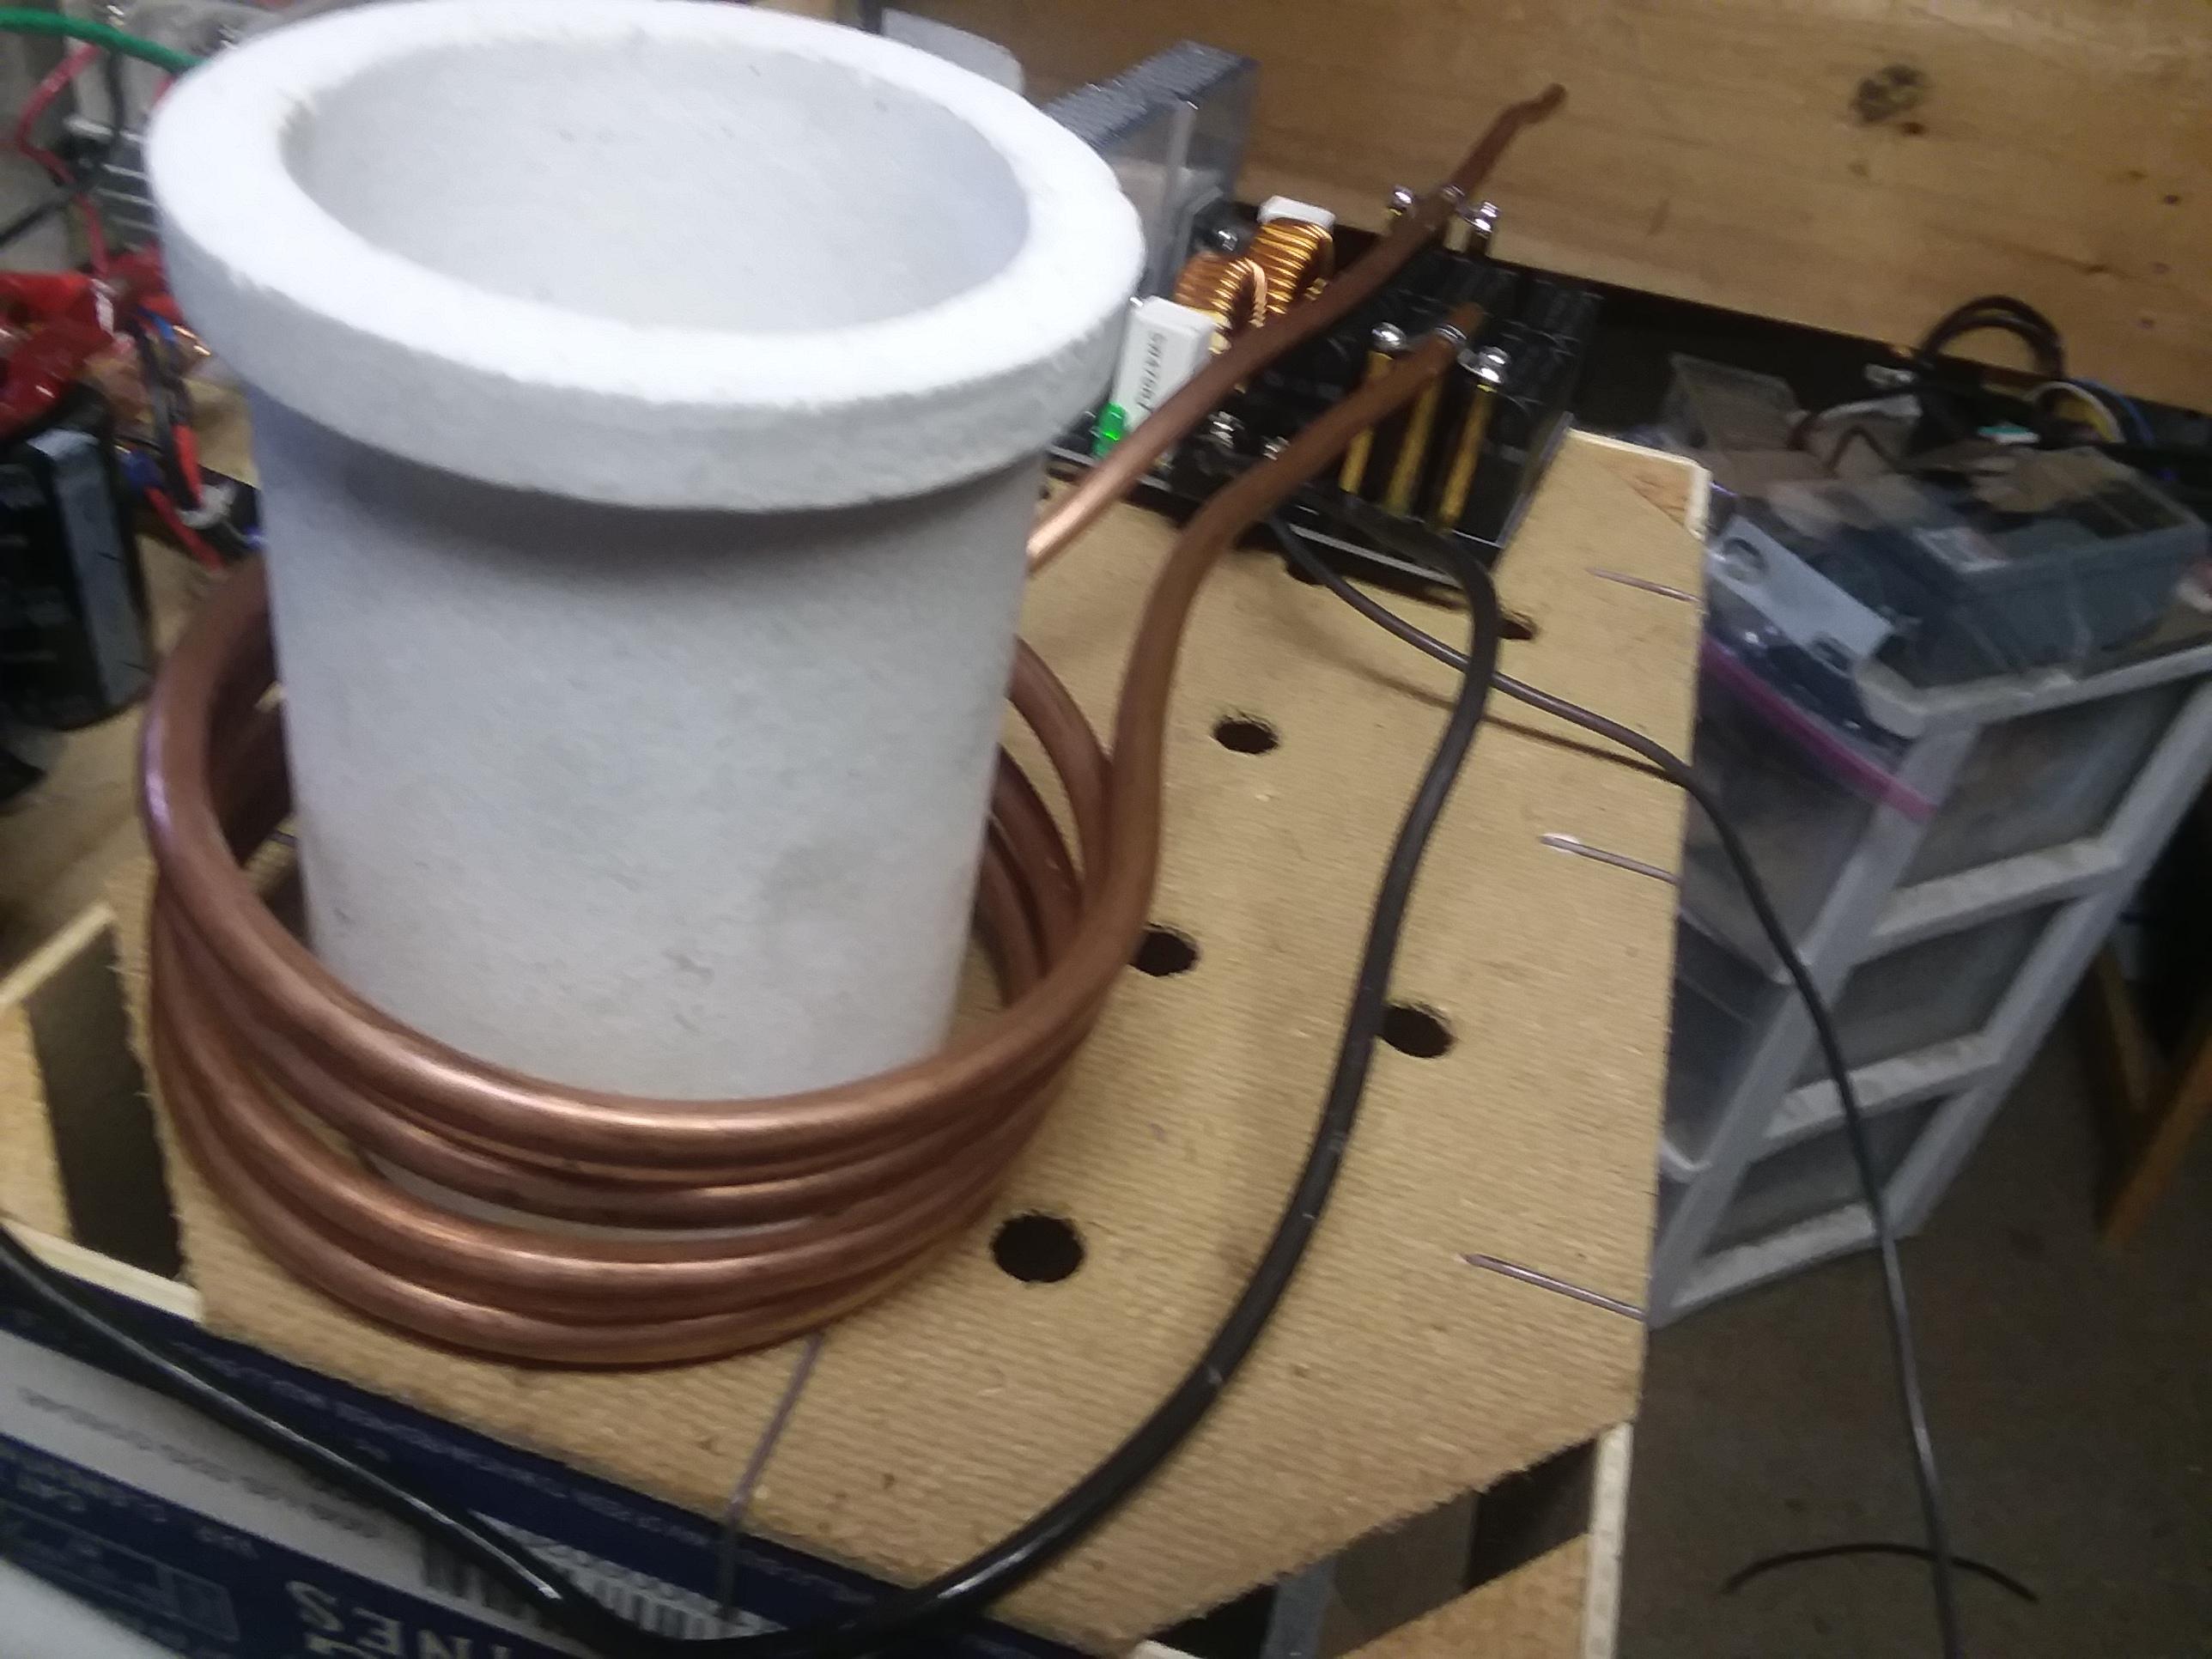
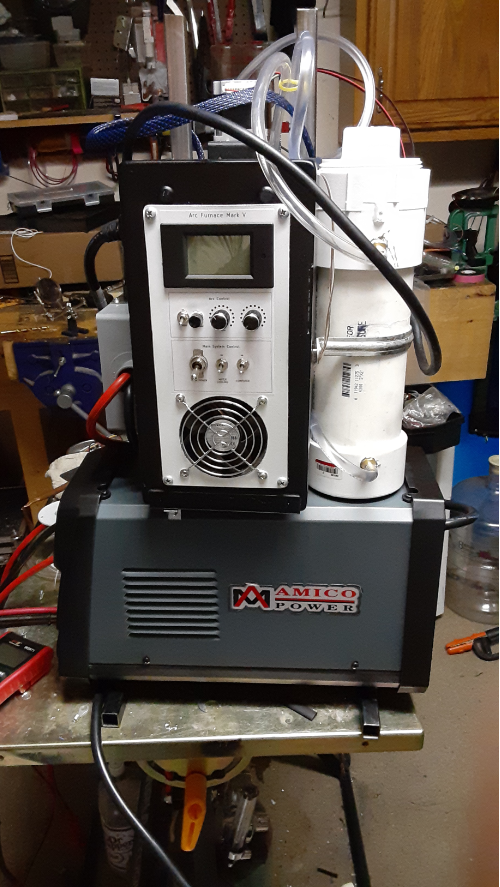
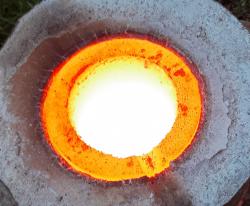
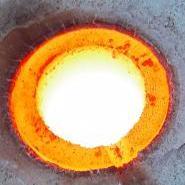
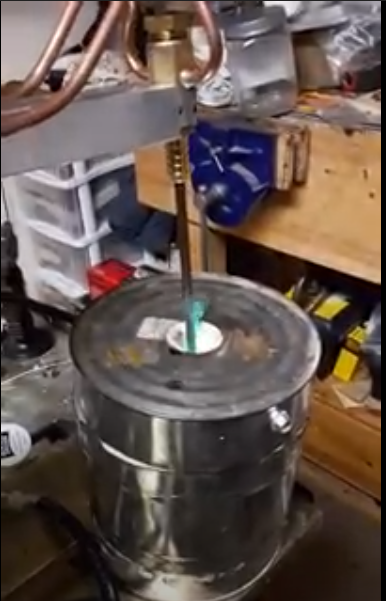
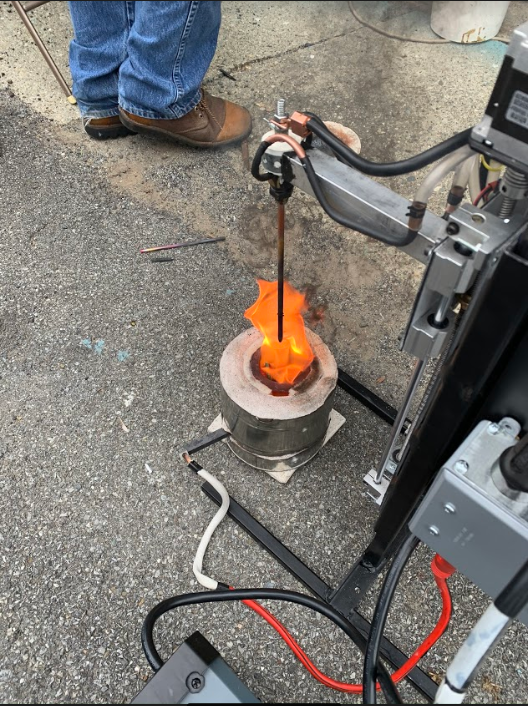
Hi All, I am new here but I wanted to share my 3 year long project to create a functioning arc furnace capable of melting pretty much any metal using simply the electricity from a common outlet. That was the goal anyway... After 3 years, I determined that, while a common 120V household outlet would likely melt steel in small quantities (less than 5 oz.) it wouldn't be efficient for anything larger. The project was inspired by a similar project produced by Gregory Hildstrom, you can simply google Hildstrom carbon arc furnace if you are interested in seeing his project. Anyway, his ran on a very expensive lincoln 275amp welder. My goal was to produce something similar but which would shrink the size of the furnace and increase its efficiency to the point where melting and casting steel at 2,000W was a reality. The accepted minimum wattage to melt a pound of steel from most sources is about 300W of direct heat from an arc furnace, making it much more efficient than coal or external (burning) heat source, which usually requires many thousands of watts of input to melt the metal due to all the wasted heat from inefficient combustion and the need to heat the surroundings to the melting point of the metal. Whereas an arc or induction furnace directly brings the metal up to its melting point and the incidental heating of the surrounding is only useful to keep the metal molten long enough to cast it. The stages were as follows: Furnace Mark I, II and III utilized a UPS tranformer putting out 24V AC or 36V DC (once rectified) Mark I was an AC furnace using two handheld graphite electrodes and was an indirect heat type. there was no smoothing and the arc was unstable and not easily capable of what I was looking for. It was scrapped for parts. below is the super simple schematic of the furnace. Mark II Mark II was a rectified DC furnace which was manually controlled. It tended to trip it's breaker constantly as it had no current control mechanism. Mark III was the first Computer controlled furnace and while it worked and the computer was supposed to regulate the current by shunting it through a resistor when it went too high, it was not fast enough and the leads began to overheat from the high current running through them (the transformer leads were only 10AWG and couldn't be changed as they were part of the transformer. This furnace also had a water cooling system in it which would keep the electrode cool by housing it in a water jacket and feeding the coolant through a small PC radiator to maintain its temperature. Mark IV was the most sophisticated furnace yet. It ran on a 1500W switch mode power supply and had both an arc furnace feature and an induction preheater. Sadly it was never completed and burned up the Pulse width modulator used to control its current during testing. These are a few of the pictures of it. A schematic would be very time consuming to create so I never did. Below are some of the production pictures and initial testing. The Mark V Furnace Worked and is the one that will be the benchmark for any future furnaces. It is capable of around 6,000W but is run around 3,000W most of the time. Power supplies are expensive so I did just cop-out and buy a 200A welder which I couldn't even build for the price I got it for and it has been very reliably running between 60A and 100A. The furnace has an arc length adjustment which, once the amperage is set, is how the total wattage of the furnace is determined. Cont'd below Below are some of the pictures of it running with both copper and steel. it will melt up to 3 lbs of copper all day long on a standard 120V outlet at 1,500W A view of the control board of the furnace. The screen displays amperage, voltage, wattage and Watt-hours of runtime. The Amico welder below is an IGBT inverter welder capable of 100% duty cycle at 153A running on a 240V two phase outlet. This is a blob of molten steel that cooled enough to get a good picture over the top. This was about 18oz of steel and took around 8-9 minutes to melt at 1,900W. Videos of the furnace running can be found here. https://drive.google.com/drive/folders/1QrslaRjOQTNyxaA5C7mcQu4EX4auMvuc?usp=sharing
.thumb.jpg.9e83761c134635a61fed4ec61f78aa7b.jpg)
.thumb.jpeg.6fb0b0a4aa33c4ef9ddb33b4d1f19beb.jpeg)


.jpg.4ad5a0be17e325c97ad7860927d01d6d.jpg)
.jpeg.e831f54bdc1ea1577e6f5a32ae467d51.jpeg)