

Goods
-
Posts
1,170 -
Joined
-
Last visited
Content Type
Profiles
Forums
Articles
Gallery
Downloads
Events
Posts posted by Goods
-
-
JLP, during the winter months we go to members forges. The hosts have been pretty open to members working on there projects. Last month I was actually asked to do the demo by the host. The rest of the year we meet at a forge the group setup at the historical society. There it’s an open forge with a large coal forge two anvils and two power hammers (25#LG and 50#LG). It’s basically first come first serve, unless there is a demo planned. We all tend to be very respectful and try to help out newcomers. It’s one of the reasons I got hooked so quickly. Of course, sometimes I feel a bit guilty about the amount of time I spend at the anvil, but when I’ve brought it up as a concern I’ve been told not to worry about it. Of course today there was a large forge and two anvils, the fire was going and no one was forging. So, I setup and got to work. No one else ever swung a hammer. (There was maybe 20 smiths there today.)
David
-
IBA chapter hammer-in today. I sharpened the handled tool I posted earlier in the week into a slitter, reshaped my long hammer eye drift/mandrel into a more rectangular cross section, and welded up a wrought iron billet. Good day and good company. Next week, IBA state hammer-in at the same location.
Sorry, no pics...
David
-
Very cool! It has that Viking mastermyr feel to it. Did you weld a bit into the peen also? (While I usually use heavy hammers, occasionally I really like to use small ones like that.)
David
-
I like the tongs and need to make some myself. As long as they work, the looks really don’t matter! What steel did you use? I’m used to seeing the make out of spring steel and seeing the 90degree bend drawn/flattened out to the outside of the bend to make the corner stronger. Let us know how well they work!
david
-
Pedro, still need to sharpen it. I’m going to take it to a hammer-in Saturday and talk it over with some folks before I make my final decision on slitter vs slot punch.
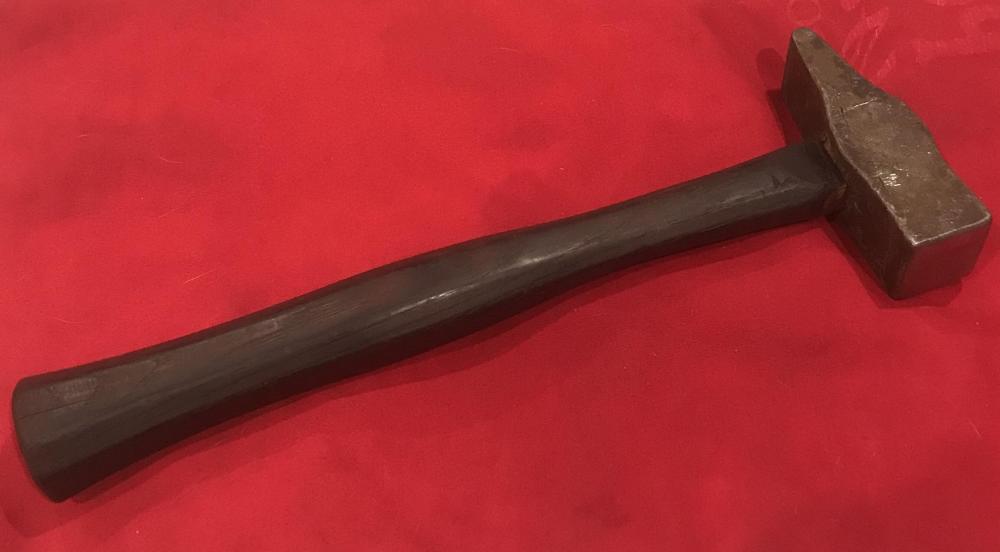
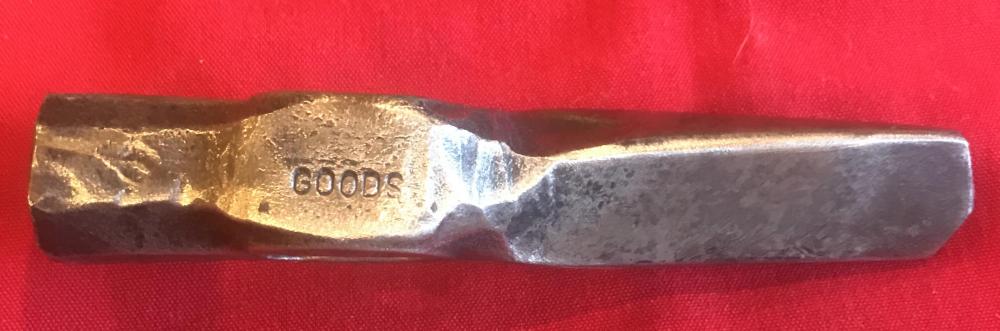
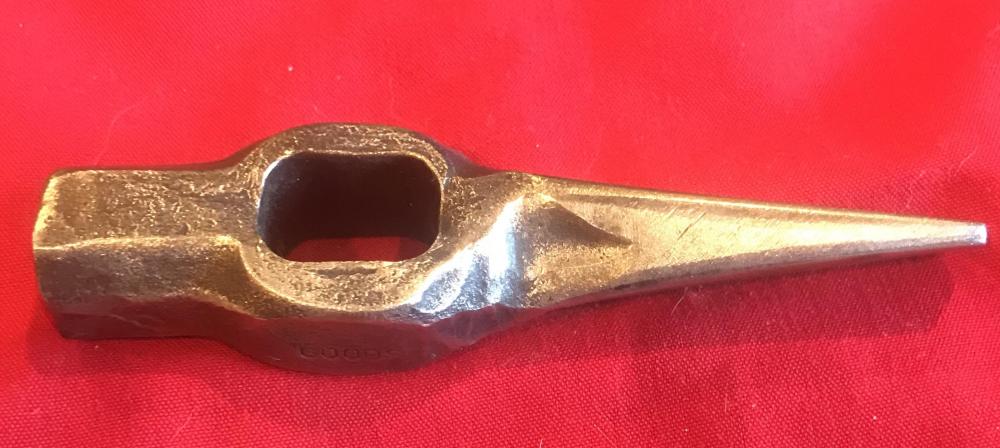
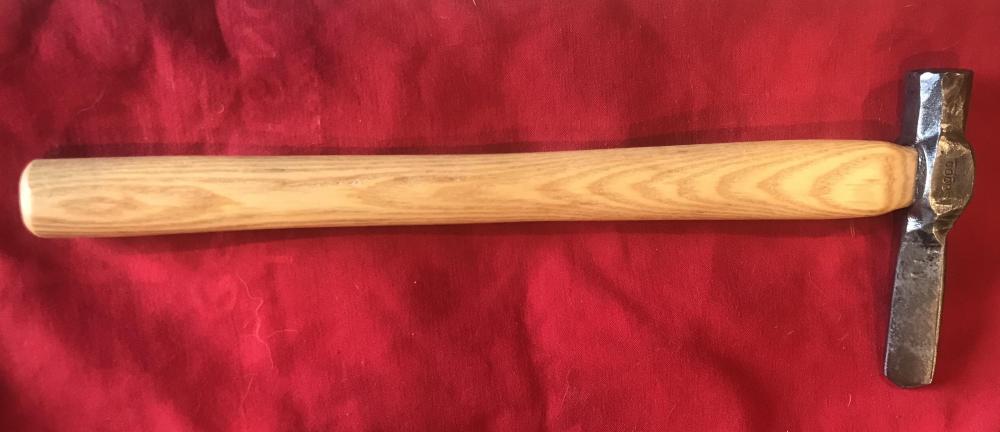
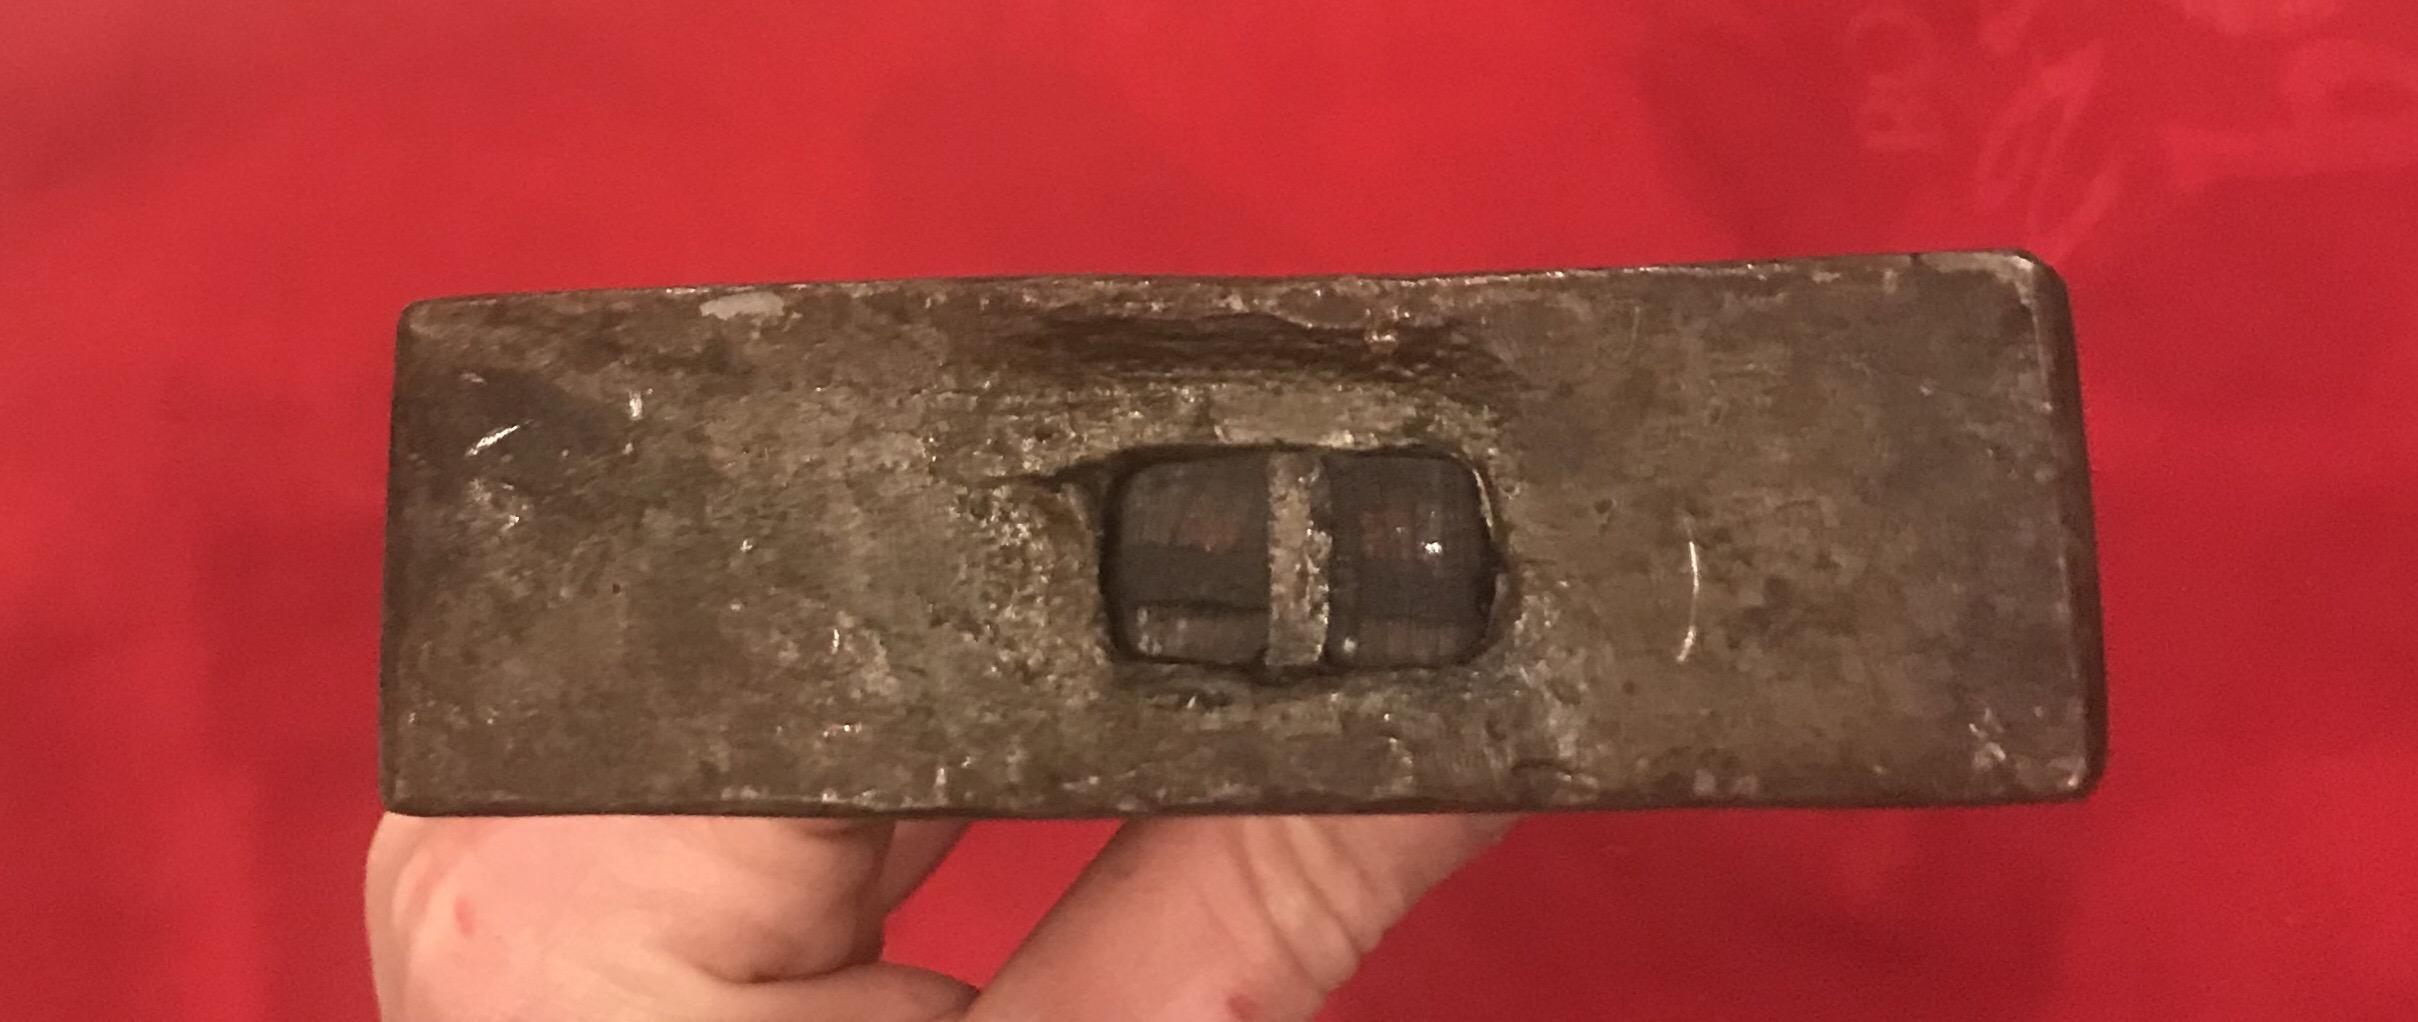
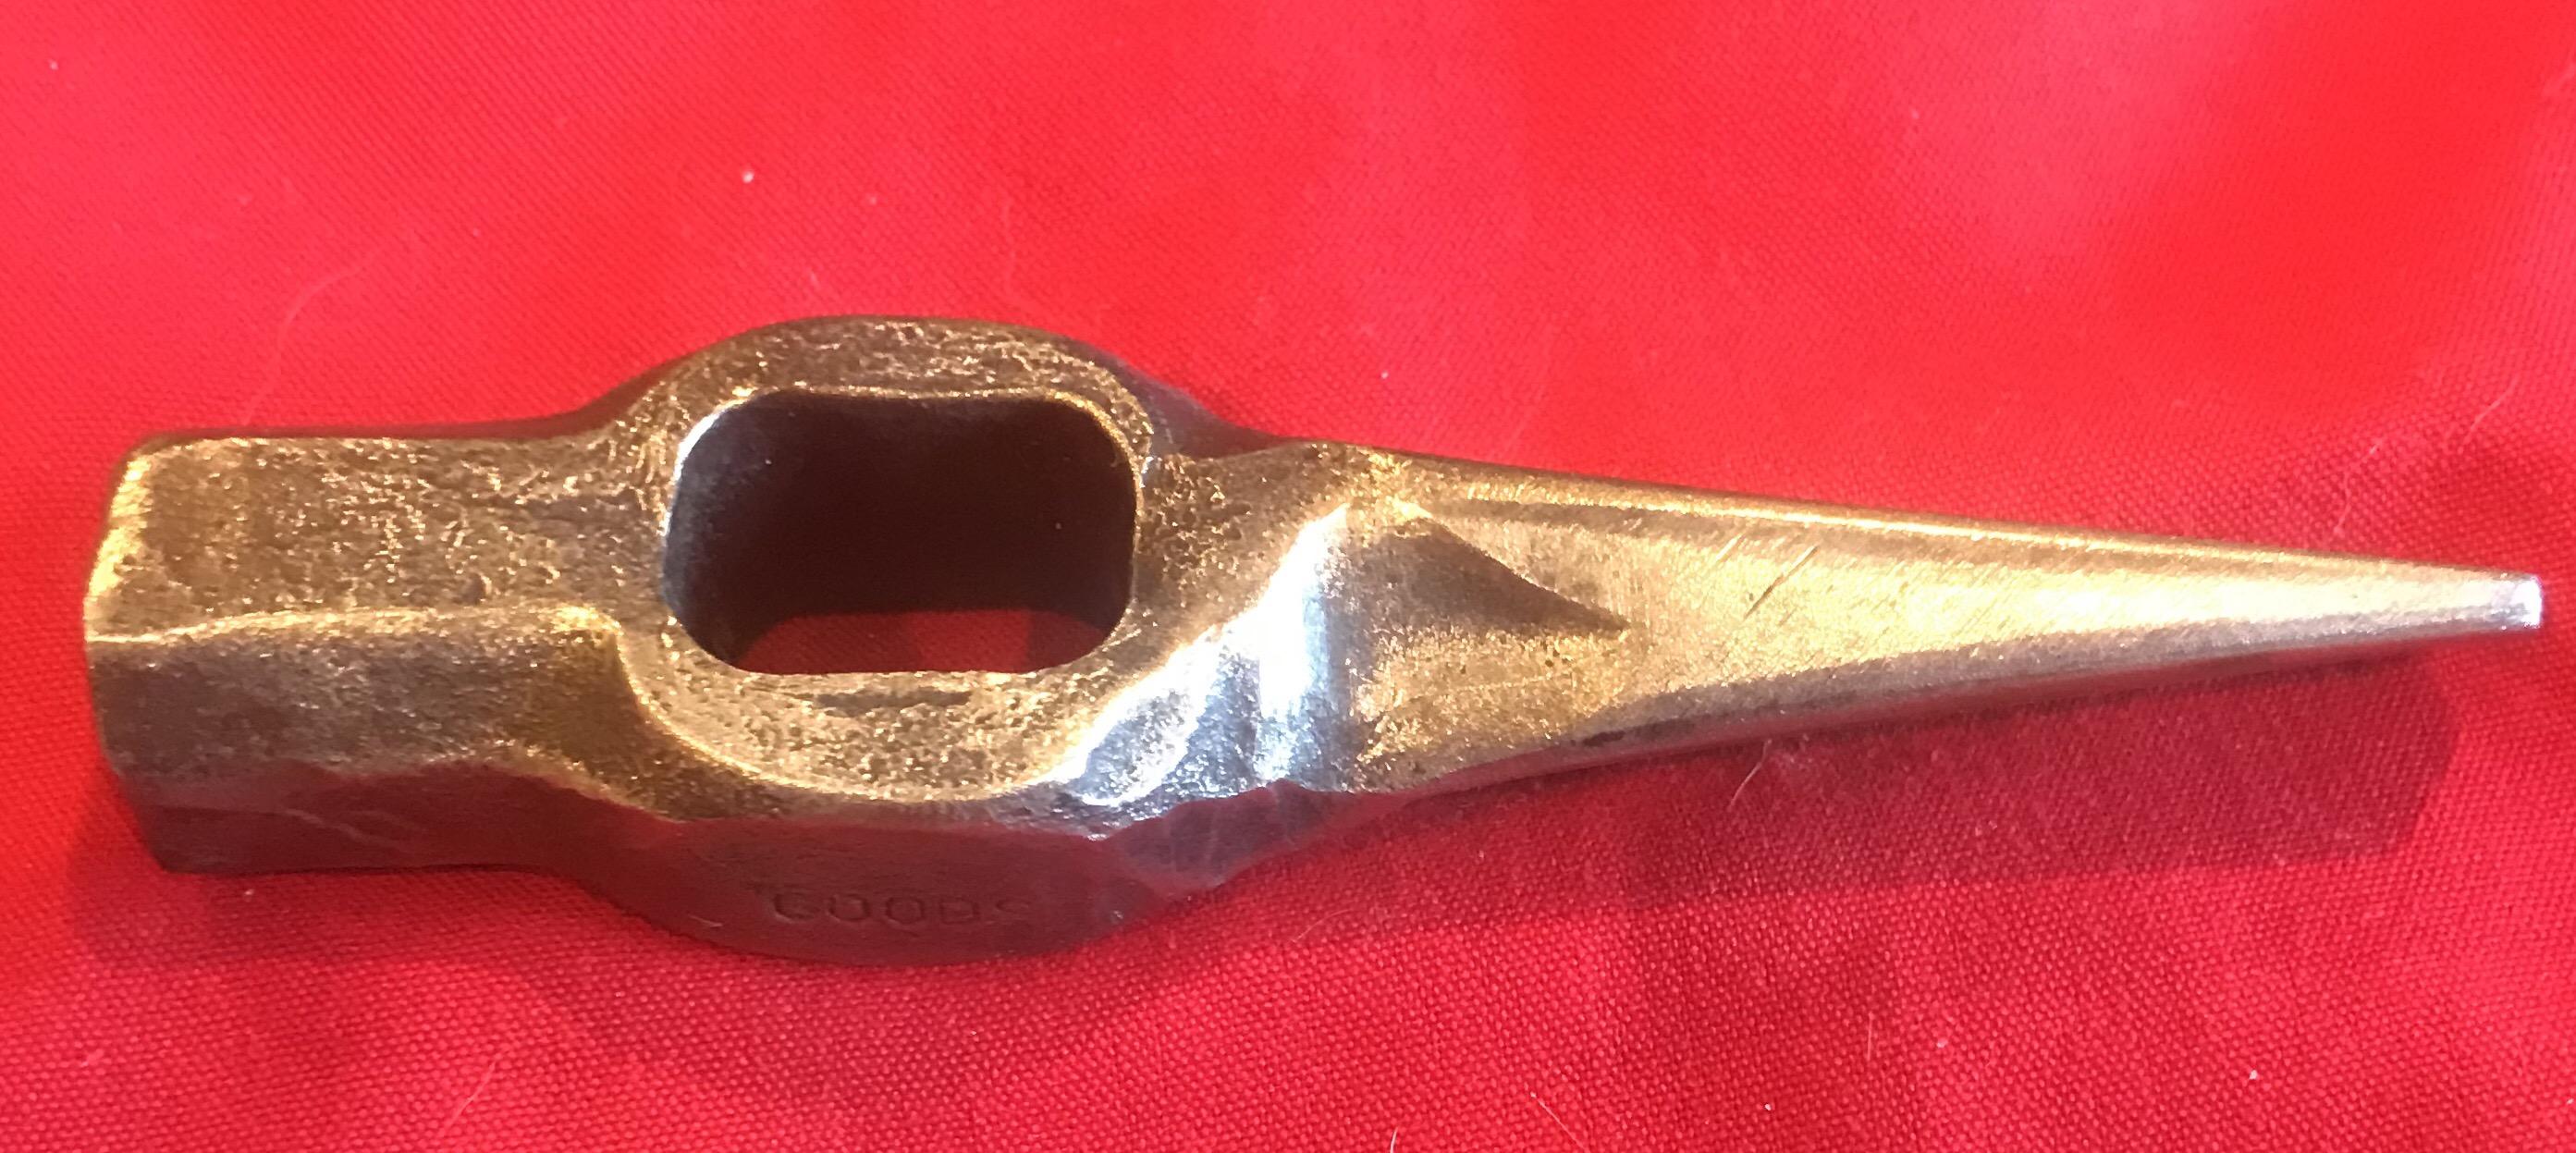
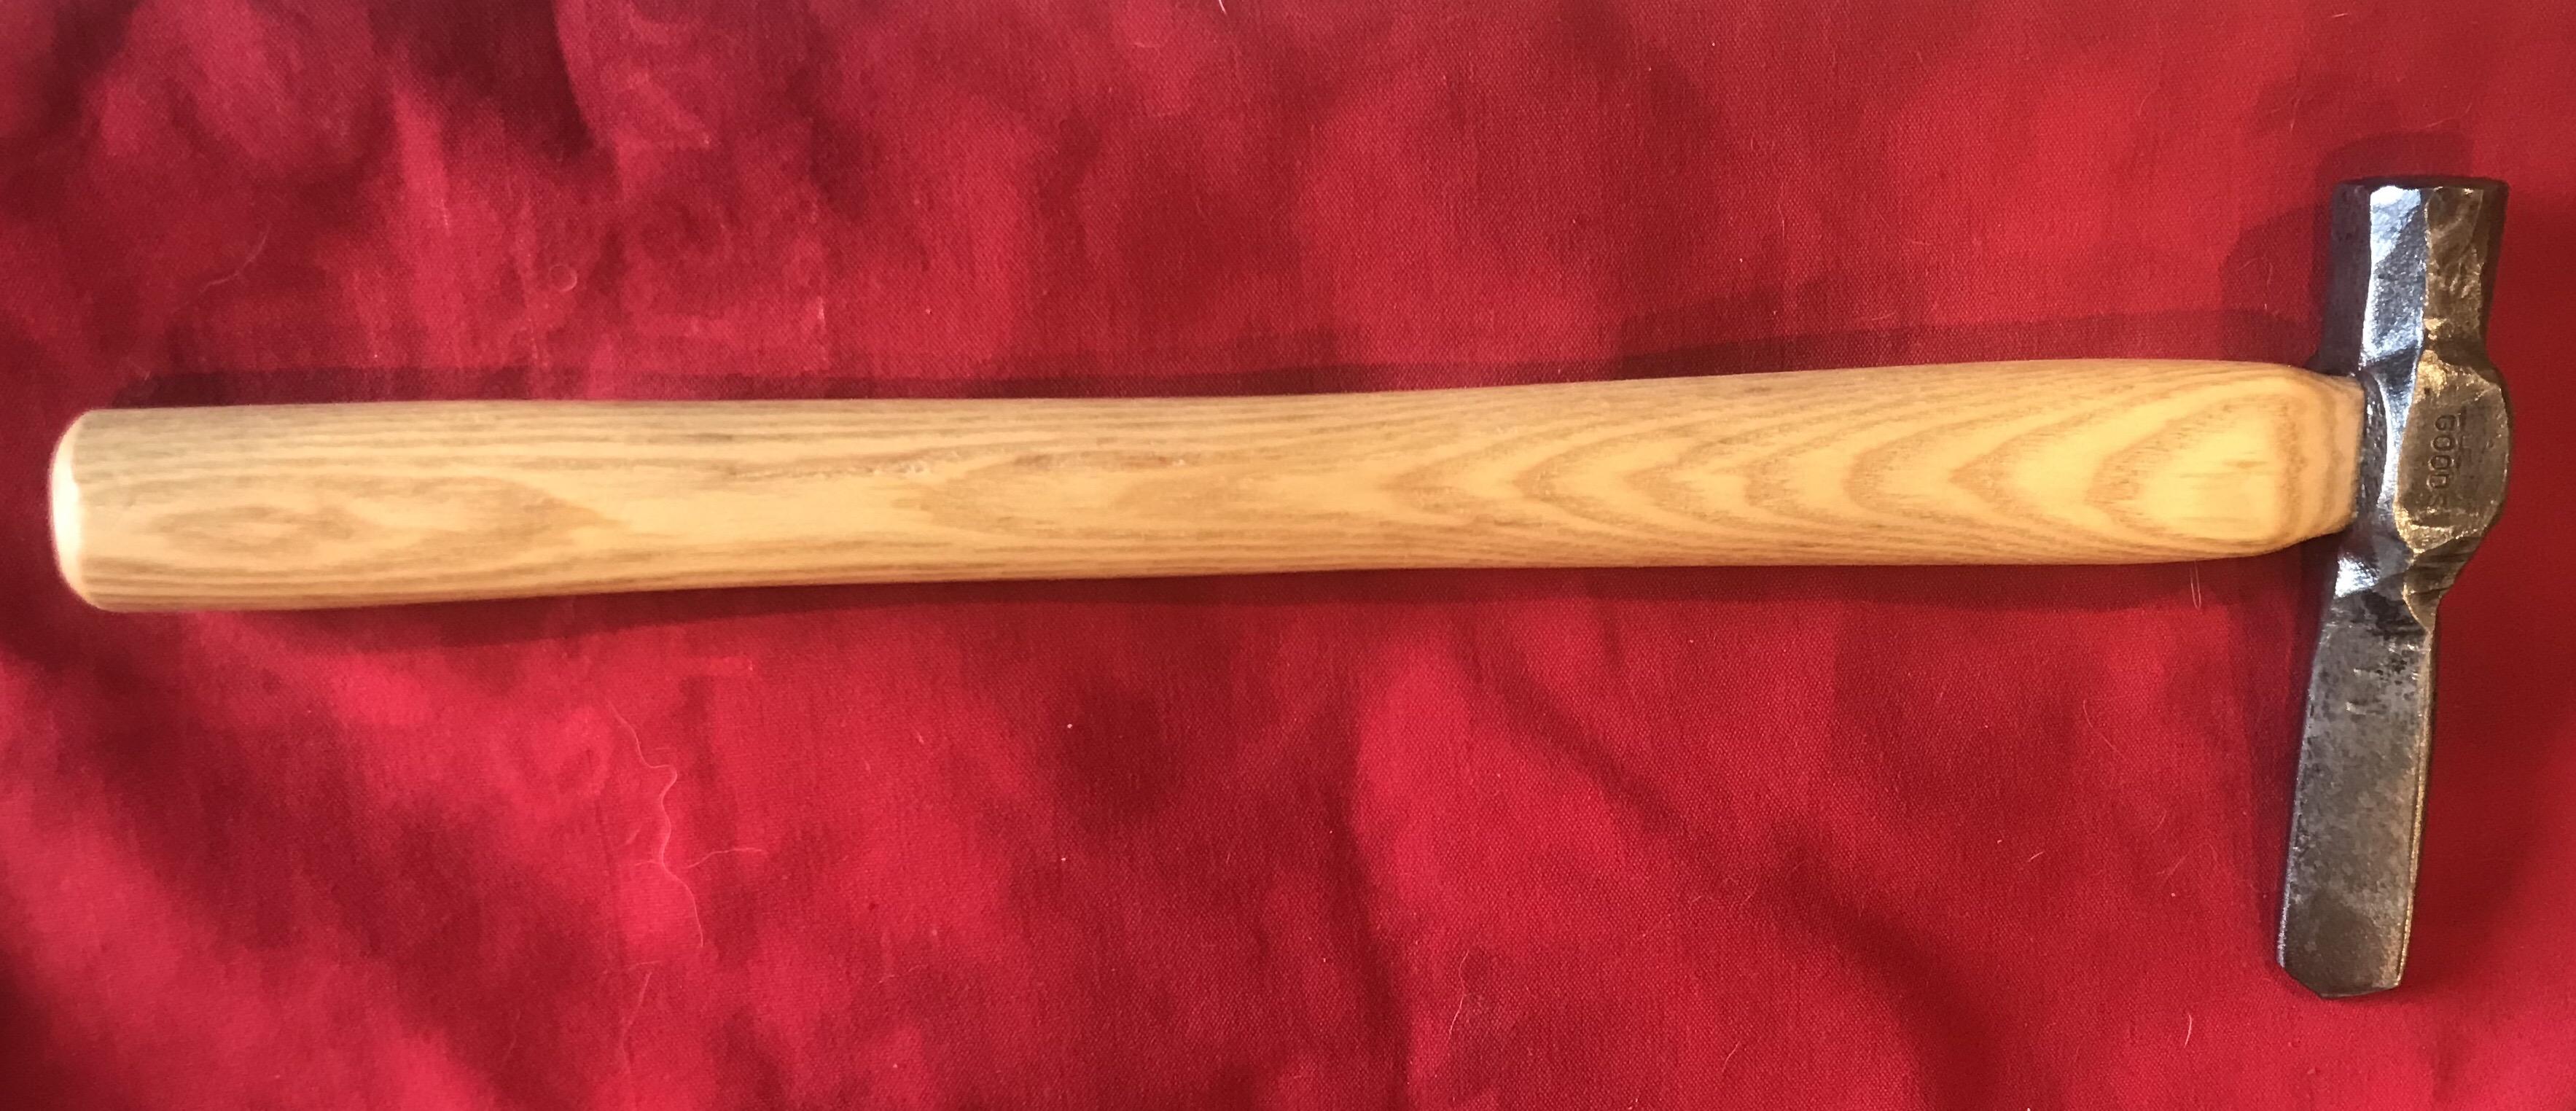
JLP, I first posted about my only previous wrought iron hammer on page 361 of this topic, but never posted a finished product. So here it is, not as pretty now that it’s been heavily used and weathered. (Very leaky garage that is not the best shop...)
I’ve become quite fond of this hammer. Very flat face and light weight works well for setting welds, the small pein move material fast, and the store bought handle is comfortable. Most of all I made it!David

-
Yes, watched that quite a while ago before I made the first one. That’s what inspired me to make it, after I was given some wrought iron.
-
JLP, recently, I have been using handles that have a rectangular “tang(?)”, so I’ve left the tool rectangular, but I also considered rounding the corners more. They are a little harsh now.
Right now, I’m mainly gearing up for an IBA demo in June, where I’m planning on making wrought iron steel faced hammer. I can waste a bunch of time not having all the right tools at home, but I’ll have to streamline everything for the demo (and practice, lots of practice!) For material, I’m planning on welding up the 3/4” wrought iron I have into 2”x2”x3” billets with 5160 for the face and peen. (I my head that about 3.5lbs before losses and should draw out to 2”square face about 6” long. I could be way off though.) I still have a lot of work to get done.
I’m looking forward to that next video. I ready get a lot out of them!
Thanks, David
-
CGL, I love that wolf!
Yesterday I Worked on a handled slitter/slot punch for hammer eyes. Not perfect, had to correct a mistake early on, but getting better!
Working end is 7/8”x1/8” set the diagonal for a comfortable working position with the slot parallel to the anvil. Still need to sharpen it, but not sure if I’ll make it a slitter or a punch. I’ve had much better luck with slitters, but everyone seems to recommend punching hammer eye. Any thoughts on which way I should go? (I’m thinking slitter, because I want to leave as much material as possible for cheeks on Swedish pattern hammers.)
Thanks,
David
-
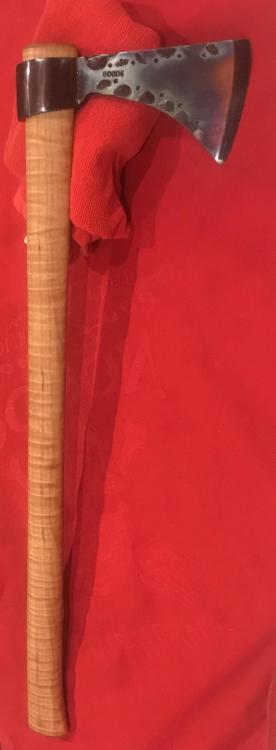
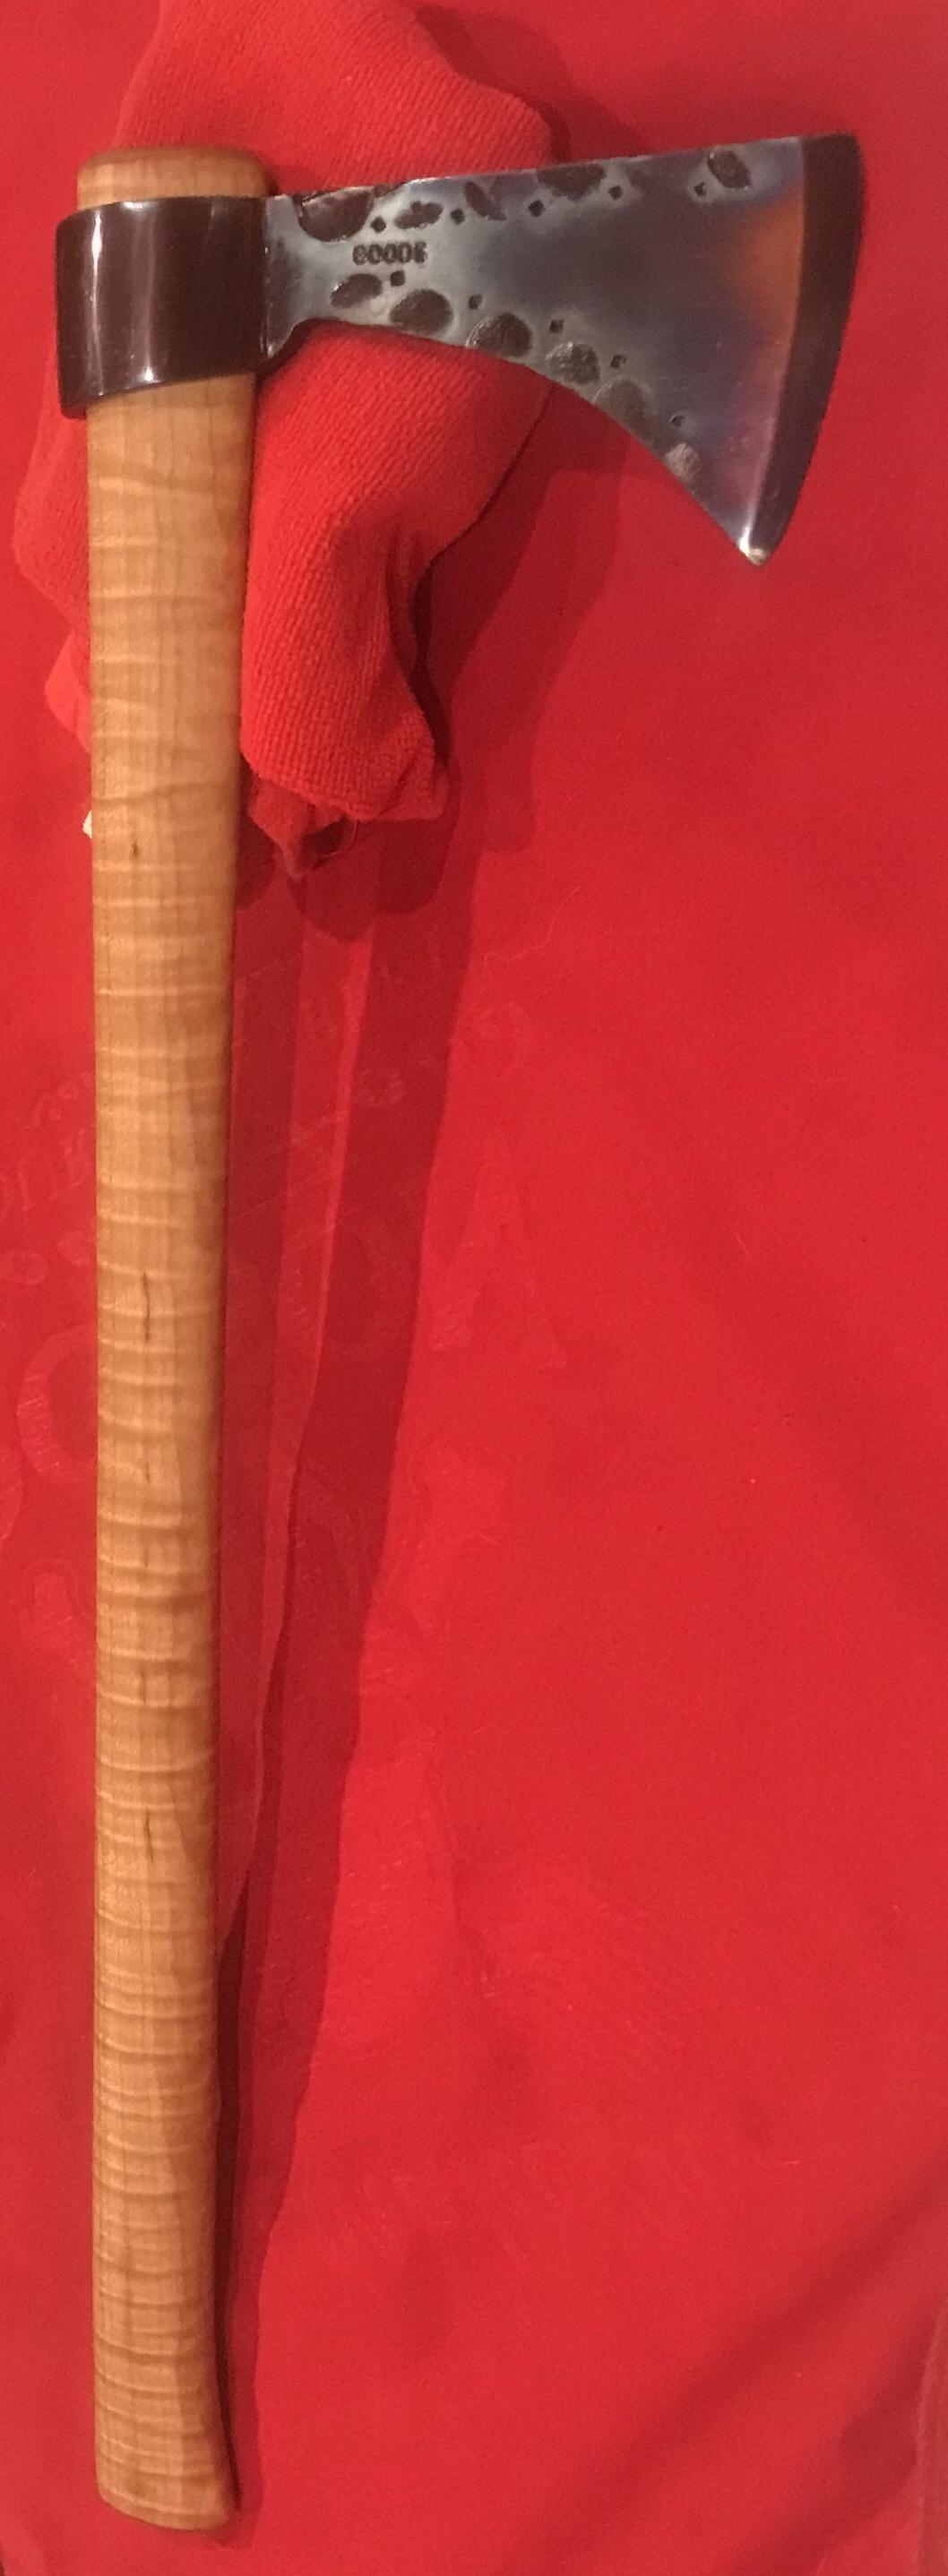
Yes, throwing hawk. I was planning on keeping it as one of a group for me and the boys to throw, but yet again this one will be gifted. I need more time in the forge!
The handle is from Dunlap Woodcraft. I ordered some handles before the holidays and was very happy with them.
The handle is probably 4” too long it’s at 21”, but could bring myself to cut the beautiful wood. (Blade is 7” pole to edge and 3 1/4” wide.)
Thanks!
David
-
Finally finished up the tomahawk I started at a demo two weeks ago. Wrapped 1018 with a 1095 bit.
-
Shoshinjoe, the garden tool is fantastic. I’ll have to put that on my ever growing list!
Hammerheart, those are pretty cool and even a little scary. Is hatchet really the right term for those, and is there an intended use?
Keep it up!
David
-
jlp, what is the purpose of the fullers on the corners just just behind the eye? I’ve seen them on many but not all blacksmith tools. Seeing it on tools that you make, I’m assuming it’s an extra step that is not completely needed, but improves the tool.
David
-
If you are worried about vibration transmission to the neighbors, the best thing to do is to have rubber like isolation pad between your concrete hammer foundation and the bedrock. You’ll loose the mass benefit, but you may not have things falling off the shelves. (At work, all our large power presses, 100~2000ton, all have isolated large mass foundations with rubberized isolation mounts between the press and the foundation. The largest presses move a fair amount each hit and you can really feel it through your feet when you are on the press foundation, but step over a few feet onto the shop floor and the vibration drops at least ten fold.
It’s your setup do what works for you! I’ve been enjoying following the progress!
David
-
I would love to have the stage block hidden in the pile. Heck, I would love to have one of everything there... alas, too many miles between us!
David
-
Check out JLP services video “how to make a flatter without using a sewage block”. (The link to her YouTube channel can be found under blacksmith, general discussion/reference materials/a collocation of blacksmithing links on YouTube (it’s a great resource by the way)). This video shows what type of work a post vice can do. Of course they come in different sizes and weights, you can’t do as heavy work on a 50lb 4” as you can on a 150lb 6” beast. There are somethings that are just really hard to do anywhere other than a post vice.
David
-
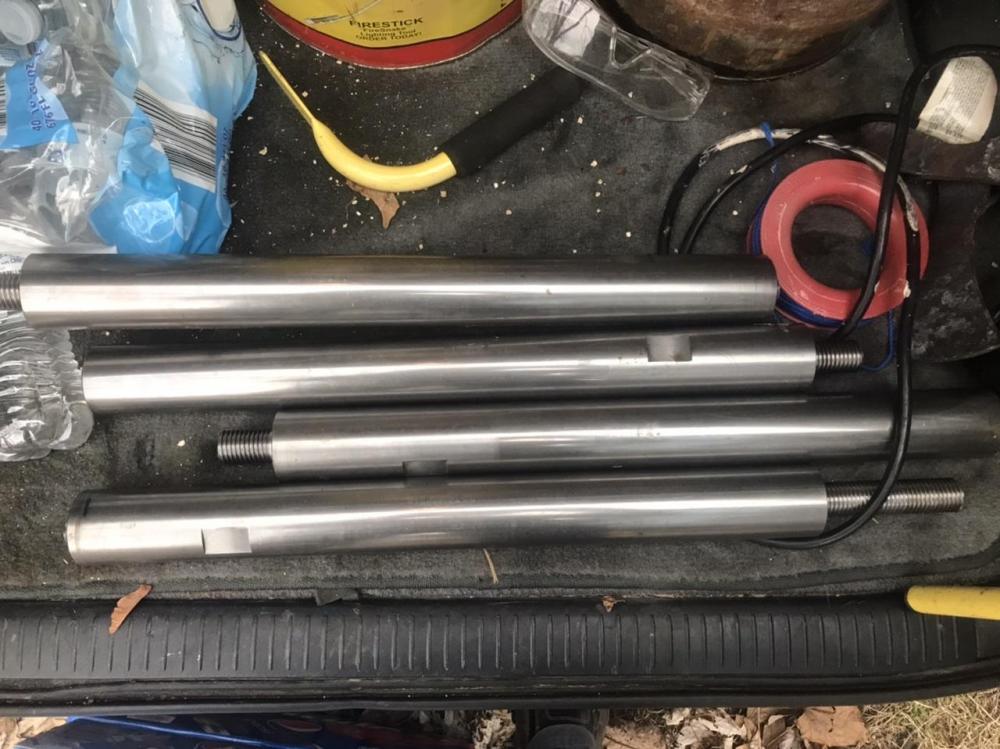
Randy & pint, I understand and appreciate the concerns over chrome plating. These are not from the cylinder itself, but the “posts” of the four post setup, and they were not part of the guiding system of the ram. Already had to confirm the material from the part print before having new rods/posts made from 4340. (That way we’ll never have to take this thing apart again.)
Having prints on the machine components at work makes sourcing scrap there fantastic. I just need to avoid over doing it, but couldn’t pass these up.
Thanks, David
-
Followed me home from work yesterday. Four 2” dia 1045 tie rods from a relatively small hydraulic press at work. Rod failed over time due to offset loading in the press. Appropriate scrap tag, and there now raw material for the forge!
Keep forging!
David
-
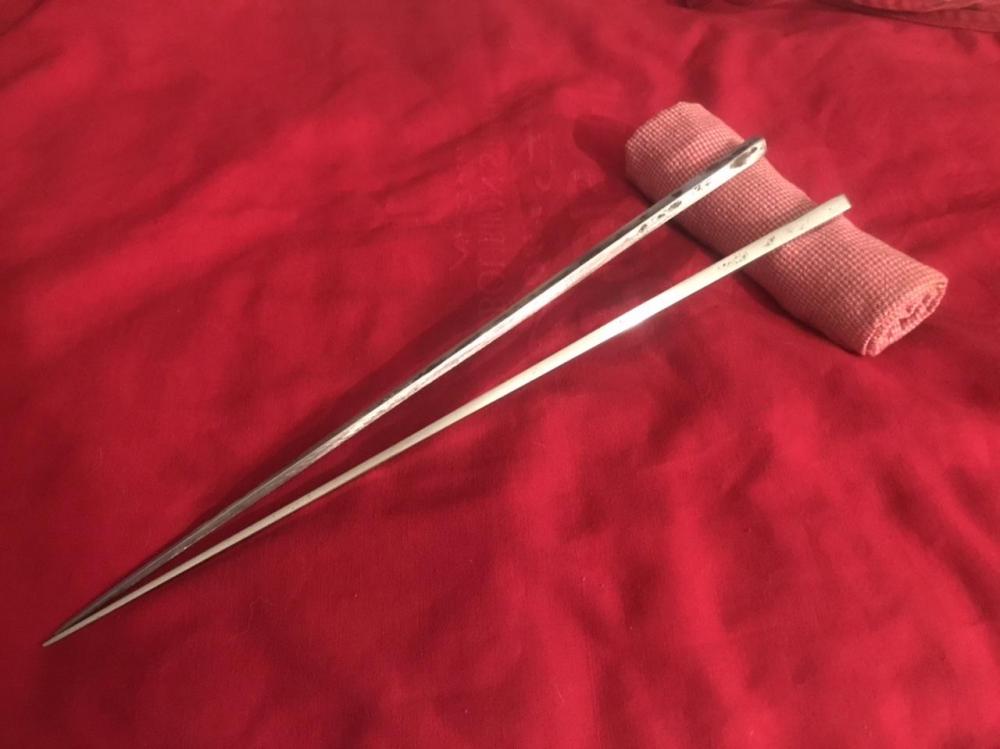
Today, I got one half of a siabashi set(?)(cooking chop sticks) finished for my older son. They started as 7/16”dia x 6” (each) of 304 stainless steel. Taper forged out to 15 inches long from about 3/8” squat down to a little lest than 1/16” square. Draw filed, then a vinegar soak, finally (only one so far) hand finished down to 1000 grit. Intentionally left some of the forge finish as a nod to the fact that they were hand forged. Next time I may try a harden able stainless steel...
Forge on and make beautiful things!
David
-
Bluerooster, I’m sure others will chime in, but for forge welding the first couple of hit are to set the weld. If you hitting to hard one the first hits (by hand hammer, presses and power hammers are a different story) it may cause the material to slide at the interface resulting in a failed weld. The key is clean, matching surfaces, and a few even steady light hits. Then wire brush, reflux and back up to welding heat and do it again. Once you’re confident the weld is set, then forge it out. Watching the videos one YouTube can be miss leading, the smiths that are really good at it, know the have a good weld and go straight into forging in the same heat. I’m not there yet, but hope to be before too long...
we love pictures...
David
-
I have never been able to get the uploaded videos to play. The thing that seems to work the best is YouTube, but not sure if everyone likes having to setup accounts with them...
David
-
Looks like you beat me to it Charles!
-
Be weary of that anvil. If it’s free so be it, but otherwise it’s over priced. The hardened steel face has broken off from cutting shelf to the hardy hole. It may work better than the rail upright, but I’m not sure of it. Look up the proper repair method for that lady, and see if you can get some experienced advise on the method. There is a link floating around this site somewhere for it...
Just my two cents...
David
-
I find internet searches useless for this type for thing. I would normally walk through the hardware store and just get what would fit close enough and was cheap. (I also have a good hardware store only two blocks away.) I believe the tube I used may have been a discharge hose. You could also try shop vac hoses, but the are probably heavy, generally meaning more expensive.
-
Yeah, I finally figured out how to lower the resolution on my uploads, and it looks like I overdid it. I wrote that if your hair drier has a cool air button, wire, wire tie, or tape it in. You don’t the hot air and the hot air may melt cheap corrugated tube, not to mention drive up electricity bills. The other note was to use a PVC T or better a long sanitary T, but conduit body shown above by Chris Williams is fantastic! That has a easy gate method built in!
David


Jasen's smithing progression.
in Member Projects
Posted
Jasent, what steel is that hammer head forged from? Was it a repurposed steel that could have gotten a cold shunt while forging, or new steel that had a defect? It looks like you will loose a lot of material trying to grind that out.
David