robie1373
Members
-
Joined
-
Last visited
Everything posted by robie1373
-
It's rubbish. After less than one summer in the sun it is noticeably faded and feels ... 'tatty?' It blew over once and tore a hole where the mid-span stabilizing loop attaches to the sheet. I got a little bit of snow on it recently (not much. I'm in the DC area not the midwest.) and wow! I'm going to have to keep a very close eye on it. I can see the whole roof shredding with a couple of inch snowfall. Having said all that, it was _cheap_. I don't expect much for the price I paid. I was seriously hoping to be under more permanent cover by now, but... life. That peak style shelter has one thing I wish I had with all the rain lately. Sides. I'm not convinced it is worth the price difference but those sides would keep things quite a bit dryer in there. It would be horrifying in the summer, though. such hot. The garage in a box thing looks nice. That would be like working in a gymnasium! If the sides roll up and you can find a way to rout a chimney, that thing could be a contender. One consideration, though. I did some napkin math recently about what it would cost to build a 10x10x8 timber frame out of big-box material using a thin-skin sheathing as infill. Depending on how you roof it, I was in the ballpark of twice the cost of the garage in a box. If you can get any part of that for free/cheap, you might be able to make something much nicer for a reasonable cost. As long as you don't burry the posts in concrete (bolted to steel plates buried in concrete for example) you can even take it with you when you move.
-
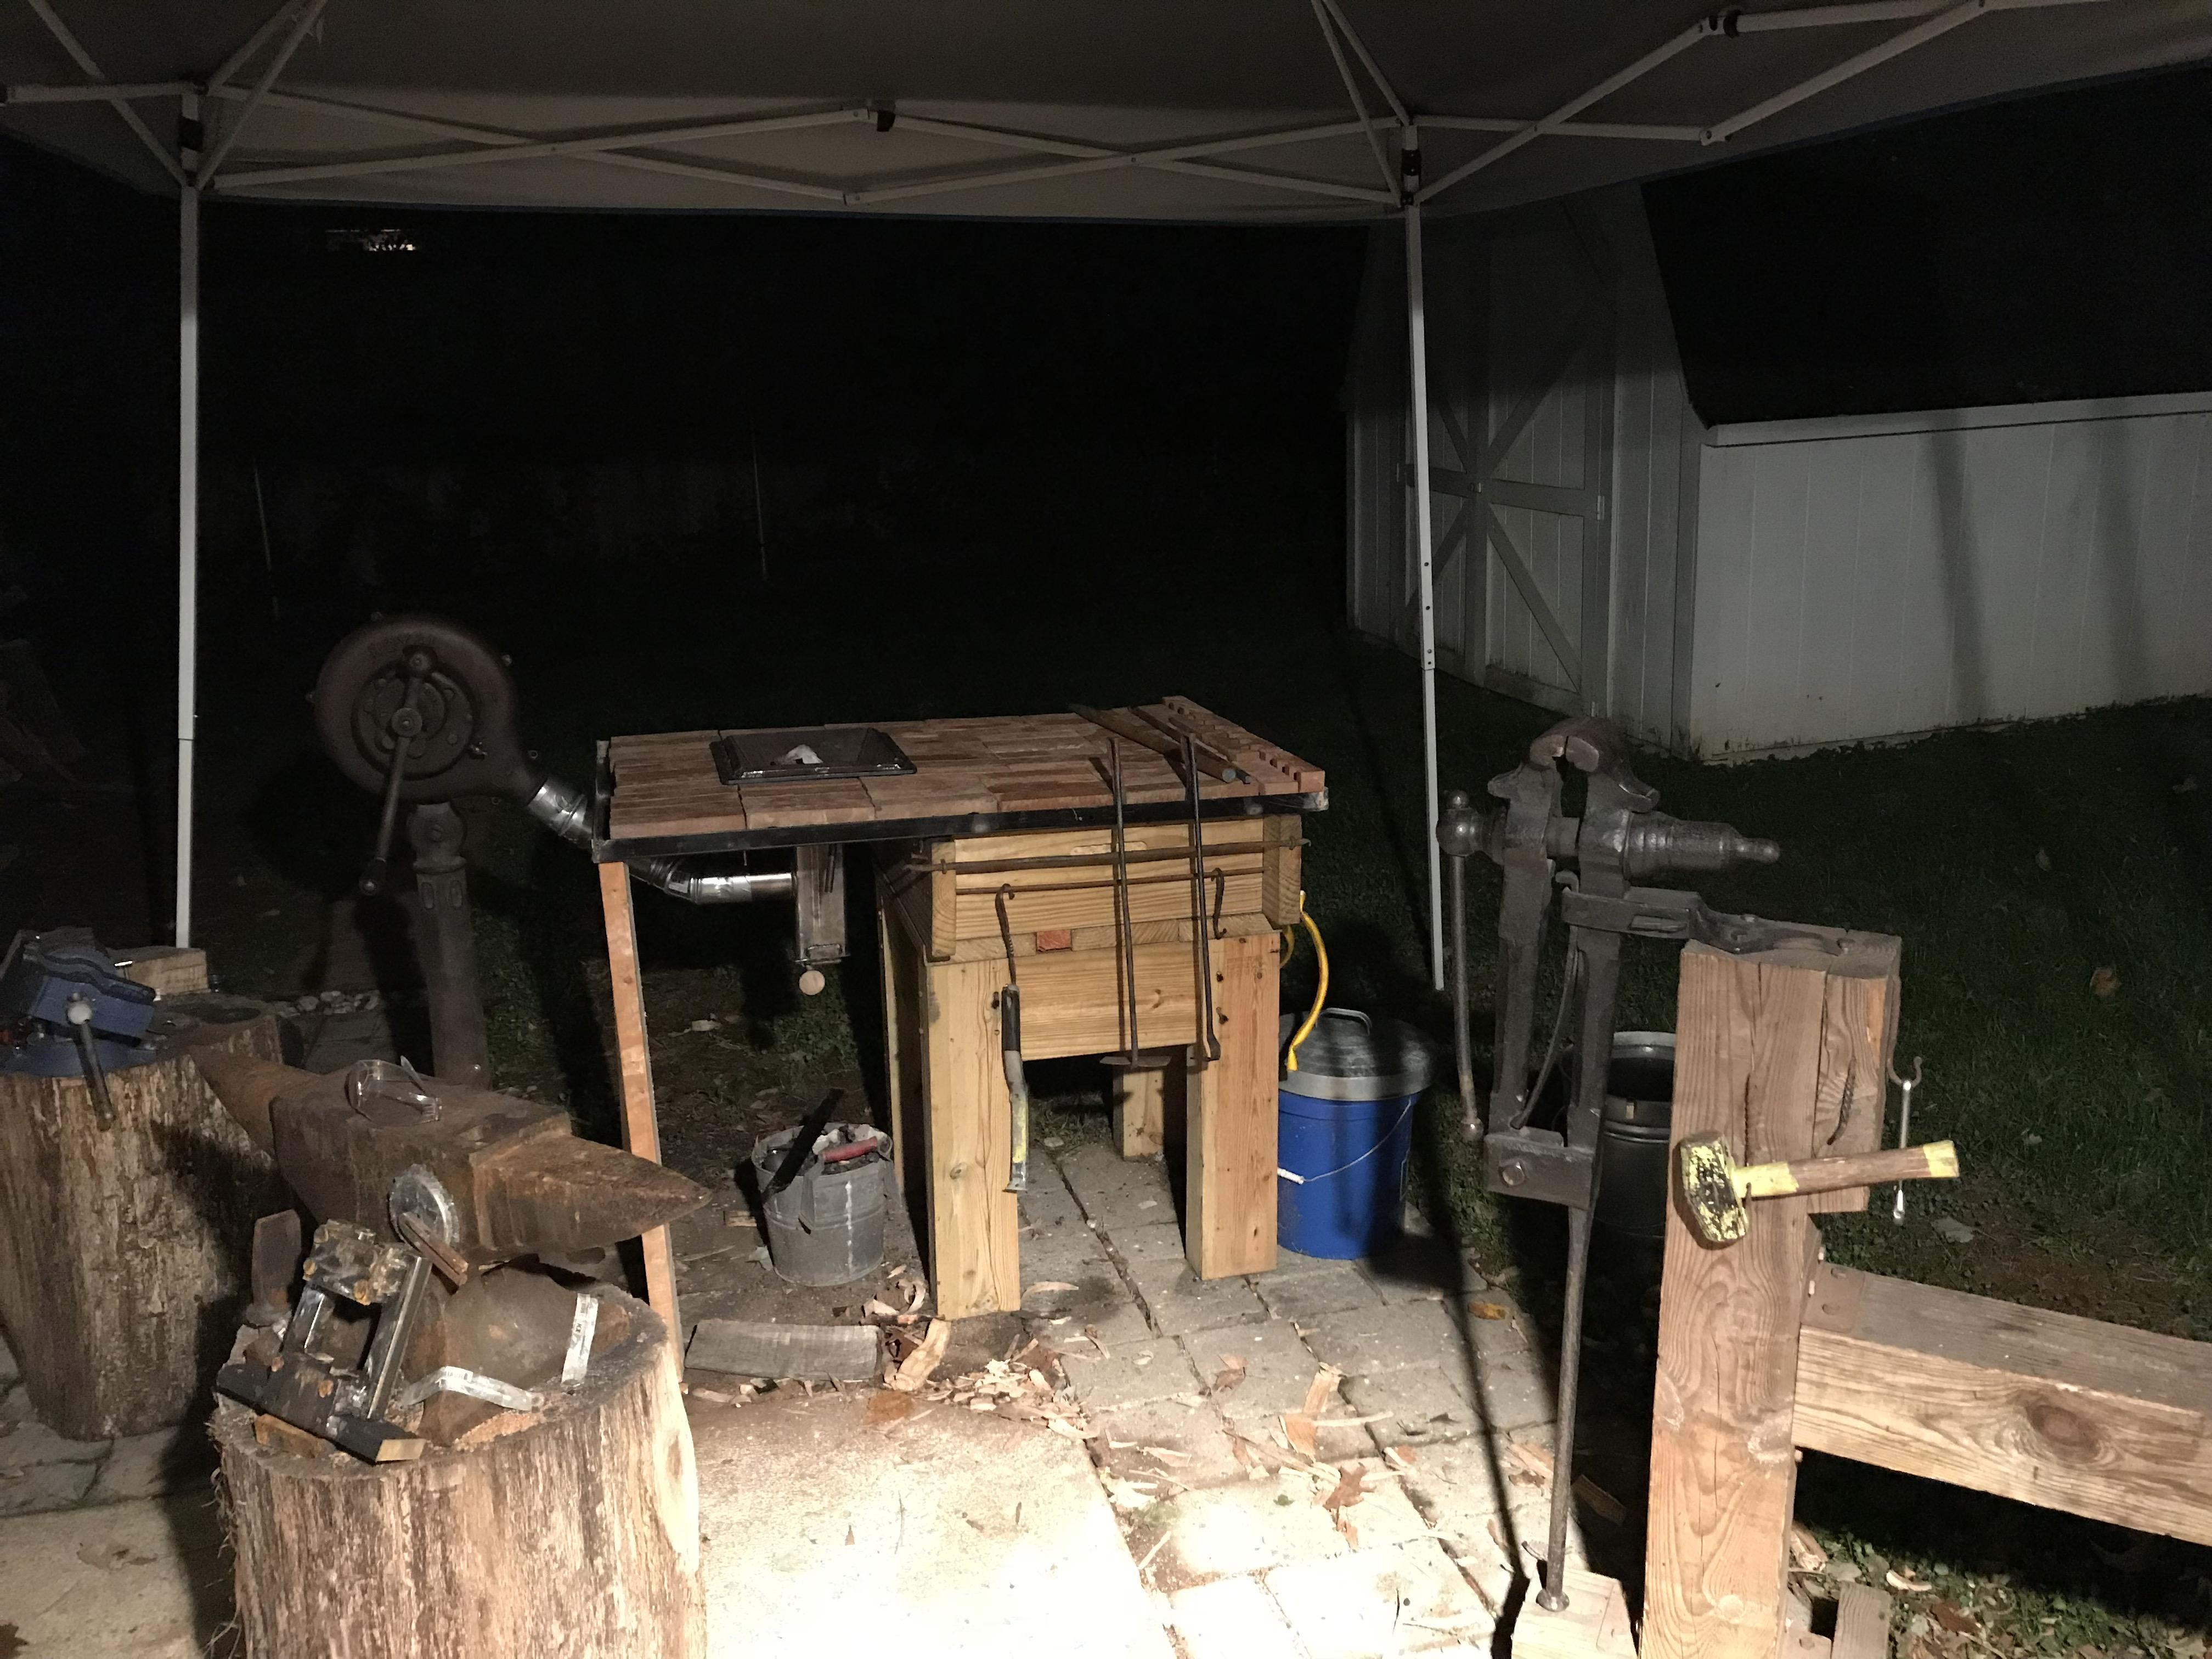
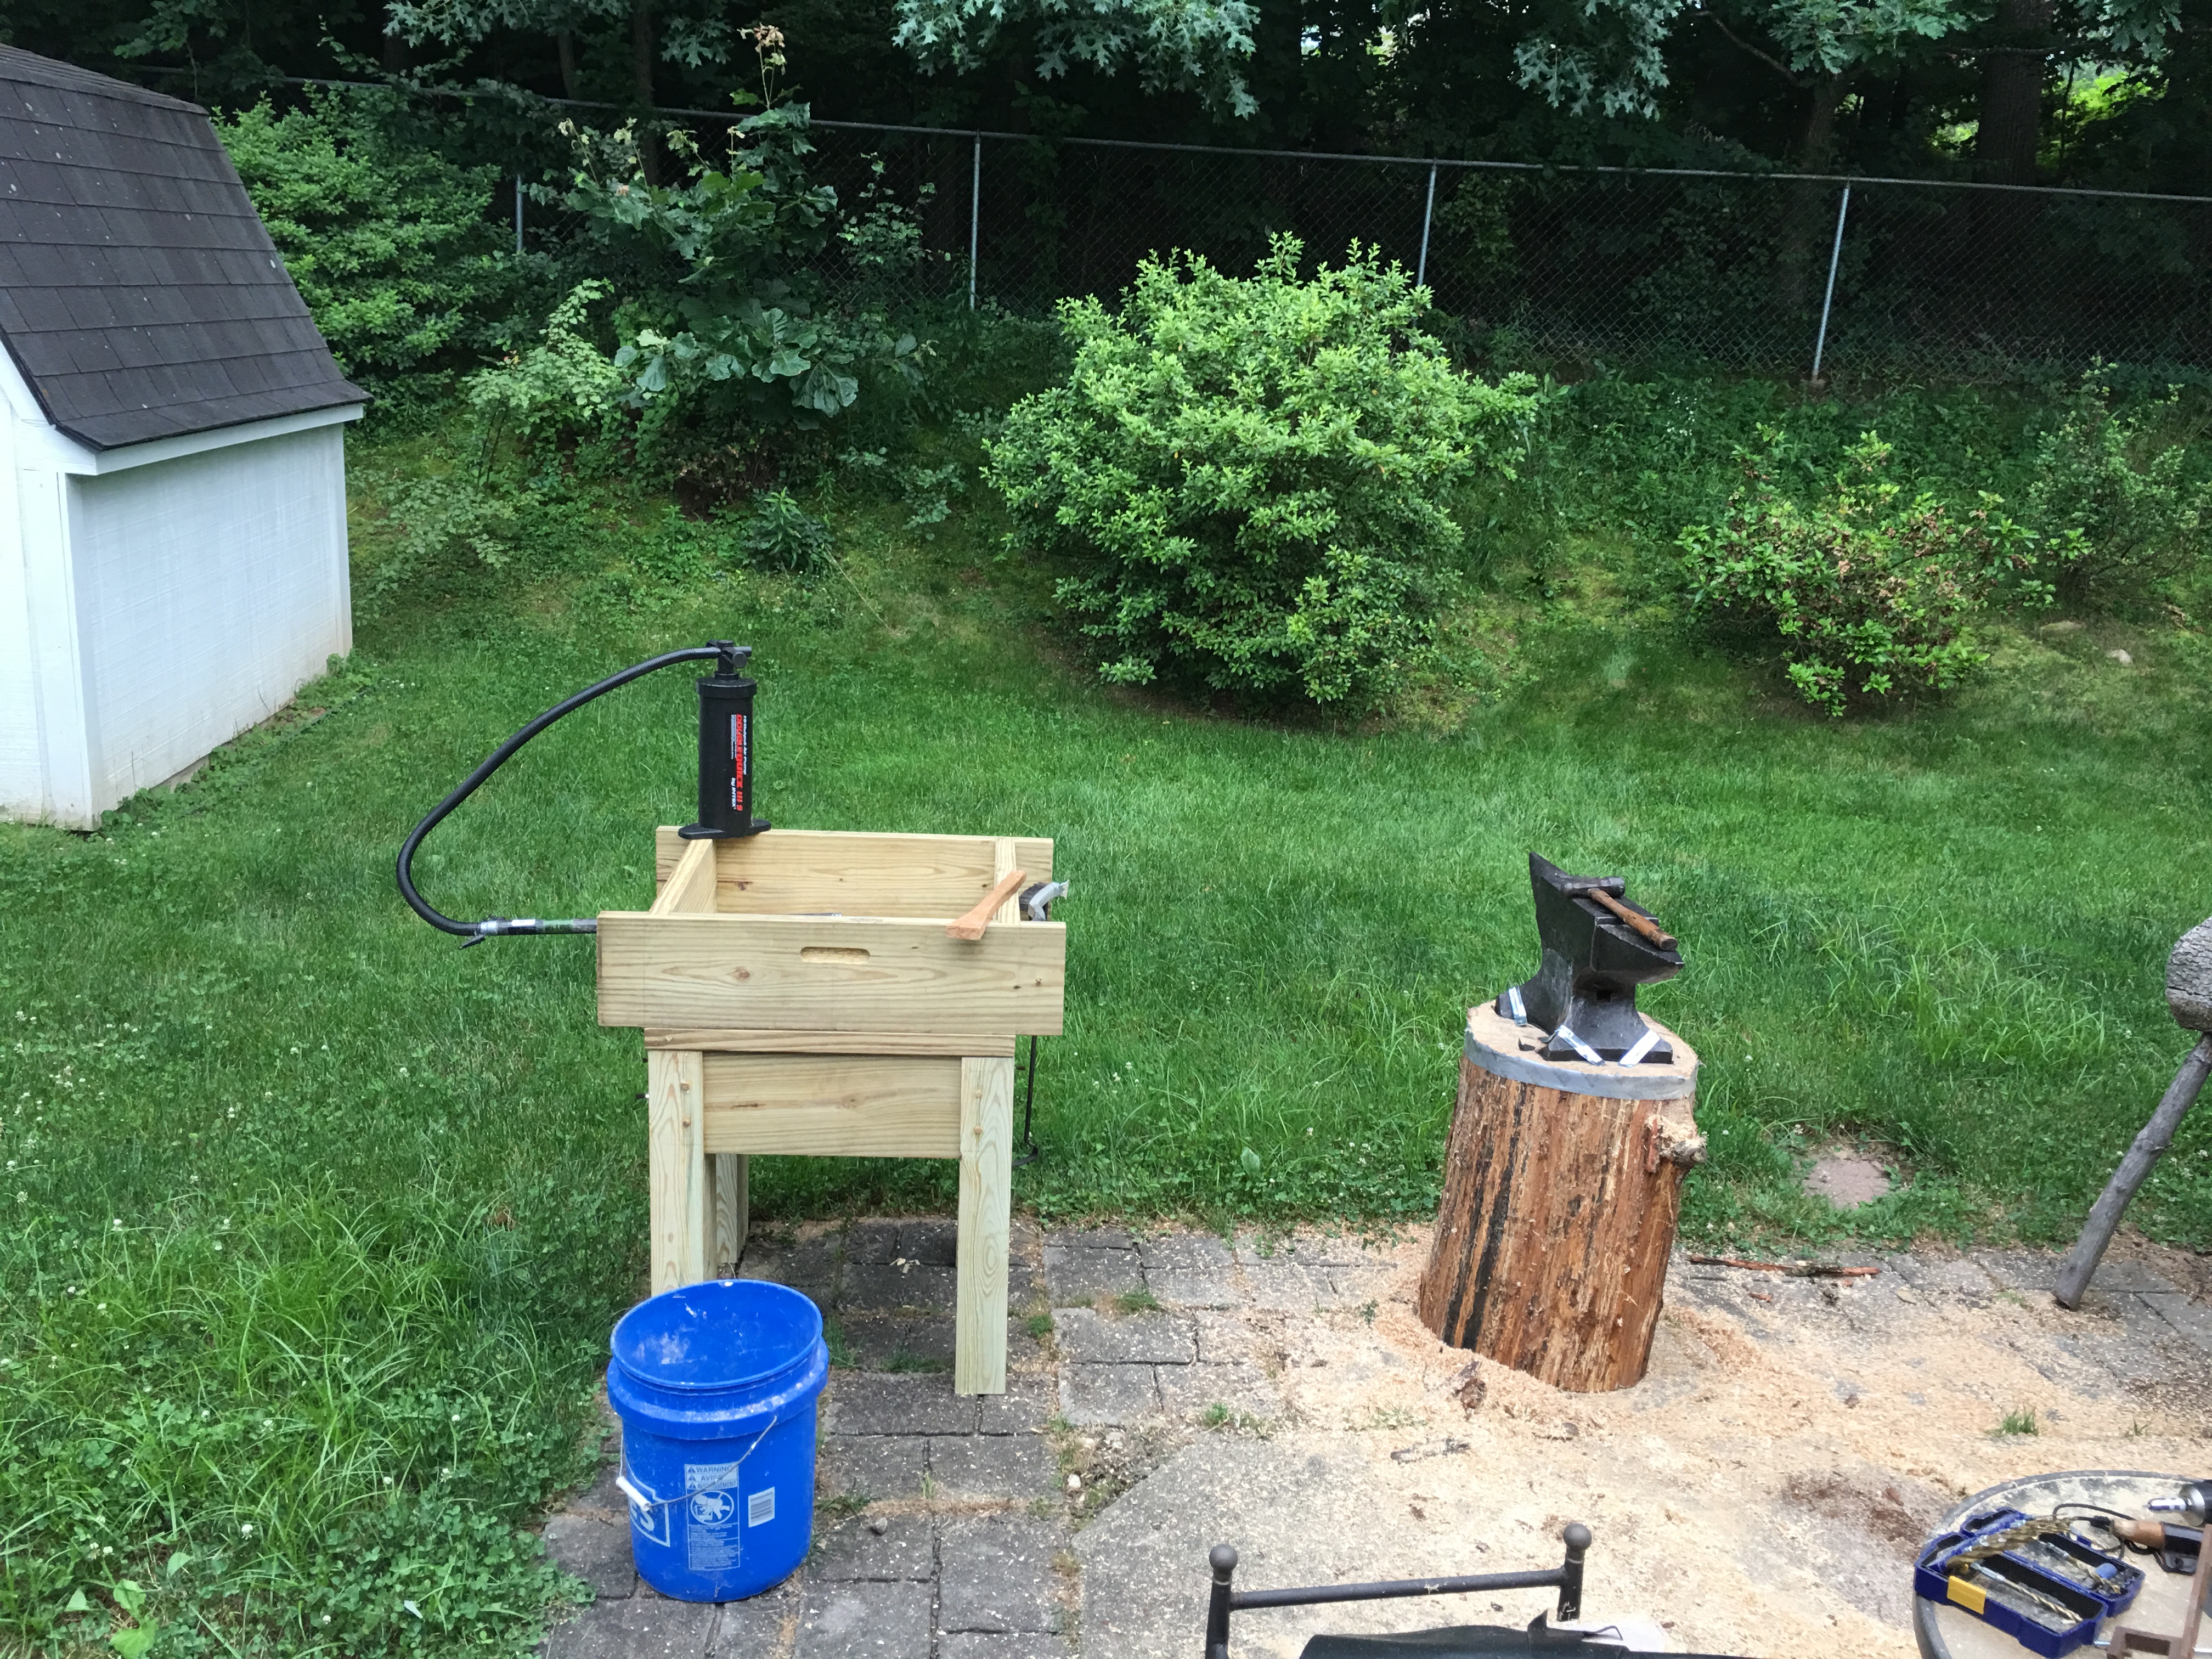
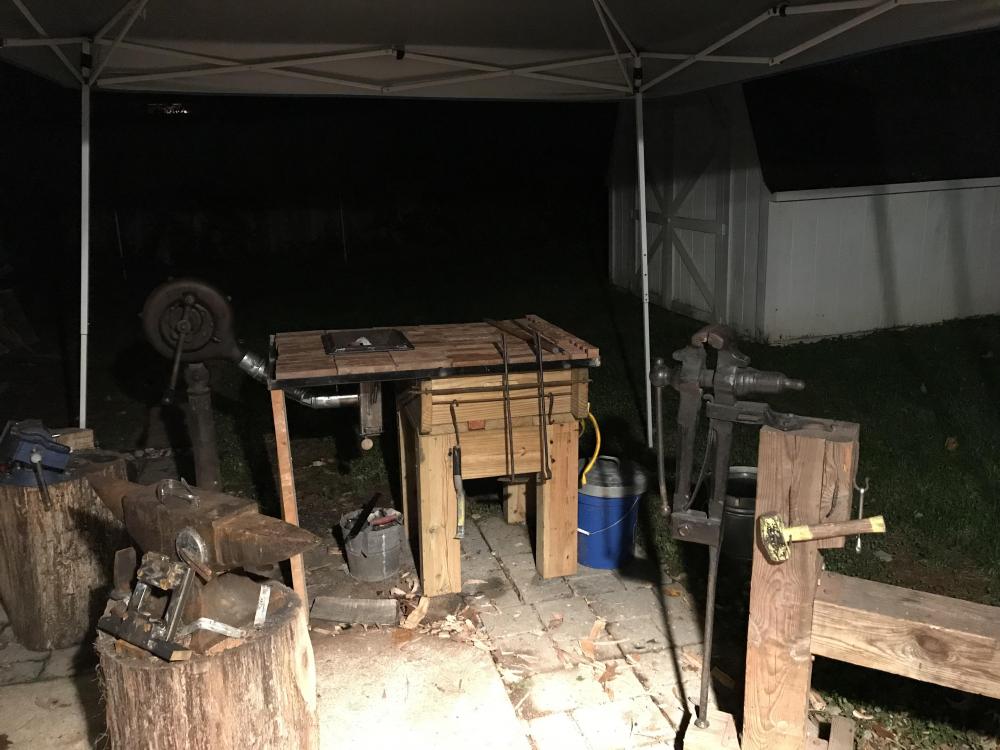
I am a fellow suburbanite. Different suburb, but that's a minor point. For what it's worth, my "shop" is all housed under an 8x8 El Cheapo tent roof thingy mostly on my back patio. I have a nice sized forge table (30"x 45") with some 8" duct hanging from the tent frame / resting on the forge table as a chimney. My anvil is mounted solidly to a stump (thin rubber mat between anvil and stump) and the stump sits freely on my patio. It makes very little noise and can be moved easily. My vise is mounted to a horse shaped contraption which can double as a vise mount for demos. I have a second stump sitting nearby that ends up being used like a coffee table. It just collects crap. All that sits under the 8x8 cover easily and I get plenty of work done there. Even in the snow. I do small stuff 99% of the time. As far as noise goes, I find that hammering orange hot metal doesn't make much noise. Missing the work makes noise. Cold chiseling makes noise. Filing makes noise. But the actual smiting part of smithing is one of the quieter in my experience. I'd spend a bit more time making cookies to buffer the days you have to cold cut and file something out of 1/8" plate rather than inventing a stealth field for the anvil. I'm not sure I hit my quota on opinions or not. I did try.
-
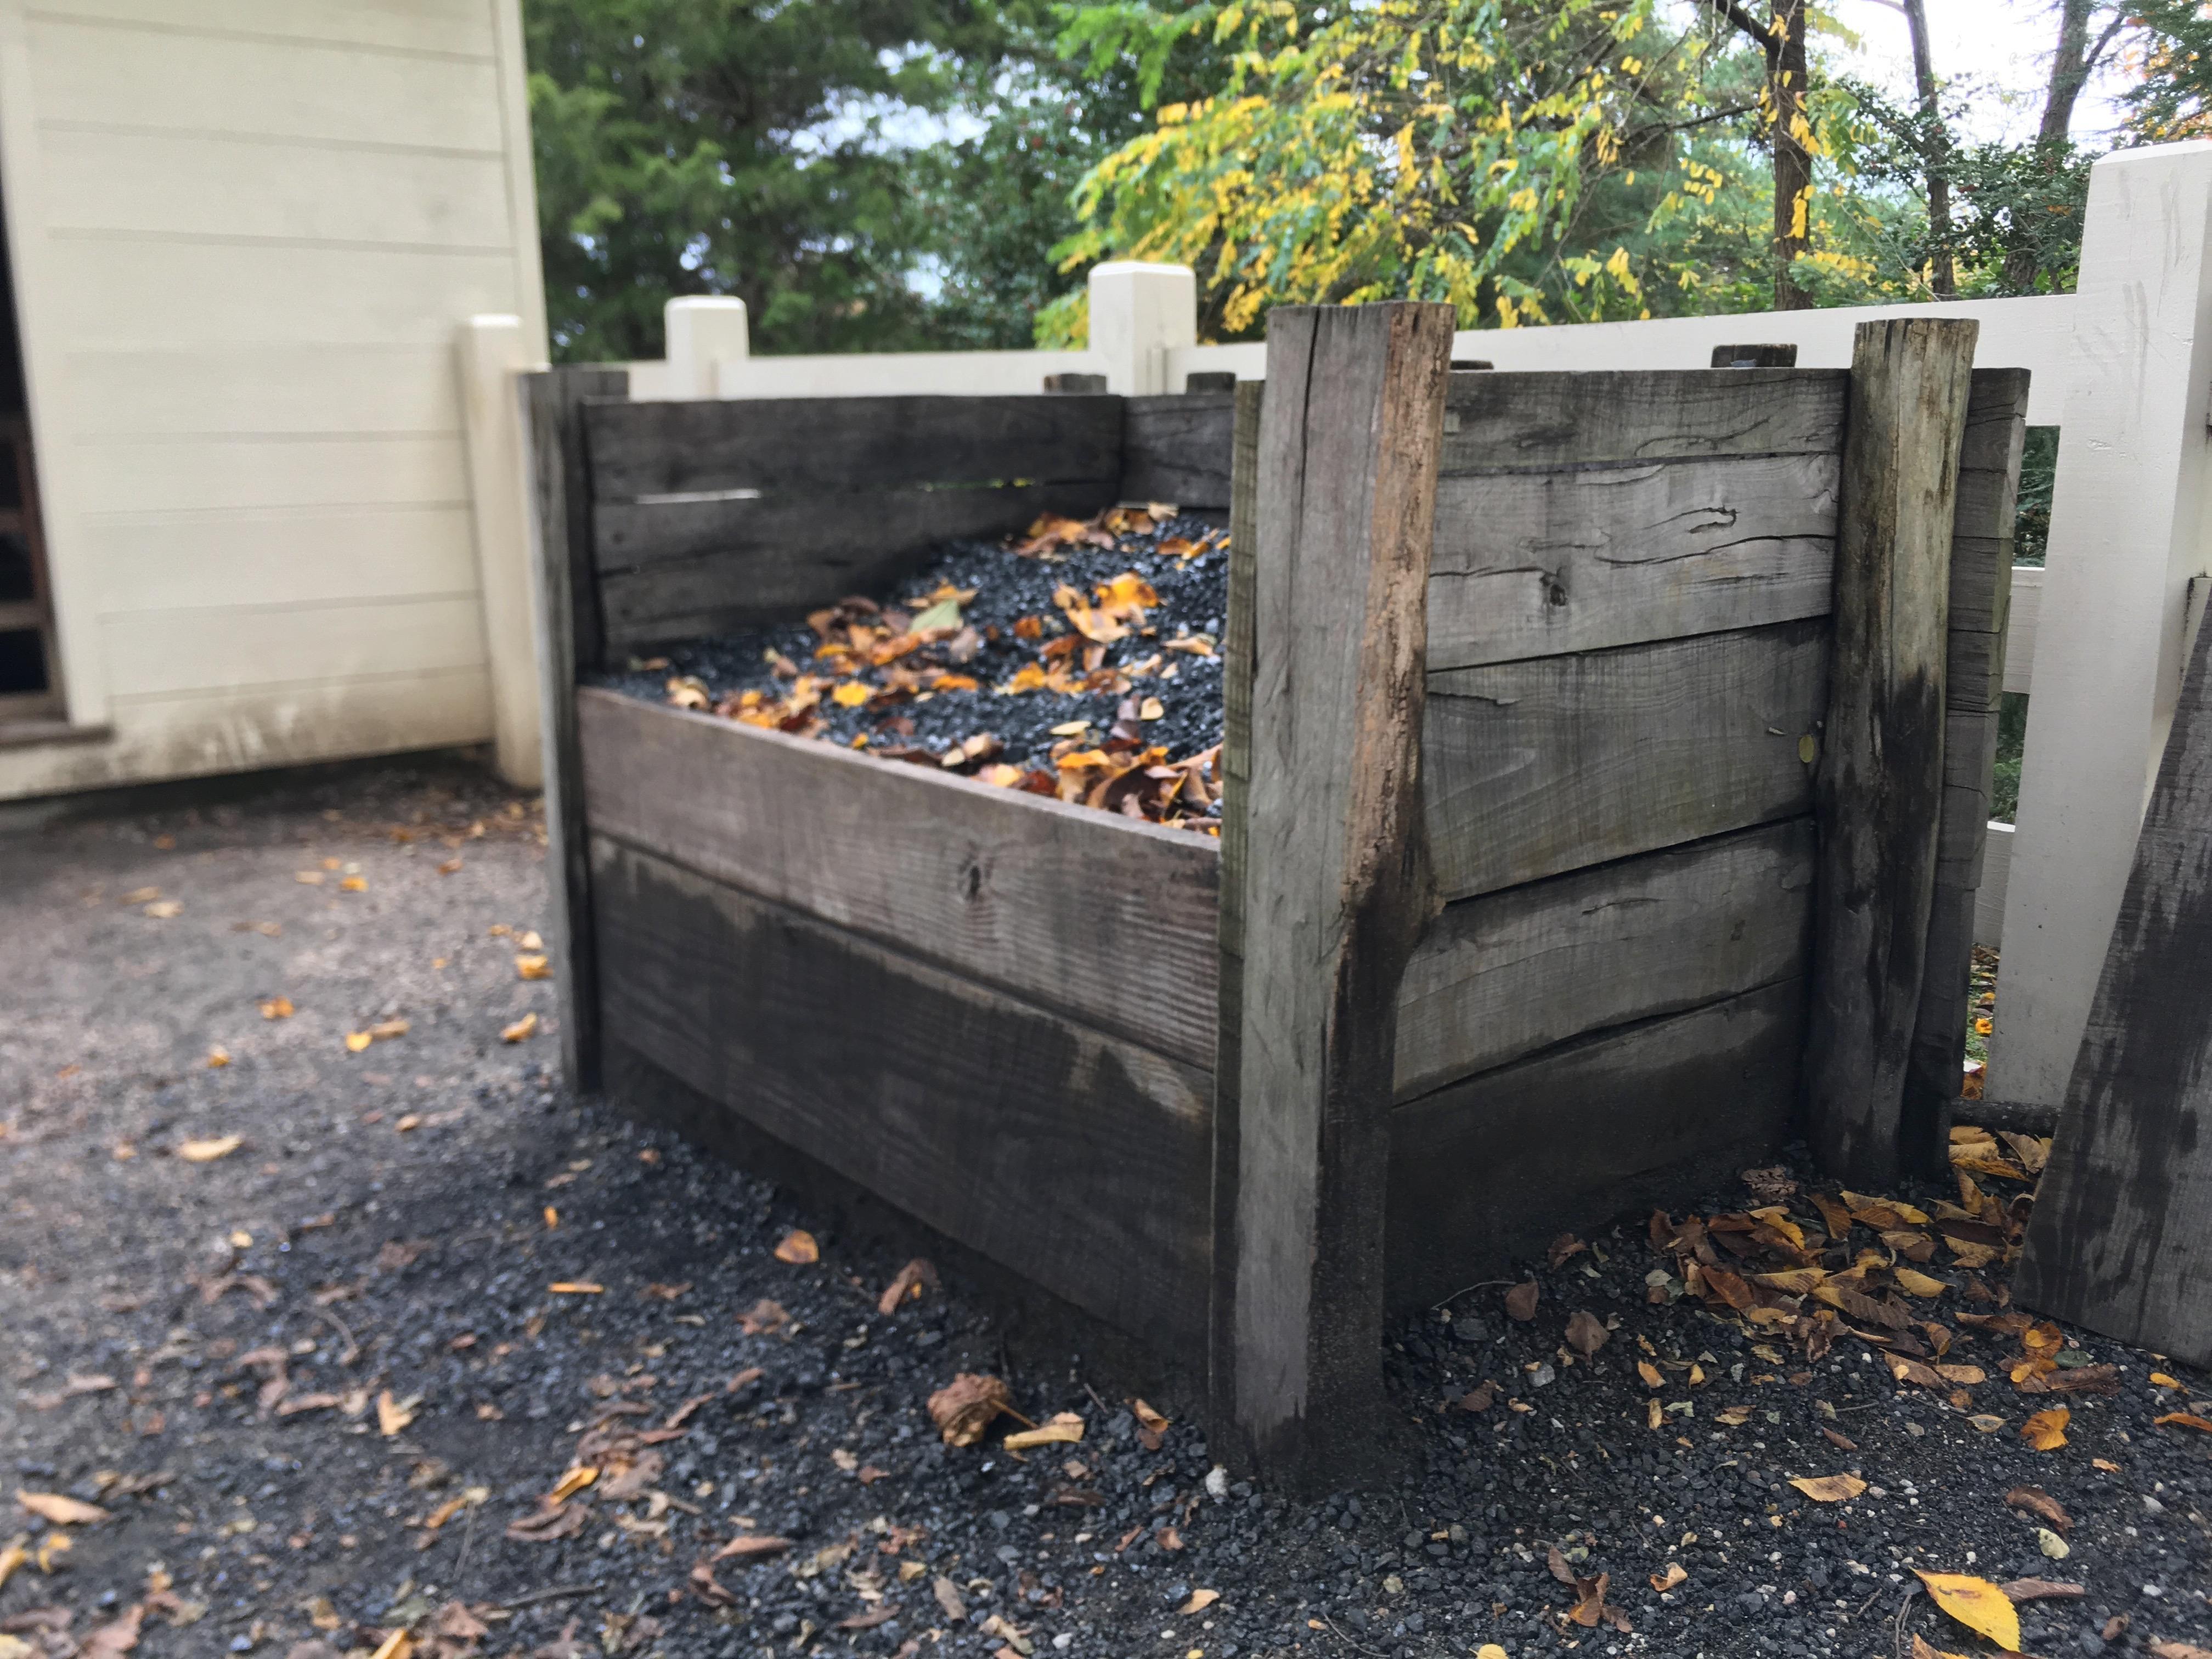
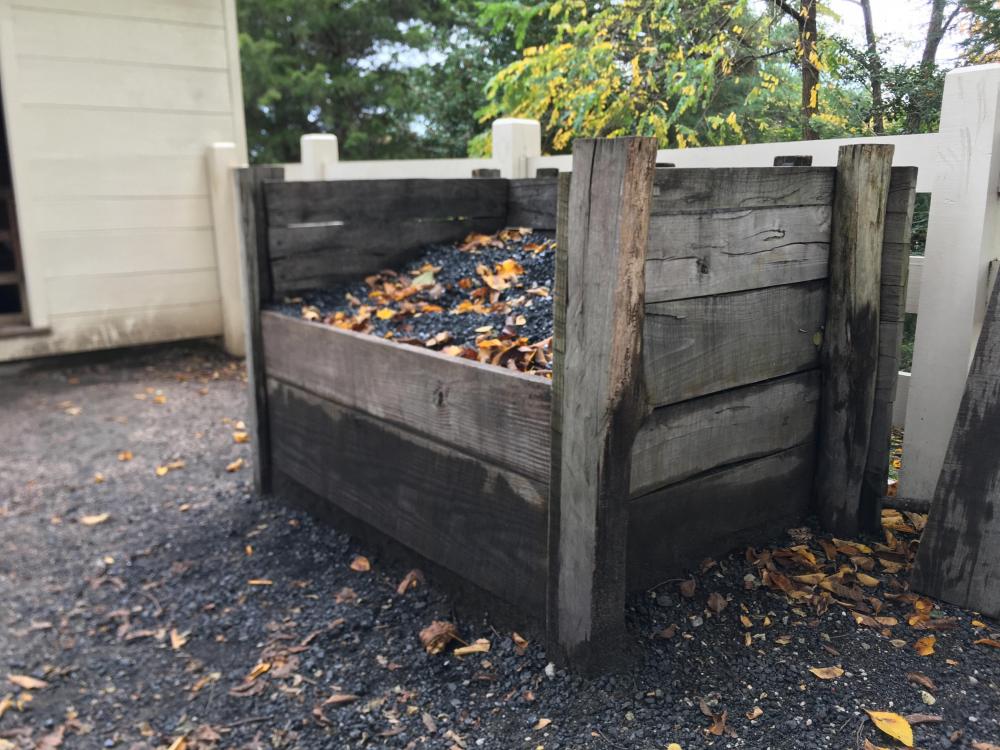
I was at Mt. Vernon this week and happen to take a picture of the coal bunker at the blacksmith shop there.
-
Depends on how long you want it to hold
-
I think these came out of the art of blacksmithing. With this you could easily copy tongs you like. To calculate the weight per foot of steel bars Square - (Width in 1/8ths) * (thickness in 1/8ths) / 19 Round - (Width in 1/8ths) * (thickness in 1/8ths) / 24 To calculate the weight per inch of steel bar Square - (Width)*(Thickness)*2 / 7 Round - (Width)*(Thickness)*2 / 9
-
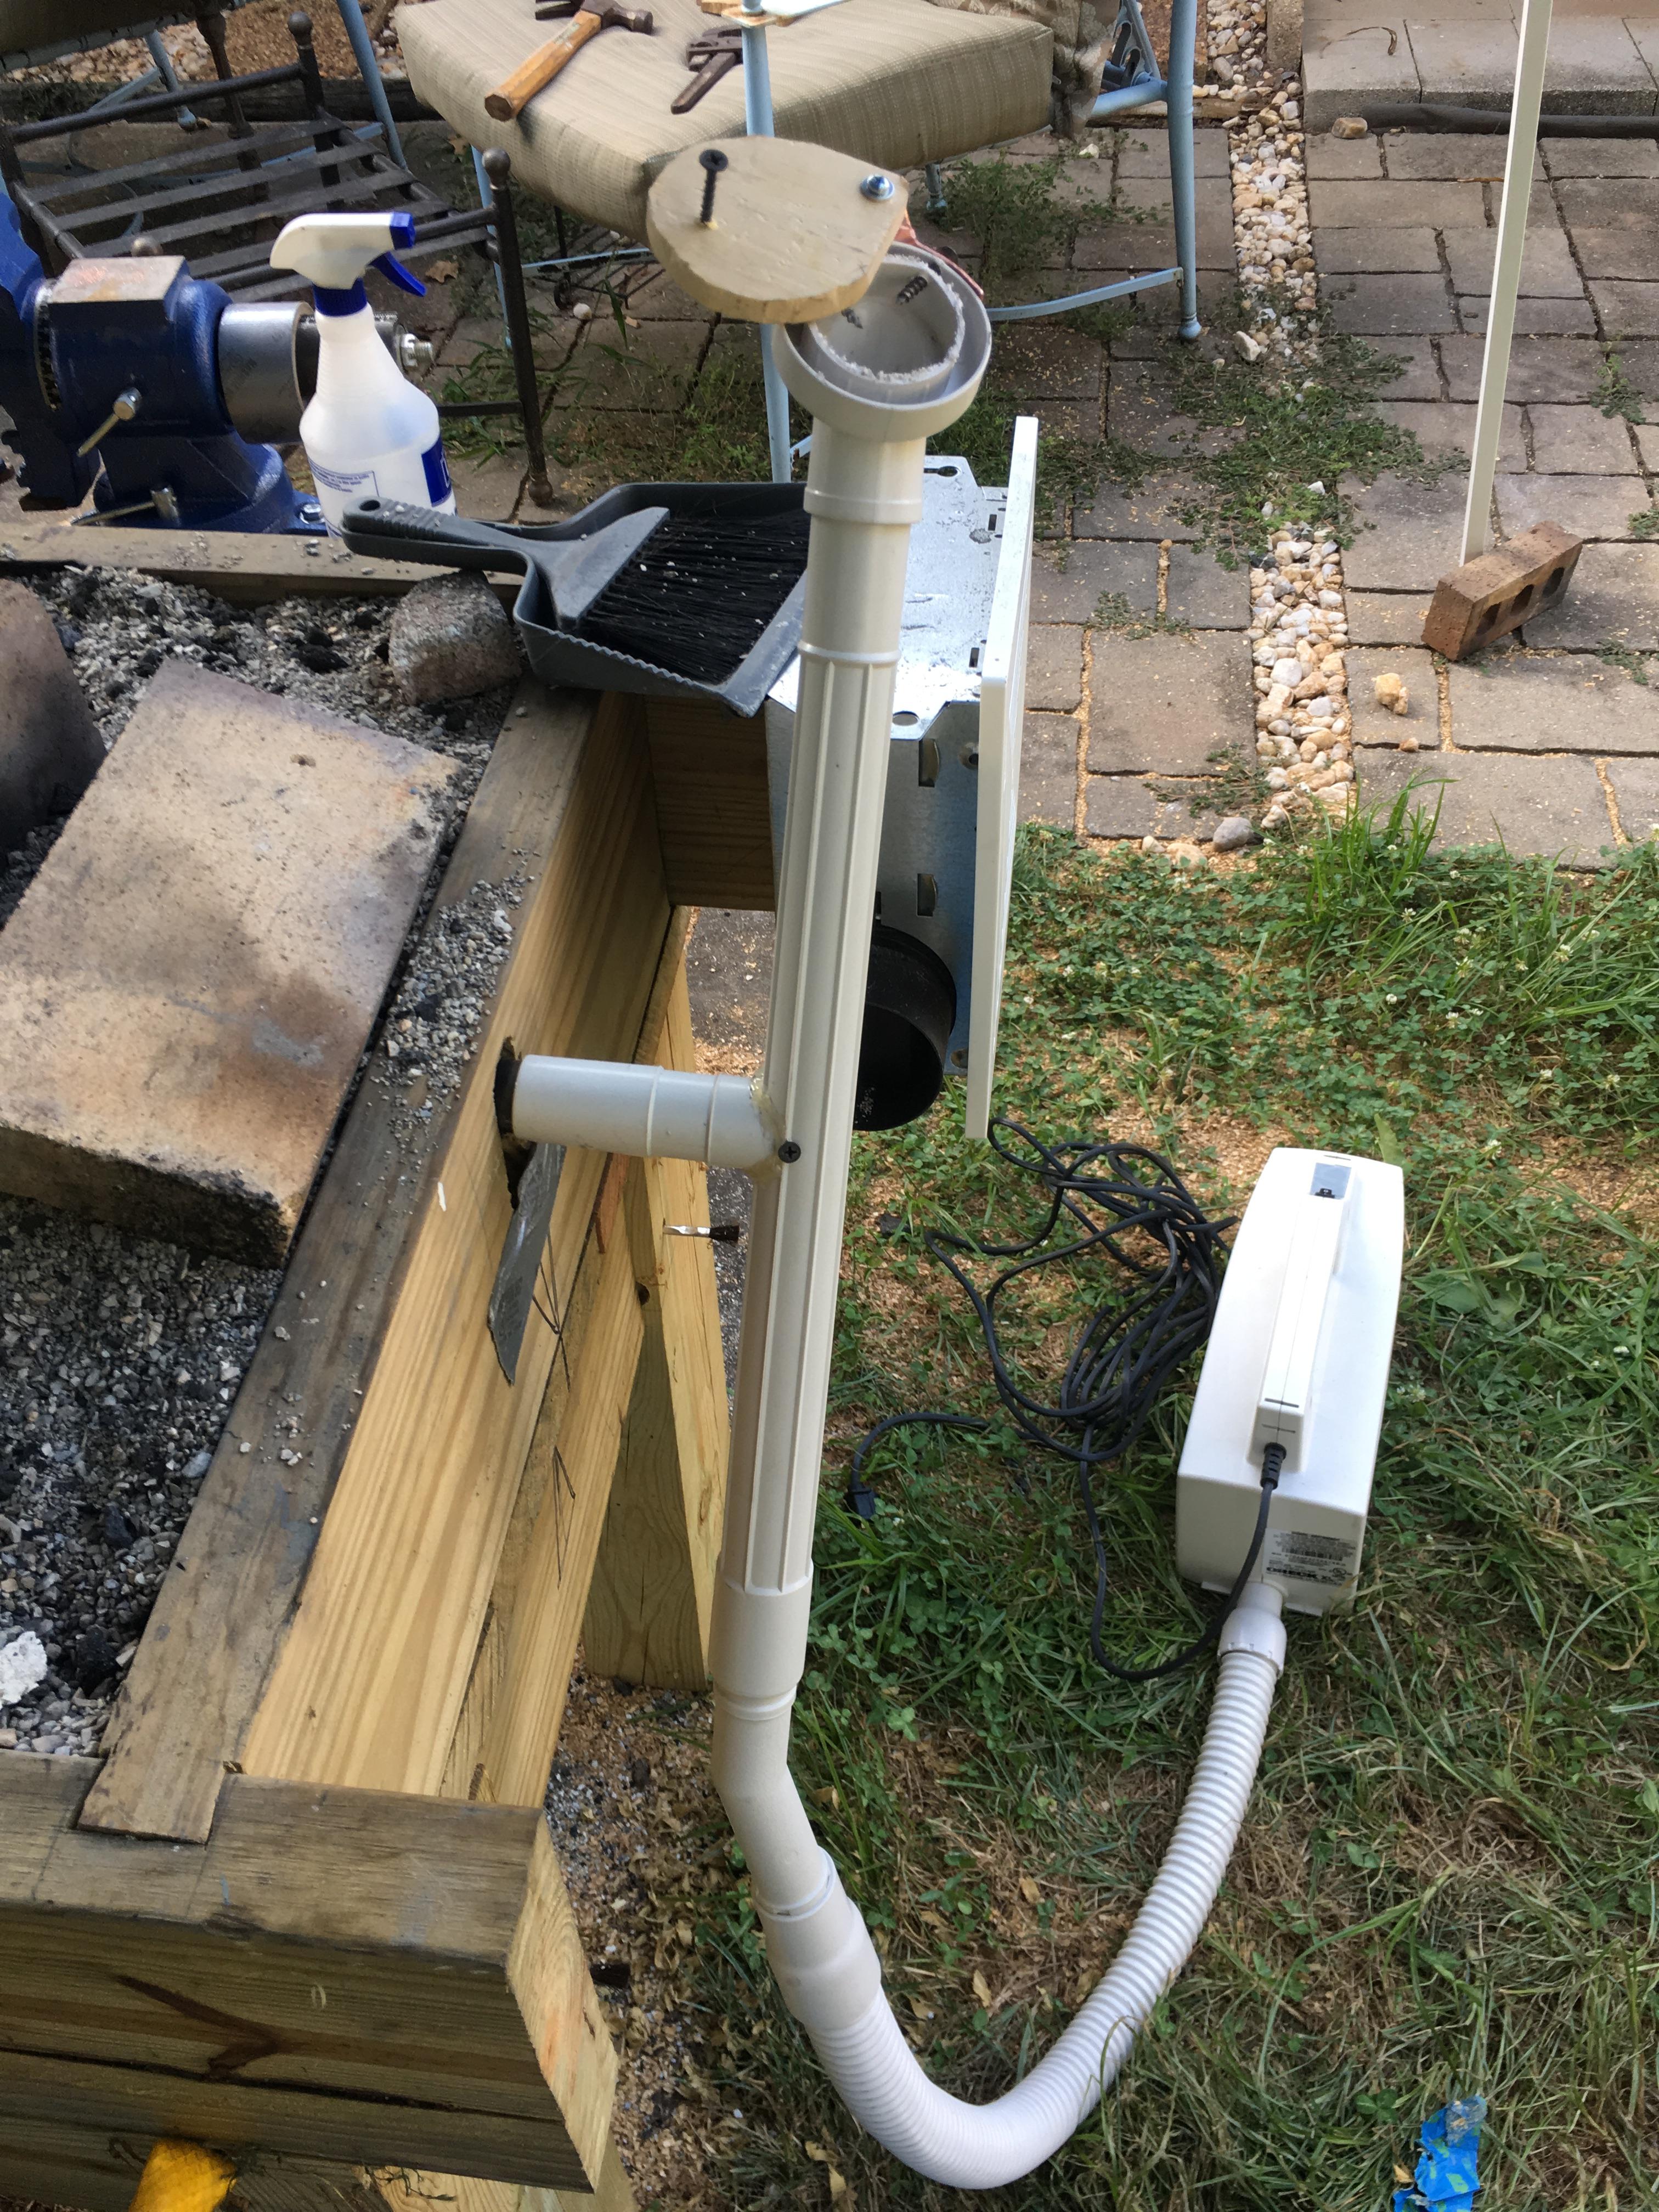
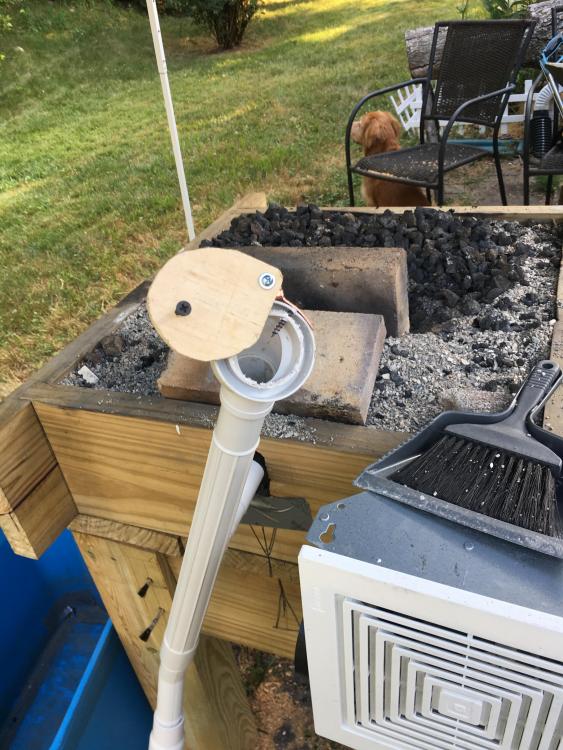
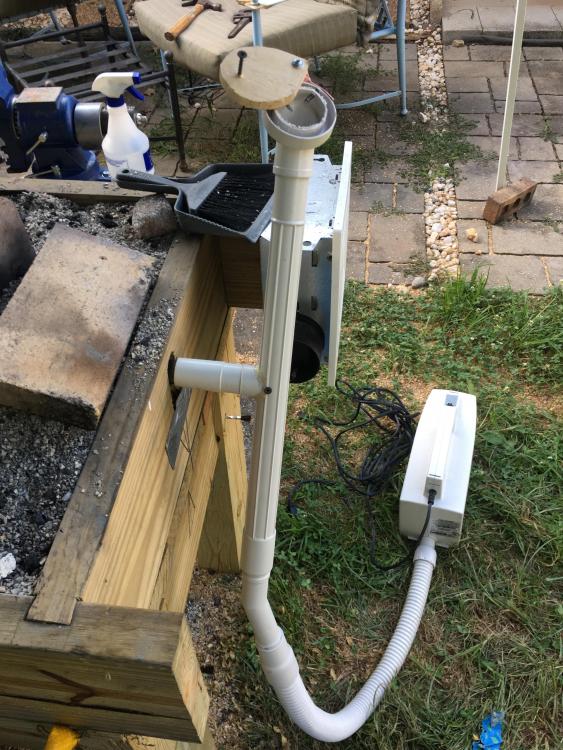
Changes! After taking on some advice about air supply I did some shopping today. I found a little vacuum that does a ton of air and fits my tuyere like a glove. Sadly, It does not react well to a dimmer. I had to come up with a plan b. I admit to feeling pretty clever about this solution. Until I tried it. The air dumps out the top of the T. I was thinking there would be just a trickle of air going into the fire pot when to top was full open. I didn't account for Bernoulli, though. In fact, I get a vacuum pulling air out of the fire pot and up the T. Sigh. I'm going to have to do some experiments to figure out how much of the outlet I need to tape off to ensure I don't get that back draft. Idealy I would like to find a more elegant location for the adjusting cap. After a quick test fire, I can confidently say I didn't have nearly enough air. I have ample air now.
-
Ah. That's capable of a lot more air than my bath fan. I'm starting to see a pattern of indicators. More air. Or at least the availability of more air.
-
It's turning into an episode of "This is your life" in here
-
I think I need to check an assumption. When I was reading about tuyere size, I thought I saw a chart recommending different diameter tuyeres for different fuels. Or at least different types of fire. I made the logical leap that they intended to compare different pipe sized with a constant air source. With that assumption I then deduced that the velocity of the airflow must be important. Is that a bogus conclusion? I'm not trying to turn a box of dirt into a space shuttle, I'm just trying to improve my tool kit for troubleshooting my forge. Thanks as always for the thoughtful and useful responses! JHCC, May I ask what kind of blower you are using?
-
I got a bit wrapped around the axel trying to figure out tuyere size for coke. I feel like most of what I’ve read is aimed at charcoal. Is approx 7/8 I.d. Appropriate for a coke fire? I do small work. <= 1” your comment about more air is making me wonder. Also, I’d love to live in a house with that address.
-
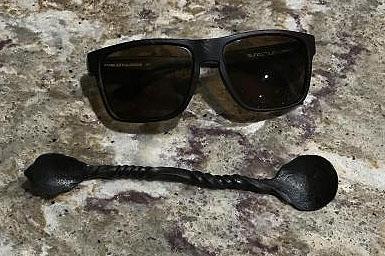
Did a little scrolling practice and a lot of drawing out and rounding practice. 1/2"sq bar to ~3/8" round. The one on the left was my exemplar. I didn't have time to smooth out the scroll today. Also made my first spoon. It has two ends. Why? because the first end wasn't quite what I was looking for Lastly I finished reading The New Edge of the Anvil. That was a pretty good read. I think I learned some stuff, and the metallurgy chapter was enlightening.
-
But the extra 'r' just sounds so much better!
-
I am using my JABOD with some coke I bought from blacksmith depot. I forge in a close subdevelopment and chose coke to reduce the amount of smoke and stink produced. My neighbors have been cool so far and I'd like to keep it that way. What I'd like a sanity check on is the layout of the fire pot for coke. In the first few burns I feel like the sweet spot is sitting about 2" below the surface of my table. The truer is 3/4" black gas pipe sitting 3.5" below the surface of the table. Those dimensions were set based on the assumption of a charcoal fire and I suspect they are less suitable for coke. When burning the coke, I shop my fire pit to be 1" below the truyere. I fill up the pit with coke and heap a pile another 3" over the top of the table. The hot spot seems to be sitting from the top of the truyer to 1 or 1.5" above the top. I'm using a bath fan on a dimmer as a blower and have an elbow sitting loosely over the gas pipe. As a result a fair amount of the air just escapes and I get what seems like a pretty reasonable amount of blast. My planned fix is to rais the truyer 1.5" and run a couple more fires in that configuration to see if it is better or worse. I'd like to here people's predictions / thoughts on the issue. Am I heading the wrong way? Is some other aspect of my fire the actual problem?
-
And then I learned that Frosty not only looks like Chuck Norris, but he knows him too. Smiling and shaking my head. Fun fact, I was an unofficial stunt double for the original Marlboro man in a white water rafting episode of Walker Texas Ranger. They spray painted my head silver and shot the scene from 3/4 of a mile away. I almost passed for him. I was 21 years old at the time.
-
In my mind, a joint where the depth = the width|length seems "wobbly". If the depth was 1-1/2 it might seem more stable. I'm thinking about an offset shape like a small bik. With a short fuller or hot cut, no big deal most of that energy is going straight down. Does anyone have any ideas on why this might have been made this way?
-
frosty, I didn't know you were Chuck Norris! I heard you forge by simply telling the metal where to go. I also heard pritchel holes were invented when you accidentally poked your anvil in annoyance.
-
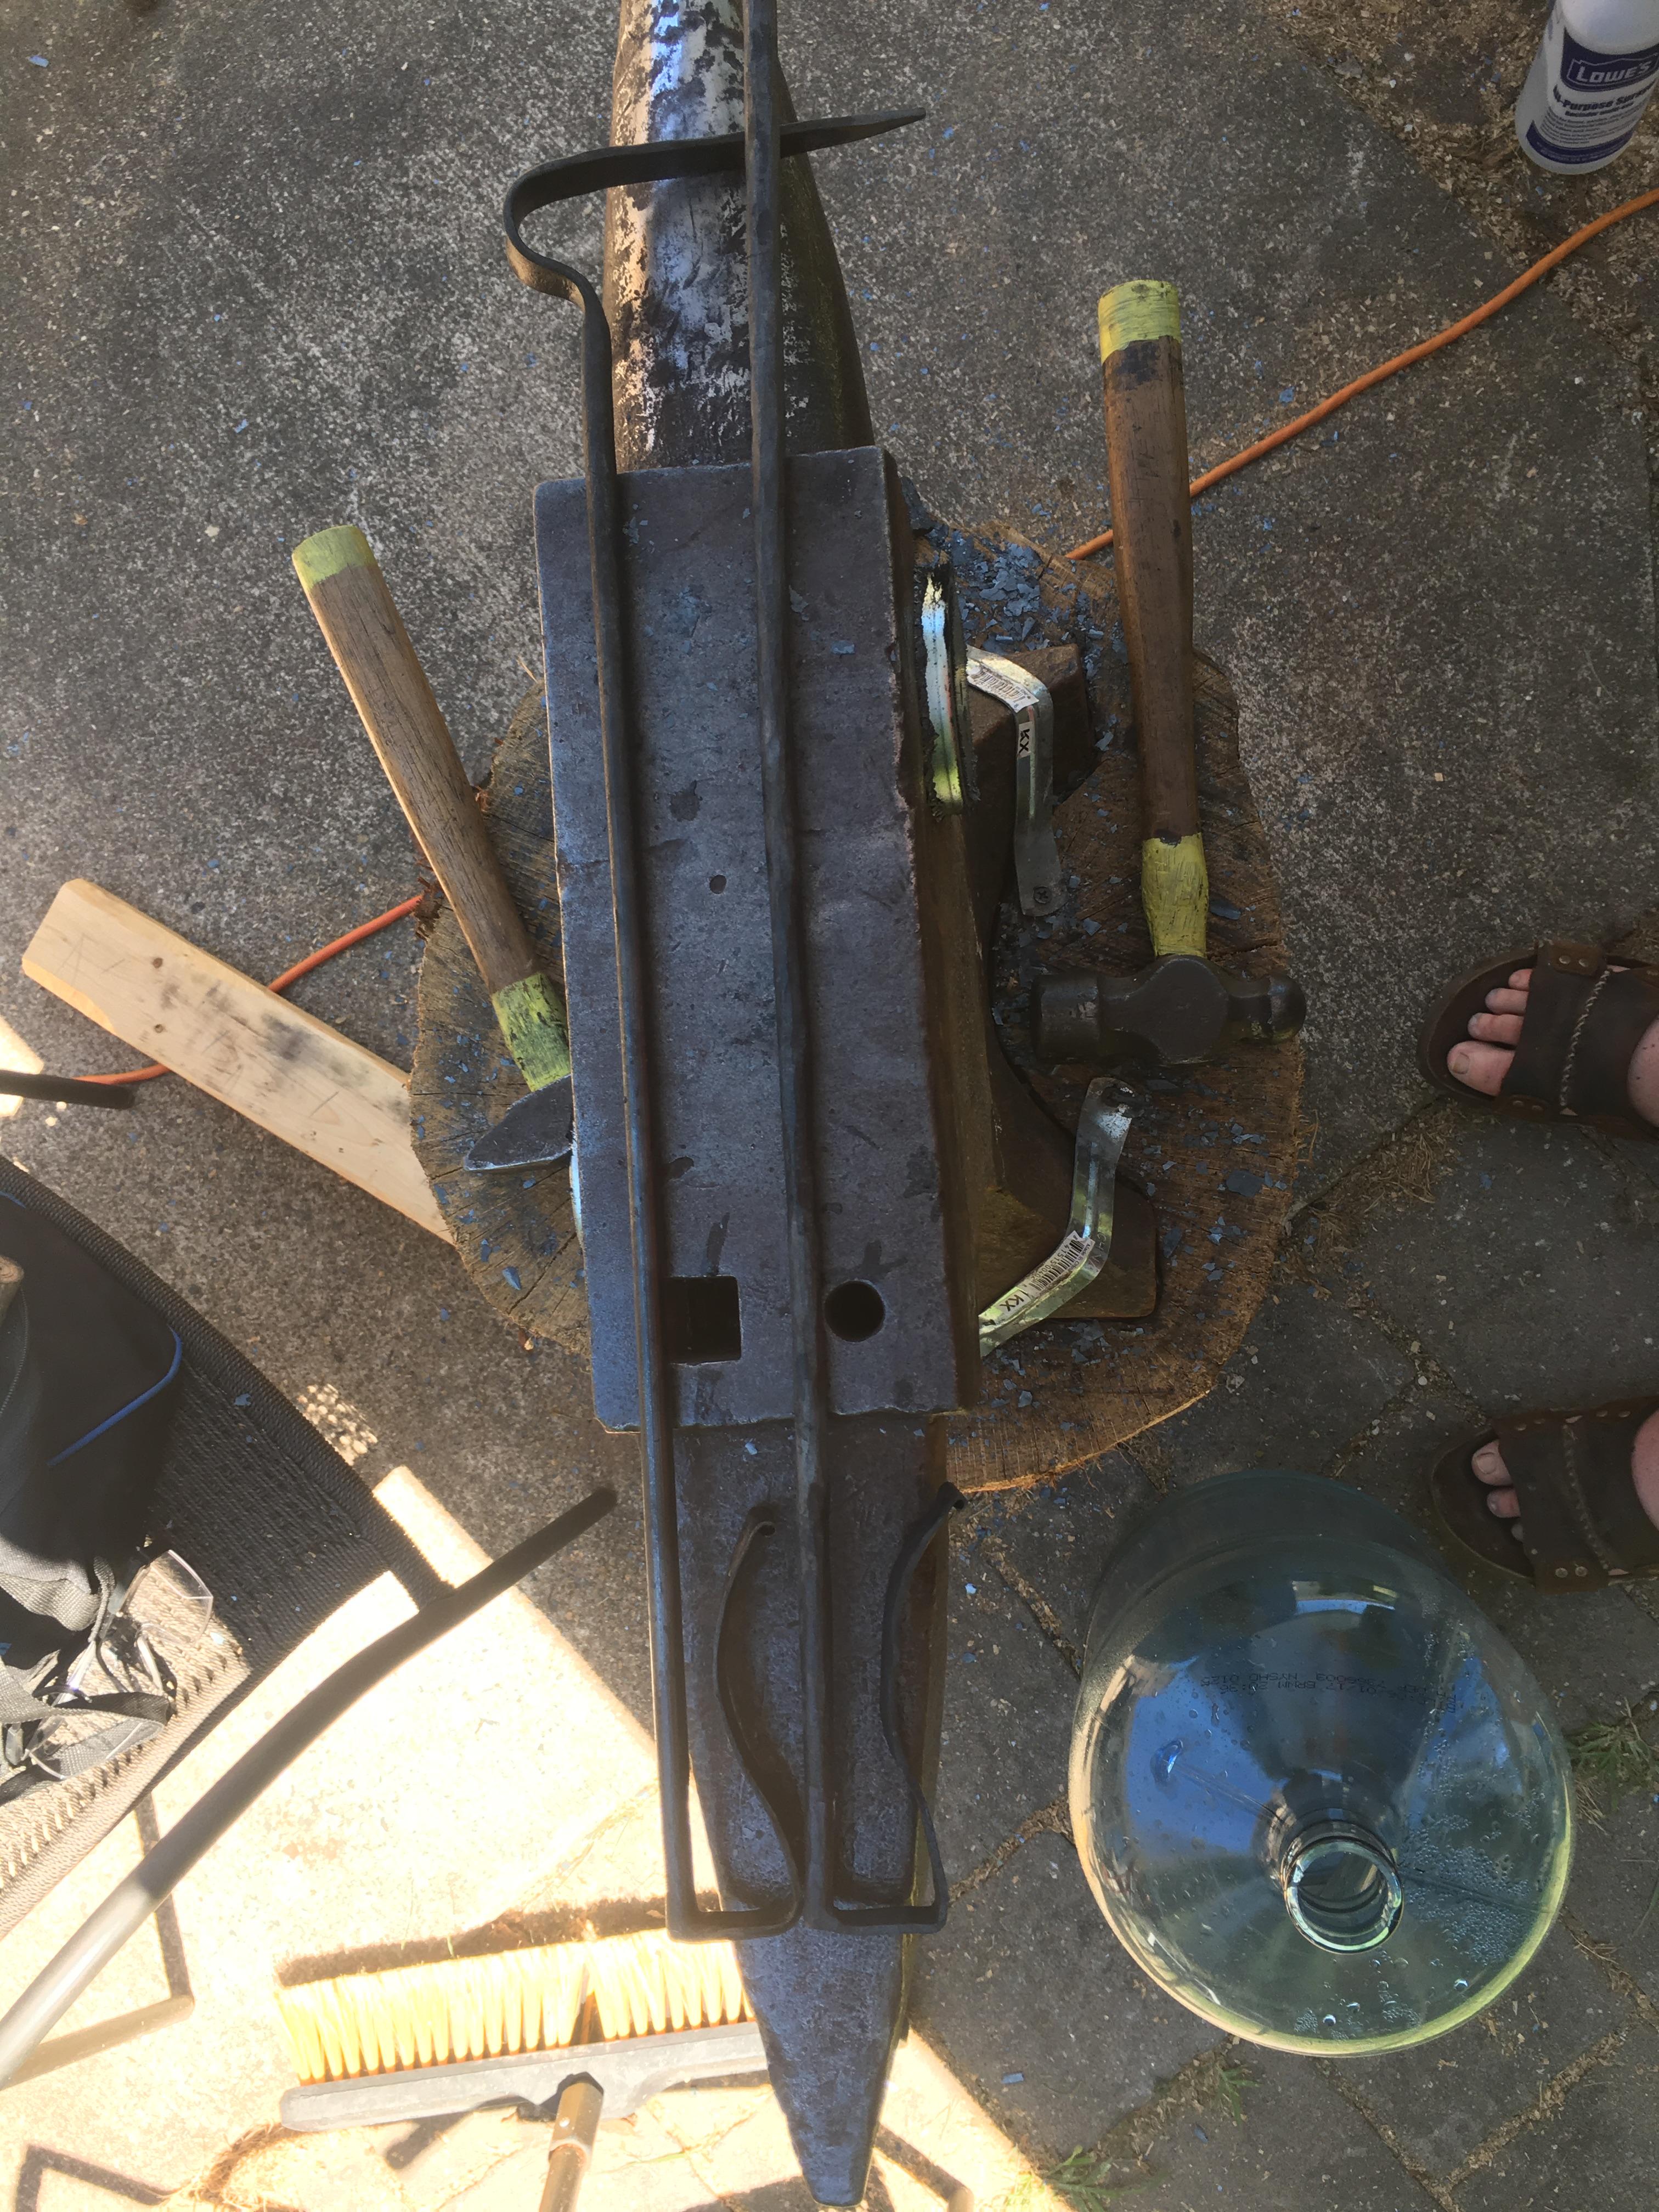
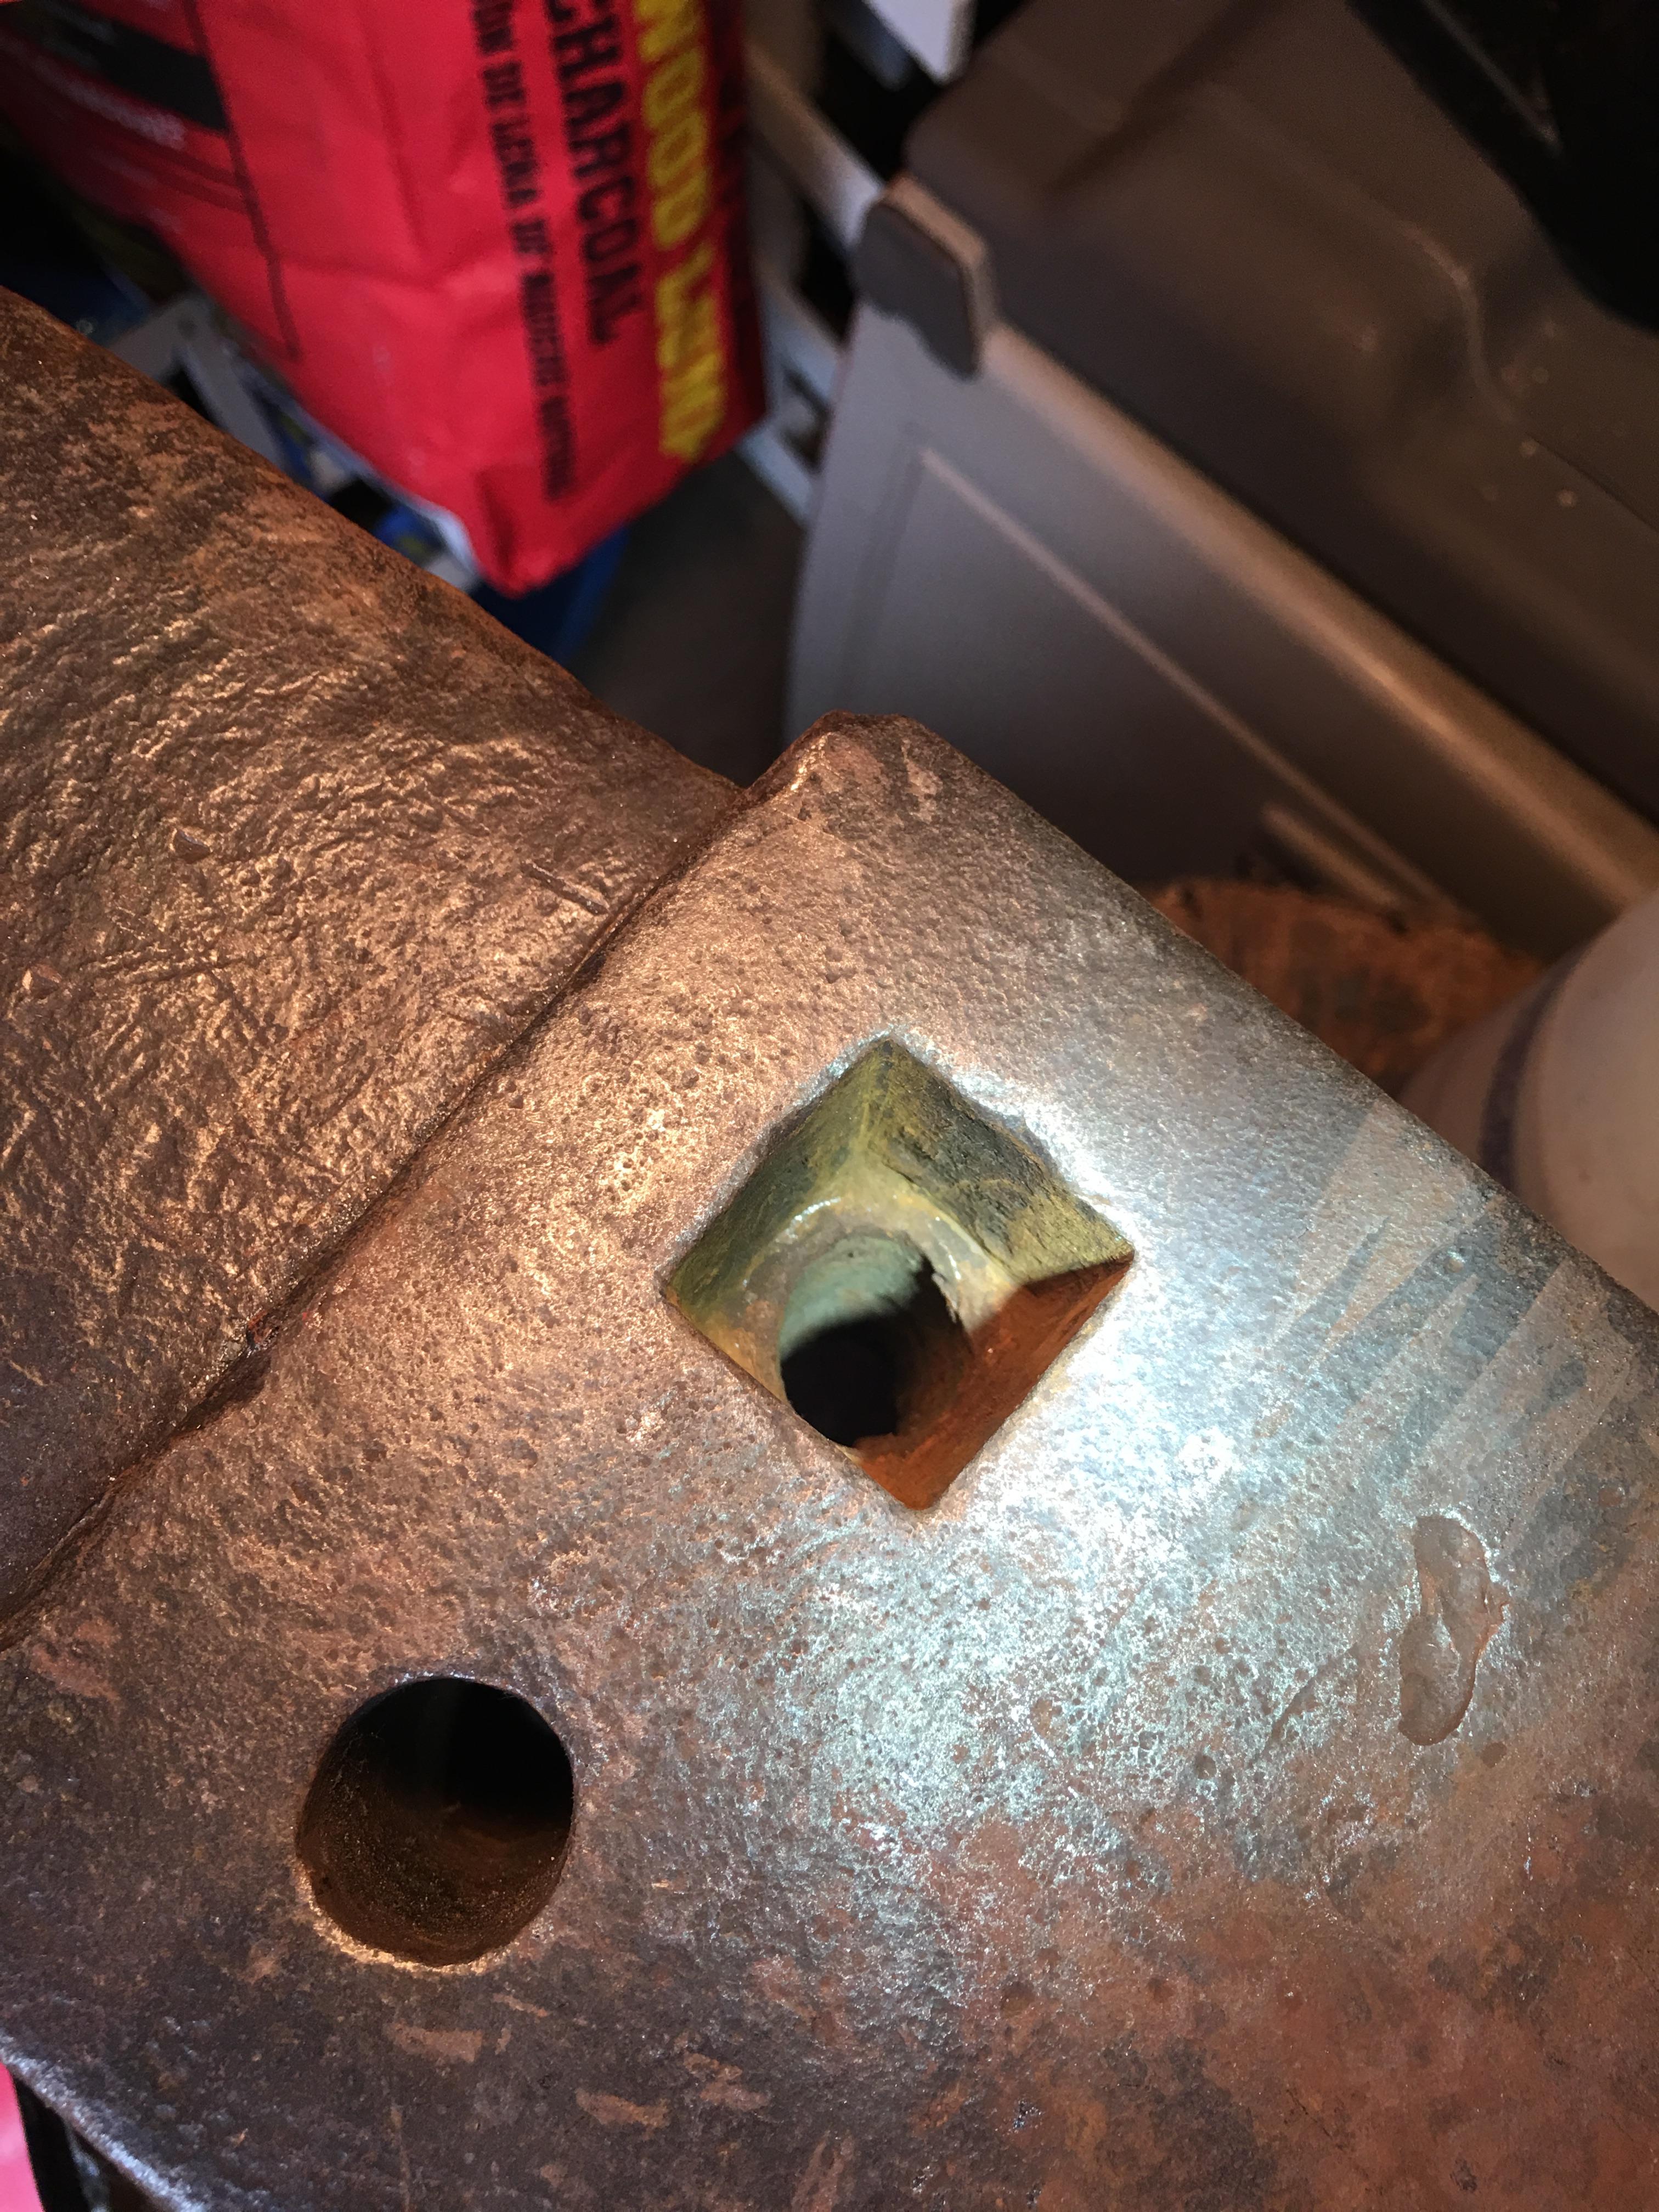
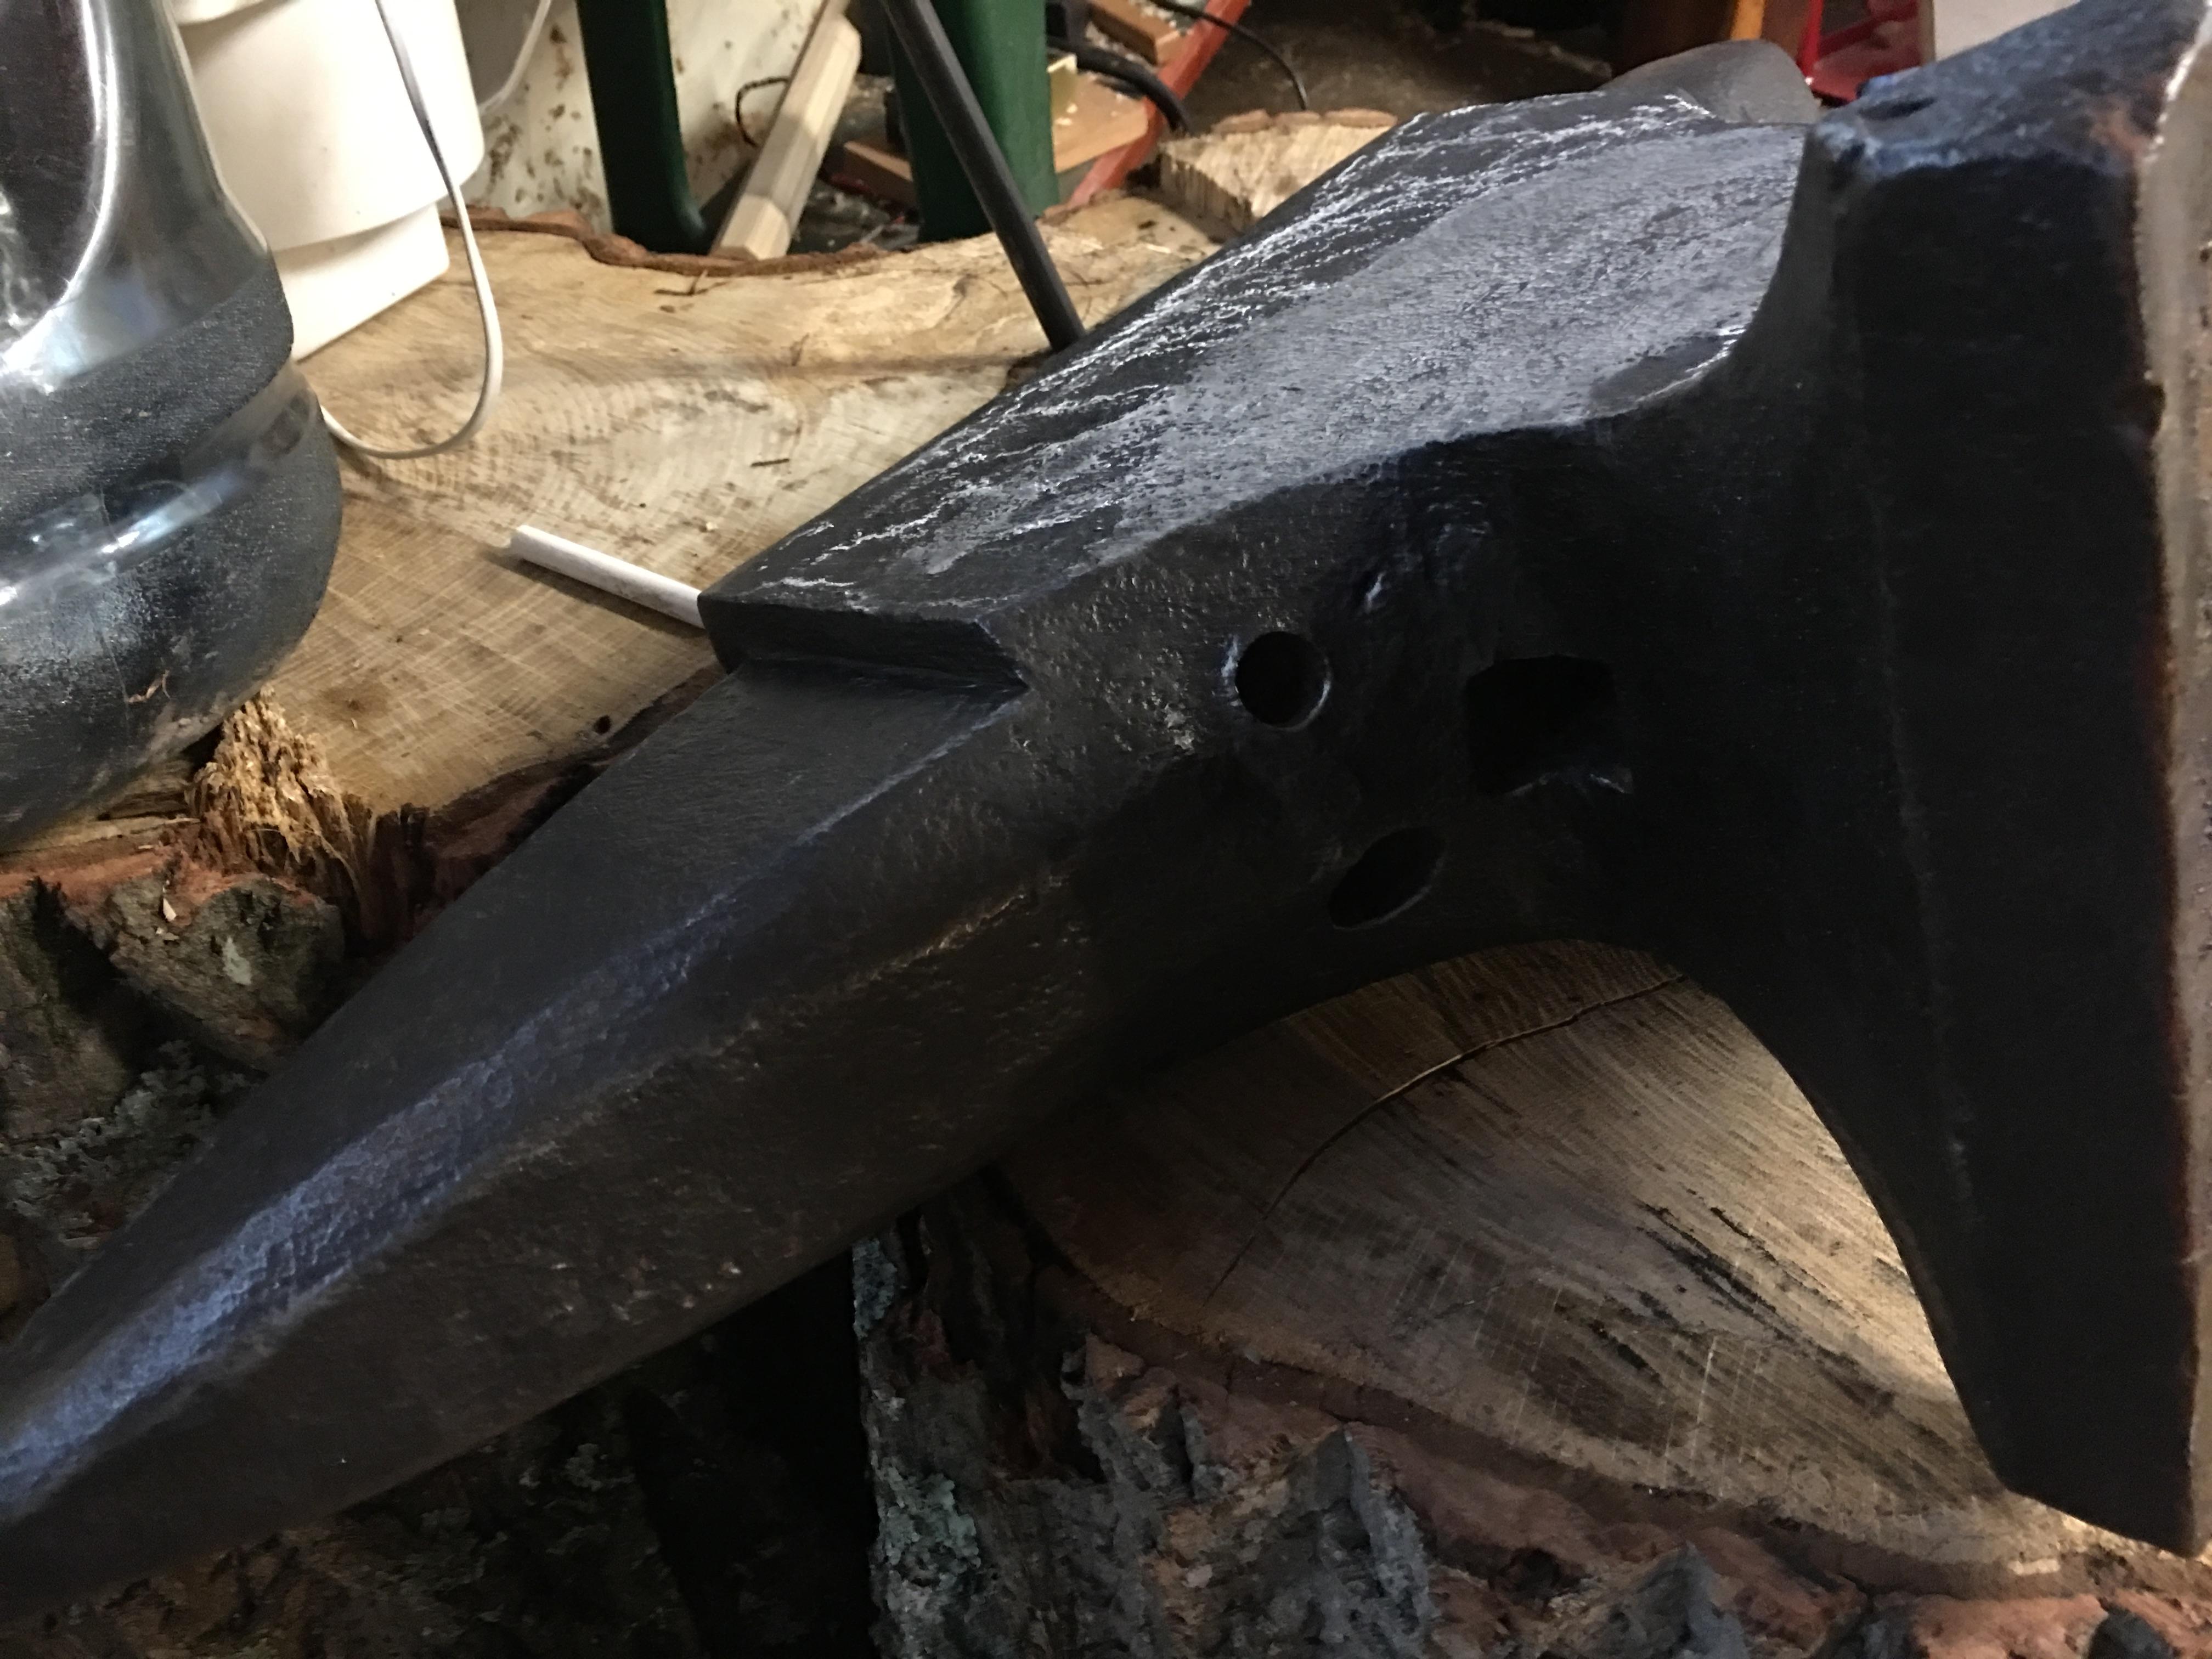
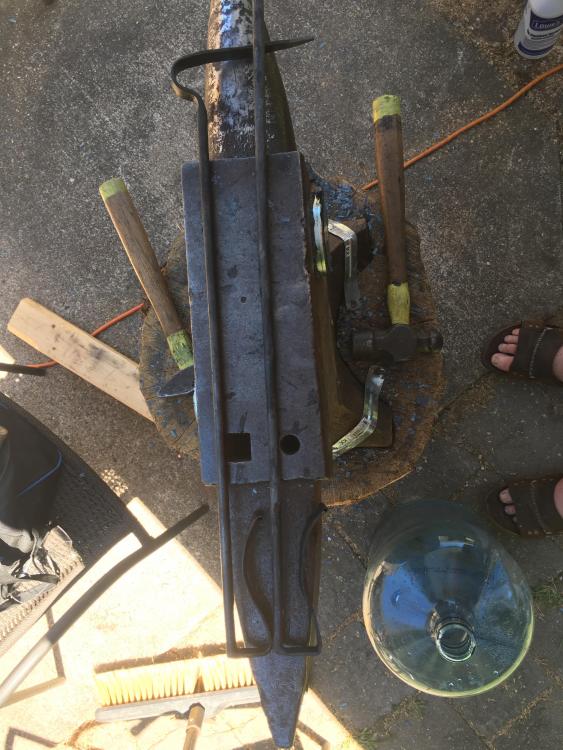
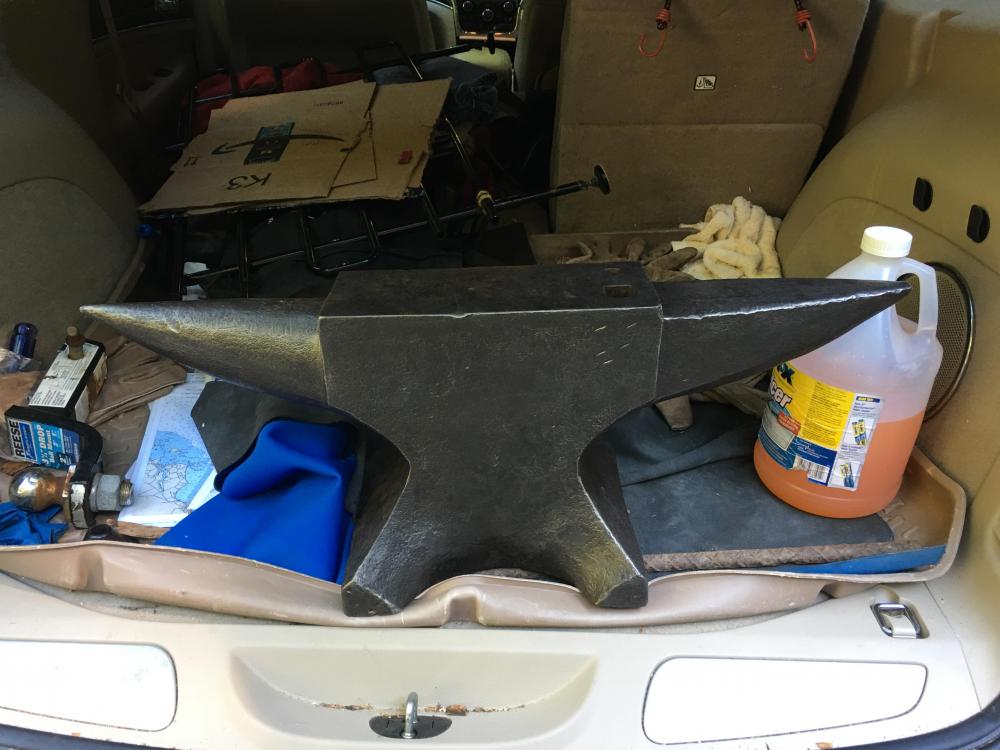
absotively. i drug out the drop light for a better picture. It is 176 pounds. Marked in CWT. I can't read any sort of name on the side. The guy I bought it from collects big anvils and got this one as crate filler. He didn't have any additional info on it other than he imported it from england. One other thing I noted is the edges of the Hardy appear to be dented with a radius similar to the round hole. Could it have been used with a hold fast the way woodworkers use holdfasts? I'm going to go look at pictures of how anvil holdfasts work. Yeah. Sorry. That's a bit of a red herring and distracts from the questions at hand. Anvil holdfasts work exactly the same as wooodworking workbench holdfasts do. I was confusing holdfast and hold down when I had that question. Back to the interesting questions. What's the best way to get hardy tools to fit and function in this funky hardy hole? And why is it funky?

-
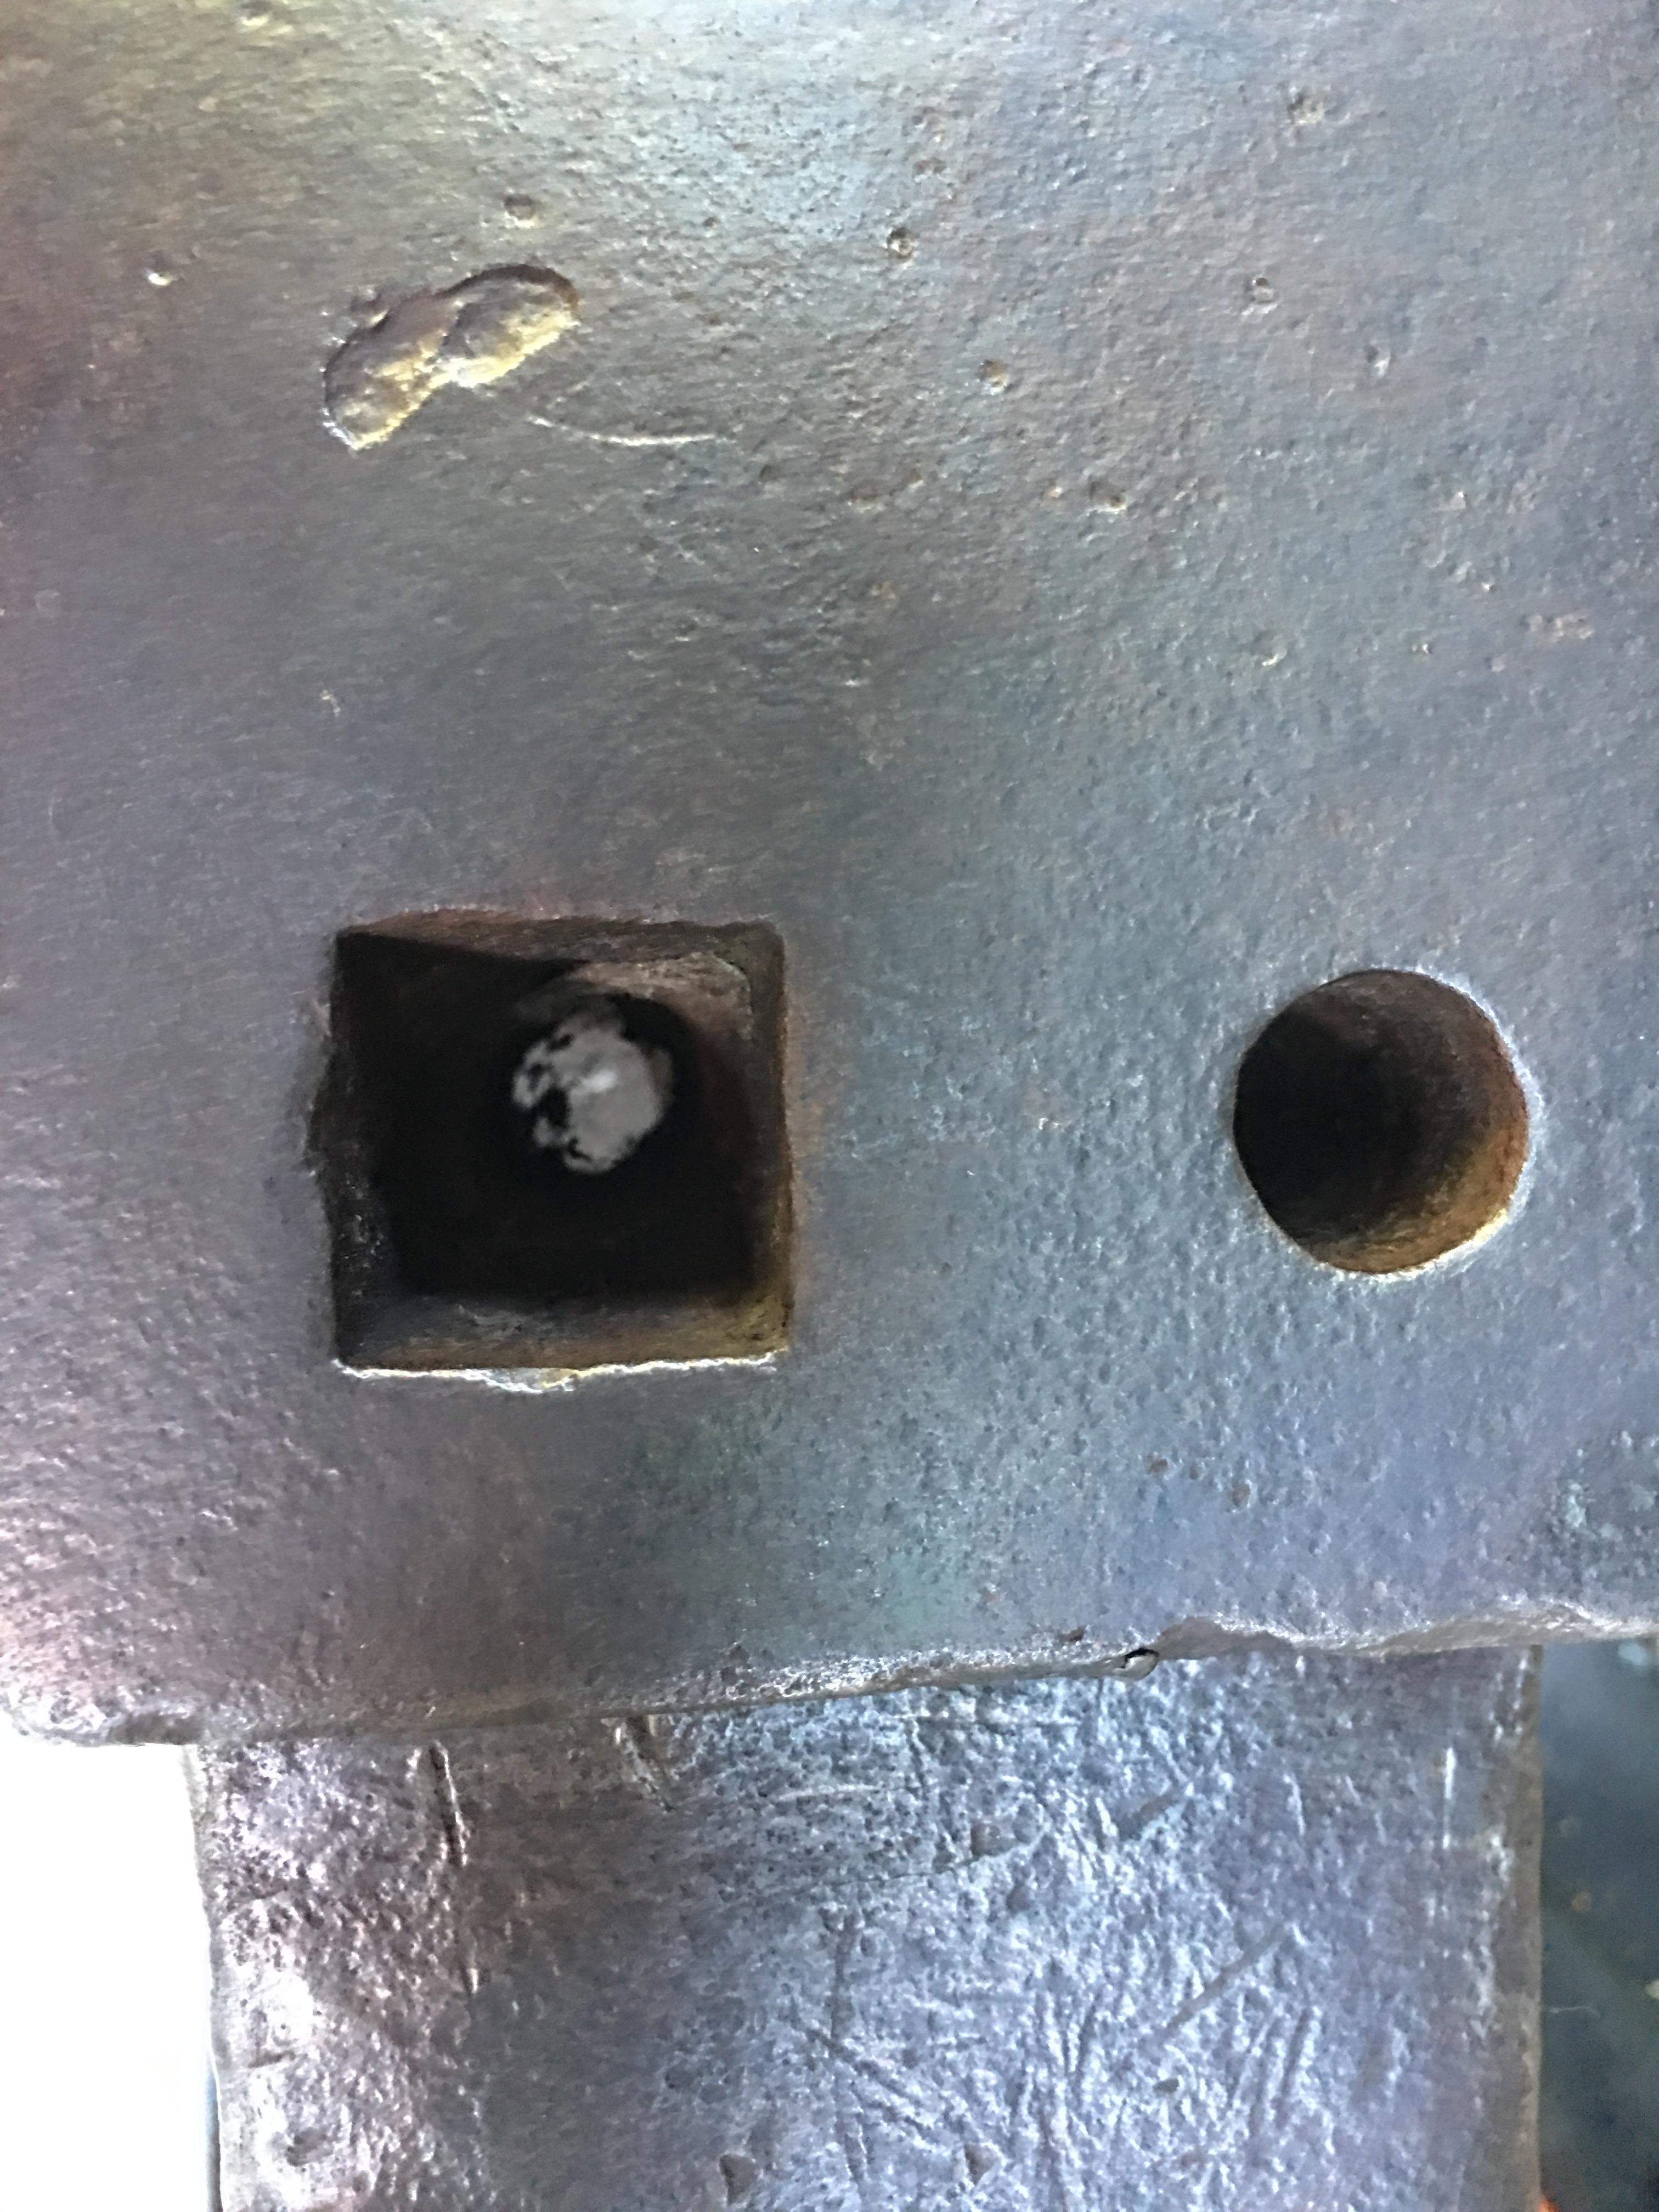
I have a new-to-me anvil with a strange hardy. The hardy is pretty close to 1" square, but at 1" deep it becomes a round hole the same size as the pritchel. This is a bit tough to take a picture of, but I think you can see it in the photo below. I included a picture of the exit of the two holes to show how they both come out of the bottom round. I.E. there isn't just a piece of scrap jammed into the Hardy. In the process of trying to fit a hardy tool into the hole, it has become apparent it is somewhat tapered too. So. Practical question is what are your suggestions for using this hardy? My first thought is to just fit the bottom 1" of my hot cut to the hole and let the rest project out over the top of the anvil. My second thought is to forge the bottom of the hardy down to fit in the round hole, leaving just the top inch square. My issue with the first idea is it sounds like it could produce a lot of stress on the anvil face around the hardy. This is not how the tools were designed to be used, so I would expect problems. Issue with the second plan is it's a fair piece of work for each and every hardy tool I make / buy. I'm not afraid of work, but my forge time is limited and the more I spend reworking tools, the less I spend making the stuff I want to make. I guess a third idea is to cut the hardy shank off at 1". I'm not sure if that is much better than the first idea. Next up is the curiosity question. What's the deal with this? Was this a normal practice? I haven't been able to find anything in the google about it. Admittedly searching for "round hardy hole" is tricky given that most of the internet doesn't know the difference between hardy and pritchel. Anyway. I look forward to everyone's ideas.


-
Since salt tablets are no longer available, I can recommend a product called endurolytes. It is a balanced electrolyte designed for those crazy people who run 100 mile races across the desert luckily they work just as well for people who just sweat a lot for whatever reason. i do a fair job of staying hydrated, but often end up with twitchy legs keeping me awake at night. I've learned that means my electrolytes are shot and i need to take some endurolytes. A smarter man might mix them in their drinks and prevent the problem in the first place
-
All finished and set up in the far corner of a patio. I started a fire with some scraps of oak from the woodpile. My fire was pretty shallow, but once I got some nice coals in the bottom I had 1/2 square bar at forging temp. I had just enough time to draw out a point and taper before it got too dark to see what I was doing.

-
I'm still a beginner myself, but in general, don't ignore the intellectual aspect of the craft if you are a "doer" and don't ignore the physical practice if you are an intellectual. There is lots of both in smithing. If you don't have time to take a class, spend some time learning how to shape a fire correctly for different fuels and different stock sizes. Or learn what different kinds of steal are and what they are good for and what their working characteristics are. Or learn something about the history of smithing in different cultures. How they solved the same problem in different ways. Any of these will make you a better smith _if_ you apply them to the physical practice as well.
-
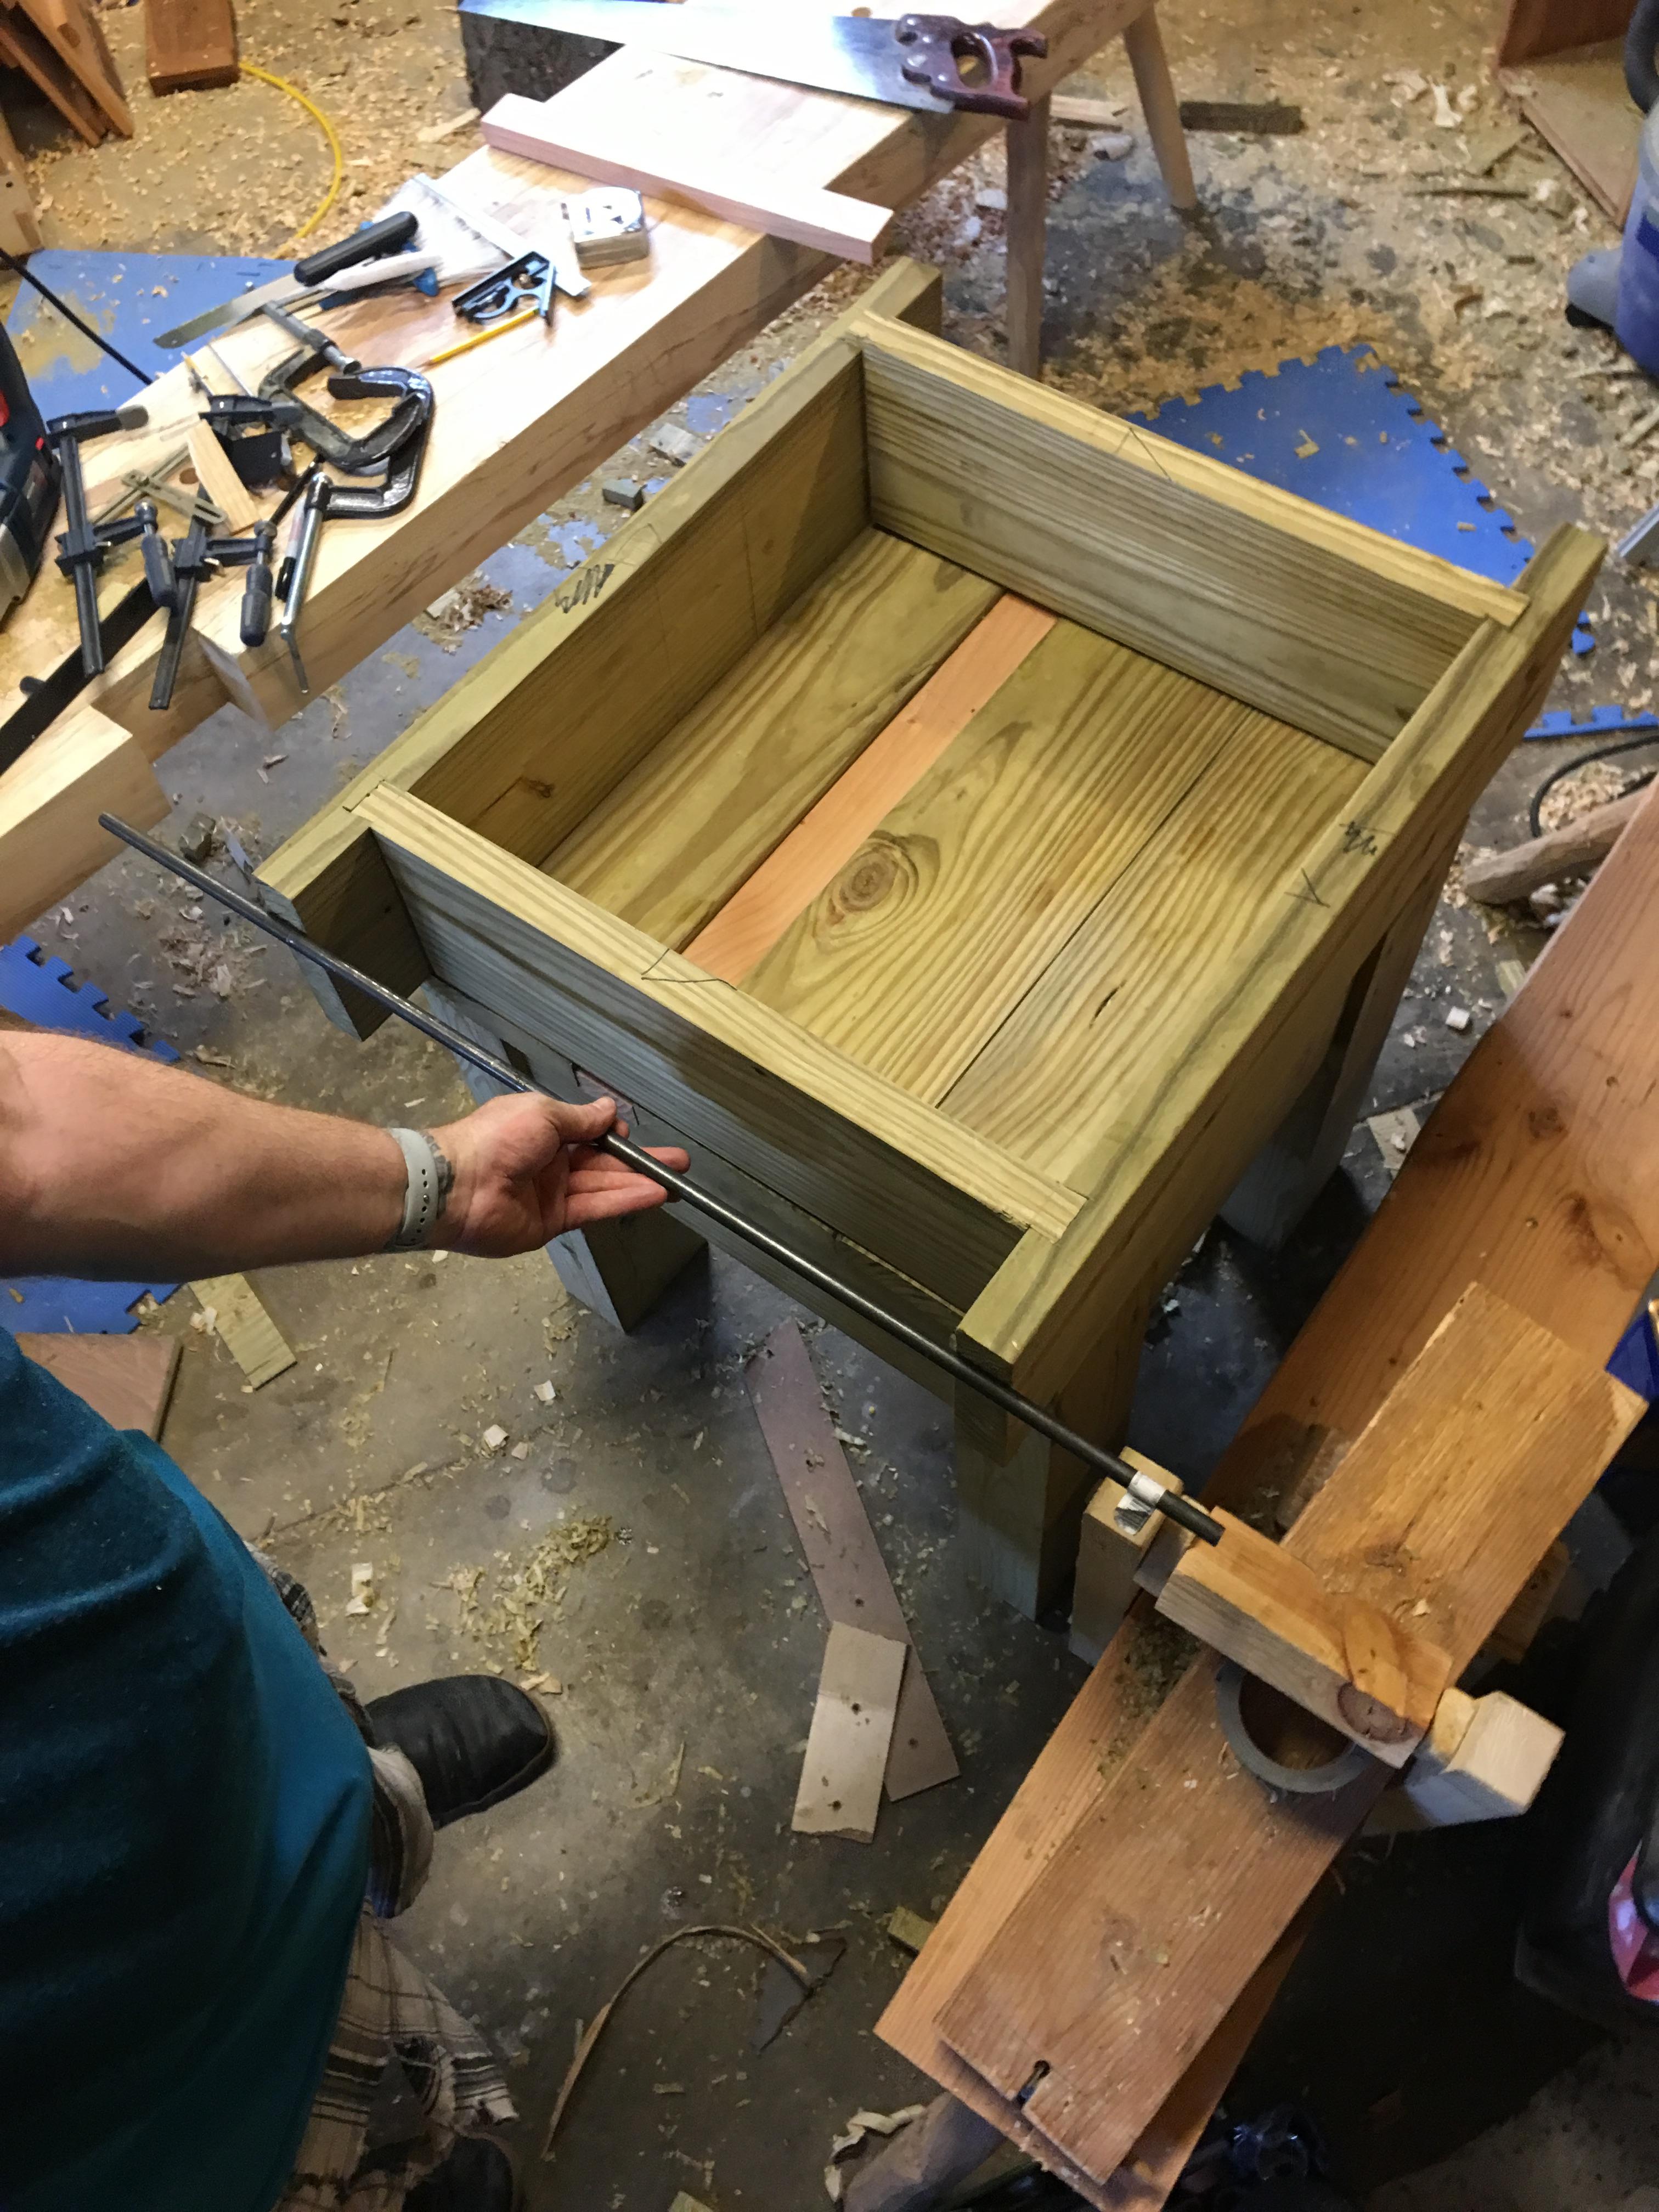
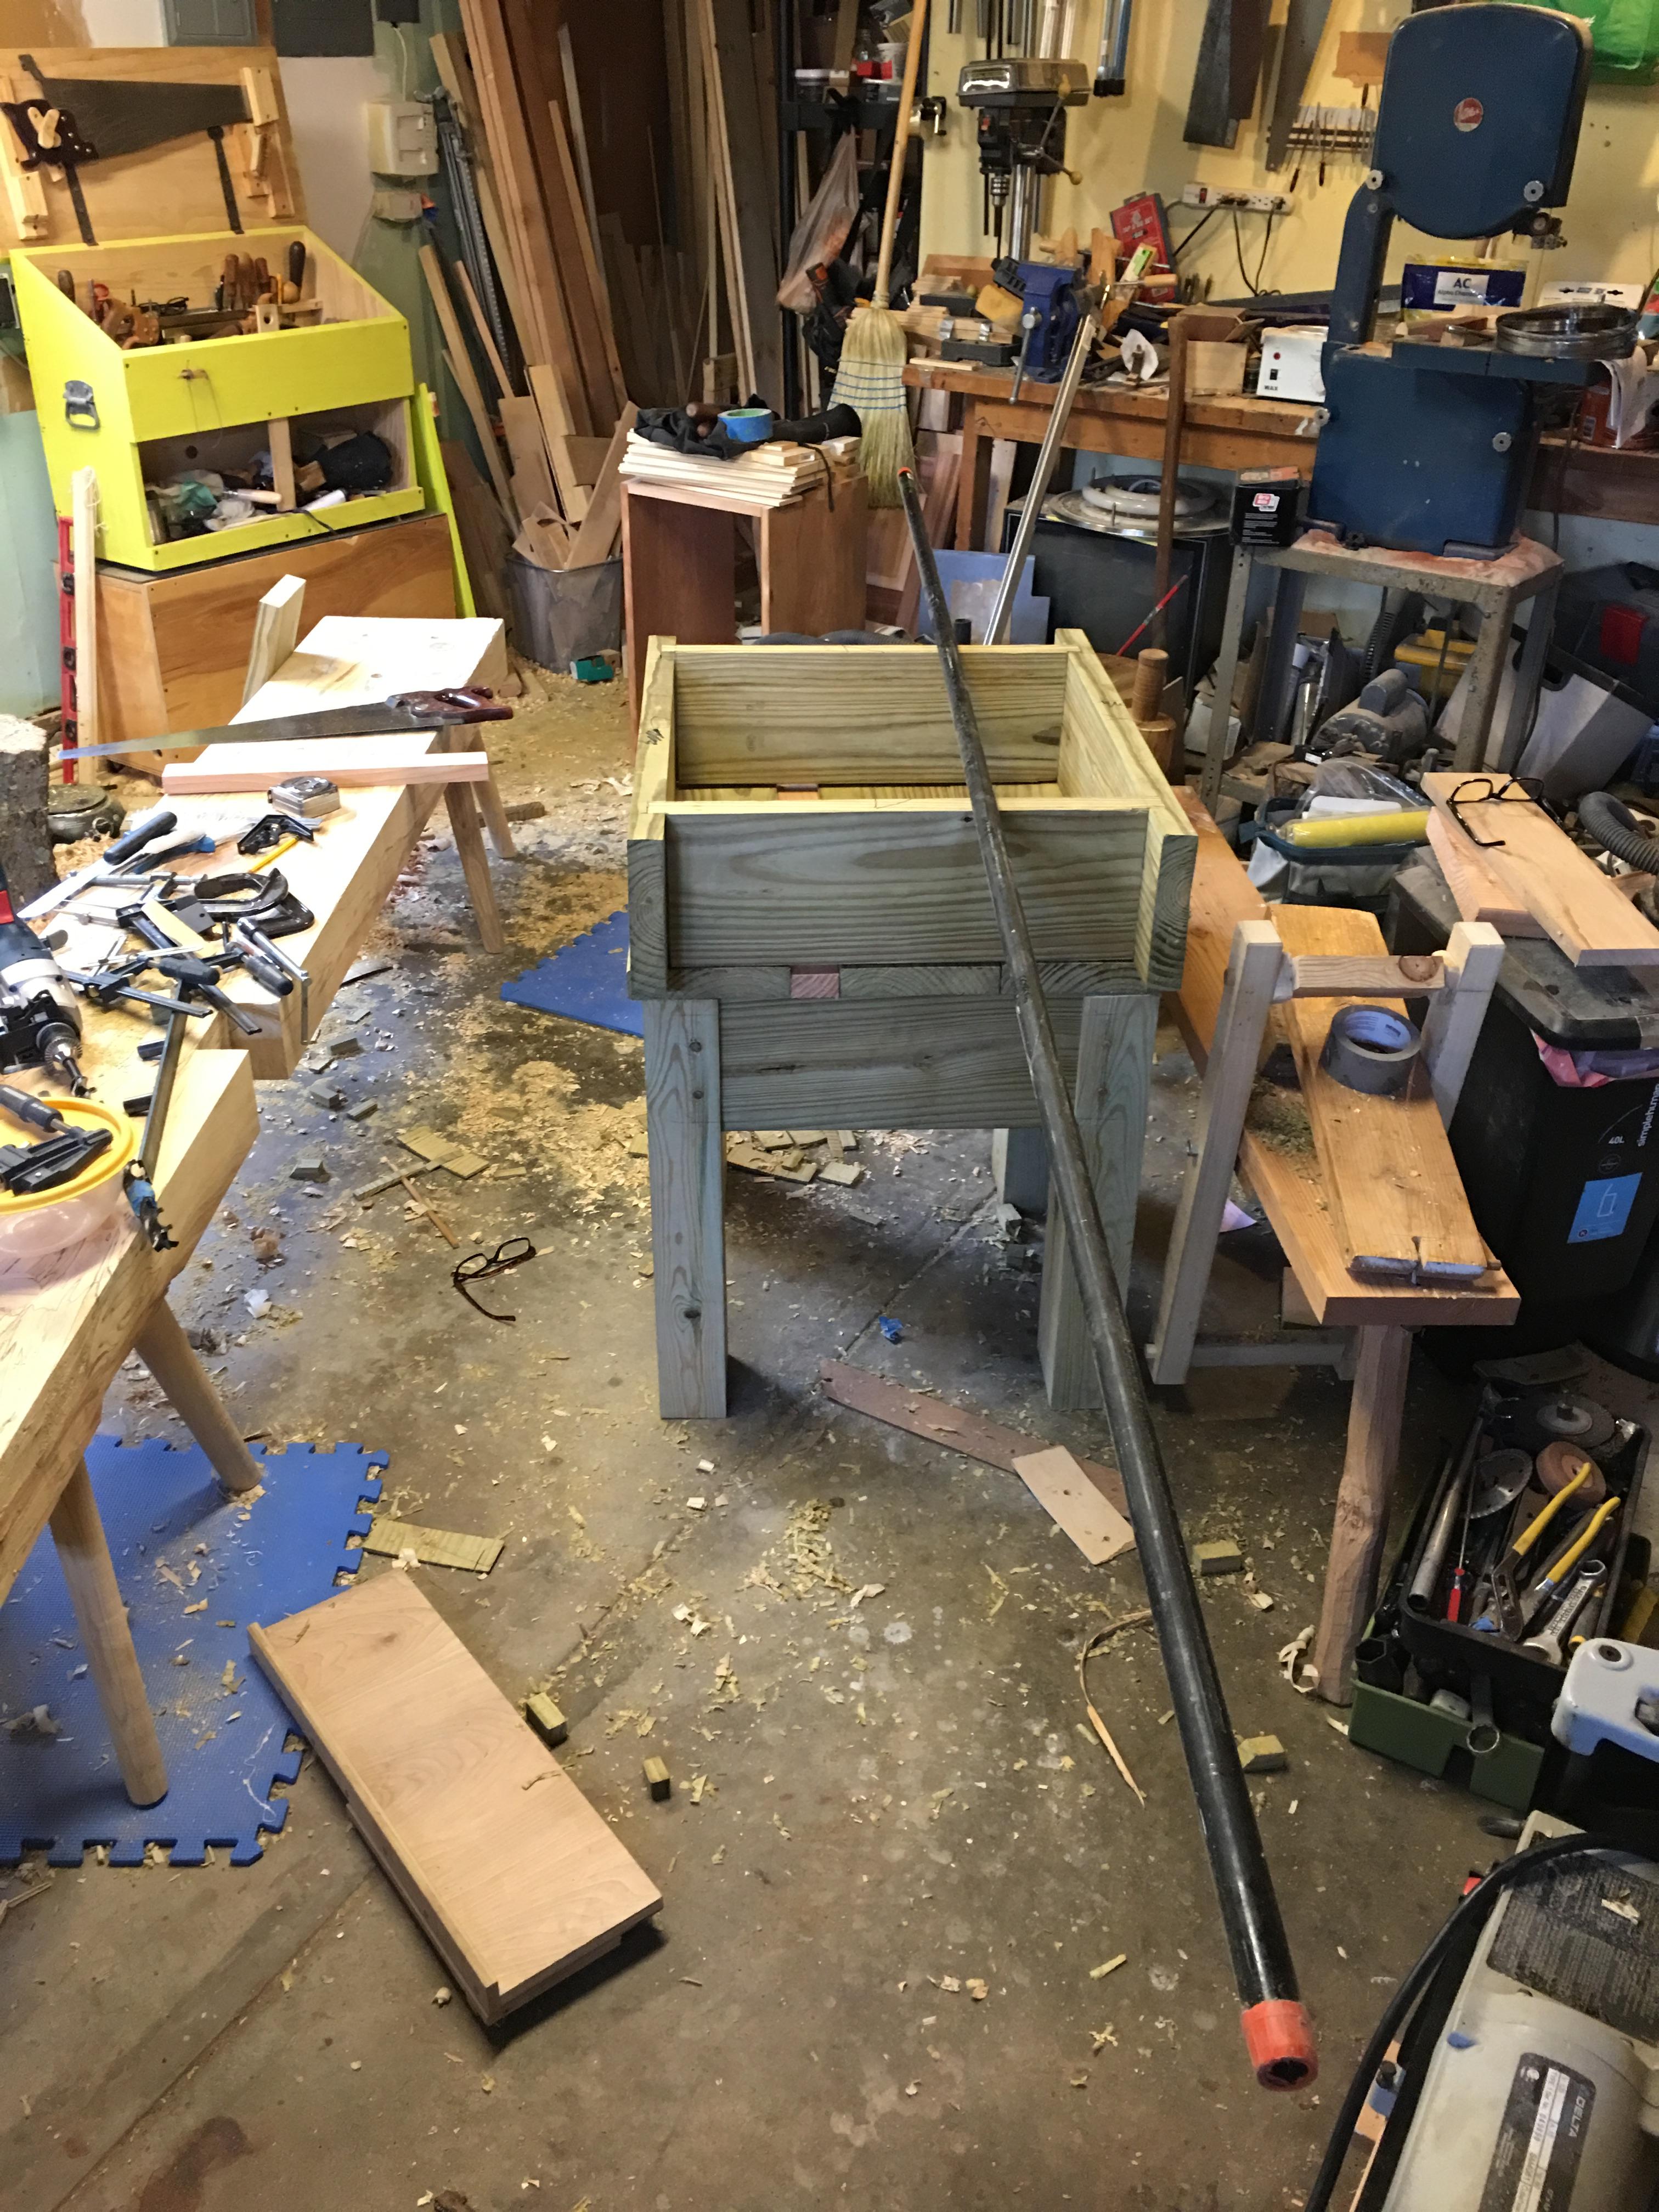
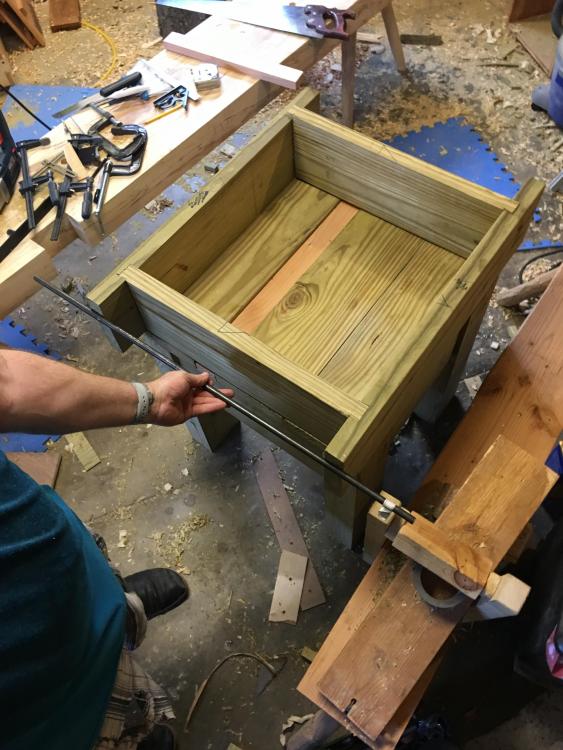
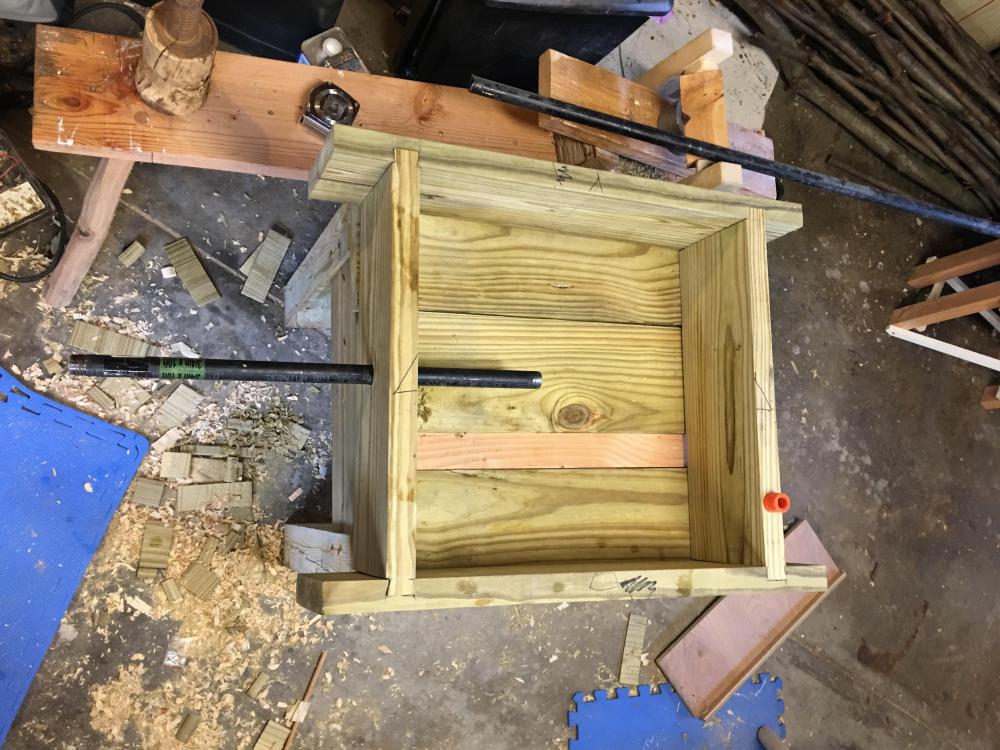
Basic construction is complete. In case anyone is curious, I diceded to go with sliding dovetails to attach the sides because the through tenons and wedges started to seem awful busy and ungainly. This is plenty strong, looks nice as dovetails usually do, and keeps the lines cleaner. There are fewer sticky-out things to bump into or catch tong handles on, or crack my skull on while picking something up off the floor. I left two of the sides long so I can run a bar between them for a tool rack. I think my tuyere might be too long... That's better. That's a good point. Unfortunately, pressure treated is what I have that I'm willing to throw at this project. As a mitigation, I'll probably keep some bricks in the box for fire shaping. I'll make sure to store them proud of the edges in locations that seem to be getting burned. Additionally, I'll be using this outside in well ventilated spaces. That's probably an obvious statement, but worth noting. Truthfully, though I am more concerned by what I breath in on my daily driving around the beltway than this. Not a reason to ignore good advice or invite trouble, but more a sense of proportion. Thanks for mentioning this. I was hoping to ask you if you still preferred the litter. It sounds like you do. I have a few ideas where I can sneak a bucket or two of dirt out of the public areas (actually high-tension power line right-of-way) in my neighborhood, but at the end of the day, I think a bucket or two of cut-rate kitty litter might be a small price to pay to avoid Undue Attention.

-
While totally unnecessary for function, I find the SAF (Spousal Acceptance Factor) goes up when I put some effort into making things purty.
-
In my case it is associated with an obscure comic book I read when I want young(er). Also, was it Mockingbird Ln.? If so, what's it like to be neighbors with the Munsters? (Go look it up kids)
-
This is such good advice. I've learned a few different pre-industrial crafts now and this is one of the most important lessons. Jargon is not meant to be a barrier to "outsiders". It is meant to make efficient, precise discussion possible. As I think about it, even modern crafts are the same way. Programming and computer trades are jargon heavy for the same reason.