RHayes
Members
-
Joined
-
Last visited
Everything posted by RHayes
-
I had a Barnes #6 lathe for a bit. The treadle mechanism was long gone and the 3rd generation farmer converted it to electric. Had it been original I probably would still have it and think it would be very suited to work like this. There are spinning wheel groups in just about every town and they all need something repaired eventually. Sounds like Frosty wants to get in on some of it
-
-
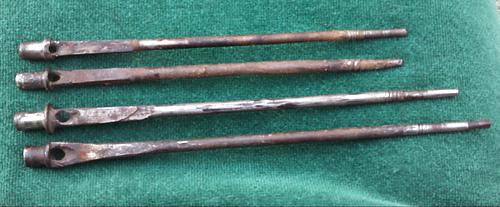
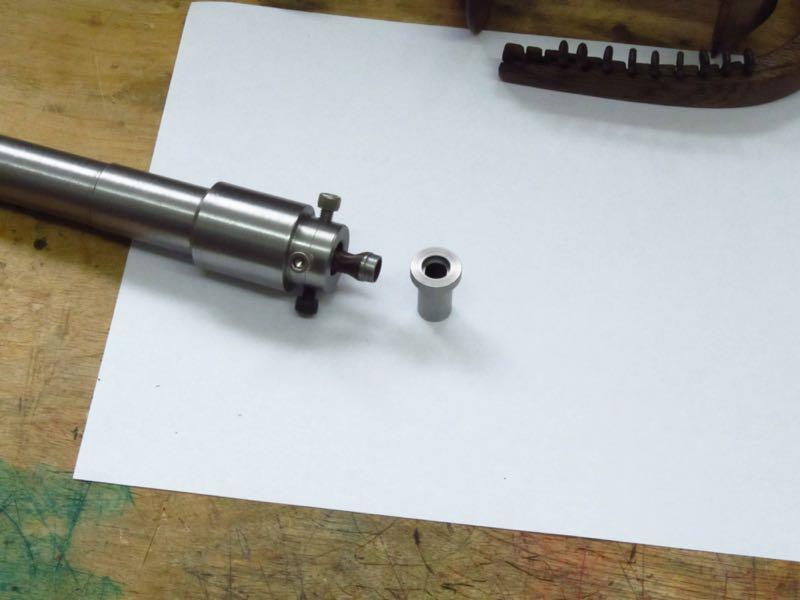
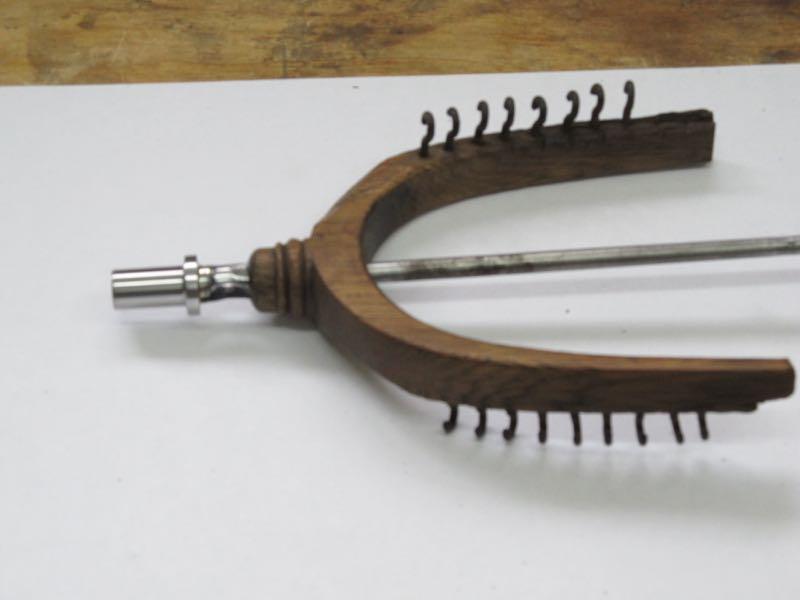
I know at least a couple out there are familiar with spinning wheels for spinning yarn. There isn't much iron on the antiques but the little there is was often forged. I make items for the fiber people and more than occasionally do repairs. The old flyer axles (or mandrels) consist of a shaft and an orifice. The orifice is often wore out, rusted, jagged and paper thin and I often repair the orifice so the remaining shaft can fit back in the original wood. My question is how were the originals forged. Here are a few: These are hard to chuck in a lathe so I made a holder with 2 spiders so I can dial them into center, cut off the old tube, create a shoulder in the area of the collar, then turn and press on a new orifice that I braze. Here is a fixed antique . The forged taper fits right back in the original wood. I ponder how the originals were made. My guess is the smith started with a round shaft, upset the end and hammered out the tapered square section, punched and drift the eye, then add the tube and collar. There is usually some left hand threading about an inch in from the end that may have been single pointed on a treadle lathe? but not sure. The left hand thread keeps the drive pulley from loosening(matching square nut inlayed in wood pulley) The flyers typically ride in oiled leather bearings. One at the orifice end, and one at the far end. The orifice on shafts that are in good condition usually look machined either before (if added separately) or after forging. I would like to make some of these like the originals. I don't think my hammering skills are up to it yet so I'm reaching out for opinions on a method and logical order of making this item. Any thoughts or comments would be greatly appreciated.
-
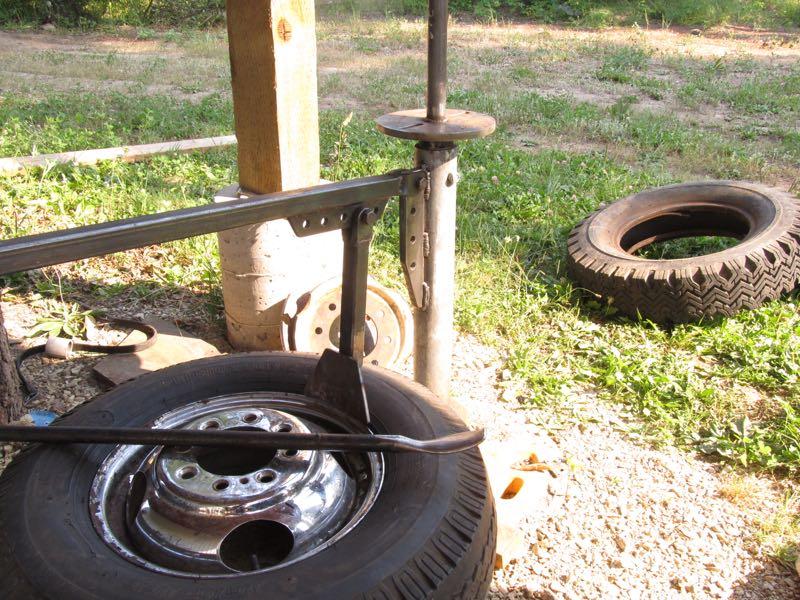
Thanks for the input. I don't expect to stray from what has already been established and will surely post a pic before the next burner gets installed. I'm thinking another regulator and ball valve this time because I want to put my weed burner back together. Although not very creative, I was able to make a couple of pivot ends for a manual tire changer/bead breaker, and forge the demounting end of the bar in my new forge. (mounting and demounting takes place with the rim bolted to the 8" round plate) This kind of stuff has me thoroughly hooked.
-
When milling slots like these, I find myself automatically centering the work piece on the end mill but now wonder if milling the slots off center might be more effective? Firewood has taken priority but just about done with it.
-
Frosty, I figured out how to hit the refresh button so have been reading burners 101. So, I've played around with my forge a bit and while putting a coat of !CS 100HT, decided to pull the burner and make another. I plan to use an odd number of slots as suggested (probably 3?), a better flare, and possibly a different mig tip.( used one for .030 ) Might be awhile to get this done, but any suggestions would be appreciated.
-
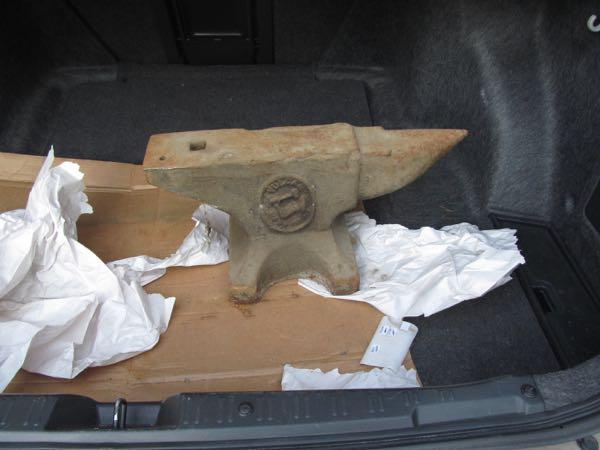
I have a better anvil than this one but couldn't pass it up for free. Its a Vulcan #12 and some will say thats all it's worth but maybe I can trade it for something.
-
When I go to Burners 101, Pages 1,2,3,4, and 47 are available. I can only go to those pages. When I click on any of the additional pages shown within the thread, they don't appear and I get the message "contact us" .
-
This could be very bad. Phone rang yesterday while I was playing with it (regarding work) and I told the caller I was way too busy, and find someone else.
-
And one more as it was getting dark.
-
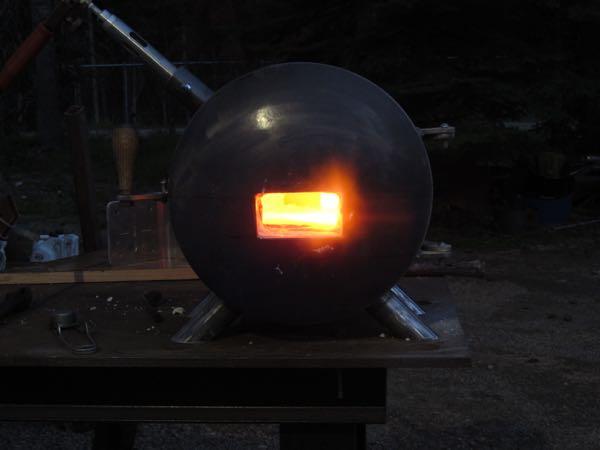
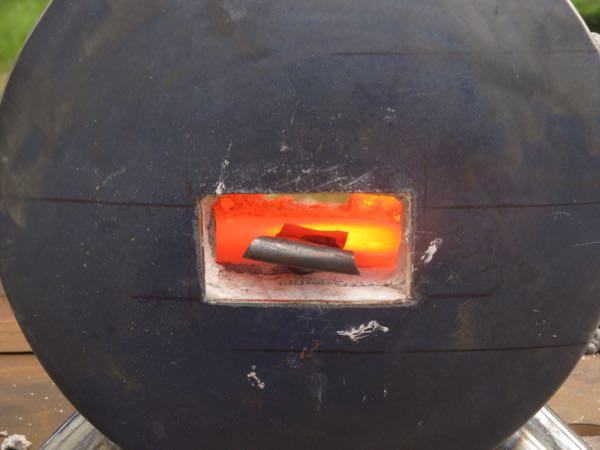
Yesterday afternoon, and today several times I fired up for a couple minutes up to about ten minutes. The first photo is five or so minutes after startup at approximately 12-14 psi. In the second photo, I was messing around with my first piece of iron ever in a forge. It seems to run fine up to 20 or more psi (reg. says 25 max), have run it up to maybe ten minutes at 12-14 psi. It seems like it will work!! I don't know enough to tell if I need to do any tweaking on the burner but will re-read what I can. All comments are welcome. For some reason I can only view the pages that show in the original topic listing. If I try to view more I get a "contact us" message. Maybe because I'm not on Facebook?
-
Ted, this looks super cool, looking forward to seeing it get built.
-
So I got my Kast O Lite applied and its curing. As Frosty suggested, I should have just leveled the bottom with the wool and Kastolite but I included the brick in the base. I don't think it will be a complete show stopper, but I should pay more attention and will post some pics when I get into the firing process.
-
Thanks Mikey98118, right now its "hurry up and wait" for more components to arrive. I suspect my door design might not be as cool as I thought once it is subjected to some serious heat and will just have to see what happens. If I need to modify the forge or burner, so be it I'm now committed to make an inexpensive forge no matter how much it costs !!
-
The volume should end up at 346 cu. in. without the brick. The brick would be approx. 50 cu in. is a K-26 insulating brick, and I could coat it with Kast O lite. I will need to raise the base up to the level of the cutouts and that was the first way considered. Sliding the bushing/ choke down on the burner slots beyond half of their length starts to greatly alter the flame and it can become a much longer, softer, dark blue. I have seen images of burners with slots or holes for air so obviously not my idea, but no, I didn't follow a specific plan and you might say I designed it.
-
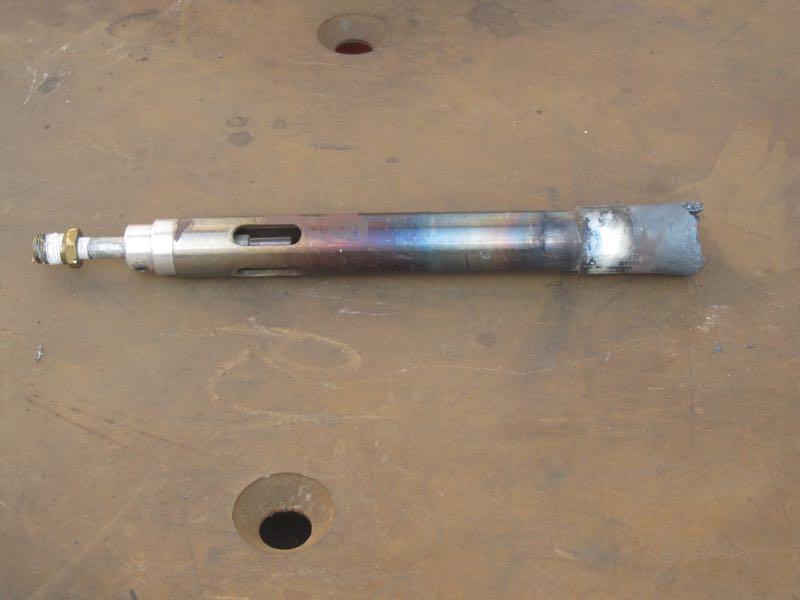
I re -measured the burner. It is 7.25 from the end of flair to the front end of the milled slots. The slots are 3/8" x 1.12. A pic this morning as the sun was just starting to shine in the shop. Propane at 12psi. My elevation is approximately 2500 ft.

-
Thanks Wayne. E-mail on its way. (M): I will be applying some Kast O Lite and a K-30 fire brick ending up with an internal volume of 300 cu. in. The burner is just something I spent a couple of hours on (includes research and developement). I read where 1:12 was good for a burner flair so turned a die with 5 deg. taper and flaired some stainless tubing, milled some slots in a piece of 3/4' pipe, turned and pressed in the end fitting that was drilled for 3/8, installed a set screw, and then drilled out a piece of 3/8" rod with a #7 drill, and tapped for 1/4 x 28 thread. The other end was threaded 1/8" pipe. The flair was dimpled on a few locations and threads tightly on the 3/4" pipe. (3/4" pipe is covered by flair). The burner is about 9" from the slots to the end of the burner flair. Since I won't be firing it up again until the insulation is covered, I really don't have any burner questions yet, but they are bound to come!
-
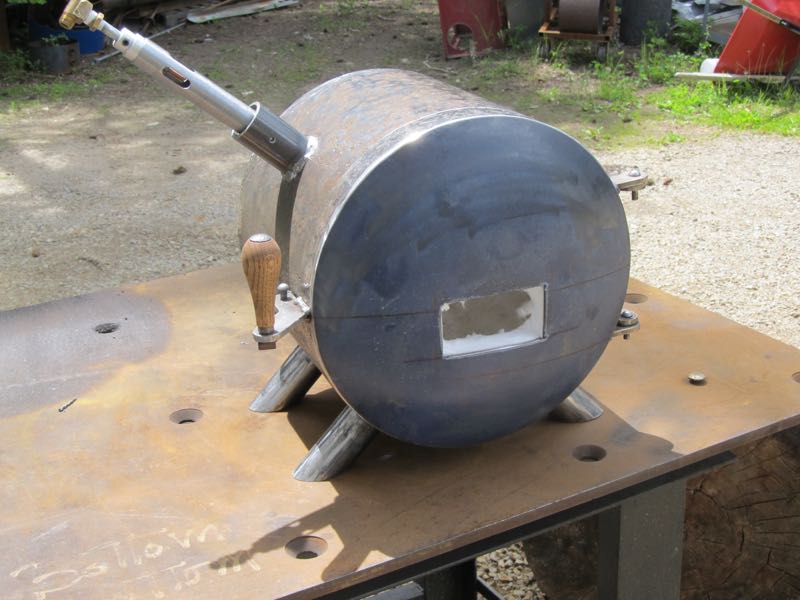
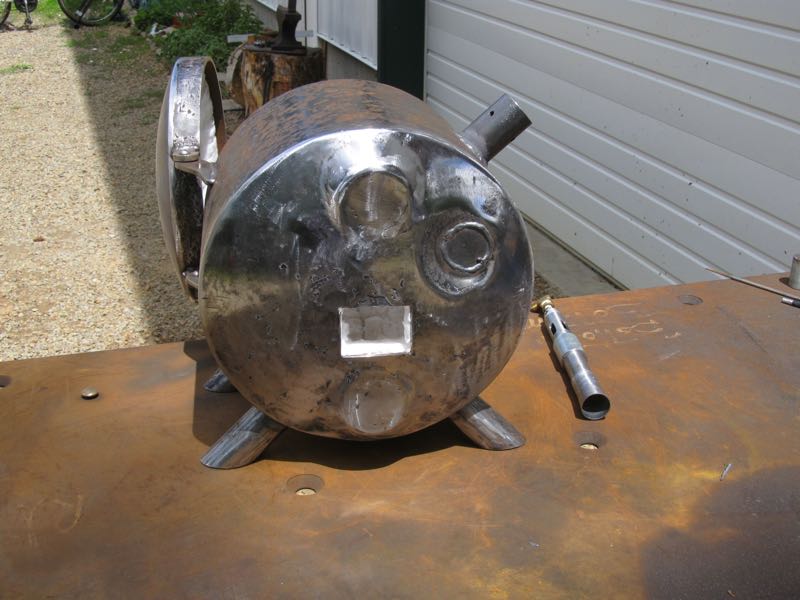
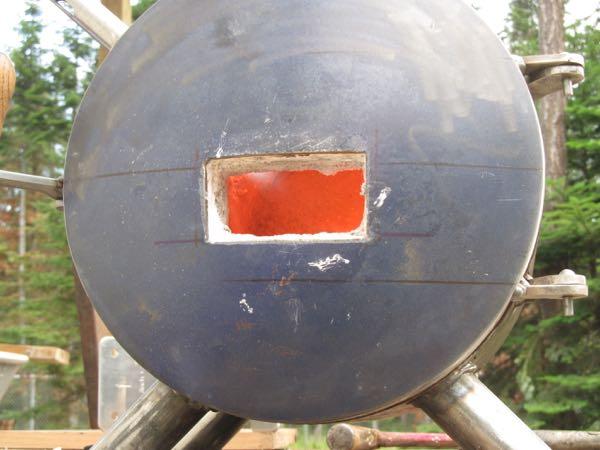
I found this site a couple weeks ago while searching metal art images. Having acquired a few related tools already, I decided to try making a forge and see where this takes me. The body is 12" casing, the ends from an old water heater, various pieces from the scrap barrel. The insulation material is in and I still need to rigidize and coat it. The plan is to place one K-26 firebrick (possibly coated?) as a replaceable interior base. The brick will end up at the height of the end cut outs. The burner is slotted 3/4" iron pipe with .030 mig tip for orifice. I haven't tried a choke on it as of yet. It lights up and roars pretty good in the free air but testing in the forge is yet to happen. The sleeve around the burner was intended as a bushing to stabilize the burner in the holder. Once the inside gets coated the volume should end up just under 350 cu. inches minus the volume of a 1.25 x 4.5 x 9" brick. I need to get colloidal silica and Kast O Lite coming to complete this. A buddy says he has some castable refractory but I don't want to risk getting something that isn't right. Comments a criticism would be greatly appreciated. Burner size? end openings? ??