Shoshinjoe
-
Posts
44 -
Joined
-
Last visited
Content Type
Profiles
Forums
Articles
Gallery
Downloads
Events
Everything posted by Shoshinjoe
-
What did you do in the shop today?
Shoshinjoe replied to Mark Ling's topic in Blacksmithing, General Discussion
100% agree with you and that will be my goal this morning Yep it is possible I will have to get in there and round it out -
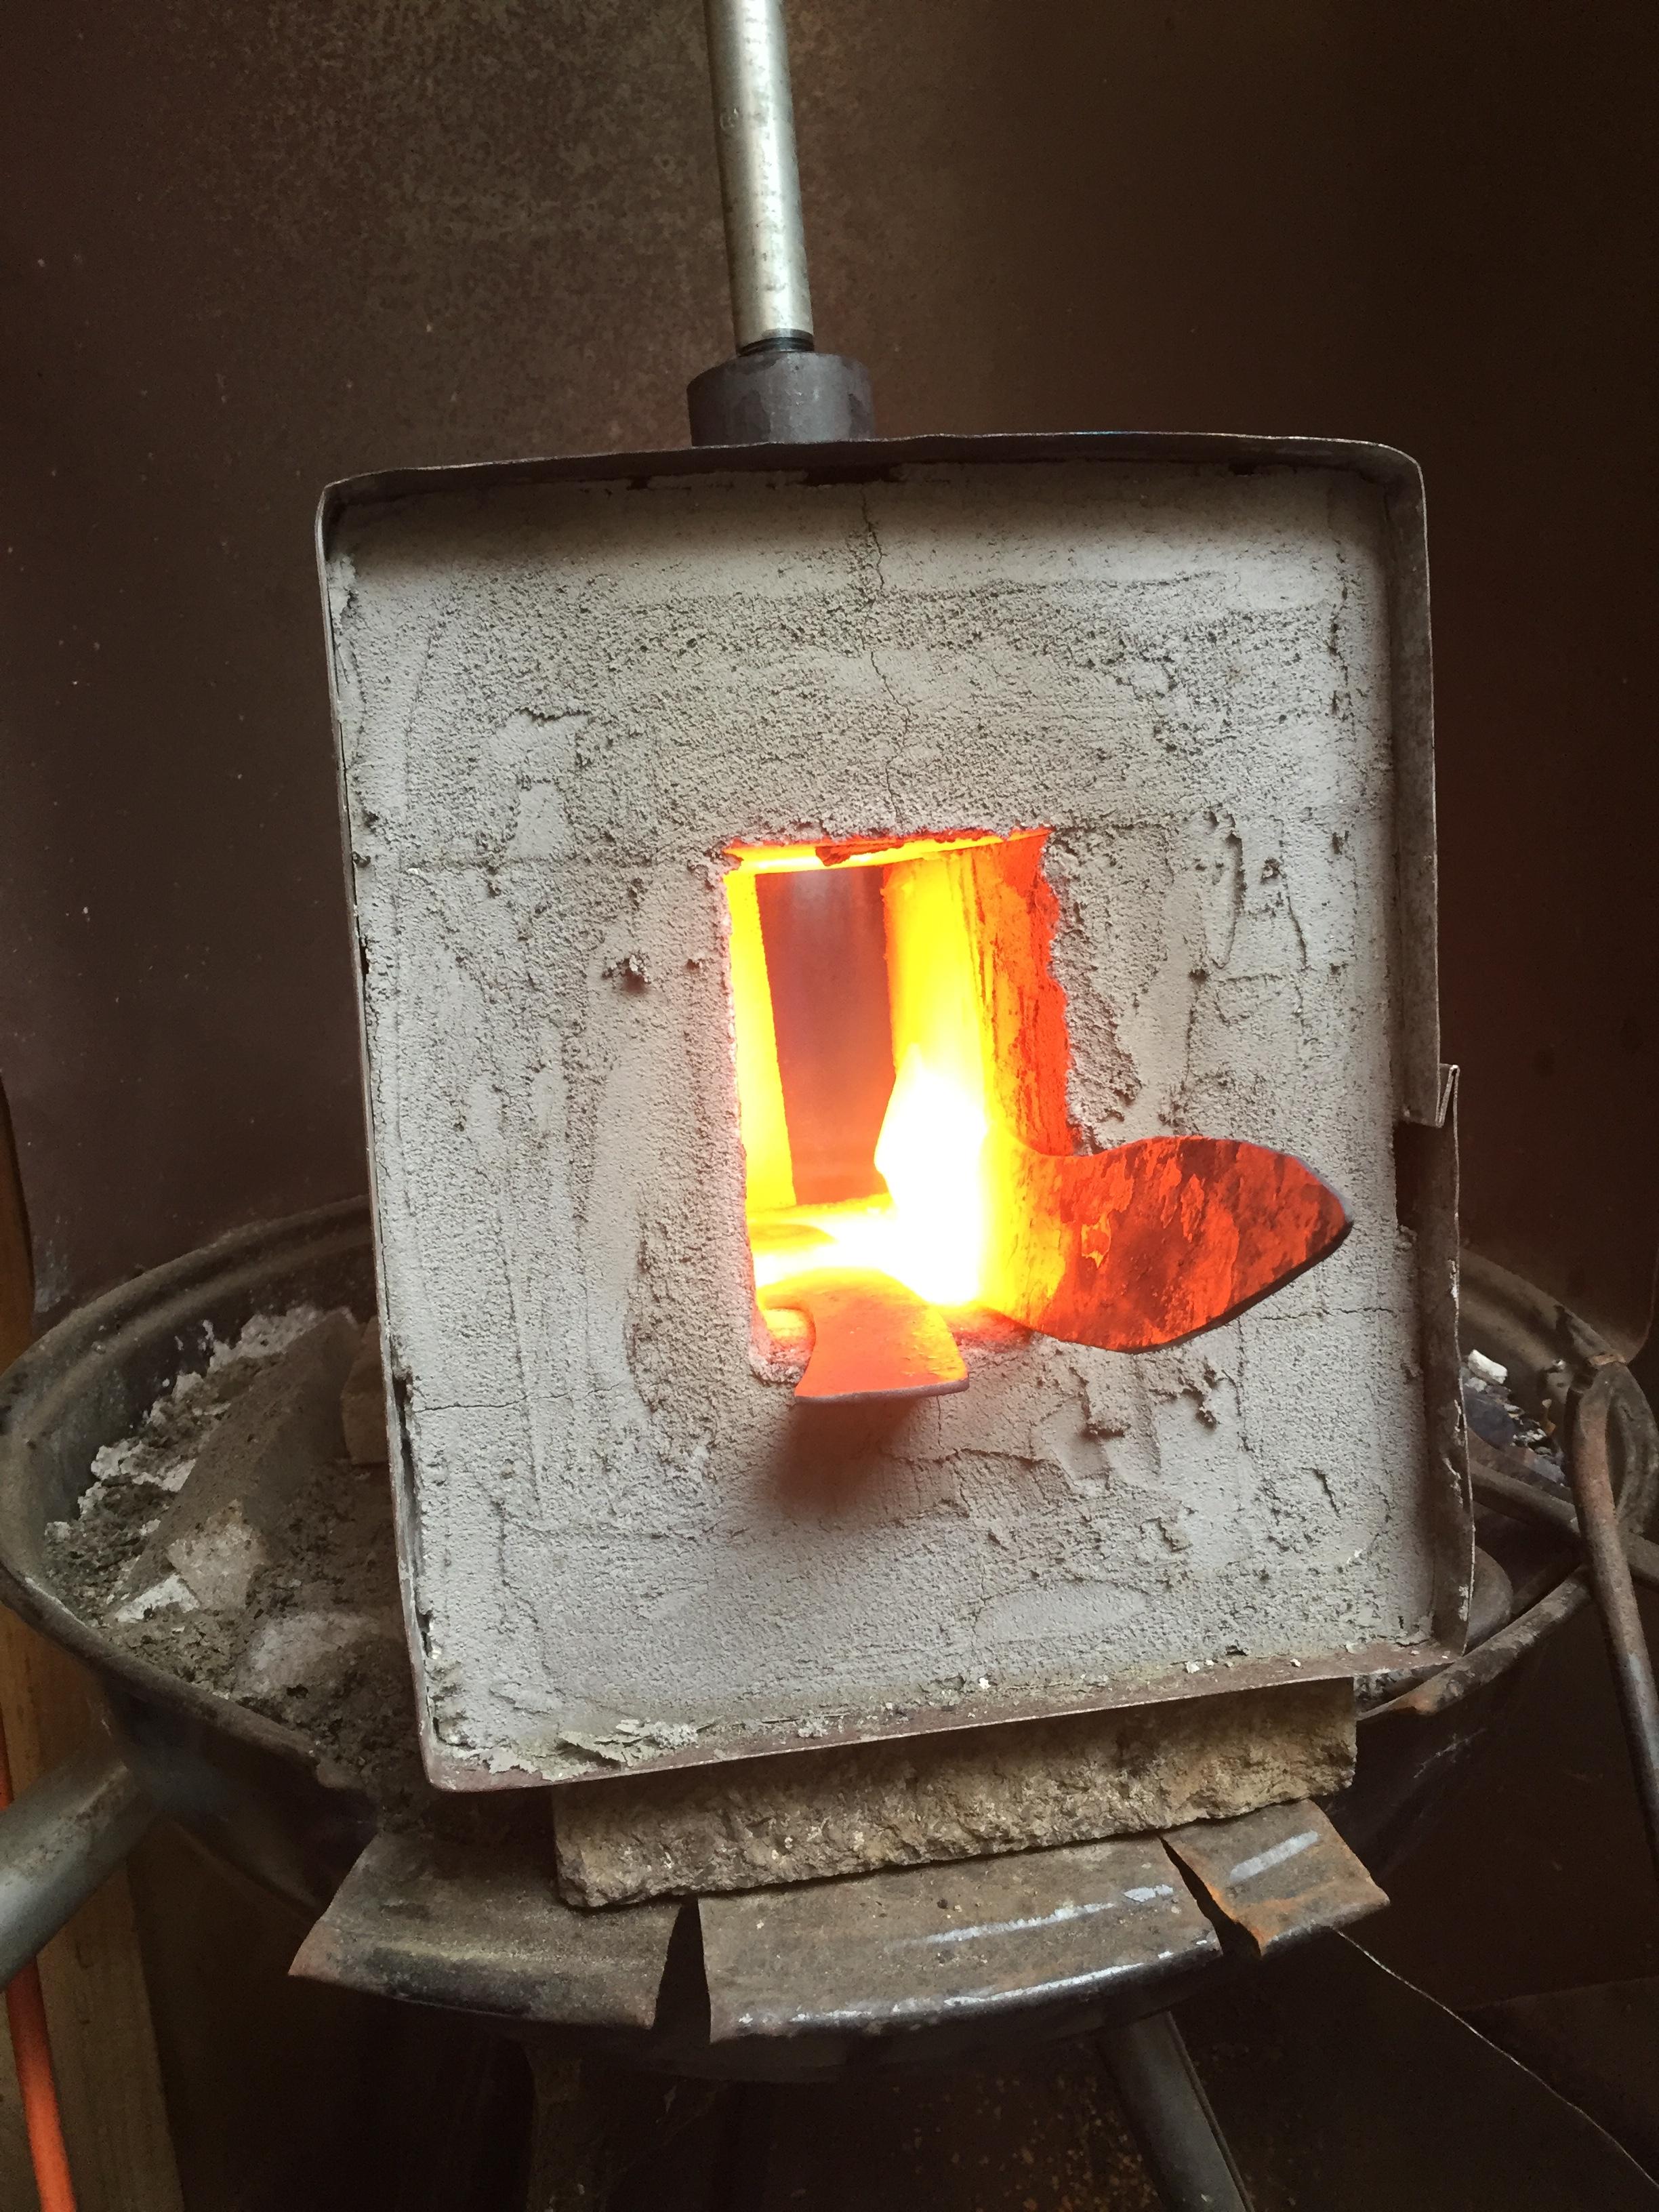
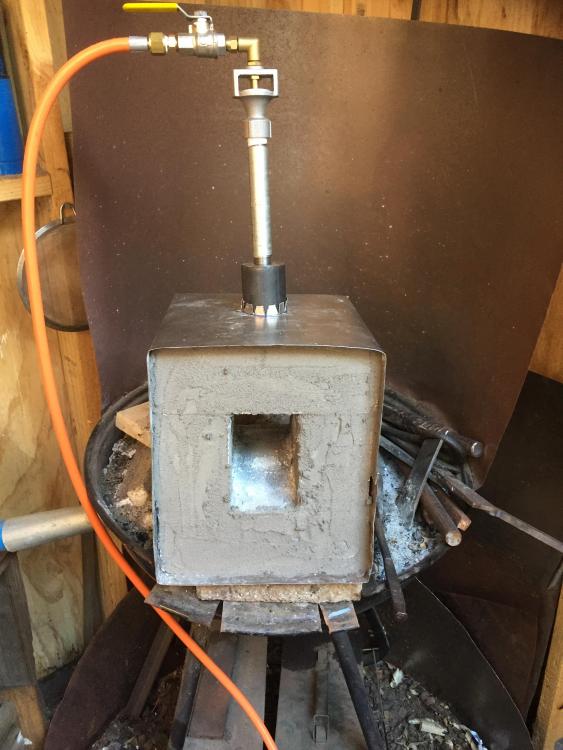
Thanks Latticino. The forge is k26 bricks coated in duracast refractory about 1/8” thick. my workshop is a tiny open shed in the backyard of our unit. Will be moving out into our farm sometime this year into a proper workshop. But I will get some better pics today Also I have a brick blocking 3/4 of the rear in those pics
-
What did you do in the shop today?
Shoshinjoe replied to Mark Ling's topic in Blacksmithing, General Discussion
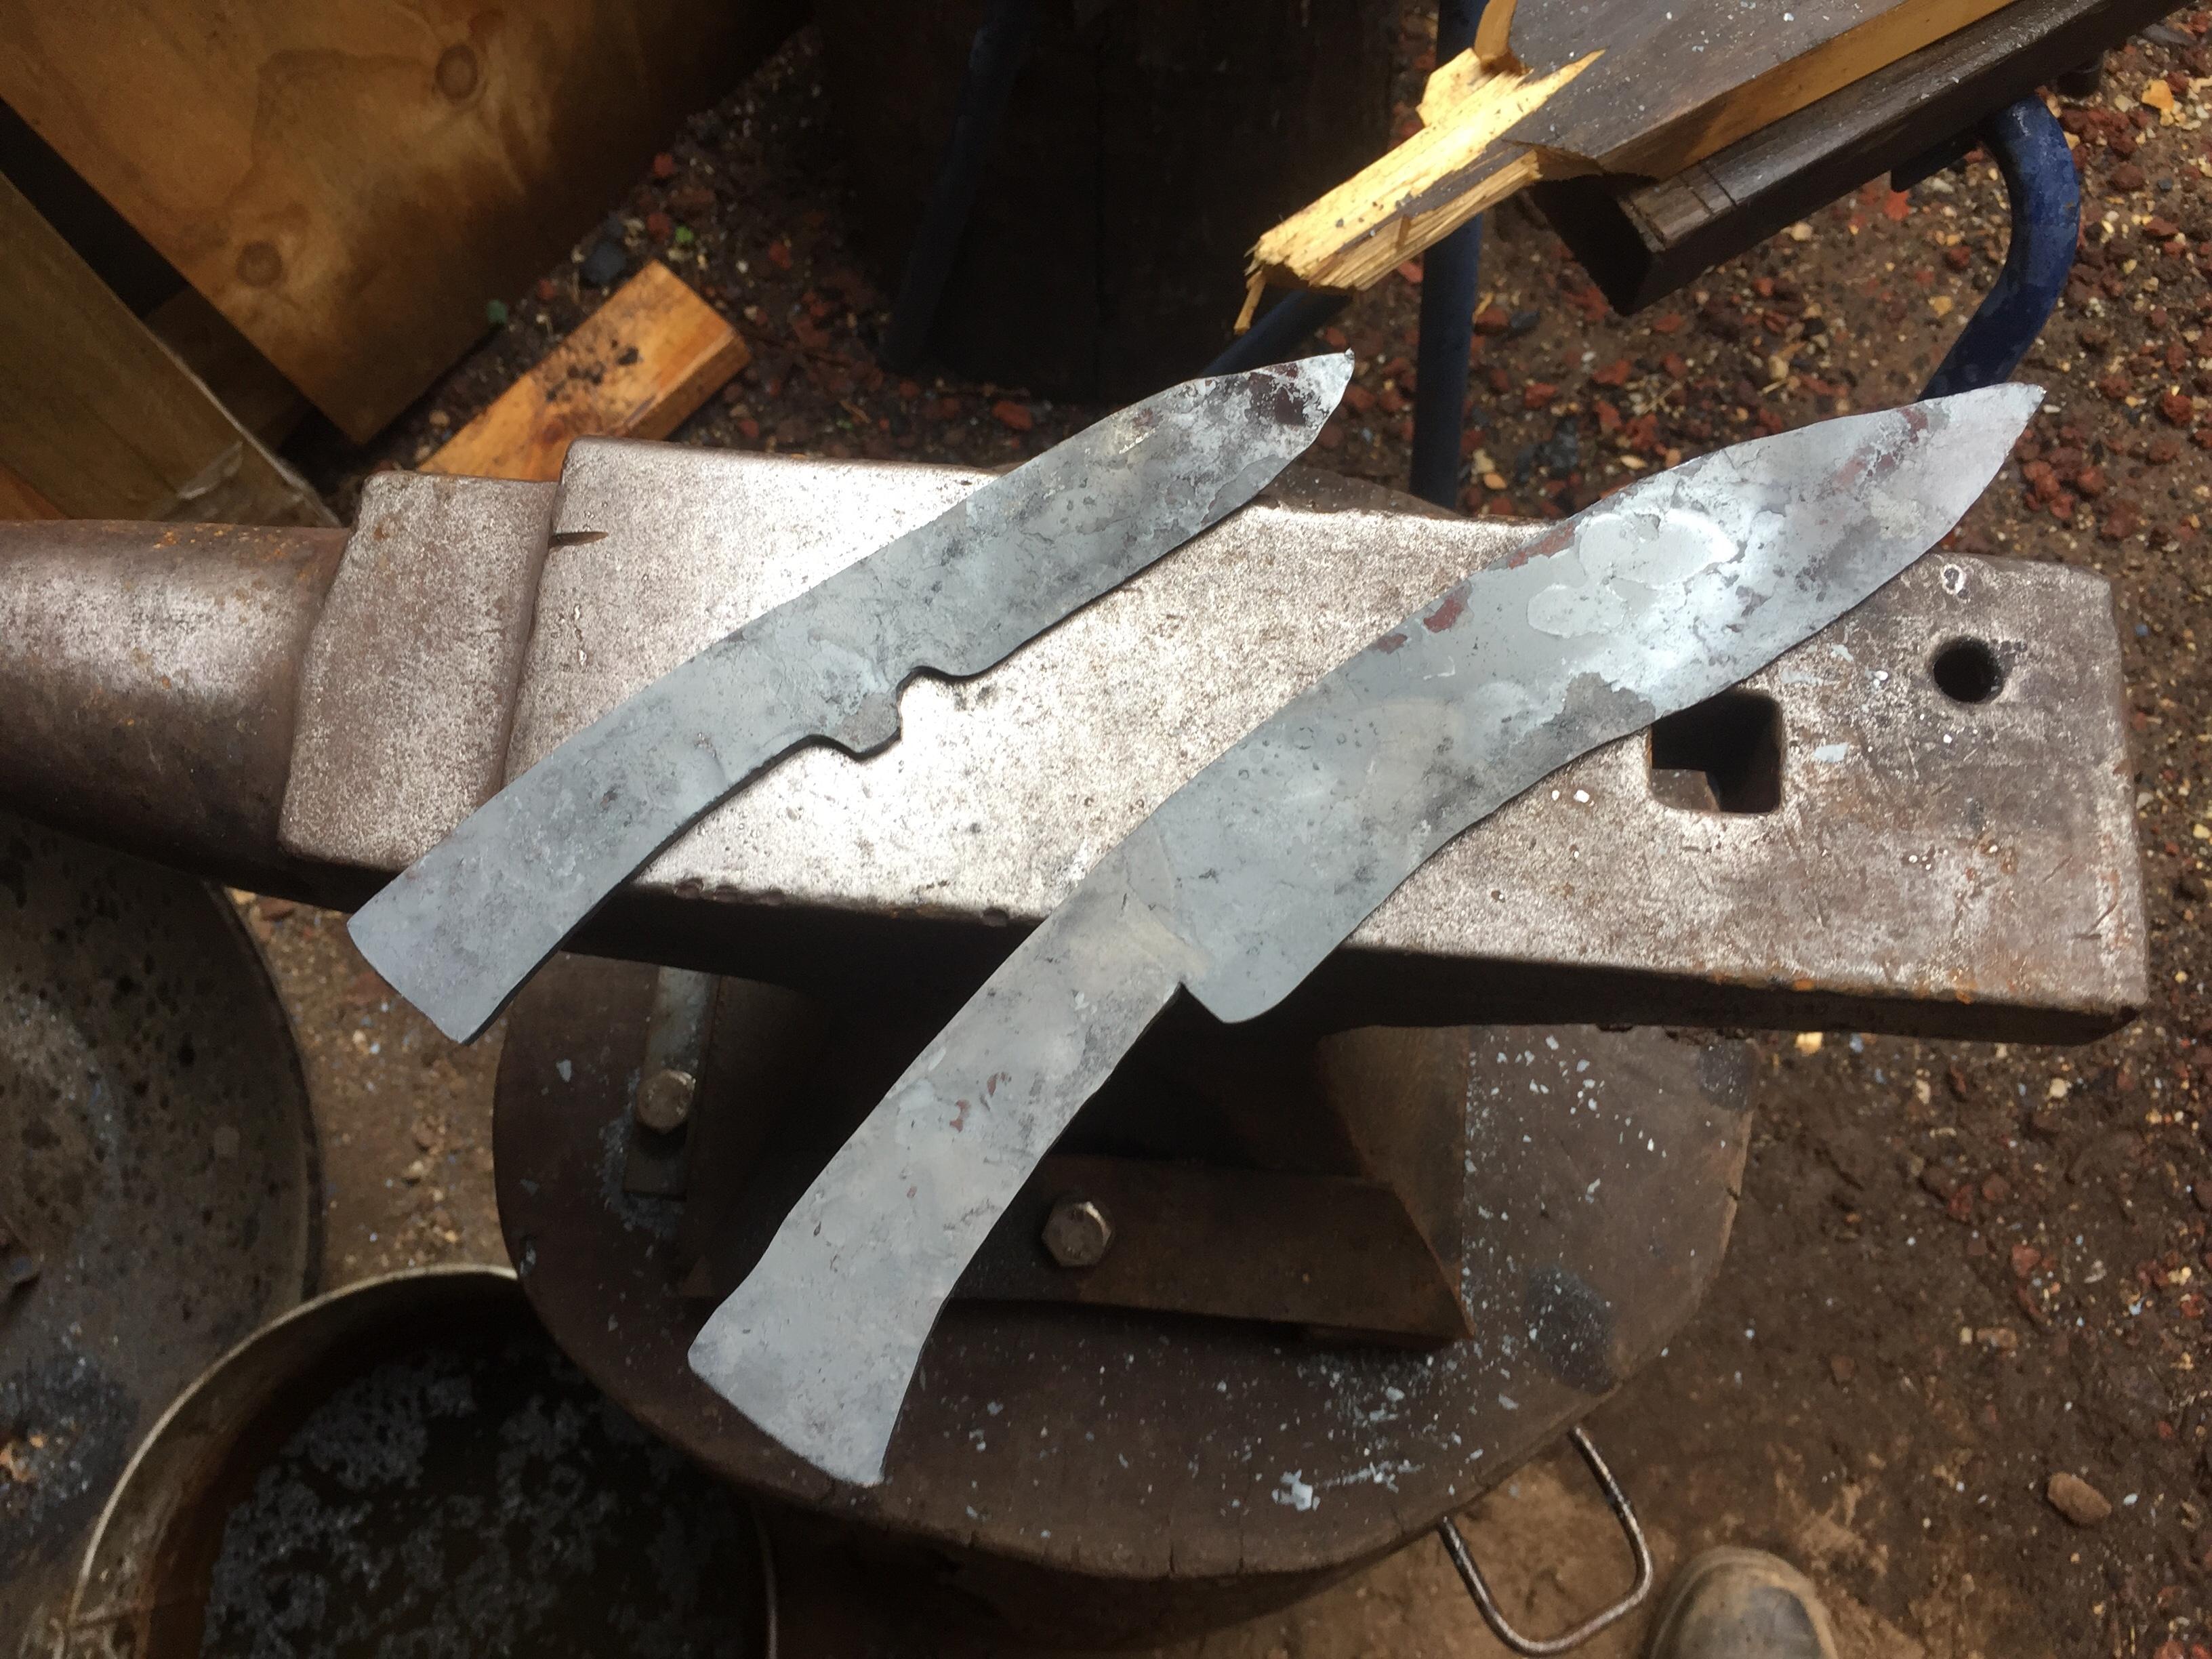
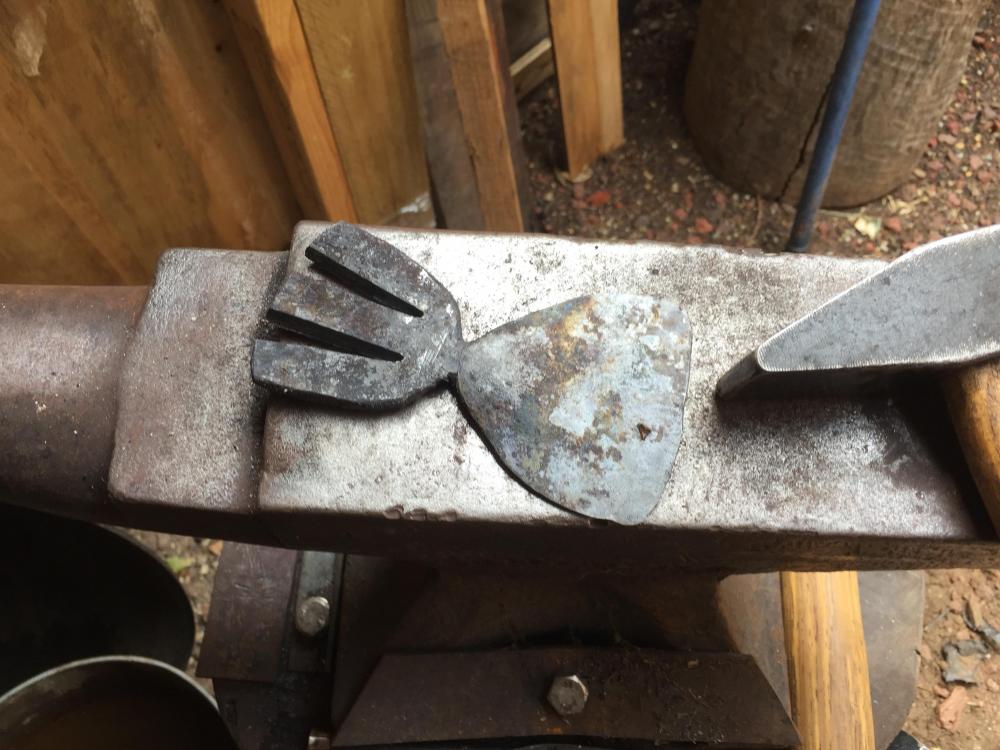
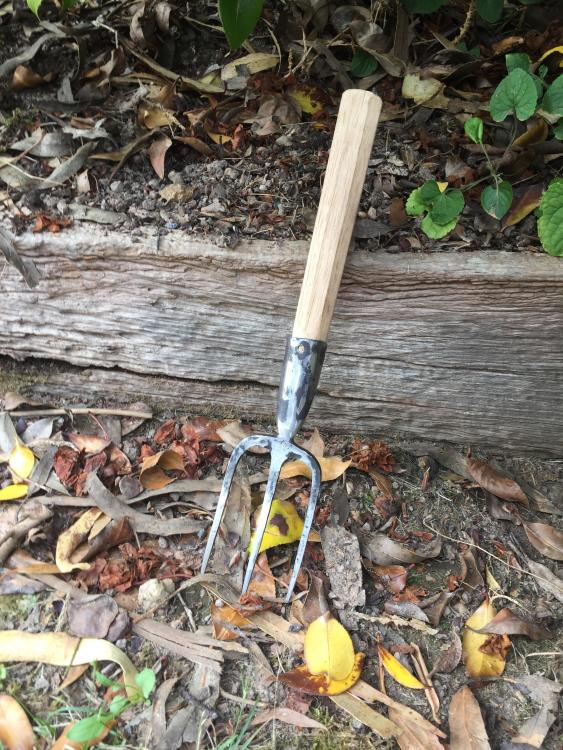
Got the rough forging of these 2 done today.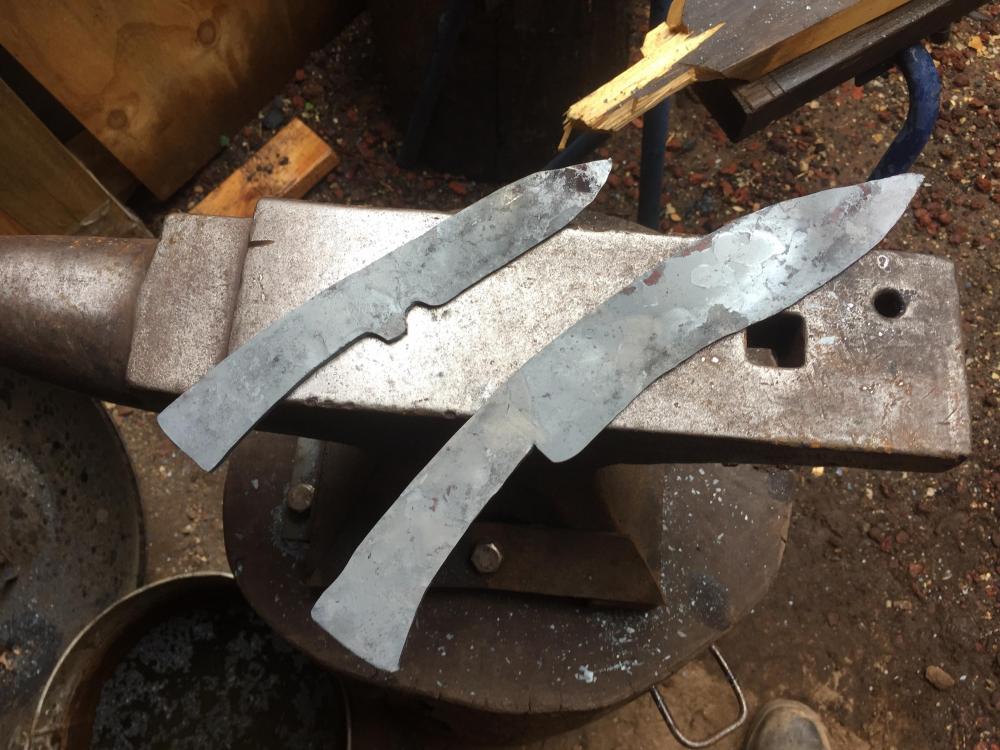
-
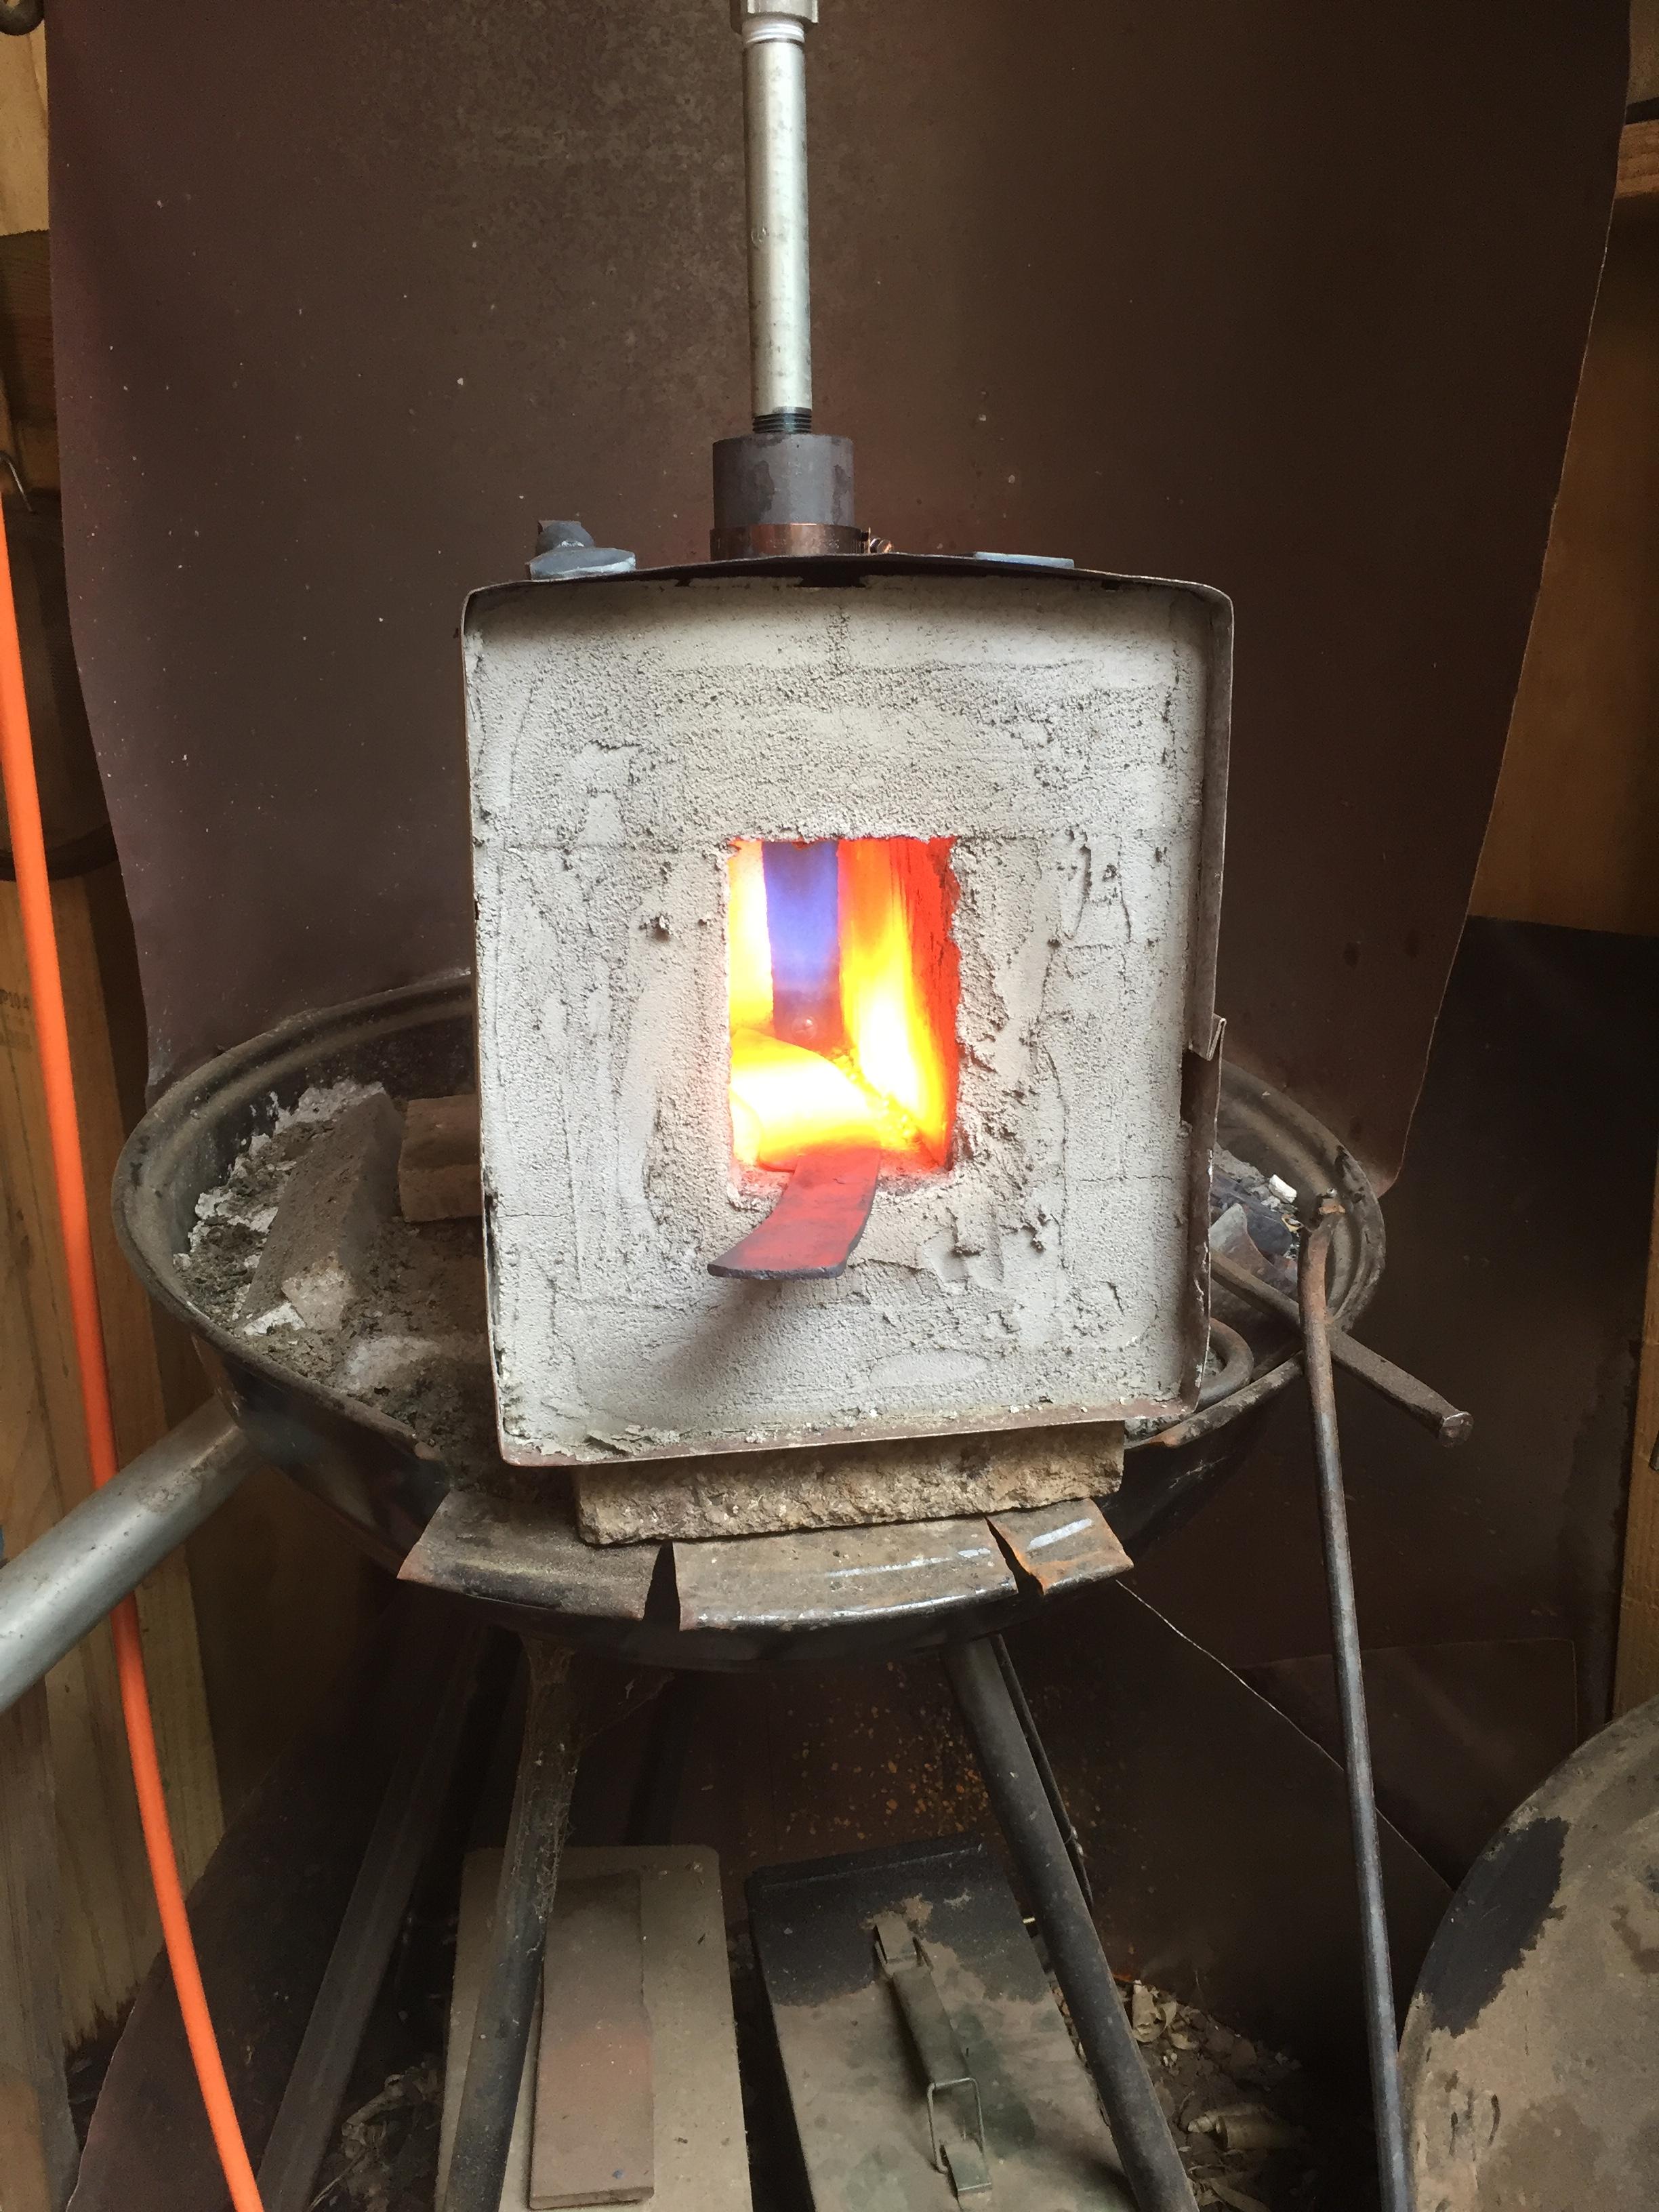
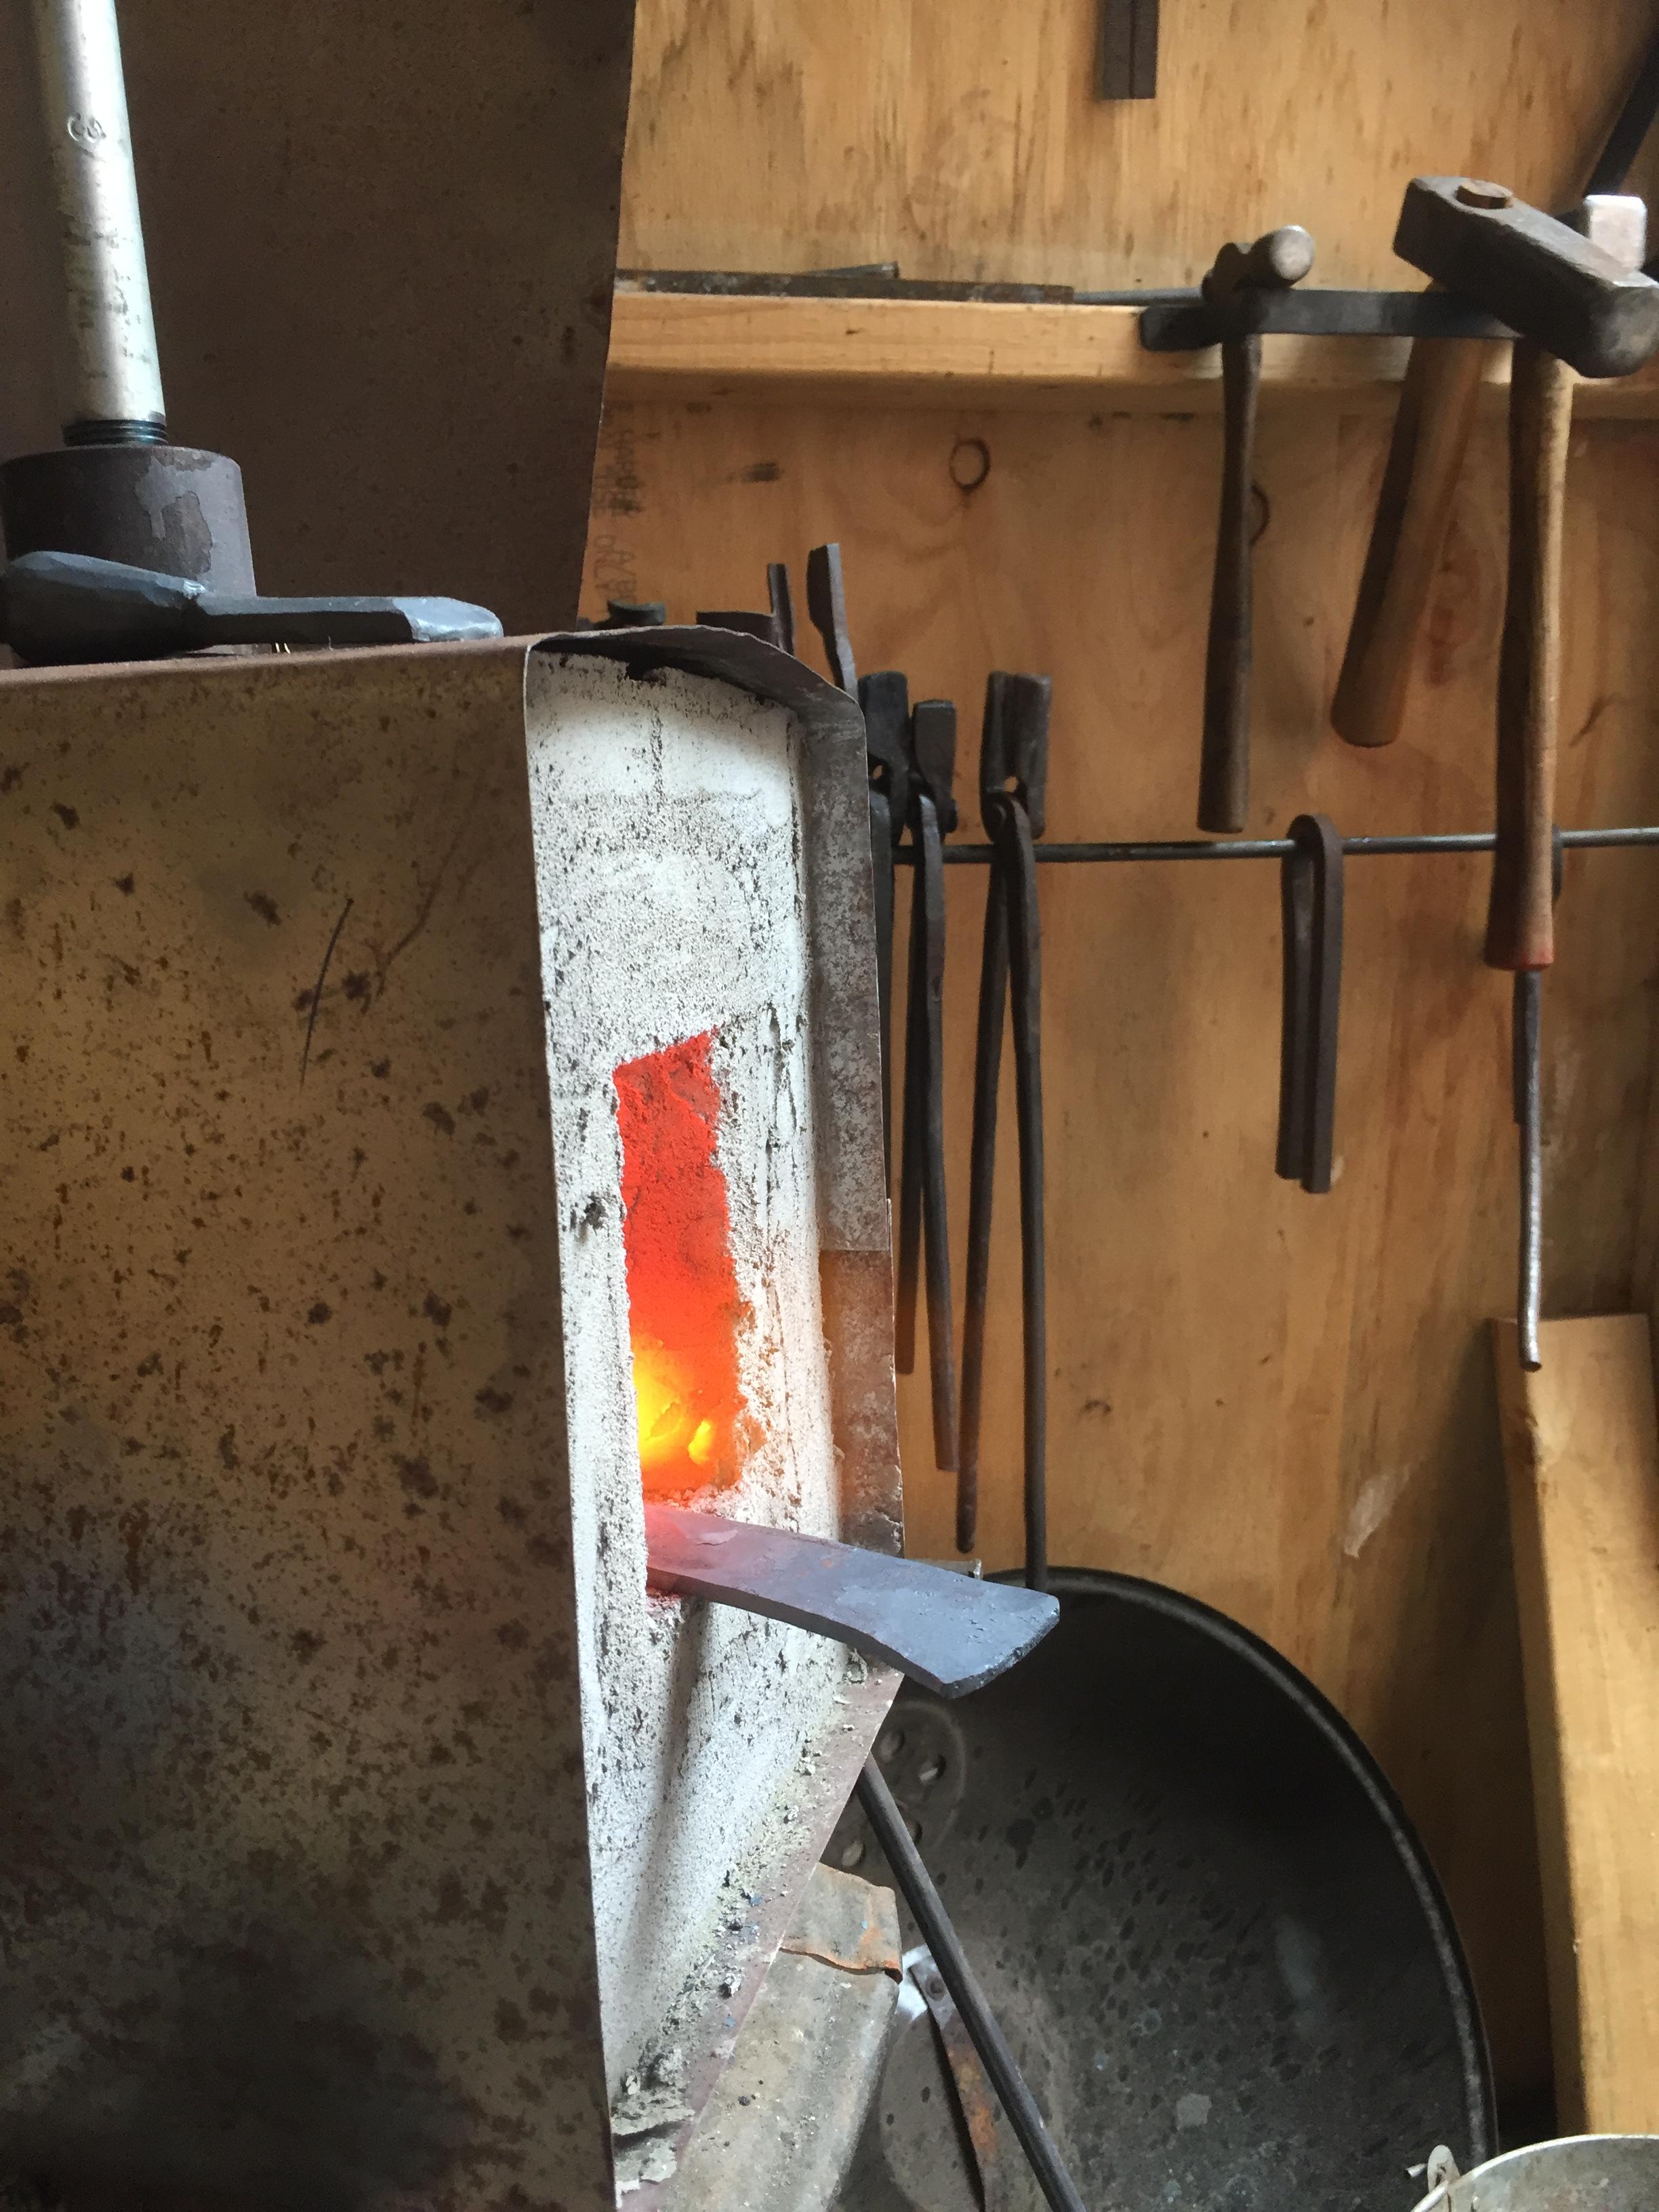
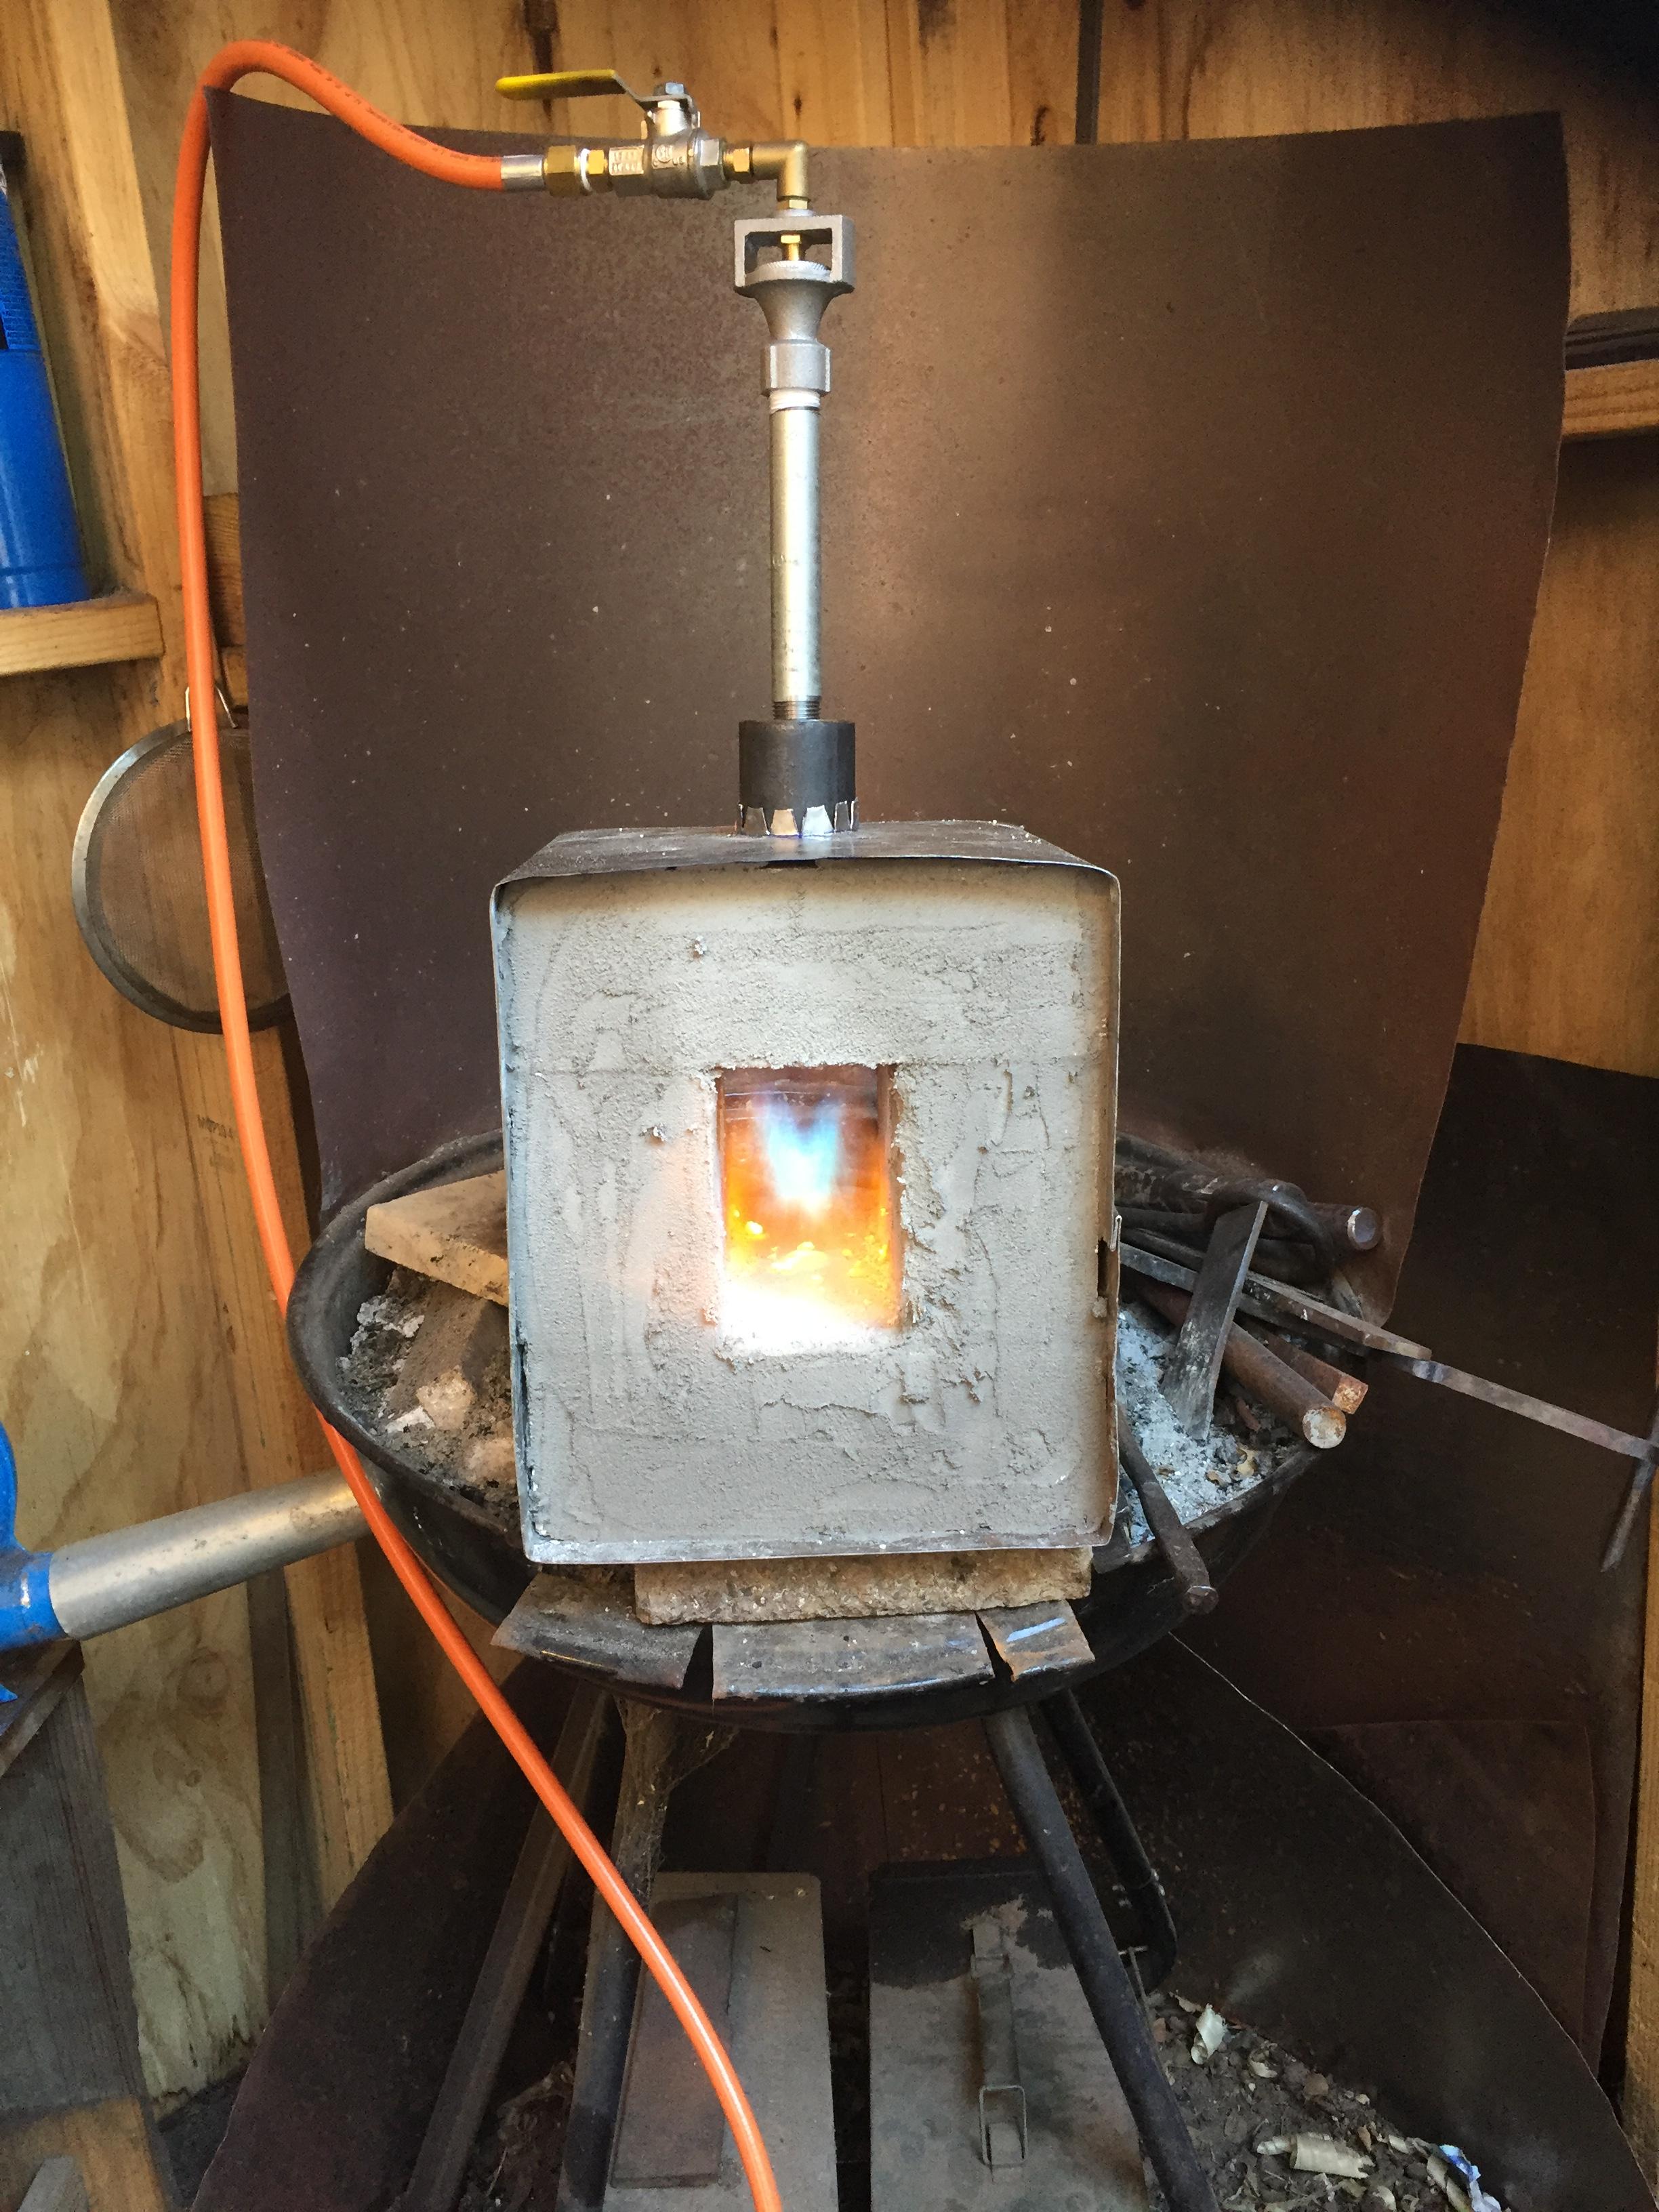
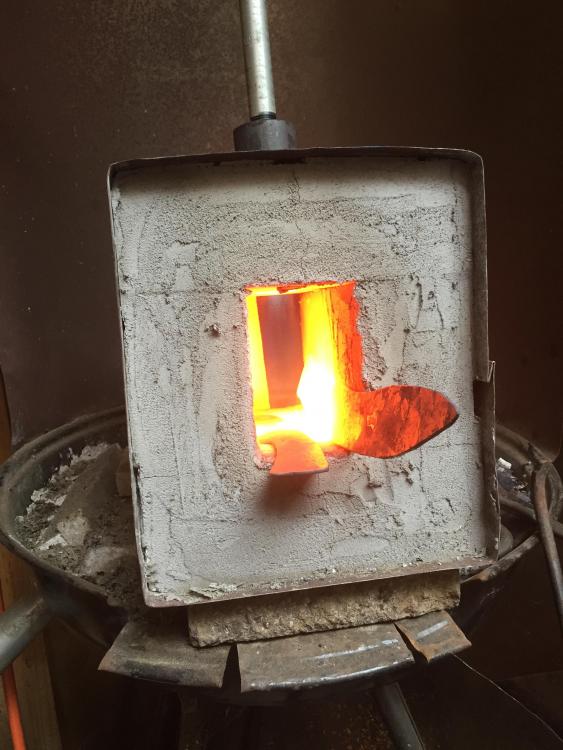
Hi all, so I am thoroughly enjoying my gas forge so far but I have a question regarding how the run. I am so new to this I am still reading as many posts on here as possible and reading through the forges and burners 101 posts but haven’t found an answer yet. So image 1 is as the forge is fairly hot but only been running maybe 15 mins. Should I be adjusting the oxygen or pressure to increase the size of the blue flame or decrease? What effect does that have? The next image is from the side just after the first pic. Even though I’ve been reading about the difference between carburising, neutralising and oxidising atmosphere I still don’t really know what I am looking for. And finally this last pic a after about 30 mins. It looks to me like the flame goes weak all of a sudden. Is this normal? What is it? specs: single Venturi burner - opening is just over an inch "Commercial links are a violation of TOS" volume of forge is 108.07in3 not 100% sure what psi I’m running but my valve goes from 0-20 and it’s about half way Cheers


-
What did you do in the shop today?
Shoshinjoe replied to Mark Ling's topic in Blacksmithing, General Discussion
I precurved the blade slightly -
What did you do in the shop today?
Shoshinjoe replied to Mark Ling's topic in Blacksmithing, General Discussion
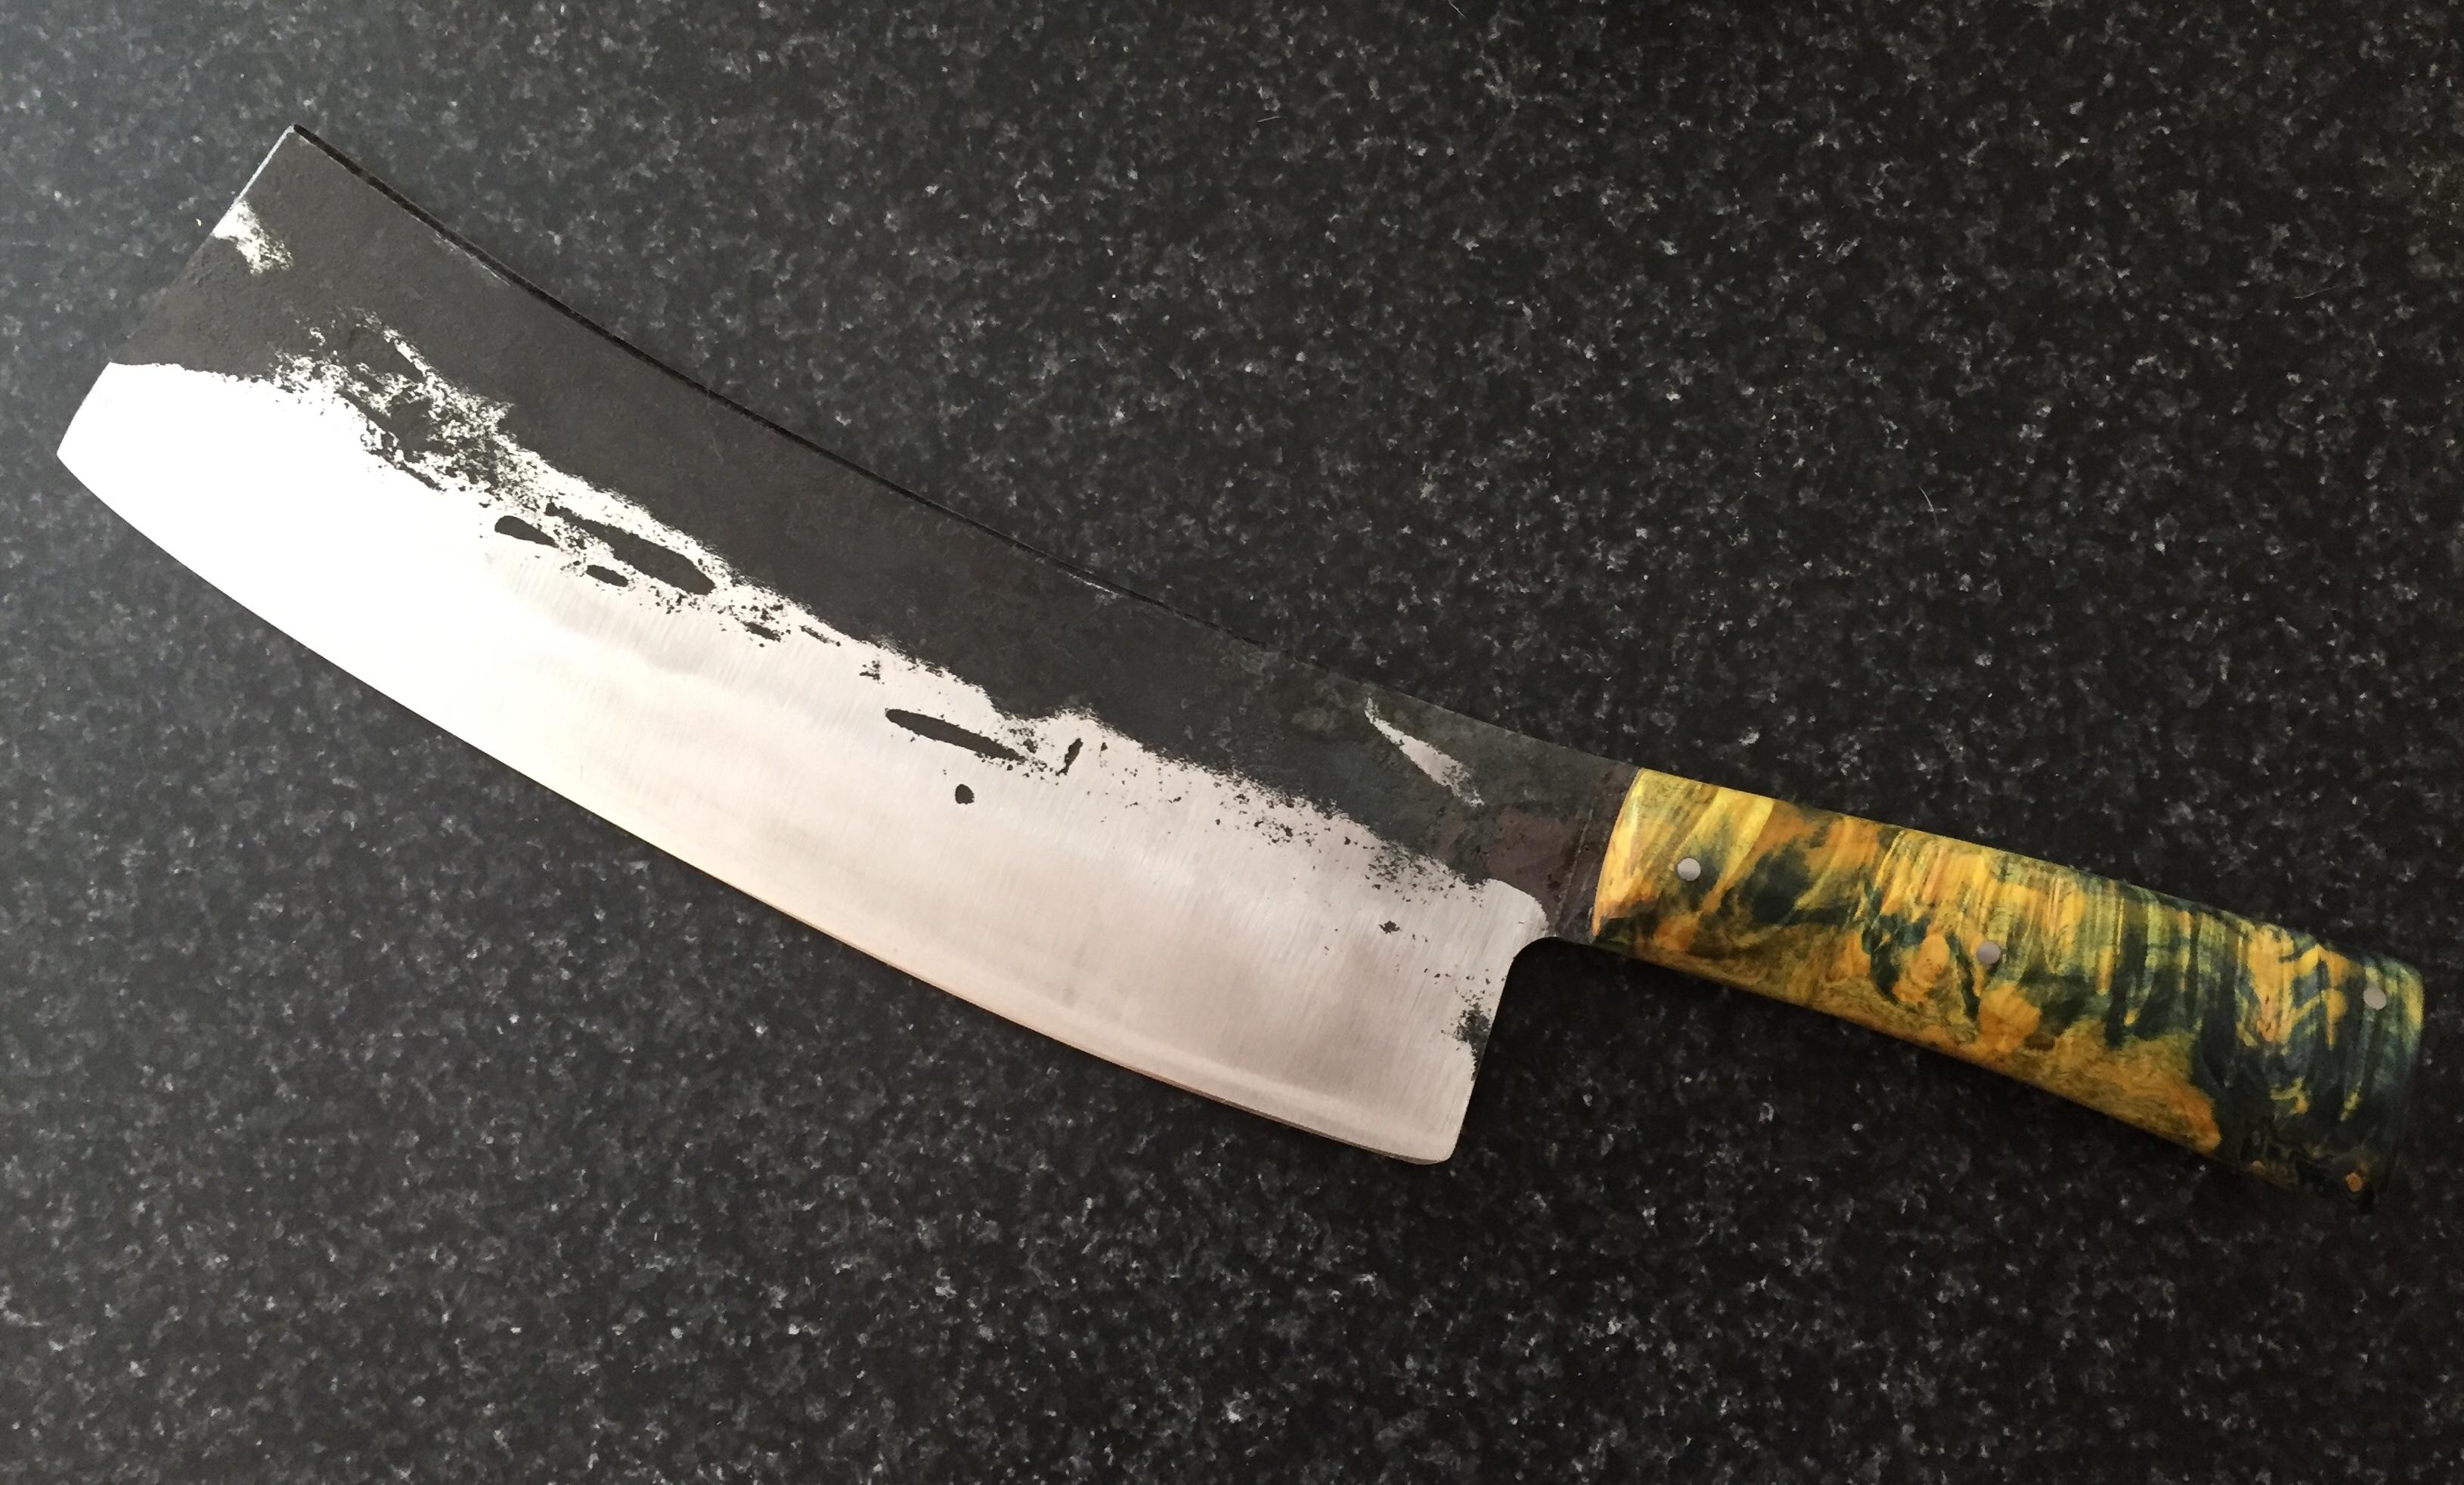
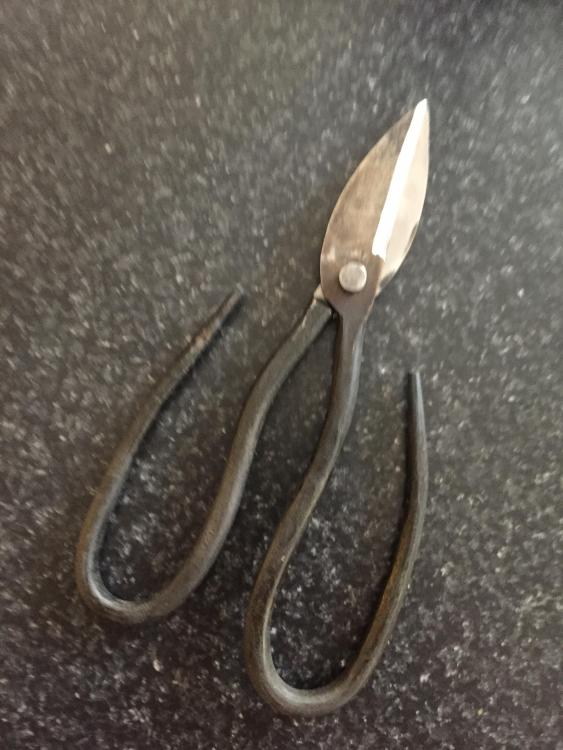
Absolutely gorgeous I’ve had a productive few days. An enormous forged cleaver named Jötunn, a pair of bolt jaw tongs and a set of scissors. the cleaver was a custom order. Is shaving sharp and able to chop through a 2x4 in about 6-7 cuts. the bolt jaw tongs are for 20mm square and round stock(roughly 3/4”) the scissors did not turn out to well unfortunately. I hammered the rivet to firmly and the blades are not moving smoothly and require two hands to open them. They do however cut quite well.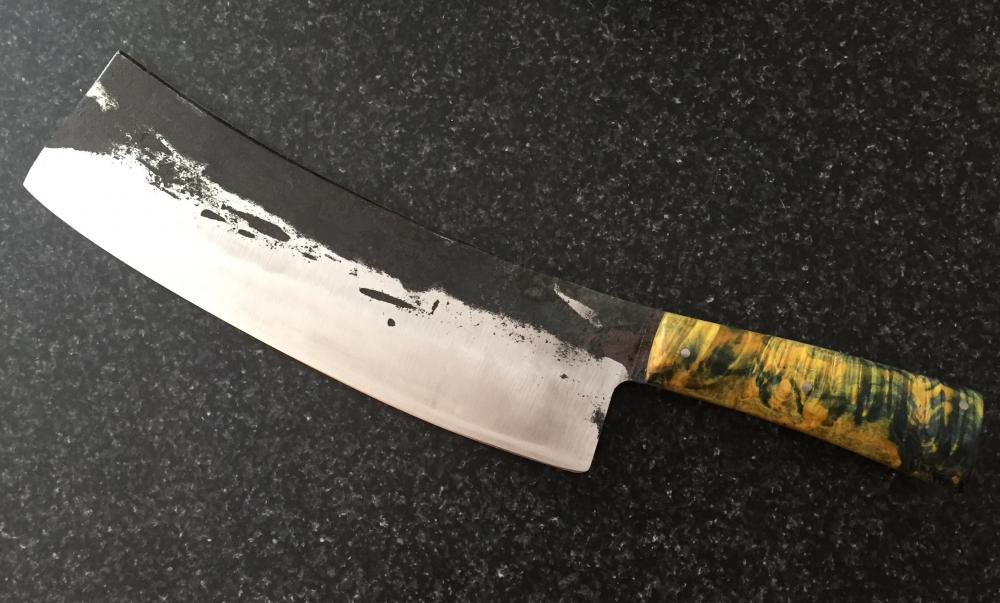

-
@Irondragon Forge & Clay No not it’s permanent location. Thanks for the suggestion.
-
Hi all, here’s a couple of pics of my first gas forge build. now after reading through forges 101 and burners 101 and many hours of scratching my head - unfortunately after I’d bought this burner, bricks and mortar - I realise that this is not the best or most efficient build. I am however quite pleased to report that the cure went well and I was able to get some crazy hot temperature in it. Also note that the burner has not been properly secured in these pics. massive thanks to @Mikey98118 and @Frosty the Lucky for making my brain explode with information. my other forge is a hand cranked charcoal forge made in a kettle bbq. Which I still really like but I am looking forward to using this. any advice and/or feedback is greatly appreciated.

-
Awesome tip Thomas thank you
-
What did you do in the shop today?
Shoshinjoe replied to Mark Ling's topic in Blacksmithing, General Discussion
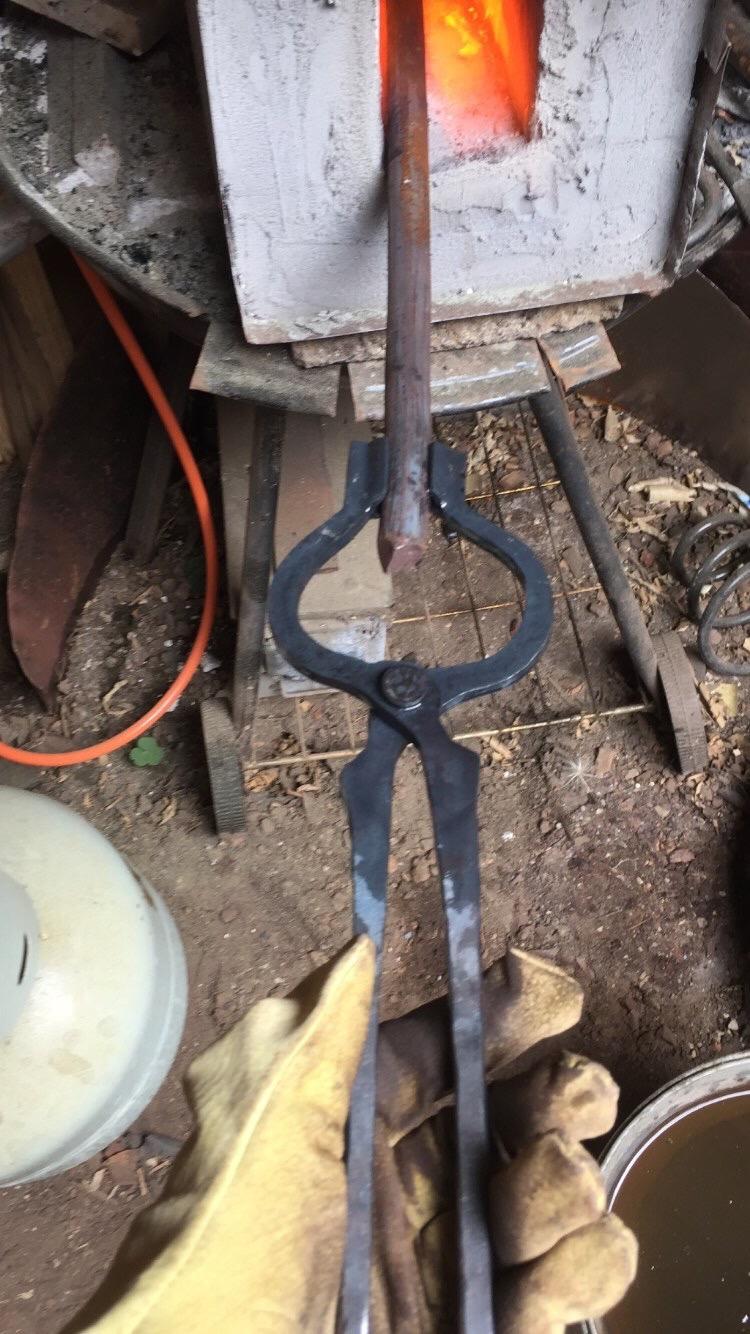
Thank you. Unfortunately the socket didn’t go quite to plan so it’s not welded. Next time I will try to keep a bit more material for the socket so it wraps all the way and I can forge it. And MacLeod thank you too I started work on this custom cleaver today for a customer...
-
What did you do in the shop today?
Shoshinjoe replied to Mark Ling's topic in Blacksmithing, General Discussion
This was xxxxxx hard for me and took a lot longer than I thought it would. But I learned so much about what order I should probably do things. Steel is 5160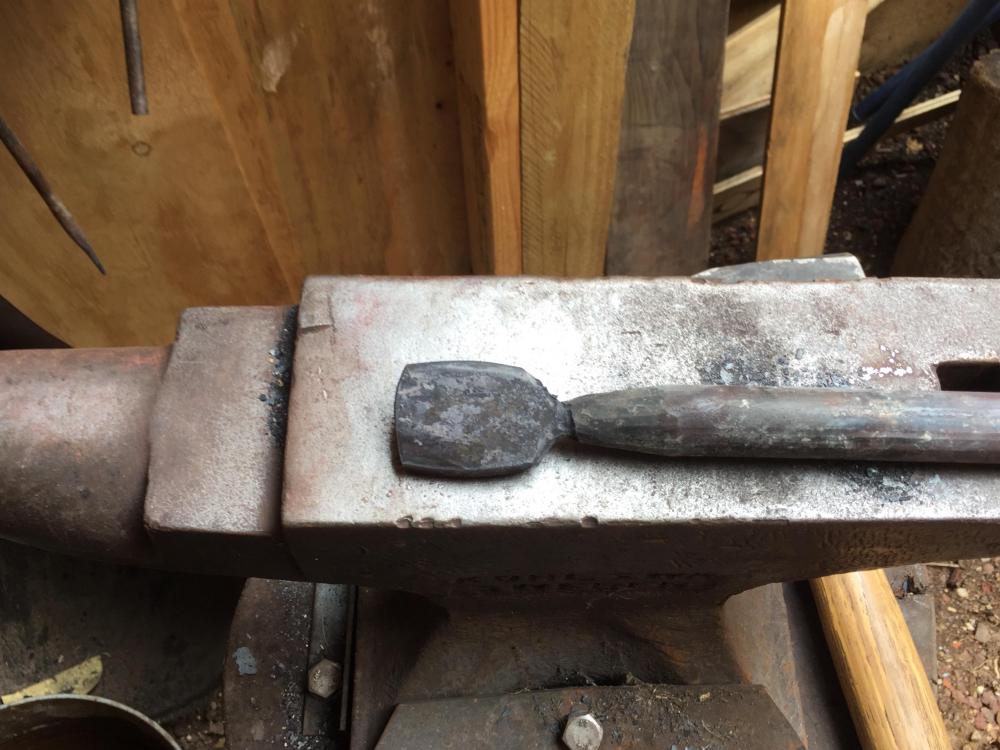
-
What did you do in the shop today?
Shoshinjoe replied to Mark Ling's topic in Blacksmithing, General Discussion
Alexandr that looks amazing. -
What did you do in the shop today?
Shoshinjoe replied to Mark Ling's topic in Blacksmithing, General Discussion
I really wish there was a like button on posts, there is just so much amazing work being shown. -
What did you do in the shop today?
Shoshinjoe replied to Mark Ling's topic in Blacksmithing, General Discussion
Alexandr that is amazing work mate! It was bloody hot today but I got the first bottle opener done on my new anvil!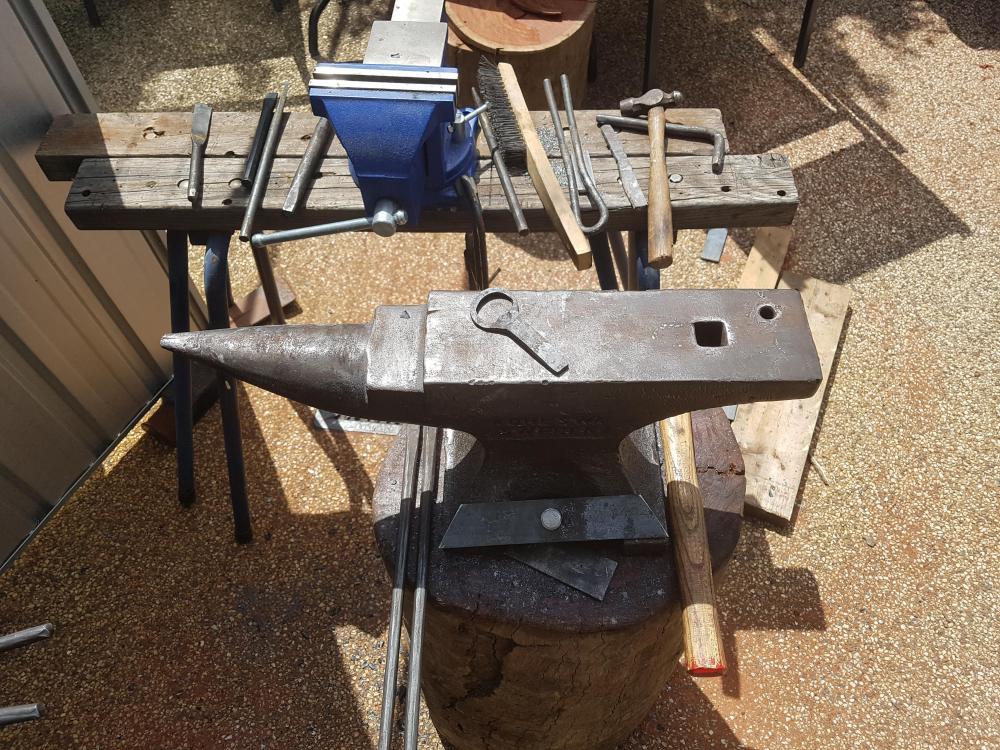
-
Great idea Glenn. When i actually have a property and proper workshop i will definitely implement this. For now my tiny courtyard in my townhouse will have to suffice haha
-
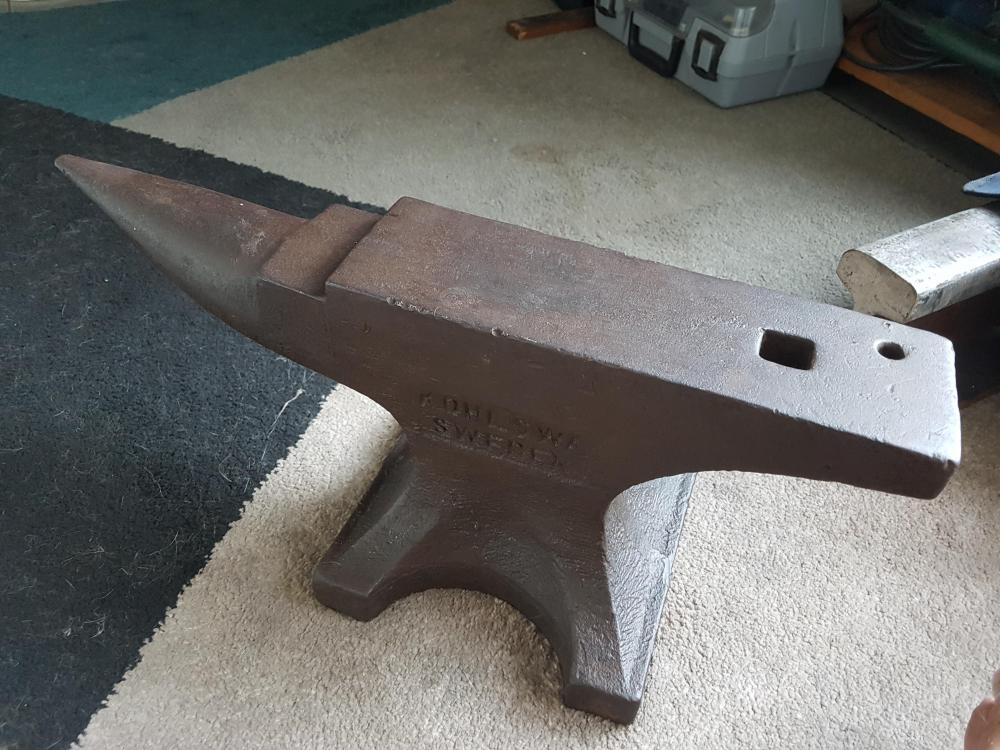
Frosty, thanks for the tips. After a bit more reading last night I realized I should not touch the face at all. I was going to wire brush it. But saw a few posts saying just use it. The dings in the edges don't bother me at all and the edges are pretty nicely radiused though very small radii. And I have some boiled linseed oil read to go. I missed out on a 169 lbs Soderfors by the skin of my teeth, for a ridiculously good price. So lesson learned, I should have jumped on it immediately. The fund for something like that has already begun. Cheers
-
Hey ausfire, cheers mate. I have not done a rebound test, but as soon as i come across a ball bearing i will do one. From the research i did i knew i could not pass this up. As you probably know anvil prices and quality here are all over the place, so i am pretty happy i found this one Im going to clean up the face today and get to work as soon as possible
-
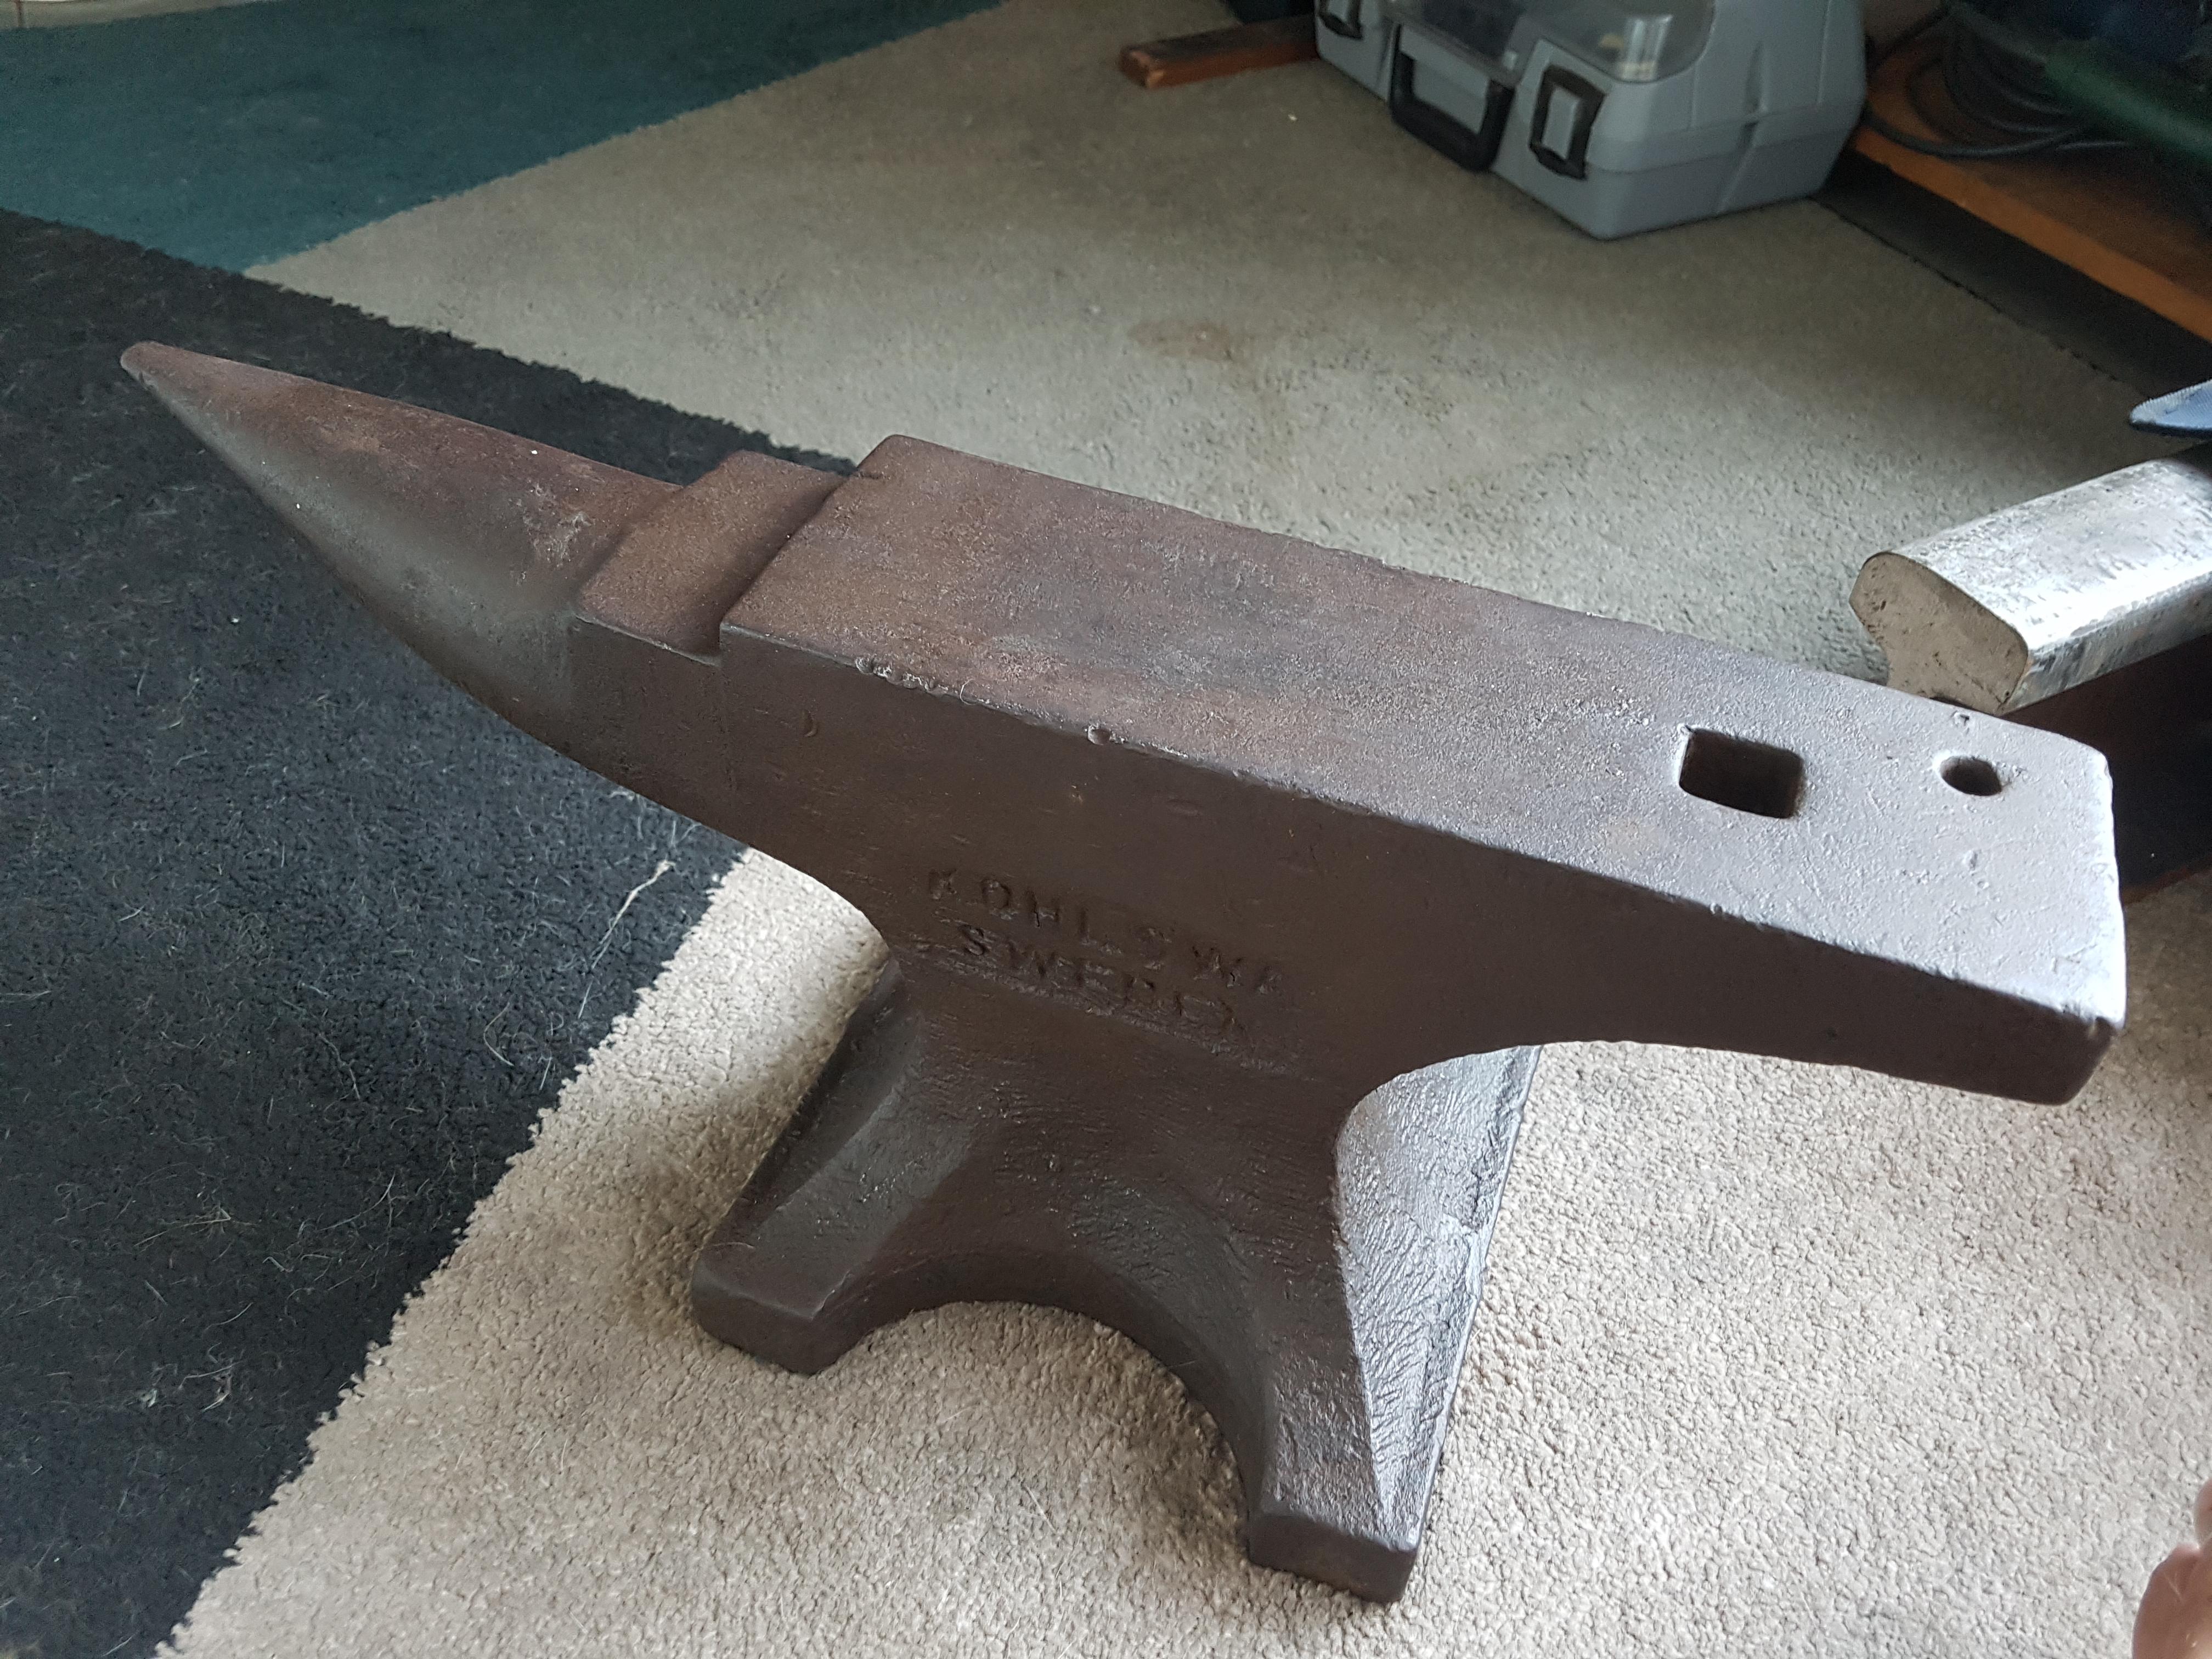
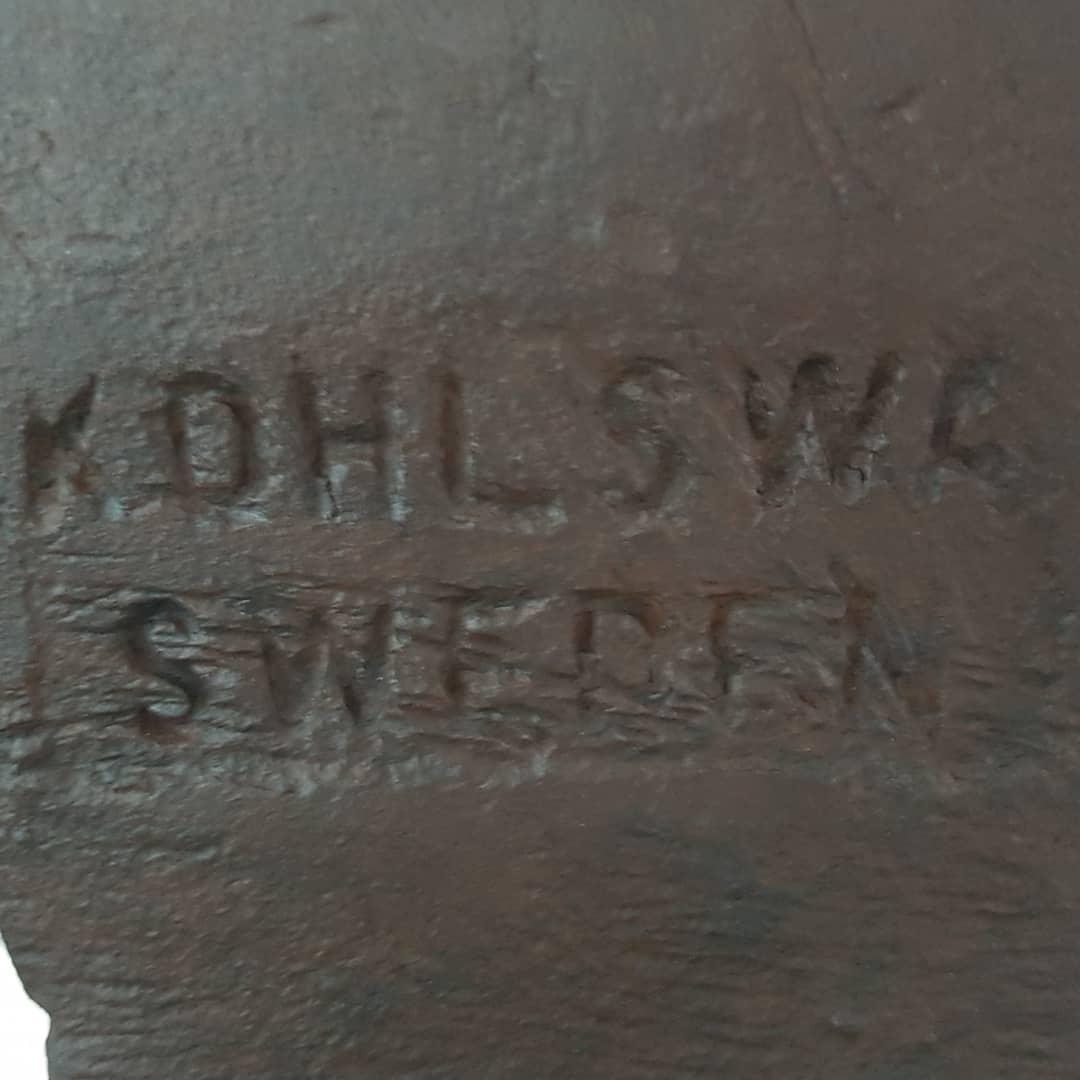
I picked this beauty up today!! This is my first anvil ever. Before this I was using some railroad track and a 10kg lump of steel shaped like an anvil. This is an 84# kohlswa. There are a few very minor dings in it but overall it is in great condition and I can't wait to put this to work tomorrow!

-
Show me your Bottle Openers!
Shoshinjoe replied to Arbalist's topic in Blacksmithing, General Discussion
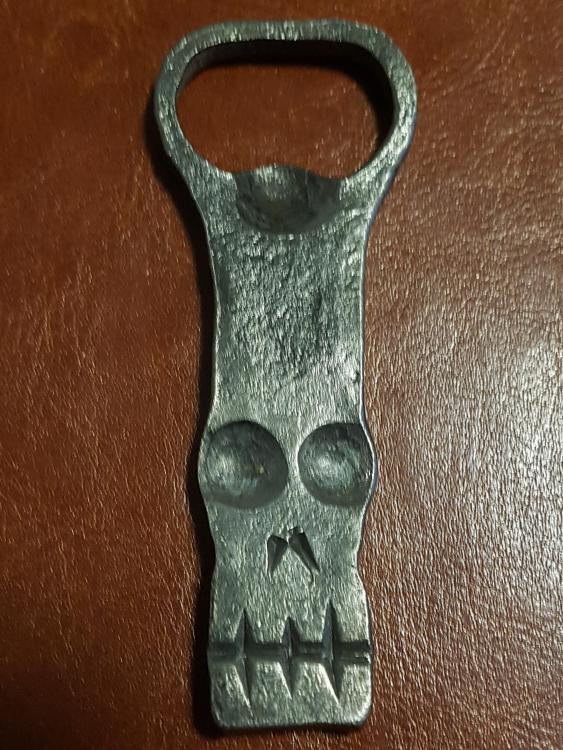
Hi every one, this is my first post and also my first attempt at decorating a bottle opener with a skull design. I have made a few bottle openers before this one but this is by far the best one i have done.