cedarghost
Members
-
Joined
-
Last visited
Everything posted by cedarghost
-
EXACTLY what I wanted to know. Thank you sir!
-
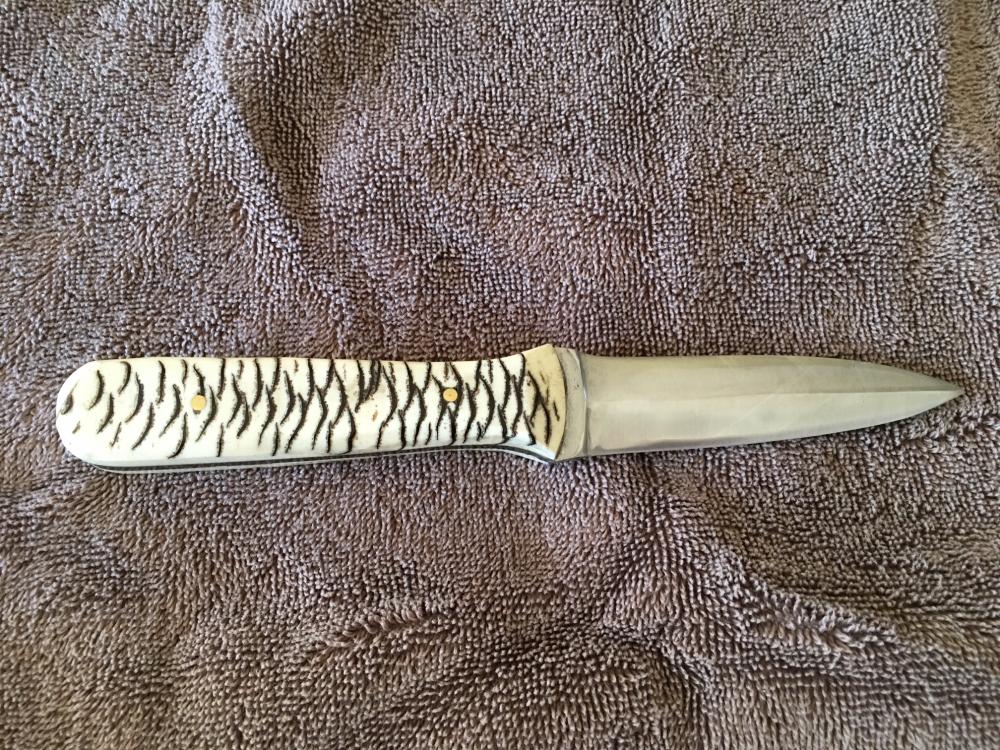
I use good steel for all my customer knives. I'm not trying to cheap out on steel. That's not the point here. Also forging good steel into a spike would not be authentic. I'd like to leave the RR markings in the butt of it, etc. I saw a spike that was forged into a cleaver with high carbon as the edge and want to try it. Call it a learning experience. Also, it should be MUCH easier to do a san mai than to forge something like 5160 into a railroad spike shape. At least for me anyway with no press or power hammer.
-
I have seen railroad spike knives with good steel for the edge, san mai style. My question is, is the spike the hot dog or bun? If it is the bun, how would I go about folding it? I was thinking forging it out flat with the butt of the spike pointed down, then folding it together and inserting a piece of 1095. Is there an easier way to do this? Thanks!
-
I have been sealing them with CA glue to fill voids then finishing with wipe on poly. I have also completely finished them using CA glue, but I don't prefer to do it that way. These are made using the instant cast resin without a pressure pot. Any of you wood guys have suggestions for other types of finish to put on them?
-
Thanks for the info. I am definitely going to look into it.
-
Thanks guys
-
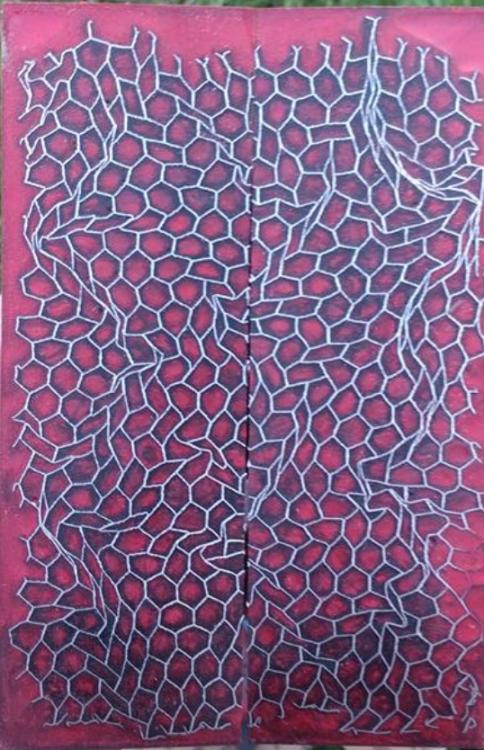
These look really cool. I'd like to figure out what's in them and make some.
-
It does look like chicken wire. At least that's what we call it here.
-
It's definitely colored epoxy. Not sure what the mesh is.
-
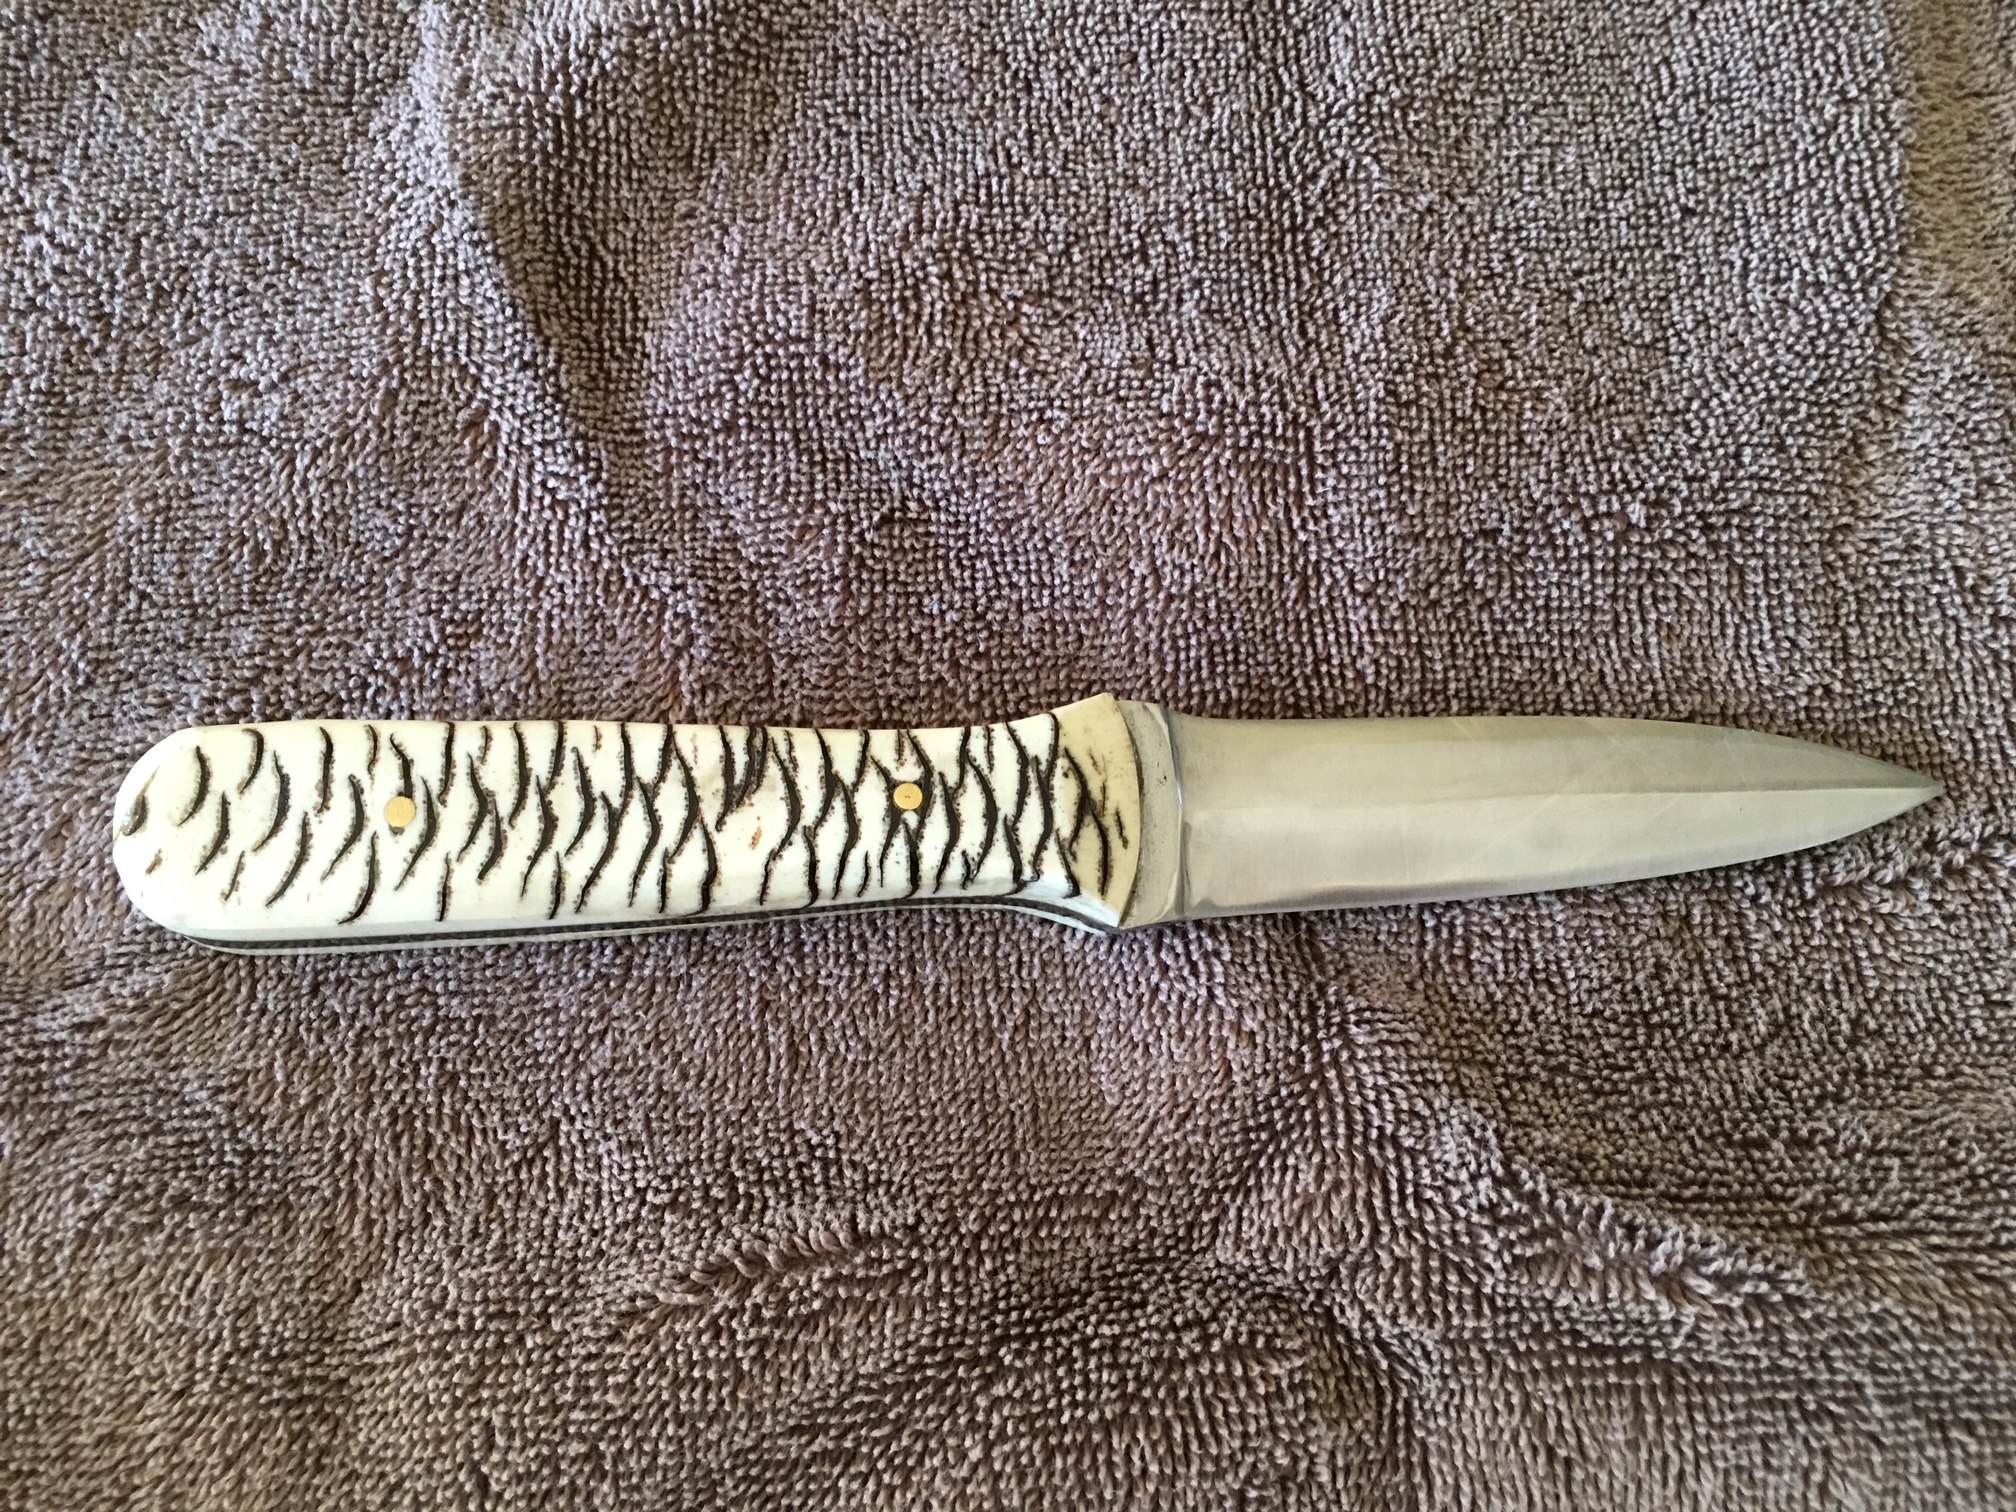
Anyone know what these scales are made of?
-
Guess I tested it too soon!
-
Good to know it may be salvageable. I will give it a try. Do you think my above approach to finish setting the weld looks sound? Thanks again Steve.
-
Going to give it a try Steve before I just dump it. Any tips? Or just heat to red, reflux, heat to welding temp and set? I have read that once your initial weld fails its hard, if not impossible, to correct it.
-
Sounds like sound advice. Thank you.
-
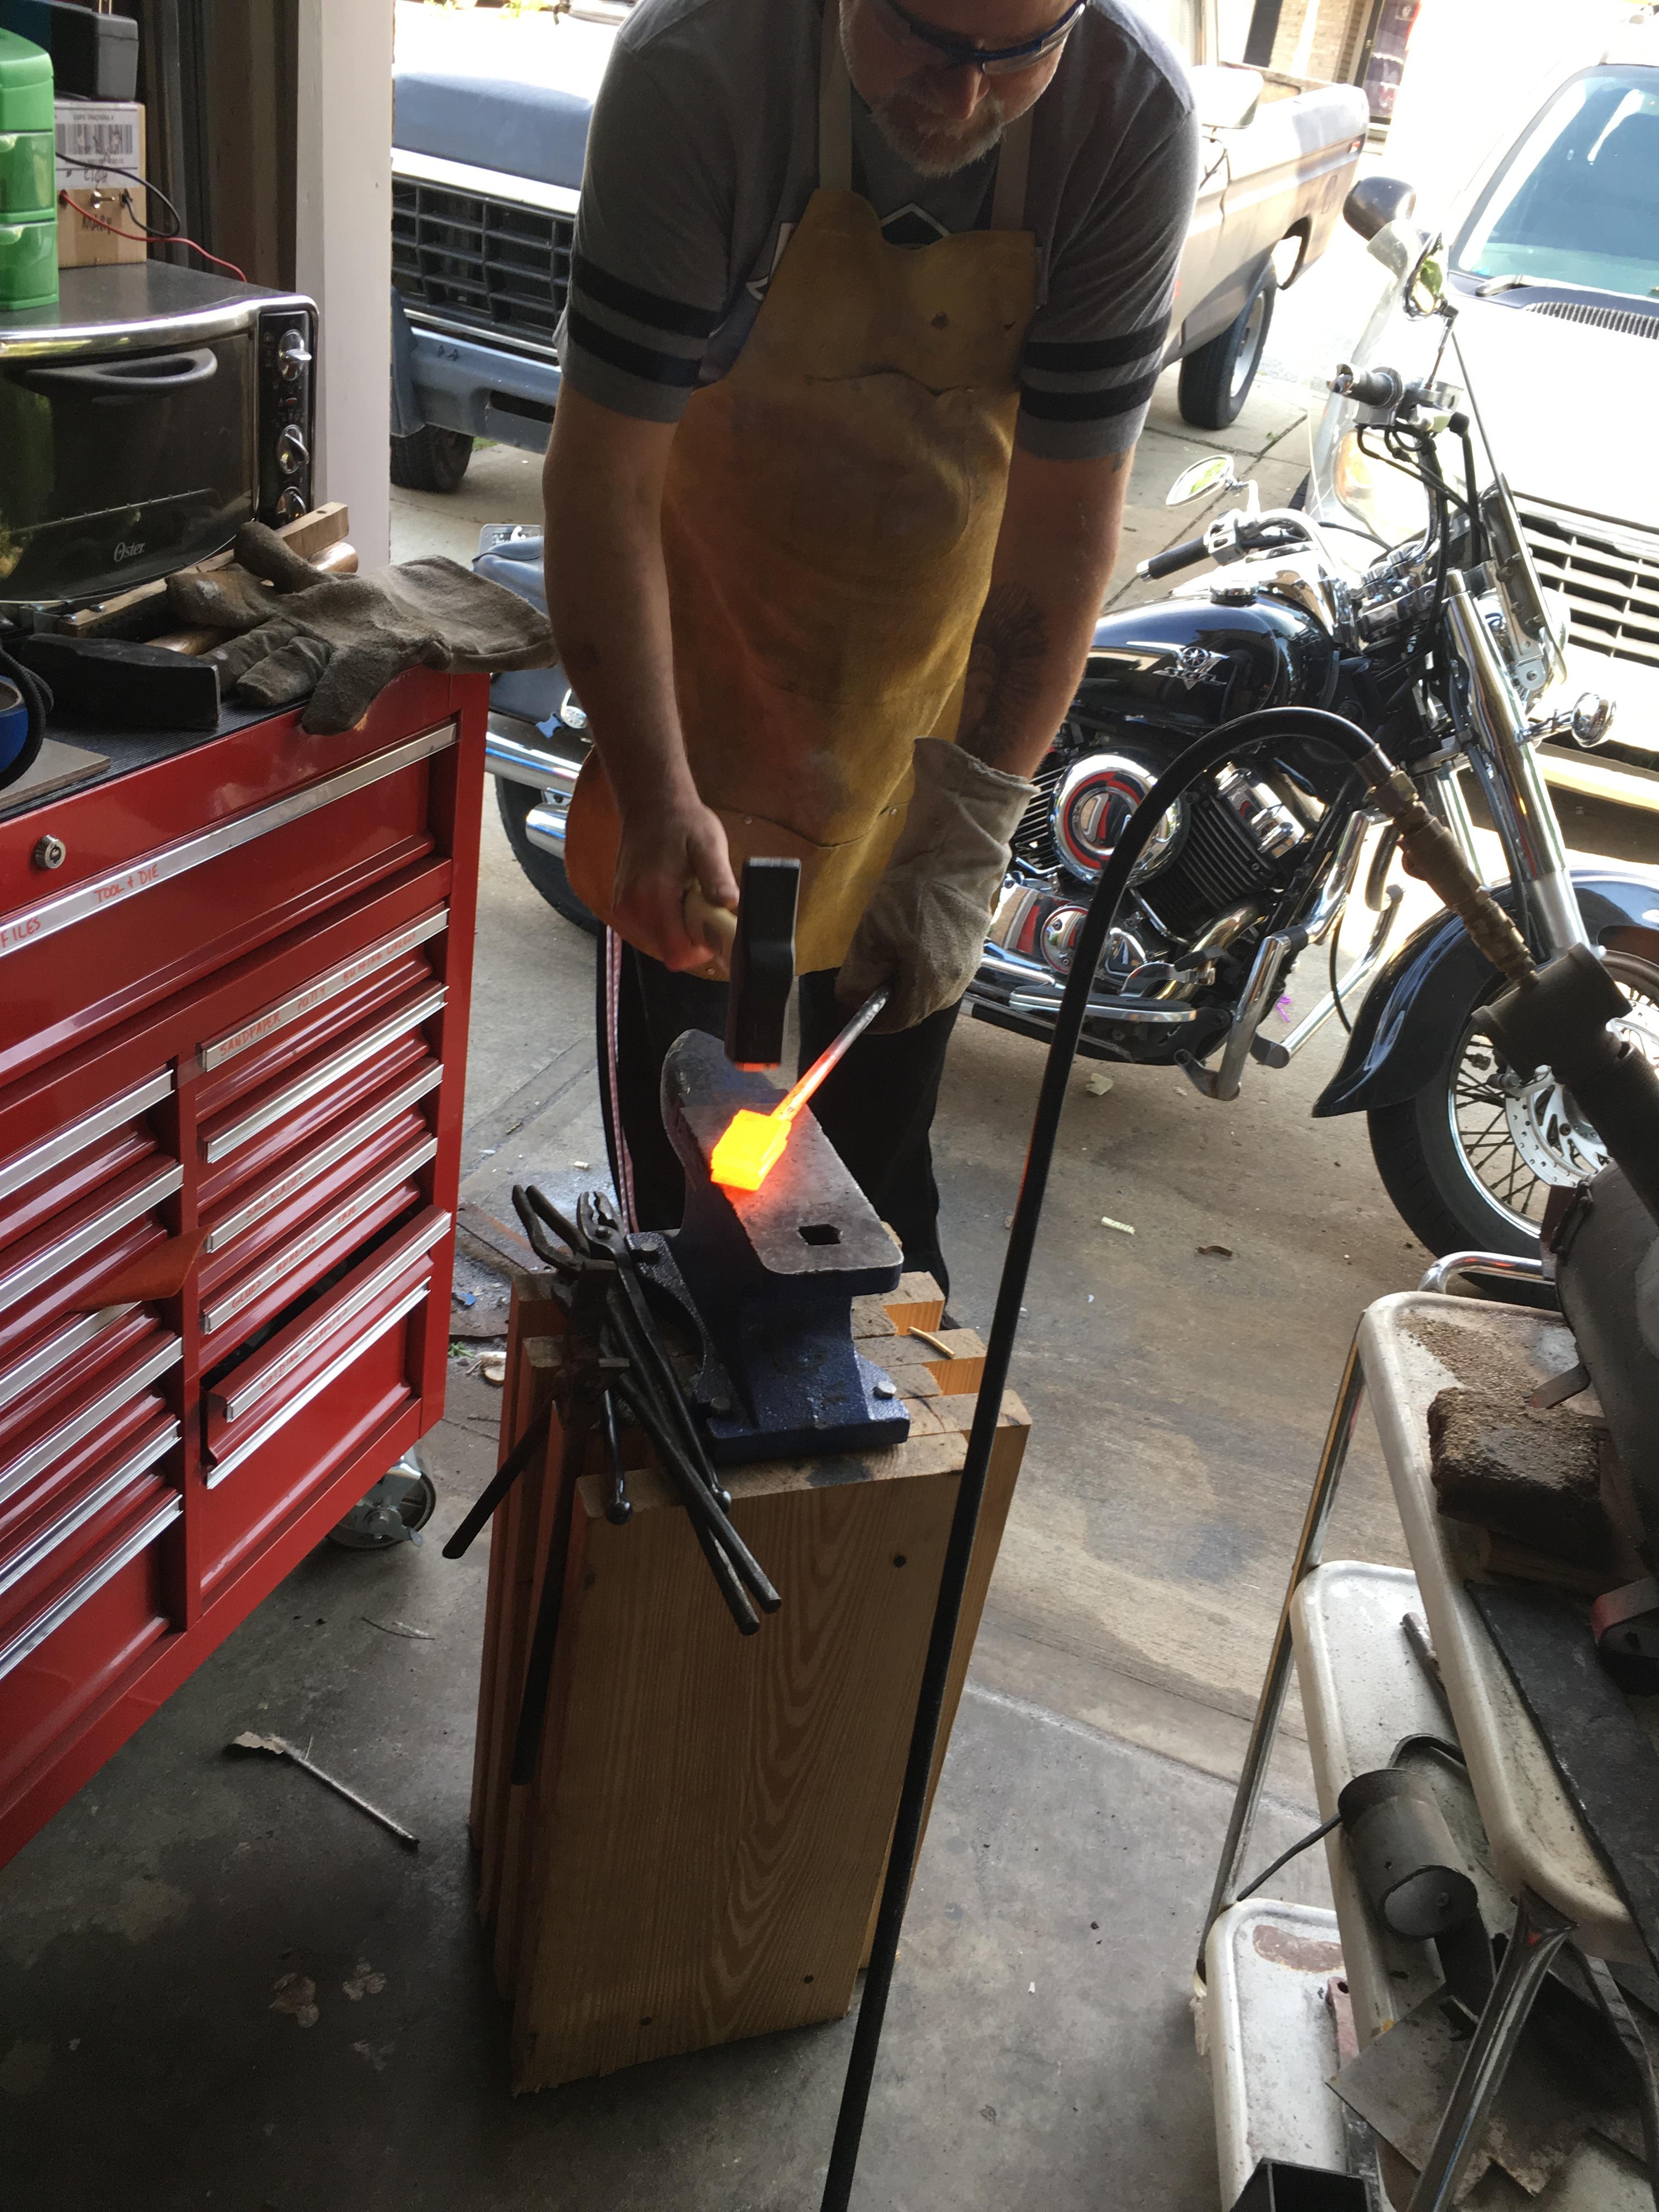
Yes! I thought I was patient but I was not patient enough. I started hammering too hard, too quickly, I should have taken it to welding heat a couple more times with lighter blows to get everything set good. Great learning experience though. I have another billet just like this one stacked up and ready to go. So we will have round 2 tonight or tomorrow. On a good note, I am using a single Frosty t-burner in my little forge and it works great! I think I probably left it on the anvil too long as well.
-
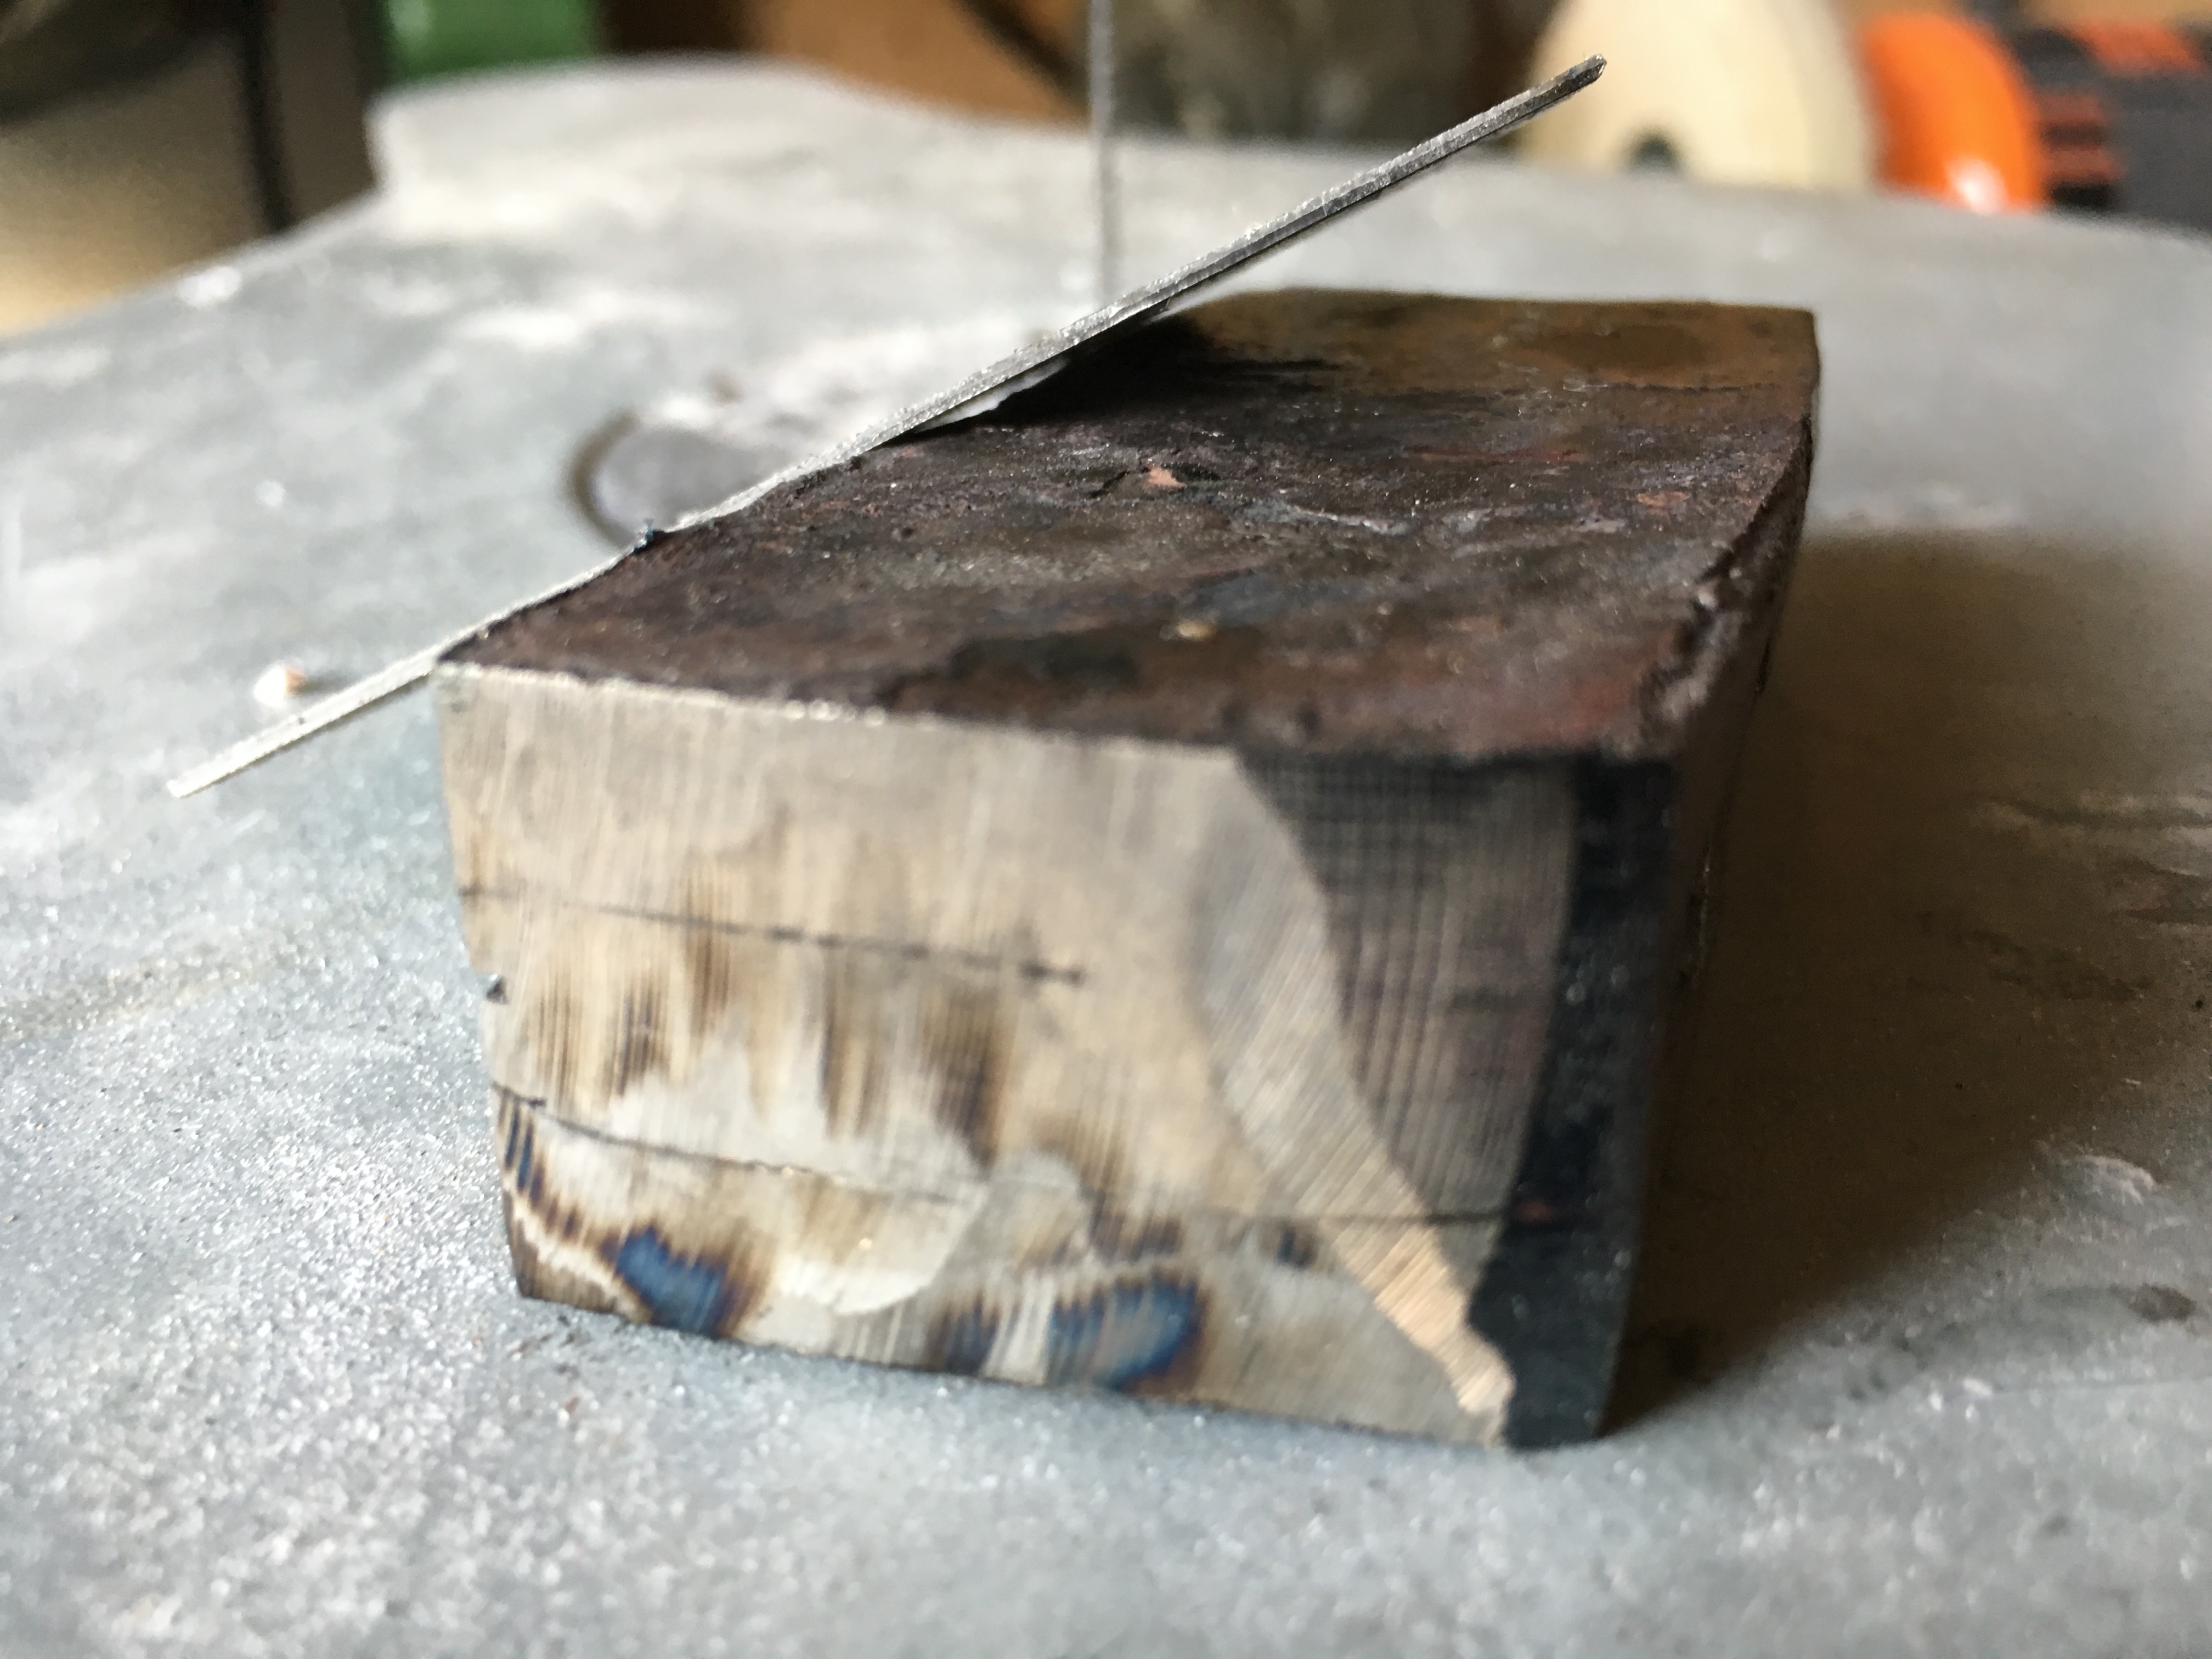
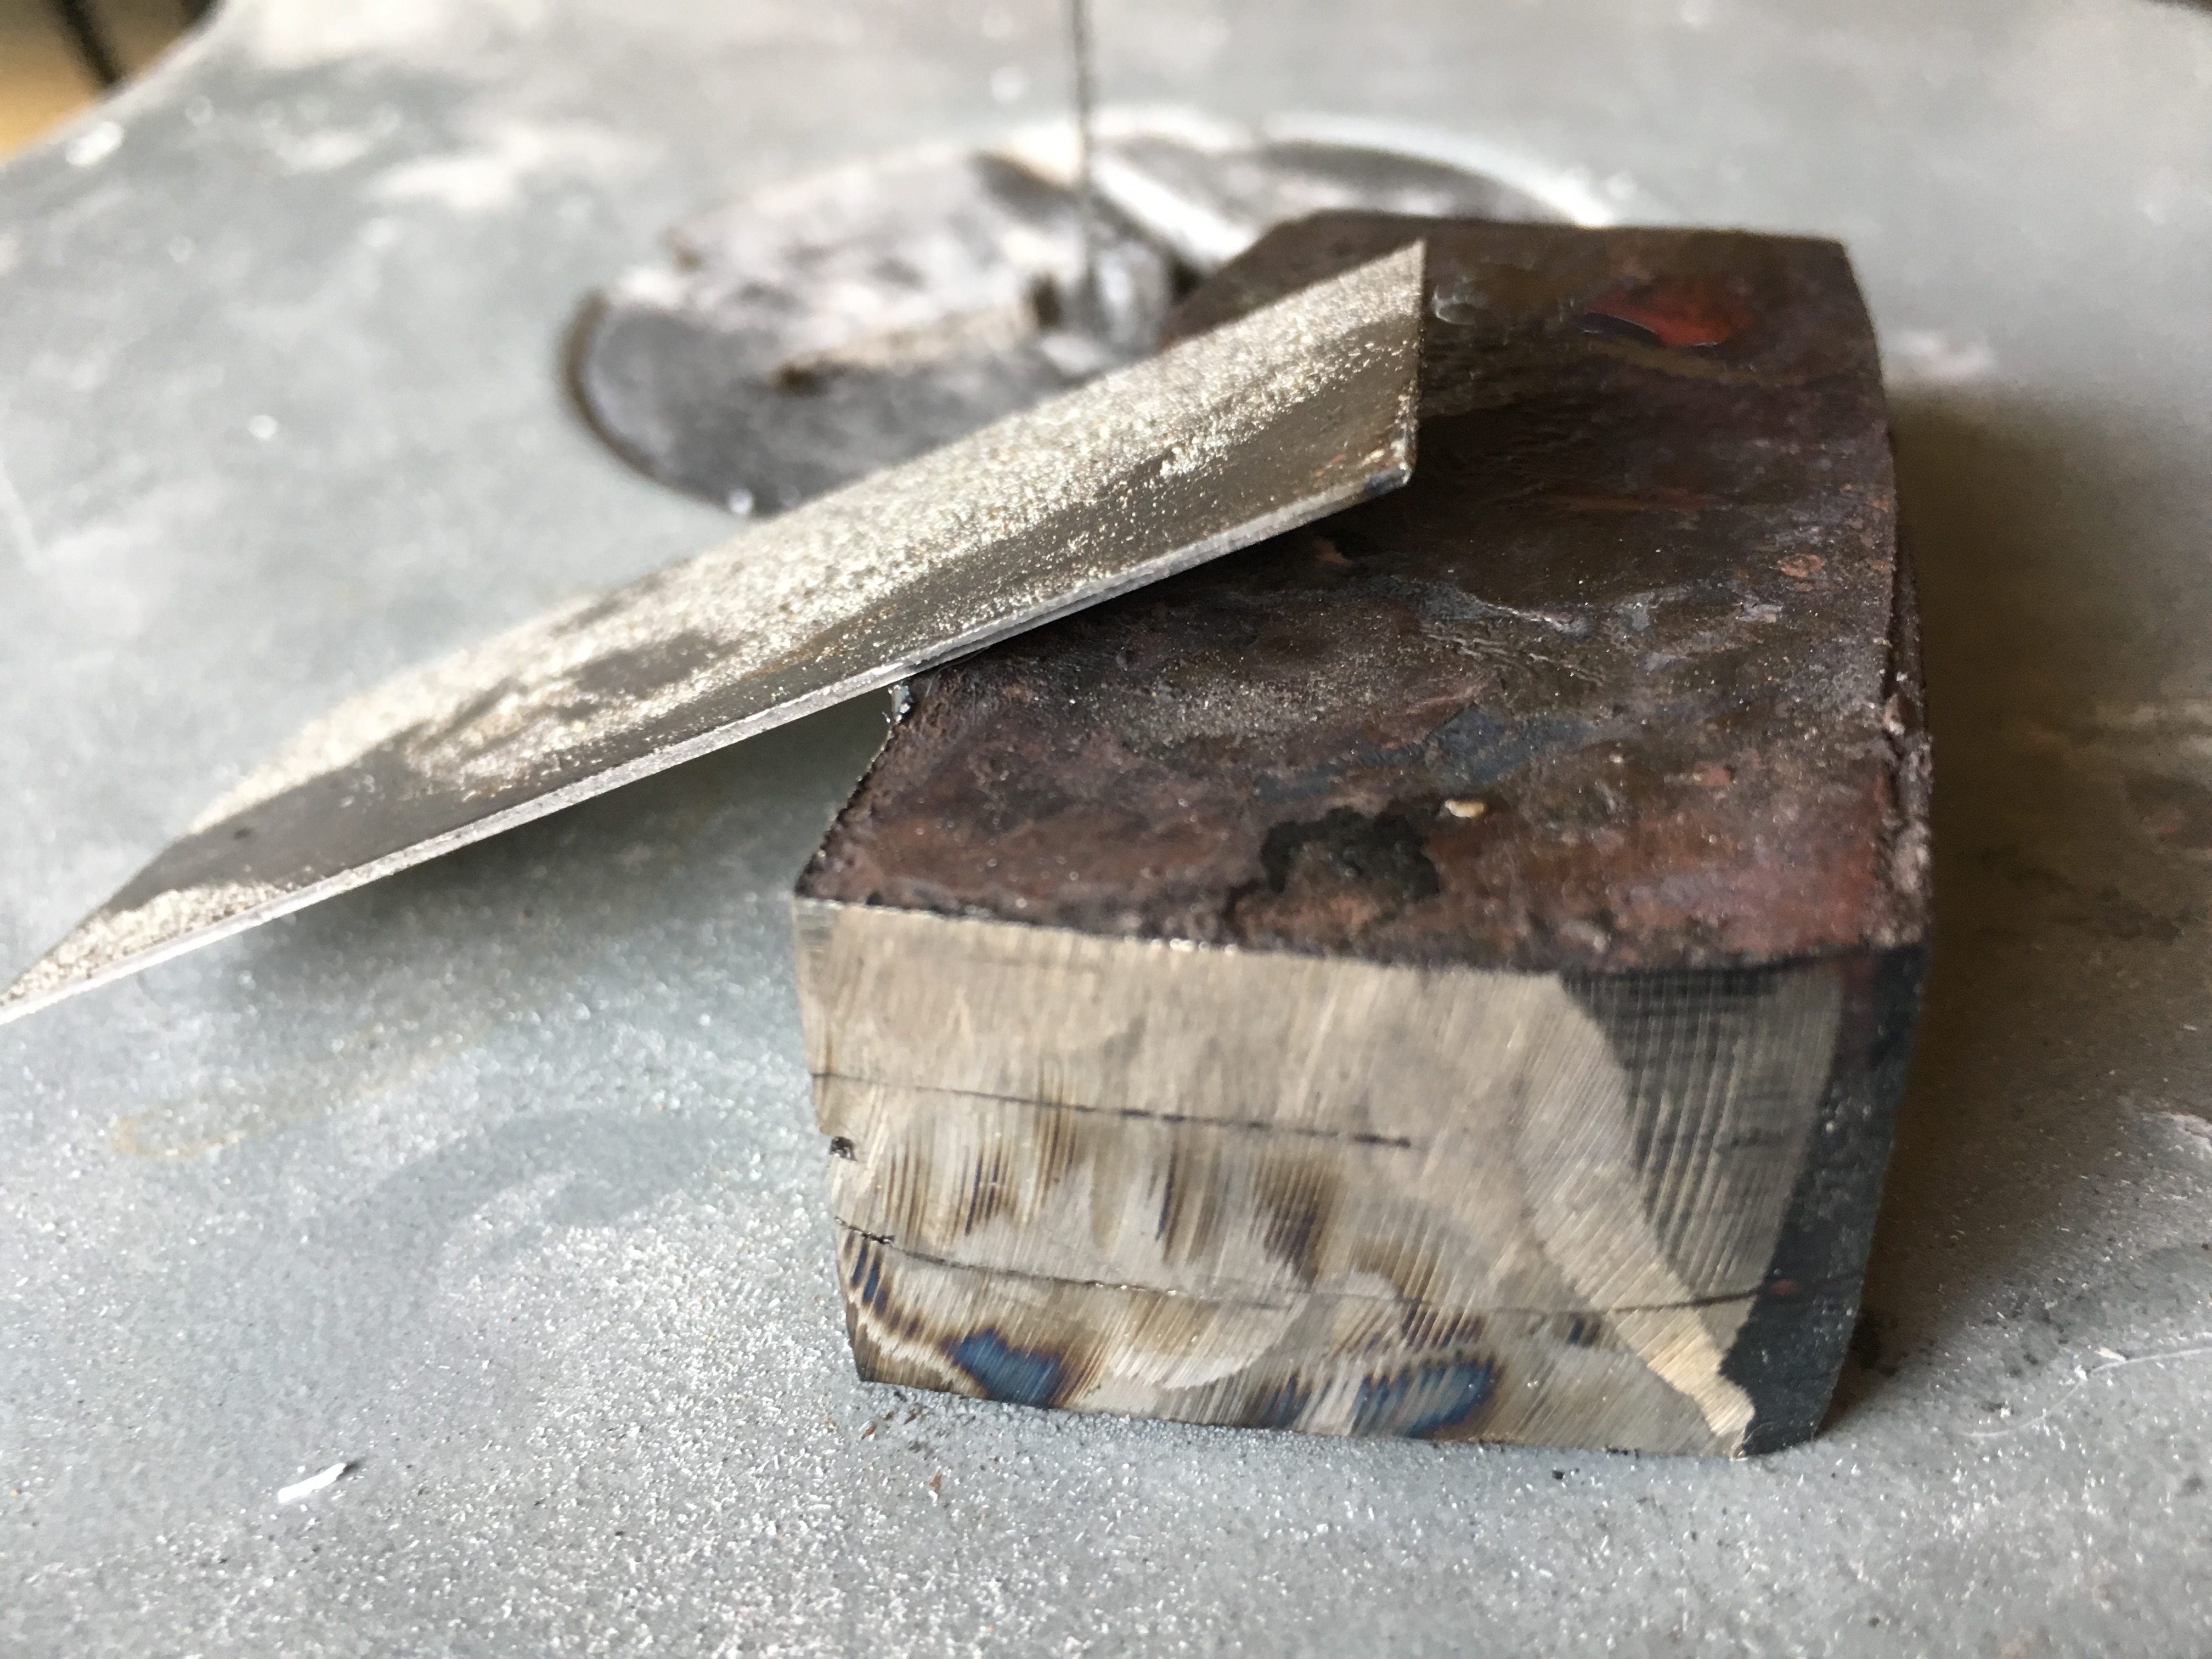
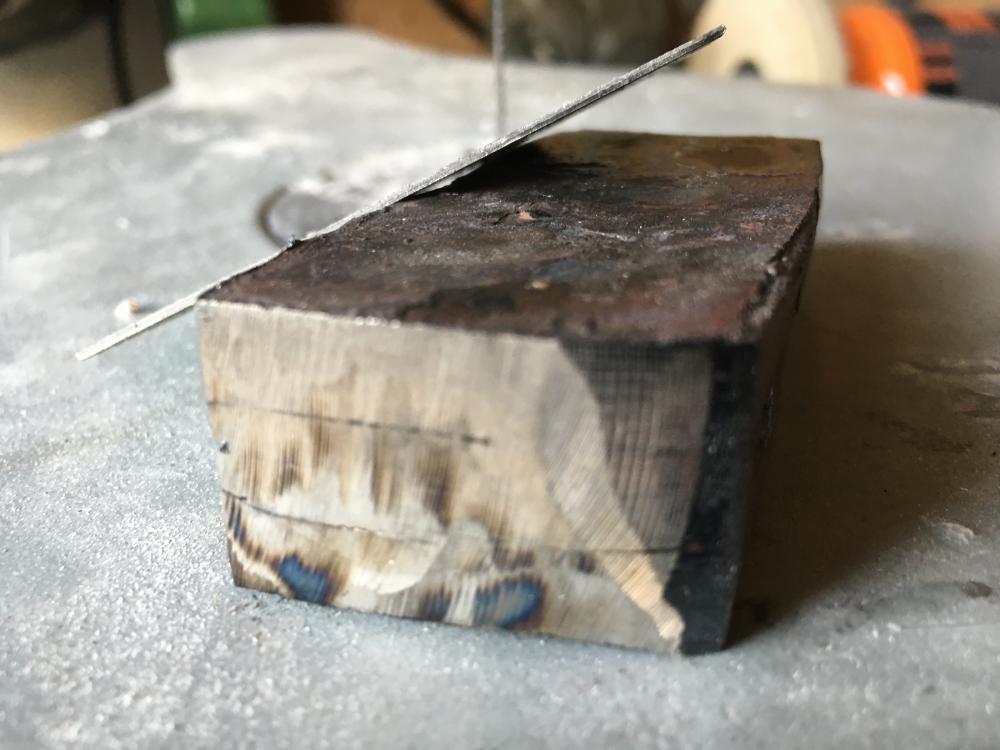
I came across some 4130 (very thin bars) so I alternated 4130, 1080, 4130, 1095, 4130, 1095,4130,1080,4130 for a 9 layer billet and decided to see if my little forge would get tonwelding temp. In retrospect I could have just tried in mild steel, but anyway.... It did not weld all the way and I suspect it was the 4130. If you look at the billet you can see a couple of lines that look like the billet is three distinct layers. i am pretty sure I had a good temp, as the steel was bright yellow/white and the flux was dancing on the surface. I cleaned everything REALLY good with the grinder, heated to red, fluxed, heated to lemon yellow/ white and let it soak and made sure all layers were the same color. Loved it to be anvil quickly and just tapped to start setting the welds. Refluxed and back in to heat it back up and tapped again a little harder when it started to feel solid. Did this for about 5 cycles before I really started hitting it good. Once I thought it was set good, I hit the sides and nothing shifted or showed any cracks. However when I ground the end off I could see the layers. On a good note, I'm pretty sure I have no problem getting to welding temp. Guess I will try again with some 1080 and 15n20. I'm thinking with the 4130 being so thin it may have burned up. The burn marks in the picture are from the grinder. Any chance of saving it? Thoughts and comment welcome!


-
Boom! Thanks for coming through Steve.
-
I've been looking for information on how to do this. I've see handles with a layer of wood, then brass, then rock or gemstone (highly polished). Does anyone have a good resource for instructions on this or can possibly point me int he right direction? Thanks,
-
Its a shame all the electronics shops are going away. There is something to be said for being able to talk to someone face to face. The SCR setup is much cleaner.
-
The wall plate dimmer switches burn out faster from what I read but people use them and they work. Better to get an SCR controller and bridge rectifier then change out the pot in the SCR controller to one with lower resistance. That's what I did first then I ended up using the boards from the treadmill when I burned up my controller. Make sure you get a rectifier with a heat sink or make one. Those little boogers get hot! Now as for the drive wheel on the treadmill motor, I welded on a steel pot that was about 3 inches deep and slightly smaller than the flywheel on the motor. I have since started running my belts right on the flywheel and it works fine though it will deform some of the super thin belts being only an inch wide. I saw a guy on youtube just using the flywheel and it worked for him so I tried it. I think this is the controller the guy uses in the video: https://www.amazon.com/Yeeco-Electronic-Regulator-Thermostat-Temperature/dp/B00MLZ1AT2/ref=sr_1_1?ie=UTF8&qid=1496262867&sr=8-1&keywords=scr+controller+10000w You're in for a fun and rewarding project!
-
-
I'll take some pictures of mine when I get home Frosty and post them up here. I built an SCR motor controller initially but then just ended up using the treadmill controls. I kept the power supply and the controller board that allows you to adjust speed. Most of them are MC-60's but mine was an MC-1200, I think. It is what provides the variable speed. EDIT*** To bypass the magnetic safety key on the treadmill control board, I just wired the three wires together. I'll take pictures. If you don't want that big treadmill control board you can build an SCR controller for around $25 that will work just fine. Like this: Anyway, I'll post pictures of what I did for a cost of 0$ using the existing treadmill parts. If yours has an MC-60 board and can solder, you can do it this way: https://hackaday.com/tag/mc-60/ Here is the two liter fan enclosure I was talking about: http://bbs.homeshopmachinist.net/threads/47611-Cooling-off-a-hot-treadmill-motor Pretty nifty!
-
I think you're right. I also saw someone use a two liter bottle and heat it to form to the motor and put a DC fan from a PC case in the other end with a filter on it. Let me see if I can find a picture.
-
If there is a blue wire coming out of the motor, that's the thermal overload. I just cut it off on mine and don't have any shutoff issues.
-
Awesome Steve! Bookmarked that page. I did manage to find Pop's and True Grit. I think I am going to use Norton's out to 120 then I have ordered some Trizacts (A100, A65 and A45) then go to hand from there. I may order an A30 as well but I ordered a medium and a fine scotchbrite and am anxious to see what those do after reading a bunch of posts about them. The less hand sanding the better.