ForgeNub
-
Posts
46 -
Joined
-
Last visited
Content Type
Profiles
Forums
Articles
Gallery
Downloads
Events
Everything posted by ForgeNub
-
I haven't but one of the books I got before I started this endeavor actually said to practice with chilled clay because it has almost the same consistency as hot steel. I've been watching videos for ages just getting started and what not, I mean I am such a rookie I don't even understand how to use all the parts of my anvil properly yet, but I did find a way to use the radius edges at the heel to make better transitions between areas. Am going to keep on practicing (need the exercise anyways) and all my metal is free because I work at an auto shop so I get tons of steel, first day I brought home about 80 pounds worth of truck leaf spring U Bolts to start practicing with! I will hit up the ceramics place by my work about some clay, thanks for bringing that back to my attention and letting me know how helpful it is!!!!
-
Good to know obvious oversight on my part
-
Ahh see my valve isn't a 1/4 turn, its a 1/4" Needle valve that allows for very fine adjustments, i've fiddled with it when trying to light to see if I can get proper Propane pressure to not overwhelm the chamber with air flow but it seems to do nothing, to be honest, I cut the bottom off of a cheap peanut can and cut a slot to go around the top tube above the orifice it slides on and I just press it down a bit and it fires, sputters for a minute then starts running smooth and once i see yellow flames coming out of the forge opening I pull the plate off and it runs smooth afterwards. So i've basically just started leaving the valve full open and sticking a blow torch in the front when I light it and once the plate is in place I'm good to go. I could possibly devise something that is like an actuator with a split door for the back so I can adjust the width of the gap at the back then use an ITC coated brick to block off that gap?
-
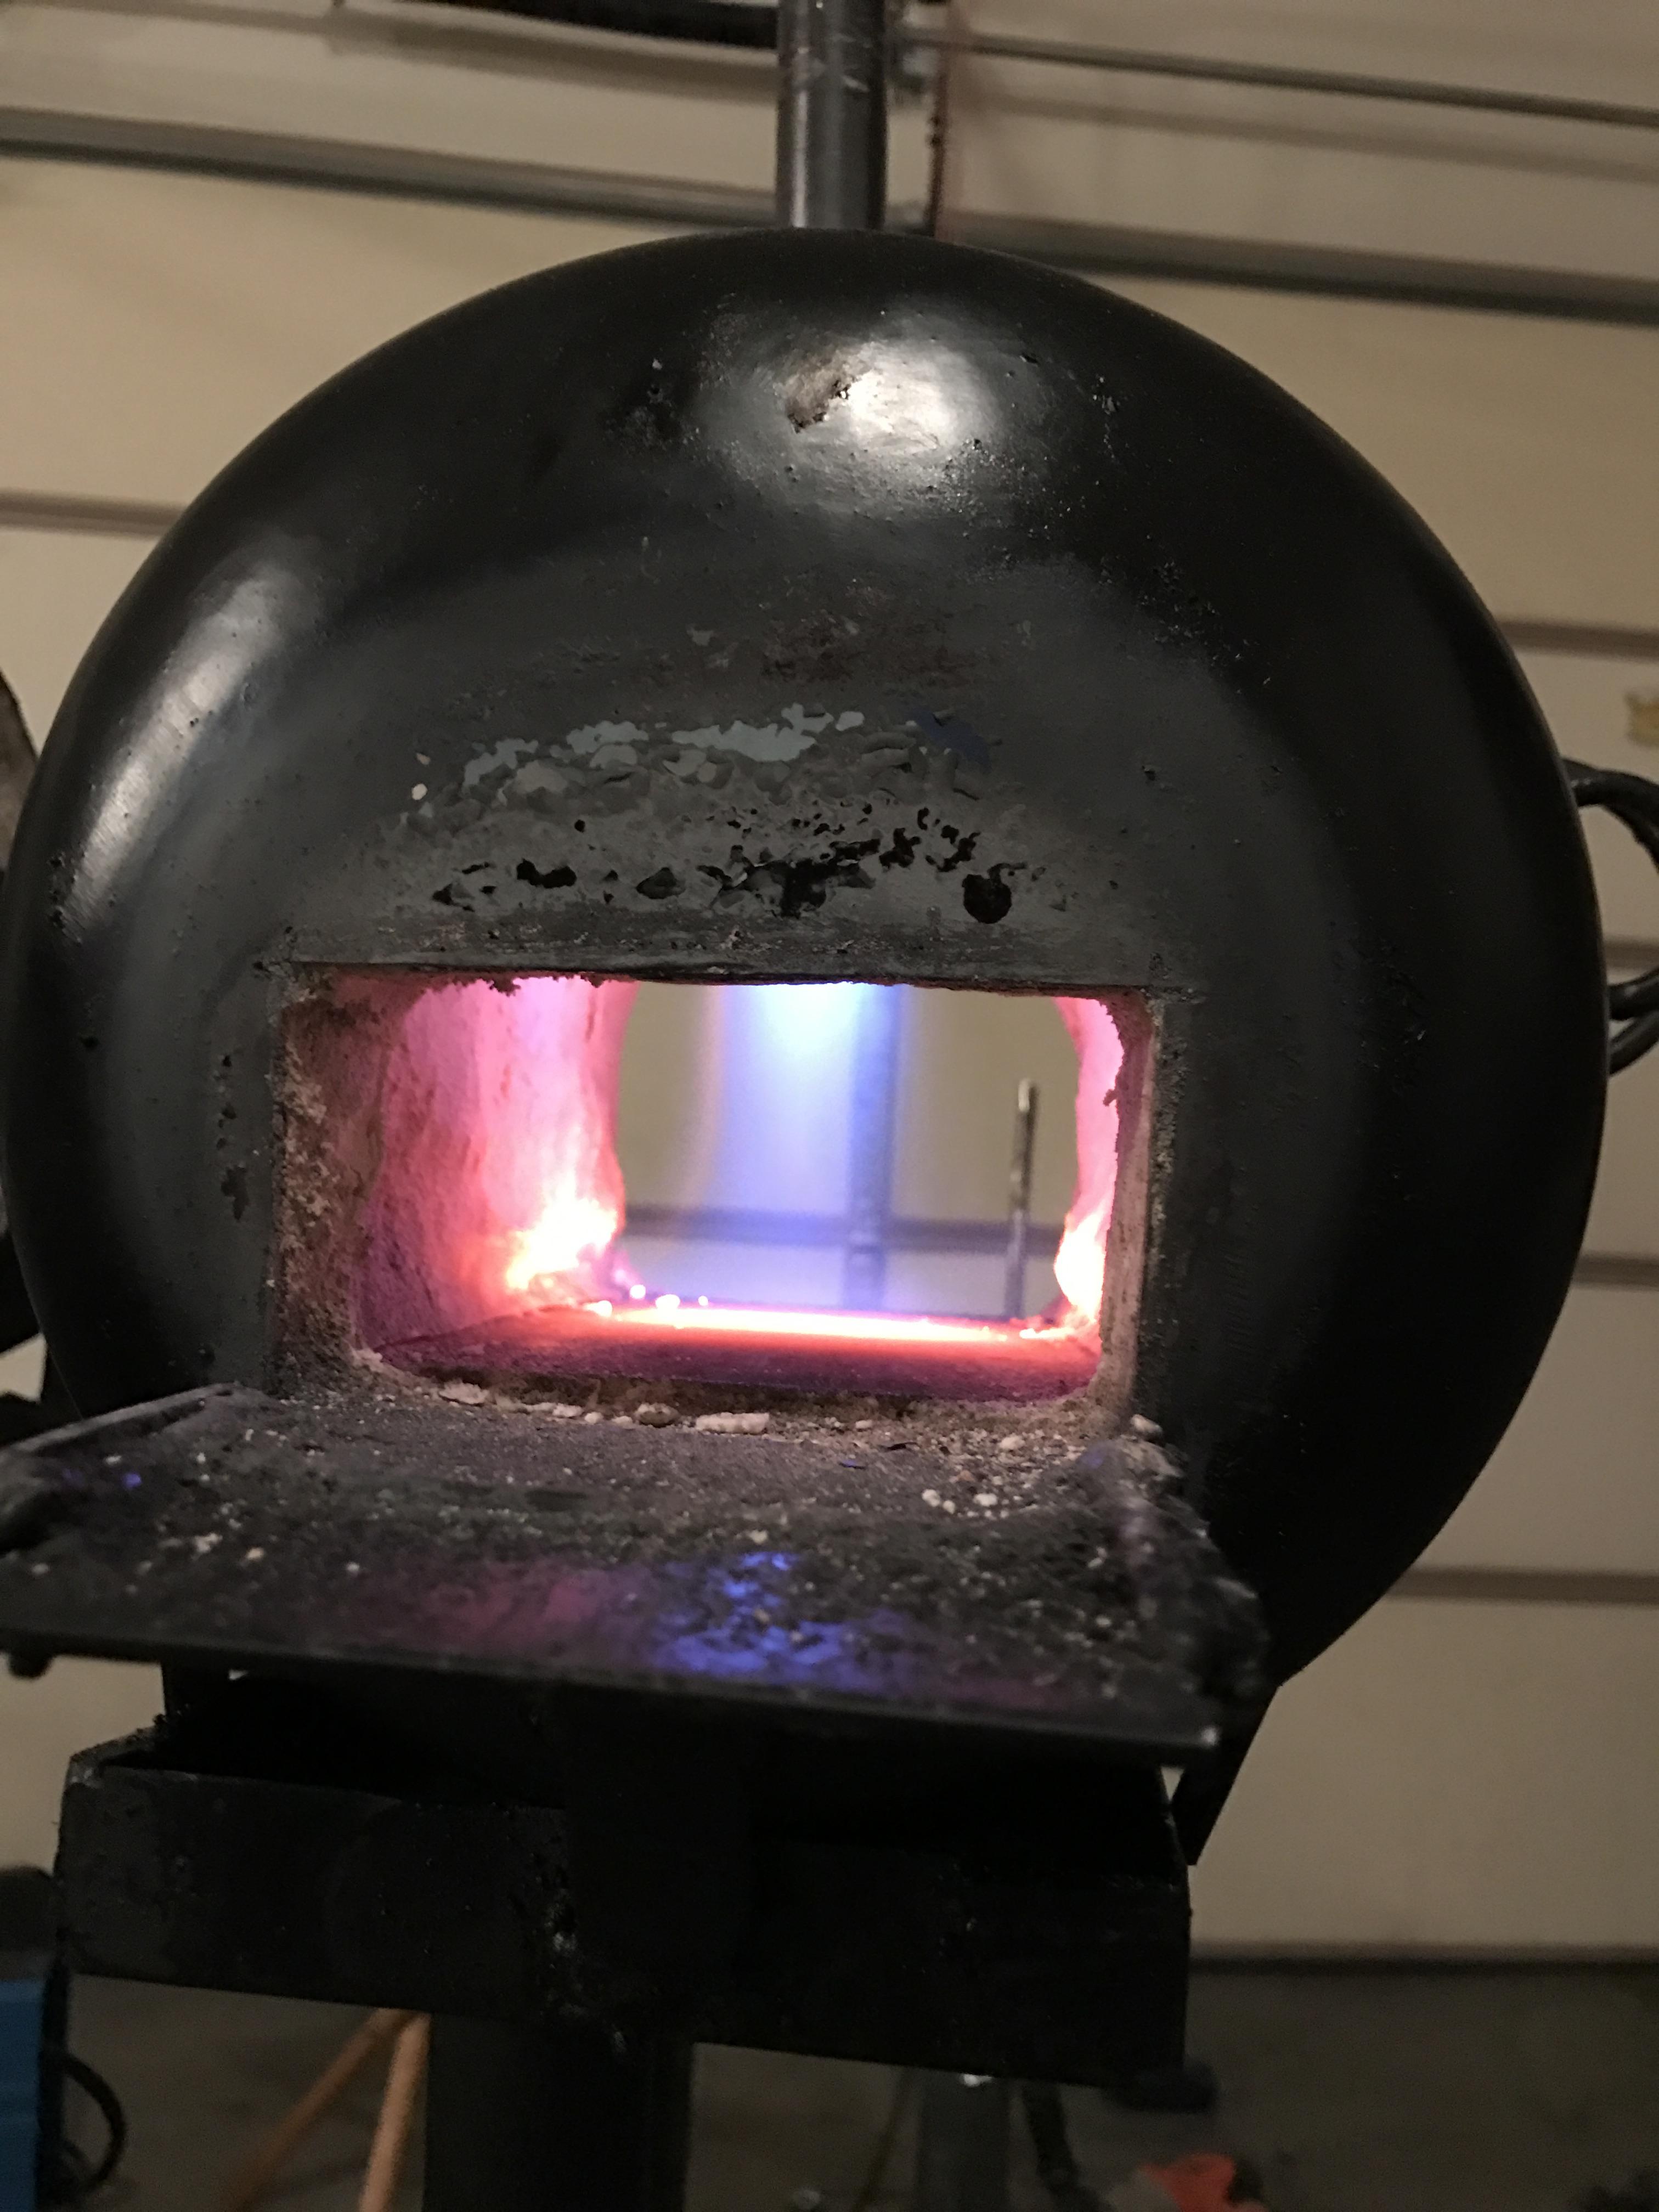
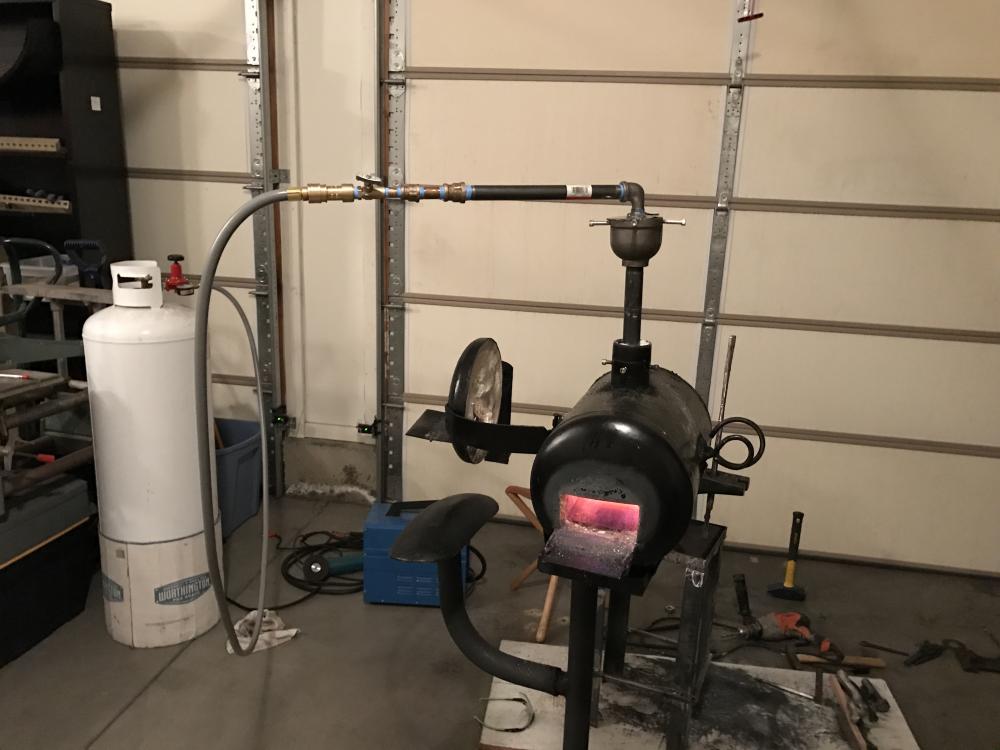
Meeco's Red Devil 610 is Rated to 3000, if you have Amazon prime its free 2 day shipping and only like 20 bucks for a half gallon, I did an extremely thin coating on my forge. The container states there is no set up or cure time on the product. I feel like its super easy to apply as it comes pre-mixed and about the consistency of peanut butter. If you use it, I just applied it with gloves on and take a scoop in your fingers apply pressure to press it into the wool or the wool will just want to ball up as you try to coat. once you get your initial coating down you can slow fire it, if you do it will bubble in the thicker spots, on my forge I just chipped the bubbled areas away and it still left a coat on the wool, cracks are easy to fill and its easy to get your hands on it, I haven't lined with ITC 100 yet so I'll do one more lining of the Meeco's heat it, rasp it to a better even surface then coat with the ITC. As is my forge gets to near white hot without the ITC in about 10-15 minutes @ 10-12.5 PSI. I'm a total newbie but I think it works great!
-
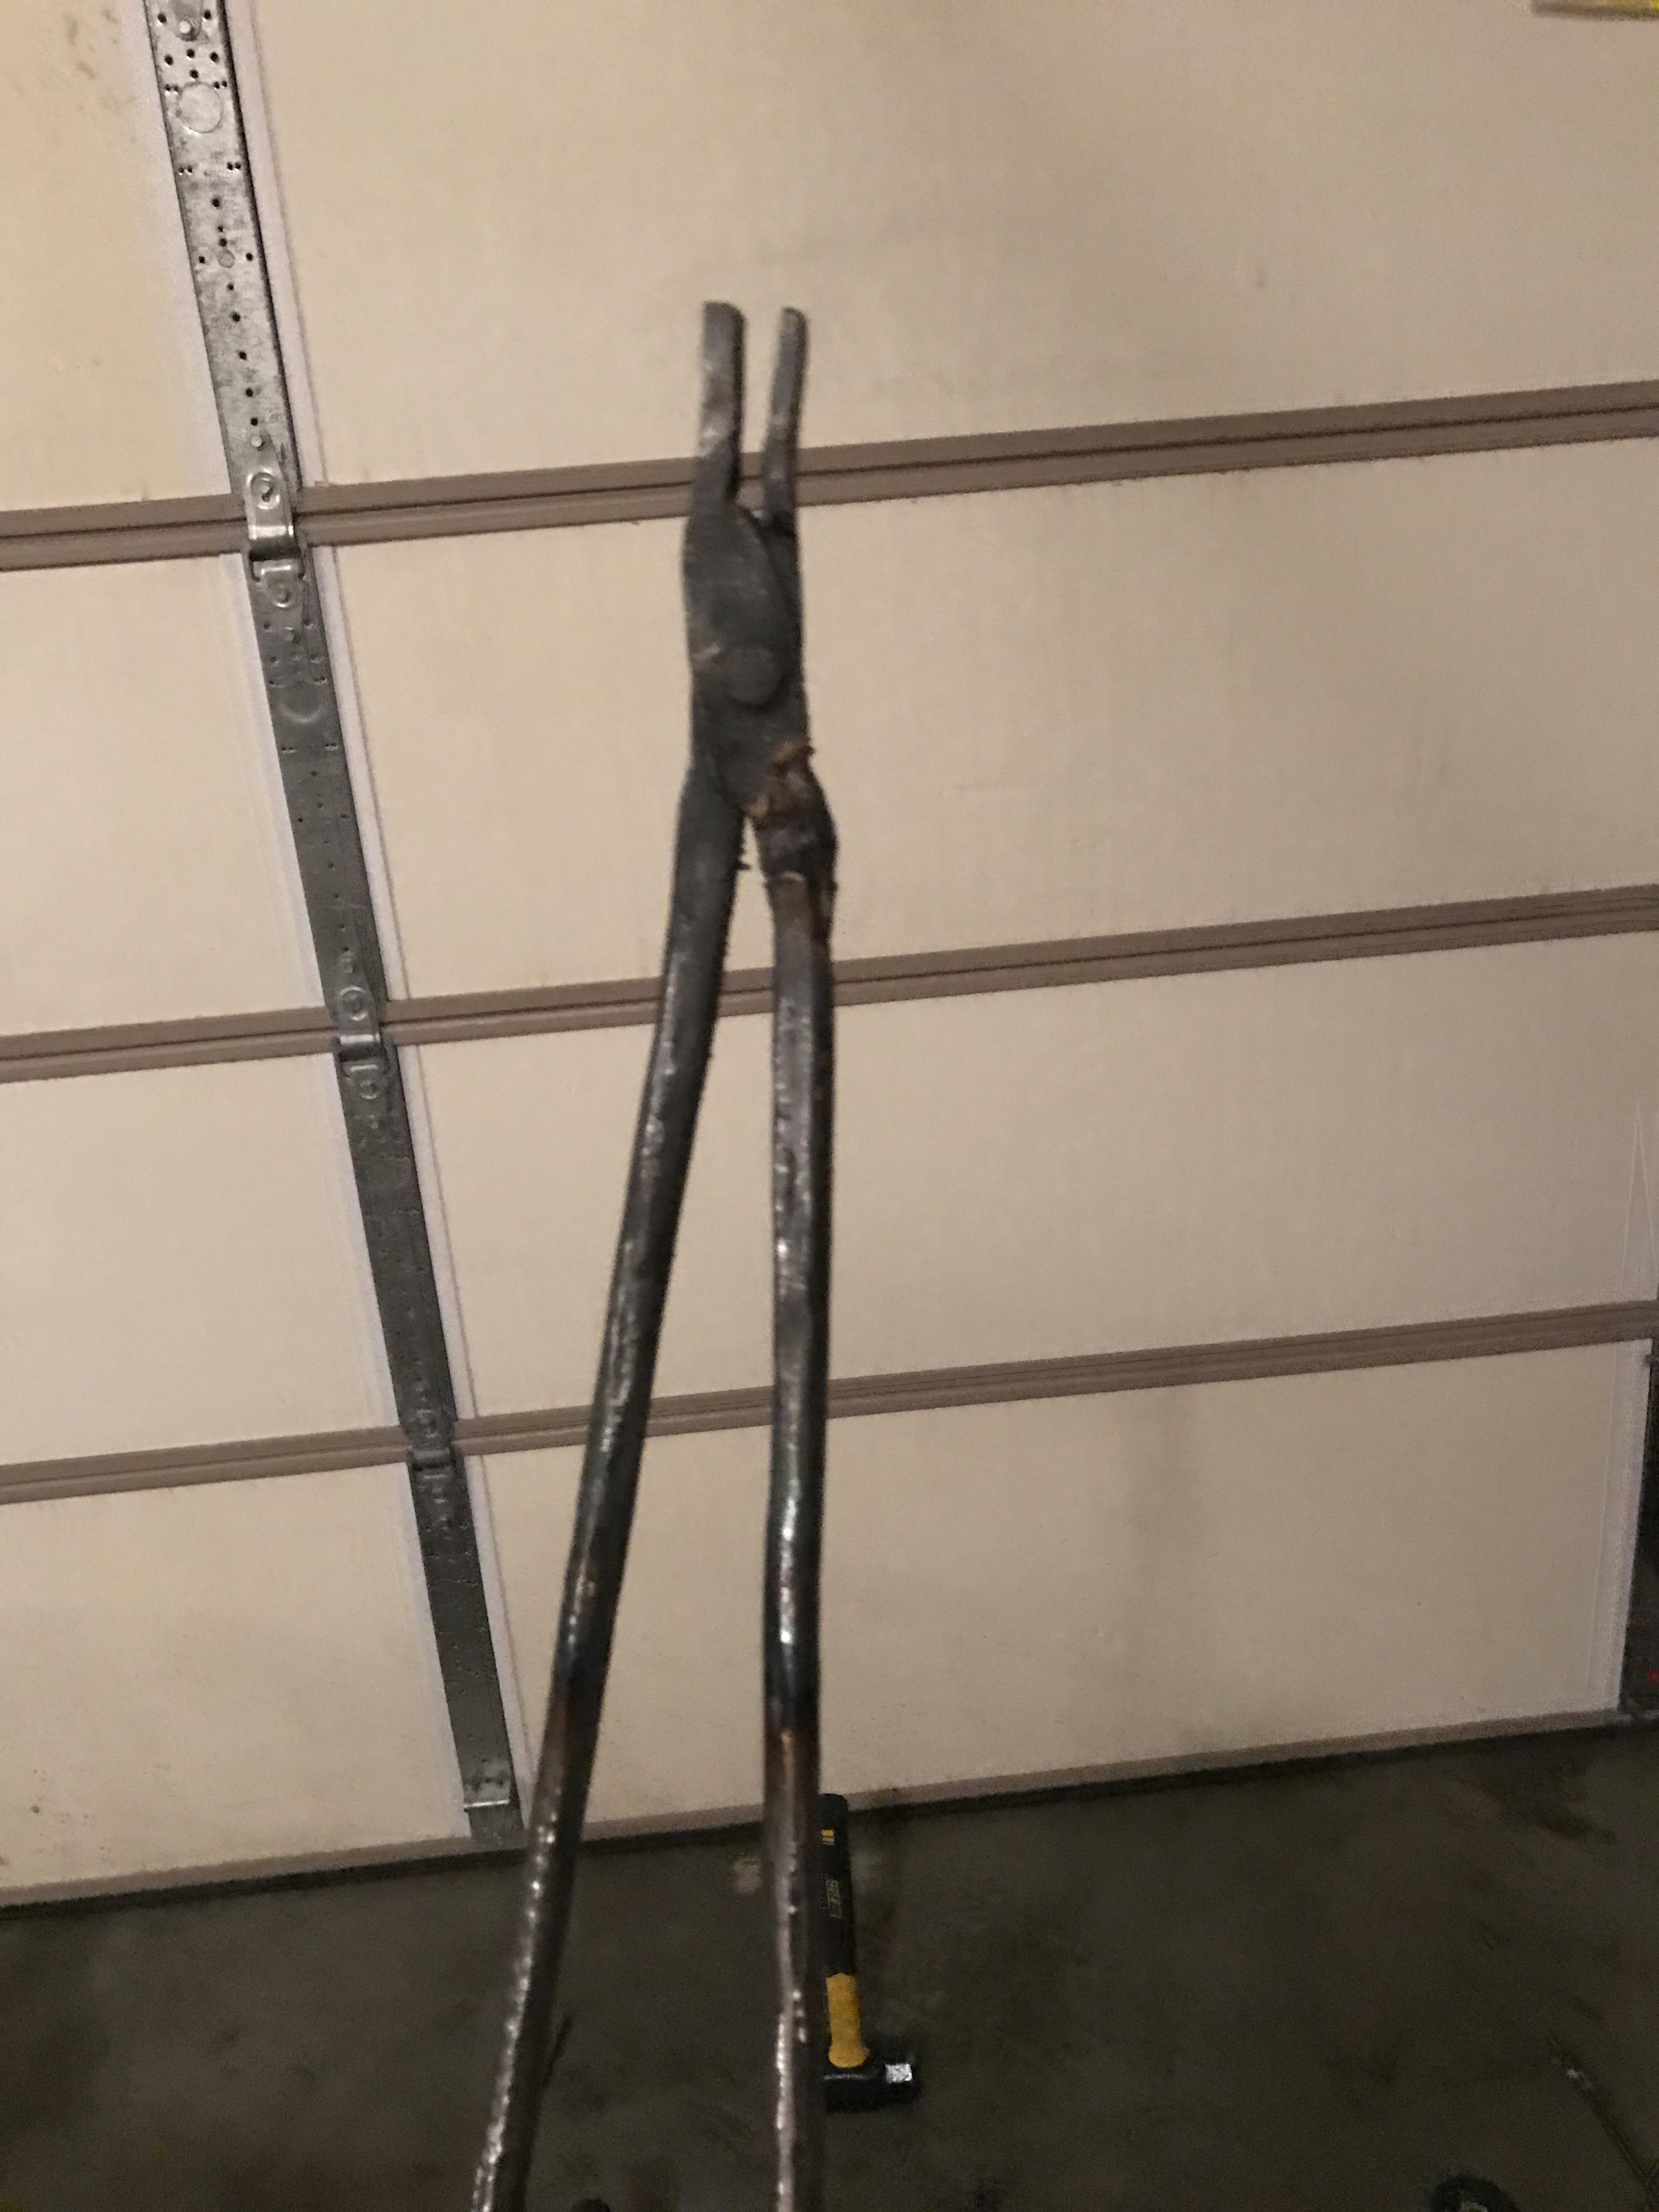
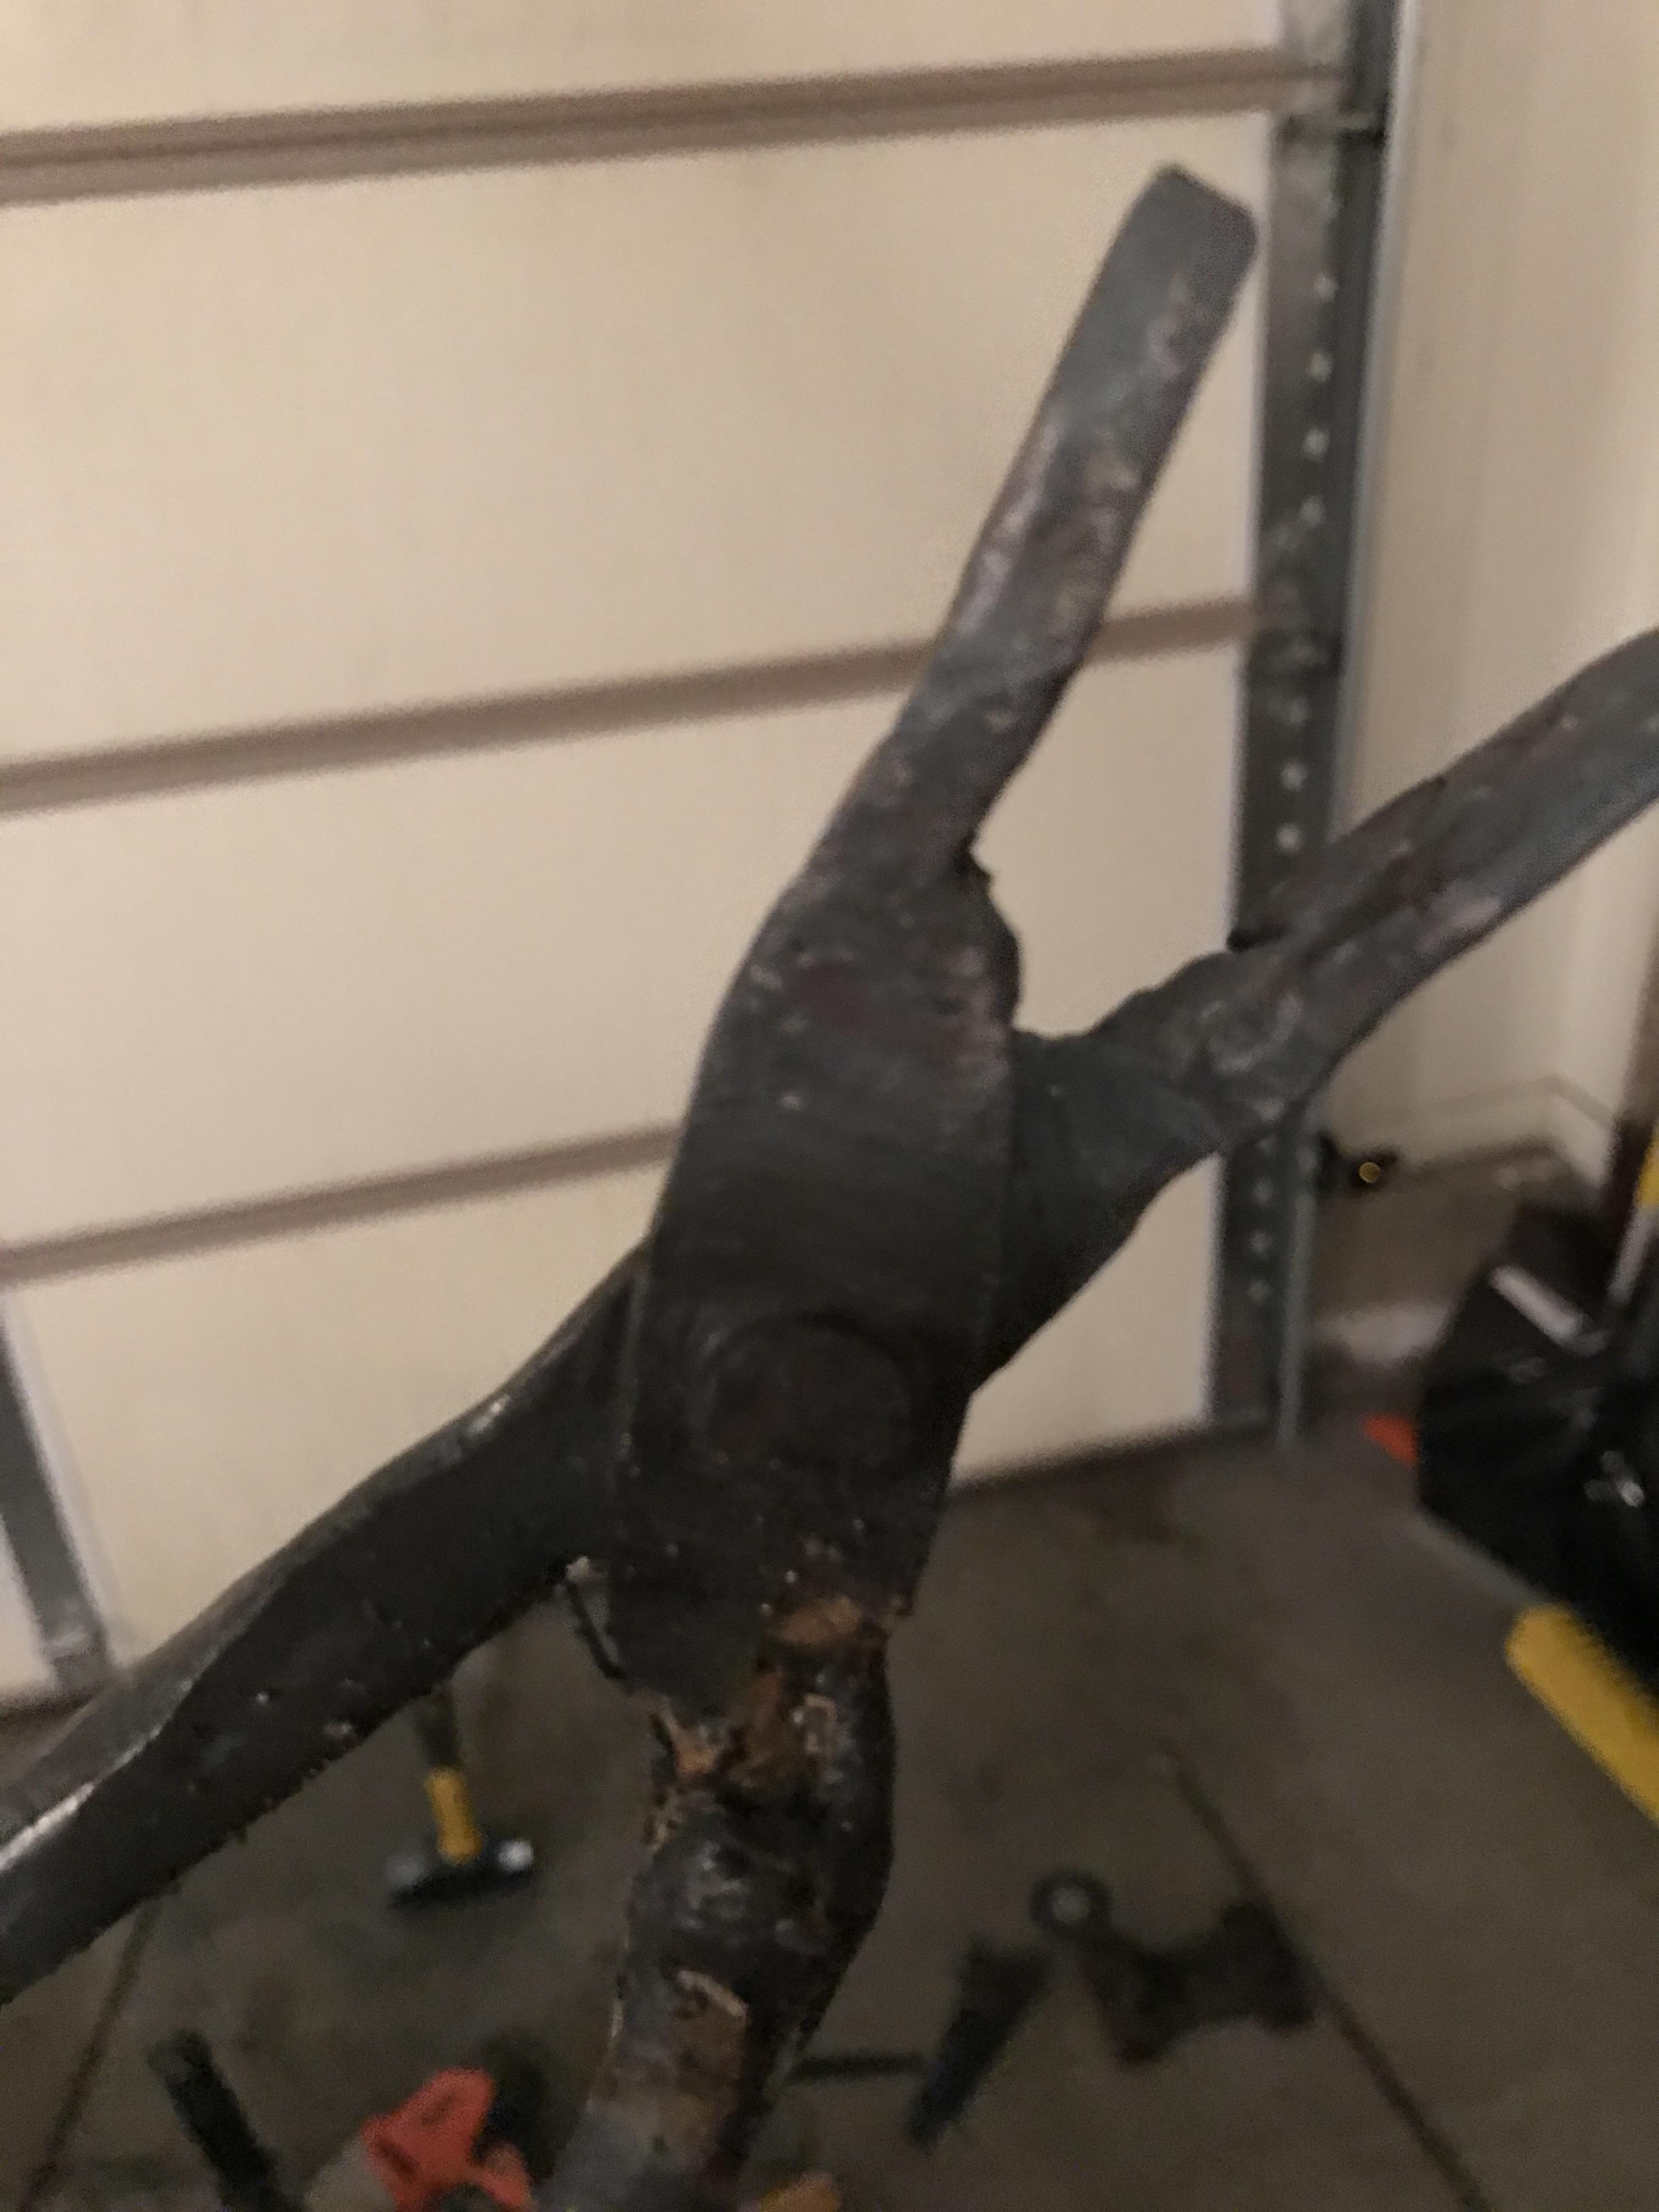
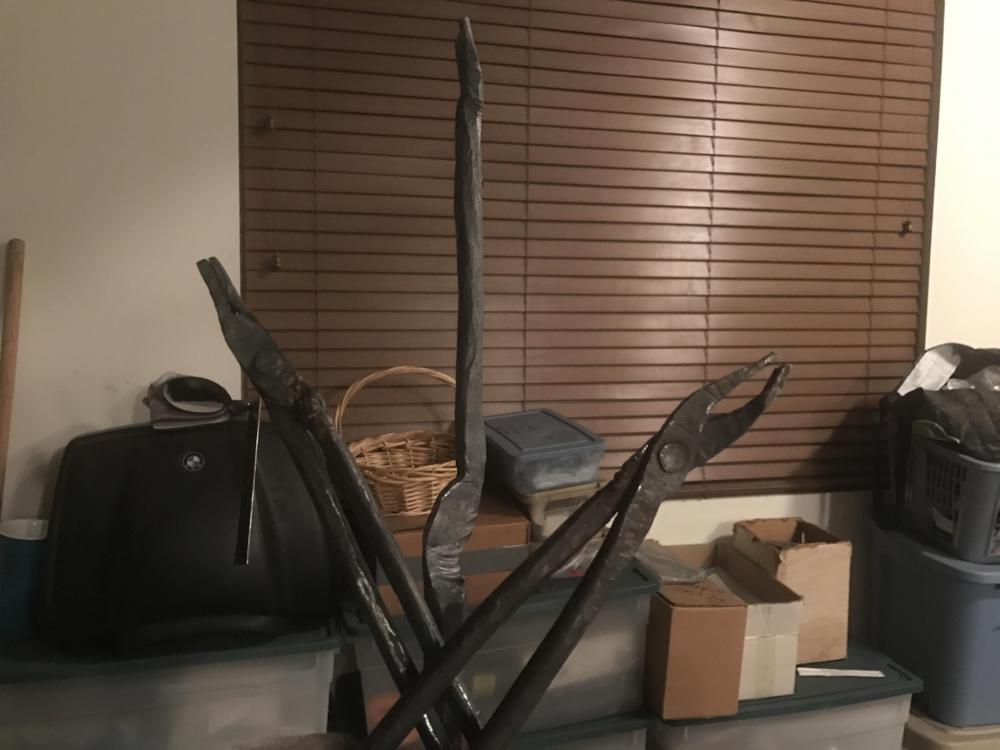
I've got one post showing my first pair of tongs, they are...meh. Started practicing a bit more based on the feedback and hammered out a really weak pair just for picking up 1/4" rivet stock and other small stuff. Newest one I decided to move with...Tongs for sections of Axle shaft. I work in an auto shop there is A LOT of free scrap (axles, springs, bolts you name it) I have a big shaft from a truck I plan on using to make hardy tools and possibly hammer heads, I am using 3/4" stock for the new tongs, using feedback from my first posts on the forums about my anvil, tongs, and whatever other knowledge I feel like I've made good progress in making the boss which I think is the hardest area to make properly. If I could get some more tips/feedback on the newer ones, I have tonight in a few hours forged out 1 bit for the jaw and down to the boss. I am thinking something like a giant pair of bolt tongs. Let me know what you think I should do as far as continuing with tapers and especially the new boss.

-
Love the feedback guys, I was getting all ticked because they were breaking and my boss is like, SUPER elongated and ugly but they do work in holding smaller stock and I can continue practicing, they took about 6 hours to make and felt like a failure but they were the best looking attempt and finalized product even with the welded rein. Thanks for the votes of confidence!
-
Thanks for the tips guys! I did weld a couple pieces of flat 3/8' bar stock to the rear opening to block it off and a porch on the front door for stock as well, I have a Pint of ITC100 coming, was horrific to try to find any in stock but ended up getting some from www.anvilfire.com and it will be here beginning of the next week, the guy there said i would have no problem coating my current cement with the ITC and to also coat a large portion of the Kiln shelf floor i used as well, but that I should leave the rear of the forge floor uncoated to help release any moisture that may be built up after cooldowns on next fire up? I've read VERY little about Kiln washing, how does it work and where do I get it? There is a pottery supply store near my home that I can use if they have any though. Also - Any ideas on what I should do about exhaust opening? Like maybe a hinged door flap insulated that can create a better seal? Also having trouble developing a choke plate or something for the burner, the opening is so big with 2" x 3/4" it won't start up unless i block off the venturi because of so much air flow but once its hot I can remove it and it runs great
-
I used Meeco's as well, it seems to be holding up well but I haven't been forging long at all. It did the same thing to me, it bubbled up on a very thin coating, I broke the brittle pieces of it off and its holding up fine the wool underneath was not exposed, and I haven't had any loose wool particles floating around, though the meeco's seems to be very delicate it holds up to the heat really well I think. (not an expert) just built my first forge(s). I didn't get bubbles that big at all, I really did maybe like a 1/16" or 1/8" coating on my wool. I'm guessing you did a thicker coat. Material says it has no set/cure times so I assumed as well just fire up after I coated, I did and my forge interior looks relatively good (I think). Meeco's is cheap, easy to apply and so I just keep an extra half gallon around for patching any cracks and what not, I will be coating it with ITC 100 HT with hopefully great success and no catastrophic failures. Add - If you want to see my forge set up, I have a thread in the forges section called "Gas Forge Heat" I was having issues getting temps up but it was a burner construction error, and have it operating well now, thanks to the advise I got here.
-
Looks good to me, no expert by any means. I used 2" Kaowool lining, and did a thin coating of Meeco's Red Devil 610. and glued the Wool to the shell using Furnace Mortar, haven't seen any slumping or deformation at all. I Don't know if many people use the Meecos, It is very brittle once its heated but I love the fact that it has no set or cure time, can line the wool and fire the forge to bake it in. My floor i used 1" Kaowool under a 3/8" Kiln shelf and once I got my burner built properly it gets yellow hot in about 5-10 minutes. I'd like to know how yours is working out, I just barely started and have built 2 forges because my first was absolutely massive and wouldn't heat up. Can always use ideas for improvement!
-
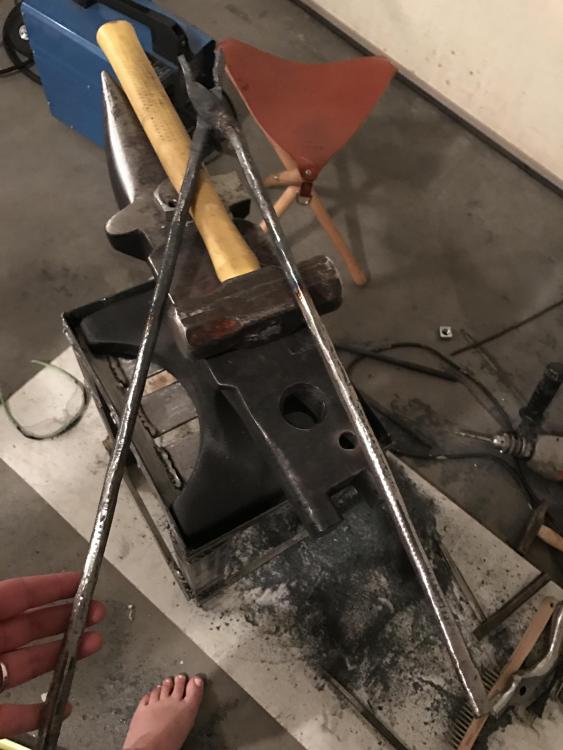
Actually, I was using them making a chisel out of some scrap, forged it all out hammering out the edge shot off the anvil, straight up while it was red hot and burnt my cheek! Thats what made me decide tongs in excellent working order are a requirement haha.
-
My thoughts exactly (atleast the tongs looking like a drunken primate made them) I think I will probably buy a few pairs first and start making projects and learning a bit faster because I won't have to use Channel locks and/or like you said, fight with the tongs. Thanks for the heads up!
-
Never even thought about the different rounded edges I do have to use all over the anvil, the learning curve is strong with this one!
-
Oh my wife took the pictures for me, I always wear my steel toe boots when I'm working @ work or at home forging. =), Have been learning alot for sure, Had ultimately like 5 failures working towards those, but have begun to understand the process on how to really draw out a bar quickly, as well as figuring out some angles, its been a fun and frustrating experience since I am/have been self teaching. Kind of a blind dive into the world of smithing, took me a couple months but within 2 months built my forge, picked an anvil and started hammering! Thanks for the feedback.
-
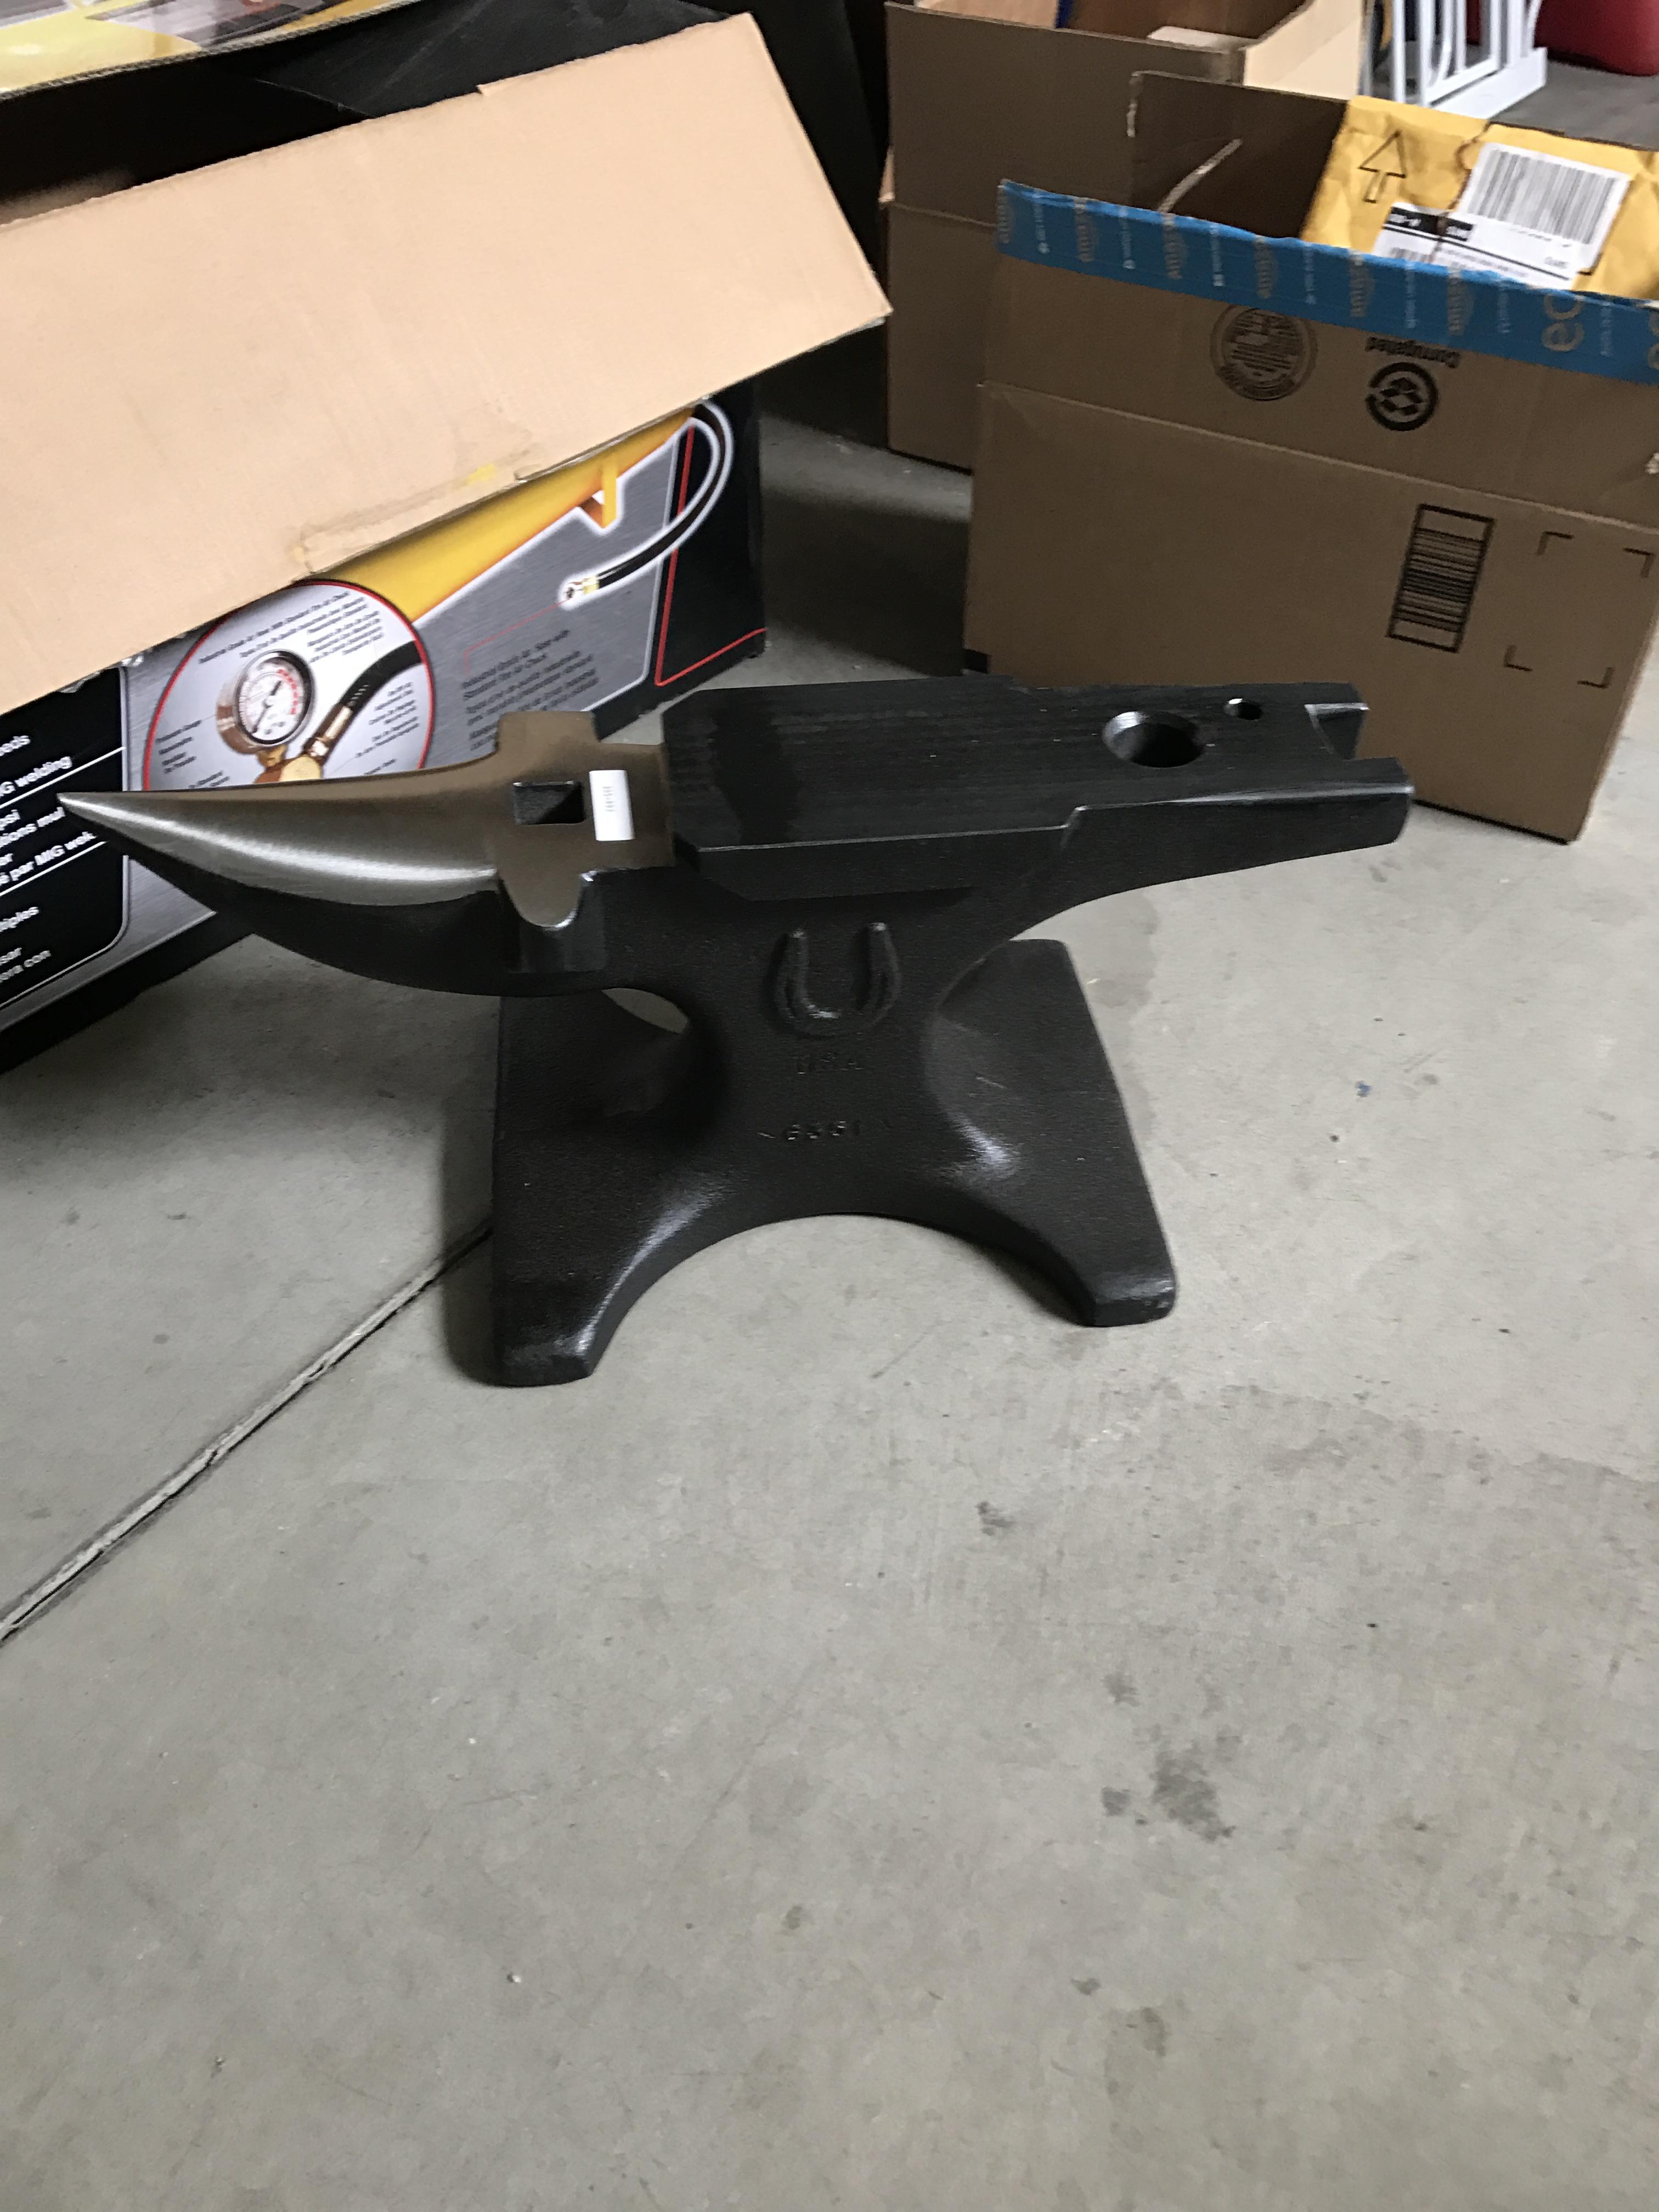
I just bought my first anvil for getting into smithing, was about the only thing I paid a decent amount of money for. It was a matter of affordability as well as knowing I am just barely starting out I bought a 70 lb, NC Tool - Big Face, has a 7/8 Square hardy on the step, a pritchel and a 1 1/2 inch turning hole (don't know what its for yet). Since I bought it and got my home made forge operational, i've semi-successfully made 1 pair of tongs and constantly struggle making a decent boss that isn't extremely elongated with sharp edges. Should I take a grinder to one side of the anvil and radius them off? I don't want to like "ruin" the anvil but I'm pretty clueless and am doing almost everything by ear. I've seen a couple of what I think are cold shuts in previous attempts in my tongs from the sharp edges? And ultimately they caused breaks in the reins or boss area. Any ideas on altering the anvil along the sides of the face to make less dings in my work?

-
So here's my first pair of tongs (handle broke so I welded it back together), never had any classes or anything kinda just winging it, but I already know the boss area needs major improvement in my technique (as well as everything else) Made from 36" x 1/2" Mild round bar.


-
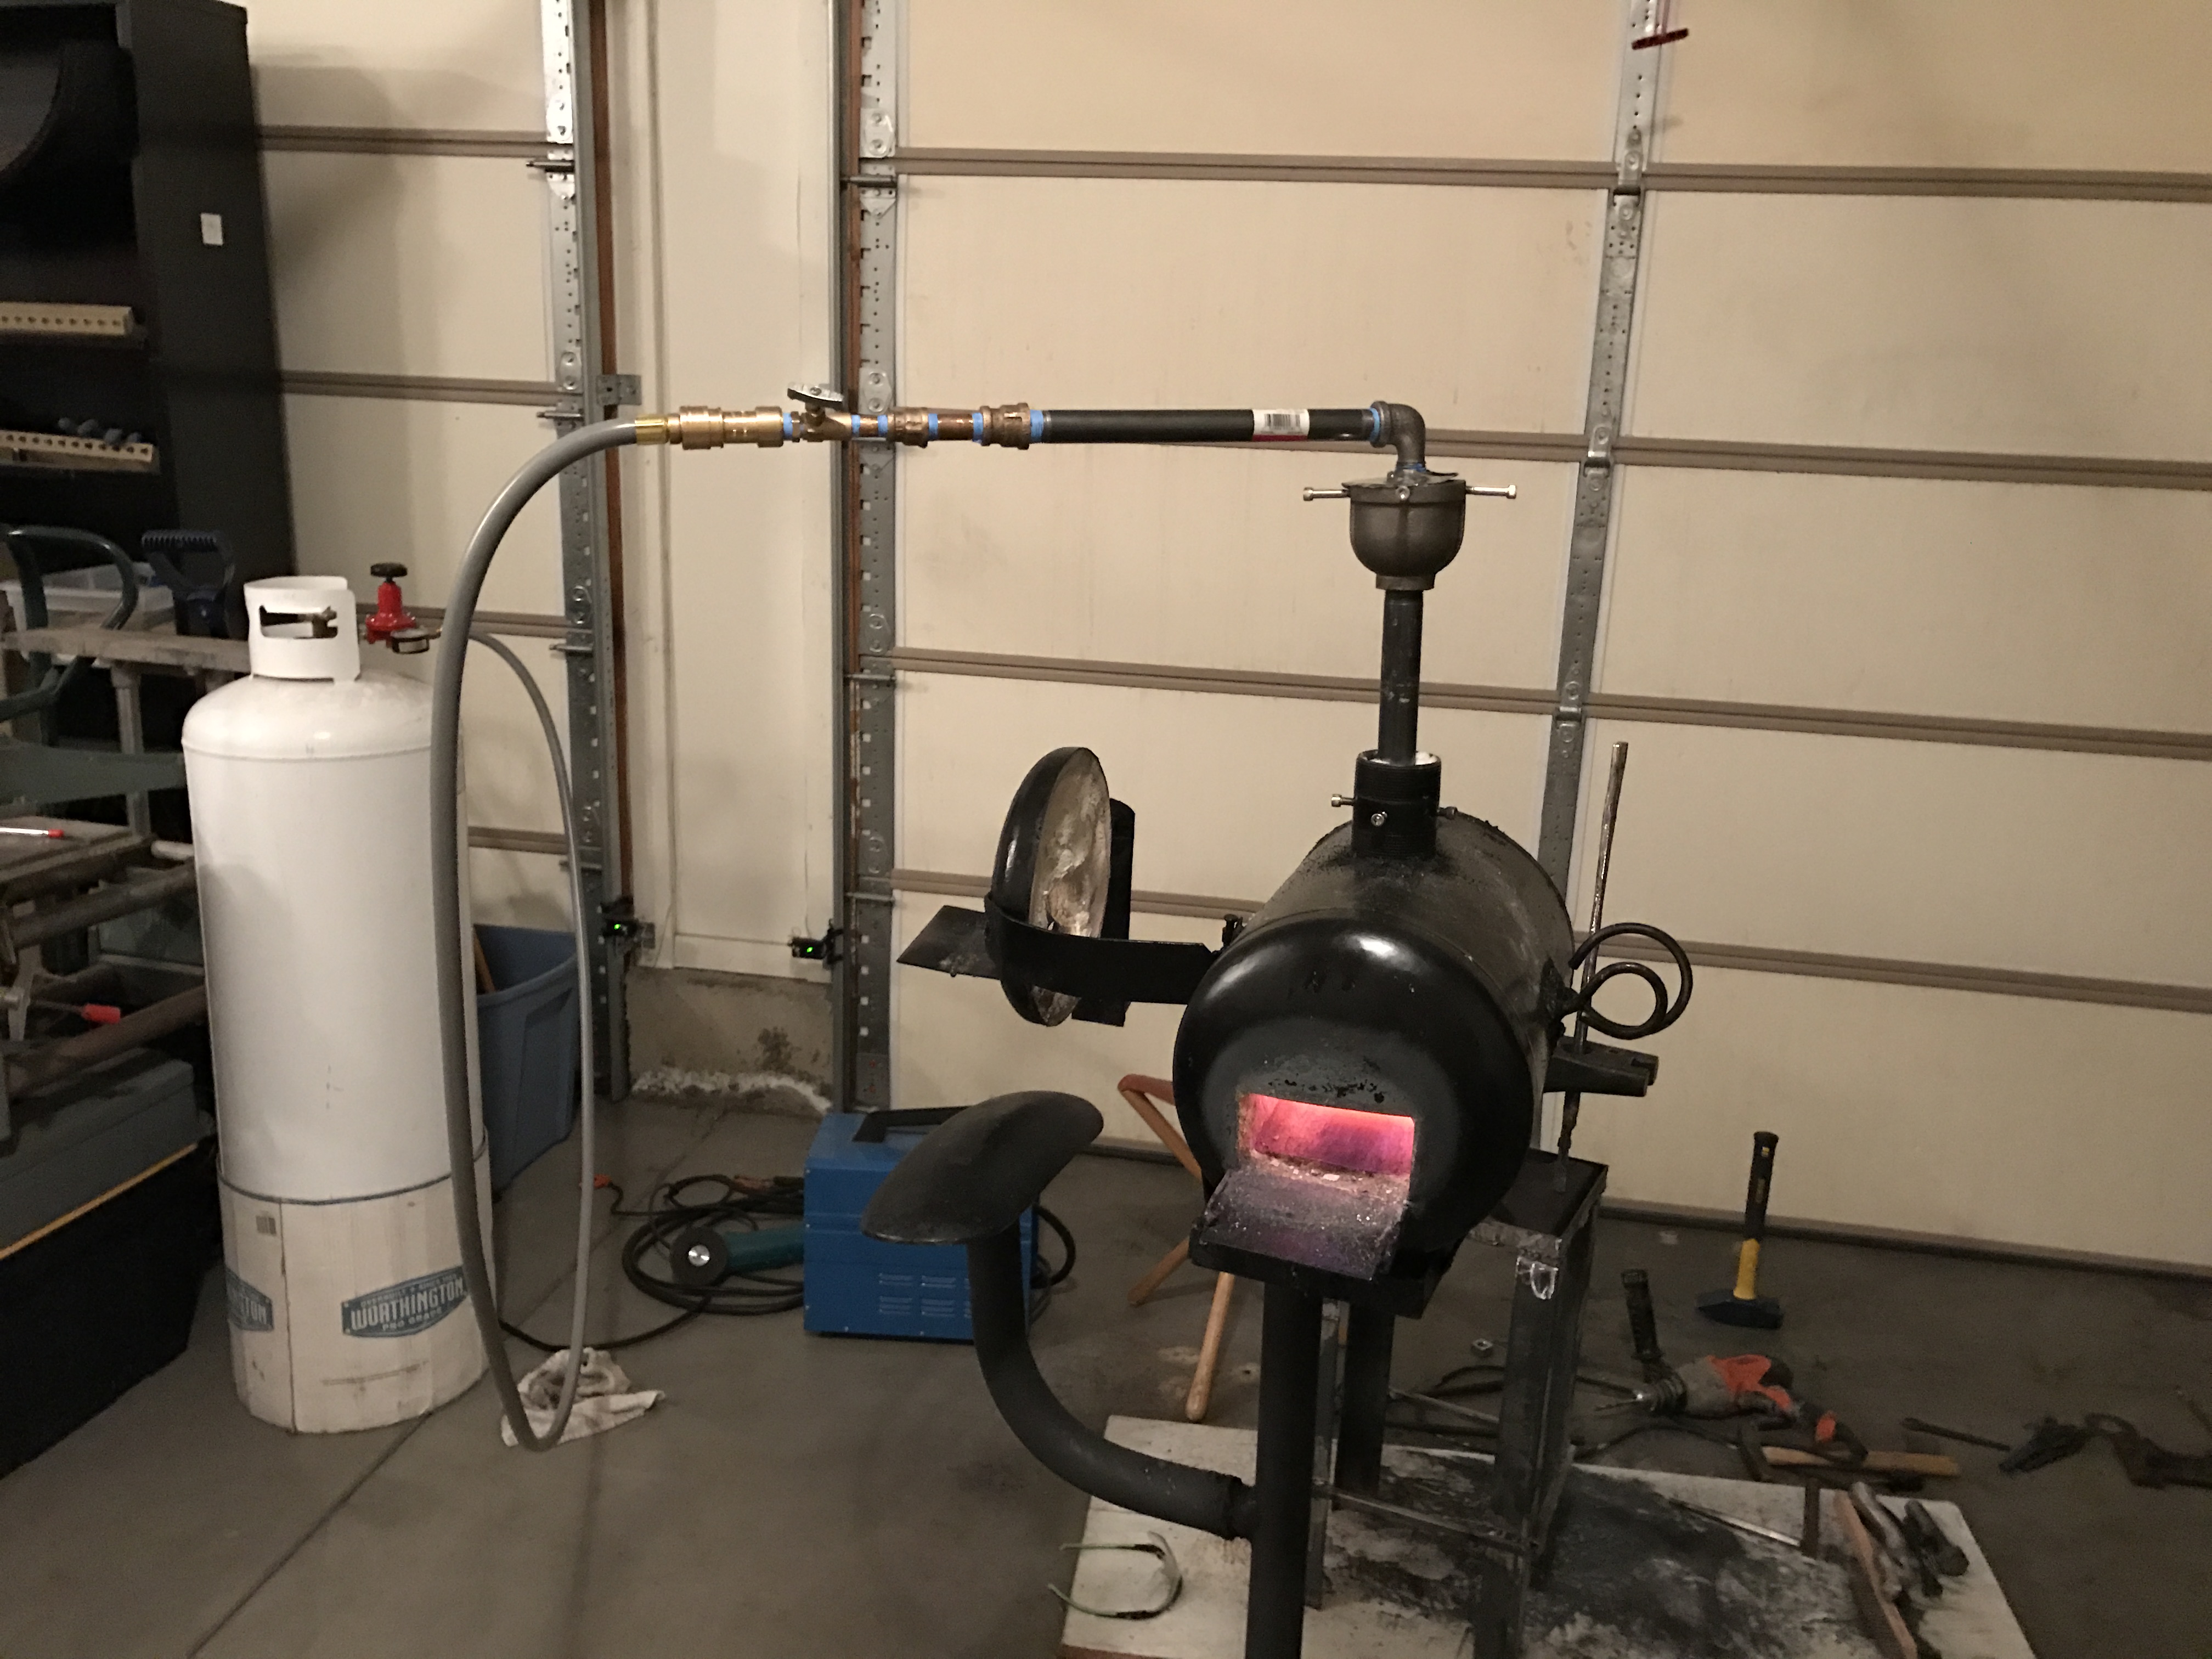
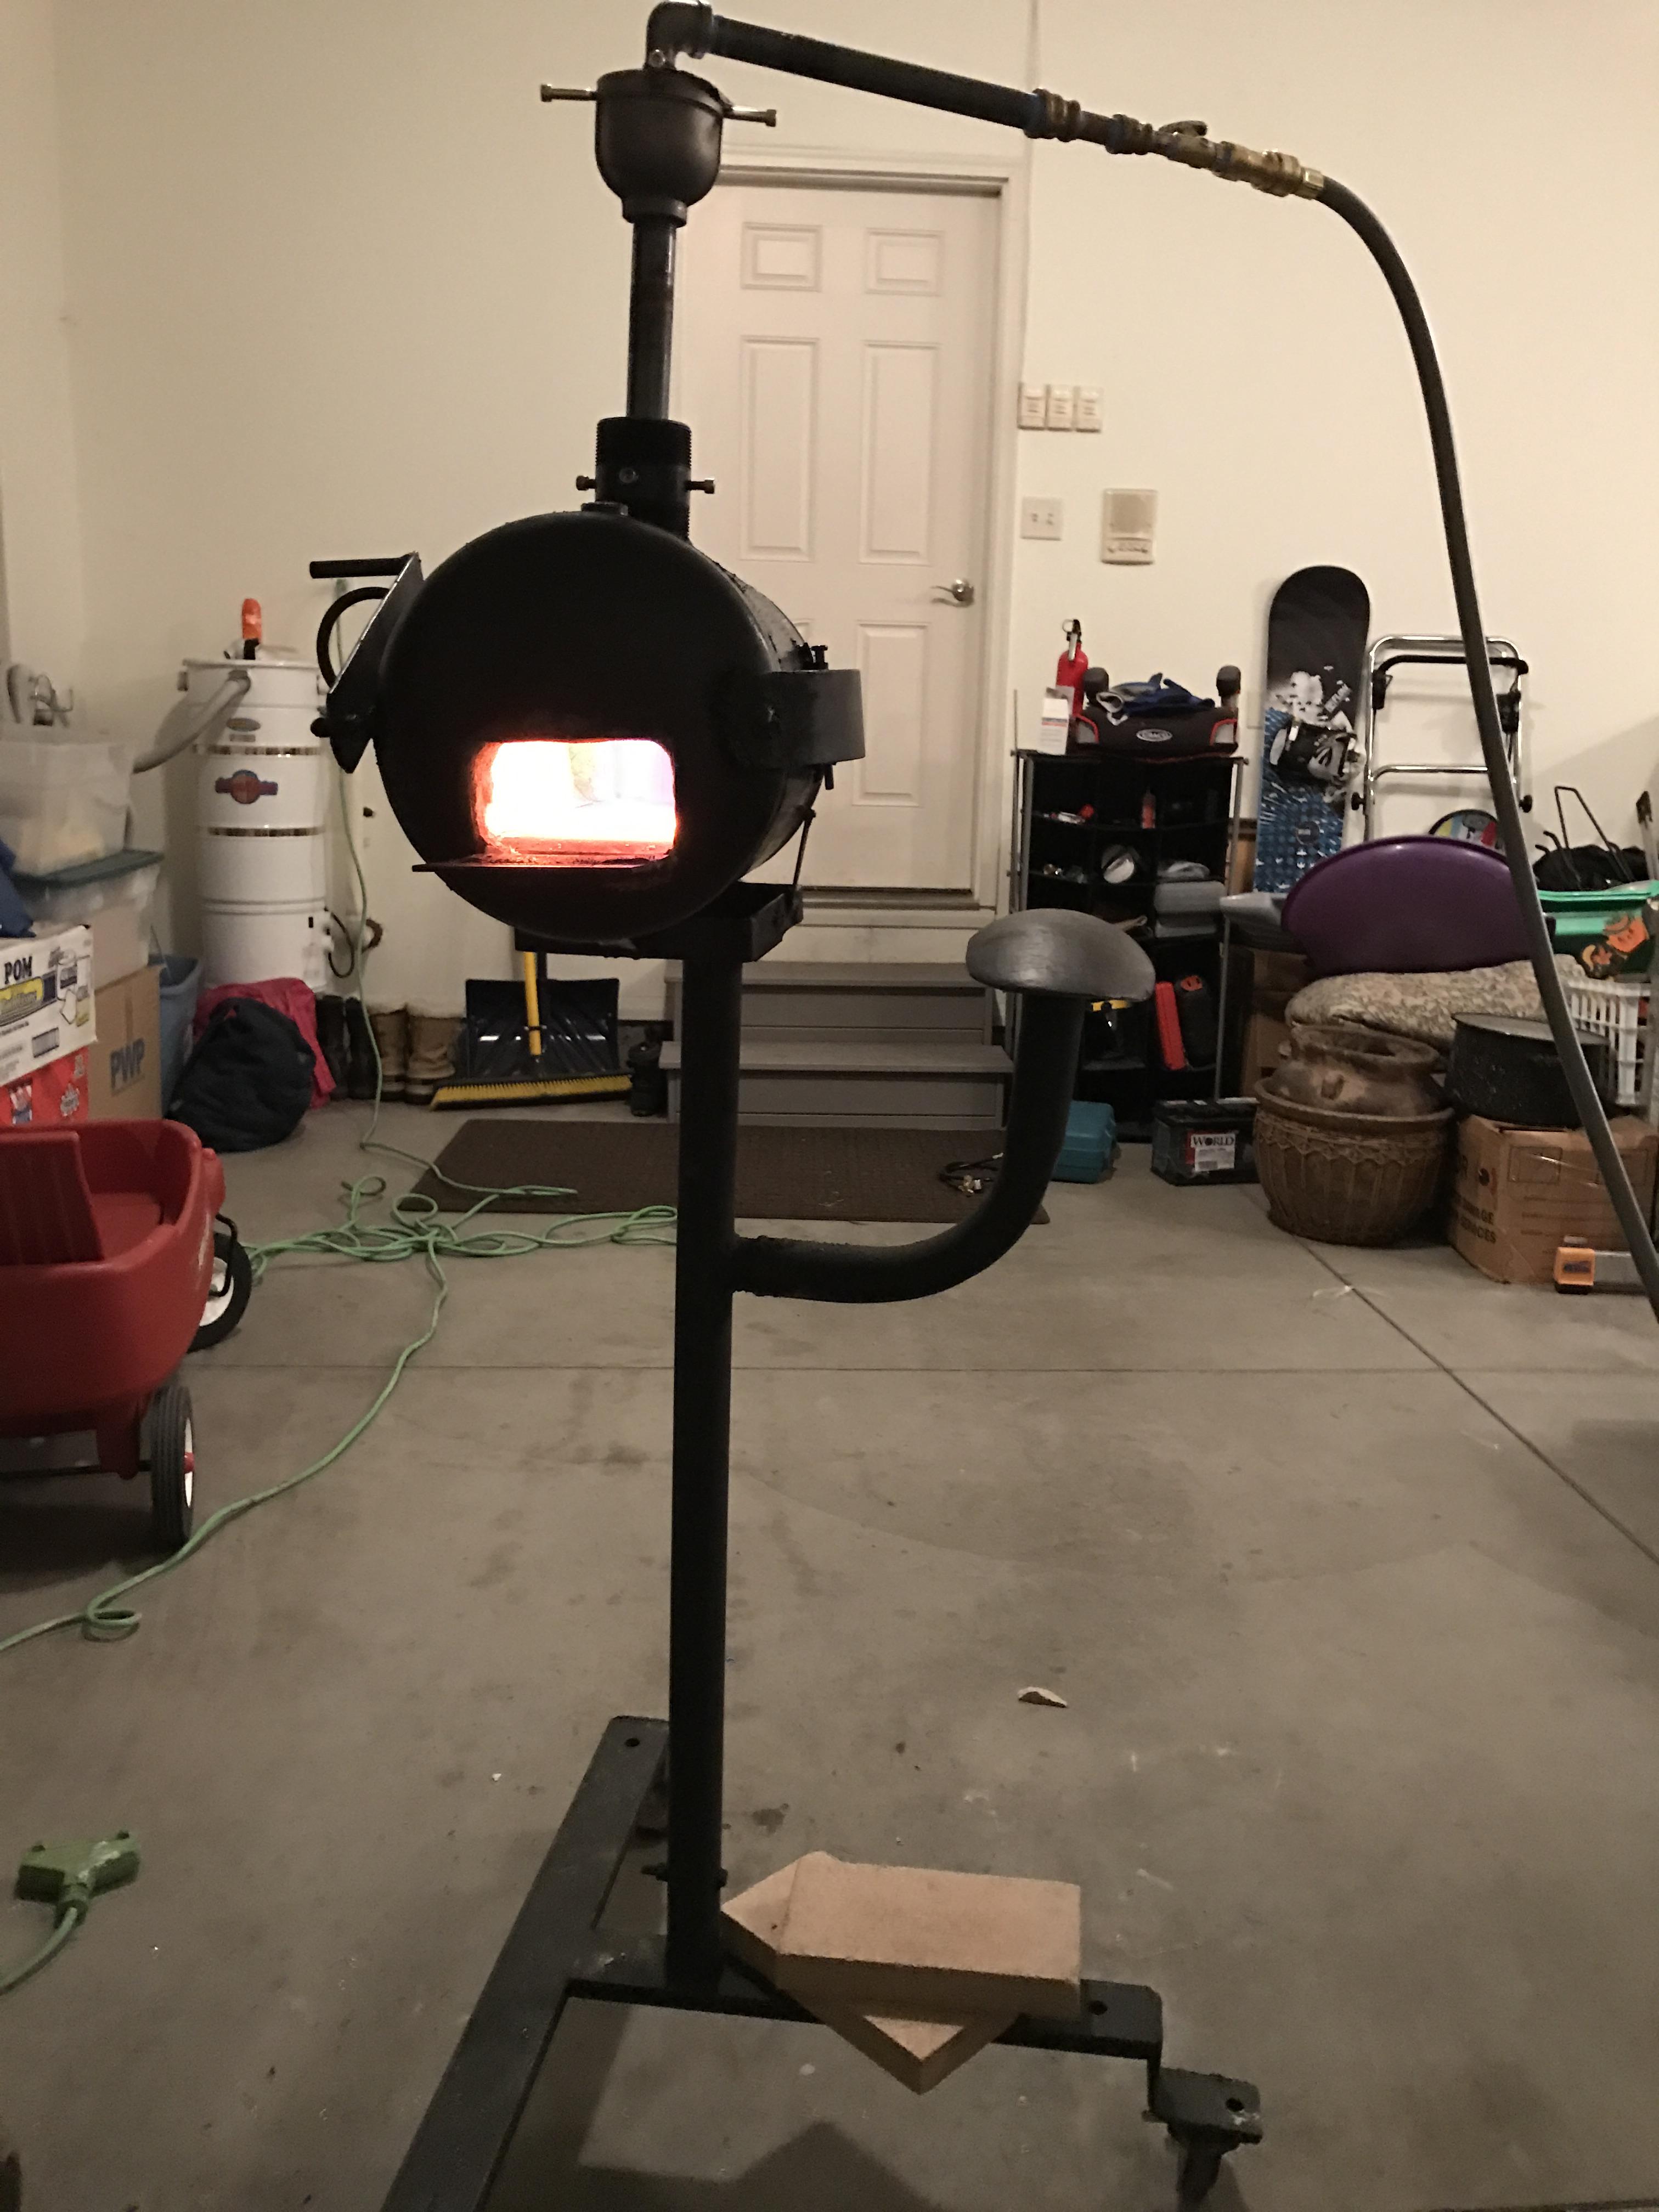
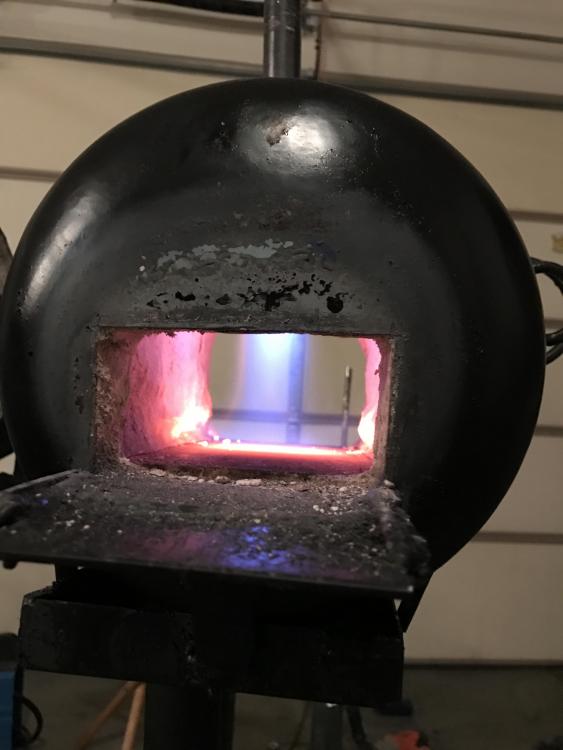
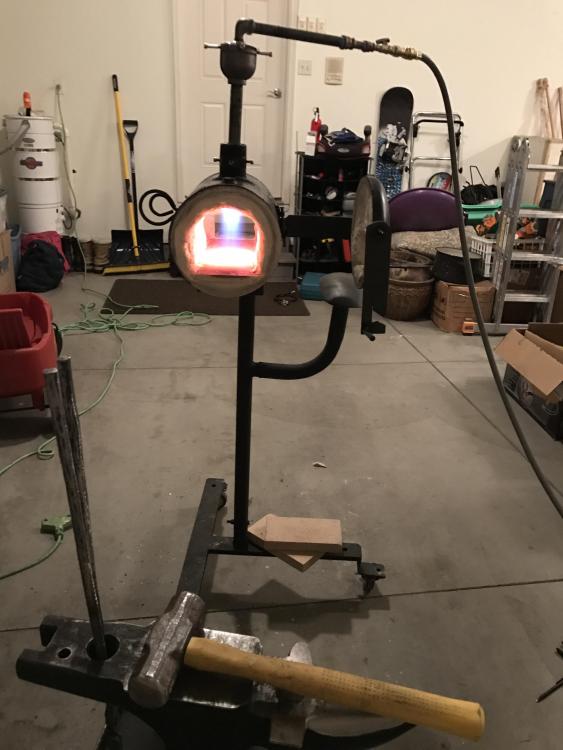
K so, I went out on a limb and made a few changes to the forge after being told it was all about Air/Fuel Ratios. Burner Set up is an 8 x 3/4 " Tube to a Stainless 1 1/4 x 3/4 Bell Reducer. Orifice is now made with 1/2 inch street elbow with brass plug tapped with a .025 MIG tip, held in place by set screws tapped into a 2 x 3/4" Bell reducer for air flow. 1/2" Pipe all the way back with a bunch of reducers down to 1/4" Needle Valve to a quick connect 6 foot hose to my 100 lb propane tank. Used to look like a campfire because I think the plug I had tapped for the MIG tip wasn't even cast straight it was all skewed and made it hard to center, so after rebuilding that It came out great, instead of a contained campfire, I now have a mini jet engine! Thanks for the help guys, heres some pics of the current forge set up after taking your advice.

-
I rebuilt the orifice and got a smaller size MIG tip think I got it nice and running properly now!! Getting up to what I think welding heat, glossy yellow with some scale on the piece. Running at 10 psi and have a proper jet don't have my itc100 yet am waiting to coat my current refractory once it shows up.
-
Hey Everybody, I just barely started getting into the forging game, and built my own forge. I am actually on my second design since I believe my first was WAY too big, but even now with the same venturi burner set up and a 240 cubic inch chamber I am still getting huge flames, no real concentrated burn and the forge is only getting up to about an Orange heat. The first forge I built was...ambitious and not well thought out and came out at 906 Cubic inches, it would get to orange too but took forever to get there and heat anything. Using a .030 mig tip, have 0-30 psi regulator with gauge as well as an in-line needle valve for further adjustment. No matter what I do it looks like a camp fire inside the forge, no real sound other than hissing from the orifice and to even try to control the dragon's breath I need to adjust the needle valve to almost full closed to not have 12" flames kicking out the front and back of the new mini forge. Any ideas? I knew the first one after taking 8-10 hours to forge tongs was just too big to run on less than like 3 burners, but curious why the heat hasn't improved with a better built and smaller forge. Thanks for any assistance in advance!