Xavier F-C
-
Posts
47 -
Joined
-
Last visited
Content Type
Profiles
Forums
Articles
Gallery
Downloads
Events
Everything posted by Xavier F-C
-
 JHCC, You got me curious about the efficiency the charcoal pyramid kiln. I believe I have found a way to estimate fairly accurately the ratio of weight of charcoal/wood. I will be using this small machine to weight each log that I will throw in the fire, individually. After that, I will sum up the whole mass of the raw wood. Once all the charcoal is in the trash can, I will measure the weight of charcoal by subtracting the total weight minus the trash can weight. I will now be able to determine the ratio. Anyway, it will be for the next day or so.
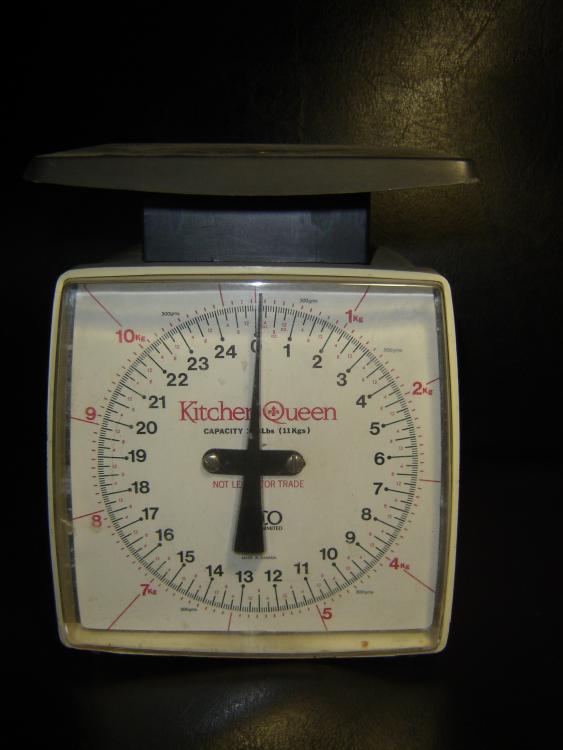
-
Frosty, The pyramid kiln has worked pretty well for me. But the semi-direct method is definitely a method I should try in the future and it looks indeed easy.
-
WoodnMetalGuy, The method shown in the video is indeed very efficient, better than the pyramid kiln. However, it is not strictly better than the pyramid kiln. For example, it would cost more to buy or/and be much more complicated to build. I also think it takes more preparation (stacking a lot wood uniformly in the container) to get it to work and it takes more time collecting the charcoal (the charcoal may also need cutting).
-
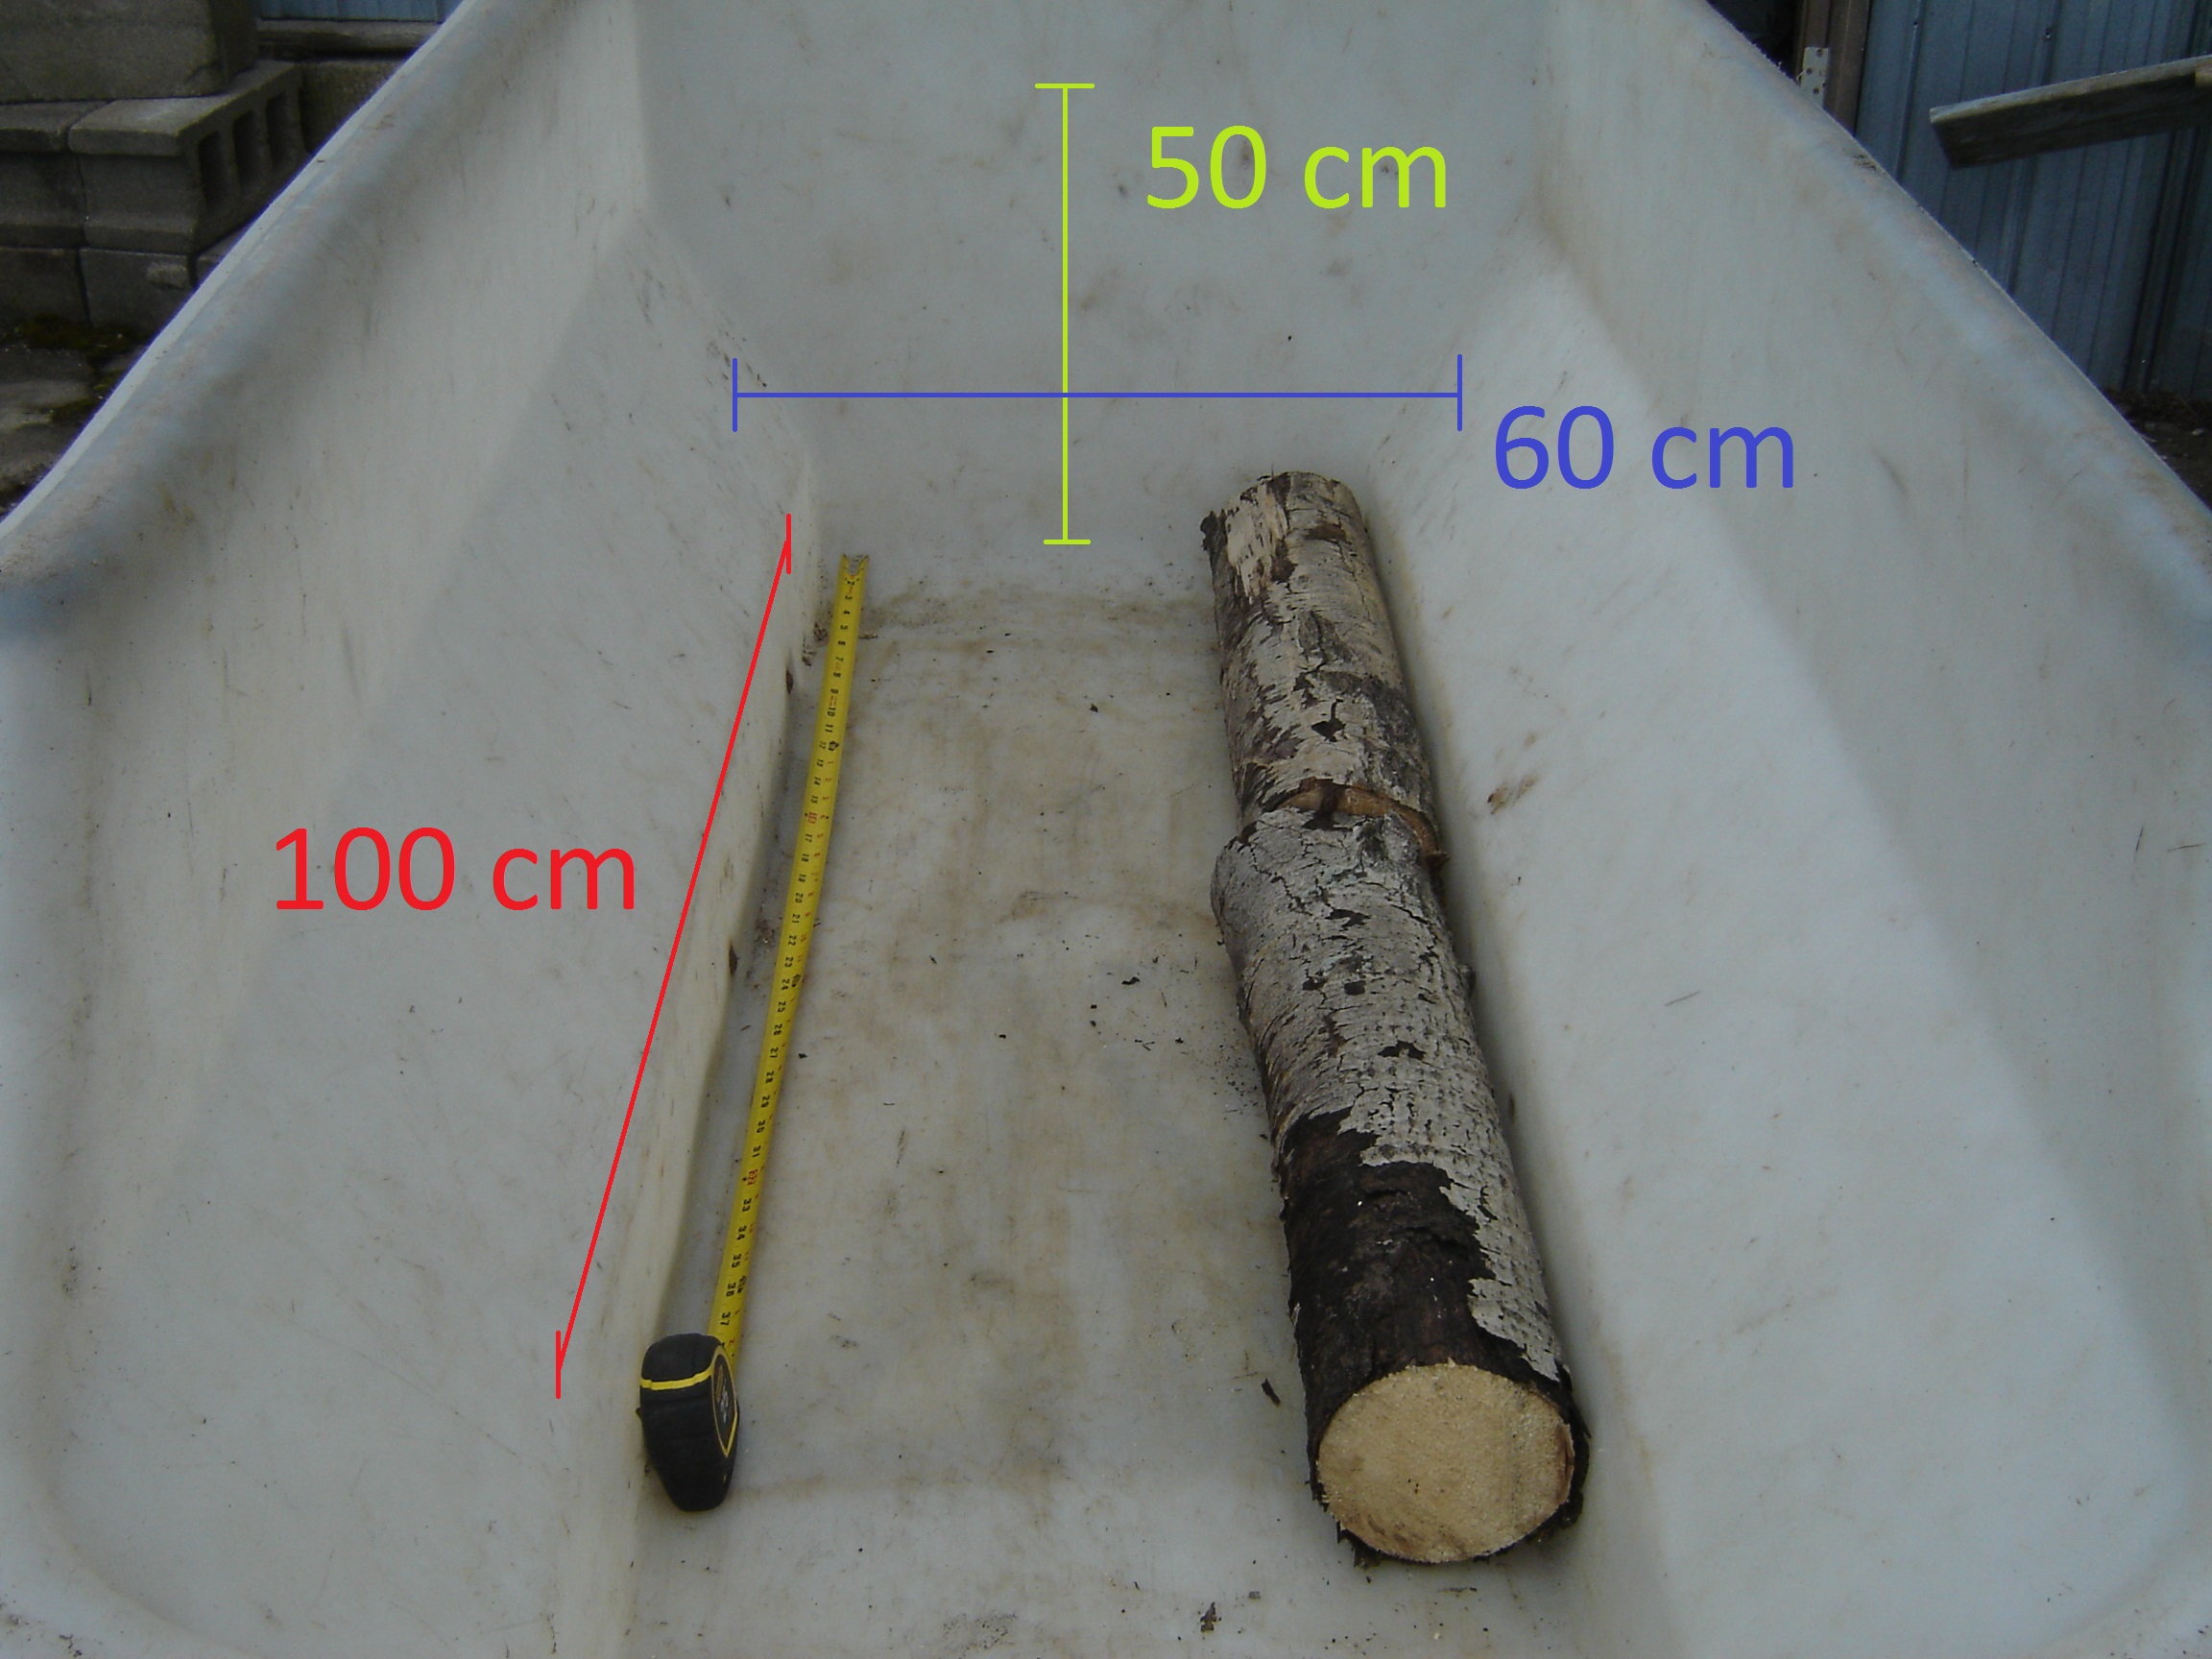
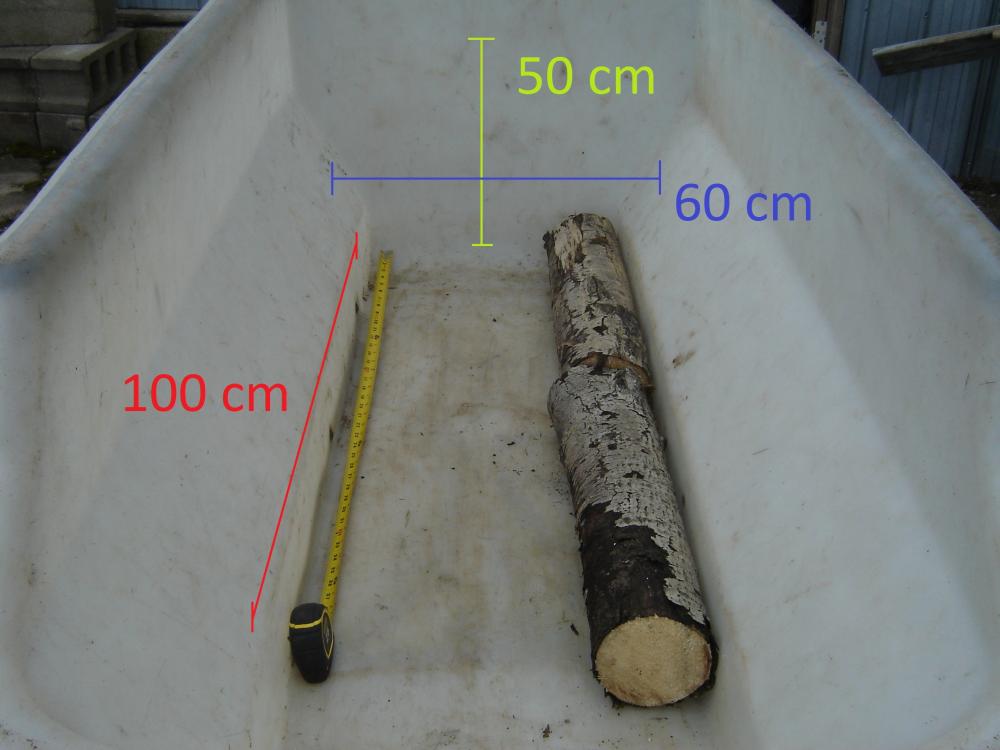
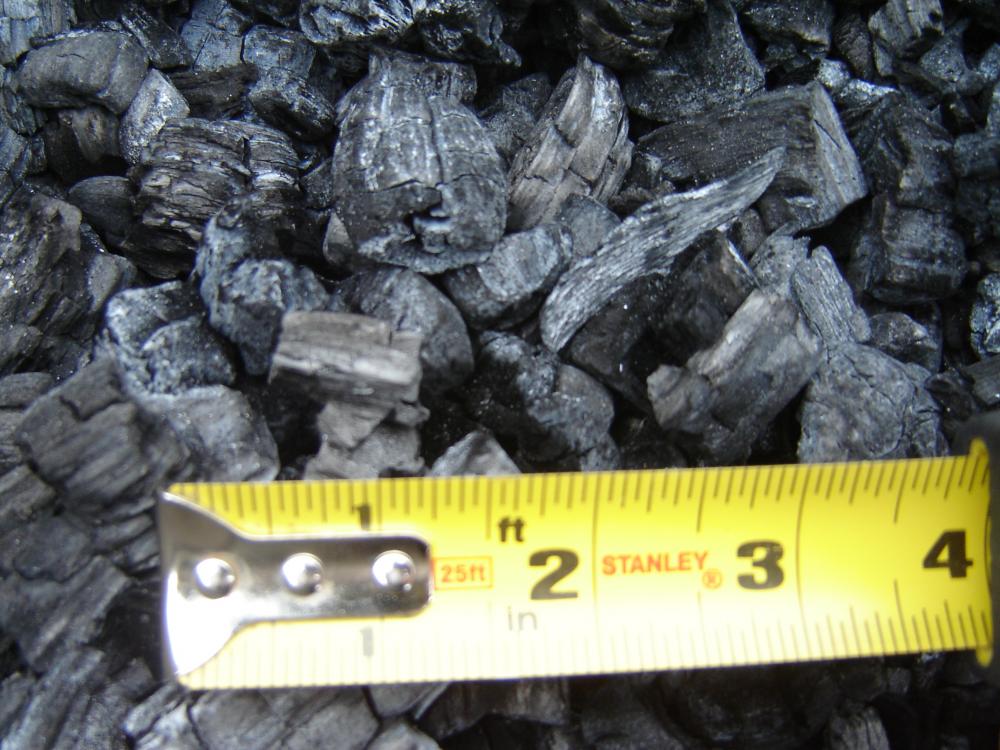
Here is the approximate volume filled with cylindrical poplar logs(fairly dry) to produce 80 L of charcoal:
-
No, I have not done any weighting, nor could I do it directly. However, I could show you an approximate volume of wood consumed, if you want.
-
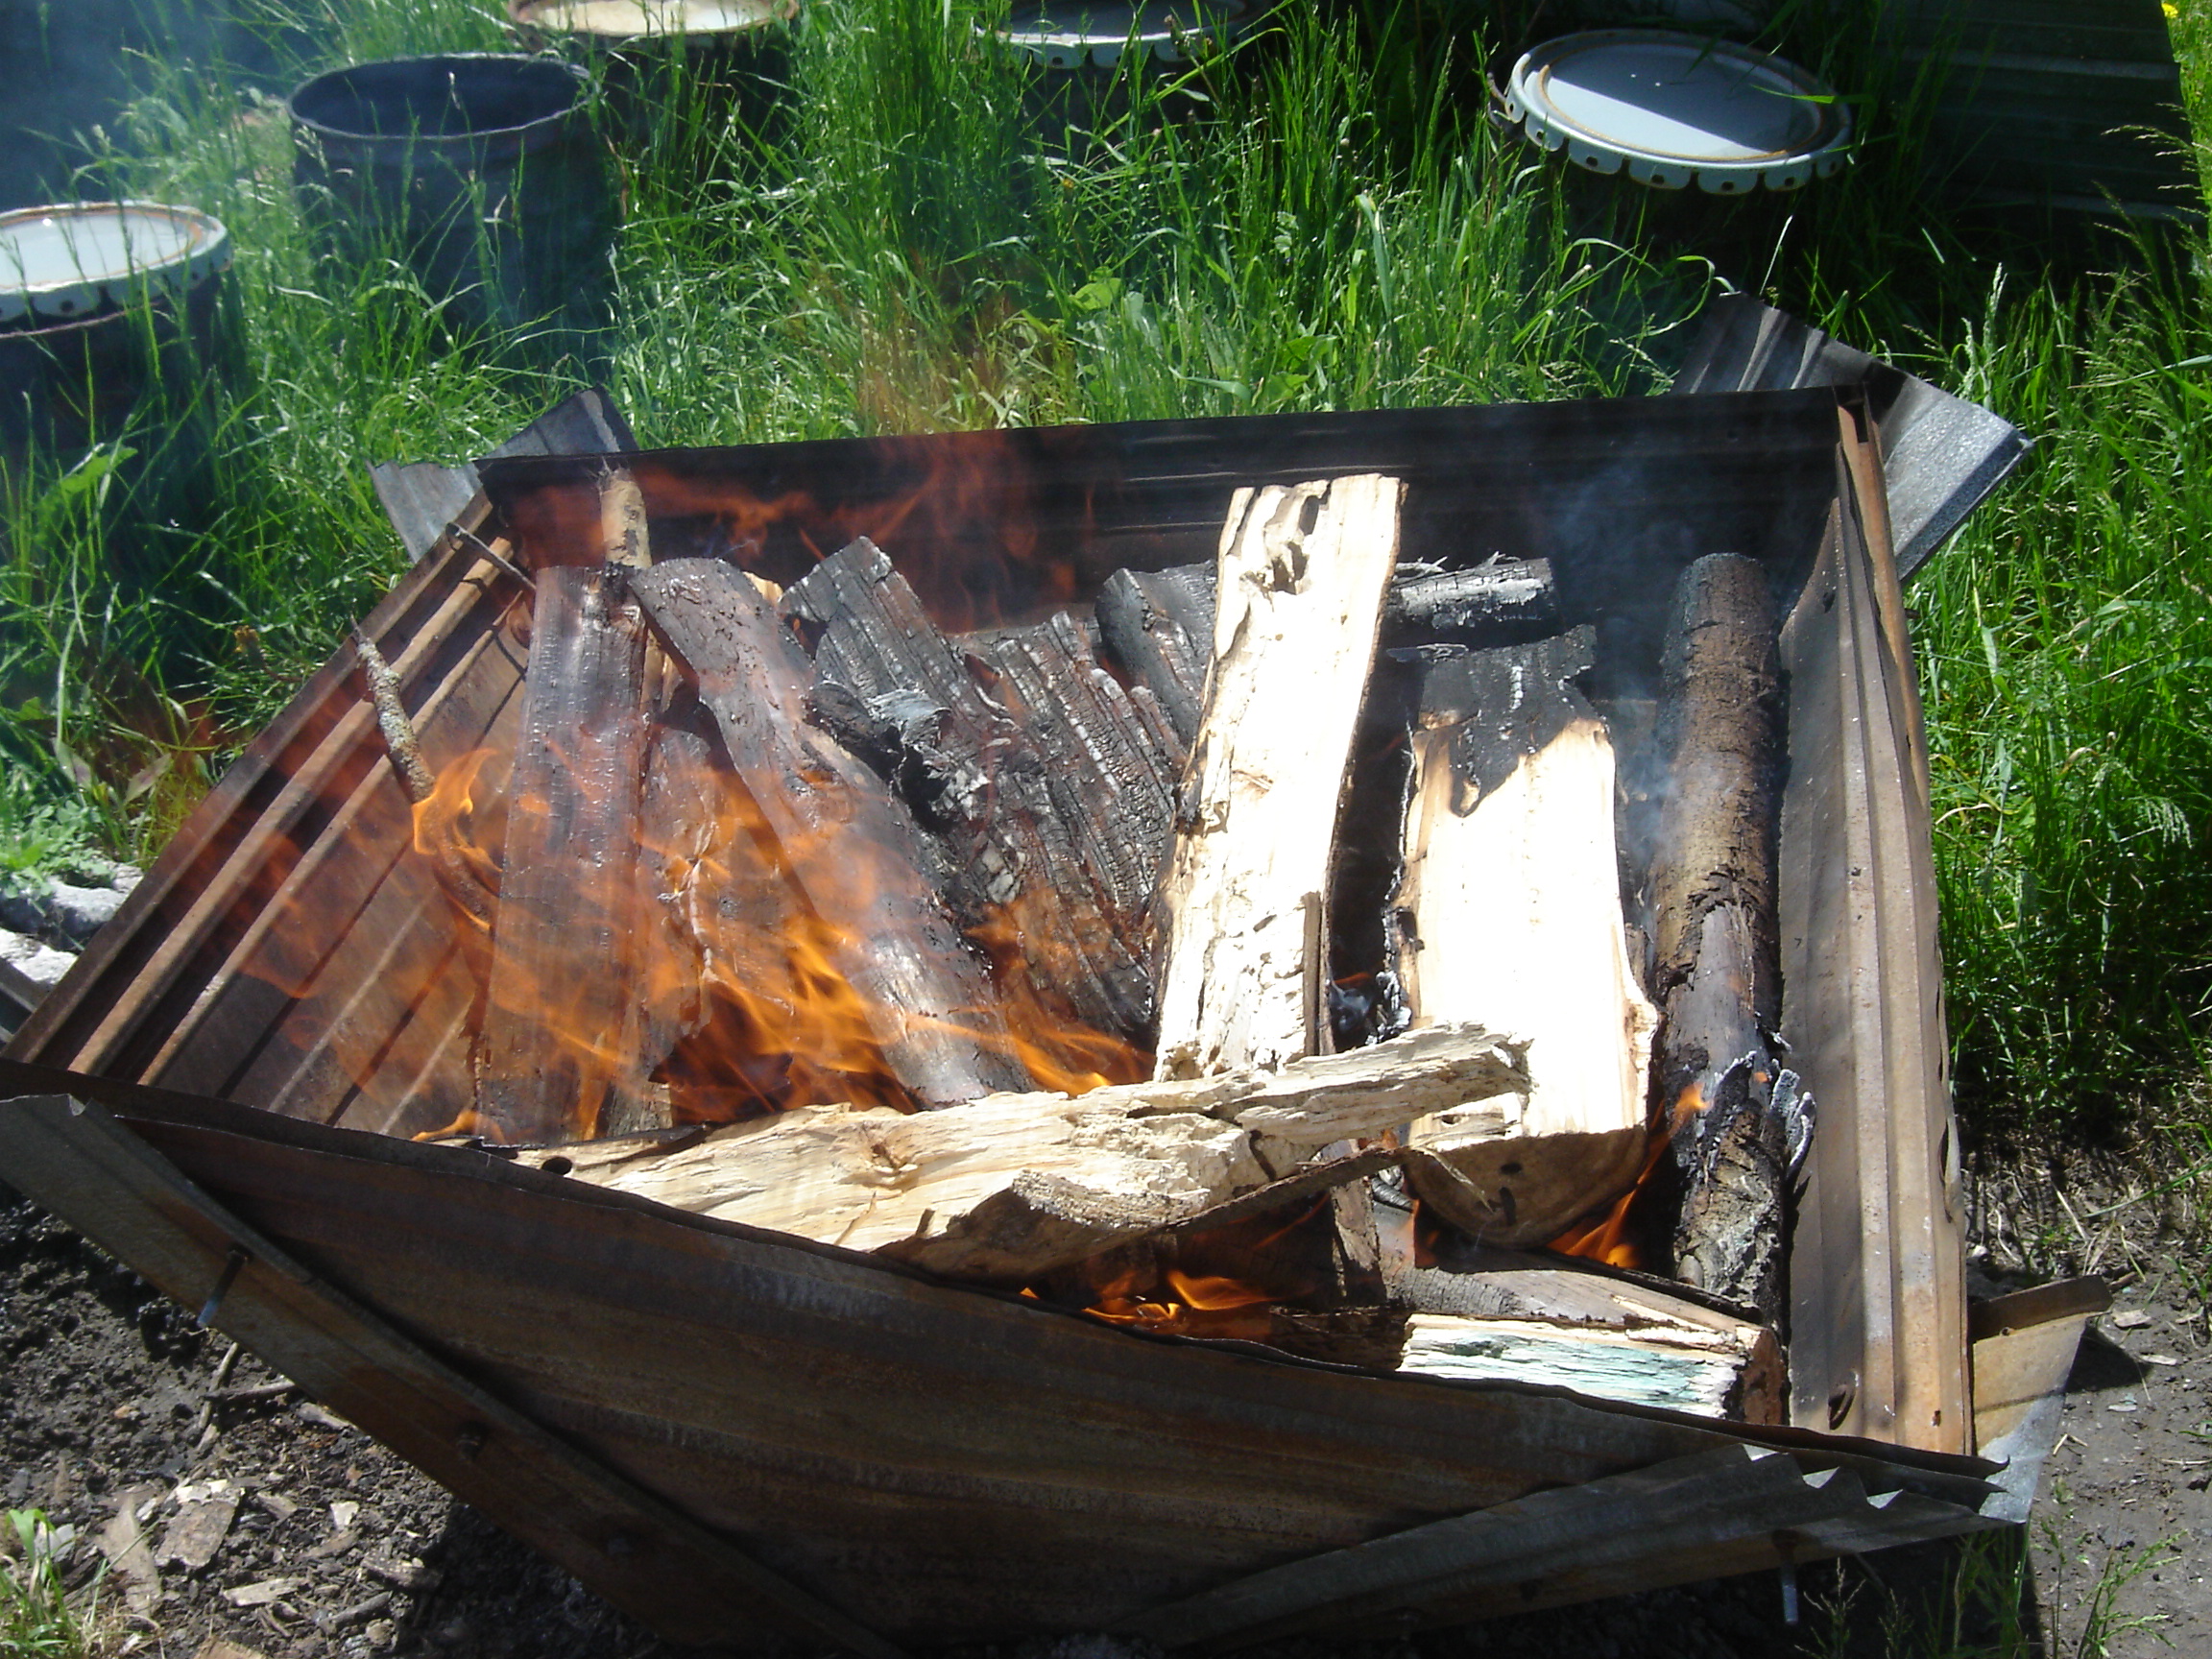
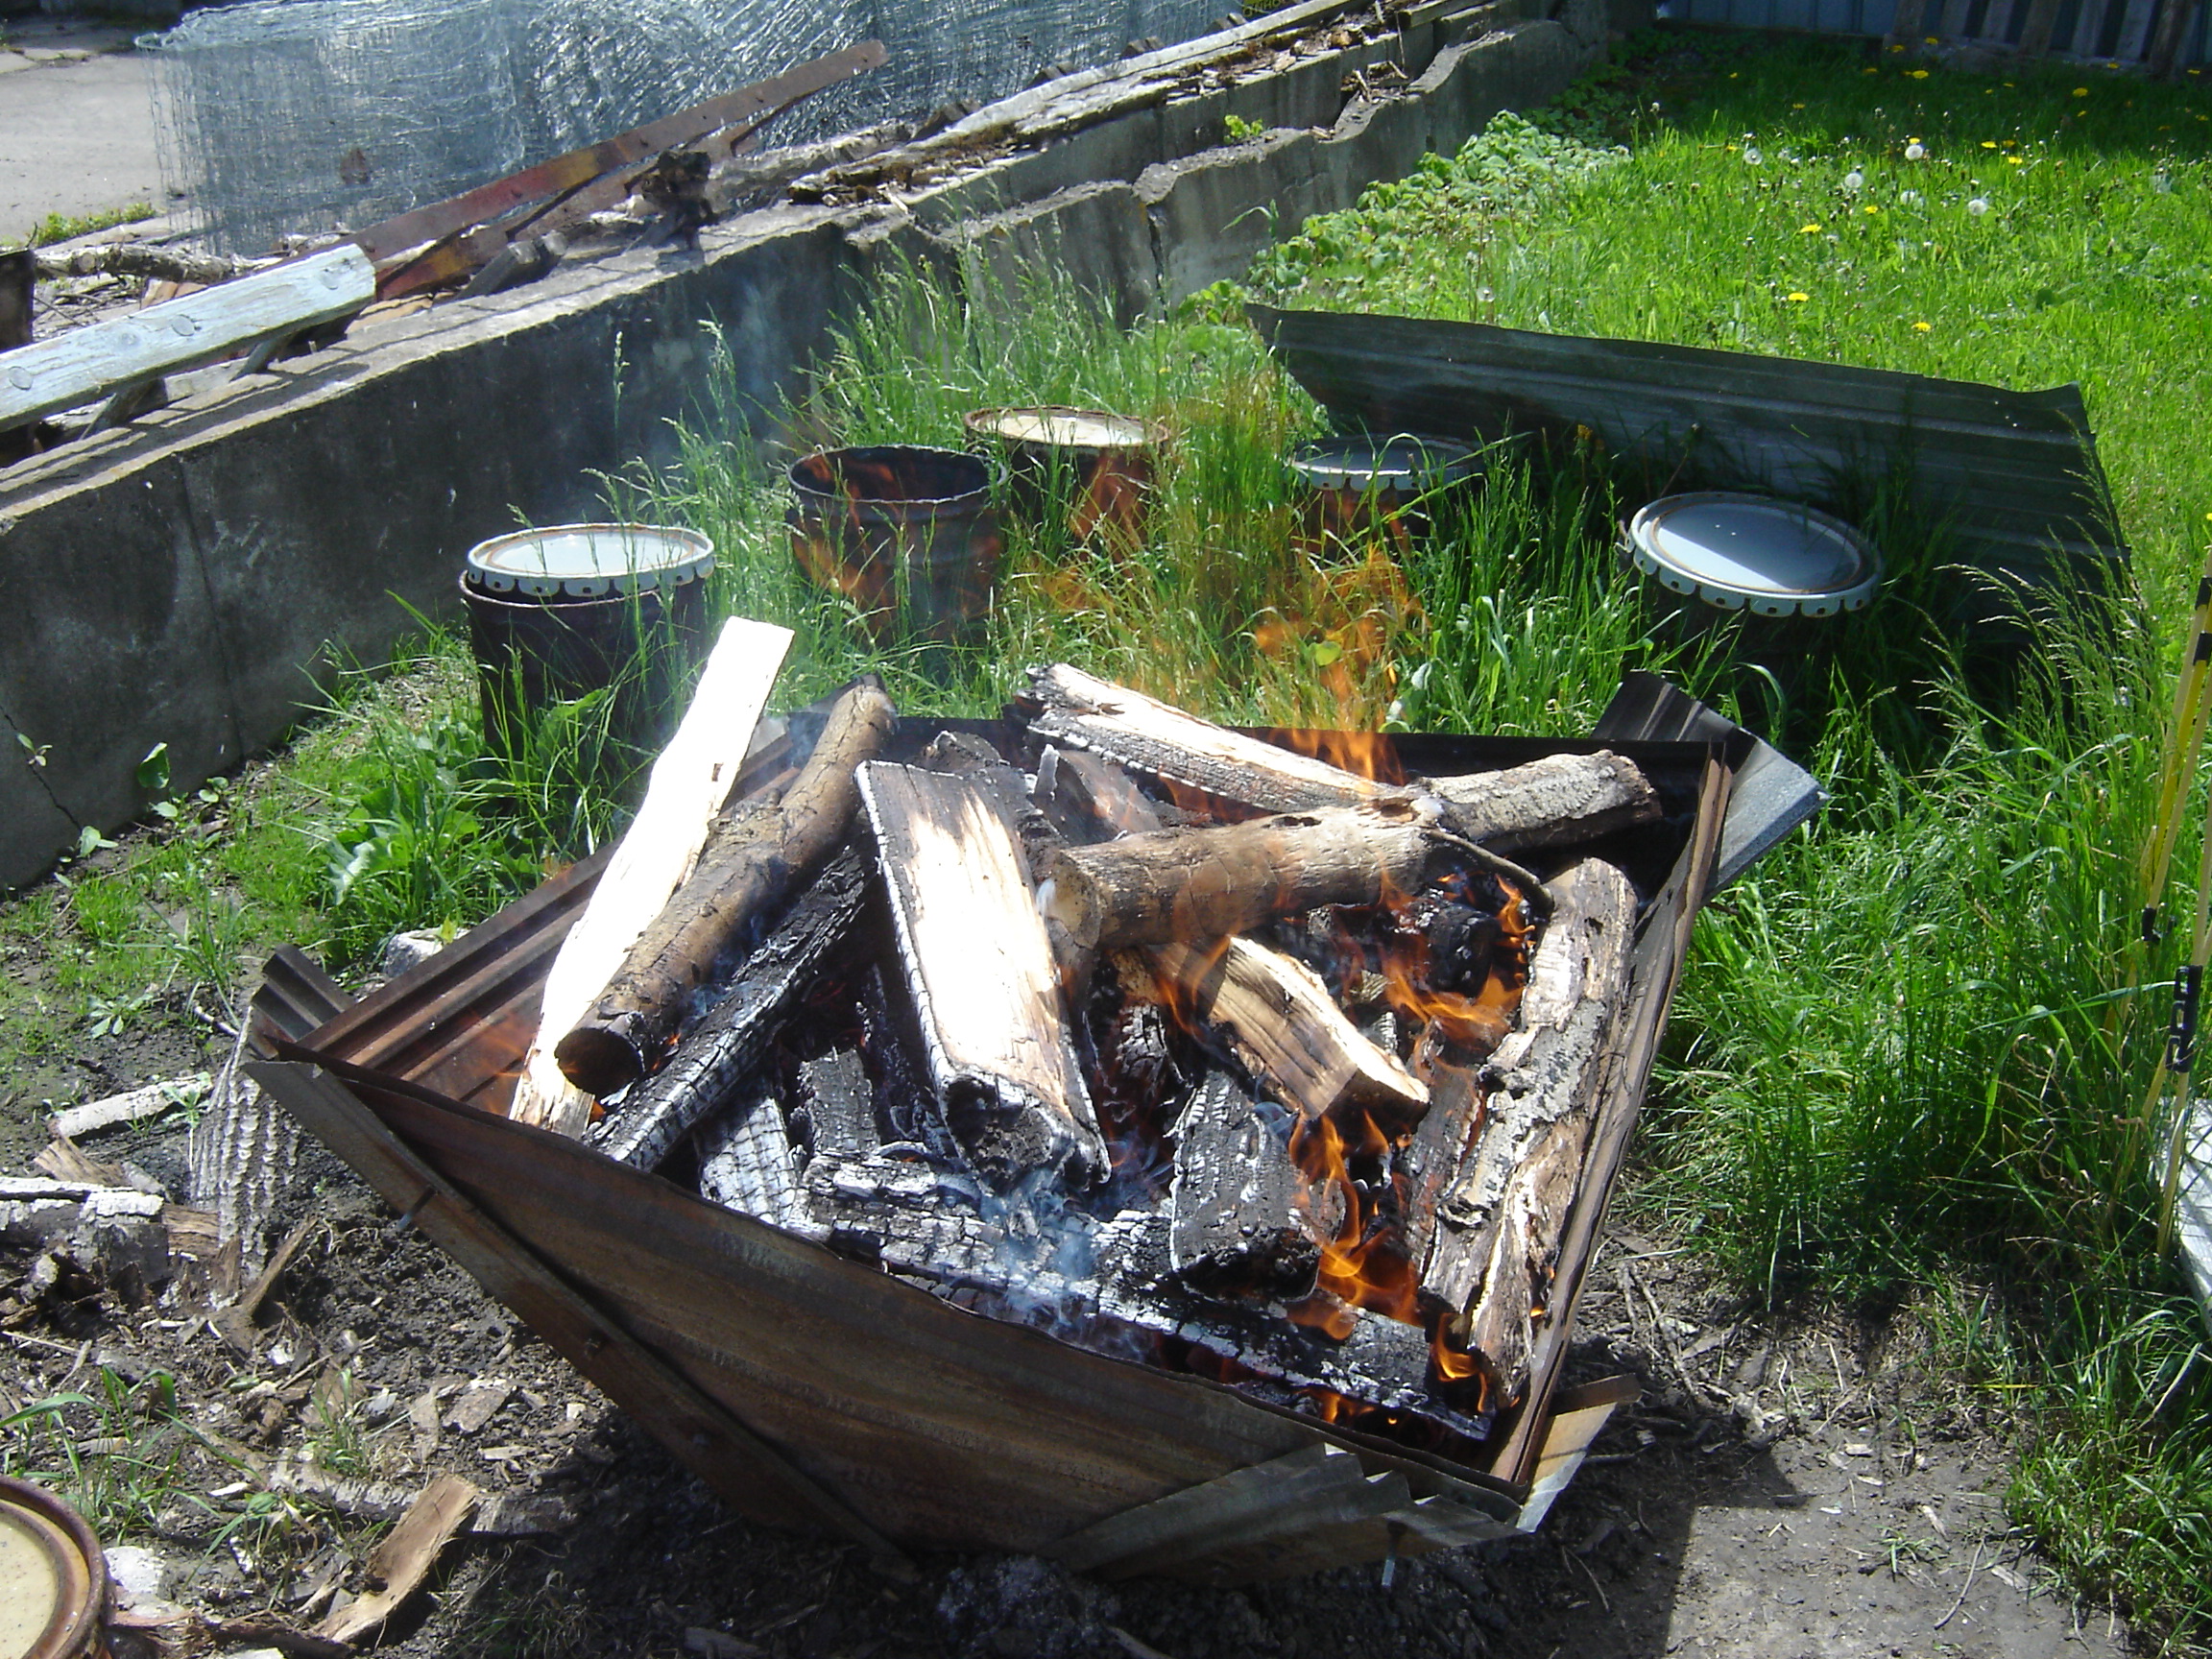
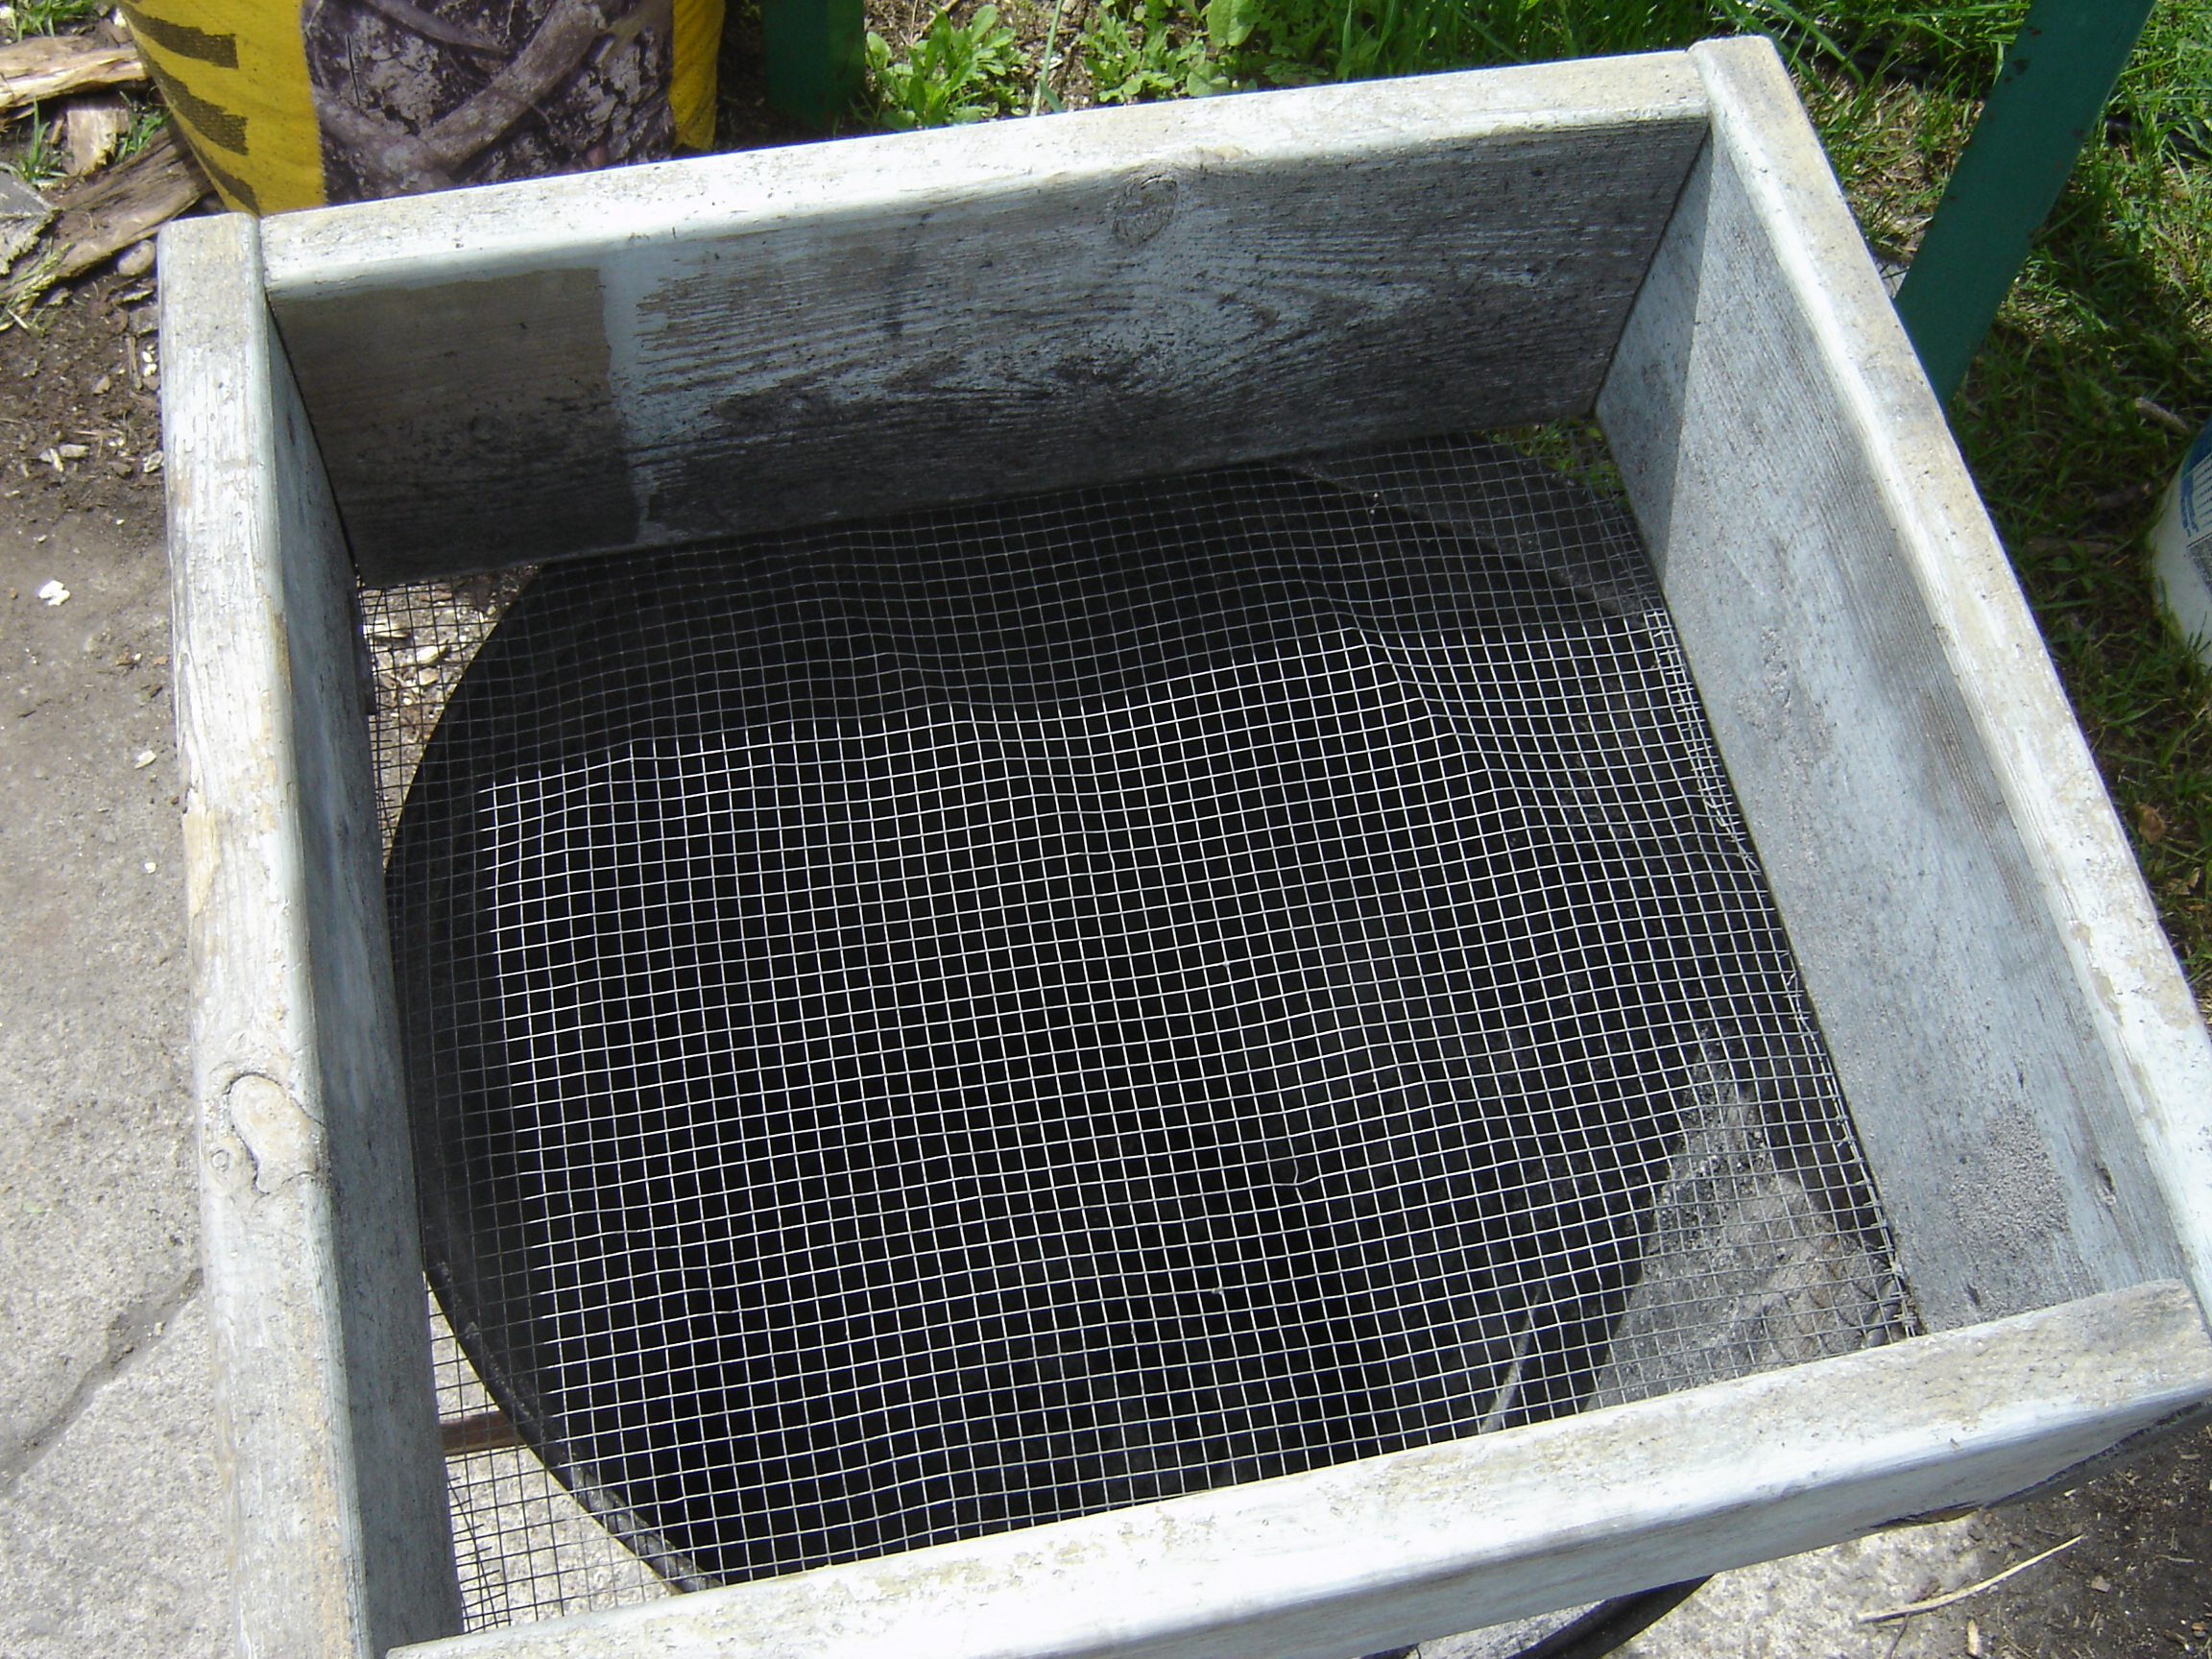
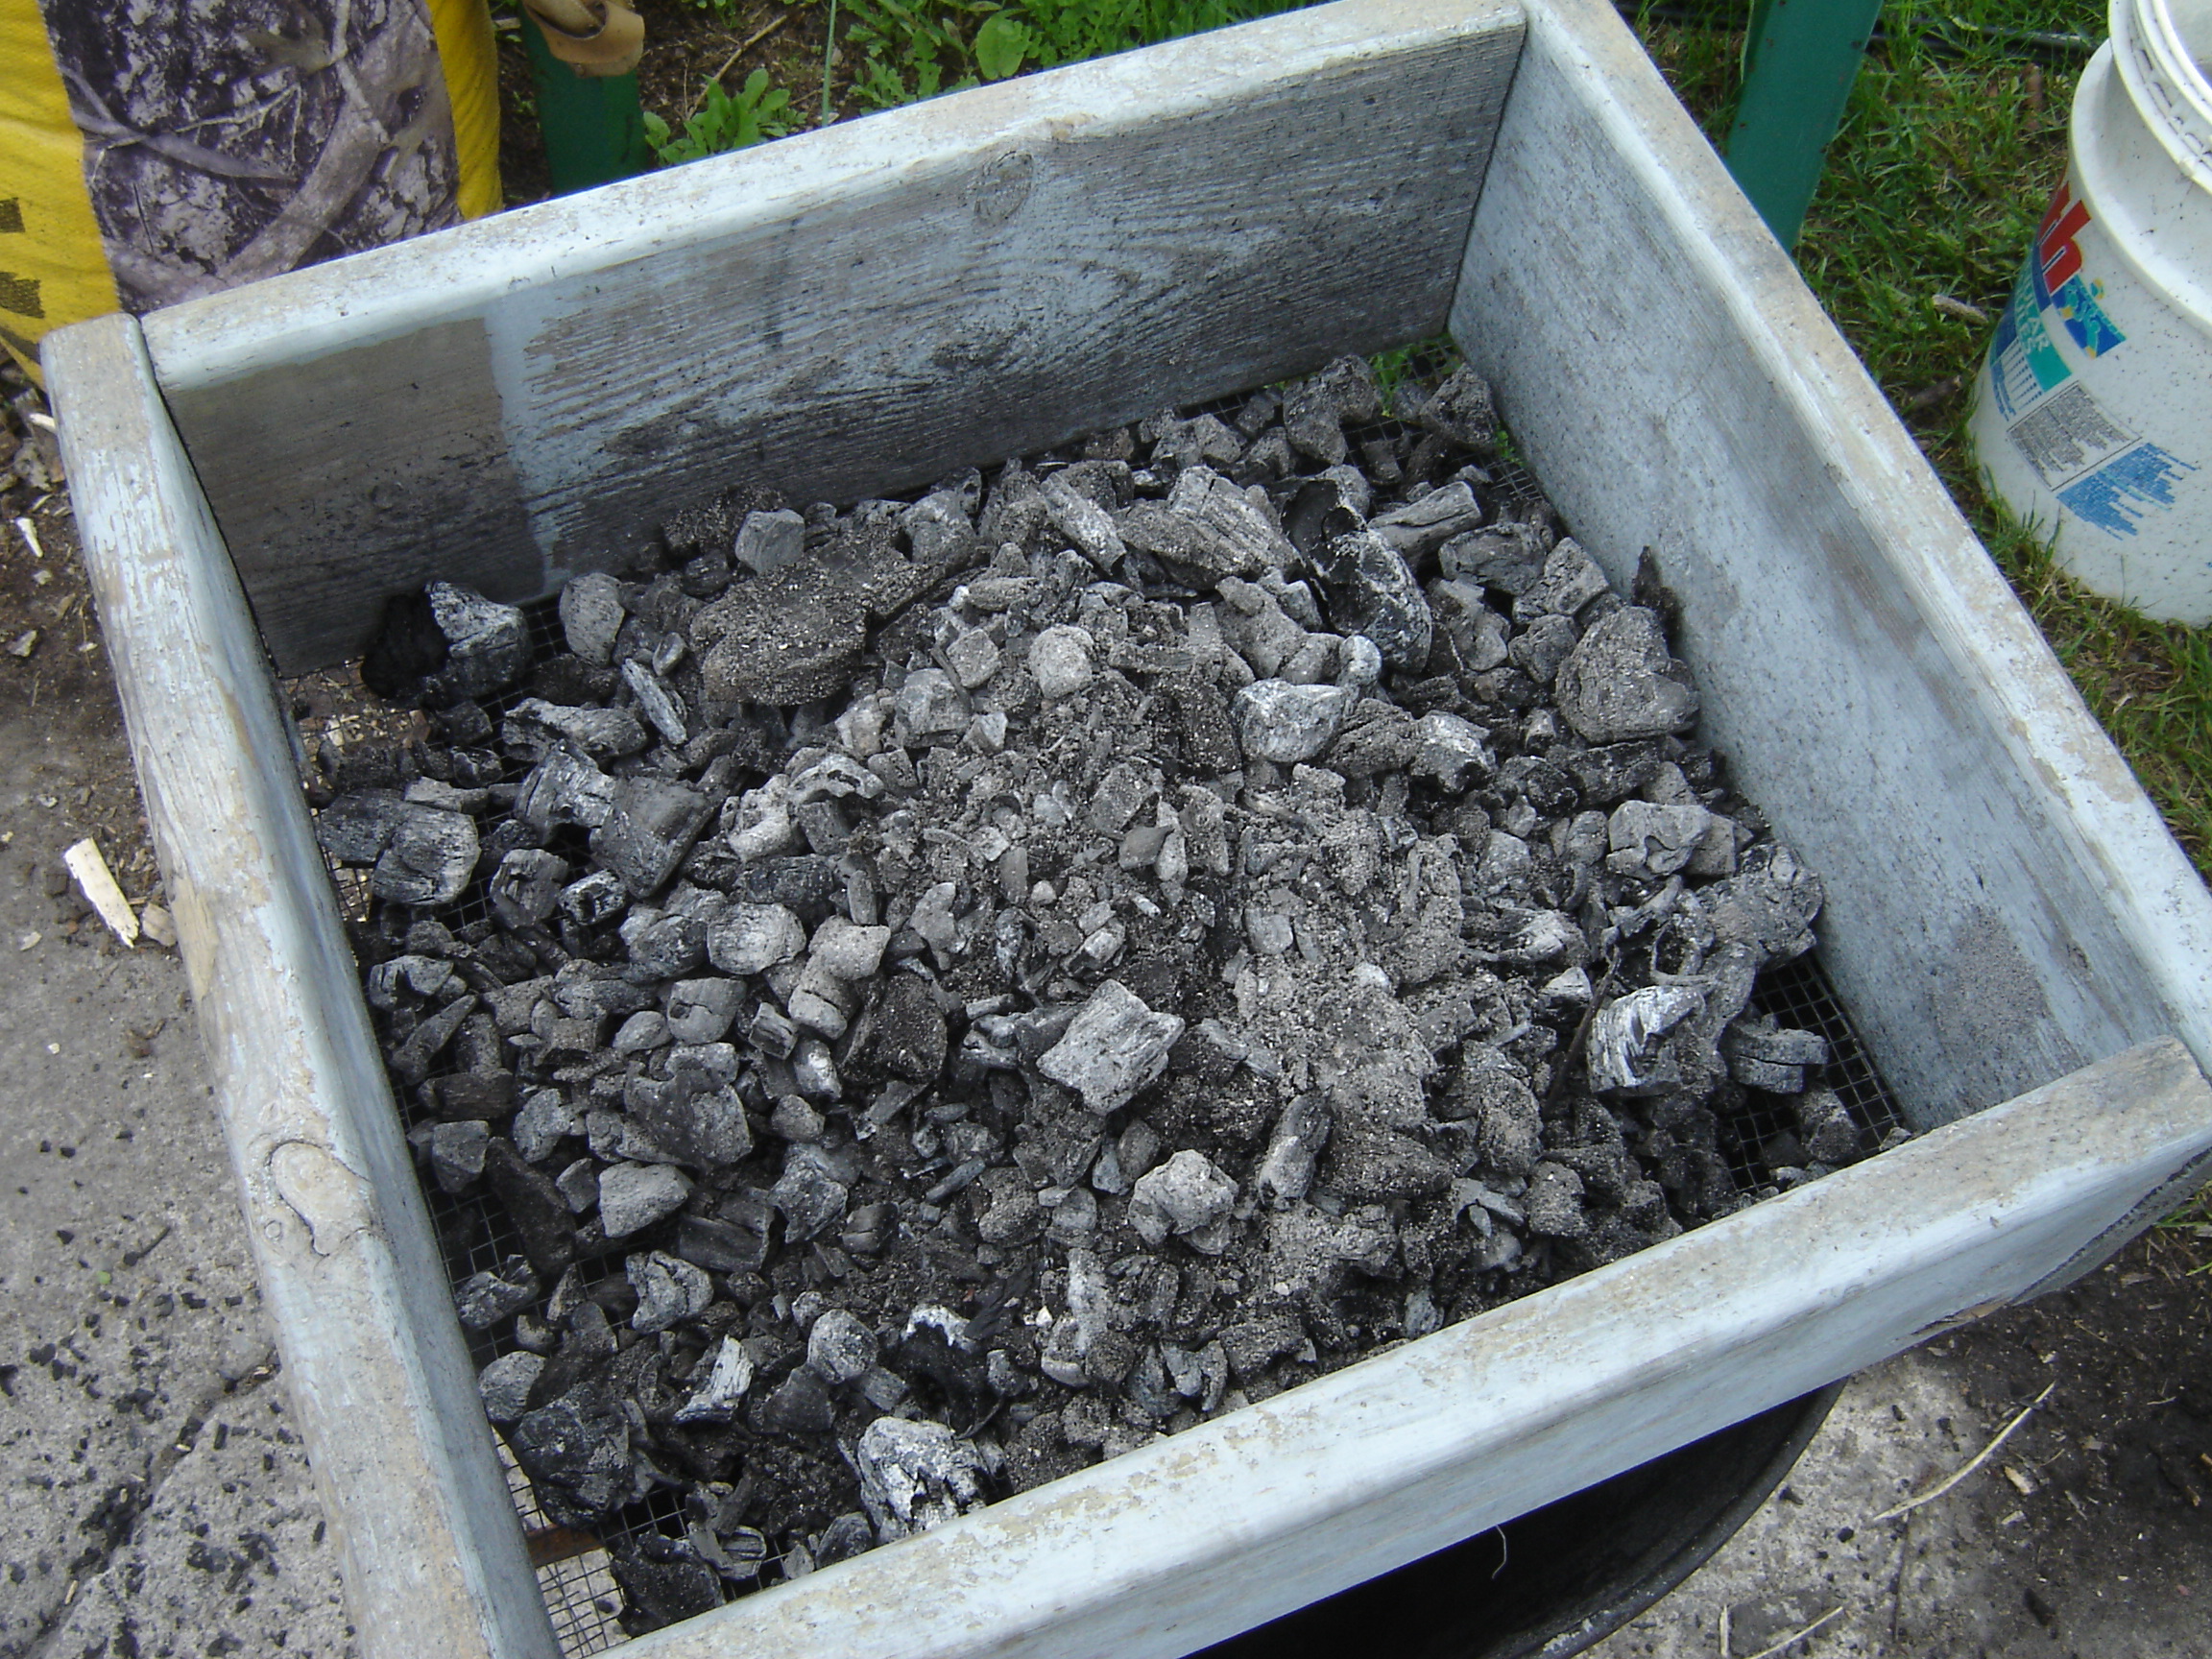
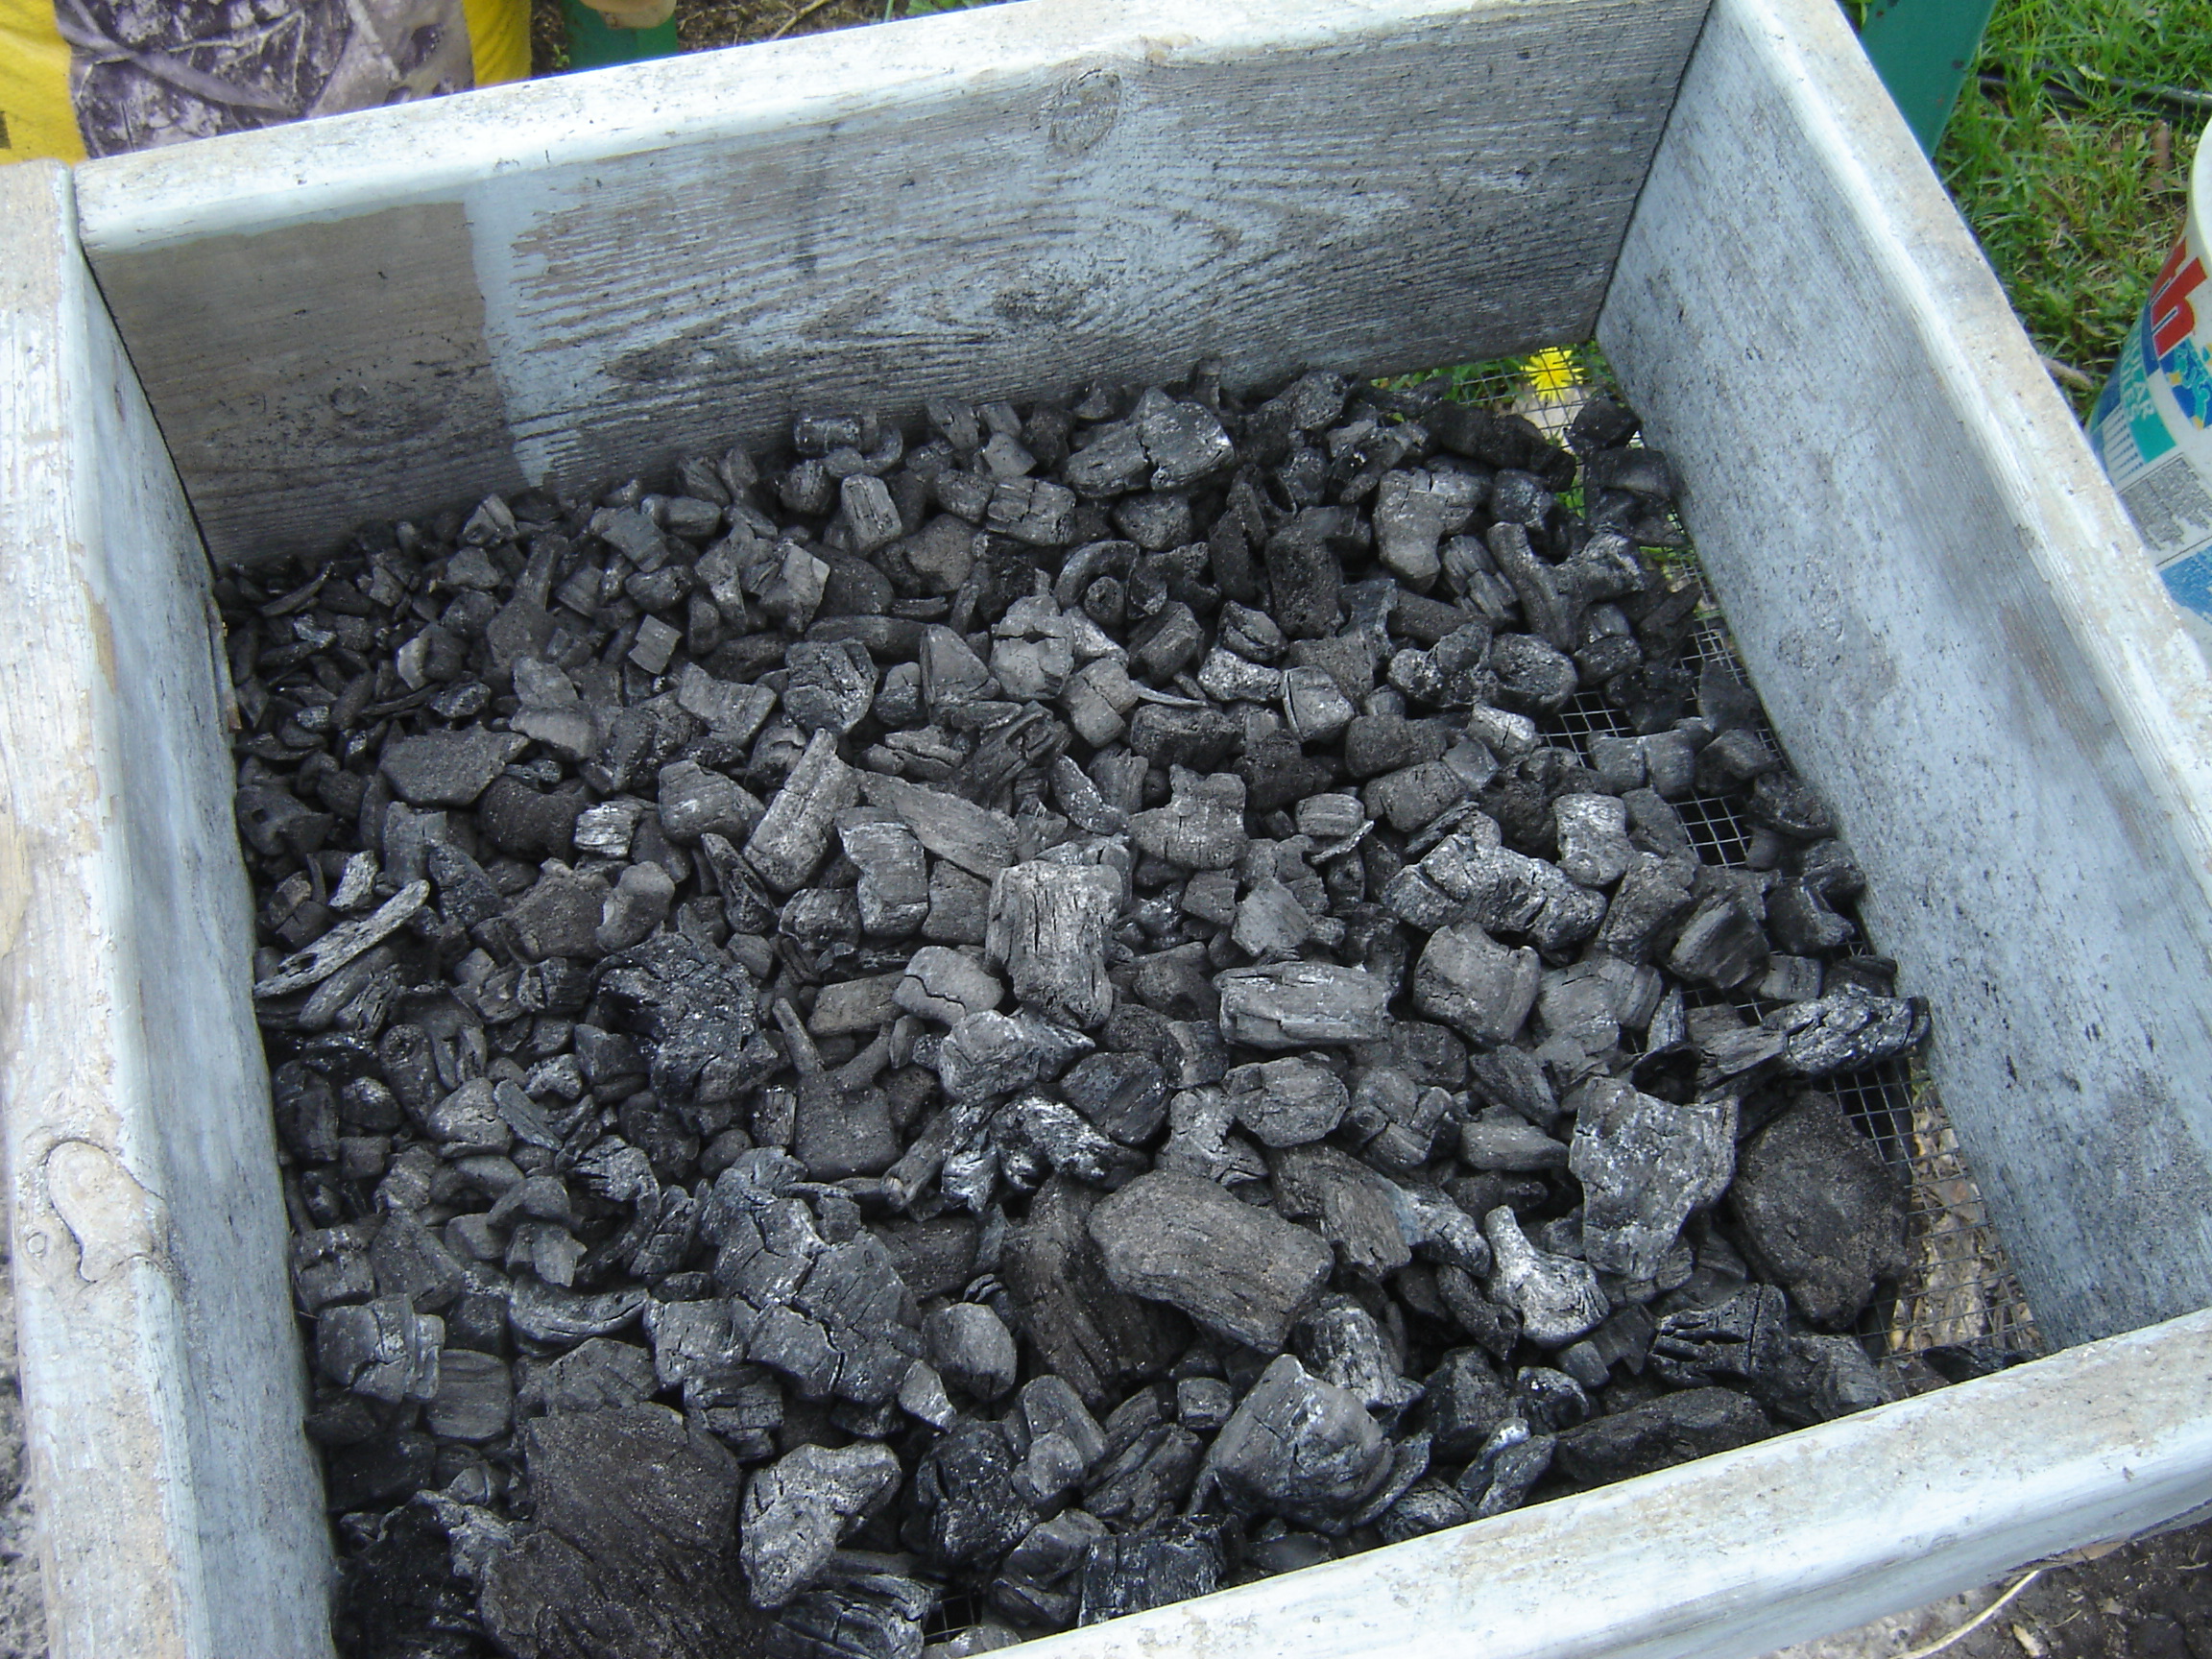
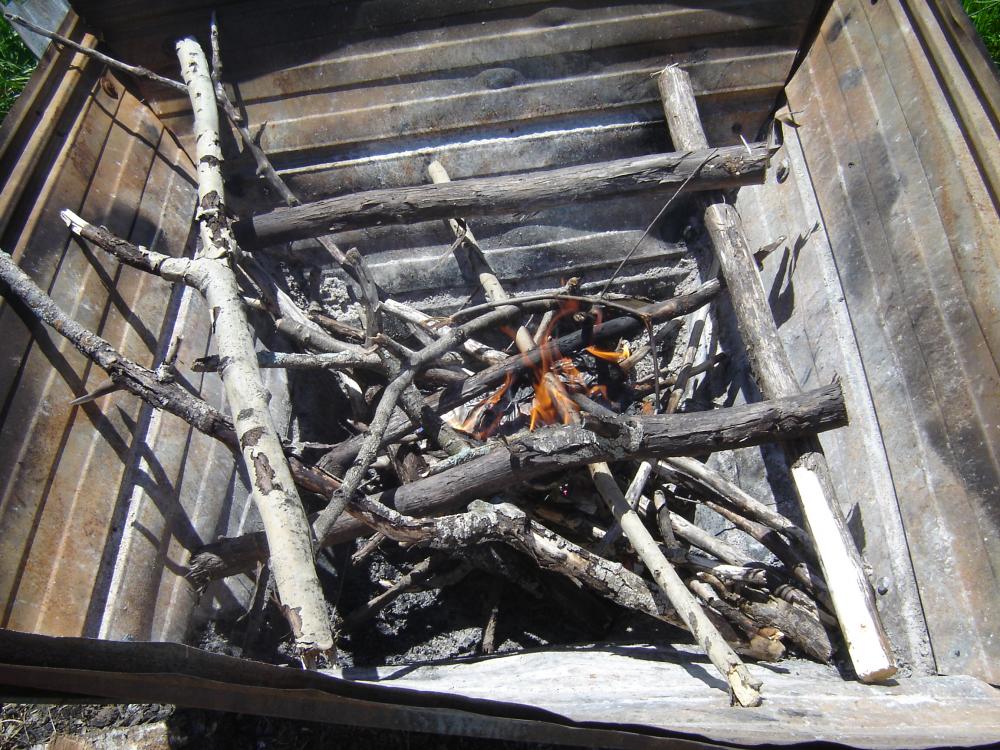
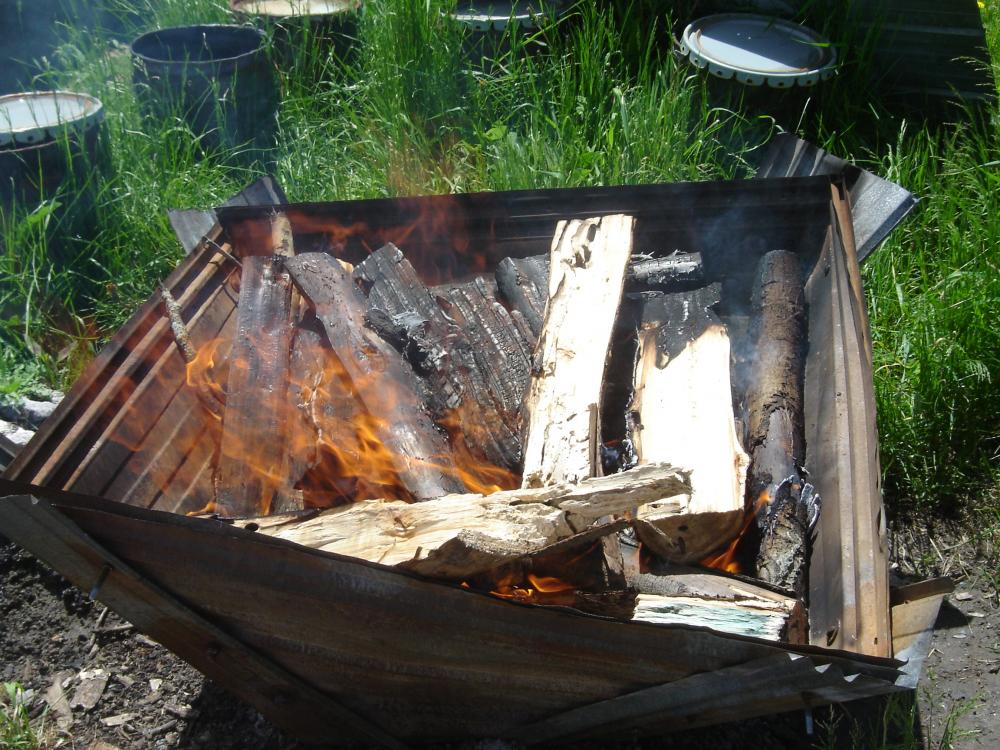
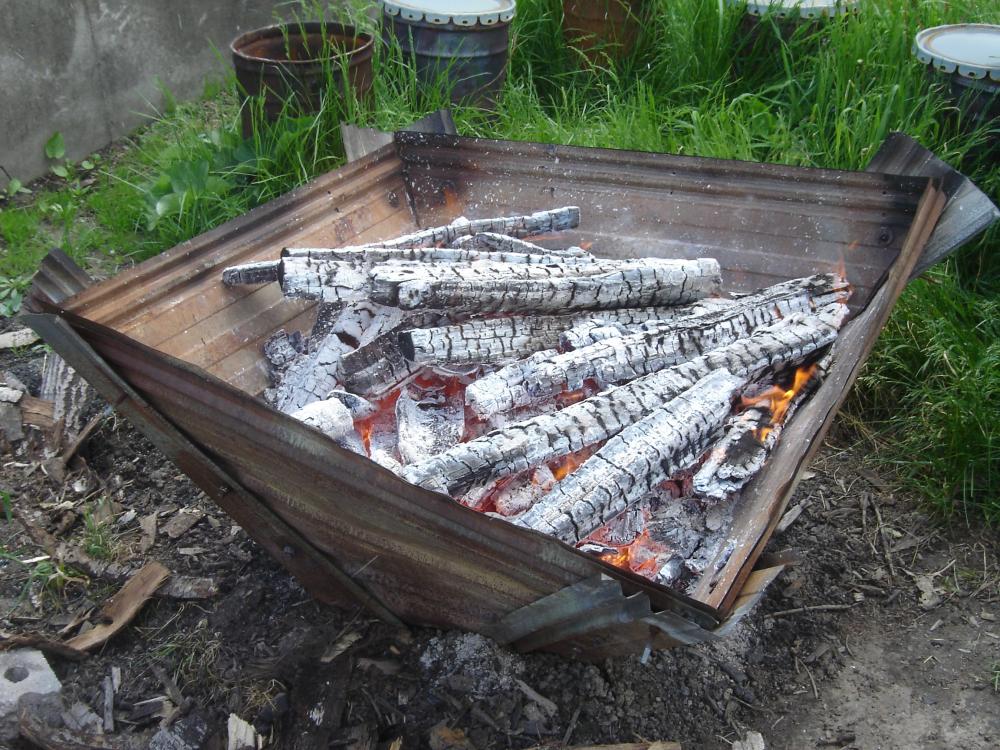
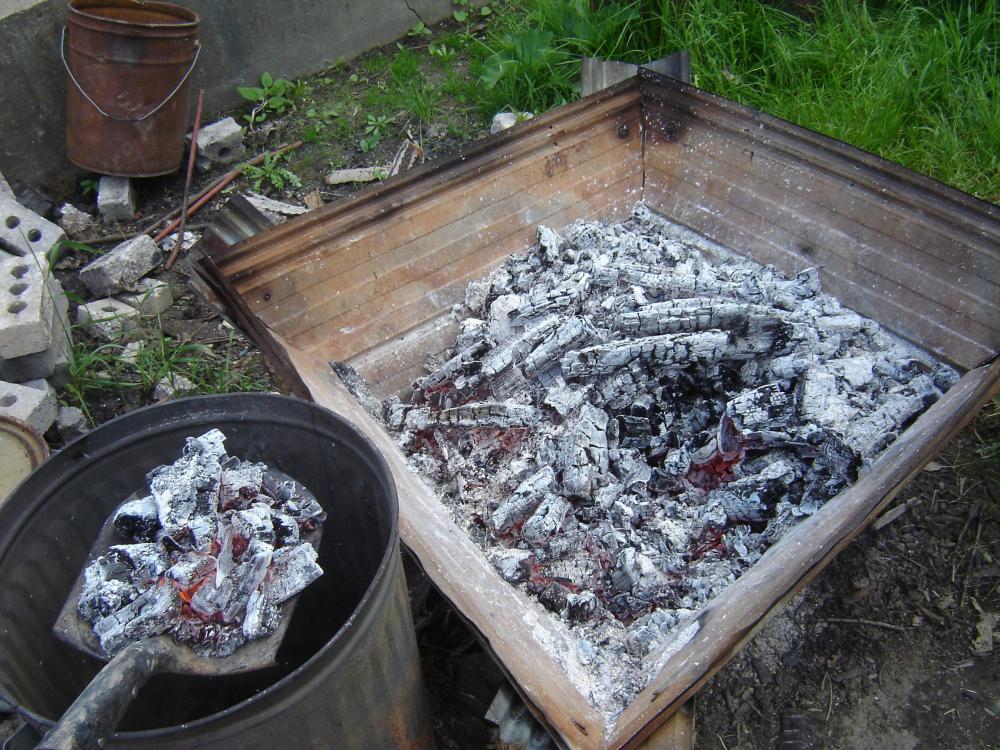
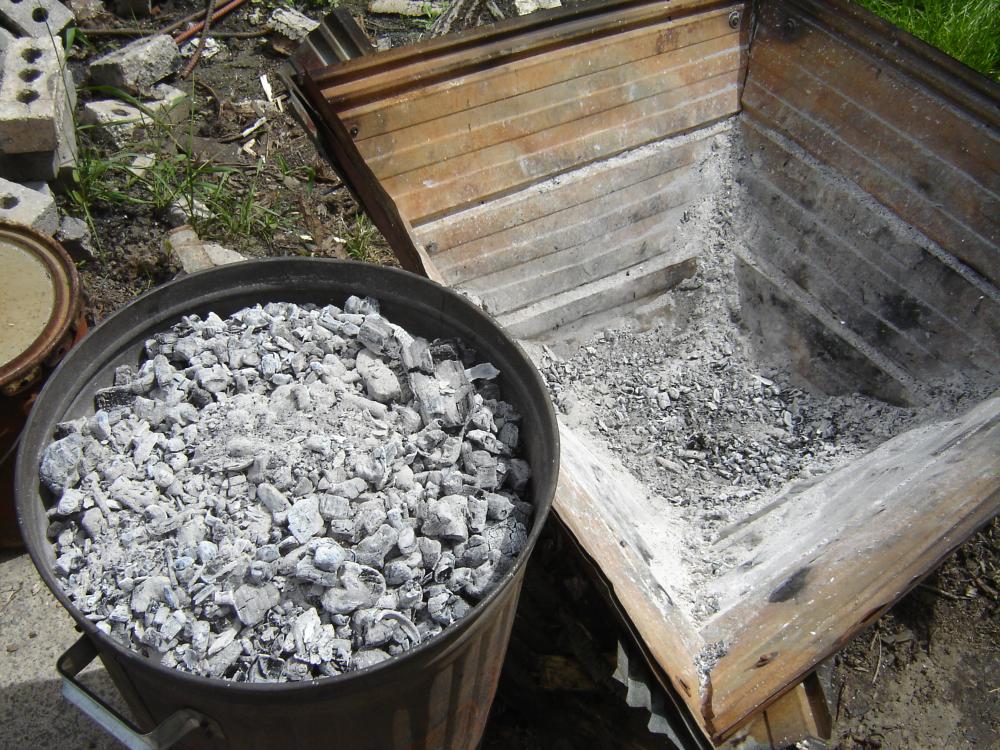
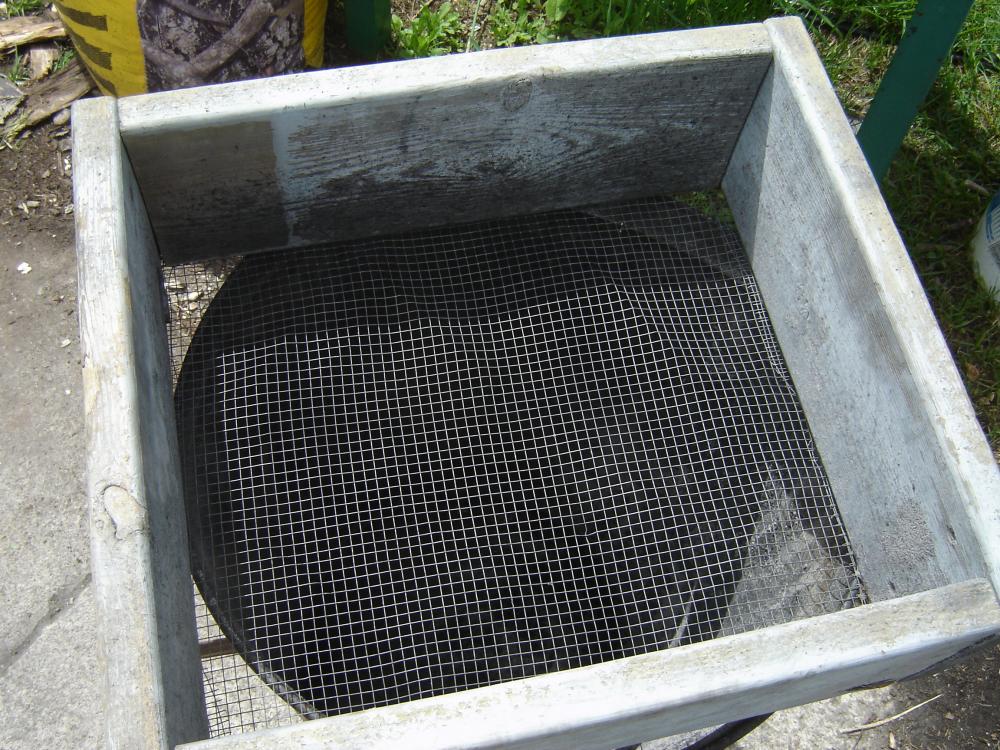
I wanted to share my method of producing charcoal in a fairly easy and efficient way using the charcoal pyramid kiln. The pyramid itself is just a homemade assembly of sheet metal held together with bolts. It is slightly buried to avoid oxygen coming from under the fire. The advantage of this method is that you can use wood that is not perfectly dry and it is quite fast. Furthermore, you won't need to cut any charcoal. In my case, I burn mostly dead poplar wood gathered by myself. 1 minute The first step is to put some mussed newspaper in the bottom and add some kindling on top. After that, I light the fire by adding an ignited newspaper in the center. 10 minutes As soon as the fire is getting stronger, I start to toss some split wood and some small round branches. 30 minutes Whenever I see a lot of flames, I just continue to toss more wood. At this point, I stopped adding wood because the pyramid is full and it was windy. 60 minutes We can already see the wood charring now. In order to minimize losses, I use some fire tongs to put the largest chunks of wood in the center. 80 minutes I am now ready to harvest the charcoal because I no longer see any flames and the chunks are easily breakable with my spade. The trash can you see on the left has a capacity of around 80 L. This is how it looks before putting the lid on the trash can. We can now see a lot of ashes. Warning: The trash can is now hot and should be manipulated safely, like using thick gloves. Before removing the lid, you should wait at least between 24-48 hours to let the charcoal cool. That is the strainer I will be using to remove the ashes from the charcoal after it has been cooled. Here is some non filtered charcoal. Here is the end product, after shaking the charcoal for a few seconds. You might want to wear a dust mask before doing this. The nice thing is that you don't need to cut the charcoal, but still get various sizes of charcoal. Personally, I just use it as it is but you could easily separate the charcoal in different grades. If you have any question or comment, I'll be glad to hear it.


-
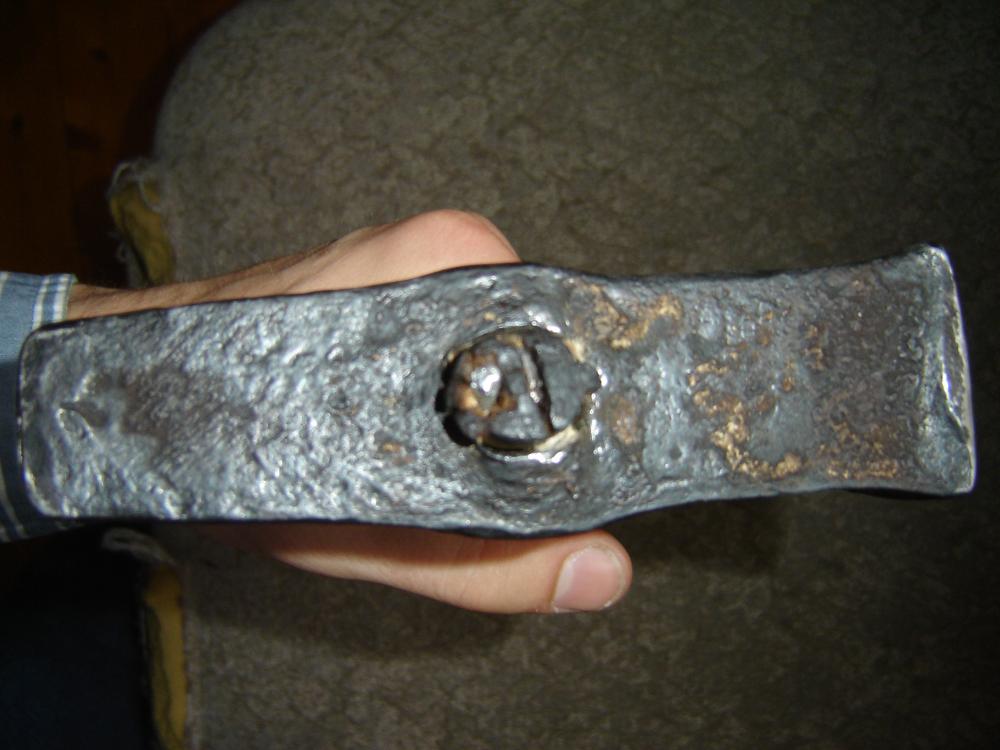
ThomasPowers, Yes, the diameter is slightly smaller in the center. It is indeed pretty important.
-
Daswulf, I made the hammer recently, so I have not tested it yet. (My forge is outside and I work when it is not raining.) However, I am already happy about the texture of the handle and the balance of the head. The steel is around low to medium carbon steel, according to the spark test I made. Thanks for responding.
-
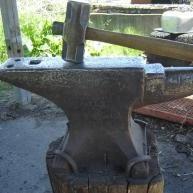
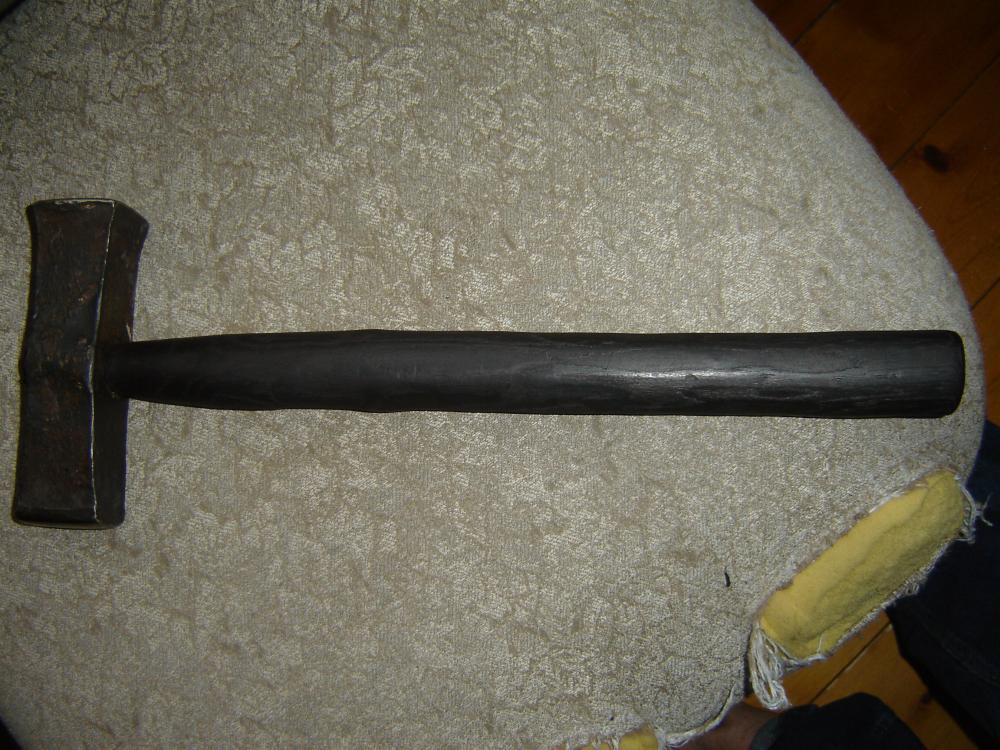
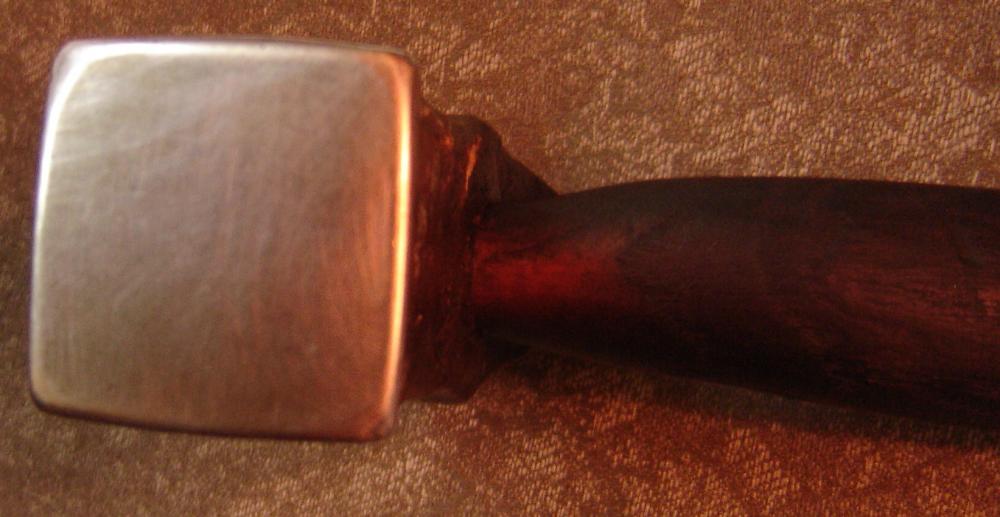
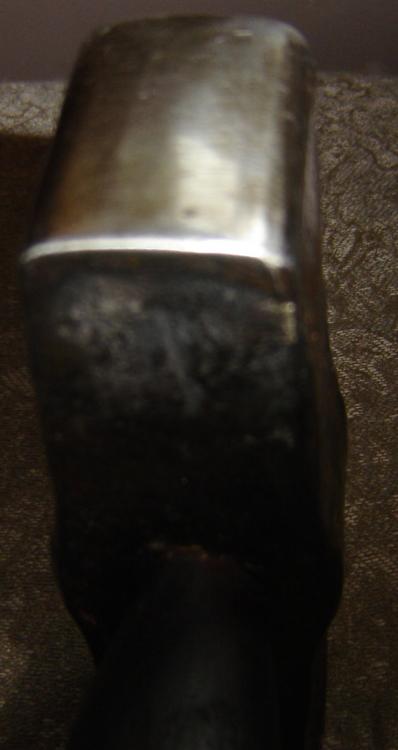
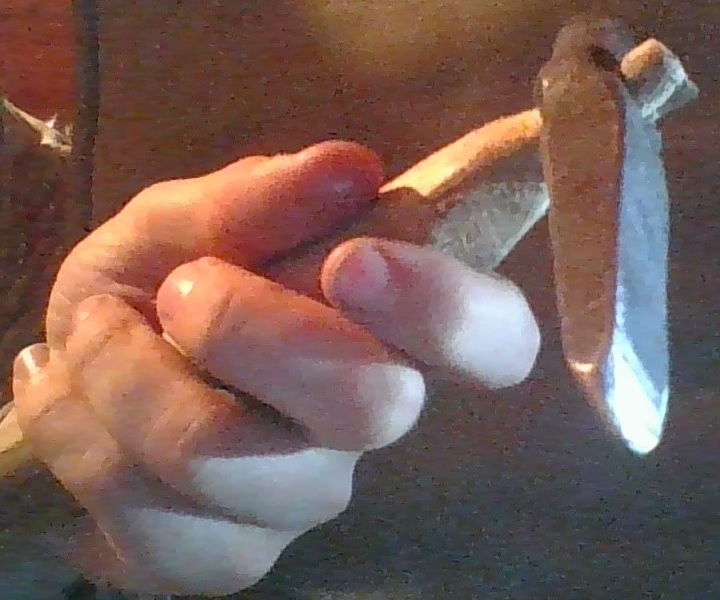
I finished the hammer yesterday and I wanted to show you the result. I learned a lot while doing both the head and the handle. The hammer was made from 32 X 140 mm square stock and I designed the peen to help me draw metal faster. The handle was made from a raw branch of ash and it measures around 35 cm. I charred it using a bonfire and coated it with linseed oil while it was hot. The hammer head weights around 2,4 lbs and handle weights approximately 0,4 lbs. I left the head unhardened.
-
I noticed many suggested to turn off the blower while I am away or forging and that is what I have been doing for a long time. To give you an idea of much charcoal I used the day I forged the straight peen, I burned approximately 100 L of charcoal for 10-11 hours (not consecutive). The hammer I designed is a straight peen around 2,4 lbs with a very blunt peen to allow me to draw stock more easily. ( It was not clear in the other photos.) I will try to post improvements to my fire pot in the near future.
-
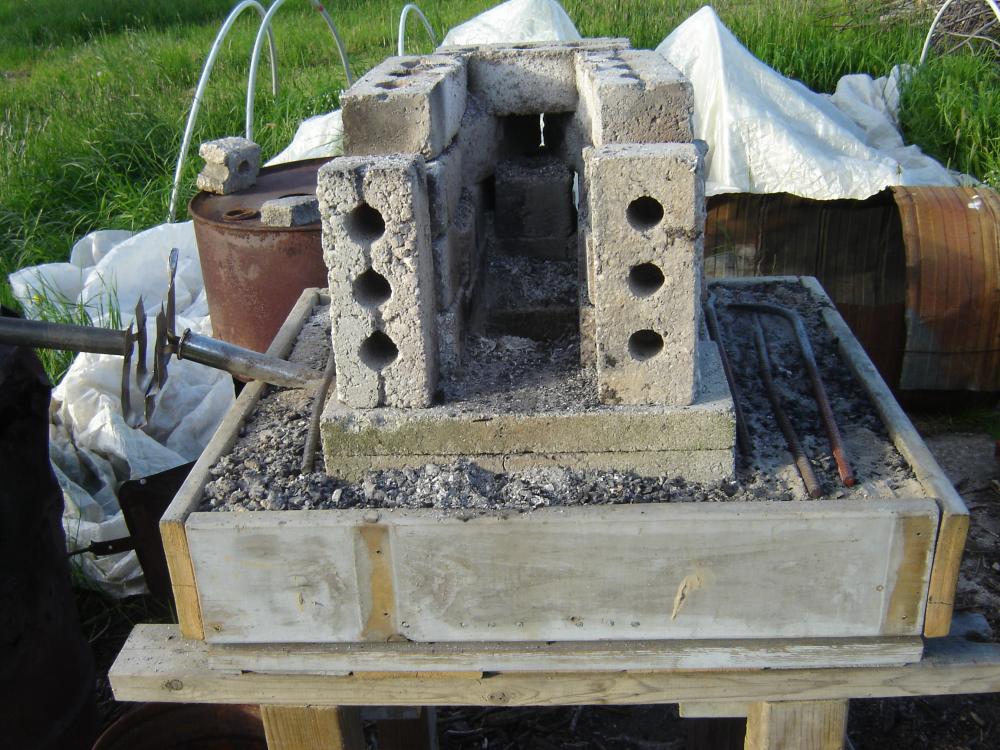
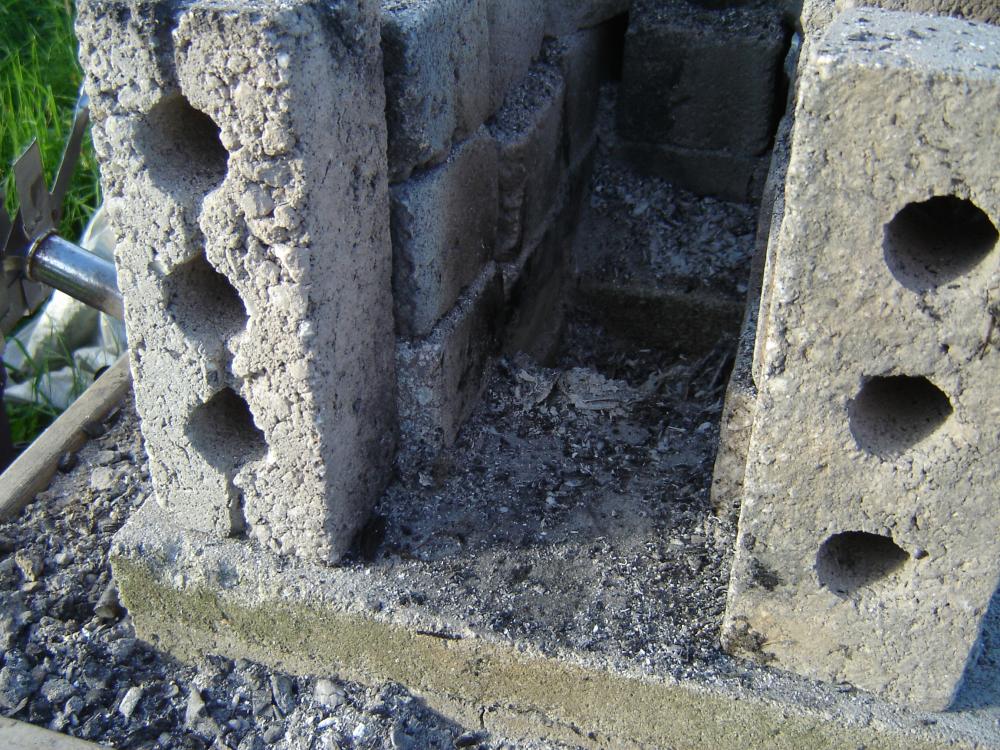
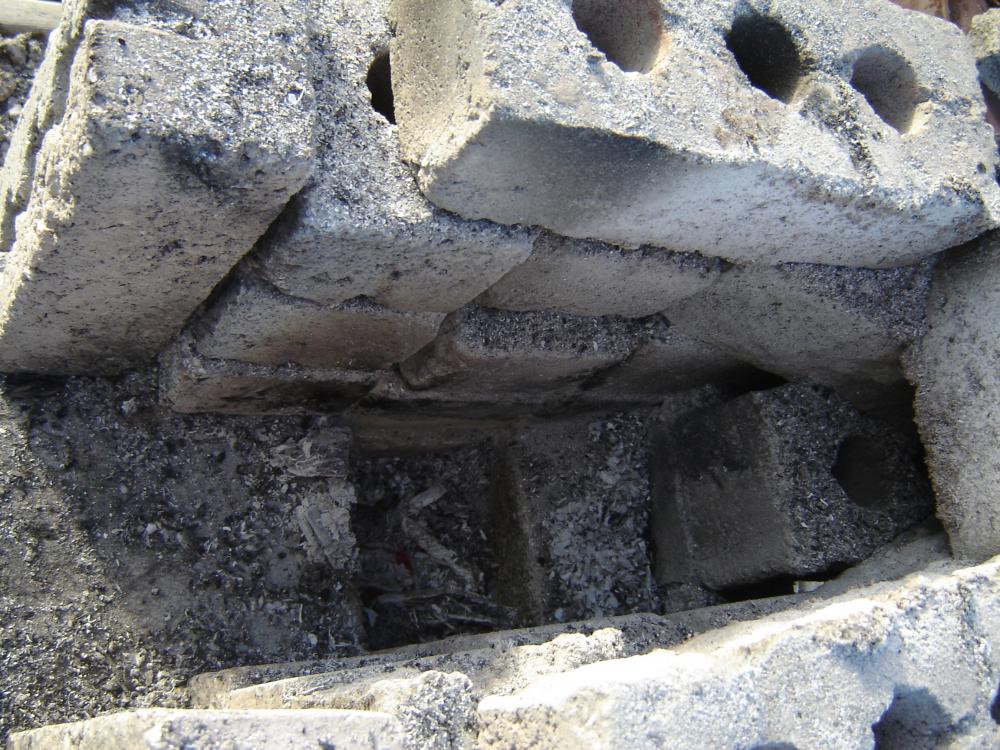
Jackdawg, I agree entirely with that my fire pot should be much wider and I should make a new one. ThomasPowers, This afternoon, I added one brick slab to increase the height and it did help a little bit. Here are some pictures of the forge after I forged a straight pein hammer. Between the two pipes, there is a connector I made of sheet metal and rivets to control the airflow by translating it. The hammer was made from 32 mm X 140 mm square stock.


-
Thanks for the suggestions! I am forging today and I will try to get more pictures of the forge later in the day. I will also try to increase the height by adding some flat bricks. ThomasPowers, I have seen Tim Lively's washtub forge but I don't think I have seen the other one.
-
I have been blacksmithing for a few months using a simple wooden table filled with clay. I had a lot more success with my newest forge compared to the old ones I made before. However, while I can fairly easily heat steel to an orange heat, I can difficultly reach a white heat or a welding heat. I have observed that my charcoal can glow from time to time to a bright white heat and heat my stock quickly, but it is not consistent. I believe my problem is that the charcoal don't fall easily into the fire pot and a lot of void is created. To bring air to the forge, i use a shop vac and control the airflow by increasing or decreasing the distance between the tuyere and the shop vac's pipe. Maybe I should enlarge the fire pot? We can't see it clearly, but my forge is surrounded by bricks for wind protection and insulation. The fire pot depth is slightly more than 4 inches. The tuyere diameter in the inside is around 1 and 1/4 inches. Here is a look of the charcoal I make. Thanks in advance.

-
What do you think of my slitter?
Xavier F-C replied to Xavier F-C's topic in Slitters, Punches, Drifts, etc
littleblacksmith, I agree with you, when the handle breaks, I won't be putting a wedge and simply will carve a more gradual taper to the wood. jlpservicesinc, Thank you for taking the time to write a very informative post. It is interesting to know the tool I made looks quite versatile. (When I made the tool, I had not a specific use for it.) Luckily for me, I am in pretty good shape and I don't suffer from any kind of physical injury. I have been blacksmithing for a few months and I never felt exhausted or felt pain while doing it. (Except if you consider the hot scales flying around.) -
What do you think of my slitter?
Xavier F-C replied to Xavier F-C's topic in Slitters, Punches, Drifts, etc
Thank you for your responses! Gergely, all of what you wrote makes a lot of sense to me. For this slitter, I could easily modify the handle if it vibrates too much. I plan to use a 4 lb hammer to beat on the tool and I suppose it should be holding fine. (I won't be using sledges on it because it is a bit thin.) I will try to make a small hammer with it next weekend or so and I will try to post the success or the failure of both this tool and the new hammer! -
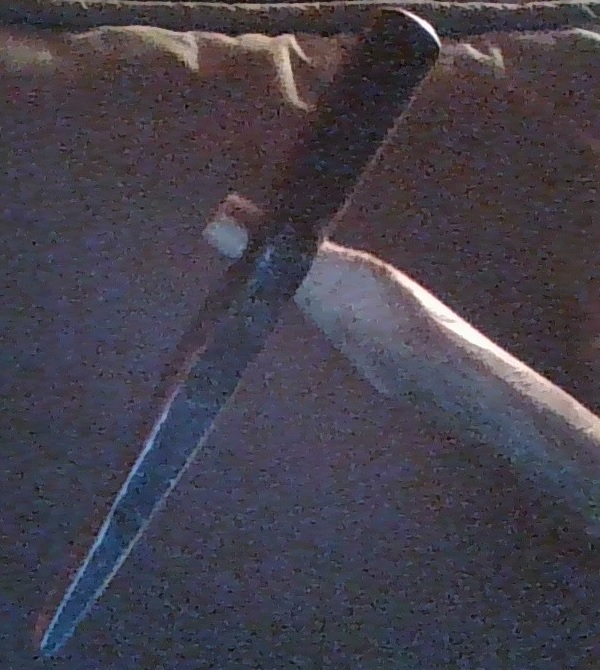
I made a simple slitter today and I intend to use for a variety of purposes, such as slitting a hammer. I wondered if the geometry of the tool is looking good or if it could have been improved. The length of the tool is around 165 mm and was forged from a medium carbon steel cylinder of around 18 mm X 130 mm. The handle was shaped from a 50 cm branch of an elm and is set in the head with a small metal wedge. Sorry for the low quality.

-
Help me identify this small vehicle piece
Xavier F-C replied to Xavier F-C's topic in Tools, ID, and pictorial reference
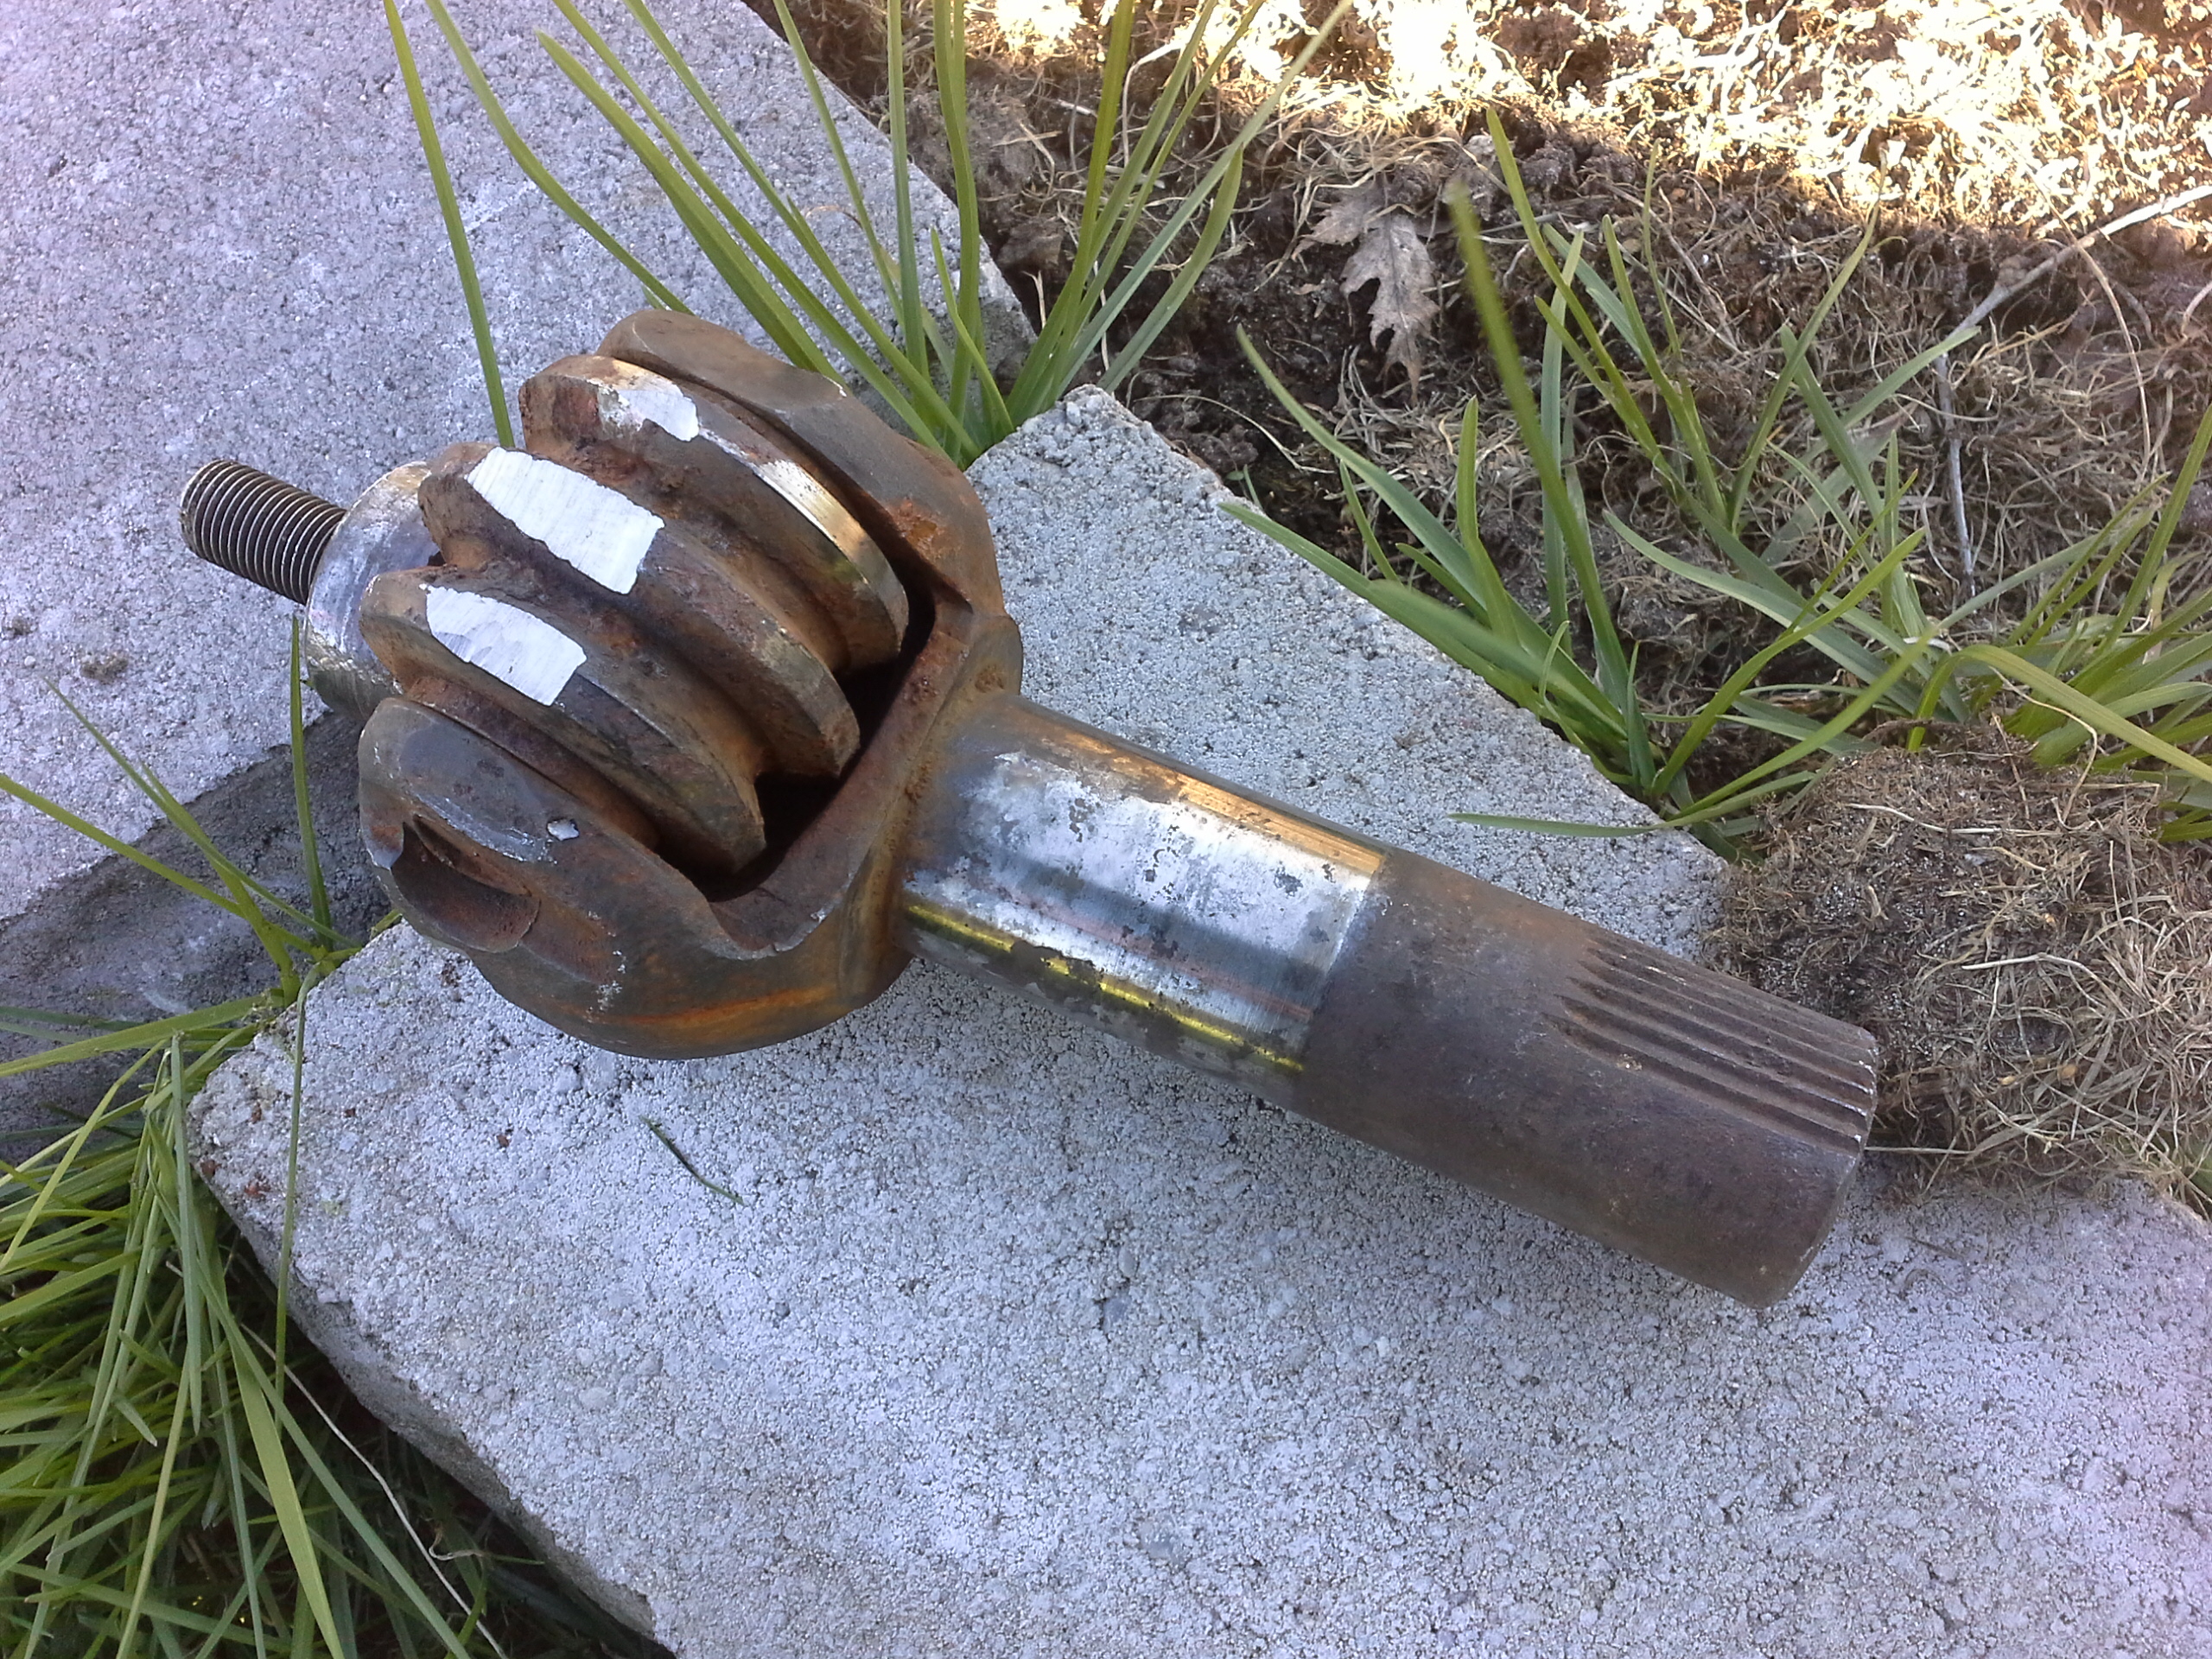
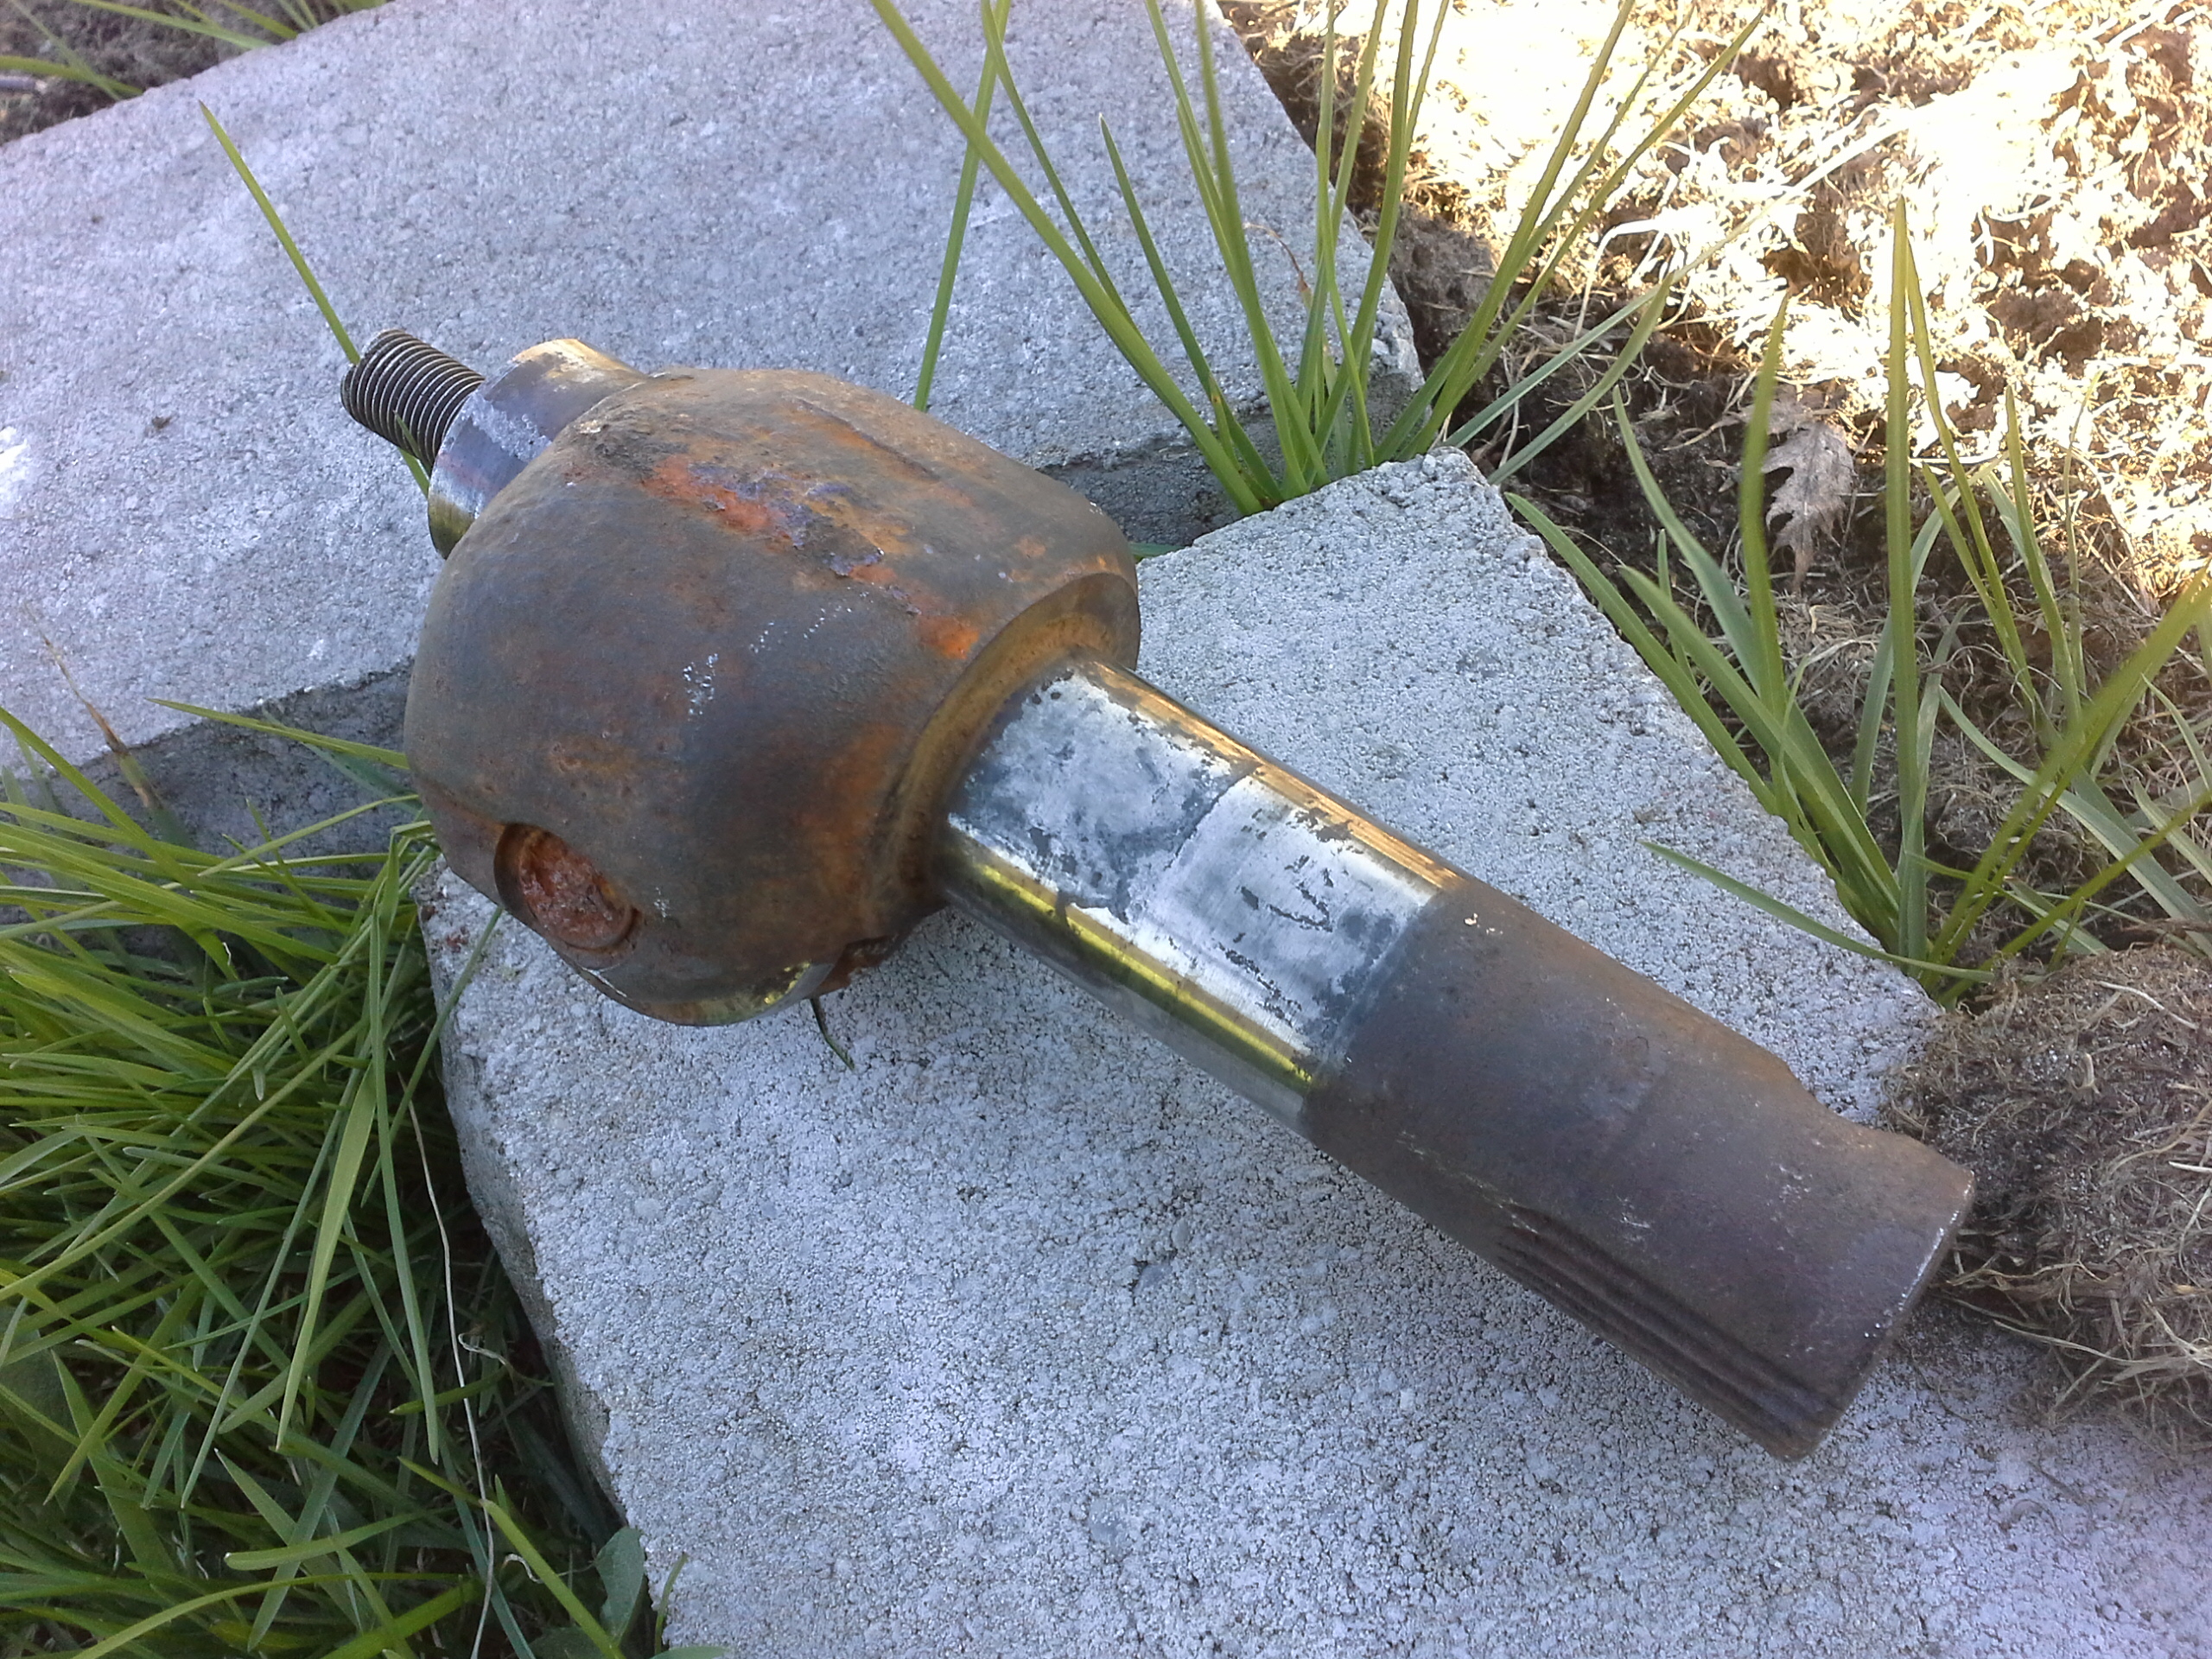
Jim Coke, you guessed right! I did the spark test on the piece and there was a lot of sparks with a fair amount of splits. Thanks to your help, I believe that it would be between low carbon to medium carbon steel. I am happy with the result because I would rather work with simple steels as I am a beginner. -
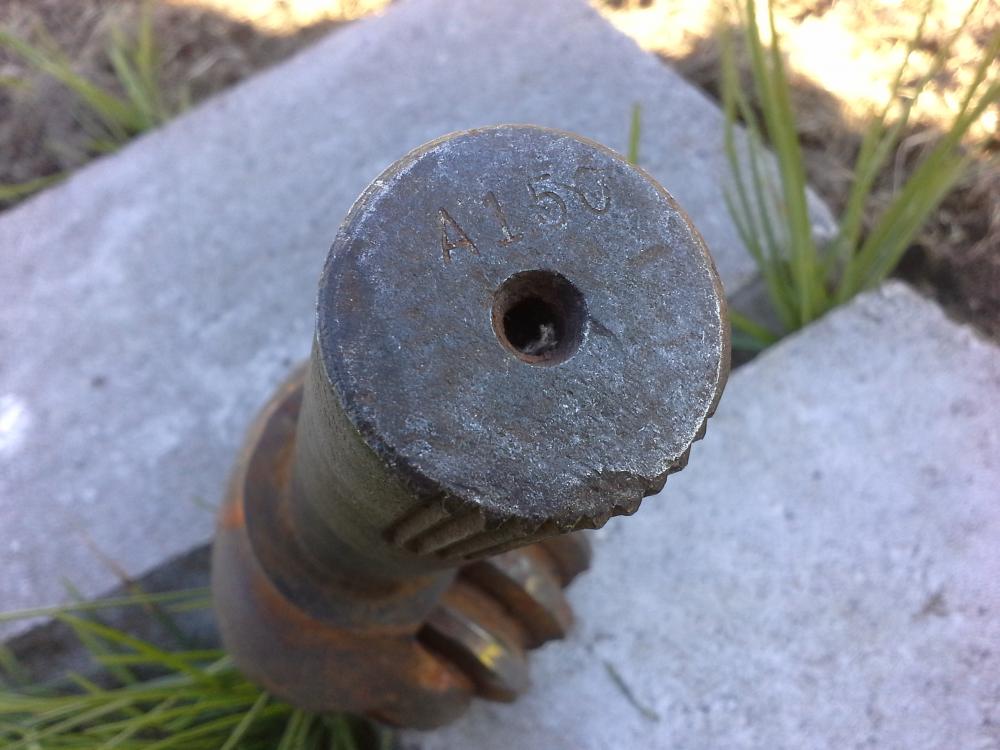
Hello everyone! I recently picked up some scrap from an old vehicle and found a piece whose cylinder looks very much like stainless steel. Do you know what steel it is? Can it be forged or is it dangerous?


-
Peter Wright anvil with peculiar hole
Xavier F-C replied to Xavier F-C's topic in Anvil Reviews by brand
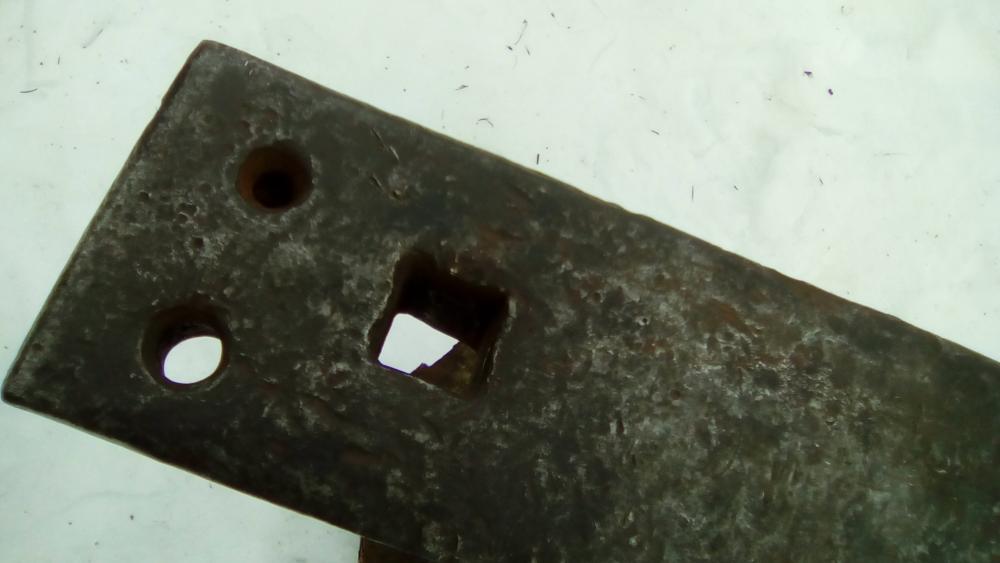
I agree with you ThomasPowers that making a disc tool would be a great project to be more effective at these tasks and being better for the heel. Would you suggest drilling the cylinder diameter or a bit larger to remove some of the above curve? Of course right now I do not really need such a disc nor do I want to make an important change to the anvil so early. But the project is definitely something I could do in the near future. -
Peter Wright anvil with peculiar hole
Xavier F-C replied to Xavier F-C's topic in Anvil Reviews by brand
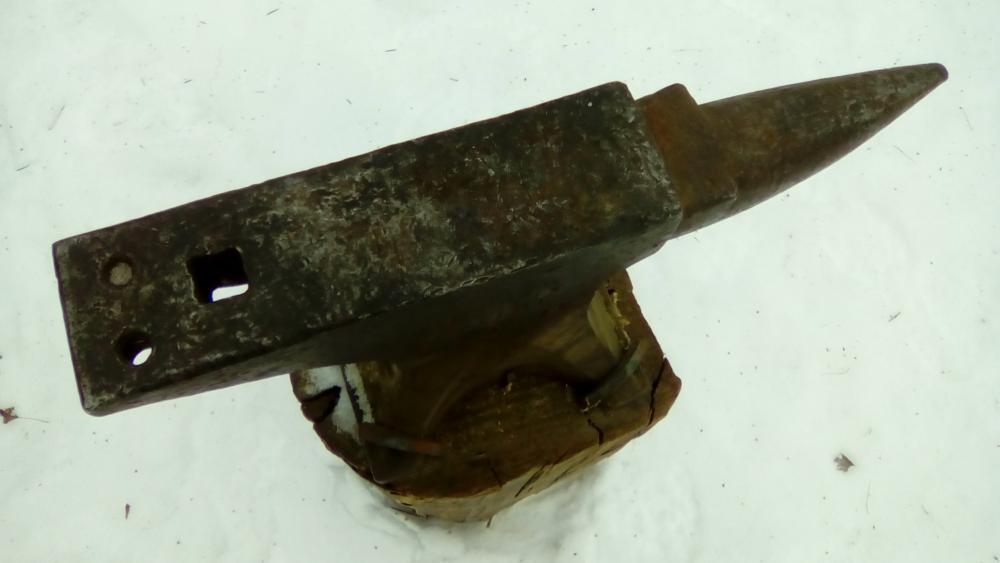
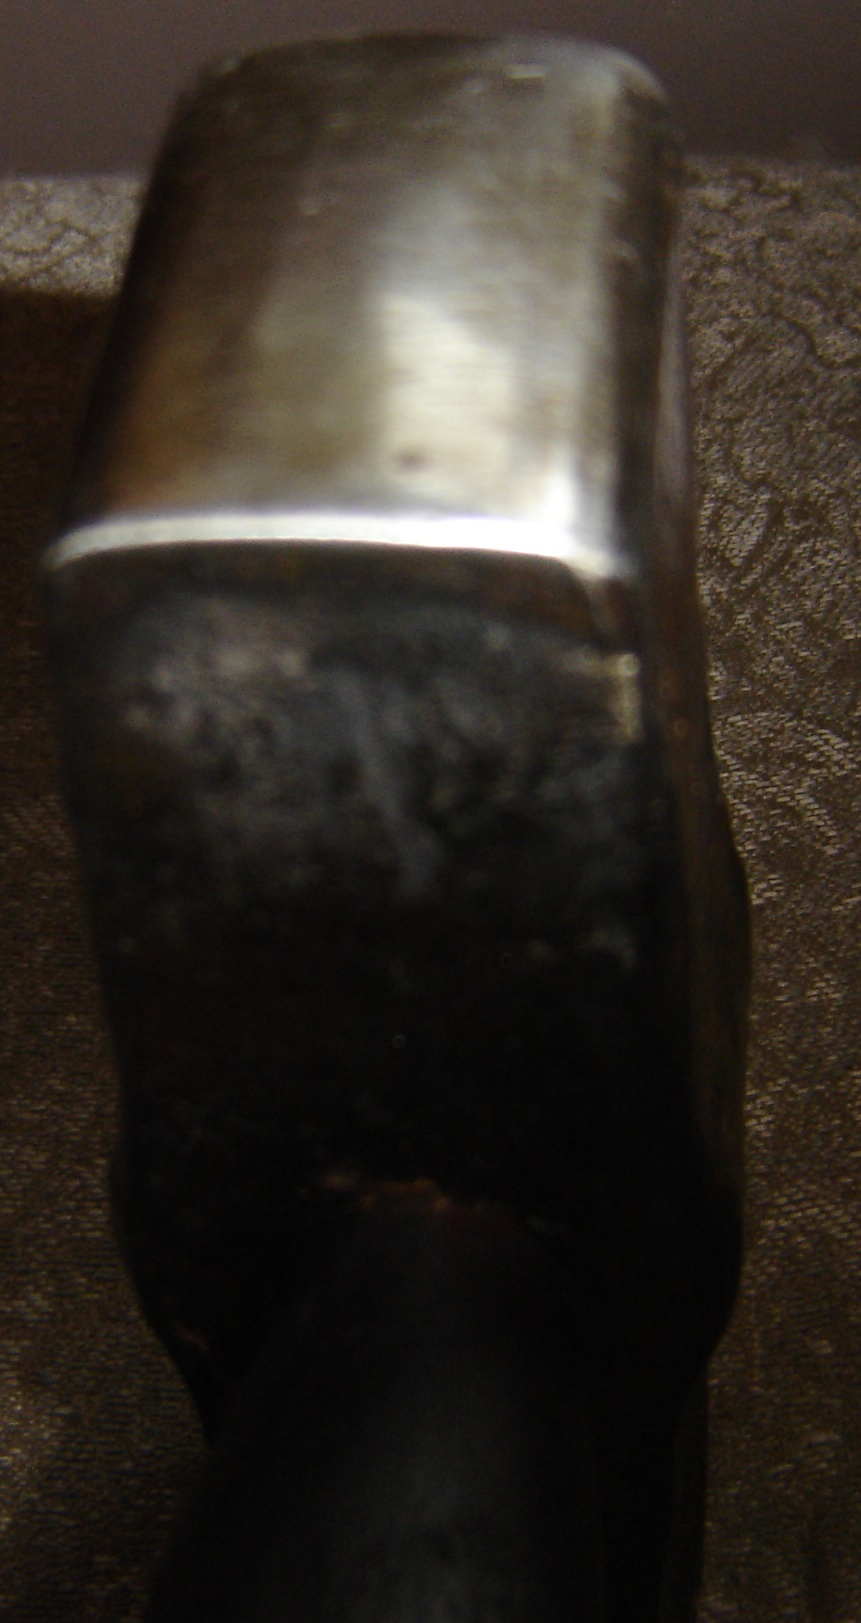
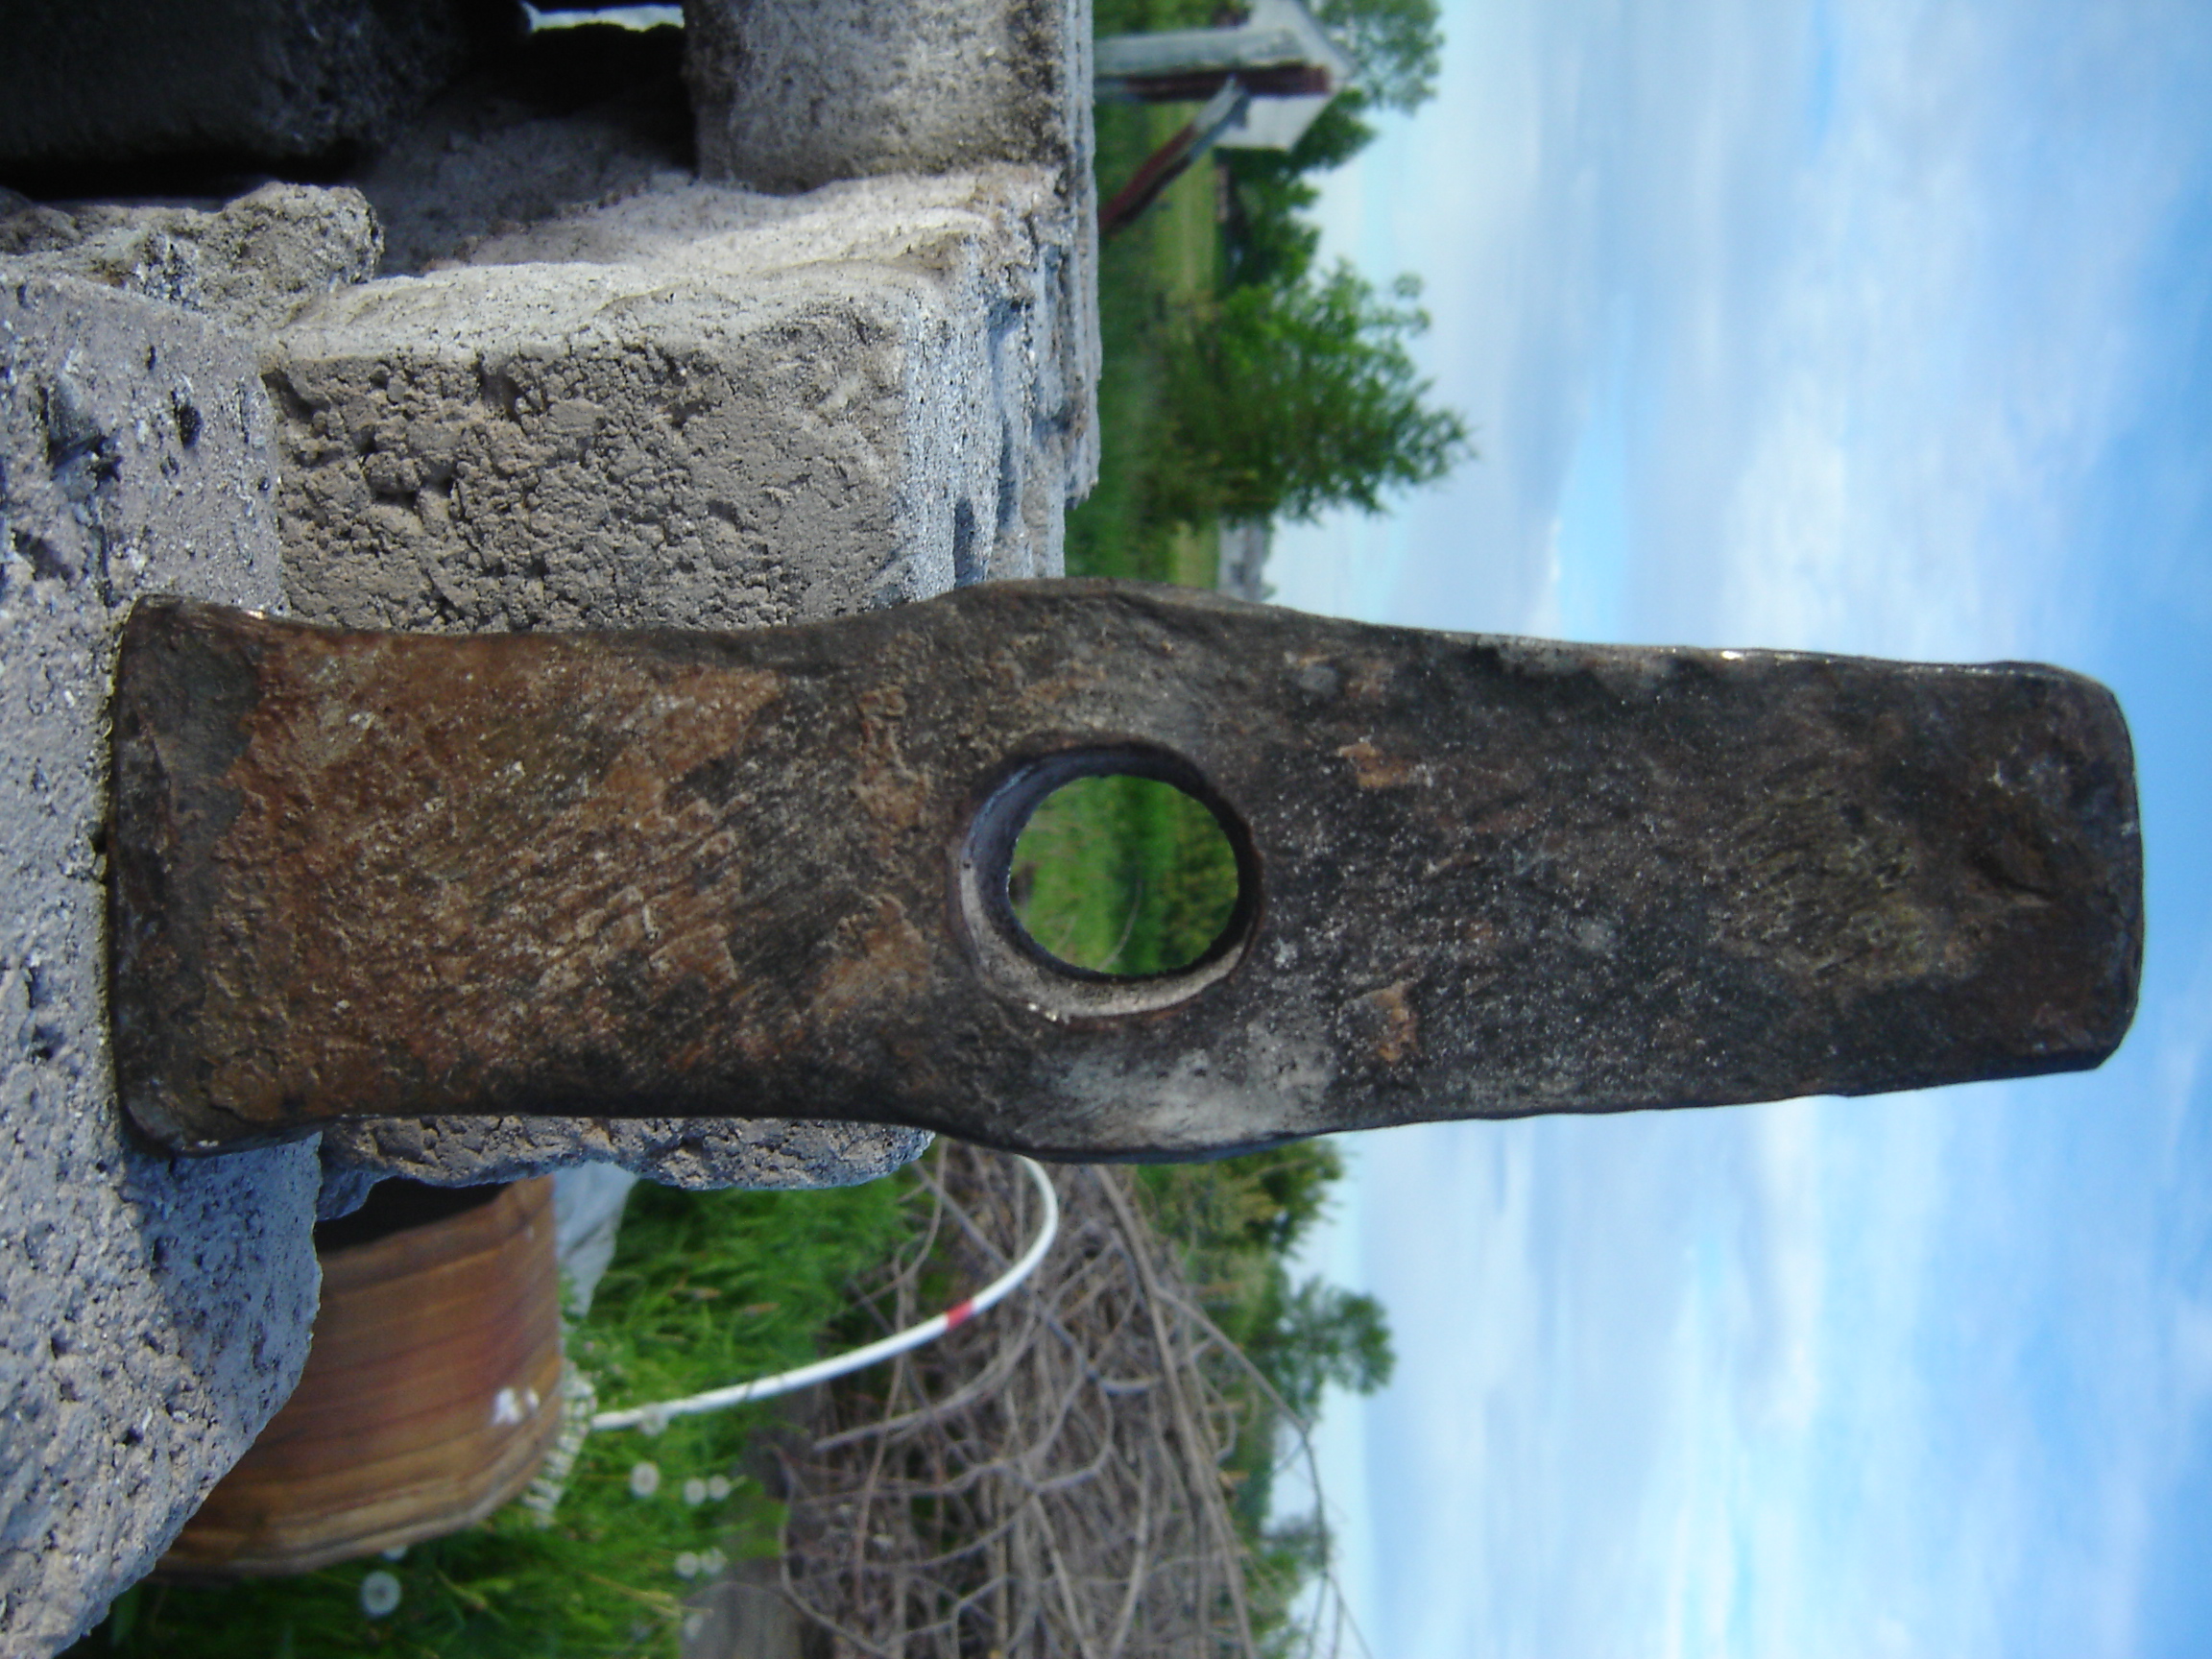
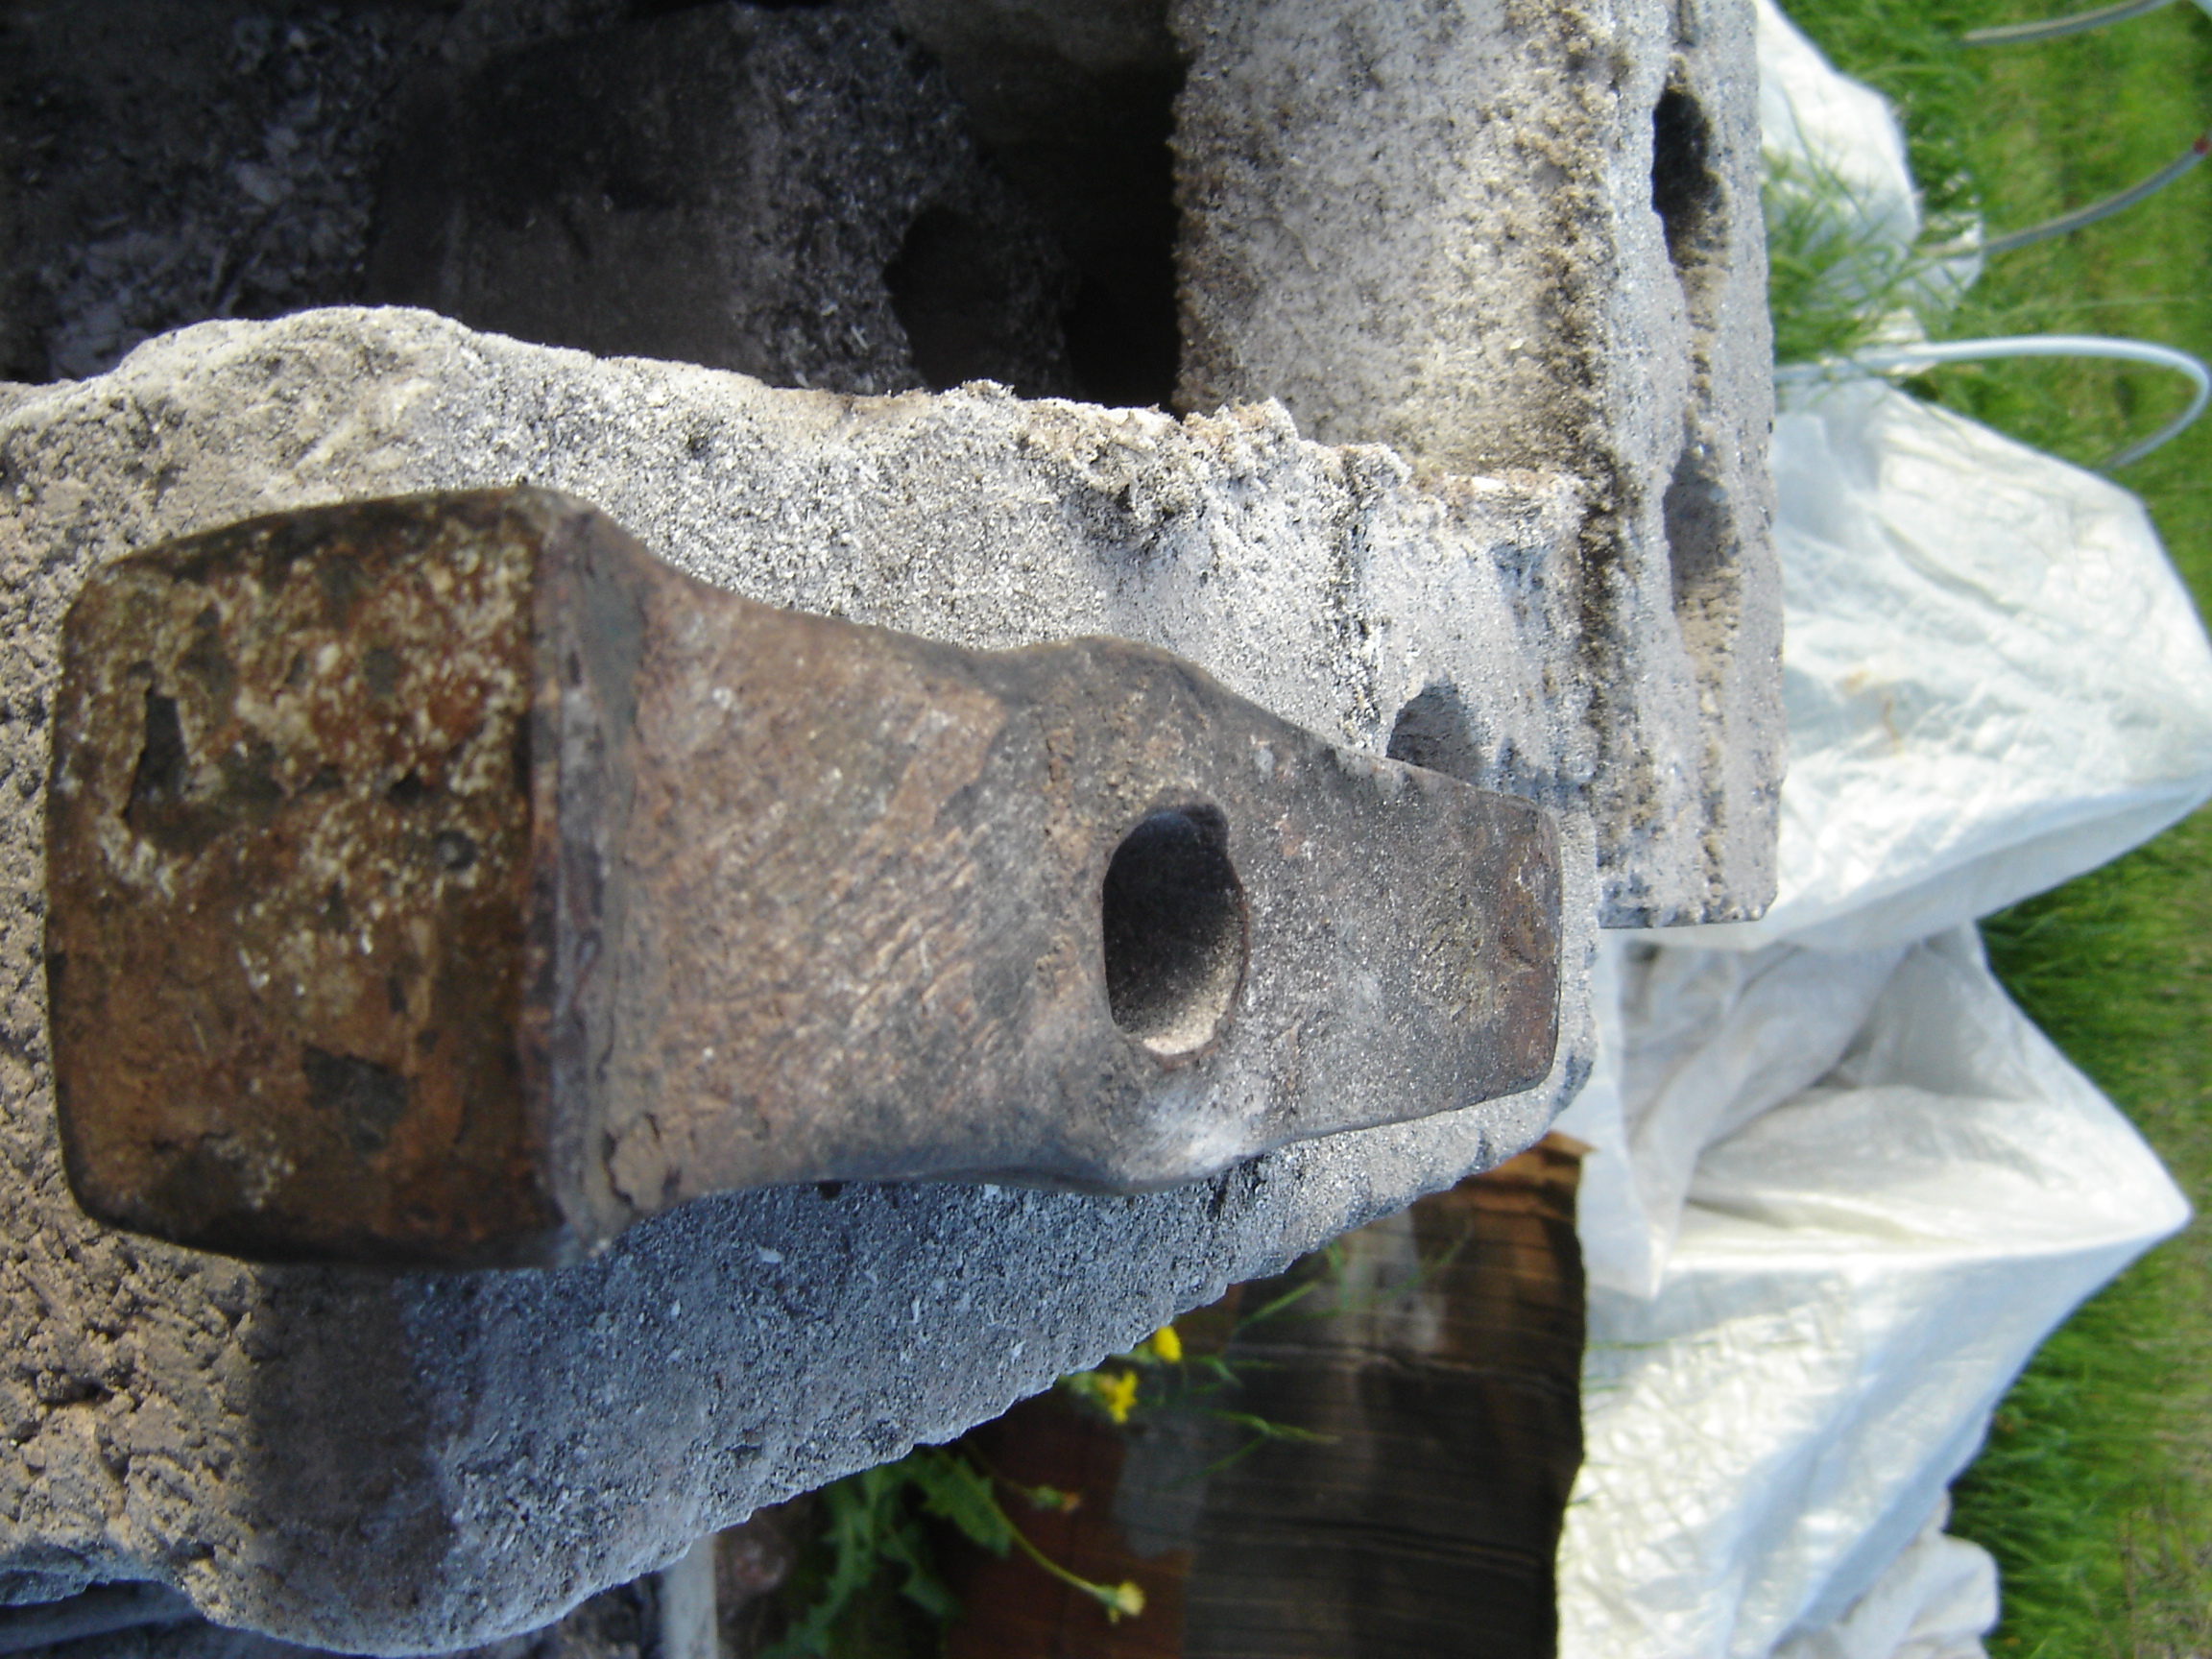
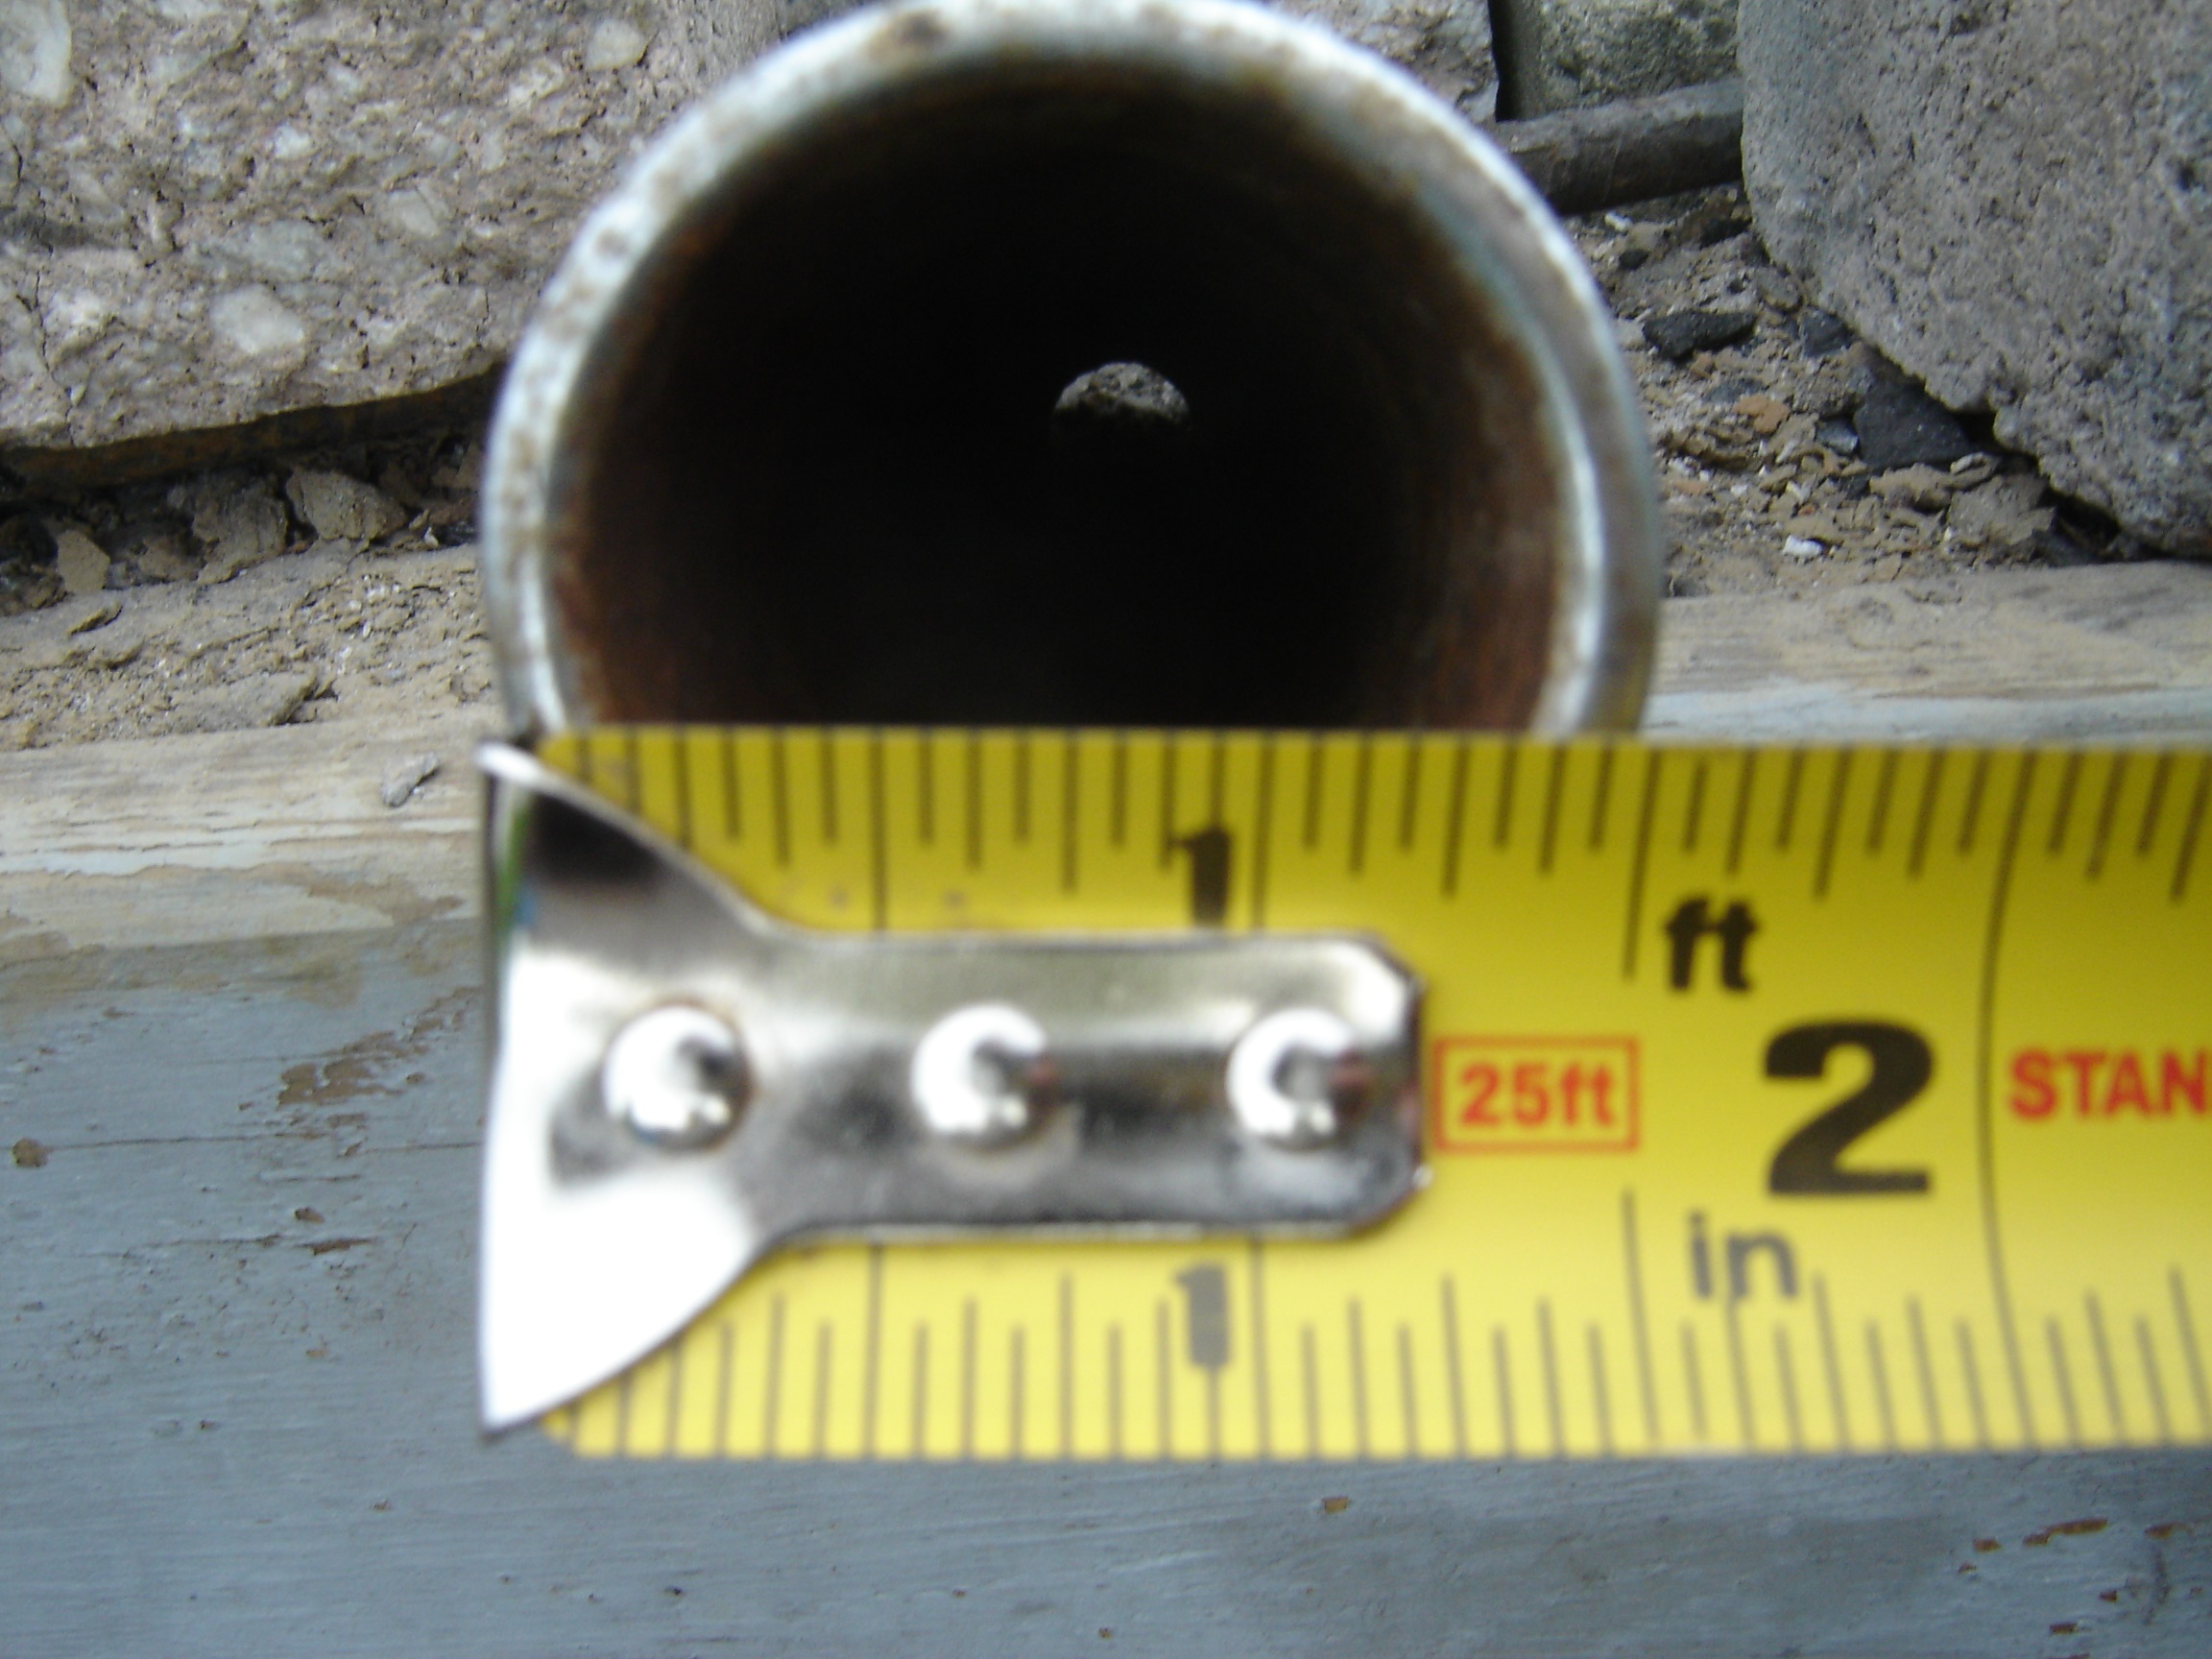
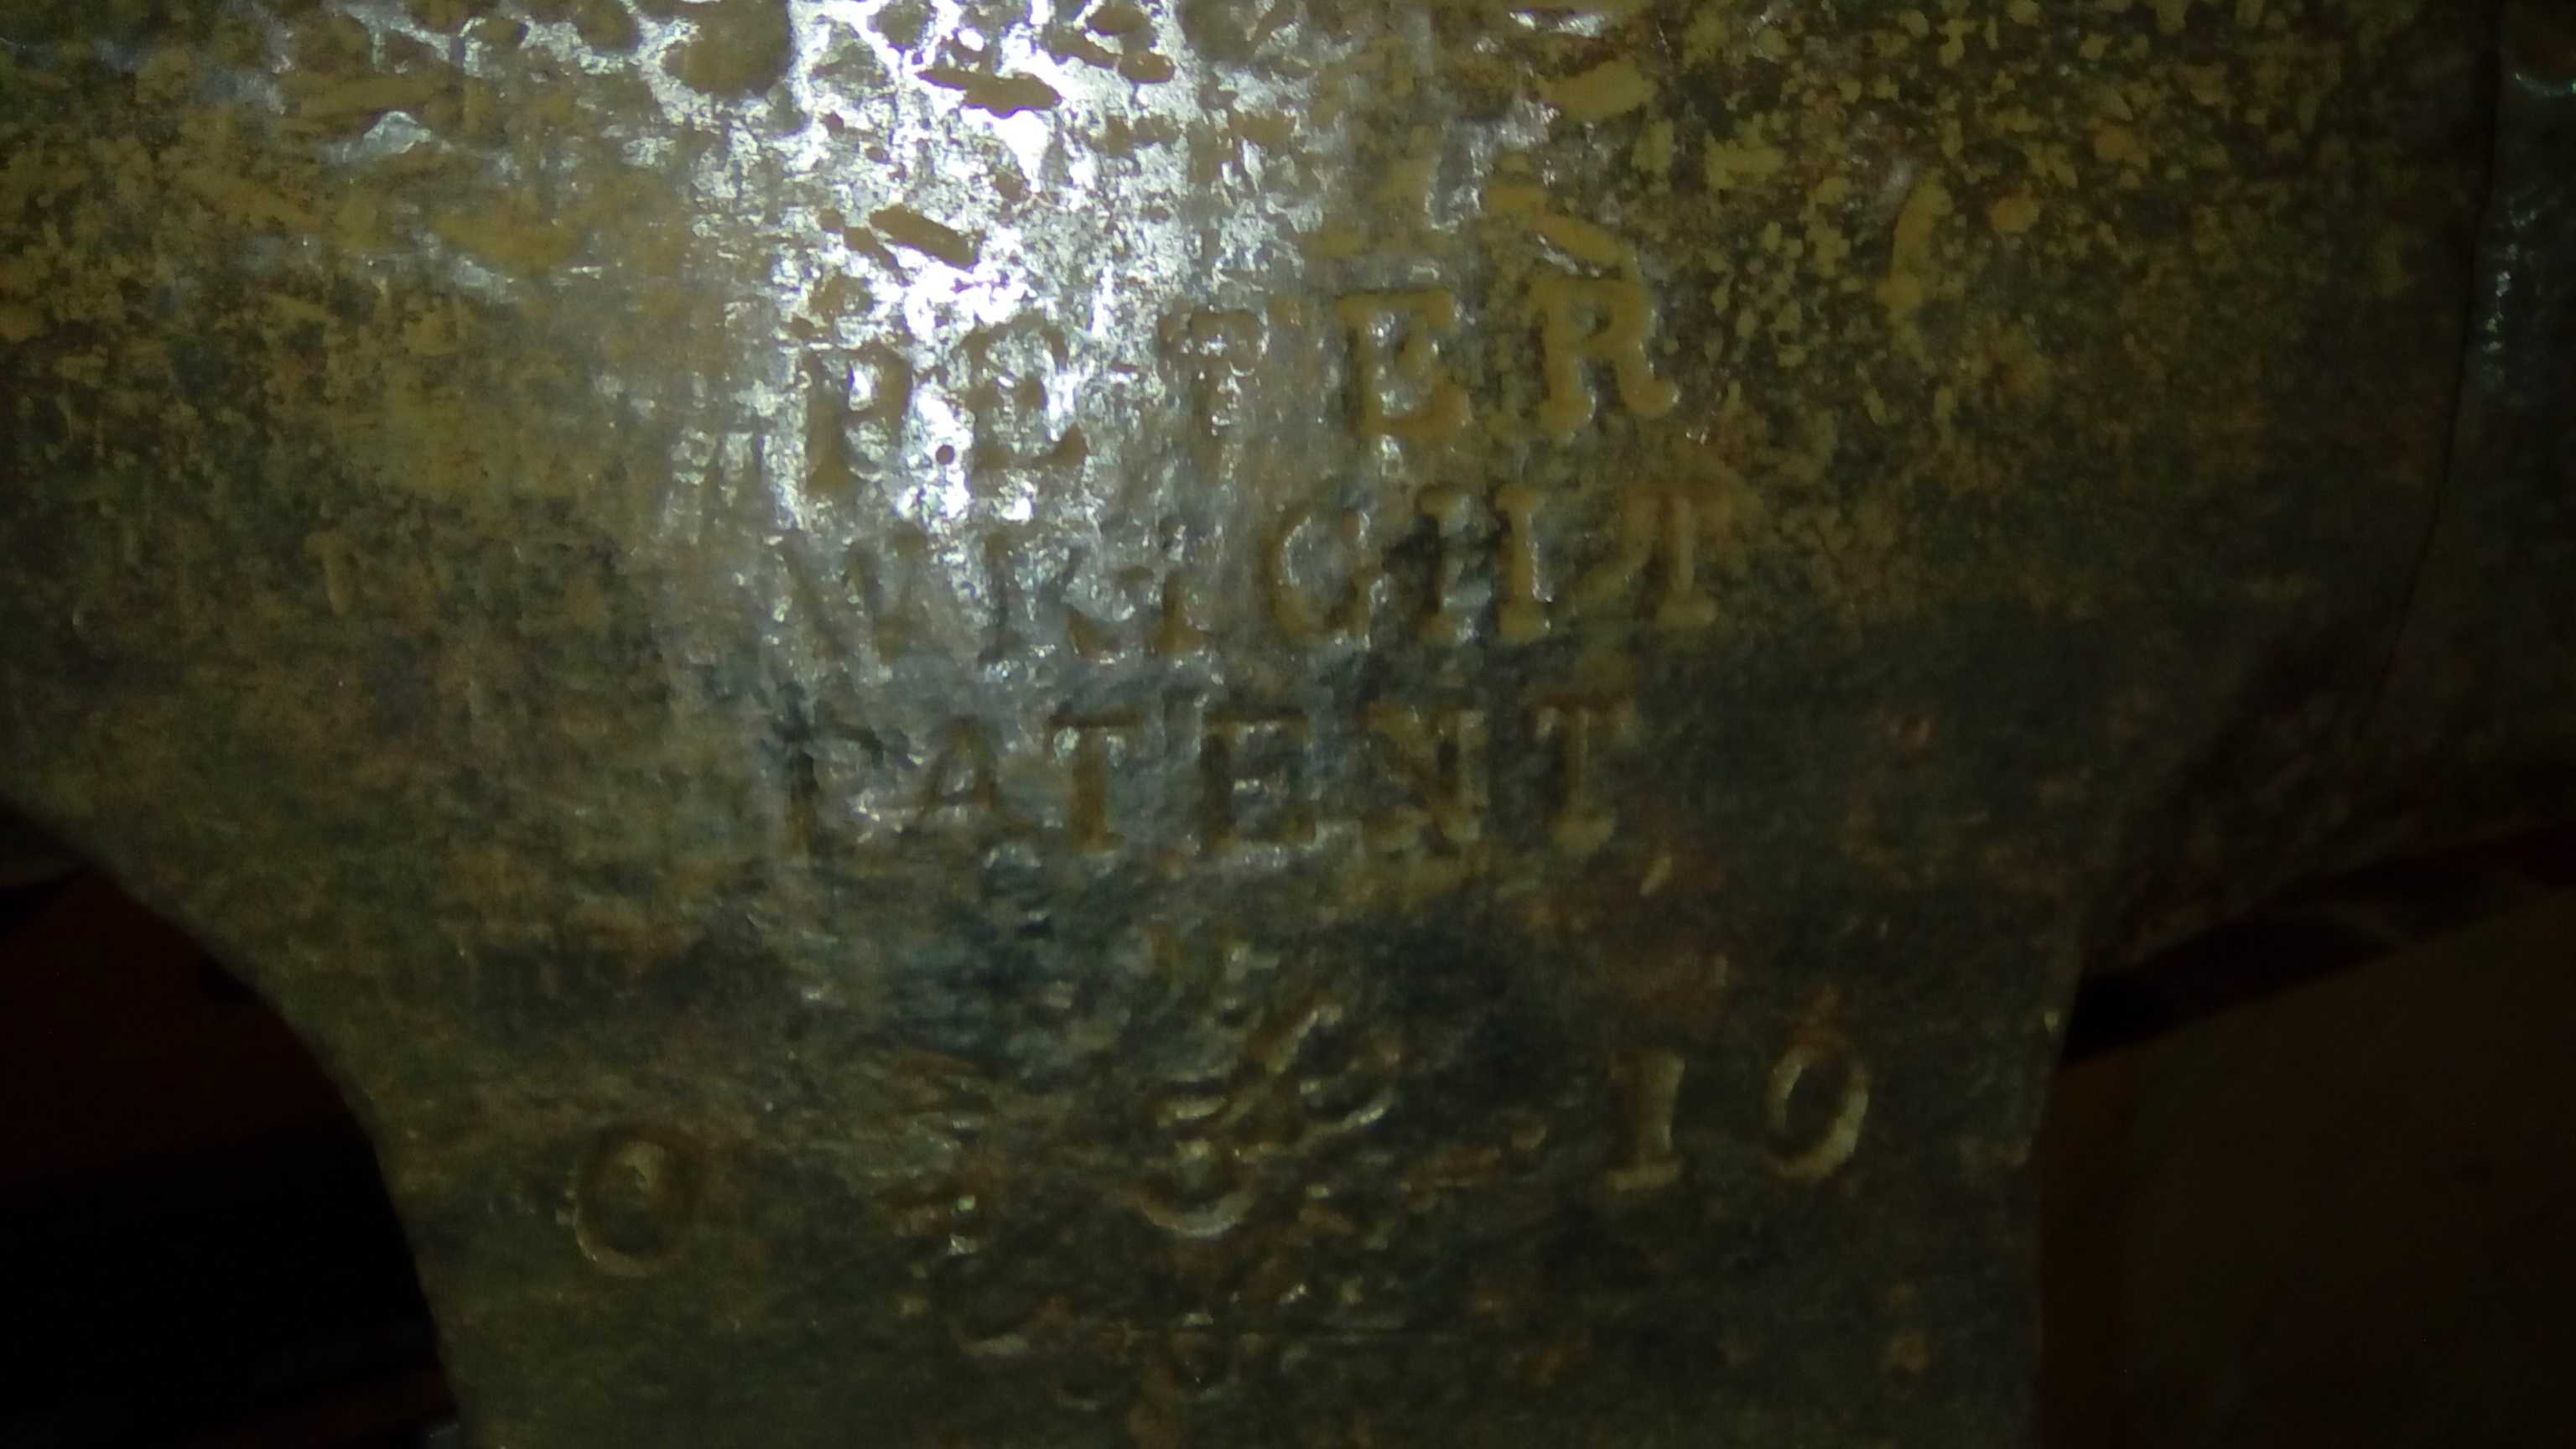
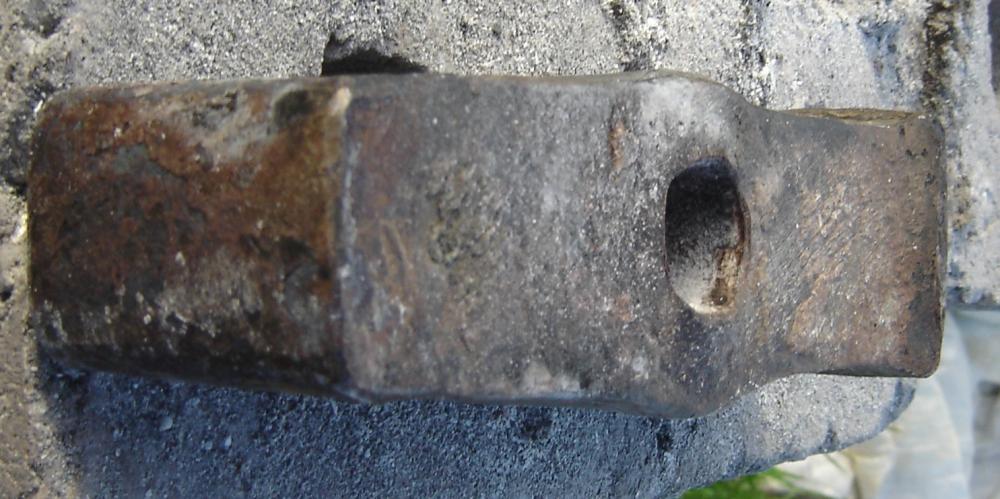
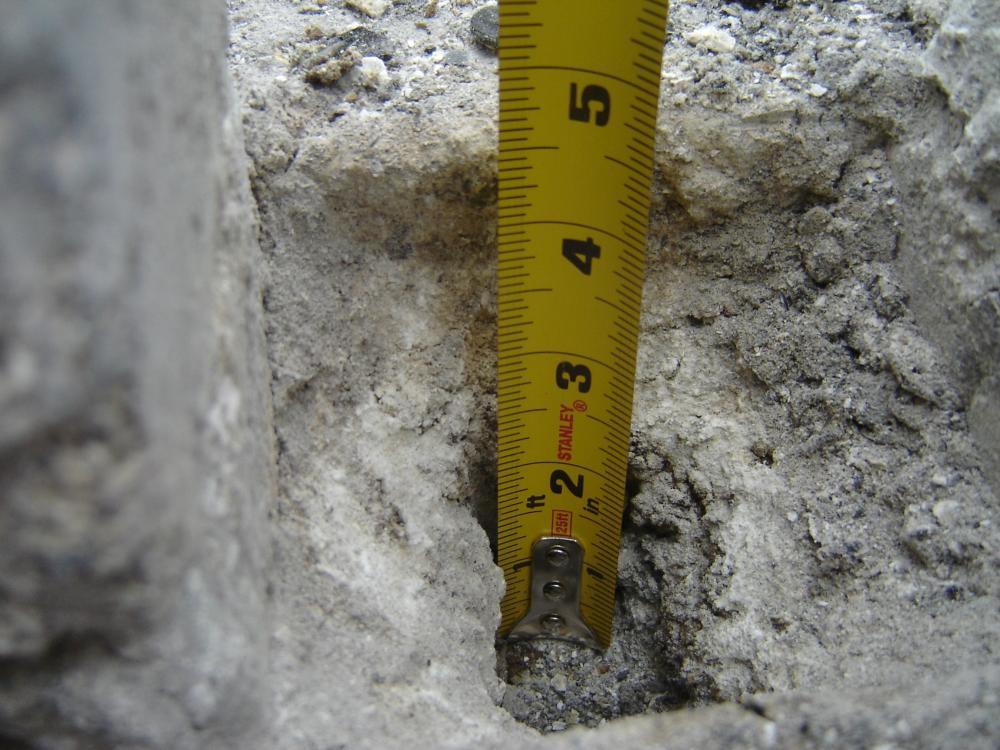
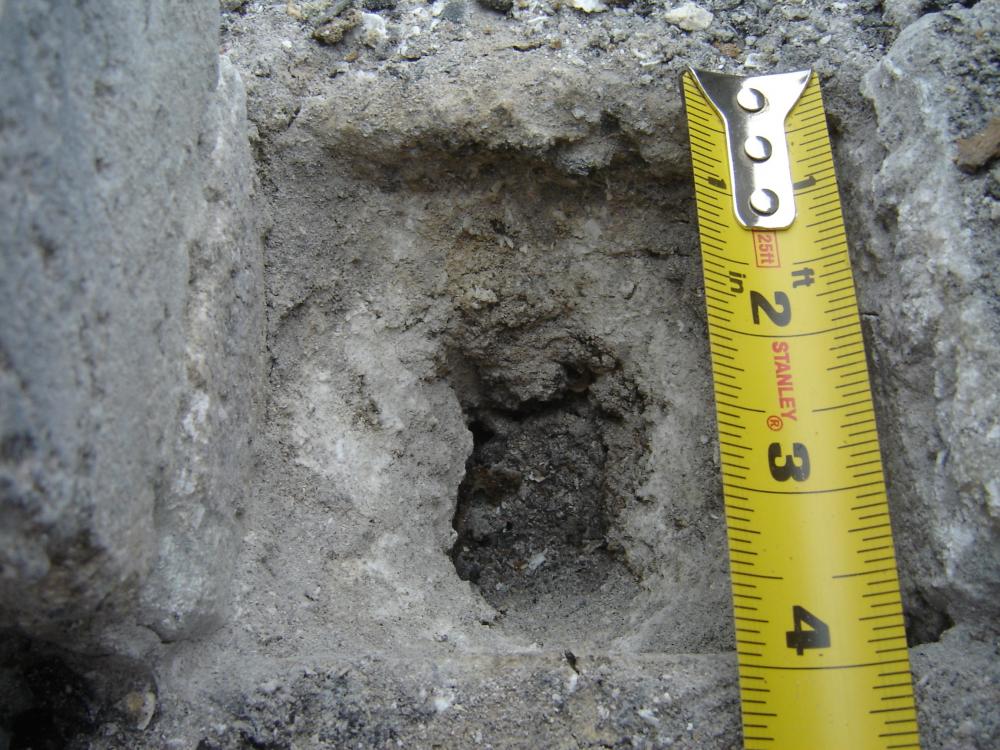
Thank you responding the iron dwarf and ThomasPowers! The underside of the heel has a normal curve and has no visible deformation. Roughly, the third hole shape looks like this: The cylinder in the picture has a smaller diameter than the normal Pritchel hole. Do you see any advantages to drill it to make a second Pritchel hole? (Of course dust would no longer accumulate.) The reason I have not measured the anvil's weight is because I was too lazy to detach it from the tree stump.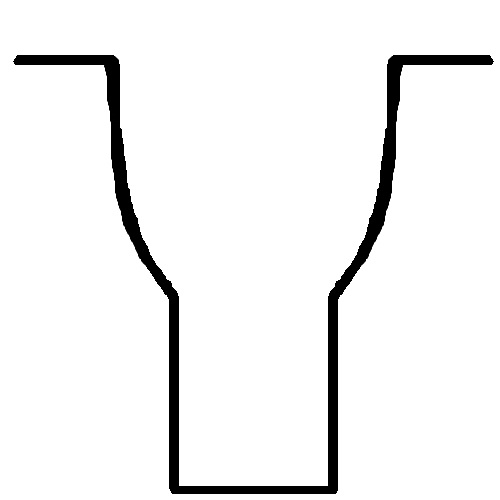
-
Peter Wright anvil with peculiar hole
Xavier F-C replied to Xavier F-C's topic in Anvil Reviews by brand
Thank you for responding Chris! If I understand you, the third hole is called a Pritchel Hole even if it has bottom. -
Hello iforgeiron! I started forging around summer 2016 at the age of 17 years old and I still am a total newbie at it. Luckily for me, with the help of my family, I recently bought a nice old anvil for a very good price. (It replaced my 20 pounds ASO. ) According to the writings, I believe it would weight 94 pounds: After looking at the third hole, which has a bottom, I do not really know its utility. If anyone know something about it, I would be very curious. As far as I see it, this hole easily traps all kind of dusts so it does not seem practical. (I had to clean it a little to see the inside) Thanks in advance! BTW English is my secondary language as I live in Quebec.