HP500
-
Posts
95 -
Joined
-
Last visited
Content Type
Profiles
Forums
Articles
Gallery
Downloads
Events
Everything posted by HP500
-
I'm almost done with a 2x72 grinder build. I'm using a KBAC 27D VFD connected to a Leeson 2 HP 3 phase motor. I did a bench test of the motor and controller last night. It is not hooked up to the grinder frame yet. The motor ran fine until I turned the speed controller below 60%. Then it started to almost jump around on the bench. Above 60% and it runs smooth as can be. Any idea about how to correct this?
-
Very helpful, thank you!
-
Good info, thank you!
-
Great idea, thanks Thomas! Just out of curiosity, what size bases have others here used for similar vise stands?
-
I'm not sure. I have very limited experience using a post vise to this point.
-
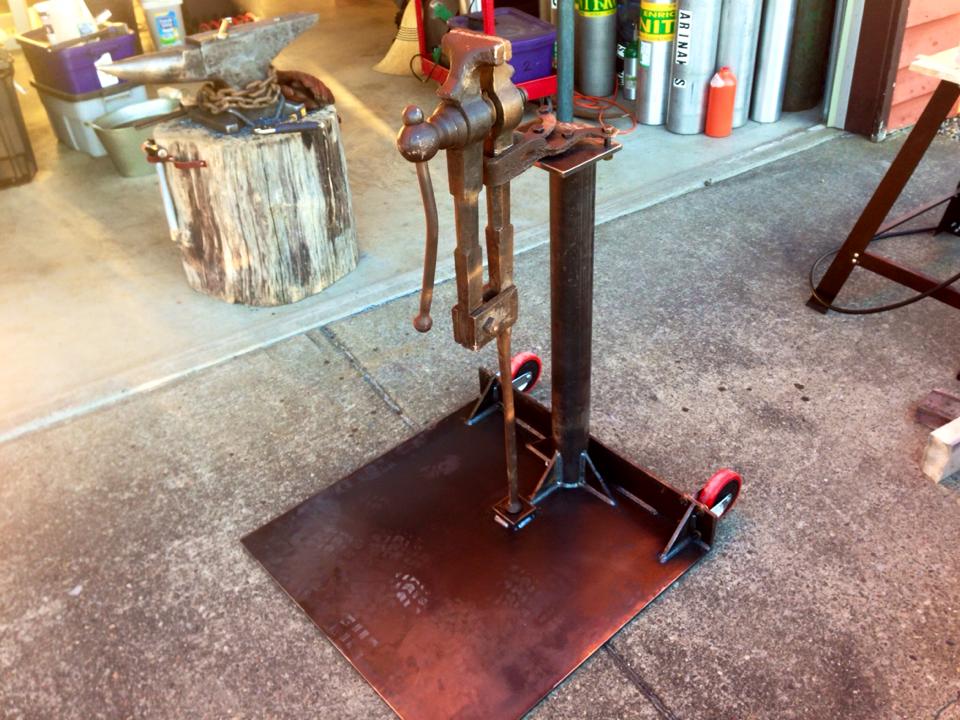
I recently picked up a very nice 50lb Columbian post vise. I don't have a shop, so I need to make it movable so I can move it from the garage to the driveway and back again to use it. I'm going to build the type of stand where you can stand on the bottom base plate very similar to this one I have a piece of 25"x24" x 5/16" plate for the base. Do you think that would be big enough?
-
Good ideas!
-
Very nice, thanks!
-
Thanks JME1149, this is very helpful. It looks like I made many mistakes with this project using my new coal forge. The file was an old Nicholson file that I had, but I did not test it for hardness before the project. I did not grind the teeth off first. I did anneal it by putting it in ashes overnight after forging, but I did not normalize it first. I did not notice any cracks after quenching, but on my third attempt the middle of the blade was in the hottest part of my fire so I'm almost positive I burned it in half because I didn't pay attention. I will definitely follow your suggestions for my next attempt. Thank you very much!
-
Good info, thanks!
-
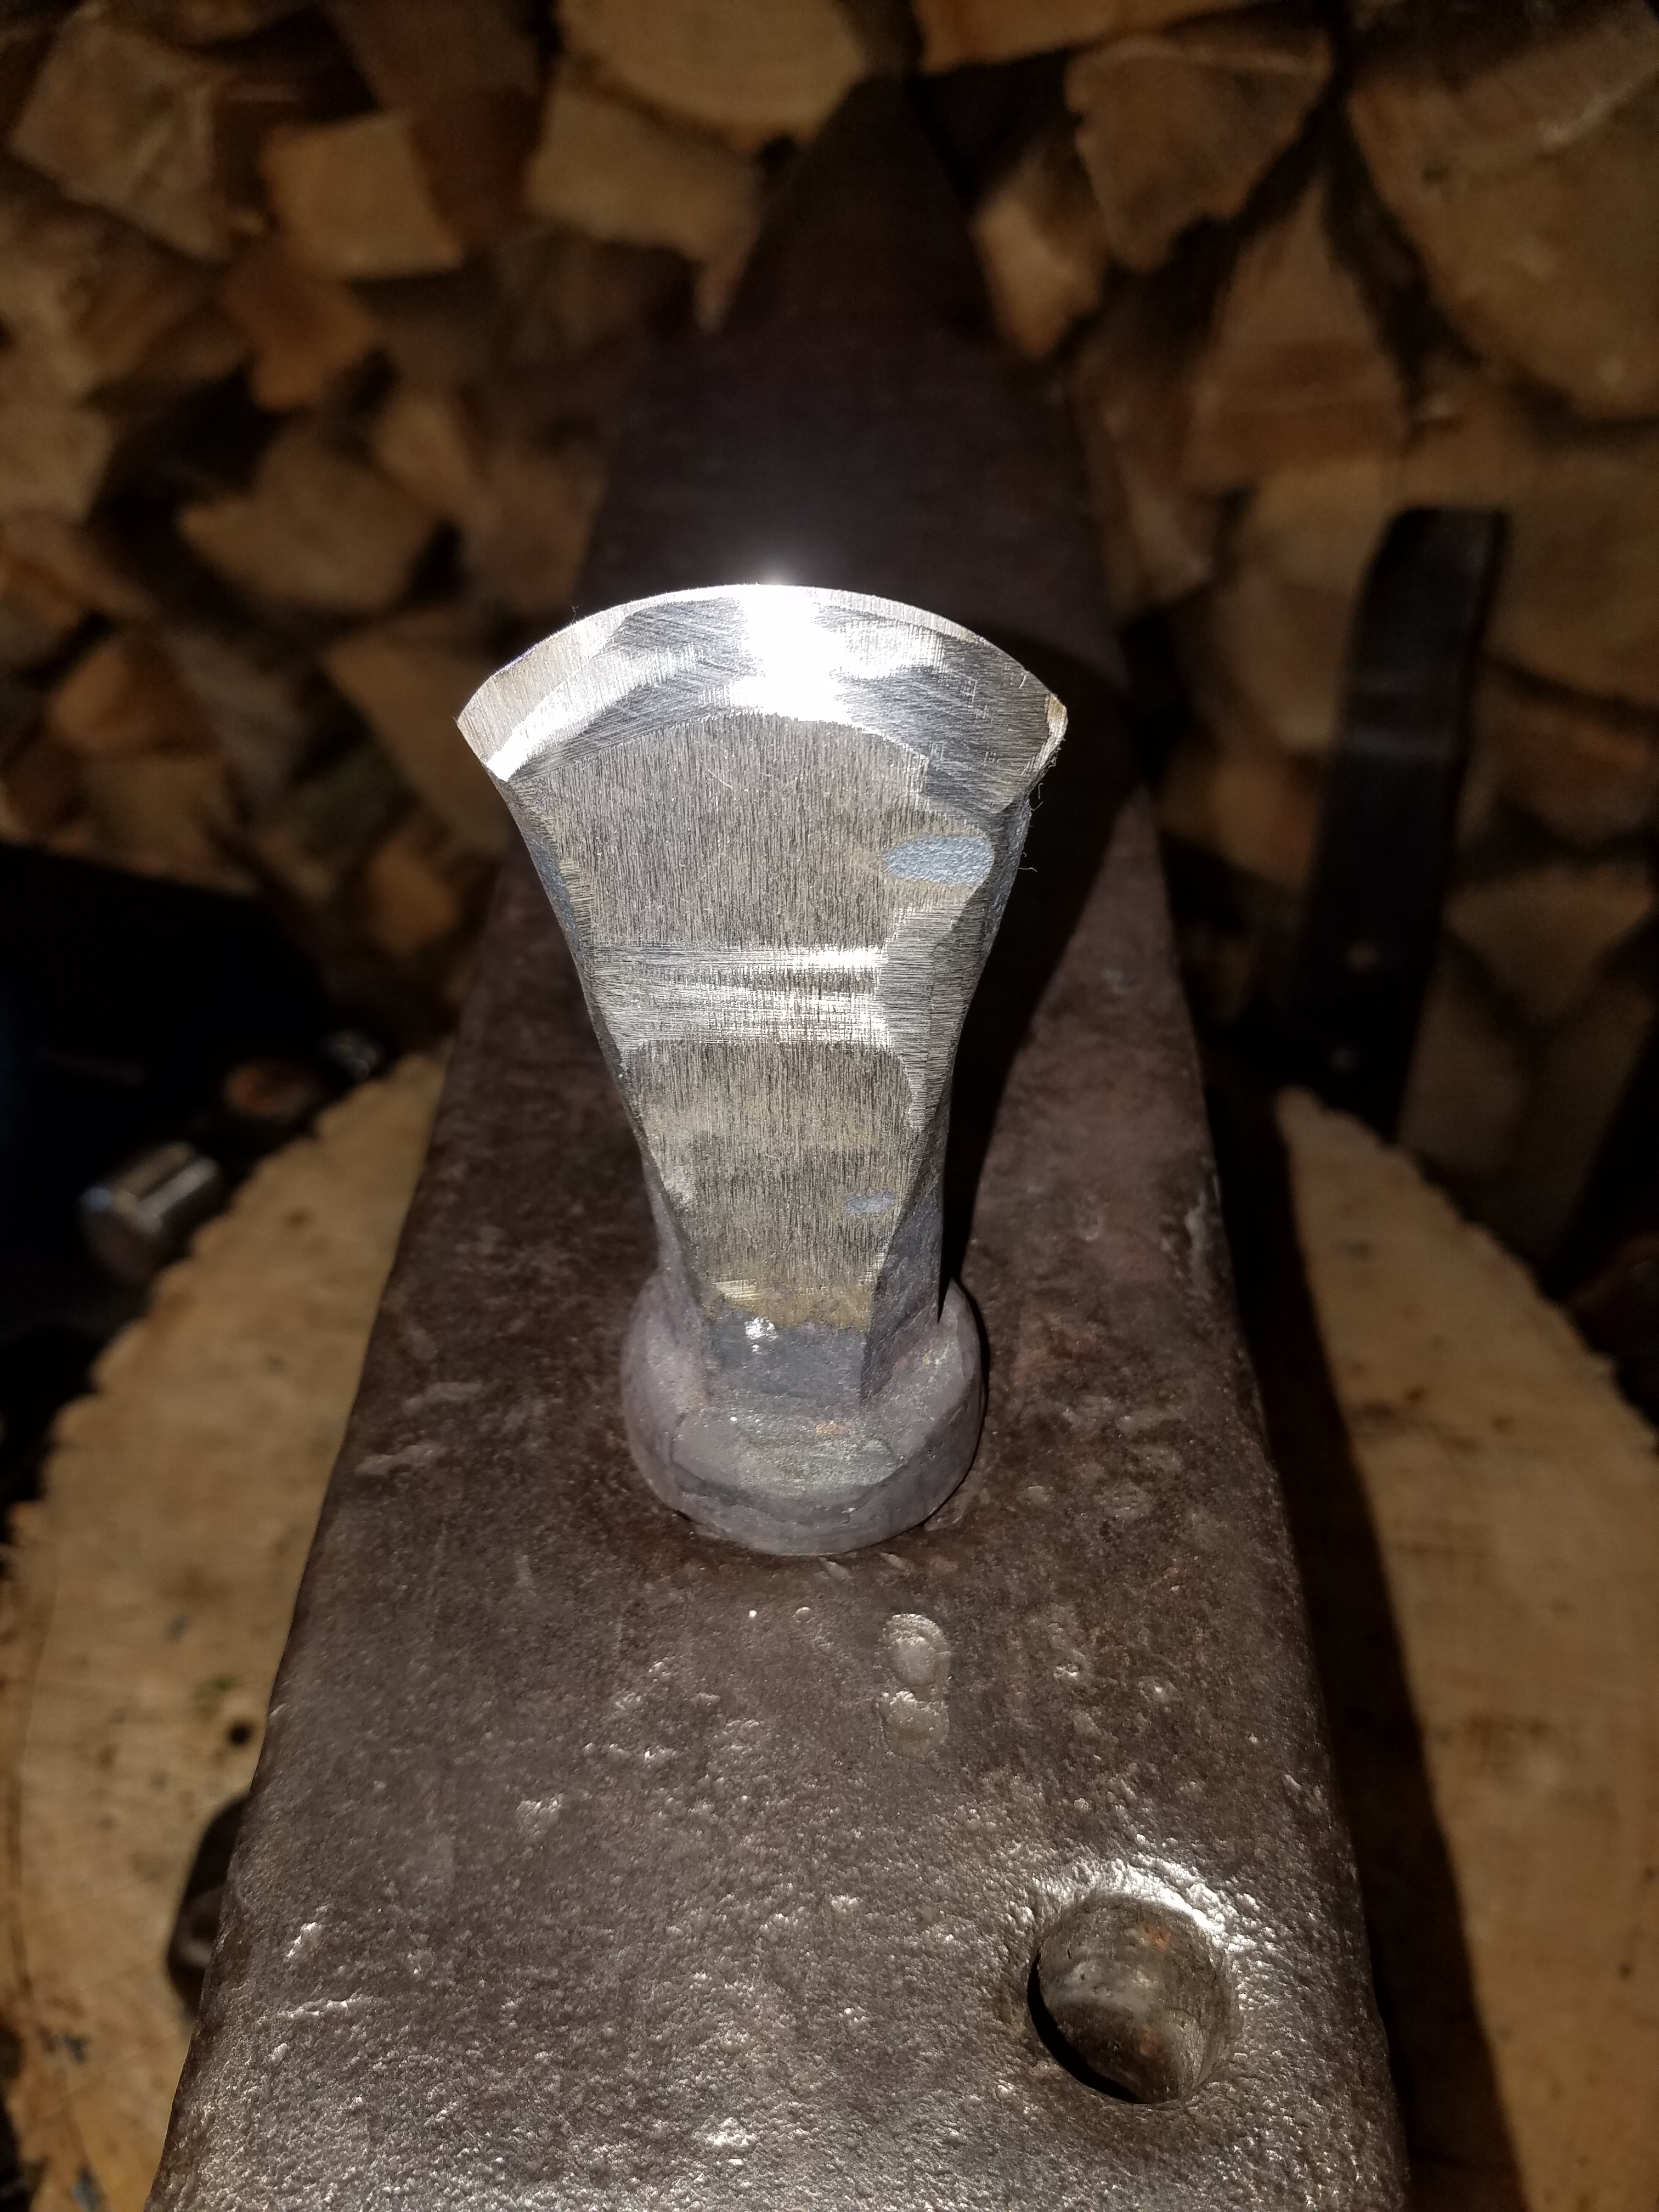
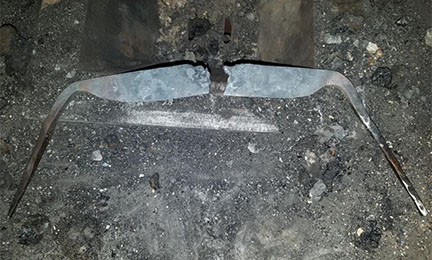
As a beginner blacksmith, one of the things that attracted me to blacksmithing is that you develop the ability to make tools. I needed a draw knife but didn't have one. I attempted to make one out of an old file I had. It was my first attempt, and I must say, it came out much better than expected. I got the angle I wanted on the tangs, the blade was pretty symmetrical, the lines were straight, I had the blade shape I was looking for, etc. I must have spent about 4 or 5 hours on it between forging and grinding. After annealing, most of the shaping was done by hand with a file since I don't have the best equipment yet as far as grinders/sanders go, so it was a lot of work. The only steps I had left was to harden the blade by quenching in oil and to the the final sharpening and tempering. I quenched in canola oil, since that is what I had available. I did the file test after quenching and it seemed to bite in just a little. I quenched again, but things didn't seem any better. I decided to try it one more time to see if I could get any improvement. Here is the result: I took my eye off of the forge for only about 10 seconds. It was enough to ruin hours of labor. I was bummed about it, but I'll chalk this up to lessons learned. My "two piece draw knife" will be given a prominent place near my forge as a reminder to pay more attention to what I'm doing.
-
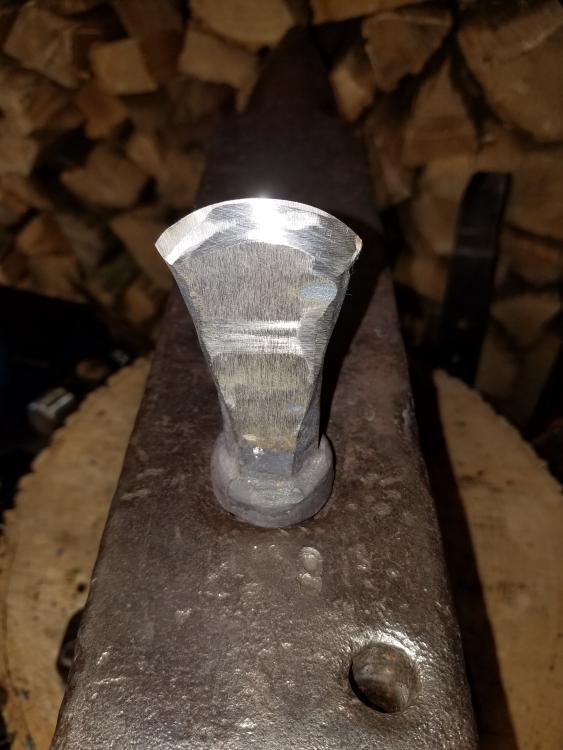
Here is my first attempt at making a hot cut that I just finished tonight. I made it from a broken jack hammer bit. It ain't pretty but I think it will work.
-
Found a Peter Wright anvil today
HP500 replied to HP500's topic in Anvils, Swage Blocks, and Mandrels
Great, that is very helpful. Thanks Thomas! -
Found a Peter Wright anvil today
HP500 replied to HP500's topic in Anvils, Swage Blocks, and Mandrels
Thomas, is "The Viking" a reference book? It sounds interesting. -
Found a Peter Wright anvil today
HP500 replied to HP500's topic in Anvils, Swage Blocks, and Mandrels
It is a tried and true design -
Found a Peter Wright anvil today
HP500 replied to HP500's topic in Anvils, Swage Blocks, and Mandrels
Thank you very much. I couldn't wait to try it out, so I made an attempt at forging my first flint and steel fire steel. It is not perfect, but I was happy with it and throws sparks like crazy! It is sitting on top of a beat up anvil that has been on loan to me until I could find one of my own,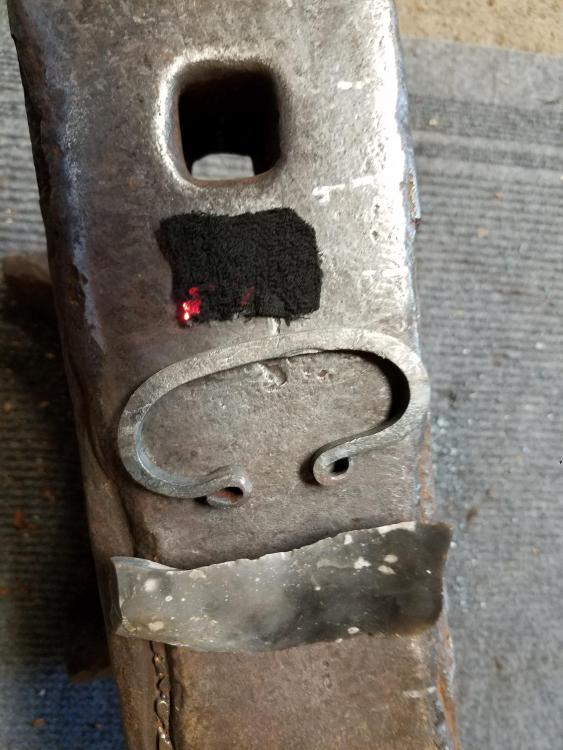
-
Found a Peter Wright anvil today
HP500 replied to HP500's topic in Anvils, Swage Blocks, and Mandrels
Thanks! -
Found a Peter Wright anvil today
HP500 replied to HP500's topic in Anvils, Swage Blocks, and Mandrels
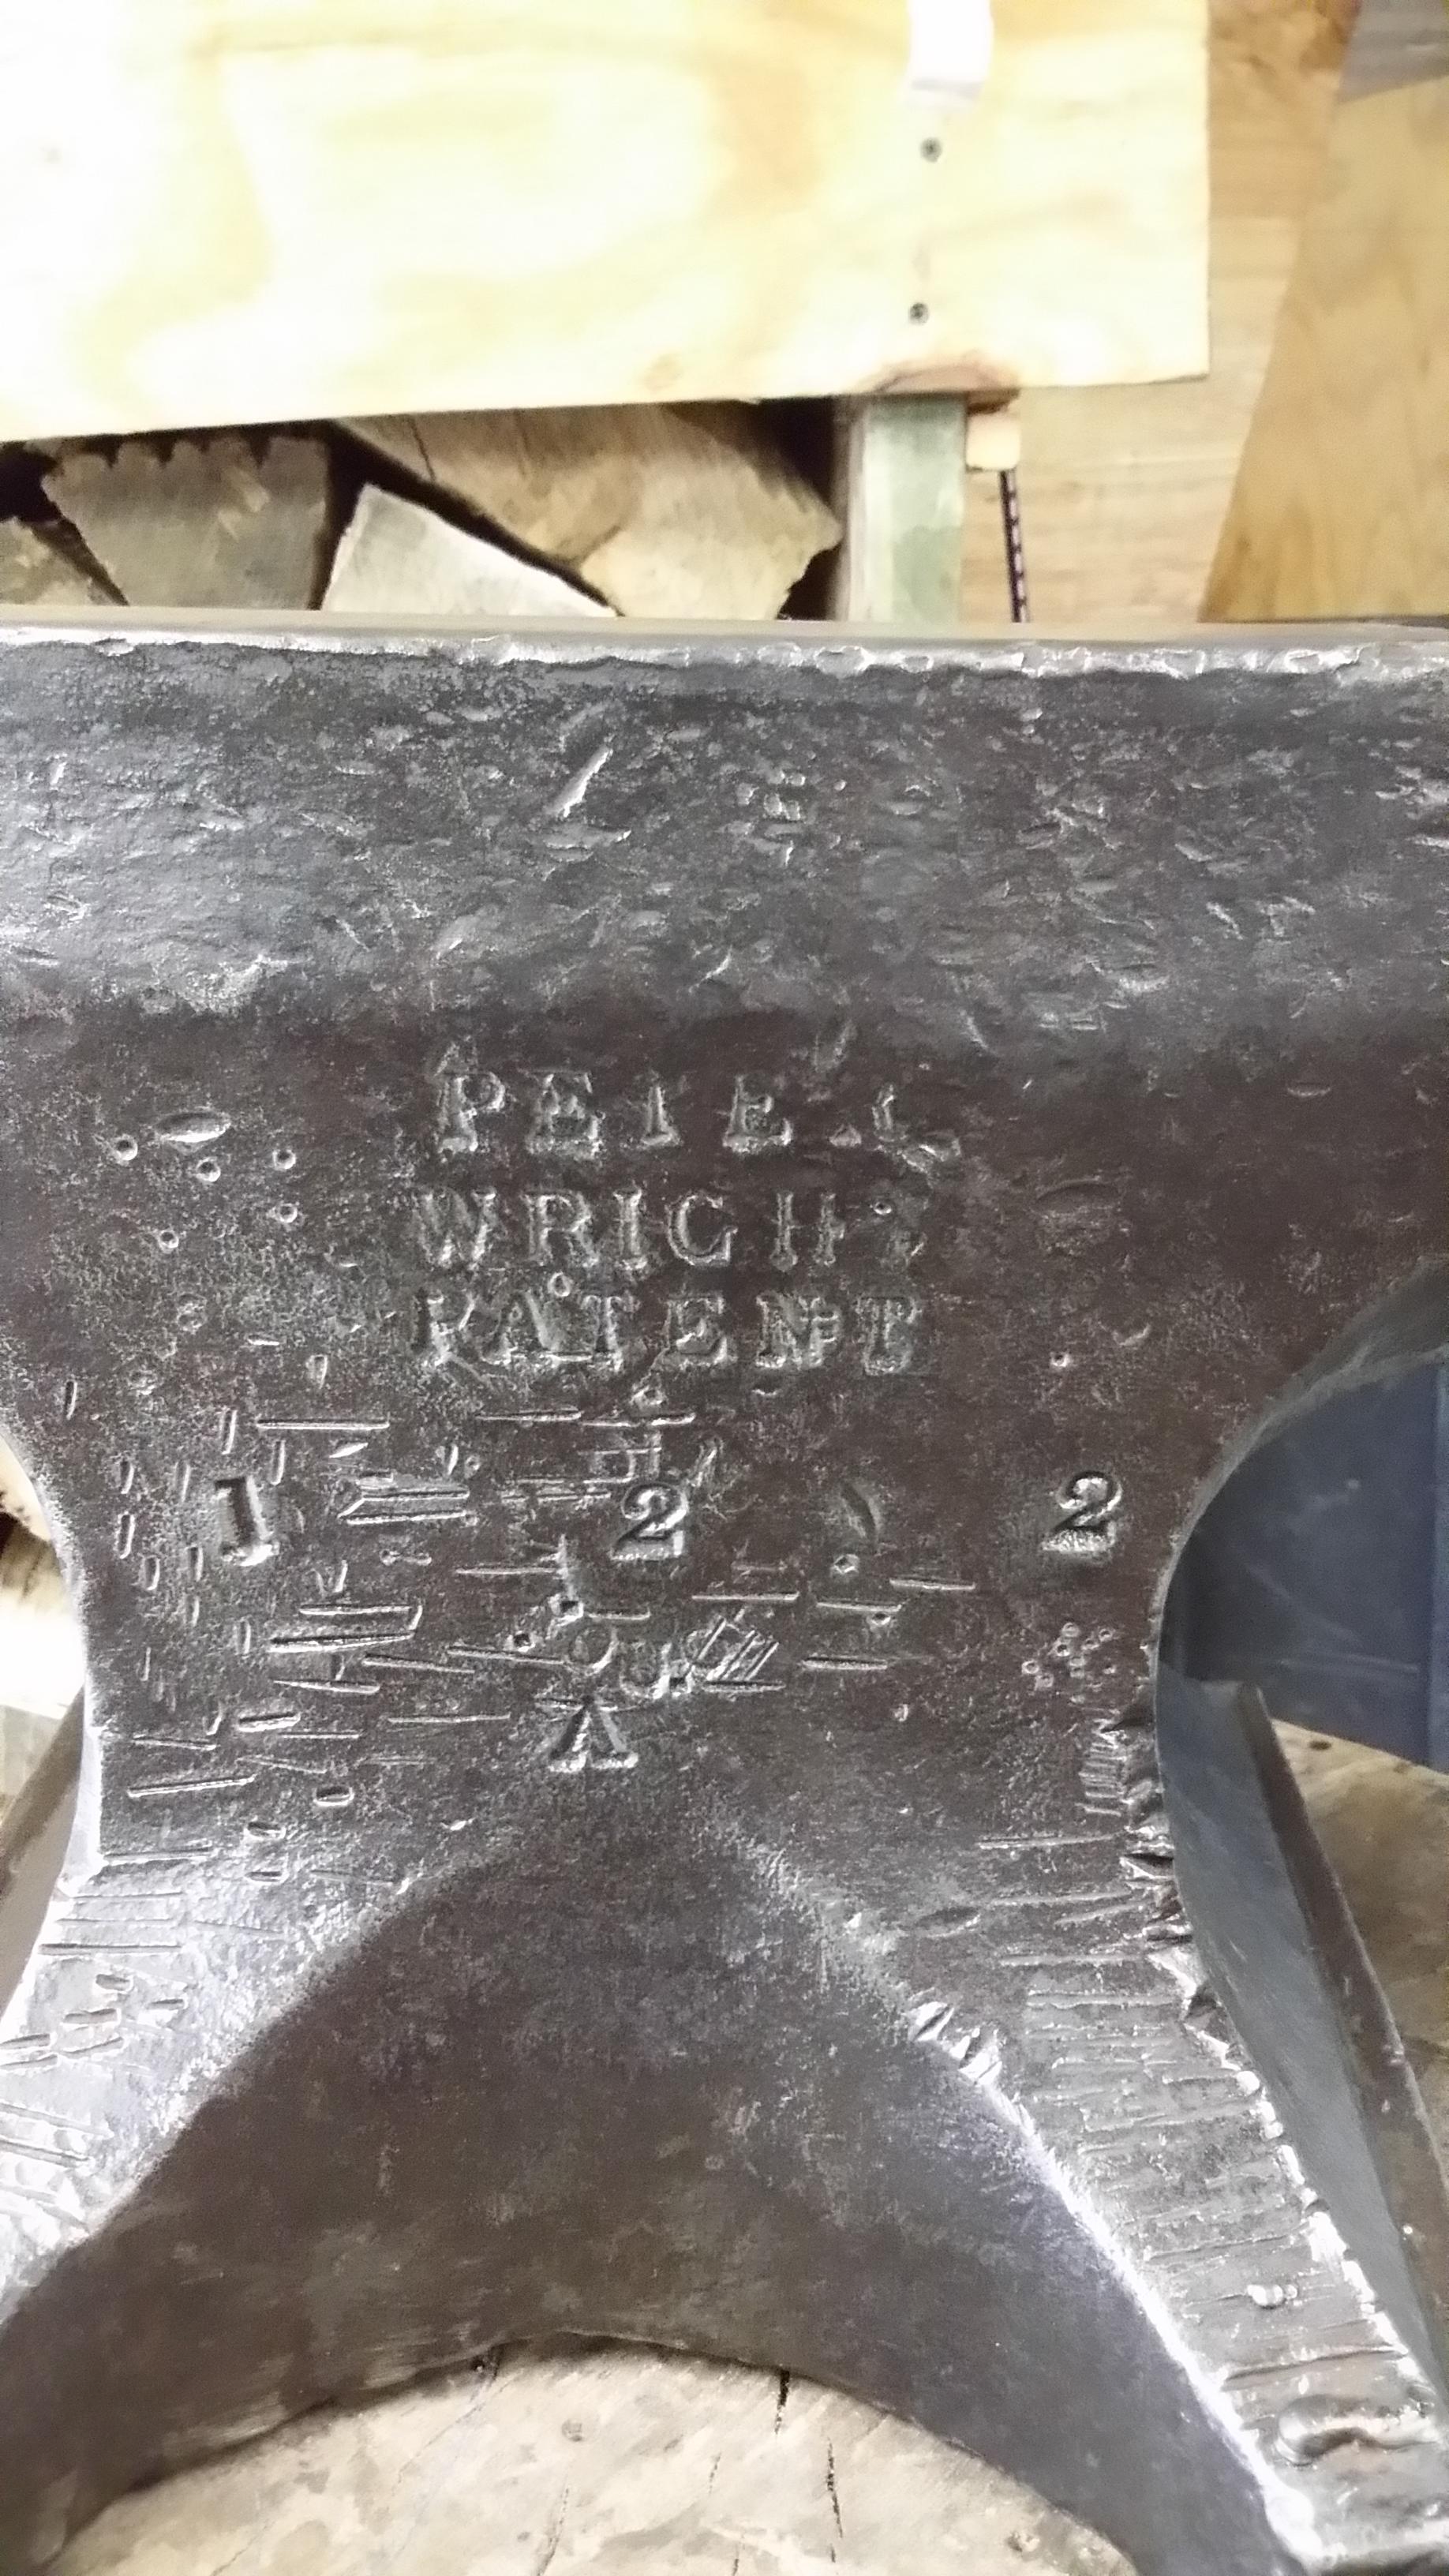
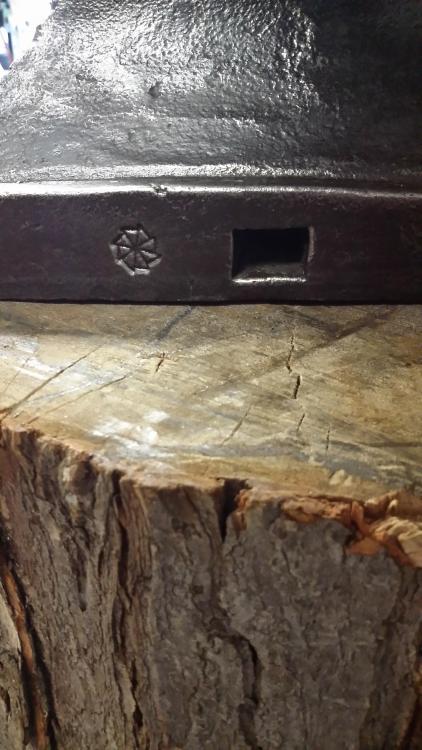
Does anyone know the significance of the stamp on the foot? Google didn't help. Thanks. -
Found a Peter Wright anvil today
HP500 replied to HP500's topic in Anvils, Swage Blocks, and Mandrels
Thanks! -
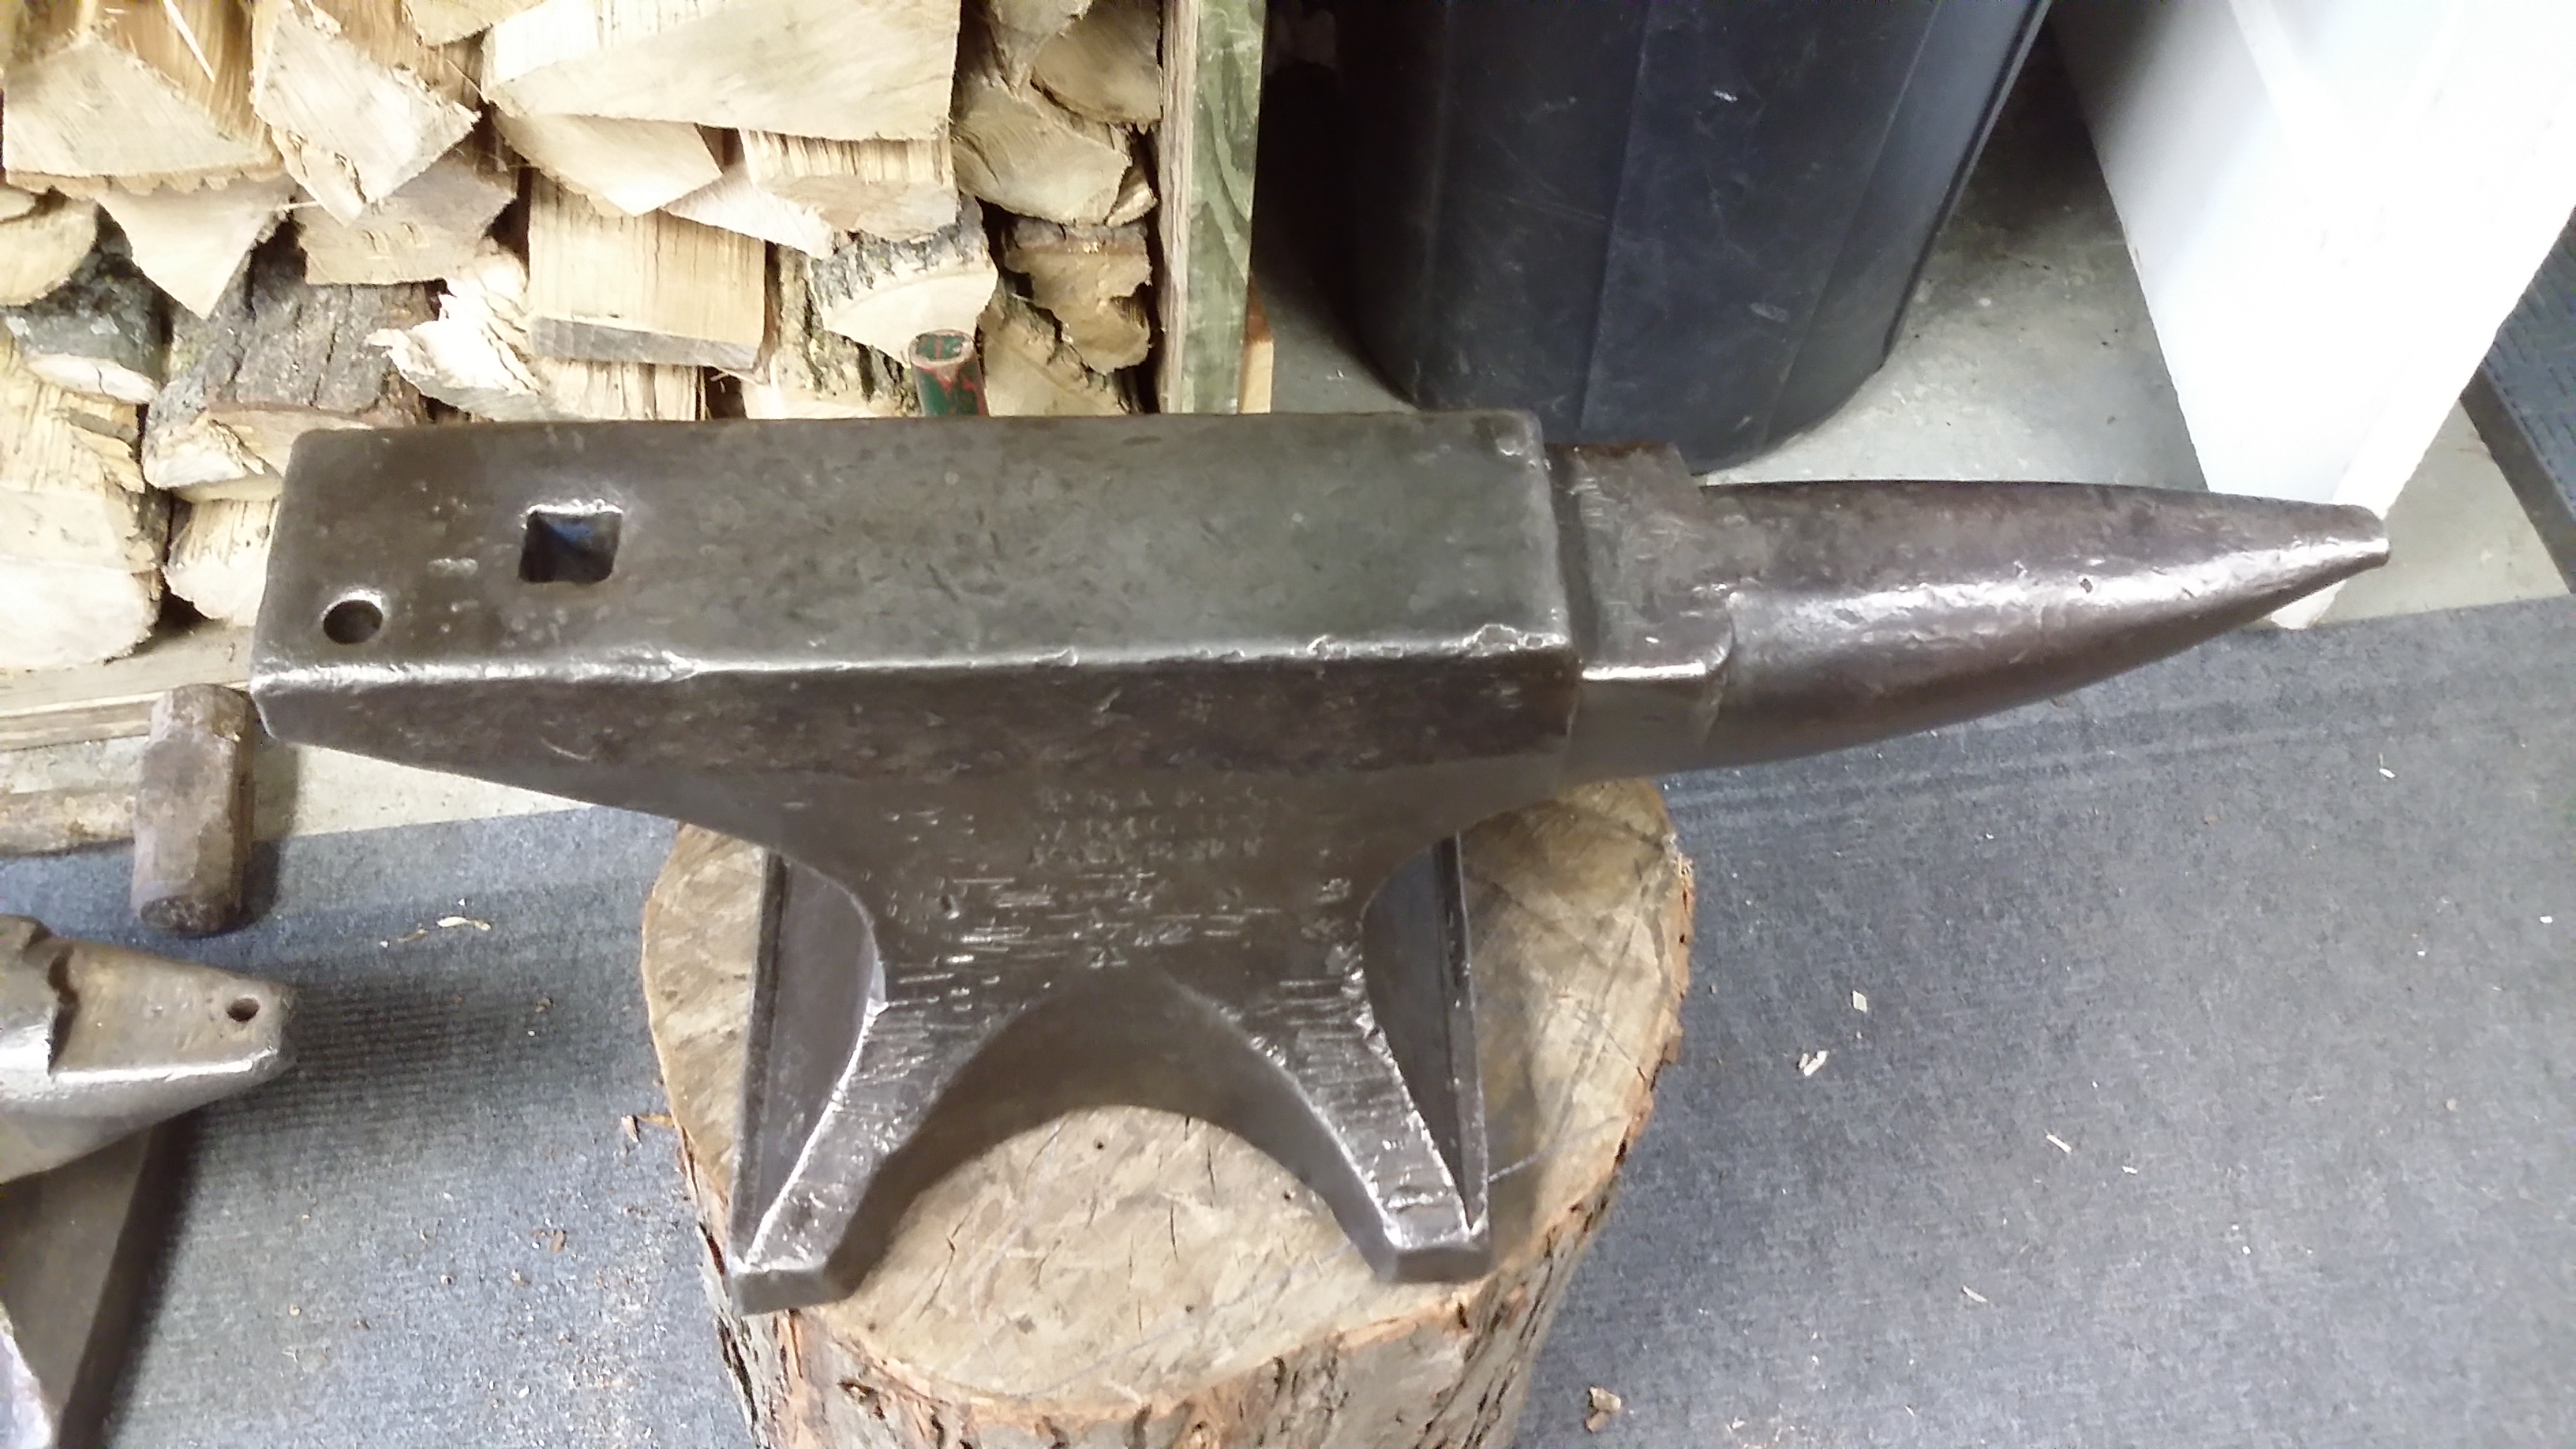
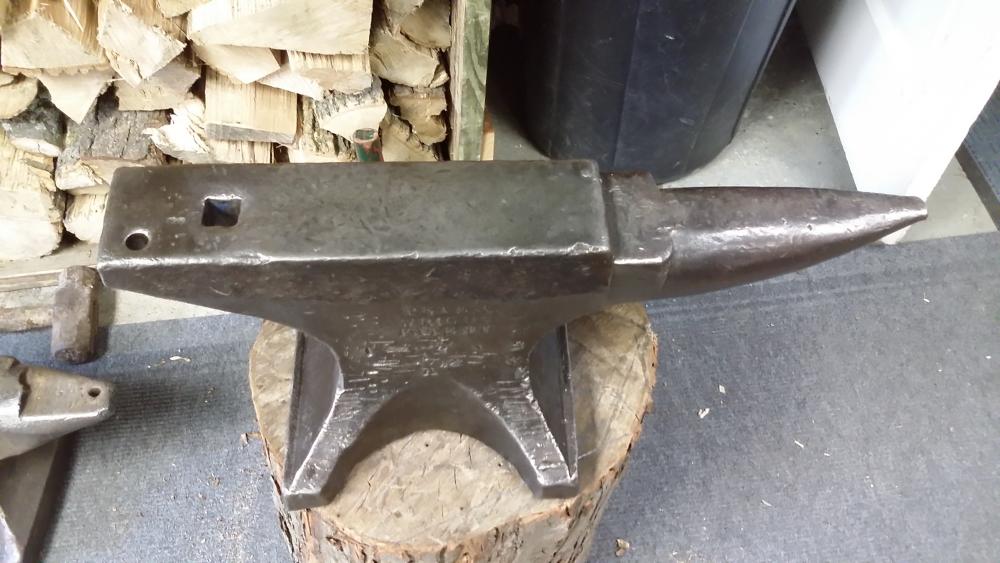
After a long search, I finally found an anvil. It is a Peter Wright marked 1-2-2 so I believe it is supposed to be 170 lbs. The actual weight on a digital scale was just over 164 lbs. The face is very flat, it has a great ring, and the rebound was around 90%. It has hammer marks, but I can live with that. I did an online search to see if I could determine the age but I came up empty. If anyone has a good estimate, I would greatly appreciate it!

-
First coal forge almost done with adjustable firepot
HP500 replied to HP500's topic in Solid Fuel Forges
Thomas, the coal is nut sized, great coking and very clean, so I imagine it is like the coal you buy in Ohio. The label on the bag says "Blacksmithing". I don't remember if there is more information printed on it than that, but I will look later. -
First coal forge almost done with adjustable firepot
HP500 replied to HP500's topic in Solid Fuel Forges
Thanks guys. I will be using bituminous coal that I picked up from a blacksmithing class. For the air supply just to get going I will be starting out with a bathroom fan that has a variable speed controller. I may upgrade some time in the near future if needed. -
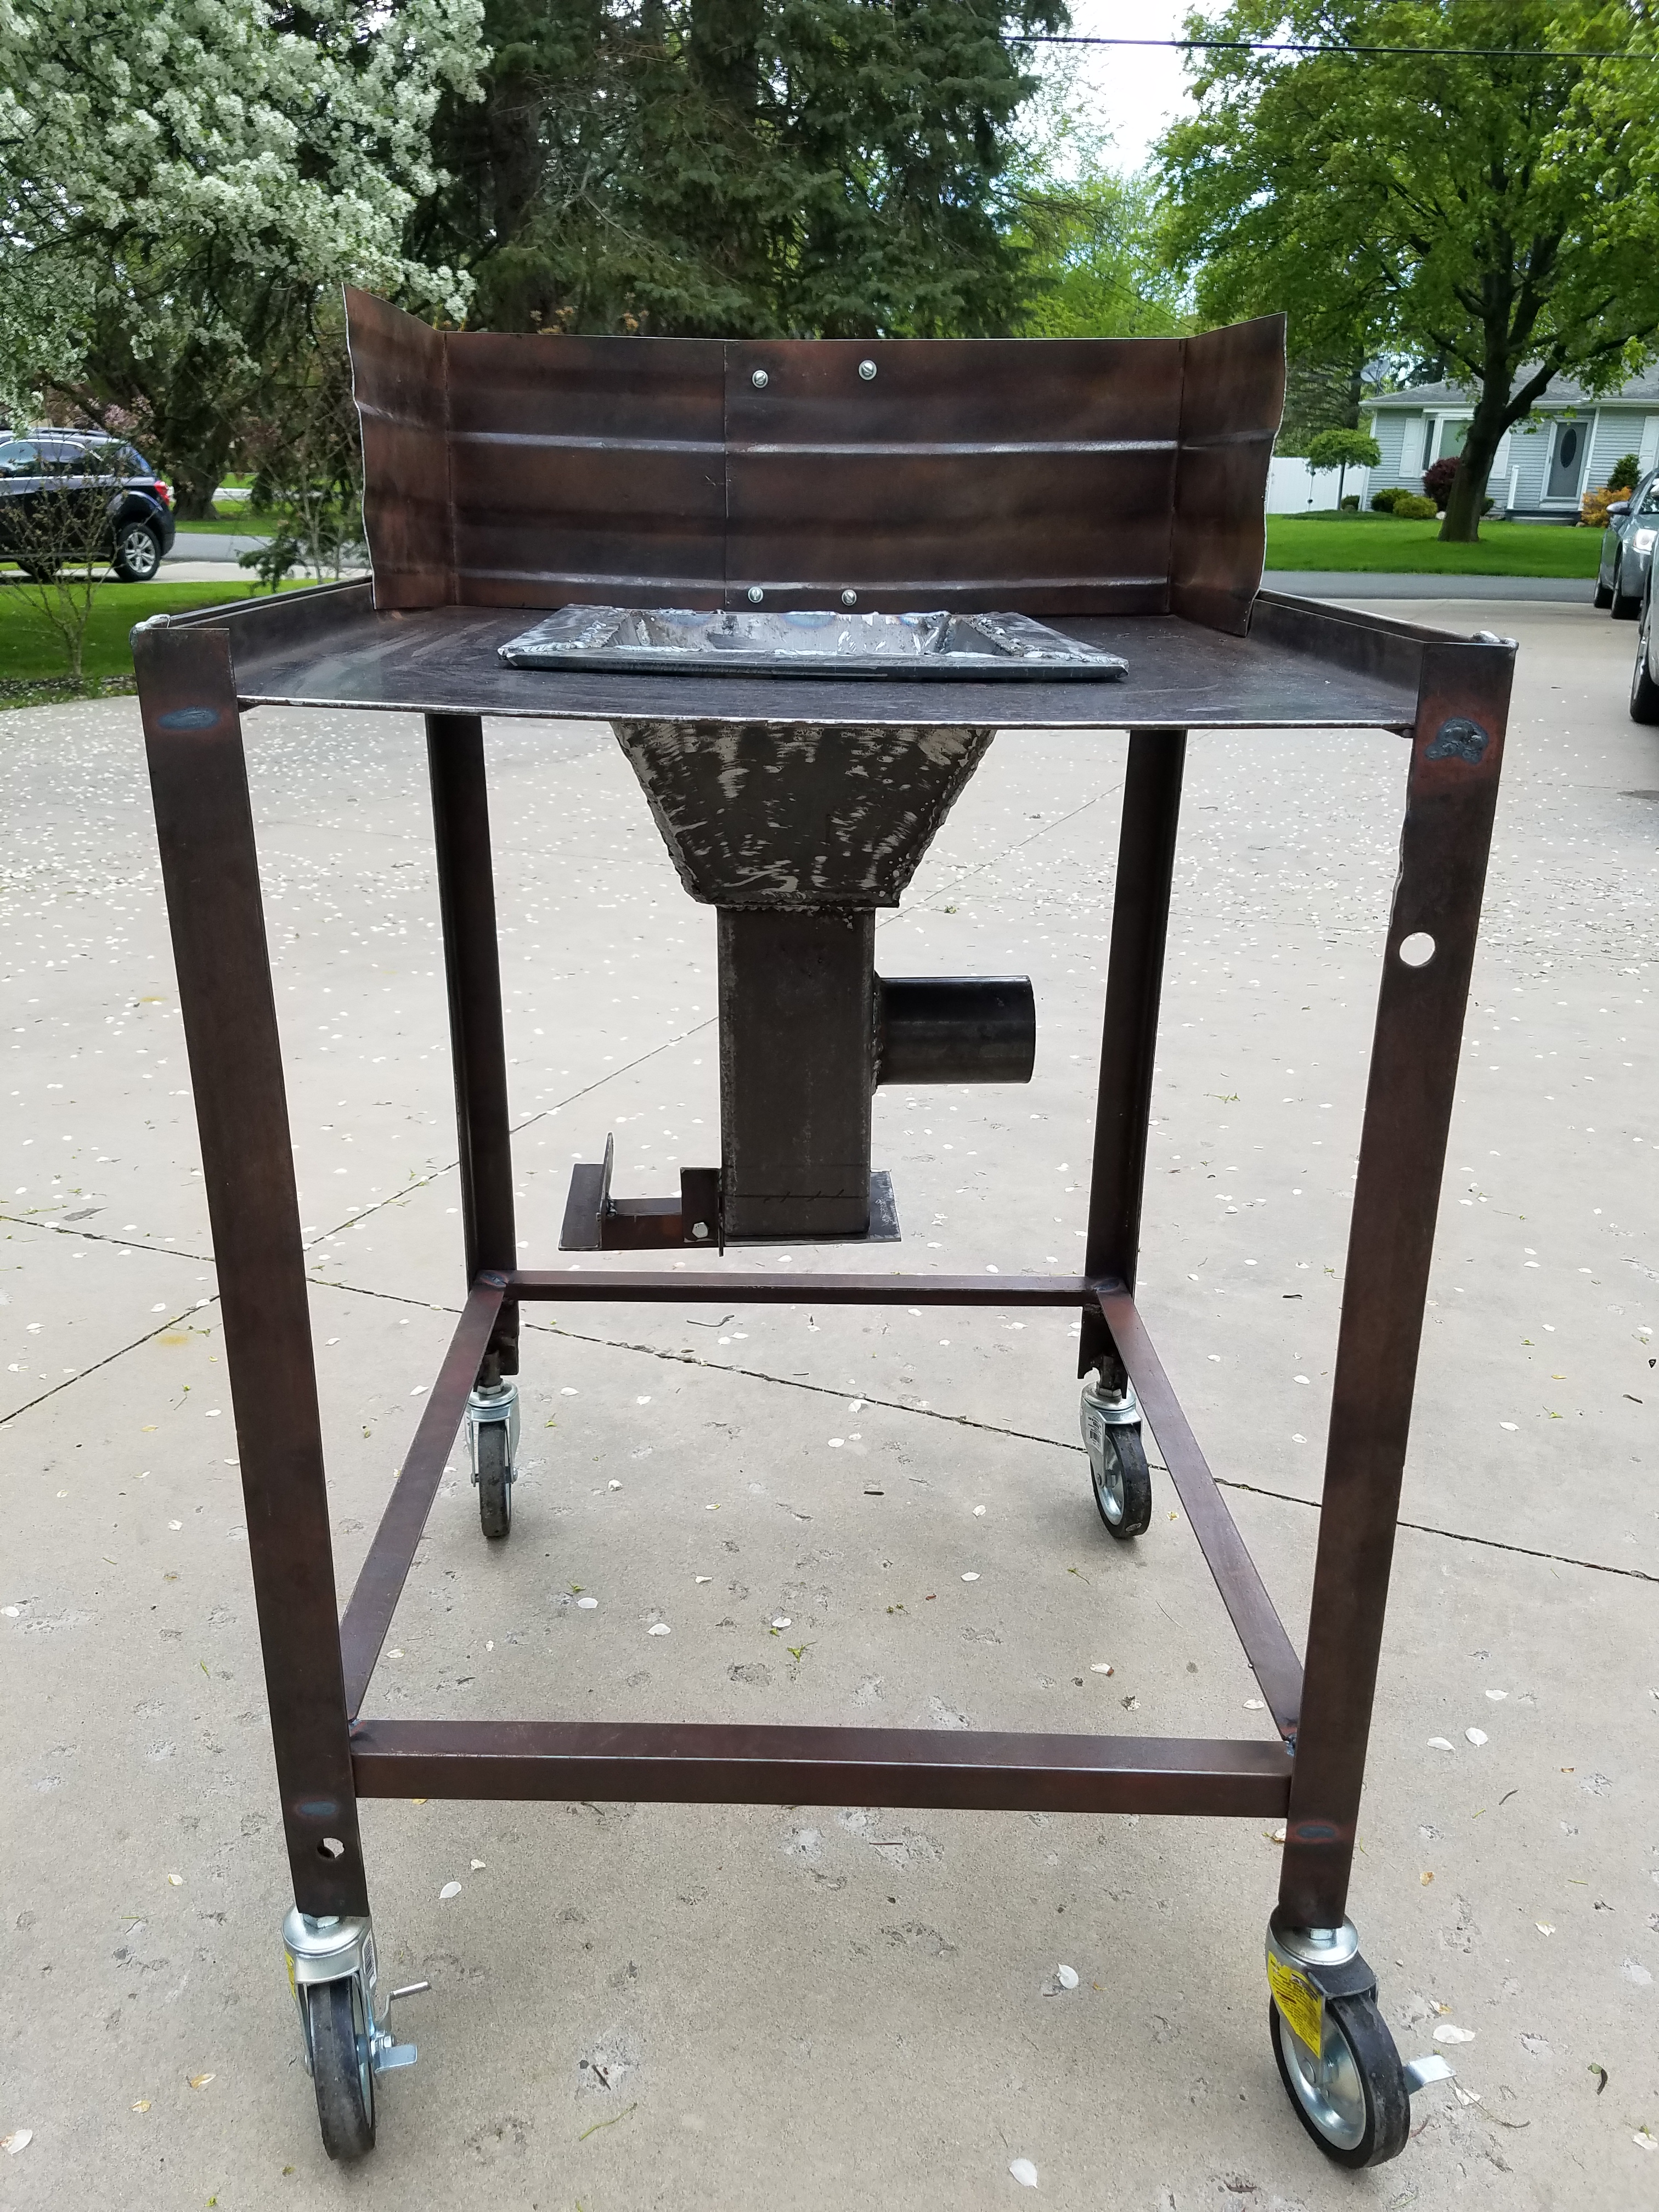
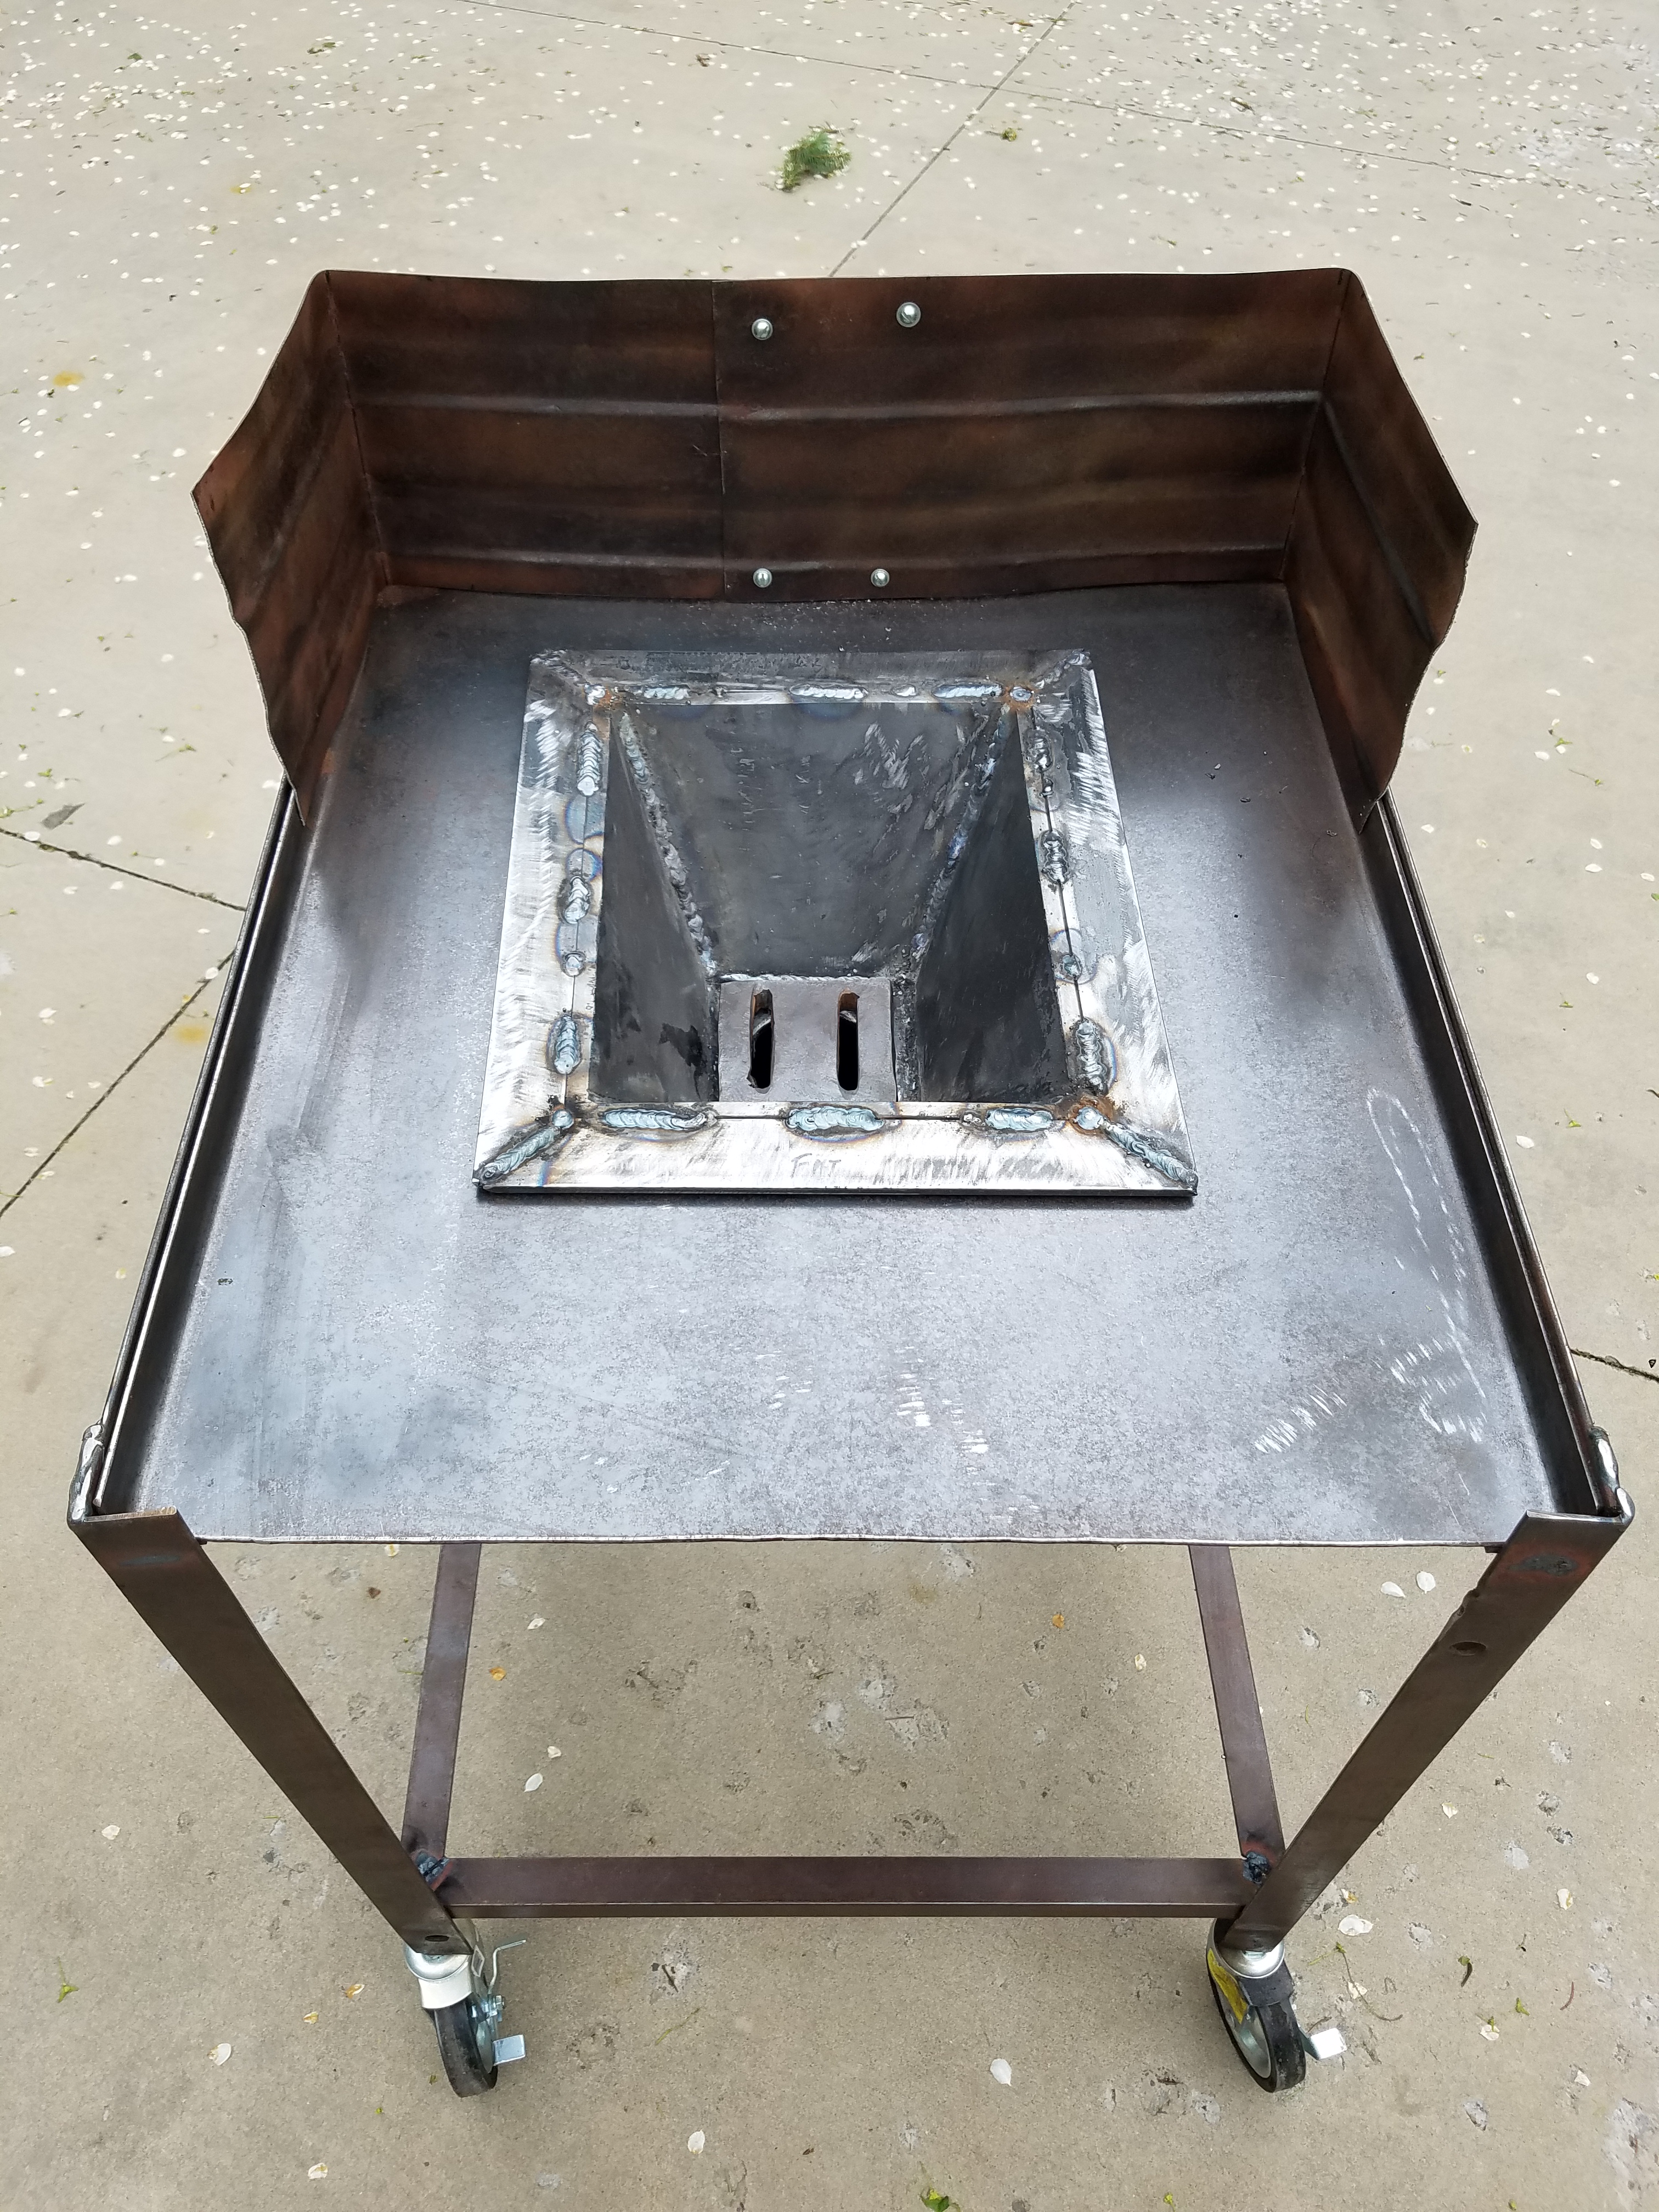
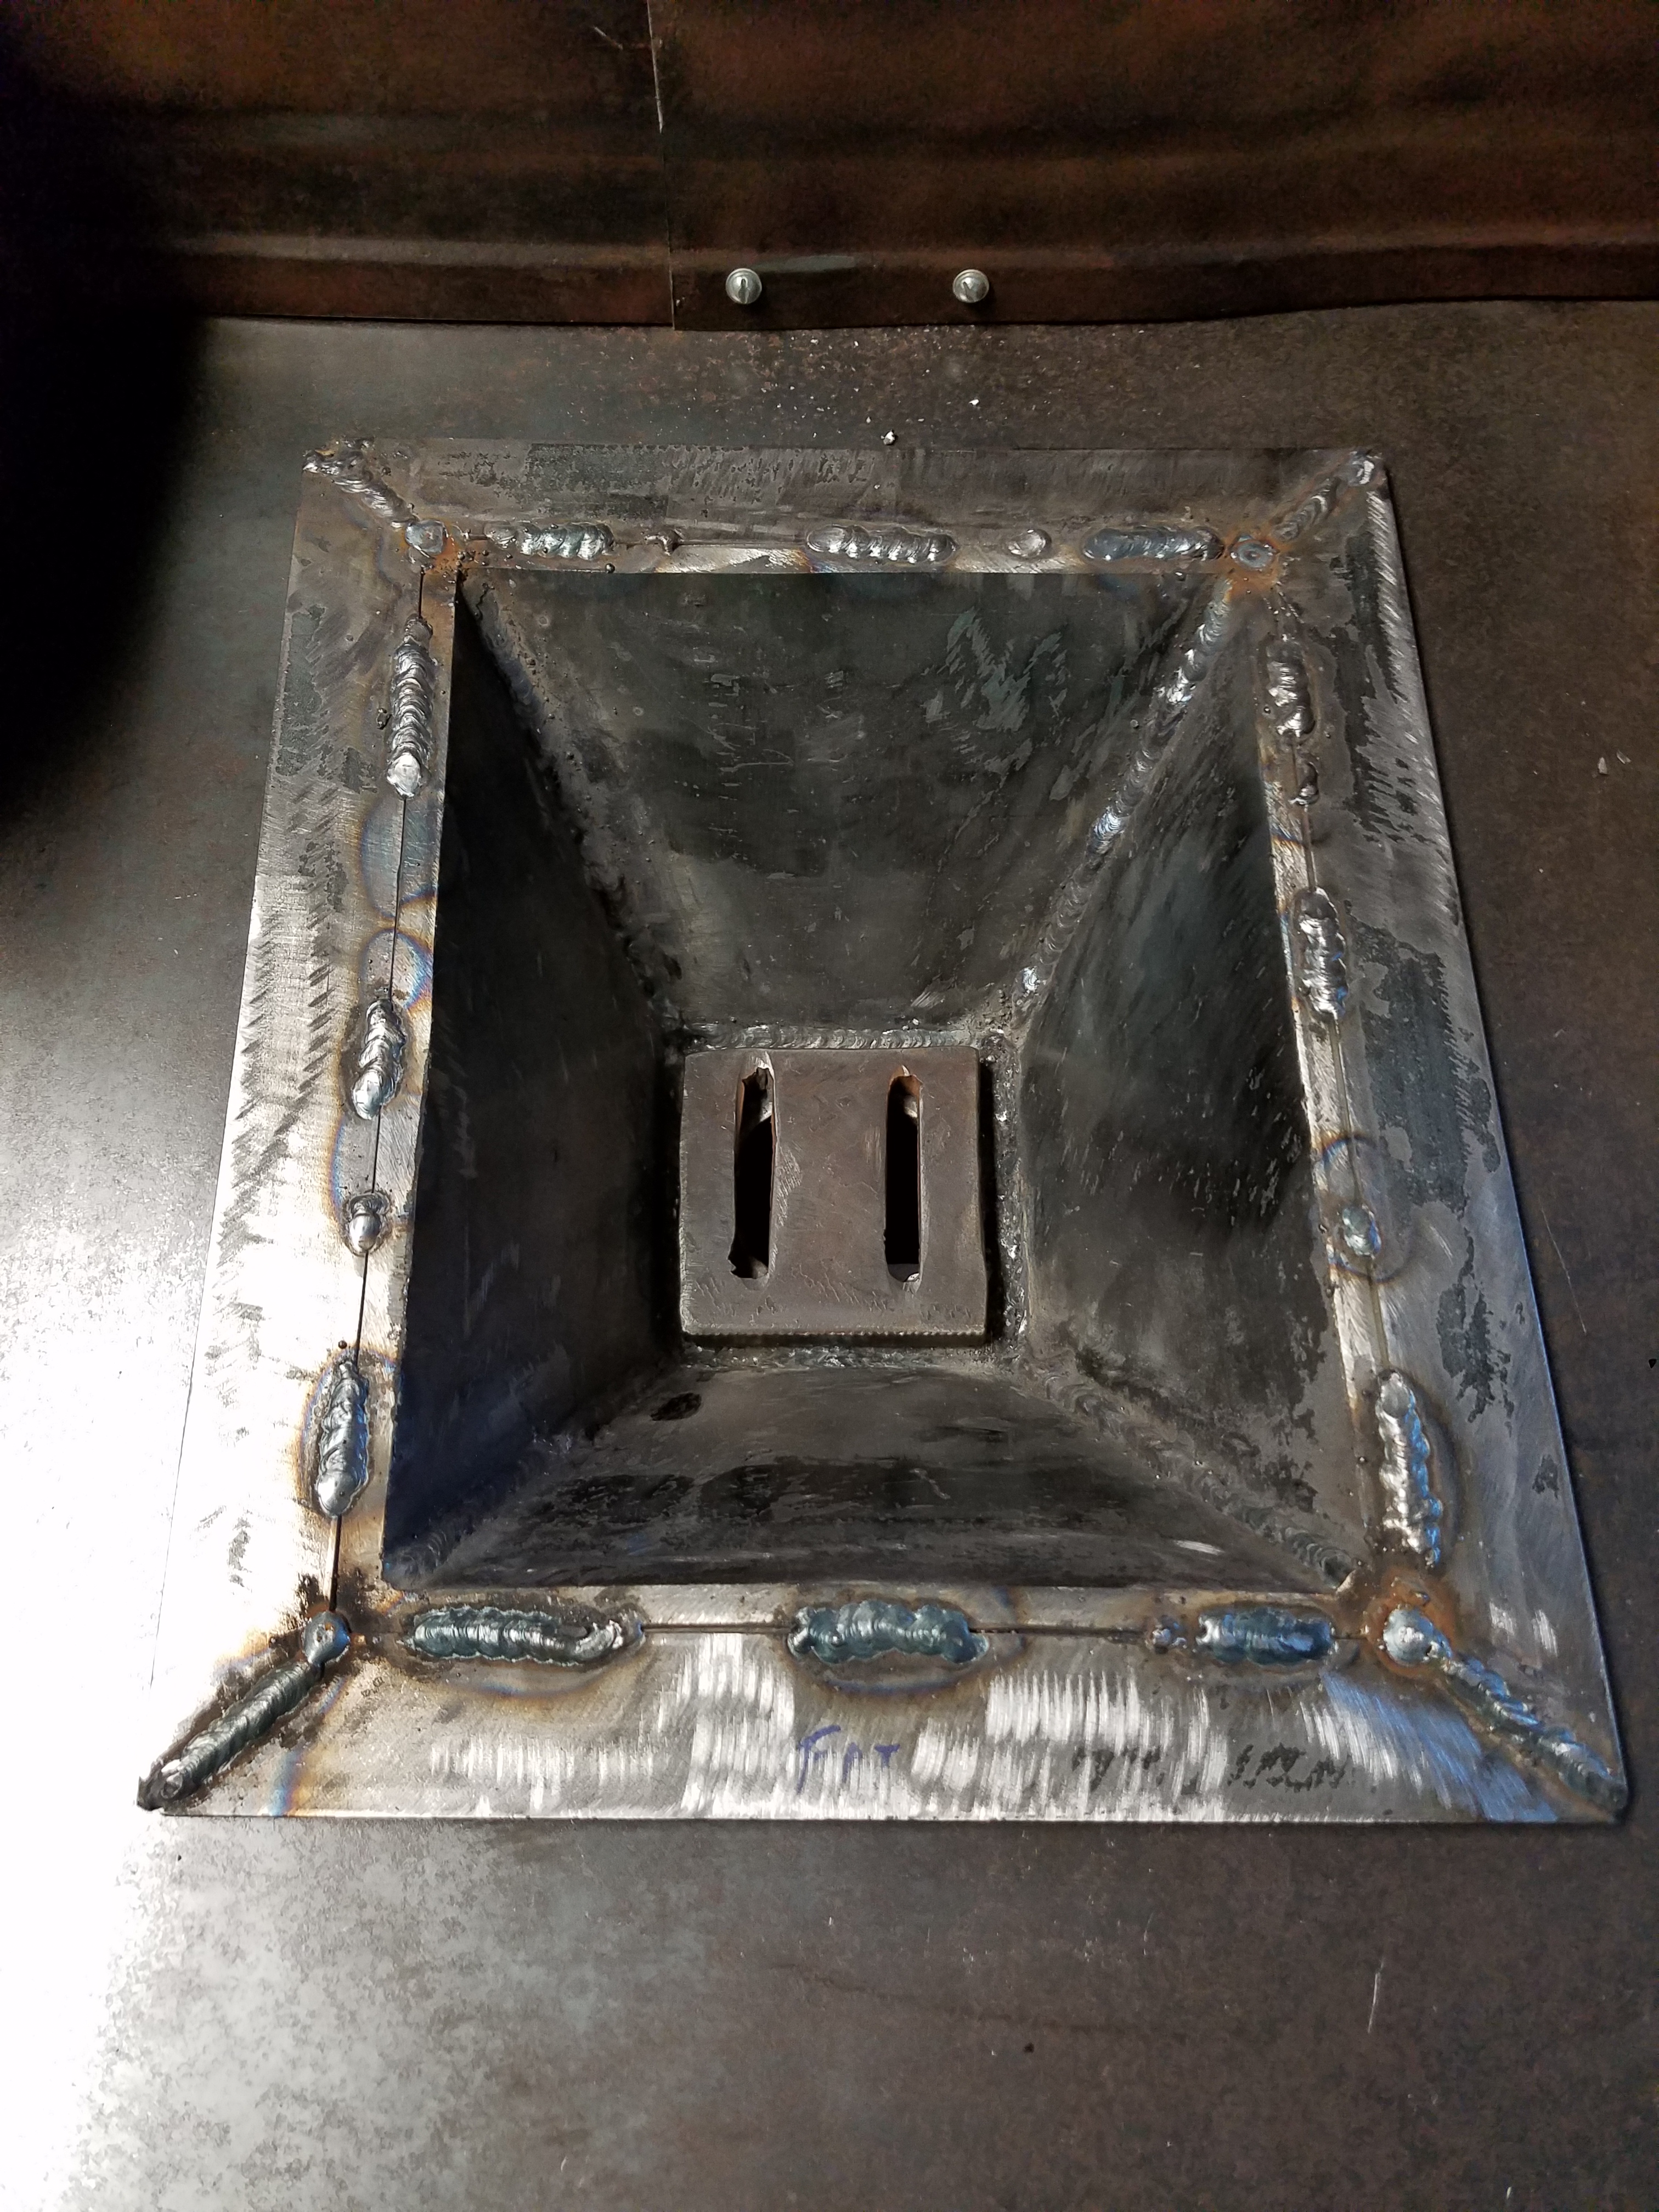
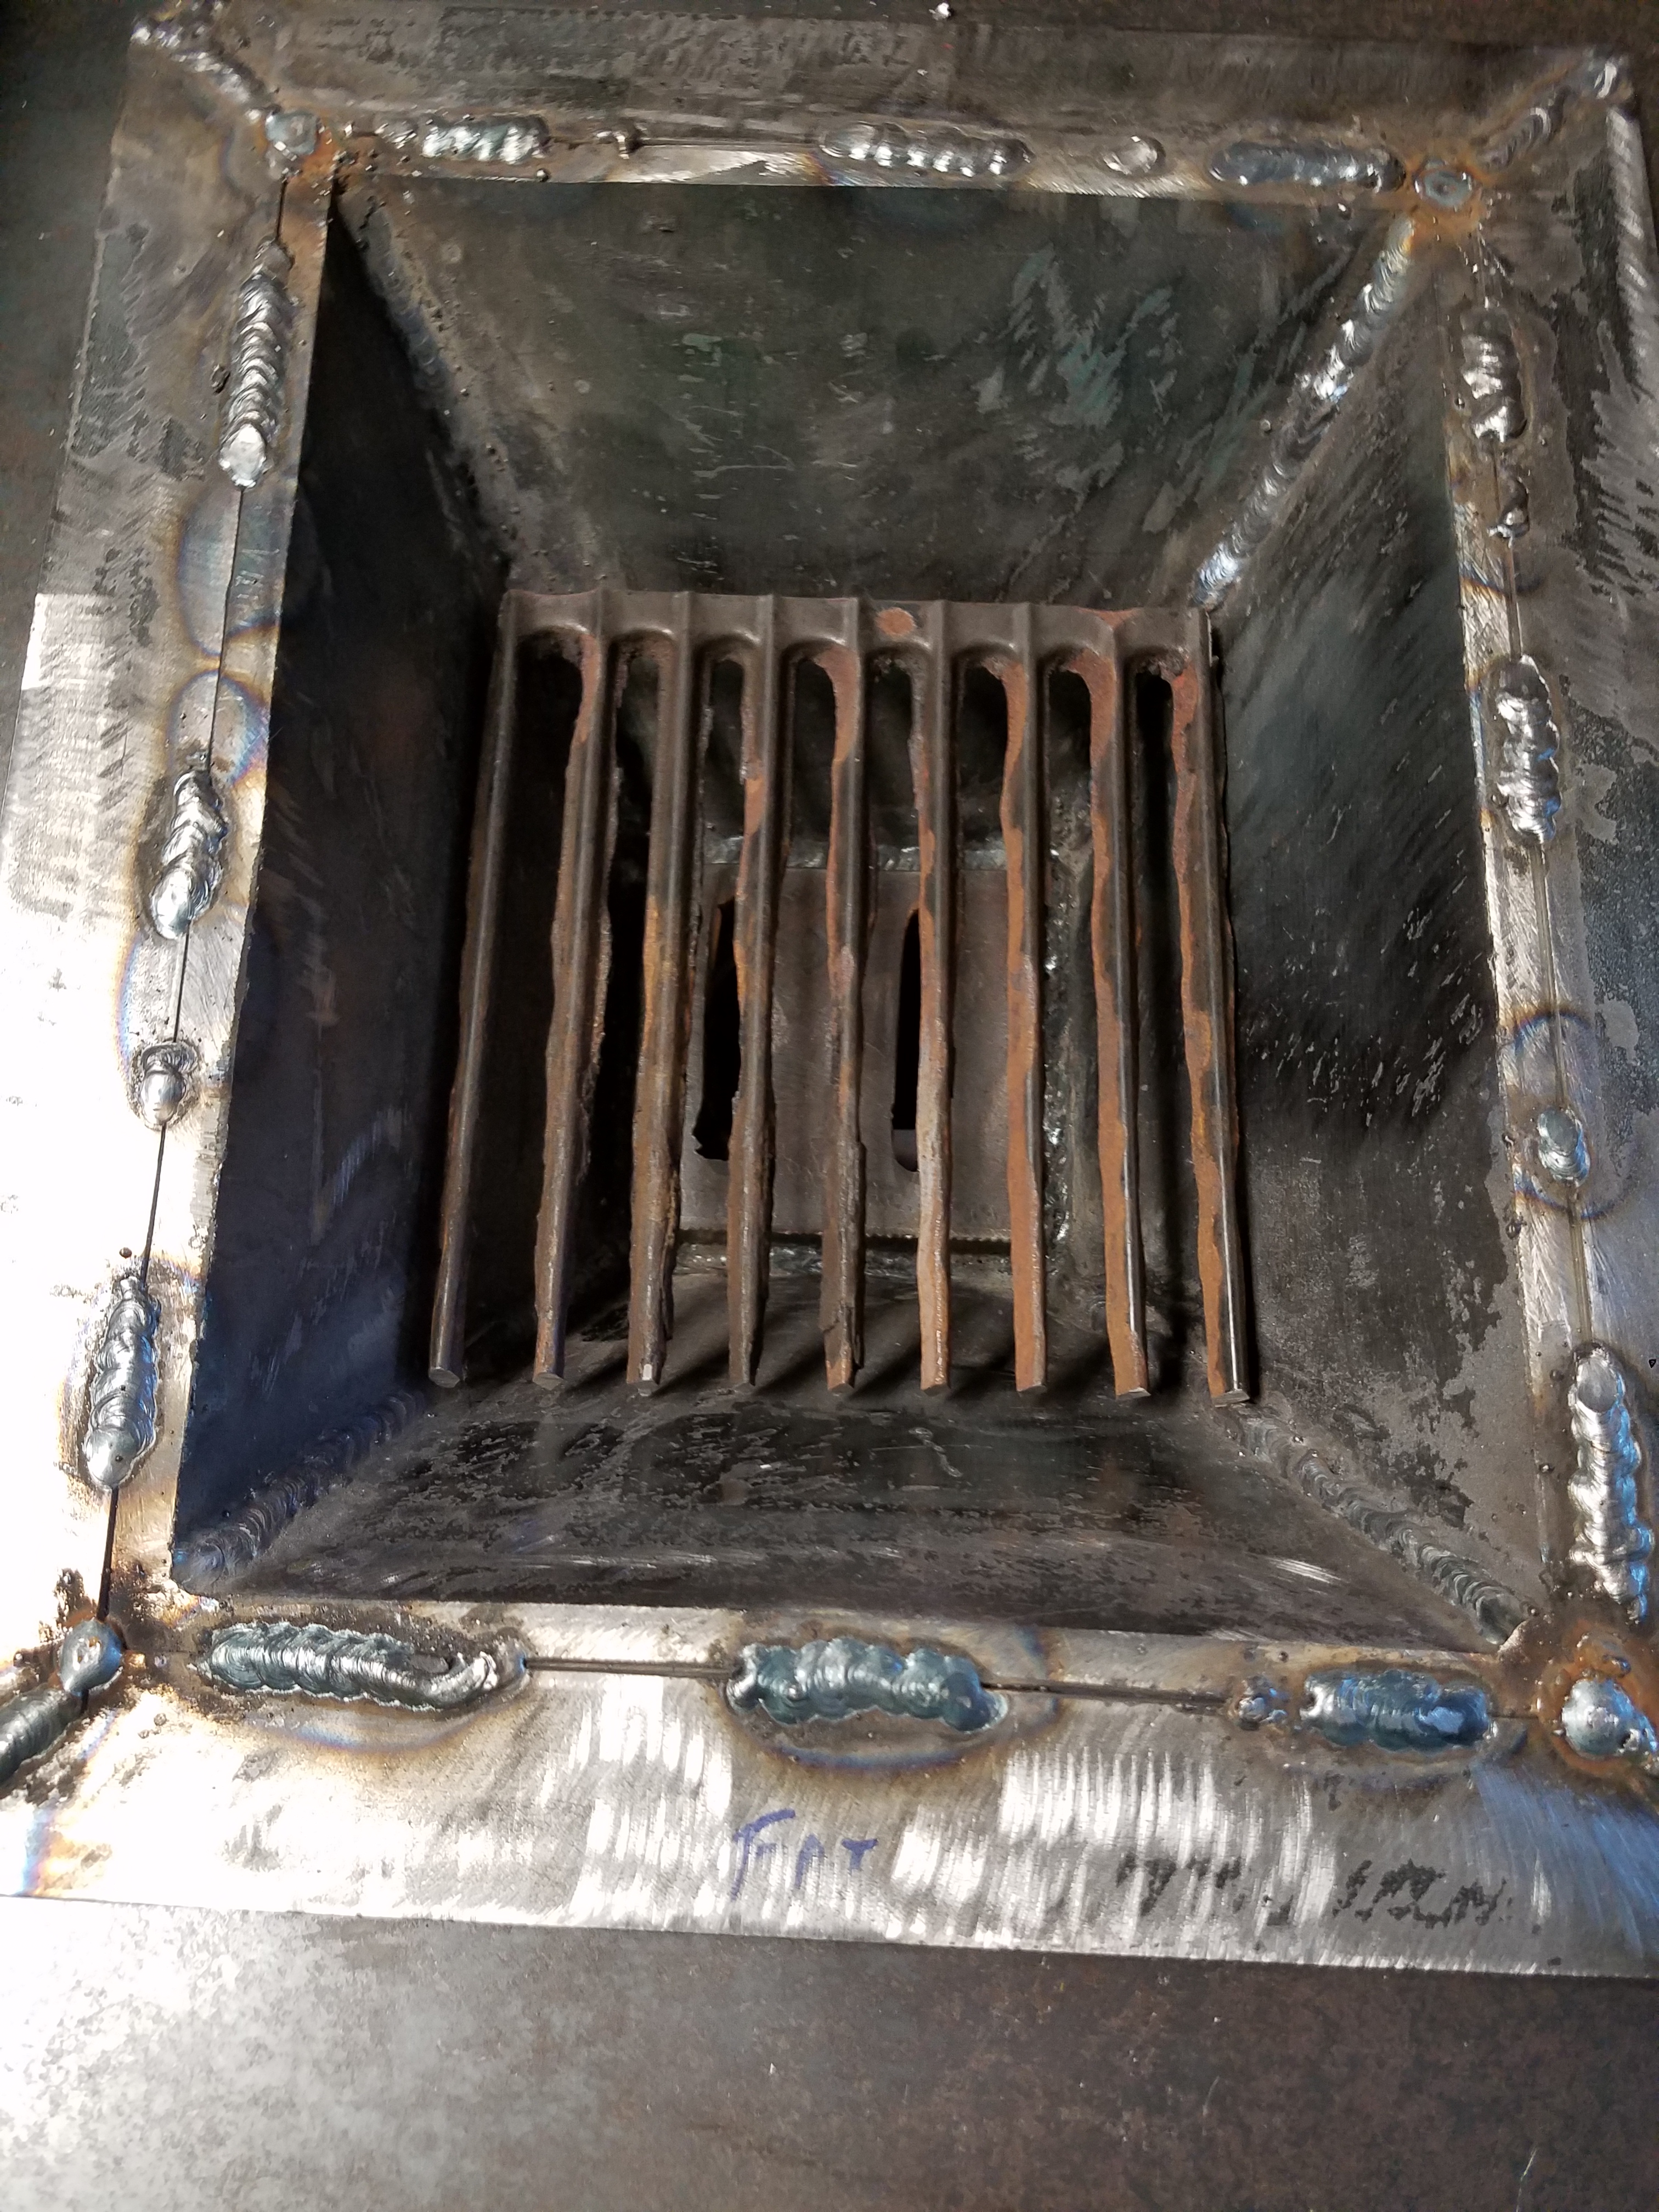
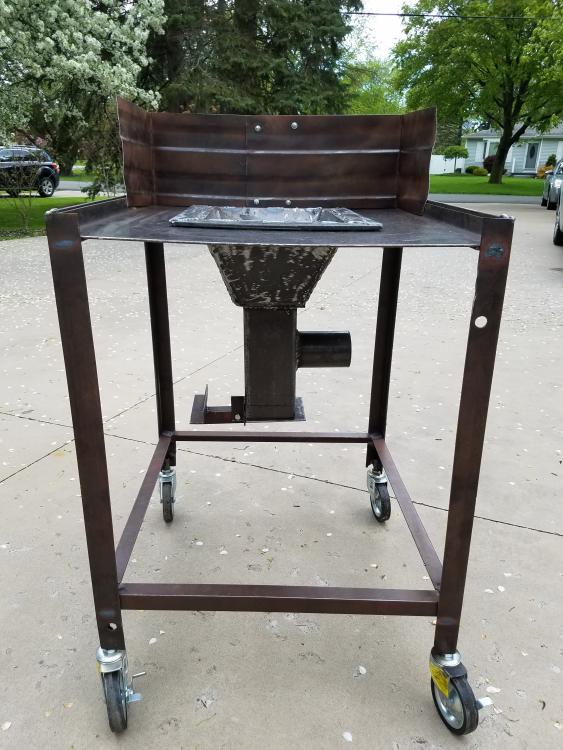
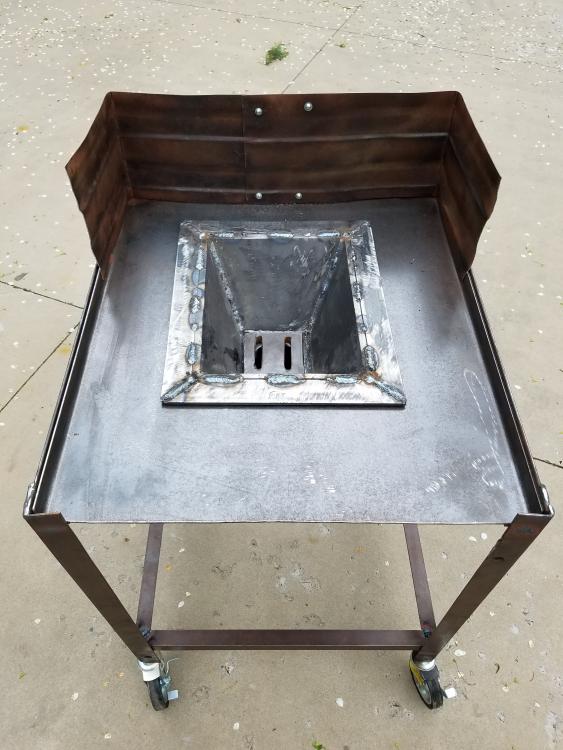
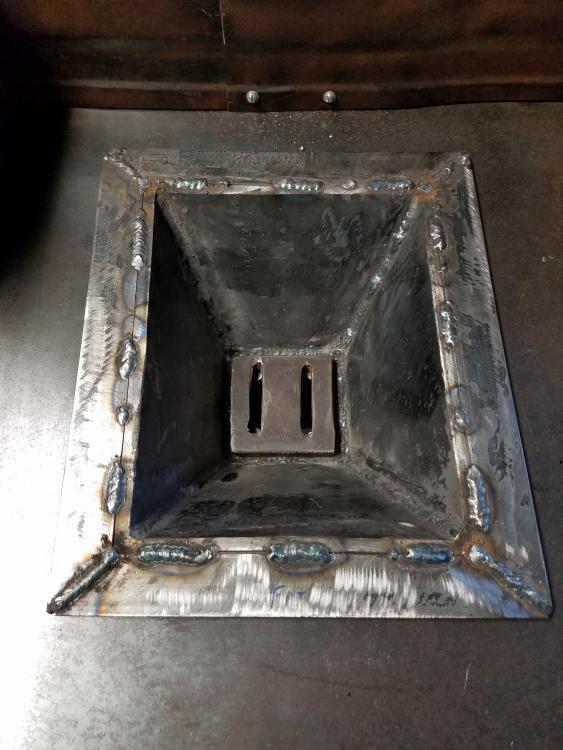
This is my first attempt at building a forge of any kind. So I dusted off the old Lincoln Tombstone welder and decided on a portable coal forge to start with. I was fortunate enough to find most of the metal for free out of scrap except for the plate I needed for the firepot. and the hearth plate. The frame and coal back stop were made from an old heavy equipment steel shipping crate my friend had in his junk pile. I got the hearth plate for $10 from a very nice local blacksmith. That determined the size of my forge, which is 24" x 22". I still need to paint the frame and hook up my air supply. After that, I should be ready to go! Top view: The firepot/tuyere assembly is removable in case I want to use it for a larger forge someday. The firepot is 11" x 9" wide x 5" deep. I'm beginner, so I'm going to start out practicing basic hammering techniques, making punches, chisels, tongs, other tools etc. and then work up to larger projects once I gain experience. Correct me if I'm wrong, but my firepot may be a bit large for the small stuff. Is this so? I came up with an idea to make the depth adjustable. I'm not sure if it will work or not, but i thought I'd throw it out there. I had a few old cast iron grill grates from my gas grill laying around. I cut one of them to size to use as a removable insert to reduce the depth to 3". I have more grill grates, so I can cut them to size to make the firepot depth any depth I want. Do you think this is a good idea or just a waste of time? What would be the ideal depth for punches, chisels, coal rakes, etc.? Here are some pics of the pot without and with the insert:

-
Thank you very much!
-
I found out what the spring clip was for. I found this picture on eBay. It is attached to the motor for some reason.