Camerican
Members
-
Joined
-
Last visited
Everything posted by Camerican
-
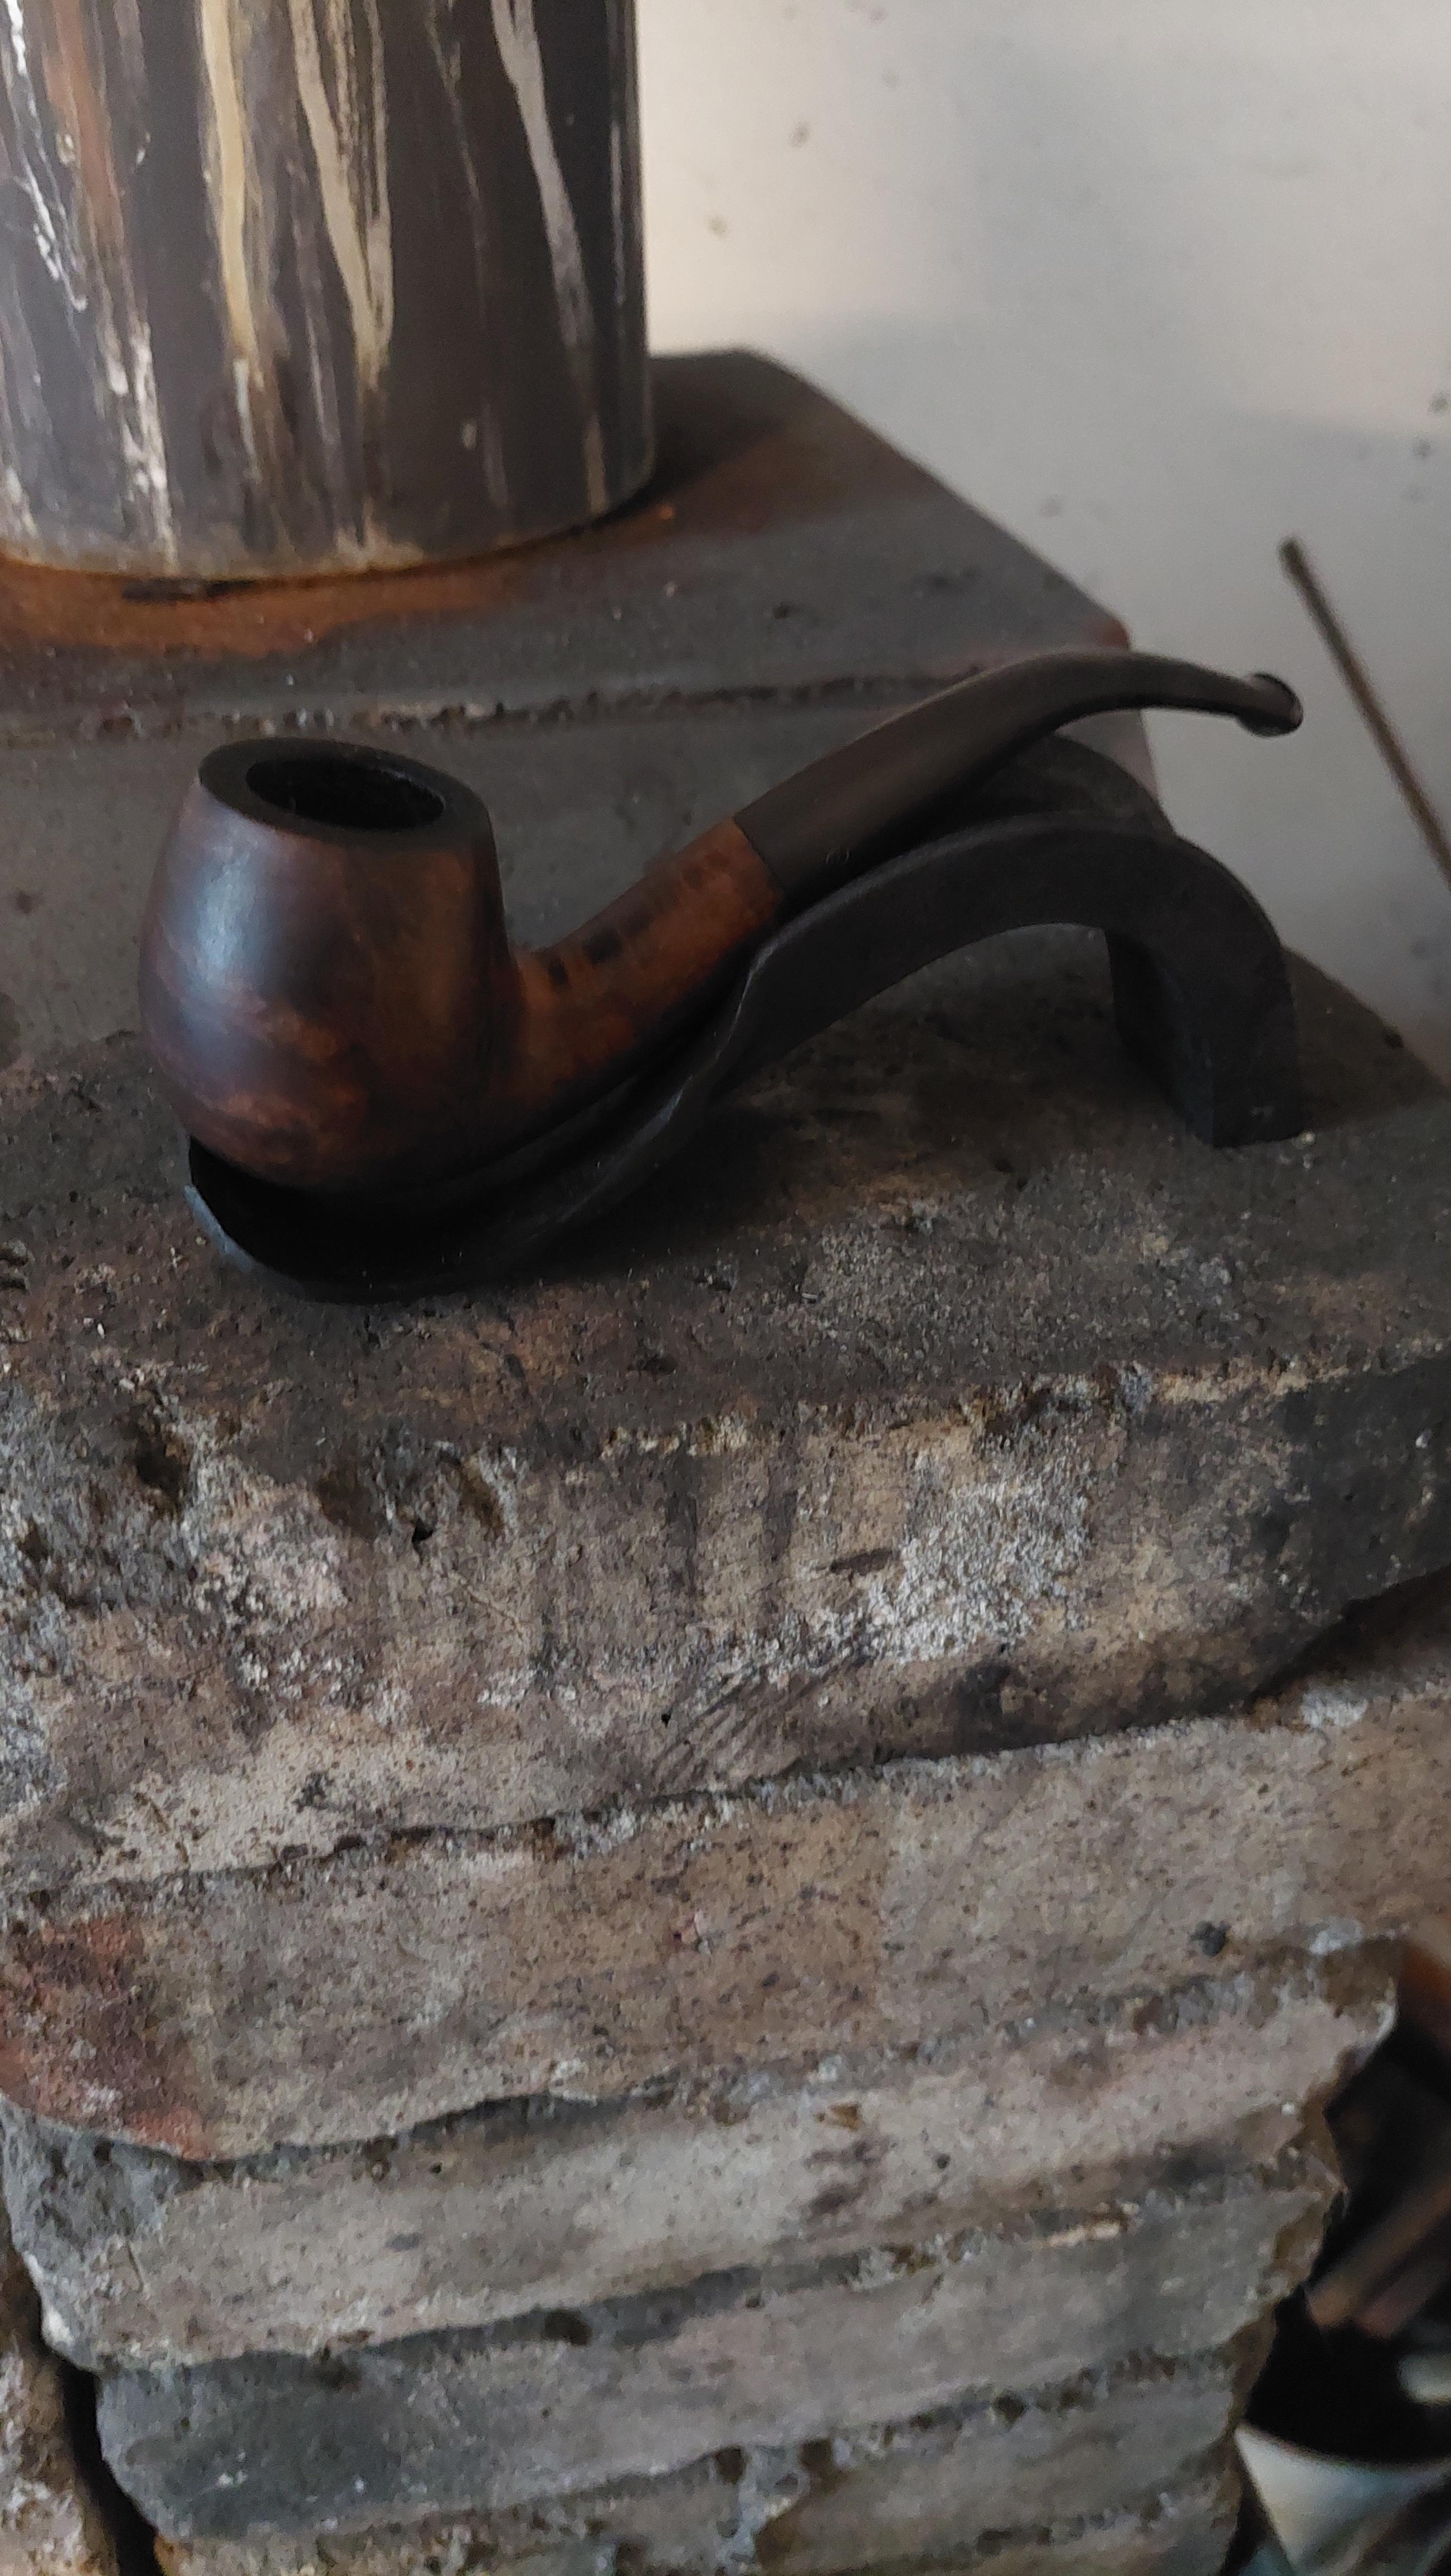
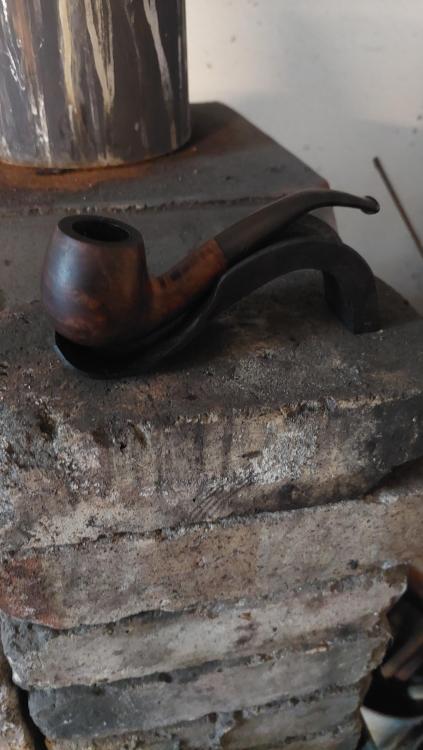
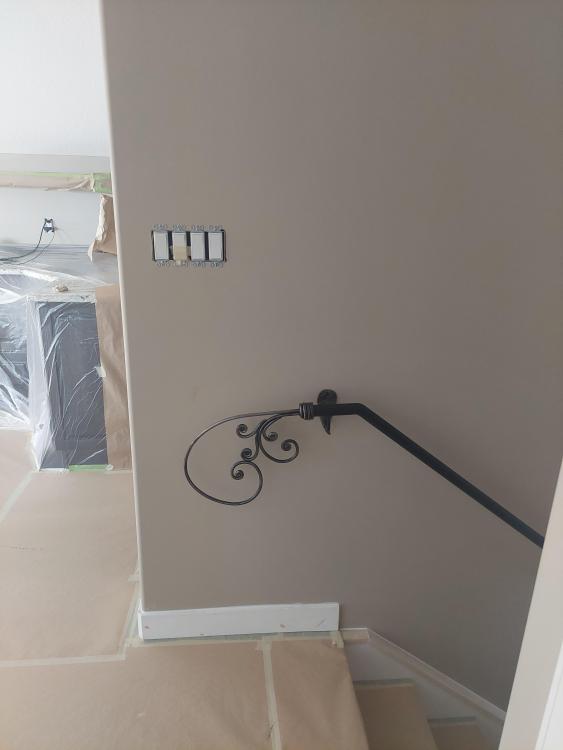
Made a little pipe holder out of some c channel I had kicking about. Nice little project while I was warming up the forge to forge weld some finials...
-
I would love to do a bigger one with collars at all the touch points. My wife has been asking me for a driveway gate. Maybe I go with this look for it...
-
Thank you arkie
-
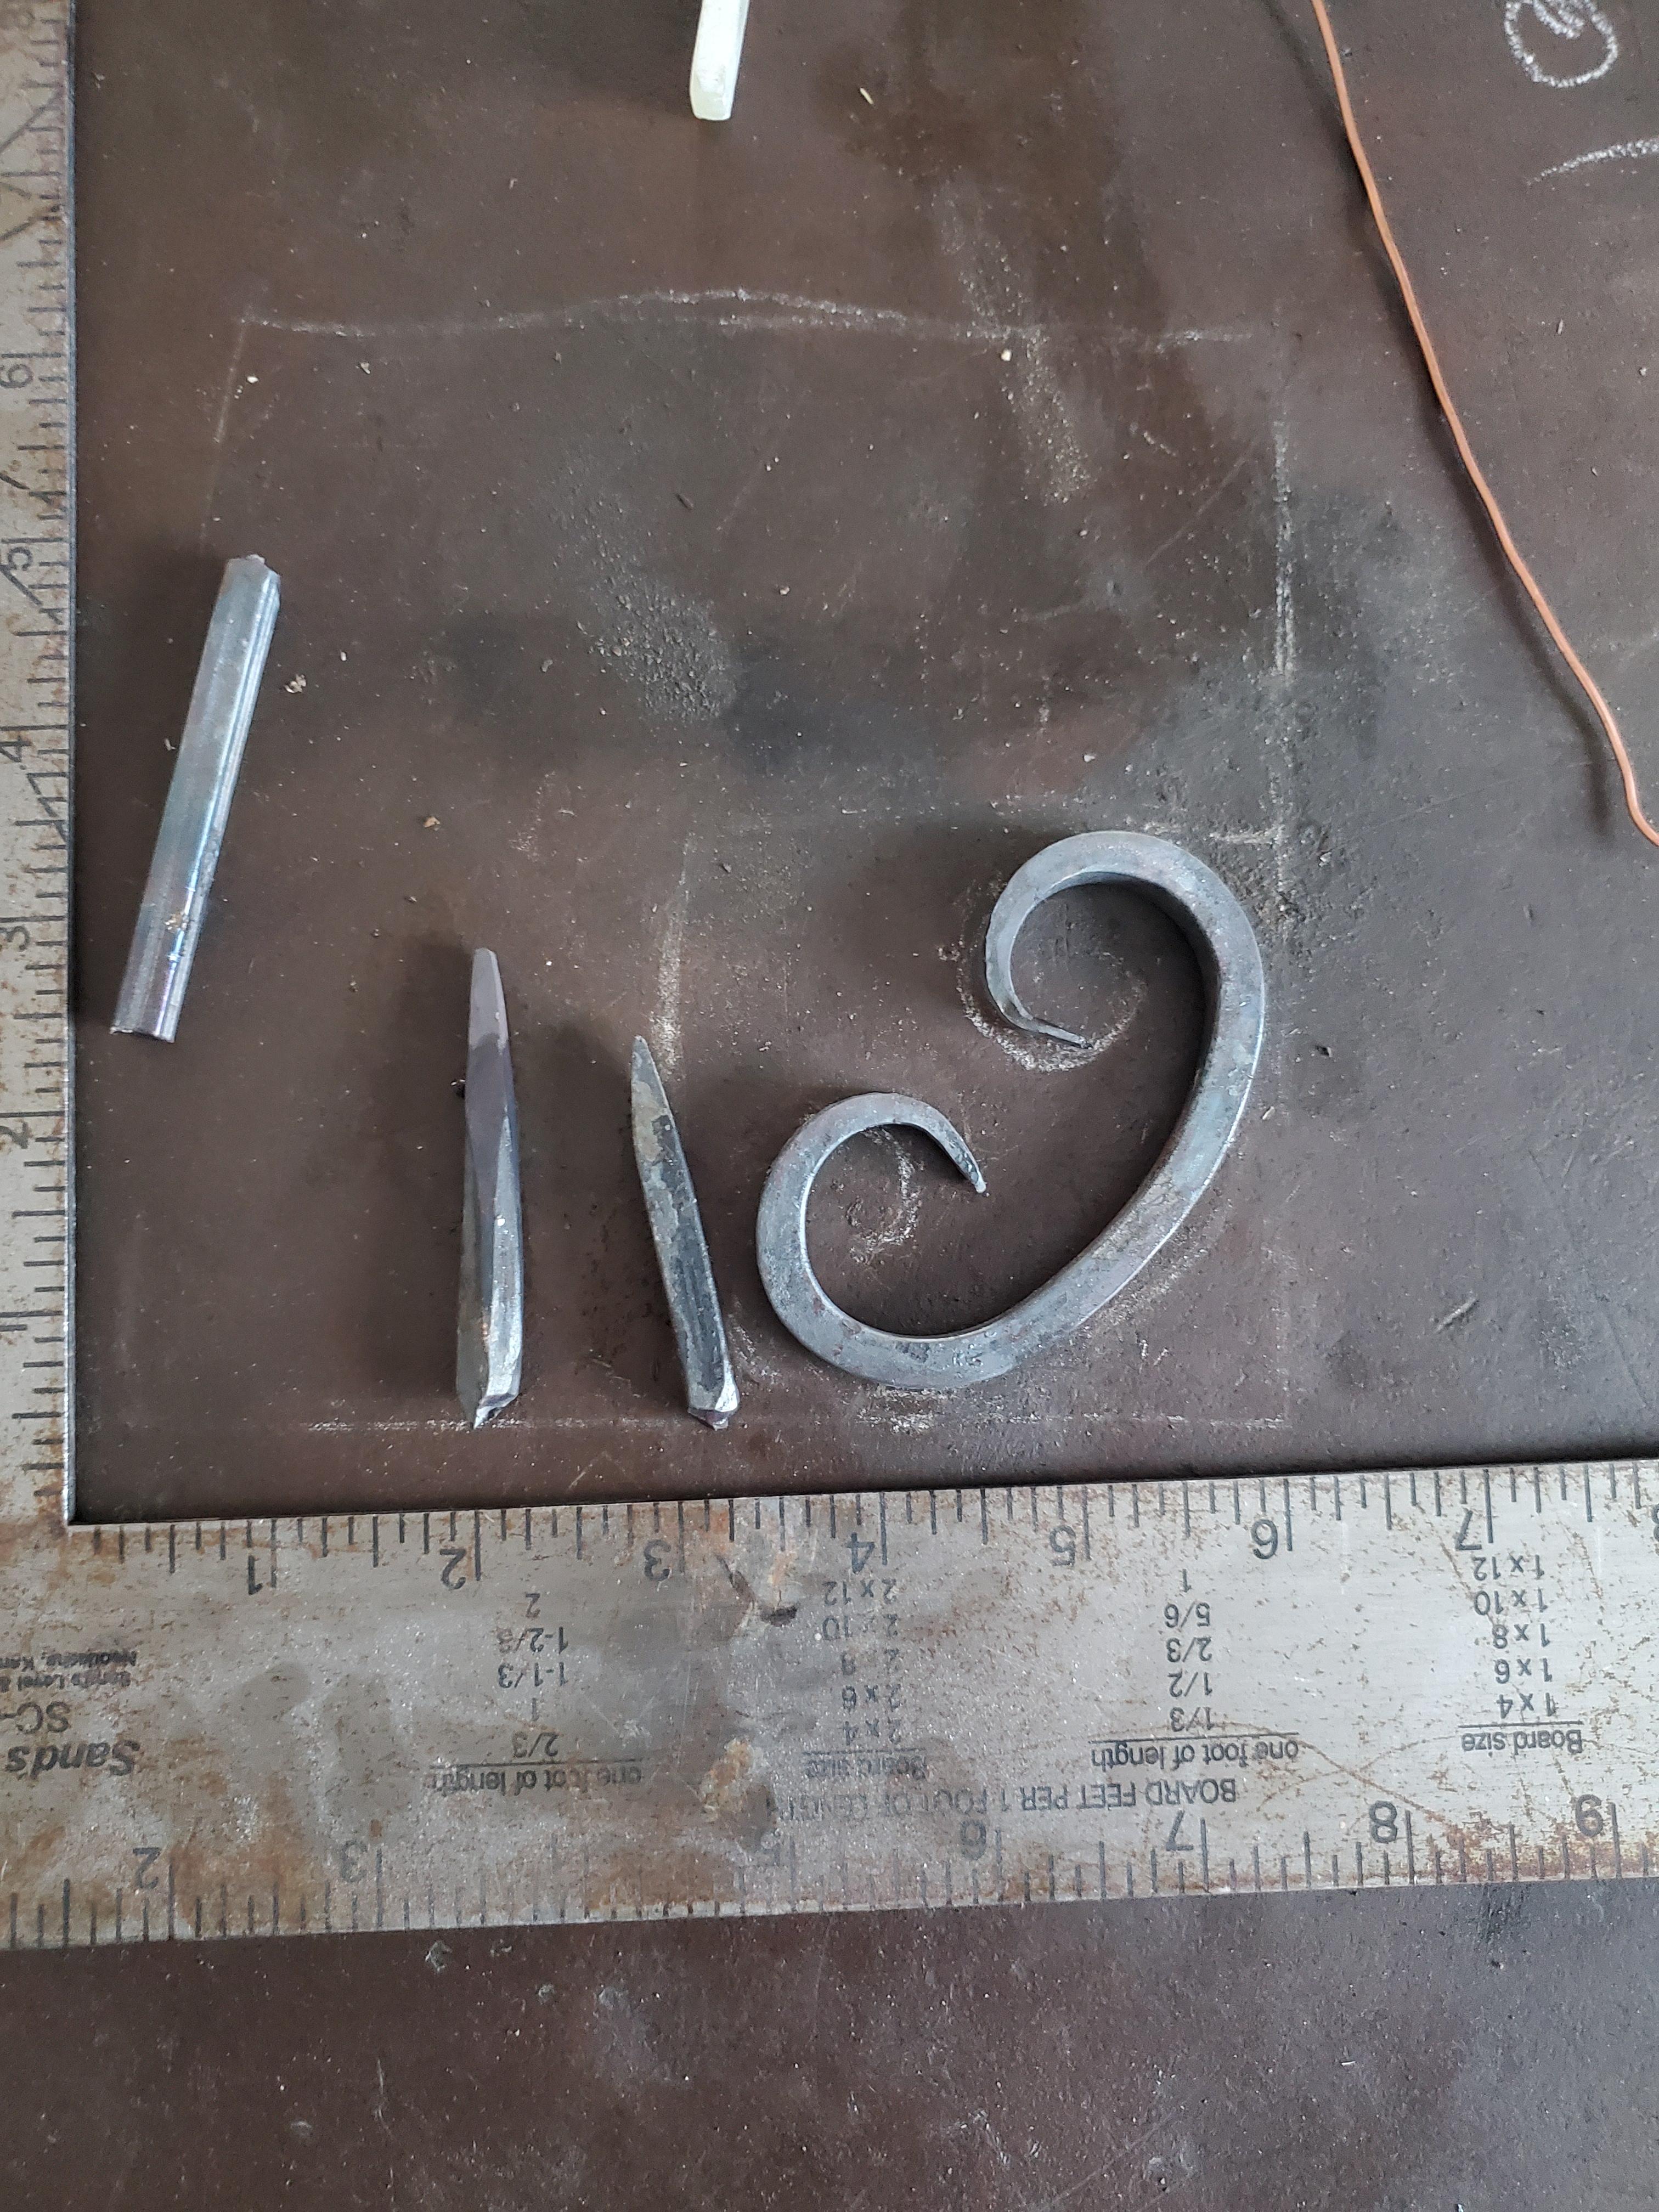
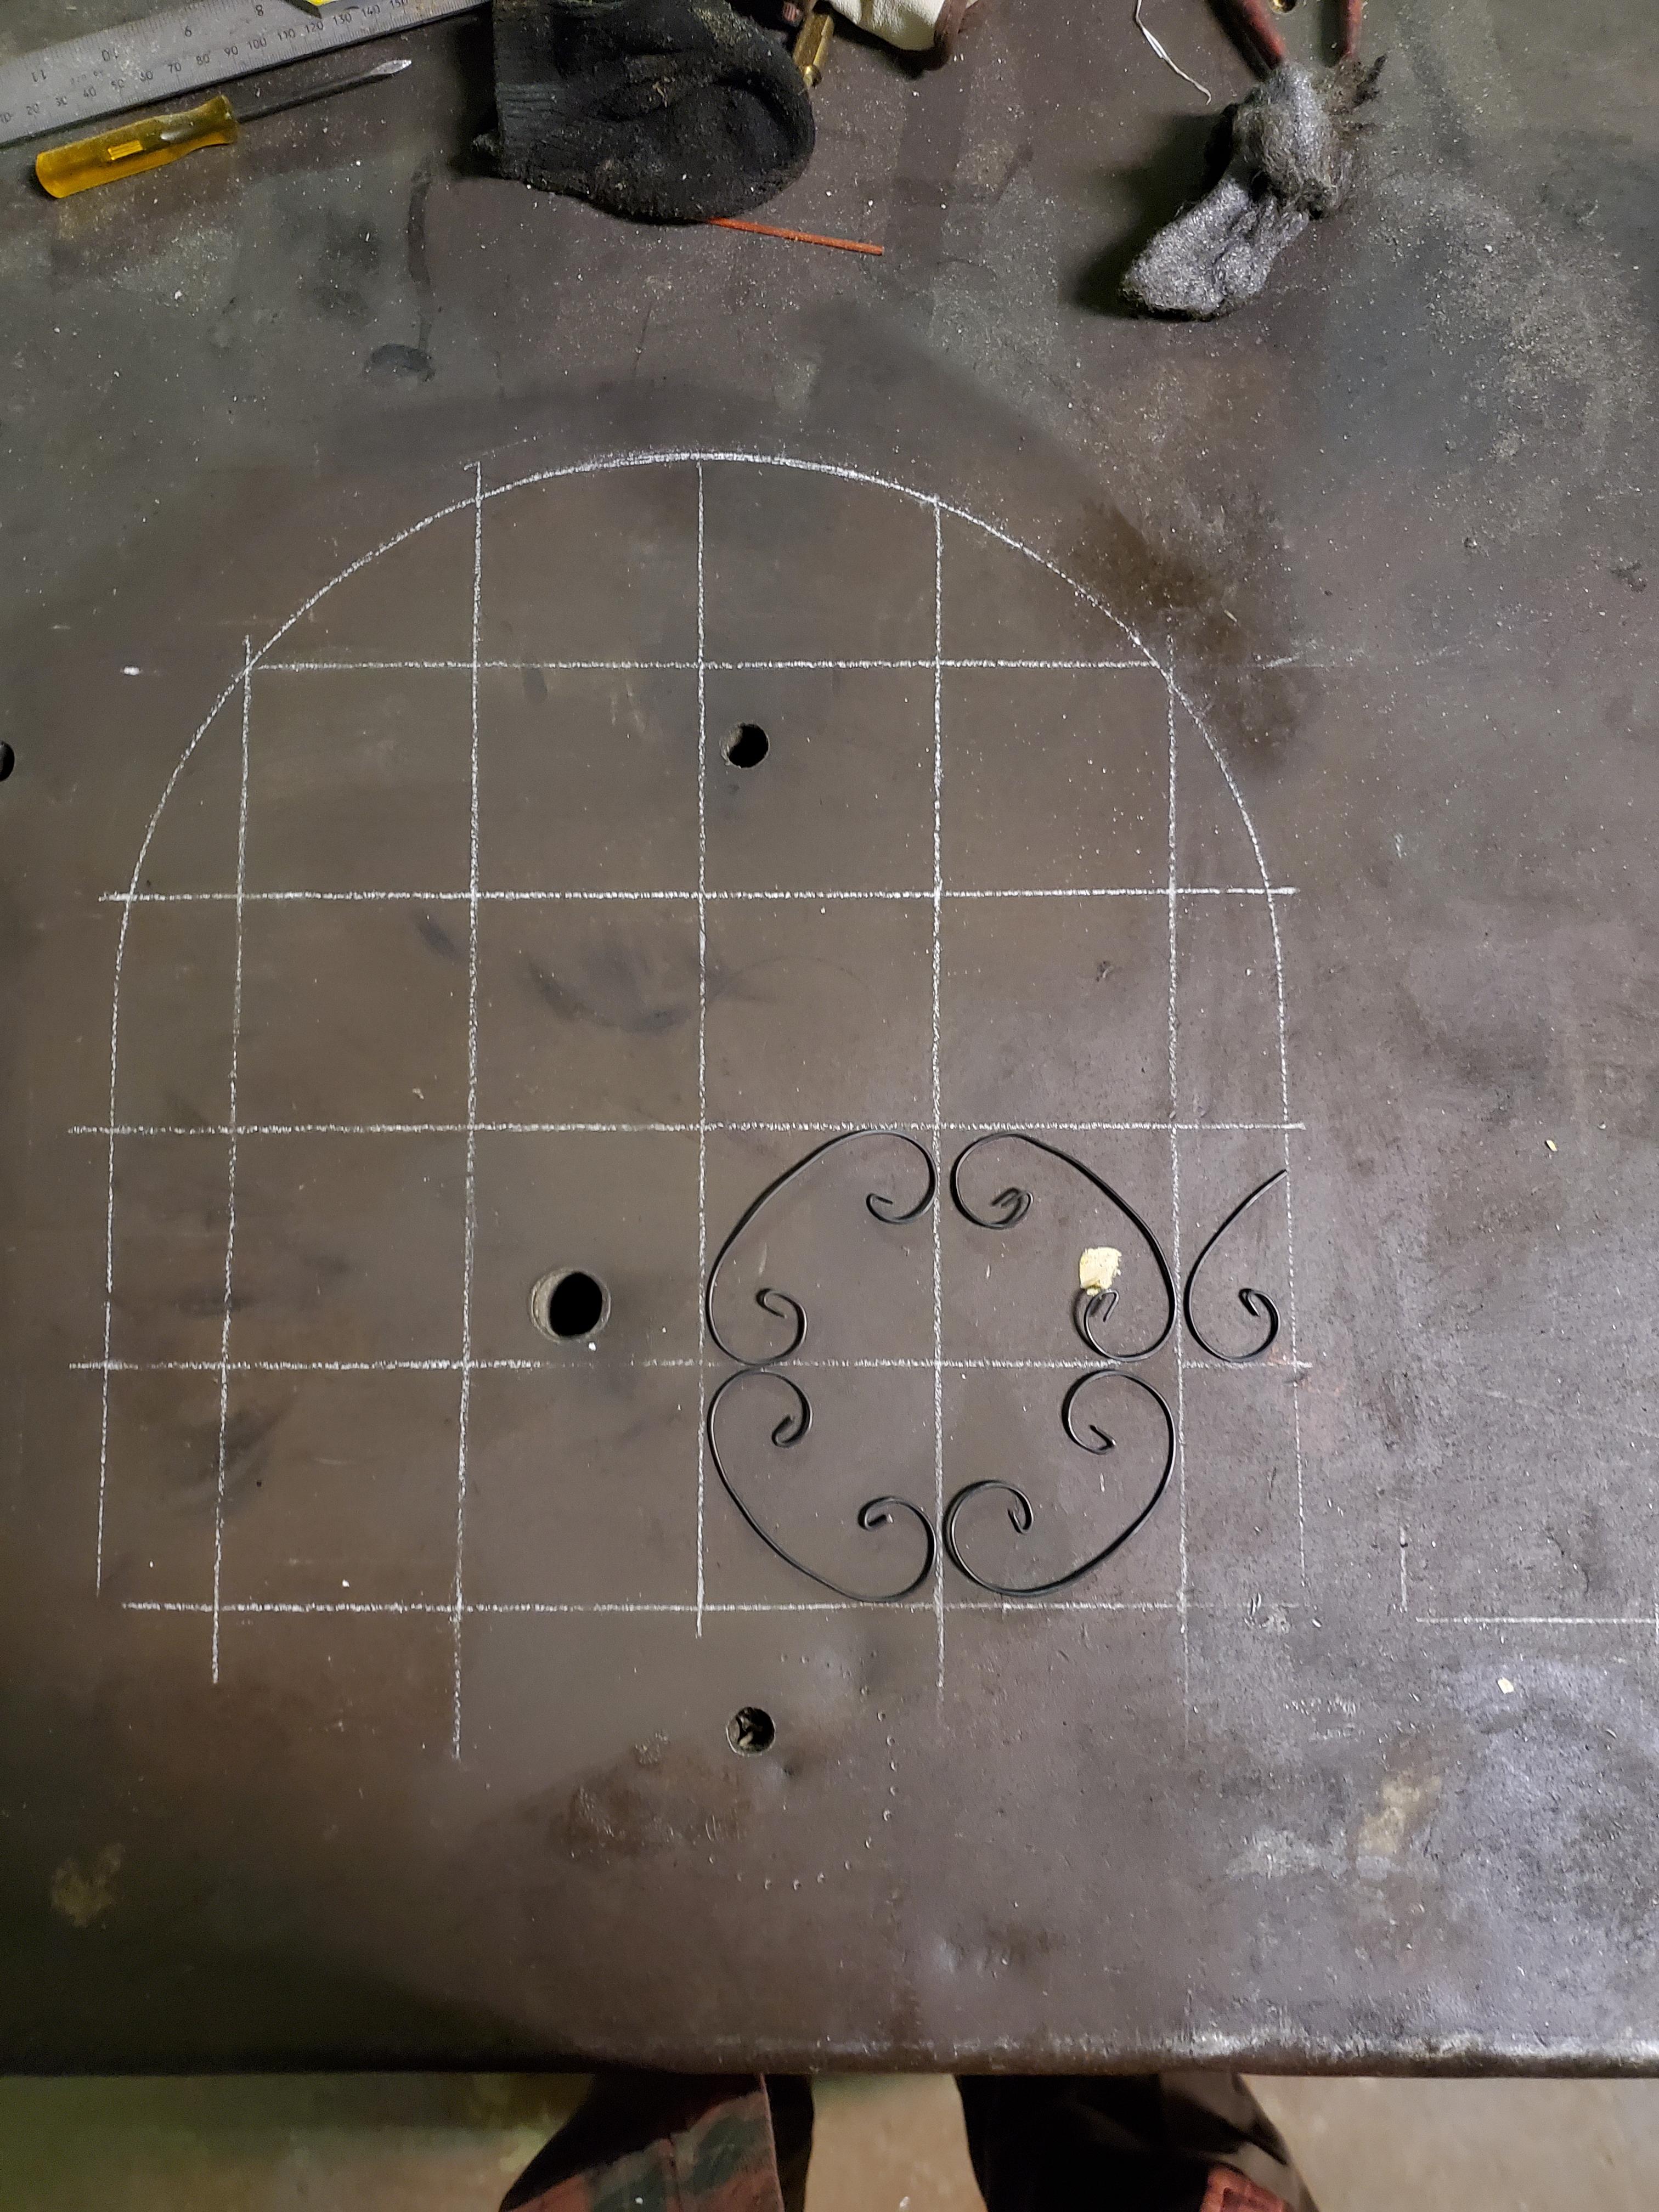
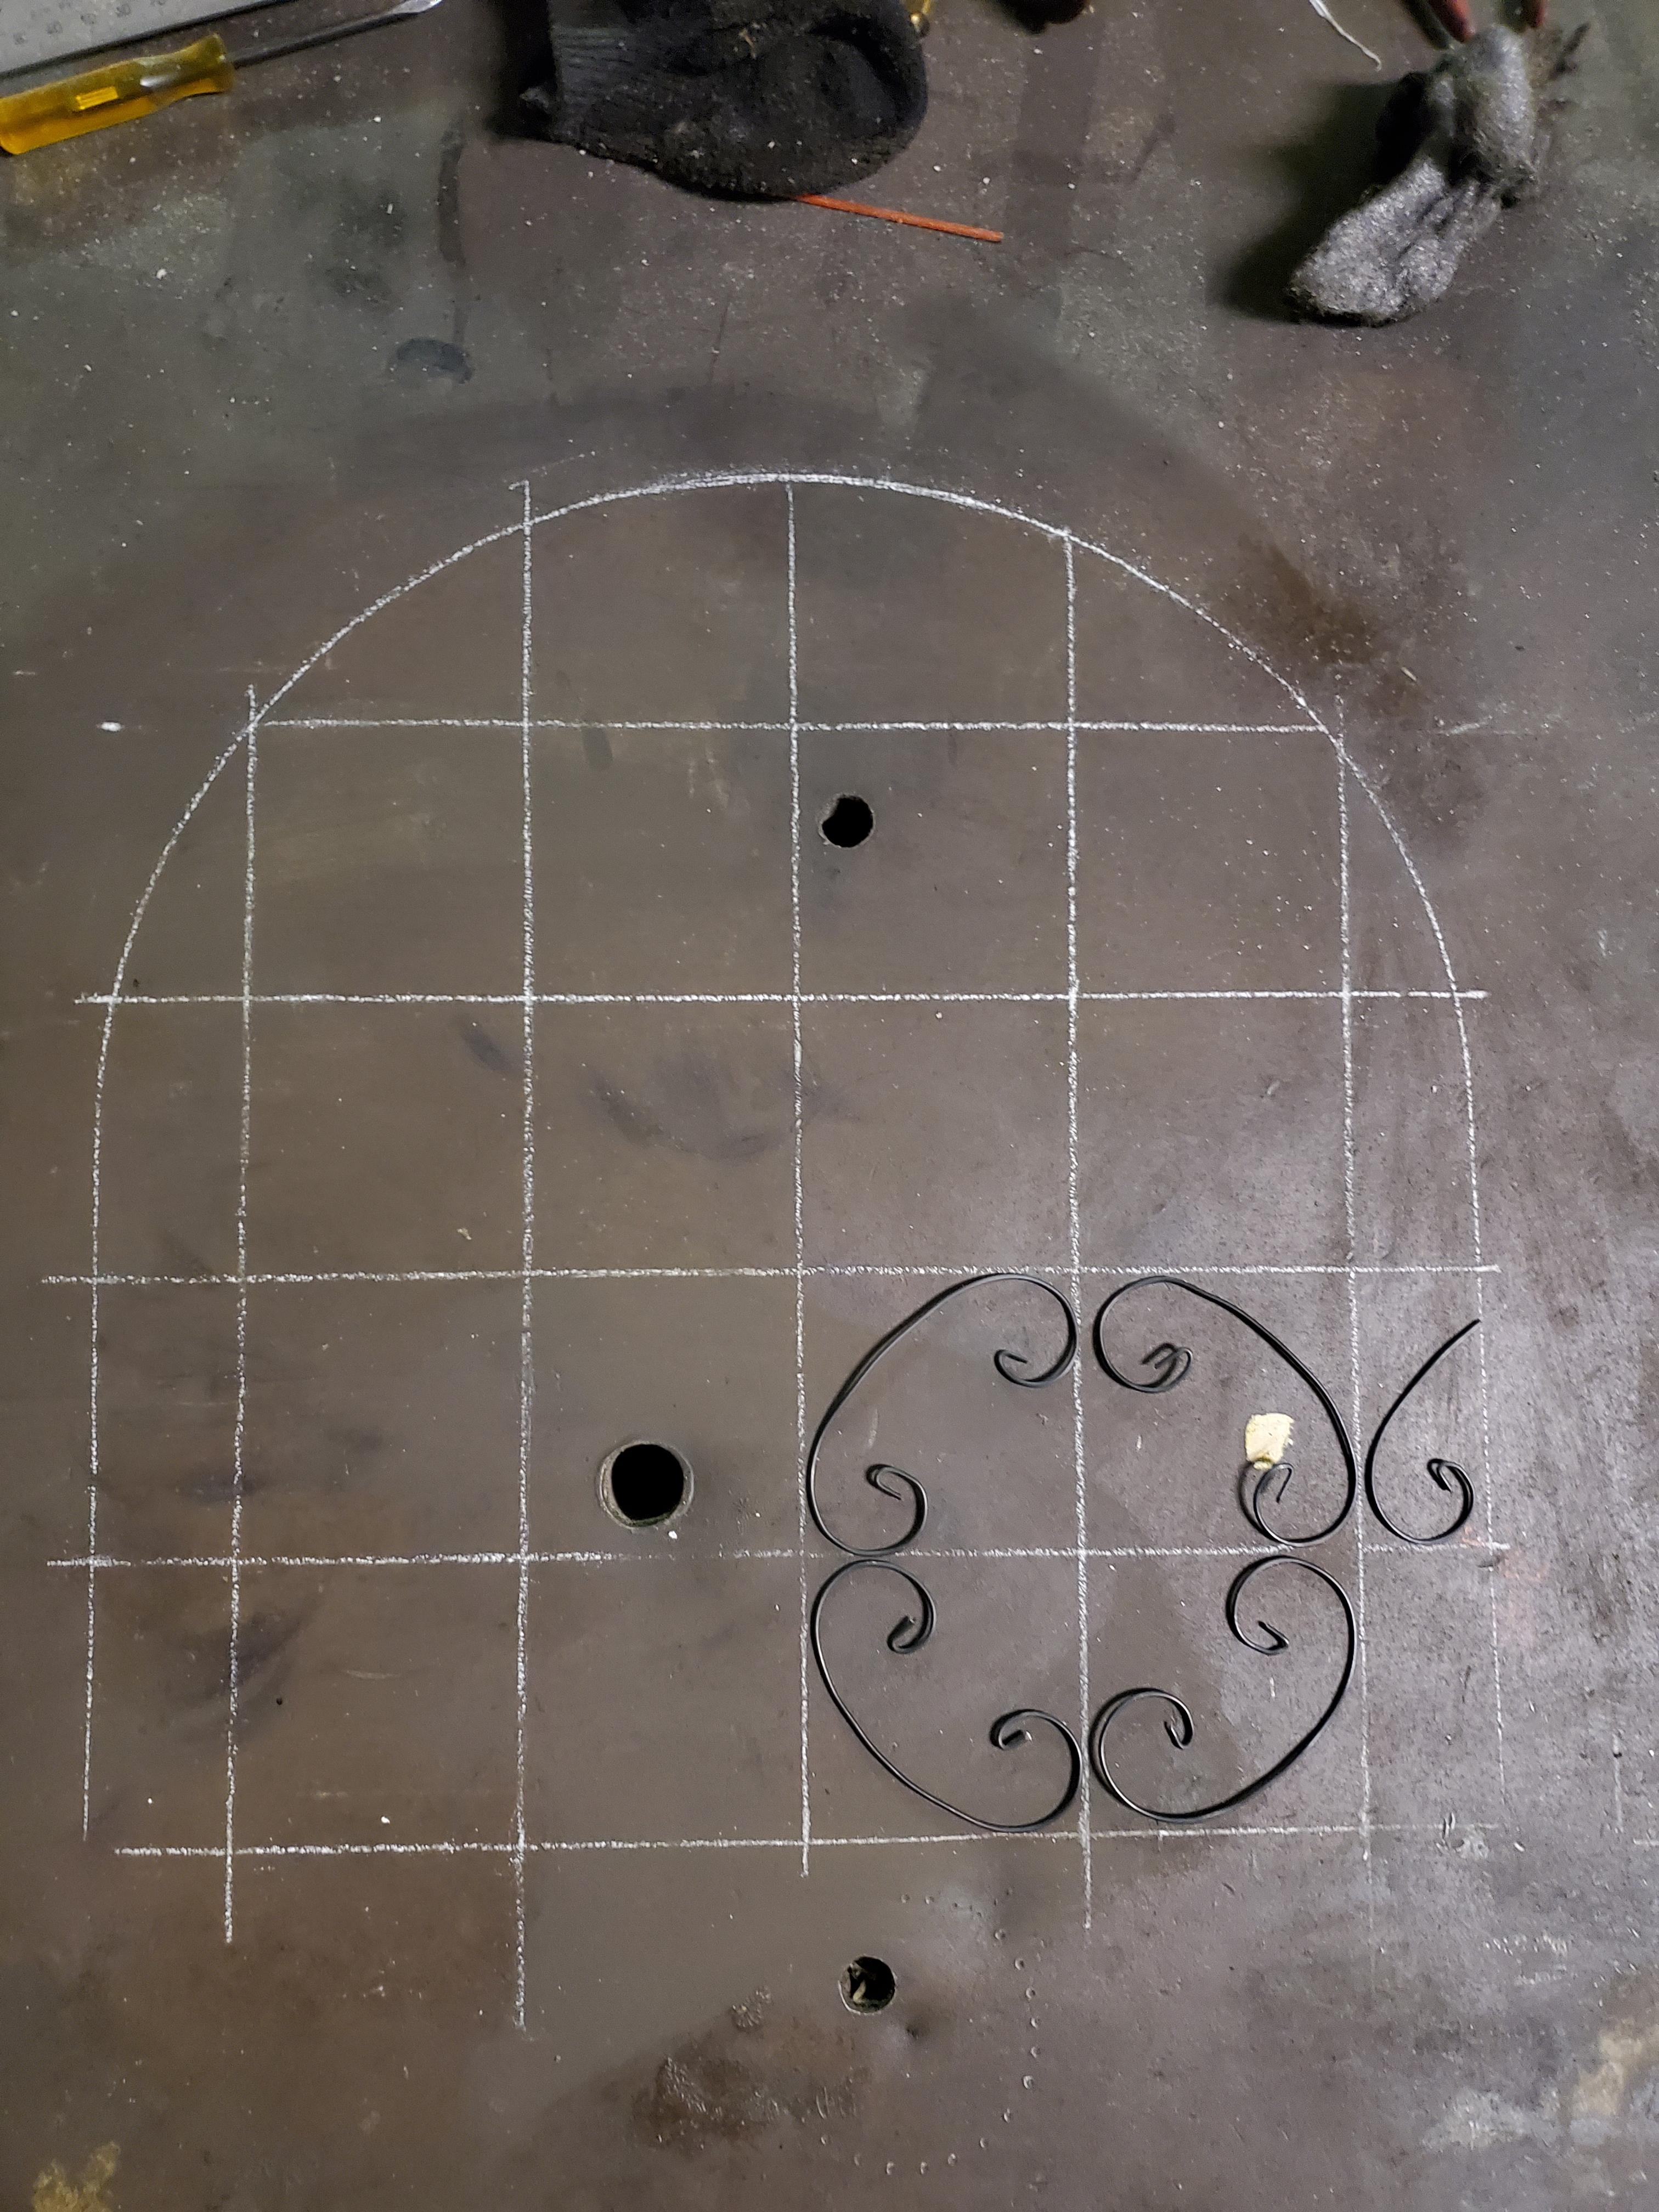
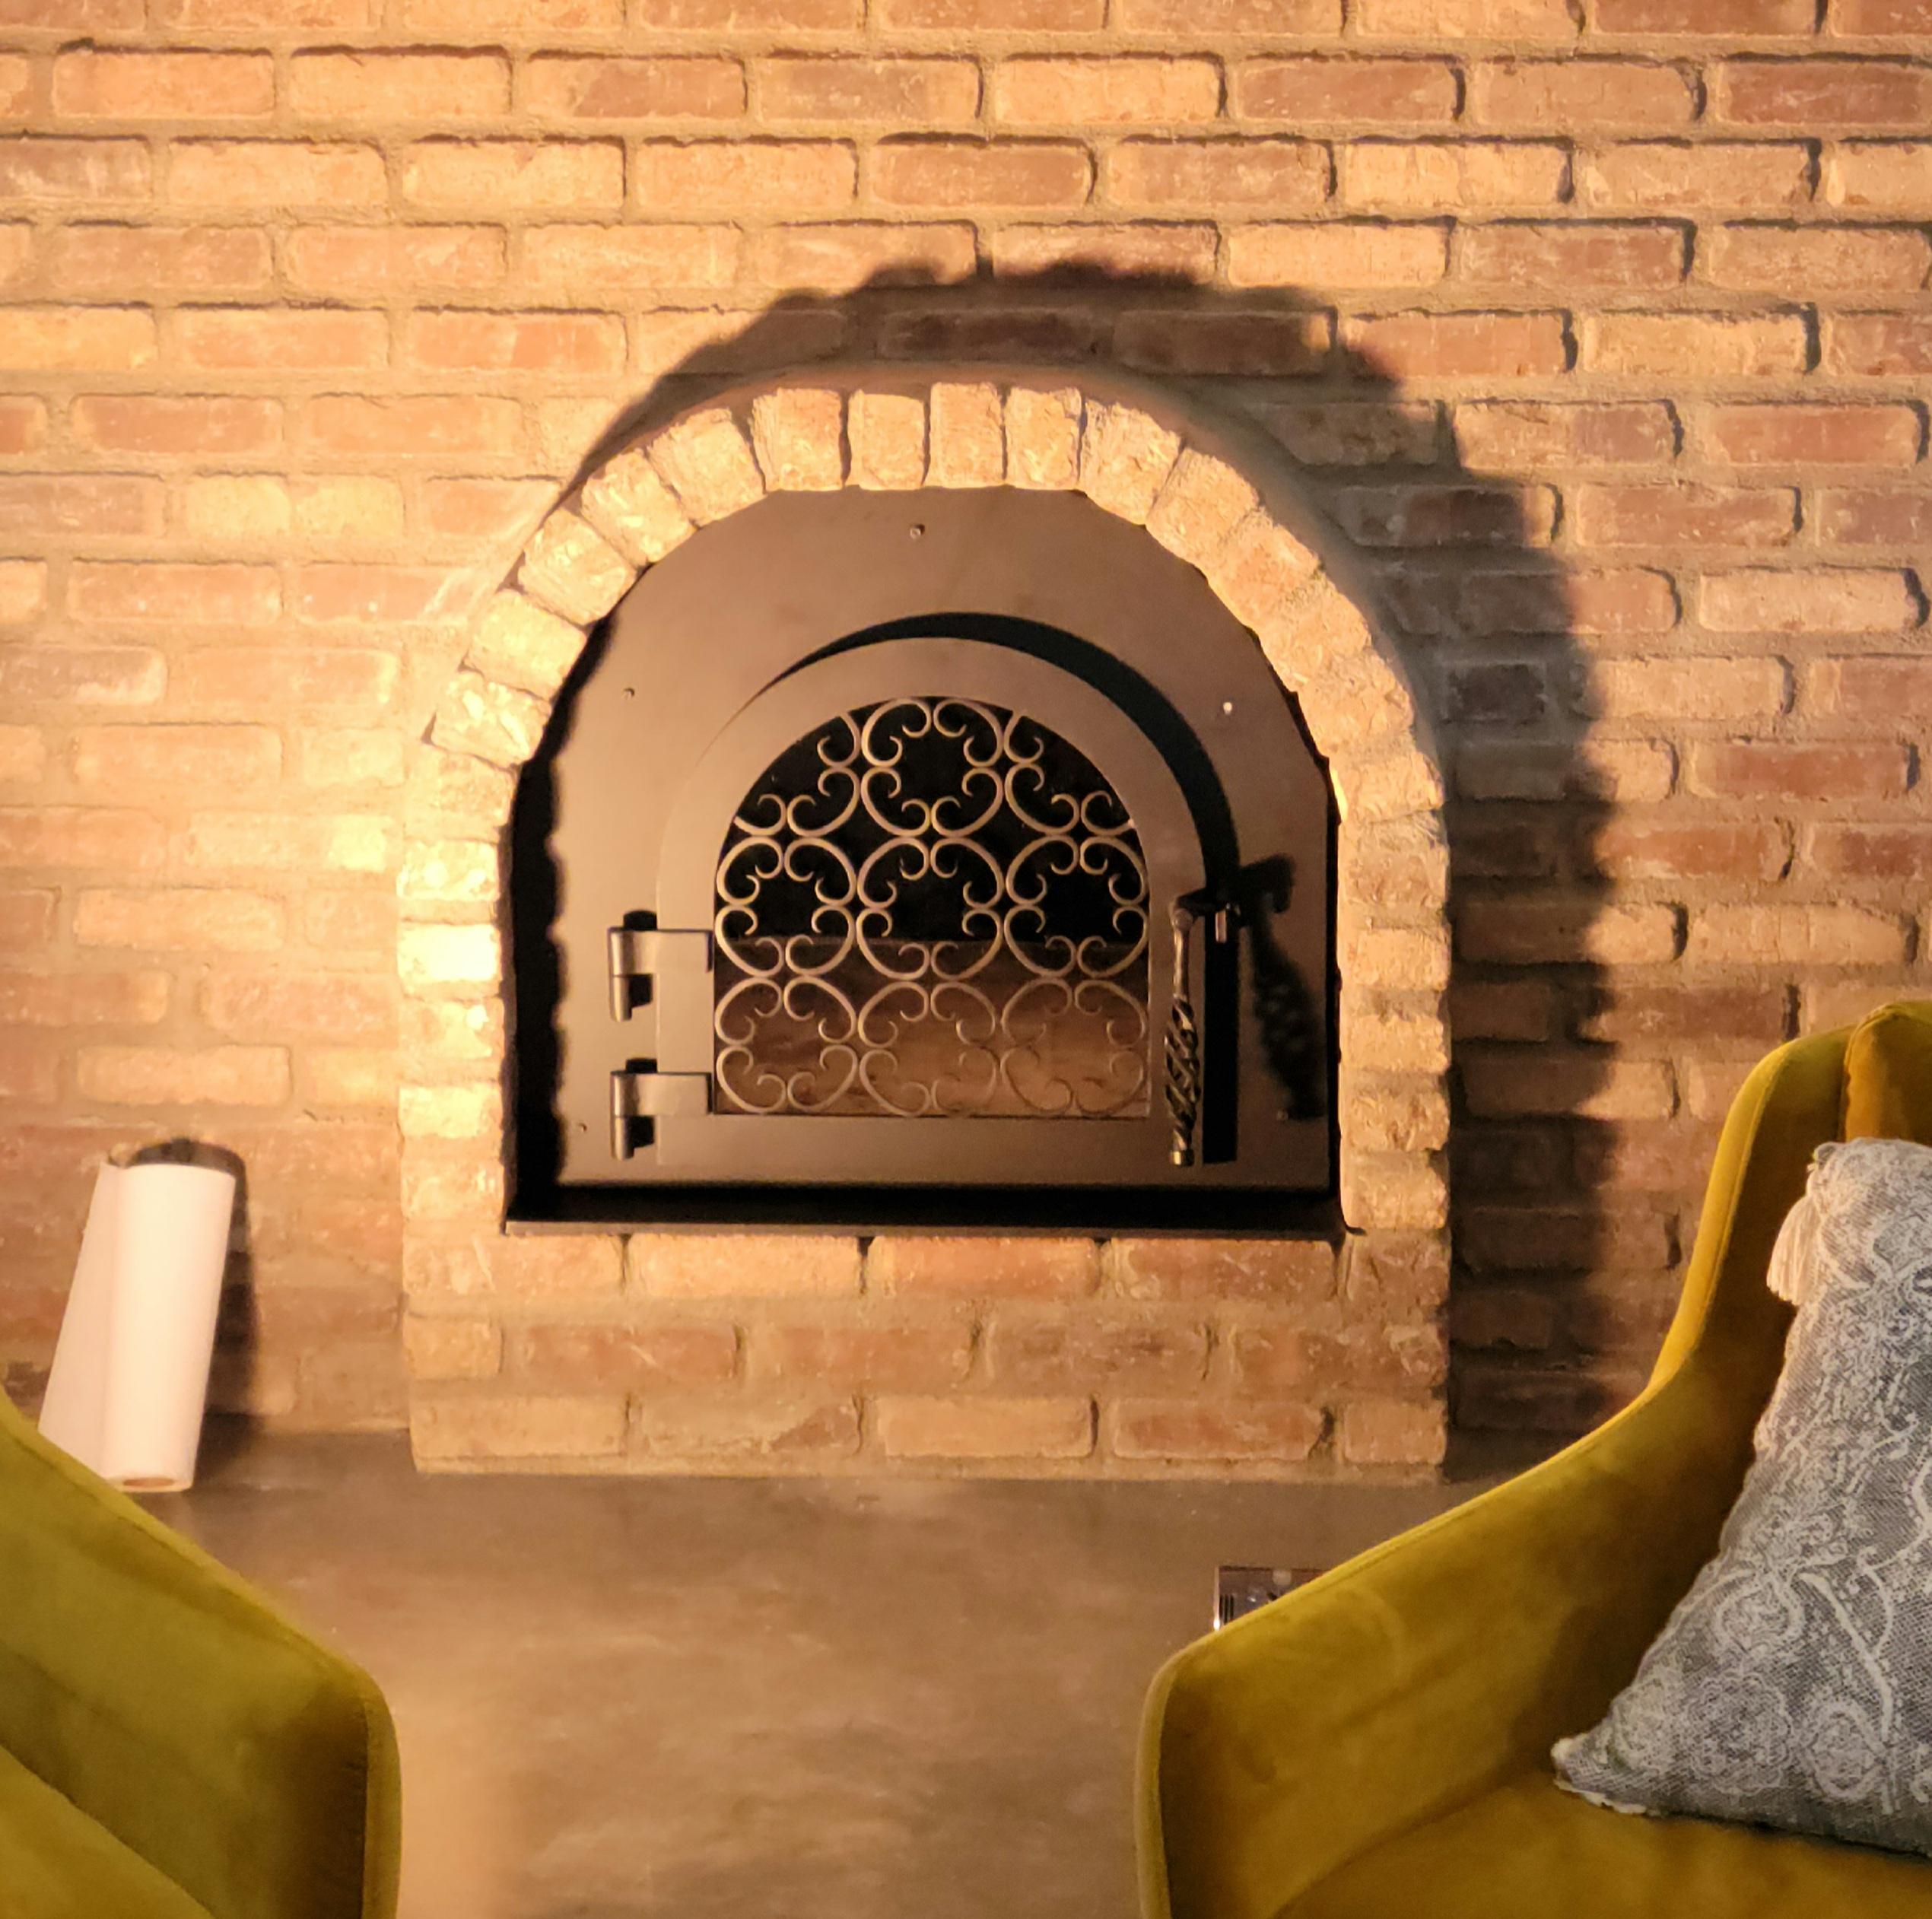
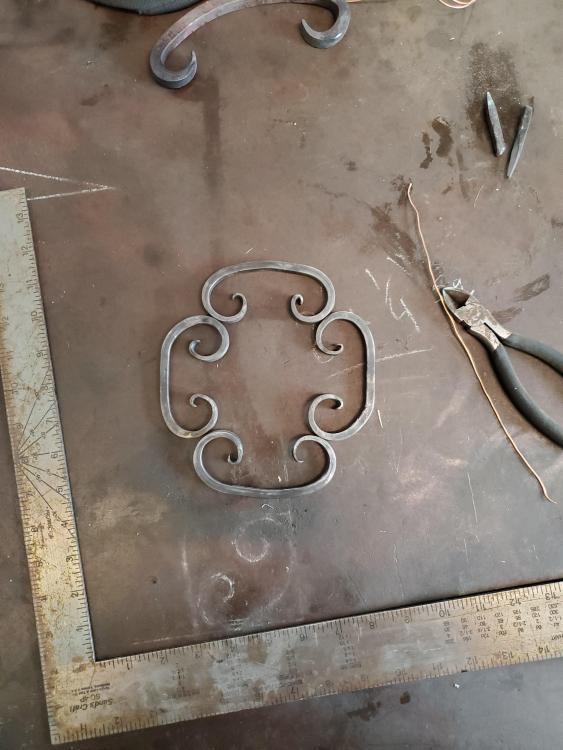
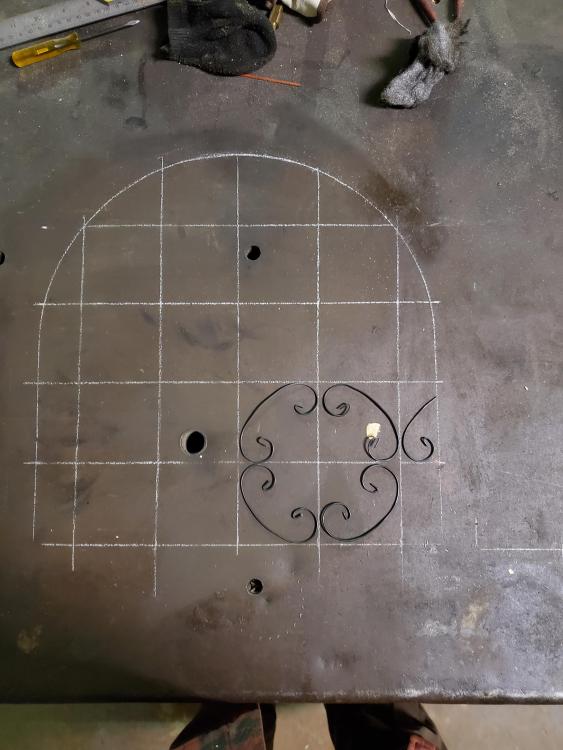
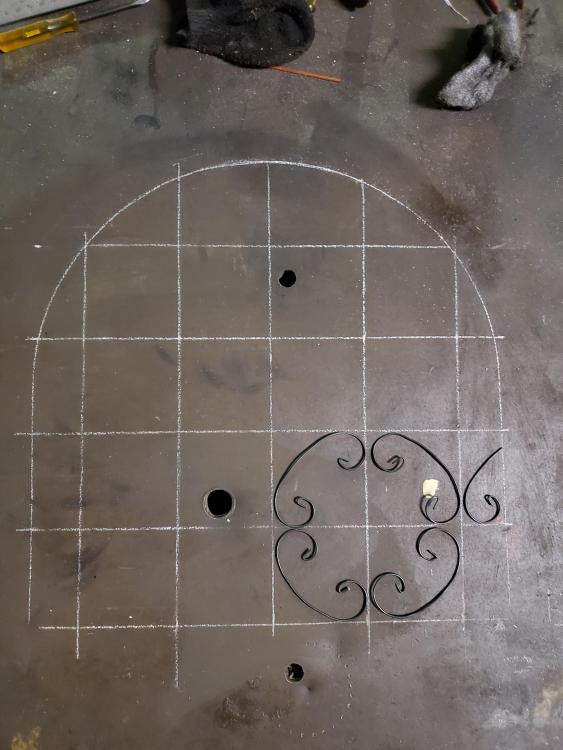
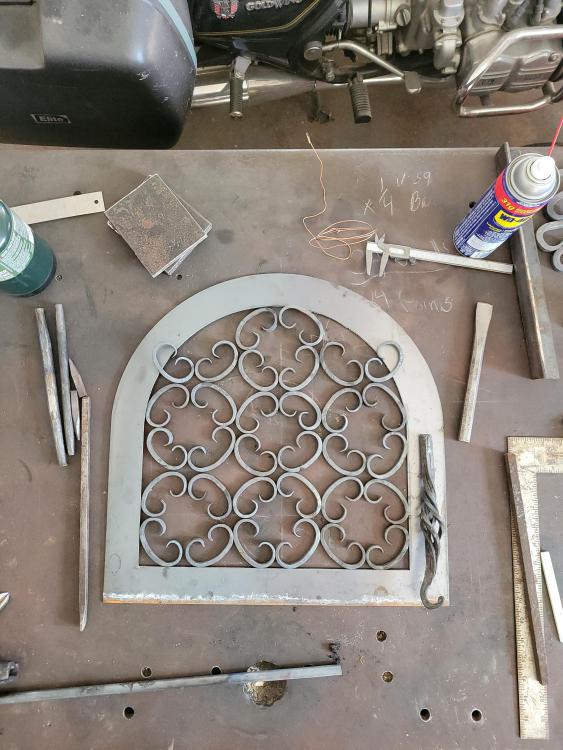
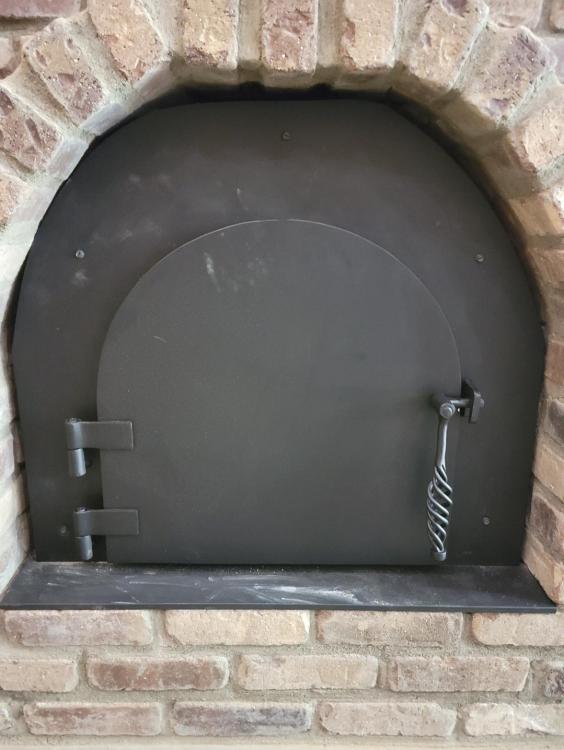
Hey all here is a fireplace collab I did in 2021 with a local metal fabricator. She did all the flat steel stuff with her plasma table. I did the forging parts and she welded it all together. Comments and questions are always welcome. First 2 pics were prototyping. I realized quickly that consistency was key and came up with a process to get repeatable results using a 4" radius swage and then a scrolling jig. Also ended up using 1/4" square whereas the prototypes were 3/8 square because that's what I had on hand. Next 2 photos were to figure out proportions. I scrolled some mechanics wire by hand. Next pic is the layout before welding and the final results last. The fireplace was actually double sided. The rear door was in the garage which let the client keep the firewood out of the house.


-
Thanks Frosty and George! I have progress pics from all my projects. I will get the last couple projects posted individually in the coming days/weeks. The fireplace grill was welded on the backside indeed. I also forged the hinges and the handle to open the door. It was actually a collab with a local metal fabricator. The door was powder coated before install.
-
Hey all, took a bit of a break from the community but back now. I have been forging through the passed 6 years of silence but have decided to come back as I don't have any smithing friends to troubleshoot with or bounce ideas around. I feel like I have come a long way in the past 6 years. The first is a pic of one of my first projects, the 2nd I did in 2018, a cowboy cook set. The 3rd is a commission from 2021 and my most recent work (2023) last. Comments and critics welcome all.


-
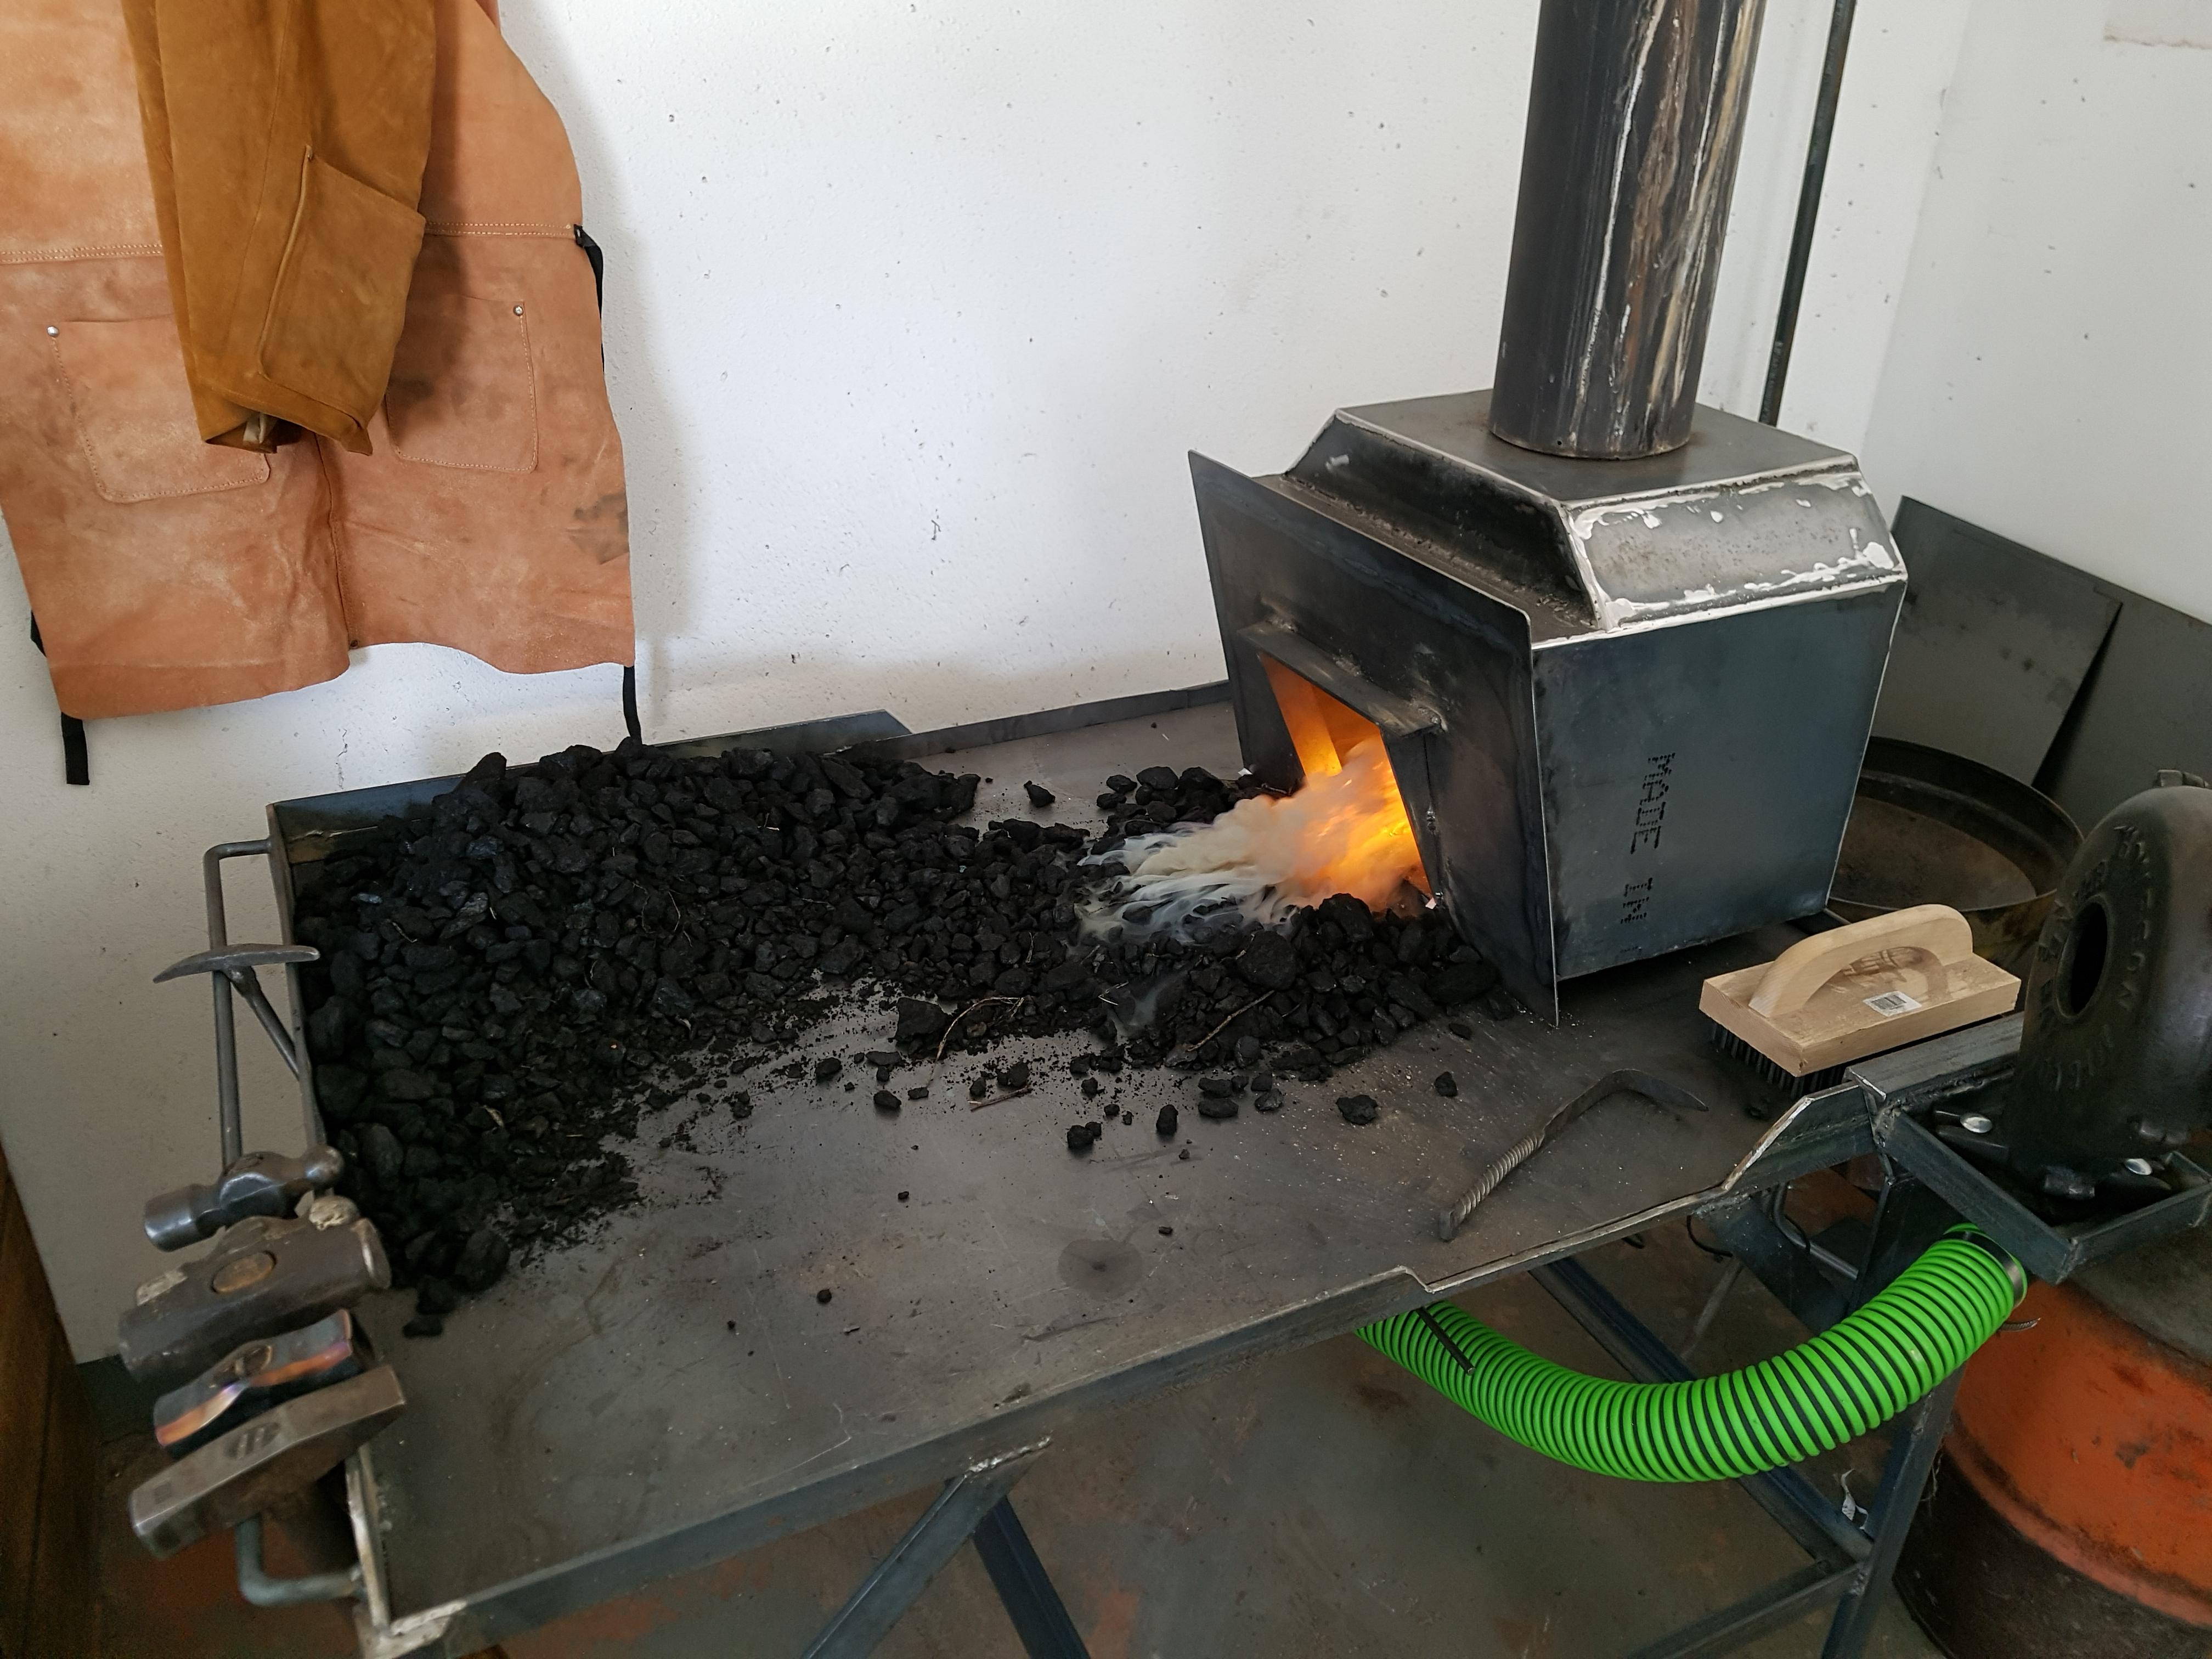
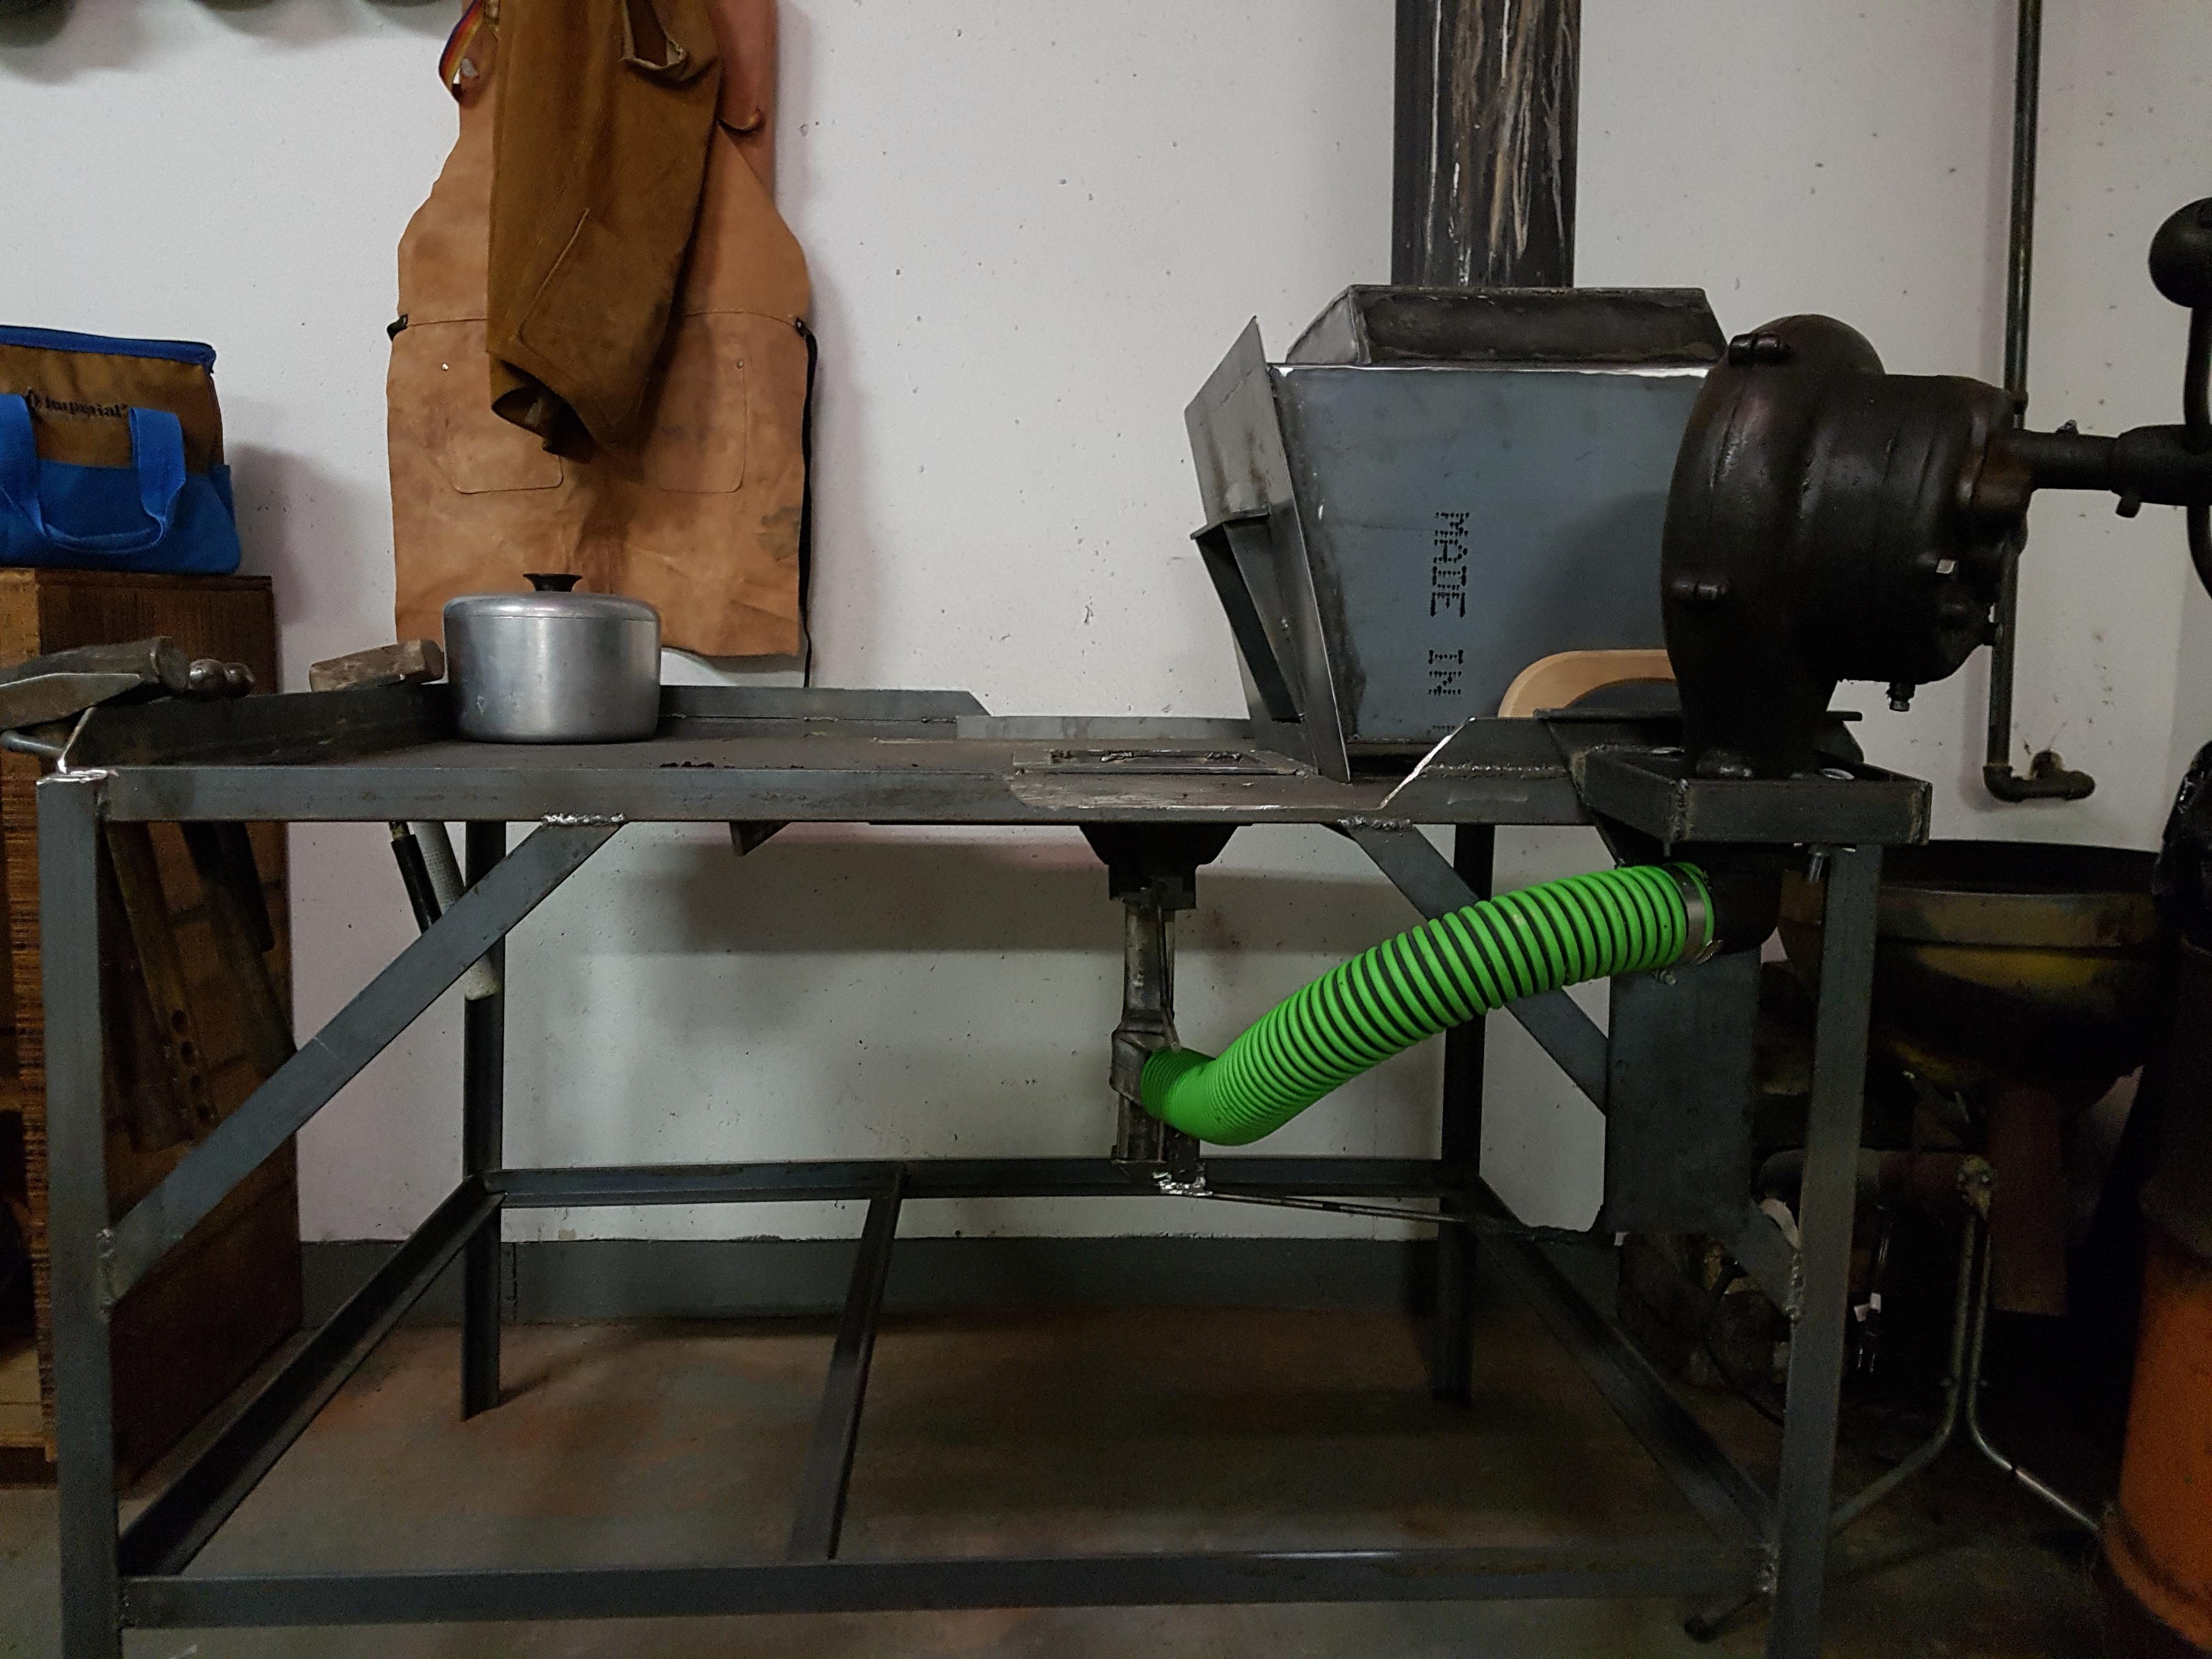
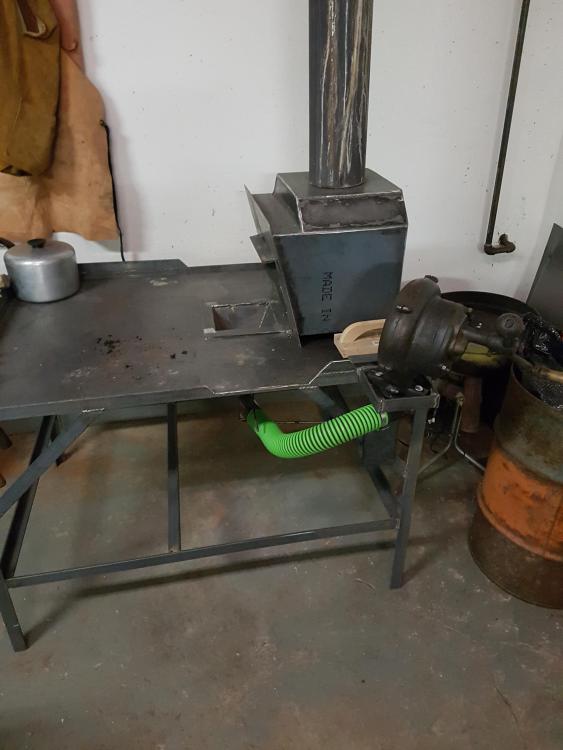
Well first of all, I am really flattered that you want to build a forge like mine! Here is an update after using this forge for 4 months or so... Still have the blower on the right. It is nice to give the left arm a break while I am cranking with the right. I use sub-bitumous coal so it stays well lit even without the air going. Have about 1200 lbs of it so i am not needing to buy coal for a long while. Klinkers are annoying but a fact of life and I have learned to deal with them. The only thing I plan on doing with this forge is to upgrade the firepot. 1/4 inch is a little thin for my liking and at 3.5 inches deep I find it a little too deep. Will be replacing it this winter probably with either 3/8" or 1/2" and make it only 2.5 inches deep. I find the 8"x8" geometry about perfect for the work I do which is tool making. I only need to hear 4-6 inches at a time with being all manual on the hammer anyhow. The 6" pipe for the chimney has not been a problem. Even at 85F in the summer it draws fairly well. I will remind you that I have an ideal situation though. 15ft straight up and no buildings in the area to cause turbulence. When I build my new smithy it will be upgraded to a 10" flue. Other than that I am happier than a pig in s#!t with this set-up. Hope to see your build in the near future. I am really looking forward to it! Thanks for the interest!
-
I use mild steel only. Save the coil springs for punches!
-
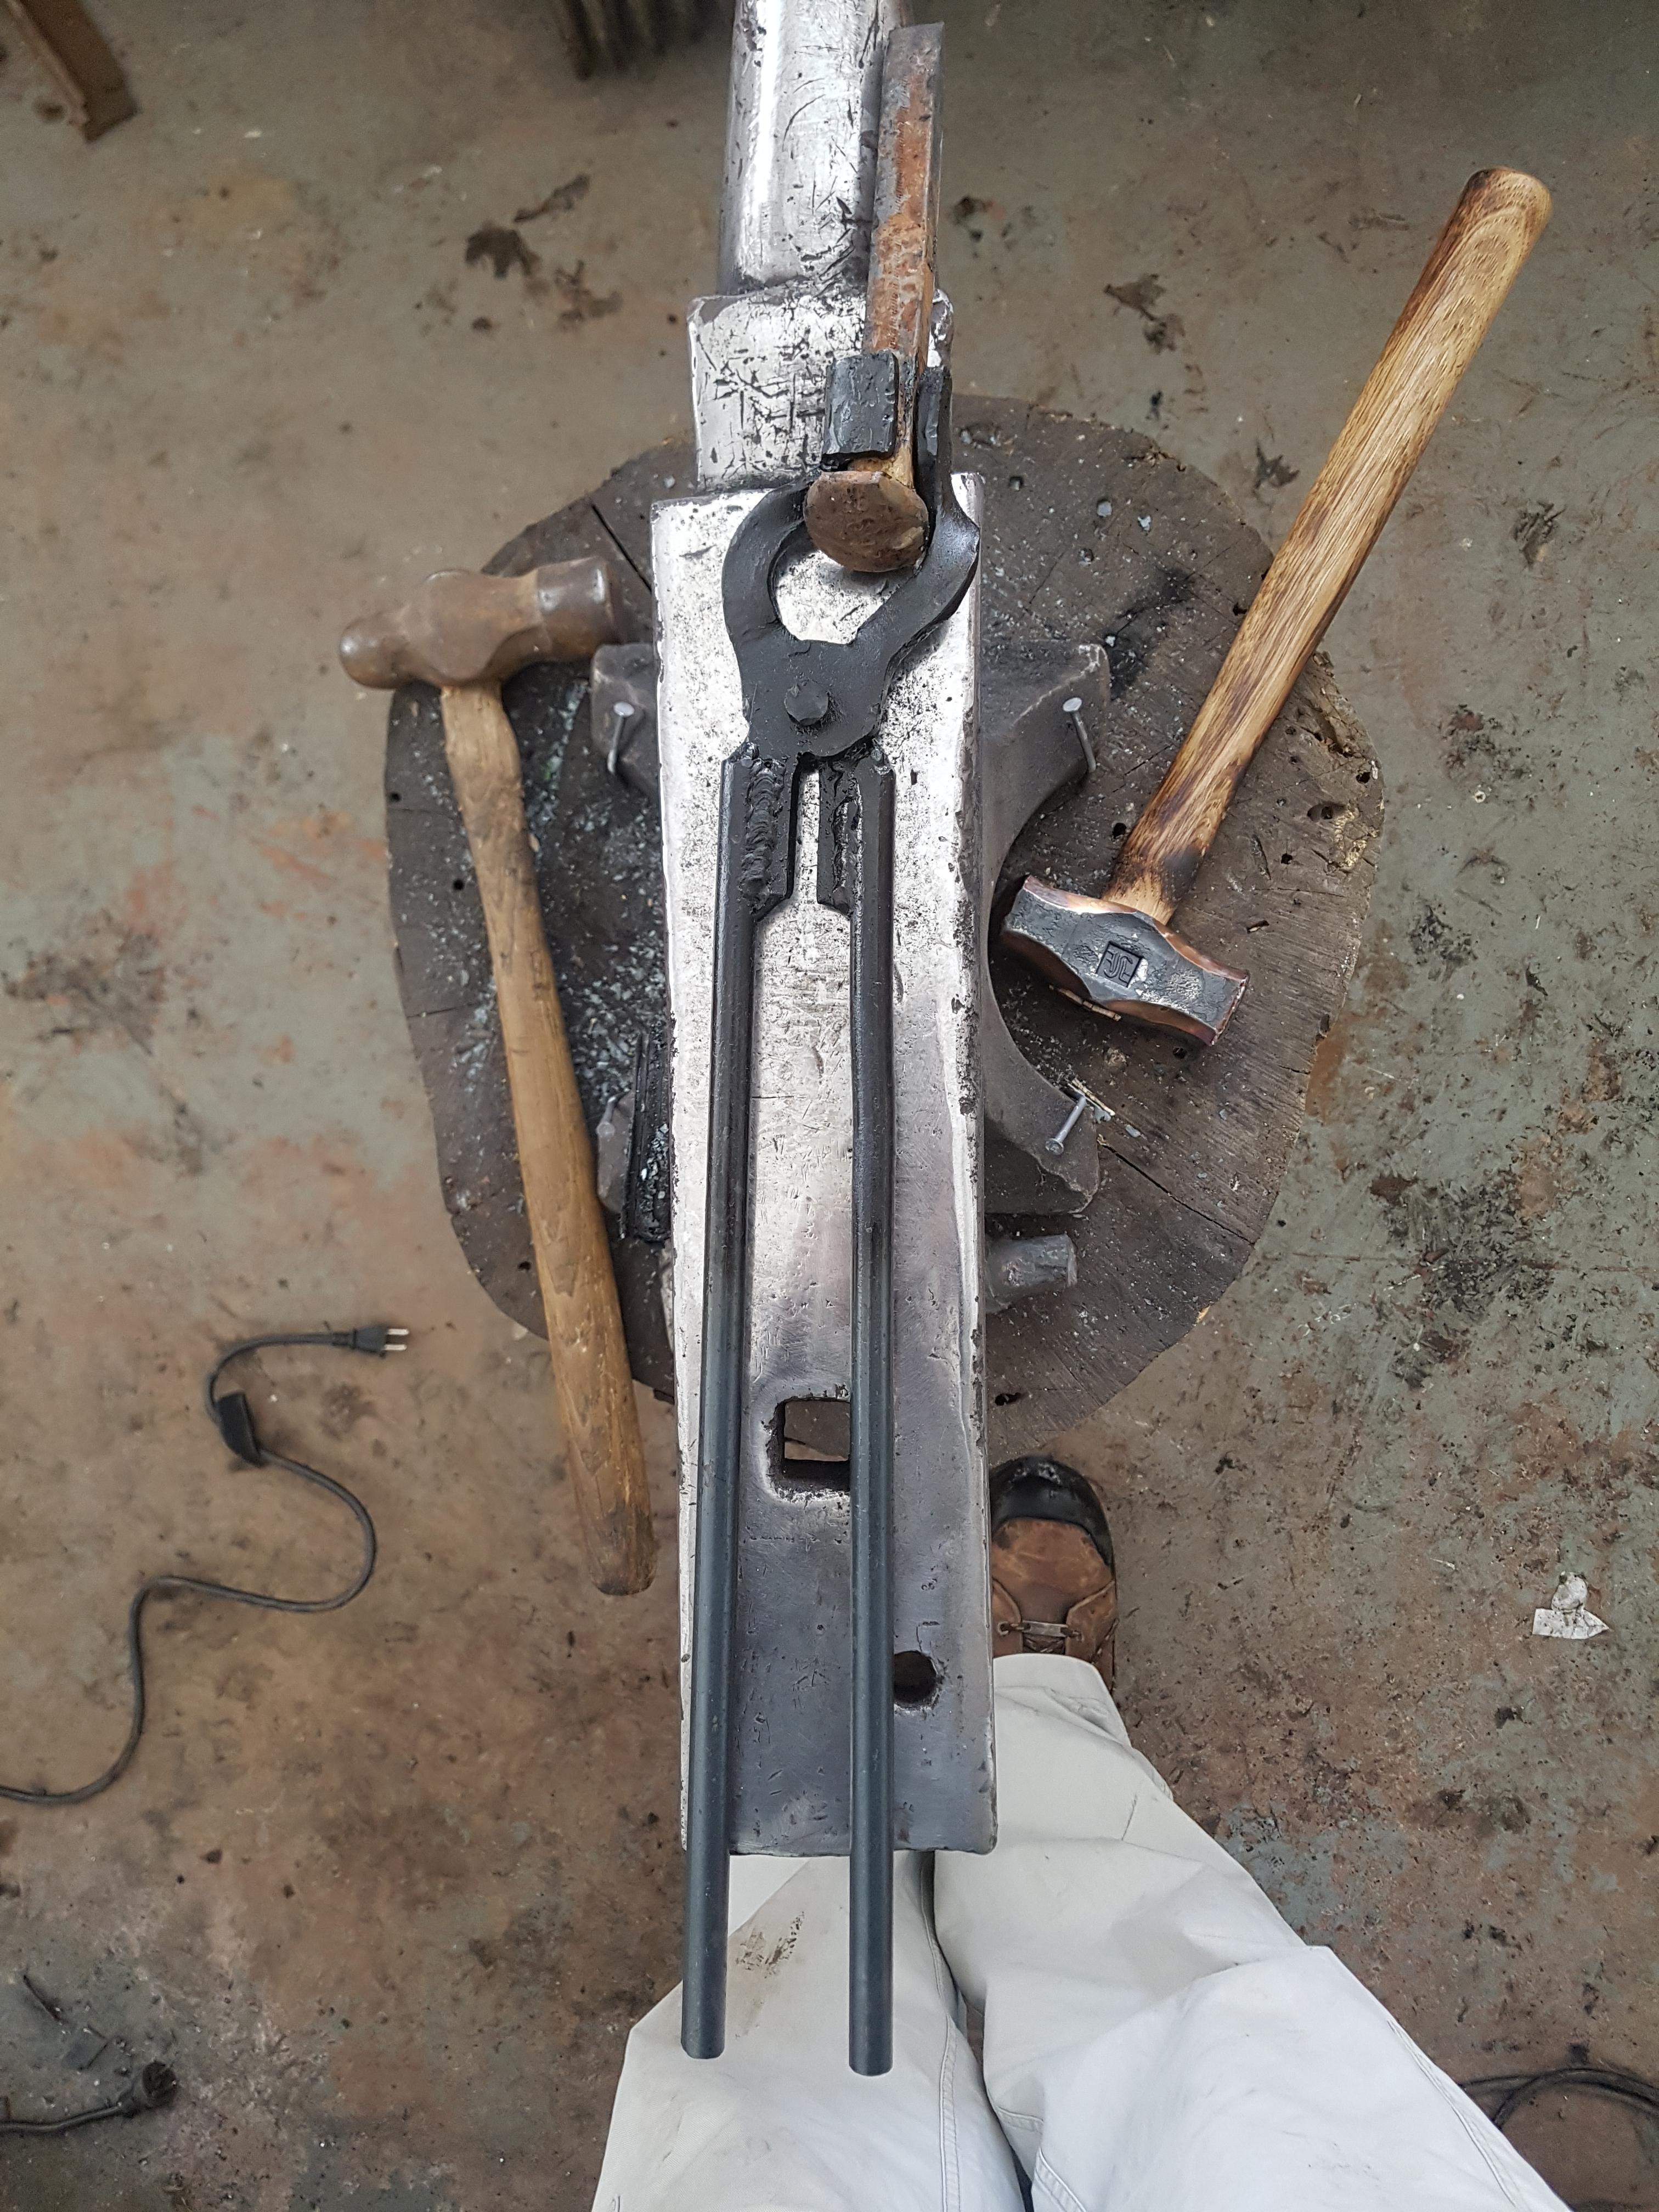
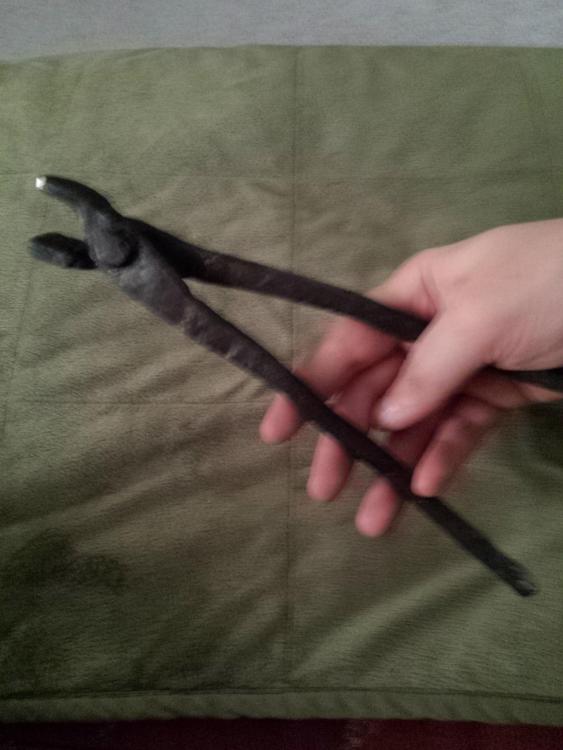
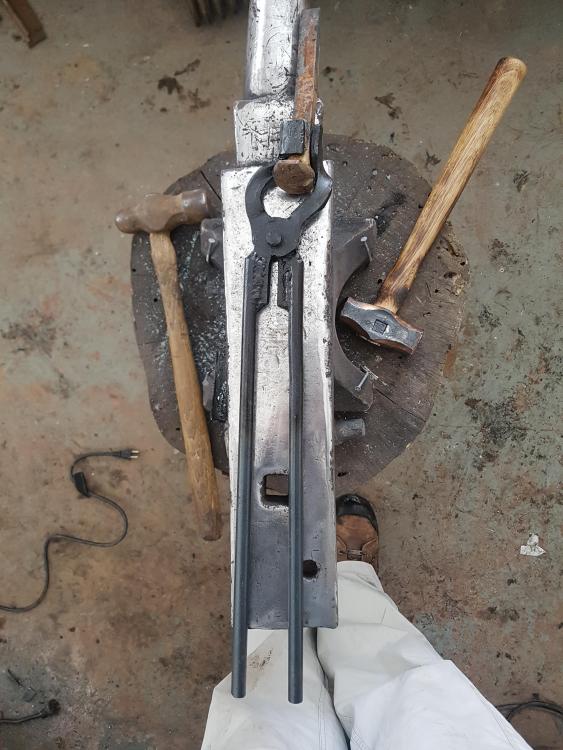
Made a set of box jaw bolt tongs with welded reins. No forge welding yet. Just flux core it. Ugly but functional. Only the 2nd set of tongs I ever made. Will work for now. Trying to get the curves symmetrical is hard!!! All in the learning process.
-
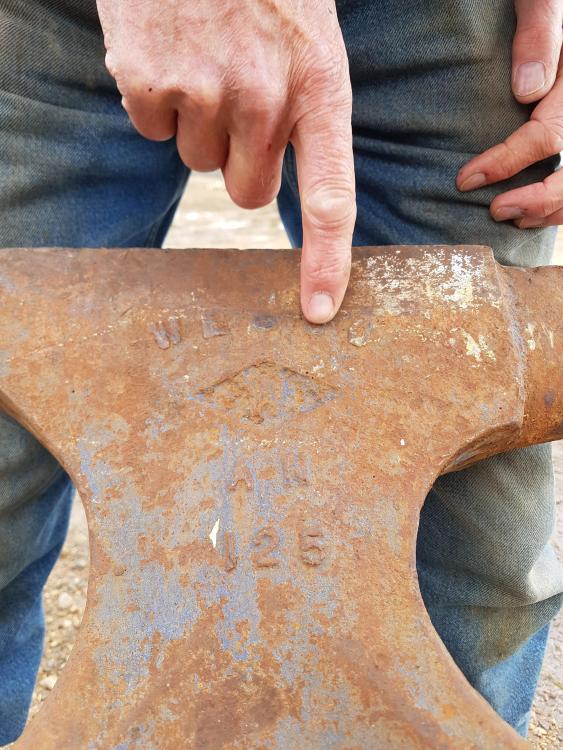
Met a fellow today. Had an anvil sitting out in the rain. It's used frequently but kinda sad to see it all rusty. Gave it a good look over. Can't tell the make outright. Maybe you fellers can help. No other markings on it but what's on the pic. Bottom is flat. And I mean almost machined type flat. One handling hole in the bottom. Handling holes in the waist. No markings about the feet. Any ideas gents? 125lbs. Verified by picking it up. Not a Trenton. The diamond has a W in it
-
-
-
-
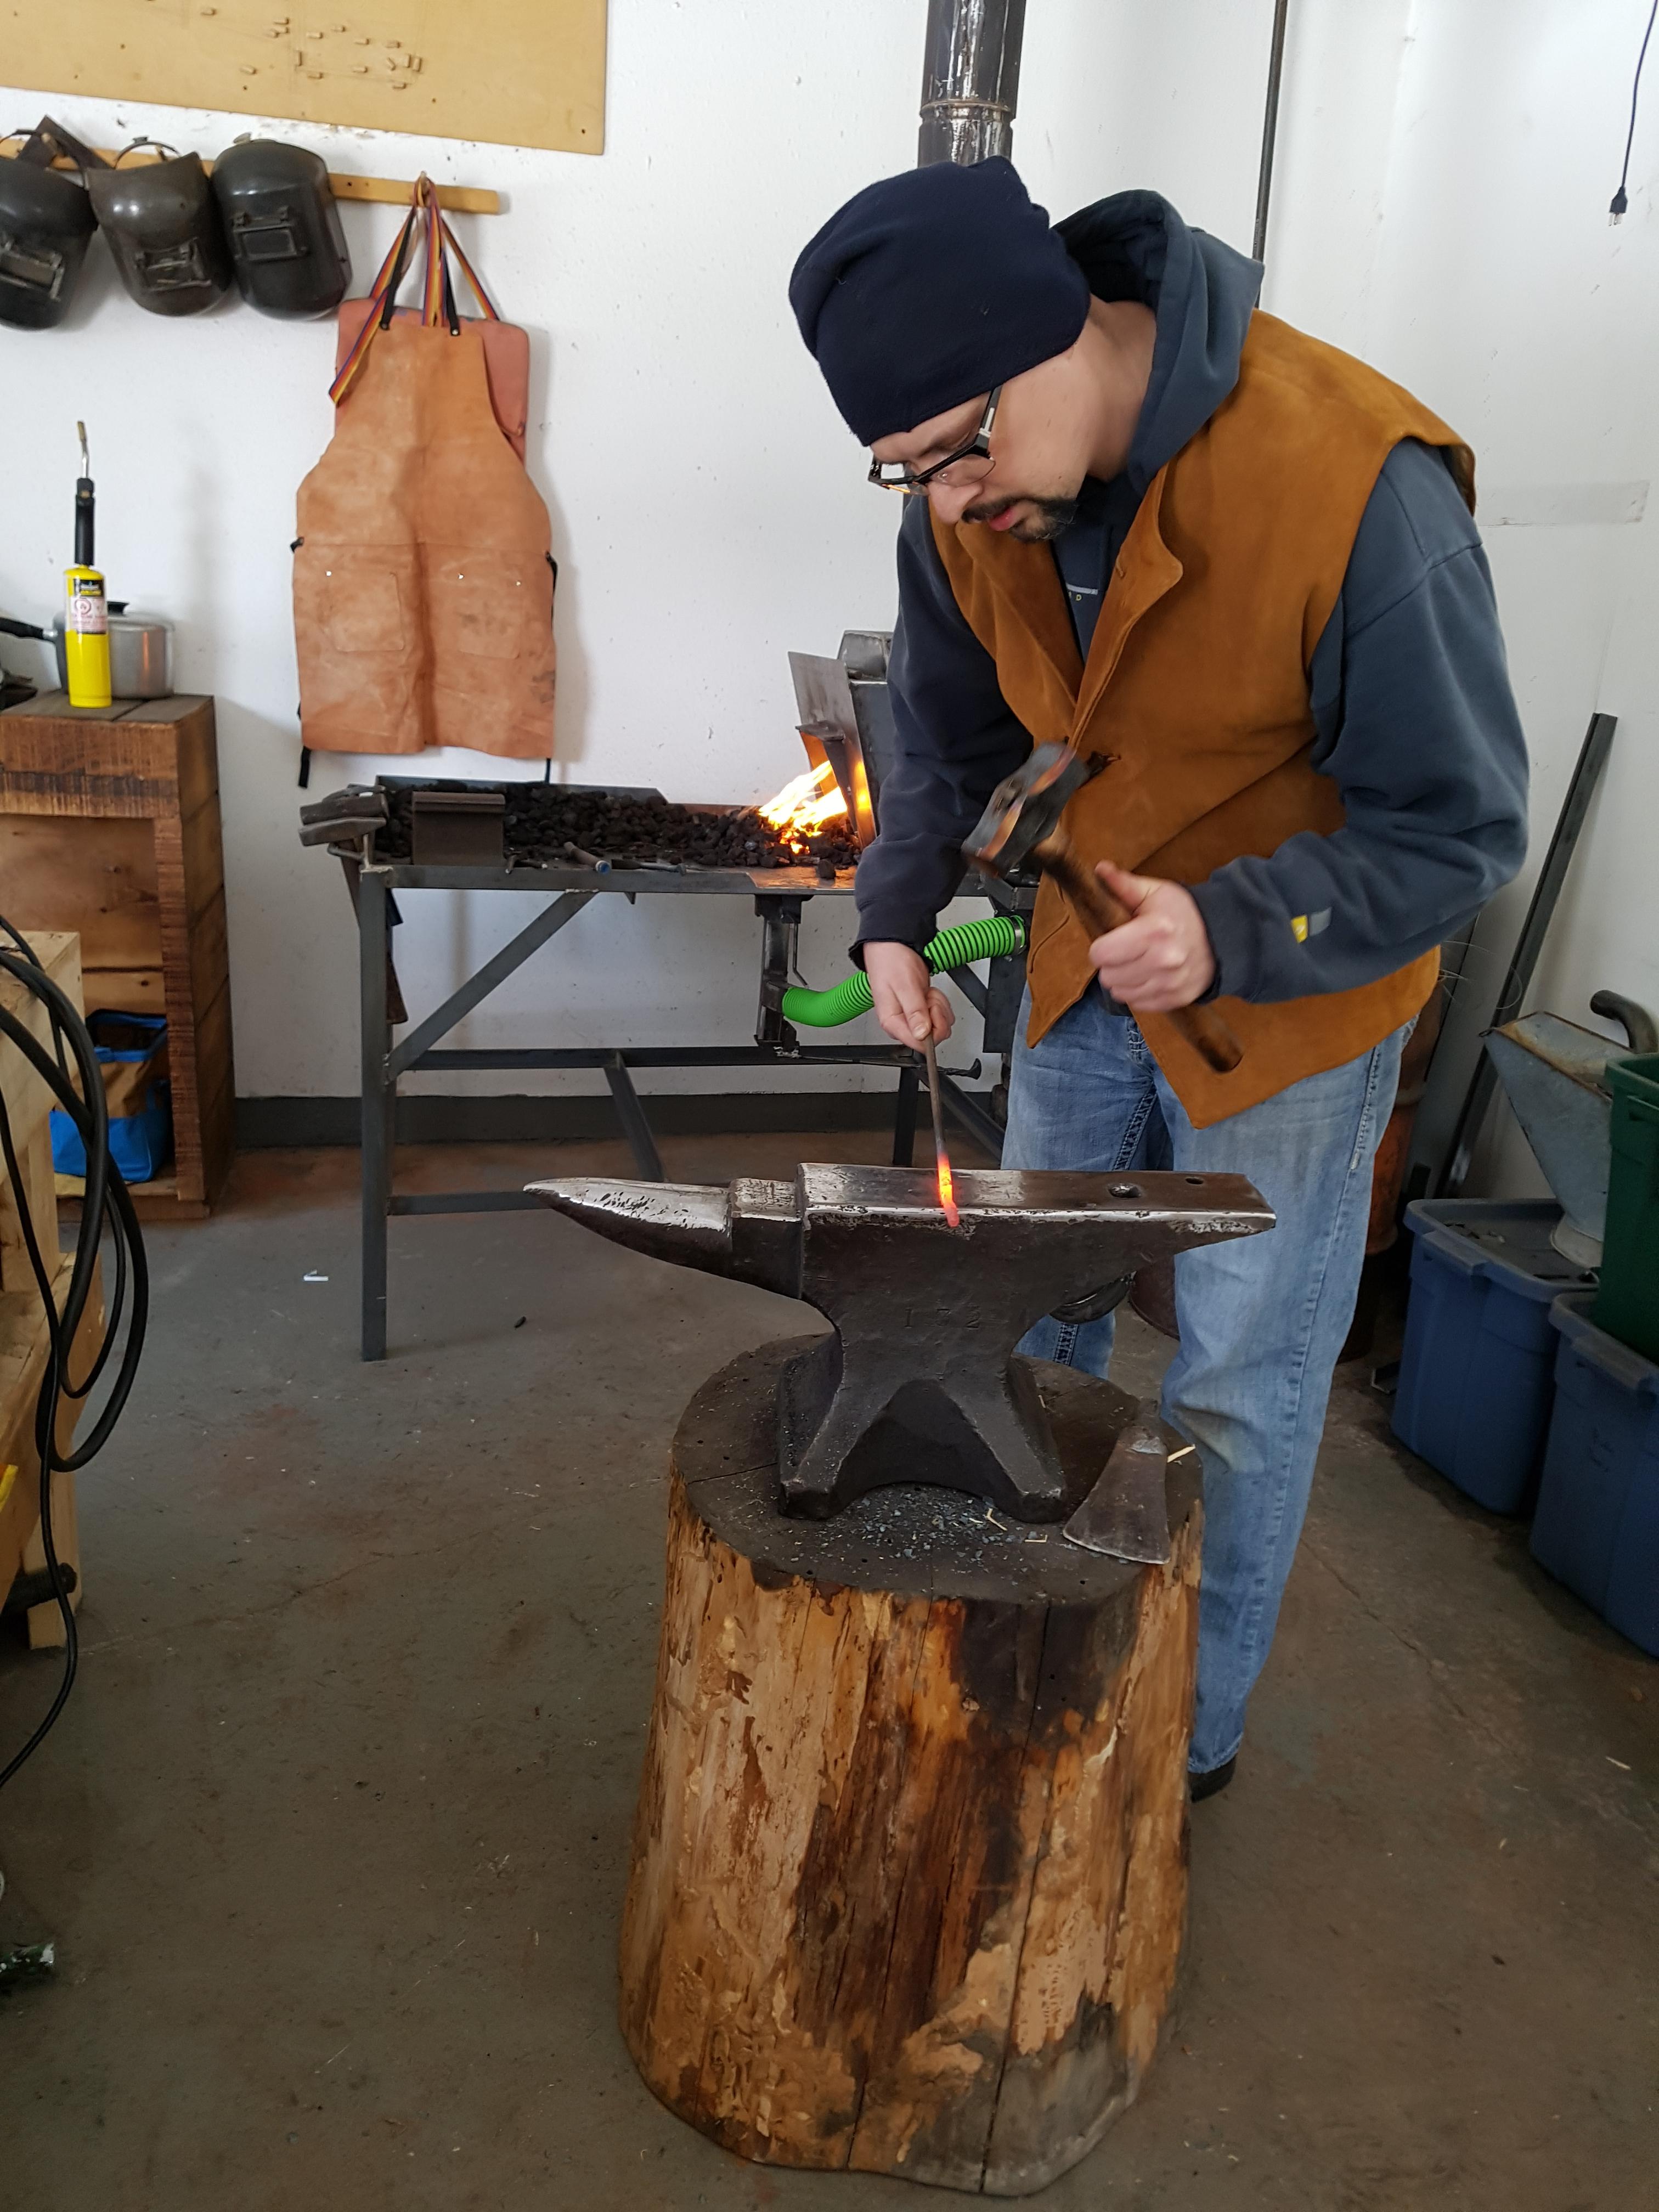
I have been tossing around ideas for holding down the anvil. I am thinking just some flat bar with a couple holes punched and lag bolts. Pics don't show it but I have magnets on the front side of the anvil which deaden the ring quite well. Those buckworth anvils ring like a bell. It really is a nice sound but probably not good for the ears all day. This was just an impulse day. Couldn't well fire up the forge without hitting any hot metal. Thanks for all of the positive feedback gents!
-
-
-
Canadian prices seem to be completely uncoupled with the US market for these things. if it is in perfect working condition, you can expect to pay 100 - 150 Canadian. if it has a stand included, add another 50. without pics, too hard to be more accurate. That being said, there are a ton of postings, especially in Ontario, that are so over priced, it is ridiculous. some people wanting 300 - 400 for something that is seized etc. I would find it laughable if it was not so rampant. I have even seen anvil shaped objects and old vintage anvils with the face completely delaminated posted for 9-10 bucks a pound. sometimes Canada really sucks. This is one of those times.
-
-
great tip!! And I will take as many as I can get. this is the first time I have set up a proper (and I use the term loosely) smithy. still not sure if the blower should be on the table like it is, or if I should build a stand for it. as for hammers, I have seen some people with racks right on the stump, but am unsure if they would get in the way there. all trial and error at this point. I do plan on using that rack for tongs. once i actually have a few sets. that is the first order of business next weekend. starting from scratch as the tongs I was using previous were on loan from a smith friend of mine. will have to make a few sets pronto.
-
Hey PapaDooks, I have a bunch of left over 12 ga that is am going to make into a long narrow tray a couple inched deep that hooks on the front lip of the table for keeping my tongs/punches/hardy that are in active use for the project. it will be of a size that i can remove it and hook it on behind the hood if for some reason it is in the way or otherwise annoying me. good idea though about the pegs. might have to make a few of them in the same style so I can move things around as i figure out where the best place for things are...
-
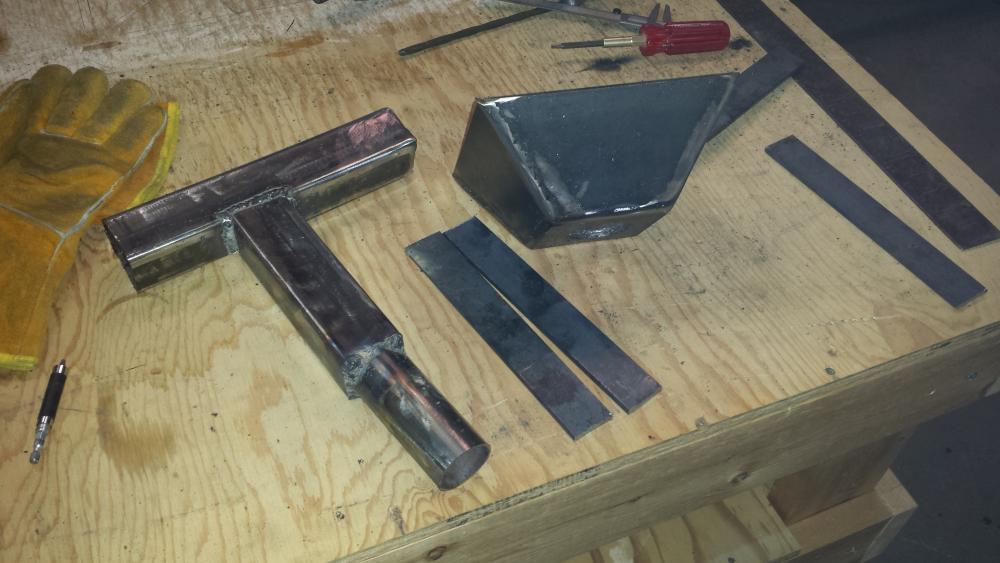
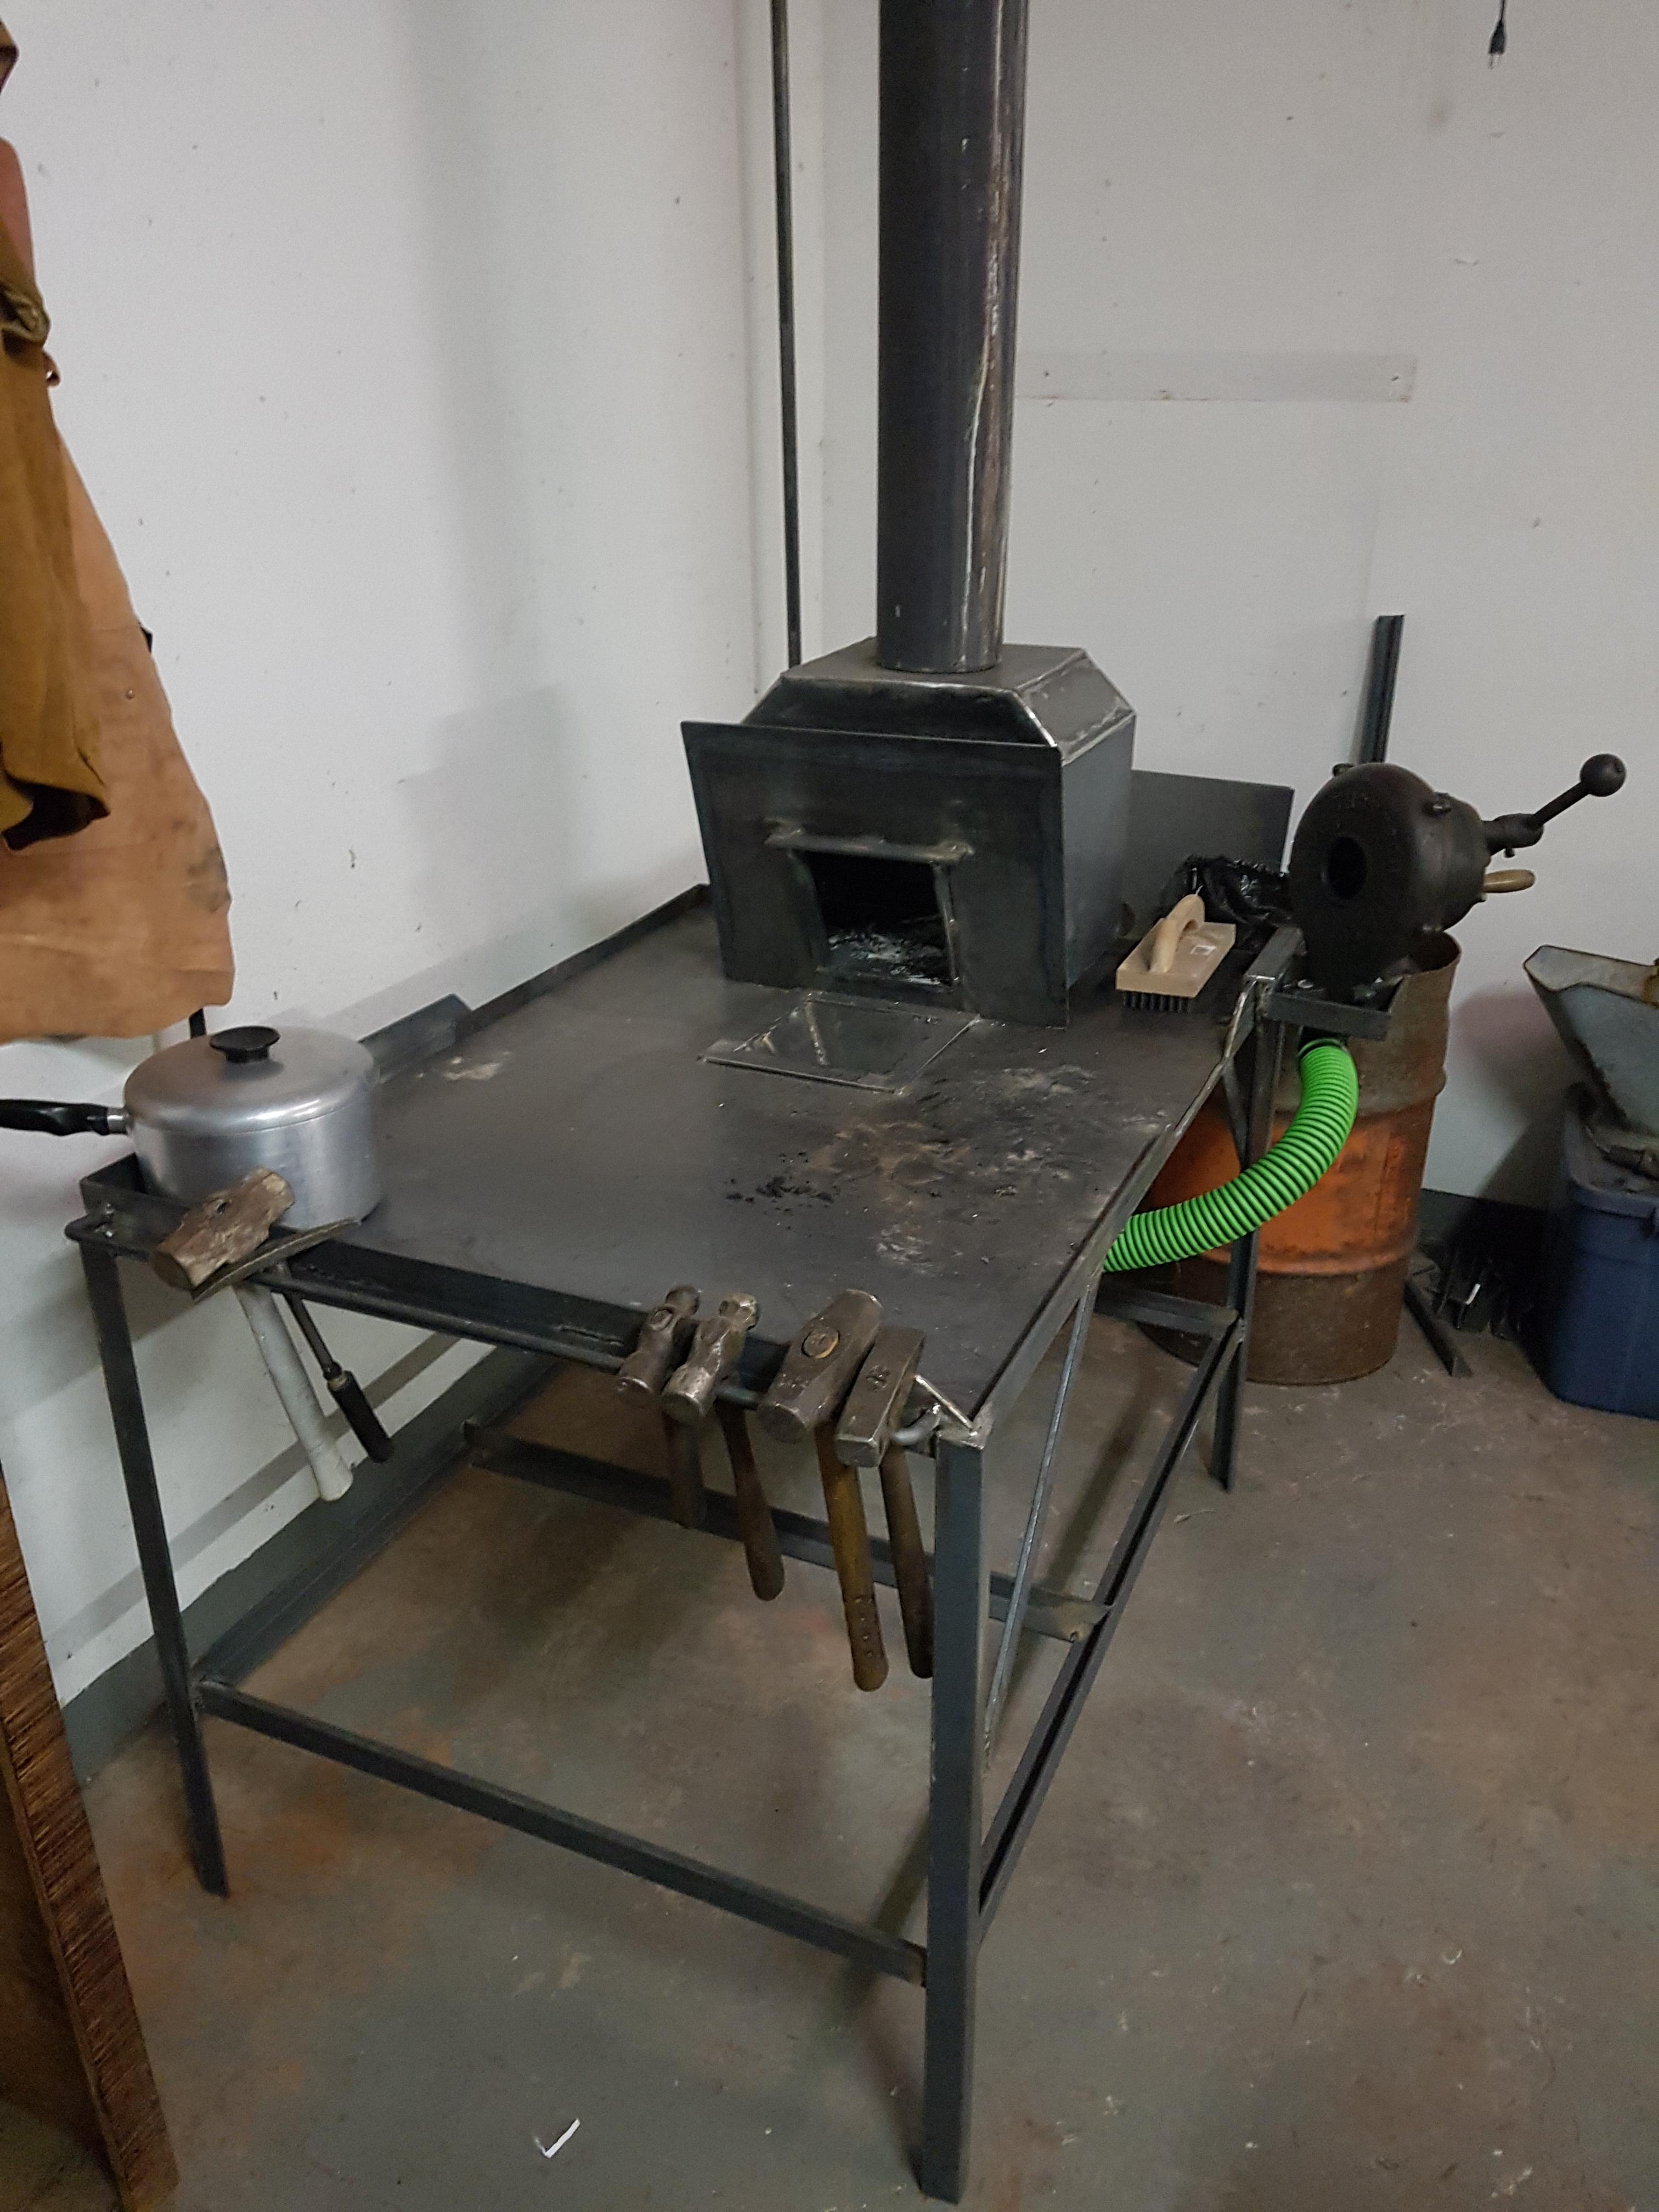
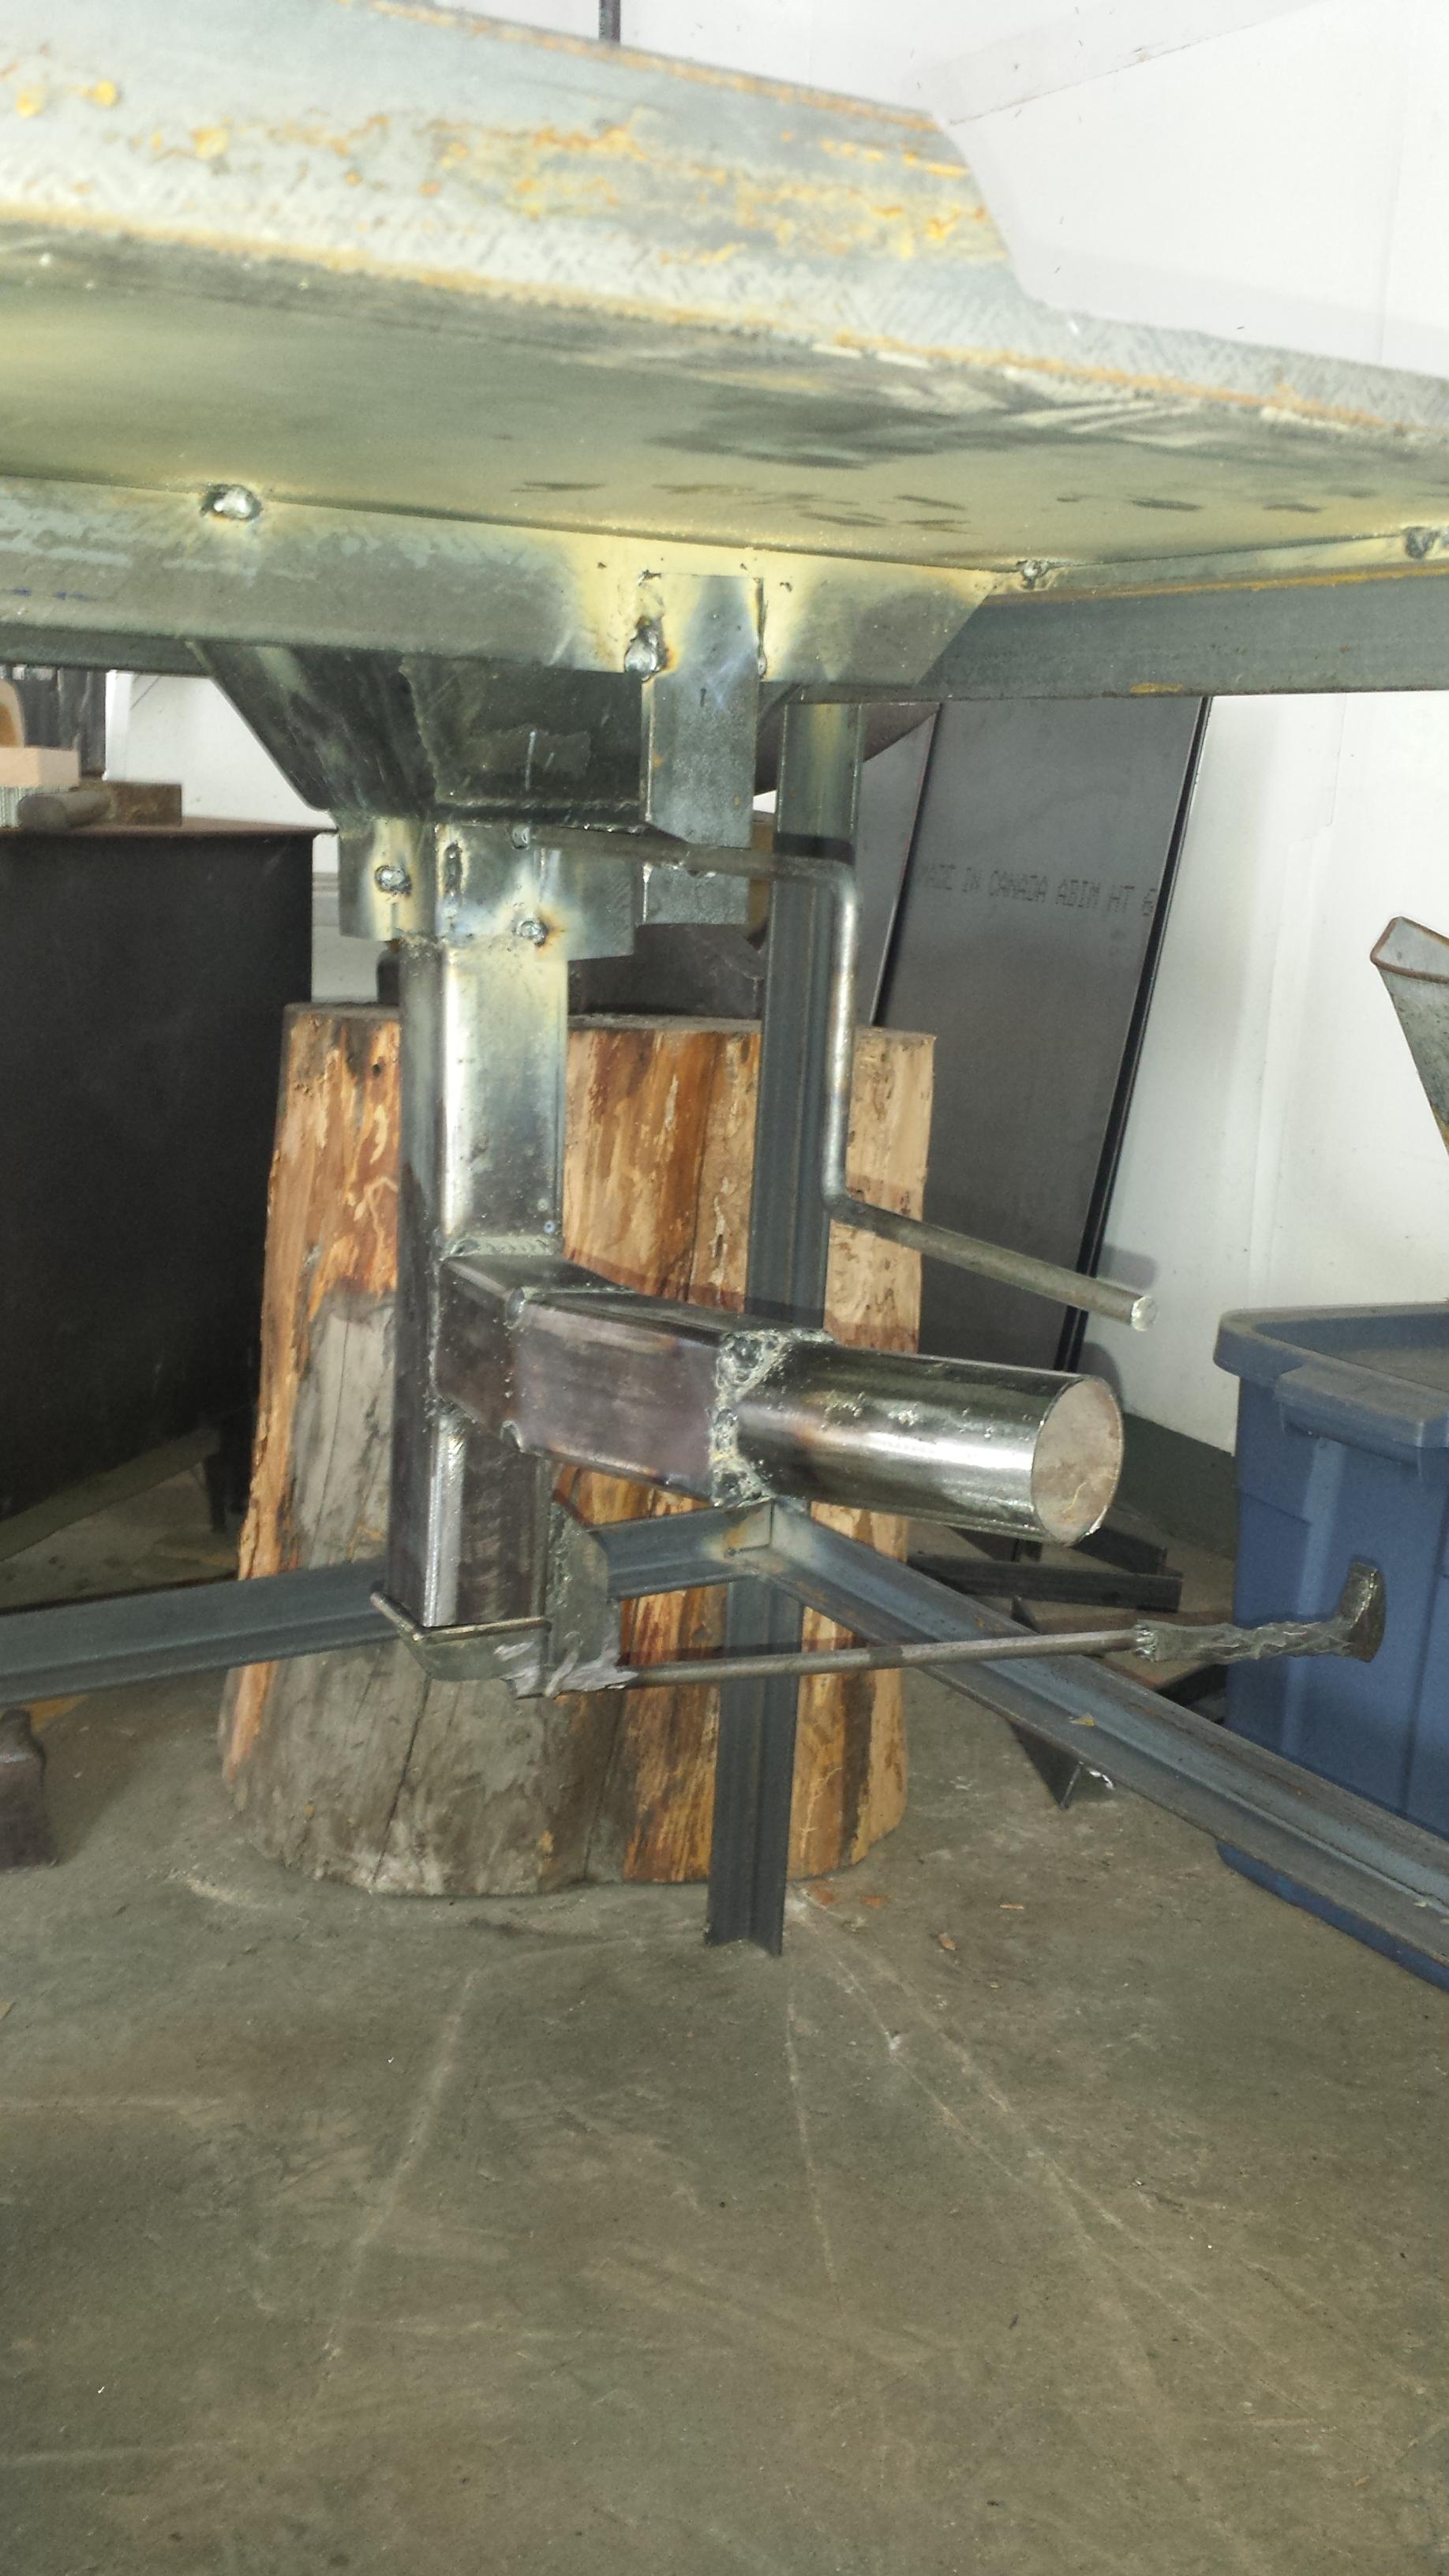
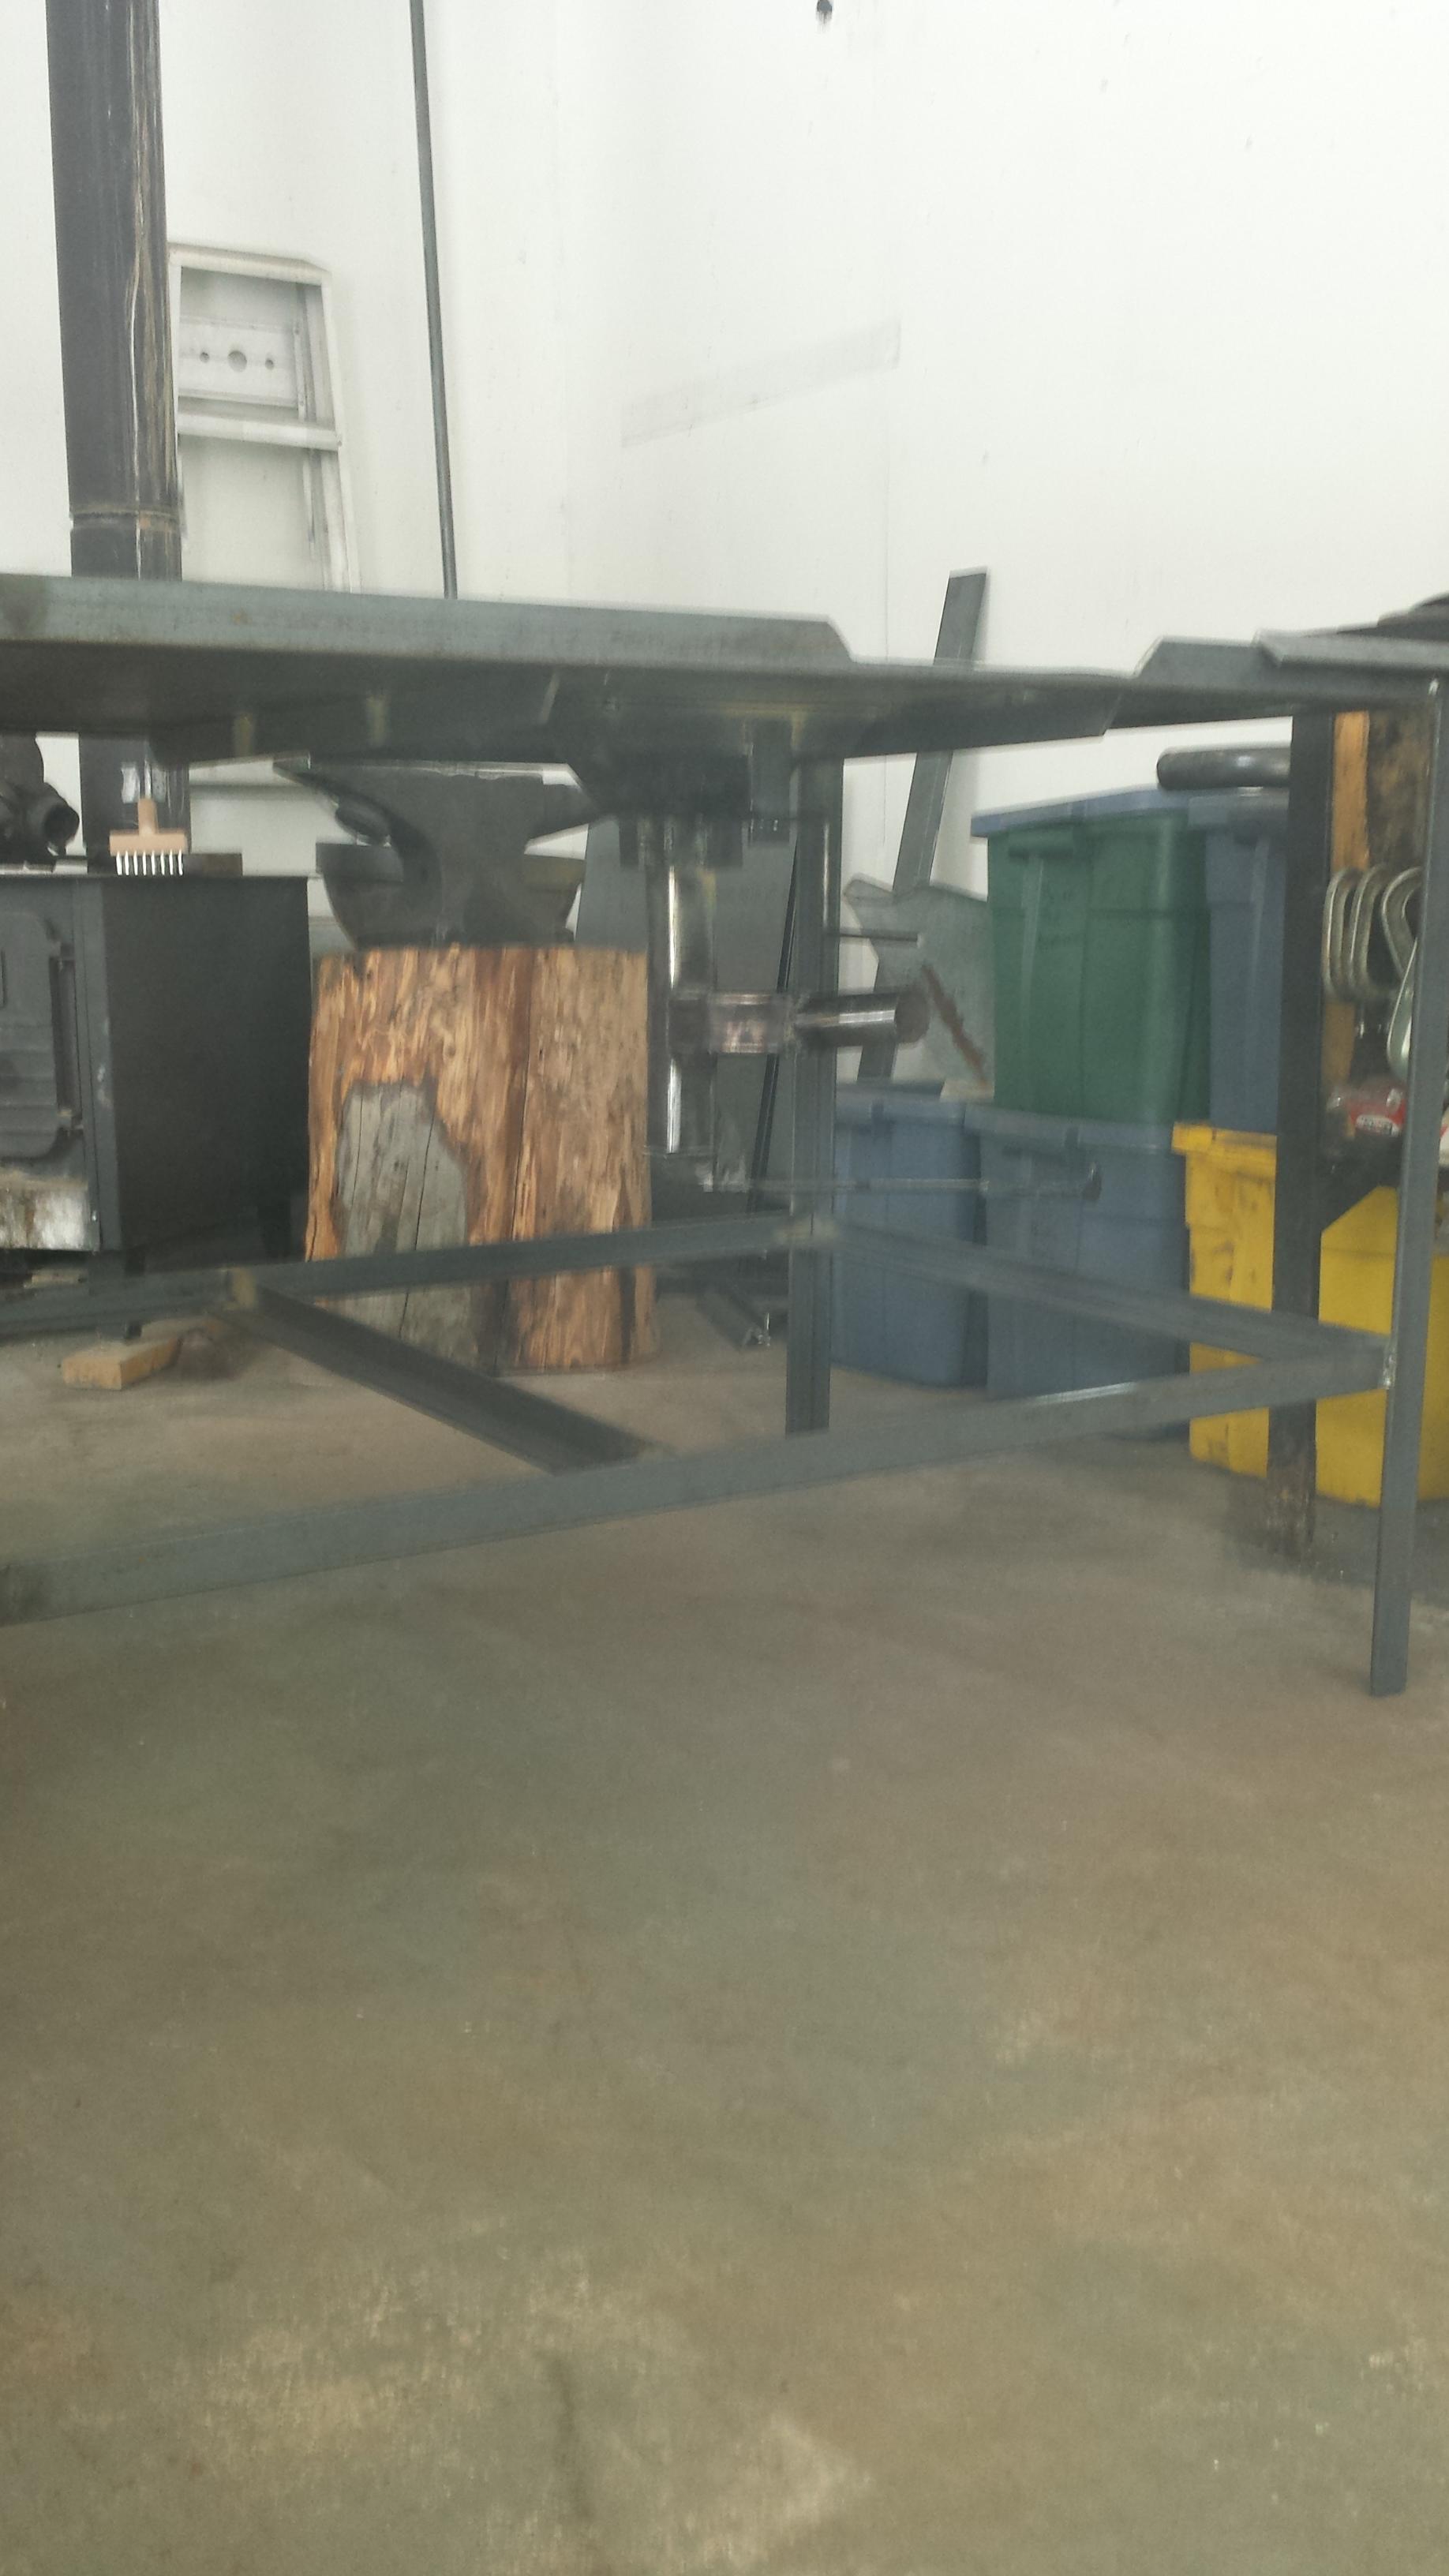
Thanks Frosty!! I must admit it was not the cheapest build. Probably around $500 Canadian pesos. Will post some more pics following the first firing. She blows air now, but we will see how well she chooches. Wish I had time to test it tonight but alas dad duties call. Here are the promised final pics of the install. And details below Table: 3/16 plate 36 x 48 Firepot : 8 x 8 x 3.5 inches deep from 1/4 hot rolled steel Hand made tuyere from random box tube and such. Custom pineapple twist handle on the ashdump cut off my first rr spike project. Thompson blower: vintage 1900 ish. (Canadian equivalent to a buffalo I hear) Super sucker side draft hood made from 12 GA sheet metal. All put together with a crappy tire (harbor freight type) Mastercraft 80amp Flux core welder. This was my first time welding. I probably could have started with an easier project but hey it works! Added a tool rack at the end for my hammers and tongs. Will probably put another one on the opposite end as well. All that is left to do is drop the sheetmetal in for the cooling rack below the table . Minor detail. Please do let me know what you all think. And thanks for the opportunity to share!


-
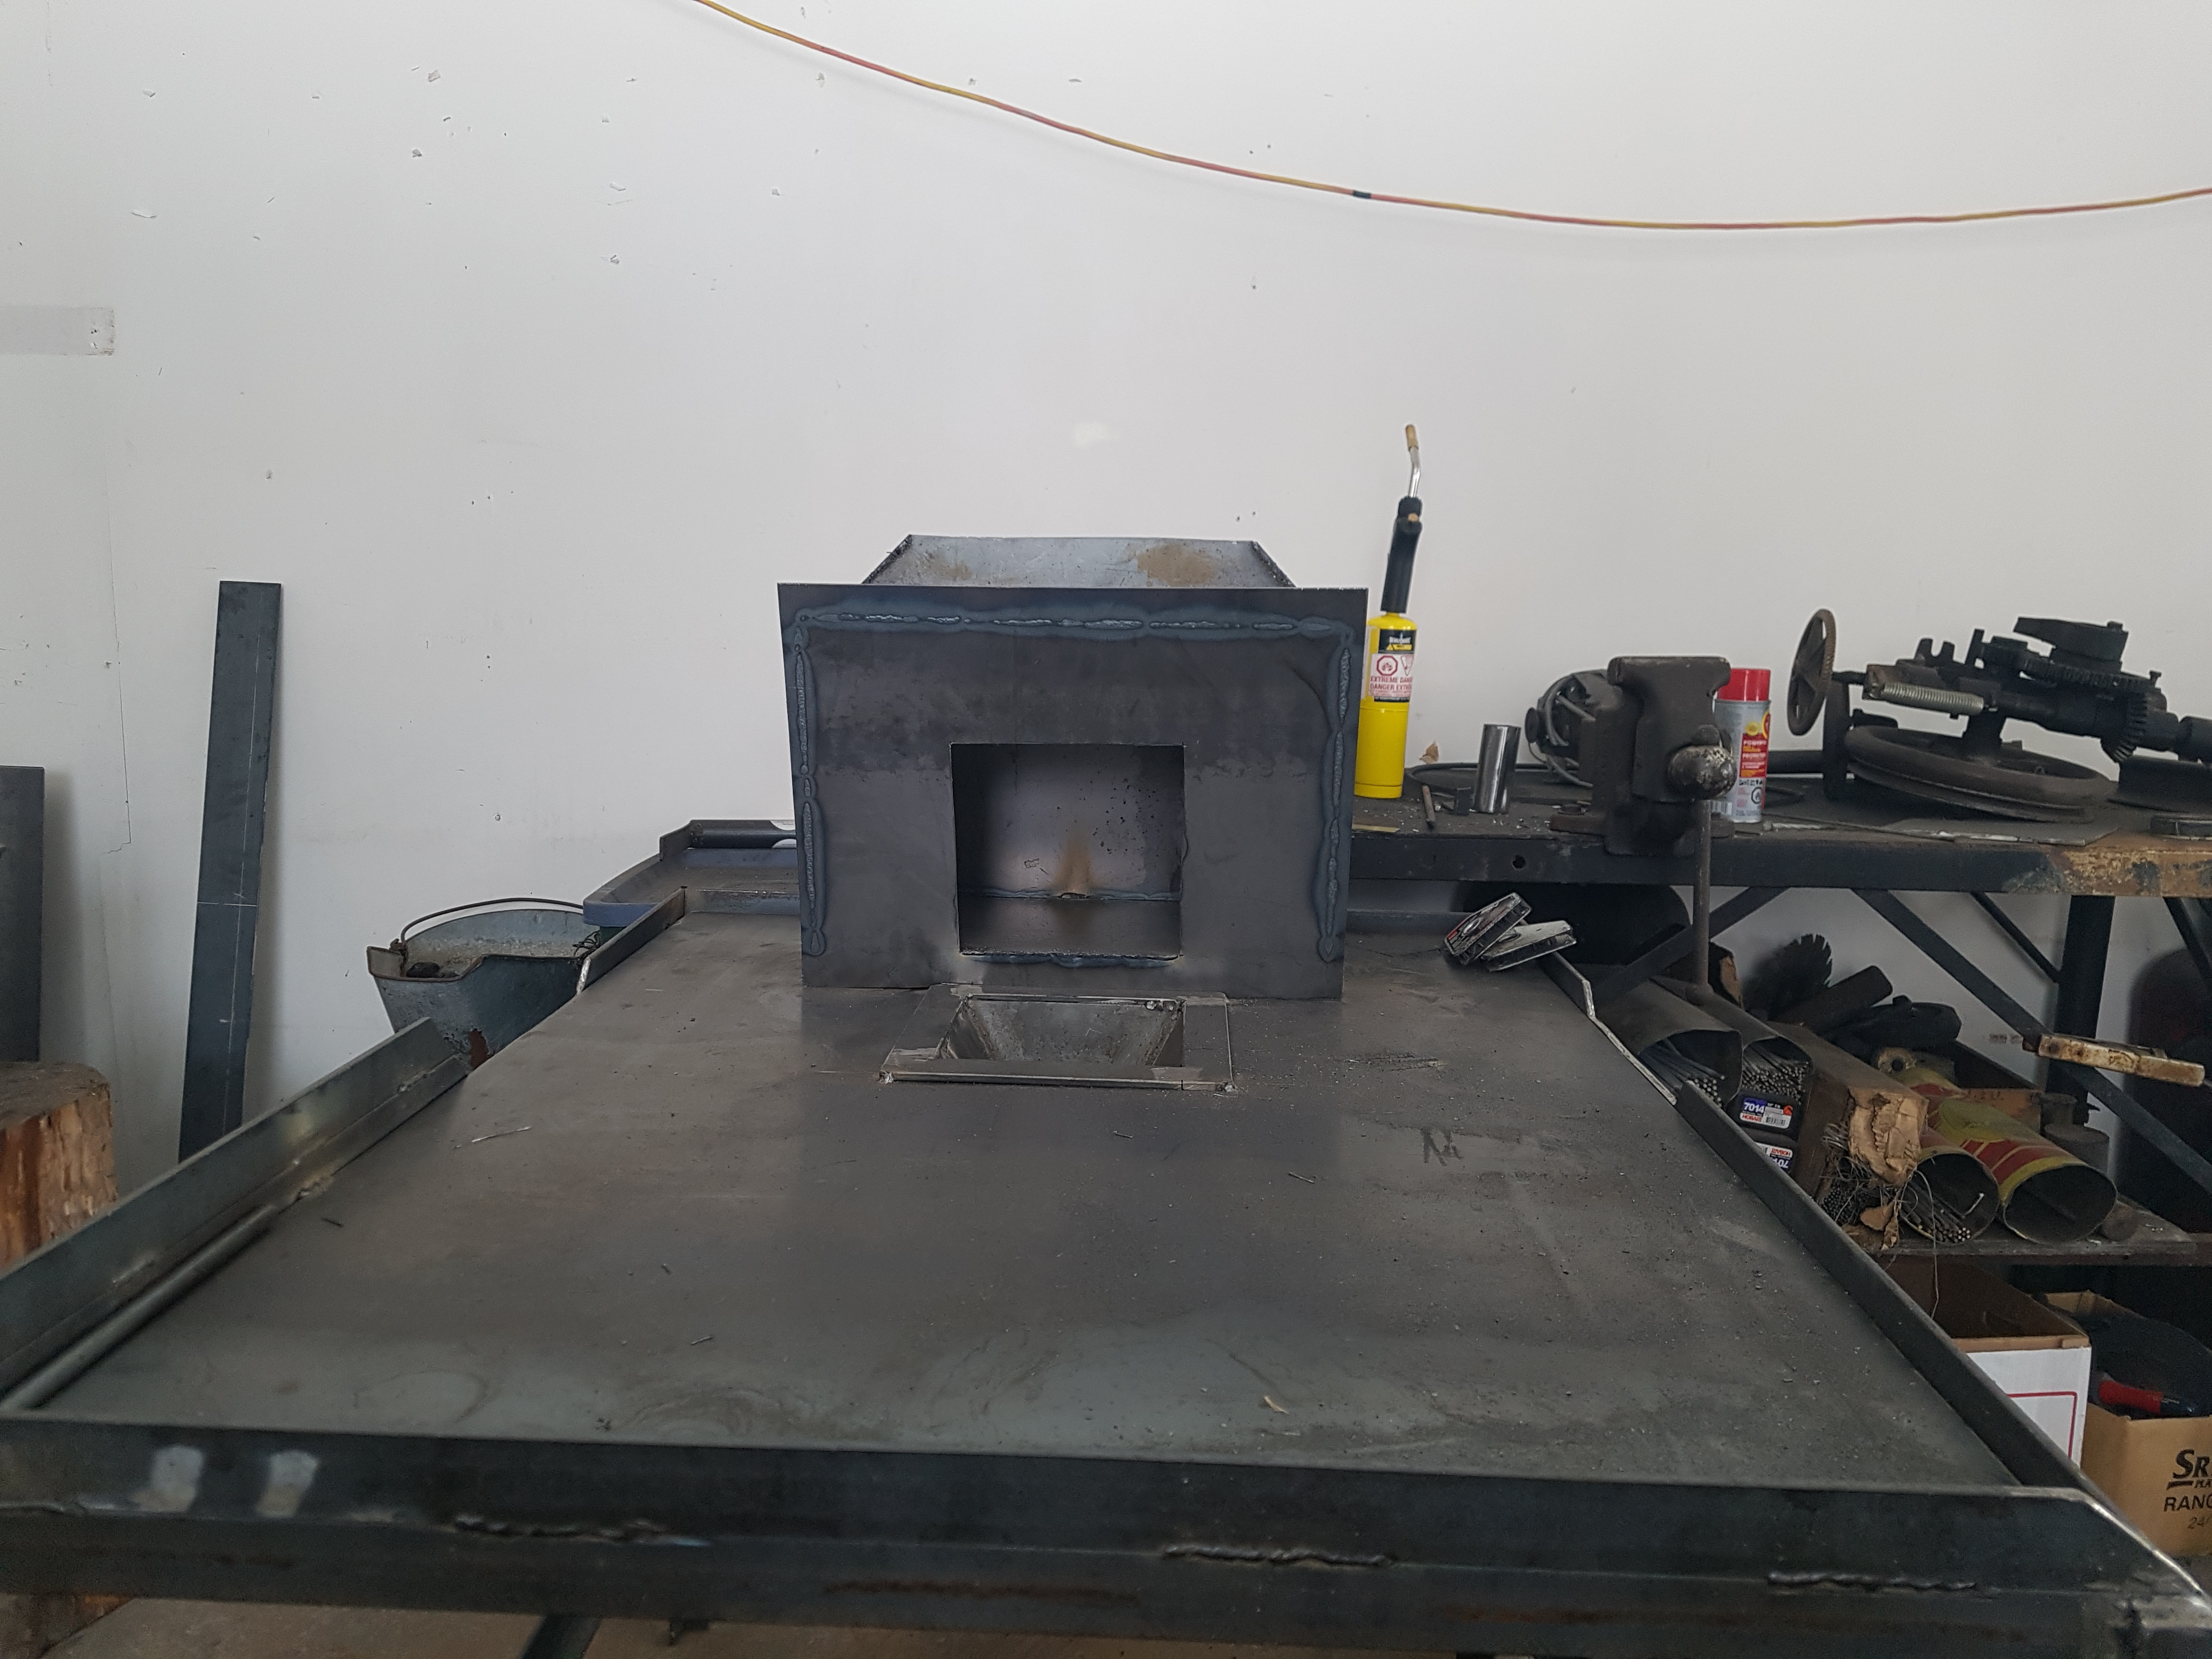
hey all, been a while since the last update. getting very close now. was out sick for the better part of 2 weeks, and then was away for work. I have about 3 or so hours left on getting this project done. since the last update I built a super sucker style hood. and added it on. this is the only picture i have at the moment but will add a few more once the blower stand is done next week. thanks for hanging in there. It is installed on a less than ideal 6" pipe (20f t tall) , but I will have you know that surprisingly it draws. I too am a little baffled about it, but perhaps the height and the fact that the nearest obstacle from the windward side is over 100 yrds away plays into it. Will be nice to get this project done and actually burn some coal. been a long time.

-
-
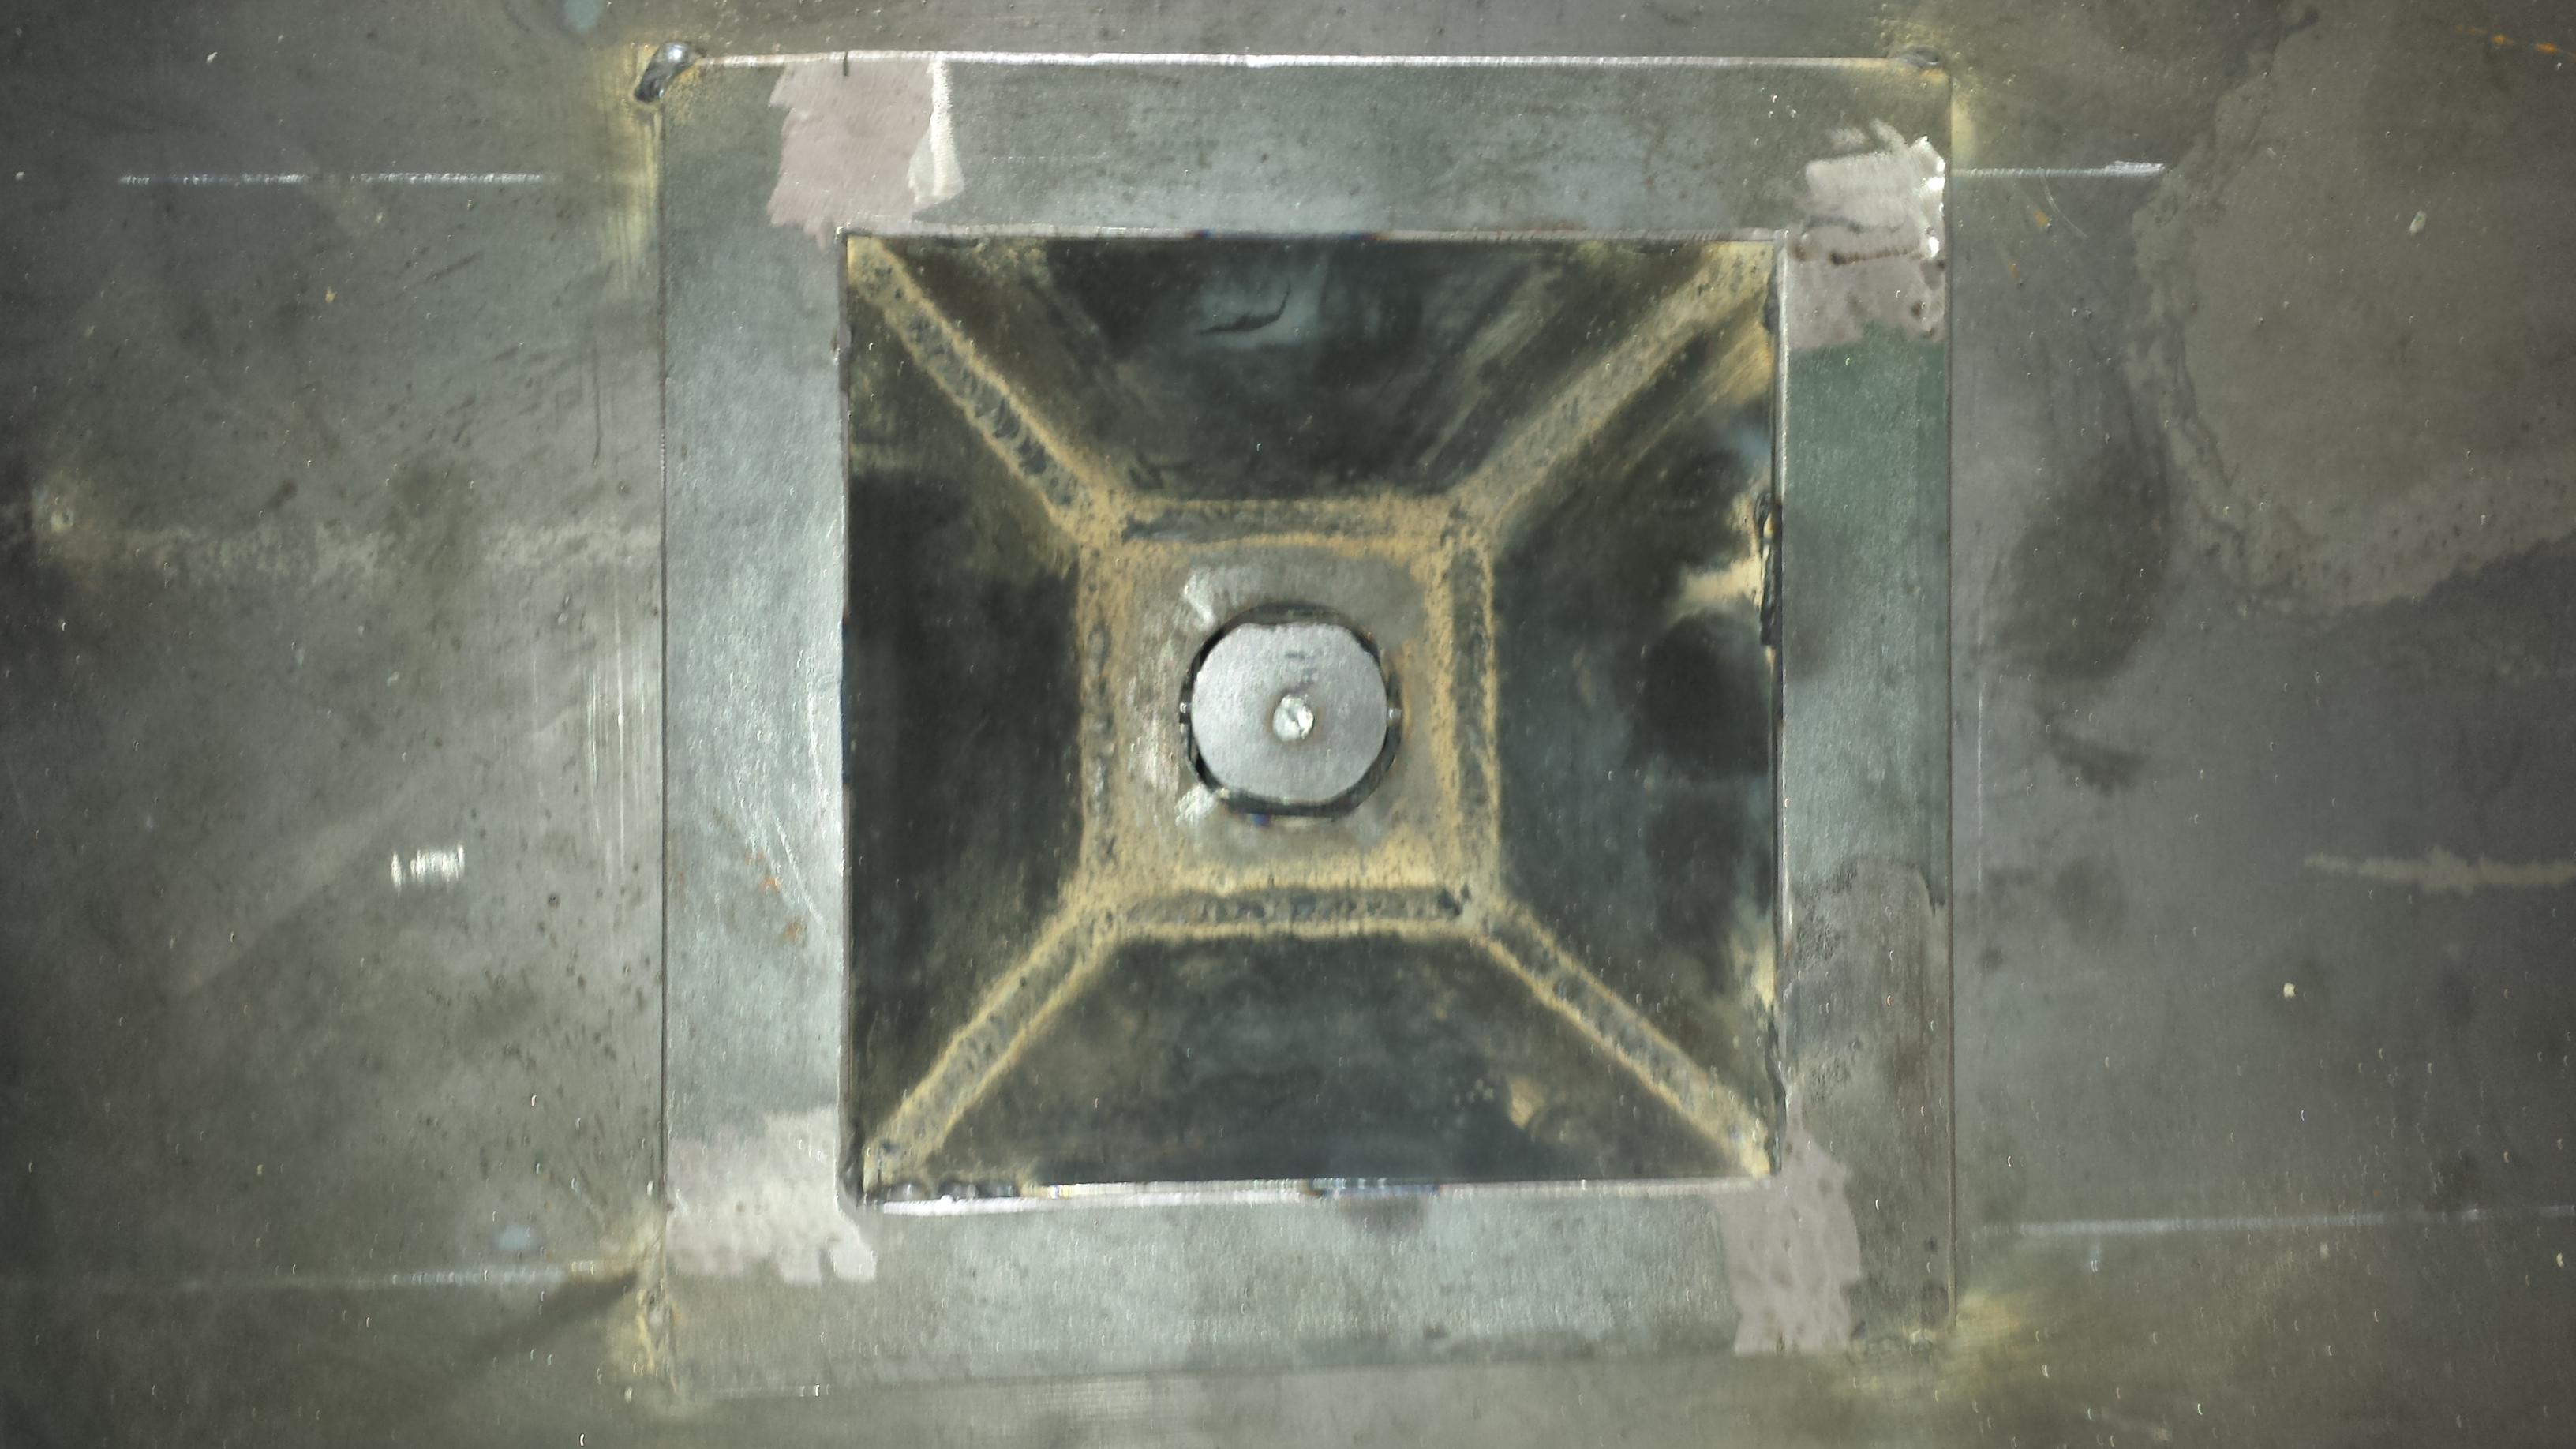
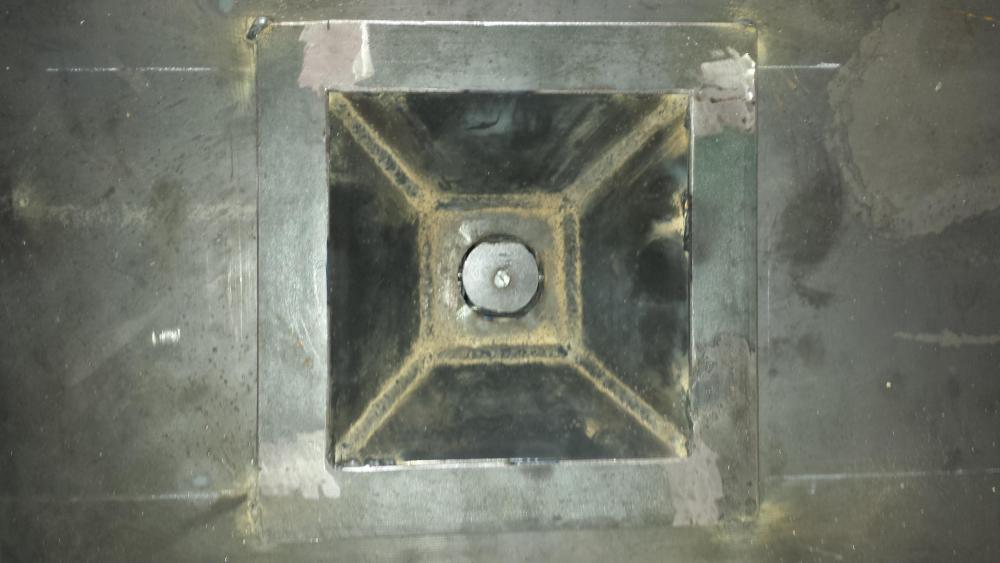
Been a couple weeks. Down with the flu last weekend so I was not able to work. Got some done yesterday though. Firepot in and tuyere built. Clinkerbreaker is in and the ash dump. So I just need a paint job on the tuyere and legs of the table and she is done!! Going to make and modified sidesucker hood next and we will have irons in the fire!! So excited to see that this is coming together! One decision yet to make is for the blower stand. Don't know if I should make a bracket that hooks right onto the forge table, or make it stand alone beside the forge. Any input is appreciated.


-
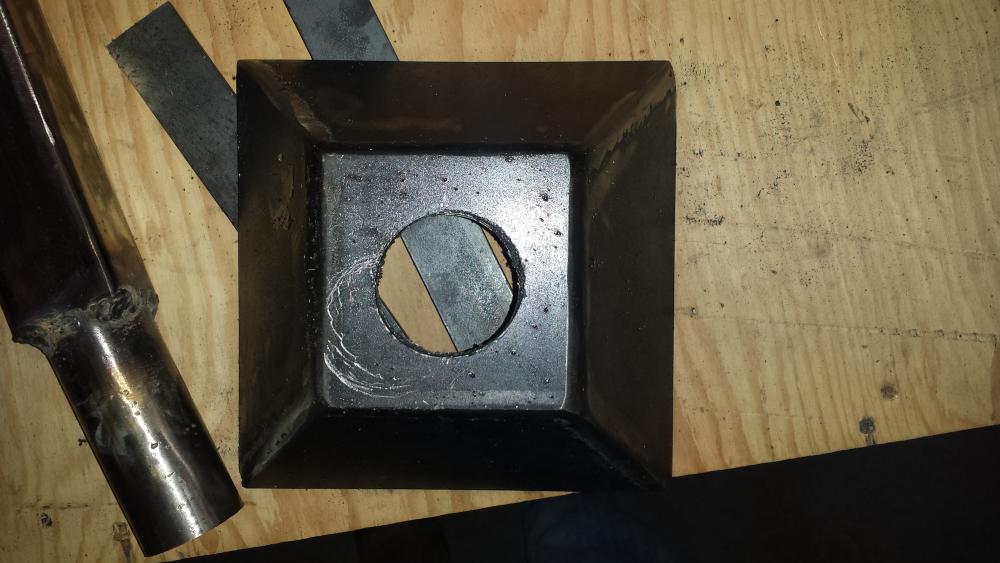
Some progress today. Got the firepot half welded together and the tuyere built. Only in the shop for a couple hours today. Hopefully will get the rest of the firepot ash dump and clinker breaker done tomorrow and get the hole cut in the table for it. Firepot is 4" square on the bottom, 8" square on the top and 3.5 inches deep. 2" air hole.