
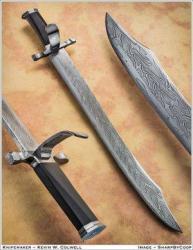
kevin (the professor)
-
Posts
222 -
Joined
-
Last visited
Content Type
Profiles
Forums
Articles
Gallery
Downloads
Events
Posts posted by kevin (the professor)
-
-
I really like the grind and hammon. It seems to be well designed overall, too - like it would work really well as a hunter, if someone was willing to scar up that lovely surface.
nice...
kevin -
Yeah, I have tried the worn-out knife trick for a filet knife, too. I appreciate your input, but I don't think I am going to grind the knife down. I, too, have done a lot of fishing and filetting, and this type of blade works for me. It is also easier to keep a shallow angle with the inch wide blade. With the worn-down boning knife, the angle of the bevel can often become to steep (if the knife was 1/3 inch wide, and only 1/16th inch thick at spine, then it would have an included angle of about 20%, and that is if the piece of steel that is .0625 inches thick). This knife has a 13% included angle on the bevel, 6.5% per side. That was my goal. To get the same bevel angle on a 1/3 inch knife, you would have to have the knife 1/24th of an inch thick, and that is not a wise idea from my perspective. I wanted a shallow knife with a "zero bevel."
Other people prefer other attributes, and that is ok, too. Many professional fisherman use electric knives and would laugh at us for doing it this way.
take care,
Kevin -
yes, the blade is hand forged and shaped with files and a 1x42" belt grinder. I have a piece of rr track set in a bucket of clay to kill the ring. I am working in the garage of a condo, so I had to be quiet.
the butt-cap is coin mokume, so it is really a stack of 6 quarters that I forge welded and shaped. You can see concentric rings of copper and nickel where I beveled it on the back and parallel lines on the sides. It looks cool, I have been using it for most (4 of 5) butt caps so far. the person I was making this for actually saw a previous knife, and asked me to do this.
thanks for the encouragement. I don't know anyone here in CT that does bladesmithing or blacksmithing, so the feedback from the forum is invaluable. It is the closest thing to teacher and supporter I can get right now.
kevin -
Hello and Greetings,
from my understanding, the lump frrom briquetes is not good due to wax binders wanting to stick to and interact with steel.
Regular, plain charred wood is better.
I use gas forge, venturi style. Really simple and dependable, and friendly for the condo garage I work in.
If I was in other location, I would use charcoal made by me, or buy the stuff that is nothing but wood with extra's burned off. You can get small bags at megamarts, and large ones from restaurant supply places.
Welcome and happy forging,
Kevin -
Hello again,
I had several people on a different forum mention that the handle was not in proportion to the size and task of the knife.
This time, I decided to go with their suggestions. I tried to just shrink the original handle, but I discovered a flaw in the wood as I ground it down. One of those random things, you know, like when you are not really skilled and don't own a drill press, and let your drill slip into a hole parallel to the one you are drilling. Then, it takes off at a wild angle to the side for a second before you stop. That sort of random, uncontrollable, unforseeable thing.
So, as I ground the first handle down, I uncovered the errant channel I had put into it while trying to get the tang through the block in the beginning. Not having a drill press is no excuse for a simple mistake, but it would have helped, and it makes me feel better.
Had to hacksaw and chisel the thing off!
Still, the outcome is better now, because I put a piece of Rosewood that looks better than the mesquite did.
So, enjoy the photos, thanks for the advice.
If only I could make a wooden sheath to hold it....
Kevin -
it flexes ok, but not as much as some of those that I have bought in past. It is a little more rigid than that, but still flexes a good bit. it is not quite 8 inches long, so the amount of flex is considerable.
thanks for looking.
kevin -
Hello Everyone,
I am posting pictures of a filet knife that I just finished. It is my 5th overall, and it was a serious challenge.
I only made a filet knife at this point in my learning because a friend and colleague wanted one to give to her husband. He is a serious fisherman. Its nice to know that someone will use and appreciate the work, and that motivated me to make this difficult design. Otherwise, I would have made a hunter or fighter or camp knife for myself.
It was definitely a learning process.
Stats:
1095 (from 1" x .25" stock)
12" long
1" wide at widest
7.5" blade
.125" thick (a little less at ricasso, a little more at point, deliberately)
edge quenched in heated canola, diff hardening line visible but camera shy
tempered 415 F, two one-hour cycles (it is springy)
coin mokume for butt-cap (I love this stuff, and it is becoming a signature kind of thing. This person asked for it specifically).
There is about 1 centimeter of "flat" near the spine that tapers to nothing toward point. So, the entire blade is essentially one long and flat bevel. I did put a very slight secondary bevel when sharpening after the dropping and chipping incident described below.
PLEASE DON'T BOTHER TO TELL ME THAT IT IS NOT POLISHED WELL, OR THAT IT COULD BE POLISHED BETTER. I KNOW, AND I AM LEARINING. I appreciate your comments, and I need advice to keep growing. I am just stuck with polishing, and hope to get better with next knife.
Dee- if you read this - thanks for all of the effort and information you gave me. I did what you said, and had it polished pretty well. Then, I dropped the d*** thing, and it landed, edge first, across a piece of a post-vise that I have "stored" on the floor of my basement. I was tempered well (I think), so I decided to change edge geometry just a tad.
So, I had to grind the chip out of the edge, added a very small secondary bevel, and I decided on a nice satin finish. My excuse - it is to be used, not looked at.
It is still, by far, the sharpest knife I have ever made. (probably about average or just below for what a lot of you out there are doing).
Enjoy the photo's. Thanks for looking, and any and all comments are encouraged.
Kevin -
good start. I have found out that forging a knife, especially in the beginning has almost as much to do with your files and grinder technique as anything else. Hav fun finishing this.
kevin -
Thanks for advice and encouragement.
is there any way to turn the silver portion of the mokume black?
this would really match the handle materials.
the internet is the main place for me to get info and companionship for these tasks.
thanks,
kevin -
Hello Everyone,
I am posting pictures f knives 3 and 4. The process of everything is getting faster, but as I learn more I see more that I don't like about what I am doing. So, I spend a lot of time trying to correct mistakes, some of which can't be fully "corrected."
The more I do, the more I see what I can't do... its kind of like when I started painting or doing psychotherapy (both are arts).
Except when I don't do therapy well, its other people who suffer, not me (people who have never tried it may not realize what an art this craft really can be).
Stats
both Admiral Steel 1095 (from 1"x1/4"x5ft flat bar) - I got 4 or 5 of these bars . I read somewhere that 1095 was good to start with - forgiving.
both edge-quenced in heated canola.
both triple normalized prior to quench
both convex grind
Big one:
11 inch blade
1.3 inches wide
3/16th thick at ricasso (if you can call this a ricasso)
1/8th at tip
tempered for 2 one-hour cycles at 400 deg F.
Handle- curly maple and leather spacers (some type of maple, anyway)
guard - aluminum
butt cap - coin mokume
This one had more of a drop point, and is designed to be "camp" type, with some chopping ability, and very sturdy. Light polish, with scratches left from sharpening after polish (I was playing with what the bevel would look like if scratches were left in). Temper line visible, but may not be in photo.
The mokume looks neat, you can see the concentric rings on where I beveled it.
Little one:
9 inch blade
1.1 inches wide
1/8 at ricasso (such as it is)
3/32 at tip
tempered 2 one-hour cycles at 380 deg F.
handle - ebony
fittings - aluminum
clip point, designed for piercing/slicing. Very gradual edge bevel, acute angle. vinegar ectched with light polish. Temper line visible, but may not be in photo.
I have a hard time with grinding ricasso and plunge cuts on my grinder. I tried files, and goofed that, too. I will have to work on this.
Any suggestions, ideas, or encouragement are welcomed.
Thanks for looking,
Kevin -
steve
thanks a lot for the tips. I hope to use some of them on #3 this weekend. I polished #2 and gave it to my friend the collector. He was very happy to get it, no friend had ever given him a hand-forged knife before and he was touched.
for this guy, i think that was the best possible gift, even though i wished i could have done better. those of us who appreciate this art/skill seem to develop a real love of the stuff. there is not much "halfway" about it.
kevin -
Yes, I had read some of his work a couple of times. I will read this specific paper. I have also followed the heat treat post. I remember that there is a window from around 900 to around 500 degrees F where steel can be moved before it "sets." I actually did that to finish getting the bend out, after creating the unwanted hammer marks. To clarify, they occured just before the final heat and quench.
good stuff, and I appreciate these specifics.
Kevin -
I see, sort or press with or between 2x4 and anvil. That would have been just right for my last blade.
If I ever get the basics and cosmetics right, I will begin with the real issues of things like cutting, hardness, and edge holding.
Although, compared to the cheap Gerber knives I have been carrying, even the two I have made are a great improvement in edge geometry, hardness, cutting, and edge holding (as demonstrated by cutting some cardboard).
This may not have been a very high bar for testing, but these little successes are what help keep this fun!
thanks,
Kevin -
I have uploaded a picture of the blade after forging and rough grinding. If anyone sees anything that I can change to improve, please mention it to me!
I am hooked on this stuff, and I love to see the work those of you do who are professional. I am not deluded to think I will reach that level, but I am enjoying the process. I am getting to the point where it is becoming fun to see what is "the best" I can do.
To paraphrase something I read on knife making: it is easier than most think to create a knife, but it is more difficult than most think it should be to continutally produce predictable, top notch results.
This captures what I am going through - luckily I can get something fun, but to get something fun and of good quality is a big challenge.
It is a wonderful thing that those of you with knowledge and skill are willing to share with us.
thanks,
Kevin -
It was definitely a lot of fun. I actually started a third today. I really enjoy the forging part the most, but grinding is becoming more fun.
I need to get better way to hold sandpaper while I polish. I have been cutting strips and wrapping around file, and rotating when each small section fills or won't cut. If there is a more ergonomic way to sand, it would help.
Any suggestions?
Kevin -
D*** I wish I had thought of the two by four!
-
OK, here is my second attempt. It is better than the first. I listened to what you guys told me, and put a better polish on my hammer and practiced hammering at correct angle and tuning forge to reduce scale before I started.
So, this one is shaped better, the handle is more contoured, and you can actually see the temper line in the steel, even with my poor polish.
This time, the main problem occurred when the knife was clean and pretty after rough grinding. (I also practied grinding some before starting, and I am getting a little better at that).
However, during the thermal cycling for normalizing (after grinding), there emerged a little wave in the blade. I tried to tap it straight with my smallest (and not recently polished hammer). :mad::confused:This left hammer marks, so that I had to grind the blade thinner than I really wanted.
Question: What types of things do you guys recommend for minor straightening once the blade is relatively close to final shape, especially ways that won't cause a newbie to leave hammer marks?
Alternatively, should I just leave them thicker until I can not leave hammer marks? (I am hoping there is a way to fix minor bends that will be less likely to leave marks).
Any and all input is welcomed and encouraged,
Thanks,
Kevin -
Messerist,
Thanks. I was actually practicing to make something like an early Randall.
I want to make a knife for a colleague and friend who is a collector of edged tools and a Viet Nam vet. He accidentally let slip that he liked the Randall pattern, so my first knife was practice to try to eventually make one for him.
Besides, I like the style myself.
The Randall website as much as dares you to make your own. Check out this link
http://www.randallknives.com/construction.php
thanks for the encouragement,
Kevin -
Hey Nashdude,
thanks for the comments. I get where you are coming from - this knife is made from a bar of steel, some old leather and a stack of quarters.
I just always wanted to make a knife with a really cool wood handle, and I don't feel like waiting for the wood I have to dry. I have scrounged a lot of local wood and I am carefully drying it in my basement. I just plan to buy wood until I can get what I have to dry (I tried microwaving and almost started a fire, and soaking in linseed oil but don't like the result).
thanks for opinion,
kevin -
Yes,
Canola is a kind of light colored cooking oil. It is also pretty healthy for people, as well as evidently good for blades.
kevin -
OK, thanks. I really want any input you guys are willing to give.
I will try the lighter oil. It has to smell better.
I really enjoy looking at the functional art you guys can turn out. I have always had a fascination with edged tools (knives, swords, axes and arrows especially).
keep the advice coming. If there are any gatherings or teachers in New England, please let me know.
Kevin -
I forgot the heat treat - I practiced watching colors and testing magnetism for about 5 runs (3 used to normalize).
Then, after the last heat, I quenced in somewhat heated motor oil (if you notice the guard was colored by heating and dropping in oil, which heated my quench a little).
Tempered for 2 hours at 350 degrees.
I was amazed at how HARD the knife seemed, as judged by trying to file it. Even as rudimentary as this is, its better than the knives I had been buying from factories.
If you know of any opp's to view bladesmithing in CT or New England, please let me know.
ANY AND ALL ADVICE IS WELCOMED!
Kevin -
Hello Everyone,
thanks for letting me on the forum. I have been watching for a month or two. I am a Forensic Clinical Psychologist and college prof by day. However, I grew up a Texas farmboy, and I missed making stuff with my hands.
So, true to my geeky nature, I researched how to forge for a year (I made tools, including knives by stock removal when young and working on farm). I grew up in a culture of self reliance, so I was doing things like making knives and reloading ammo when really young.
I am attaching a few pictures of my first forged knife (I could not get the gallery and thumbnail process to work, so any advice is welcomed). They show the sequence. You will notice that after the first assembly, I ground the mokume to fit, and the heat shrank the leather on the handle. As soon as a make a couple more, I will be able to convince my wife to let me buy some nicer handle material.
Also, the knife has a slight "clip" to the point because I burned the original point off with my grinder! I think grinding is going to be a lot harder for me than forging.
On the bright side - I am hooked, and the knife is much better than any factory knife I could buy.
Knife stats:
1095 (started with 1inch x1/4inch x5ft bar from Admiral Steel
10 3/4 inches oal
6.25 inch blade
1/8 inch thick @ guard
1/16 inch thick @ tip
Convex grind
Thanks for all of the information you guys have given me. I have read this forum, and the books by JPH and Wayne Goddard, and they also were very helpful.
Take care,
Kevin:) -
Hello,
I am new to this forum. I hope to post first forged knife and brief into about me soon. All I can really say is that I like 1095 so far.
However, I have spent a lot of time trying to track down resources, and I am pasting a link to a site from Cashen Blades that is really helpful.
http://www.cashenblades.com/Info/Steel%20selection/Steel%20selection.html
(if the link does not work, just search around the cashenblades.com site)
good luck,
Kevin


asking for ideas or suggestions
in Knife Making
Posted · Edited by kevin (the professor)
shrinking pics
Hello Everyone,
I am posting a blade that is forged and ground. It is somewhat polished (I am not good at polishing, among other things).
Here is my situation: there are not any people that I know near me who are into forging and grinding blades. So, I am asking you guys for any suggestions or input regarding the knife at this point.
Please include things to fix and ideas for finishing. If the idea is within my limited skills, or near enough to them that I can learn to do it within the course of finishing this knife, then I will give it an honest try (this is #6 for me). Handle, guard, spacer, butt cap, etc.
Any guidance or ideas will be appreciated and a serious attempt will be made to follow (reasonable) directions given. Consider it teaching over the web.
thanks for taking time to read this.
stats:
10" blade
2.25" wide
3/16 @ ricasso; 1/8" tip
tang - 5.5" (I am going to hack about a half to a full inch off)
blade has large flat ground bevel with convex at cutting edge (very sharp but with pretty thick section supporting edge - sharpened on slack belt and mouse pad with abrasives)
1095 admiral steel
edge quenched in canola
tempered at 430F for two one-hour cycles
guard materials on hand:
aluminum or mild steel flat bar, 3/4" wide and 1/4" thick
alumin flat bar 1.25" wide and 1/8" thick
mild steel flat bar 3/4" wide and 1/8" thick
spacer and butt-cap:
coin mokume from quarters (2 sets welded up)
leather
small blocks of ebony, rosewood, mesquite, and pine
the above listed flat bars
Handle materials (all blocks):
rosewood
kingwood
mesquite
ebony
a pretty attractive but unknown hardwood burl (my favorite of bunch)