
Forging Carver
-
Posts
640 -
Joined
-
Last visited
Content Type
Profiles
Forums
Articles
Gallery
Downloads
Events
Posts posted by Forging Carver
-
-
oh lol! I should go edit that!
-
well some good news! I gave that opener to that one carver and now a person wants to buy one FROM me! This is going to be my first sale! I just need to figure out a price. I suppose I will just ask what they are willing to pay. Thank you all for your help!
The capitalized from is an inside joke for those of you who are wondering why!
")
-
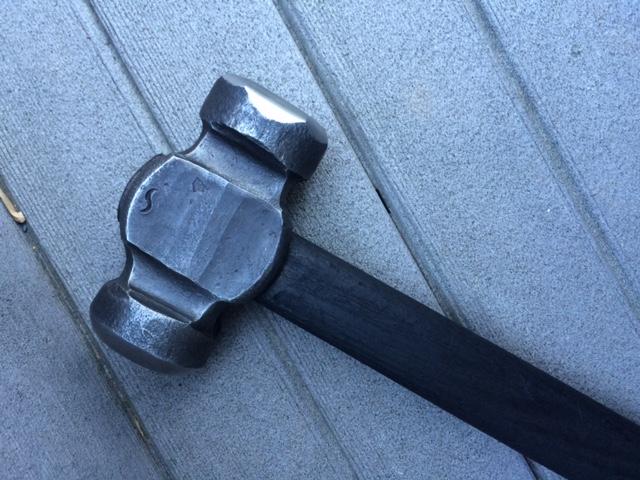
Vise Hardy
in Vises
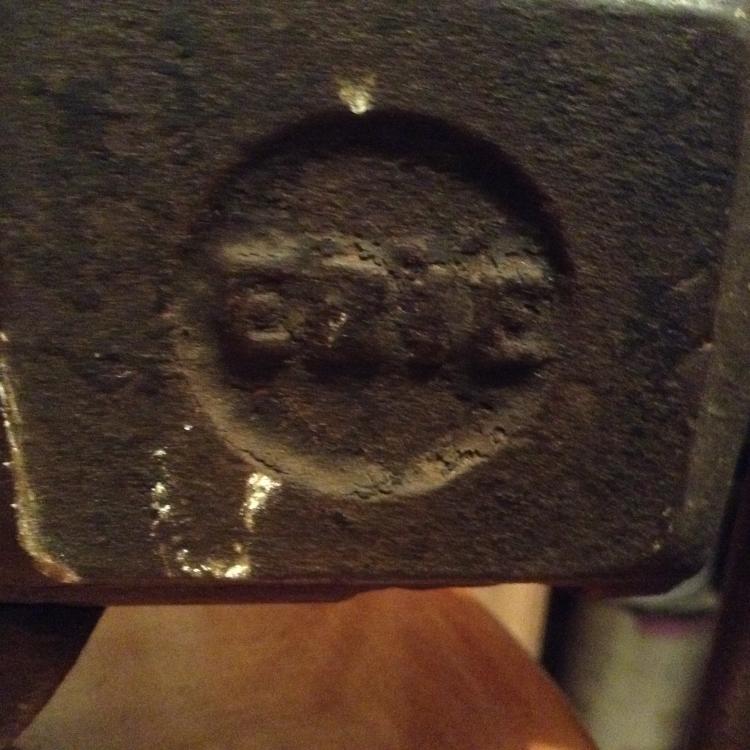
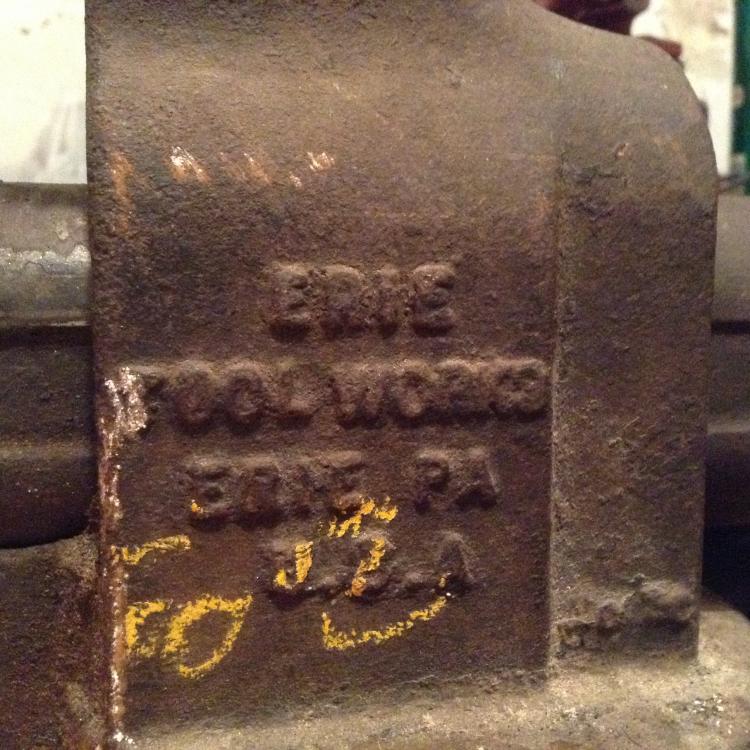
Yeah smoggy I hope i will be able to but who knows. I saw a guy in this thread post a picture of a vise that I don't quite know the name of, but it seems like it would work good. It was Vaughn who posted it. Nice and small and I have used them in my shop class before and they work pretty well. Anyways, here is my vise. It is made by Erie vises and the jaws are 4in. Thanks

-
2 hours ago, DSW said:
GRRRR! I see we are still dealing with the disappearing post issue....
Pull them out of the trash and post up a pict. If you want, drop them in a USPS flat rate box and mail them to me. I'll weld on some more steel or some small angle iron and mail them back if you cover postage. Depending on size, they might fit in a flat rate legal envelope and be cheaper than a mid size box. Can't say without seeing them.
Oh that would be awesome! I am going to go take a picture right now and might as well take a picture of the vise to for the other thread. Thanks
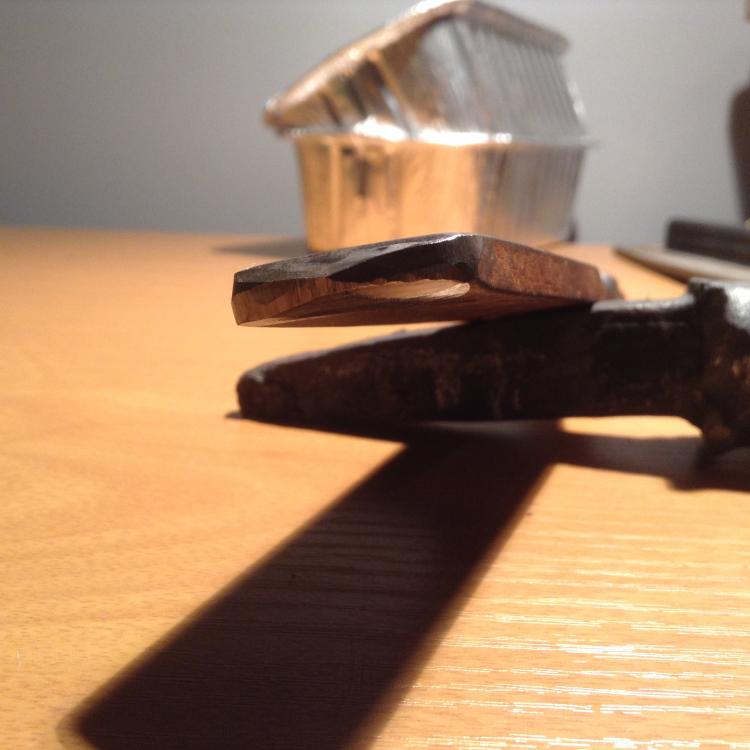
Here they are. Tell me if you think they are too ruined or small to do something with.

-
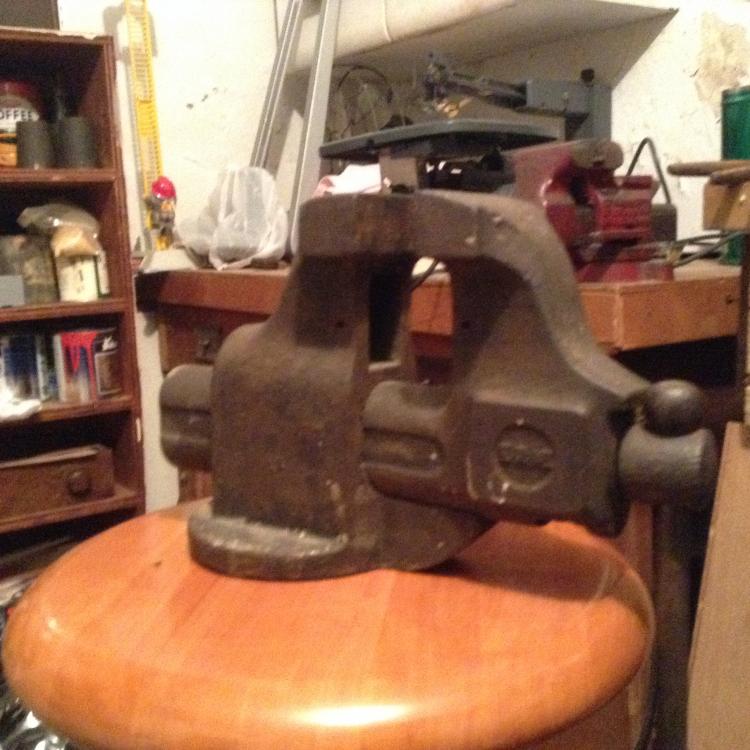
Vise Hardy
in Vises
Ok thanks. I can get a picture for you guys. It is a pretty nice vise and heavy duty for a machinists vise.
-
ok thanks I will look into that stuff.
17 hours ago, Glenn said:It is ok to smoke but DO NOT inhale. If you can see it, smell it, or taste it, then it is not air and not good for the lungs.
Step out of the way of the smoke. Put a box fan to blow the smoke out of the work area. A chimney dies not eliminate the smoke it just moves it up and out of the way.
That may not be coal smoke in your ears, nose, and lungs. It may be the dust and dirt from the forging process, and dust and dirt you kick up while working, grinding, etc.
Lowes has MPERIAL 10-in x 60-in Galvanized Steel Round Duct Pipe for less than $14. Cut a hole in the side to let the smoke in. You can set it on a 3 sided stack of bricks instead of cutting a hole. Or look for a piece of metal you can roll into a tube to act as a chimney.
ok thanks I will look into that stuff. So do you mean to cut an arc shape and put it in the back of my forge? I was thinking about getting one of the bent pieces and then connecting it to a piece like this for a chimney. Only issue with that is I need a stand. Right now I am working in a 12 in dia brake drum as a forge, so this 10in duct will fit perfectly as an updraft.
-
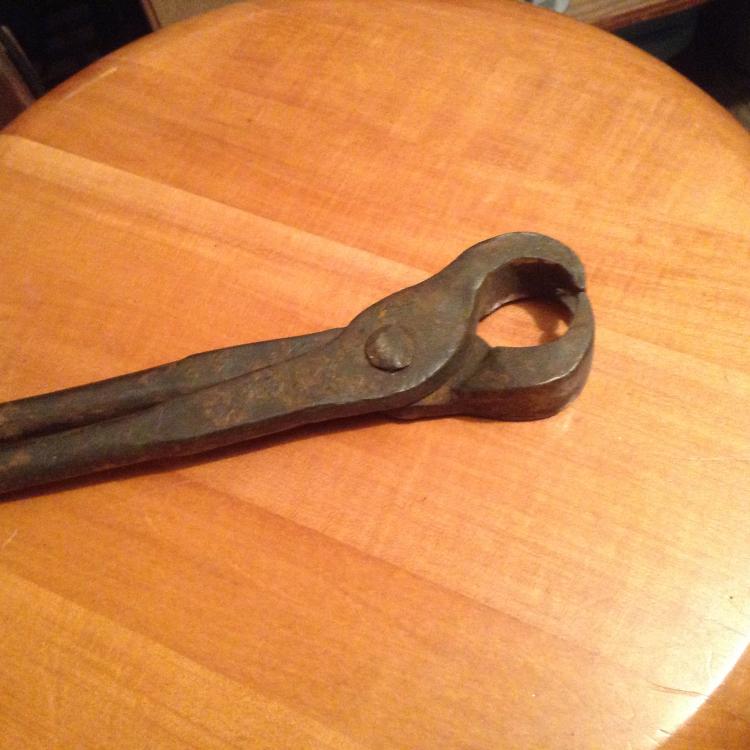
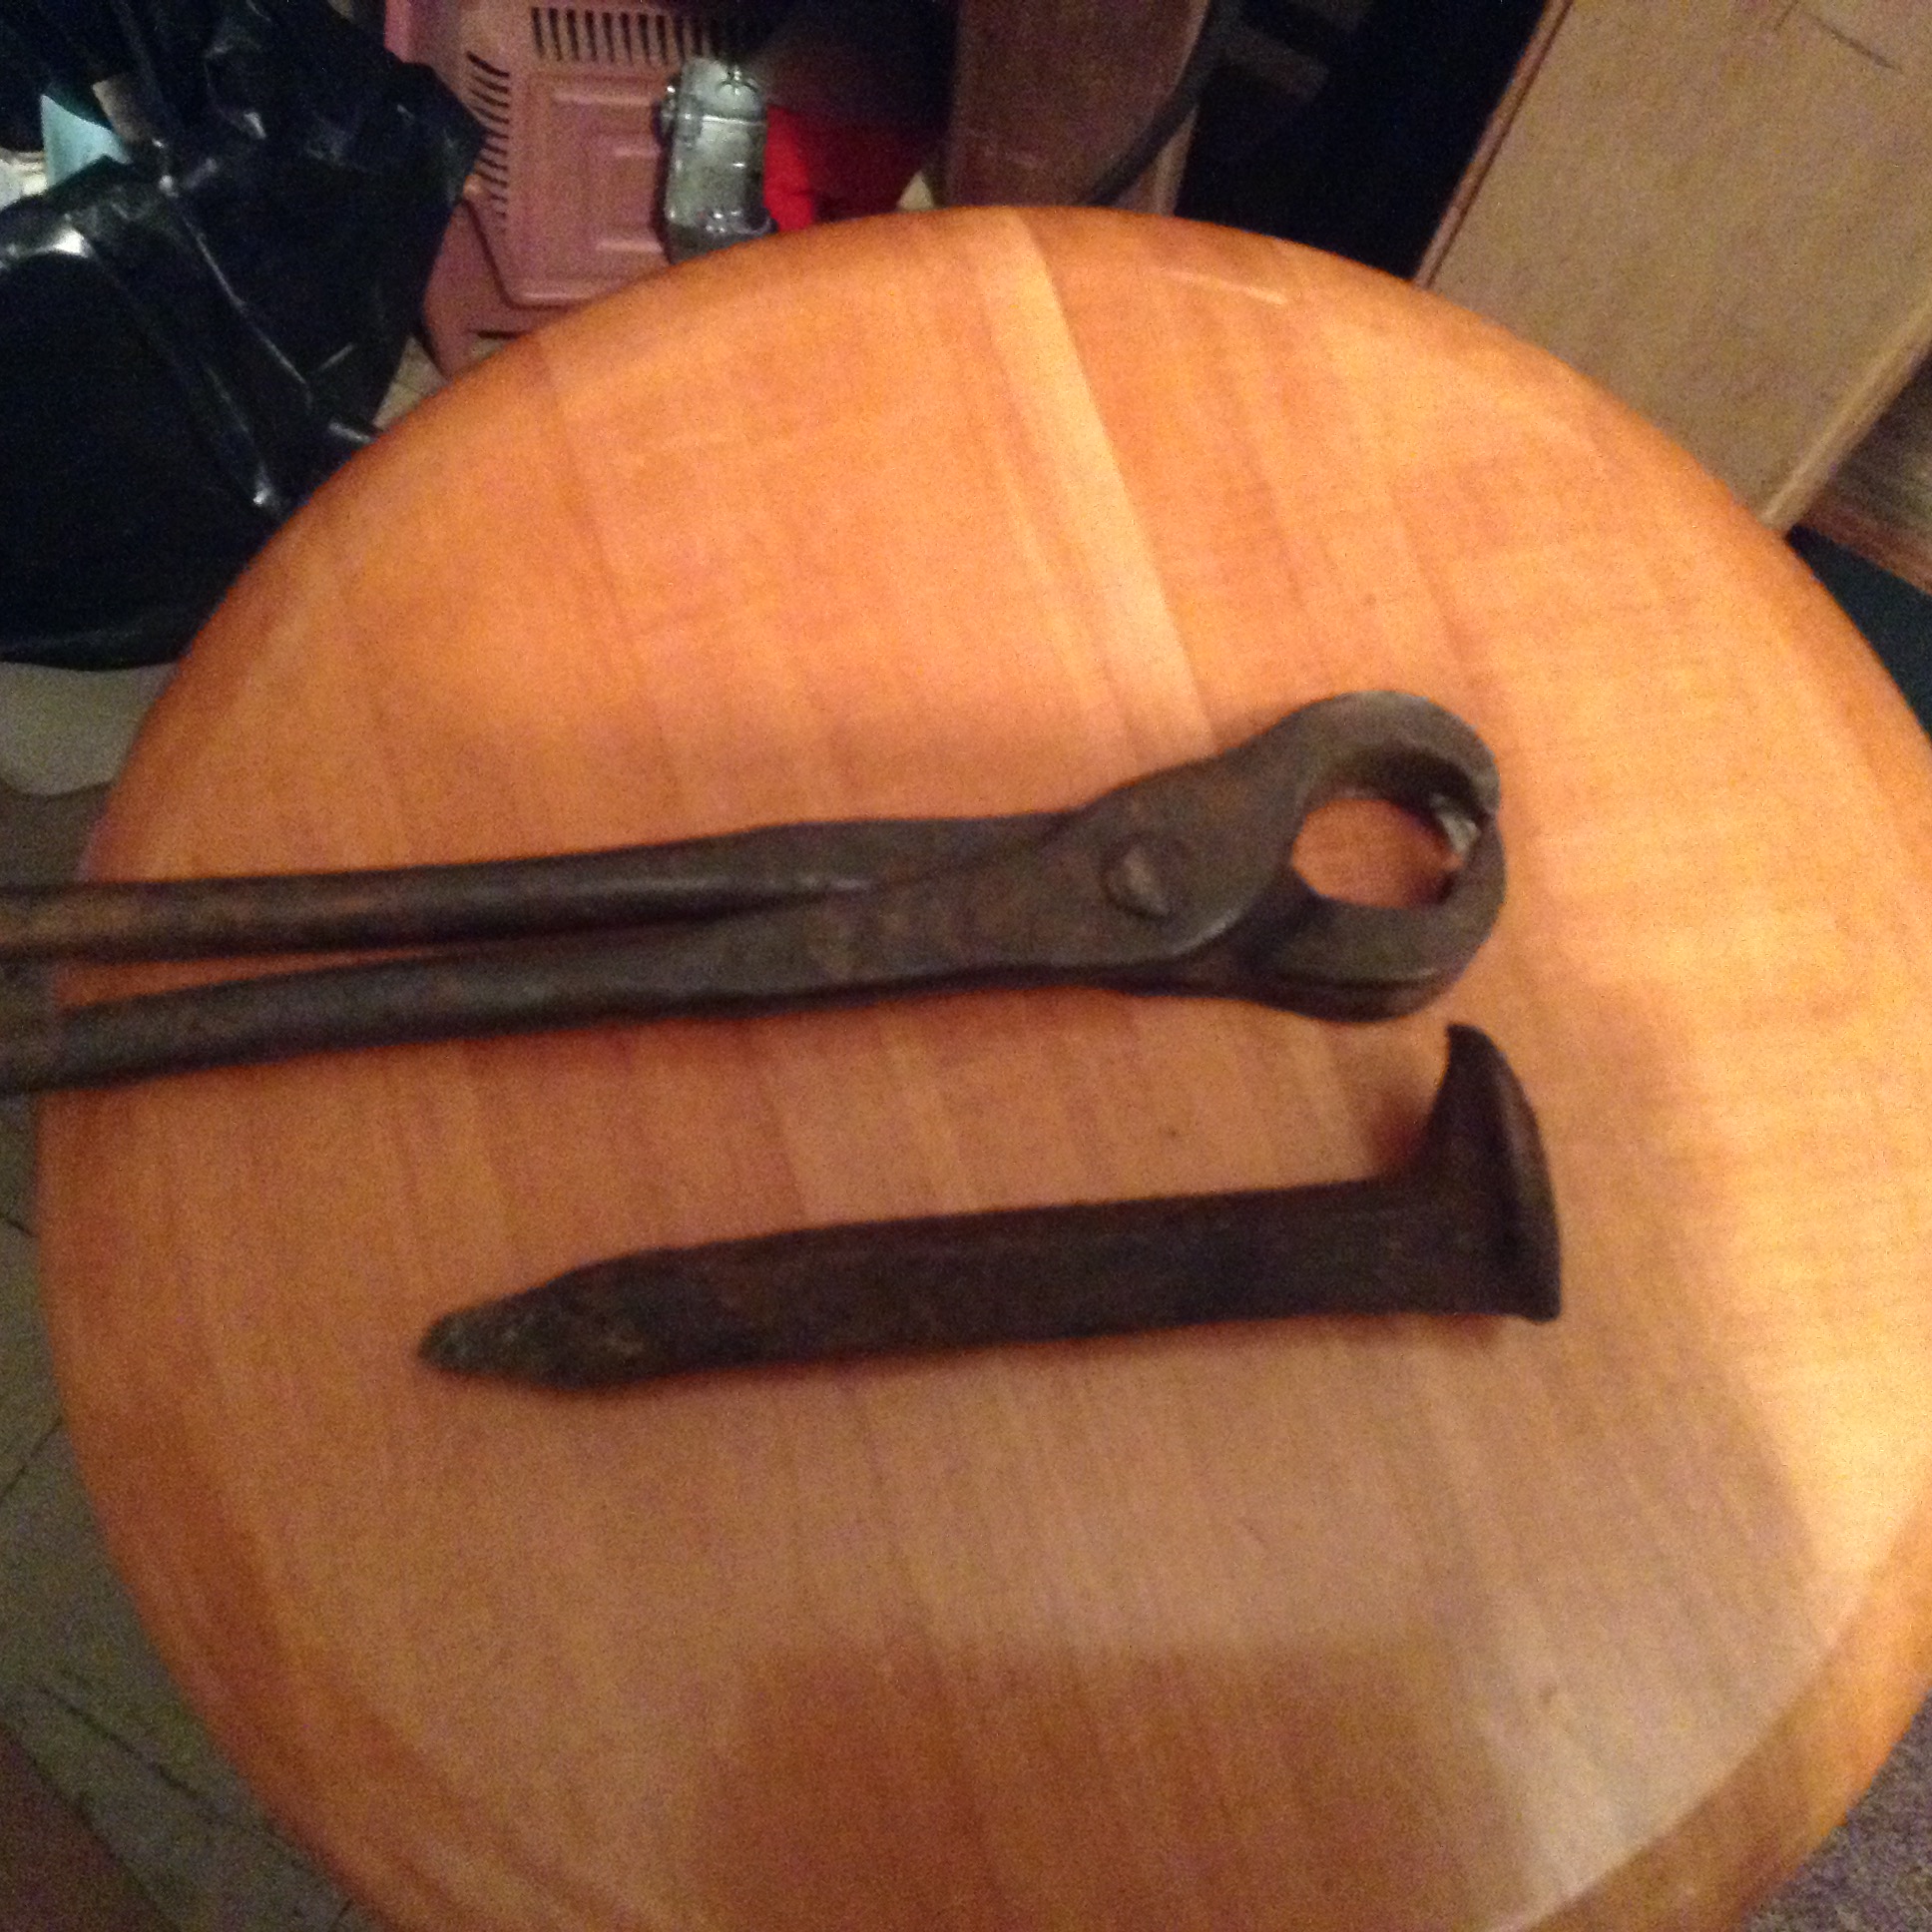
oh thats what you meant by modify. I got my pair of nippers and cut a v notch in them but I messed them up and they are now in the trash. Gonna have to find a bigger pair.
-
alright thanks for the help everyone.
-
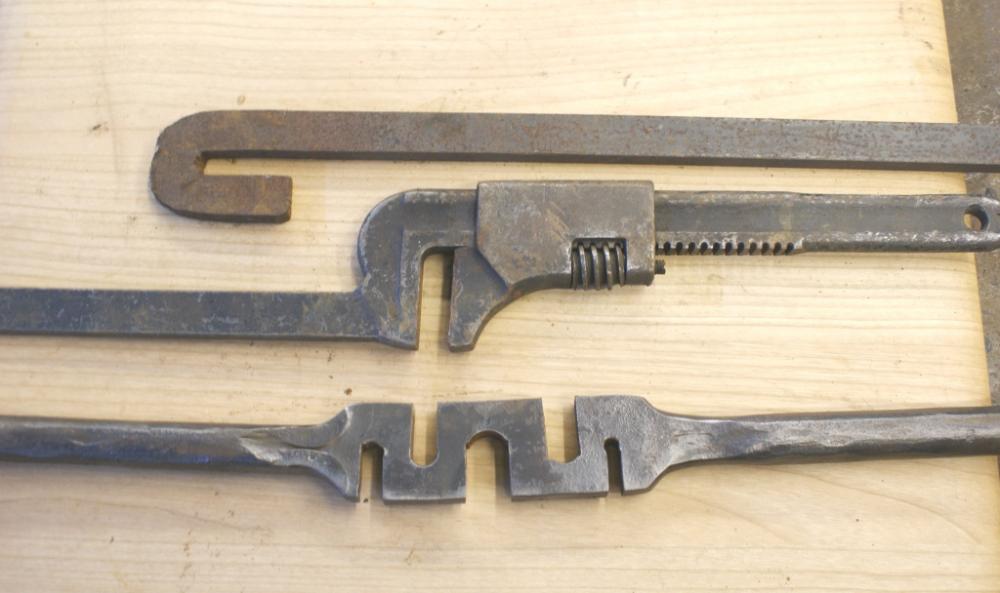
Ok. I got a monkey wrench home, so I might bring it to a welder to get a handle on it.
Thanks
-
Thanks for the help.
3 hours ago, John B said:These are simple twisting aids that may help, you could make something similar that would fit into the pritchel hole on your anvil, a second one can then be used to apply the twist.
Hope this is useful
Did you make the wrench in the middle? Thanks
-
Vise Hardy
in Vises
alright thanks. My vise you bolt from under the vise, not on the sides of the base. I suppose I should just use channel then? Thanks
-
-
Vise Hardy
in Vises
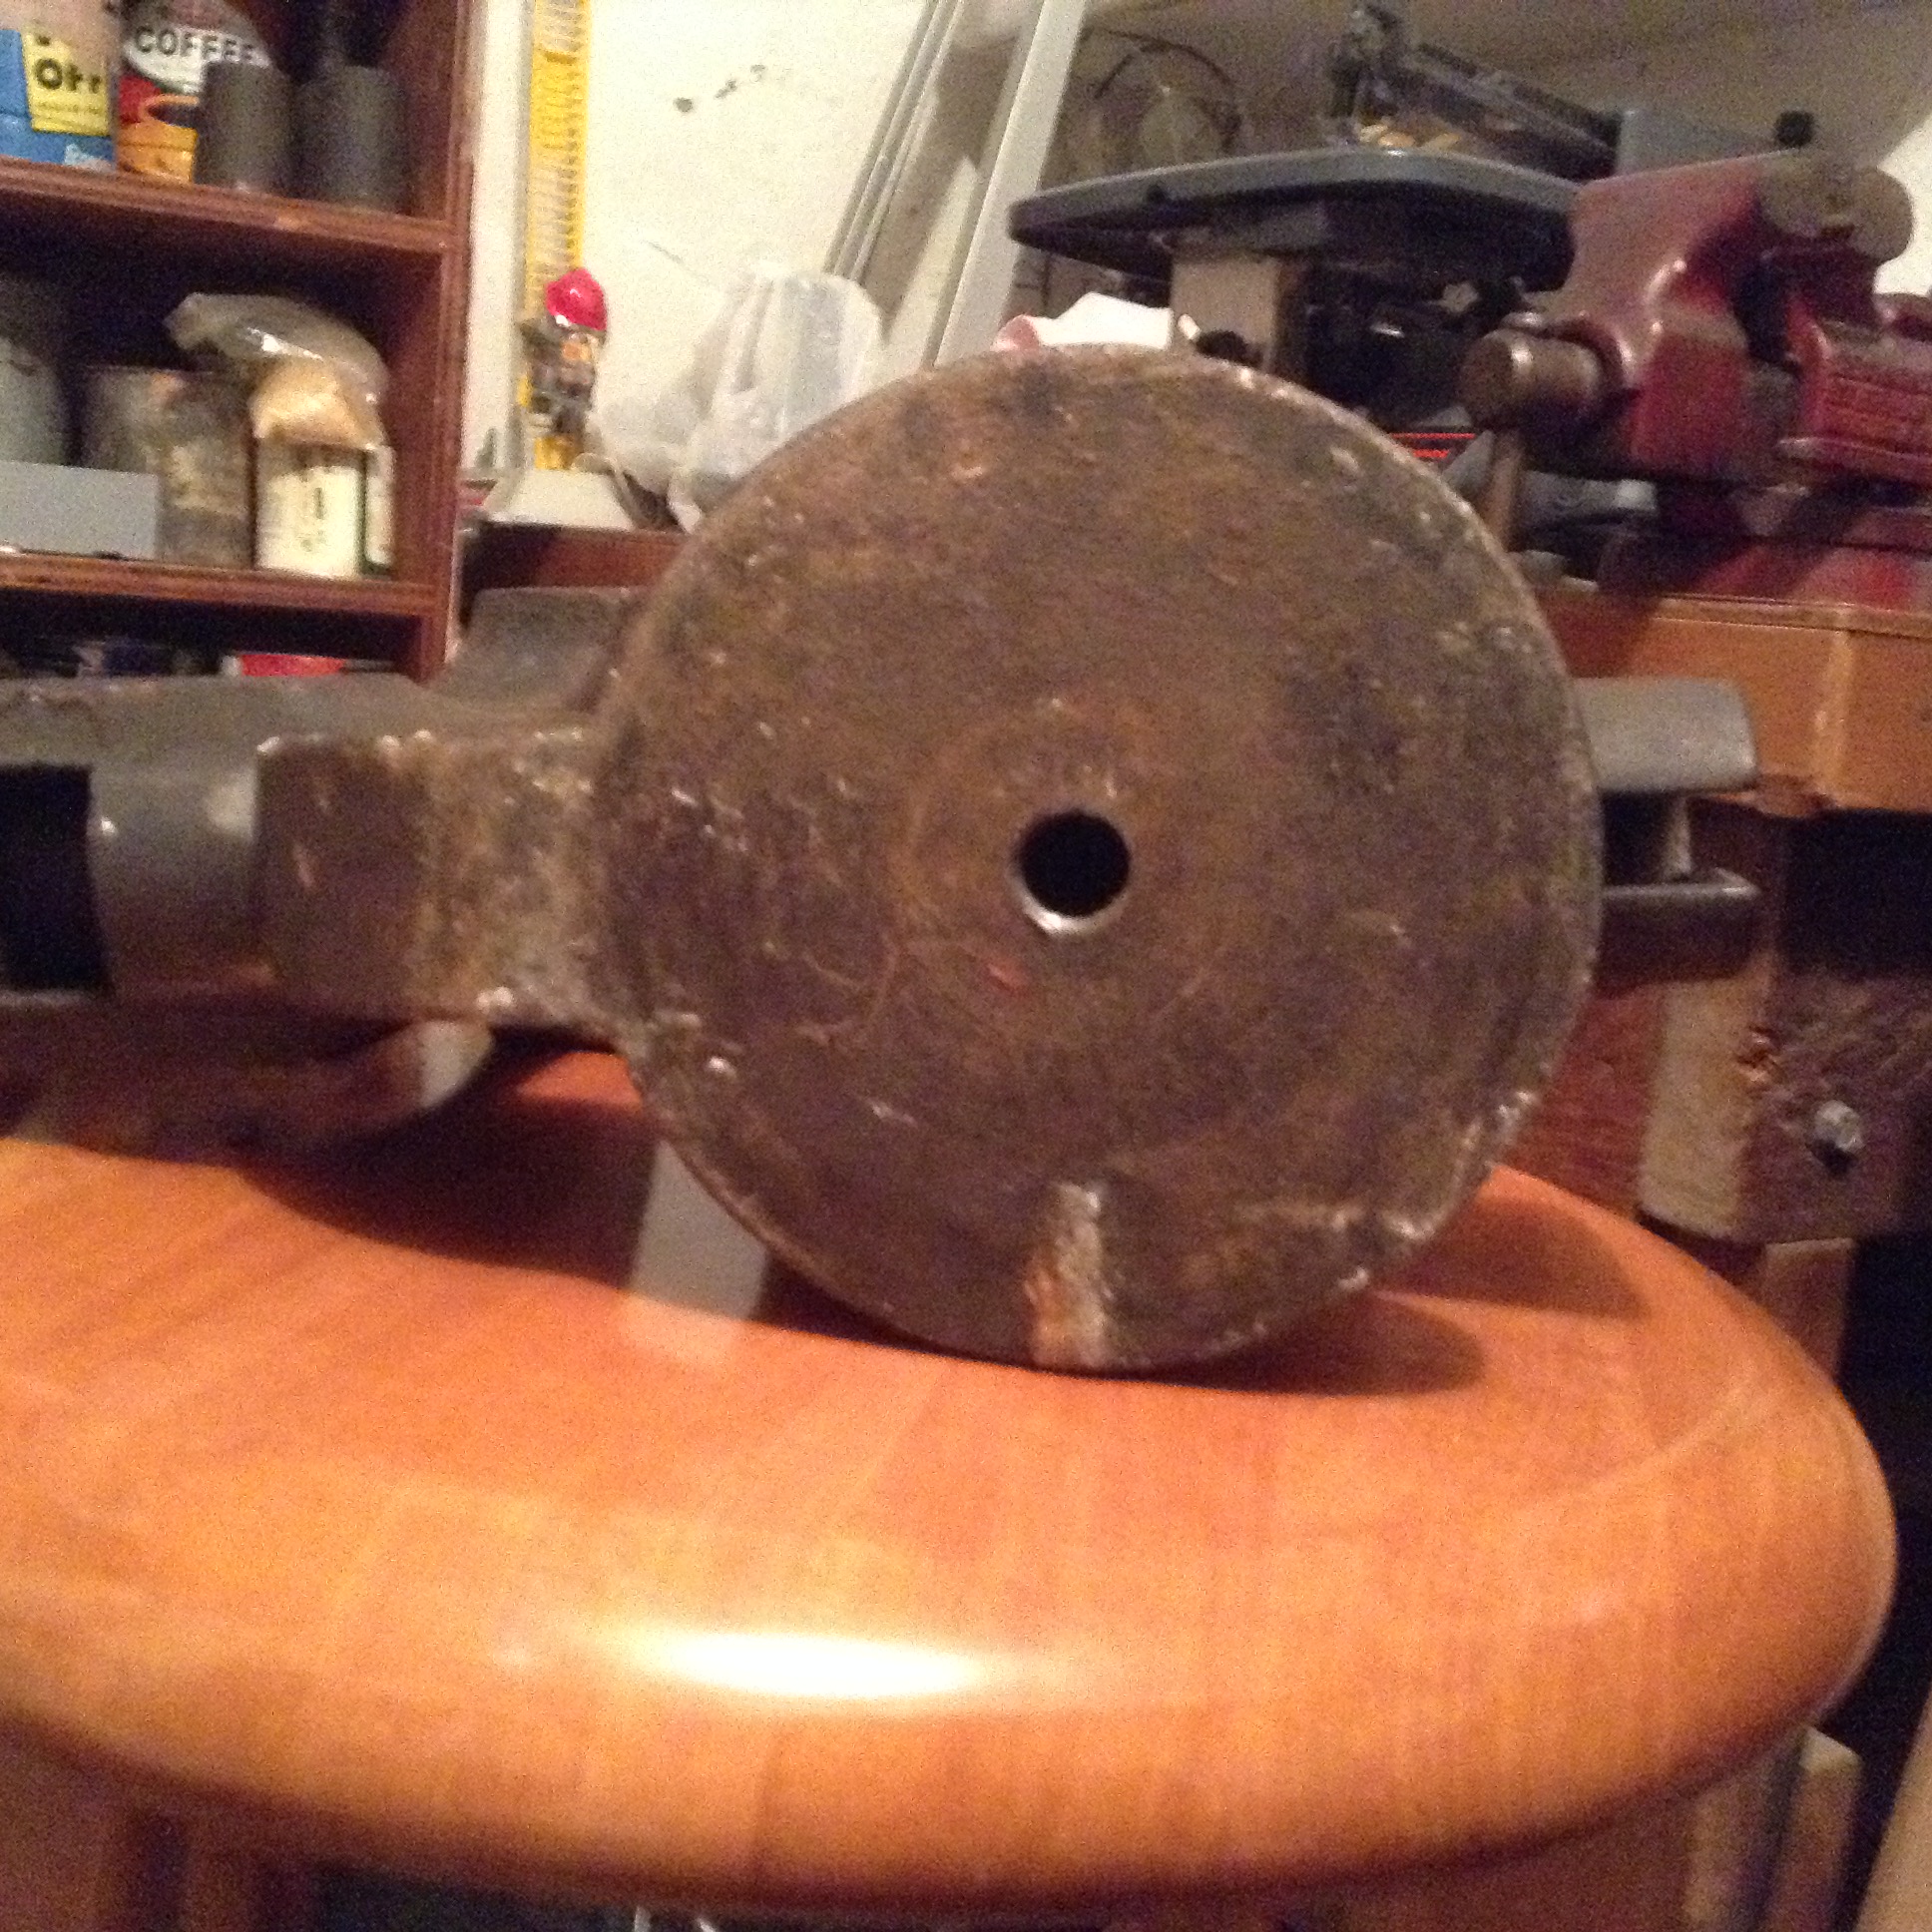
So I don't have much space and can't get a post leg vise. I also have no where to attach my machinists vise because I can't have all these stumps on my parents yard. So I was thinking that I could just weld a shank on the bottom of of the vise so it can fit on to my anvils hardy hole and so I won't need a table to bolt it down. I just wanted to make sure it's not a dumb idea before I do it. Thanks
-
2 minutes ago, JHCC said:
I've done a couple of twists with a wrench clamped to the anvil instead of using a vise. It's awkward and hard to keep even, but it works.
So basically you get something like a c clamp and attach a monkey wrench to the anvil. You then put the piece in the monkey wrench and then twist with another monkey wrench? Thanks
-
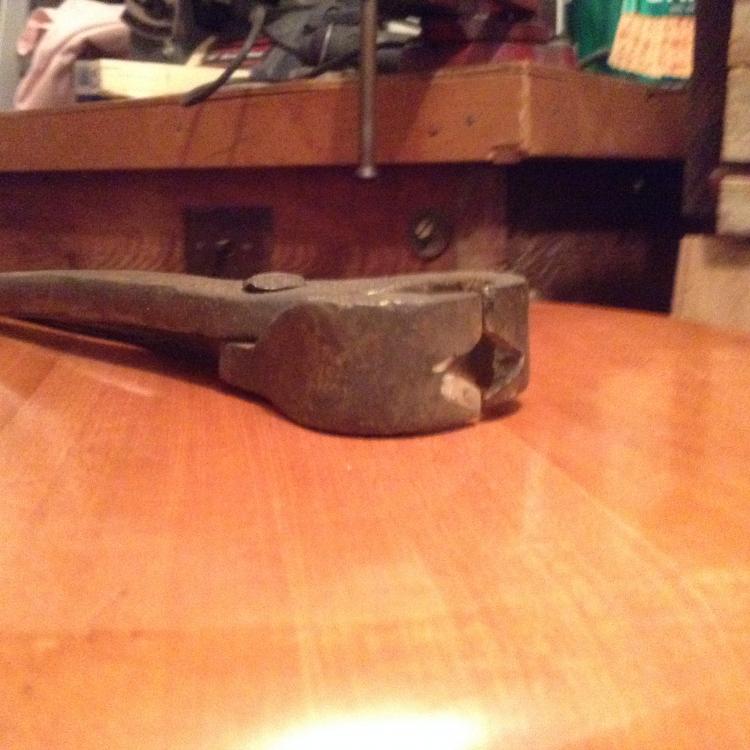
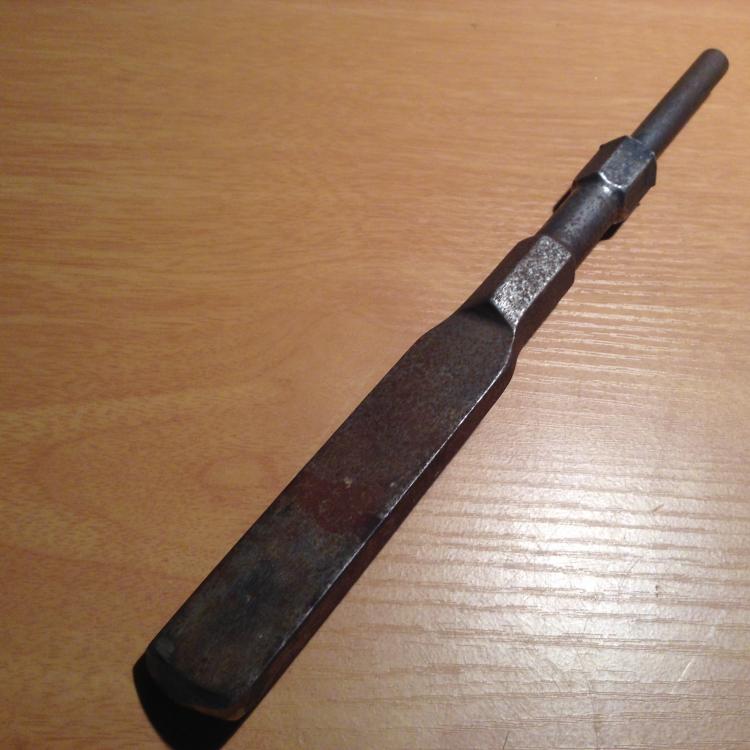
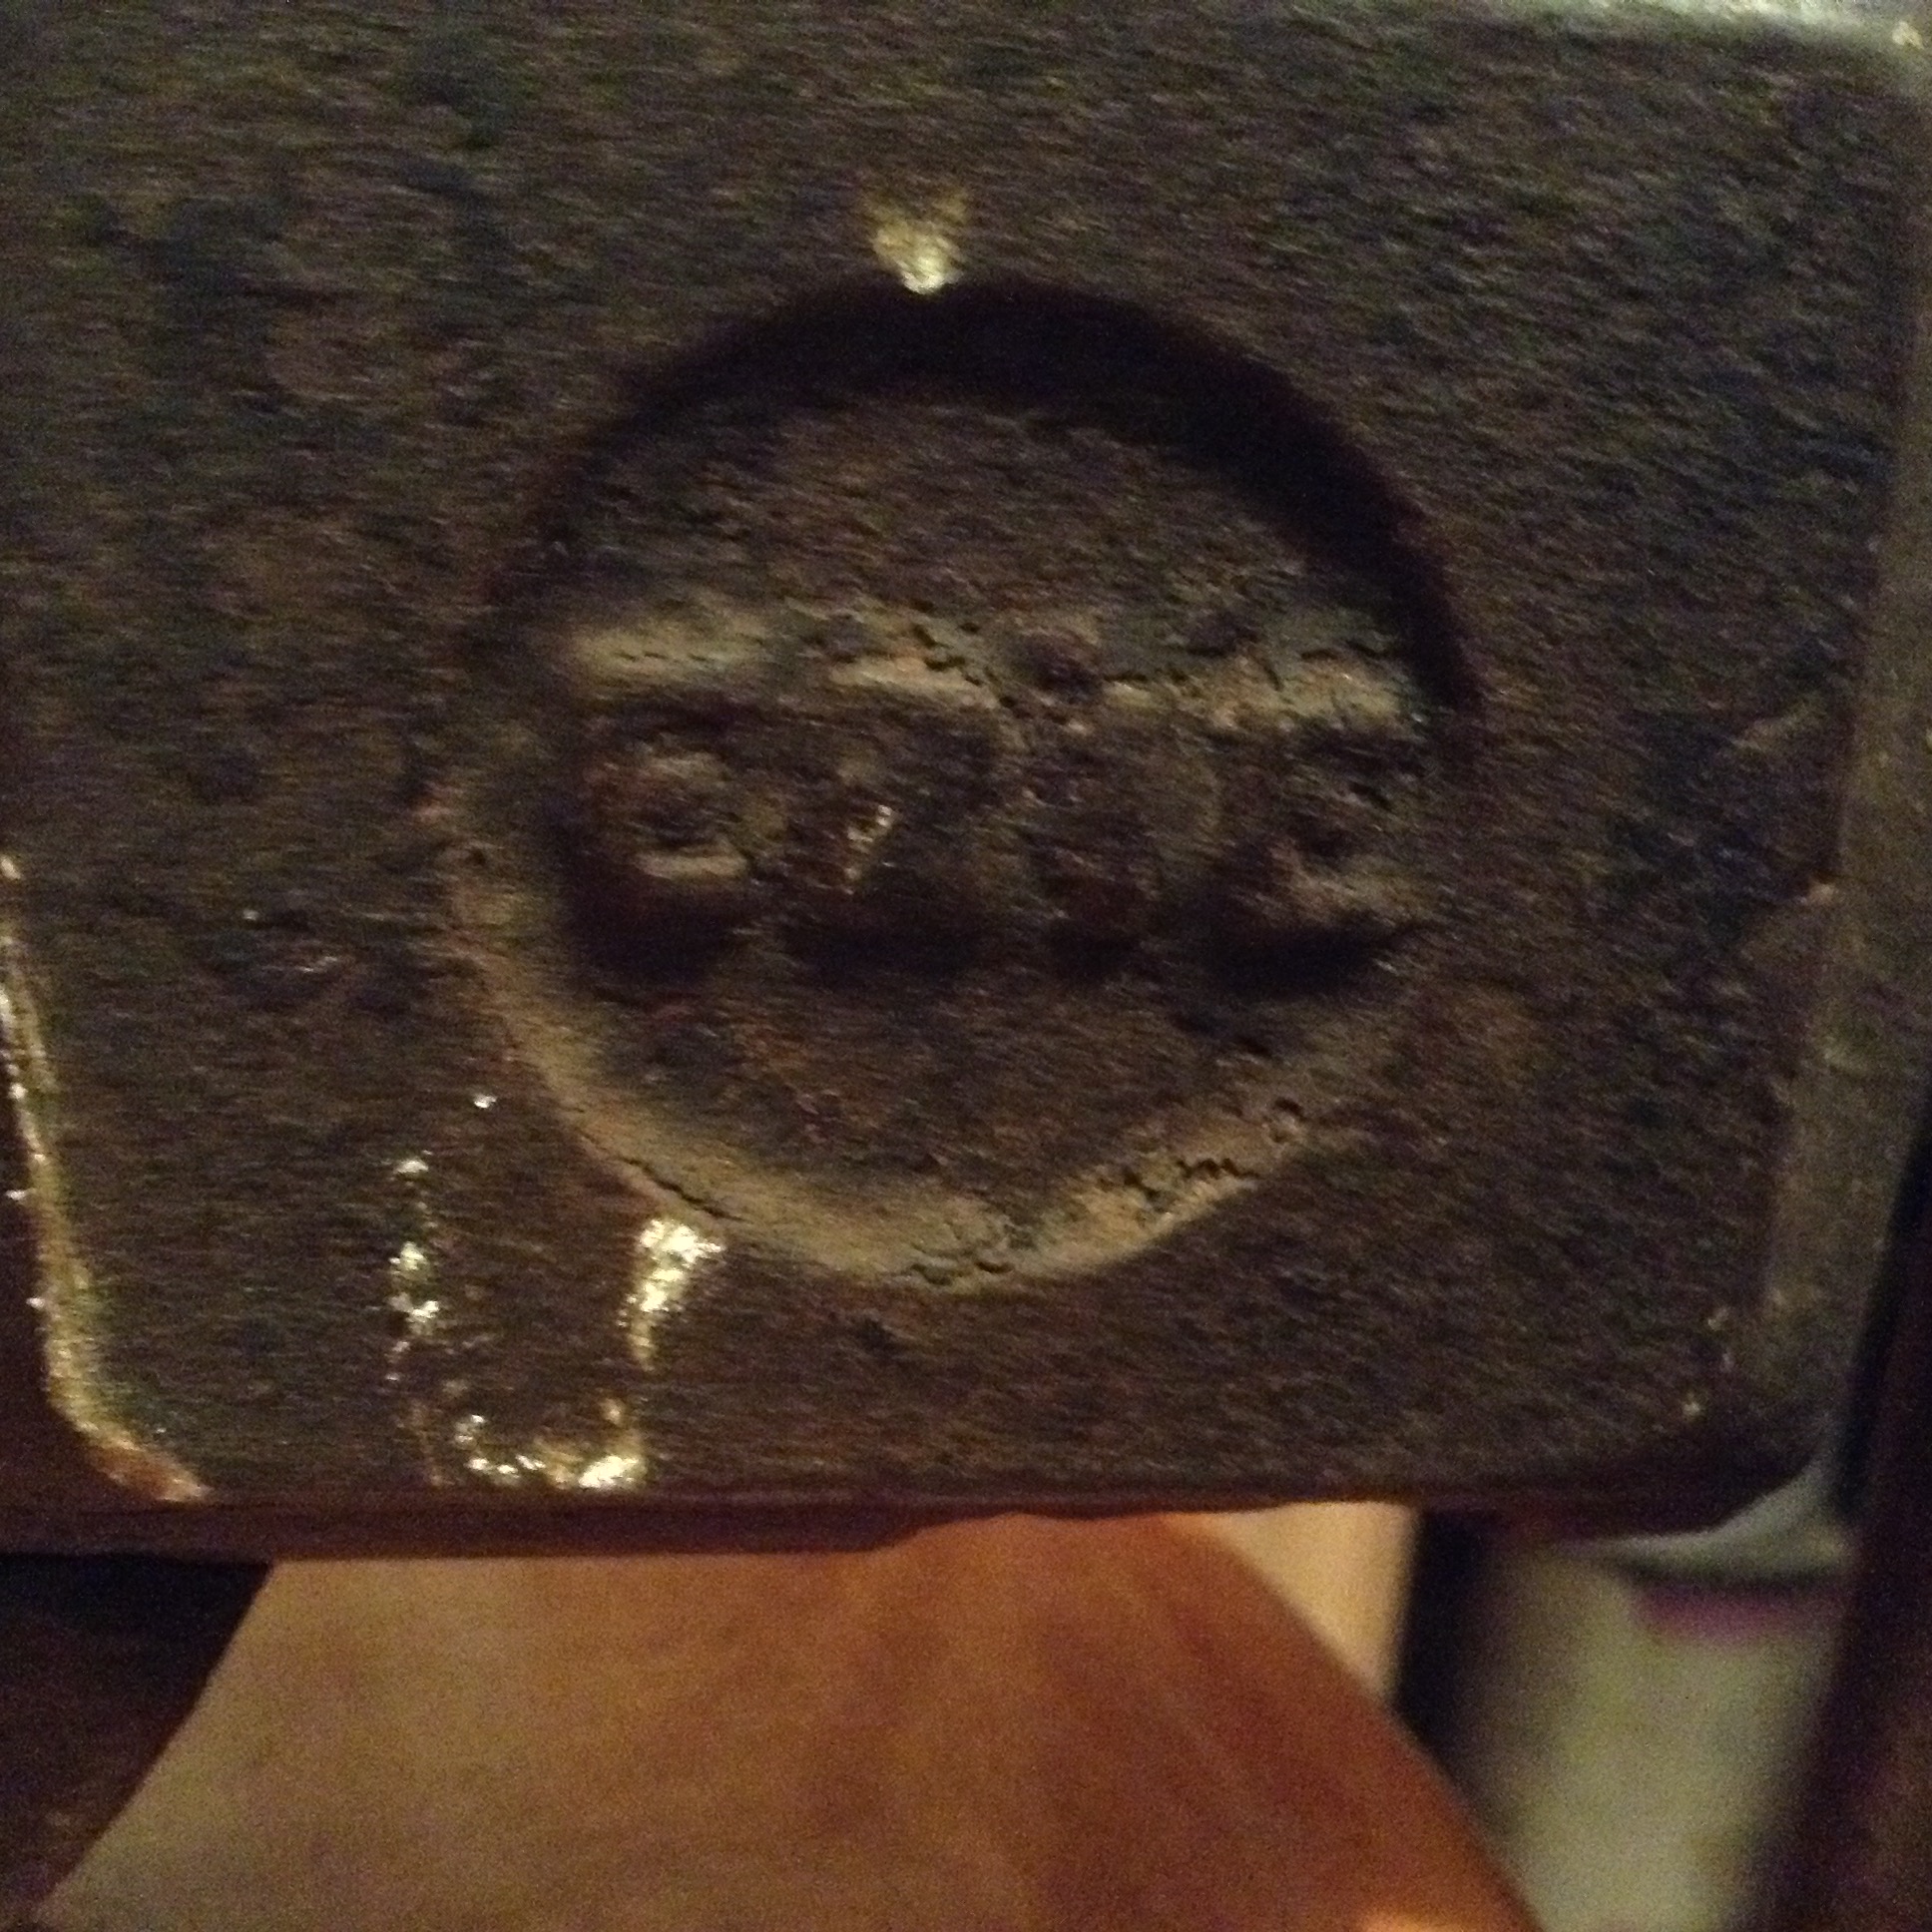
Made a railroad spike opener today. The opener was brushed then finished with Trewax. I wish I had a vise to make a twist in the handle, but I'm sure there's a way I can make a little jig to twist spikes. I left some rust and scale on the head to give some character. As much as I love this, I am going to give this as a gift to a carver who is very good to me. I am definetly going to make more so I think I can part with this one. i think openers are going to be my thing, or at least for a while!

-
This article goes for all you guys with a solid fuel forge without a chimney
So today once I was finished forging, I took a shower as usual. Once I got out I then get a face wipe and clean any soot still on my face. I then got a Q-tip and cleaned my ears which is also usual. However, today I have come to notice that the Q-tip was black which shows how much soot from the smoke gets into your ears. I then realized that my noise was a bit black on the inside so I cleaned that out. I now just went to blow my nose, and a black sort of booger type thing came out. This is really scary because if this much coal and soot gets just in your ears and nostrils, I can only imagine how much is in my lungs. This makes me more than ever want to get at least some kind of chimney for my forge. I have been keeping an eye out for some duct work, but at this point I am thinking abut just spending the money on it. I just thought I would share this with you fellows so you are aware of the importance of having a chimney on your forge.
-
Thanks for the help. I was thinking about buying the a pair from one of those blacksmith sites. A v notch in hoof nippers is an excellent idea. I hope my nippers are big enough!
-
Alright thanks. I really wanna make some tongs so I can hold railroad spikes and other various sizes of short stock, but they look too complicated and take too much time to do. I have a piece laying around that looks like it could make a good slitter and another that could make a good drift, but they both are too small to hold with your hand. Vise grips could work, but I constantly drop the steel with them. Also, my forge is only a brakedrum so there isn't much room to heat a large section. This should probobly be posted in a different section, so if it is sorry. Thanks for the help
-
On October 6, 2015 at 12:27:38 PM, Frosty said:
Why cant I delete the quote part!!! Grrr
Ok so I will get around to making a legit slitter once I start making some tongs after the holiday. Tommorow I really wanna make a opener from a railroad spike either like a traditional one or a wall hanger one that I saw posted on here. Thanks for the help everyone.
-
Lol yeah well the only caps I lift are those to my root beer! Can you guys give any tips to forging the curved part at the end of the opener handle. It gave me the most trouble because I can't hit the opener portion or else it would bend. Also, I used a craftsman chisel my dad gave me kind of like a slot punch except it gave me a hard time taking out the piece of steel. I am thinking that all I need to do is grind away the edge to make it work better? Thanks
-
Hi,
I recently made my first bottle opener and lots of people loved it. They are also lots of fun to make! So in the Show Me Your Bottle Opener thread, I see some guys make them out of railroad spikes which is such a great idea because people like to buy merchandise that they can see it used to be something else. So this guy from my carving class absolutely loved the opener and wants me to make him one out of a railroad spike sometime. So Christmas is a couple weeks away and I was thinking about making him one next weekend which is going to be the only time I will have to make it. So I need a pair of tongs to hold a railroad spike fast and I wont be able to forge them and have enough time to make the opener. I saw a guy make a pair of flat jaws by welding reins to some channel locks, but i need a quick and easy way to hold a railroad spike. I suppose flat jaws or video grips could work, but are there any better options? I was thinking about getting some angle iron and making some cheap v bit tongs out of channel locks by bringing them to a local welder. Any ideas? Thanks
-
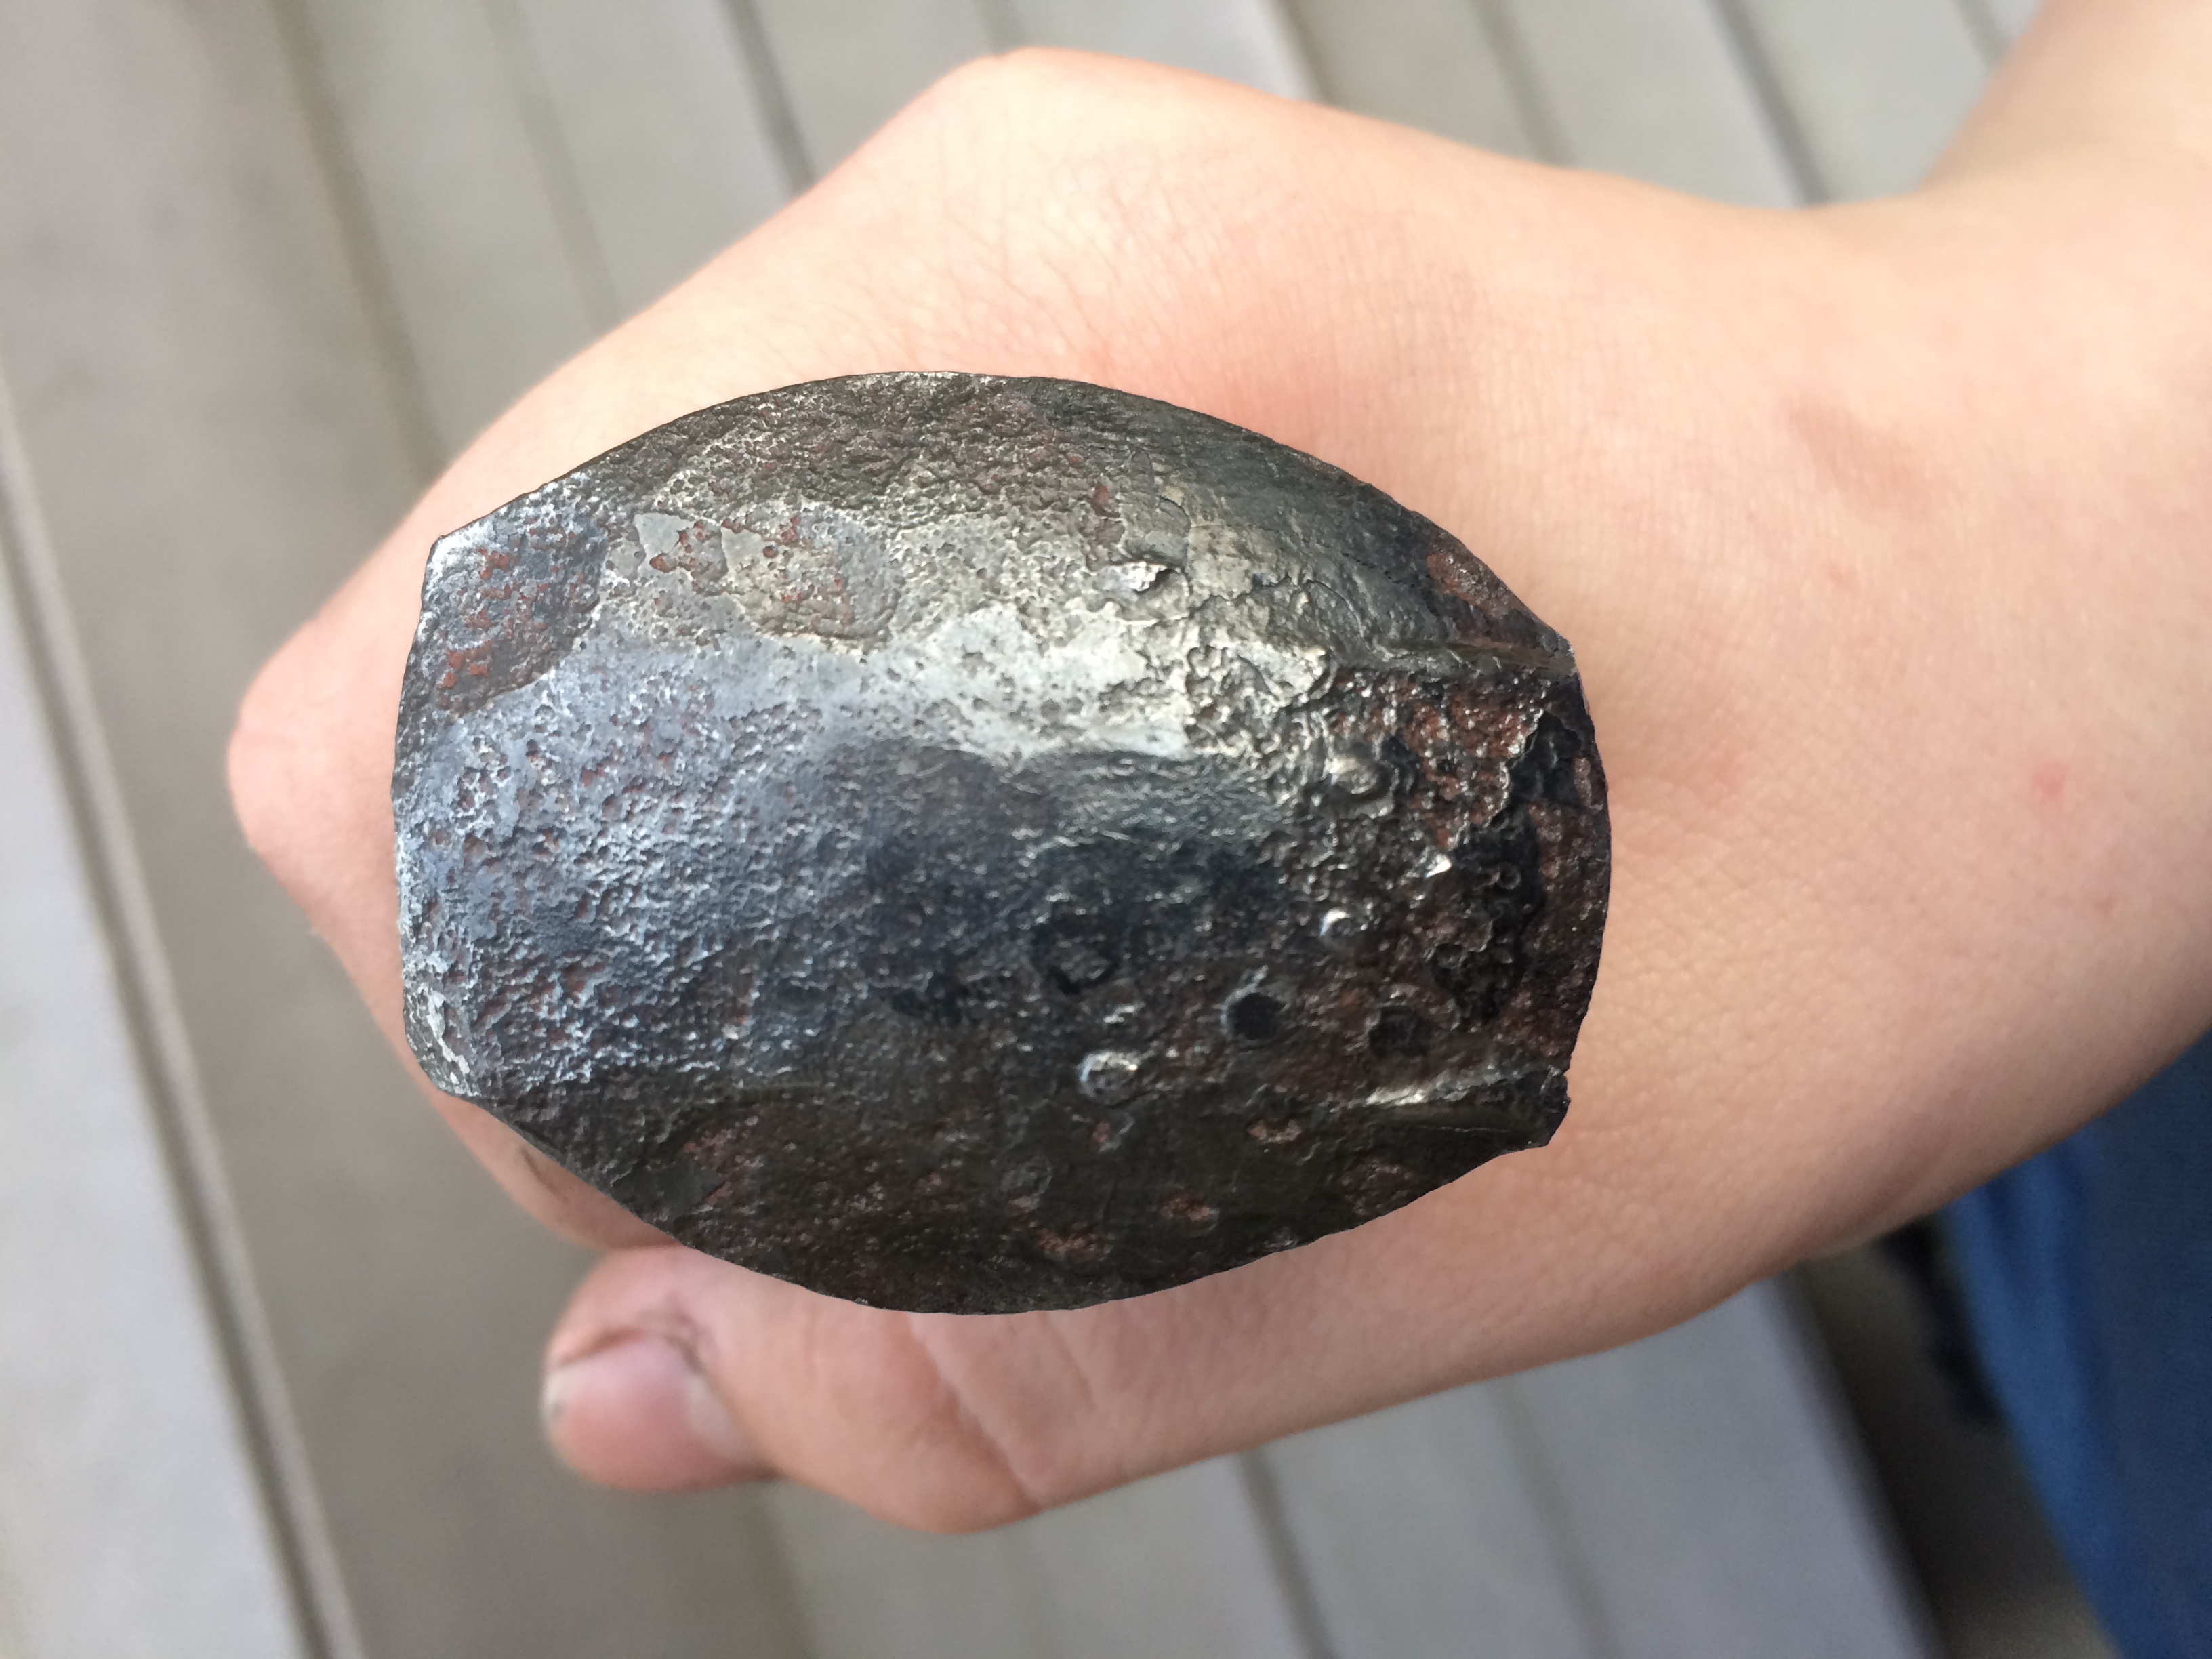
I made my first opener today! I found them to be lots of fun to make! My first one I accidently burn the top part which I am guessing was because I made it too thin. I showed a guy from my carving class and he absolutely loved it! For some reason he is infatuated with stuff forged from railroad spikes like knives, so he asked if this was made from a spike. I plan on making some railroad spike tongs and start making openers from spikes becuase as it was mentioned before in this thread, people like to see something they know of forged into something else. Tell me what you think and any ways I can improve the next one and how to forge them cleaner. Thanks

-
On September 17, 2015 at 6:57:10 PM, ausfire said:
Well, it's not exactly straight off the forge - I have a wire wheel handy to get rid of scale and such. I was just looking for a quick way to permanently protect the bare metal, apart from applying preparations which take time to dry. Frosty's Carnauba wax seems like the best solution. Now that I have some, I'll give it a try with the next spike openers.
So how do you forge the spike down to be able to punch it? A gradual taper or just start hammering a particular length at the end down until it is the thickness you want? Thanks
-
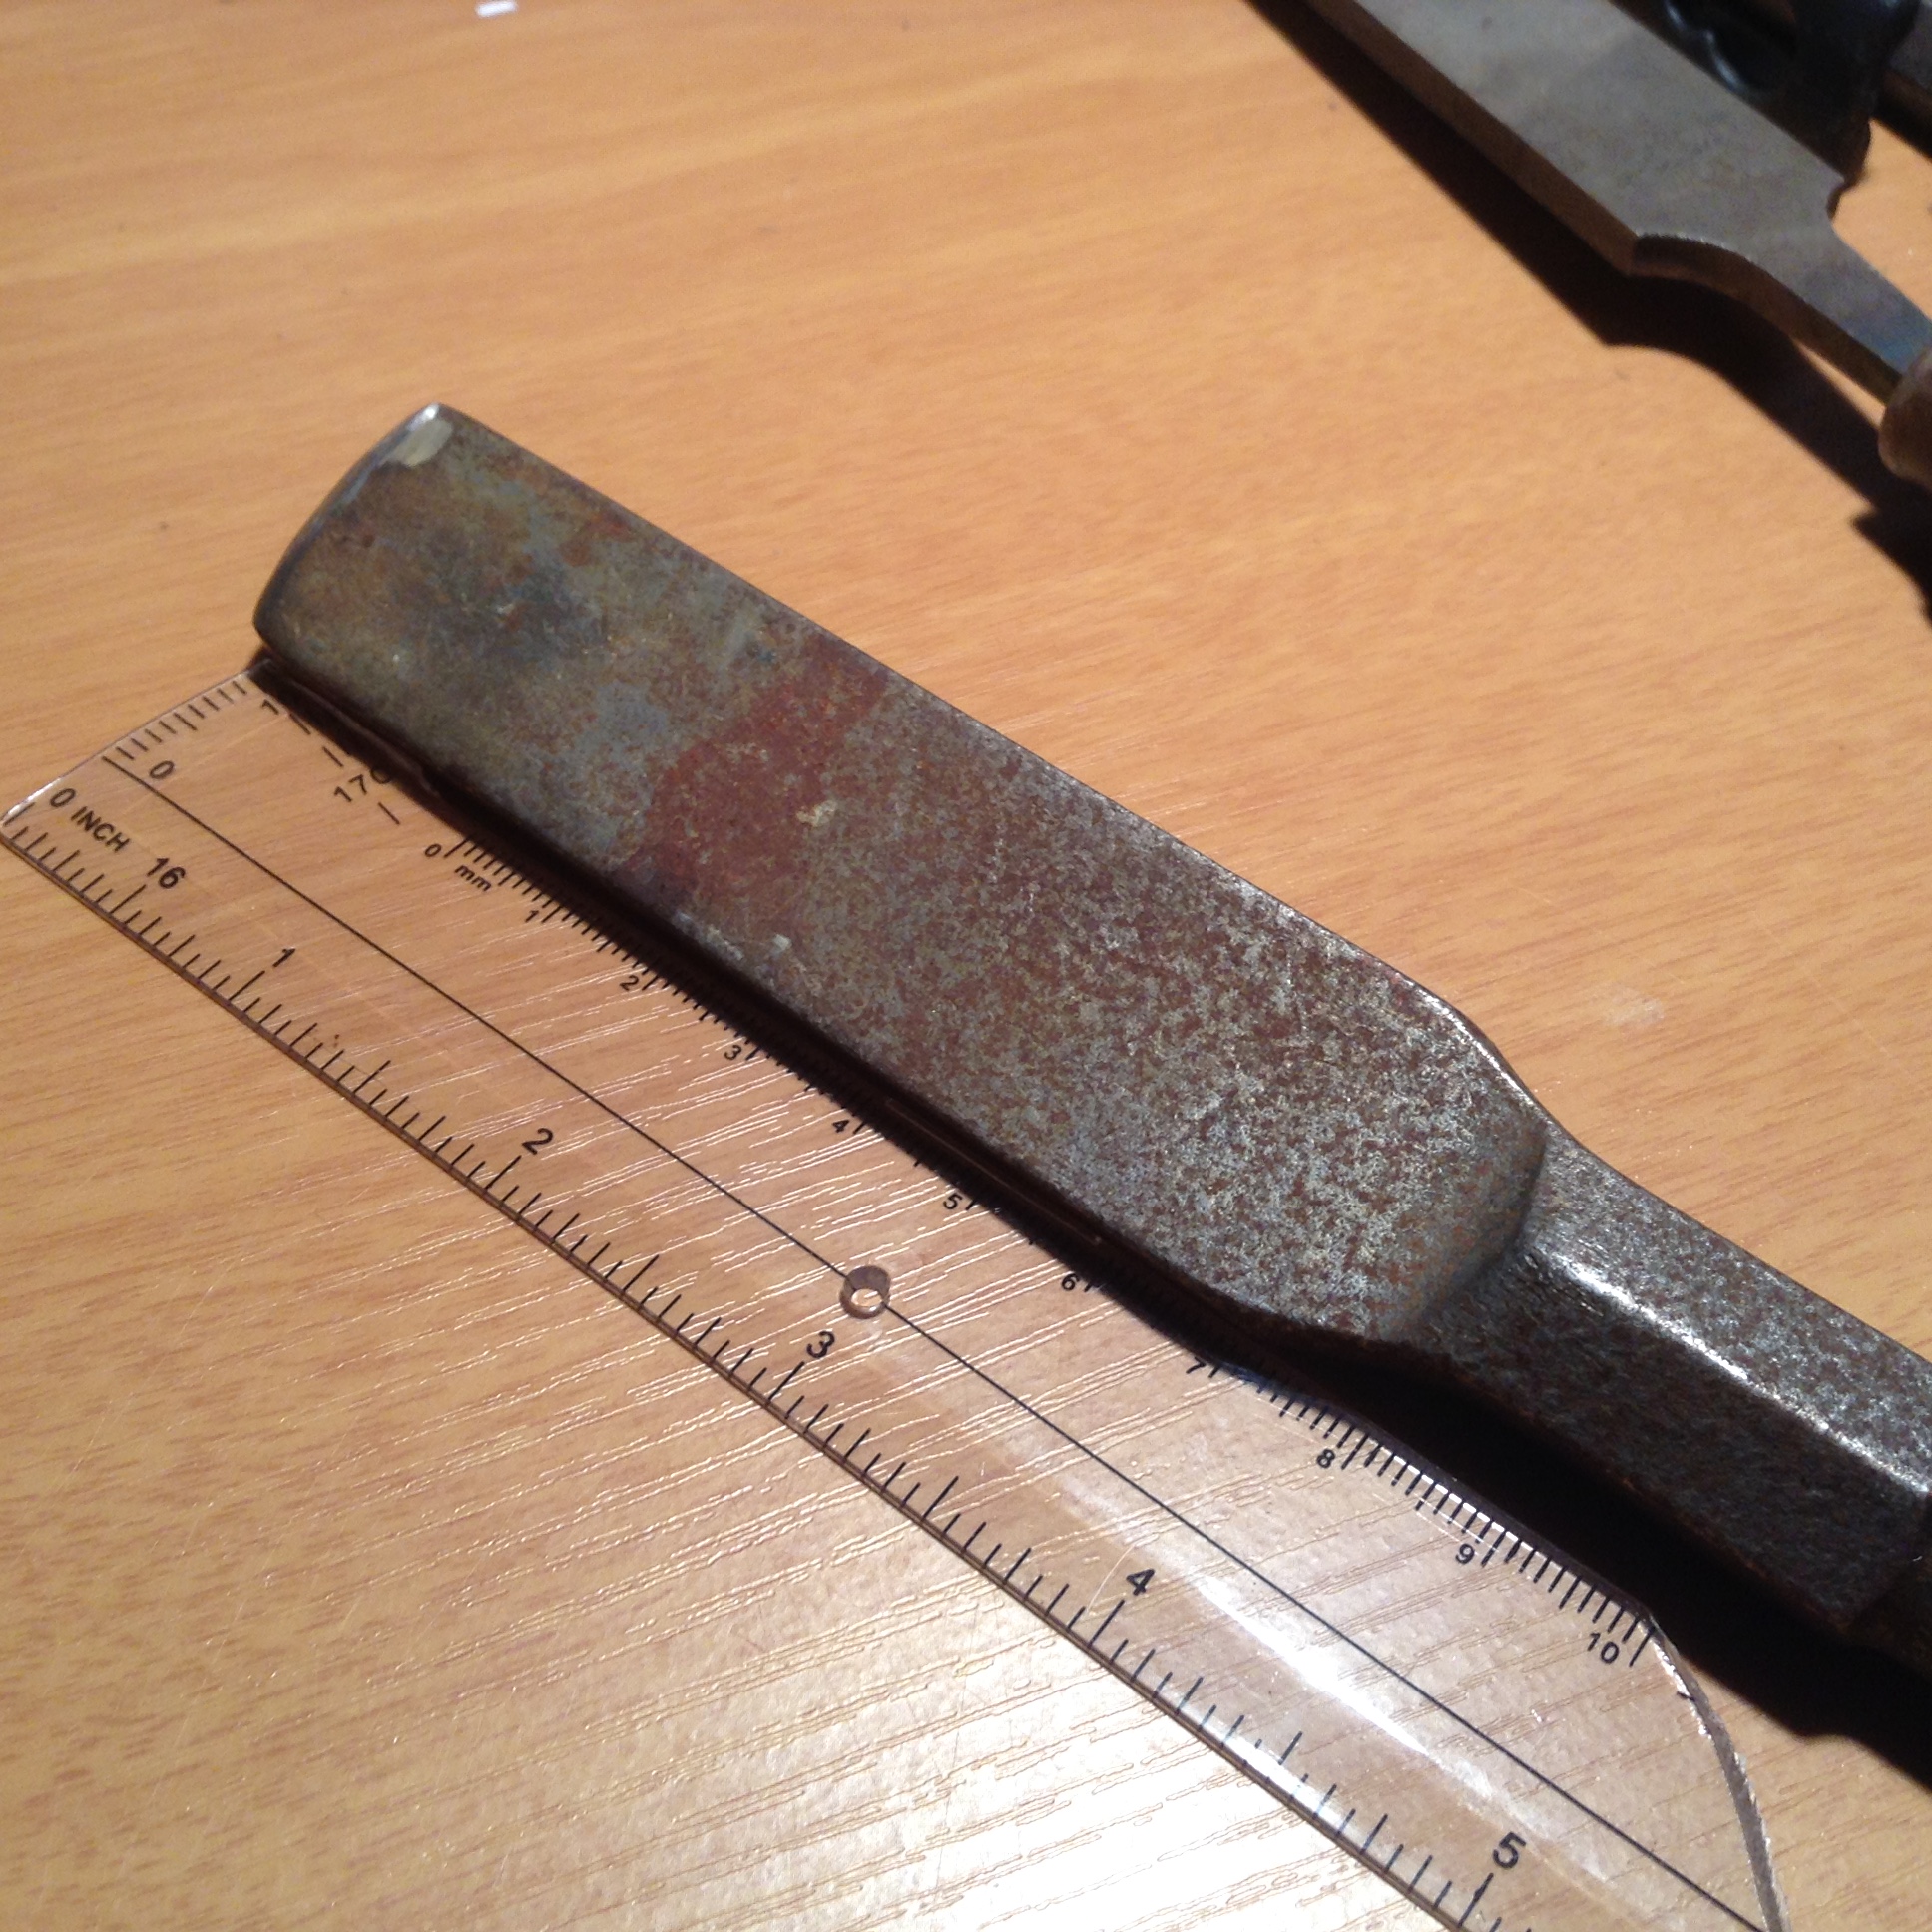
Here's the slitter I made from that jack hammer bit. The grind isn't the best but I think it will work just fine for now. I watched the colors and grinder any areas away that got too hot so I got some nice steel with a heat treat which will probably not last very long becuase I am learning. This weekend I plan on making my first opener from a railroad spike after I make myself a drift so I can fit it on the horn. I only have mild around for right now but I know that guys say mild is good for learning with. Just need to figure a quick way to hold the stuff. Maybe I can make a trip to the welder tommorow. Well here's the slitter. Feel free to comment. I haven't posted this comment yet and I would bet that at least one pictured will be turned the wrong way.
Ooh yay I jinksed it! I should do that more often and maybe I will get my pictures turned the right way!


Show me your Bottle Openers!
in Blacksmithing, General Discussion
Posted
What I found after making a couple is that you should upset the tip of the taper to about 1/4in because it is a bit thin there then flatten it out. I suppose that if you punch and leave enough room for when you work on the horn, it would thicken enough too but I have never tried that. Plus, upsetting is some good practice for me because I am a beginner.