Eric Morgan
Members
-
Joined
-
Last visited
Everything posted by Eric Morgan
-
That's quite true, Frosty...
-
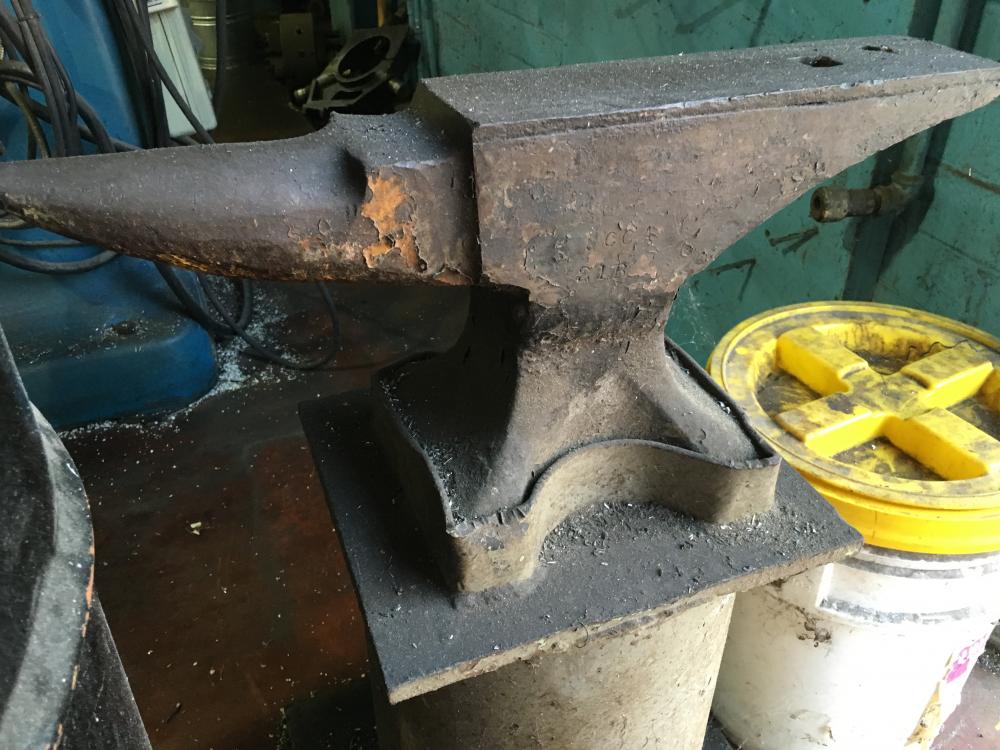
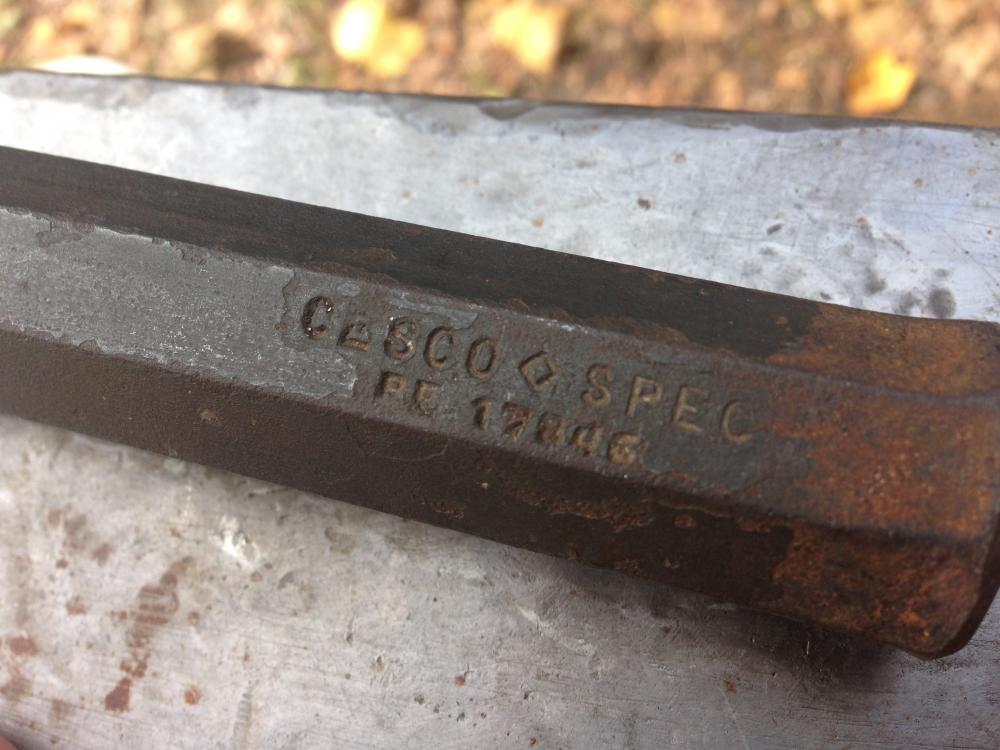
There is a logo or something cast into the other side of the anvil, but I wasn't able to take a picture... I'll try to get one tomorrow morning before I leave work.
-
Hey guys, saw this little guy in the machine shop at work this morning... Maybe 75-100 pounds, cast body. Bought new by the plant where I work probably in the past 25-50 years ago. No more than 75 years ago when the plant opened. I can make out CCA with what looks like 21B under it. Any idea on what make it might be? May try to see if they'd let me buy it and take it home...
-
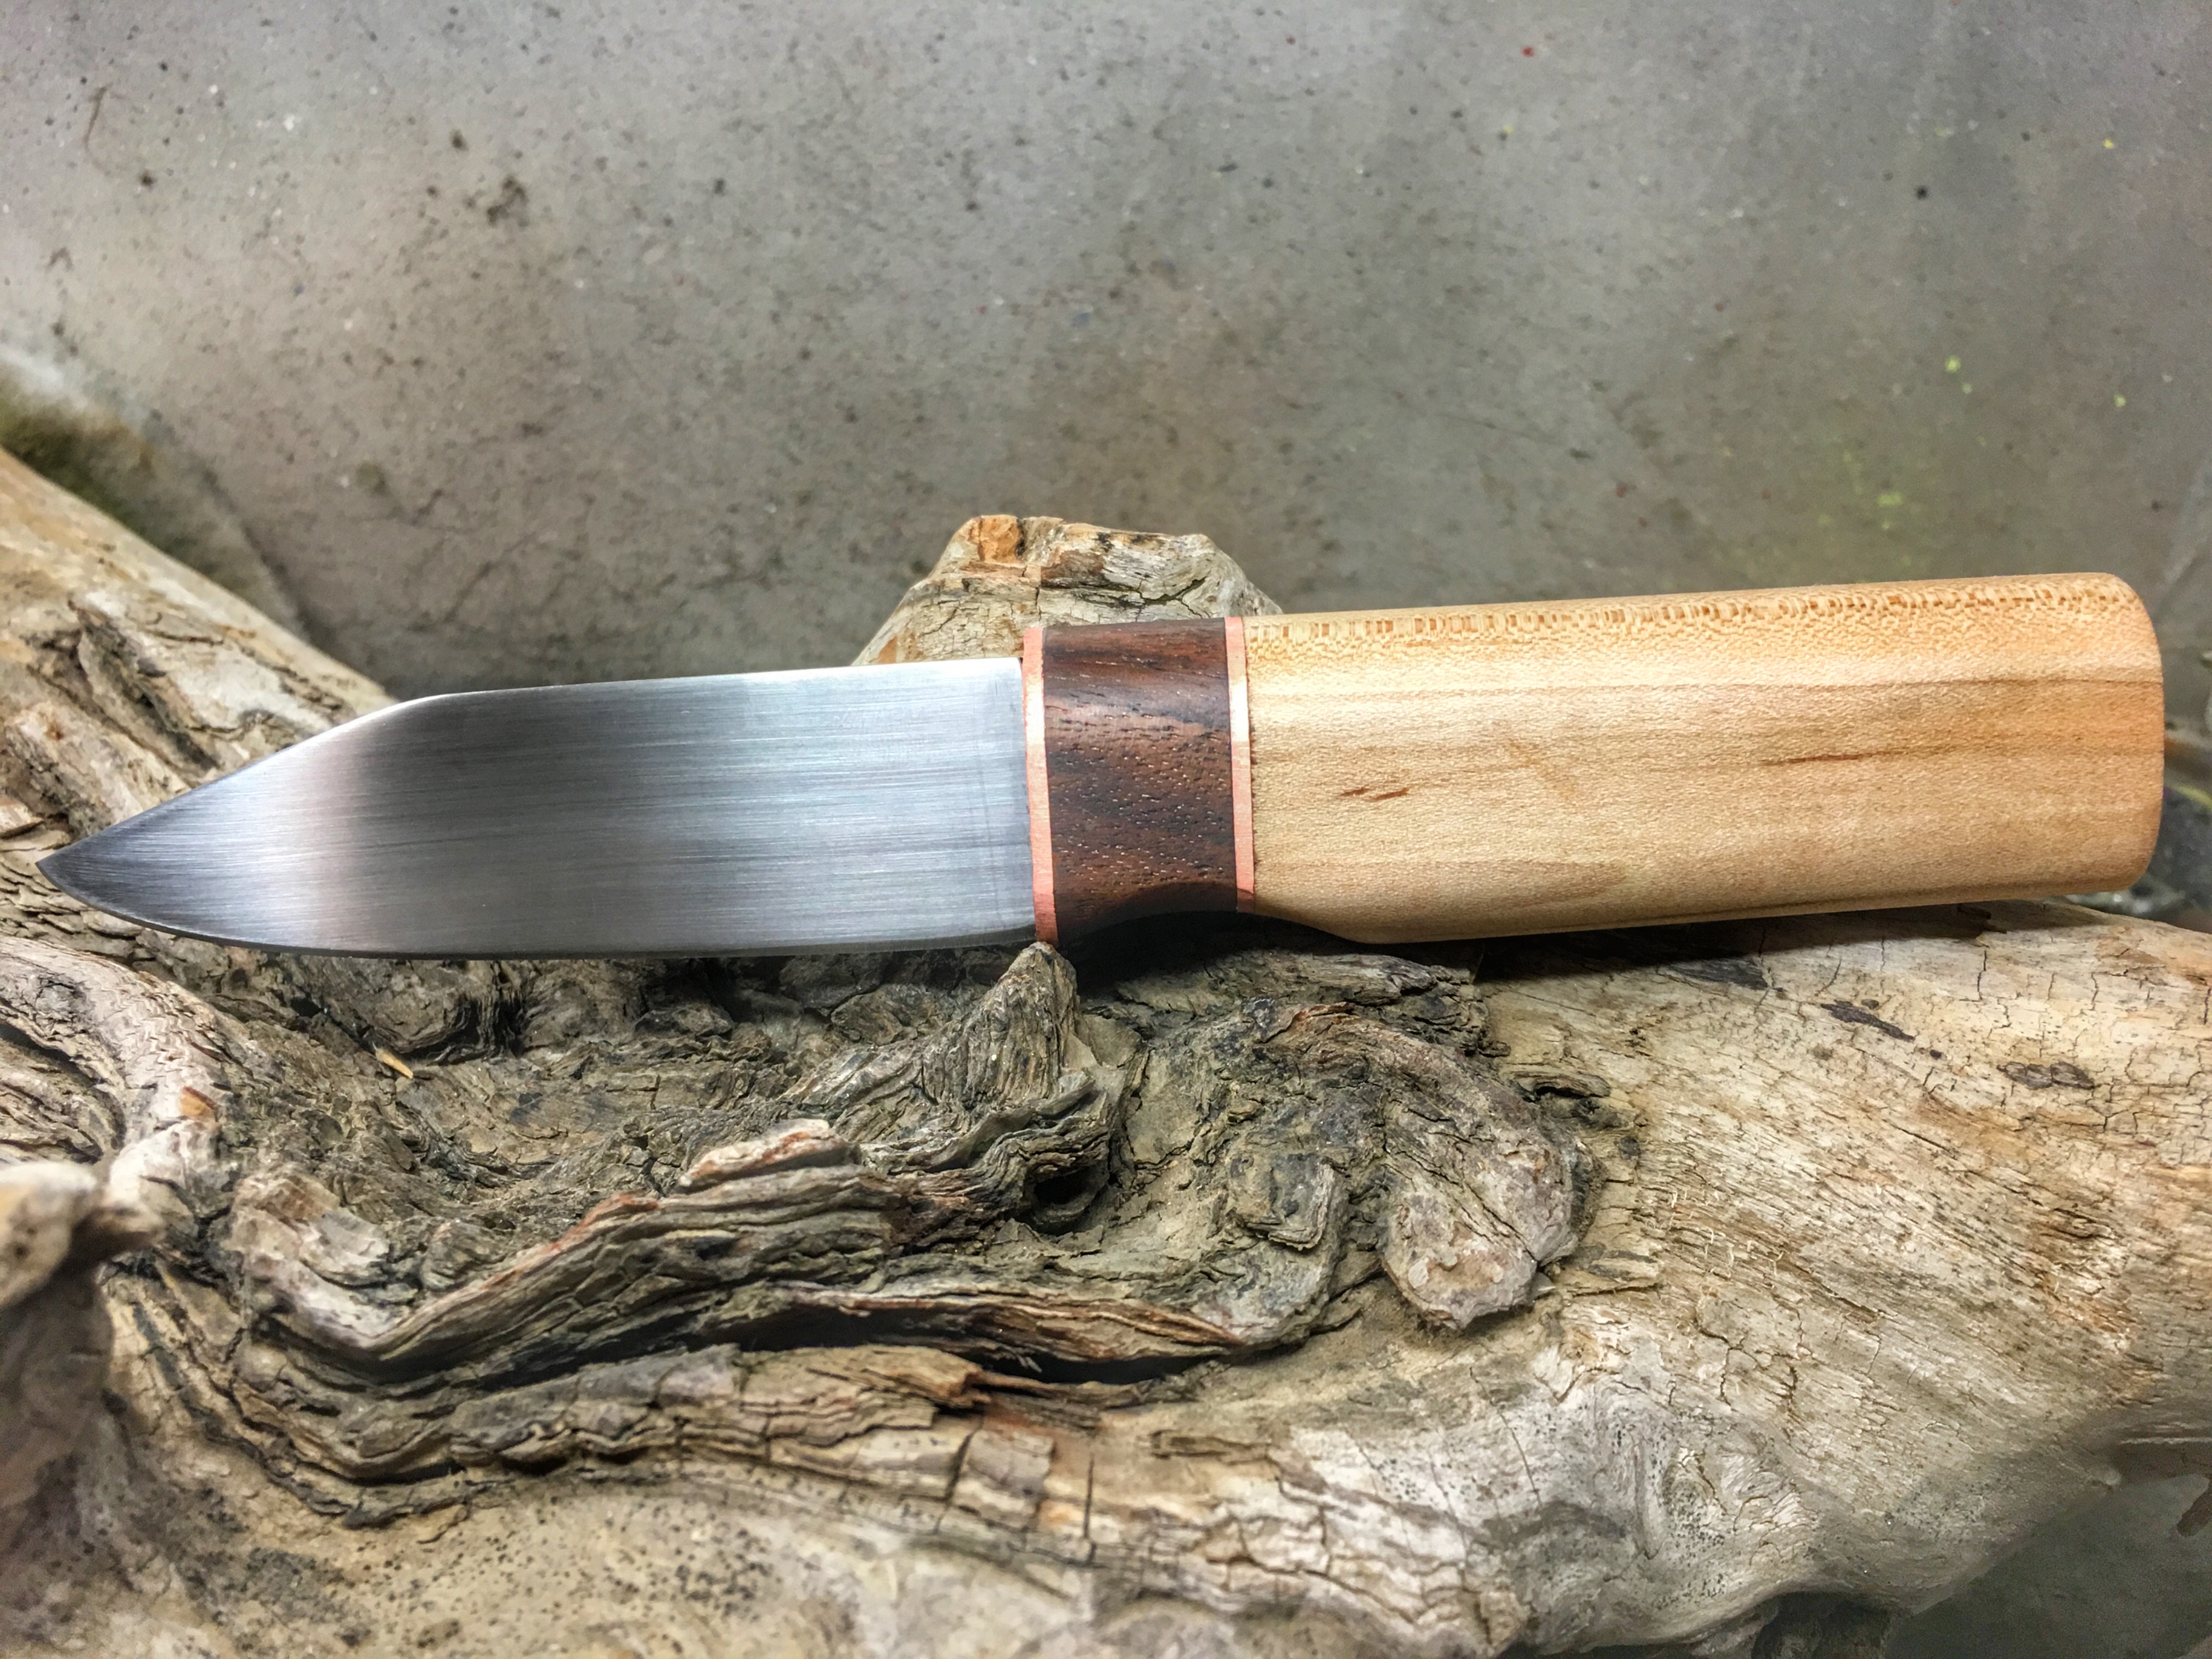
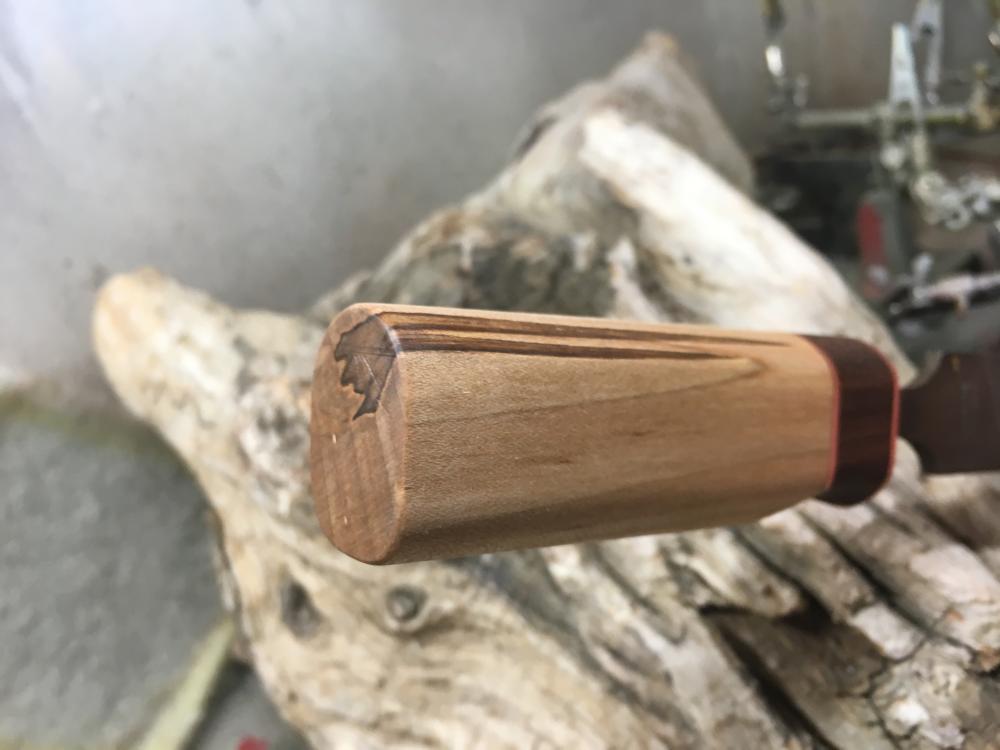
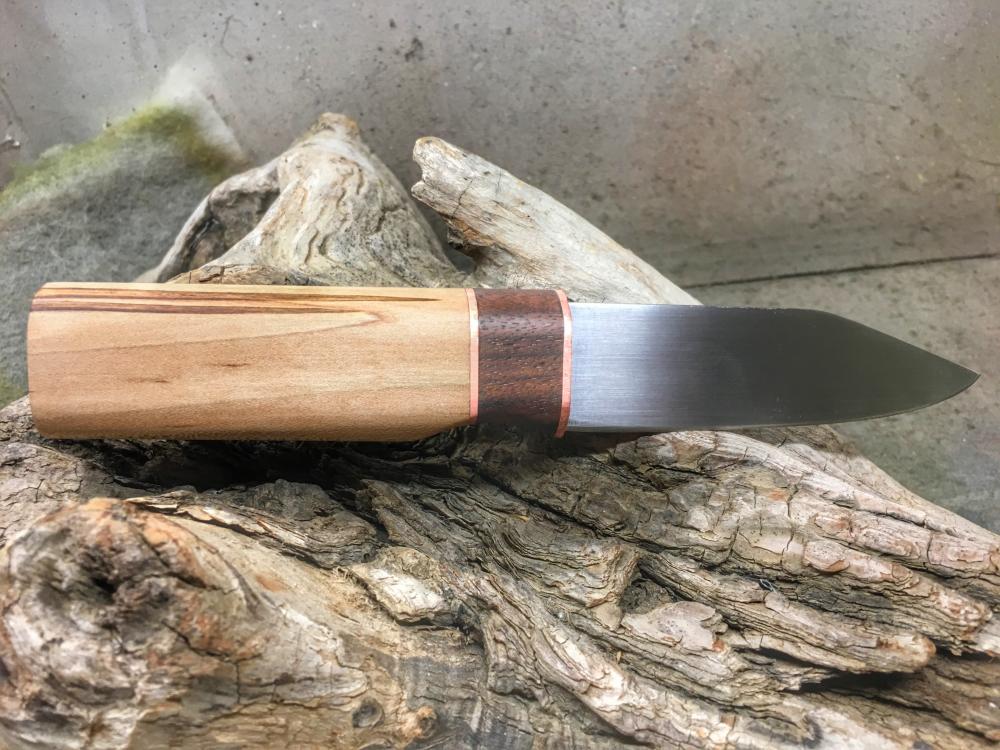
Thanks Jackdawg. As far as the copper corrosion, I honestly don't know. Hopefully, any corrosion can be kept to a bare minimum. Once the Danish Oil is cured? Set? Hardened? Or whatever the appropriate term is, my intention is to buff it and finish over that with something like Renaissance wax, so maybe that will keep the copper clean
-
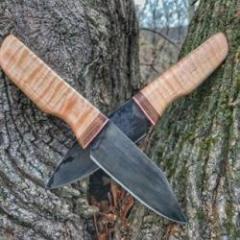
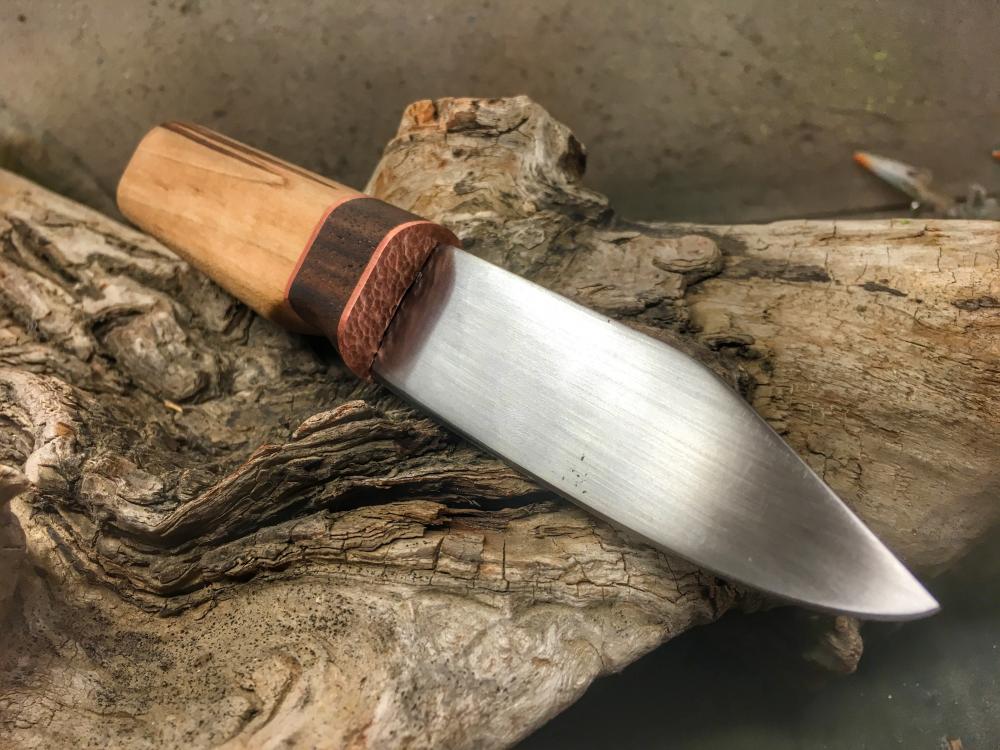
Finished her up today... Decided against a butt cap, as the wood had a nice dark streak in it that gives the maple some extra flair IMO... I I know it isn't perfect, but it's the first knife I've finished with a handle (my first was a "blacksmith knife" and the second didn't survive heat treatment) and I'm proud of it. I'm sure in time I'll look back and wonder why I would show it to you guys, but I think I may have worked my way through at least a small portion of the learning curve with this project. I would like to add that I have never done any woodworking in my life, and ironically, I think the handle turned out better than the blade did almost lol

-
Thanks Dustin. I decided to not do a pin after all... I cut the walnut and maple pieces for the handle last night, as well as the copper for the booster, butt cap, and spacer
-
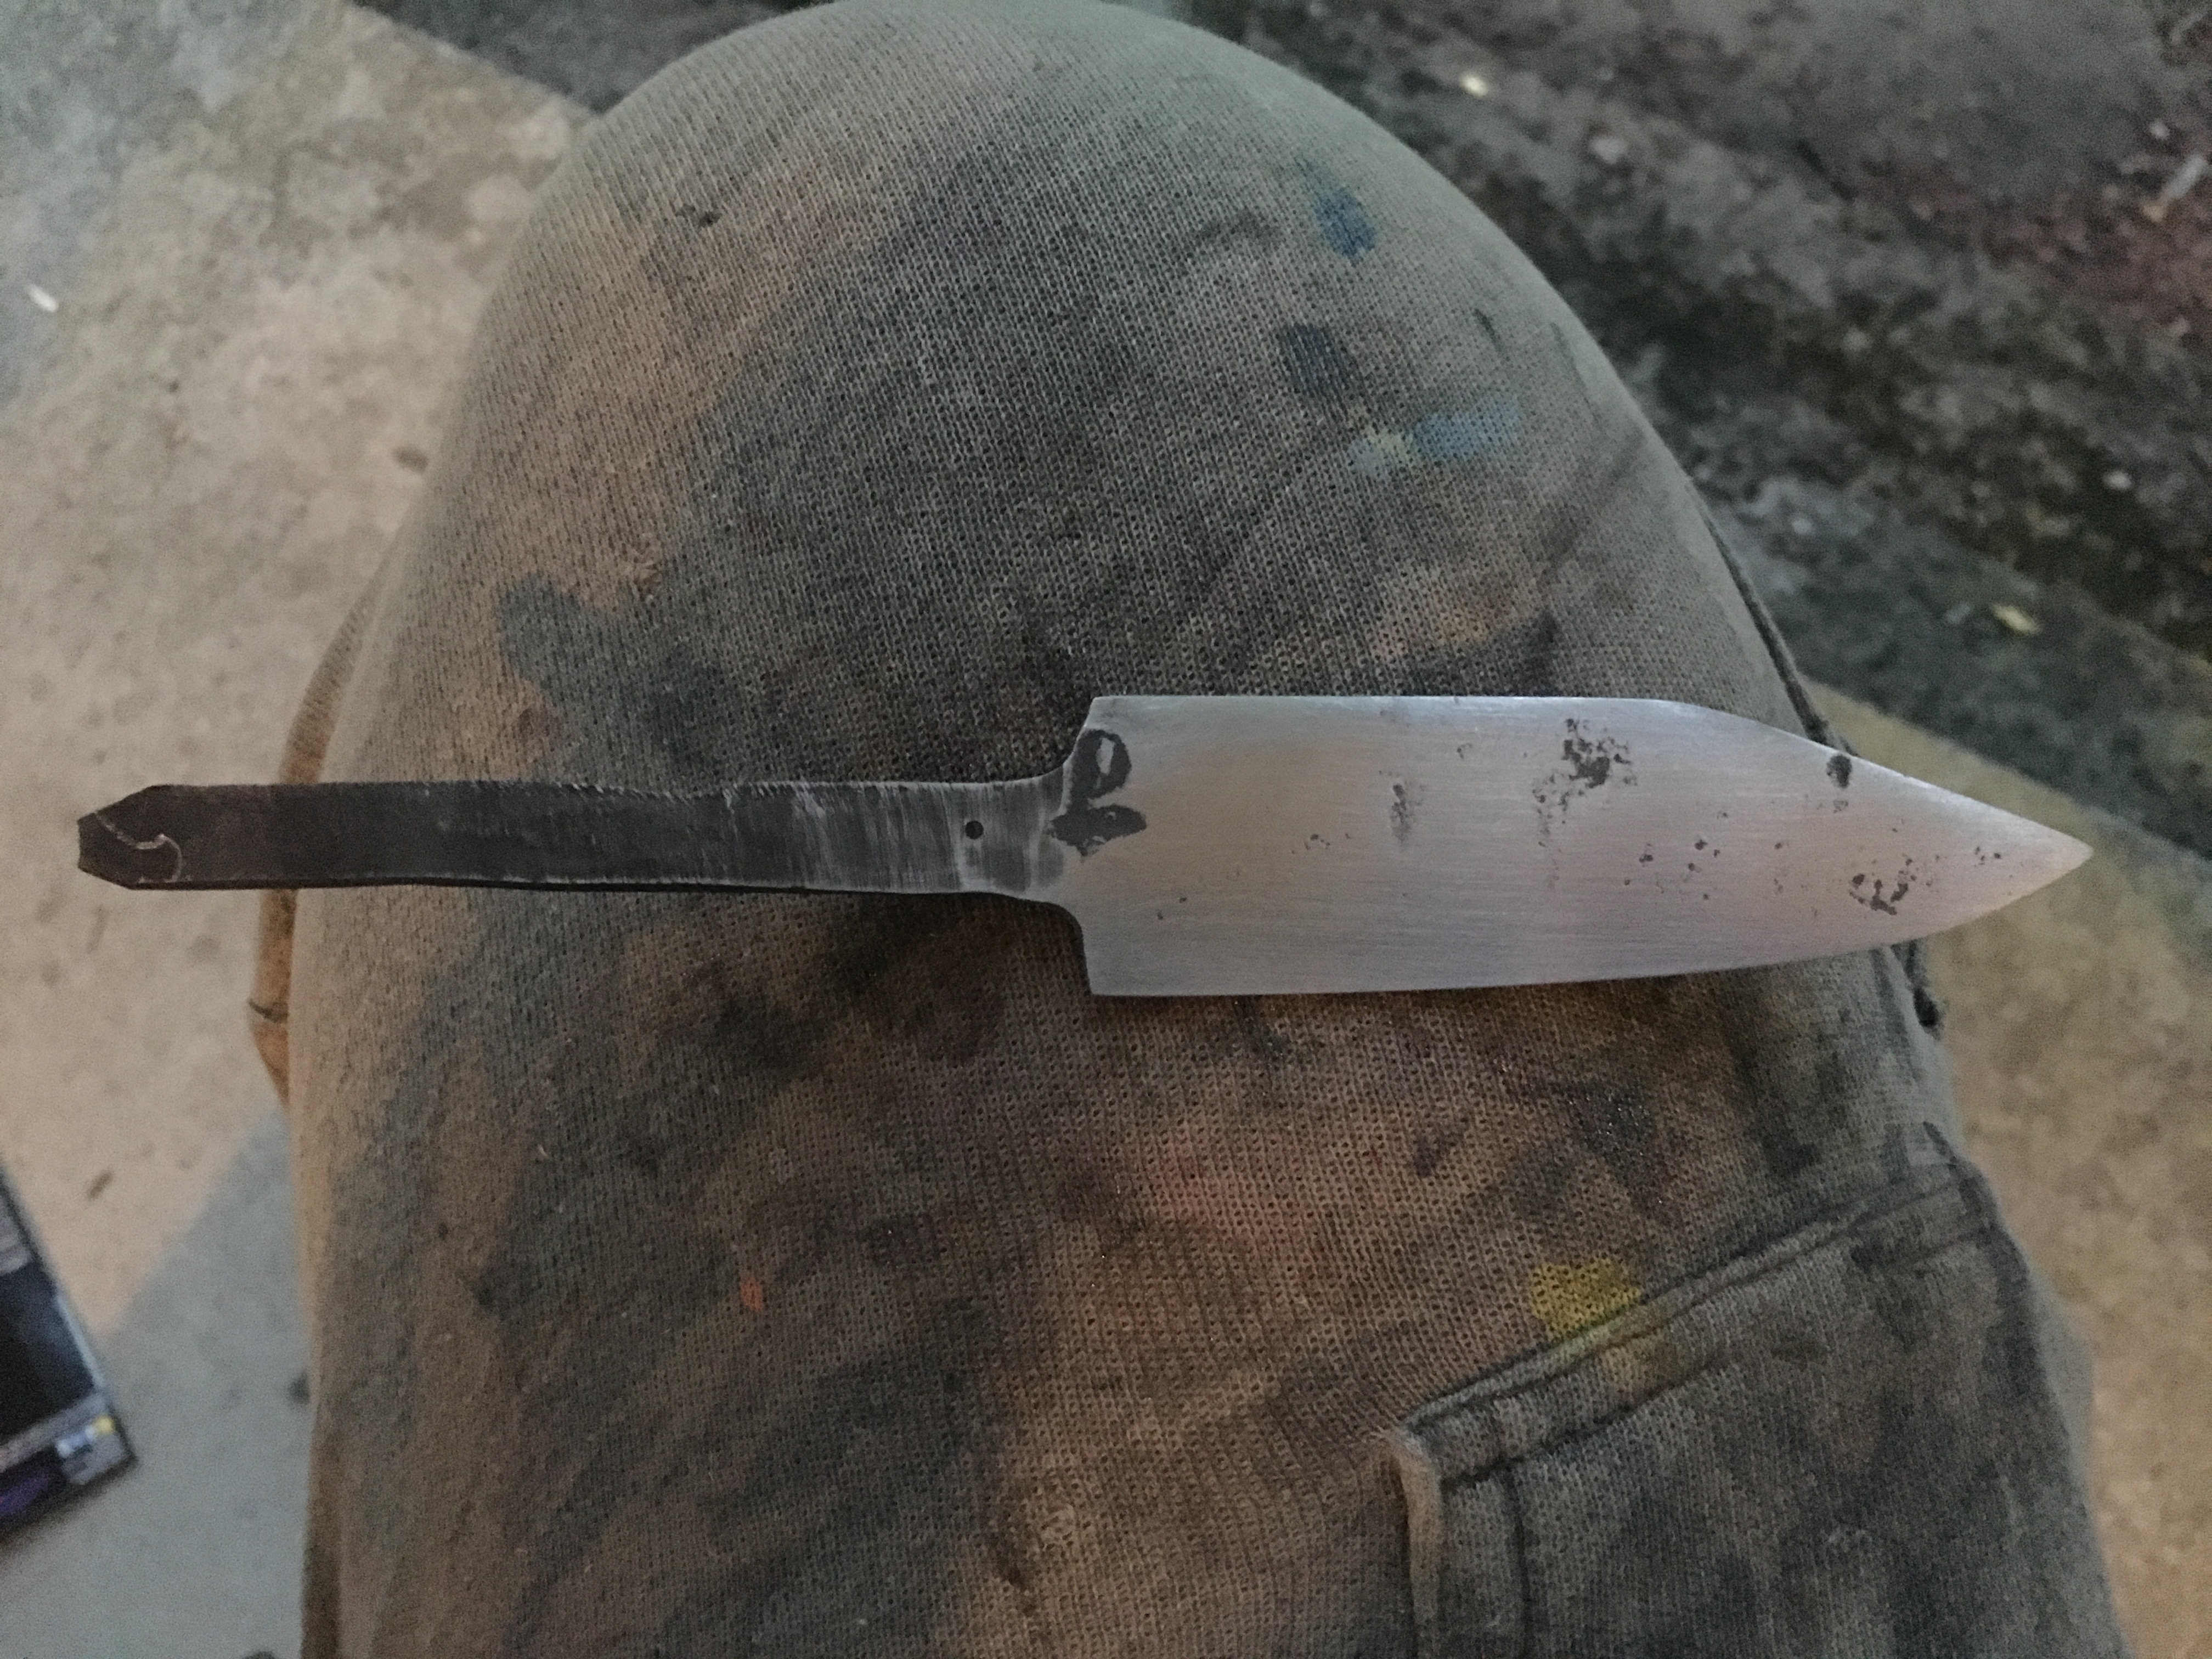
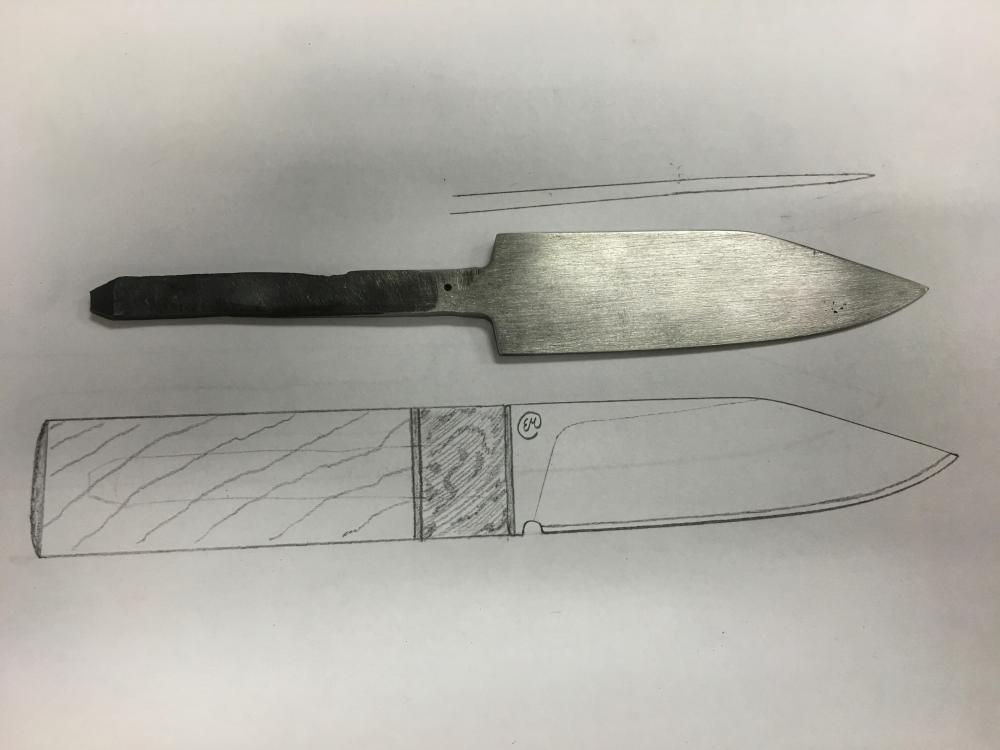
Decided to not go the wild cherry route... Got some walnut and maple for another project, and thought I'd use a bit of both of them... I've attached a pic of the blade draw-filed before heat treatment, and with a concept sketch of what I was going for. I have decided to not have a plunge line or choil. I figured a full flat grind will give me more of the look in wanting with this piece.
-
Working some on this guy this evening... Still have some more grinding to do to thin the spine down and get the last of the forging marks out. It's 52100 from an outer bearing race. This stuff is TOUGH to forge BTW lol... Much harder than the 1095 I've hammered on... Gonna use some Wild Cherry with a brass guard...

-
Thanks for the responses guys... When I get the chance, I'll do two test coupons from the same bar, one with and one without flux to see what, if any, difference it makes...
-
My thought process was that coating the blade with flux would create an oxygen barrier, or at least restrict access to the blade while heating... Again, I'm quite new so this is all just half-baked theories of mine lol Jim, does he mention his reason? I haven't read that book...
-
I hope I didn't put this in the wrong section, but while at work musing about heat treating, decarburization specifically, I wondered if coating the pieces to be heat treated with flux would help prevent decarburization. I did a search here, but didn't find anything specific to using flux as a decarb preventative. I don't imagine it would hurt anything, and would think it a thin enough layer to not affect the cooling curve of the quench, but I'm quite new at this... Has anyone used this "method" before? If so, what sort of results did you have?
-
I think my comment could've been better worded also... I'm very new at knifemaking, so I meant my comment more as a question than a statement. I've seen similar patterning on some blades I've heat treated, and have been pulling my hair out trying to avoid it thinking it has been significant decarburization... BTW, I like those knives you posted...
-
I could be wrong, but to me it kinda looks like decarburization...
-
That's fantastic!!!
-
-
-
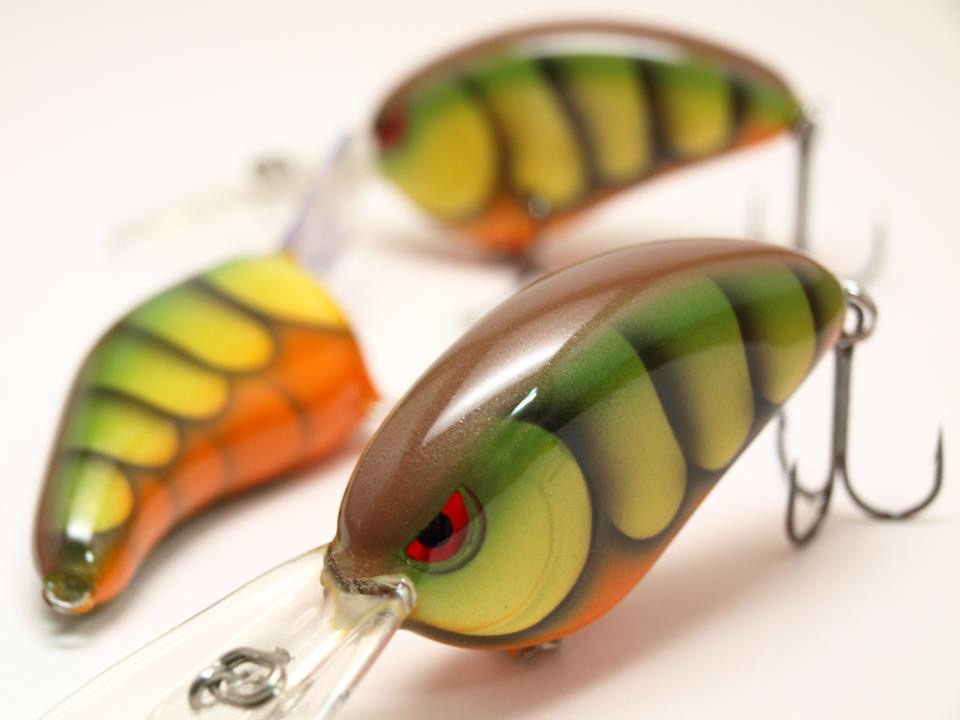
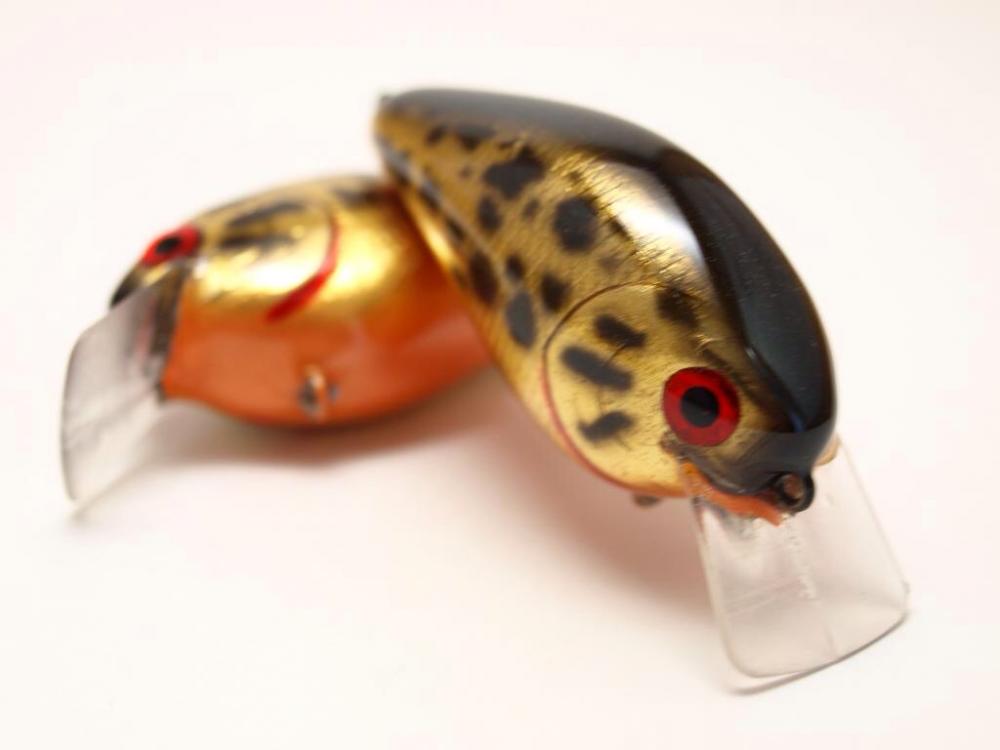
Ugh, my reply disappeared three times! To the OP, if you are working with smaller items like knives and such, a decent lightbox can be made from a cardboard box, some white posterboard, and some tissue paper. Just do a YouTube search for lightbox and you should be able to find some good instructional videos. I attached a few pictures of some fishing lures I've painted to give you an idea of what multiple sources of diffused light can do.
-
Reason I was asking is because I haven't even built my grinder yet... Just getting my ducks into rows so to speak
-
http://heleta.com/abrasives/sanding-belts/9825 I'd never heard of this website before, anyone have any experience with them?
-
What I highlighted can not be stressed enough. Hydraulic presses can cause hurts that don't heal, if you know what I mean. As Charlotte posted above, find plans for a proven, safe design, and follow them. No offense meant, but a hydraulic press is not something one should just throw together without doing a good bit of learning on the forces being subjected to the framework. Even then, I still recommend following a known safe design.
-
Thanks for all the replies everyone
-
I'd imagine you're definitely right, Mr. Coke. I can see it working well for that application with that profile. Any idea of typical materials used to make these? This would be an item I could see being made of a medium carbon or lesser steel due to its application.
-
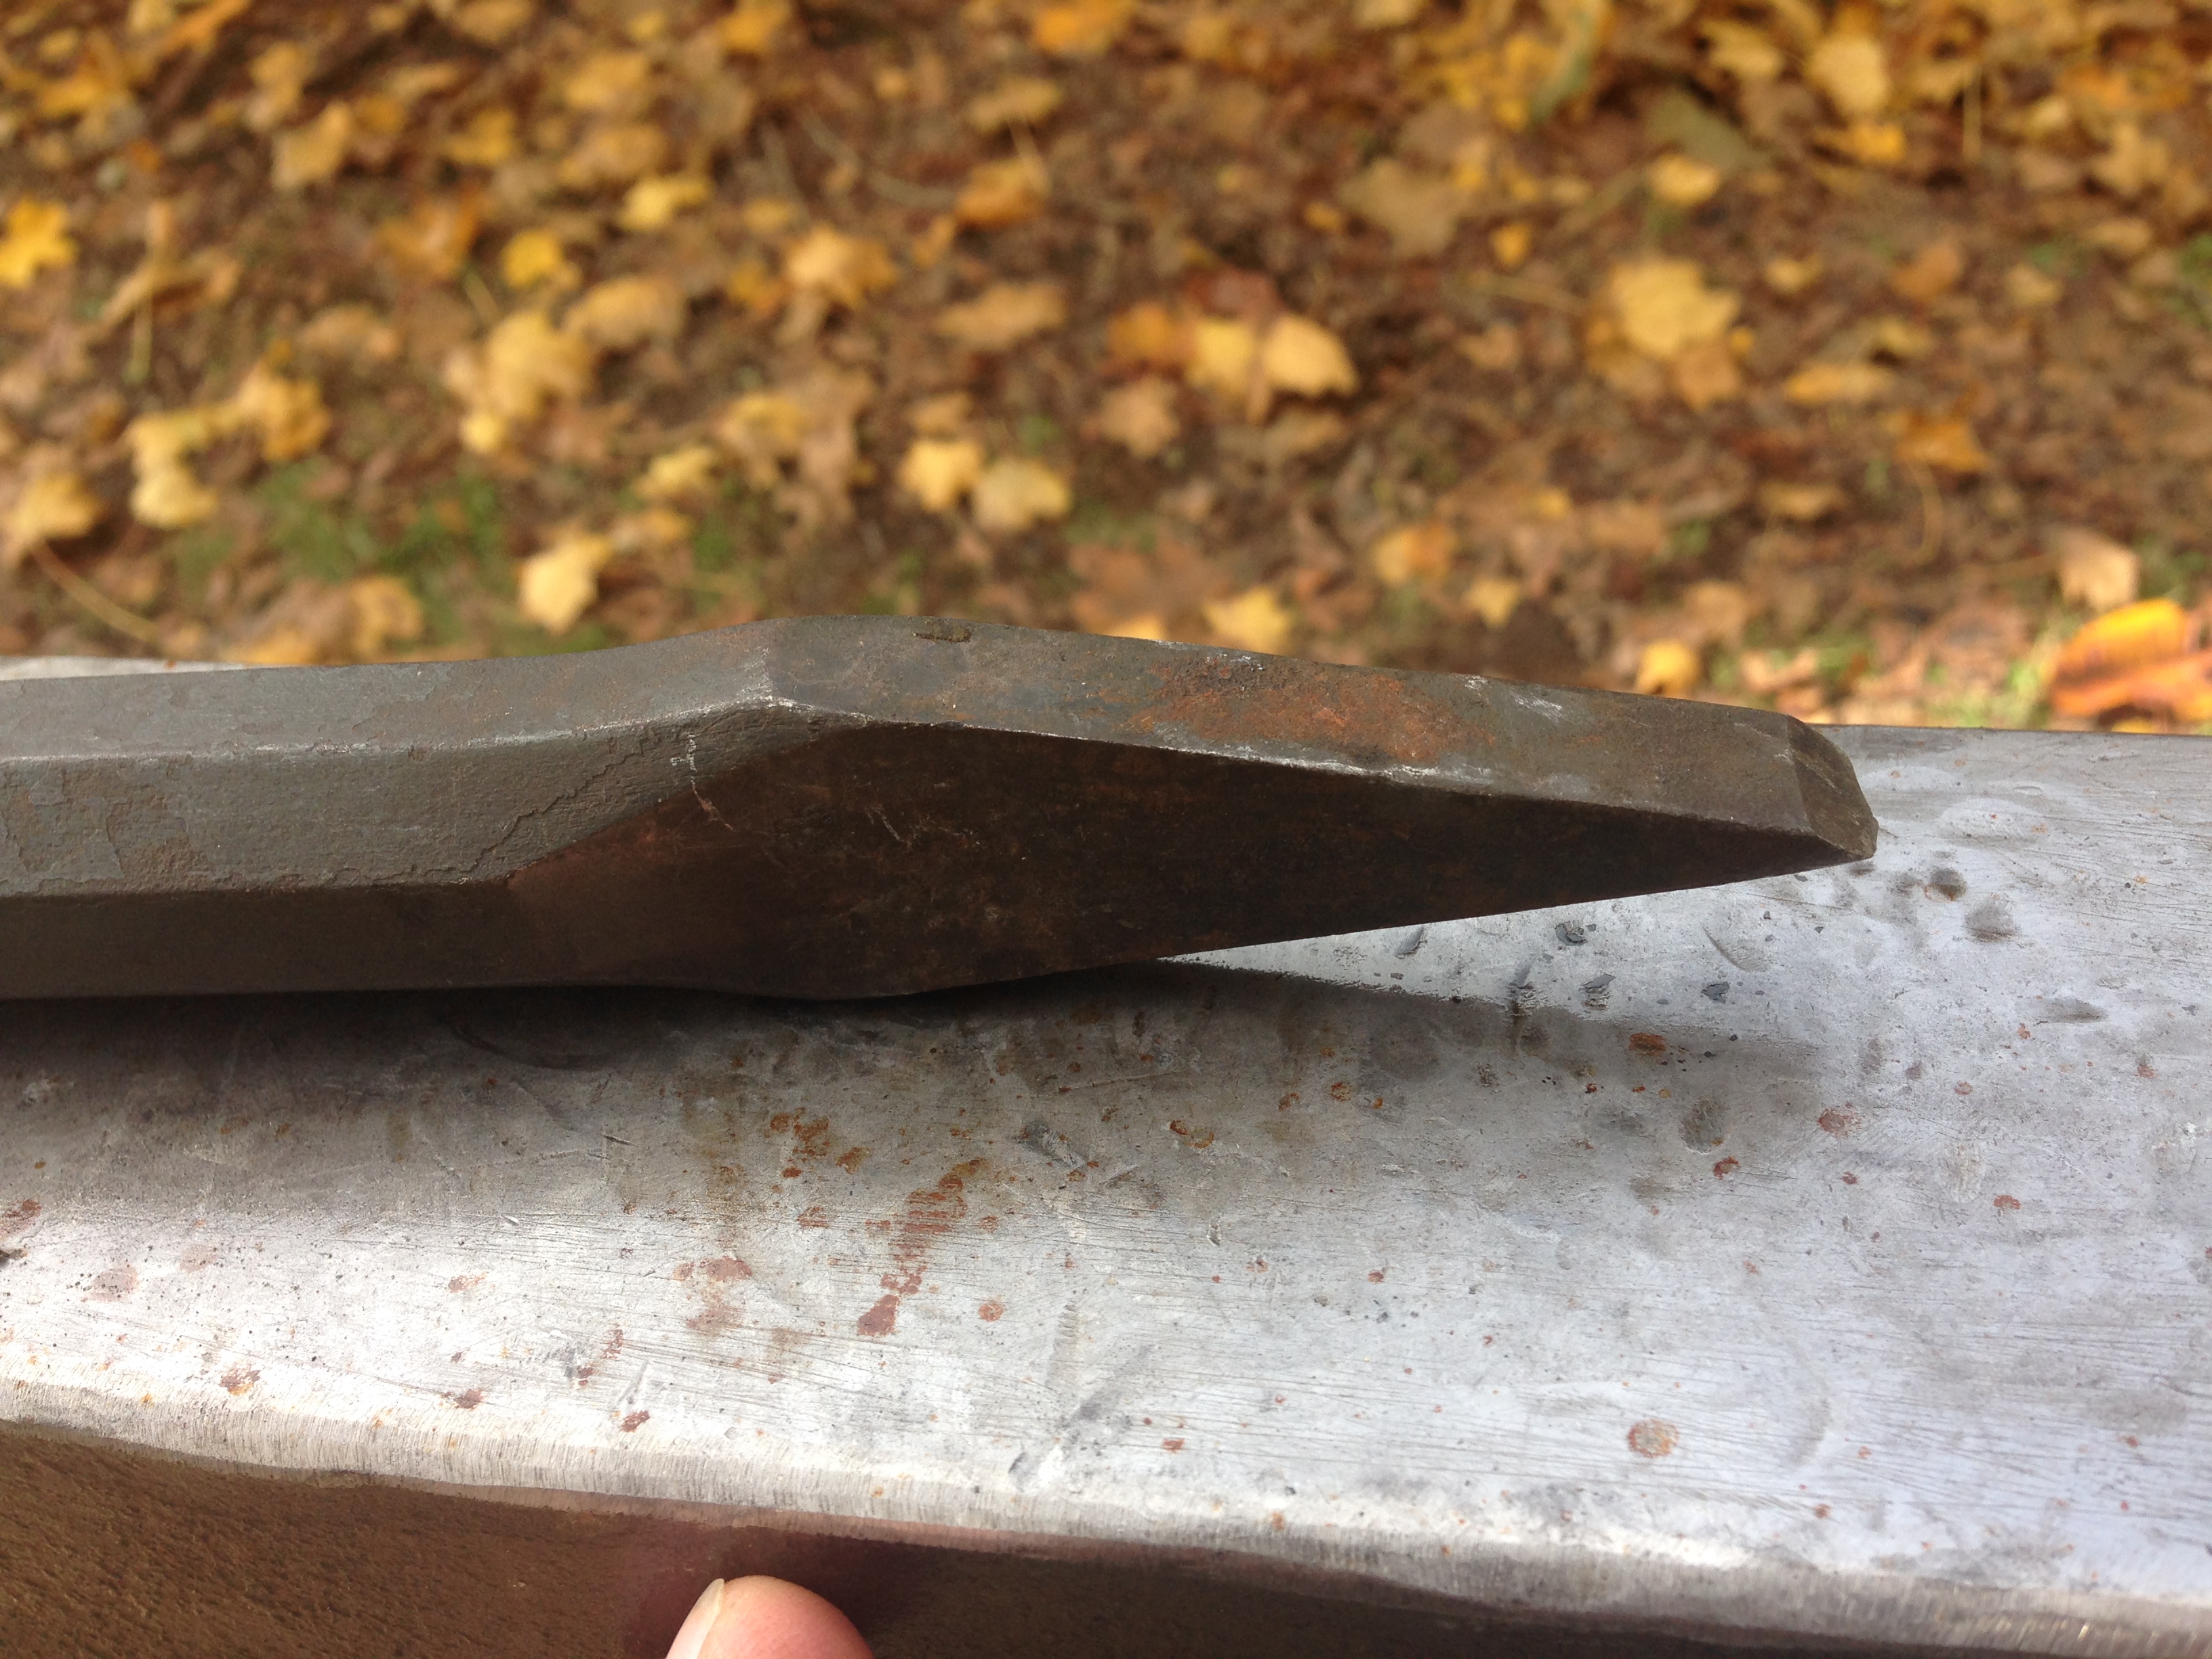
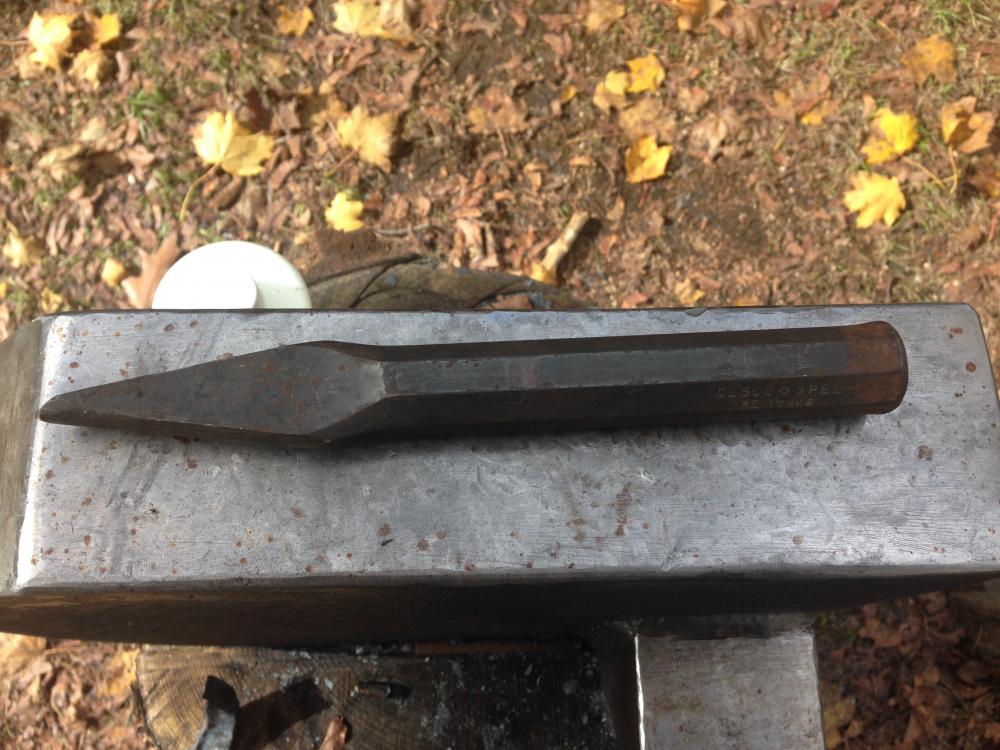
Hey guys, I found a chisel/punch/pointy tool in a local pawn shop that I bought for $1.00, but I've never seen a tool with this sort of profile... Any ideas?


-
Those look great!
-
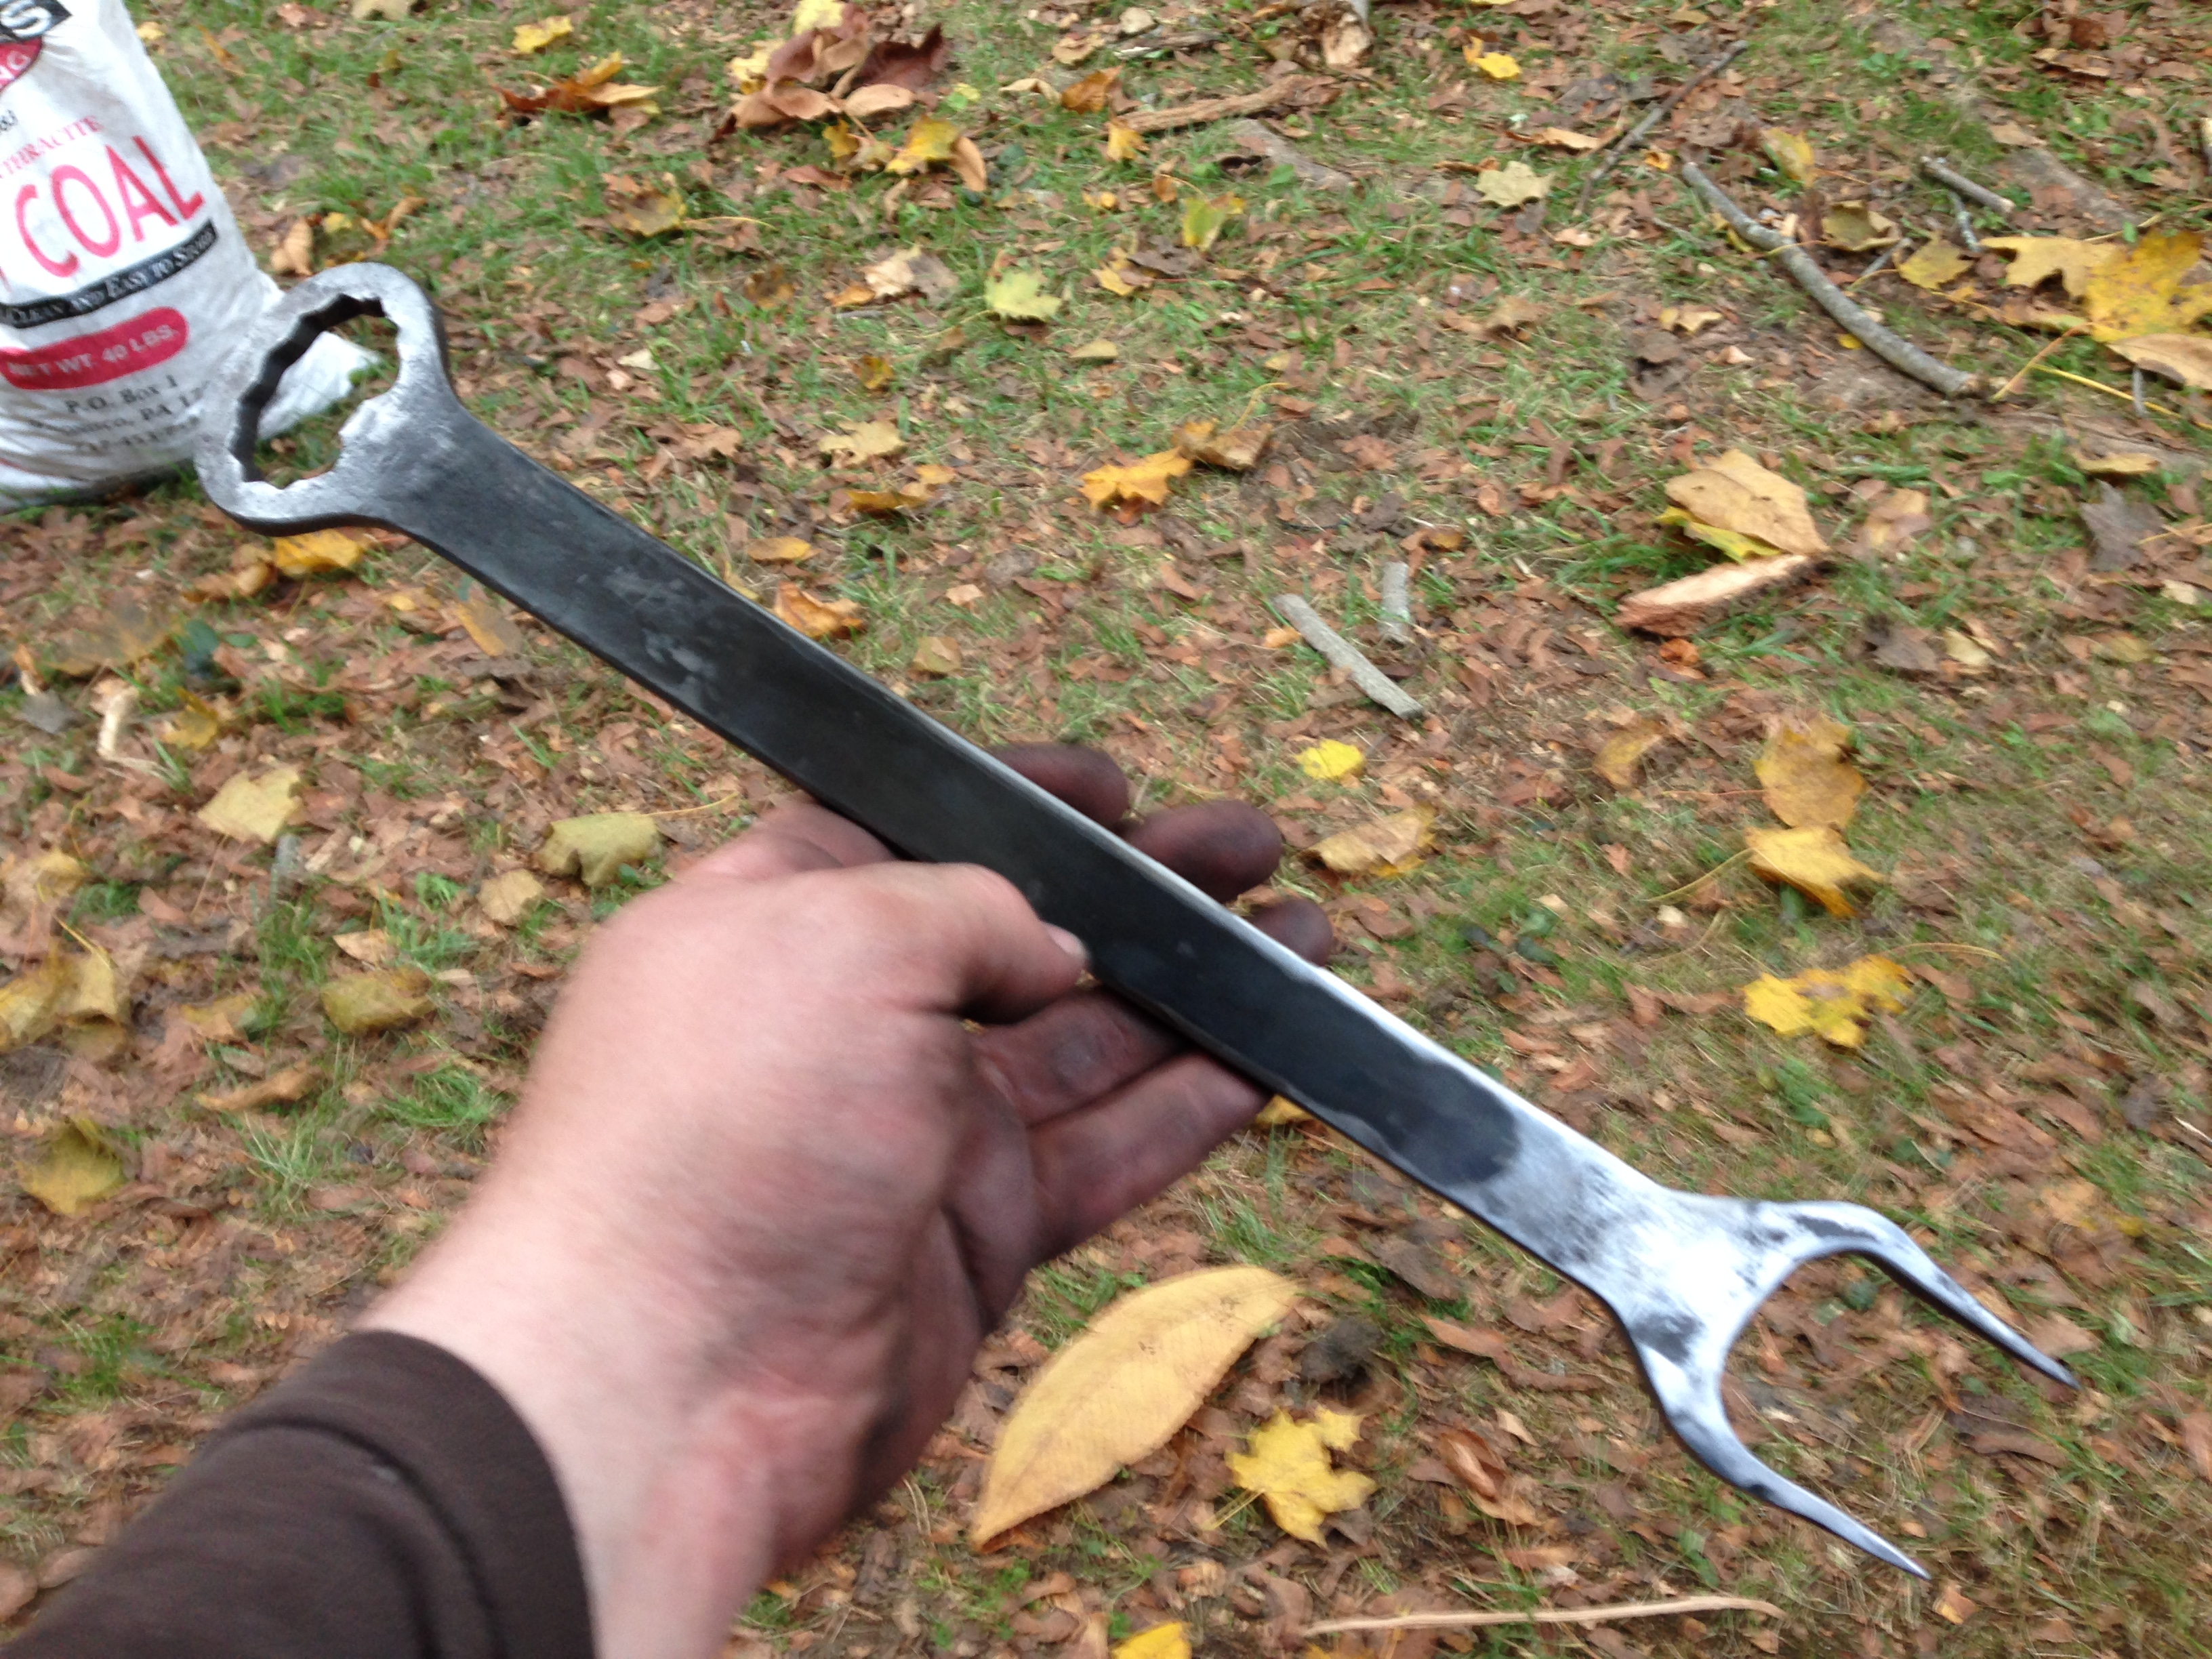
I had a wrench shape cut out of some 1/4" AR scrap to practice making wrench BBQ forks from and figured the box end would make a handy bottle opener...