Adam R
-
Posts
45 -
Joined
-
Last visited
Content Type
Profiles
Forums
Articles
Gallery
Downloads
Events
Everything posted by Adam R
-
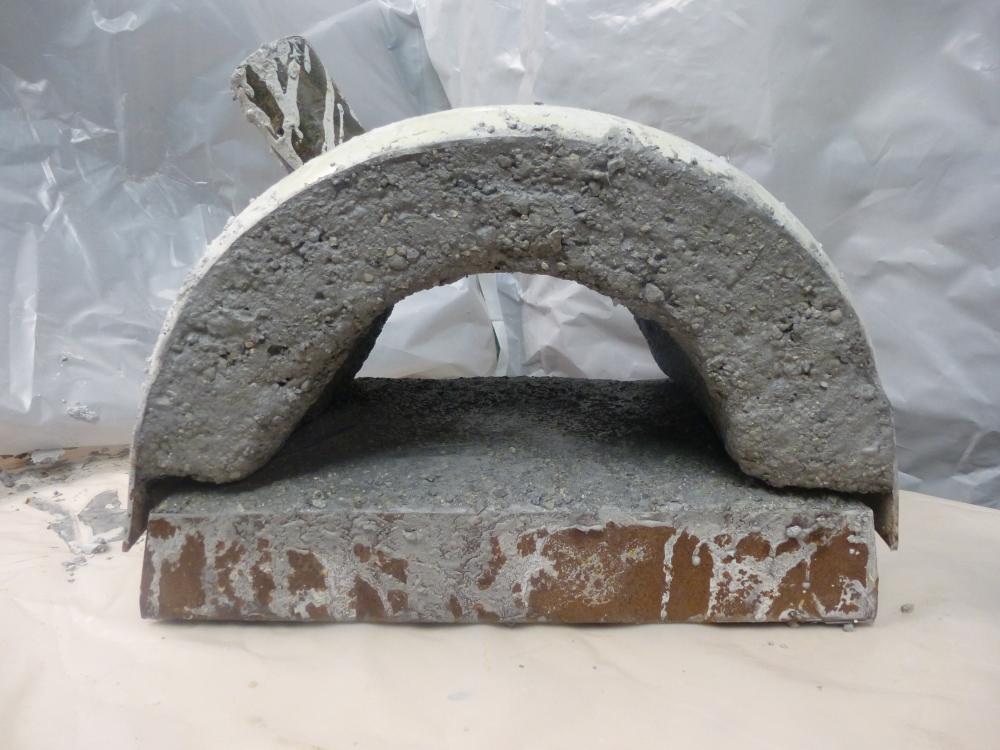
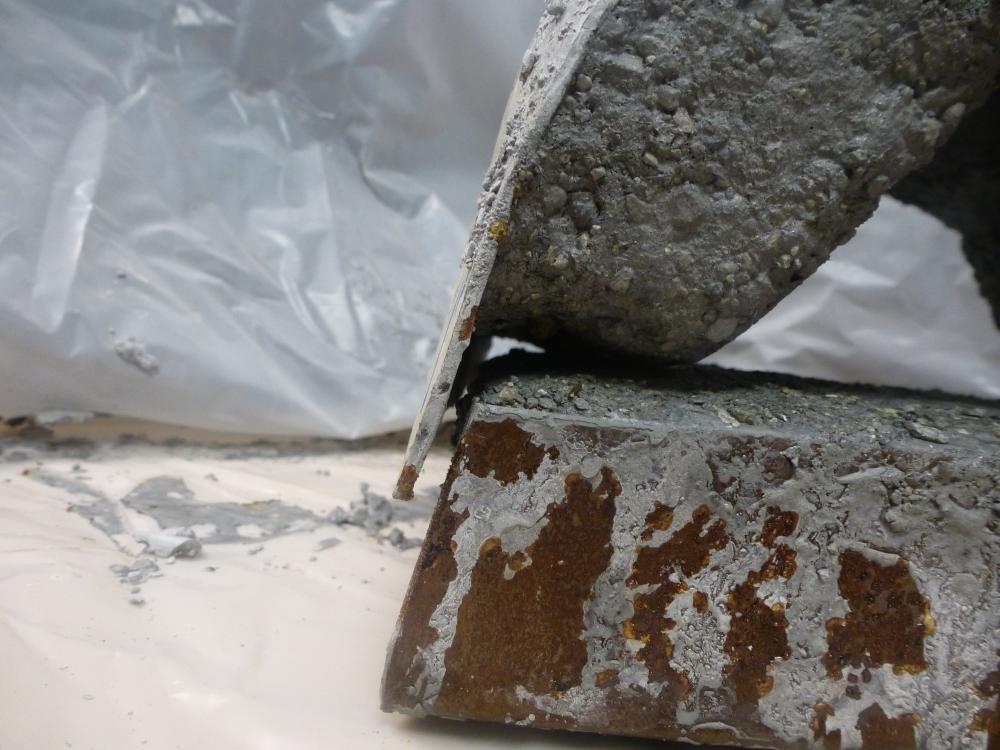
So after some life has happened, here are some pictures of my progress. I've lined it with the ceramic insulation, rigidized, and installed a first coat of castable refractory. The bottom pan was a bit of a trapezoid, and now that I've added the castable, there are some gaps on the sides, and between the top and bottom. I'm thinking that I still want to leave the two pieces separate, after I cure them, for putting on the infrared wash. However, I also want to seal between the two pieces with castable. Not sure exactly the sequence here, any thoughts would be helpful. I'm thinking of possibly laying a layer of castable down on the bottom and putting a barrier of plastic in between, to get the surfaces to "mesh", then take it apart after a couple days of drying. To mix the castable, I poured the dry mix into a large ziploc bag, added the water, then sealed it to mix. I figured this would help to eliminate the dust, which is the biggest health concern associated with this product. It worked pretty good, and then was disposable afterwards. It wasn't spreading very well with a putty knife, so I wound up using my hands with gloves on, and tapping the material into the corners and into a layer. That was as close to vibrating it as I could come up with on short notice and for a thin layer. I covered the pieces, with the wet castable applied, in plastic, to let it slowly dry for a couple days. One of the thicker spots actually took over 24 hours to fully set. I haven't seen it described before, but the castable acted like sand mix concrete with some quarter-inch stones. After I figure out about getting the fit up right between the two pieces, and apply the IR wash, I plan to use zip screws with some bridger strips to hold the two pieces together. The inside dimensions of the forge are about 3 3/4 inches high by 7 3/4 inches wide. Between the insulation and refractory, I have lost a little bit of my desired dimensions, but I can possibly add a little bit of height when I do the next layer of castable, to make the seal.
-
Oberu- that link has some great info. Thanks!
-
I will be taking pictures as I go, and probably posting all at once. I have been reading a lot on safety precautions associated with the forge lining materials before I jump into those processes. I want to make sure I am taking the proper precautions. There is a lot of info on IF about this that should be heeded. I wound up cutting the tank 2" off-center to give myself the option of making the inside a bit taller. After I cut the tank apart, my brother told me he found a disposable helium tank by the dumpster of the clubhouse room where they live. The straight section of the tank is almost exactly the same as the propane tank section I am using. The wall is thinner so would have been easier to cut. If modified/squished appropriately, you could make an oval forge with the helium tank that is almost as big as the D-shape I am starting. I made a pan out of some light sheet metal that will hold the insulation for the bottom. I have stalled out a bit on progress after the weekend with other obligations and safety research, but hope to get some pictures uploaded next week. Not sure if the D-shape will concentrate the heat in the middle. That may be an advantage if forge welding temps are acheivable. I still could make an oval out of the pieces I have, but D-shape is growing on me. Anybody know what sort of drying times that should be observed before firing the forge for the castable refractory? I imagine it should be a couple days to dry, then turn the burner on very low for a few minutes to get the forge warm, turn off, seal with fire bricks to retain heat, repeat with increasing heat/time for a couple cycles. I haven's found much info here.
-
BoiI method? I'm intrigued. We have the thornless variety. When researching toxicity, I found this variety is nontoxic, and almost weed like in its overuse in urban areas. Now that I am paying attention, I see it all over.
-
I have been using honey locust from when the groundskeeper at work trims the trees. I was originally thinking to carve it for spoons, but it was so tough and stringy I figured it would make a good handle. I've used it for one handle with good success, and have some rough blanks drying for a few months.
-
The (Advancer) Nitride bonded shelf is only about 5/16" thick, so I would think it wouldn't take too long to heat up. I am not very familiar with either product. Knowing how strongly people have advised against split hard fire brick, I figured almost anything would be an improvement. Getting something free especially when it is a product that is extremely expensive ($190 for 12"x24") tends to get a newbie excited. It is possible the sample I was given is a specialized product for what I don't know. Small forges are not the suppliers main business. The spec sheet said it was rated to 2600 degrees. On the subject of high alumina kiln shelf, I found on Continental Clay's website they have a reasonably priced shelf rated to cone 11, and a premium alumina shelf rated to cone 13 for twice as much. I haven't seen any discussion of different grades. From the earlier comments I would imagine the lower grade with a kiln wash is recommended. If I have missed the answer somewhere, maybe it will help someone else that hasn't asked. I will try to find the mix for Frosty's kiln wash, or pm him. I read over the forge 101 section again and found the answer to the castable question. I know I read it before, but I wasn't looking for that question apparently.
-
I called around for kiln shelf, and wasn't able to find a good local source. I would check users as TP suggested in the future. I wanted to get the other supplies before they closed early. I placed an order, and met the salesman I had talked to. While we were chatting he mentioned that he some offcuts that were available. He cut me a piece of nitride bonded silicon carbide to the dimensions of my planned floor size. He gave it and a remnant of silicon carbide shelf for testing purposes. As it turns out he and his grandson are going to be working on a propane forge build in the near future. The small quantities of ceramic blanket were offcuts and thus free too. Maybe this part belongs in the "It followed me home" section. It never hurts to chat with your local supplier! I picked up a bag (55 lb) of Missou castable plus (3000 degree). While I was there. He wanted me to make sure this was the right product before I opened it. As they would take it back unopened. Please advise on this as a durability layer. It seems similar to the recommendation from other posts. I am fine with using and keeping/sharing with other local folks especially since I have received so much for free on this build.
-
Great input to think about. My forge will reside in an old grill with 1/4"x1" steel straps to support it. Although with the lower height it may fit inside on the original grates. That should be enough support, and if the outside of the forge is getting hot enough to damage cast iron, my insulation needs improvement I would think. You all have me thinking of a D shape now and flattening the lower half of my tank. I got some prices on kiln shelf. 5/8"x12"x24" silicon carbide for $68 (no broken pieces in stock 3/4" in the same size $96). That does seem expensive, but I can cut it (can't I with a wet tile saw?) and make 3, 8" pieces which would make 3 different forge floors. They didn't have high alumina?? They also only sell castable refractory in 50lb bags $48 (no split open bags). If my shelf covers the floor would I need castable? If castable is that important, I can find it in smaller quantities online. If I install the durablanket before I attached the two halves i could fire the digitizer as Mikey described with a plumbers torch I would imagine. Thanks for the great info I have the day off tomorrow and might pull the trigger on some supplies. Any more thoughts are greatly appreciated.
-
Latticino- The different rating for the layer was something I hadn't considered. I like that idea. There are some Mizzou 3000 degree castable refractory materials. I will check on pricing and quantities available from my supplier. I think the dual rigidizer application might help keep the shape of the layers thus saving the air pockets/insulation value. Any idea on how to fire/cure the rigidizer other than just air dry? bigb- I somehow missed or forgot about your post. That is an interesting idea as well. It reduces my internal volume even more. That will take some more thought.
-
I am in the planning stages of a new propane forge. My first build was a brick pile that I have used for a few months. All of the soft bricks are cracked, but it has provided some valuable experience. I have read many posts on forge design here as well as Wayne Coe, Zoeller and other sites. I have contacted a local refractory supply company regarding basic information, but wanted to make sure I am on the right track before I start ordering supplies. To start, the brick pile has shown me that I need a bigger chamber for making scrolls etc. than the 4 1/2 square x 9 I have right now. I want to be able to start making some architectural pieces, as well as the normal blacksmith/woodworking tools that so many of us wanted to make which led us to this addiction. I don't want to make the over-sized mistake that has been mentioned so often. I have had the chance to use a disposable helium bottle forge with 1" of insulation. The interior size 7 1/2" ish diameter by about 12" gave me the capacity that I think I can live with. Here are some general specs for forge lining that I have gleaned. Please let me know where I need to adjust: Insulation- 2) 1" layers of 8lb. Durablanket. the local supplier has that brand in 2300 and 2600 degree. I have read the temp rating used is not as important as the coatings that will make it durable and reflective. The 2300 is significantly cheaper, but if the 2600 is going to pay for itself over the life of the liner that will be what I choose. Rigidizer- Ludox Collidil Silica is available in as small a quantity as a pint. I have read that it should be applied between the insulation layers and "fired" to cure. I seem to recall someone mentioning they fired by placing the forge in an old oven. That isn't really an option since the only one I have is in my kitchen, and the warnings I have been reading about liner materials make me want to do all of the work outside away from the kiddos. Forge floor- I mentioned the High Alumina kiln shelf that Frosty recommends to the salesman that I talked to, and he said it was very expensive, and that he recommended a #1 Split fire brick. I know that has been STRONGLY recommended against here, but he was talking to me while he waited for his lunch to arrive so I didn't push harder on that point. I was going to call for more definitive pricing, but thought someone here will probably have a recommended supplier. Or at least some pointers. Kiln Wash- Here is one of the places my understanding is incomplete. Some posts recommend going straight to a kiln wash, while others say to apply a castable refractory first. I would like to make the surfaces as efficient, durable, and long lasting as reasonable. I was told there was a Zirconium kiln wash (not sure of the brand) available that is $3.90 lb. for dry mix. The salseman recommended 1/8" thickness as an reflective surface. There is probably a spec sheet available, but not on their website. Forge body- You were no doubt thinking at some point, "Where is this kid going to put his forge lining?" This is where I am diverging slightly from some standard forges. I was able to purchase an old 20 lb propane cylinder from my local propane supplier for $1, which I suspect went to the vending machine. That being said I am not married to the thing so I could skip using it for this build entirely. One of the problems that I have seen in other posts is that the chamber of a 12" diameter by rounded 12" (the whole cylinder) lined as described above (8"x 12" roughly finish) is around 603 cubic inches. This is way over-sized for the projects that I am likely to build. Mikey mentioned in his Forges 101 thread that oval shapes are an improvement on the tube forge. I ran a calculation on a 6"x 8" oval shaped cylinder 10" long and got a volume of 377 cubic inches. If you throw in a kiln shelf, that is pretty close to the volume where it is possible to forge weld with a 3/4" Frosty-T burner that I already have made. My thought is that if I cut the ends off at 10" then cut an inch strip out of each side, I would have a more oval shape that would get the volume and forge chamber that I think I need at this time. If I cut some relief cuts in the outer edges I could flatten the top and bottom to make it more oval shaped still. I imagine there would be a point at which the ceramic insulation would not want to support itself. There would probably also be some diminishing heat reflection/circulation as the shape became too flat. After the shape is made and possibly lined, I would probably rivet the two halves back together by overlapping the one inch on both sides instead of removing them all together. The burner will be attached through the top about 45 degrees off of vertical. If you all don't think I am too crazy I am planning on just the one burner. Front and back closures will start as fire bricks until I learn what I really need for pass through and access. This turned out to be a really long post. Thanks for reading this far. I figured it would be a good idea to mention as much info as possible in one place instead of a liner thread, and a forge shape thread.
-
So I have used the forge fairly successfully a few times. Have held the steel while the older kids forged a couple flat tapers ( that's harder than it looks dad). I haven't fired it up the for a few weeks, but I did this afternoon and it won't come up to temp. I am not getting a good roar out of it like before. Am using a new tank, so that shouldn't be an issue. I am not seeing the blue green flame like before, and the DB is orange/shooting out 8-12 inches. Adjustment of the burner depth doesn't seem to make a difference, nor does opening/closing the openings. There are some cracks in the bricks, but none that weren't there last time when I forged and heat treated a hatchet from an old hammer and other tool steels. Wind is not an issue today. Just for fun I was trying to do a demo for some out of town relatives. Any thoughts or suggestions appreciated.
-
Tried out the burner depth adjustment (1 1\2" ultimately). It worked great! The cold spot is gone, and I was able to turn down the gas pressure once I got up to temp. I'm still only getting to the high orange range. Not sure if I should really expect to get more from the above forge. The consistent temp is nice for having several pieces in the forge at a time without needing to worry about melting. Not sure exactly the color of the dragon's breath since I have been working outside during the evening. I do know that the arm hair gets singed within about 6-8" straight out and 12" or so above. The flame seems to be blue/green to orange. Opening the front and back really helped as well to get things warmed up. Then I closed the back, and slowly closed the front like suggested. The grill lid and a strategically placed fire brick seems to have conquered most of my wind issues, but I will definitely keep the coffee can idea in mind for later. While I am still playing with this forge, the materials for a ceramic insulation lined forge are on the list for the not so distant future. I have been discussing this forge, and experiences with my brother who was thinking about a brick pile. He is going to skip the pile and jump right to the next level. Maybe someone else will do the same.
-
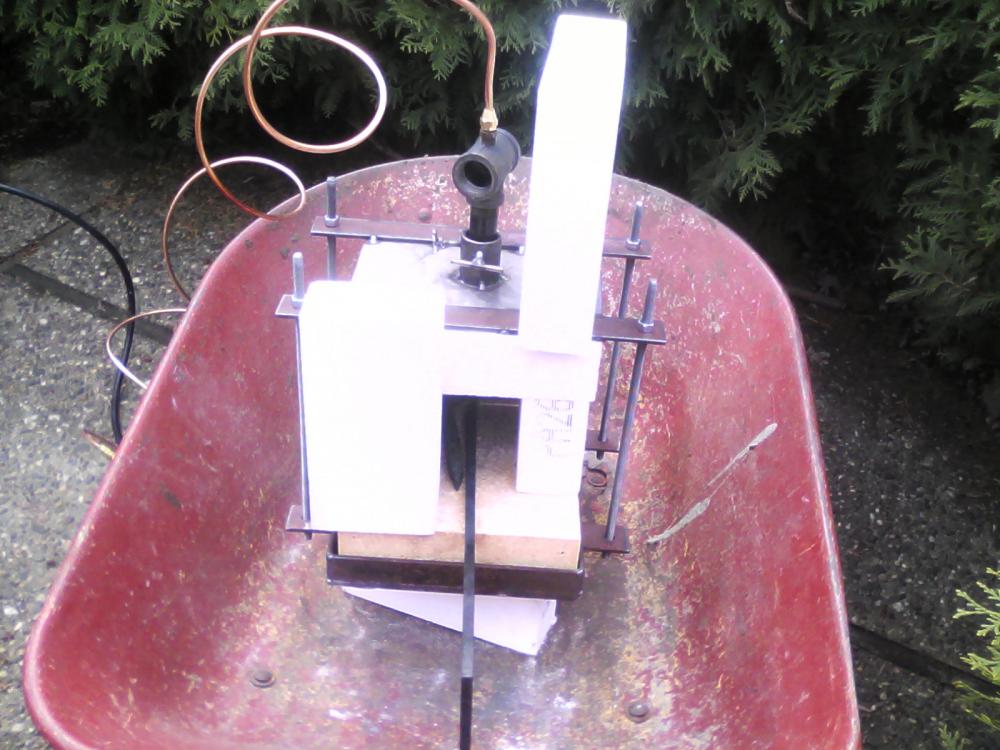
I've had some life happen, but am finally getting back to tuning the forge. I made the 1/2" burner and have eliminated the back burn issue. I have trimmed the MIG tip which seemed to improve the performance. I think I may need to trim a bit more. My flame seems to be fluttering a bit, not the steady roar that Frosty has described. I also have installed the forge in an old grill (after a good washing to eliminate the grease fire potential). The cover seemed to work fairly well as a wind shield with some decent wind. Will see how it work in the future. I am seeing the limitations of the hard fire brick acting as a heat sink. I am thinking this may be the reason metal is taking a while to get armed up. I am new to gassers. Is it normal to have a spot directly under a vertical burner that is cold on the metal? I was trying to make a horse head out of 3/16x1" mild steel and it seemed as though tstock directly below the burner was darker than either side. A side note, the bushes seen in the pictures have been removed (some of the mentioned life) to get rid of the fire danger/clean up the yard.
-
Well that helps tremendously. I can make a half inch burner on my lunch break tomorrow, and give it another try with a wind screen. My thought with using the brick pile was to start with something small to figure out what I need. I have seen a lot of people start way too big, then not be able to get up to temp. With the way I designed my current frame, I can get the chamber to 6.5" x 4.5" x 9". That would give me 263.25 cu according to a volume calculator. I should at least be able to get some use out of it this forge with my current supplies. I will save the 3/4" burner for the next one.
-
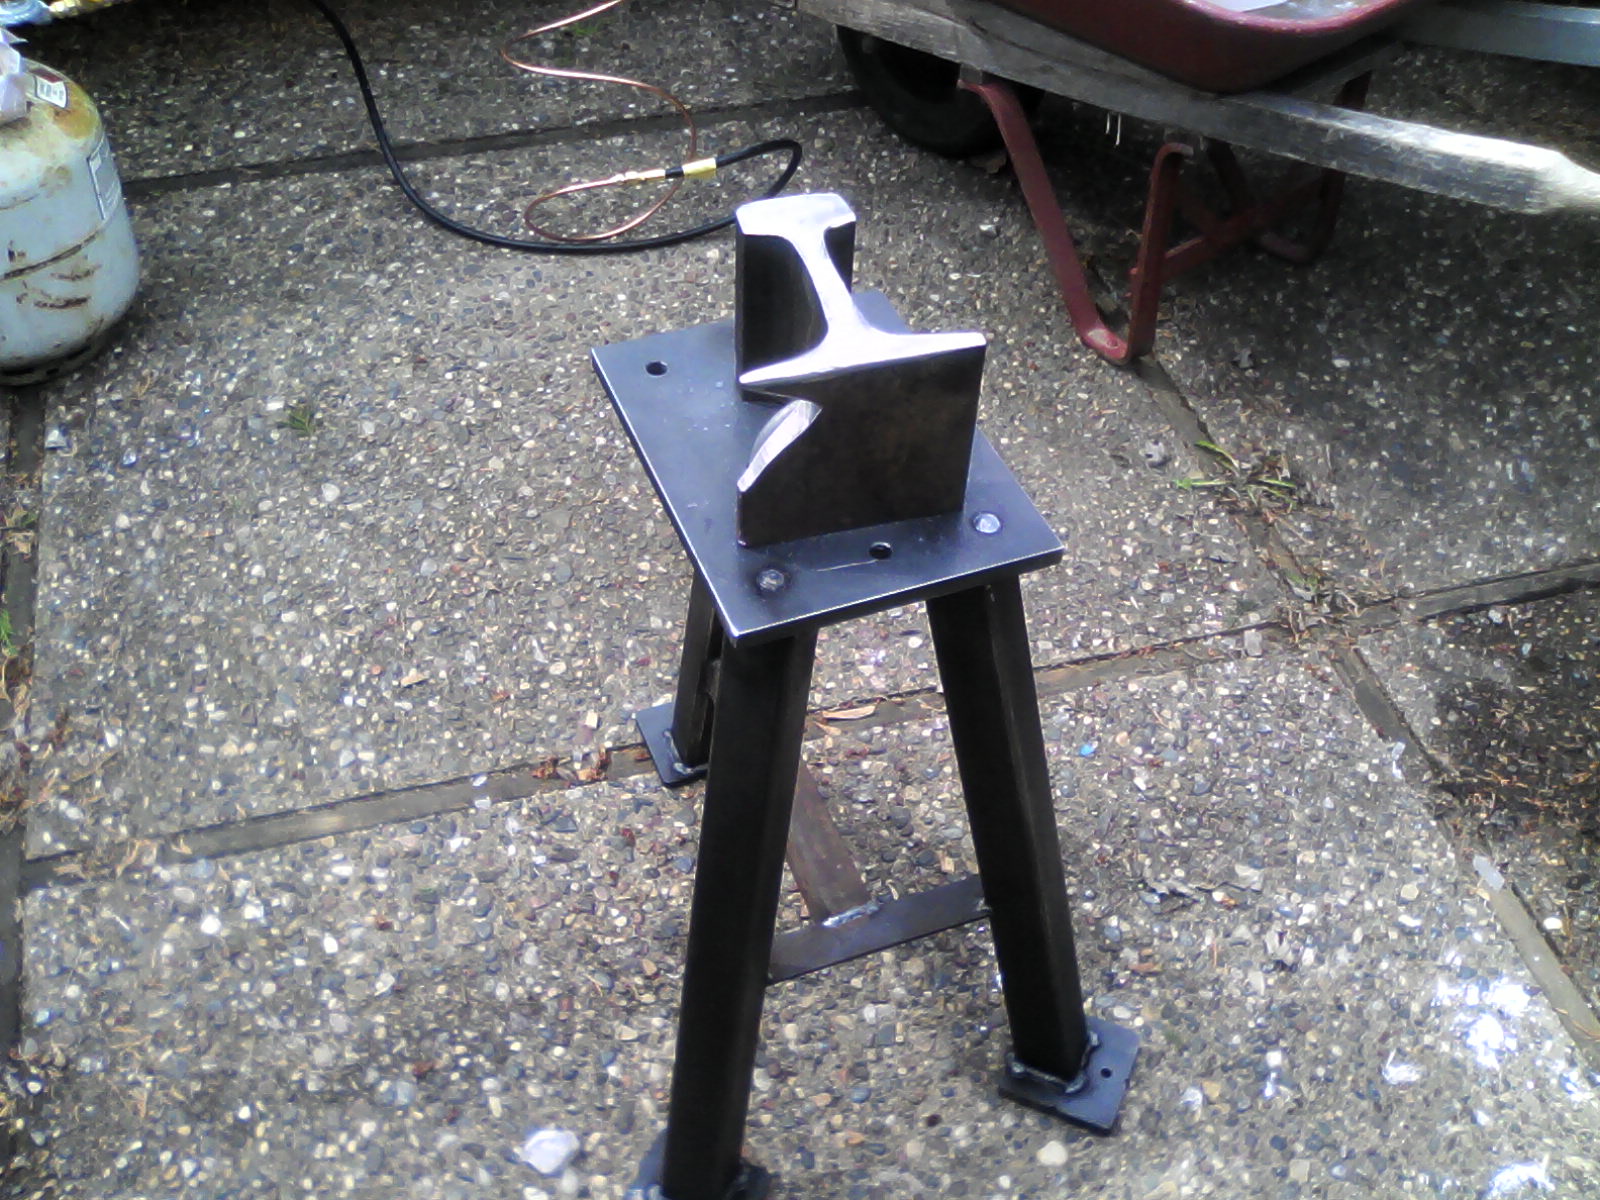
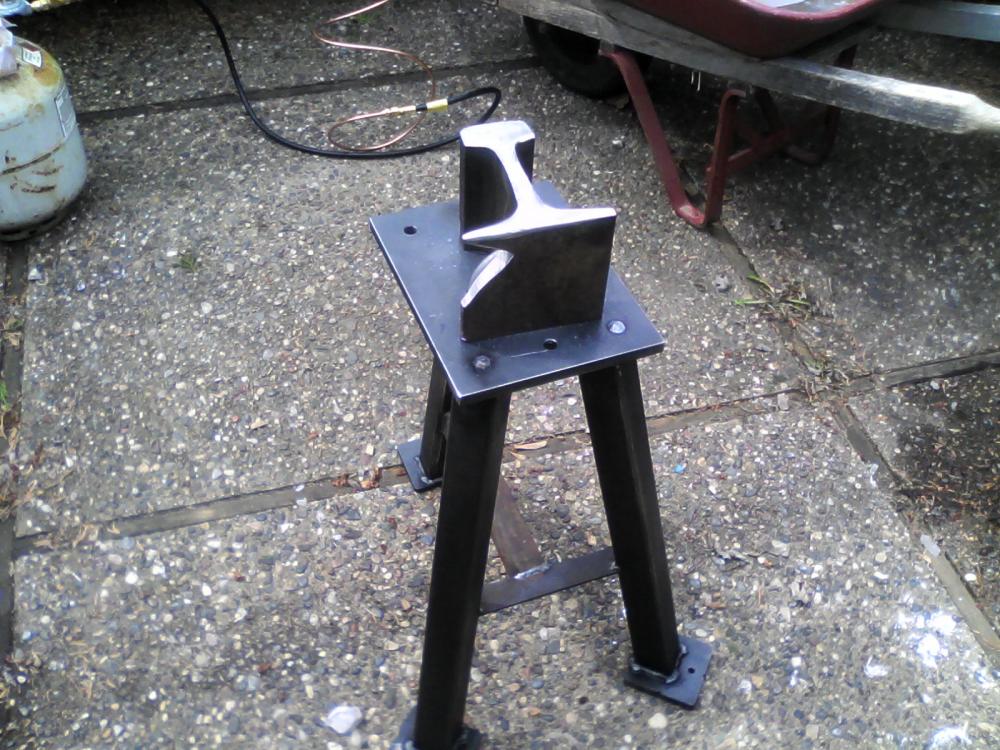
I just finished a new brick pile forge with a T-burner (3/4", 6" nipple, no flare, just flush with the inside surface of the ceiling brick). My burner lights, and seems to burn a nice blue flame. When it was lit yesterday in higher winds (20-25) the flame was coming back up the nipple and out the side if the T. I didn't think that was good so I used my 1/4 turn valve and shut it off to relight it. I am working outside, as it seems to be smart with a new setup. I am not sure if the wind is my only problem. I packed things up last night and thought I would try again today with less wind. I am getting the same flame shooting out the sides of the T. I set two bricks up next to the burner to try to protect against the wind, but that didn't seem to make a difference. Trying different pressure settings didn't change the flame issue. The forge is similar to the brick pile forge on the Zoeller site with 3000 degree hard FB for the floor, and 2600 degree IFB for the rest. The chamber is just over a full brick inside, so I know that I am not undersized with the 3/4" burner. I tried moving the burner up 3/4" so it is not inside the forge but it didn't make a difference. I also tried closing off the front opening some (the back has a brick laying down to close it off), that didn't do much either. I have looked at many of the post on this sort of topic, and haven't been able to find any information. The search function hasn't yielded many results, but that may be user error. I am using a 0-20psi regulator from Menard's that is intended to run a turkey fryer from the packaging. I am using a .030 MIG tip (what was on hand) that I have cleaned out with a set of tip cleaners to slightly oversized. If this is the source of the problem as determined by comments I can get an .035, but this seems unlikely to me. When the burner wasn't acting up, it did bring a slightly undersized RR spike to a nice orange in a couple minutes. I also had some 3/8" square that warmed up rather fast, if a little focused. I imagine that wider higher heats are achieved as the forge warms up, which hasn't really happened yet. Just for fun I am including a picture of my vertical RR track anvil and stand. This is a small chunk that I have made for the kids to use as they grow. I may add a top that will have a hardy hole that can slide over the outside of the short chunk. If the stand looks like overkill, it is because I have the notion that a small anvil could sit there someday. For now I am testing the horn on it to see if I like the side it's on before I cut into the bigger piece that will be more to my height. By the way the kids are far from the forge as I am getting things figured out. This probably seems a little rambling, but I know that you folks like the details. Thanks to Frosty, Charles Stevens, Zoeller forge and others for sharing your knowledge/ideas.
-
Welcome to the site! If you are interested, you should check out the Guild of Metalsmiths. It is a MN group that has beginner as well as more advanced blacksmithing classes. I am just finishing the beginner class this Saturday. I have met a bunch of great people as well as found some great learning opportunities.
-
LOL! Thanks for the kind welcome. There are worse things than this dark side. I have been thinking that some cross discipline projects could be very cool. Thomas, where about are you in NM? My in-laws are in ABQ.
-
Hello IFI. I have been reading for a few months now, and decided to finally write my introduction post. I learned to weld in HS, and have been repairing/fabricating things at work (Facilities) for around 15 yrs. I wanted to start blacksmithing to make wood working tools that I couldn't afford. I have made a few projects with an OA torch (hammer head adzes, hatchet, bolt tongs for RR spikes, etc), and have since become addicted. I have been using a borrowed PW anvil that sits on a three legged sand and oil filled basebase, with a wood spacer, that I made after seeing similar designs here. I have a chunk of rail I was given that I will be standing on end to make an anvil like Charles Stevens made, as it will fit my budget, space, needs for a very long time. I joined the Metalsmith Guild of MN, and attended my first meeting on Wednesday evening. I have also registered for the beginner blacksmith course in October. At the meeting I met some great people, and saw cool demonstrations. I also learned about some open forge opportunities for any experience level. I will be going to my first one next weekend, where I hope to learn a lot. I know that I got started out of order, but I am working on tempering my enthusiasm, and learning the basics ( no swords :-). I plan to make a propane forge with a Frosty-T burner since the OA is expensive/inefficient, but that will need to wait until after my classes. I was going to post pics, but it is not letting me.
-
I liked your idea, and made one for my assistants. I also made a two prong cultivator on the same theme. I added a twist to the handles. It seems to improve the grip, and added another technique to practice.
-
Another rail road iron anvil
Adam R replied to Charles R. Stevens's topic in Anvils, Swage Blocks, and Mandrels
Charles, this is a great idea. I am a beginner that just acquired a piece of track. It will definitelydefinitely turn out to be a variation on this theme. I don't have much space to set up a shop, and have been thinking that it will need to be portable/storable. This thread has given me a lot of food for thought.