Adam R
Members
-
Joined
-
Last visited
-
Thanks for the info!
-
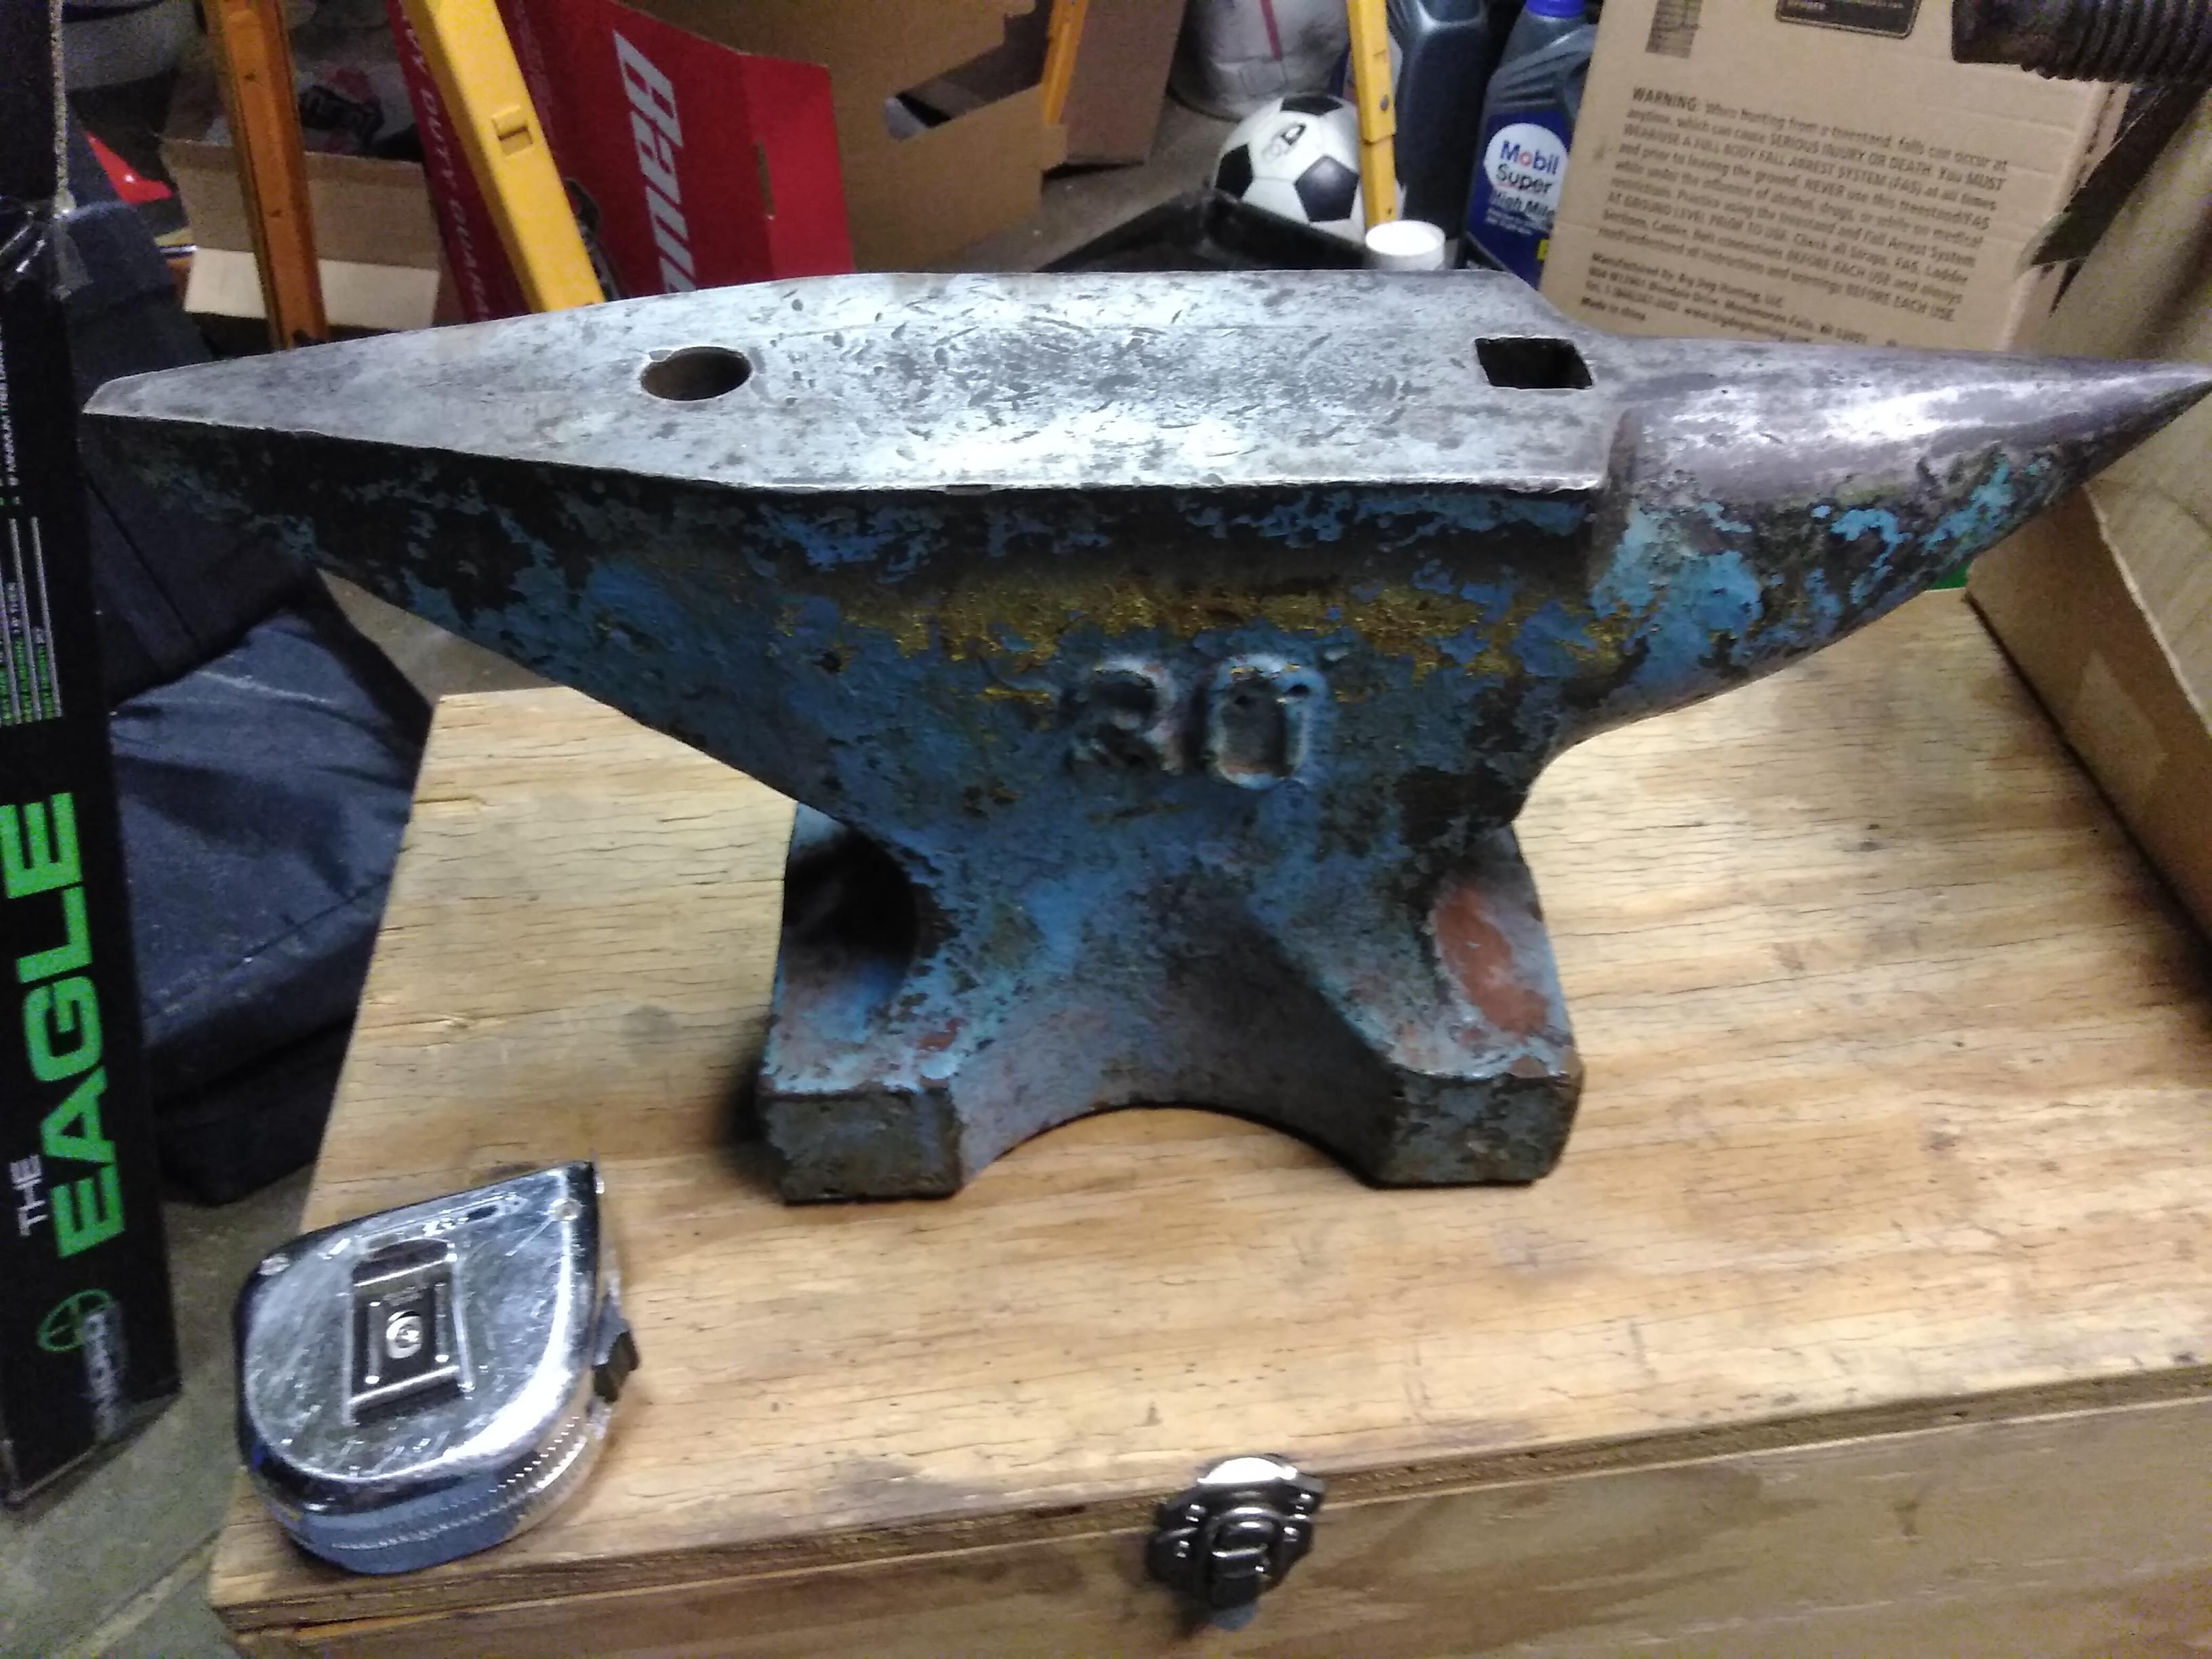
I bought this anvil on Saturday and can't find much info. It weighs 66 pounds which confirms my thought that the 30 meant kg. There is a square hole on the underside. There is a series of numbers under the rounded horn 463 9. I can't see any other marks with the paint still on it, but I thought the color might help someone identify it. The edges are almost new and far too sharp for most of my forgings, but dont worry I won't go crazy rounding them all. I know sharp is handy for some things. It measures 17 1/2" long, 8" tall, 3 1/2" wide on the face, and the base is roughly 5 1/2" x 8". The hardy hole is 7/8" and so is the round hole. Is it still a pritchel hole at that size? It rings very loudly when struck on either horn. A small ball bearing dropped from 6 inches bounced back up to over 5 1/2 (the distance I could see with my phone propped to record it). Any advice is appreciated. Thanks for checking it out.

-
It has come to my attention that another Smith uses a variation on Legal Forgery on different social media outlets than I had checked and as part of their business. As such I will definitely not be using it. I don't want to step on any toes. The thought process for what I will use continues.
-
These are some great point to ponder. Being a transplant to MN hadn't sent me down the local/regional name thought process. My thoughts with geographical context were to the US side of things with "forge" tacked onto the end. I agree with the word being overused. I love the different perspectives on this site. Thanks for sharing with us beginners.
-
A check mark would be an easy touchmark, but I am pretty sure people will think it's a "like" though. Maybe I will keep thinking about it. I am doing a couple demo shifts at the county fair next week. I will run it by some strangers, and see how they react with little coaching.
-
Glenn- thanks for the comment. I didn't want to hijack the other threads. They helped me eliminate some names that might turn clients away, etc. All of my friends have chuckled a bit at the name, and said they liked it. I just wanted to check with a wider audience.
-
I have been considering what to name my shop/business. Primarily I will be making decorative forged item and tools. I have been racking my brain for names that I could use and bouncing them off friends and family. My own name was considered, but as my children have started to bemoan, "Daddy why can't people say our name right?" That is probably not the one. One of my coworkers suggested "Legal Forgery", since that is what I am doing. I have received many funny looks, when I have said that I am going to forge something later. Then when I explain that I am a blacksmith people understand. So I wanted to ask the IF folks if "Legal Forgery" sounds like a decent name. It is a little quirky, but I have been called that before. The name has the benefit of not already being used on Etsy, or a search of the Internet. It may be too dumb a name for anyone else, but that's why I am asking you for your opinions.
-
If your wife is watching you from inside the house, forging on the patio in the snow, and says to herself, "That's too cold he better put that back in the fire."
-
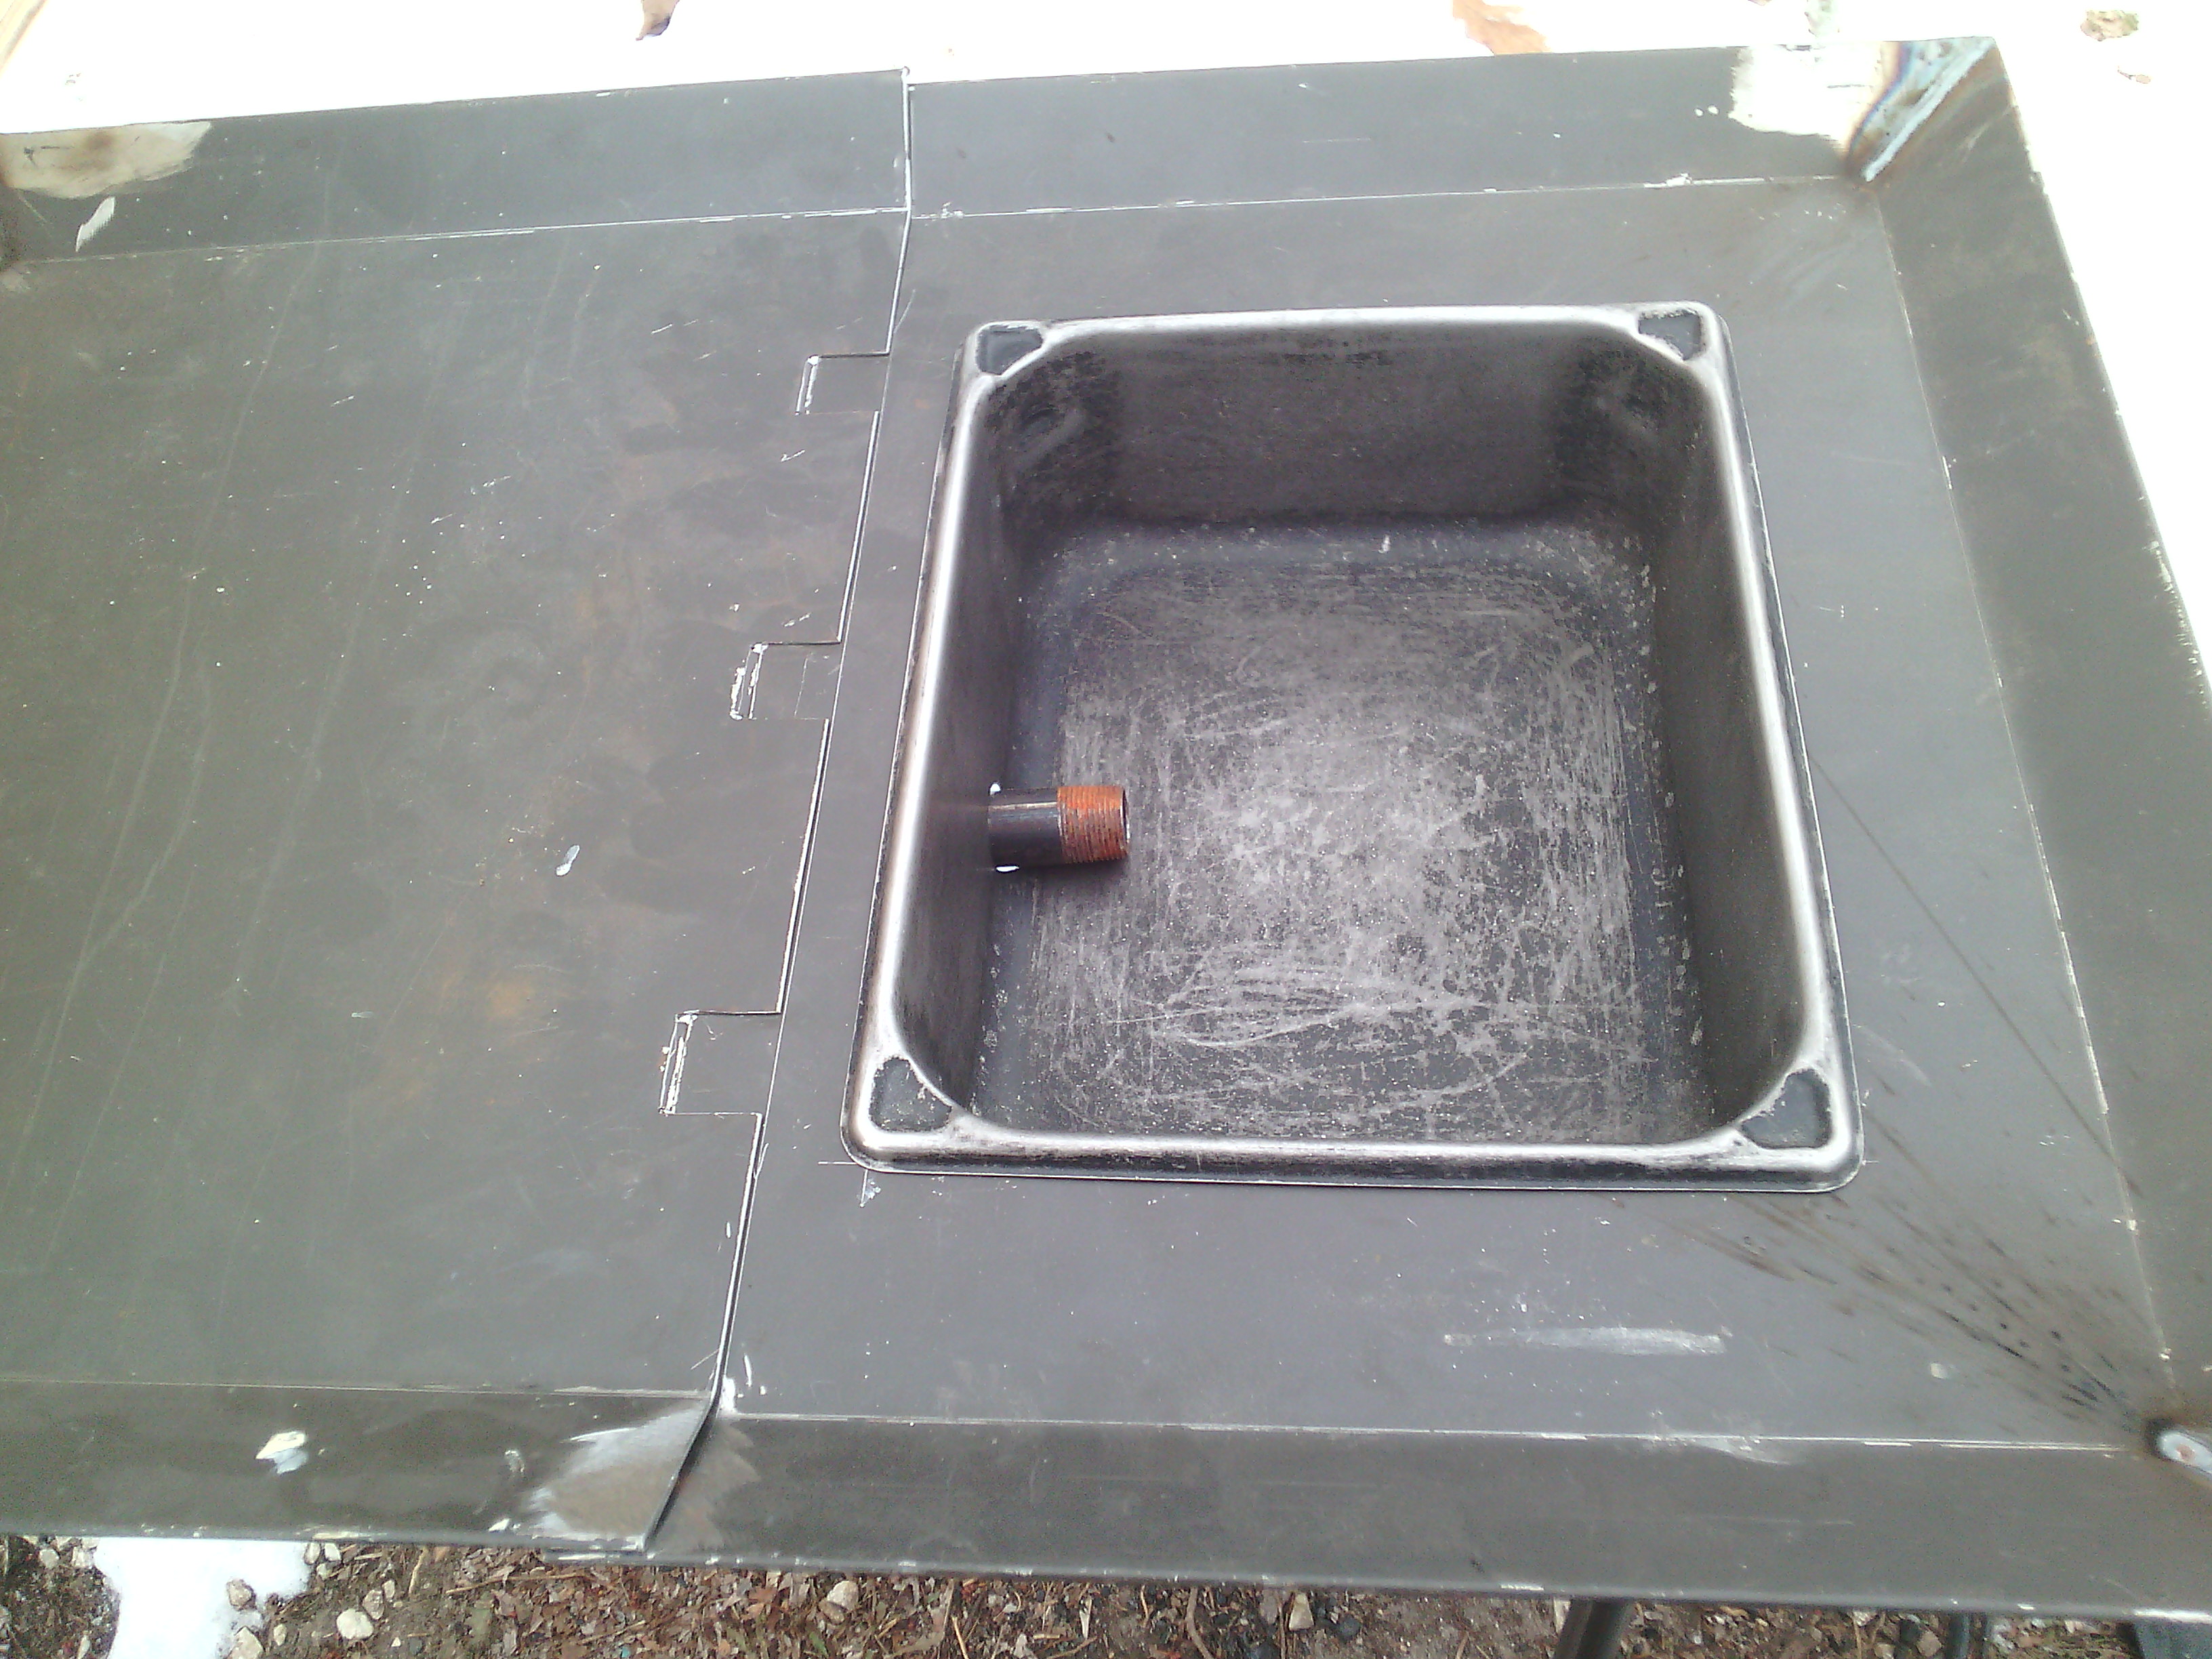
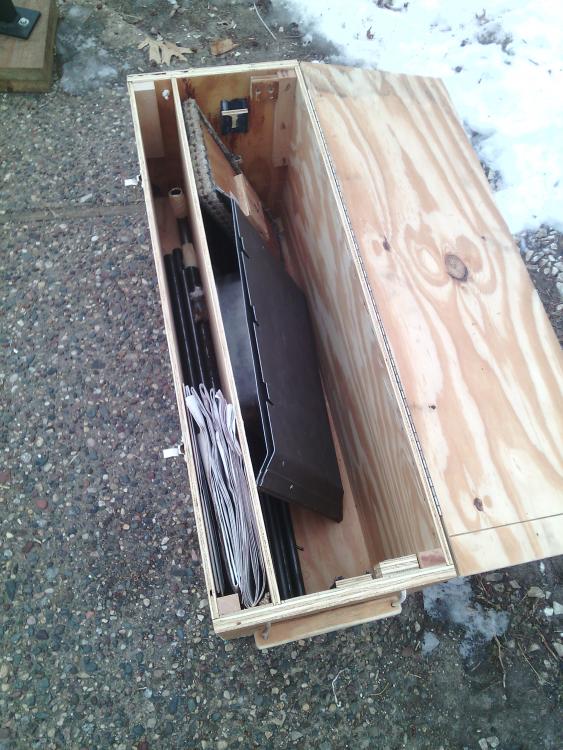
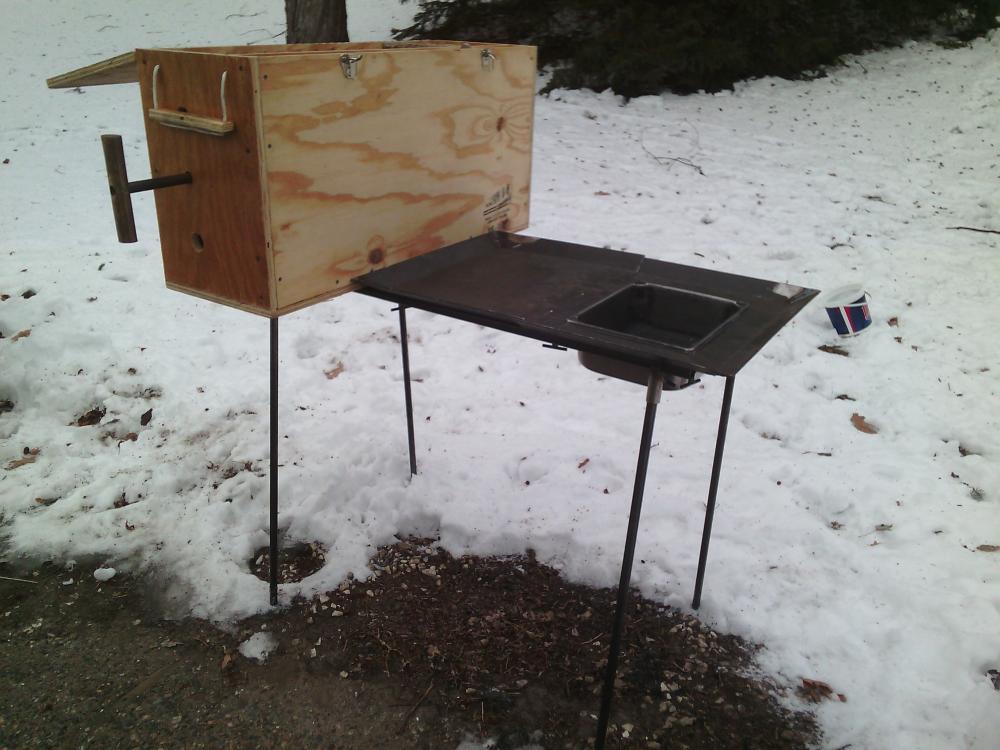
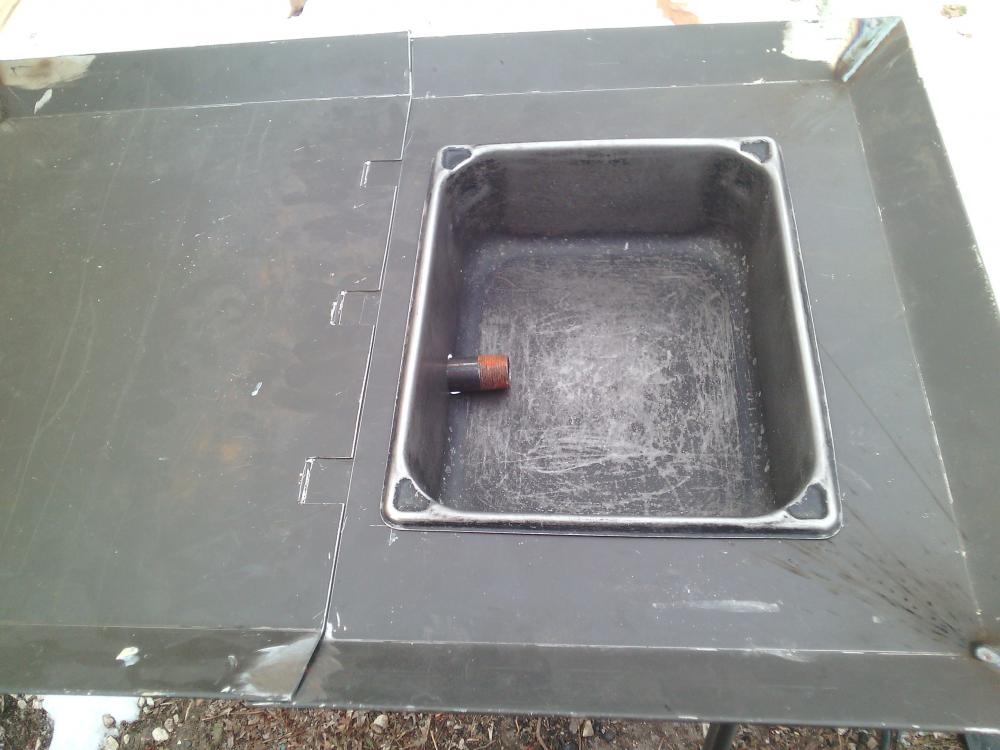
Sorry for the late update. I have been fairly busy working on my project amid Christmas activities. The first picture shows the inside of the bellows with the forge broken down. The top, bottom, and ends are 3/4" plywood. The sides and center divider are 3/8" to lower the weight. I used rabbits/dadoes for joinery. I reinforced the corners with some maple blocking and screws. The side with the valve box is only attached with screws. The the overall size is about 18" tall, 12" wide, and 36" long. the bellow chamber is just over 8" wide inside. I used a 3/4" thick piece of plywood for the piston with an added block for greater stability. I used a piece of the frame tubing for the handle. It is attached by drilling two holes through, spaced to go on either side of the piston. A masonry nail with a flat ground on the head secures the handle on both sides, and allows it to turn as pushed/pulled. I stapled a strip of an old rug around the outside of the piston to make a reasonable seal. I will use cardboard, or maybe just some of the starter newspaper to protect the inside of the blower chamber. The holes for the air valves are 1 3/8" two on each end for intakes, and one one each end in the valve box. I tried using pieces of rubber as valves, but that didn't work. Probably not flexible or heavy enough. Thinking back to what I had seen on YouTube, I stapled some upholstery fabric scraps around a 2" square of the 3/8" plywood with an attachment flap left on one edge. When those were installed they worked great. A piano hinge and some box latches helped to keep everything aligned, and fairly sealed. I could add some weather stripping for a better seal, but I'm not sure if it is worth the effort. The air exits the valve box on the bottom. I used a pre-bent piece of tubing from an old chair to turn the corner. Built up layers of masking tape make the seal into the valve box. A piece of 3/4" black pipe is used for the tyure. The table top is made of two pieces of sheet metal with tabs to keep them aligned. I bent the edges up to help keep the fuel in place. I ran out of time to make pass through drop downs, but I will take care of that next week when I am back at work. The frame is at about 35" tall overall. That worked very well for me this afternoon. The legs just fit into the box. The handle for the piston was at a very comfortable height for me. Taking Thomas Powers advice, I built a fire in our fire pit to make the charcoal then transferred it to the forge. That went very well. I was able to use the other side of the top to stage the extra charcoal, and snow to cool it down. This seemed to work, but if someone with more charcoal forging experience (first time for me) has any suggestions I would be happy to hear them. As the fire got wider than I wanted, I sprinkled some snow around the outside like I was taught with a coal fire (while adding air). I added some dirt to the pan sides to shapes the fire. My hot spot seemed to be just over the tyure and about an inch in front of it. Is that normal for a side blast (first time with that too)? I will move the pipe farther into the pan next time. Charcoal produced more sparking than coal, but I was expecting that. I'm not sure I would want the sparks without the snow, but I can get coal from my guilds supply at reasonable prices. I will use a different pan/tyure height for coal. I was quite pleased with my success today. I managed to make some coat hooks, more charcoal than I used, gain some knowledge, and have some fun. Thanks to everyone for your input. If you want to see pictures of anything else, let me know.
-
That was the original idea, but I was considering the other suggestions. I spent the day working on the table top, and frame. However, my favorite steel yard was closed today for weekend holiday replacement I assume. I should have thought of that. I tried another place that was open, and was reminded why I like the one I do. Fortunately there was some stock that I could replace and usable scrap at work. After I get the littles in bed, I will try to post some pics.
-
BigThe pans that I could use for this are damaged beyond food service use. I am saving the good ones for when we make sausage. Skipping that step makes things easier. I found a video of a guy making a single bellows like you are describing. He used wire hoops, and leather for the fabric. Your inner tube suggestion reminded me of some old tubes from the landscaping equipment at work (ATV size). Some ceiling grid wire hoops with small rubber strips/contact adhesive to hold them in place (maybe skip the hoop all together?). He used a box valve system, but I figure you could push up the bottom chamber to fill the top through the box in he middle. Is that what you are describing? Since I need a box to hold it all, I will probably turn the box into a bellows while I'm at it. I'll make sure to use screws for the valve chamber so I could change it to vertical when it won't sit in the snow. If I used inner tube scrap or rubber roof material for the valves it probably wouldn't matter if I stood it on end. You guys have me curious enough I may just make both. I am off work next week.
-
So I am sold on the side blast idea. In reading Charles sticky about the box of dirt simple side blast I realized I have most of the supplies needed in my garage. I have some old steam table stainless steel pans that were being thrown out of the cafeteria at work. There are three sizes 5w x 9l x 6d, 5w x 11l x 6d, and I think the winner at 9w x 11l x 4d I could use for the fire pot. I realize that it is probably too shallow without building up sides of dirt or bricks. However, I have more than one. If I cut out the bottom of one, and straighten the flange of another, I could wind up with an adjustable pan close to 9" deep using some sheet metal screws. I could drill a hole in the side of the lower pan for the tyure and adjust the depth of the box until I found what works best for the project. Would I need a brick on the floor of a metal pan to protect it from the heat? Possibly a scrap of 3/8" steel plate? If I inset the above pan into the sheet metal top from my original post there would be some air circulation around it. One of the big reasons I like the pan idea is you wouldn't need much dirt. You do however still need a box to hold everything. If I used a tear drop bellows how big would it need to be? I never really considered that type. I am also intrigued by the constintina style bellows, but I am not finding much info on how to build one. I have not given up on the box bellows, but the alternatives are intriguing.
-
Thanks for the input. I will definitely look at side blasts. It is amazing how simple a forge can be. I came up with the idea after seeing some military forges. I will do some more research, and post some pictures of what I come up with.
-
I thought that might be a problem. Yes I am thinking about packing parts in the box. A solution could be to line the sides, top, and bottom with scrap plastic laminate. This would provide a smooth, durable surface even if I don't pack anything inside the chamber. Laying the plunger (?) with handle removed down on the floor, and strategic packing could also help. I was also thinking that I would build the box as a complete cube instead of the short side chamber that I have mostly seen. There would of course be the chamber for directing the air, but I could use the extra space above to house some of the sharper pieces. Outside of packing in the air chamber, do the basics of the rest of my design sound reasonable? Does a box bellow work well in a coal fueled bottom blast forge? All input is greatly appreciated. Even if I get talked out of this idea, I will have learned something, and possibly given someone else an idea (maybe what not to do).
-
I want to start by saying this may be a crazy idea. I have a Propane forge, but there are times when it would be nice to use coal. There are some Demo/class opportunities that I have seen where you need to bring your own forge. Transporting a hot gas forge, propane tanks, etc home in a car are not a good idea (possibly illegal?) in my opinion. A truck is not an option at this point. I have taken/helped teach classes with coal forges that have a welded fire pot, with a hand crank blower. The tables have been steel or cast iron, but not really all that much larger than the fire pot. I do not have a hand crank blower, but I do have plywood, and know how to build a box (cabinetmaker in the past). The thought is to make a frame of light round tubing that fit into sockets with t-bolts (think a ladder ball goal). Make a two piece sheet metal table one side of which would have a hole for a welded fire pot. and make the frame large enough that I could set the box bellow on the opposite end from the fire pot. There would need to be some cross-bracing on the legs, and obvious attachment details to work out. However, with some engineering, I could fit all of that into the box. I would think that a welded fire pot would cool down quicker than a well insulated gas forge, and coal can be thrown in water to cool it off. Yes I know that it will need to have the sides and bottom replaced over time. I have seen people complain about rivet forges that do not have dips on the side to allow a piece to pass flat through the fire. I was planning to add that to the design considerations. I am thinking that a box bellow that is in the 32-36" long and 18" tall would accommodate the frame, table pieces, fire pot (with detachable bottom blast plumbing). I am not opposed to a side blast, I just don't have any experience with them. So the questions are, Is this a stupid/dangerous idea? What are the flaws that I am not seeing? Would a box bellow even work with coal? Thanks in advance for any advice. Sorry for the somewhat rambling idea.