
Benton Frisse
-
Posts
378 -
Joined
-
Last visited
Content Type
Profiles
Forums
Articles
Gallery
Downloads
Events
Posts posted by Benton Frisse
-
-
20 hours ago, ThomasPowers said:
How much finish grinding will you be doing?
I haven't decided yet, but I don't mind grinding to finish, though I will forge as closely to finish as possible. I'd like to grind clean once finished with forging, head again to restore the black scale/oxidation color, then move on to heat treat in which I'll wire brush clean after.
-
Hey gang, I've been doing some reading about how well A2 performs as a steel for wood working tools. I found a good price on some A2 in the size I want for making wood chisels of various sizes. However, some places I'm reading for heat treat say you absolutely have to have heat treat foil and some say you do not for air hardening. Anyone here have any thoughts or experiences with it?
-
Lord have MERCY this is beautiful.
-
My favorite piece you've ever done, Owen!
-
These definitely look like something a Forged in Fire champ would crank out. Good looking stuff, man!
-
Theo, I don't think there's much to say other than "Beautiful!"
-
8 minutes ago, Frosty said:
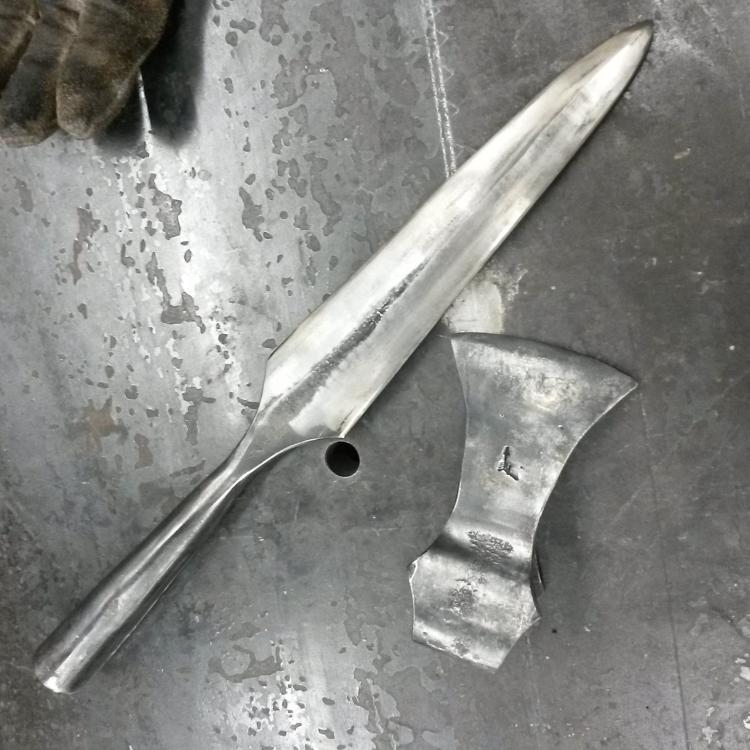
Sounds good Benton, I met Elmer and Linda some years ago and would love taking a class with him. Nice looking spear point, you ARE going to post pics when you put it on a shaft. YES?
Frosty The Lucky.
You betcha! I am hoping to swing by the local lumber spot this coming week... the guy told me I could get a 5/4 straight grain ash board 8 feet long... I about jumped with joy! Ash available around here where Emerald Ash Borer has gnawed everything to bits? Yippee! Elmer is a genuine heck of a guy. Hope to get to learn more from him. His classes are great because i got to take LOTS of notes.
-
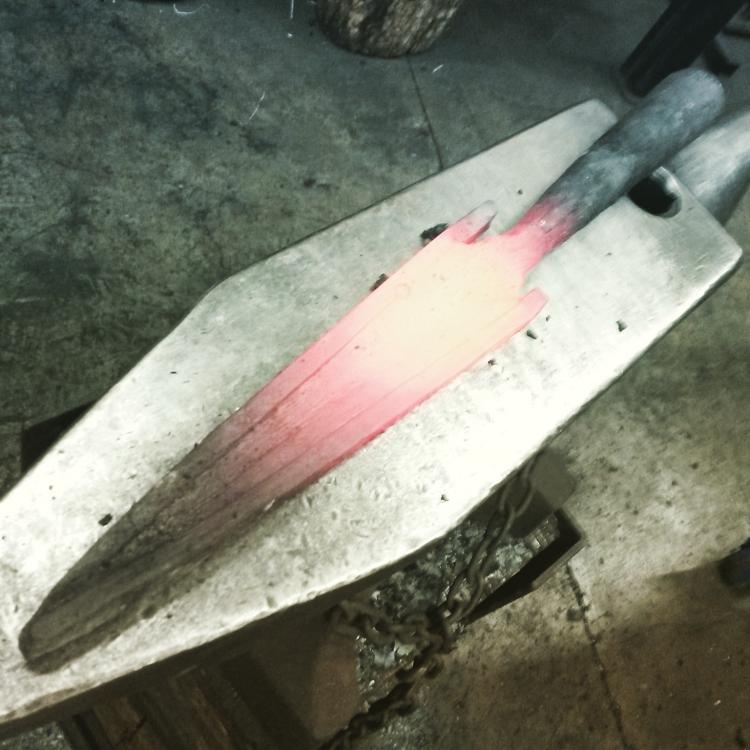
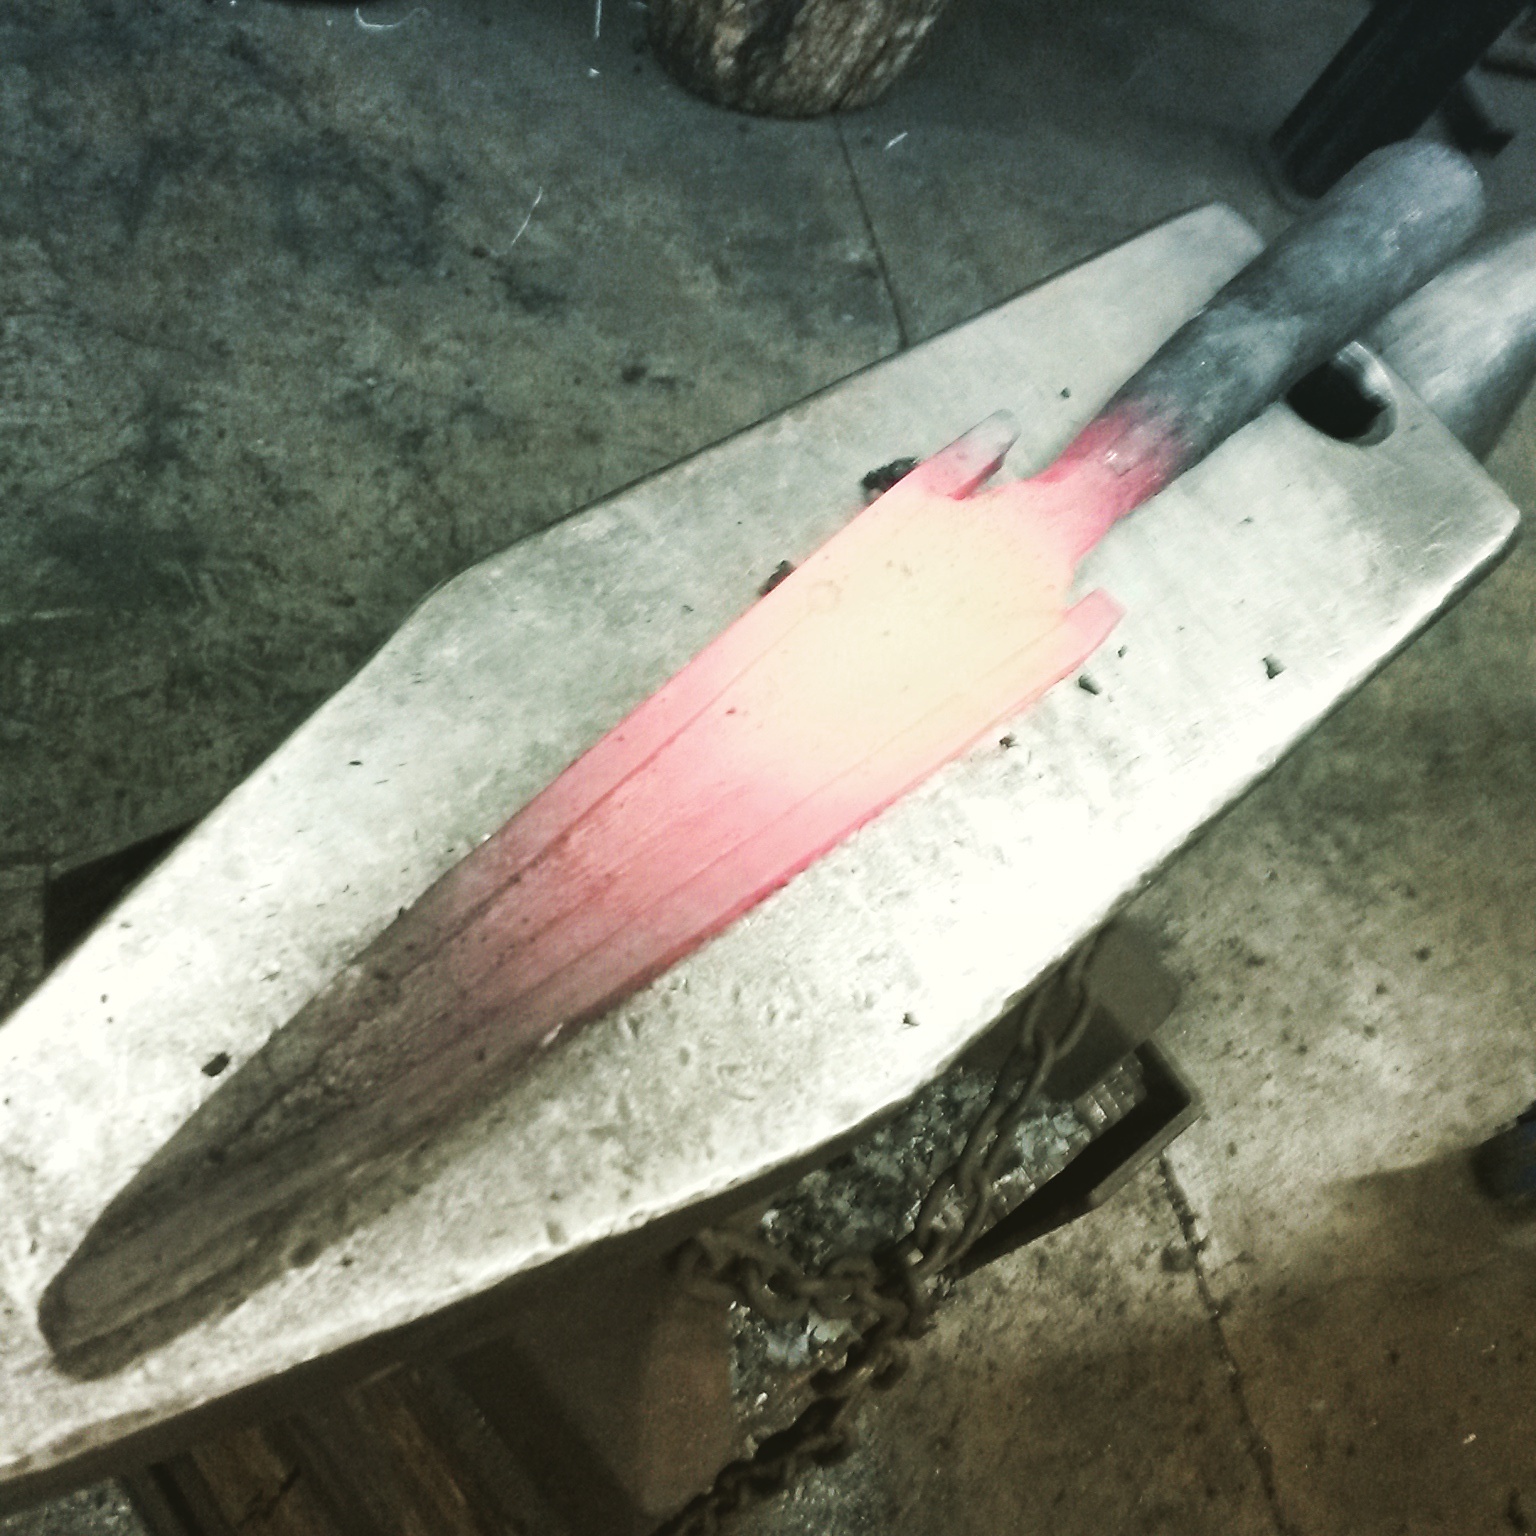
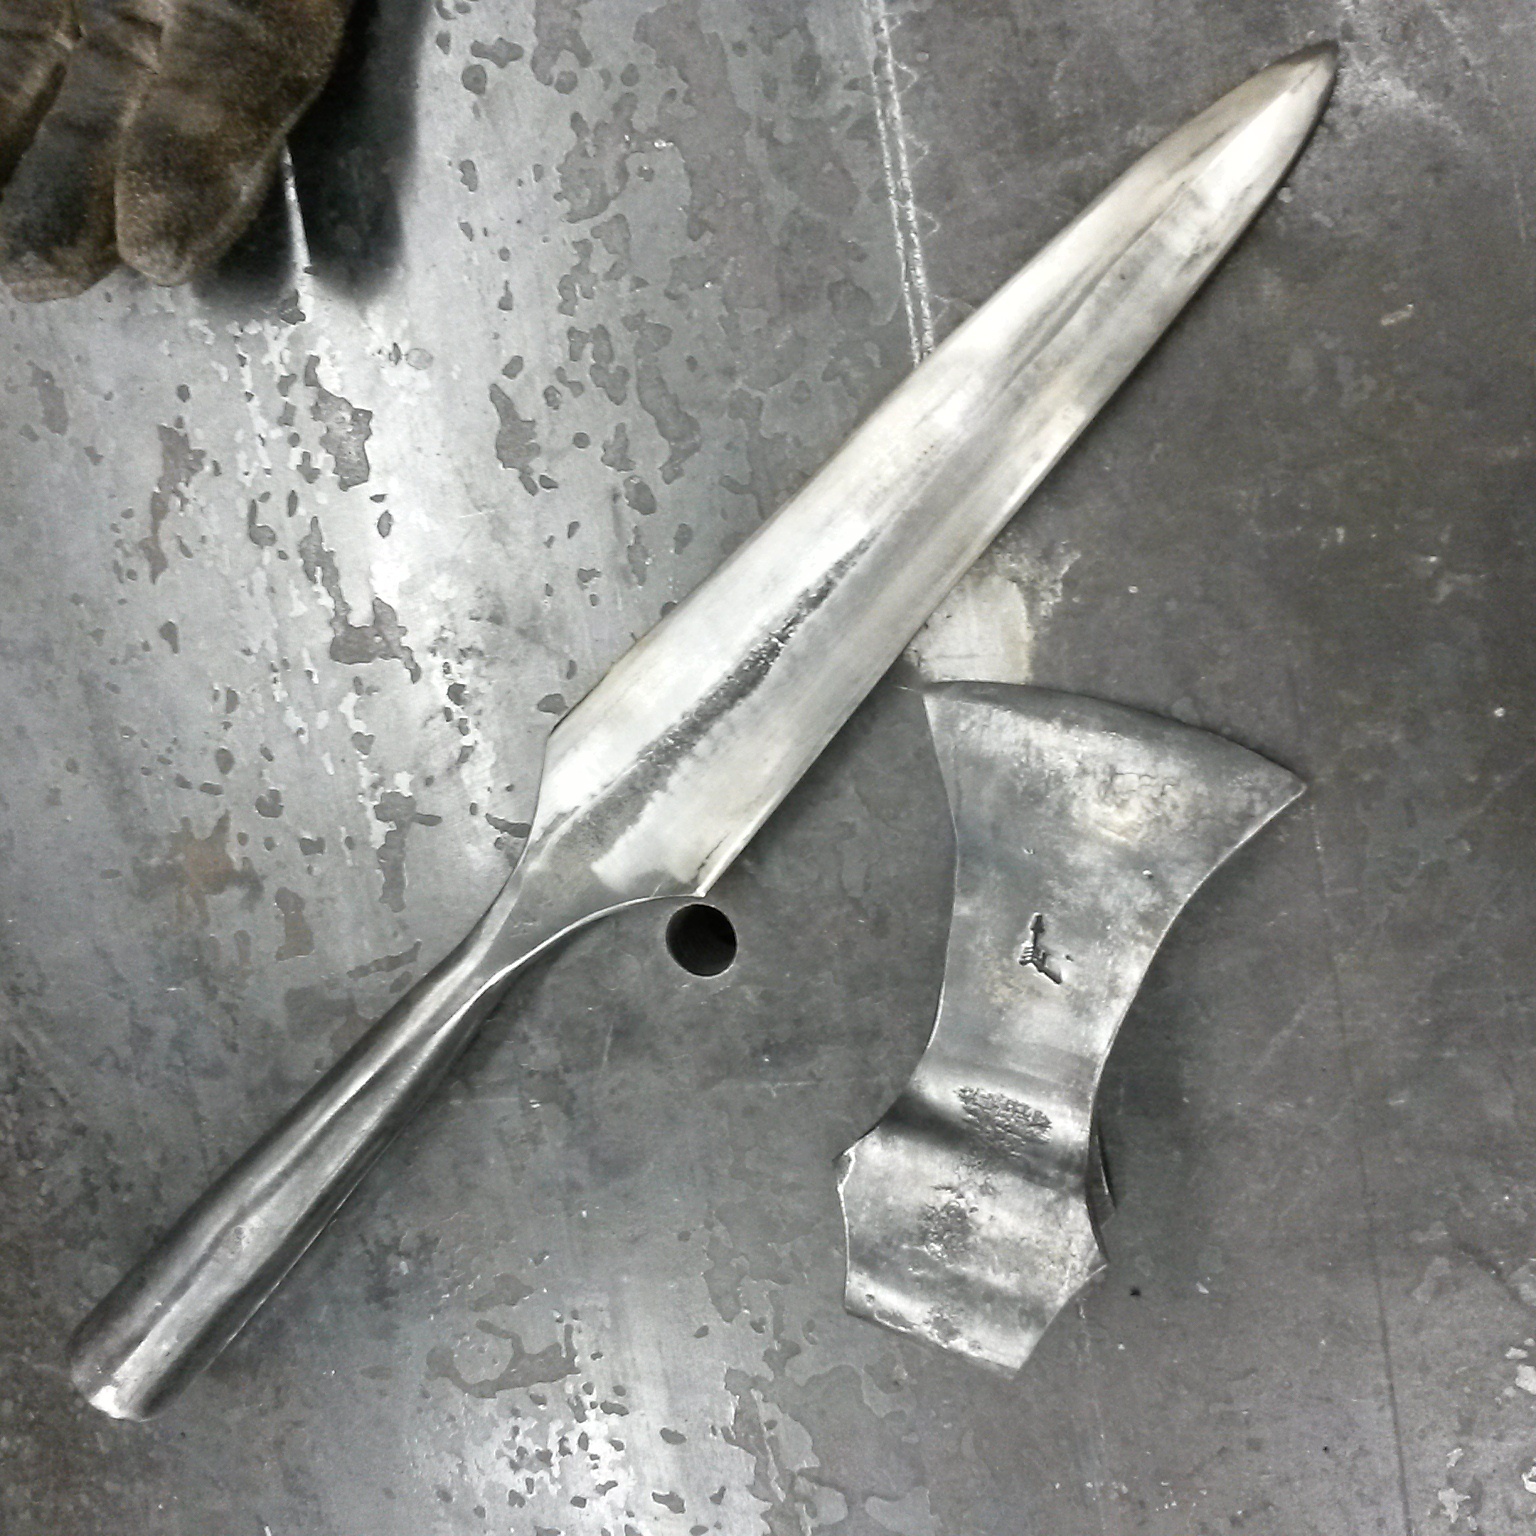
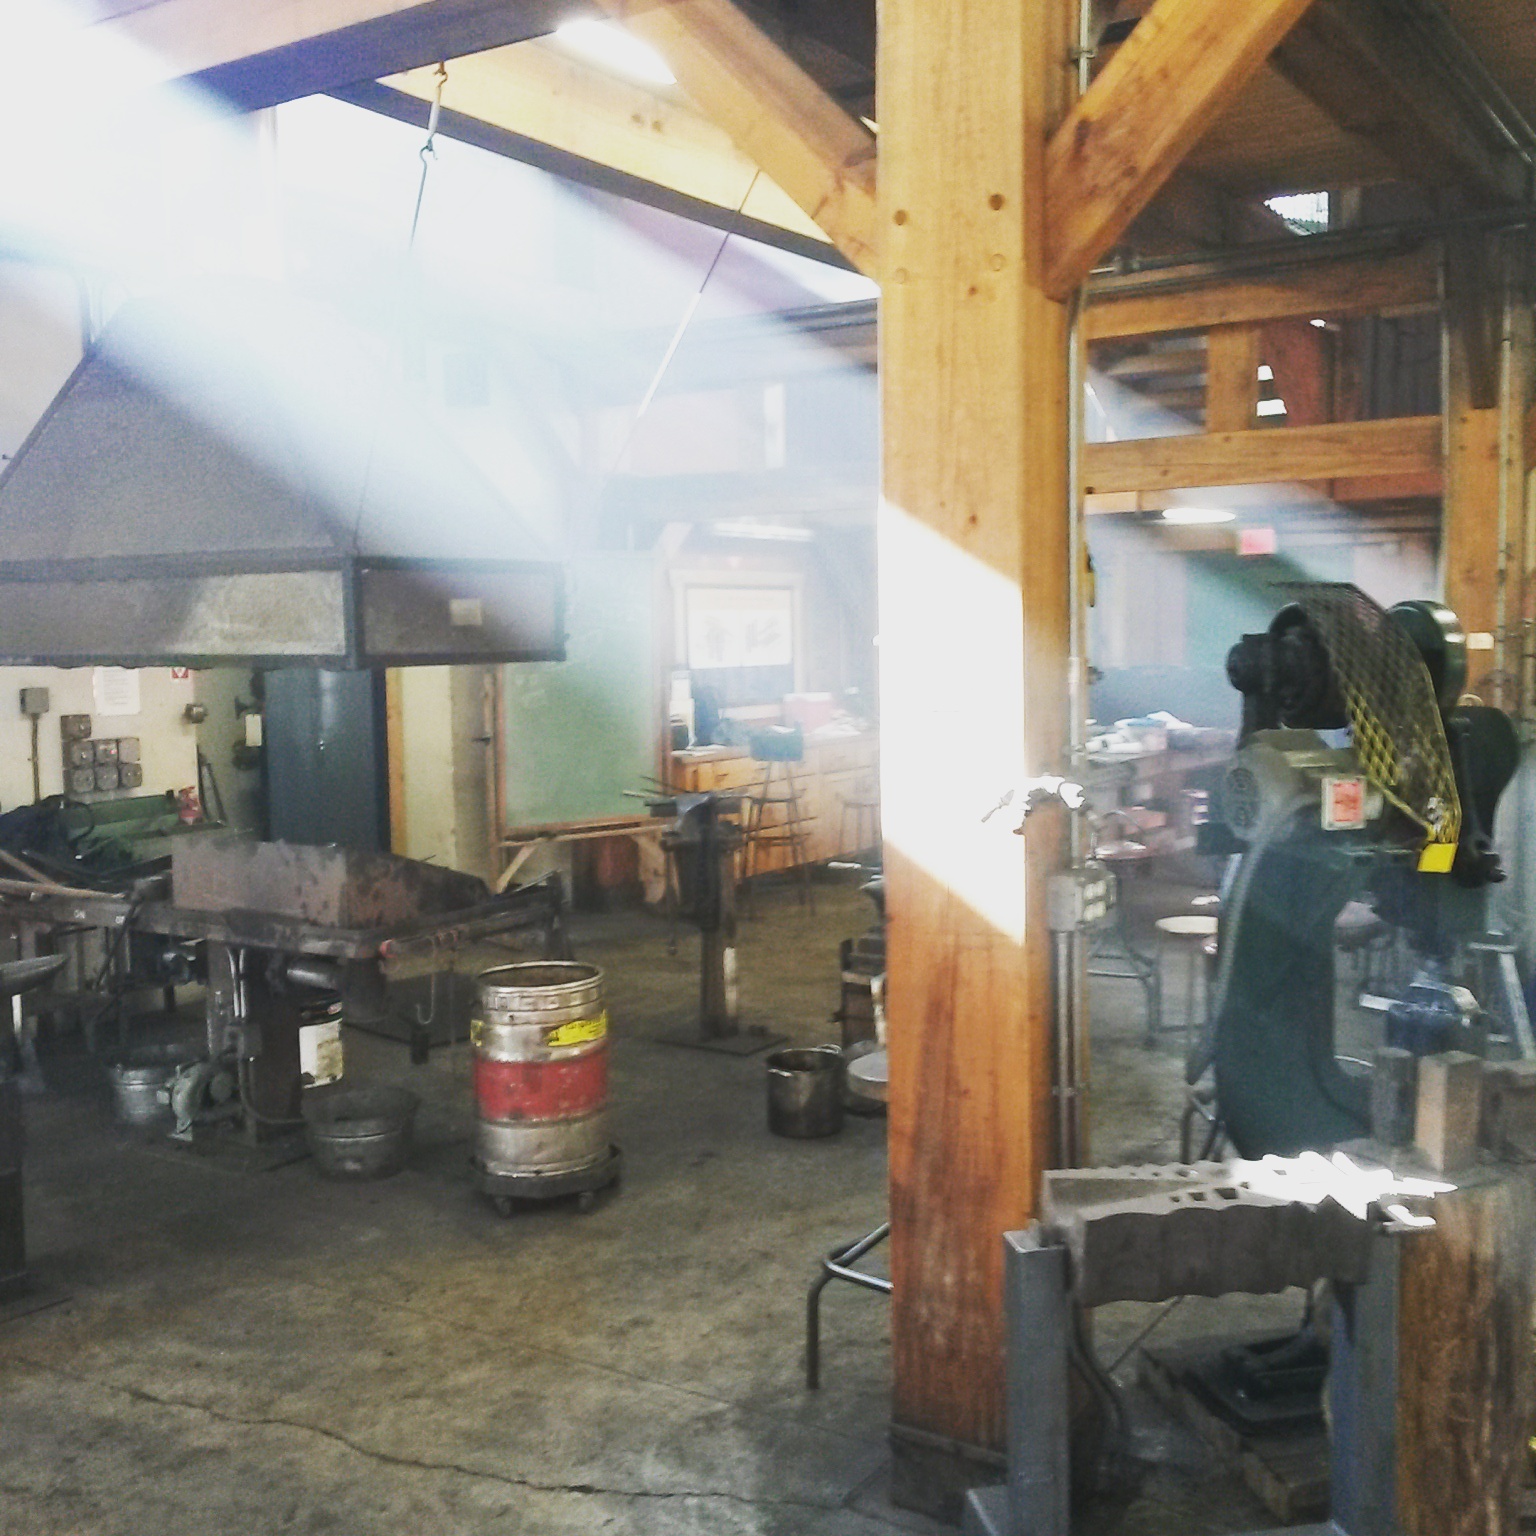
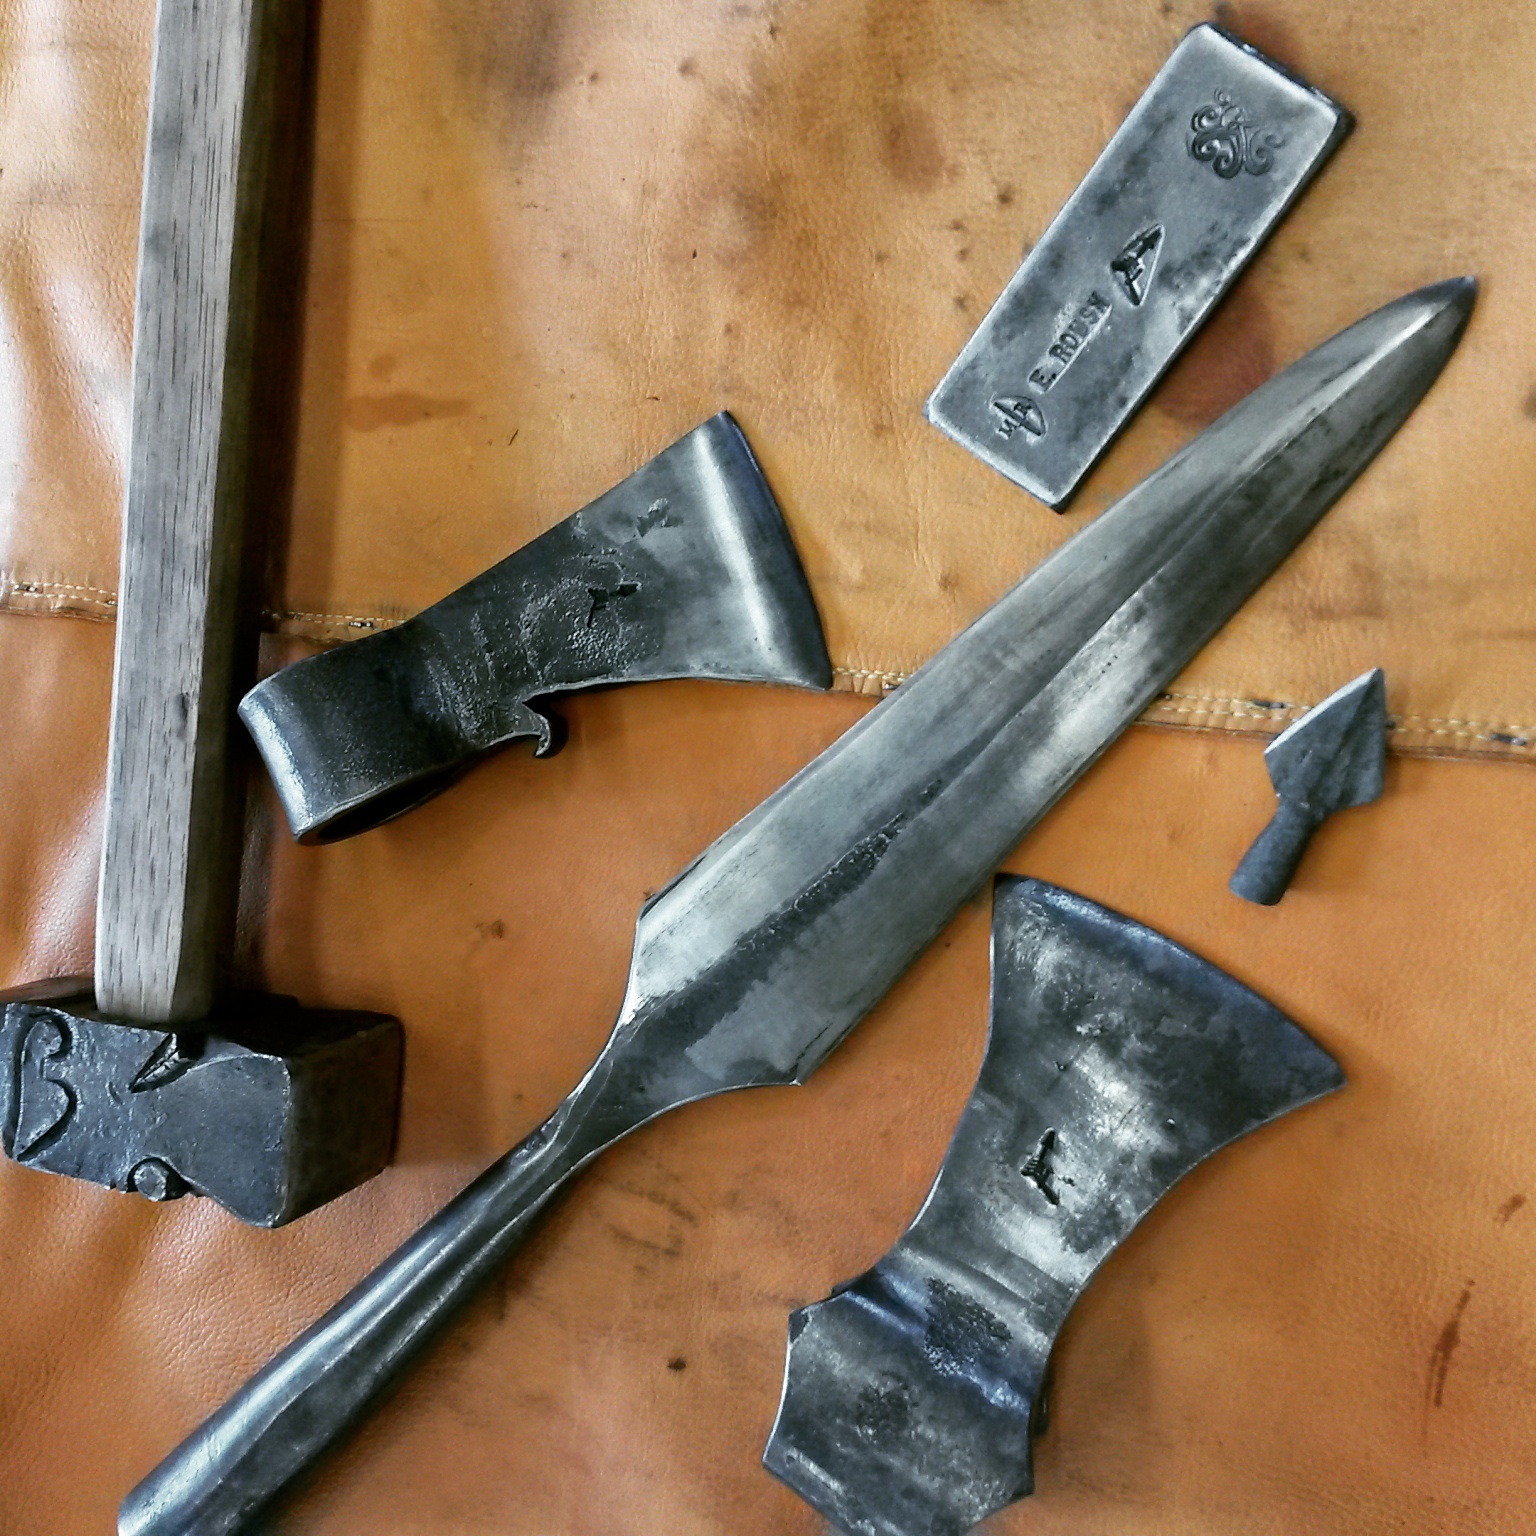
Took a Viking Era Blacksmithing class taught by Mr. Elmer Roush a few weeks ago. Great class! We went over mammen pattern axes, spears, arrowheads, and some other pattern axes. I was able to forge a large spear (my favorite exercise from the class), a mammen pattern axe, a mess of arrowheads (none of which I was super proud of, need more practice with those), and I managed to squeak in a tomahawk on the last day for fun! Great class, great facilities at John C. Campbell Folk School, great FOOD, and a truly inspiring, down to earth, helpful instructor and assistant. I can't wait to go back and learn more from Elmer. I've never forged a spear before but I think I truly enjoyed forging the spear more than I do axes, tomahawks, knives, or whatever. What a fun process! The spear, hawk, and axe are all A36 with 1095 welded cutting edges and bits. The arrowheads are all mild. Thanks for looking! Moderators, I put this in historical based on the title, my apologies if it is improperly located!


-
Good looking stuff!
-
Awesome chisels! How did you grind that bevel like that? I recently tried my hand at a bowl adze and grinding that bevel inside of the curve was so tough... luckily it fit my contact wheel on my old 1x30 just perfect.
-
I dig it, great work!
-
Awesome stuff about the coffee! Does it tend to be more or less aggressive than white vinegar?
Beautiful slicer, man!
-
Oh that's a beauty... definitely something to be proud of, man!
-
On 3/6/2017 at 1:26 PM, ThomasPowers said:
The more you work it at welding temperatures the better the welds tend to be. My best example of this was I took a billet of bandsaw blade and pallet strapping, that had been folded a bunch of times and stood it on end and hammered it down into a disk to make a pizza cutter---the welds held being hammered the wrong way all the way down!
I would love to see this, Mr. Powers! Do you have any photos?
10 hours ago, 1776 said:Awesome, I was wondering if a Damascus hawk could be done! And you seem to have done a wonderful job! Well done!
Thanks, sir! 1776 was a good year, btw.
-
Thanks, everyone! I have a small blade that is coming along from the same billet. Phew... full convex grinds are so tough. Tried Mr. Rich Hale's push stick method, it was still tough.
I was really worried about blowing apart some layers while forging this mouse hawk, and I actually threw in an offcut of damascus to get a bit better spread out of the bit. It's hard to see in this picture, but if you look close enough you can see the distinct change in direction of the layers.
-
Thanks, man!
-
On 2/23/2017 at 1:16 PM, JPH said:
Benton:
Actually it makes it a bit higher in pitch more along the lines of a whistle than a swoosh.... Now you have to get your blade speed up due to the shorter blade length in order to get proper tachi-kaze...
JPH
Let me hunt up the pics of my "cutter" swords if ya want...
Do you offer workshops or classes? I see your location is soon to be FL?
-
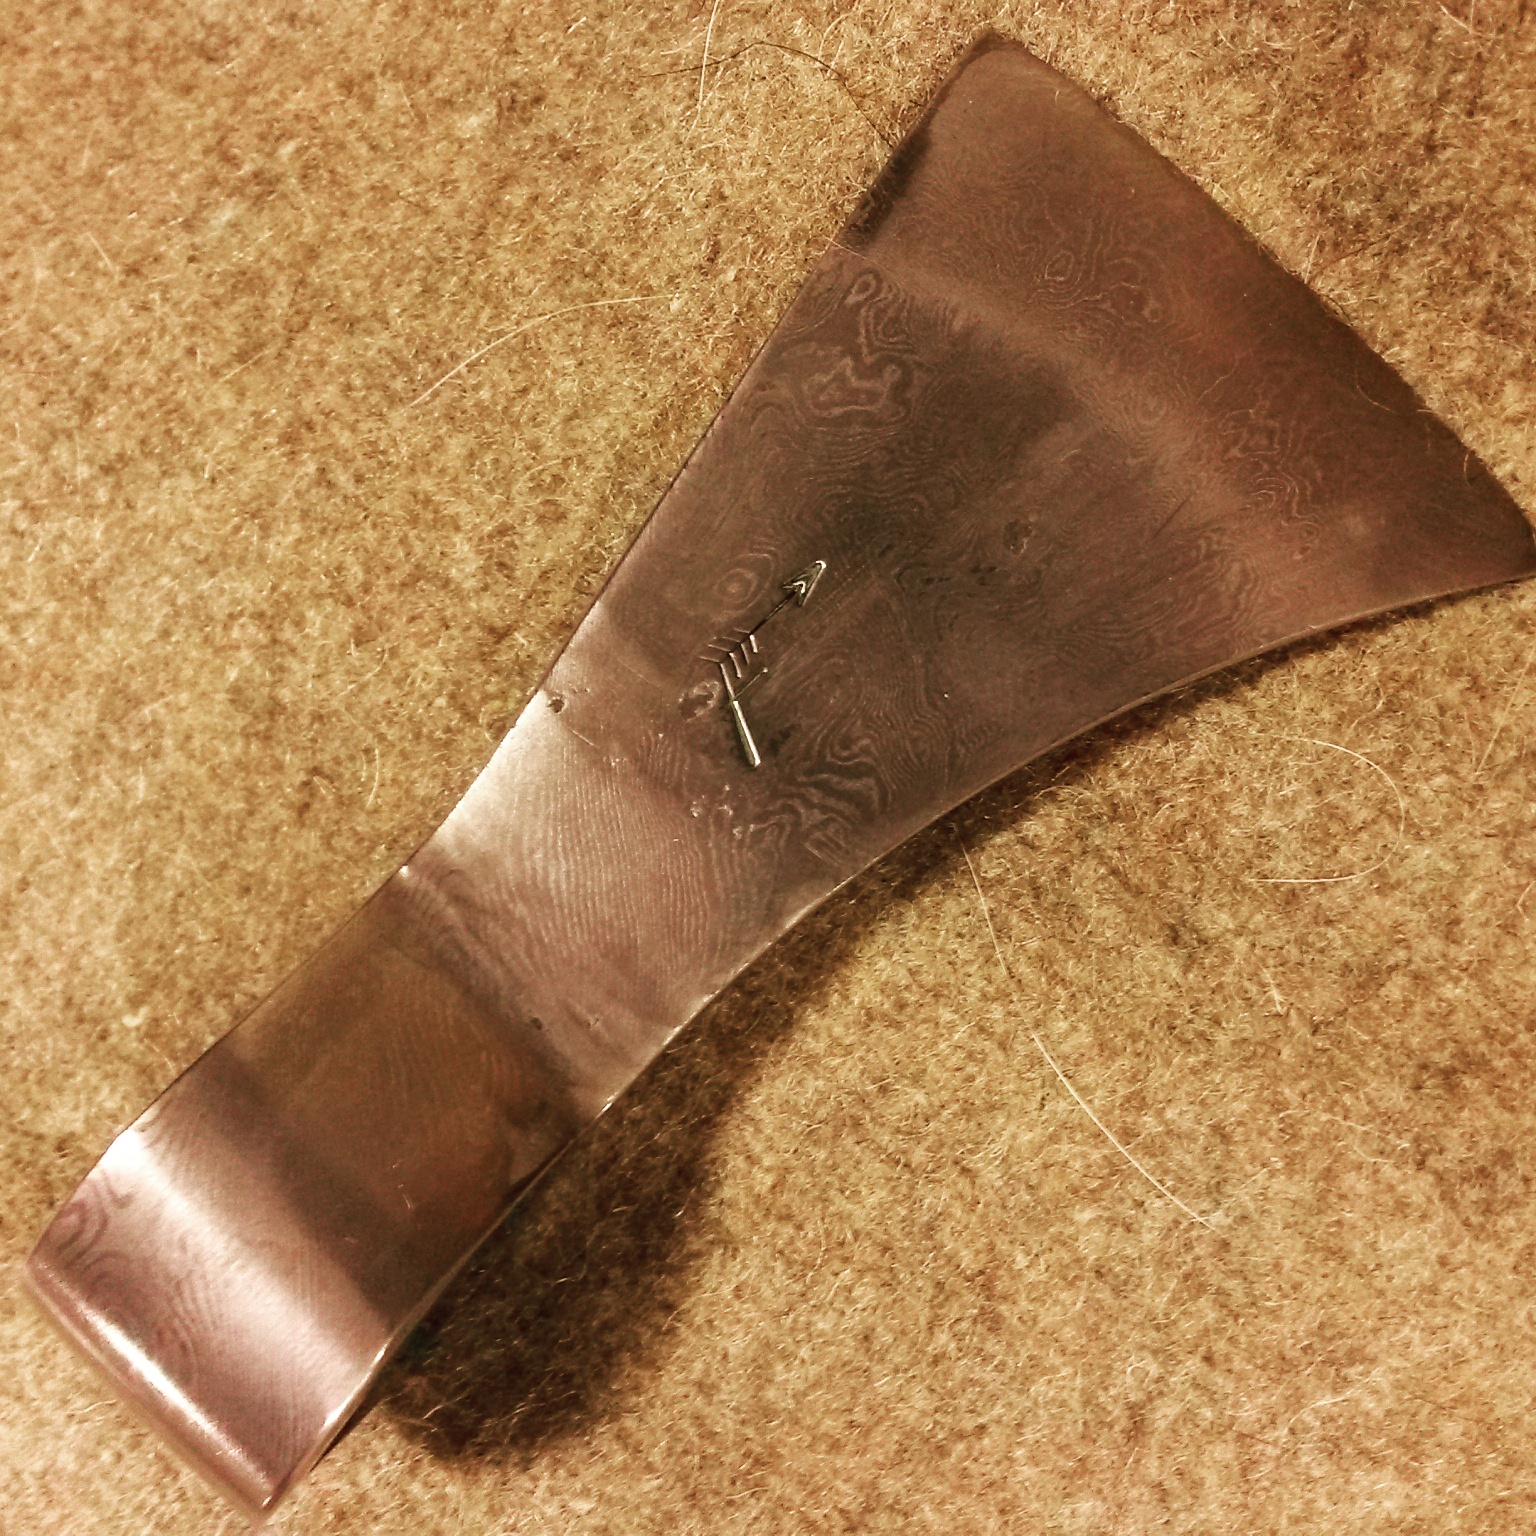
Here's a small little mouse hawk recently finished. 15n20 and 1095, roughly 224 layers. Baked at 440F for about 2 hours. Will be hung on a hickory handle, ebony stained with pewter caps on both ends. This was just etched in vinegar, 50/50 cut with water and heated to boil then poured in a coffee container with the hawk and let sit for about 2 hours. Will probably go back for a second etch, I'm not entirely happy with this light etch. Thanks for looking!

-
I'd love to cut tameshigiri at the dojo with this! Iaido practitioner here as well. JPH, this is completely beautiful. What does the double bo-hi do to the tachikaze when you cut? Does it make it louder?
-
Beautiful, buddy!
-
Stunning work, mate!
-
G'dang that's a beautiful blade. Love the Ti spacers!
-
I have Brent Bailey's axe drift. 100% would recommend. Great tool.
-
Ooh I like this knife with the brass guard. Great work!
1.75lb Bow Tie axe
in Axes, Hatchets, Hawks, Choppers, etc
Posted
Hey guys, here's one finished up recently. Forged from 10 in x 1.5 in x .5 in mild with a 2.5 x 1.5 x 3/8 in spring steel insert for the bit. I forged this to use with my chisel I forged a while back. We're adding a 125 year old red oak log cabin onto my parents log cabin from the 60's. The main goal of this project was to not only make some tools and use them the old way but to also put my heat treat through it's paces. This old red oak is hard... like $9 dollars worth of jawbreakers hard. So far, I'm completely ecstatic with how my heat treat is holding up. I did do this heat treat the old fashioned way though, not in my Paragon kiln. After quenching I waiting for my colors to change to where I wanted them and then quenched again. I know this is a pretty risky way to do a heat treat, but I really wanted to try things the old way. I did have to re-grind the chisel to have a bit less steep grind. The axe handle is proving to be a nice fit, too, being ash. I like working ash more than hickory, and it looks better to my eye. I've been using the axe to shave uneven surfaces and clean up the notches for our mortise and tenon on each log. Thanks for looking, guys! Happy Forging!