

Latticino
-
Posts
2,169 -
Joined
-
Last visited
Content Type
Profiles
Forums
Articles
Gallery
Downloads
Events
Posts posted by Latticino
-
-
Thomas,
Good point, but I would hazard to guess that the enamel materials might not be the same as those used in enameling "craft" today. Would certainly be worth testing out before application for the final product. Careful attention will need to be paid to firing temperatures (to avoid devitrification) and cooling rates, to ensure proper annealing of the glass layer. Of course you also have the issue with keeping it all in place on the vertical sides of the cup as well.
Might just be easier to find a paint on polymer that would be food safe. Not completely sure why shellac would be unacceptable for vegetarians (isn't it some kind of bug secretion?), but I don't know that I'd want it in contact with even a minor solvent like alcohol in any case. Surely there are food safe coatings available that would be OK ((how about this one for example?)
-
Enamel on gold, copper or silver is a standard, and probably OK. I'd be leery of enameling onto steel as the thermal expansion coefficients may not be all that compatible. A blown glass insert, glued in, would be my recommendation. Hand wash only, in any case.
-
Please consider coating your refractory blanket with some type of sealant (even colloidal silica is better than nothing) to reduce the fibers being blown into the air. Take this advise from someone who didn't for 10 years of regular glass blowing and now has scarred lungs to show for it.
-
Respectfully you need to learn a bit more about punching holes. As I alluded to earlier, if you are punching (removing plug of metal when you finally make the hole), you should not need to put the stock over the Hardy or Pritchett hole until after the plug has been cut clear. If you are slitting the hole your final cut can be over the hole, but you should be almost through before you go there.
I suggest you get some practice punching slots in smaller mild steel stock. Flat stock is the easiest, and can be good to practice the feel of the punch when it bottoms out on the anvil (say 1/4" x 1"). Then I'd graduate to 3/4" square. When you get up to larger dimensions it will certainly help to punch from both sides. In any case you want to limit the amount of effort you need to make to drift the eye open. You can certainly thin the walls of the eye by forging down onto the drift, but driving it open is just asking for tears and cracks, once you get the eye to more reasonable hawk dimensions.
From what I can see of the outcome, I think your punch geometry is not optimal for the thickness of stock you are attempting. Check out videos from Mark Aspery on making slot punches or see Brent Bailey's hammer eye slitters if you plan on going that way.
-
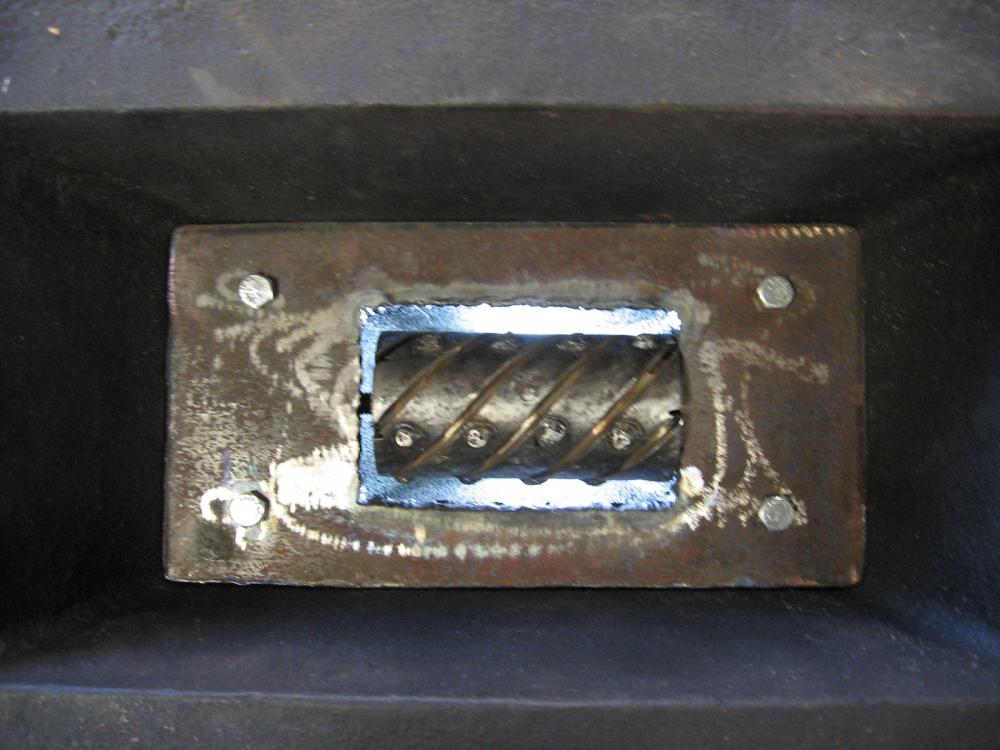
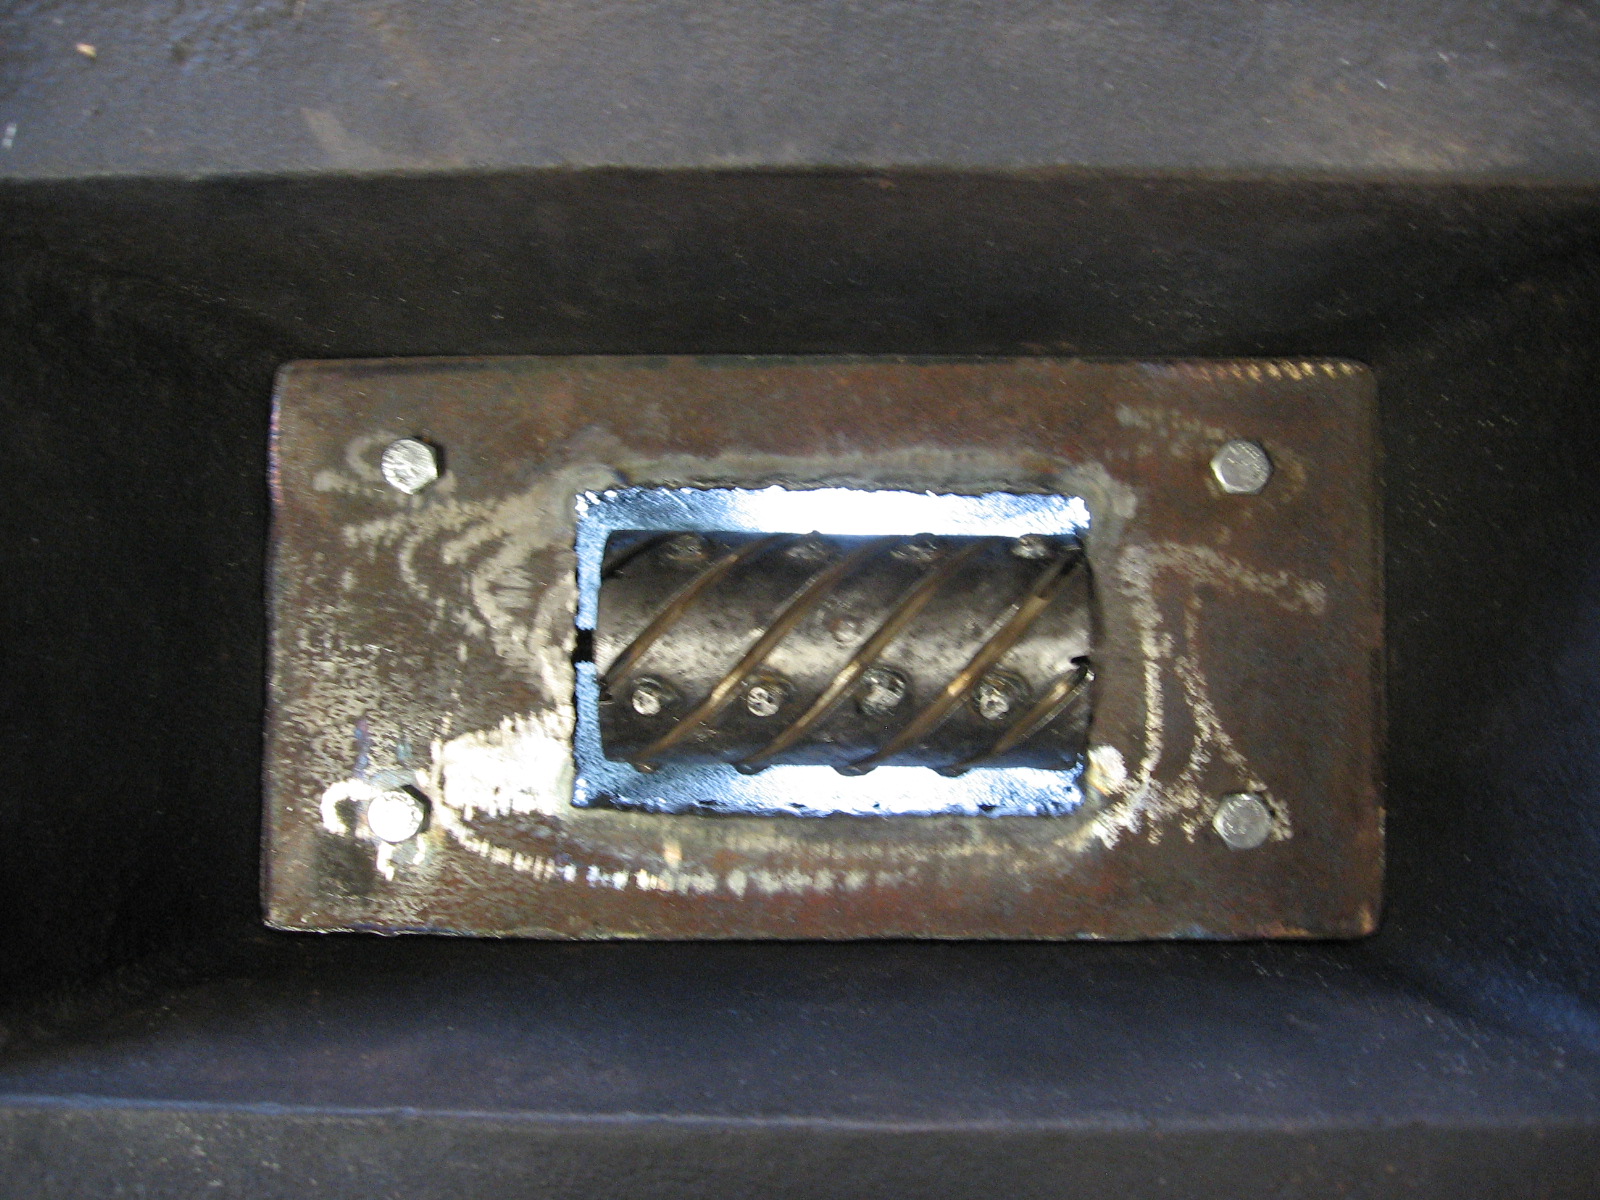
Not to hijack the thread or anything, but one refractory reinforcement that I have used very successfully is stainless steel needles like these: http://www.newhorizonstore.com/Products/129-refractory-stainless-steel-needles.aspx. They work great, but make the refractory a lot more painful to dry mix by hand before you put the water in...
As regards mixing blanket and hard refractory, I expect that it will improve the hard refractory" insulating value only a nominal amount. Remember that it isn't the blanket material that is the insulation in a refractory blanket shell, it is the trapped air in the thickness that has the radiant heat reflected away from it by the blanket material. If you fill those hollows with castable you negate that insulation. If you don't fill the hollows, you don't really have a bond, and you might as well go with the conventional layer of refractory inside the blanket. Of course that doesn't mean you can't use the loose refractory blanket material. You just need to cast a refractory cylinder between 1/2" and 3/4" thick (I like rolled vinyl flooring for molds for this - tape it together and you can easily disassemble), place it in your steel shell and pack the annulus with your loose fiber.
-
Is there any significant deformation when you are punching? You are slitting or punching a hole through the material first right? If not learn how to do that correctly first. 90% of that operation takes place over the anvil face (the plug that gets cut out by the punch protects the anvil face if you are punching, and a cutting plate should be used for the last step if you are using a slitting chisel.
Once you have a good hole in your stock: Drift hotter (stop and reheat when stock drift bears on becomes cold), drift from both sides (flip stock), ensure slot punch length is closer in size to desired drift (don't need to drift as much), keep your drift surface smooth to reduce friction.
-
Wayne,
I like your composite furnace liner construction, and it is similar to the one I'm in the process of putting in to my new gas forge (first one was a little large, go figure, but will see how it performs with a ribbon burner instead of a flame retention head). I'm going with 2" of fiber liner with a 3/8" hard refractory skin (as that is what I have on hand just now). But would certainly consider an AP Green product instead of the refractory. I'm curious how hot the exterior walls of your forge with 1" blanket get when the interior is at full forge welding temperatures. Per my calculations every inch of Kast-O-lite has about the same insulating value as 1/4" of blanket, so the 1" of blanket and 1/2" of Kast-o-lite is pretty much the same as having only 1" of blanket inside the forge (though the castable insulating refractory will certainly protect the blanket from getting damaged so easily, and if high alumina will also help against flux).
What I recall of Kast o lite, which I've used alone at 4" thickness for furnace doors (works well), is that it isn't quite as hard a surface as Greencast or Mizzou (which after setting are more on the order of 3,000# concrete IMHO). Since the insulating value is pretty nominal at that thickness I'd probably go for a tougher refractory like Greencast 97 (with 2" of blanket) and save the Kast-O lite for the doors.
-
I haven't used this material for a forge lining, but I have used a similar construction for a glass furnace liner (1.5" high alumina refractory castable, I think it was Greencast 97, inner liner, 3" Kastolite initial castable insulation lining and another 3" of lower temperature castable for the final layer of insulation). The multilayer construction was a bit prone to cracking from differential thermal expansion, so for the future I'd use a thin sacrificial layer of blanket in between each layer. Stood up for over 10 years of almost constant use though, so I'd say it was pretty good stuff.
That being said, according to the product data sheet for the Kast-O-lite 97, the thermal conductivity at a mean temperature for forging use is around 6 (BTUH x inch)/(SF x deg. F). This means for every square foot of forge surface area a 1" thickness will allow 6 BTUH to escape per 1 degree temperature differential between the forge interior and exterior. To put this in perspective we can do a rough calculation.
Lets assume that you have a 2" thick Kast-O-lite insulated forge that is 10" long and 8" ID. The mean surface area (not counting the ends - we can assume very thick doors on both sides for this effort), will be right around 2 square feet. If the forge interior is operating at 2600 deg. F and the exterior is at 80 deg. F this gives a heat loss of around 15,120 BTUH.
As a comparison, 2600 deg rated 6 # density Kaowool blanket has a thermal conductivity in that mean temperature range of around 1.56. The heat flux equation is proportional, so the same thickness of Kaowool will reduce the heat loss by 74% (i.e. 3,931 BTUH loss through the forge walls).
Therefore to get the same quality of insulation from the castable you would need to almost quadruple the thickness of the insulation layer. However, while this will give you a decent lining as regards insulation quality, the thermal mass of this quantity of material will take a lot longer to heat up. Might be a good choice for a full out production shop, but I doubt it would be satisfactory for a hobby smith.
Note that I have vastly simplified these calculations by not taking into account radiant losses, surface effects and the door losses, not to mention the significant losses included with the flue gasses.
Hope this helps.
-
As far as I'm concerned, for a hawk I would not go out of my way to get any specialty type of tool steel. I'd use whatever I had lying around that I had successfully forge welded or heat treated in the past. For my money the bit on a hawk doesn't have as stringent requirements as a high end knife, but if to be thrown impact resistance is probably more important than edge holding ability. 5160 or 4140 might be good choices, but I expect O1 would work fine also. In any case I would use mild steel for the body.
If you haven't seen this yet, this is a nice tutorial on the "butterfly" method of forming the eye and setting a bit: http://www.bladesmithsforum.com/index.php?showtopic=26567. I've used a modified method of this with some fullering of the body stock for the cheeks to preform the eye and improve the chances of getting a good weld at the front of the eye (thin the cheeks and keep the area to be welded thicker), a typical place for failure. Just remember not to drive in the drift to open up the eye once welded (though using it as an inner form to forge onto works nicely, if that makes any sense).
Good luck
-
Wrap and weld hawks that I've made were mild steel with 1084 or 1075 bits forge welded in place (I've also seen folks forge weld a small section of old rasp or file for the bits). I wouldn't use 5160 for a wrap and weld without putting a sacrificial thin shim between the sides to aid in forge welding the 5160 together. Actually in that case I'd probably do an eccentric forge welded eye rather than a "butterfly" join so I didn't have the shim centered in the business end of the hawk.
5160 would be great for a slit and drift hawk, though a lot of work to move around. Would be pretty easy if you have a power hammer or agreeable striker though. Needless to say you can still do a slit and drift in mild steel and add a high carbon bit to it after rough shaping.
-
1 hour ago, ThomasPowers said:
One thing I found interesting is that my 515# anvil needed to be restrained. It would actually walk on the stand during heavy hammering on it. Of course all it really needed was a couple of fence wire staples around the base to "corral" it. As a Fisher it didn't need any quieting down.
Finding the same problem with my treadle hammer, which I placed on some of those thin rubber floor mats to try and absorb some sound. After a bit of use it shifts around on the floor and has walked a good bit. Will need to lag it down in the near future before it exits the shop through the side walls
 .
.
-
Nice clean work. I particularly like the knotwork details. Was that conventional hand engraving, chisel and chasing, or machine engraving? Also, did you upset the stock ends before you forged out the two blade ends, or was the 1" stock large enough to do this?
Really like your double edged hawk, though I'm not exactly sure why it isn't just a double bladed hand axe (think some of them had tapered handles, didn't they)? The last question I have is with the handle wrapping. Not that you would be likely to throw this kind of presentation weapon, but having thrown some hawks I can see where a full wrap like this would get in the way of a clean release.
-
Looks a bit like one of these:
 They call it a multi-function utility bar.
-
10 hours ago, ThomasPowers said:
drill a 1/4" or smaller hole through a solid center golf ball and ram it on their tangs and then hang them up on a garden rake head mounted on the wall of a dry location
What a great file storage and handle idea. Going to steal that one.
-
I did try a hardening test on the material, but you are correct I probably should have checked into tempering it as well. Jumped the gun, but ran out of time before getting to use a coal forge with my smithing group (my forced air natural gas forge struggles just a bit getting up to the high forge welding heat that is recommended for wrought).
Well, I don't know what kind of steel it is, but I struggled quite a bit today with forge welding it onto the wrought iron body. Did pretty well with the first face, but when I got to the cross peen I ran into some trouble. As far as I know from my limited experience with wrought, I needed to heat the wrought up to high yellow heat, at least, to weld. Unfortunately the face material (possibly 52100) would crumble when I hit it at that elevated temperature. Clearly whatever it is I used has a rather short working range, though it does forge pretty well (but slowly) at orange temperatures. It was fine when I could heat the wrought from below first, but once I had a face on that side I had trouble.
Right now it appears to be bonded pretty well, though I do have a few cracks in the cross peen face I'll need to attempt to weld back together as I finalize the form. Still, if it is 52100 I certainly would recommend using a different tool steel for hammer faces. My buddy was working in tandem with me, also making a hammer, and had much better luck with 5160 and 1084. The previous wrought Iron/hard face hammer I forged had 1075 faces, and I'll probably stick with one of these easier tool steels in the future. Just got lazy and used what I had in the thickness I wanted to work with. Valuable lesson there: 15 minutes of upsetting and resizing the 1084 I had on hand would have saved me a lot of grief. I have lots more respect for those who can work with the more exotic tool steels after this.
-
Thanks to all for the assistance. Will likely take Glenn's recommendation and just work on it as is, after I get back from Peters Valley and have time to build a stand.
Actually I have the parts for a striking anvil and the hardy hole started in same. Still need to try to drift it to size (or do a lot of chisel and filing) and fab up the stand. Heating up 75 # of steel and moving it around is a bit daunting though. Fortunately both this mousehole like anvil and the Wright both have 3/4 hardy holes. Still want to make a larger hole to make it easier to drift hammer eyes and the like. May try to just drill that one.
-
Thanks, I'm pretty excited to put it to use and get forging. The small horn means that a lot of the anvil mass is under the sweet spot, so I expect to get a bunch of efficiency increase from my current 125# Peter Wright that has a relatively large horn. Not that I had difficulties moving metal on the PW, just that I've had some projects recently that used larger stock and always worried about striking with a 15 # sledge on the smaller anvil. Probably didn't need another anvil, but I just could leave this one to rust away where it was being kept, or get grabbed up by an interior designer.
-
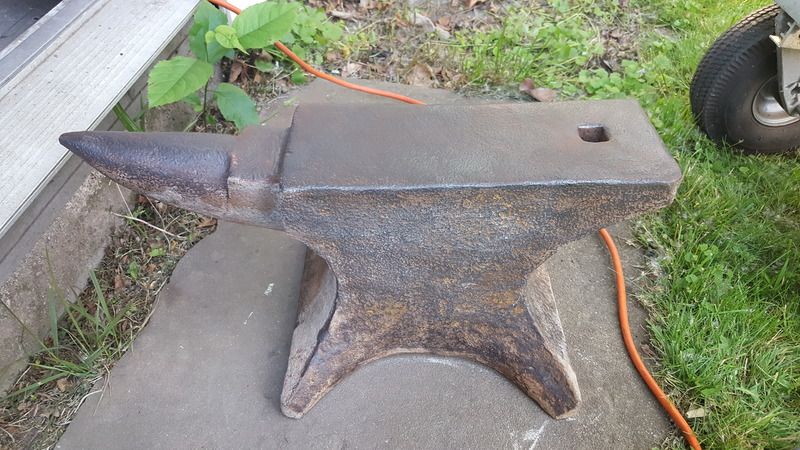
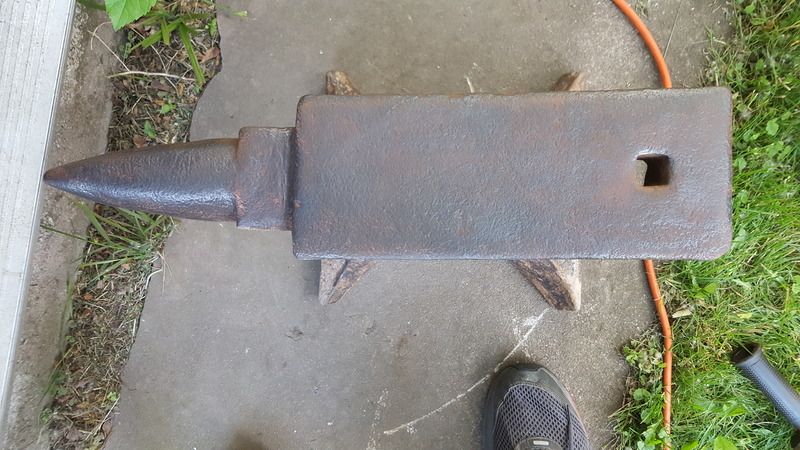
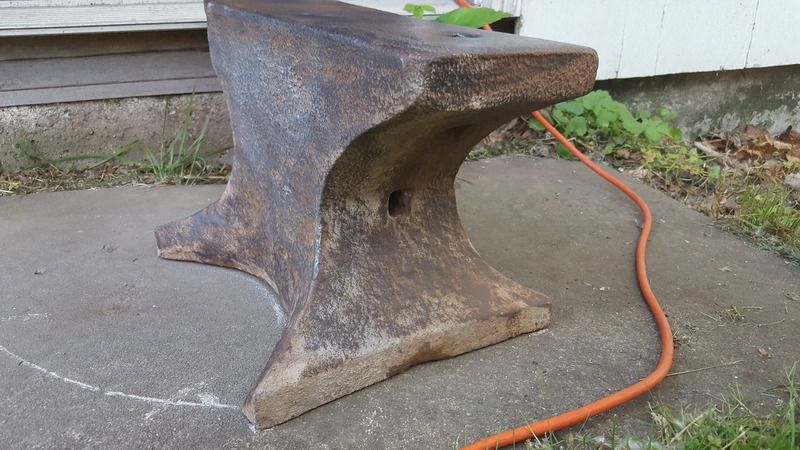
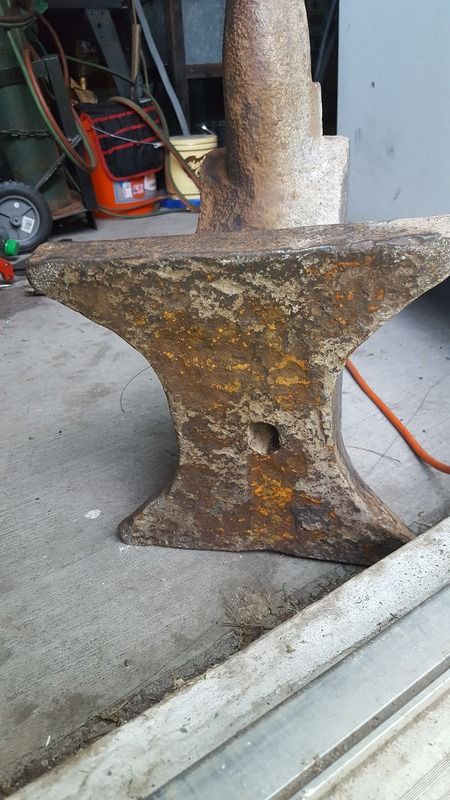
Just got lucky and picked up my second anvil off a Craig's List add. It is 165# with a 5" wide face, relatively small horn, no Pritchet hole and a 3/4" hardy hole. The face is flat and the edges just lightly radiused. Rebound, as checked with a 3/4" bearing is at around 85%. Needless to say I'm thrilled.
Did a quick clean up with a wire wheel on a 4 1/2" grinder and removed the coating of rust. There are no discernible manufacturer's marks, but I'm wondering if anyone can help me with the manufacturer from the photos below. My current theory, from what little I know of anvil types, is that it may be an early Mousehole, but I'm really guessing there.
Also there is some degree of rust pitting on the surface. I know enough not to go get it ground, or to try to "flatten the top" with any kind of grinder myself (it is plenty flat right now), but other than just using it and slowly burnishing the surface by working on the anvil, is there anything that can be done to safely accelerate the cleanup? Some light duty hand sanding just to remove the peak layer of rusted metal for example?
Thanks for any assistance.
-
It might have just been a parallel, I'm not a machinist. I have no idea what it cost, it was just rusting away in a bucket down in my father's basement. He probably got it at a garage sale somewhere.
I plan on tempering it down after the quench using my rudimentary heat treat oven. Found out the other day that it can get up to 1600 deg. F with little trouble, so should be able to use it to both anneal the hammer head before any grinding and eventually temper it there. If I can temper it down to 58 HRC (per ASTM tempering twice at around 450 deg. F) I would figure it to be OK, but I'm not sure. I've only made hammers out of solid 4140 and wrought with 1075 faces in the past. I've read that 52100 makes good tough knives, if heat treated properly, so wasn't initially worried about it being brittle. What do you think?
Thanks all for the information. As usual, members on this site are very helpful
-
Thanks for the feedback. The stock did seem to be quite tough, so I wouldn't be surprised at all if it was 52100. I think one side had a serial number on it, but I may have torched that when I hot cut it... Seems to work pretty similarly to the tank turret ball bearing I tried hand forging a while back (2.5" diameter bearing, extremely difficult to hand forge). Will probably make excellent hammer faces though.
-
A friend and I are working on forging some Viking style forging hammers using a wrought iron "core" with forge welded faces for both the large face and cross peen. I have an old, rusty 1 1/2" x 1/2" x 18" gage block that I plan to sacrifice to use for face material. I hot cut a section off last night and quenched it in water at a dull orange heat and it hardened up wonderfully, but if anyone has any idea what the typical steel type is for these I'd appreciate more accurate information so I can address proper heat treatment.
Thanks
-
-
3 hours ago, SReynolds said:
Clinker breaker. I call it the Clinkernator. It destroys clinker. Twist the handle when the air flow is a bit diminished. How do I know? I listen for the whooooshhhh sound as I rotate the crank. I can also feel the resistance to turning the crank when the passage is partially blocked..
Awesome clinker breaker. You should market those.
-
2 hours ago, ozarkmountainknives said:
No need for a metal backing, make sure your handle material is stabilized.
Assumed since the OP said the wood was just "laying around the house" that it would not be stabilized.
Kamas
in Axes, Hatchets, Hawks, Choppers, etc
Posted
I have a nice vintage hedger (corn scythe) that looks a whole lot like this one:
Always though of it as the European version of a kama and assumed it was hand forged. The blade is on the order of machete thickness and is stiff, fast and light. Certainly not meant for chopping through oak (though it does limb shrubs easily), but still wouldn't want to get in the way of one swung in anger.