

rhitee93
-
Posts
252 -
Joined
-
Last visited
Content Type
Profiles
Forums
Articles
Gallery
Downloads
Events
Posts posted by rhitee93
-
-
Wow, I missed this when you posted it. That is pretty cool. I like how it goes from refined at the business end to organic at the socket.
-
Thanks for the compliments everyone.
Frank, the 15N20 layer is from an 1/8" thick bar I have. I got the bar from Aldo about a year ago but didn't appreciate at the time how unusual that thickness is.
-
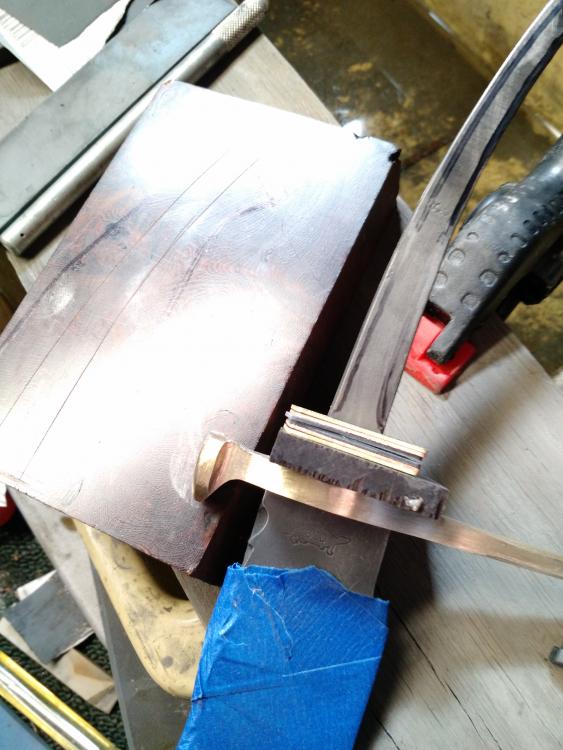
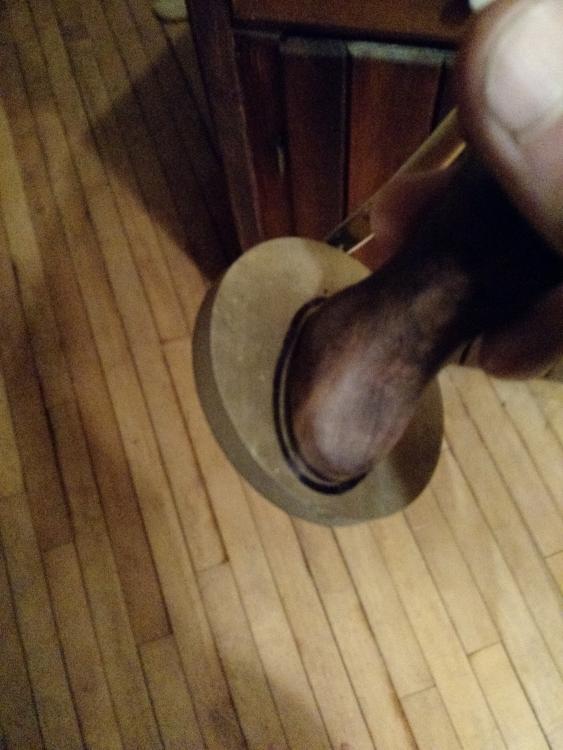
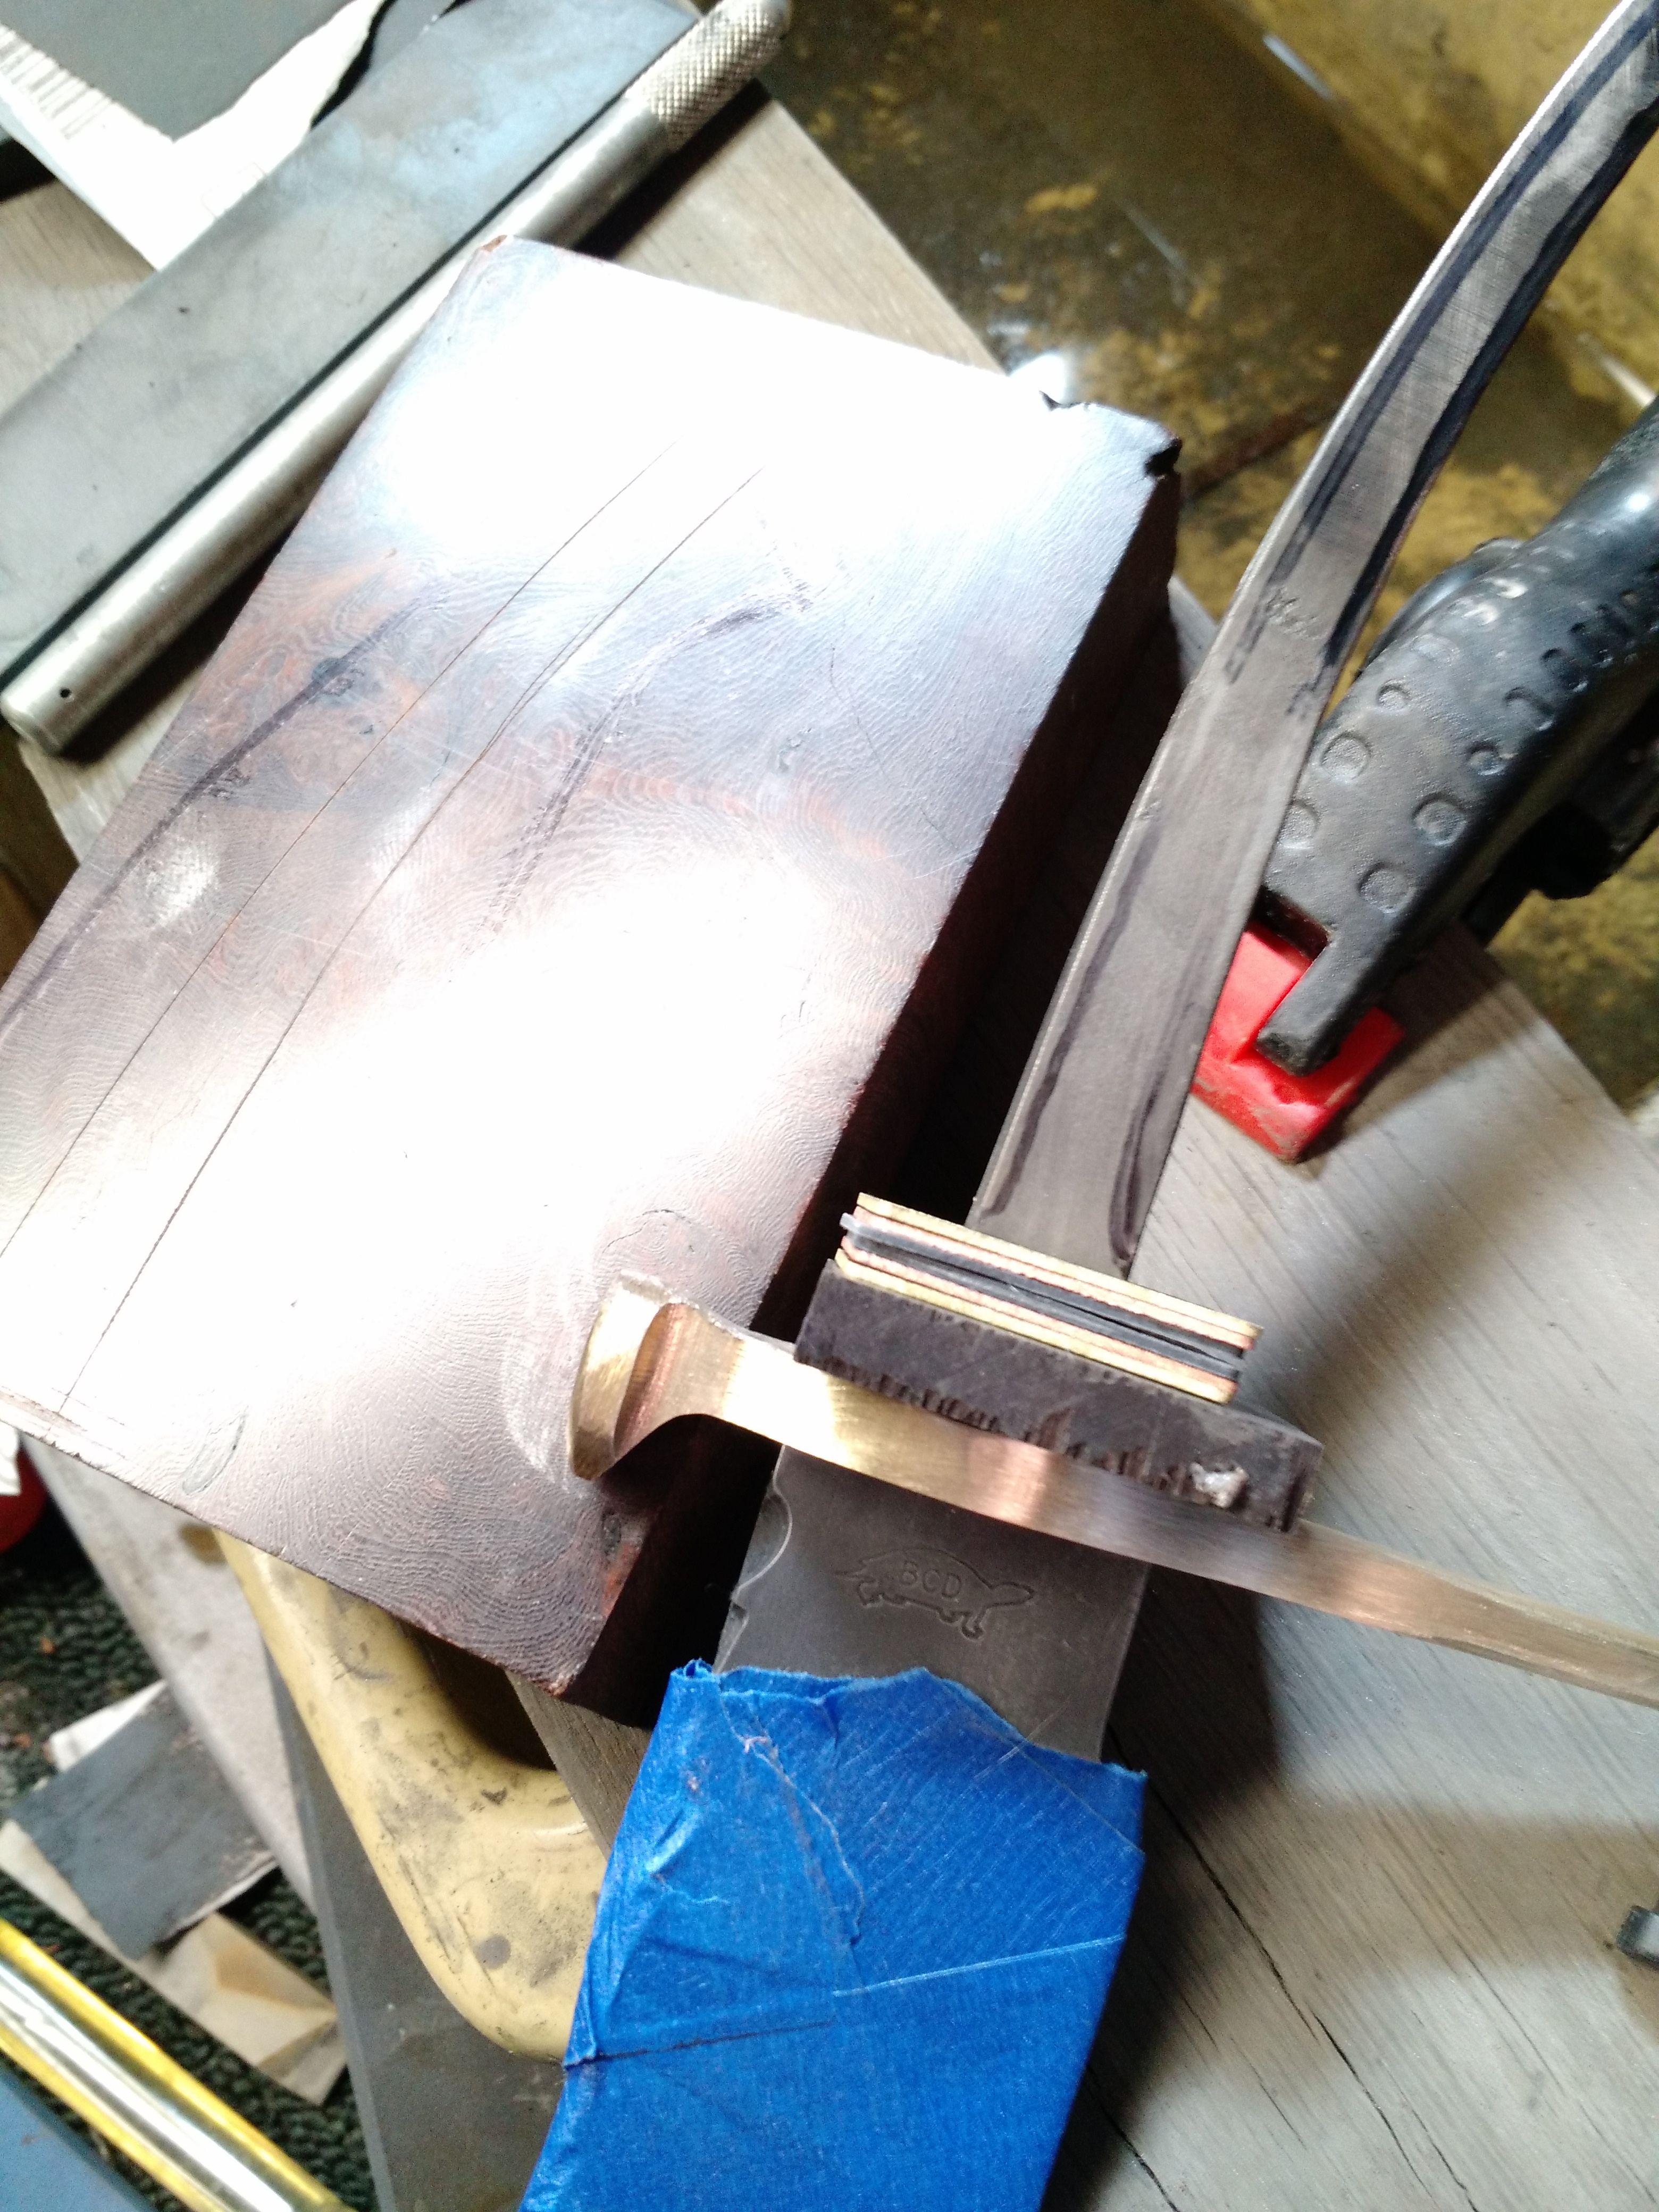
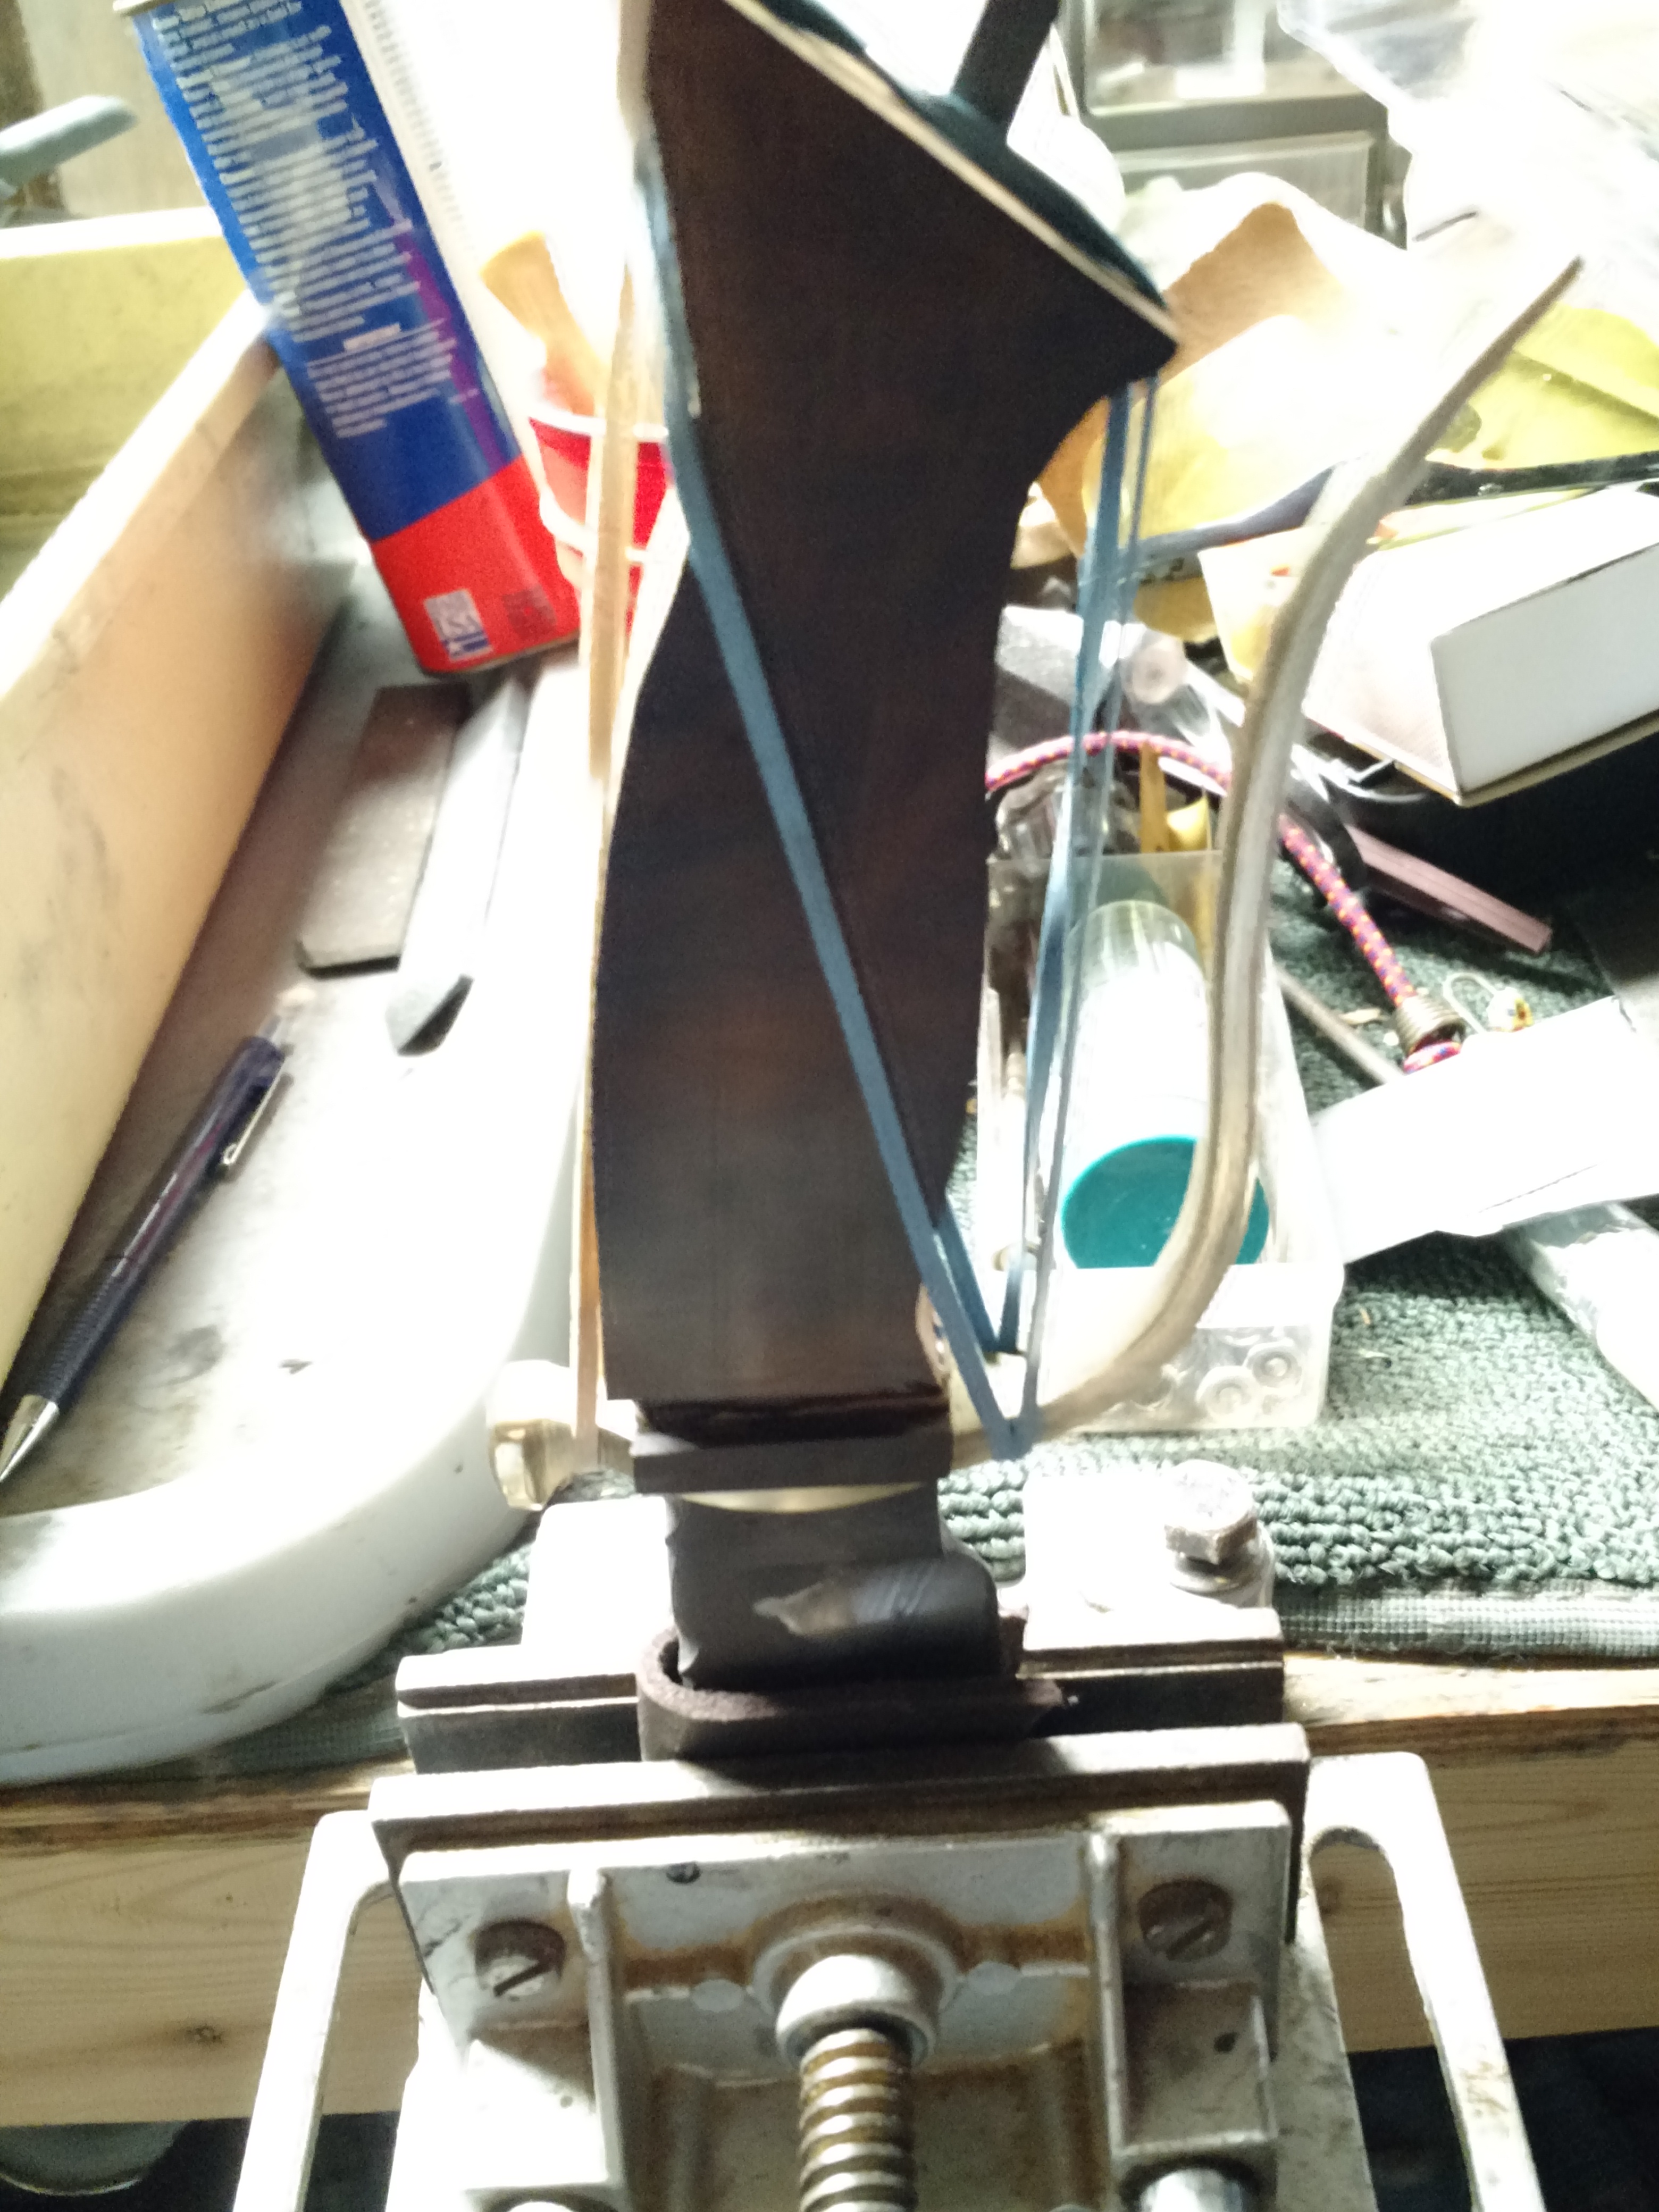
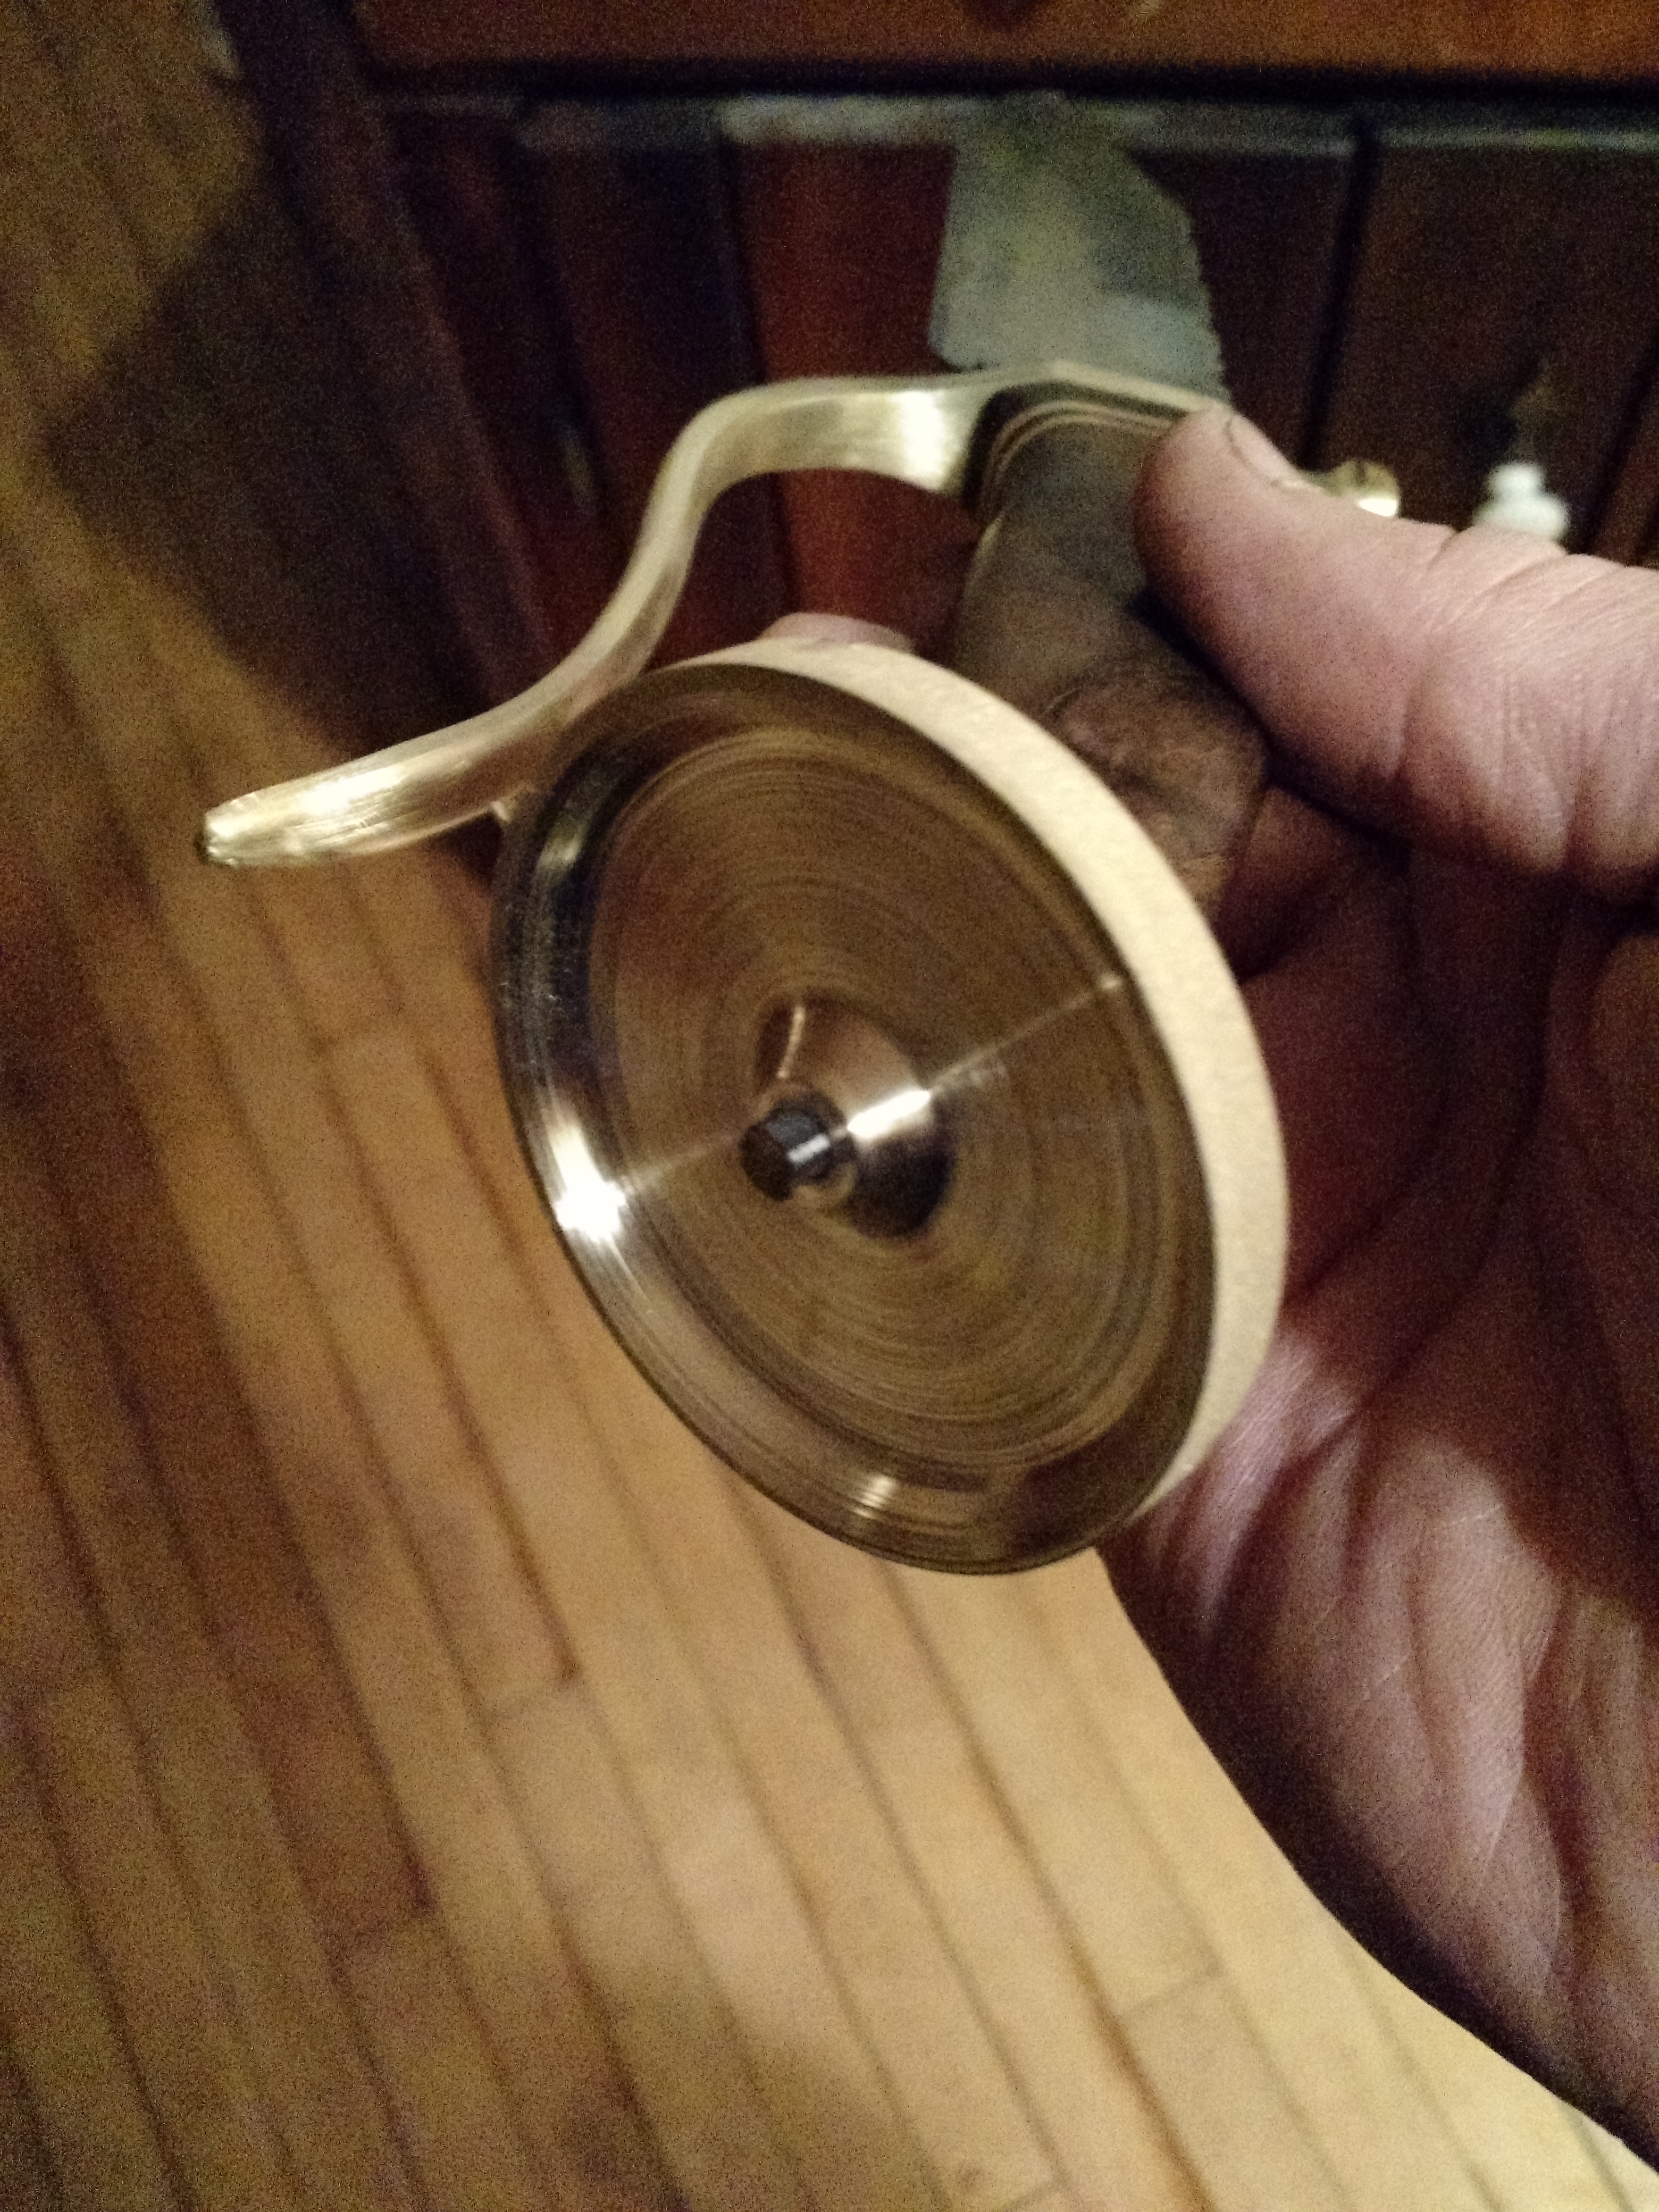
Thanks guys. I regret that I didn't take more WIP shots on this one. That is something I am trying to do more of now. Here are a couple:
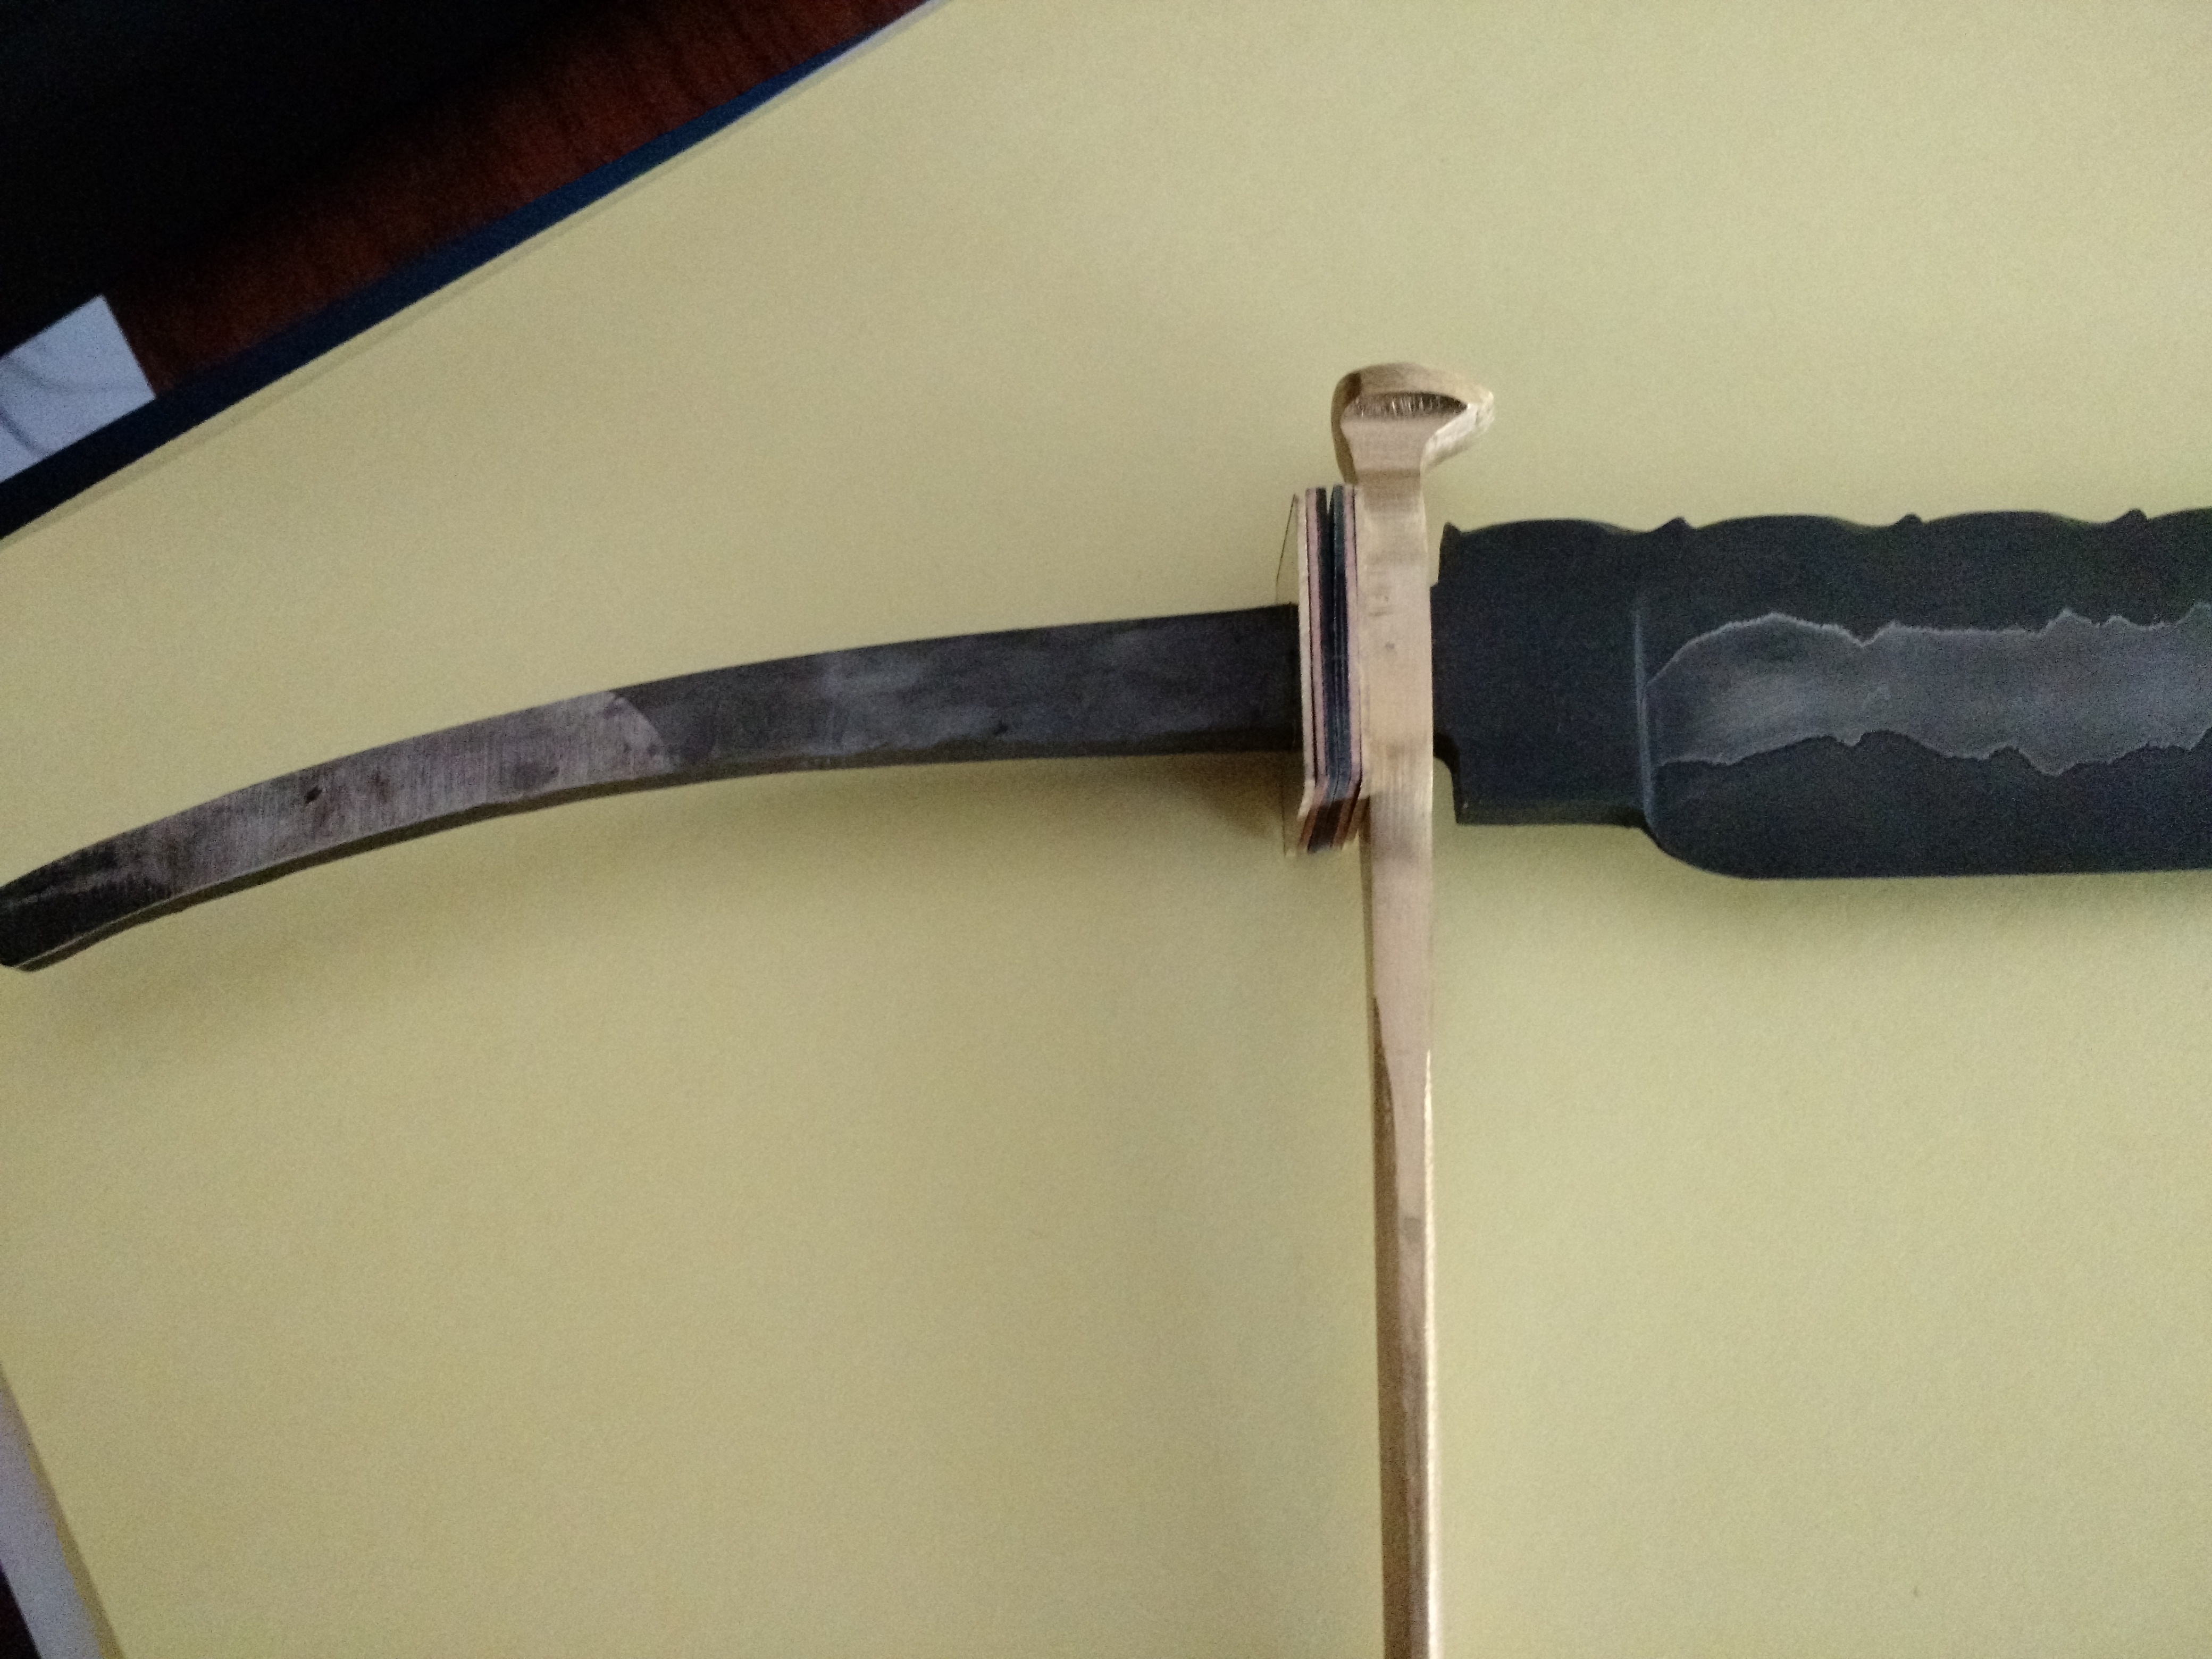
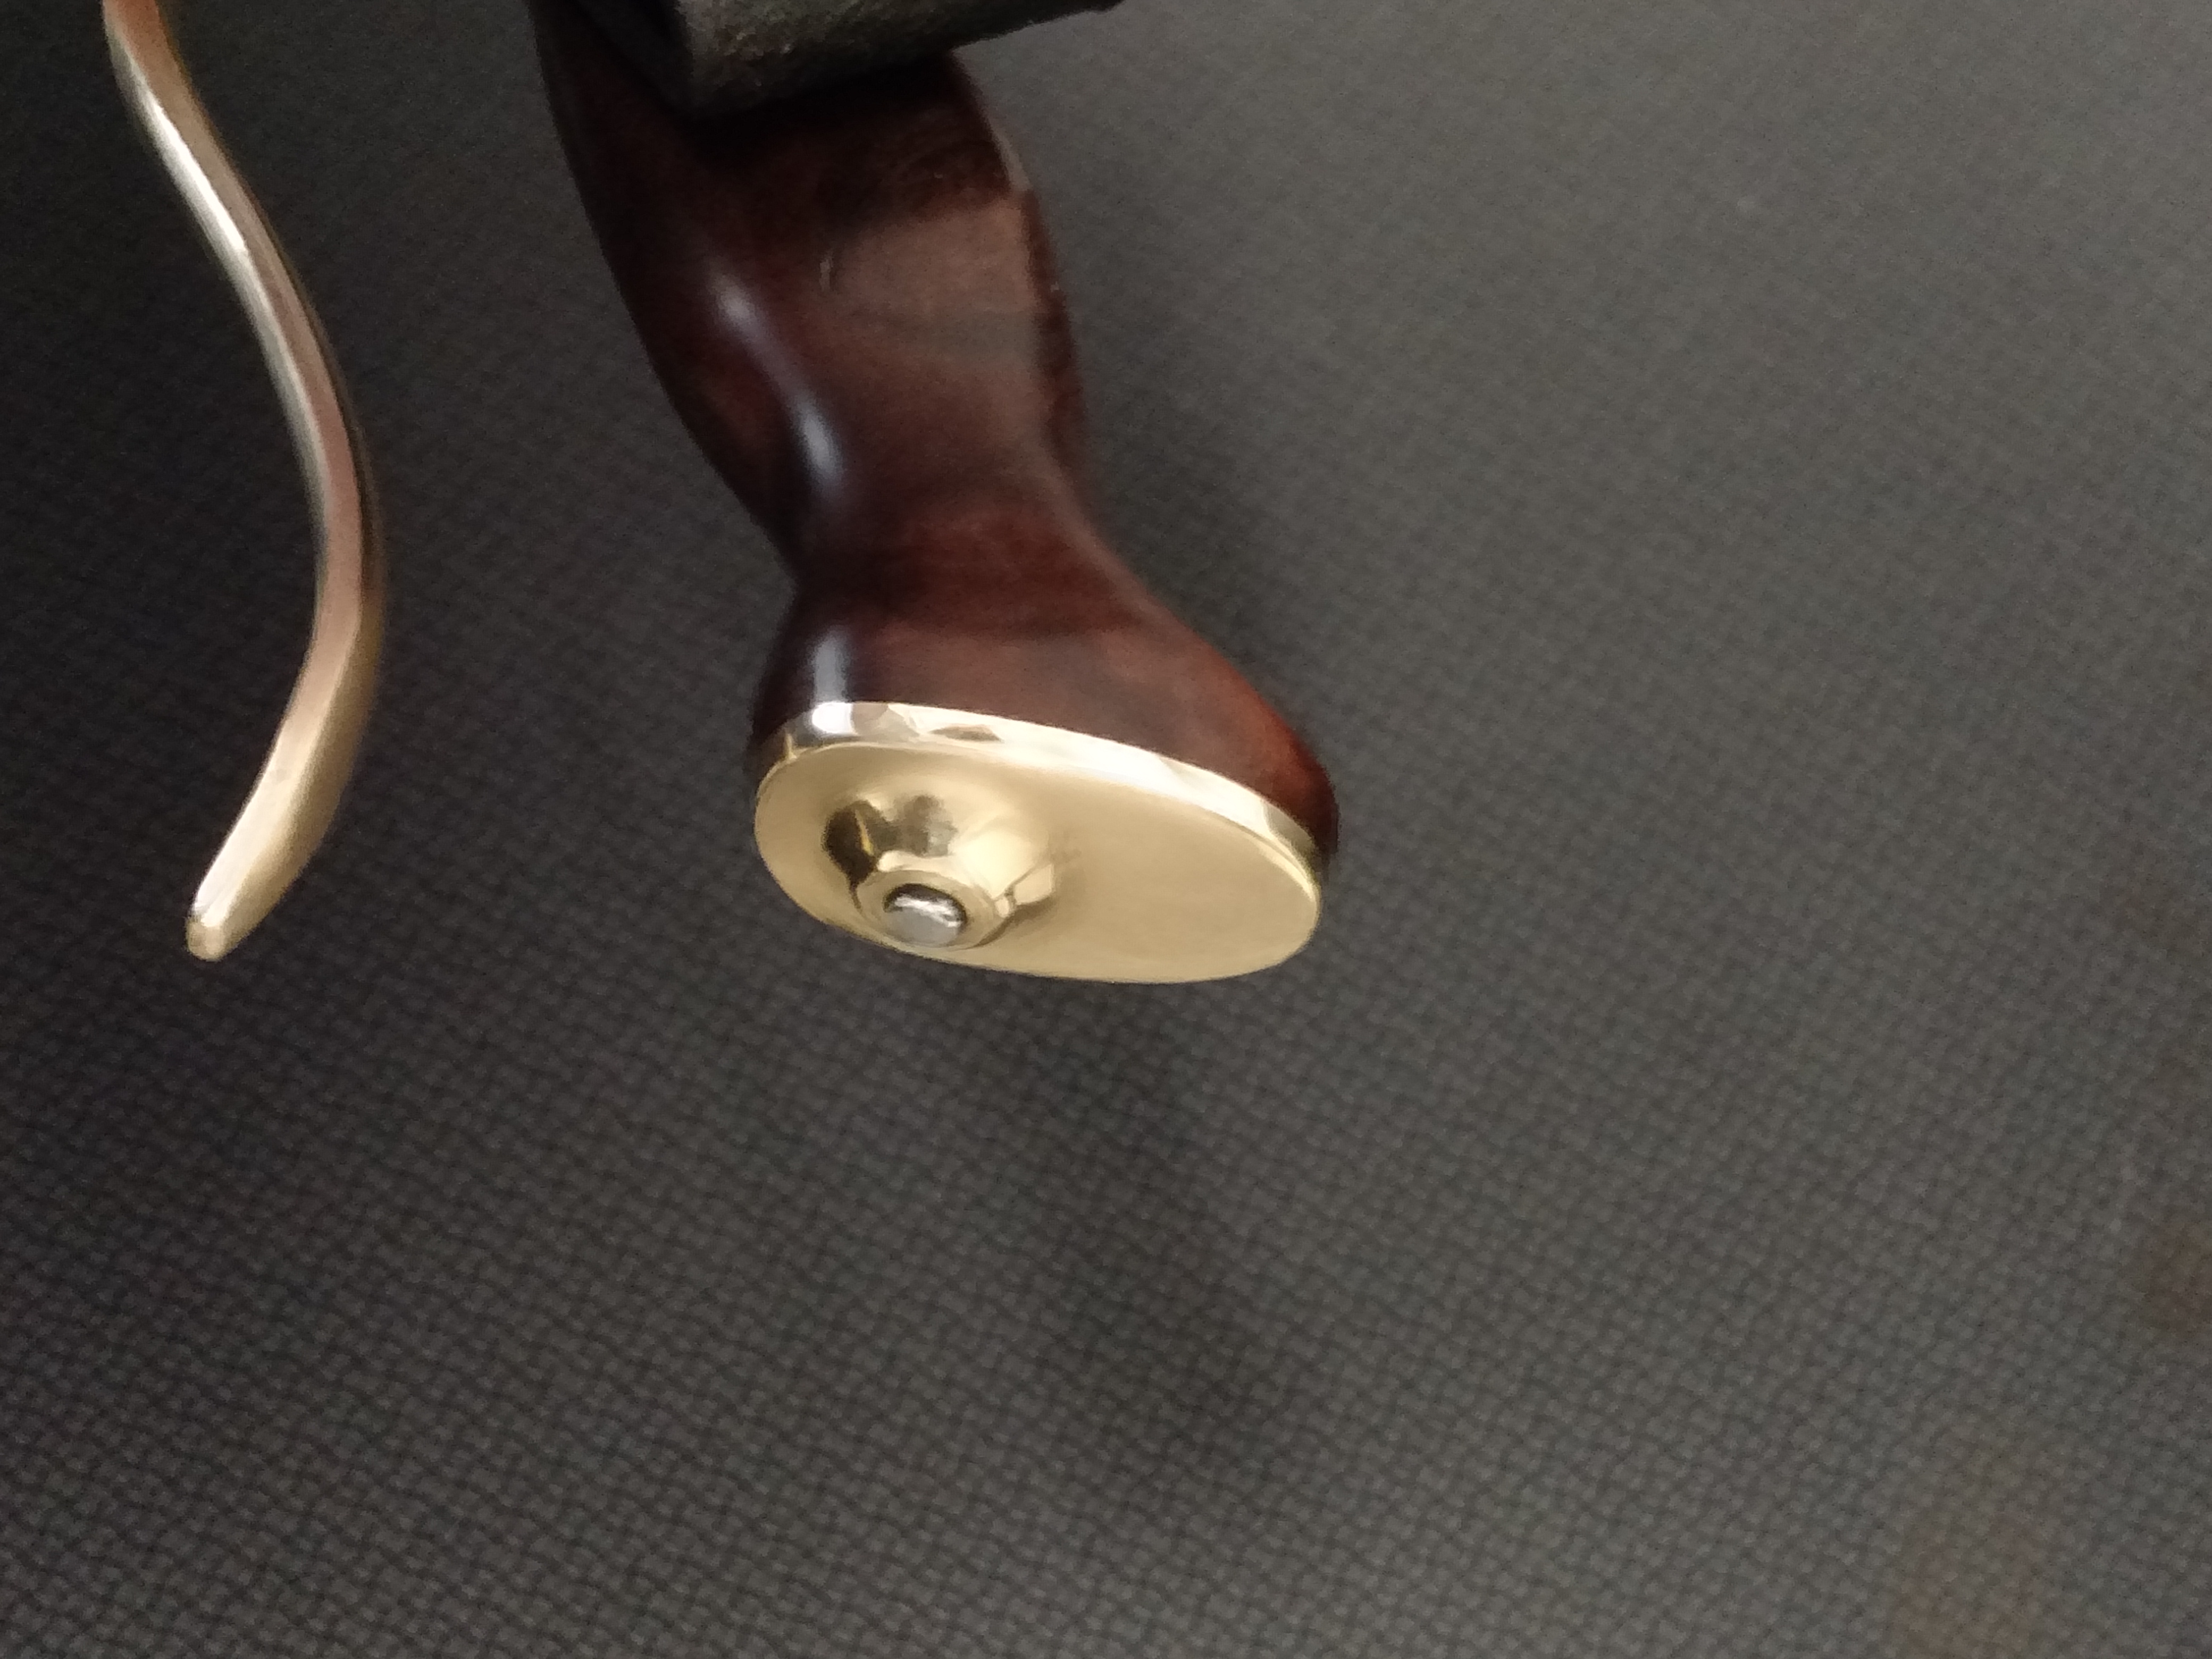
This is a closer shot of the blade while I was working on fitting the guard, and another of the pommel as I was working on the handle shaping. The pommel is threaded onto a 1/4-20 stud that I tig welded to the end of the tang.
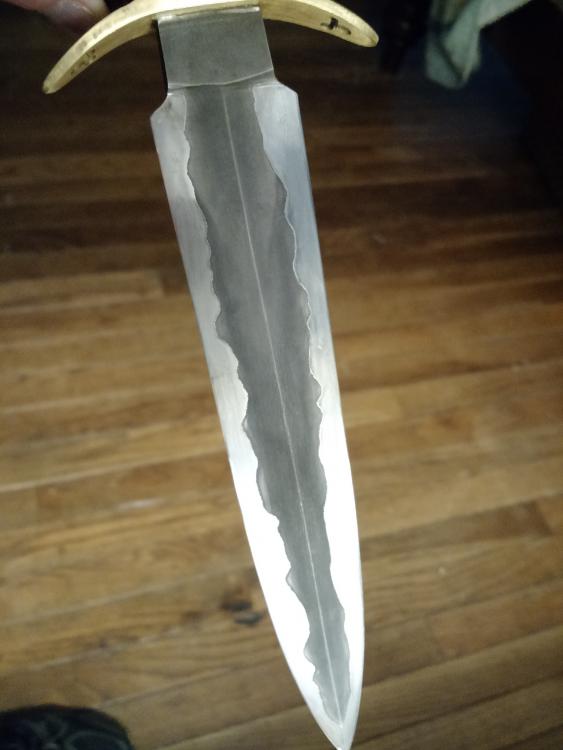

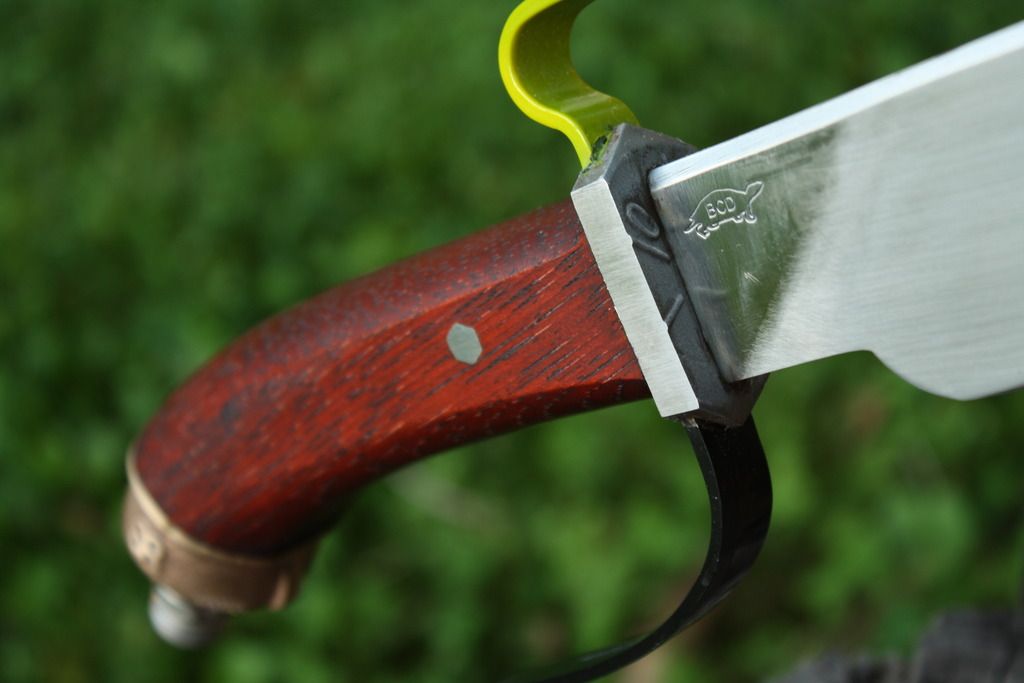
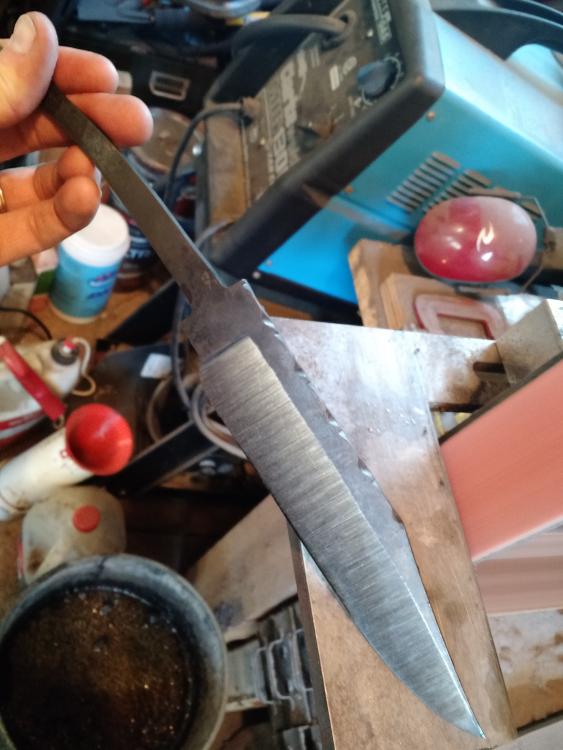
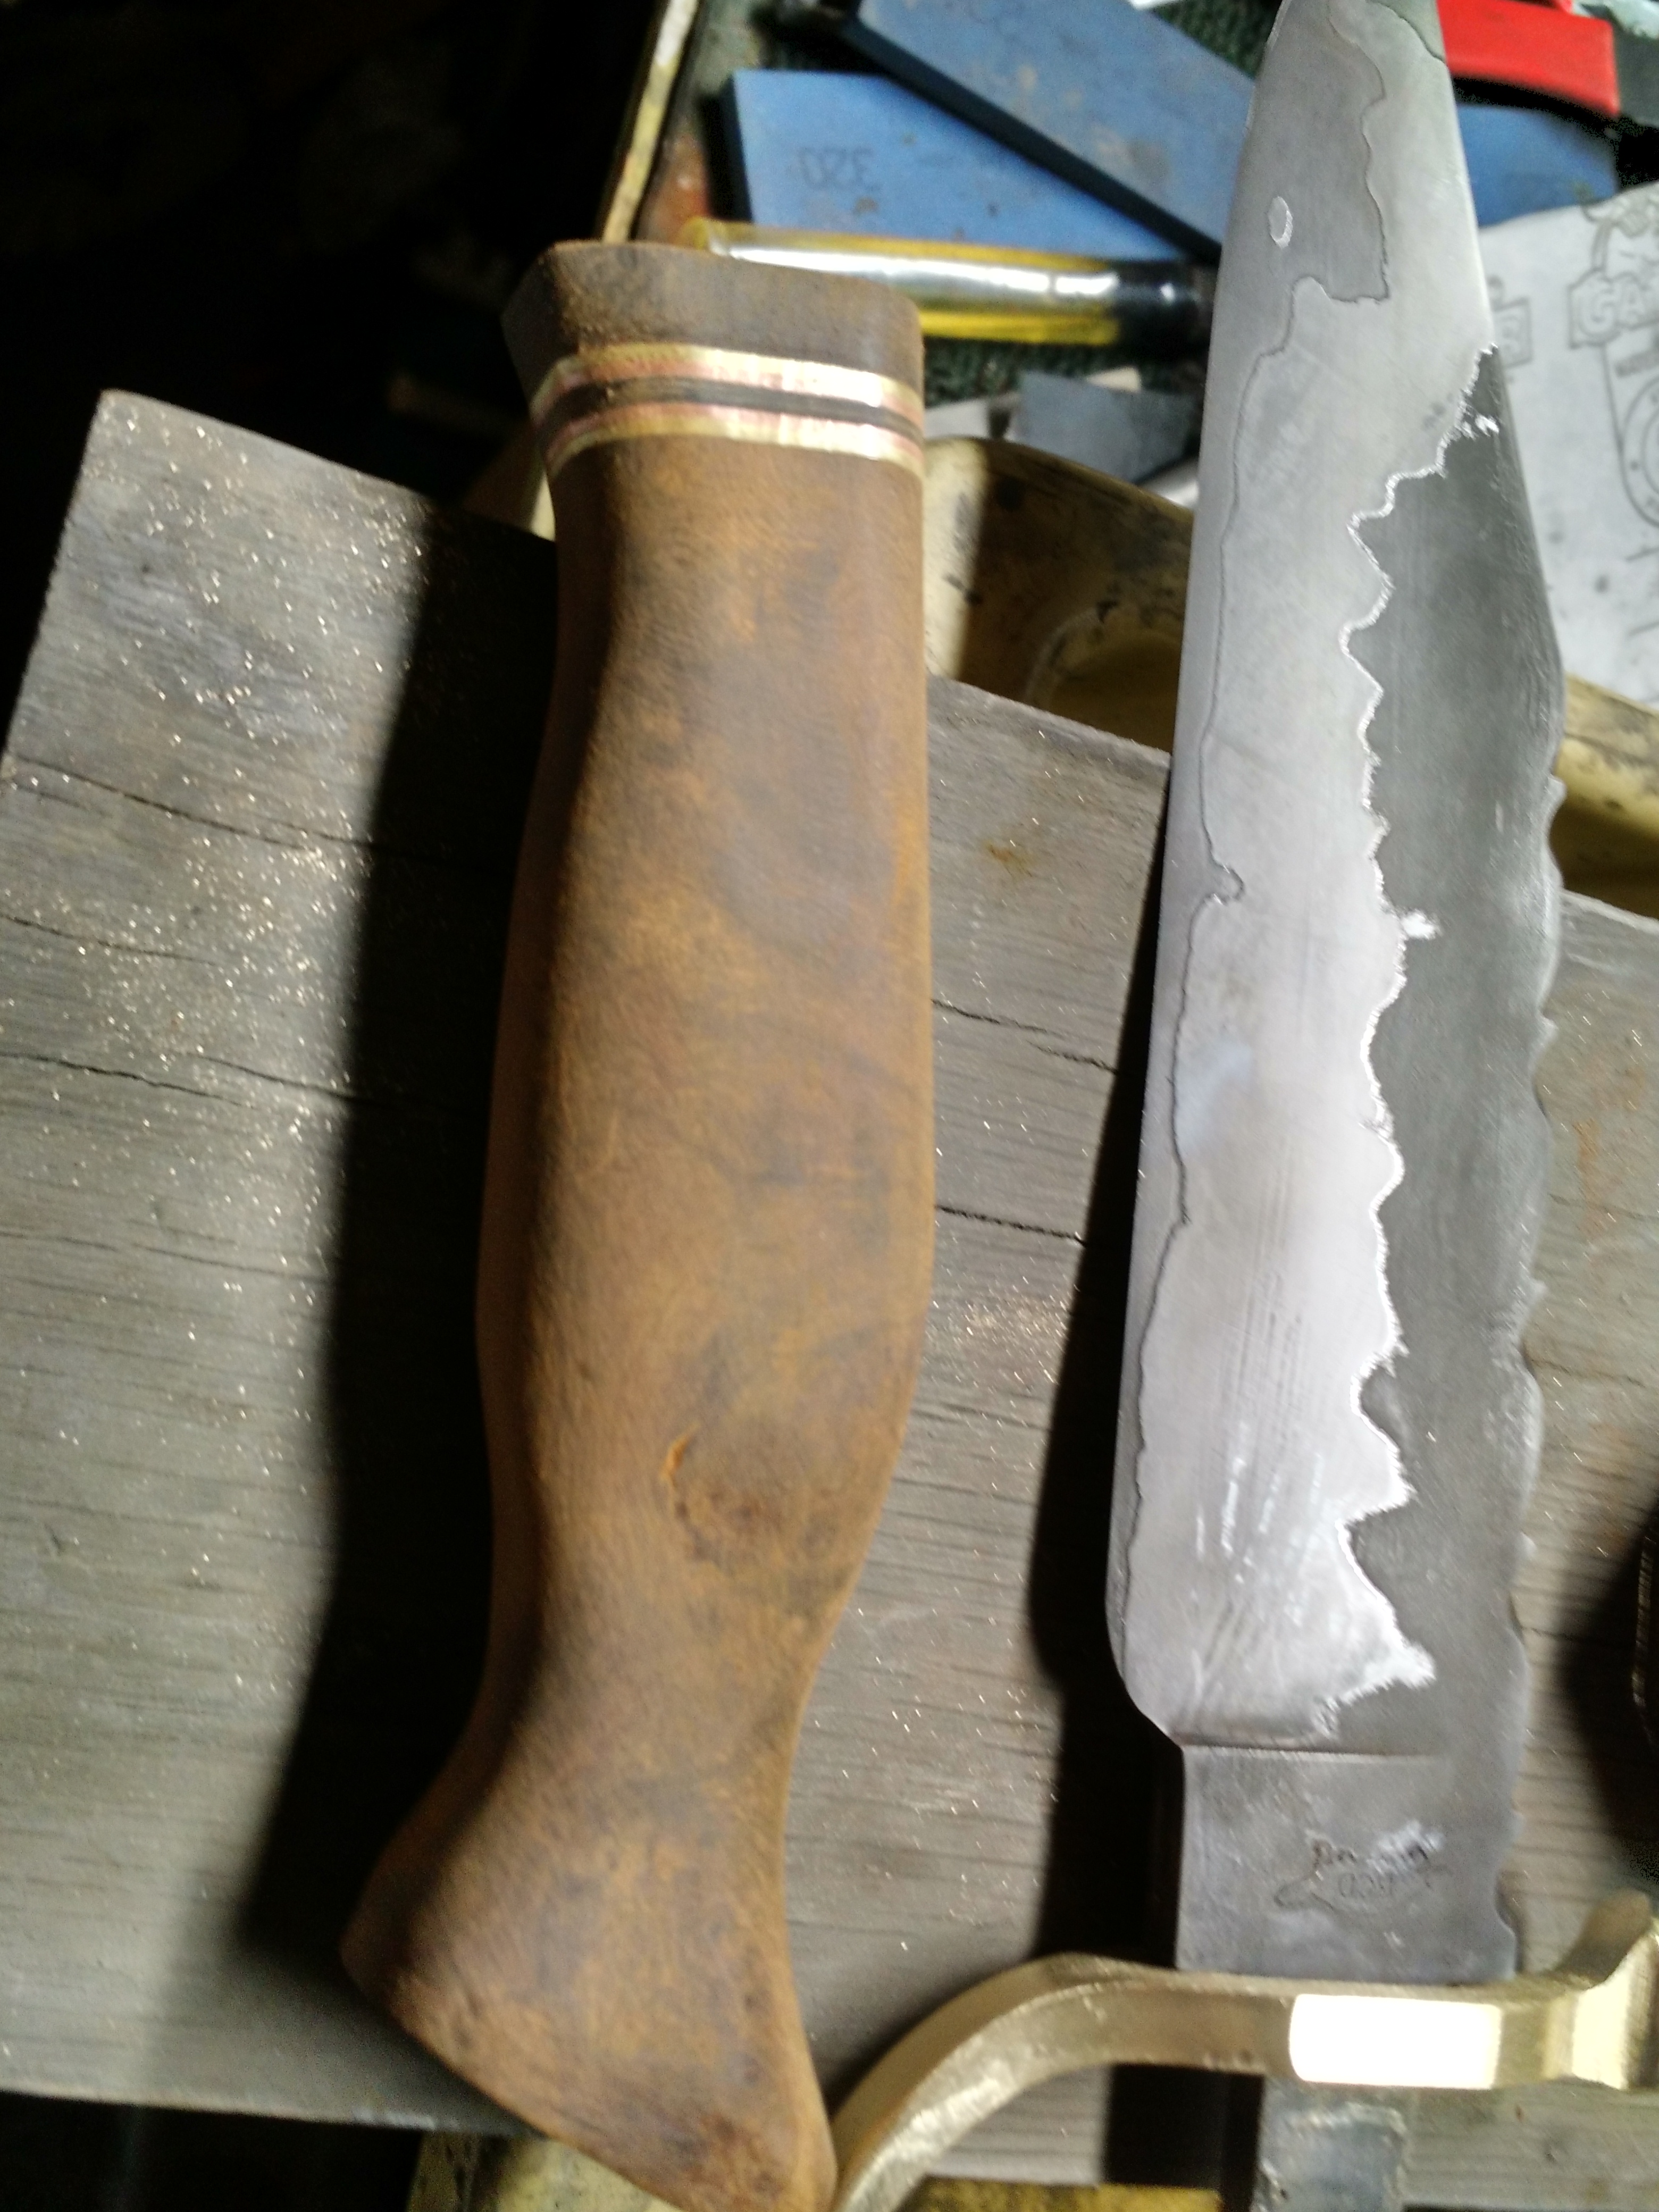
Here is the other side of the blade. It looks so much like the first pic that I didn't bother to post it initially. I obscured the kid's name for privacy sake.
-
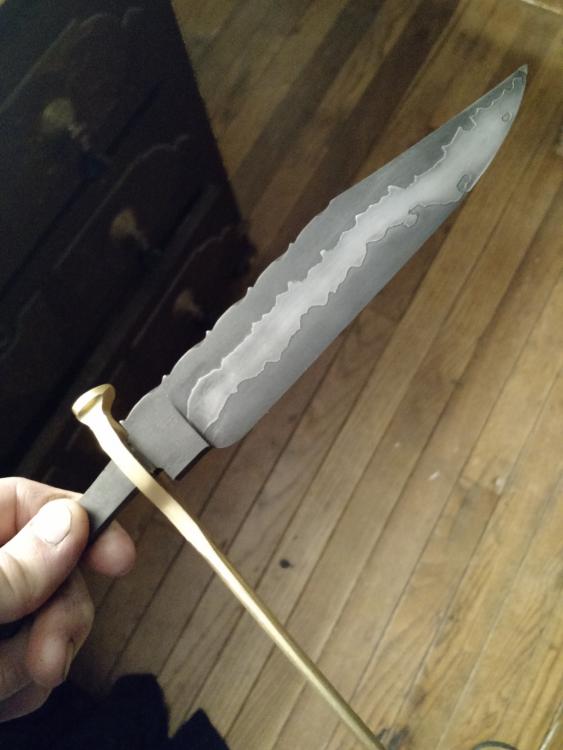
I made this knife for a friend who recently has his first child. It may be rather inappropriate as a baby gift, but he has been in the work force for over 20 years. He can afford to buy his own diapers and other baby gear. I wanted to give him something he couldn't buy.
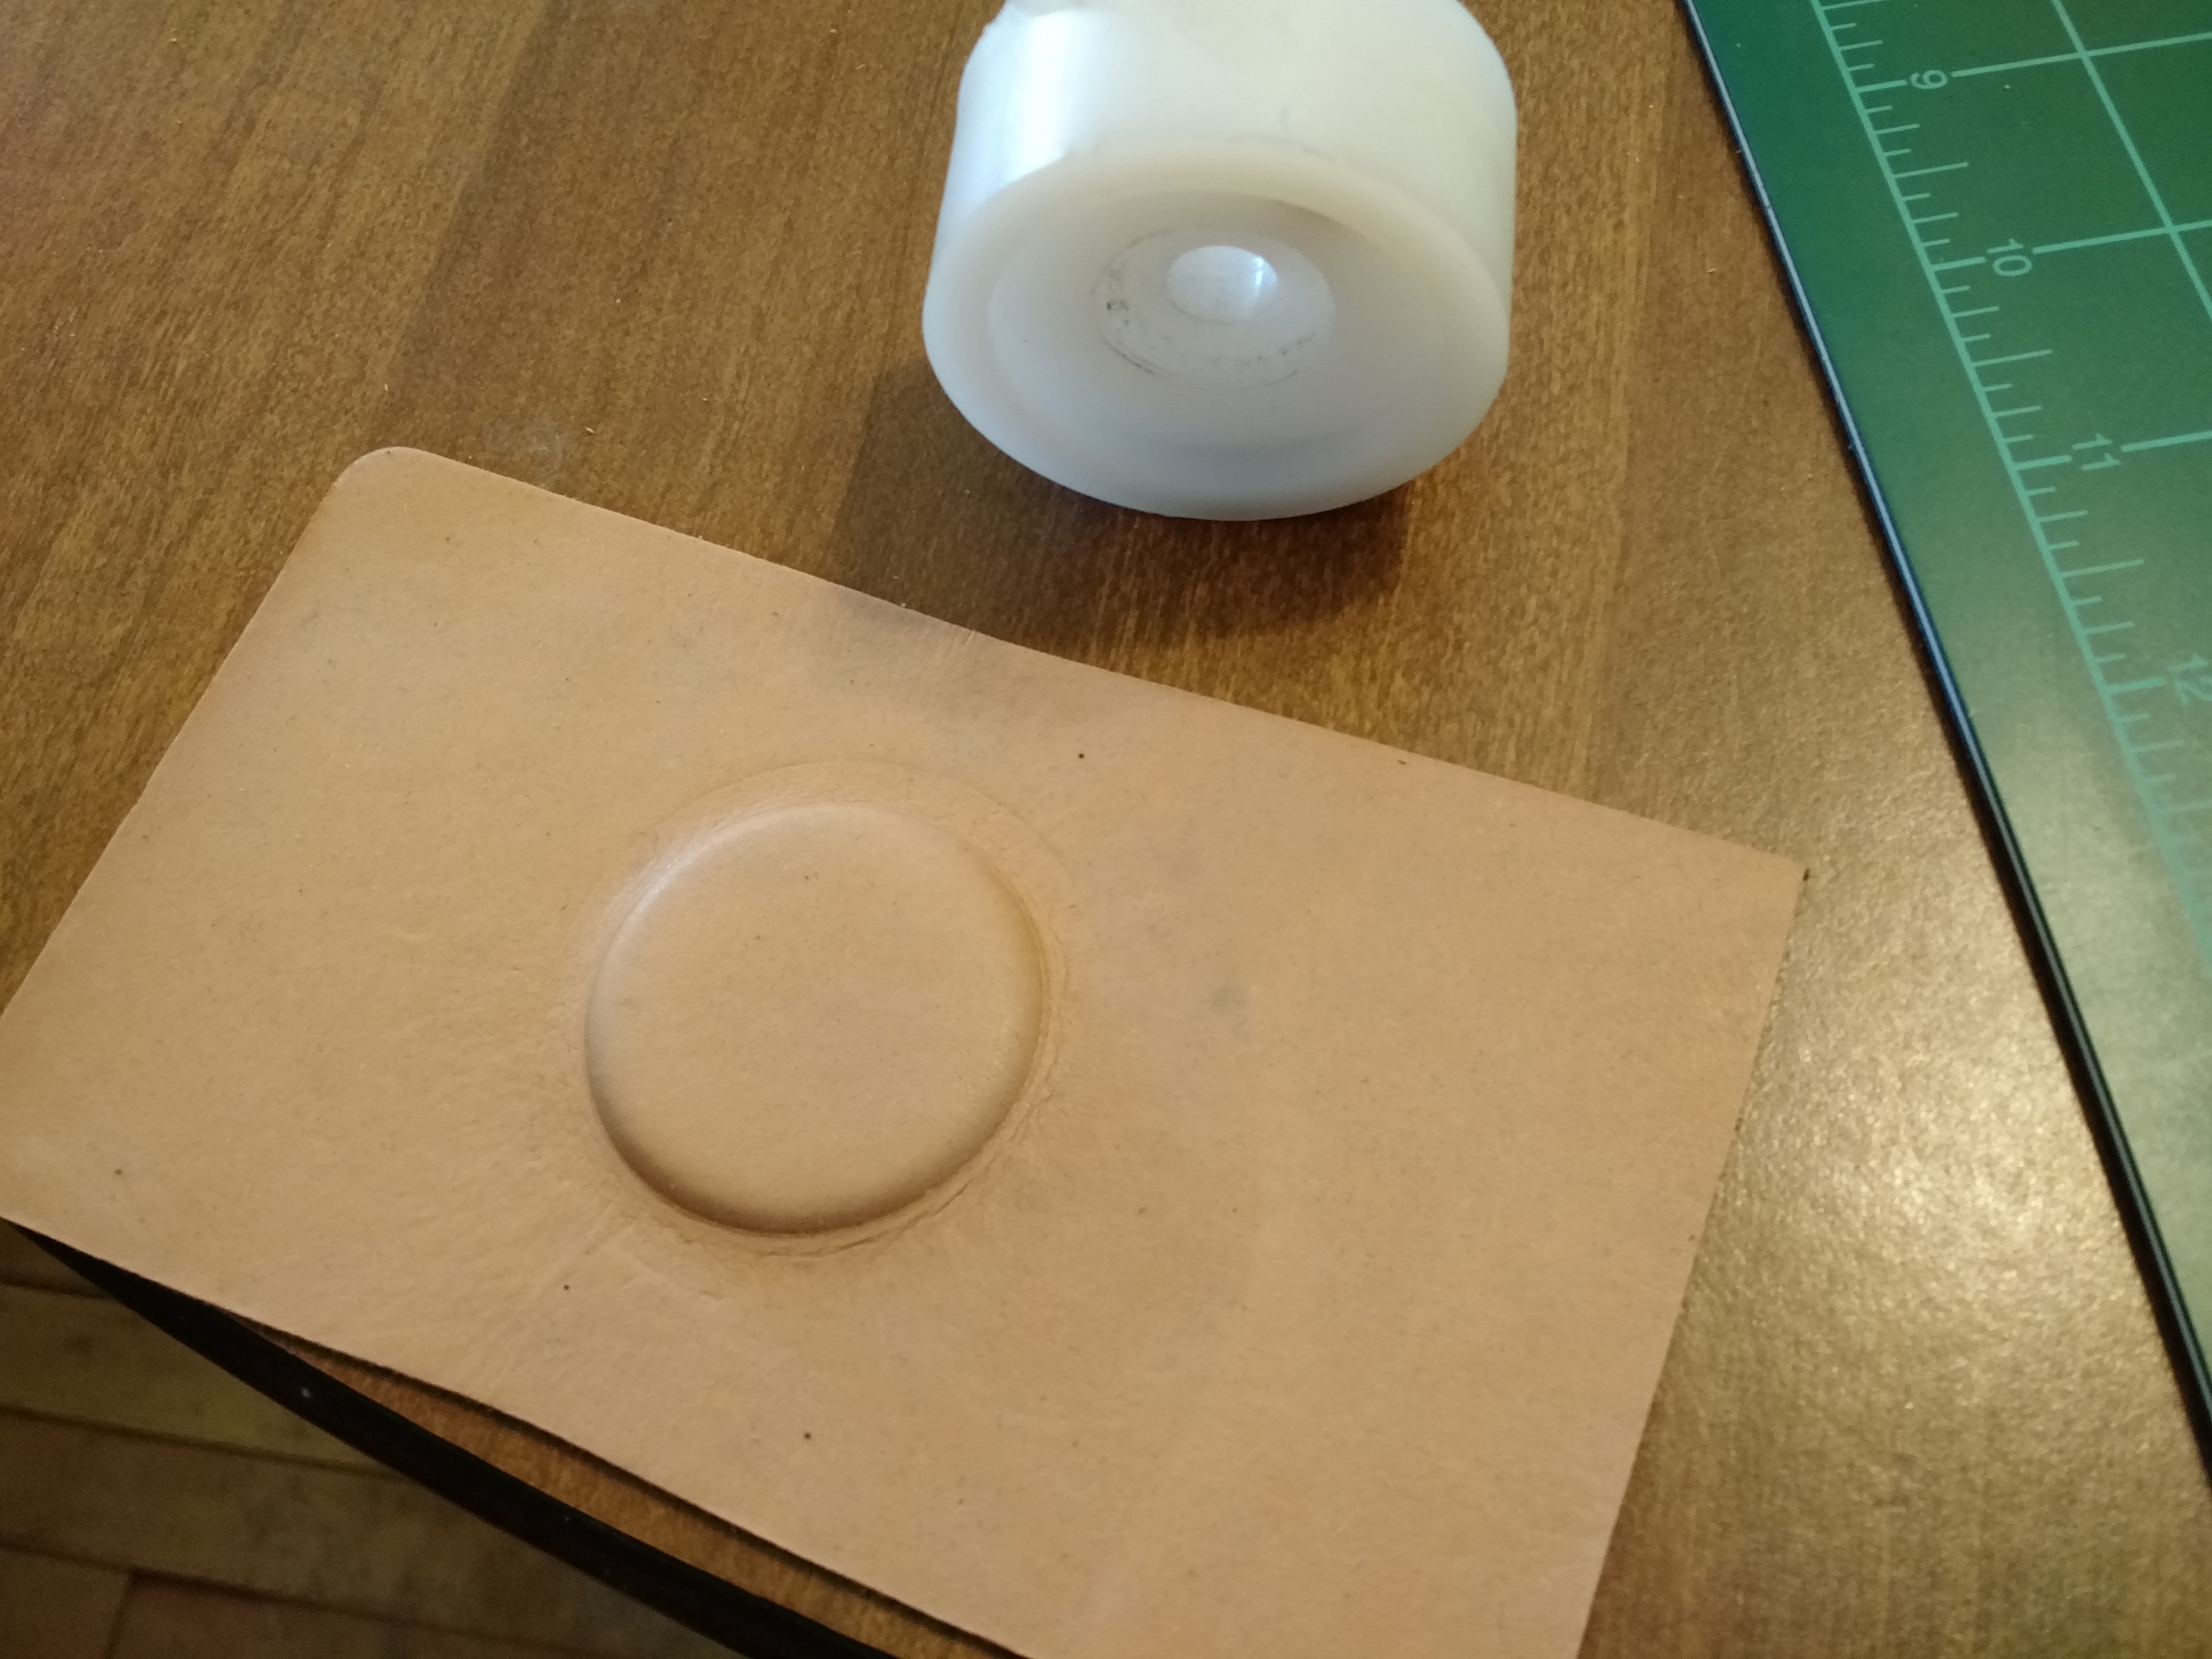
It is a 3-layer construction with 15N20 in the middle and 1084 on the outside. The hilt is made from brass, and maple burl with African black wood and copper accents. The pommel is actually a hollow construction to maintain balance, and the engraved disks are sterling silver. One side is engraved with the child's full name, and the other with the birth date.
Thanks for looking, and critiques are welcome...
-
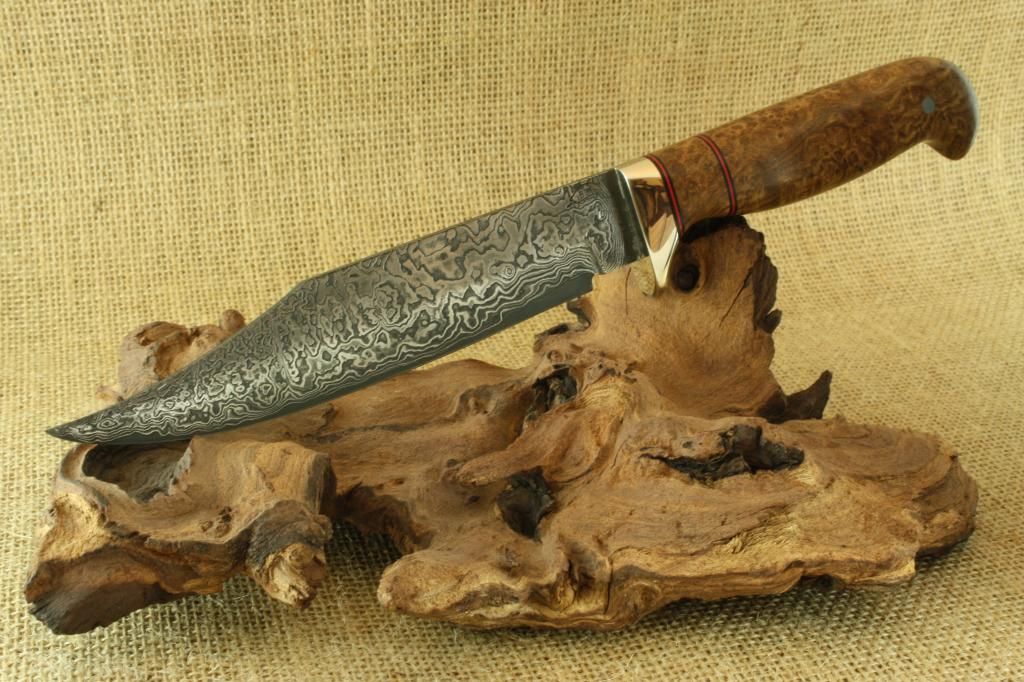
That is a very striking pattern. Feather damascus is out of my range at the moment, but would you care to share you billet composition?
-
Thanks guys. The challenge isn't a competition, but rather everybody just agrees to try a certain challenge. In the end, you swap your knife with some other maker at random. It's all for fun and learning. My work is pretty amateurish compared to a lot of the other makers, and certainly won't be the "Best" knife in the lot. (whatever best means...)
-
This wasn't part of your original question, but I suspect you'll find that tempering 1075 at 500F is going to give you results that are pretty soft for a chef knife. Opinions vary, but I would have tempered at 390F.
That being said, it looks like a good start otherwise. I'm not a fan of a ricasso on a chefs knife, but Wusthof puts them on some of their high end knives.
-
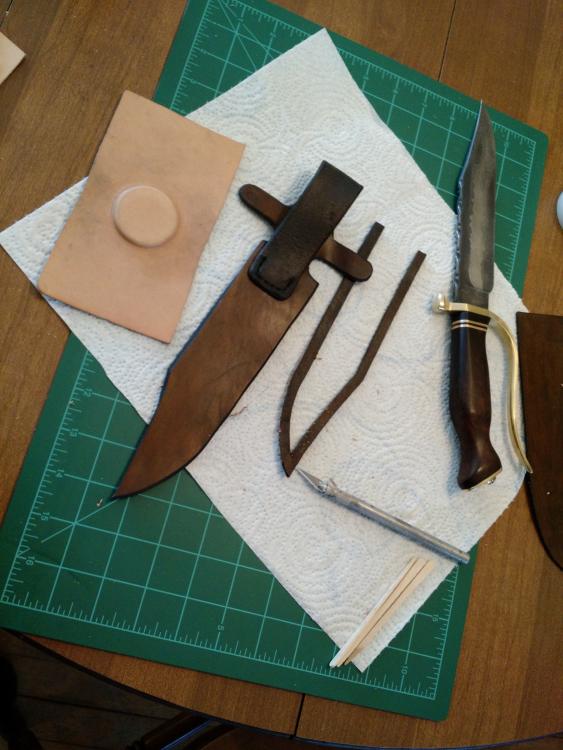
Unfortunately, the pockets got sealed up because the fiberglass resin soaked into the denim.
I used a 3/16" hex broach to form the hole for the pin.
-
1 hour ago, littleblacksmith said:
ive never seen jeans in a hardware store.....
Littleblacksmith
I actually buy my jeans at the local farm store. Piasesy daughters off, but you can't beat $10 a pair. I did buy a new pair, and use an old one for the sheath though...
-
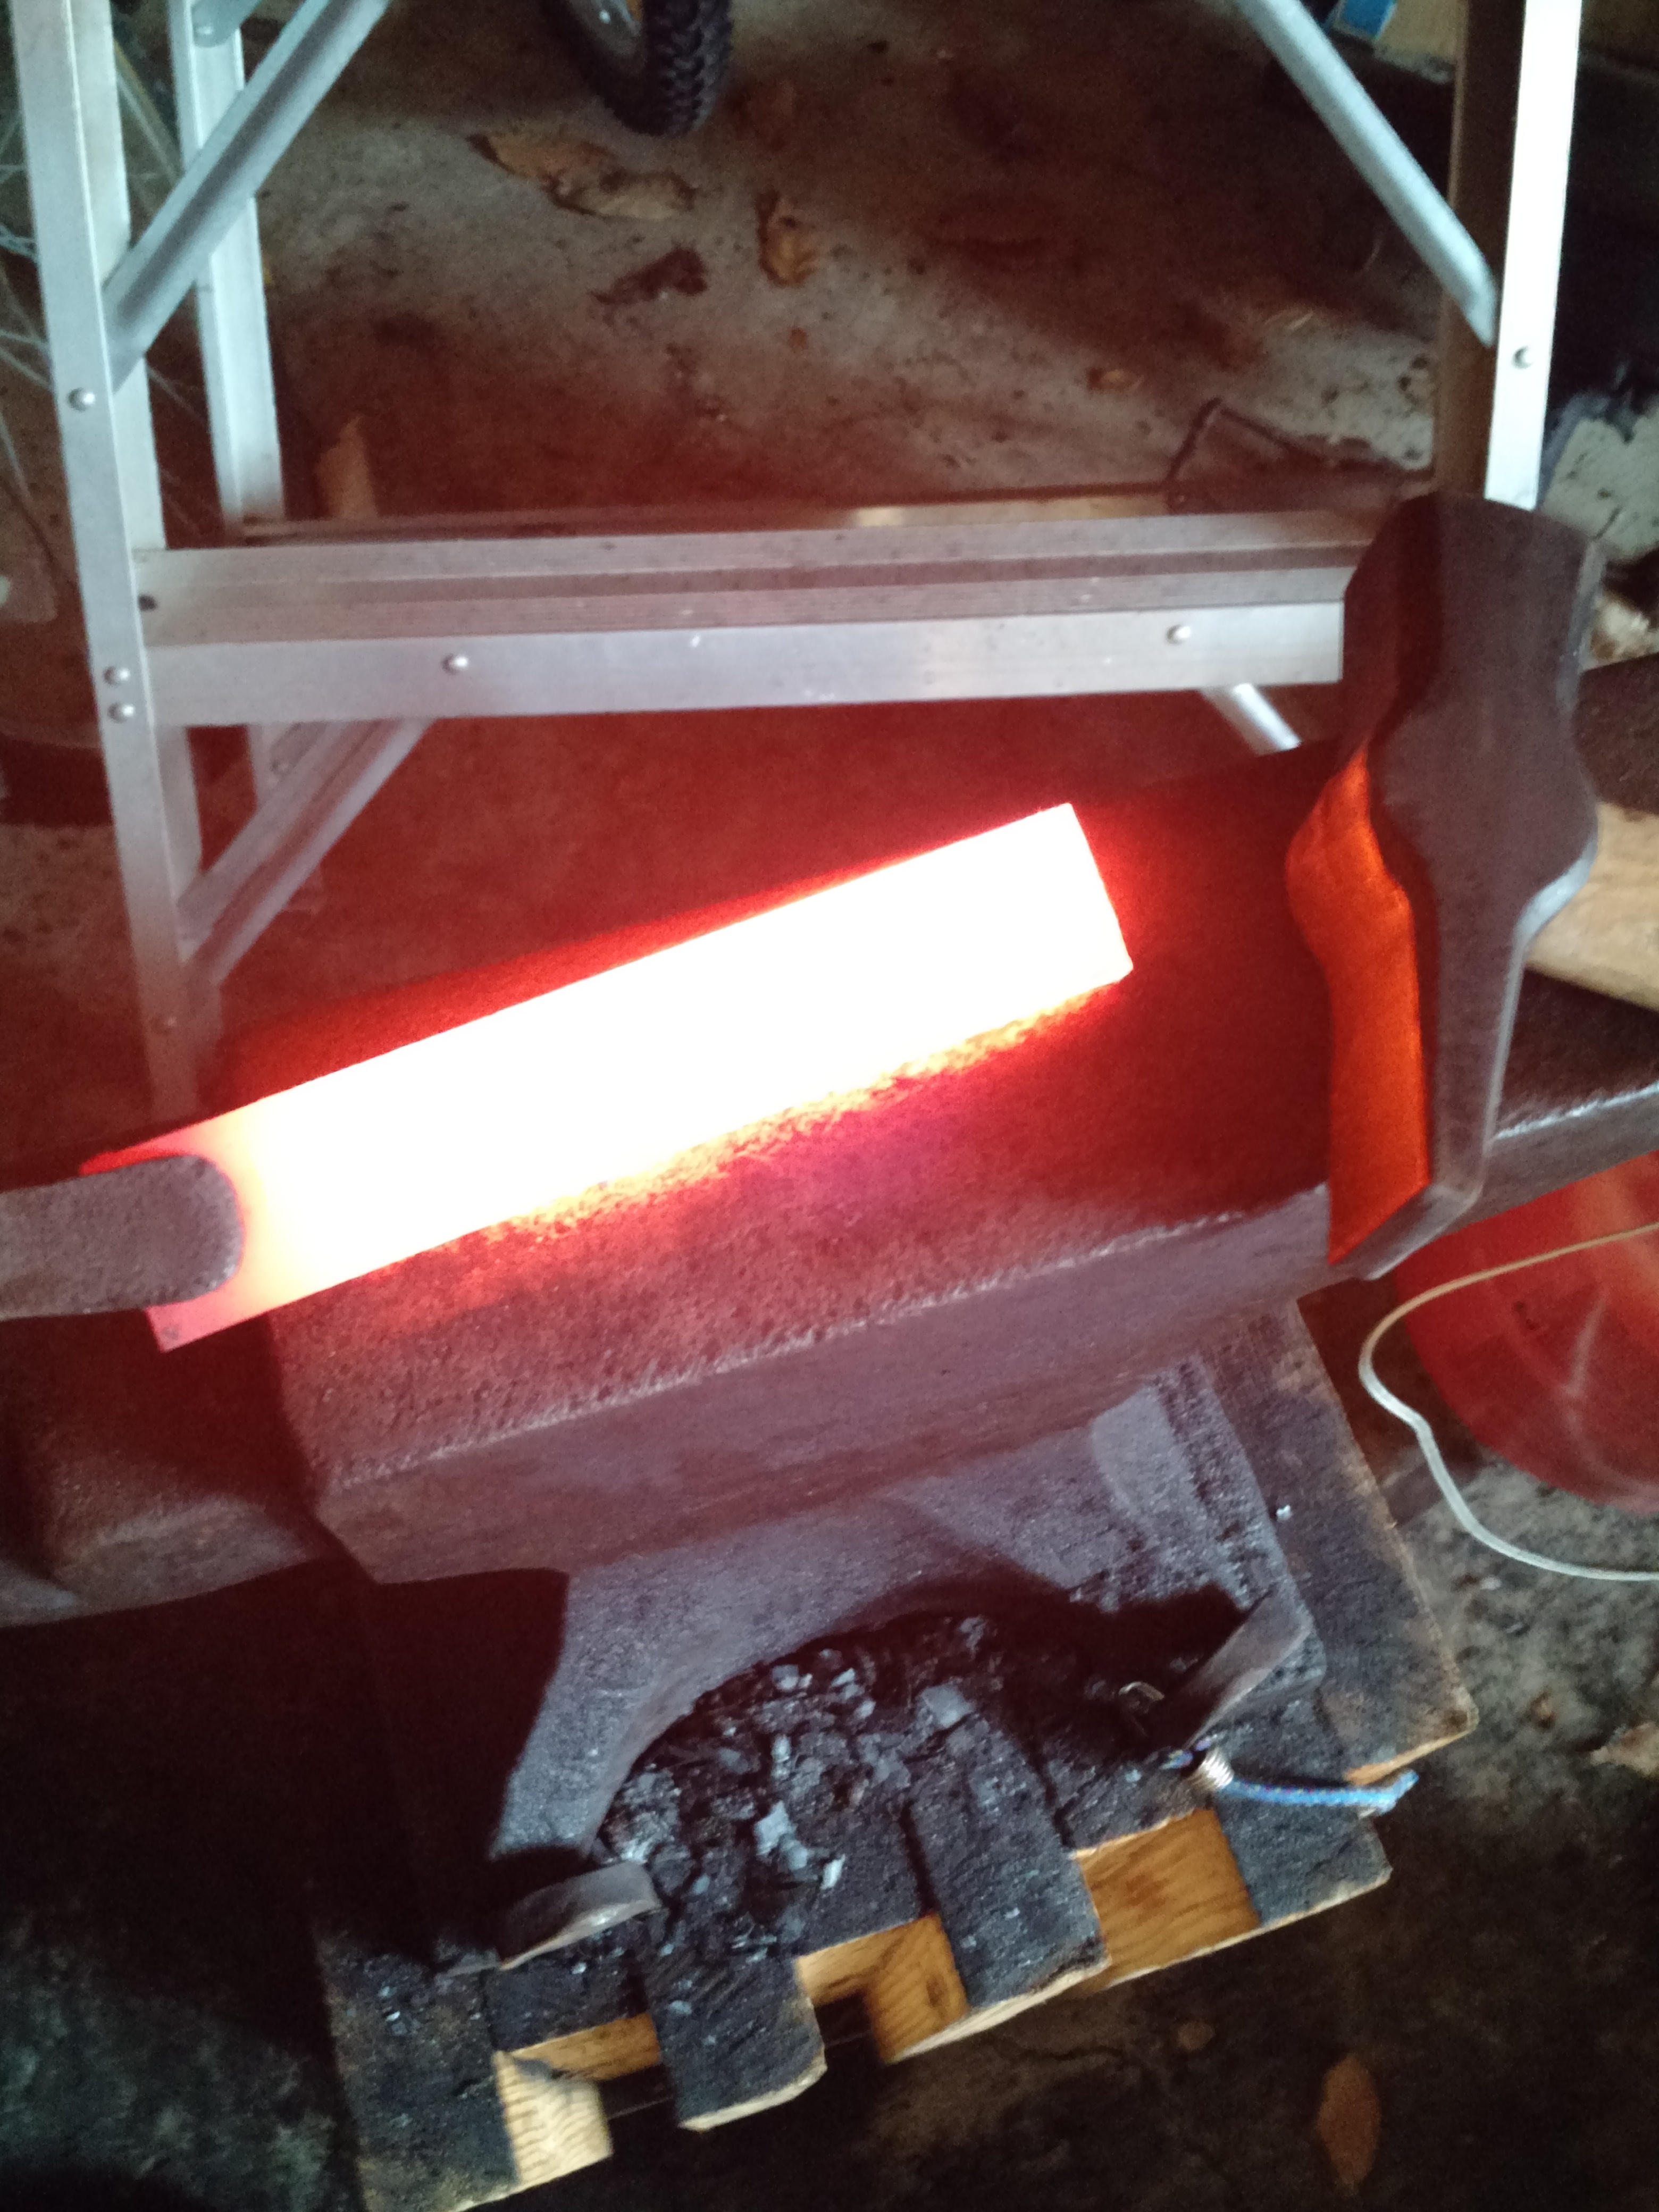
The heat treat process was what caused a lot of angst with this challenge. People were doing a lot of interesting things to come up with usable steel with predictable properties.
In the end I was running short on time and I had it on reasonable authority that the Stanley Wonder
BrasBars are 5160 so I treated it as such. It hacked through a 2x4 rather quickly with no noticeable loss of sharpness.EDIT:
Ooops, I had to read this 3 times to find the type-o Thomas mentioned. I had to fix it in such a way as to not ruin his daydreams at work...
-
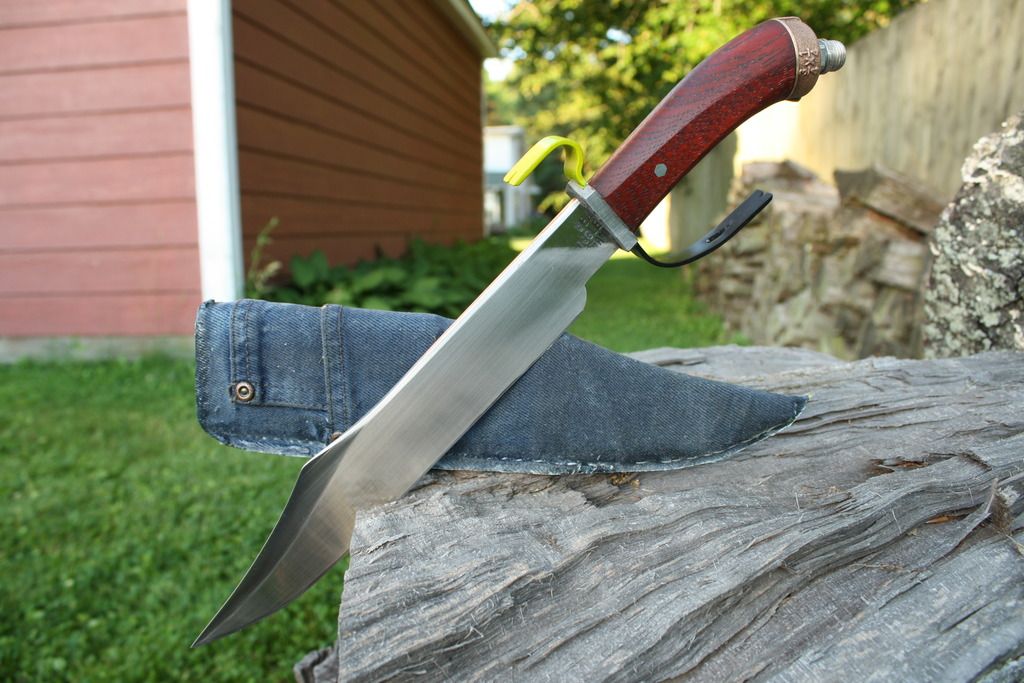
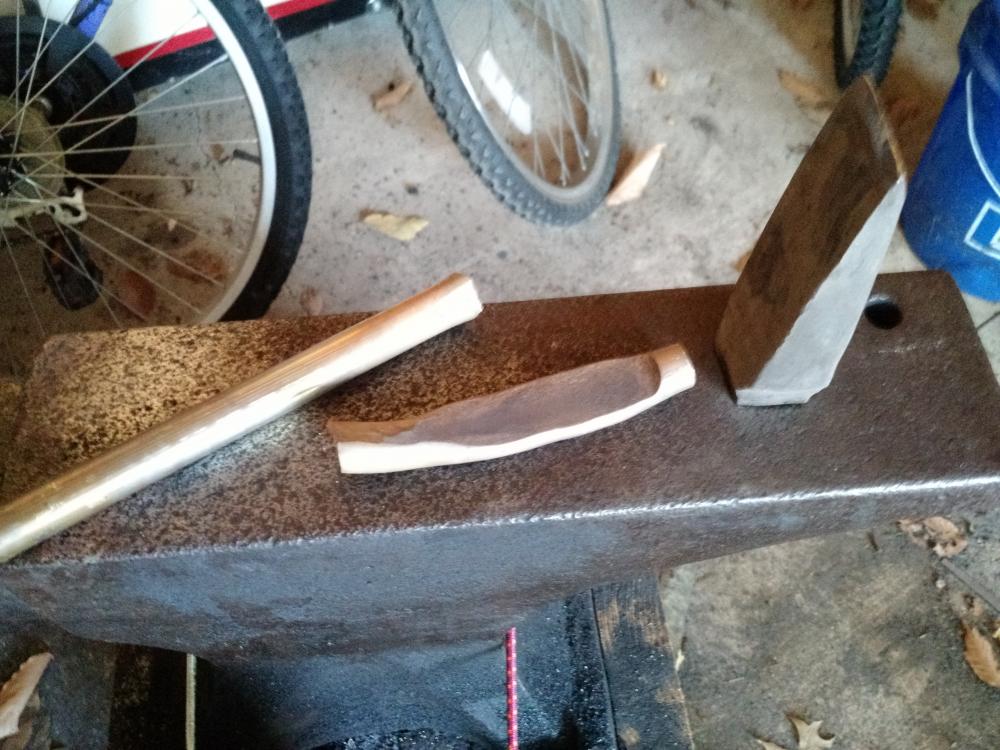
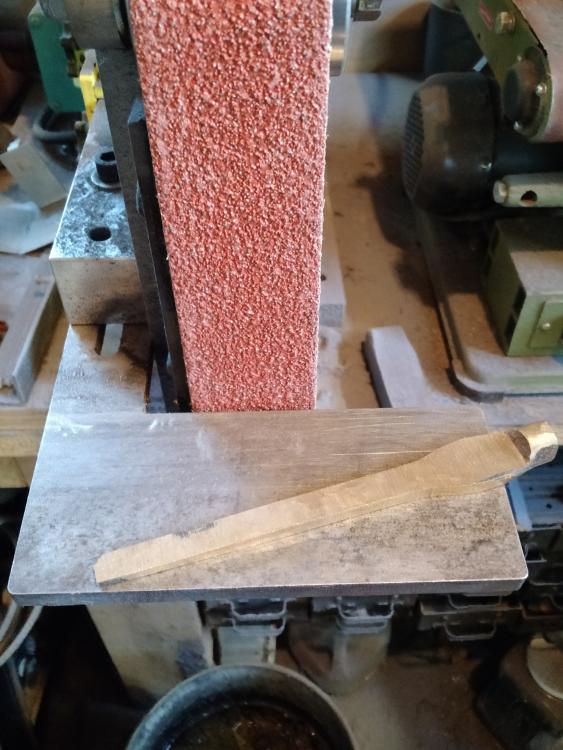
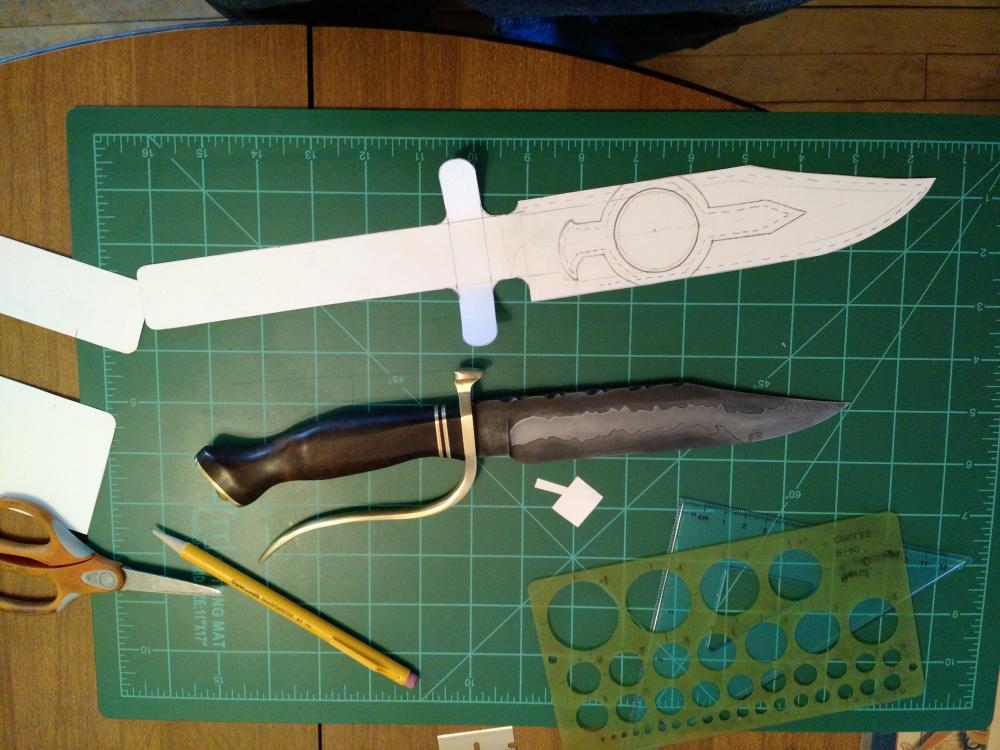
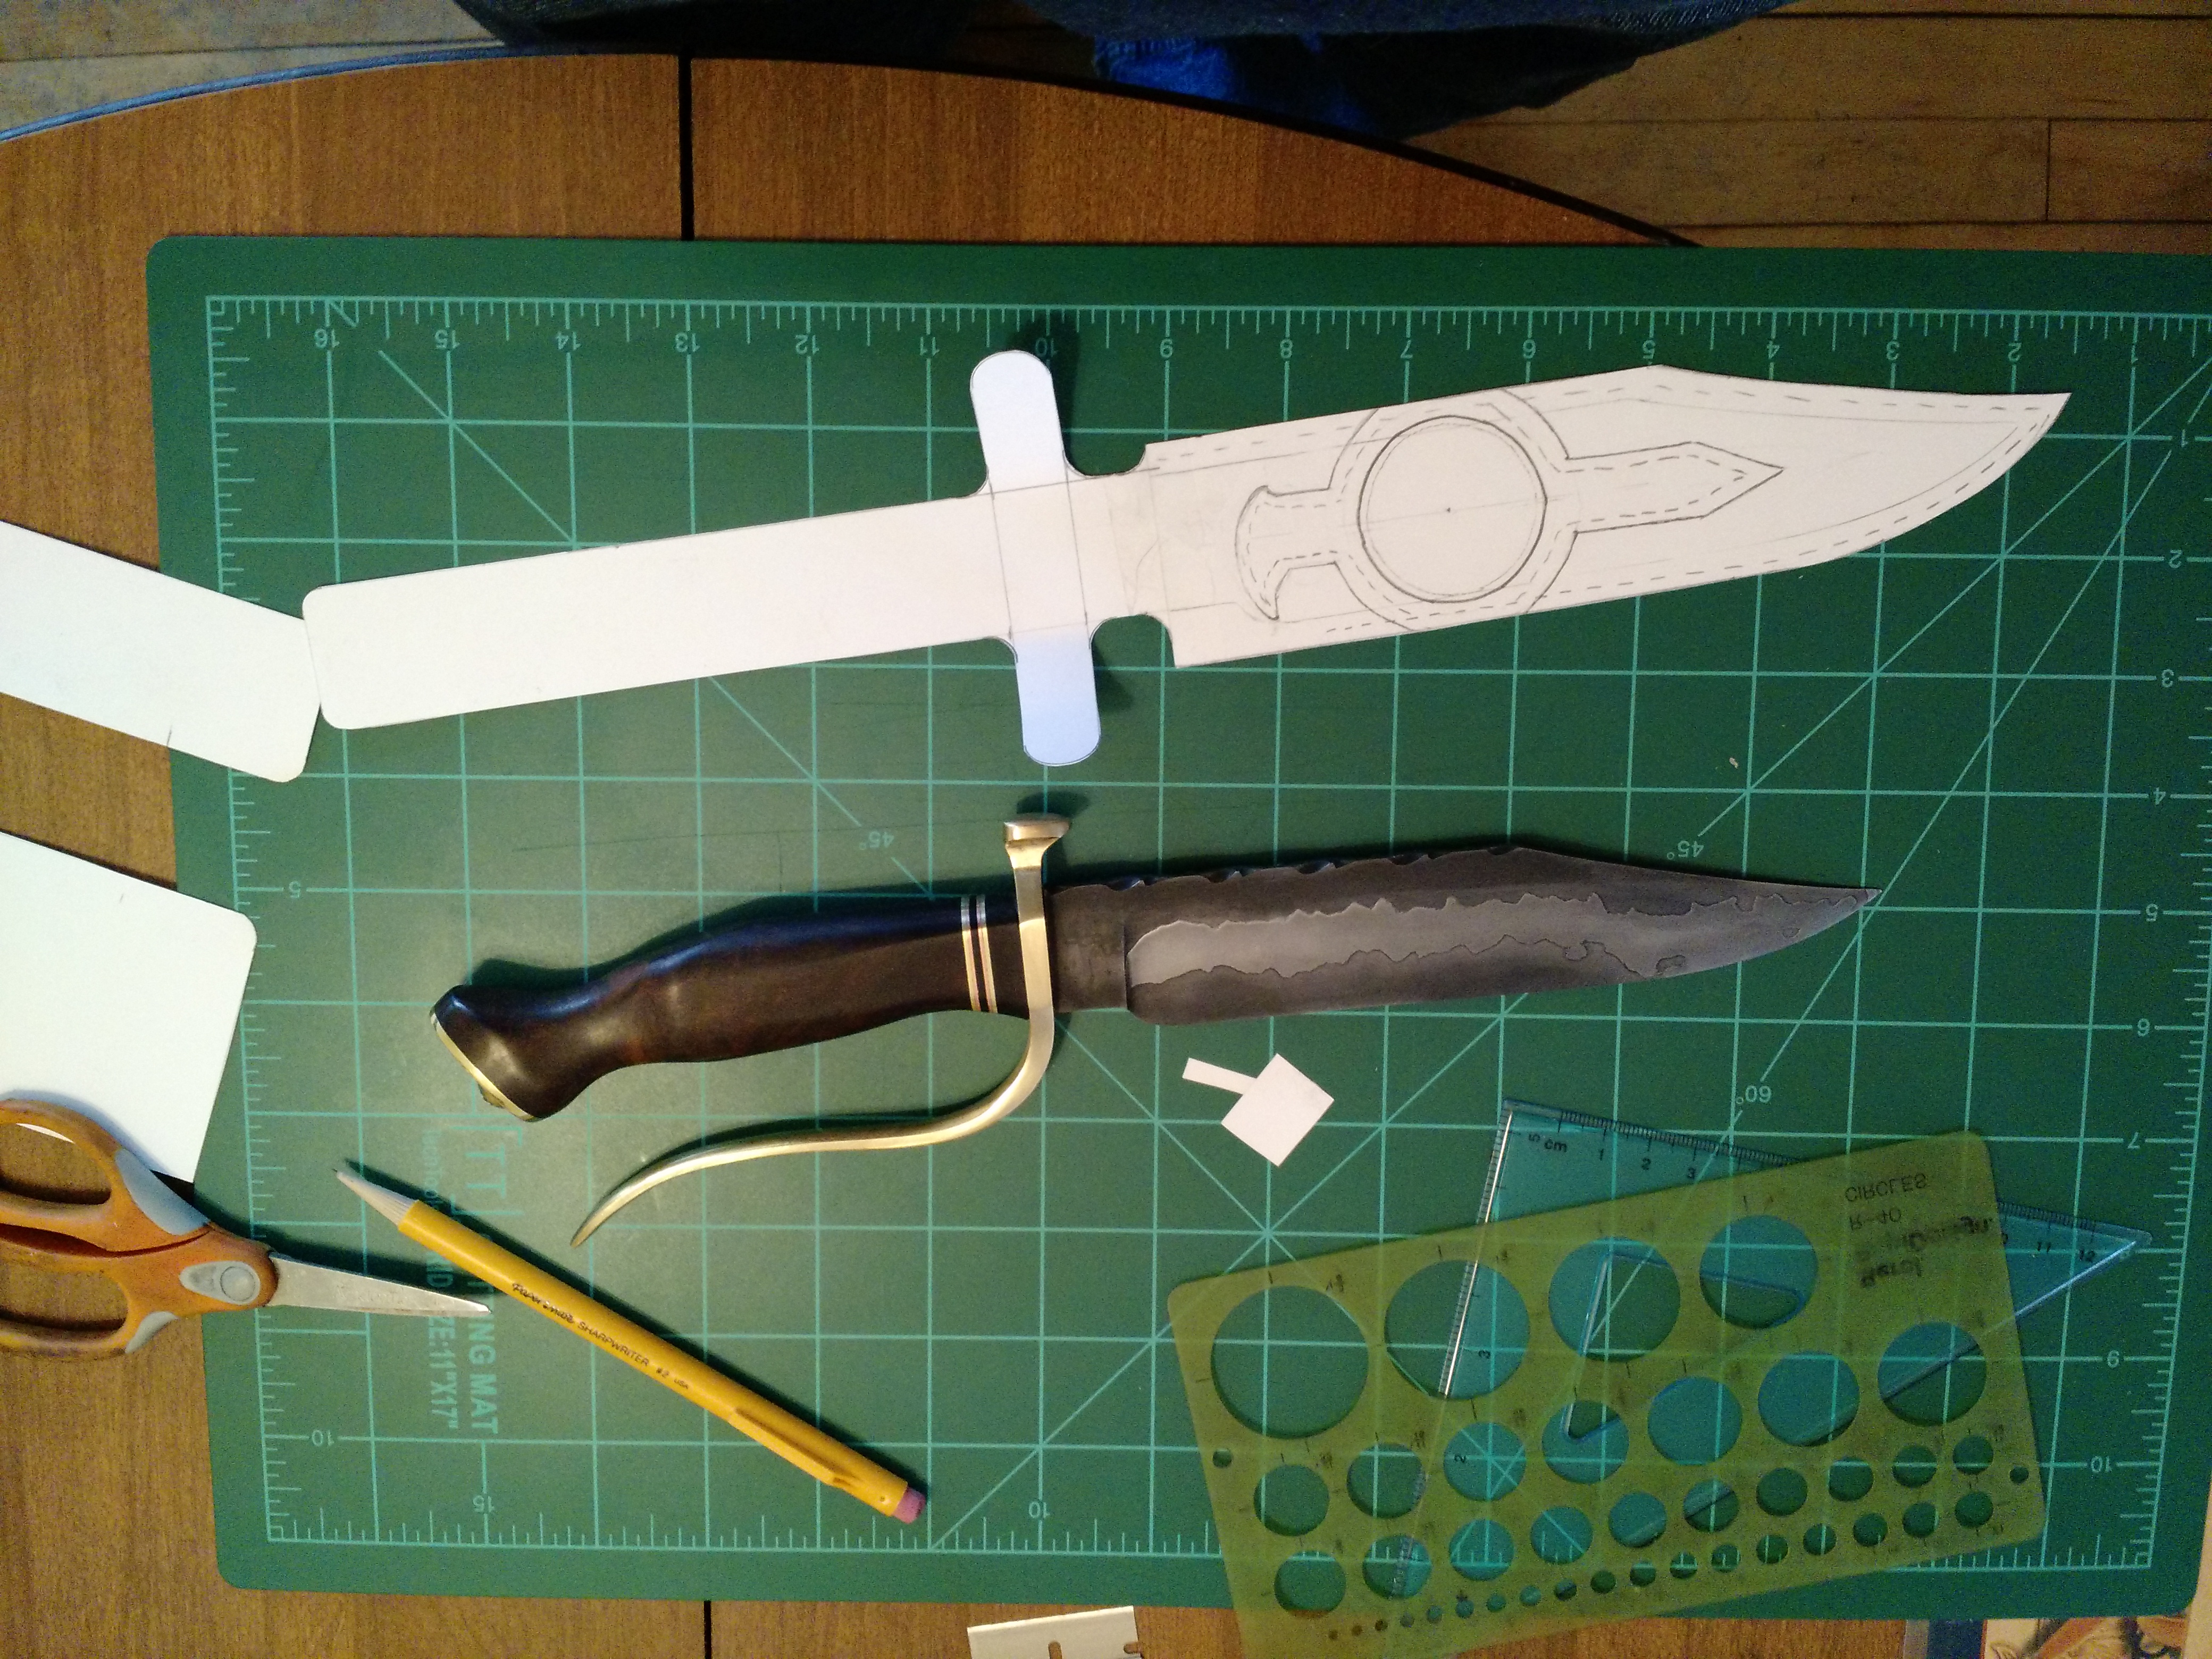
Well, this one isn't going to please everyone, but it has a reason for existing. Another group I am a part of does an annual challenge. This year the project was to make a Bowie style knife using only materials that you could find in your local hardware store. I decided to go for a rat-rod sort of theme, and tried to incorporate components that would be identifiable in the end product.
The following materials were used:
Blade - Stanley Wonder Bar
Guard - Part of a grade 8 Bolt head with a 6" Wonder Bar
Handle - Part of a pick handle
Pommel - a bronze pipe fitting with a weed-wacker spark plug
Pin - A piece of a 3/16" Allen wrench
Scabbard - Wood core covered in cotton cord, impregnated with auto-body fiberglass resin and covered with a piece from old blue jeans.
This is a tongue-in-cheek art project, but it actually came out much cooler than I imagined.
-
That's interesting rockstar, I know that a lot of people who get very interesting hamons use powdered abrasive in the later stages of their polishing, and that many will selectively polish the harder edge to create more contrast. (That is a traditional Japanese method) However, I haven't heard about why the powdered abrasive is different than the paper backed or stones.
I have seen a lot of inferences to heat reducing hamon activity. A few post by people that get great results have even mentioned that normal tempering temperatures will negatively effect hamon activity. It doesn't take a great leap in logic to believe that localized heating to 300F during grinding would have a similar effect.
-
It's about the right size and shape to make a version of "Sting" as it was represented in the Hobbit movies.
-
The end grain on that bamboo is quite striking. I didn't know it would show that much figure. Now you have me thinking...
-
I tried to post this back in the fall, but kept getting the forbidden thing so I quit trying. I'll give it another go since the thread is still alive:
My company uses the various 3D printing technologies every day. (Actually, several times a day) SLS, SLA, FDM, UV Acrylic, Direct to metal, direct to wax etc. About the only thing we don't use on a regular basis are the systems that can print sand molds directly for sand casting. We bought our first SLS machine back in 1999, and it's been off to the races ever since. I know the value and limitations of this technology quite well.
What I would like to see you do is spend a few hours fetteling the surface finish of the parts. I know how much time it takes to do it, and it would be a few hours invested. However, you already have many hours invested in the CAD work not to mention the blade. Spend some time to smooth out your positive parts before you invest them for casting. I think the results would be mind blowing.
The resins respond very well to wet sanding. The detail you are creating will make sanding challenging, but it can be done. You might consider the direct to wax options which would allow you to flame the surface smooth rather than sand.
Anywhooo, you asked for critique, so there it is . Take or ignore as you wish.
As for the 3D printing technology in knifemaking, I don't see it as cheating, just different strokes for different folks.
-
Very clean execution! These liner locks have caught my attention lately, and I may have to try one. Do you have any assembly pics you would care to share?
-
Reminds me of the Tin Man in the Wizard of Oz. Maybe his typing hand rusted up solid...
-
Wow, I'd say you did a really nice job. Extra points for going the distance and taking the time to clean up the finish. Most people who present a spike knife as their first project show something that looks like it has simply been squashed flat and is covered in 36 grit grid marks. You, however, have achieved a nice level of fit and finish.
Now that you are addicted, grab some of the good blade steel you mentioned, and have at it
")
-
Well, I would agree with the "2" assessment. It seems like you are happy with the results, so that is all that really matters. However, since you asked for my opinion, I'm not a fan of the blade or handle shape. I would have picked a more interesting piece of wood as well, but that is purely a matter of taste.
I agree that the finish on the knife turns me off. However, I am a stickler for not seeing any scratches, or dings.
Make knives the way you want; just don't be surprised if people don't agree with your choices.
Just for calibration, this is my 3rd knife. I finished it about a year and a half ago. At the time I was pretty proud, but today I would give it a 5. The pattern welding is very muddy, and I don't know what I was thinking when I put the pin where I did. I like the deeply concave clip point, but most people thought it looked odd. I also wish I had used a contrasting material at the pommel.
I keep pushing myself to get "Better" by my definition, and suggest you do the same by your own definition. I can visualize a "10", but on my best days. I can probably only manage a 7 or 8.
-
That is fantastic. Like everyone else said, the bolster really sets it off. It's form, and the way you inletted into the boxwood are very impressive.
-
On 3/6/2016 at 1:40 PM, Frosty said:
Uh HUH, I worked 6-10s for close to 20 years as an exploration driller. My off time was consumed doing laundry, sorting through mail, paying bills and not a lot else. Paid well though, kept me in the black for a long time.
Frosty The Lucky.
Jobs like that can make you a rich man. Not because they pay so well, but because you don't have time to spend the money...
-
Thanks John,
Your knives prompted me to go out an look at how this is done, and that is the tutorial I found. It explains the process well.
I'm working with hand tools and alone right now. I think trying to weld up a billet that thick and then splitting it wold be an exercise in frustration.
I'm scheming and scrounging to build a press. Hopefully some day I'll be able to take on some more involved projects like this. Pattern welding was the only reason I got interested in making knives in the first place
-
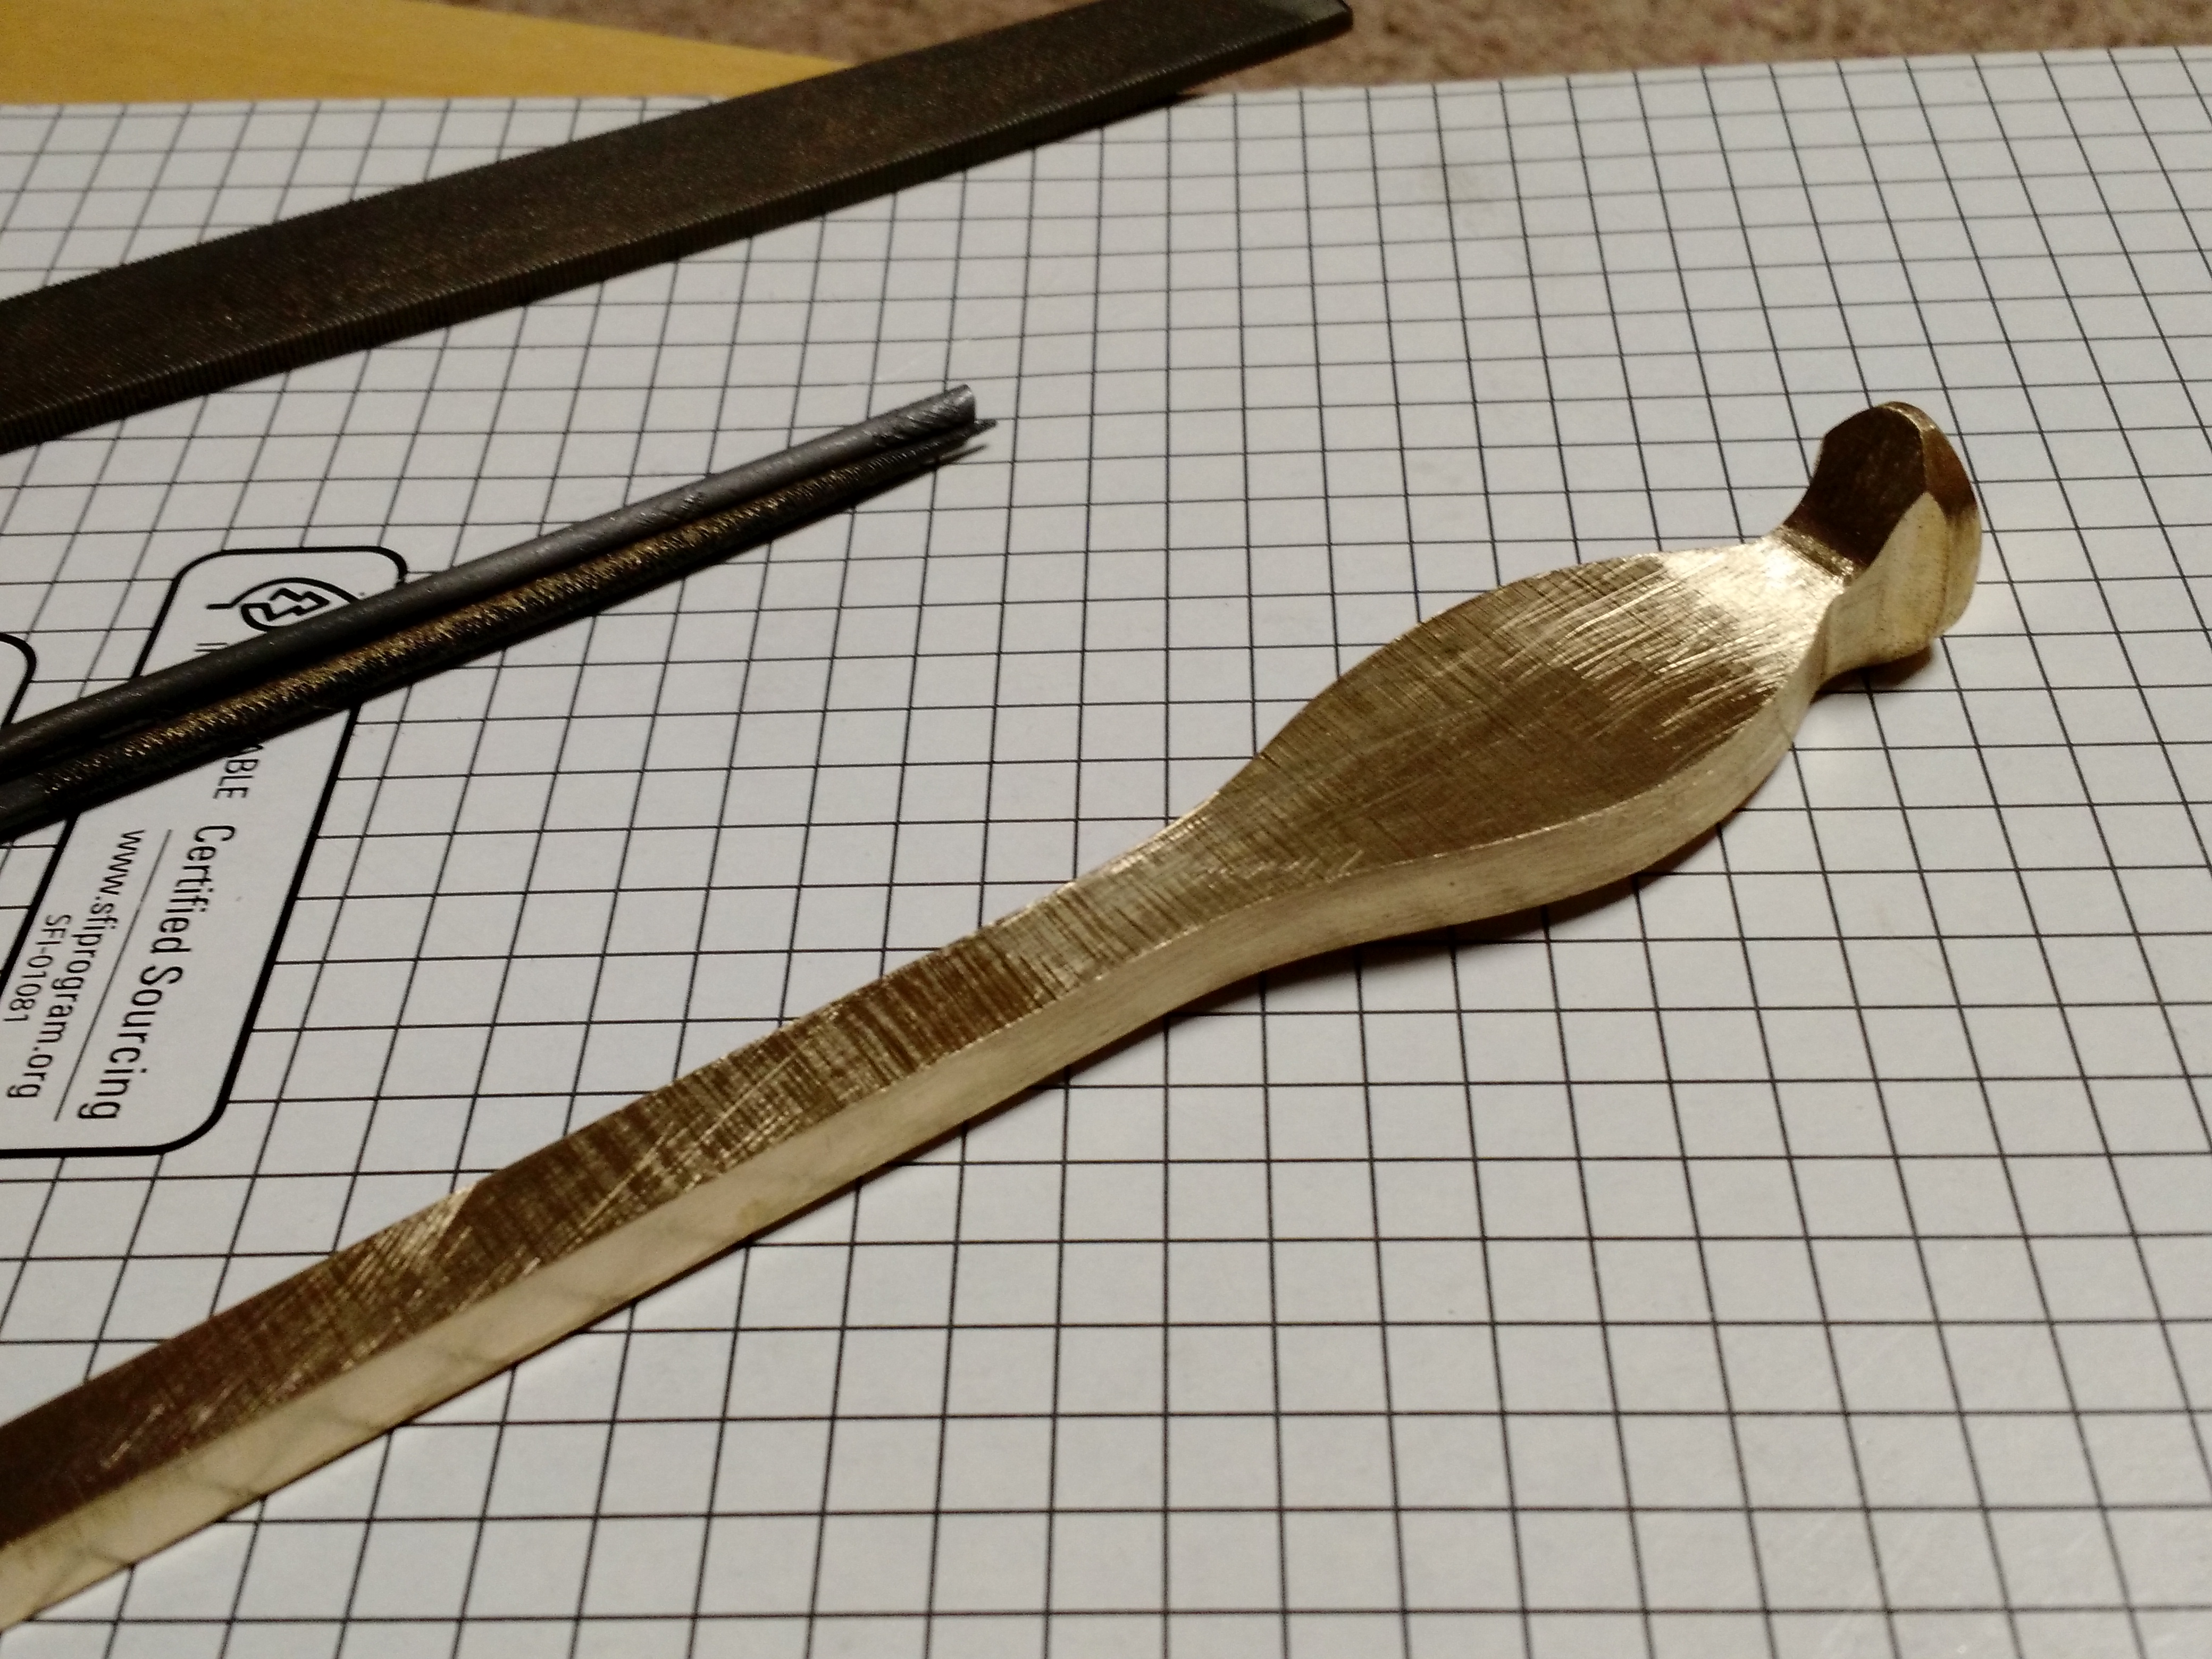
Well, most of the WIP pics are of the more boring parts of assembly, but I'll trow up a few if you want. Here are a few of the guard being formed:


Here are a few of the handle fitting. Because of the way the handle buts up against the guard at the spine, I had to be able to take the roughly epoxied handle stack off so I could shape it. As a result, the spacers at the guard end are held in place with 1" brass pins in addition to the epoxy.


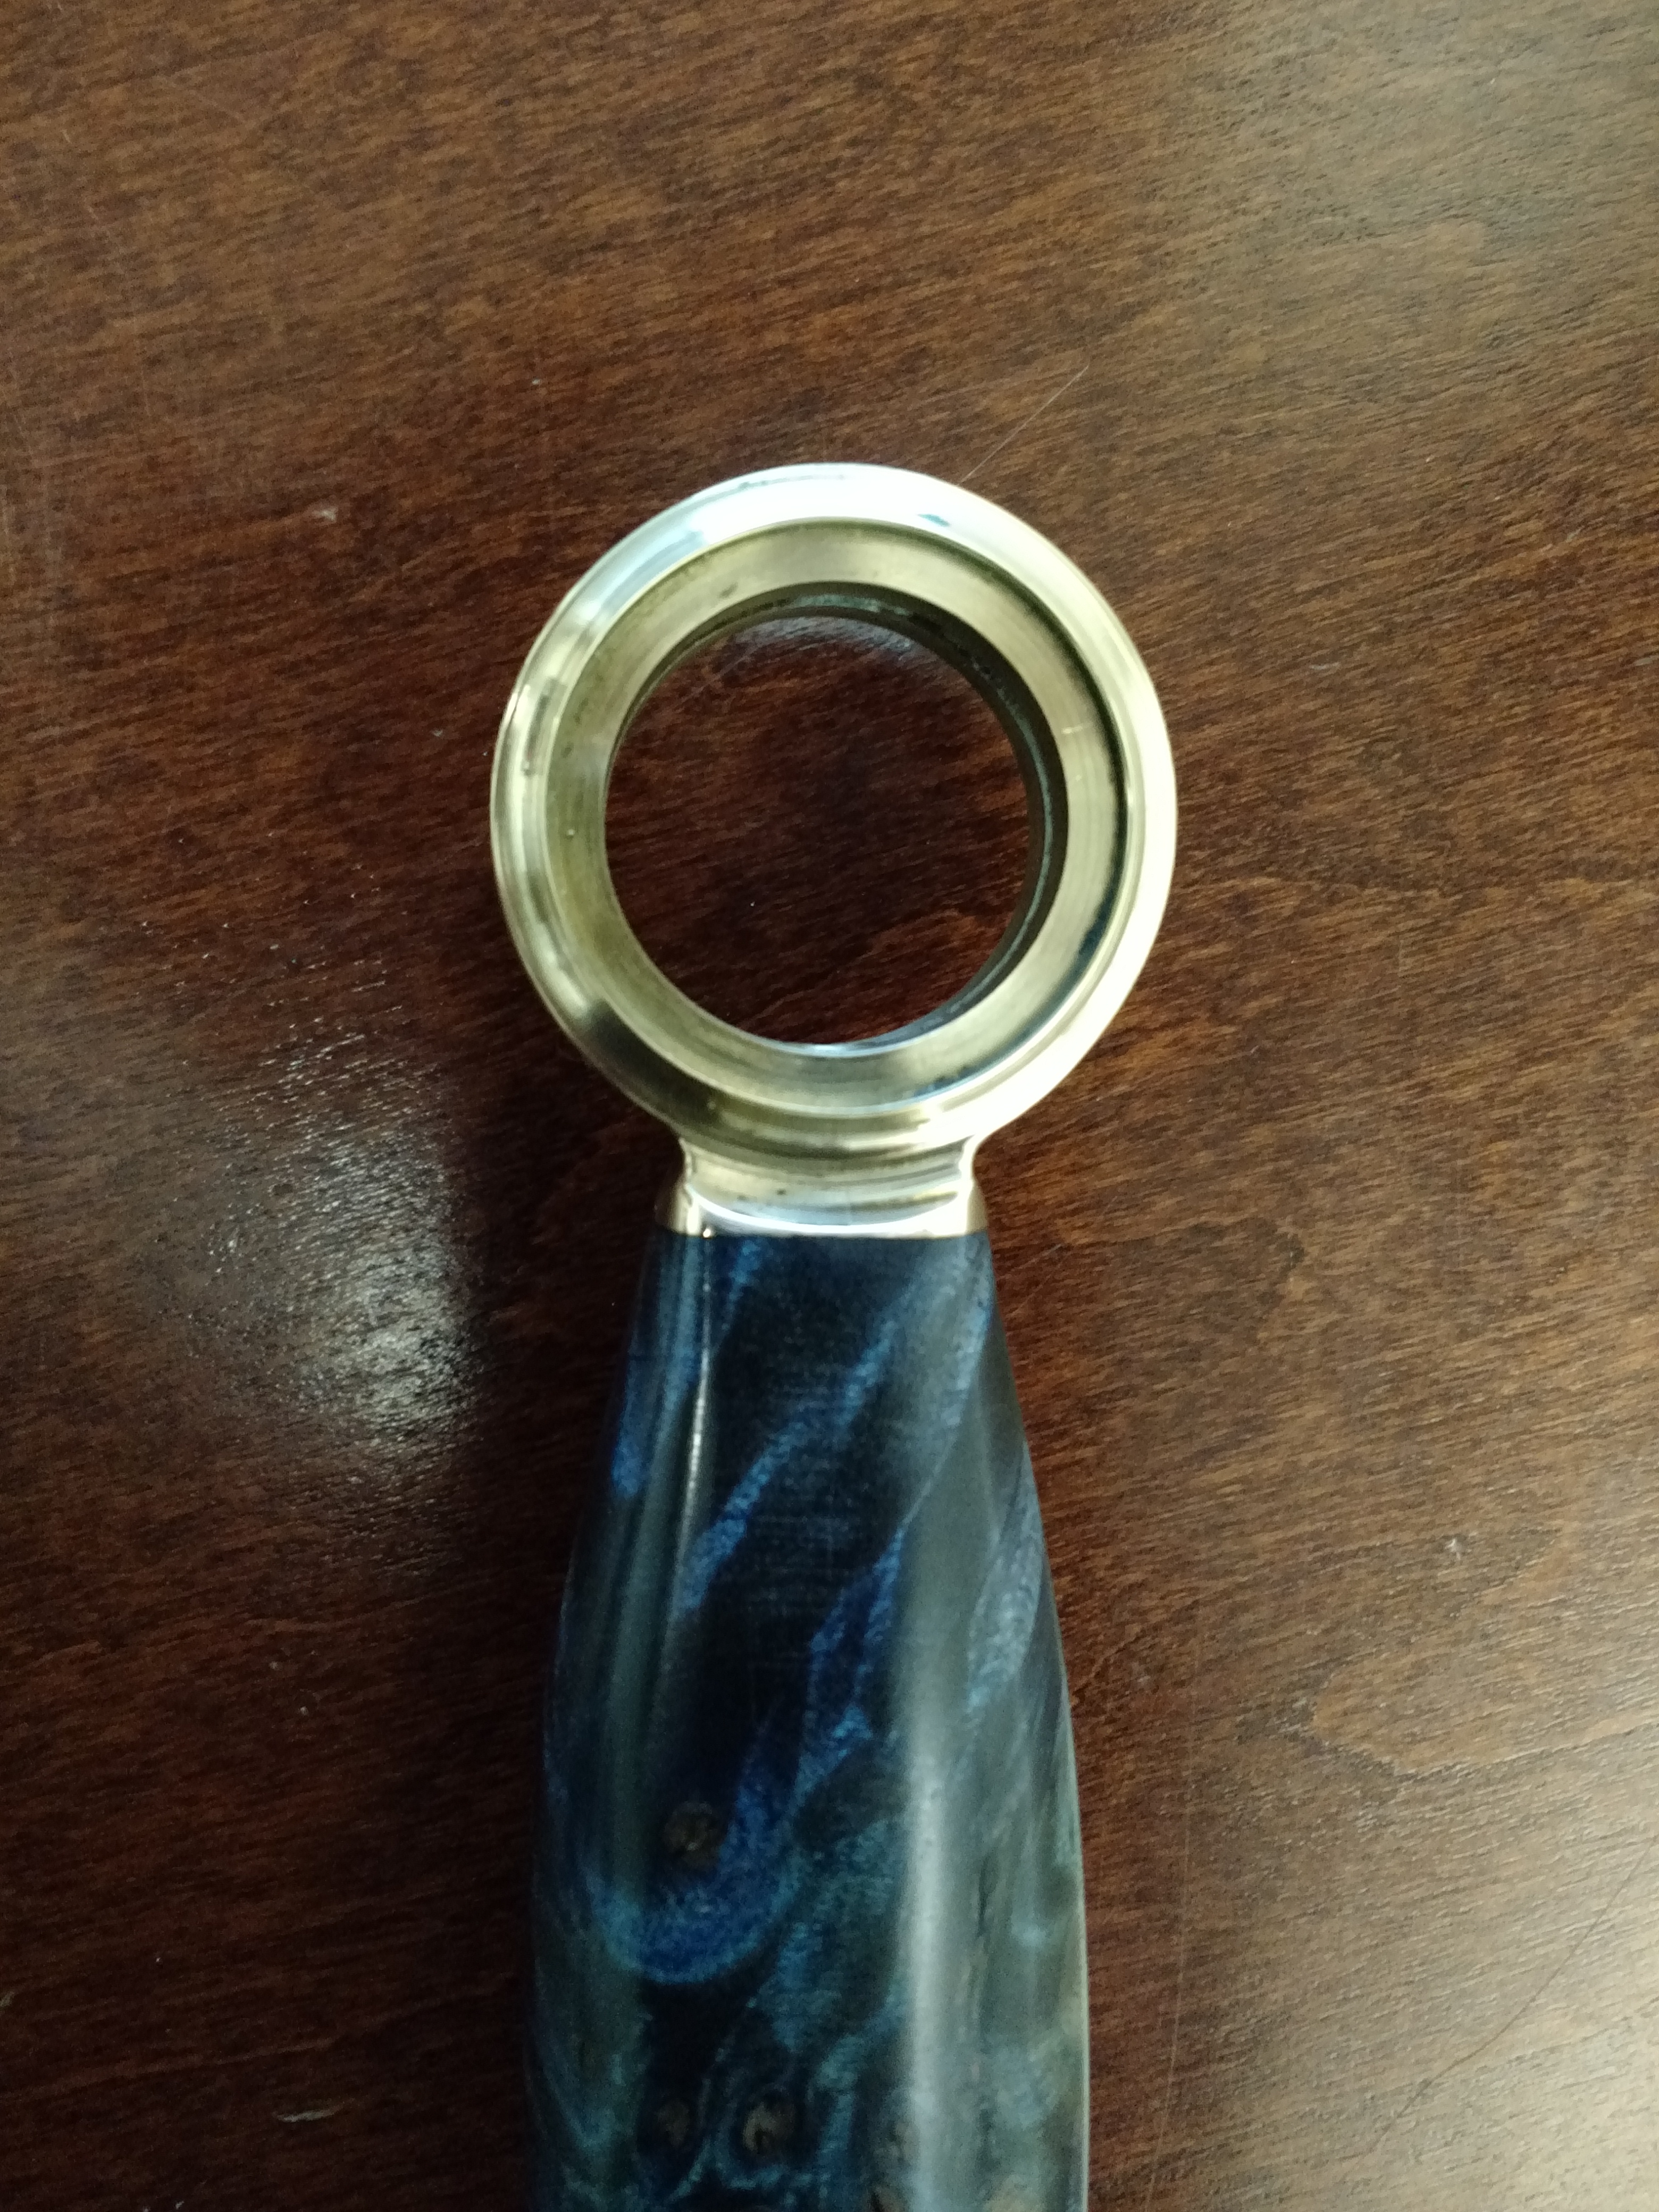
I reverted to my machinist tendencies to make the pommel/peen block. I turned a disk with a raised center and then cut out what I wanted for the knife.


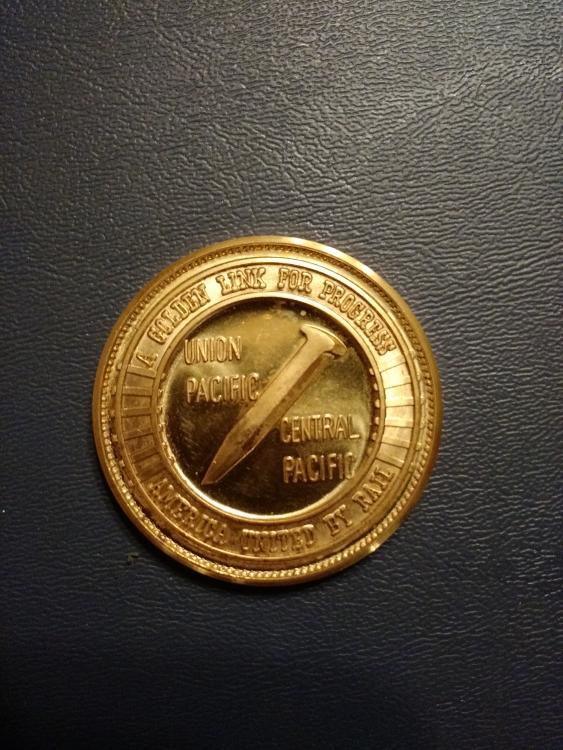
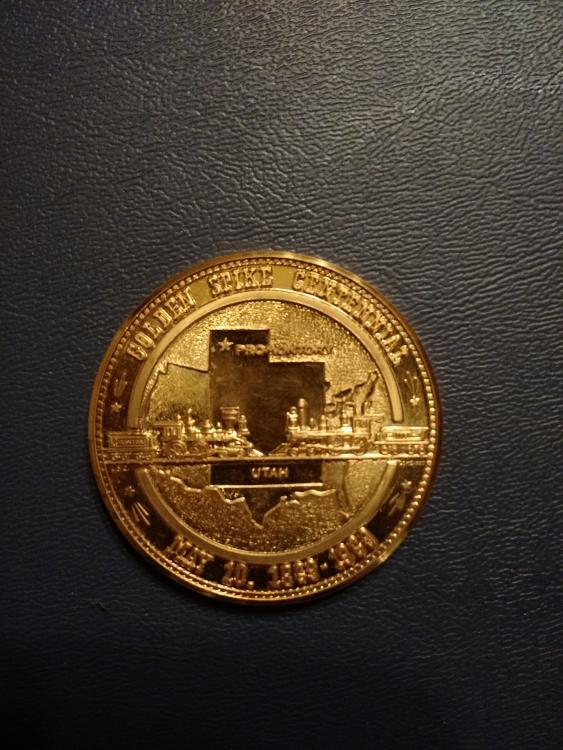
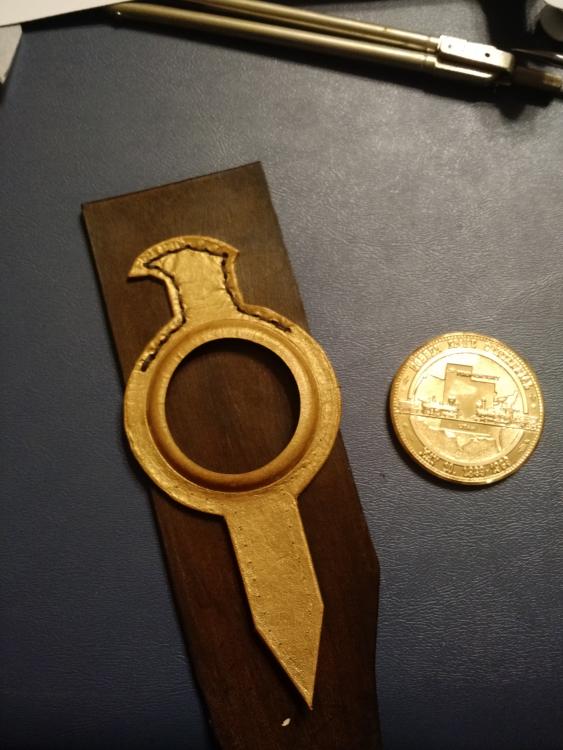
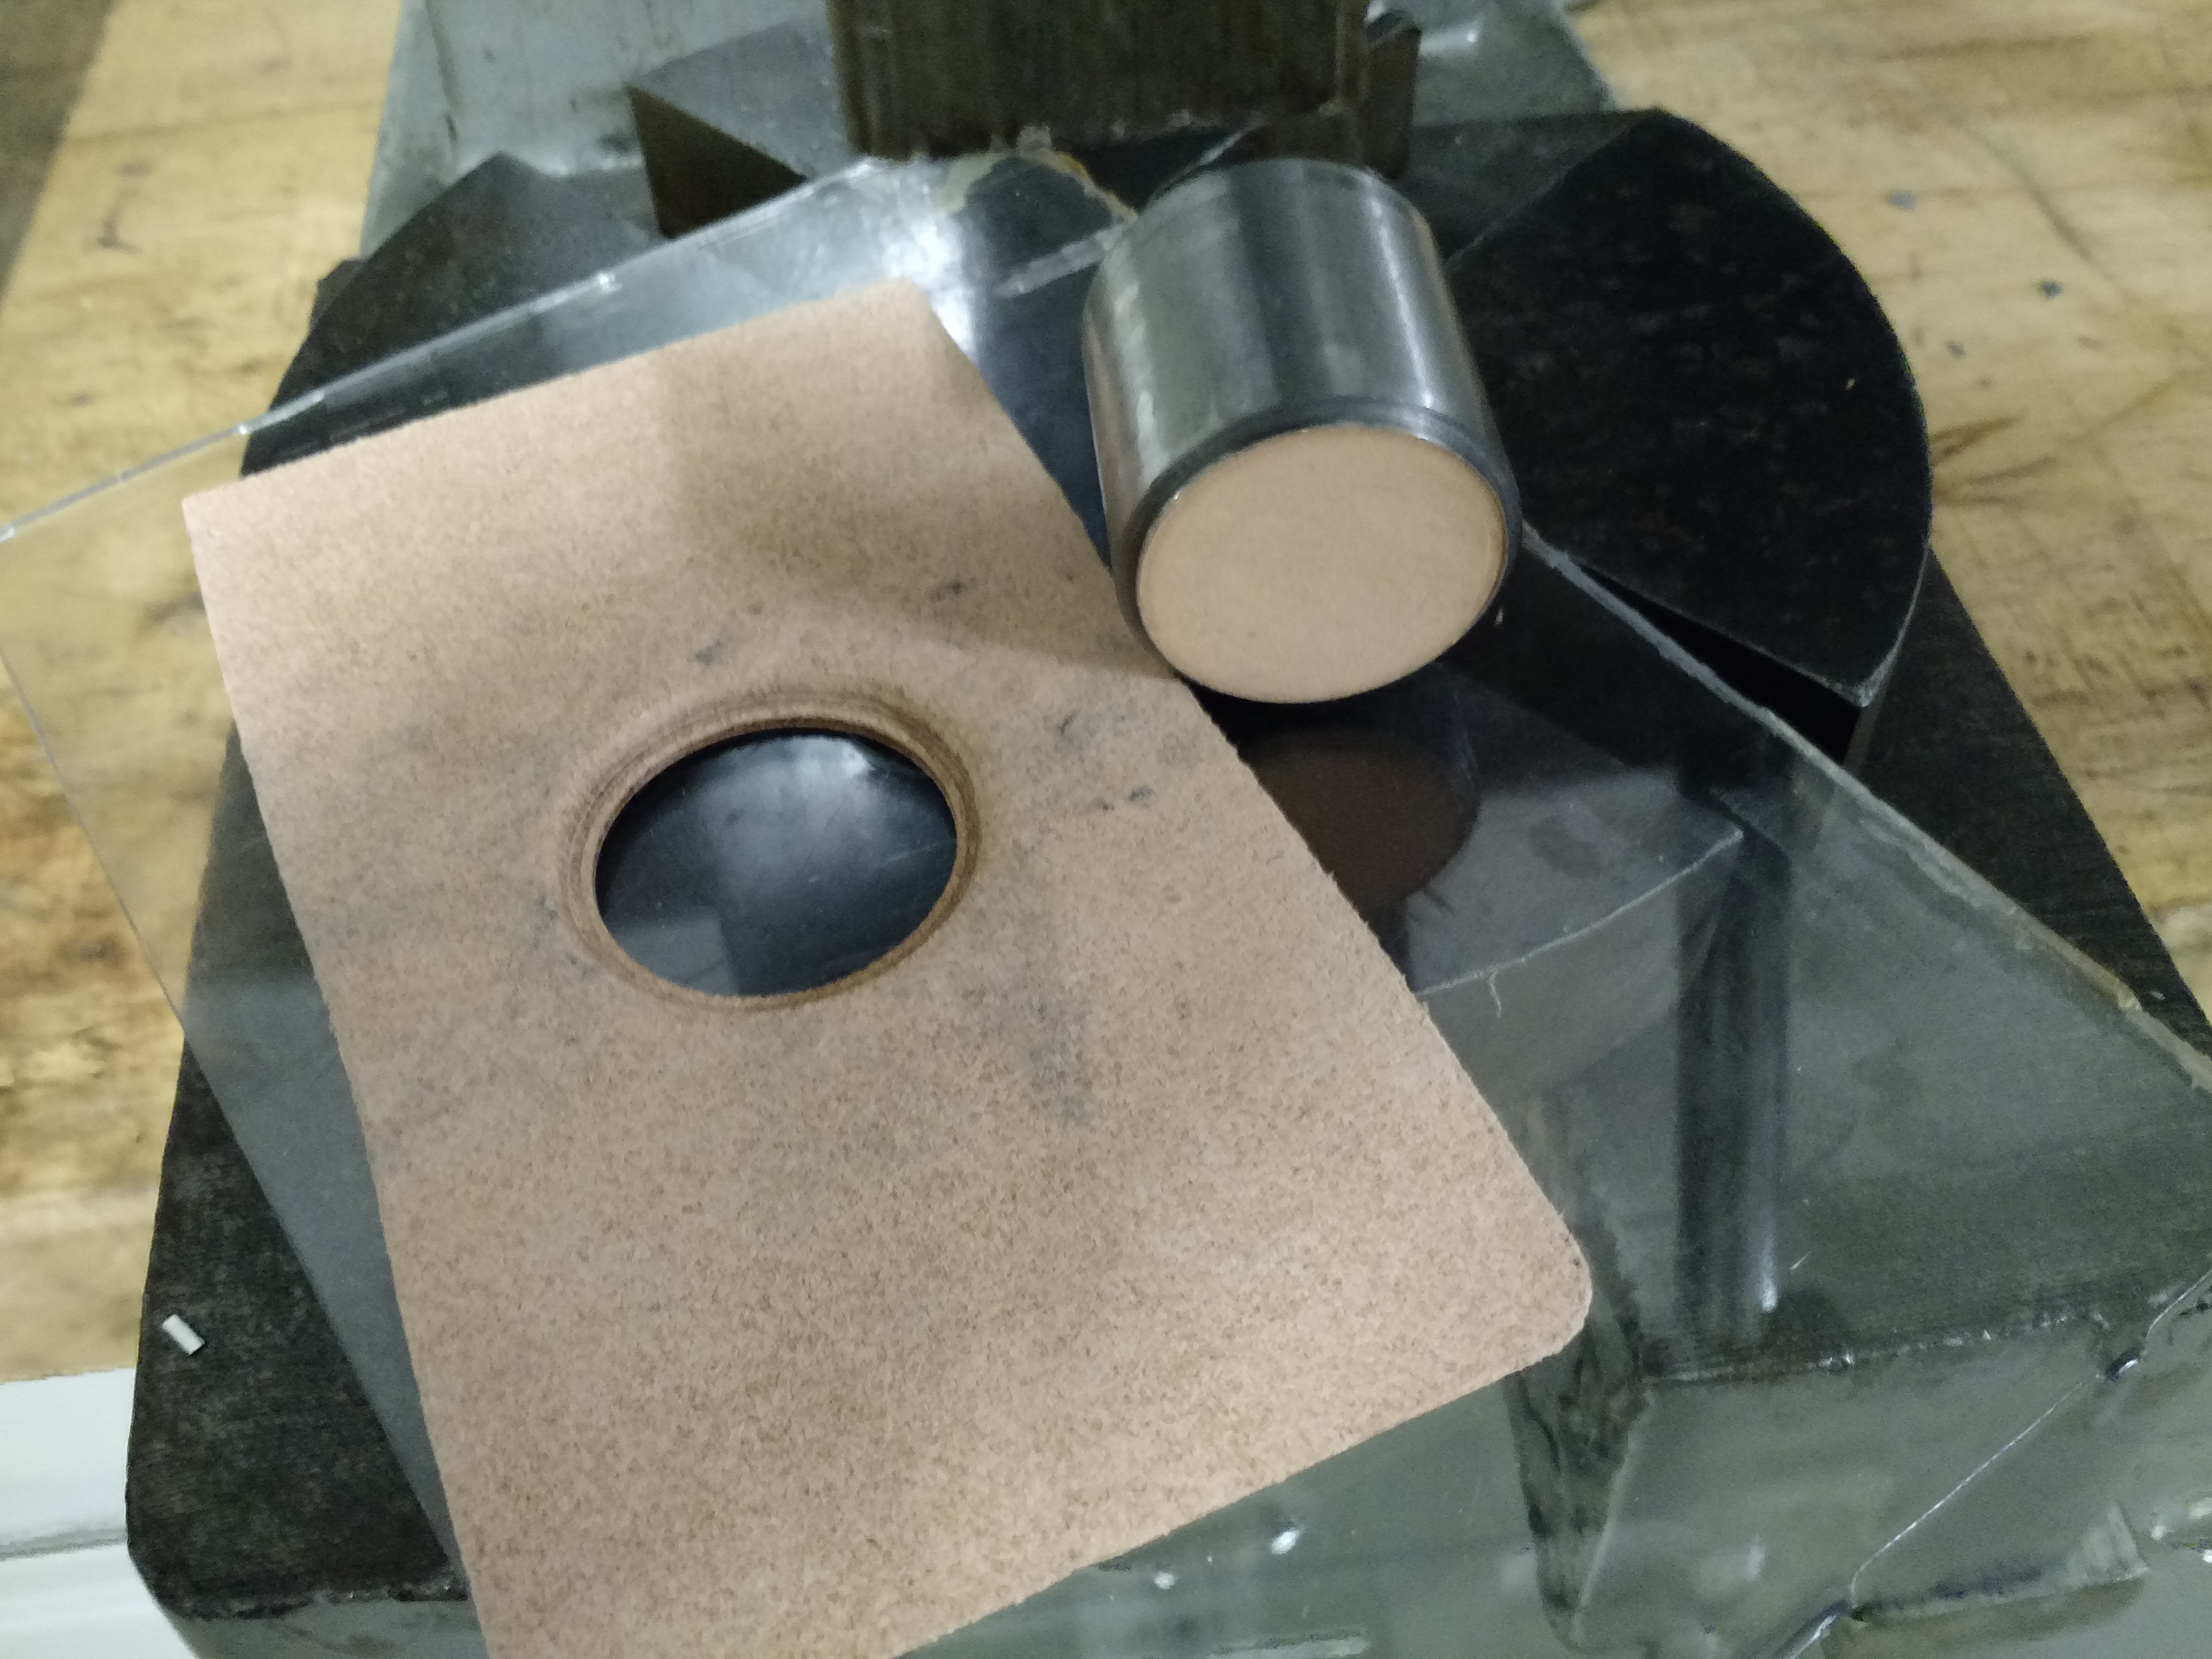
To form the pocket for the coin, I machined a die to press the wet leather around the coin, and then a second die to punch out the circular window.


Various other bits.


-
I have come back to look at these 4 times now. That feather pattern is mesmerizing. Maybe some day I'll grow up and be able to handle a billet large enough to try that pattern.


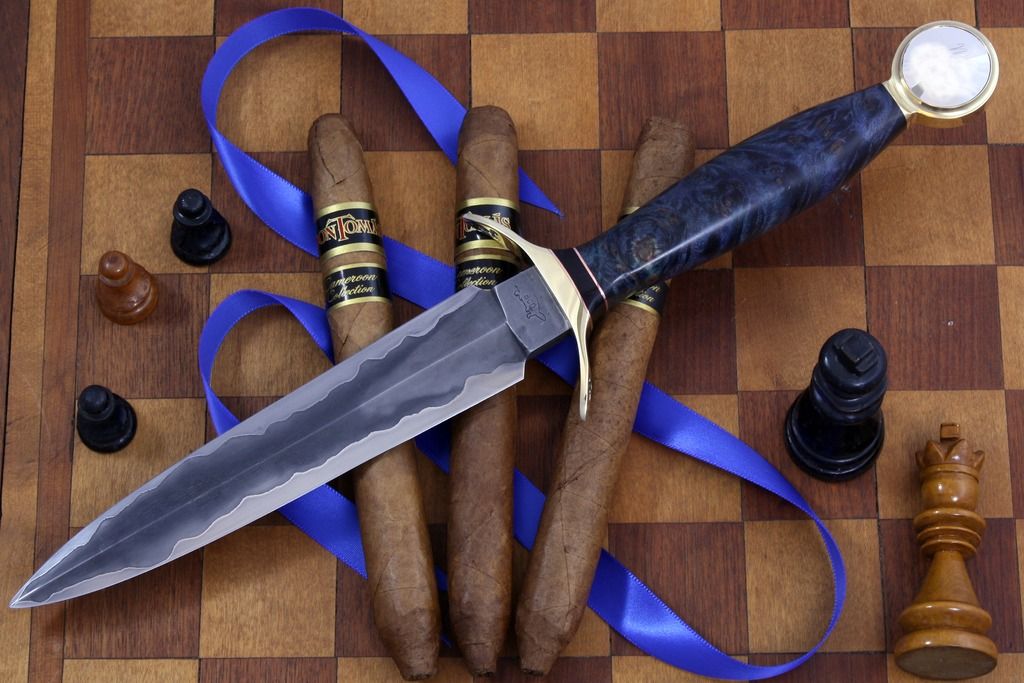
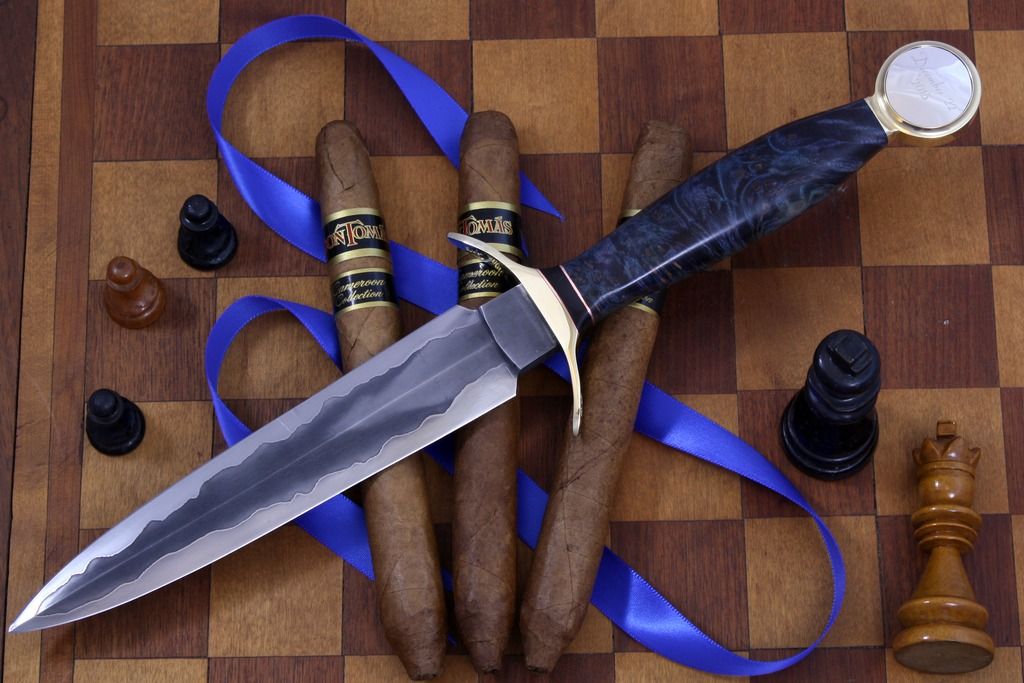
San Mai Dagger
in Knife Making
Posted
I have not worked with L6 at all yet. I've only been making knives for a couple of years, and only make abut 6 or 8 a year, so I haven't had much time to explore outside of 10XX steels and 15N20 yet.
I've heard L6 is a bit more finicky to deal with, but a lot of people use it in their pattern welding.