flyguy8555
Members
-
Joined
-
Last visited
Everything posted by flyguy8555
-
Here's the old with the new. 160# Shaper. I followed other wiser heads on this forum and put a piece of conveyor belt under the anvil prior to bolting in down, to lessen the ring. I mostly do smaller pieces, so the smaller sweet spot isn't a problem for me. The rebound was a pleasant surprise - working off of an old railroad track, I'd never experienced that before. All in all I'm in Heaven
-
Here's my new JHM Shaper 160# anvil - a Christmas present from my wife (yes, I am blessed). Prior to this I was working on a chunk of railroad track - this is a HUGE step up for me.
-
This is what's waiting for me when I get home from work. My wife (a true Goddess) bought me the JHM Shaper for my Christmas present. Of course it arrived while I was at work, so she and the female UPS driver had to get it off the truck and into the garage. I have been working with a hunk of railroad track up to this point, so obviously this is a BIG deal for me. A huge step up.
-
Thanks guys! I appreciate the intel, as always.
-
I've searched the forums, and haven't had much real luck finding out what type of steel leaf springs are made out of. I realize that there may be more than one type of steel used for leaf springs - I'm just curious as to the carbon content in general. I was "gifted" with a pile of truck springs, and I'm planning on having a friend with a plasma cutter (a good friend to have indeed) cut them up into usable pieces for forging knifes.
-
That's pretty much what I'm working with. For the bigger stuff I have a brake drum coal forge, but I have to move it outside the garage to use it (space and ventilation limitations). I'll give the Plistix a try - thanks for the advice.
-
I should also mention the cost. $12 for the fire bricks (I bought them at the class, so no shipping), $37 for the Bernzomatic torch (local Ace Hardware), and $21 for the adapter hose (they have them at Walmart, in the camping supplies). I'm using the LP tank from our gas grill. I don't know about fuel consumption yet, but next time I fill the tank, I'm going to start a log to record hours so I'll know how long a full tank lasts me.
-
I'm in North-Central Iowa - thanks for the reminder, I've been meaning to put that in my profile and keep forgetting. Right now the bigger gas forge is on hold because my smaller forge is working sooooo well. It's made from 2 soft fire bricks - the design is copied from Paul Linden, my toolmaking instructor at North House Folk School (I don't think he originated the idea). I was having trouble getting it up to temp with my old propane torch, so I recently upgraded to a Bernzomatic swirl tip torch and an adapter hose so I could run off my bulk LP tank. As the saying goes, now we're cooking with peanut oil! It now gets up to temp fast and works great. the inside dimensions are 2 1/2" by 9". I use an old paving brick for a "back door", it helps retain heat, and to forge longer pieces, I just slide it out of the way. The inner shelves and the stand are made from the same steel grating - so far it hasn't burned up. Paul had used ceramic rods in his forge - I used what I had on hand.
-
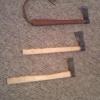
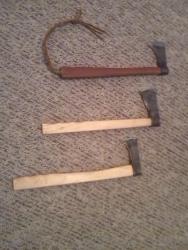
Not that it's all that special, but I recently scored a couple of lawn mower blades from the local mower repair shop. After chastising me for not asking him last summer, the owner was able to find 2 blades in the dumpster for me. He told me to stop back in March, and he'd have many more for me. I've made a few tomahawks out of them so far.
-
While taking a blachsmithing/tool-making class at the North House Folk School in Grand Marais, MN., I was able to purchase the materials to replicate my instructor's small gas forge. Using a decent propane torch burner and a bulk LP tank, it heats up fast and works very well. Inside dimensions are approximately 2 1/2" by 9". I'm sure this design has been posted here before, but I couldn't find any references to it in my searches, so I thought I'd throw it up here.
-
Got my small gas forge up and running - worked on a tomahawk (steel is from a lawnmower blade) for my future son-in-law, finished the handle on another tomahawk, and that's about enough. It's cold here and forecasted to get MUCH colder by Monday - probably stick to indoor activities (unheated garage) til this snap passes.
-
I think they're referring to putting the iron on the wooden wheels - kinda like the tires, so to speak. They would heat the iron to expand them, then put them on the wooden wheels; as they cooled, they would contract and tighten down on the wheel.
-
Thanks! Good info.
-
Thanks guys! That's what I needed to know.
-
I'm in the process of building a gas forge out of an old freon tank. I have the tank cleaned out and the opening cut, and used the handle off the top to make a base for it. So far so good. Now to line it with something. I was planning on buying kaowool to line it with, but recently saw a yotube video on the construction of a soup can forge. In the video, the guy lined the forge with a 50/50 mixture of plaster of paris and sand. Has anyone here had any experience with this method of lining a forge? Pros/cons?
-
That's a valid point - I think I'll figure a way to make it removable. Maybe get a small piece of square tubing and line the hole with it - then I could just drop it in like the Hardie hole on an anvil. Also, Arkie, good idea about using a masons chisel - I have one in the toolbox that hasn't moved in years. Time for it to earn it's keep.
-
Would the & shaped pieces be good for making a drift out of?
-
Cool! I picked up a couple of those too - thinking I could use one to make a bending jig. I'll get to work on it. I scored a couple of coil springs this week while dumpster-diving, and have made a knife so far. Next is a set of decent tongs (right now I'm using vise-grips). Sooo . . . is there anything useful I can make out of the spikes? Otherwise they're outa here. I have the coil springs, and a couple of lawn mower blades, which I'm told are fairly high-carbon steel. BTW, thanks for the good intel - having folks like you to brainstorm with is a godsend.
-
I was planning on boring a hole in the top of the stump, squaring it up with a chisel, and cutting the head off the spike so it would fit in the hole. I'll make the square hole tight so I have to beat the spike into place. Another question - should I harden and temper the spike? I'm told that spikes are medium carbon steel, how hard do I want the finished tool to be? I was also thinking about making a hot chisel out of one of the spikes - worth the effort, or should I be looking at another kind of steel for this?
-
I'm new to blacksmithing - took a class at North House Folk School this fall, and when I got home I got busy setting up shop. I have a chunk of railroad track for an anvil, a small sledgehammer to beat with, and I made a brakedrum forge. I'm learning as I go (with substantial help from this forum), and I'd like to make some sort of a cutoff tool. I got ahold of a few old railroad spikes, and I'm considering using one to make a cutoff hardy and mount it to the stump I have the "anvil" on. Any thought or advice will be appreciated.