ironjohnlogan
Members
-
Joined
-
Last visited
-
Thanks a ton, my curiosity on this subject has been ruinous to my internet reputation over the last 6 months as I mentioned above. Everyone keeps citing my ungrateful attitude as a beginner asking questions...? Which is so far from the truth I don't even know how to respond? The shear fact I am melting steel in a crucible with forgeable results should be indicative of my continued pursuit of these processes. I don't even know what I am going to do with the material, I stopped making knives a couple years ago and teach blacksmithing classes now. It is just a fascinating process I would like to learn more about and is giving me a deeper understanding to my favorite artistic medium; iron
-
What do I do to deserve lectures? You are right, every time I have ever tried to interact with an online forum it is a disaster. I jump on far flung topics and get shat on for trying to learn new topics. 13 years as a forum member, a metallurgical degree, close to 30 years as a smith and now the founder of a metal art school teaching blacksmithing full time should count for something? My dirty laundry that people have choose to gatekeep me in the past shouldn't be used as evidence against me - but proof there is something wrong with the equation. Your very tone I think you assumed my lack of experience. Is that racketjawing by your definition? I didn't comment on this post with a question but I got handed answers like I am begging for your hard won research? Reread my first comment replying to the original poster. He asked about melting capability of a 15kw induction - I do 200g batches all the time in my 15kw 220v WITHOUT any problems in my open graphite crucible under molten glass. Sorry I even mentioned that darn w OO t z word.... Like I said why does it elicit such strong responses? Happy melting! May your crucible never spring a leak
-
What the heck is wrong with this topic that it reacts such strong responses? I have scoured the internet, I assume same as the original poster and found next to nothing on the topic of induction crucible steel. What source material should we be referencing and where might we find it? I tried joining the wootz society to ask this question - they say no beginners I tried joining wootz facebook groups to ask this question - was blocked Sharing my "obviously not wootz" induction made steel with dendritic carbide formations got me banned from bladesmith forum The calculator on wootzsmith is cool but leaves a lot of missing in the whole what to do after it's melted? I try to be supportive on here and get yelled at by an admin for obvious rookie mistakes Feels like gatekeeping big time Do I know what I am doing? NO Is that stopping me? NO

-
I regularly melt 200g batches of steel with my 15kw 220v induction in .5kg graphite crucibles with no issues. I don't know what "Max" is - I haven't needed to enlarge my process for testing purposes. 200g is a big knife or two smaller ones. Wrapping my head around wootz myself. Melting isn't the issue - it's the slow cooling at solidification... easy in a big insulated furnace, not so much in a open crucible.... I have experimented with slowly ramping down the amps on the induction, or burying things while their still sloppy in vermiculite, or a coffee can lined with kaowool - experiments still continuing. The "traditional wootz" guys are super gatekeeper and don't like us induction cowboys - so we're in uncharted territory it seams but I know a lot of guys are super interested in refining the process. Just the fact we can make a custom batch and see it happen before our very eyes is the magic of steel in the palm of your hand! Don't let the naysayers say it can't be done! Happy melting!

-
As the year comes to a close, smiths from near and far gather at Summer's End Hammer-in at Artfire Michigan October 25 - 26 2025 Artfire Michigan 4567 Churchill Rd Leslie MI 49251 Right off highway 127 exit 56 Line up of demos and workshops Hearth refining bloom experiments (hands on) Induction forging Seasonal all levels projects: Wands, Snakes and Skulls Raku pottery Induction Steel making Pumpkin carving GLOW Forge

-
Don't know what is "max" but I regularly melt 200g patches of homemade steel in my 15kw 220v induction forge using .5kg graphite crucibles. It's a really cool process and the small crucible makes enough for a knife or two for testing purposes.

-
I absolutely agree, can't stand trying to learn from video. But seems to be a lot of people's preferred method of sharing today... Happy places like this still exists to get in touch with the wider community Artfire Michigan is located in Leslie Michigan about 20 minutes south of the State Capitol in Lansing. It's a quickly growing community of smiths started in 2023, we started doing classes a year ago come September. We are busy building shop, getting the hammers running and making metal move. Anyone that wants to join the fun is welcome to our weekly Open Forge Thursday's 6-9pm. For info and directions look up the website and the Facebook page. Artfire Michigan Along with the Beaudry we are also "Whispering" a KB-1 Reiter, suped up an old style Blu 100, and preparing to rebuild a 50 Little Giant. We have a 25 ton hydraulic press and a No.8 fly press, induction forges, grinders and a plethora to anvils in a group setting clustered around a single shared forge. At the far end of the shop there is a gantry crane where we will be laying an end grain block floor to level the surface for the hammers. As I mentioned in my first post the floor is sloped - the building was built as a semi truck oil change in the 1980s and has a hugely thick reenforced sloped drain floor that angles by average 1/4 per foot towards the trench in the center... Floating the hammers on top of the blocks and anchoring down to the concrete is the only way I can easily think of to leveling the space - but then the positioning and attachment of the tower in relation to the hammer becomes an issue... Would love to hear what others have done and had success with, can't wait to get her up and running again!


-
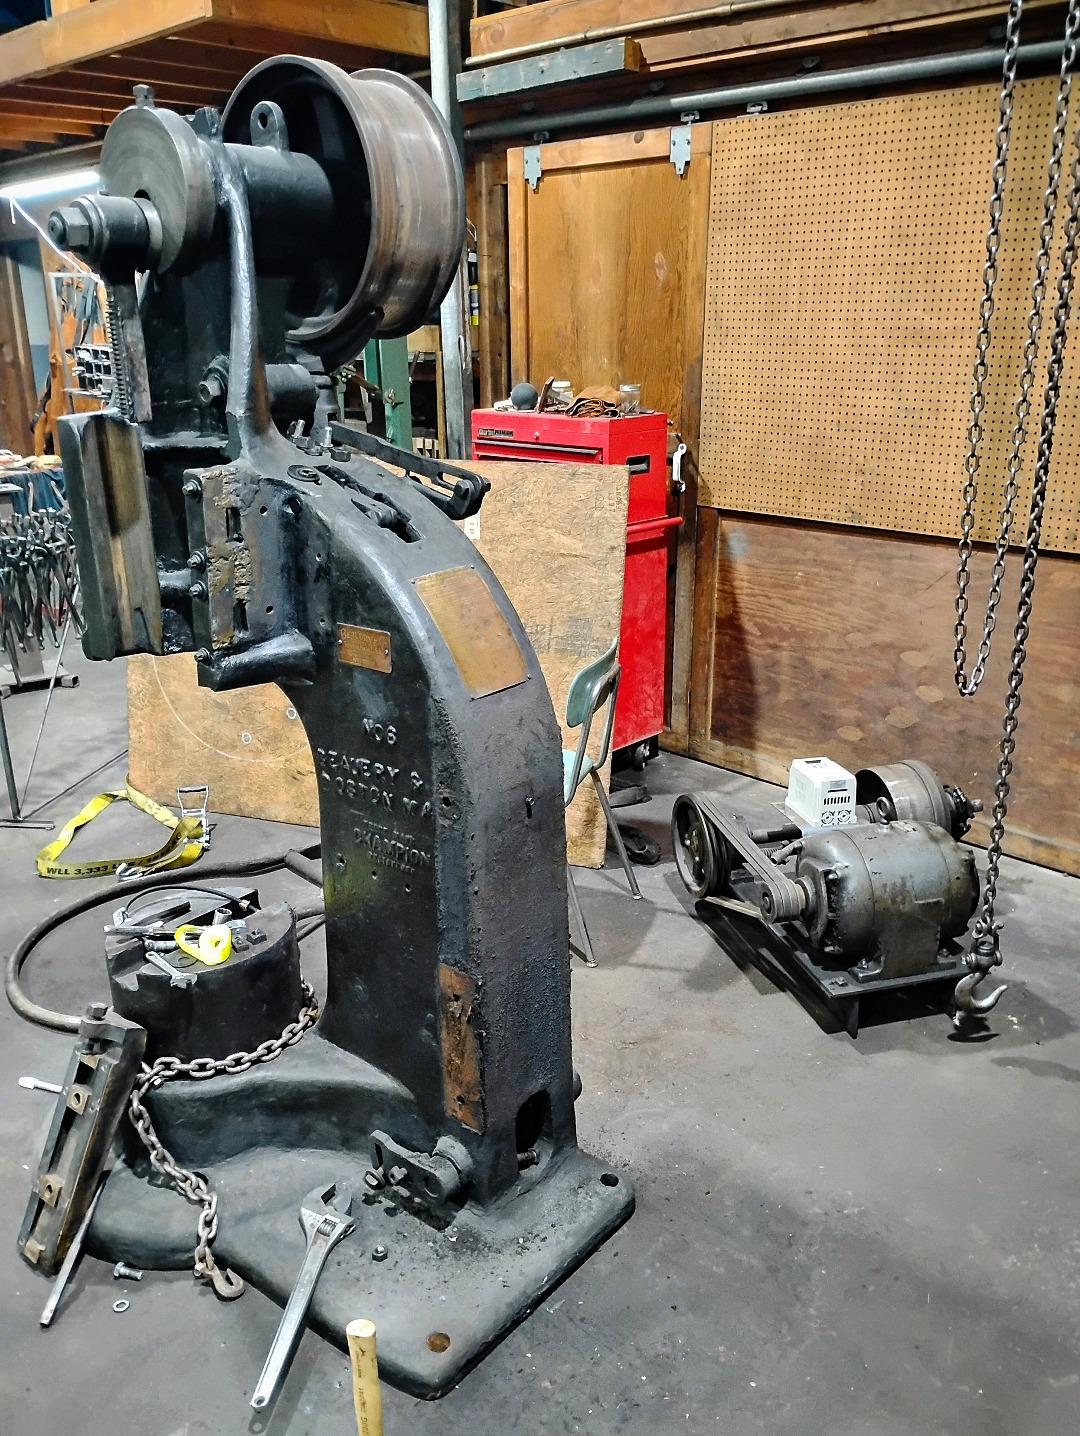
Hey Frosty, yeah it's been about a year and half of absolute madness. I am building Artfire Michigan from scratch, teaching beginner classes every weekend with returning students two nights a week. We're building shop as we go and the complexity of the Beaudry's set up has relegated it to a back burner. These old style Beaudry's are not simple set up like a Little Giants, for one I do not have a clutch. That pulley you see is direct link to the pitman crank, as such I will have to set it up as originally intended with a flat belt to acquire the "slippage" needed for controlled forging. If you look these old style Beaudry's up you will see the jackshaft towers I am talking of. A jackshaft tower is a stand in for a shop wide line-shaft system. Consisting of a tower and platform to support motor and pulley arrangement to replicate the "slack hanging belt" of a overhead line-shaft system. It is this slack that creates the clutch for this age of hammer. Love the base for your Little Giant! Great ideas with the recessed plates and bolt sockets. I also have a 50 pound old style Little Giant that needs the same treatment once I get the Beaudry going. Thanks for the inspiration!
-
ironjohnlogan changed their profile photo
-
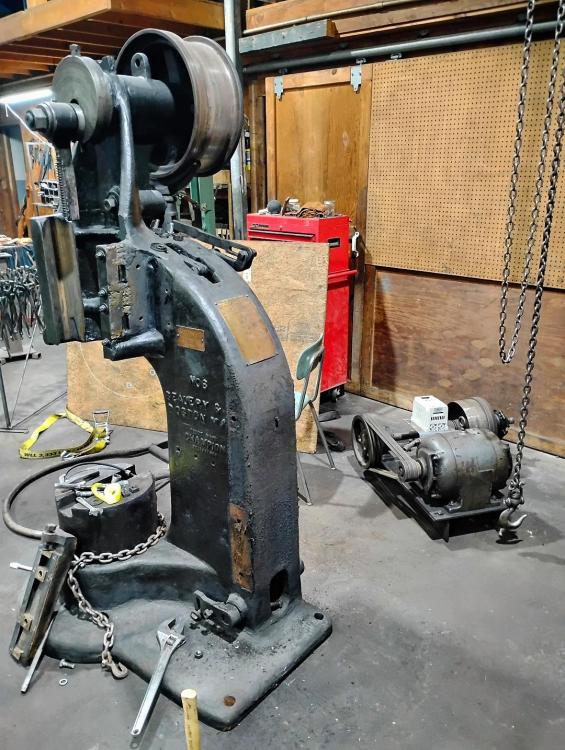
The 1915 Beaudry No.6 is progressing slowly. The broken cheek for the bronze guide is bolted on and reinforced with a heavy welded gusset back to the frame (removed for the picture) and the previous electrification with homemade clutch is removed. Now the big choices 1) How to build the jackshaft tower and shafting/pulleys arrangement for the 17 inch flywheel 2) What belting/motor/speed reduction to aim for 200bpm (less than the factory suggested 275) 3) Design and make a new idler and idler/treadle connection 4) The the big looming question I am still scratching my head on is how I am mounting the hammer... For many reasons I do not want to permanently hard bolt the hammer to the floor (the floor is sloped 1/4inch per ft) nor do I want to cut the floor (7 inch reinforced concrete) for an isolated foundation... I got heavy oak timbers to make a raft but not sure how raft and jackshaft tower go together? All ears form you guys that love these hammers - I want to do this old girl right and have her running and looking her finest!
-
Found his same wip of Bladsmithing forum https://www.bladesmithsforum.com/index.php?/topic/35524-new-hammer-acquisition-300-lb-beaudry-full-rebuild-with-detailed-pics/
-
Too bad the photos in that wip don't work anymore
-
My newest acquisition for the new Artfire Michigan school is a 150 pound Beaudry I rescued from an abandoned blacksmith shop in down town St Louis Missouri. Now I need to learn everything there is about getting this old girl up and running again! Who has a Beaudry and willing to share some insight? I am all ears!

-
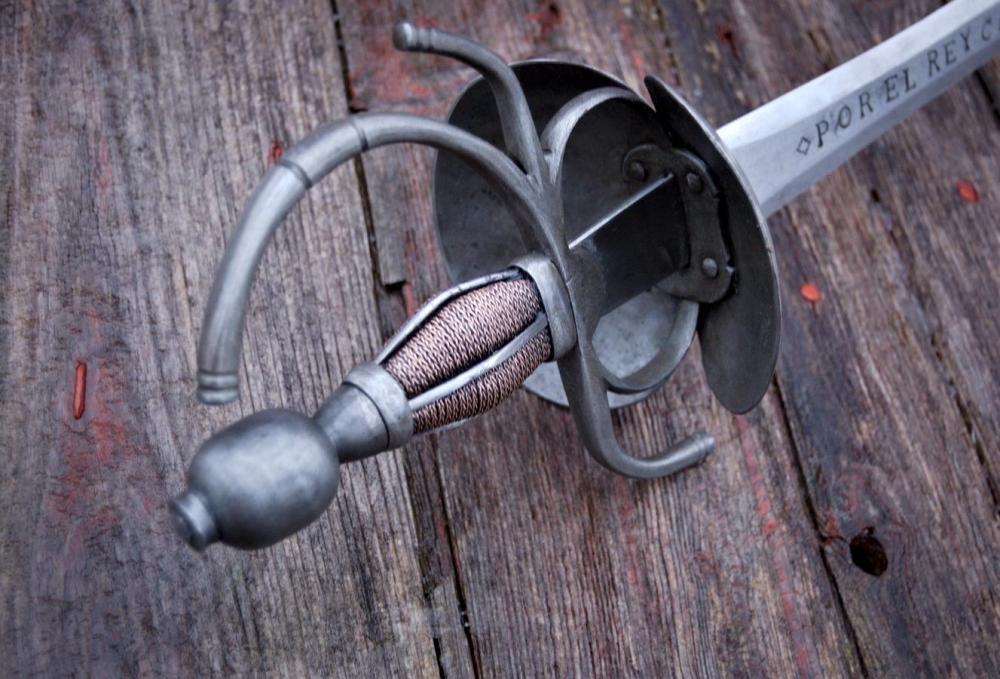
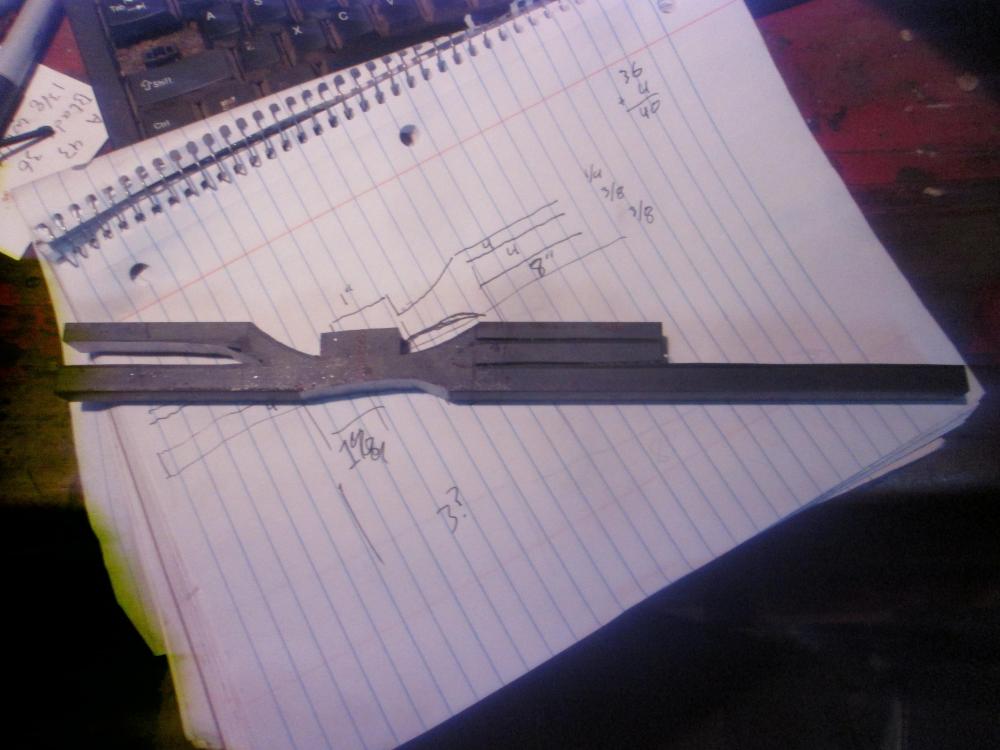
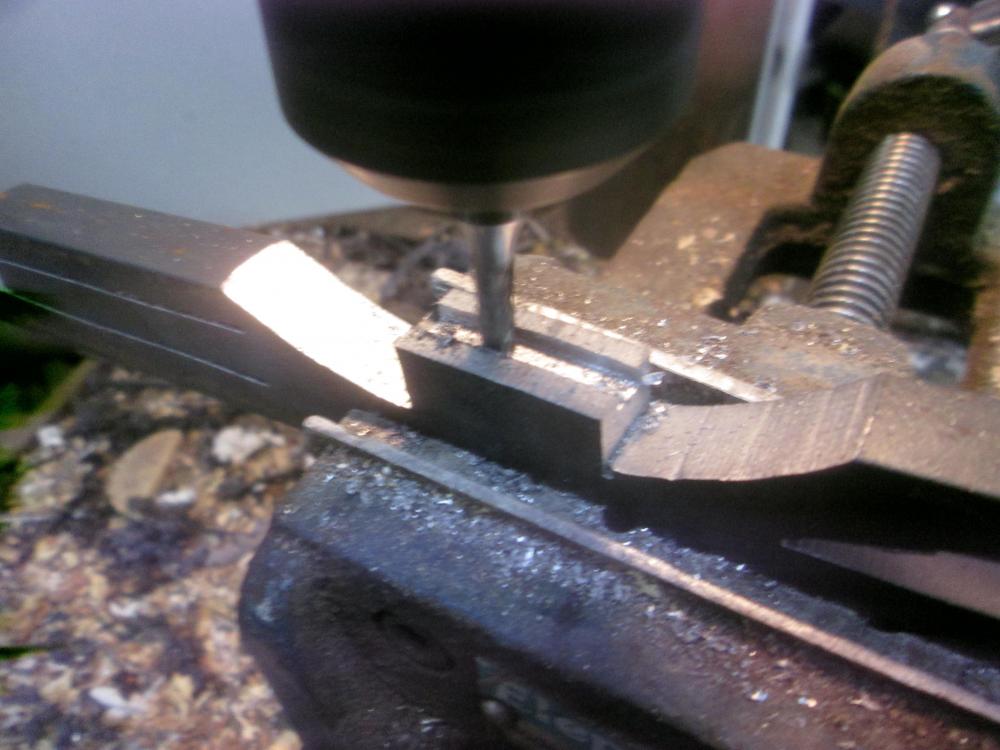
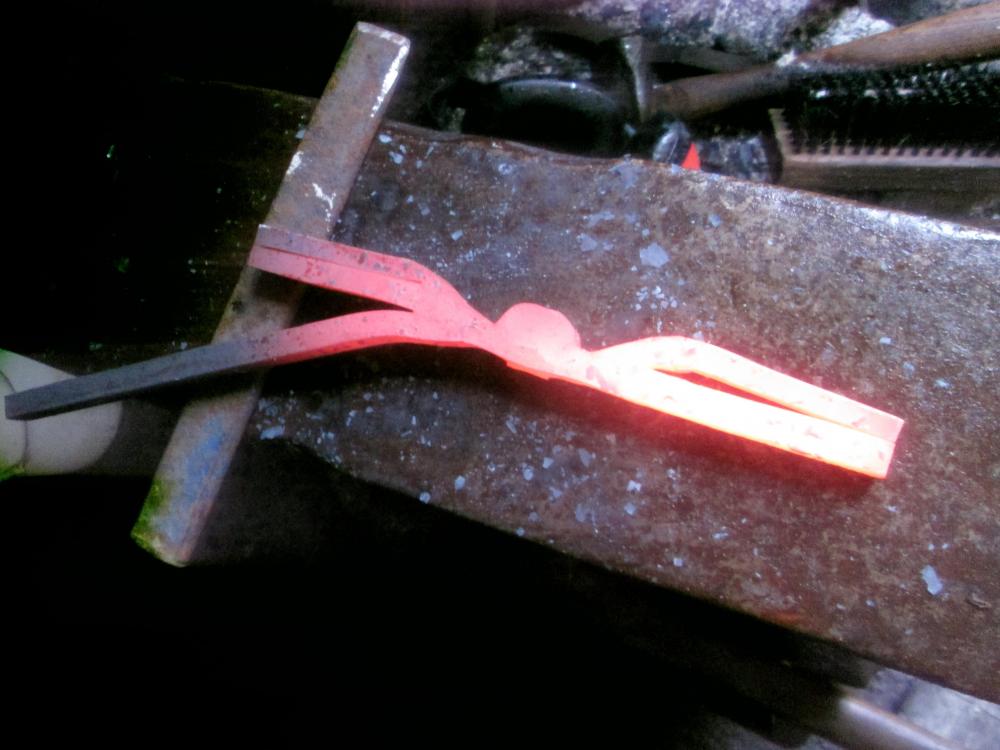
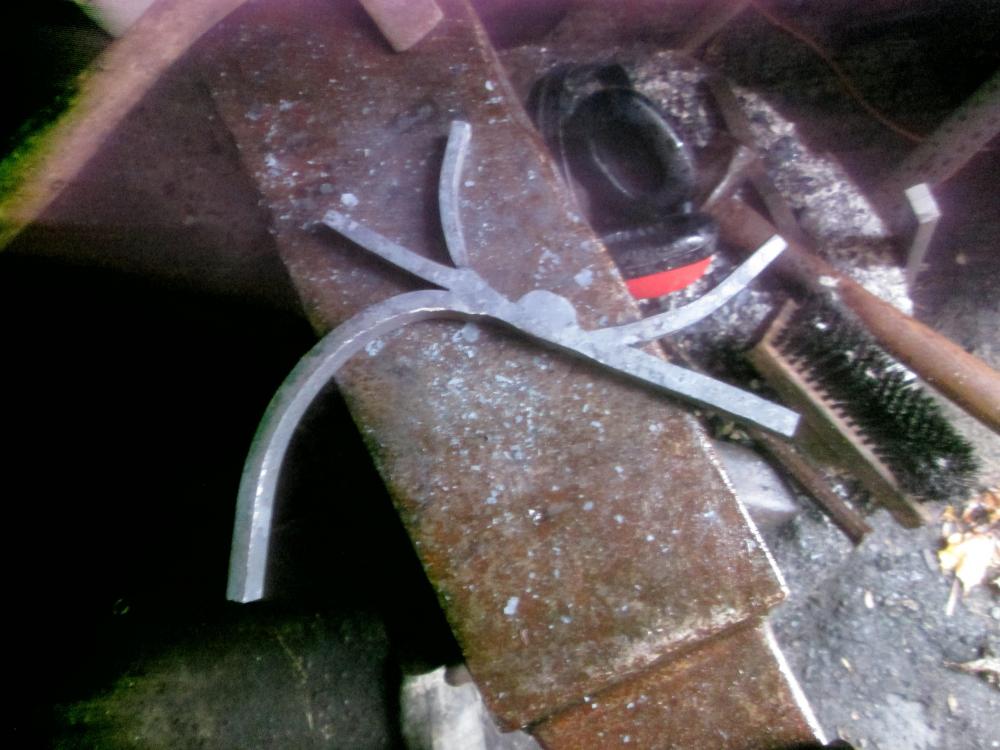
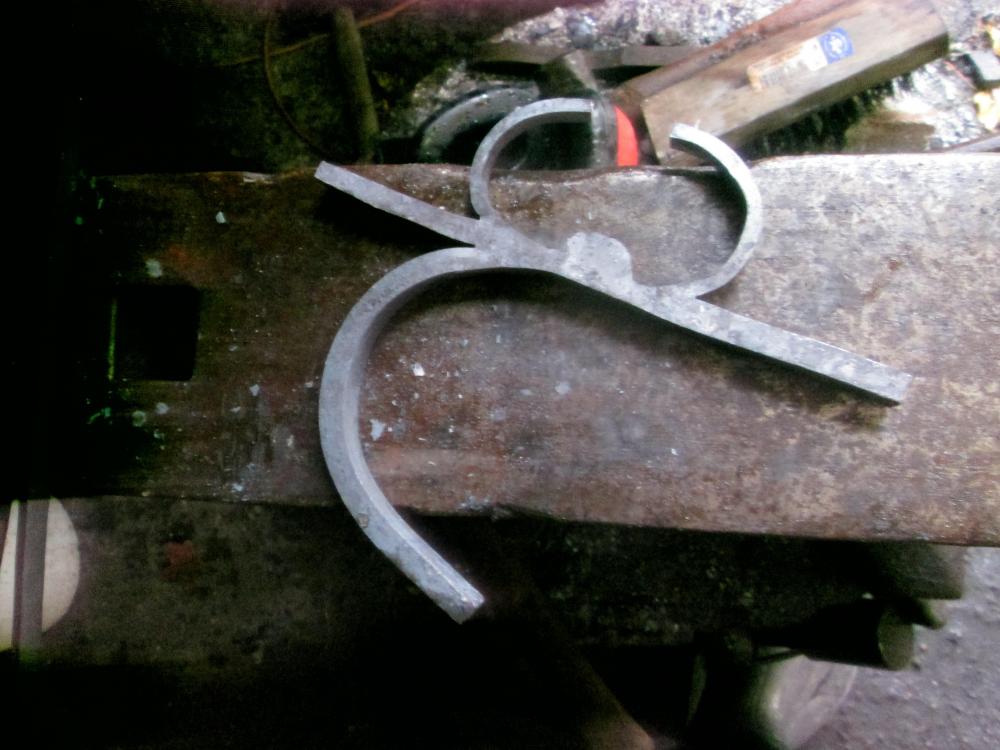
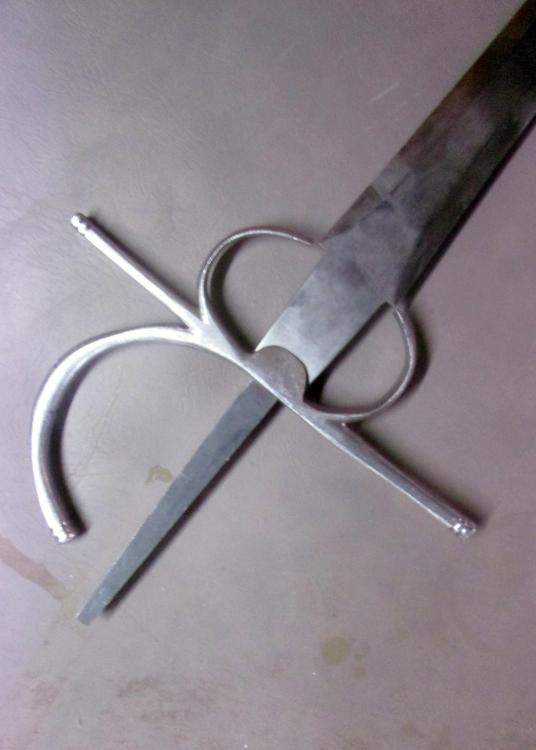
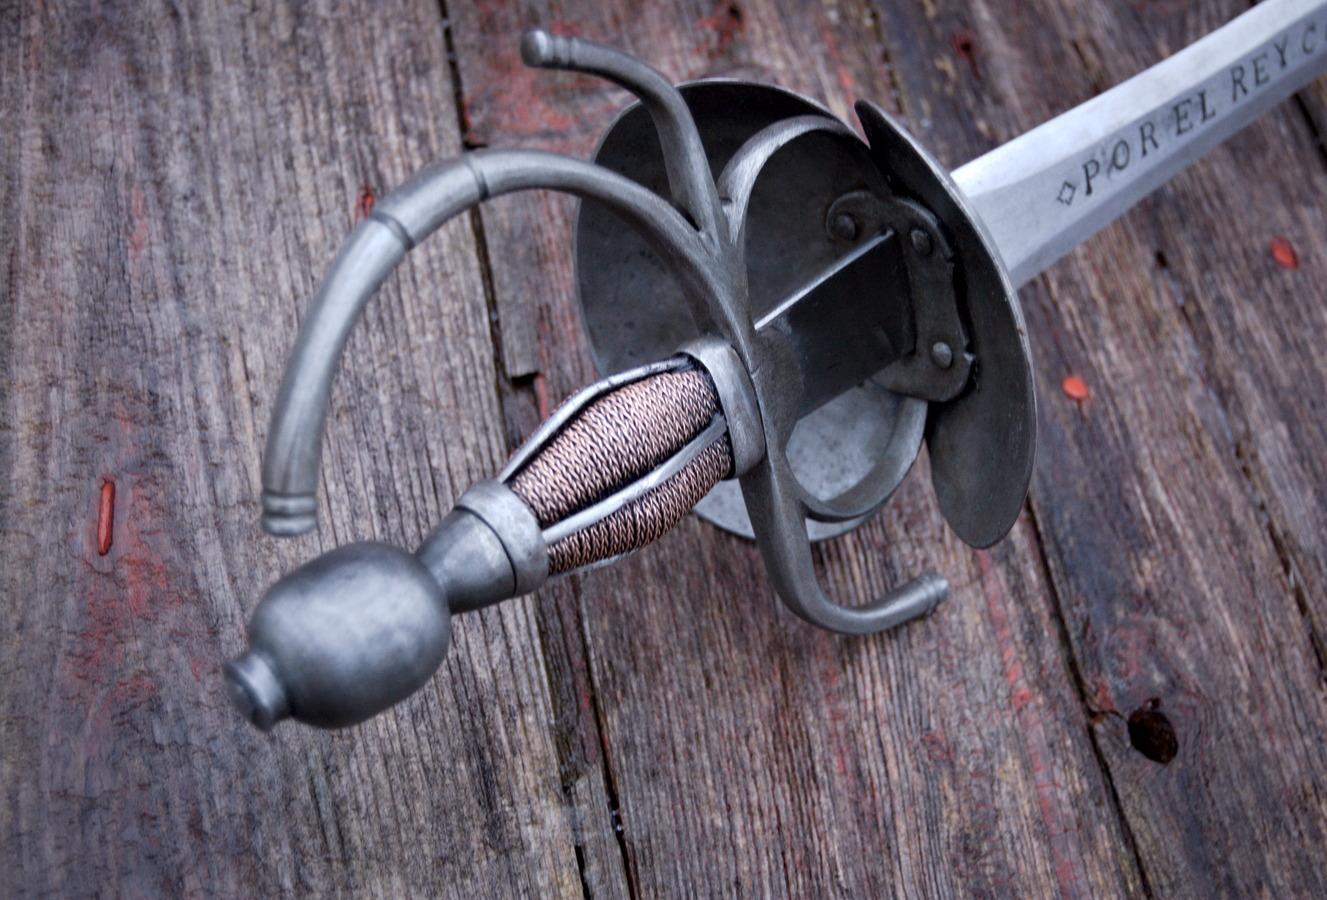
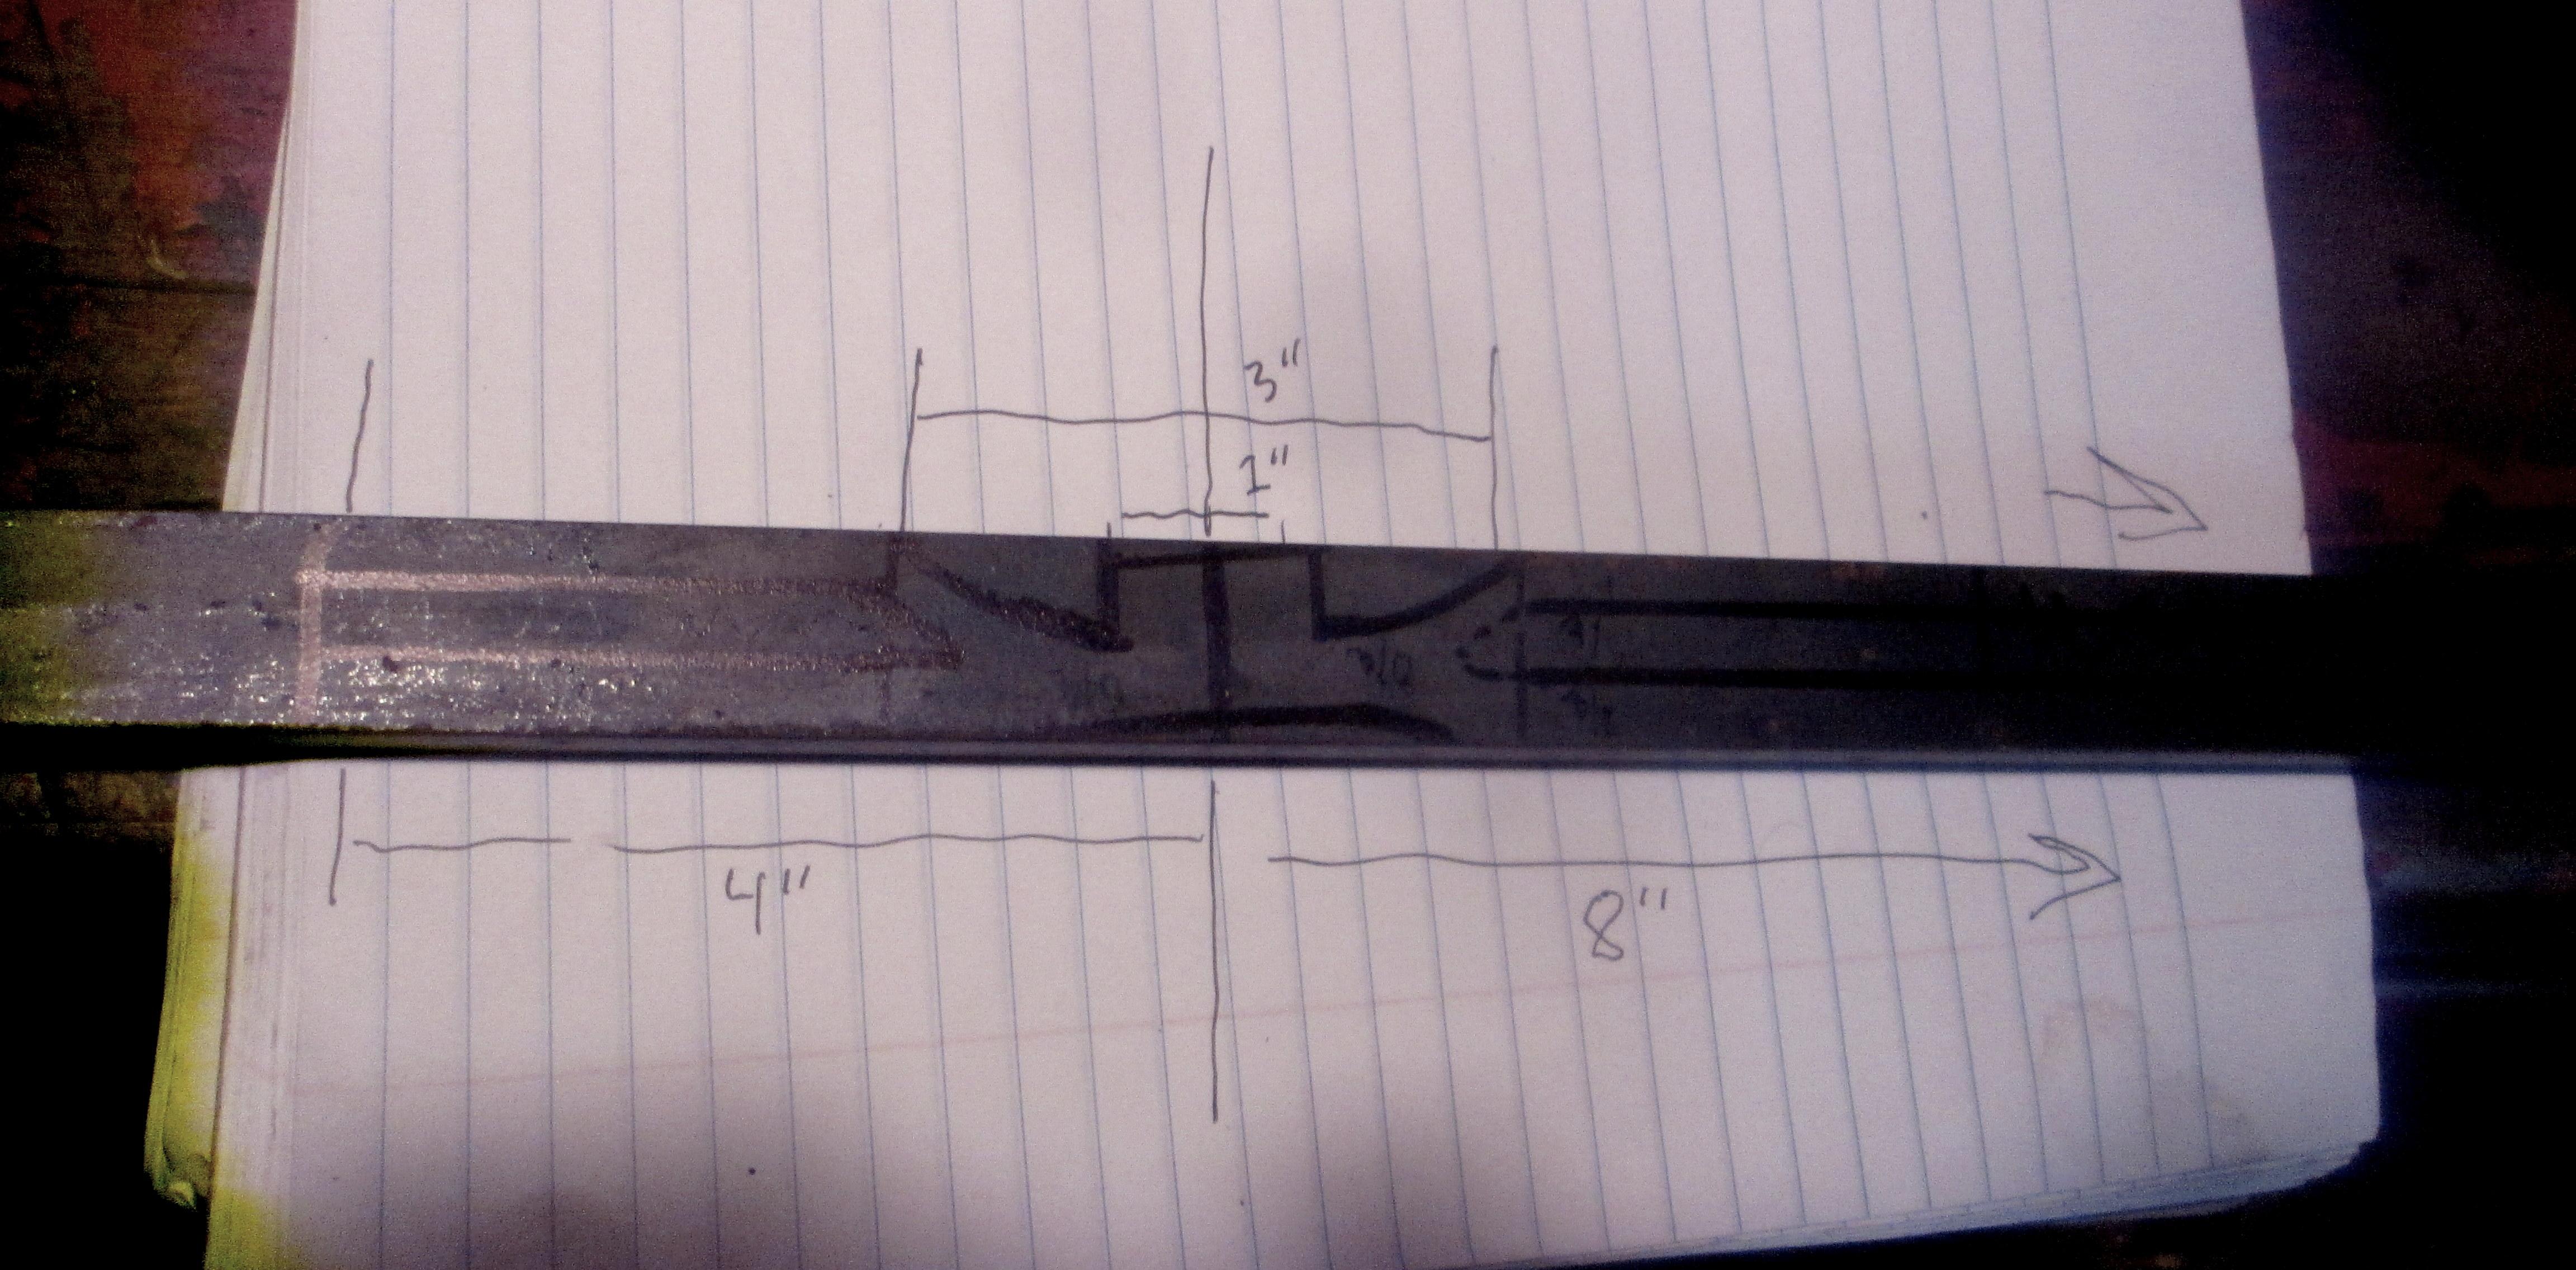
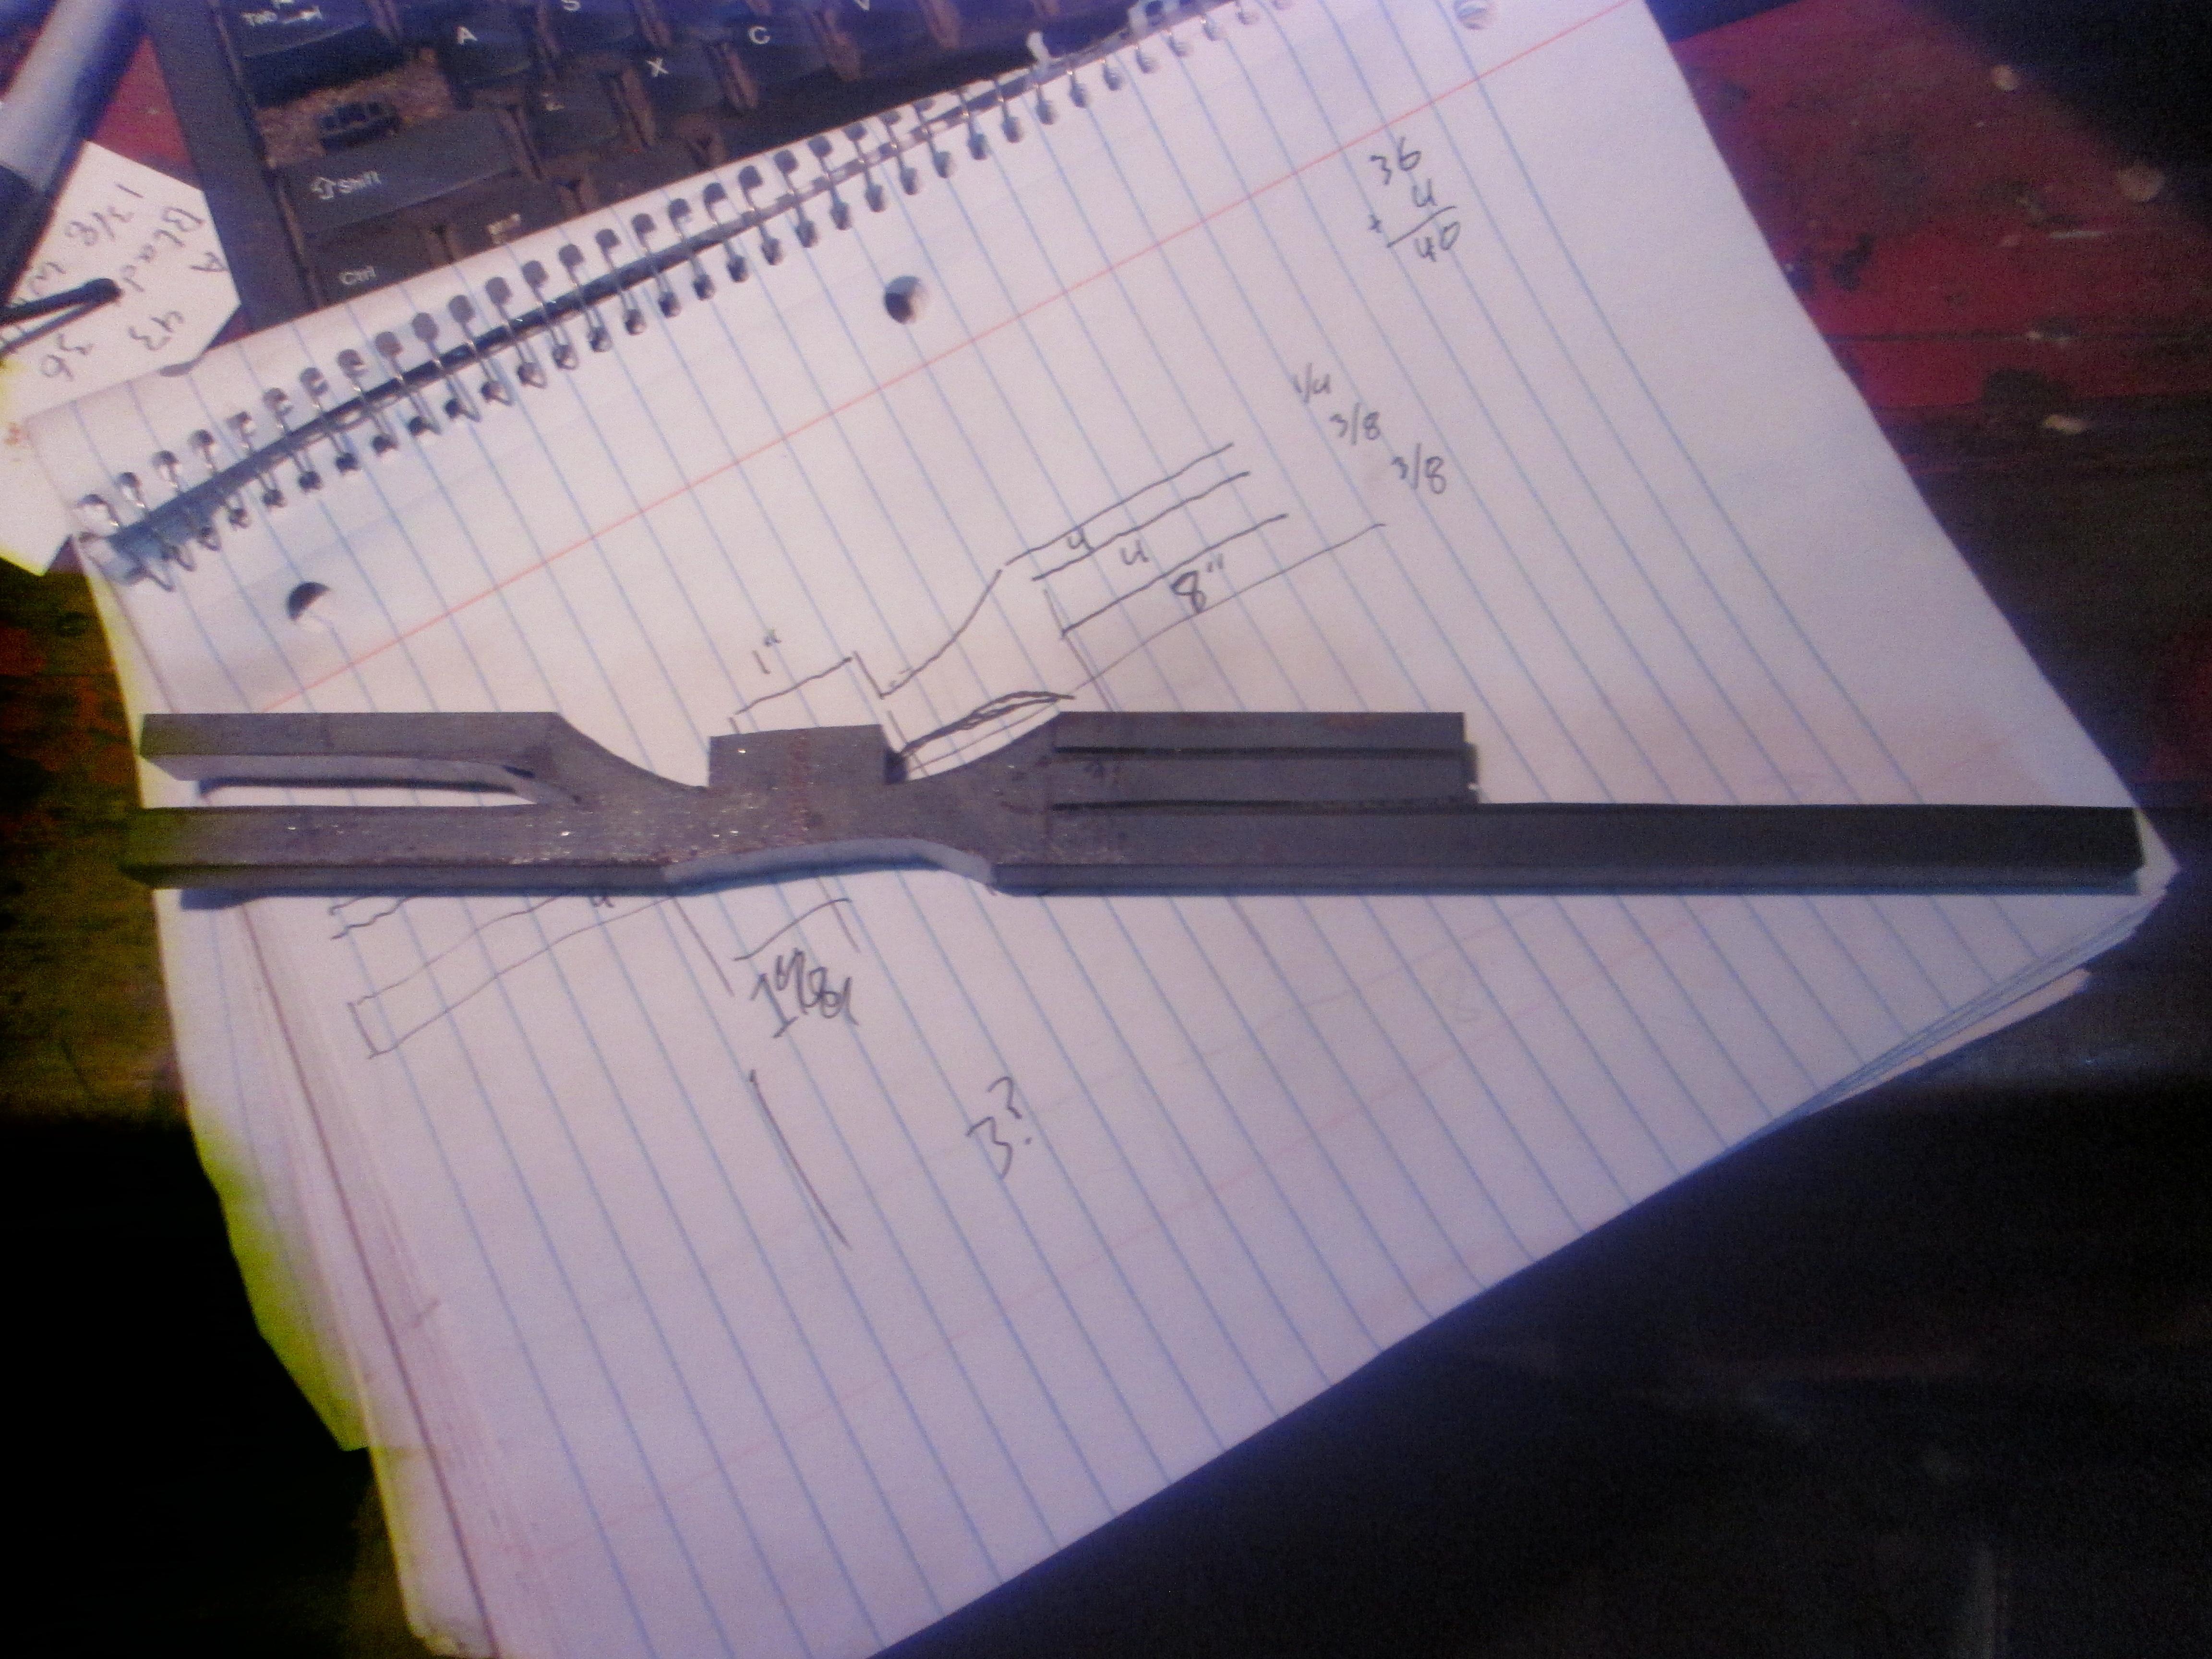
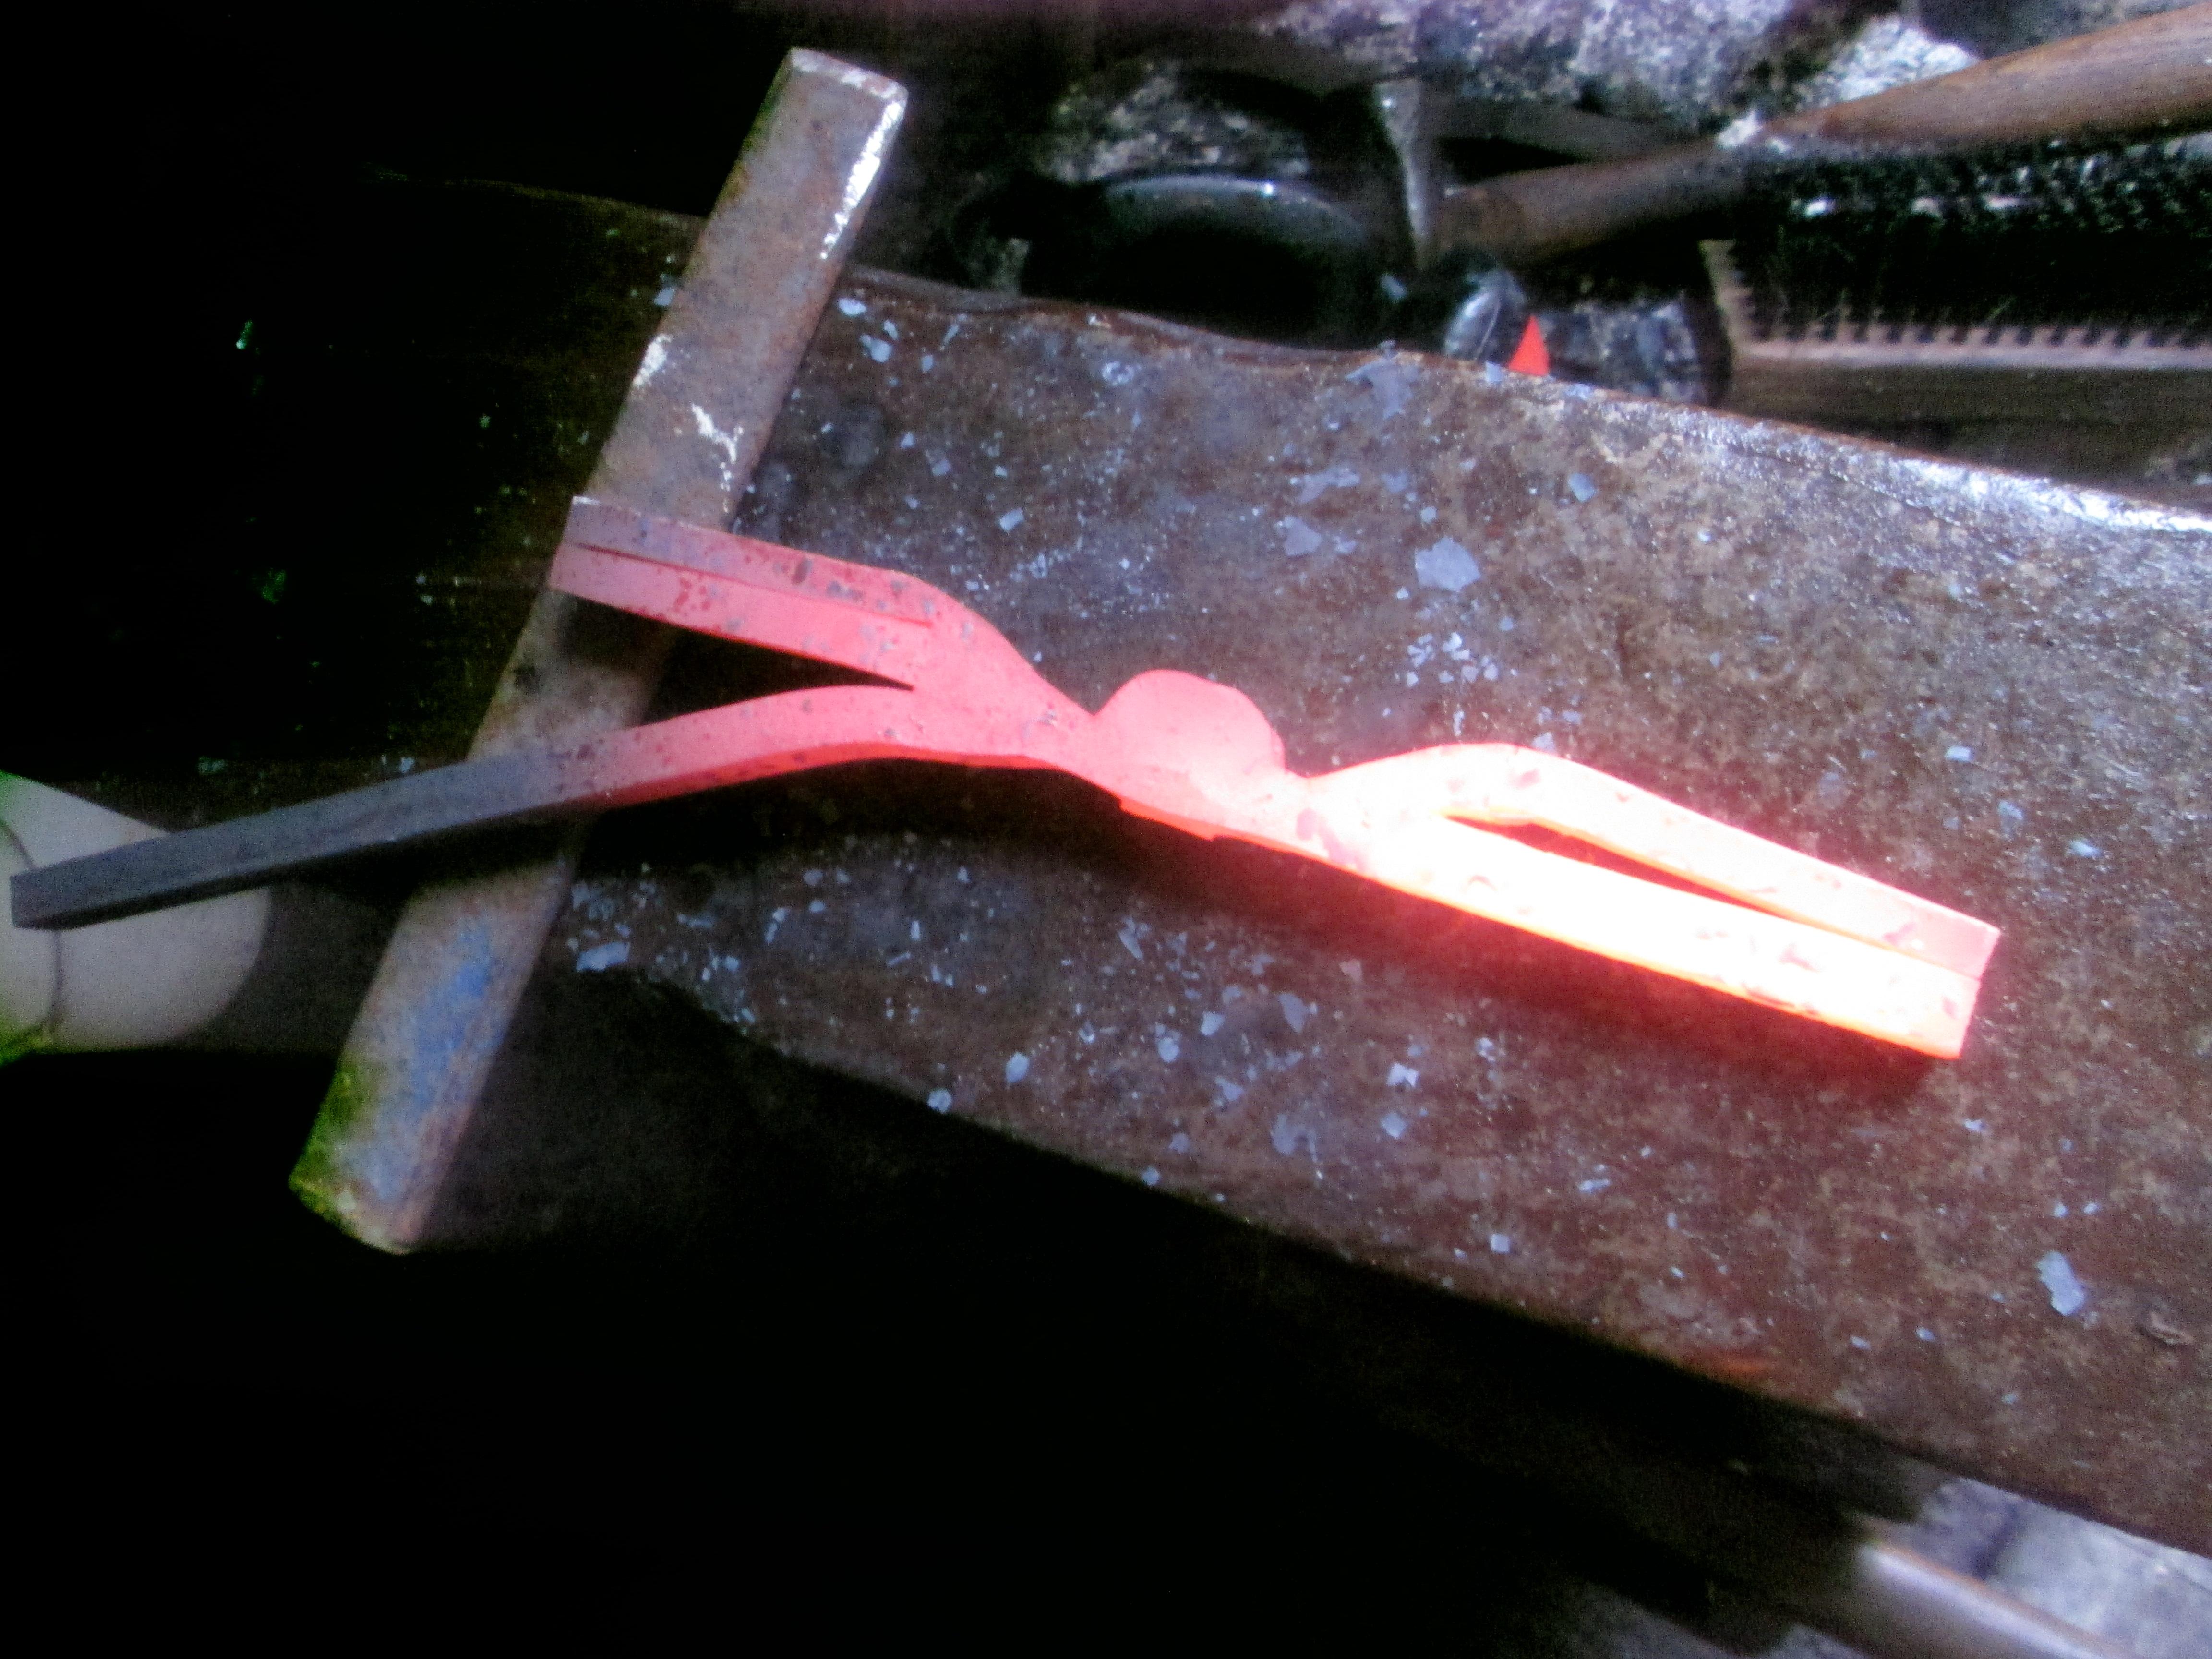
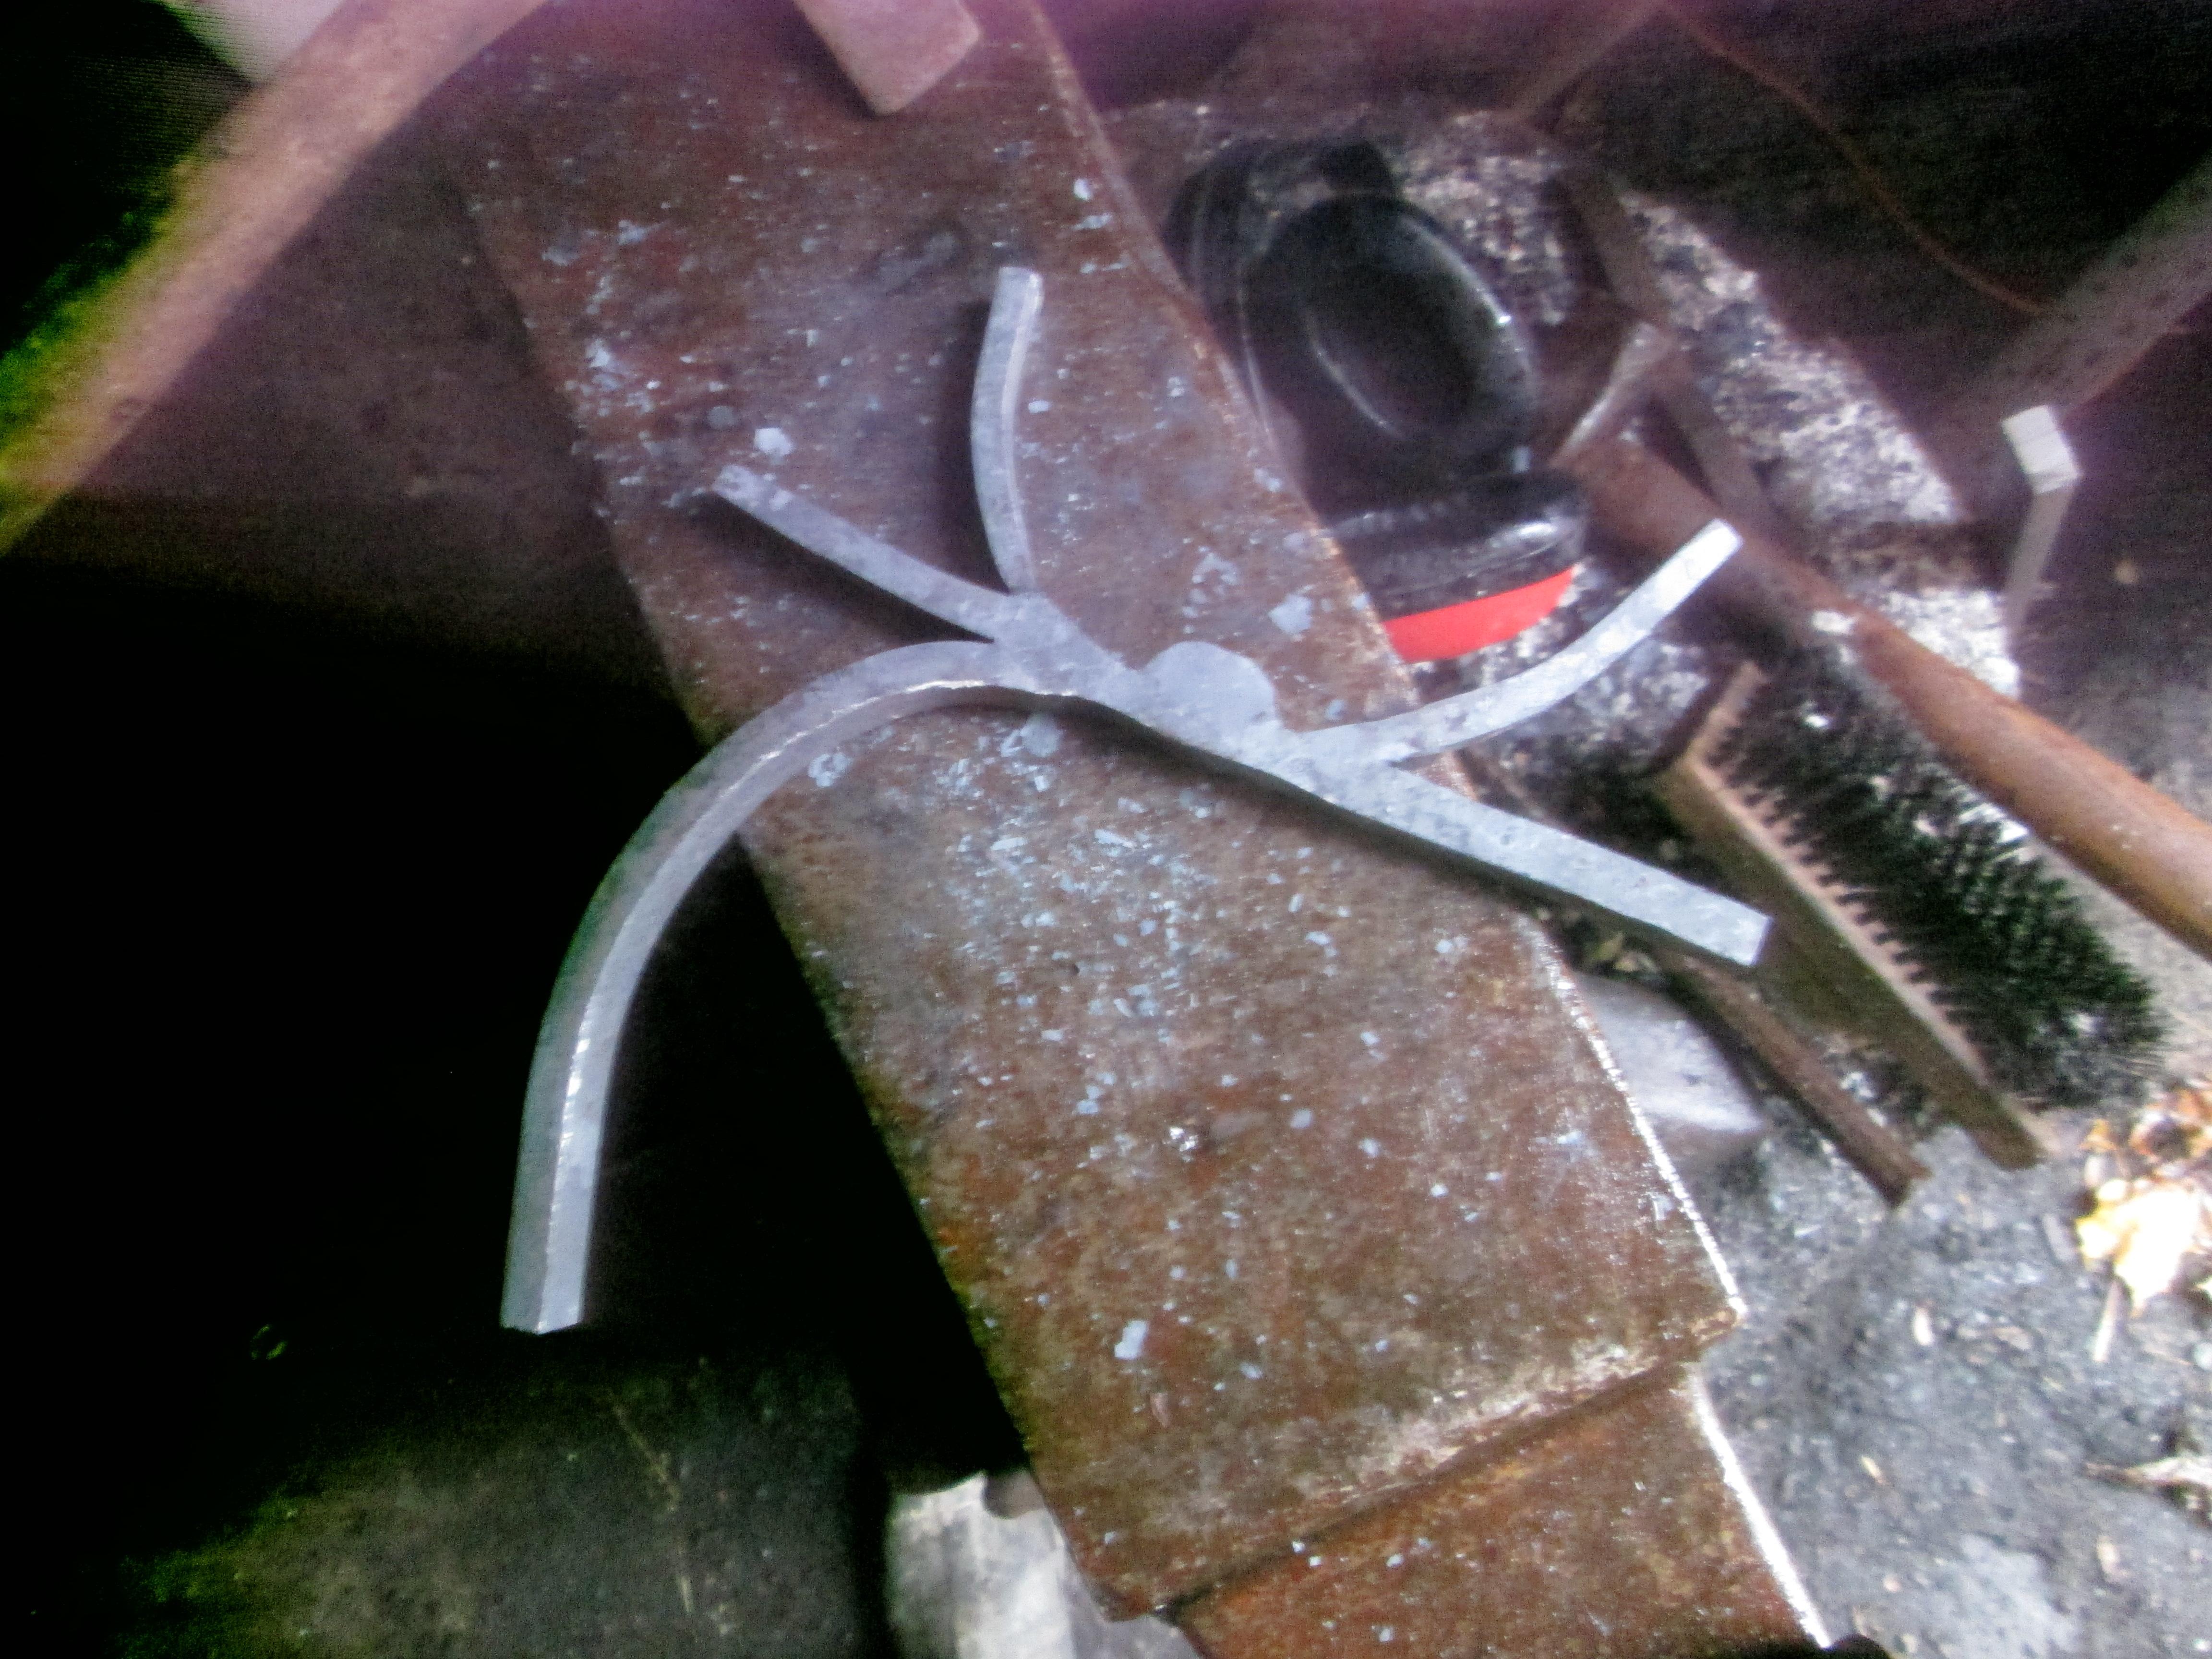
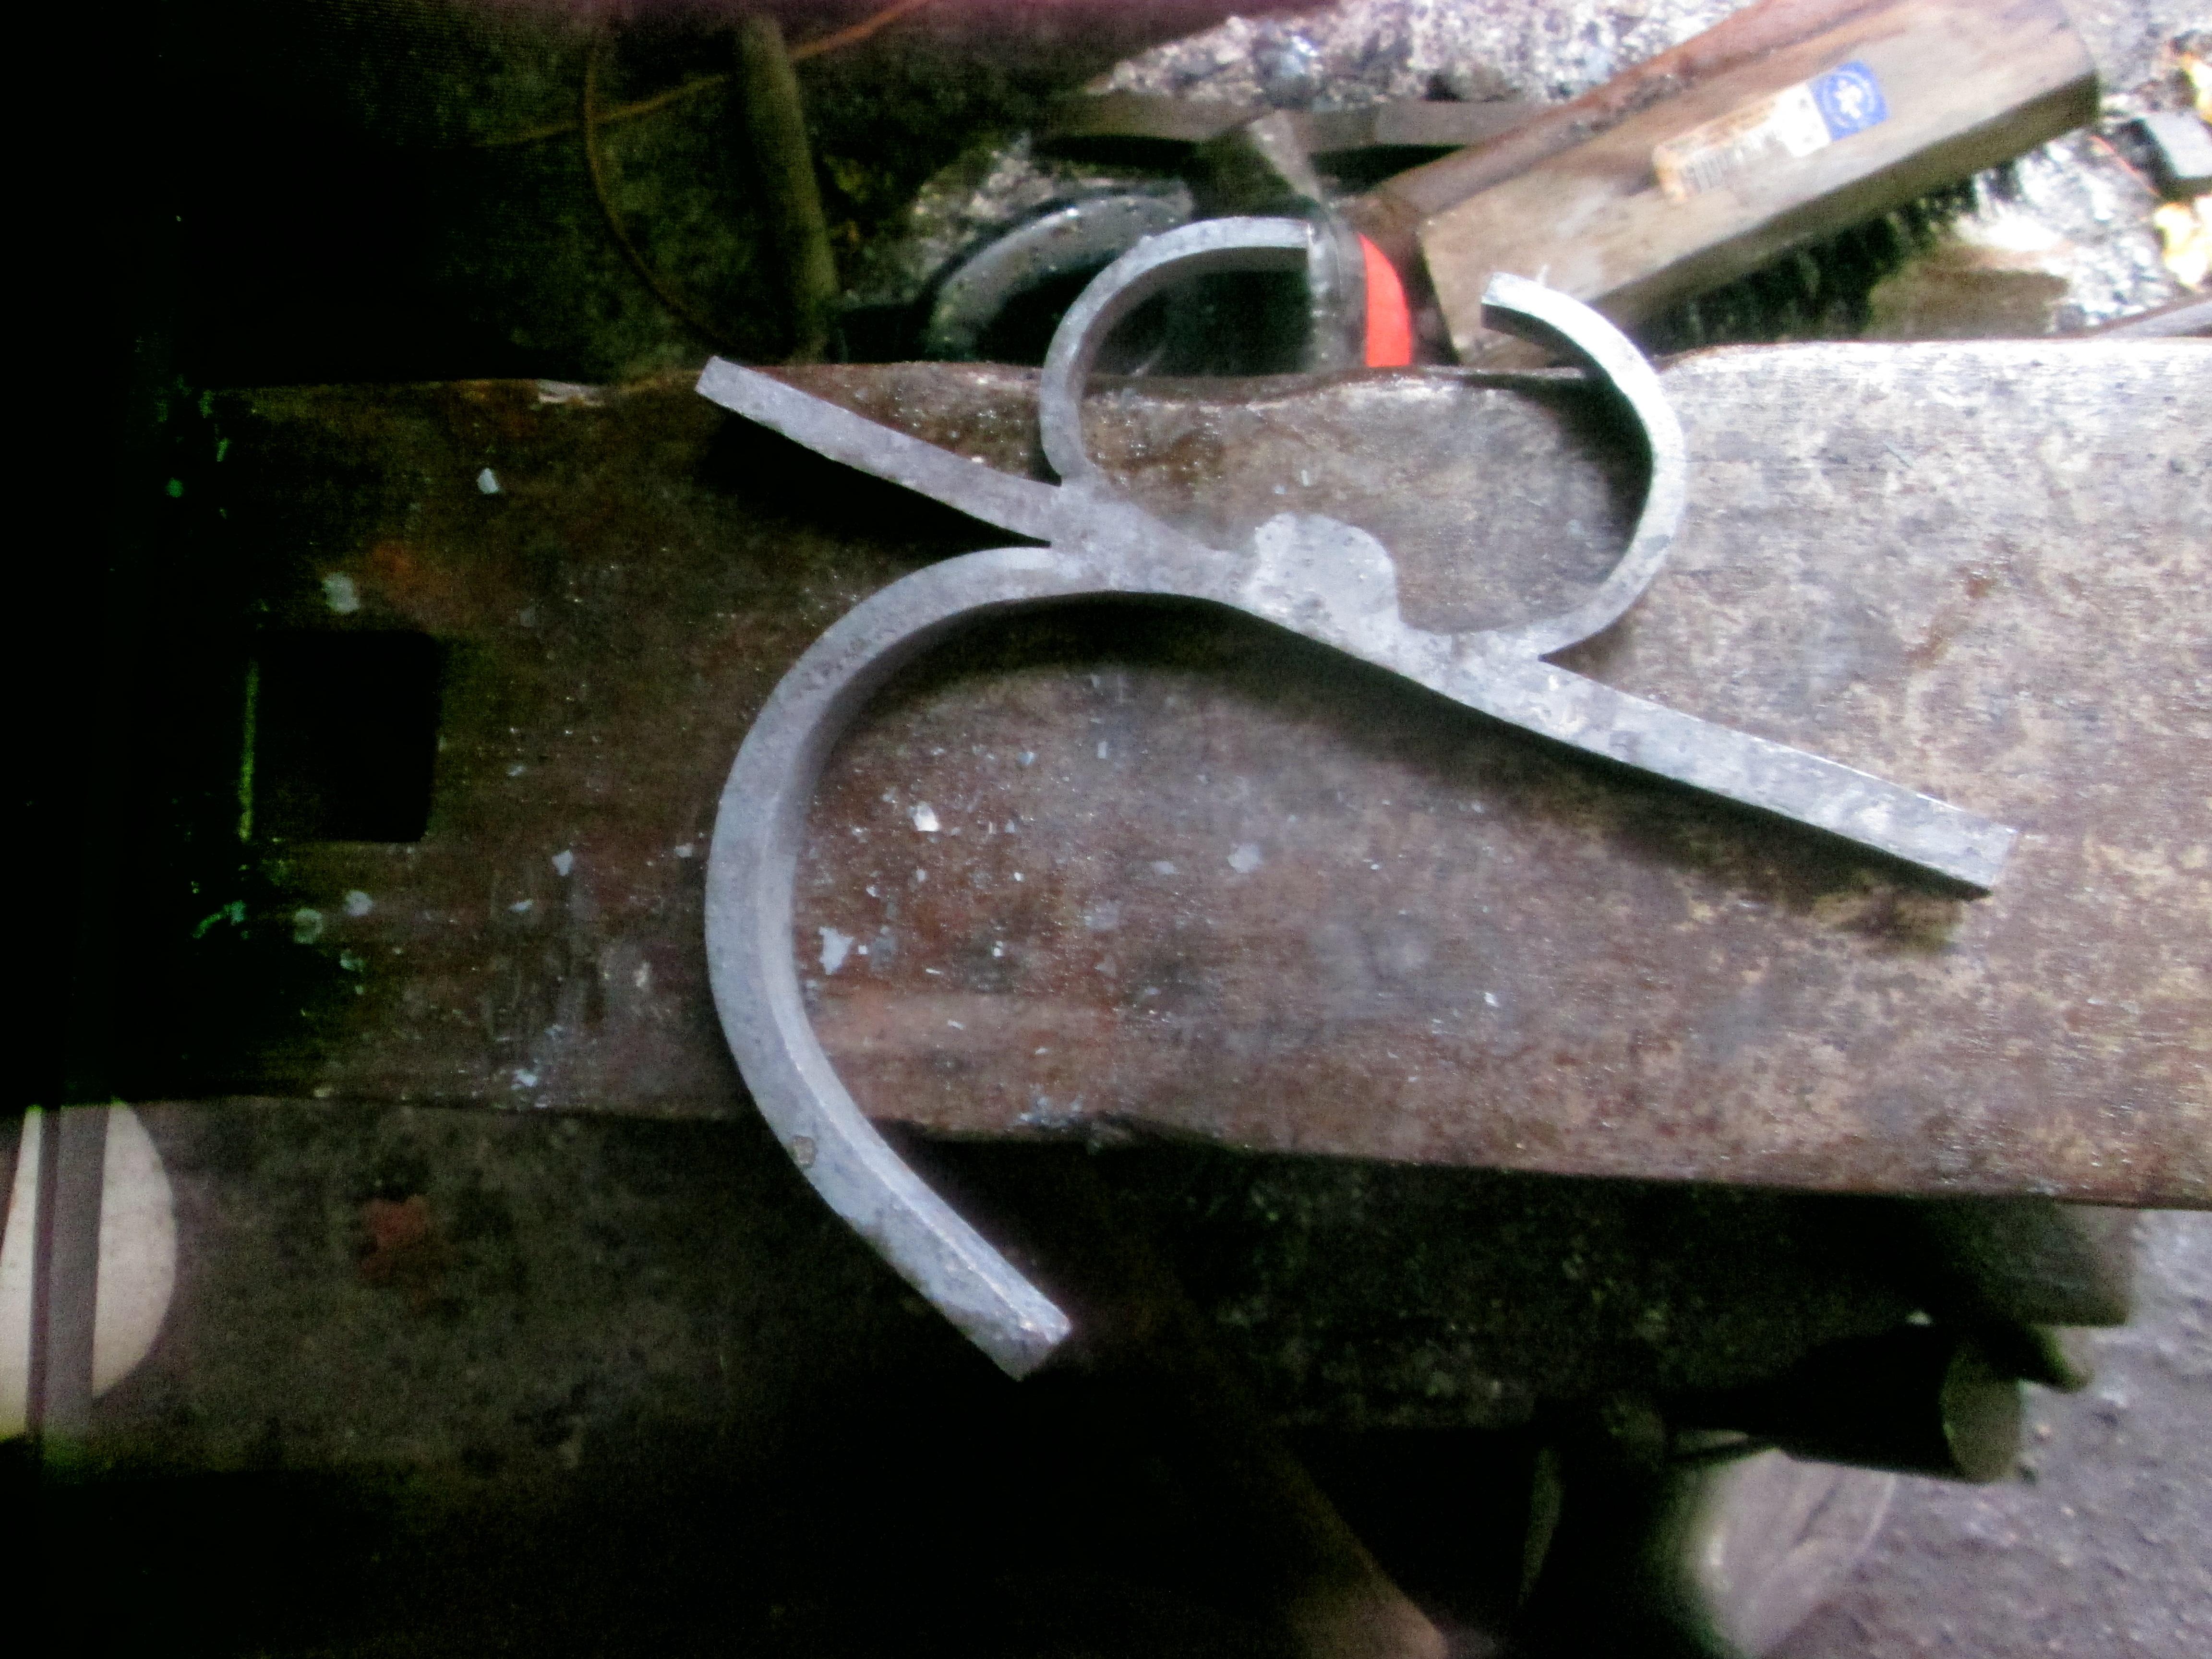
Over the last 8 years I have been asked a number of times to make a very certain type of sword, and I seam to be the only person to have ever reproduced it. The sword is the Spanish model 1728 Cavalry Sword. We are lucky to have a number of originals in privet and public collections, and the original arsenal diagram for their construction. After much trial and error I have found a great way to forge the hilt from one piece and want to share. This technique works well for any semi-complex to complex hilt (with the addition of more rings once the base is forged). Here is a picture of my most recent Spanish M1728 copy (12/2/19), measurements taken from the original #7366 in the collection of Arizona Historical Society. Now the WIP of how to make it! I start with a piece of mild steel that measures 5/8 x 1 x 12 inches. Lay out the "center" at 4 inches form one end, 8 inches from the other. Notice on the hilt above that one side has three pieces (pass ring, quillion, knuckle bow) and the other side only has two (pass ring, and quillion), Lay these out as straight lines parallel to the bar. Now for the super secrete part! Draw in the block (where everything comes together and the tang slot is) at a slight angle. Remove the waste. I use a band saw, but what ever tools you have. You can see I also shortened the pass ring and quillion to their final length of 4in on either side of the block (the knuckle bow is the long piece and will be shortened once bent to final shape) I mill the slot in the shoulder, but you can also hot slit this with a chisel. Later the tang slot is hot punched with a 3/16 x 1/2 punch which opens the block up and makes a nice swell in this area Once all this cold work is done, it is time to fire up the forge! First forge the angle out of the block, aligning the quillions both sides. Once the block can sit on the anvil you can punch the tang slot (3/16 x 1/2in punch). Then begin opening all the arms Once open stop before you round over the rings so that you can get in the tight spots with grinder or files and bring all the "arms" to final thickness either forging or grinding Now bend the arms to final position and trim to final length. At this point grind / file (whitesmith) the hilt, fit to blade, etc. If I wanted side rings etc, I would weld them on (arc or mig) and file to hide the joints. But I bet one of you is creative enough to figure out how to get everything out of one piece! Thanks for looking! I look forward to seeing what others do with this idea! If you have any questions or want to see more of my work please check out my website www.irontreeforge.com