
Daniel Lea (AKA 99pppo)
-
Posts
229 -
Joined
-
Last visited
Content Type
Profiles
Forums
Articles
Gallery
Downloads
Events
Posts posted by Daniel Lea (AKA 99pppo)
-
-
I think you will be perfectly fine using hot rolled steel on this. Cold rolled steel has a little bit less tolerance in dimention and usually very sharp edges, furthermore it is a bit compressed short under the surface which makes it also a little bit harder and tougher. But hot rolled steel would be the one to go for the usual blacksmith...
-
So what would you suggest?
By the photo's 99 posted it doesn't look like a roof jack will be needed on the roof, as the pitch looks pretty minimal.
I see that the Roof Jack's can also be a stack flange. I know them to be the standard image of a roof jack which allows you to stay on step roofs. -
Cool thank you!
99pppo
This is what you need to seal around flue & roof ...
http://www.ebay.com....=item439d9a2302
Dale Russell -
I think I will built a roof for the flue out of sheet metal and seal the gap in the roof with rabbit proof fence and some kind of heat resistant clay.
Nice job! What are you going to use to seal it up? -
Nice ideas. I will practice a lot more to make them and then also share my experience. Due being also a viking-reenactor I will have enough chances to test them in use! Btw I sent you a contact request on MSN just that you don´t wonder...
99
Ihave made quite a few brooch's myself over the years. It will work better with the ends cosed as you said, I make my fancy ones with a leaf on one end folded back and a little scrol like yours on the other end.
As to the corkscrew i wrap it around a taper about 19mm log that is about 2mm on the small end and 6 or 7mm on the large end. Then I use my scrolling tongs to pull it out to the length I need, and turn the end to point almost straight out for a couple mm. I have been making them out of coil springs and use them as forged. -
Wow that´s a great tutorial, thank you for giving me the link!
99pppo
If you want to look at corkscrew info try this post
http://www.iforgeiro...__hl__corkscrew
Brian -
Thank you very much! Knowing how they are used will help me a lot to make them properly. I will re-do it with all new knowledge I gathered about them. And if I happen to make them really really good I will do a little video tutorial so other people can also understand them better. Again thank you very much for your usefull comment!
Dear 99pppo,
At the risk of "preaching to the choir" I'll tell you what I tell my customers about penannular brooches.
They are called that because they are "almost a circle." An annulus is a circle, a donut (schmalzgebachenes) is an annulus. Pen- means "almost." "Penultimate" is almost last and a "peninsula" is almost an island. They are also sometimes called "omega" brooches because the resemble the Greek letter omega (particularly if they have curled back terminals like you did).
My explanation to customers about how to use them is that it is very simple but not immediately obvious. (1) pass the pin through the fabric. (2) Raise the tip and pass it up through the gap in the body of the brooch. (3) Turn the brooch 90 degrees to lock it. (This works better if I'm doing it while explaining it. Also, I make them do it themselves because they will remember it better if they have done it. Like in blacksmithing, muscle memory lasts longer than just mental memory.
Penannulars go back to at least the 1st century BC. They are particularly associated with the early British, Irish, Welsh, Viking, and late Roman cultures.
Historically,
George M. -
I have to admit that I din´t knew how these broochs are used when I made the one on the picture. Now I know how they need to be in order to work best! I took a piece of 6mm round and wrapped the screw around it.
Nice work. I like the corkscrew and may try something similar. As someone who has made hundreds of penannulars and worn them I'd sugget that the opening be a bit narrower. The brooch will sit flatter against the material when worn. Also, the twist in the pin may be harder on the fabric than a straight pin. One of the concerns I hear over and over from customers is whether the pin will leave a permanent hole in the fabric.
One of the problems with making historically accurate (or, at least, in the style of) viking iron penannular broches is that there aren't many historical examples. I've only ever found illustrations of a couple and even then any surface decoration is rusted away. Cuperous alloy artifacts are probably over represented in the archeological record because the preferentially survive. And nearly all the bronze, etc. penannulars are cast rather than forged.
In making the corkscrew portion do you wrap the material around a mandrel and then pull it out to a longer screw shape? If not, could you please describe your technique?
Yours,
George -
Yea but I hope you can get the screw part on the corkscrew better than me, haven´t found out how to get that right yet. Be sure to close the brooch further than I did it here, I will have to change that also... Thanks for your comment!
I like the bottle opener and will be making a version of it.
I also like the penanular brooch. -
Also thanks to you!
Nice I love the wine bottle opener very good job -
(: thx!
Wow very cool -
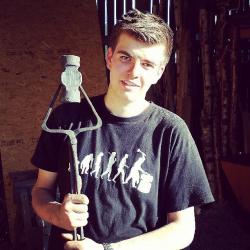
Hey Guys,
have been out in the shop today and came back with these three little Items:
This ring brooch:
This leaf key ring
And last but not least my first attempt on the viking mead-bottle corkscrew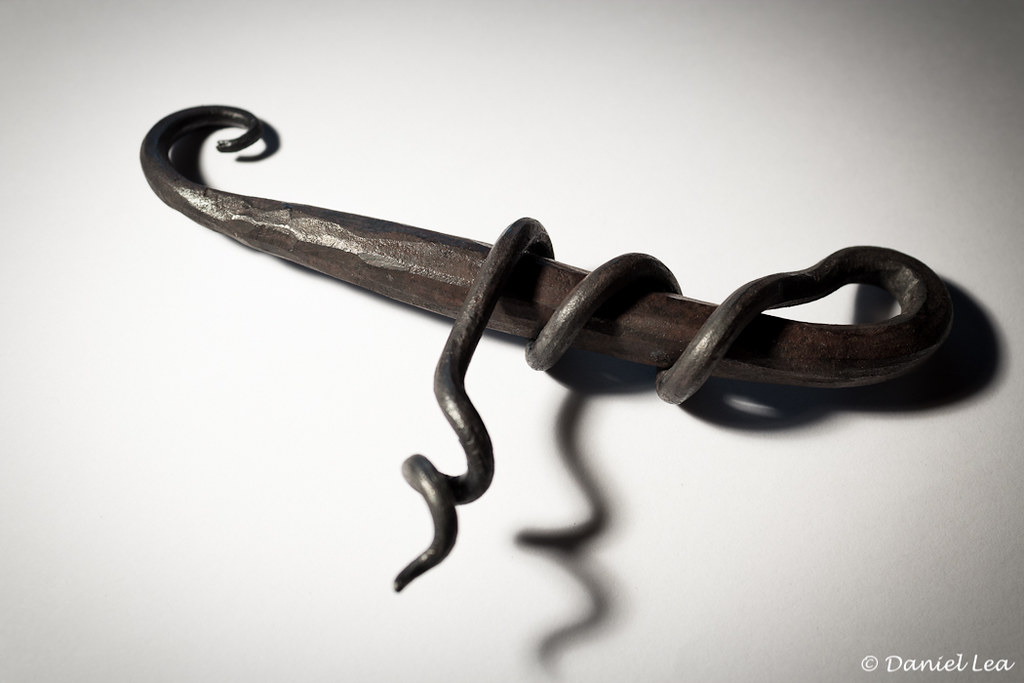
I´d be glad to hear your opinion about that stuff.
Kind Regards
- Daniel -
Due to the fact that it is called "galvanized spiral tubing" I think it most certainly is galvanized =P. No seriously it is galvanized but the galvanization stands temperatures up to 180°C. At its hottest point it becomes perhaps 80 or 90 celsius, so I don´t worry about that. And I know some smiths that work with this since 20 years or so and they also never faced a problem with the galvanization either...
Hi 99ppo. is that pipe galvanised? -
Thank yo very much! I will take a look at the link!
nice work http://atar.com/joomla/ here is a link for you Jim has written 3 books on blade making under pattern welding he gives examples of different types of styles the books are a good read as well. -
Hey Guys,
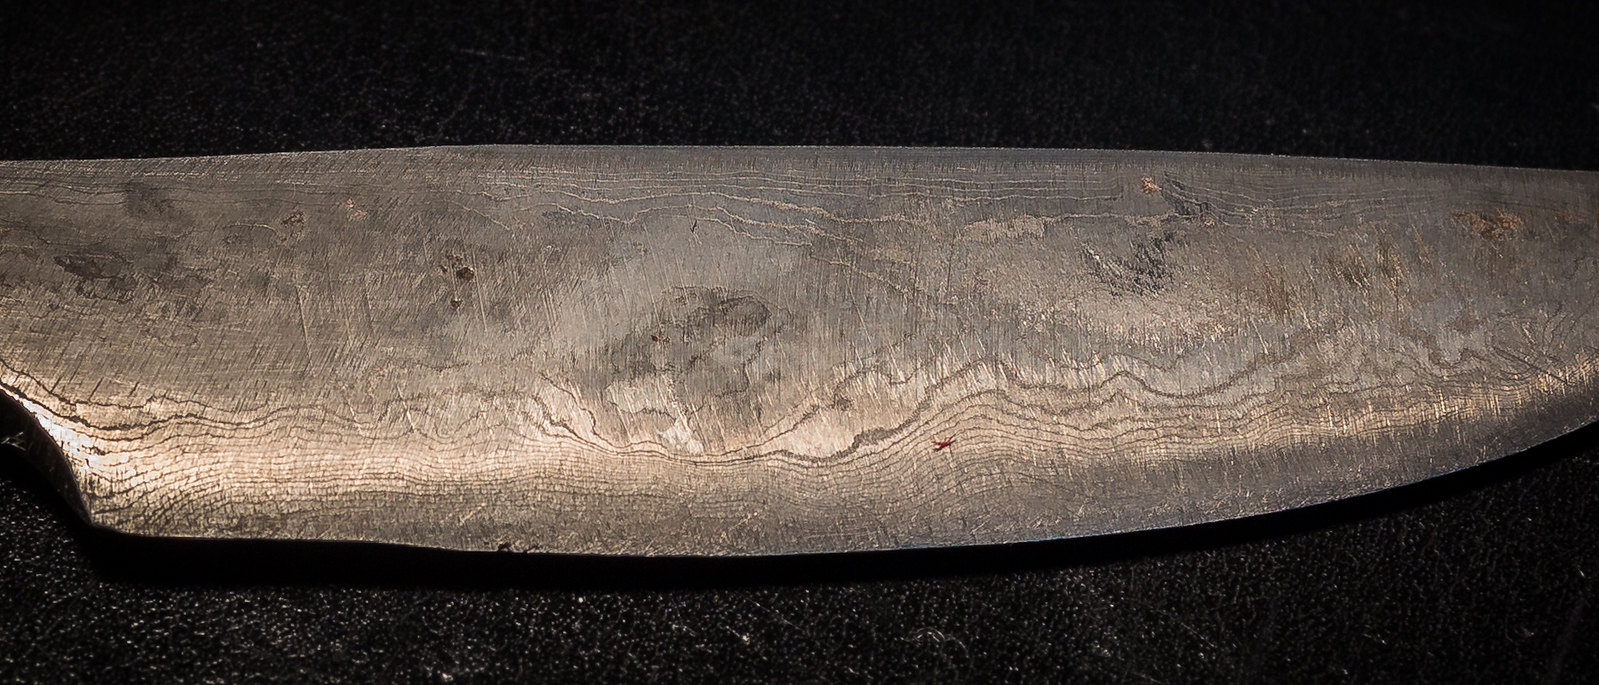
yesterday I forged my first pattern welded billet out of a three layered bar I made previously. Basically just to practice firewelding and the technique of welding Damascus (or pattern welded steel in that case). It is very small and the knife itself is rather just for the decorative pattern and not heat treated or so. I welded the billet out of two layers of mild steel in which I clampwelded a piece of car spring. The holding bar I fixed with a faggot-weld to the billet. I used no welding machines... I forged 364 layers.
A video of me welding the last fold you can see here:
Here are some pictures (I etched the blade with boiling vinegar):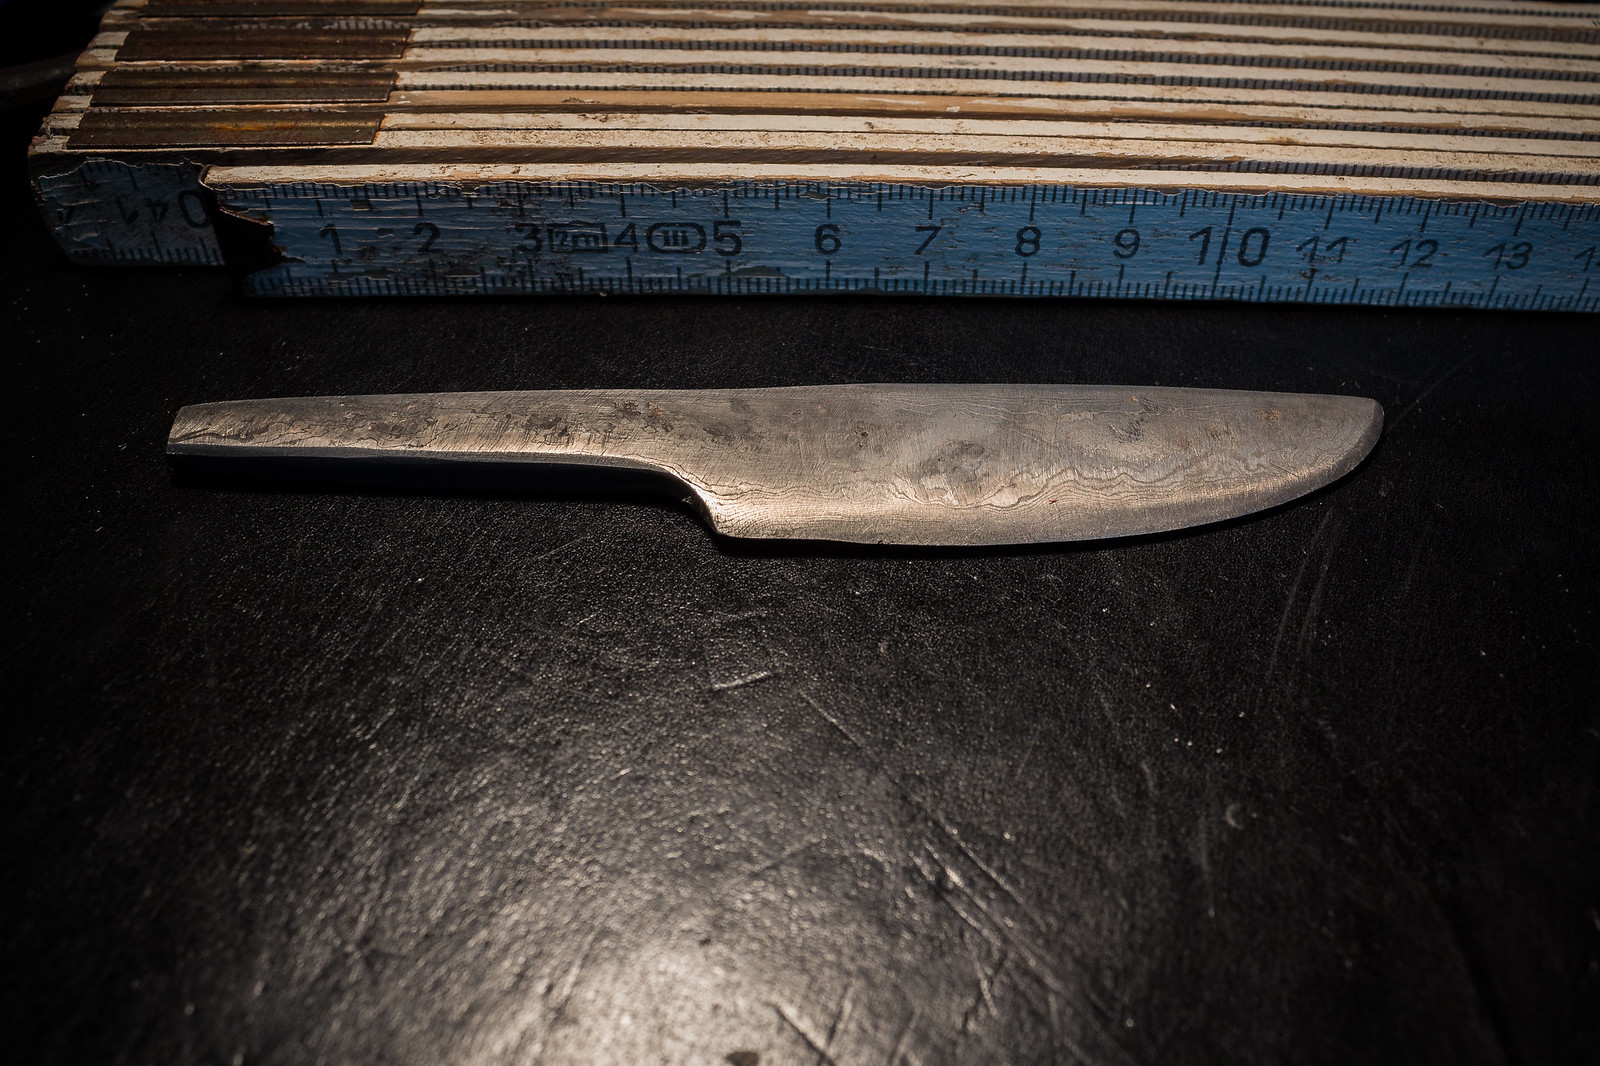
If you have any advice for me for future projects I´d be glad to hear it. If you have a question I´d be glad to answer it.
For now - kind regards
- Daniel -
This video is very well made and extremely informative. Plus these tongs seem to be very, very strong! I think I will try this method with some personal variation...
-
Just made myself an unhardened Hammer, that is simply annealed after I drifted it to a new handle size. One can feel by the rebound that it is very soft. I can also hammer in dents on the edge of the anvil or with other hammers without harming them. So I guess I will take that one to hit hardened tools with. So you can sleep relaxed from now on. BTW I made a hint in the video at the respective part telling about the Problem. Thanks again for your replies!
-
Thanks for your reply, some interesting thoughts there!
I enjoyed the video. We all have slightly different approaches. I make my second shoulder at an angle moving my holding hand to the left maybe 30 or 40 degrees. I use a hafted 13 or 14 mm hot punch for the jaw depression; no worry about spalling. It leaves a crisp depression. I have a power hammer, but I almost always lap weld on the reins, using 10 mm round. It gives practice and it is fun. The face of the scarf is on the flat of the rein, often the 2nd shoulder side, not the edge. I have punched and I have drilled the rivet holes. Francis Whitaker said that he always drilled the holes. For the past 15 years or so, I curve each rein a little behind the rivet area, so that the tongs will hang up nicely without the reins sticking out at an angle. This also allows me to fine-tune the reins so that they are parallel. Parallel feels good to my hand. American farriers' tongs mostly have circular jaws, but that is not so important as keeping the jaws short and light. Riding horse tongs are often 14 inches long (approximately 36 cm). -
Ok good cause I have a hammer that I usually don´t use but for this it will be just fine :D!
That should work fine -
Do you think it will be soft enough when I take a hammer I usually don´t use and anneal it as soft as it possibly can be to hit on hardened tools like the ball pean in the video?
And thank you for listening and taking the advise and acting upon it. -
I will either anneal the face of the ball pean used to make the divit or forge a special tool for it. Thanks for the safety advise!
-
Hitting Hammer to Hammer can be dangerous indeed. But if the Hammers are intact and have no fissures and if the force is as low as in that case it should not be a problem.
Some folks might not know the dangers of striking the a hardened hammer face with another hardened hammer. Like with the ball peen used to form the jaws. I've never seen either hammer chip, but I believe it can happen. I've got a softer hammer for abusing my ball peens.. and I sometimes remember to grab it.. :P. As long as the metal is hot I don't think it's as risky.. but I felt it was worth saying.
Great video. Nice tongs. -
Yea I´d also prefere box jaw tongs but I am not yet able to make them... So right now farrier tongs are the best I can get. As soon as I am confident in making box jaw tongs I will make the video dude :)!
Hi Daniel,
Nice vid even if lacking a few of the finer details,
Whilst not denigrating your tongs, (I would like to see the ends a little more rounded/disc shaped), farriers tongs are not the best design to hold flat bar when forging a straight length in, they are more suited to holding and manipulating as when making horseshoes,
For flat bar, box jawed or even side tongs are more useful, they hold the material so it is prevented from sliding out of line, as on the longer lengths as the scroll you are illustrating in your picture,
the short jaws on the farriers style tongs allow material to be easily moved to enable forging curves on edge,just observe how a farrier uses them when making horseshoes.
Good tongs, but not my first choice for general smithing work.
Look forward to your next video (Box jaw tongs maybe?) -
First thank you! I am just a little bit confused because I made the hole in one heat :)? I sometimes put a little bit of scale into the punch hole to keep the punch from getting stuck.
Your technique is fine. Your taste in music is also fine! I make tongs the exact same way......................the only constructive critique that I have is that one should be able to punch the pivot holes in one heat for each tong............with a bit of practice, punching should become more effortless........overall nice demo! You may also wanna try a saline punch lube for the holes, or using coal dust, it makes punching the holes easier.
three neat little items I made today
in Blacksmithing, General Discussion
Posted
Well I have to admit that this screw isn´t yet working but I informed myself how to make really working corksrews and I will be doing a re-do soon!