
Daniel Lea (AKA 99pppo)
-
Posts
229 -
Joined
-
Last visited
Content Type
Profiles
Forums
Articles
Gallery
Downloads
Events
Posts posted by Daniel Lea (AKA 99pppo)
-
-
Unless you are very skilled and efficient in drawing out, welding on the rains goes much faster, you get a smoother finish and you need much less energy. Downside of welding is the risk of a welding failure or that the weld breaks later. If you are very efficient in drawing out, have one or more striker(s) to help you or a mechanical hammer, I suppose you go for drawing out. If you have to work alone and without help I suppose you weld the rains on.
I really appreciate you making this video. It was clear and well explained. Did the drawing take much longer than the welding? -
Excellent work as well as interesting video.
Thank you very much! :) -
I agree, it is just very hard to have a fire that is clean and big at the same time. It worked well this way also, I have a very very large fire pot so half full is more than full on the most pots I saw yet. But thank you for your advise, when I have to weld bigger pieces I will rememer it!
I would make one suggestion, when forge welding you need a much larger fire you are getting down to the air supply your fire pot was less than full. better to have a bee hive effect so your metal heats up evenly. great video good content -
I am soon going to make one with a rounded blade, that process I am going to entirely film then :).
Wish I'd have seen the making the iron part. I need to make one. -
Hey Fellows!
Me finishing and testing the first draw knife I forged yet. It is handforged from C60 (AKA 1060) tool steel, water hardened and gradually tempered from the spine. Yet it services me well :-).
http://www.youtube.com/watch?feature=player_detailpage&v=qVj32un5BG0
Yours
- Daniel -
Yes, for me it is all about the art and the craft and that is all what counts for me!
I love your video. I love Joe's video. You each have your own style. The purpose of all this is to build. There is enough recognition out there for everyone to bask in that sunshine of accolades. Please by all means carry on! -
Hey Guys,
in this very video I explain the procedure to make box jaw tongs that fit for 25x10mm flat bar.
Due to the fact that a lot of people saw TechnicusJoe´s tongs videos to be mirrored in my video I watched his and yes, I can also see the similarities. But this must have happened unconsciously and I, although I sure have been influenced by his work, did not try to copy him on purpose. My main source for the box jaw tongs and the welded on rains was Mark Aspery´s video, for the flat jaw tong what I was taught in France and for the drawing out Brian Brazeal´s video. The purpose of this video is to show people that are keen to learn the technique to make a pair of box jaw tongs and I think it - as well as Joe´s videos do - suits that purpose very well. I took to note that this problem is in place and I will watch out for it in future videos. But I don´t need ten or more additional people tell me this over and over again ;).
That being said I hope you will have fun and benefit from watching it ^_^.
Yours
- Daniel -
My anvil is not a Refflinghaus anvil but an H. W. Holthaus. But Refflinghaus describes the process of making them pretty good.
http://www.blksmth.c...haus_Anvils.htm Prices don't seem to bad for new ones either. Nice buy on that old one! -
Sorry translation mistake! It is called puddle iron I think (Puddeleisen in German). http://www.ernst-ref...erstellung.html
"forged pig iron": pig iron is crudely cast cast iron which is not forgeable. Do they mean forged bloomery iron---real wrought iron as many anvils used at that time?
I have a William Foster English anvil marked 1828 that is real wrought iron with a forge welded face on it. -
I got an answer in the German equivalent of IFI.
For anyone that is interested:
It is a "H. W. Holthaus" anvil, produced in Dahlerbrück, Westfalen, Germany. The age is correct and it is a forged pig iron anvil with a welded on steel face. Due to the fact that the face is in splendid condition I may add a zero to the 25$ :D.
- Daniel -
I can´t say for sure but I think it might be possible that kg already was used in the industry but I don´t know anything definet.
I think you would do better talking with German smiths about that one as most of use are pretty limited to the US, UK and some Swedish brands that were imported into America. I would also assume that pricing is VERY location specific.
BTW When did the metric system get used in Germany, was it solidly in place in 1824? (google: The North German Confederation adopted the metric system in 1868 and the remaining states in 1875 (after unification). In some of the German states the metric and pre-metric systems were both in use before 1868 - and after 1875)
So that date with kg is most unlikely to be German; was that style of anvil produced in France back then? -
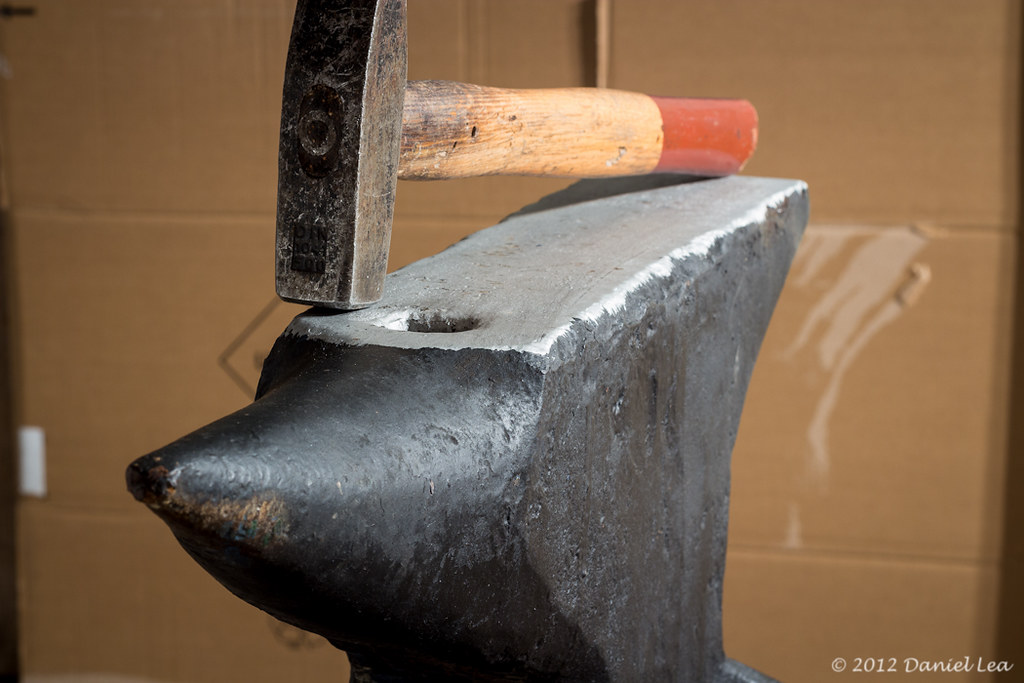
Hey guys,
today I got a new anvil that I bought from a colleg of my father for just 25$. It was covered by thick painting but I removed it and was able to reveal some signs. I also made a video about the sound and the rebound.
Perhaps one of you can indentify this anvil and say me what steel/iron it is made of and how much it actually is worth.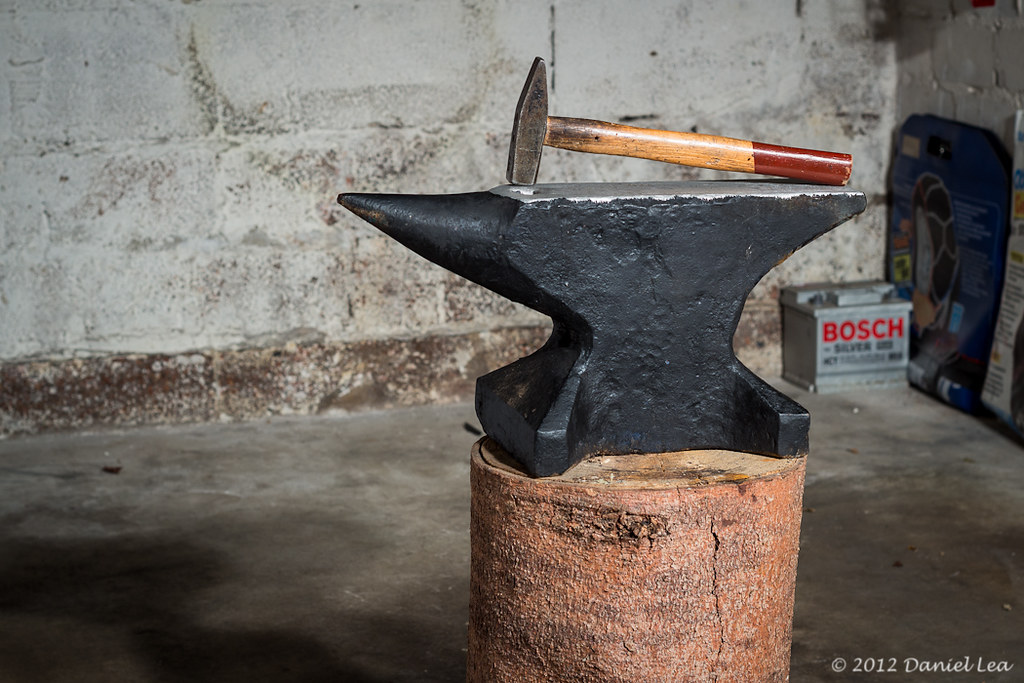
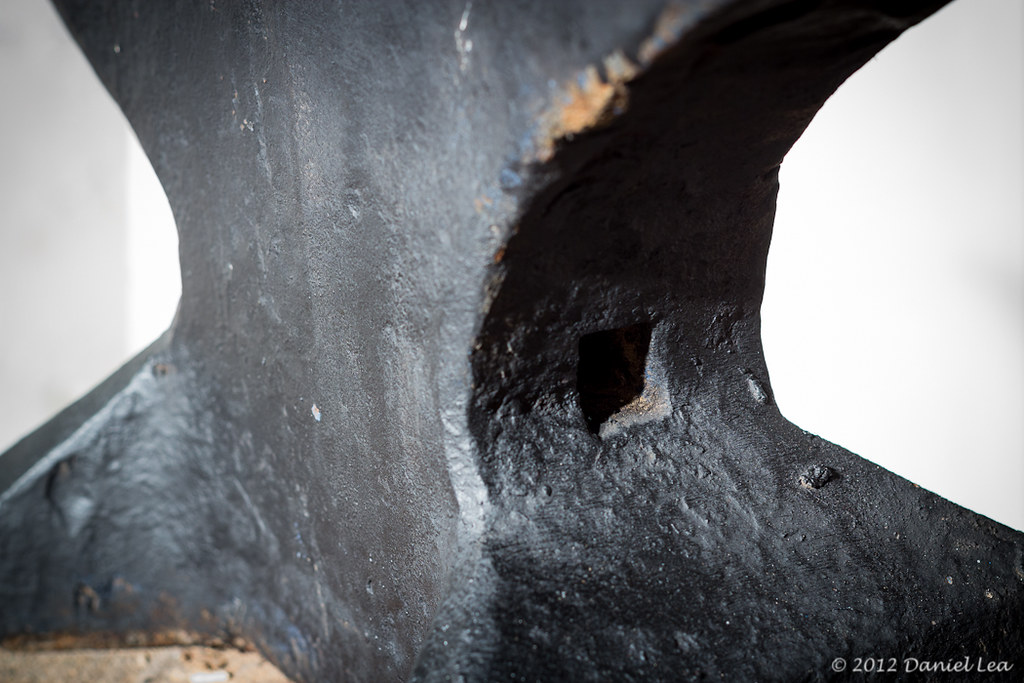
Here it becomes interesting! I think that the top letters say "1824" -> if that is the production year this is almost antique o_o. And the middle ones seem to say 44 1/2... in kilogramms this would fit pretty good. And there is also a touch mark that looks like a square with two hashes on top.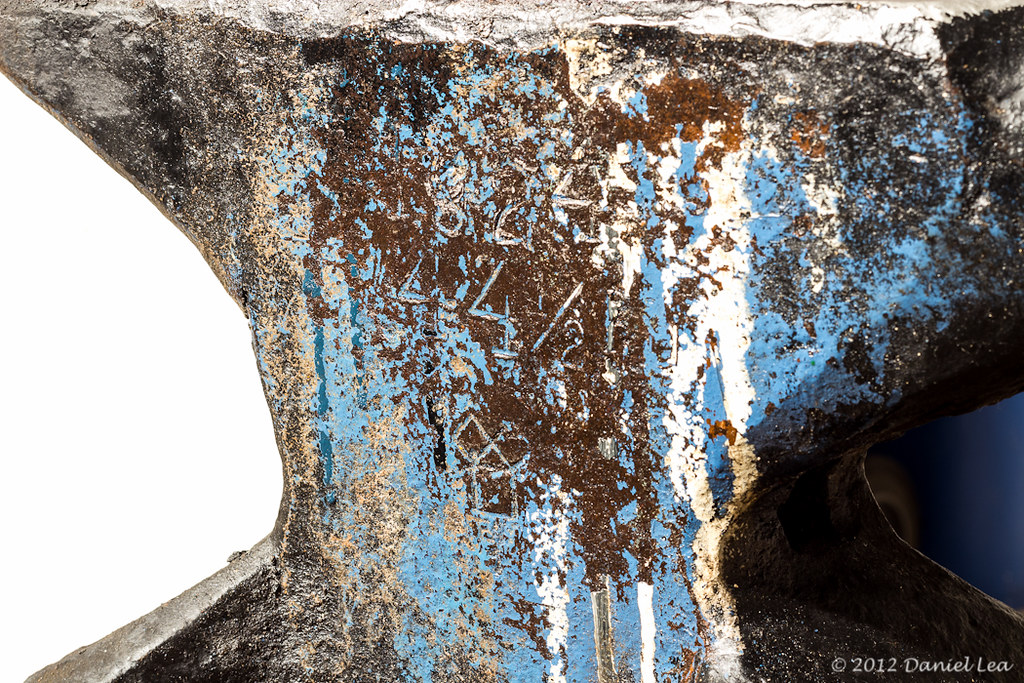
Here I marked the letters that I think I was able to recognize with Photoshop: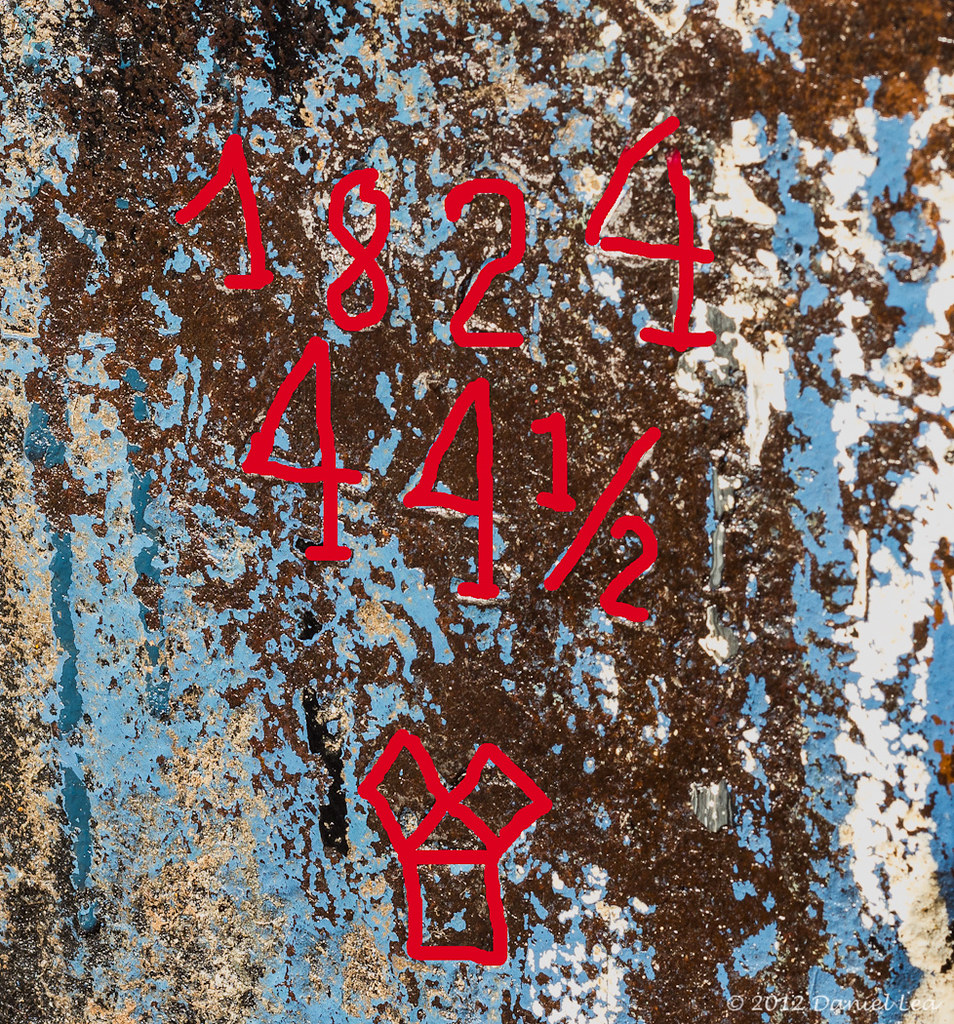
I was actually impressed by the good rebound! You can also hear the sound (although it got a little scratchy from the microphone in real it is pretty clear!)
Ok I would be glad if you can tell me something about this anvil. For me it is a nice little anvil I may take with me to demonstrations or other events that need a portable anvil.
Yours
- Daniel
you may get more answers if you asked in the anvil section, I will relocate for you -
It is possible to forge outside, also in winter. The workpieces will cool of faster but not extremely. You can help that by warming up your tools a little bit. Hammer, tongs and also the anvil, this way the heat is not sucked out so fast and it is better for the tools. A good thing would be to shelter the wind of with a few makeshift plywood walls or so. This way the heat of the fire would also be reflected back. But you can also use the wintertime to set your garage up properly and work with the propane forge.
-
From my own experience I know that it is bloody hard to forge in cold conditions. So anybody that can work under these circumstances ows my respect!
-
Hahaha jawohl! Only professional and formal^^ I can punch both perpendicular and paralell with this type of punch.
You're German, you're suppose to be formal. :-)
Daniel, you might think about changing the orientation of the indexing. As you have it, you would be punching with the bar perpendicular. It works best to punch parallel. Mark Aspery shows it the first way in his book, but has since changed it to the second. Other then that, looks great! -
As I wrote this is ONE possibility to make´em. There may be better, there may be worth. This one works for me. At Julien´s I also worked with some Brazeal punches, some facts I liked, some I disliked about them. I have to say that my version has a thinner more stream line type than the punches Julien made with Brian. The different bevels in my punch allow the force to be transfered to the tip very good without having a cloggy and heavy tool. The shape and the hight quality steel allow the tool to be light and ergonomical without the danger of bending or crumbling.
Your punch is a beautiful piece of work. How about consider some differing tactics here. Now I am telling this only because I have been in the presence of some of good strikers and hammers makers as you posted being with Alec Steele the othe day. The primary penetrating device into a blank for a hammer is short, stumpy, fat, strong, and it still has the shape on the end that you have provided.
After a sizable amount of penetration...but still less than half way....remember you go in from both ends...you go to a slimmer, longer, penetrating device. Why? you ask....because as you penetrate deeper you are gathering up more heat and resistance. A simple change to the more streamline punch allows the process to proceed. Remember that you are not removing material but replacing it. You replace the existing material with the punch, and then the drift. Go back to your original pics and compare with some of those from Brian Brazeal and Lyle Wynn. I too have made the mistake of attempting to penetrate material way too thick with even a good shaped punch. When retreating to the streamlined penetrator the job was completed more easily. There was little side friction so the penetration went as if onto very thin material.
I am not the best at some of these things but I have been in the presence of some very good persons teaching the same principals. You have brought forth a good learning process that should receive more comments.
Perhaps Brian or Lyle will expand upon this to an exacting lesson. They are grealy qualified.
Carry on -
I am living in the sourounding of Frankfurt am Main, in the federal state of Hessen in the middle of Germany. Former West-Germany. That is about 220 miles north west of Augsburg.
Gerald, did you emigrate from the "north"? Virginia was considered the South. As for all them non southerners, suchs to be them :)
99ppo, what part of Germany are you in. I lived down in Augsburg for several years back in the early 80's. Great work on the punch. -
Oh I thought this would be a common colloquialism. What I best write under a post when I don´t want to sound too formal?
I see you're posting from Germany, so I'm assuming you're German. Y'all is only used in the south, the rest of the USA thinks of it as Redneck Speak. :-) -
I also saw that it is too loose. I will put wedges under the feet so it stand stable. With a wooden block you have to deal with the wood working with the temperature and moisture change.
A quick question - have you thought about nailing down your anvil a bit harder? That made my anvil lose its ring almost entirely. It now does a relatively dull thud.
The piece is, of course, marvellous :) Amazingly clean finish, I can't spot a single hammer mark. Top notch! -
I used the rounding face on the horn, but it was so effective, that I had to be carefull not to move too much. I then just planished on the face. Thanks for your comment!
nice job I would make one comment if you use the rounding face of the hammer and edge of the hammer face over the horn you would move a lot more metal faster. -
Hey Guys,
just me showing one possibility to make a hammer eye punch. I used C60 tool steel in 20mm round stock:
Here are the different steps:
1. forge the round bar to an octagonal shape
2. create a teardrop shape about 1 inch below the top
3. create a light taper that starts of at the end of the teardrop and gets thicker for about 2 - 3 inches
4. then cut off additional 4 inches and create a light taper that gets thinner to the tip
5. taper about 1 - 2 inches at the tip thinner than the rest
6. planish and make everything nice and straight
7. dress the striking face
8. dress the surface of the rest of the tool and remove remaining sharp corners (optional)
9. heat up the whole tool above the transition point and let cool down slow (eg. in sand or on coals) to anneal it
10. grind the tip
11. heat up about 1 inch of the tip to cherry red colour and quench it in water or in oil to harden it (optional) ATTENTION: NEVER harden the striking face!!!
12. temper the hardened portion and a bit above to sky blue colour
13. clean it and touch up the edge
14. look out for cracks, test whether it is shatter proof
15. have fun with it :).
Here is the one I made in the video: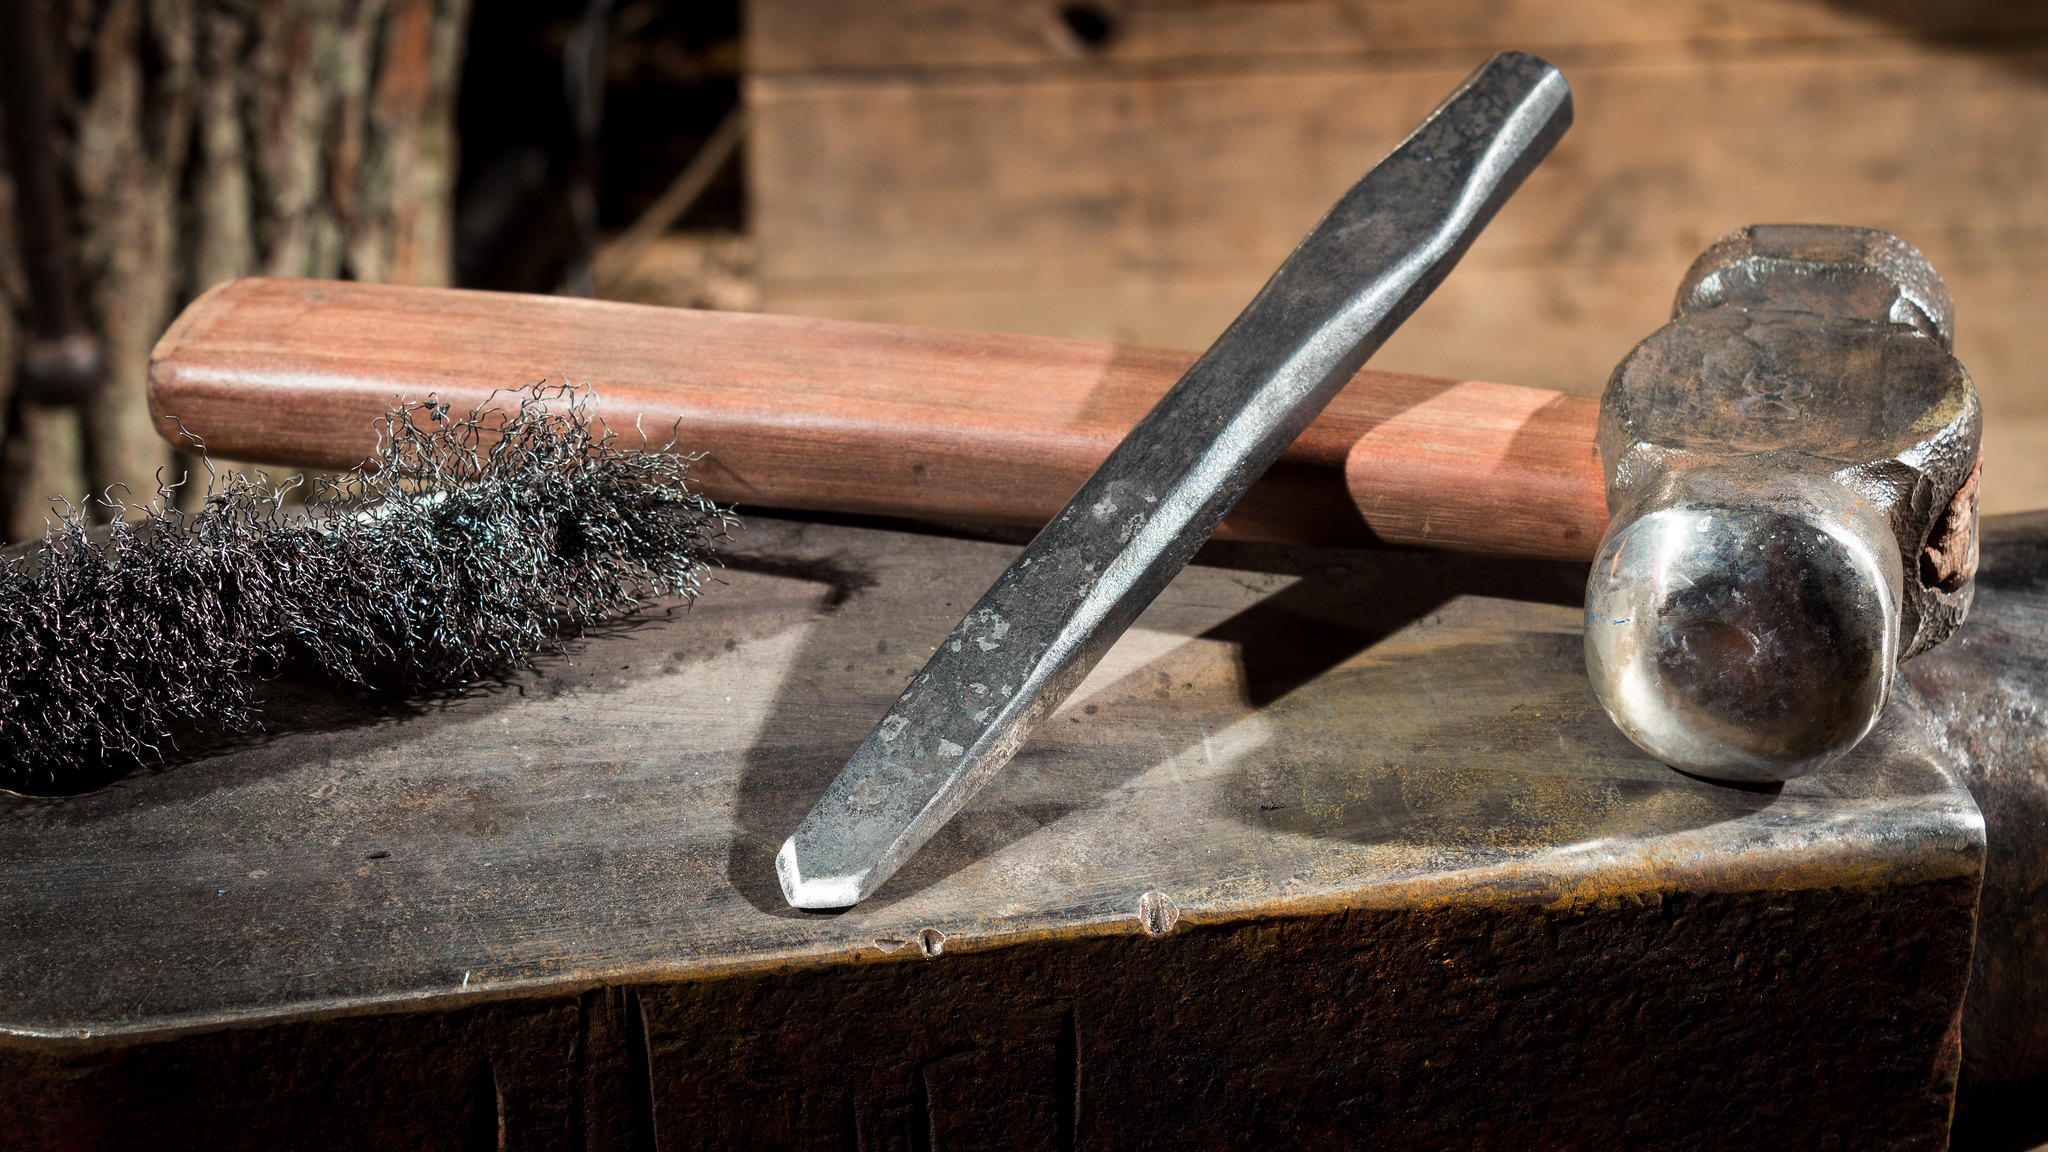
Well I hope this was helpfull.
Yours
- Daniel -
The rounding hammer is definatelly great to have in your toolset! I made mine with Julien Puy a few weeks ago and I really enjoy using it. The round face allows one to make very clean and smooth products.
Here is my one: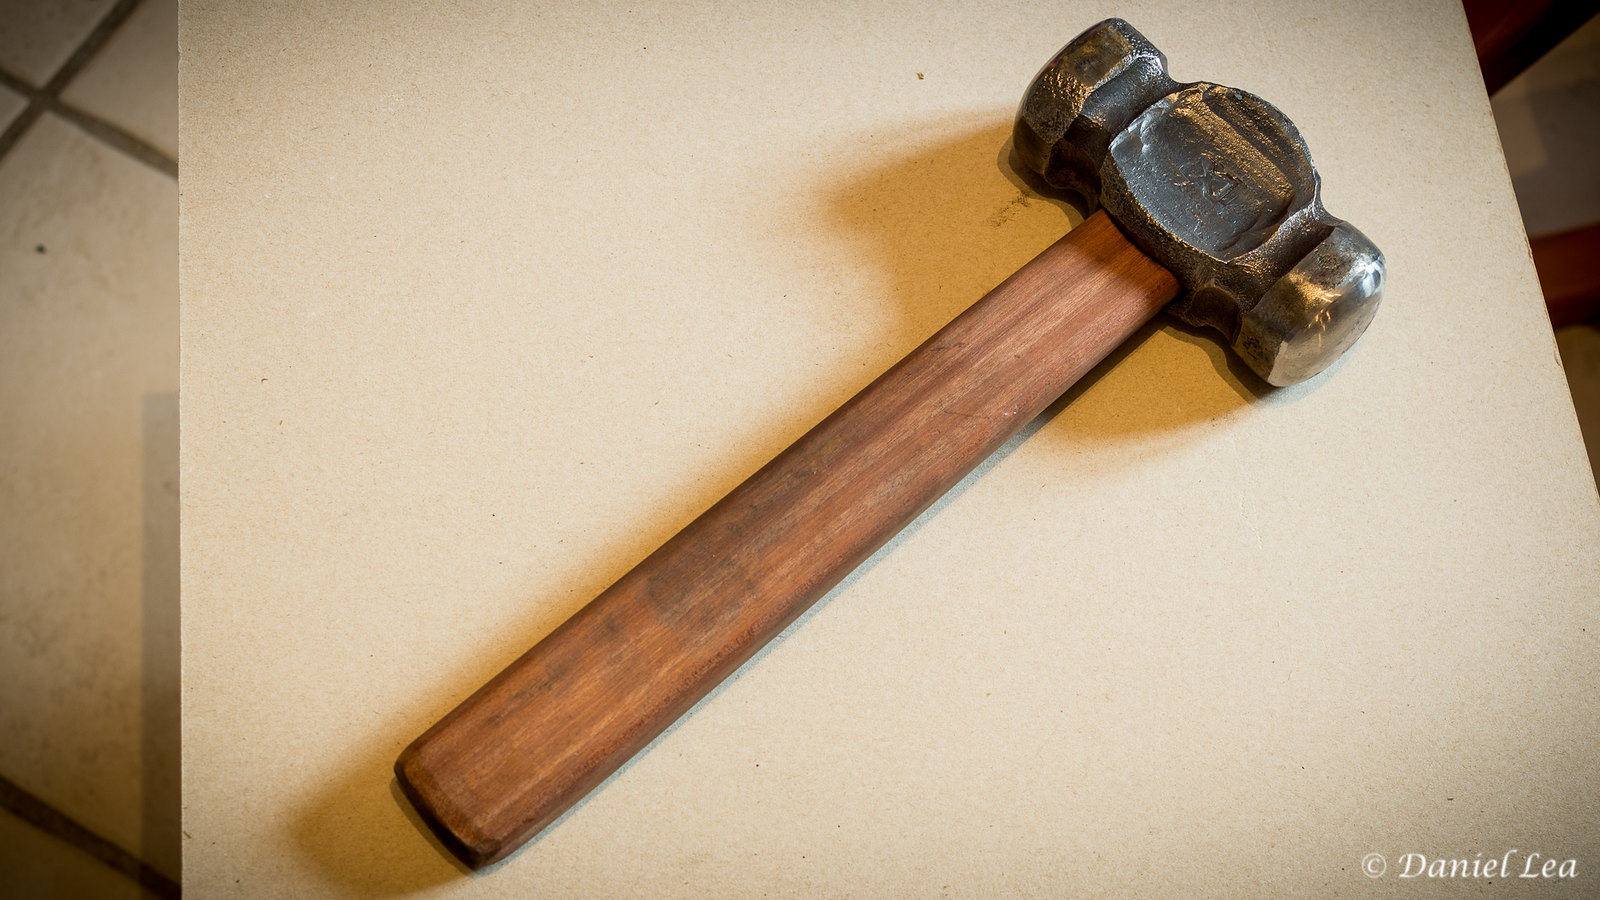
It already serviced me very good making these new chissels for me:
If you get the chance to make such a hammer or get your hands on one you should definatelly go for it. Although I would not want this to be the only hammer I have. It is great but don´t want to miss a traditional crosspeen hammer on various projects.
- Daniel -
You are very right with what you said. Julien is very precise about what he is doing. That he taught me: "If you think clean, if you have clean tools and you forge clean you will end up with clean product." While you are taking the heat think about the steps you are going through when the work piece comes out of the fire, because then you don´t have time to think long. Then forge this steps and make sure you work equal on both sides. Rotating the work piece when upsetting or punching is very important to keep stuff straight. And yes the thing with the flatter was to make the drift loose. Same with tapering: "When you make a bad square you will get a horrible octagon and then you will get a screwed up round. If you make a beautiful square you get a beautiful octagon and in the end a beautiful round. For me those little smart steps are what differentiates a really good "pro" smith from a fairly good armature.
Thanks for posting these pic and videos.
There are some subtle bits of good information that many viewers may not be aware of. One is shown as the hammer is being rotated after each hit, with the flatter on top and the rounding cup on the bottom. Go back and look at it. That rotation helps keep the rounding ball from going lopsided because we each hit a bit differently with each stroke. That rotation averages out those errant strikes.
Another subtle picture is going from the striking phase of the cheeks and then back to the cupping die. Why? When the metal is drawn down by fullering it also seizes the drifting action. So to release the drift from the hammer metal a smart hit or two on hte ends pushes the metal to loosen itself from the drift. this is an action to not be taken lightly. Should you be is this phase and slow down the hot swelled hammer material will cool and seize the drift. Then you have to beat the heck out of the drift to remove it...sometimes unsuccessfully.
And what a very neat shop. Many of us are envious in this area for sure. But there was one situation that makes a strong example. Striking height is very high. If the striking height was lowered quite a bit then the hammer would be hitting the top tools at about the same level as the anvil is now.
Great videos
Carry on -
Just because some people weren´t sure who I am in the footage above... I am the blonde guy in the blue jacket and gray-black trousers. Julien is the man of middle age with the French accent and the beard. Alec is the smaller boy with the IFI shirt and beige trousers who always switches from British-English to French in the Video.
... just to make that clear ;)
finishing and testing my first self-forged draw knife
in Knife Making
Posted