
Daniel Lea (AKA 99pppo)
-
Posts
229 -
Joined
-
Last visited
Content Type
Profiles
Forums
Articles
Gallery
Downloads
Events
Posts posted by Daniel Lea (AKA 99pppo)
-
-
Hey fellows,
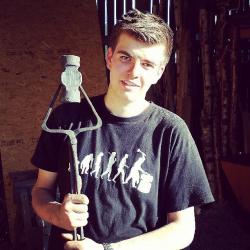
after I published my guide on how to forge a rams head wall hook some people asked me how to make the punch for the eyes of the rams head. Due to the fact that there isn´t any video covering this very type of punch yet, I decided to make one on my own. I hope it can give you an idea how you would forge one on yourself. Please bare with me, it was -10°C and gloves where an absolute necessity in order to be able to forge anyway.
http://www.youtube.com/watch?v=NCkMiVZR8Pw&feature=youtu.be
Here a little written description:
1st heat: forge a square taper
2nd heat: dress up the taper
3rd heat: dress up the tip of the punch
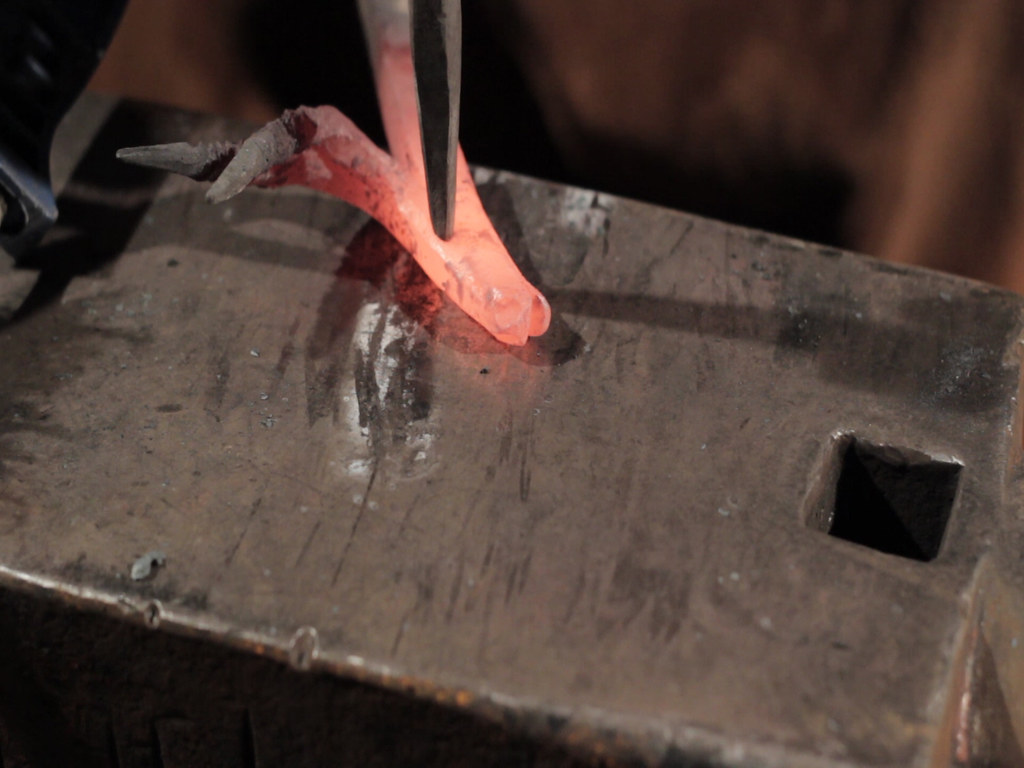
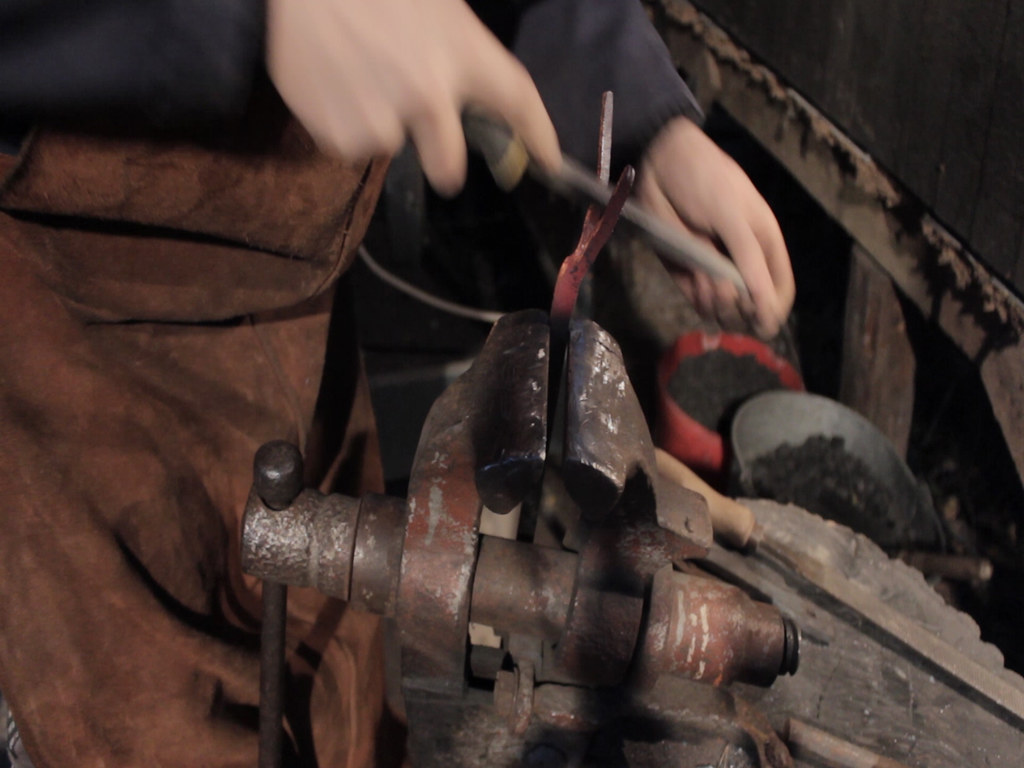
4th heat: punch a dent into the tip of the punch using a ball punch
5th heat: take off two opposing corners of the tip, if you want the eye ball to be round, only use a file, if you want it elliptical first upset it horizontally with the hammer and then dress it up with a file
6th heat: cut it off at desired length
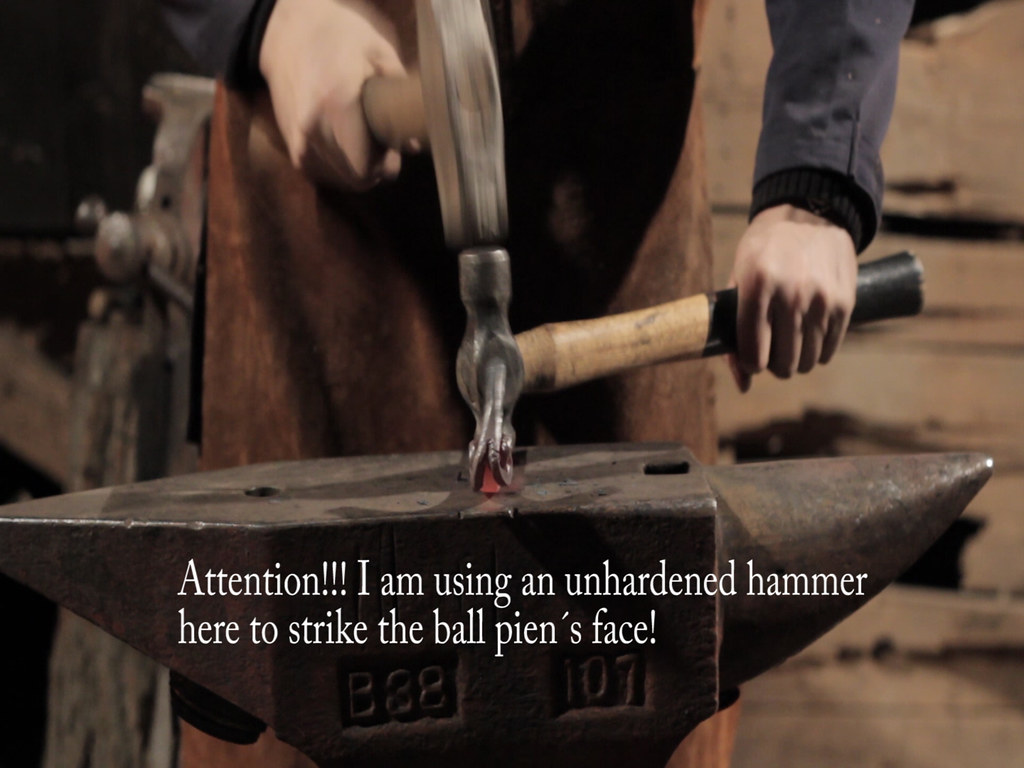
7th heat: make the strike end of the punch octagonal and forge a teardrop shape about 1" below the striking face, dress the striking face
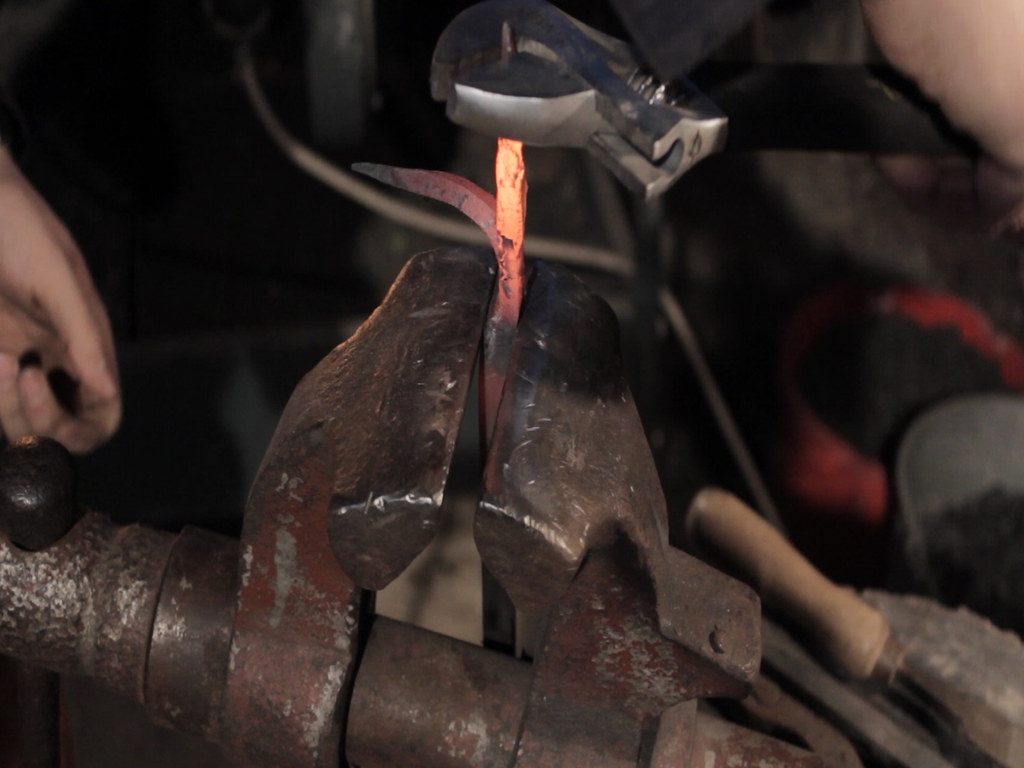
8th heat: anneal the whole punch
9th heat: harden the tip of the punch at cherry red color and then use the spare heat to temper it to sky blue color
last step: test if it is shatterproof and test the punch on a piece of steel.
I hope you enjoyed the video and learned something new!
Your
- Daniel
-
Easiest way to stop it turning is a square hole and a square nail
If you can put nails into the wall you want to fix it, yes definatelly!
-
I had thought about the risk of damage to the wall and that it would take extra time, but if I remember correctly, the artist who posted this said that he didn't want to have two screws because of the aesthetics of it. I'll look back and verify what he said about it.
I just had a random thought pop in my head about a possible fix for the chance of turning without adding a second screw. I agree about two screws being the better method and is how I plan to do it once I get to the point of being able to do things like that.
I look forward to see your works, as soon as you are able to make them! Creative ideas are always important, you have to see with the time what is worth the efford and what not.
-
still need to try these out...
Do so buddy, do so!:D
-
Please take into account that I haven't made ANYTHING in a forge yet, so my idea may be totally rediculous. But as long as the hook were not going onto stone or brick (or anything of such hardness), could you maybe add a small spike to the back of the material a short distance above the screw point. this could dig into the wall enough that between it and the screw the hook would not rotate on it's own.
Perhaps at some point in the process upset the metal laterally about 3/4 " above where the screw hole will be, creating a bulge on the back side. forge the bulge into a small spike that could be pressed/driven into the wall before or during installation of the screw. I modified the pic of the finished hook to give a rough visual representation of what I'm trying to convey with my words.

The spike would be small and protrude out the back side of the 'body' and not be visible when mounted. Forgive the poor quality of the image editing.
This is actually a very creative idea, but I think making a second screw hole is much faster than upsetting and making that spike. And this spike would also damage the surface you mount the hook later worse than a second screw. If somebody would pull on the hook you can even make a very big scratch into the wall. Nice idea, might actually even work but not suitable for the praxis.
-
Simons nicely put. I find the major part of my job as a blacksmith it to educate coustomers. I always bring a piece of riveted T and aluminum welded T so they can see and feel the diference.
I believe that´s a very good idea francis!
-
Thanks for all the kind remarks made concerning my videos. Trying to remain totally traditional in a modern world is almost impossible and many an old smith has said to me "if Tijou had an arc welder he would have used it" I totally agree with this statement, but it is like anything that anyone wants to do well and to the best of their ability.....you have to know how to do it right before you can ever hope to understand a technique or process, whether you work traditionally or not.In effect, you have to know the rules before you can break them. I was taught by a renowned English smith and the first thing he told me was "Simon, there is no such thing as a self taught Blacksmith" and I am sure that by subscribing and contributing to this most informative site we are all endorsing that statement. Without sharing in our knowledge and ideas, it is that much more difficult for our profession to move forward. My first ever course 20 years ago was tongmaking, a simple topic or so I thought. My tutor made me fireweld the reins to the jaws. It took me three days to get two pieces to stick together and my career nearly ended before it began. I had never been so disappointed in all of my life, as this was something that I really wanted to do and it was so damn difficult. This was my turning point, Blacksmithing was no longer just an option, it was a lifelong challenge.I practised in my own forge for three months solid and then attended another course, I felt on top of the world when I effortlessly welded two pieces together in front of my tutor.He looked at me calmly and said "I see you have been practicing". I was looking for more recognition at my superhuman achievement, but then it dawned on me that Blacksmiths do not become skilled overnight, they have to practice techniques as I did, and on a greater scale than I could have ever imagined. I vowed to myself that Blacksmithing was to become my life and that I would promote it at every opportunity to anyone who wanted to know about it and share my enthusiasm. I was fortunate enough to be pushed into entering one of the County shows about fifteen years ago and this is where I met people such as John B from the Blacksmiths guild and other pivitol figures in the Blacksmithing world such as Bob Hobbs (gold medalist with the worshipful Company of Blacksmiths) and Richard Jones, current live champion Blacksmith,I have never looked back. I am the current UK National champion Blacksmith for the second time and have been reserve twice, I am also a Licentiate of the Worshipful Company of Blacksmiths of London (a recognised teacher of the trade)and I always tell my students that we don't just strive to make a living, we make a lifestyle. I am sorry to appear boastful, but when my students say to me "you make it look so easy", I reply that "I was in exactly the same position as you once". Without other smiths graciously passing on their knowledge and expertise I would still be trying to stick those two pieces together and would maybe have taken a different career path altogether. The videos are a little bit of payback and hopefully inspiration to other budding national champion and potential professionals, the techniques that I show are not set in stone and don't need to be religiously followed to get the right result. I still learn many techniques from my students who come to my classes with their own ideas and I still "invent" things that I find have been in existence for thousands of years already. That is the beauty of our profession, you will never know it all. Simon Grant-Jones www.simongrant-jones.com
Thank you Simon for also sharing your thought here, I mean this thread is about you :) I agree with what you say. Take the best from your own heritage and combine it with the best you find all over the world.
-
A few weeks ago I came in contact with a Belgian carpenter who was searching for a smith that could make a tool for his tool collection: a holdfast.
He tried a few smiths in Belgium, but found they were too expensive and/or didn't even reply back.
So, after going through a few forums, this carpenter found me. He made the request and we discussed the design.
I then sent him a quotation and it was a deal.
What I am making now is a big holdfast made out of 1 inch square stock.
Upsetting the stock for the bend.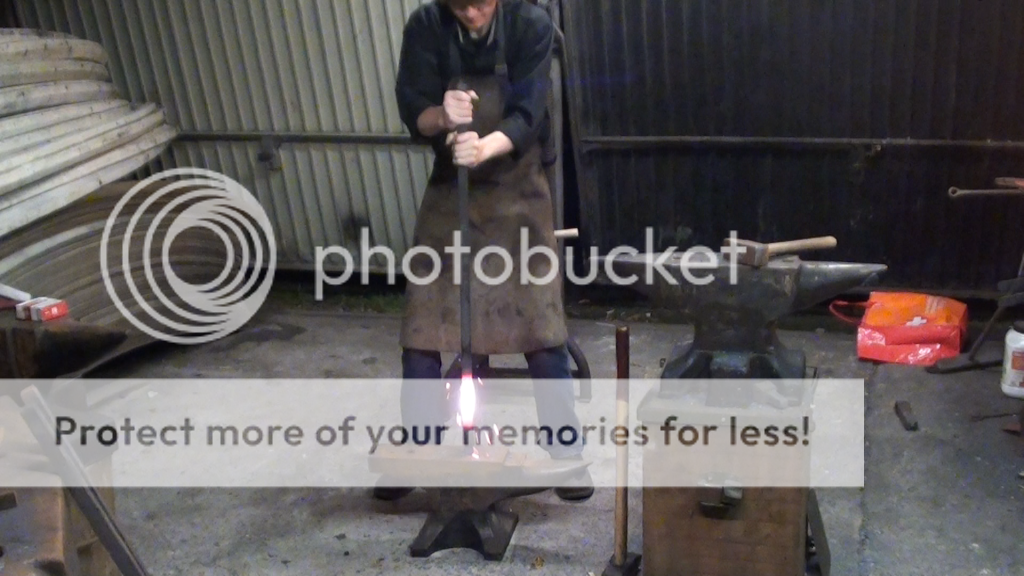
Doing the bend.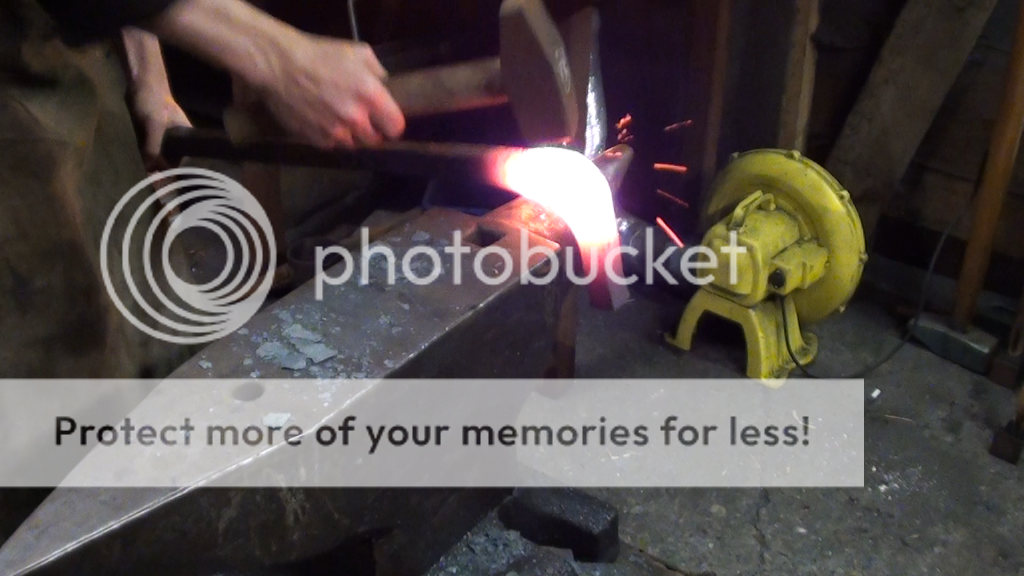
Some more upsetting.
And some shaping.
The holdfast is not done yet, but close. It need some more forming and small adjustments.Very cool project you have there! It already looks like it will work great when it is finished! I specially like the 90° corner and the very vivid looking tail, you managed to make very clean. Good sucsess with the further work on that!
- Daniel
-
I have always figured I will make an item as perfect or "traditional" as the customer is willing to pay me.
It is good to see that many smiths are continuing the traditional techniques, but that is just as important as embracing the new technologies. In order for the craft to not just survive but thrive both techniques must be embraced. There will be customers who will be willing to shell out the money to have something that is constructed using completely traditional techniques. But the majority of the world today is unaware of what is traditional and what looks traditional. In my opinion, the digital world would appreciate the complete hand craftsmanship quality of a traditional constructed item, but for many the pocket book is the deciding factor.
Arch welders are not that much of a problem compared to some means of fabrication. What drives me up the wall are yard fences that are made of cast iron imitating forged iron work, and worse yet are the fabricated fences and driveway gates made from aluminum. I cant stand seeing those around town.
Unfortunatelly a lot of people today don´t appreciate or know the real art behind it anymore. Today I waited for the bus in front of an extremely bad industrially produced and extremely visuably welded fence and I said man that is ugly. It could look so much nice made propperly. And they just said "it looks fine that way to me. Isn´t it the same handmade and mass produced" Then I said to them "It is like if I would give you a printout of the mona lisa and you would say 'what do I wan´t with it, it´s no real painting' and I´d say it would just be the same."
-
Simon is an active member of the Blacksmiths Guild UK and also member and webmaster for the National Blacksmiths Competition Committee and thoroughly deserves this recognition. Currently he also teaches students at Kingston Maurward College, Dorchester, in Dorset passing on his skills and encouraging others to follow his example, he can also be seen at other events the Guild host where he is pleased to talk to anyone to help them and often picks up the tools to demonstrate or compete in friendly rivalry, Finch FOuundry St Clems day celebrations is another event he regularly attends, bringing along some of his students to take a trip into the past working conditions of the industrial blacskmith.
If you would like to see his work and more like it go to the National Shows where you can usually see him competing in both live competitions and static ironwork exhibits alongside some of the UK's best practitioners
http://www.blacksmithscompetition.co.uk/ has venues and details including some pictures of exhibits at the shows involved,
NBCC SHOW DATES 2013
North Somerset Show May 6th
Devon County Show May 16th, 17th, 18th
Royal Bath and West May 29th, 30th, 31st, June 1st
South of England Show June 6th, 7th, 8th
Royal Cornwall Show June 6th, 7th, 8th
Three Counties Show June 14th, 15th, 16th
Royal Welsh Show July 22nd, 23rd, 24th, 25th
New Forest and Hampshire July 30th, 31st, August 1st
Edenbridge and Oxted August 25th, 26th
SImon Also featured in the Metalwork series on the BBC, talking about Robert Bakewells work among other things, and this can currently be seen on the BBC iPlayer for those who can access it.Here he is at Finch Foundry with curator Roger Boney at the St Clem's Day celebration signing a book that was published to support "The High Street" series on the TV, where he was the resident blacksmith and this series showed why blacksmithing declined over the last few hundred years.
Wow that is some great information! Thank you!
-
A very good example, Daniel. This is the same thought/idea/feeling I also stand for. This is the way to keep the old/traditional techniques alive and pass them on.
Though, you will have to look into have much he actually earns doing it this way. But besides that, it's still proof. And if I can do the same, doing everything traditionally, I certainly will.
For me there is no pressure that I HAVE to make money in the trade this way. I simply love it too much to become a modern smith. I then rather do it as a big hobby, traditionally and do another job, so I can pay my bills.
Again, a very good example.
Joe
Thank you for this comment, Joe. I doubt that he makes "the big money" with it, but that is not what counts for him, I guess. And that is also the reason why I don´t want to become a professional smith because I would then may have to use techniques I simply don´t want to use and that would take away all joy of it. The innovation that the smith should undergo is to develop techniques how to increase the quantity, without losing the quality. Unfortunately a lot of people today misinterpret this innovative character of the blacksmith and think that the easiest way is always the way to go. And I believe that if you have the skill to forge your stuff efficiently, causing little costs and work time without making the work piece itself cheap quality you can survive with it. And there are at least some examples that prove that (Habermann, Bullermann, Aspery, Brazeal, Grant-Jones... just to name a few).
Since I heard of the blacksmith school of Julien, that he had to close because the French state cut the subsidies I hope that I will be able to support trade schools like his, that teach traditional techniques, in the case I will one day have the financial and influential power to do this. This way I might do way more for the craft than when I would found a blacksmith shop and maybe even go bankrupt and never able to forge in my live again.
-
Hey Guys,
this time I don´t want to promote my own work, but the one of a really great traditional blacksmith in the UK. His name is Simon Grant-Jones and here are two videos:
http://www.youtube.com/watch?v=lfBZdzJvySs
http://www.youtube.com/watch?v=Gh0sz6yw_F4
And this picture I also found, he made this candleholder only using traditional techniques:

In my eyes that prooves, that one can definatelly survive as a traditionally working blacksmith, not using archwelders and stuff like that. My eyes hurt every time when I see ugly, welded or machineforged fences in the city or even on historic buildings. Take this as a motivation to try to stay as traditional as possible. The smith has always been an innovator, but if stuff starts to be ugly and cheap, this is no innovation, but a stark step backwards!
Your
- Daniel
-
Very cool, thanks for the suggestion!
Daniel when I carve in metal making rams heads, Dragons and others I use a carving block it can be even made out of a piece of angle iron it comes in very helpful when making animal heads. nice job on the video and pictures. These are pictures of my block


-
Thank you for defending me George, but Dave was right with the work on the horns, there in the end it was too cold. But actually the ambient light is indeed very bright and they still must have been red. Furthermore mild steel can be worked cold to a certain degree... It is the camera as well as the ambient light that alter the visuable glowing colour so actually one can only judge it with his own eyes in a very dark shop.
Dear Dave,
It has been my observation that it is tough to accurately judge heat by videos. The cameras adjust for exposure and depending on the camera, ambient light, etc. will not show the same color as a live eye would. Often, the video shows the metal at a hotter temperature than what it really is but I've seen the opposite too.
It appears to me that Daniel is a pretty experienced smith and I would be suspicious of the idea of him working metal at too hot or cold a temperature. Anyone who can accurately judge welding heat usually knows one end of a hammer from another.
Lightly,
George M. -
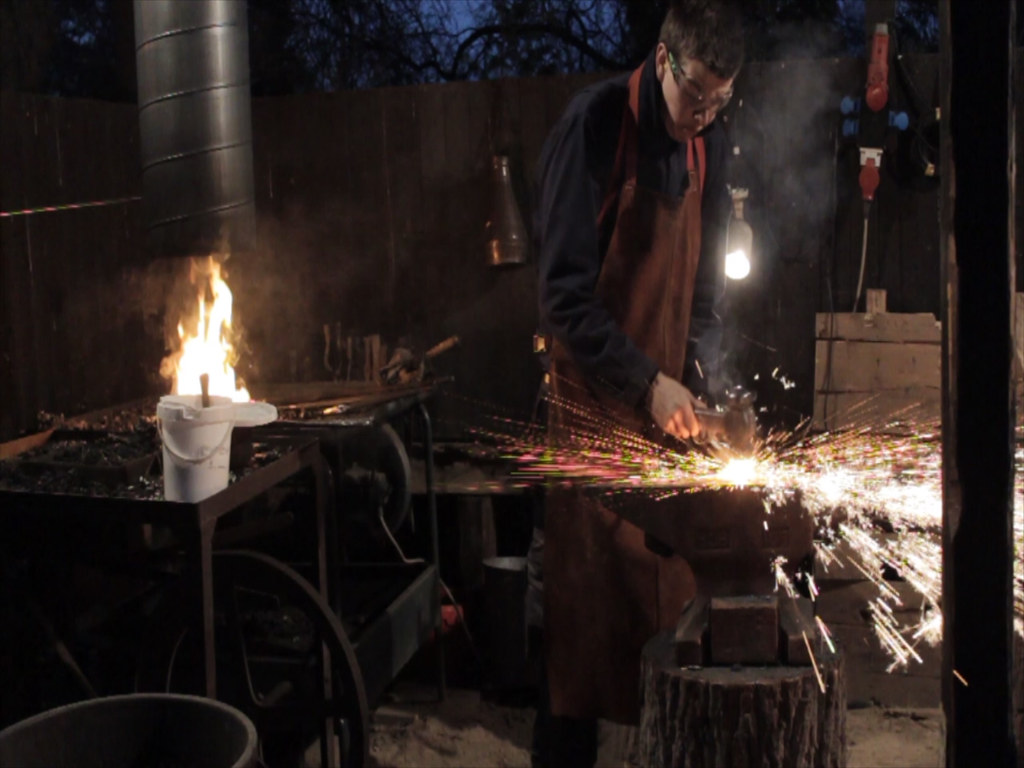
Thanks Paul, usually when your steel sparks you burned it and you can through it away, but when forgewelding you use a flux that forms a protective coating around the steel, that keeps the oxigen away from the steel and thus allow it to be that hot without burning. If you see sparks in the fire your wait for about 5 seconds and then you take it out, it should have optimal welding temperature then. You shall not let it get so hot, that the steel turns liquid already. If you have drops coming of of the steel you made it too hot even for welding and it will kind of shatter like cast iron. The welding temperature depends on the steel and the flux you are using. Pure iron with sand as flux will have a very high temperature, high carbon steel with borax or fancy welding powders will weld at much lower temperatures.
A question from a uninitiated. When you where welding the piece was throwing off many sparks. Every book I read says once the steel is sparking it is too late to weld it because it is burning. Could you please explain why it worked for you?
That is a lovely piece by the way.
Paul -
Thanks for your comment, there are some good thoughts in there I will sure consider on my next hook! I know that this hook might tend to turn around but I simply found no estetically pleasing way of adding two holes...
Hi Daniel, That looks great! The only suggestion I would have would be to add two holes for screws, with just one after a while it can work slightly loose and turn (depending on the wall material it is fastened to, some material works loose quicker than others) with two it should hold more securely. Also, for making coat hooks a broader end of hook is usually better for garments- a very pointy end will mishape them, I often will flatten the end out in a bit of a fishtail and curl that over so that there is a little more surface area to support the garment. Or you could fold over a section at the end and forge weld that to create a ball or wider end. This also depends on whether the hook is intended as a coat hook, or a hook for something else. This is not to pick holes in what you have done, simply suggestions of what I have found works! Keep up the good work! -
Thank you Sam... and welcome ;)
Very Well Done thank you for the show .
Sam -
Dear George,
Dear Daniel,
What sort of a price would you put on one of these and how long did it take you to make it?
Curiously,
George M.
it took me about two hours to make this one, but I had to videotape it... So usually I think it takes about one hour or a bit less to make one from beginning to end. I think I would charge somewhat around 25€ for such a piece, but I doubt that this would even cover all costs. If you want to buy one from me, you can send me a private message and then we could discuss the conditions.
- Daniel -
16. Make an indentation with a round punch or a ball pien
17. Cut of the hook from the parent bar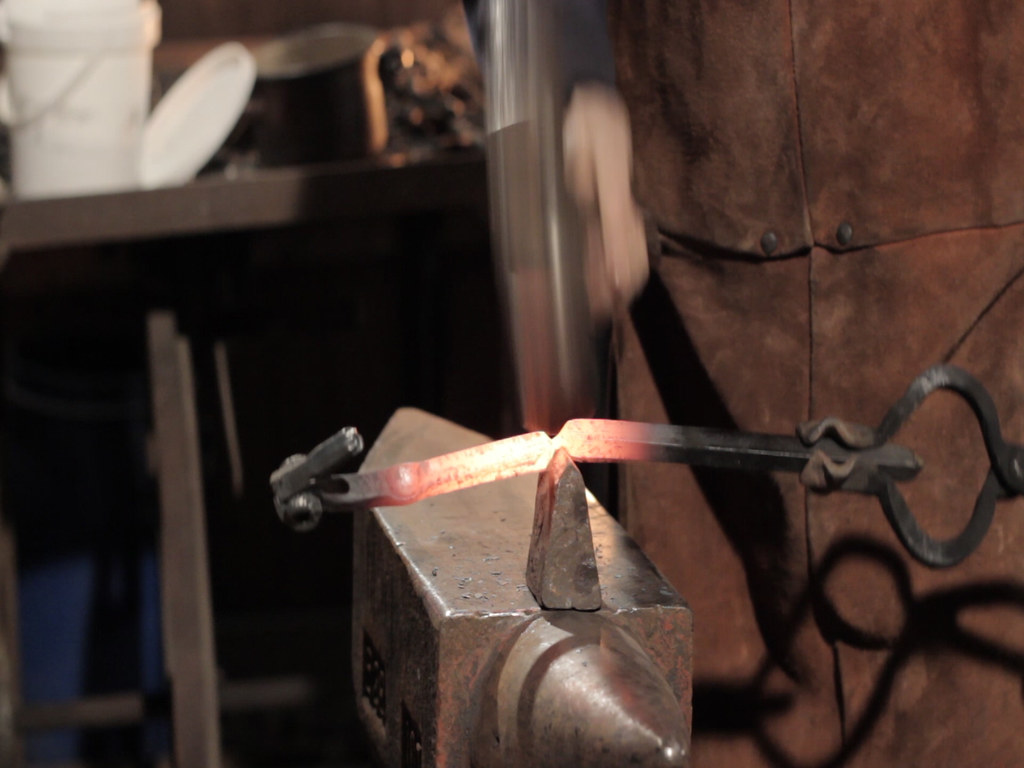
18. Punch or drill a hole inside of the indentaion for the screw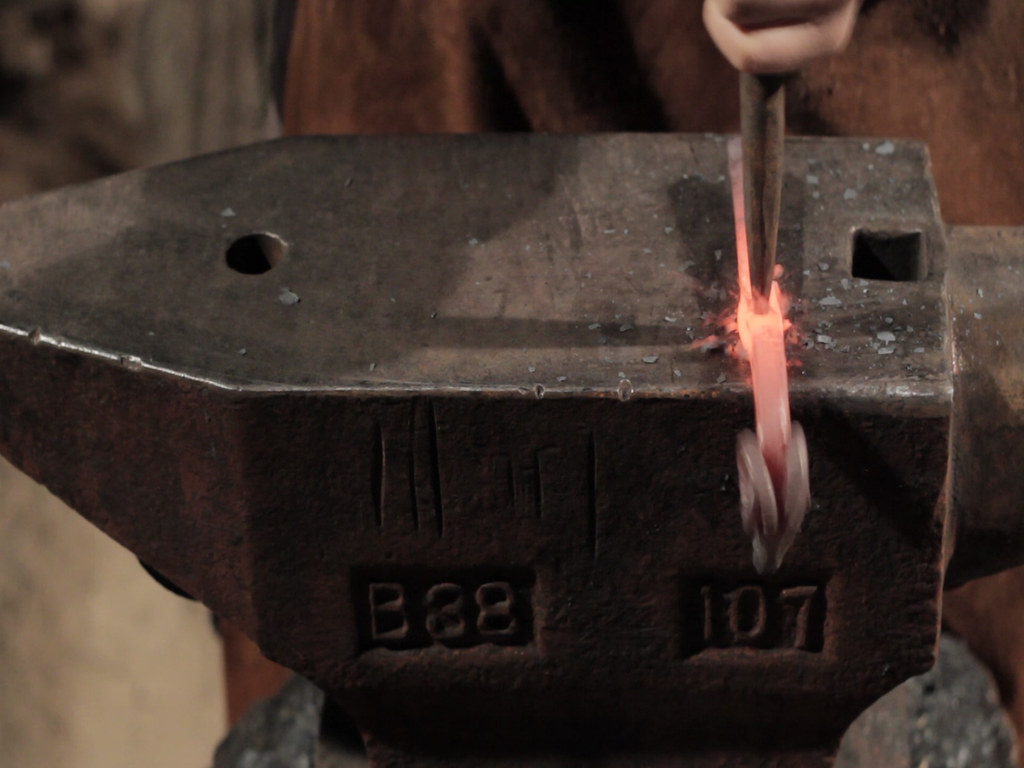
19. Taper the hook and round it of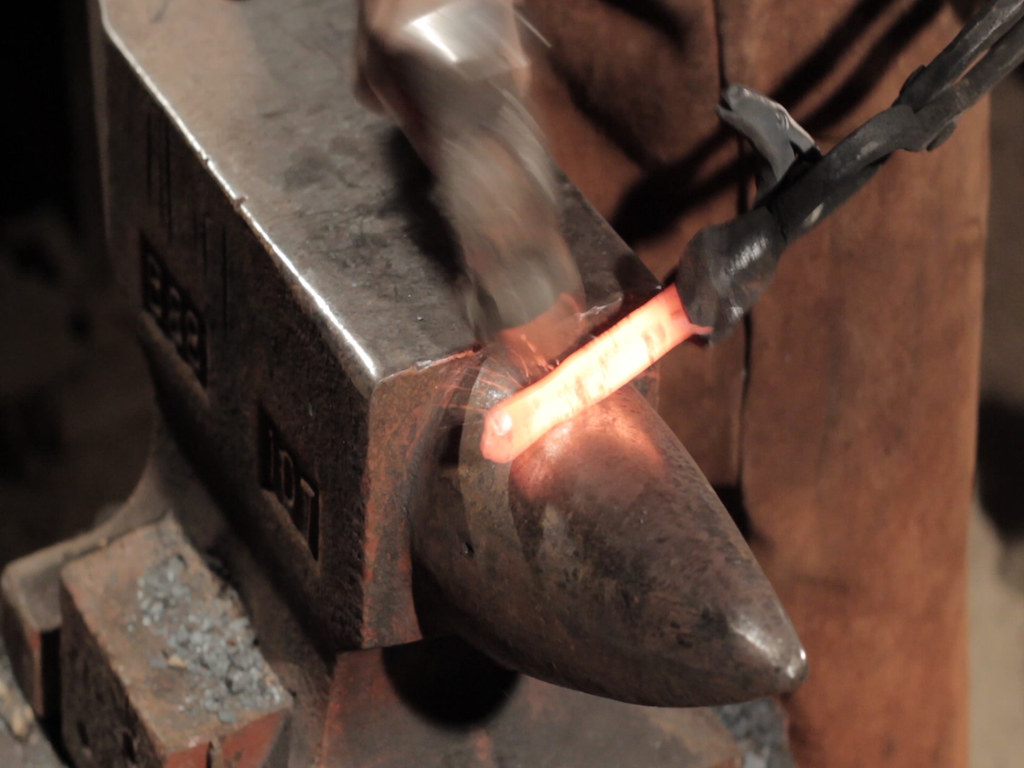
20. Create a curly cue having the face facing upwards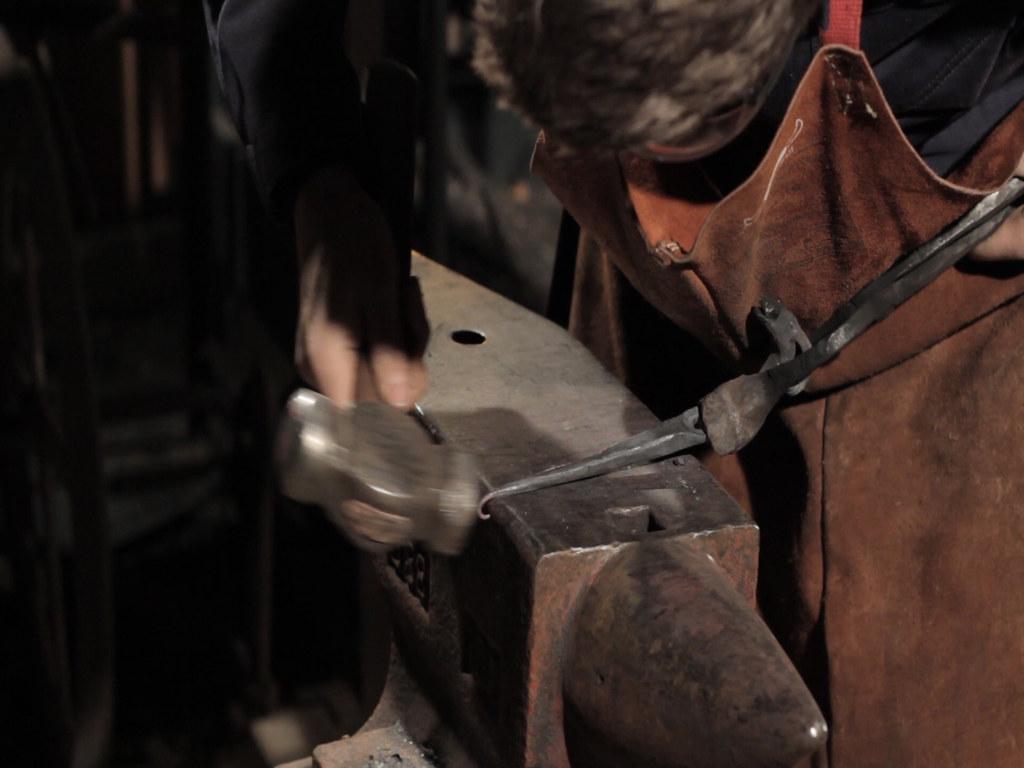
21. Cool of the curly cue to protect it and then form the hook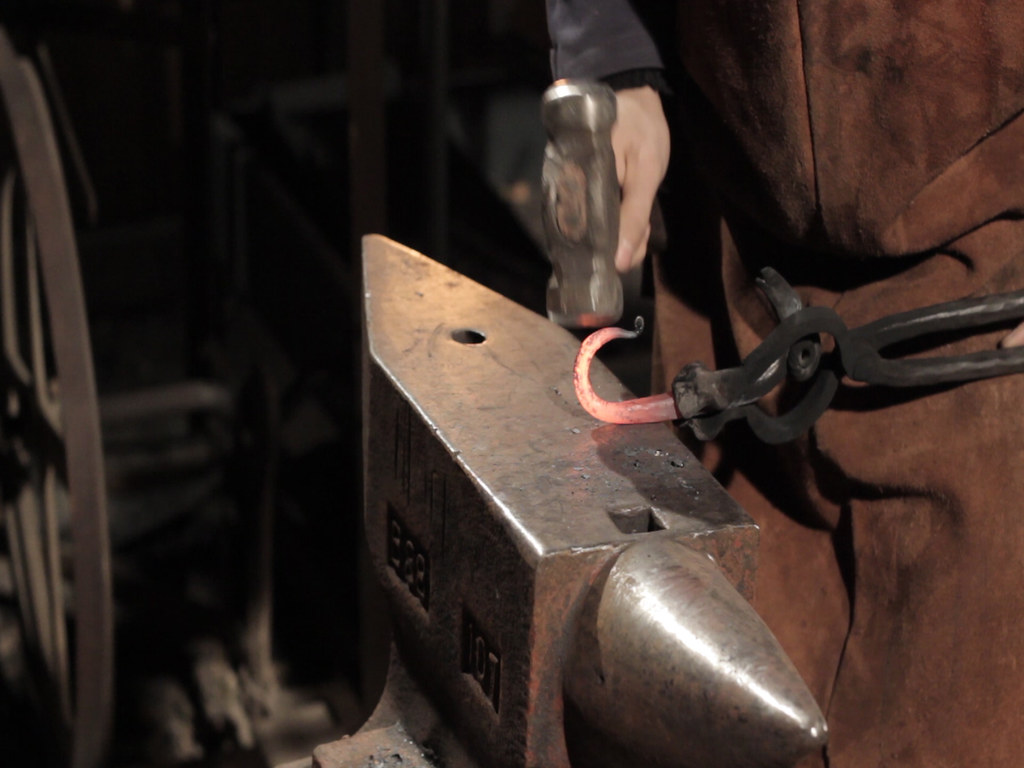
Now you can finish it to your desire, I used a wire wheel on an angle grinder to make it shiny.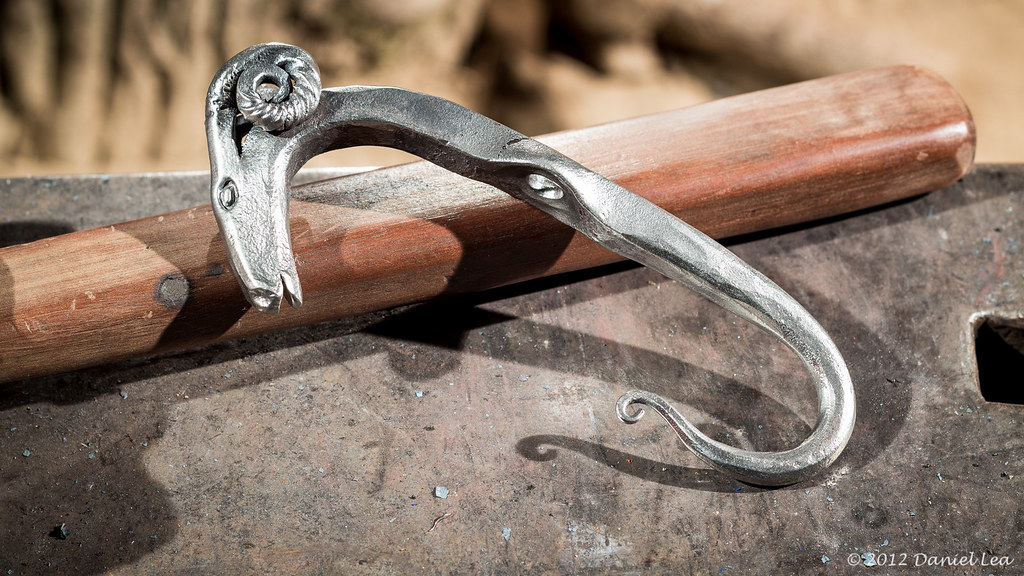
Here is the video:
If you have questions or constructive critique feel free to express it in a comment or personal message.
Now have fun making one yourself! :)
Yours
- Daniel -
13. Forge the eyes using an eyeballpunch (To make the eyeballpunch forge a flat sqare punch, punch a dent into the face of the punch and then break two corners of the square)
14. fold over the head using a wooden log, a wooden or raw hide mallet to protect the face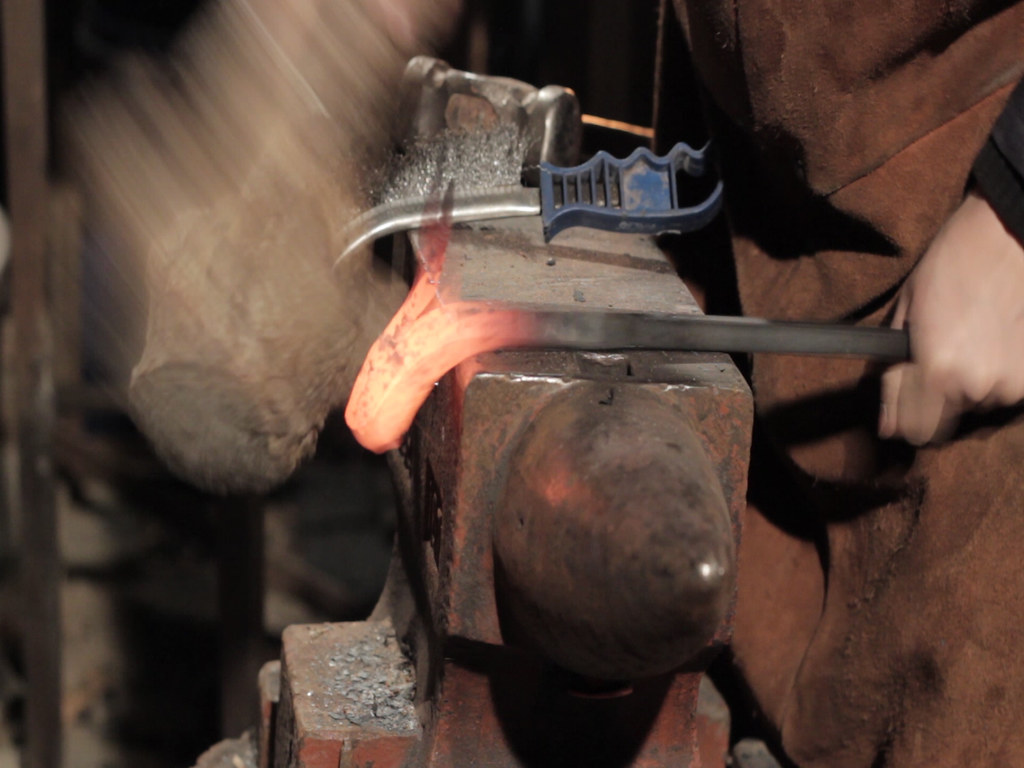
15. Curl the horns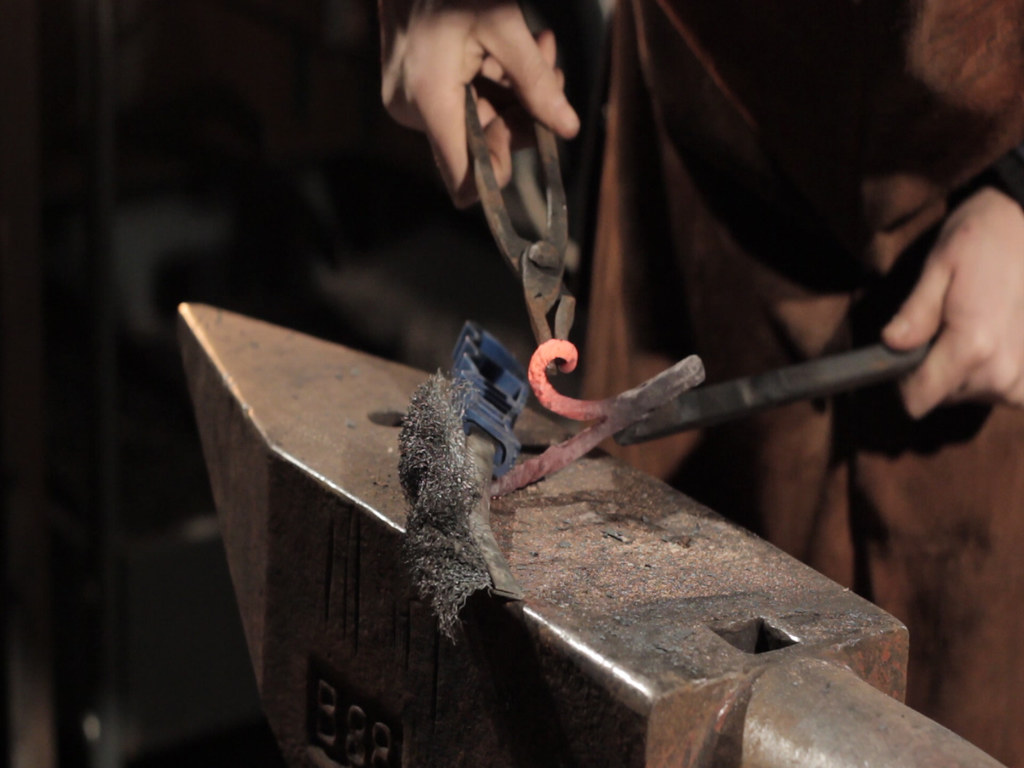
-
8. Forgeweld
9. Taper the face
10. Cut the mouth with a hot chissel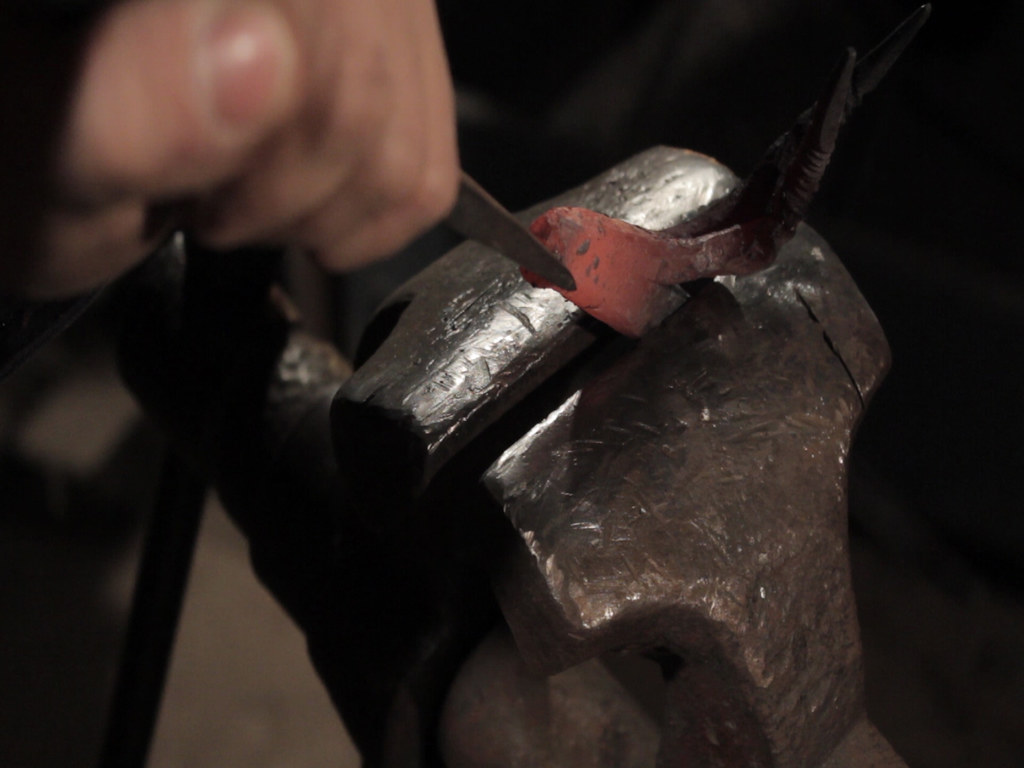
11. Use a flat punch to create flatspots where the nostrals are going to be
12. Forge the nostrals with a round punch
-
5. Twist the horns
6. Fold over about one inch, leave about 1mm space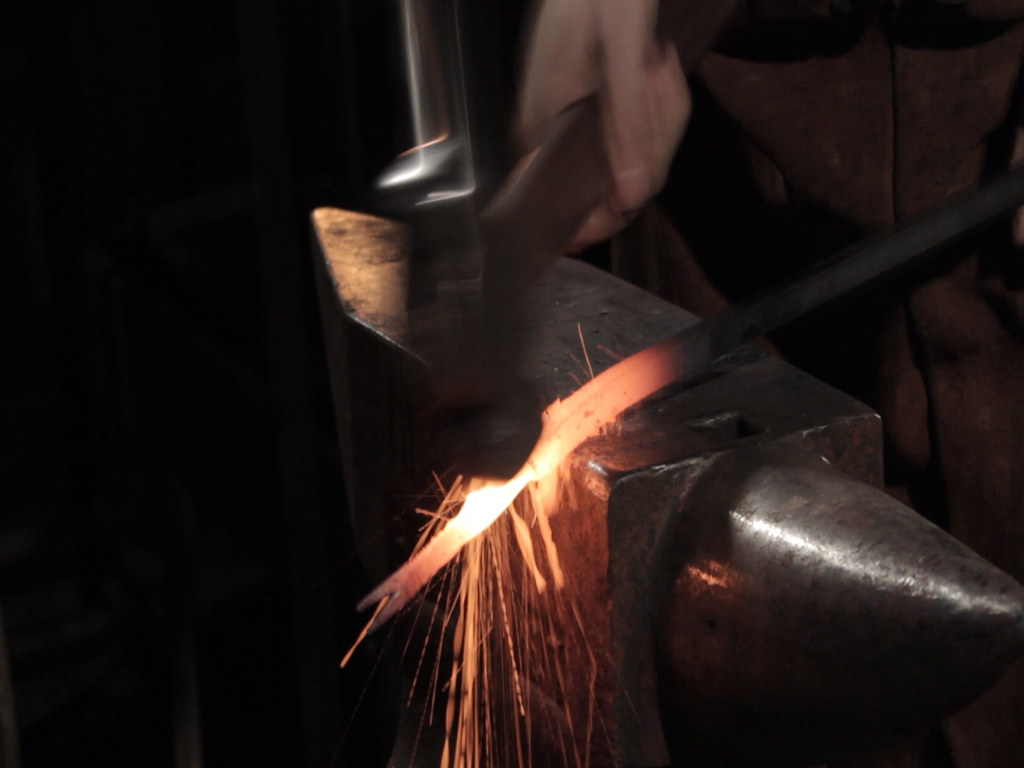
7. Apply flux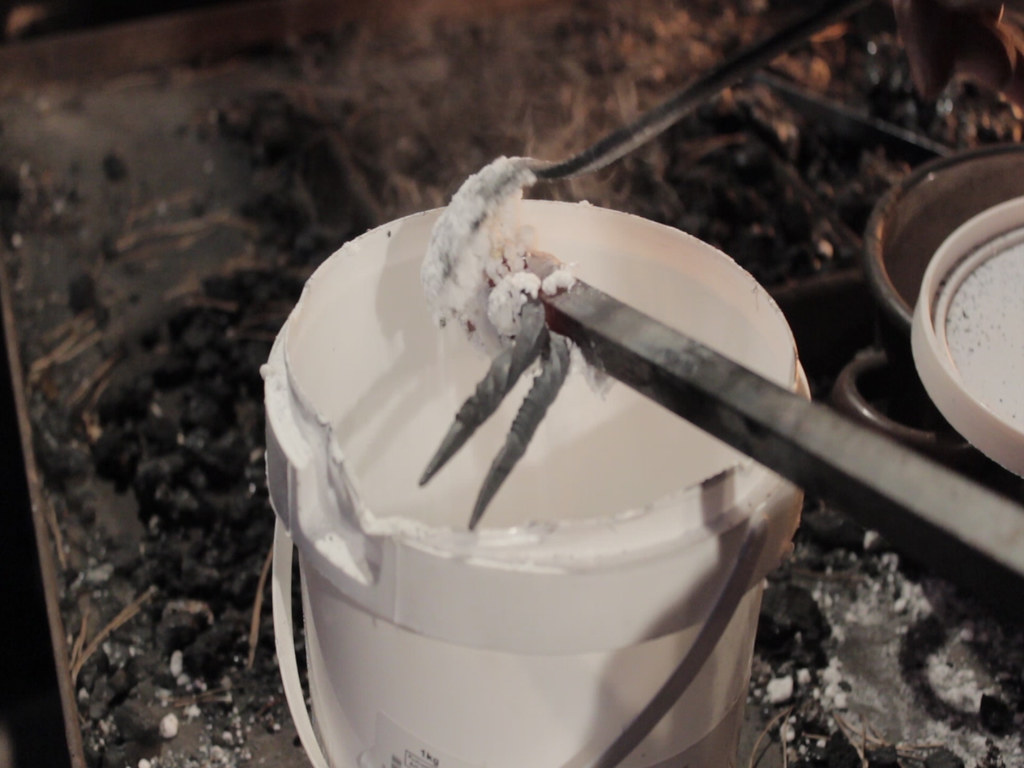
-
Hi guys,
here is a little guide on how to forge a rams head wall hook. I am not a professional instructor and this is just the way I do it currently.
I made a video and extracted the most important frames (full video on the bottom of the page):
1. Take a sqare bar (here 12mm) mild steel and draw down about 2 1/2 inches to half parent bar thickness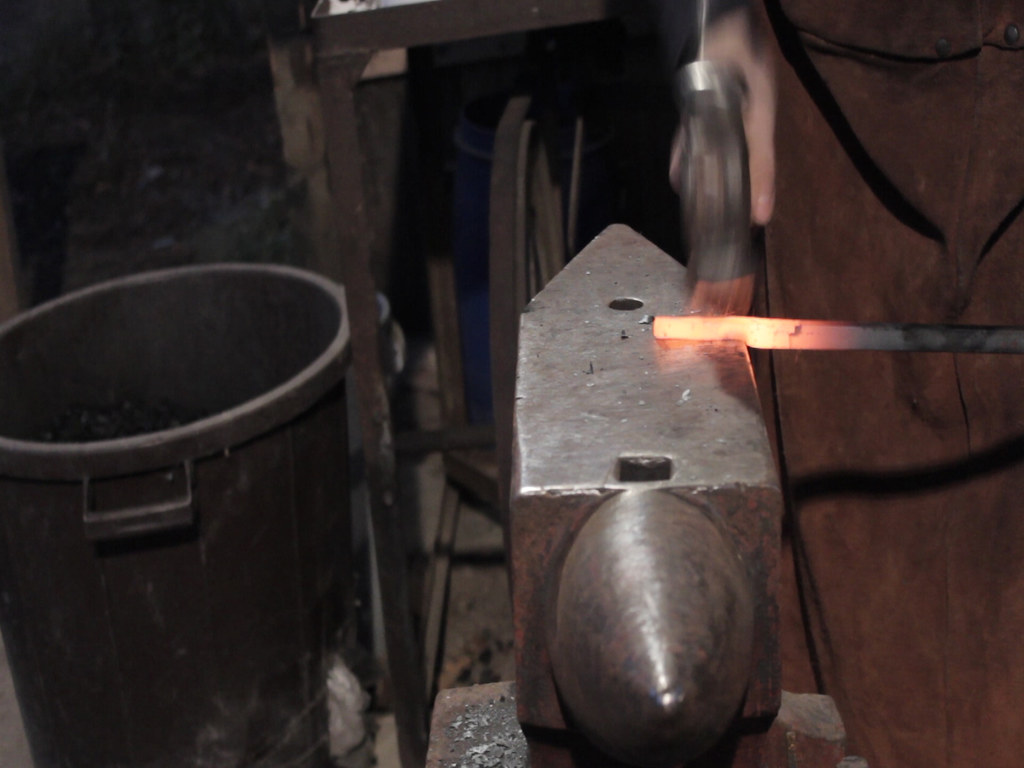
2. Split the set off section with a hot chissel along the middle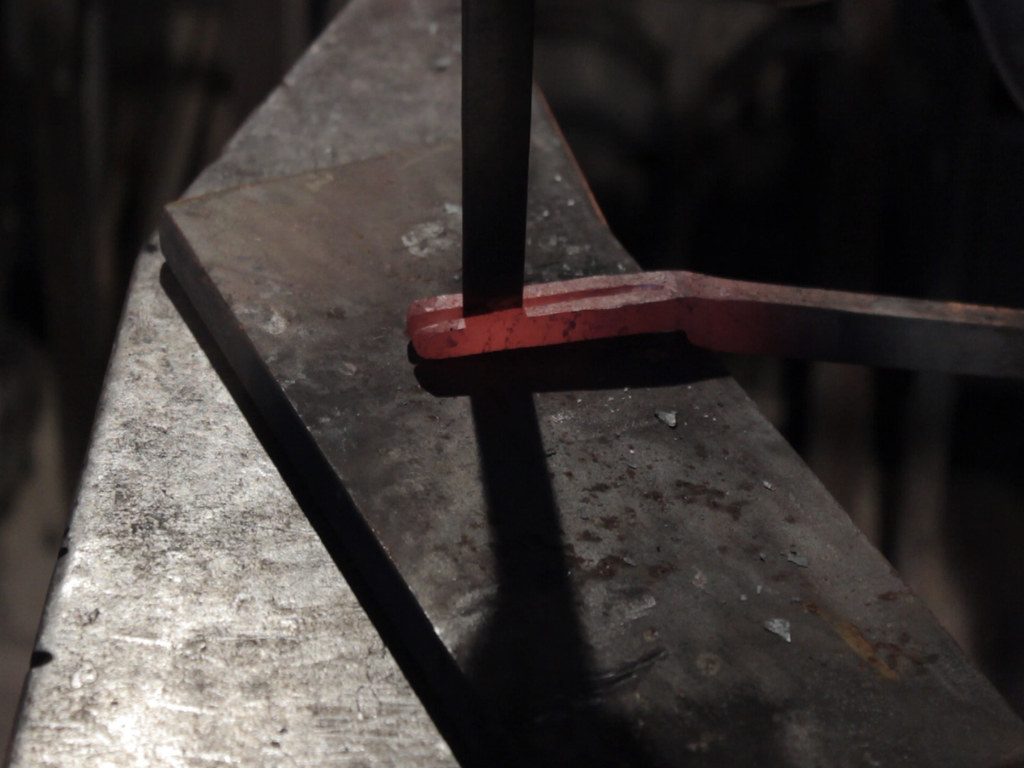
3. Fuller inbetween the horns and clean up with a file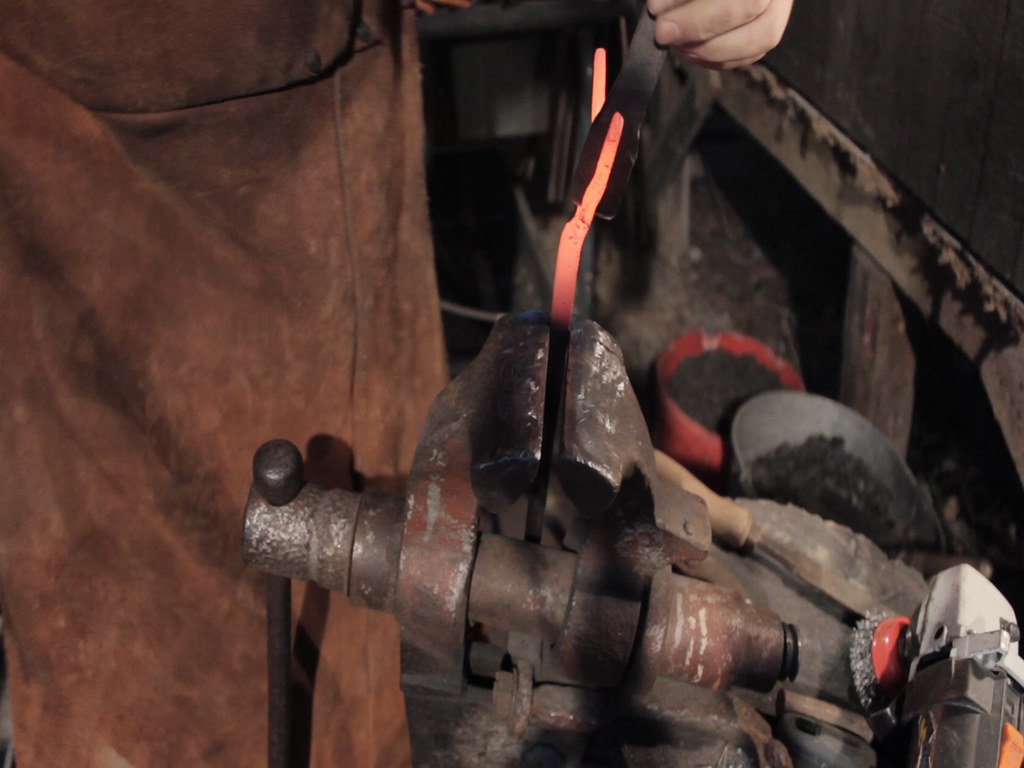
4. Taper both horns (fold one horn back so you can work on the other)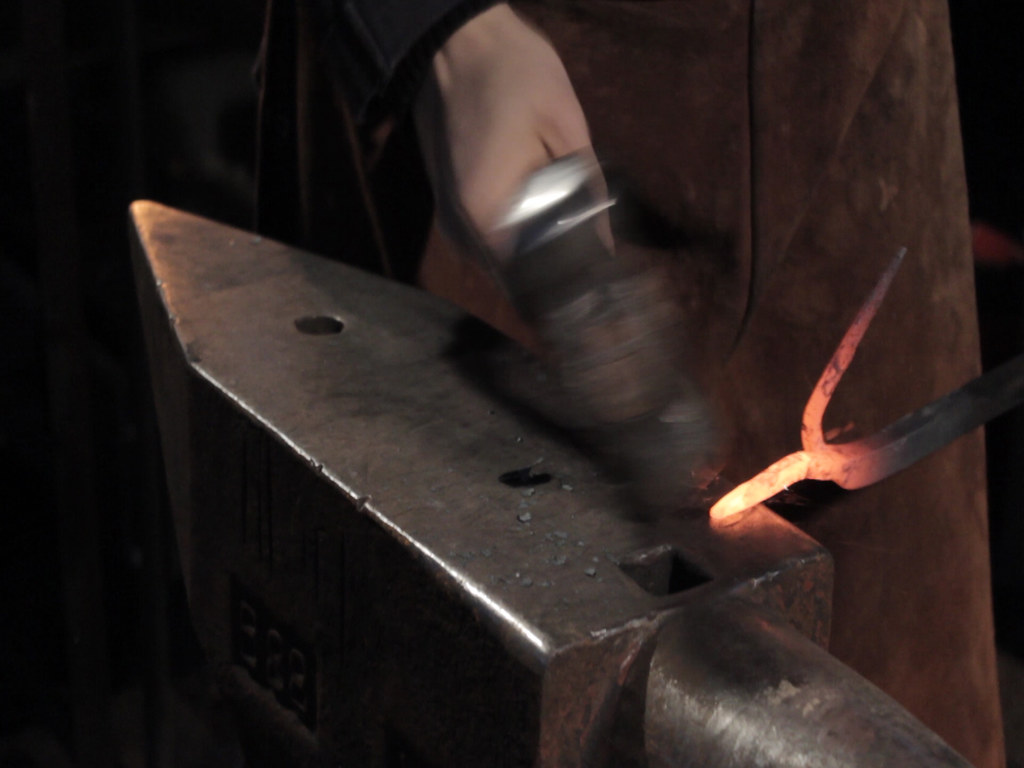
-
Hey thanks Sam for the tip!
Well Done good to see you pined the handles with the fitting and hammering the ends try heating it first add the handle while it is still cherry red hot and then peen it . this will stop the handle from being burnt .
Sam


video tutorial: how to forge an eye punch
in Slitters, Punches, Drifts, etc
Posted
I will be at Alec S. place this winter where we will inter alia forge a brazeal style hotcut that has a very narrow and curved blade that cuts through steel like a hot knife through butter :D. Sometimes one can also benefit from such a wide angle eg. if you want the end of the cut of piece to have a bevel.