

poundhound
-
Posts
118 -
Joined
-
Last visited
Content Type
Profiles
Forums
Articles
Gallery
Downloads
Events
Posts posted by poundhound
-
-
I like the fish you did, very life like.
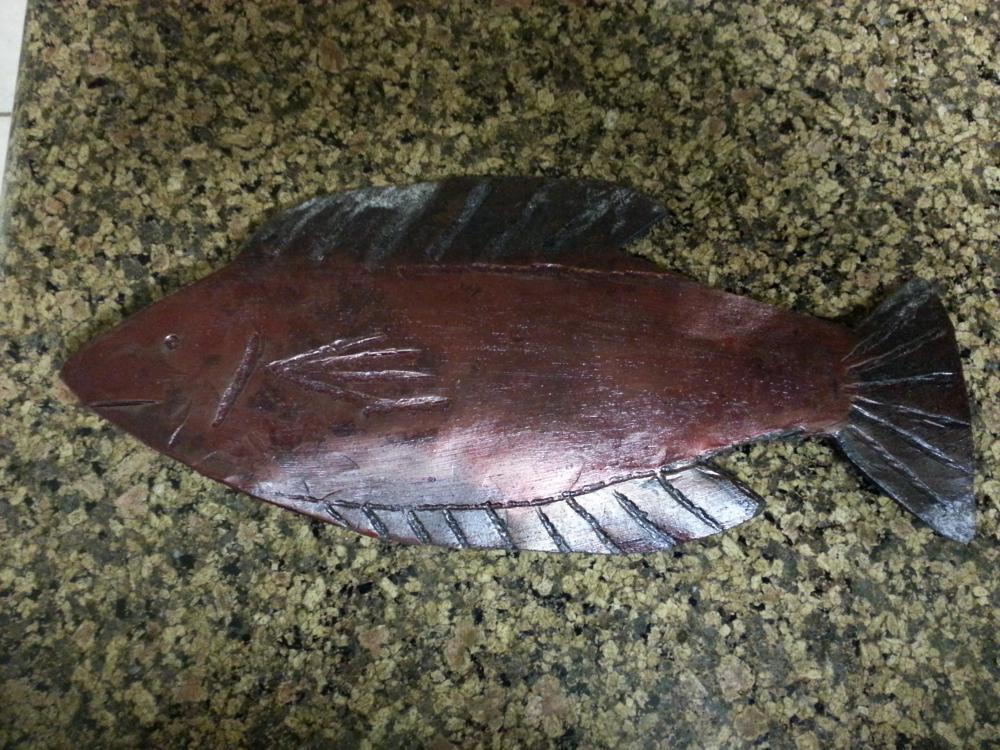
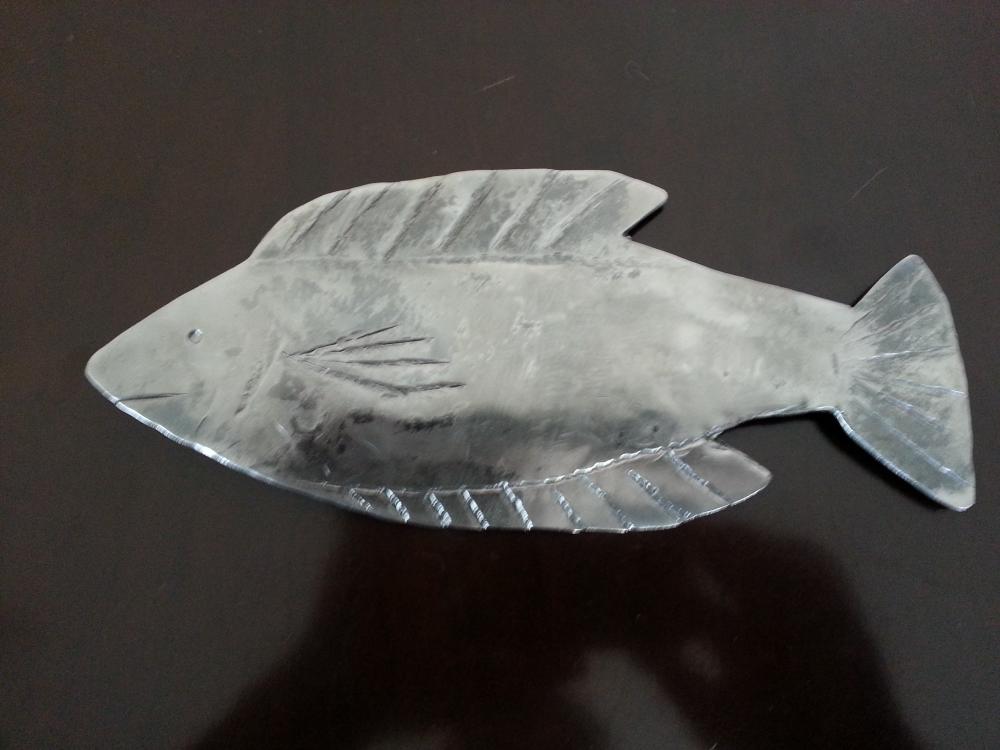
Here is a fish I made for a friend some years ago, just hammered out the shape, and used metal stain for the colors
-
I have the benefit of being height gifted. At 6'5" my "Normal working height" is above the average man's. So to get the vise up to a comfortable working height, there was about 1.5" between the bottom of the shoulder, and the concrete base of my stand. 1/4" plate + pipe to make up the difference.
i was wondering because with my vise it's about the right height without the extra pipe below the vise leg
Poundhound
-
For mine, I welded a section of pipe onto a plate mounted to the concrete. The tube fits around the foot, but catches the flare to direct the force through the flare down to the ground.
clever idea
Poundhound
-
Does the plate under the leg have a hole cut for the let to sit in and if so is it through both plates or just the little top one?
the plate under the leg has a hole in it to receive the part of the vice leg below the part of the vice leg where it flairs. I used a piece of steel thick enough so i did not have to make another hole in the base plate.
Poundhound
-
Thanks for the picture. It got my brain working.
") I have a sprocket off a 322 Cat excavator, and a vise to be set up for outside use. just hadn't figured out how to make my few bits of angle iron work best.
I have a sprocket off a 322 Cat excavator, and a vise to be set up for outside use. just hadn't figured out how to make my few bits of angle iron work best.Can't wait to see what you come up with. Please post pics.
-
So what are you bolting the stand to?
I was going I was going to bolted down to the cement slab so that it doesn't move when I put torque on it
It's pretty heavy but this will make it in movable
-
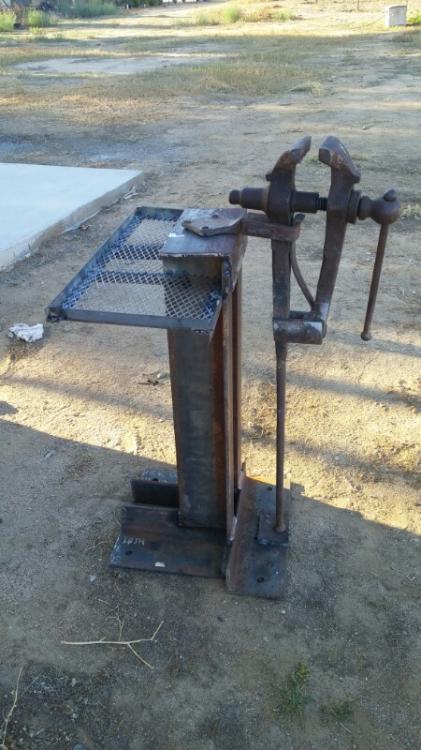
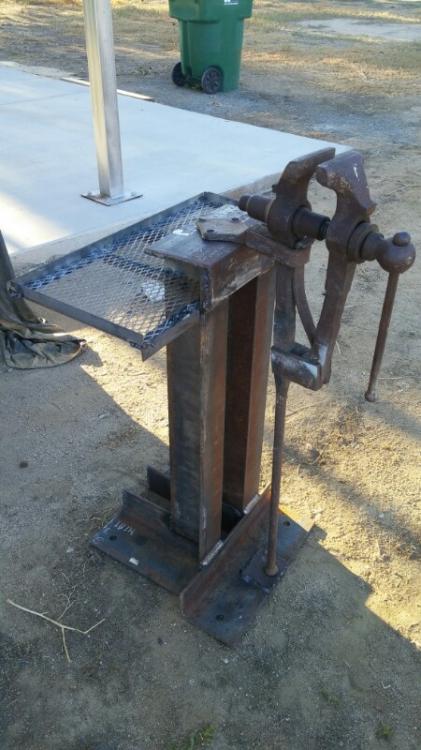
here are a few pics of a post vise stand I made over the weekend, still need to prep and paint it before I bolt it down.
Made out of some 8"x 4" 3/8 angle iron I had lying around
Poundhound
-
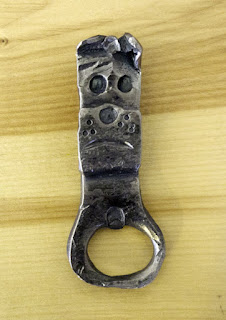
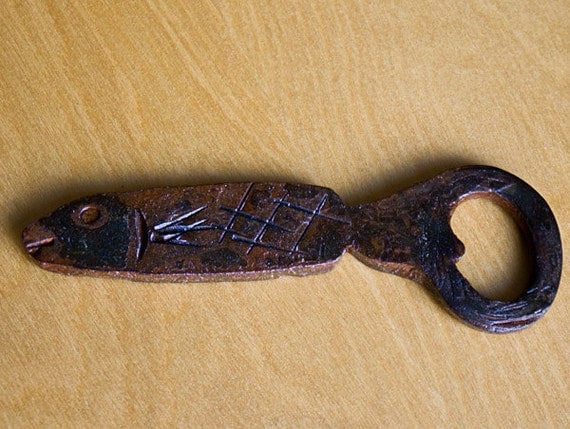
very cool scull for head on bottle opener, not something I have seen before.
PoundHound
-
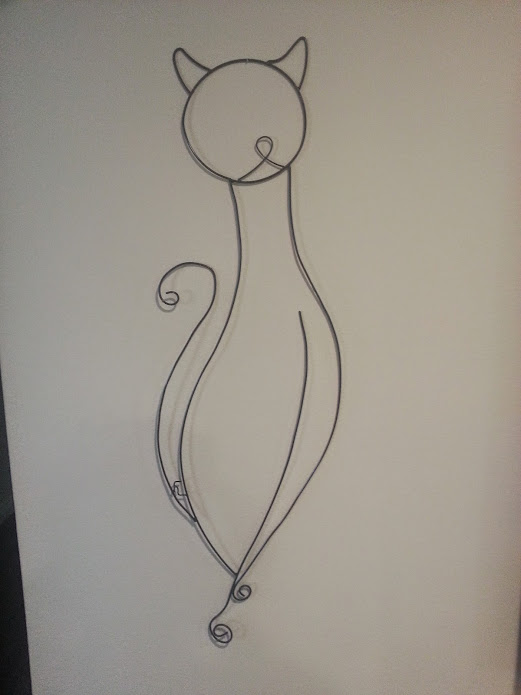
here is a cat I did for my wife
-
Thanks for the positive comments
9 Gage wire. Thinking of trying some out of rebar
Poundhound -
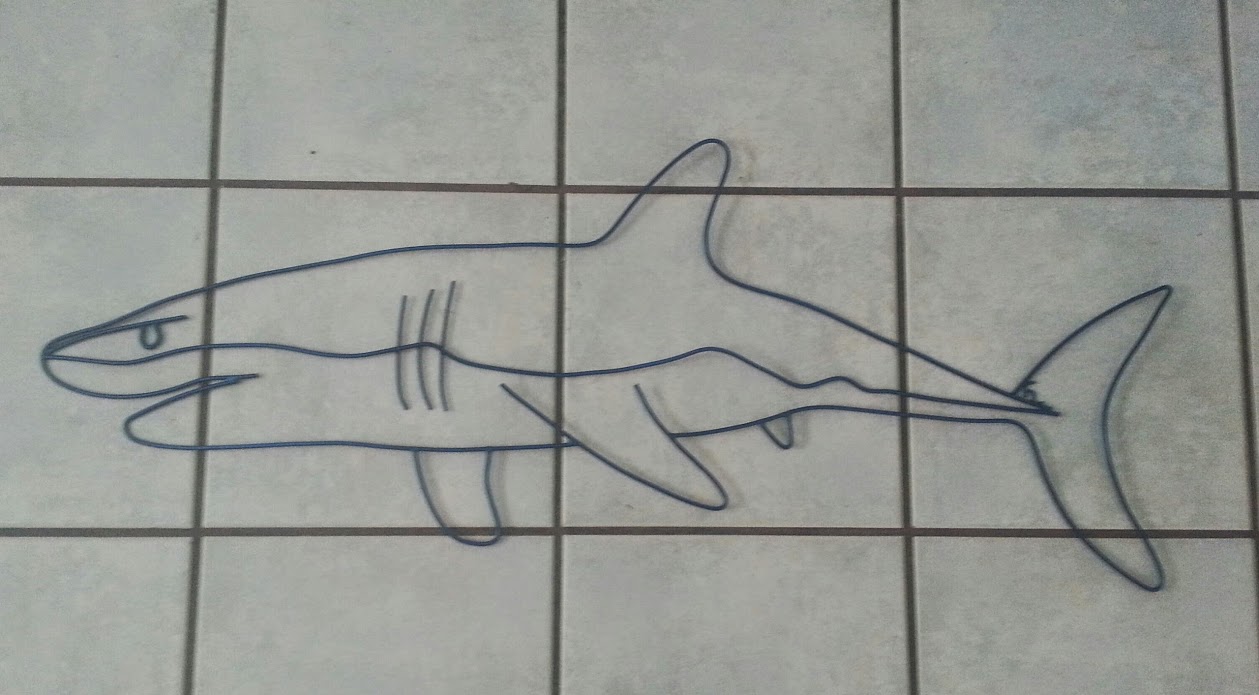
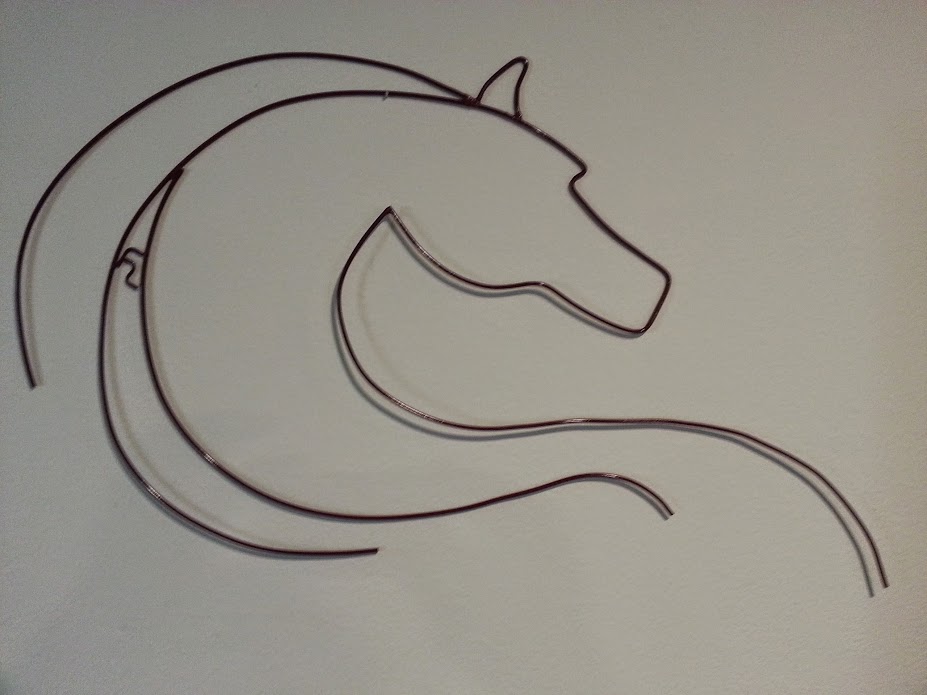
thanks here is a wire shark and horse I did. the shark is on the floor tiles. the others are hanging on the walls.
-
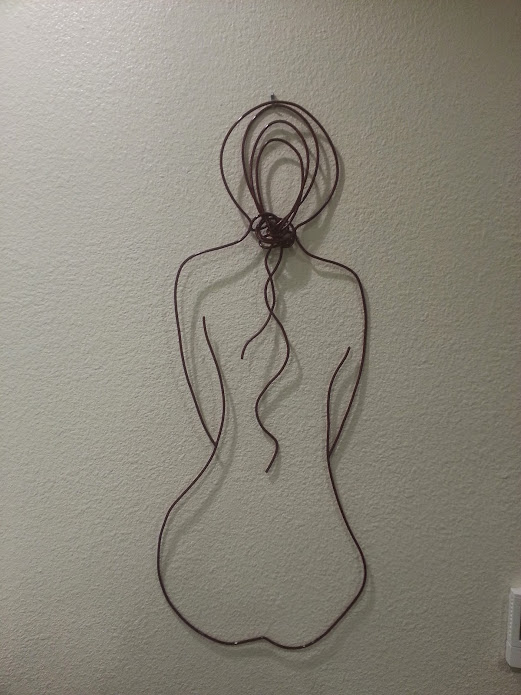
here is a wire sculpture I made, by just bending some wire and a few areas where I braised the wire to hold it together with some brass braising rod. Even though it is mostly empty space it creates a great effect
PoundHound -
I almost forgot a dog
-
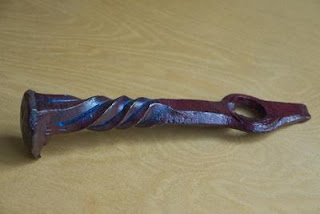
here is an alligator from bar stock and a railroad spike twisted

-
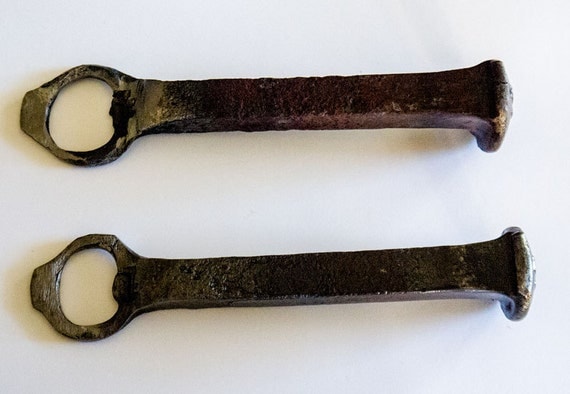
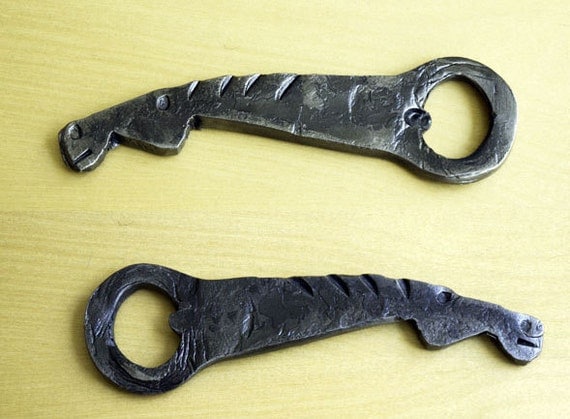
Here are some bottle openers out of railroad spikes, bar stock, a horseshoe. I have a few more but don't have the pictures on me.
Pound Hound

-
Thanks
I have to get better at the polishing. I don't have a belt grinder which can do a lot of the work for me. But I do have an orbital sander which i have pads up to 220 grit. then hand sand from there.
I am starting with a pretty uneven surface, since the lawnmower blades are used they have a lot of dings in them which I grind out.
PoundHound
-
Hello, and happy Fathers Day.
Here is another knife I made using another lawn mower blade, it is the knife at the bottom of the picture. The top knife is one I had posted before. I used most of the blade the holes are where the blade attached to the lawnmower. The blade is over 10 inches long and 3 inches wide, and the handle is 4.75 inches. I used purple heart for the wood on the handle.
I polished it to a mirror finish, you can seen my hand and camera in reflection.


PoundHound
-
I like the way the file teeth were incorporated into the blade.
Very nicely done knife.
PoundHound
-
I posted the first knife I made from my old lawnmower blade, here is a knife I made from the other half.
designed it kinda after a Bowie knife.


PoundHound
-
Hardening is one step,,,tempering another,,,hardening without tempering equals a very brittle blade that likely witl break in use.
I know you know this but it is covered in those lessons also....if you are interested in learning.
Sorry I did follow the instructions from the knife classes and after the hardening I did two cycles in the oven to temper the blade. I left that step out in my explanation.
I will check out the knife chat, so far I only knew about the knife class posts.
PoundHound
-
How well did it harden/hold an edge. Nice knife.
I don't know :-o
I annealed it prior to shaping then heated it to non magnetic then did an oil quench. Refined edge and honed it after that. I don't know how to test edge hardness.
PoundHound
-
Happy Memorial Day, and I hope everyone took the time to remember those who gave the Ultimate Sacrifice for Our Country.
Had the day off and got around to making the handles and attaching it and putting in the brass rods. I used some old bubinga wood for the handle. This is the first kinfe I made from steel, and first handle I made and attached.

Kinfe is overall 12 inches long with about a 4 inch handle.


PoundHound
-
This is a brass plate I did tonight. This one you can see how nice and clear lettering can come out with this process.

Pound Hound
-
I have put up the copper / brass etching tutorial, Since they moved this post to non ferrous metals, I put it up there. here is the link
http://www.iforgeiron.com/topic/33266-copper-brass-etching-tutorial/


matching pump and cylinder pressures
in Presses
Posted
Any help appreciated.
I am starting to assemble components for building a hydraulic press. I have purchased this hydraulic pump because it seem to be all set up double action control valve with a foot pedal control built in. It puts out pressure to 10,000 psi.
The cylinder I purchased has a max rating of 3000 psi.
Do I put some kind of pressure relief valve between the two to make sure the pump does not exceed the cylinder's max rating of 3,000 psi?
The pump has a pressure dial, I could just make sure I don't exceed the pressure manually, but though the relief valve would be a better design.